

Page 1

Page 2

Page 3

Chapter 1
Chapter 1
1
Features
Interactivity
• Animated character
• Challenges and
praises
50 Activities
• 17 Vocabulary/
Spelling/Grammar
• 13 Math/Logic
• 12 Games/Memory
• 8 Computer Skills/
T ools
Multimedia
• Digital Sound/
Animation
Expandability
• Expand learning
potential with our
Smart Cards
(each sold separately)
Safety Catch
Unit
Volume
Switch
Speaker
Game
Menu
Keyboard
Left
Cursor Button
Directional
Cursor
Button
Right
Cursor
Button
Smart Card
Drive
Key-chain
5
Instruction
Manual
4
Mouse Pad
3
2
Mouse
Right
Mouse
Button
Left Mouse
Button
Mouse Jack
Contrast
Switch
LCD
Screen
1
About your Zip the Robot Learning PC
Zip the Robot Learning PC is supplied with
the following parts. Please contact your
retailer should any parts be missing.
1 - Unit
2 - Mouse
3 - Mouse Pad
4 - Instruction Manual
5 - Key-chain
Page 4
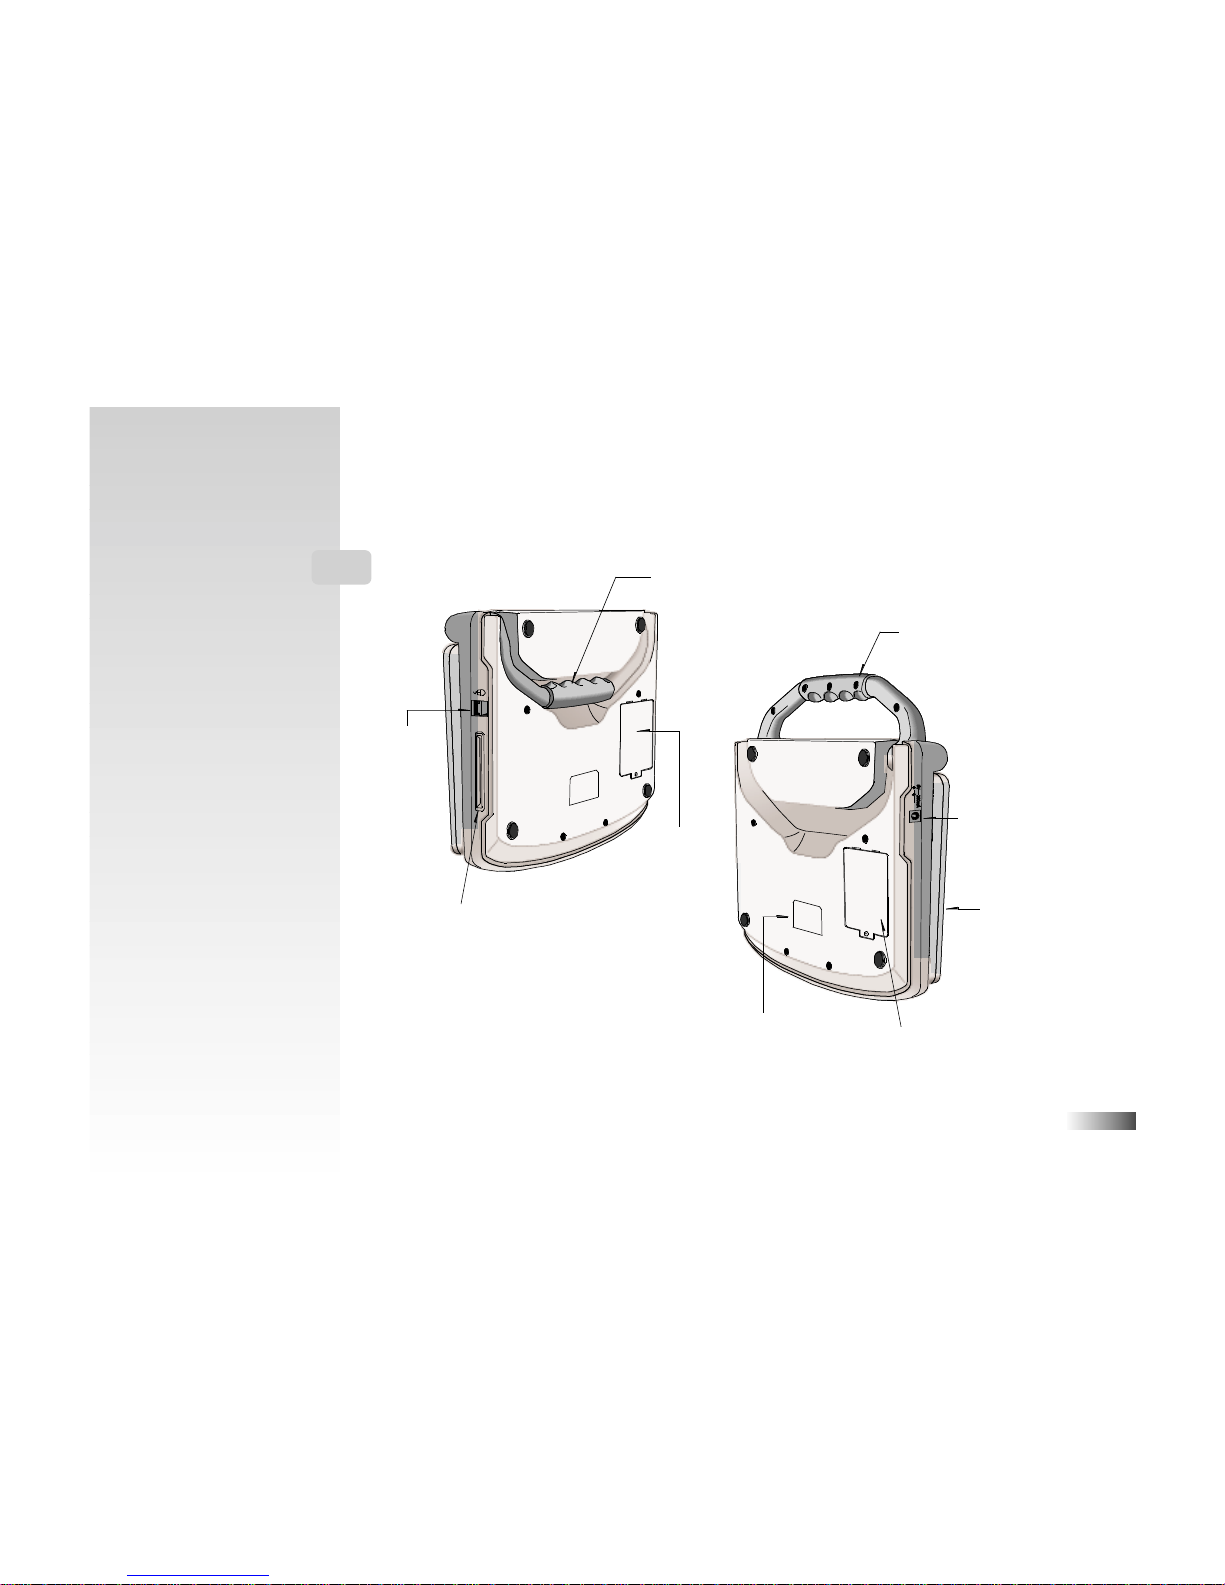
2
Unit
Mouse
Jack
Smart Card
Drive
Handle
Handle
AC Adaptor
Jack
Top
Battery Cover
Battery and Adaptor
Requirements
Battery
Cover
Page 5
3
+
-
Chapter 2
Chapter 2
Getting Started
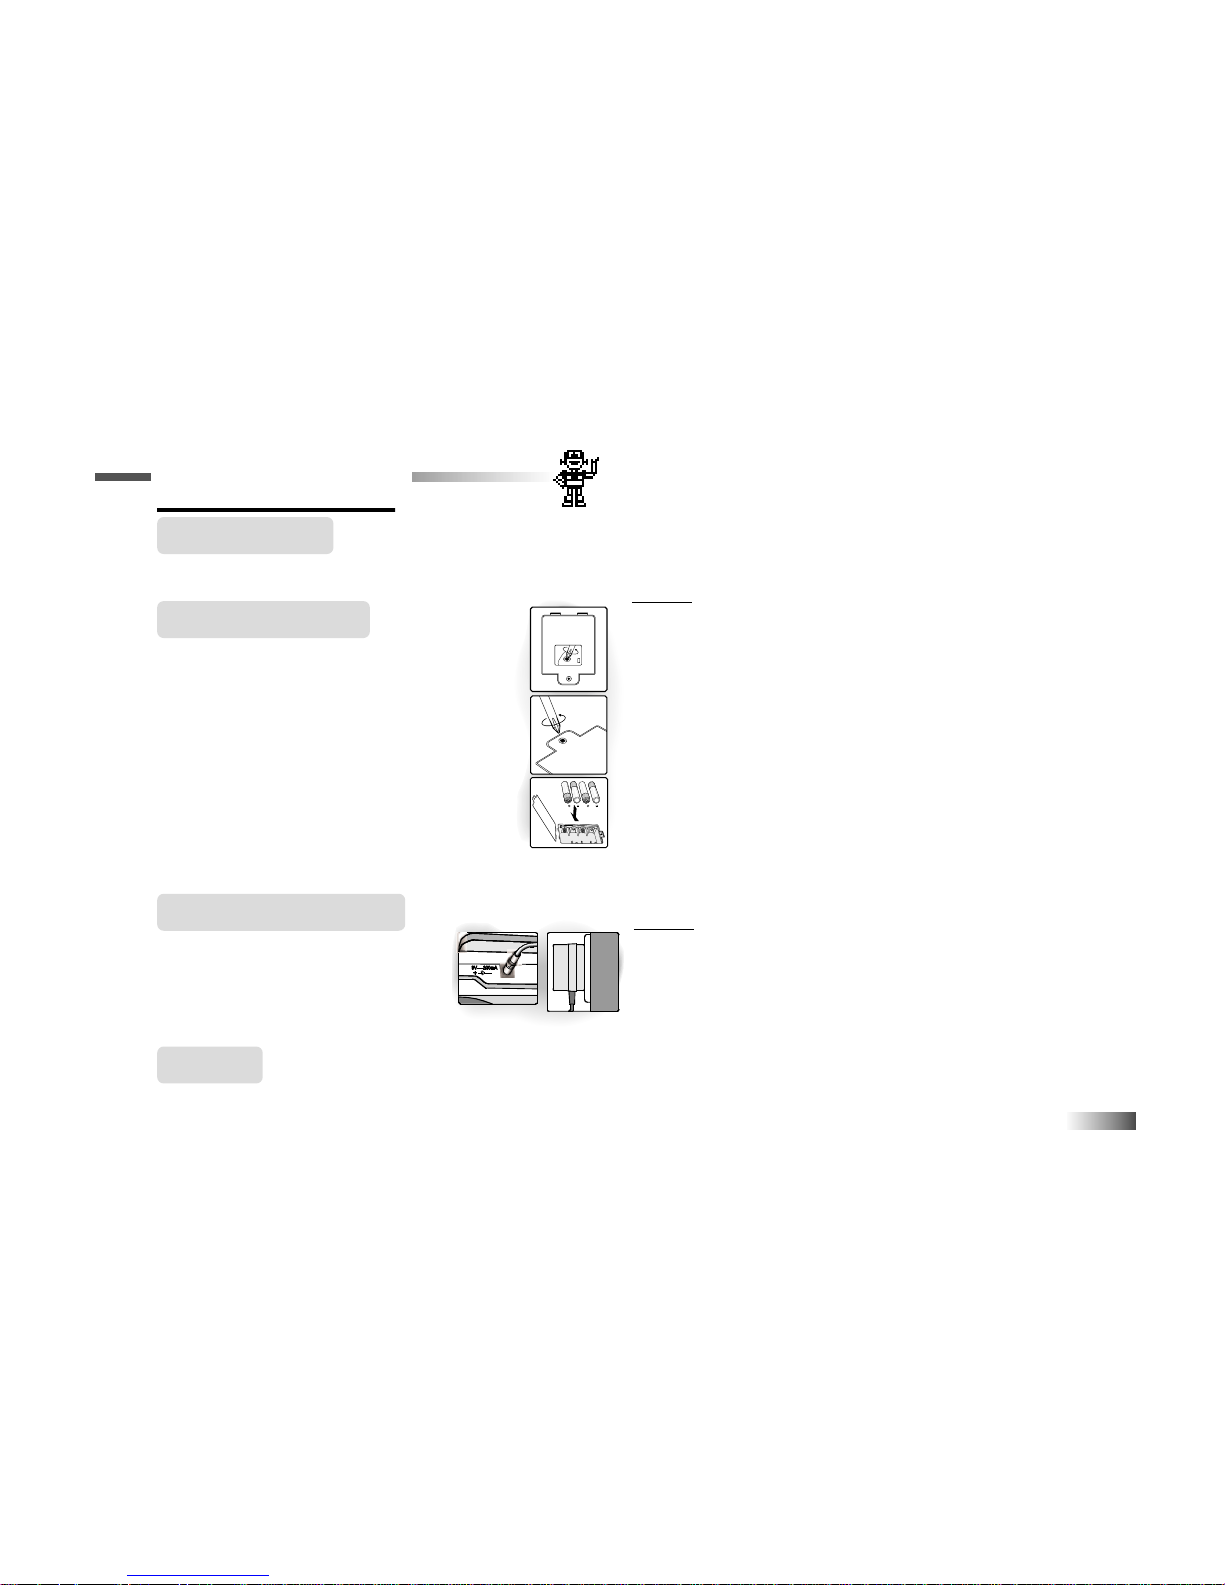
Battery Installation
AC Adaptor Connection
Auto-off
The learning PC will be automatically turned off after about 5 minutes of no input from the player
.
Your Zip the Robot Learning PC operates on 4 AA size batteries (not included) or
a 9V AC adaptor (sold separately).
Caution
• Different types of batteries or new and used batteries are not
to be mixed.
• Only batteries of the same or equivalent type as recommended
are to be used.
• Remove all batteries when replacing.
• Remove batteries from the unit if the unit is not going to be
used for long periods.
• Do not dispose of batteries in fire.
• Non-rechargeable batteries are not to be recharged.
• Rechargeable batteries are to be removed from the toy
before being charged. (if removable)
• Rechargeable batteries are only to be charged under adult
supervision. (if removable)
• Exhausted batteries are to be removed from the toy.
• The supply terminals are not to be short-circuited.
Caution
• The unit must not be connected to more than a 9V power supply.
• The unit must only be used with the recommended adaptor.
• The adaptor is not a toy.
• The supply terminals are not to be short-circuited.
• Toys liable to be cleaned with liquid are to be disconnected
from the transformer before cleaning.
1. Make sure the unit is turned off.
2. Using a Phillips screwdriver, open
the battery cover at the back of the unit.
3. Insert 4"AA" batteries.
(Note the correct polarity: +, - ).
4. Replace the cover.
(The unit is automatically turned on
as soon as the batteries are installed
or the adaptor is plugged in.)
Plug the adaptor into the adaptor jack
on the left side of the unit.
Plug the adaptor into a wall outlet
.
Page 6
4
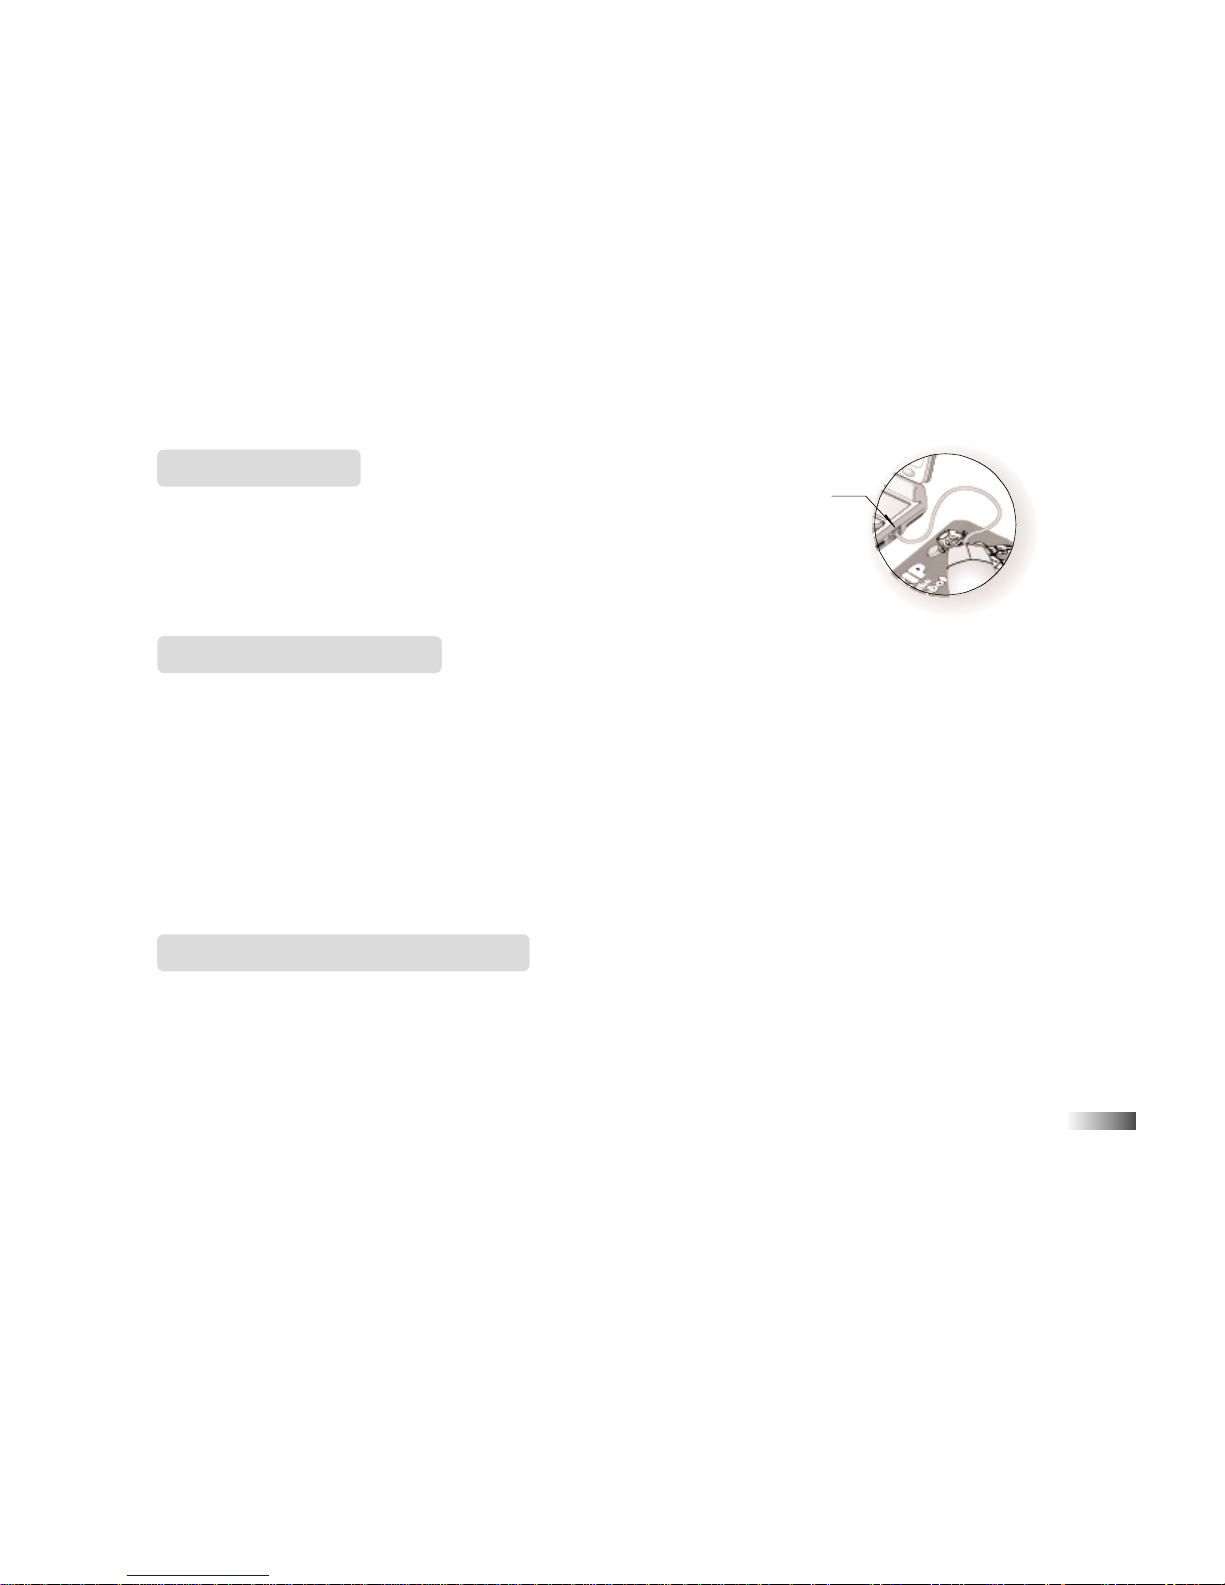
Mouse Jack
Mouse Connection
Cleaning and Maintenance
Starting Zip the Robot Learning PC
1. Ensure the unit is turned OFF.
2. Plug the mouse into the mouse jack on the right side of the unit.
3. Turn the unit ON.
4. To ensure the mouse is kept clean, keep it on a clean mouse pad.
The unit should be regularly examined for damage to the cord, plug, enclosure and other parts. In the event of such
damage, the unit must not be used with the adaptor until the damage has been repaired.
Always disconnect the power supply before cleaning.
Wipe the unit with a dry cloth.
Do not get the unit wet.
Do not dismantle the unit.
Cleaning the Mouse
Turn the round mouse-ball cover in counter-clockwise direction and lift open the cover.
Take the ball out, and wipe the ball and the inside of the mouse with a dry cloth cleaning out all the dust.
Open the unit by pushing the safety catch located on the front of the unit.
Turn on your Zip the Robot Learning PC using the [On] button located on the lower left of the keyboard.
At the end of your session, remember to turn off the power using the [Off] button on the lower left of the
keyboard. (Attention: Zip the Robot Learning PC has no data storage capacity.)
Page 7
The Keyboard
The keyboard operates in the same way as a real computer keyboard.
The Mouse
Move the mouse in the direction that you want to move the cursor arrow.
(see How to Make a Selection and Submit Your Answer)
The Cursor Buttons
You can use this to control the cursor arrow. Press the arrowheads on the directional cursor button indicating the
direction you want the cursor arrow to go. Then press either the left or the right cursor button to enter your selection.
Cursor Arrow
The mouse or the cursor buttons can control the cursor arrow.
The Flashing Cursor
This shows you the position in which the next keyboard entry will appear.
5
Chapter 3
Chapter 3
Useful Features an
d Controls
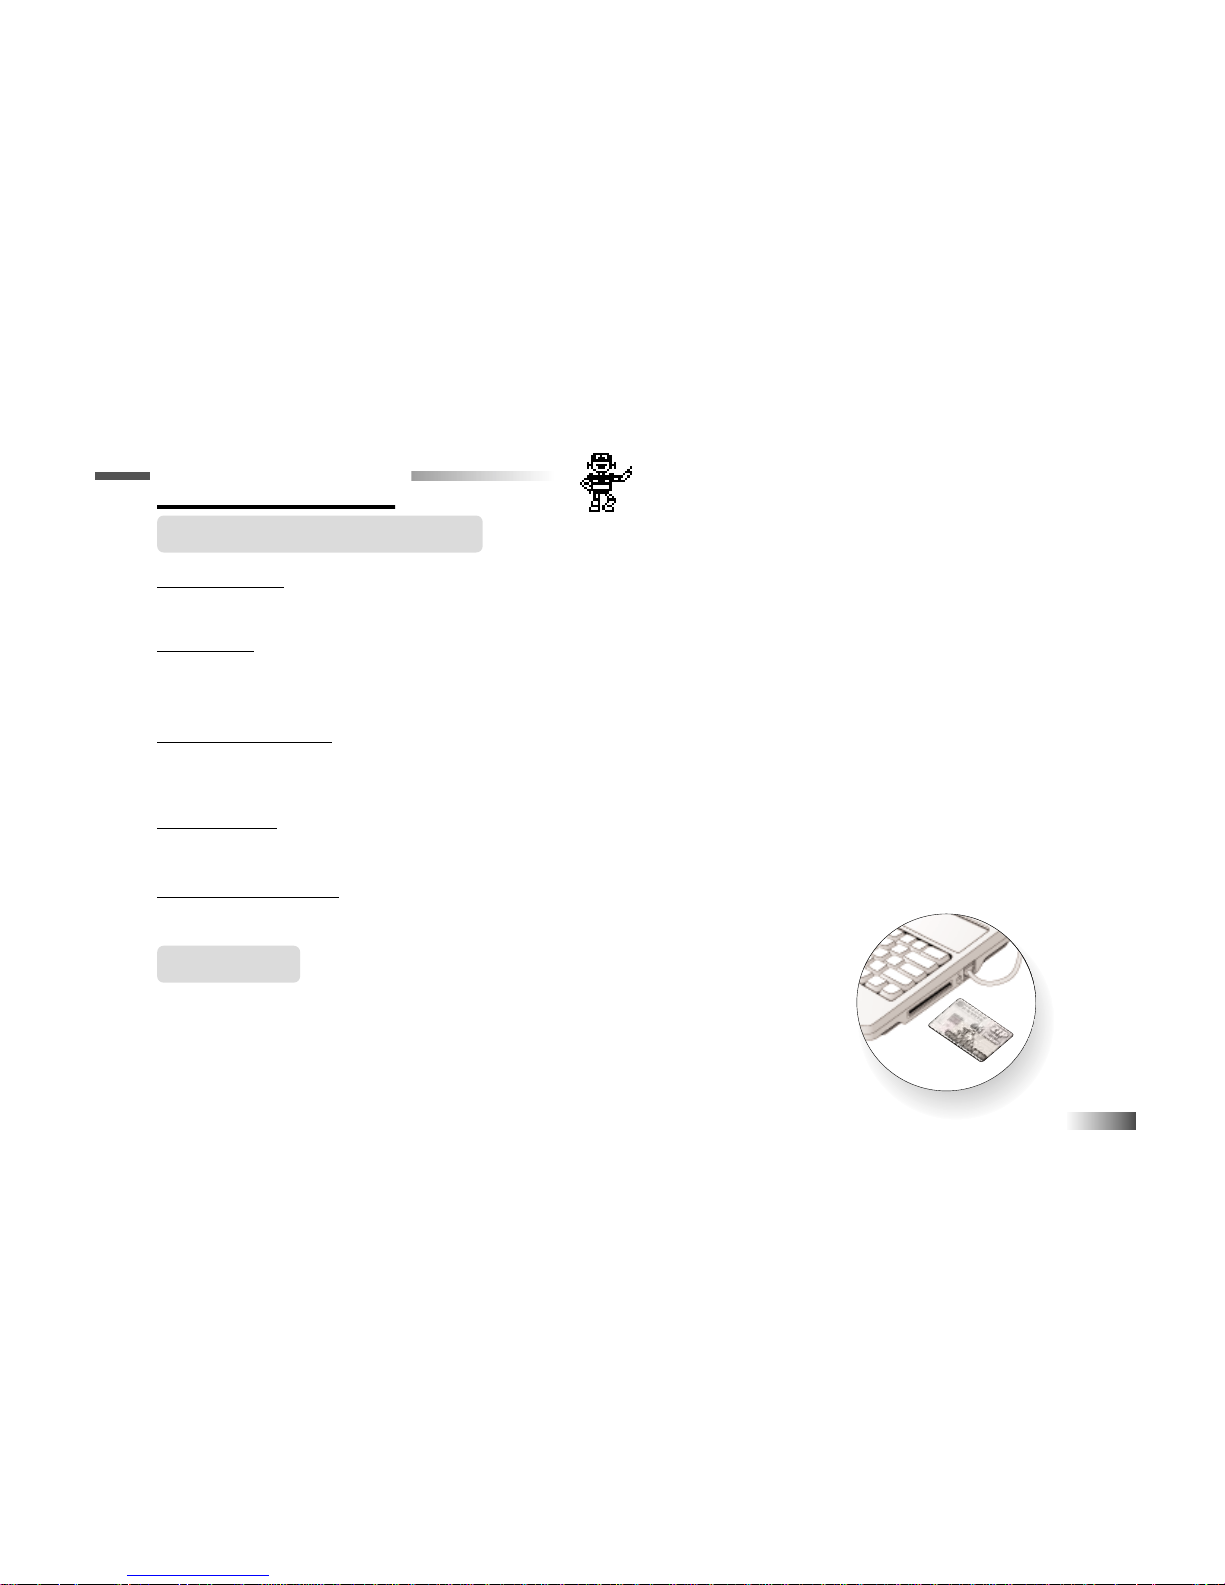
Smart Card
(sold separately)
Do not scratch or damage the metal contact plate of the Smart Card.
Only insert Oregon Scientific Smart Cards into the Smart Card drive.
1. Plug the Smart Card into the Smart Card drive on the right side of the unit.
Page 8
6
Name of Smart Card Activities
Demo
Volume
The current activity will be interrupted and the Smart Card animation begins.
After the title screens, a menu screen appears. On this menu screen are two direction
icons and a title of one of the activities included on the Smart Card.
2. Use the arrow cursor or directional cursor button to scroll through the titles.
3. Press [Enter] to play the displayed activity.
Expansion questions for the following activities are included on each Smart Card.
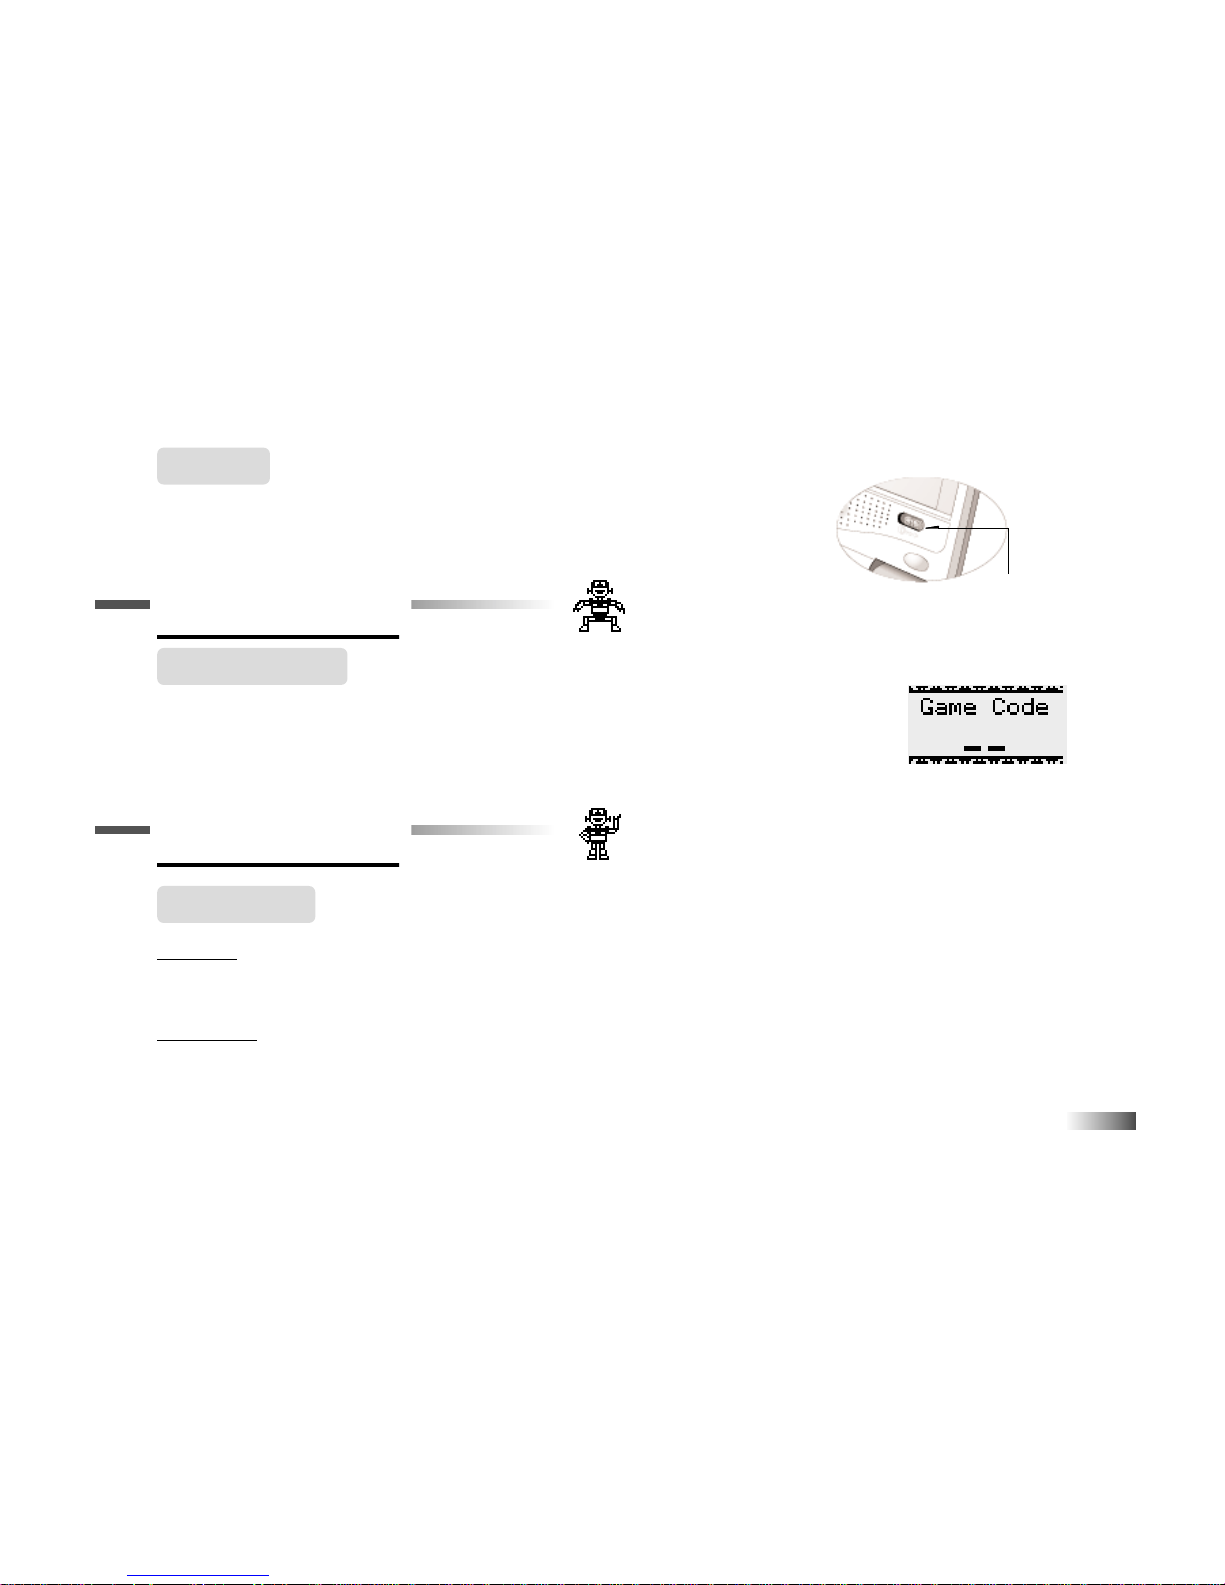
While the Smart Card is plugged in, only those activities included on the Smart Card are available. To play other
games in the learning PC, unplug the Smart Card. Press [Game Code] to go to the Game Code screen, and enter a
Game Code from the Game Menu.
When the [Demo] button is pressed, you will be shown a demonstration of some of the exciting features and activities
on your Zip the Robot Learning PC.
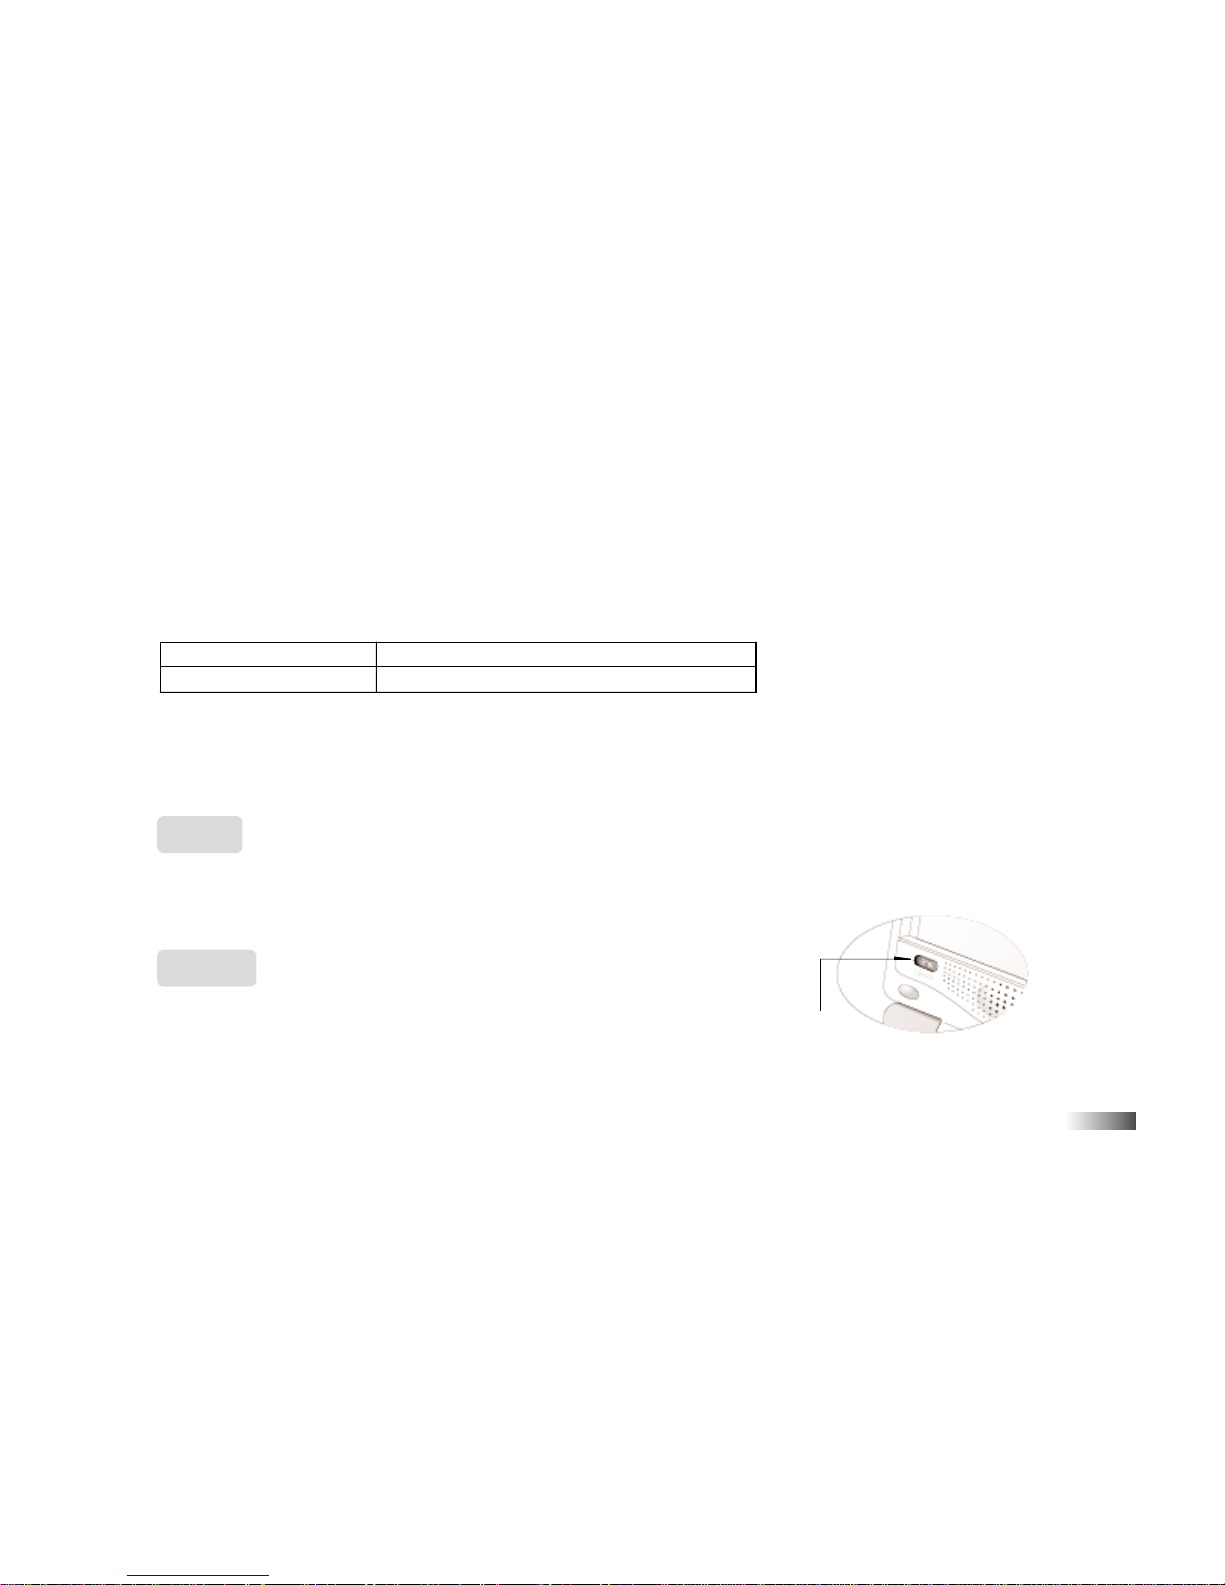
You may adjust the volume to a lower setting.
The volume switch is located at the lower left corner of the screen.
Volume
Switch
Word Fun
Spelling Fun
Cap-It, Mark Me!, Rhyme Time
Word In Word, Sound Check, Sir Plus
Page 9
7
Contrast
Depending on your surrounding lighting conditions, adjust the contrast for better
viewing. The contrast switch is located at the lower right corner of the screen.
Chapter 4
Chapter 4
Game Selection
From the game menu above the keyboard, choose a game. When the Game Code screen
opens, enter the game code of the game you want to play. If no game is selected, Zip the
Robot Learning PC will automatically make a selection for you. Press [Game Code] to
go back to the Game Code screen anytime you want to play another game.
Chapter 5
Chapter 5
Game Selection
Game Rules
(These apply to most games.)
Attempts
Game questions come in groups of 10. You will be given 3 attempts to answer each question.
Points are awarded according to the number of attempts taken to answer each question correctly.
Time Limit
Each attempt to answer a question is timed (1 minute for levels 1-5, 30 seconds for level 6). If you are unable to
answer the question in the allotted time period, it is counted as an incorrect attempt. The clock will reset after each
incorrect attempt.
Contrast
Switch
Page 10

8
Scores
If the question is answered correctly in the first attempt, 10 points are awarded.
If the question is answered correctly in the second attempt, 6 points are awarded.
If the question is answered correctly in the third attempt, 3 points are awarded.
Score 85 points or higher after a group of 10 questions to go to the next HIGHER level of difficulty.
Score 60 points or lower, to go to the next LOWER level of difficulty.
Help
Press [Help] to repeat the audio instruction prompt.
Hints
If you find any question too difficult, press the [Hint] button to get a clue.
But remember you can only use a maximum of 2 hints per question, and a point will be deducted for each hint used.
Summary Screen
After a round of questions, a summary screen appears to show the score of the last round
and whether you will go up a level, go down a level or stay at the same level.
The summary screen disappears, and the game resumes automatically.
Winning a Game
Beat level 6 with a score of over 85 points and discover a special surprise. Good Luck!
Chapter 6
Chapter 6
Two-Player Mode
Basics
Go to two-player mode by pressing [Player1/2] . Return to one-player mode by pressing [Player1/2] again .
Most games follow a basic format in the two-player mode. The left cursor button is the Player 1 button,
and the right cursor button is the Player 2 button.
Page 11

9
1. Initiate the two-player mode by pressing [Player 1/2] on the keyboard after the first question appears.
The "Two-Player-sign-in screen" appears.
2. Player 1: Type in your name and press [Enter].
3. Player 2: Type in your name and press [Enter].
The two-player mode screen disappears, and the names are saved.
After the player sign-in screen has been filled in, the game proceeds similar to the one-player mode except the
players must compete to answer the questions.
The first player to hit his/her button (Player 1: left cursor button, Player 2: right cursor button) is awarded an
attempt to answer the question.
1. If the first player answers the question correctly, points are awarded to the first player, and the game continues.
If the first player answers the question incorrectly, the second player is invited to answer the question.
2. If the second player is correct, points are awarded to the second player, and the game continues.
3. If the second player is incorrect, the correct answer is revealed, and the game continues.
Two-Player Game Rules
Each attempt to answer a question is timed (1 minute for levels 1-5, 30 seconds for level 6).
Each player is given one attempt to answer a given question. Ten points are given for the first correct answer and
zero points for an incorrect answer. In the second attempt, 6 points are awarded. No hints are available in the
two-player mode. Game questions come in groups of ten. After a group of ten questions, the summary screen will
show both players’ scores and announce the winner.
Chapter 7
Chapter 7
Make a Selection and Submit Your
In some games, you must select your answer from a list shown
on the screen.
Mouse Keys
Arrow
cursor
Cursor
Buttons
Page 12

10
Method 1
1. Press the arrows on the directional cursor button to move the arrow cursor over the chosen object.
2. Press the left cursor button once.
1. Use the mouse to move the arrow cursor over the chosen icon.
2. Press the left-button on the mouse once.
Press the letter key that corresponds to the choice.
Method 2
Method 3
In some cases, you do not need to make a selection. Use the keyboard to type in your
answer at the flashing cursor.
Method 4
Press [Enter] or either cursor button when the object you want to select is directly above the monkey’s hand
(Monkeyshines), the monster (Monster Mash) or under the dropper (Cap-it).
Method 5
MONKEY SHINES MONSTER MASH CAP-IT
Type in the answer
a > Spatter b > Platter c > Cider d > Sputter
Page 13

11
Chapter 8
Chapter 8
Scroll
Sometimes there will be more information than can be displayed on the screen.
In such cases, there will be a "scrollbar". Move the cursor arrow over the arrow tips
on the scroll bar, and press the left cursor button.
Chapter 9
Chapter 9
(Games and Game Codes)
Spelling
(01) Plug It In
Remember the animated vocabulary word presented by Zip the Robot. After the
animation, the vocabulary word appears with a missing letter.
Type in the missing letter.
(02) Mumbo Jumbo
The word that Zip the Robot says is shown scrambled.
Unscramble the word and spell the word correctly in the given spaces.
(03) Show & Spell
An animated vocabulary word is shown briefly.
Spell the word in the spaces given. Each space represents a letter.
(01)
(02)
(03)
Page 14

12
(04) Monkeyshines
A word with an extra letter scrolls across the top of the screen.
When the extra letter is directly above the monkey’s hand,
press [Enter] or either cursor button to remove it.
(05) Sound Check
An animated vocabulary word is briefly shown, and the word is said.
From the four words shown on the screen, select the word that begins with the
same sound.
(06) Sir Plus
Below the word shown, type in its plural form.
Word
(07) Cap-it
A sentence scrolls across the bottom of the screen.
1. Identify the letters that should be capitalized.
2. When the desired letter is underneath the dropper, press [Enter] or either cursor
button so the magic potion will capitalize the letter.
(08) Phonics Fun
Press letter keys and learn the alphabet.
(09) Mark Me!
A sentence without the correct punctuation mark scrolls across the screen.
Replace the blank with the correct punctuation mark.
Use the keys or the left cursor button to select the proper punctuation mark from
the choices given below the sentence.
(You can make the sentence scroll faster by pressing any key.)
(04)
(05)
(06)
(07)
(09)
(08)
Page 15

13
(10) Double Dare
Challenge your opponent to solve a mystery word.
1. Player 1: Type in a word (maximum 7 letters) without Player 2 seeing it, and
press [Enter].
2. Player 2: Guess the word one letter at a time, and use the keyboard to type in your
guesses (maximum 8 wrong attempts).
3. Player 2: Type in a word (maximum 7 letters) without Player 1 seeing it, and
press [Enter].
4. Player 1: Guess the word one letter at a time, and use the keyboard to type in your
guesses (maximum 8 wrong attempts).
Whoever scores the most points wins the game.
(11) Concentration
An animated vocabulary word is shown briefly, and the word is said.
1. Remember the position of the letters that made up the word.
2. After the letters are hidden, click once on the tiles to uncover them, and press [Enter].
(12) Jumbler
Unscramble your opponent's word (maximum 7 letters).
1. Player 1: Type in a word without Player 2 seeing it, and press [Enter].
2. Player 2: Unscramble the word one letter at a time, and use the keyboard to type
it in (maximum 3 wrong attempts).
3. Player 2: Type in a word without Player 1 seeing it, and press [Enter].
4. Player 1: Unscramble the word one letter at a time, and use the keyboard to type
it in (maximum 3 wrong attempts).
Whoever scores the most points wins the game.
(13) Match Box
Match the given word with its opposite.
Vocabulary
(10)
(11)
(12)
Page 16

14
1. Scroll to choose the opposite word by using the down arrow on the directional cursor
button.
2. Press [Enter] or either cursor button when a word is chosen.
(14) Twin Terms
Synonyms are words with similar meanings.
1. Identify the synonym of the word shown.
Selections will move across the bottom of the screen.
2. Press either cursor button or [Enter] when the synonym is directly under the arrow.
(15) Rhyme Time
An animated vocabulary word is shown briefly, and the word is said.
A selection of words then appears.
Select the word that rhymes with the word you heard.
(16) Word In Word
Help the workman decide which letter to delete to create a new word.
1. Using the cursor arrow, select the letter to be deleted.
2. Press the left cursor button once.
(17) Animal Tales
Use the scroll arrows to the left and right of the screen to see more animals.
1. Select the animal that matches the vocabulary word.
2. Press [Enter] or either cursor button.
(18) Addition
Type the correct answer in the space provided.
Math (These games will develop your arithmetic skills.)
(13)
(14)
(15)
(16)
(17)
(18)
Page 17

15
(19) Subtraction
Type the correct answer in the space provided.
(20) Multiplication
Type the correct answer in the space provided.
(21) Division
Type the correct answer in the space provided.
(22) Drop In
An equation with a missing number is shown on the left of the screen.
On the right, four numbers rotate under a hook.
Solve the math problem by supplying the missing number.
Press [Enter] or either cursor button to select the number positioned below the hook.
(23) Monster Mash
An equation with a missing operation sign is shown, and a selection of operation signs
moves across the screen.
1. Identify the correct operation sign.
2. When the operation sign is directly above the monster, press [Enter] or either cursor button.
(24) Operation
Compare the 2 equations on the screen.
1. Select the correct operation sign using the cursor buttons.
If you think the first equation is greater than the second one, then choose [>].
If you think the first equation is less than the second one, then choose [<].
If you think the first equation equals the second one, then choose [=].
2. Press [Enter] or either cursor button to submit your answer.
(19)
(20)
(21)
(22)
(23)
(24)
Page 18

16
Games
(25) Park Pick Up
Use ¨, ←,→,↑and ↓on the directional cursor button to move through the park
and pick up all the trash without repeating your path or bumping into the monsters.
The path will be reset after 3 invalid responses.
(26) Time Teller
Note: 12 hour clock
1. Remember the time shown by the alarm clock on the screen.
2. Use the number keys to fill in the time in the space provided.
(27) Sound Board
1. Identify the animal sound played.
2. Select the animal that made the sound from the choices shown.
(28) National Anthem
1. Use the scroll bar on the right to see more countries’ names.
2. Select a country to hear its national anthem.
Press any key to interrupt the music and return to the country menu screen.
(29) Short Stuff
A. Eliminate icons from the columns before the columns are filled up. Icons are
eliminated when three icons of the same kind are arranged in a row horizontally,
diagonally, or vertically.
B. Icons move from right to left from the platform.
When a column is covered by the platform, the icon moves over the top of it.
Use the directional cursor button to maneuver the platform over other columns.
If the column is NOT covered by the platform, the icon falls into the column.
When three or more icons of the same kind are arranged in a row, these icons are
eliminated from the columns.
(25)
(26)
(27)
(28)
(29)-A
(29)-B
Page 19

17
C. Apoint is given for each icon eliminated, and the icon above it drops down.
The game is over when three or more icons fill up a column, and the platform
cannot pass through. The game is also over when the columns are filled up with
icons and there is no more room for new icons.
(30) Odd Ball
This game tests your observation skills.
Four icons are shown on the screen.
Select the icon that is different from the rest.
Memory
(31) Brain Train
A train travels across the screen.
1. Remember the sequence of numbers in the box cars.
The train reappears with empty box cars.
2. Key in the same sequence of numbers in the box cars.
(32) Hide & Seek
A grid of icons is briefly shown and then hidden. Uncover the icons a pair at a time.
1. Select and turn over the tiles using the cursor buttons.
2. Find all the matching pairs of icons one at a time.
(33) What Was It?
Remember the icon flashed on the screen.
Select the icon you just saw from the selection of four.
(29)-C
(30)
(31)
(32)
(33)
Page 20

18
(34) Sound String
Four tone buttons are shown.
1. Remember the sequence of tones played by Zip the Robot.
2. Repeat the tones using the number keys or by selecting the tone buttons.
(35) Melody Mania
An octave of a piano is shown.
1. Remember the sequence of notes played by Zip the Robot.
2. Repeat the notes using the number and letter keys.
(36) Just Right
A sequence of icons appears on the top of the screen.
1. Remember the sequence in which they appeared.
2. Select the objects in the order they first appeared.
Logic
(37) Number Puzzle
Arrange the tiles in numerical order.
Slide the tiles by clicking on a tile adjacent to the shaded empty space.
Only tiles next to the space can be moved.
(38) Fib Finder
Press [Enter] or either cursor button when items displayed on the screen do not match
what Zip says. If the displayed items match the audio, do not press any key.
You have 3 seconds to make your decision.
(39) Mystery Letter
Follow the clues and guess the mystery letter by the process of elimination.
An instruction is given "The mystery letter is between _ and _". Then all the letters
are highlighted except the possible mystery letters.
(34)
(35)
(36)
(37)
(38)
(39)
Page 21

19
1. Select one of the possible mystery letters by pressing a letter key.
2. If the letter is the mystery letter, points are awarded.
3. If the letter is NOT the mystery letter, and the mystery letter is NOT to the right/left
of that letter, then all the letters to the right/left of that letter will be highlighted.
4. Make another attempt to guess where the mystery letter is located.
You are given 3 attempts to find the letter and answer each question.
(40) Number Line
A sequence of numbers is shown but one number is hidden in a balloon.
Key in the missing number.
(41) Beeline
Under some of the flowers are hidden bees. Pick all of the flowers without stepping
on a bee.
Use the arrow cursor to select a flower.
If there is a hidden bee under the flower, the game resets.
If there is no hidden bee, a number will appear in the space.
This number indicates how many hidden bees are adjacent to this space.
After the last valid flower has been picked, all the bees are revealed.
(42) Shoofly
Swat the fly that is hiding next to this animal.
An animal sound is played.
The fly is hiding behind one of the animals next to this animal.
Select the animal which the fly is hiding behind.
(40)
(41)
(42)
Page 22

20
Keyboarding
(43) Finger Fun
Learn to touch type!
Follow the lessons and learn to type the letter keys using the correct fingers.
Type the displayed letter using the finger indicated on the screen.
(44) Hippity Hop
Practise your touch typing skills.
Type the moving letters on the screen to keep the frog from falling into the waterfall.
(45) Cat & Mouse
Don’t let the cat get the mouse.
Type the scrolling words as they appear on the screen.
(46) Key Quiz
1. Remember the flashed word.
2. Type the word in the empty spaces.
(47) Invasion
Letters move across the top of the screen.
1. Use the directional cursor button to move the cannon beneath a letter.
2. Type the letter to shoot it down before it reaches the bottom.
The cannon will only fire when the letter typed is the same as the letter being aimed at.
(43)
(44)
(45)
(46)
(47)
Page 23

21
Tools
(48) Calculator
The built-in calculator works in exactly the same way as a real calculator.
Use the number and the function keys to enter a mathematical equation.
Press [Enter] to see the answer.
Press [C] to cancel your last entry.
(49) Animationary
Select a word and see its exciting animation.
(50) Jukebox
Names of melodies move across the screen.
Select a melody while the melodies scroll across the screen.
Press any key to interrupt the music.
(00) Setting
1. Type your name and personalize your unit.
2. Press [Enter].
(47)
(47)
(47)
(47)
Division
Subtraction
Addition
Multiplication
Equals
Cancel
Page 24

22
Chapter 10
Chapter 10
Trouble Shooting
Before contacting an authorized service center at 1-800-853-8883, carry out the following simple checks.
They may save you the time and expense of an unnecessary service call.
No display
Is the power supply connected?
Are the batteries installed properly?
Do the batteries need replacing?
Difficult or no response from the mouse
Is the ball of the mouse and mouse pad clean and free from dust?
Is the mouse connected correctly?
Black-out screen or abnormal display
Disconnect the power supply by removing batteries or disconnecting the adaptor for at least 10 seconds before
connecting the power supply again.
Developing learning aids is a responsibility that we take very seriously.
We make every effort to ensure the accuracy and appropriateness of the information which forms the value of our
products. However, errors can sometimes occur. It is important for you to know that we stand behind our
products and we encourage you to call our Consumer Services Department at 1-800-853-8883 with any problems
and/or suggestions that you might have. Our service representative will be happy to help you.
Conforms to safety requirements of ASTM F963, EN71 Parts 1,2 and 3 and EN50088.
In an effort to continually improve our products, the actual screen display on product may differ slightly from the
diagrams shown.
Page 25

Accessories available for this Learning computer (sold separately)
Zip the Robot
Smart Card for Zip the Robot
Smart Card 1
Word Fun
Increase the challenge
of grammar and
punctuation activities
with these new questions.
Including:
• Capitalisation
• Punctuation
• Phonetic Recognition
Smart Card 2
Spelling Fun
Expand spelling
excitement with
the new questions
in this spelling upgrade.
Including:
• Spelling Rules
• Phonetic Recognition
• Word Formation
AC Adaptor
(9 VOLT 300mA)
Smart Card 3
Vocabulary Fun
New questions and
upgraded fun to
vocabulary activities.
Including:
• Synonyms
• Antonyms
• Word Recognition
Page 26

TTable of Contents
able of Contents
1
Chapter 1
About your Zip the Robot Learning PC
3
Chapter 2
Getting Started
7
Chapter 4
Game Selection
7
Chapter 5
Game Rules
8
Chapter 6
Two-Player Mode
9
Chapter 7
Make a Selection and Submit Your Answer
5
Chapter 3
Useful Features and Controls
11
Chapter 8
Scroll
11
Chapter 9
Games and Game Codes
Spelling
Word
Vocabulary
Math
Games
Memory
Logic
Keyboarding
Tools
11
Chapter 10
Trouble Shooting
11
12
13
14
16
17
18
20
21
Page 27

Dear Parent/Guardian
Thank you for buying Zip the Robot Learning PC.
Using the latest technology,
Oregon Scientific aims to develop unparalleled electronic learning products that make
learning a lot more fun.
Designed by experts, our products are packed with unique interactive activities
that make an invaluable contribution to your child’s development.
As well as activities with specific objectives of furthering skills of
language, mathematics, music, memory, logical reasoning and general knowledge,
Zip the Robot Learning PC will provide a safe and realistic introduction to
computers and encourage creativity and independent learning.
When it comes to developing your child’s mind,
Oregon Scientific’s products help them achieve their potential.
Page 28

Oregon Scientific, Inc.
19861 SW 95th Place
Tualatin, OR 97062, USA
Tel: 503 639 8883
Fax: 503 684 8883
Email: info@oscientific.com
Look for us on the World Wide Web!
http://www.oregonscientific.com
Warning:
Changes or modifications to this unit not expressly approved by the party responsible for compliance could void the user's authority
to operate the equipment.
NOTE:
This equipment has been tested and found to comply with the limits for a Class B digital device, pursuant to Part 15 of the FCC
Rules. These limits are designed to provide reasonable protection against harmful interference in a residential installation. This
equipment generates, uses, and can radiate radio frequency energy and, if not installed and used in accordance with the instructions,
may cause harmful interference to radio communications. However, there is no guarantee that interference will not occur in a
particular installation. If this equipment does cause harmful interference to radio or television reception, which can be determined by
turning the equipment off and on, the user is encouraged to try to correct the interference by one or more of the following measures:
•Reorient or relocate the receiving antenna.
•Increase the separation between the equipment and receiver.
•Connect the equipment into an outlet on a circuit different from that to which the receiver is connected.
•Consult the dealer or an experienced radio TV technician for help.
" This Class B digital apparatus complies with Canadian ICES-003."
" Cet appareil mumérique de la class B est conforme à la norme NMB-003 du Canada"
 Loading...