

Page 1

USER’S MANUAL
MANUEL D’UTILISATION
BEDIENUNGSANLEITUNG
MANUAL PER L’USO
MANUAL -
DE INSTRUCCIONES
Page 2

086-002016-047
Page 3

TOUCH-SCREEN DATABANK
USER’S MANUAL
MODEL PDA283
TABLE OF CONTENTS
Introduction.............................................................................................................3
Description of Parts.................................................................................................4
Description of the Main-Menu-Display Icons.......................................................5
Inserting the Batteries.............................................................................................6
Self Initialization.....................................................................................................7
Getting Started........................................................................................................7
The Easy-Touch Pencil....................................................................................7
System Setup............................................................................................................8
Key Tones........................................................................................................8
Display Contrast Control.................................................................................9
ENGLISH
FRENCH
Security Access...............................................................................................10
Deleting Records............................................................................................11
PC Link..........................................................................................................11
The Phonebook Mode............................................................................................12
Categories .....................................................................................................12
Inserting A New Record.................................................................................13
Browsing Phonebook Records........................................................................14
Viewing or Editing Existing Phonebook Records..........................................14
Search............................................................................................................15
Lock ..............................................................................................................15
Notepad Mode.........................................................................................................17
Inserting a New Note......................................................................................17
Bookmark Mode.....................................................................................................18
Inserting a Web Site Address..........................................................................18
GERMAN
ITALIAN
SPANISH
1
Page 4

Time / Date Mode..................................................................................................18
Choosing a Home City...................................................................................19
To Enter or Edit the Home Date and Time....................................................19
Daily Alarm....................................................................................................20
ENGLISH
Calculator Mode....................................................................................................21
Calendar Mode......................................................................................................23
Finding The Time Of Cities Around The World............................................20
Numerical Calculations..................................................................................21
Metric Conversions........................................................................................21
Currency Conversions....................................................................................22
FRENCH
Translator Mode....................................................................................................26
Help Mode..............................................................................................................27
Reset........................................................................................................................28
Maintenance...........................................................................................................28
Viewing Past or Future Dates........................................................................23
Daily Scheduler.............................................................................................24
Erasing Past Schedules..................................................................................25
Anniversary Lists and Holiday Lists.............................................................25
GERMAN
Specifications..........................................................................................................28
ITALIAN
SPANISH
2
Page 5

INTRODUCTION
Congratulations on your purchase of the Touch-Screen Databank (PD283).
A multi-function device, this product provides seven primary functions.
A Phonebook
Stores individual names, phone numbers, addresses, and other information in twelve textfield categories.
A Notepad
Stores message information and important need-to-remember notes.
A Bookmark
Stores Web Site addresses and related information.
A Time / Date Clock
A current-date calendar, local-time clock, and world-time clock for 84 major cities around
the world.
A Calculator
A 10 digit numerical calculator with metric and currency conversion functions.
A Calendar and Daily Scheduler
A daily planner and scheduler that highlights important dates or specific blocks of time.
ENGLISH
FRENCH
GERMAN
A Translator
Translates over 9,500 words into seven different languages. Translates into: English,
French, German, Spanish, Italian, Portuguese, and Dutch.
Using touch-screen technology, primary functions can be accessed in one step.
Unlike conventional databanks that utilize extensive keyboards, your PDA283 simplifies
data input. Using an Easy-Touch Pencil, functional sequences are fast and simple to
follow. Large easy-to-read display icons enhance the product’s user friendliness.
Another feature of your PDA283 is its PC connective capabilities. With an additional
extension and special software (sold separately), data can be transferred and safely stored
on a computer terminal.
As a final note, take time to read this manual. Understanding the many features of your
PDA283 should increase the unit’s usefulness and help to avoid mistakes that may
otherwise result in lost data.
3
ITALIAN
SPANISH
Page 6
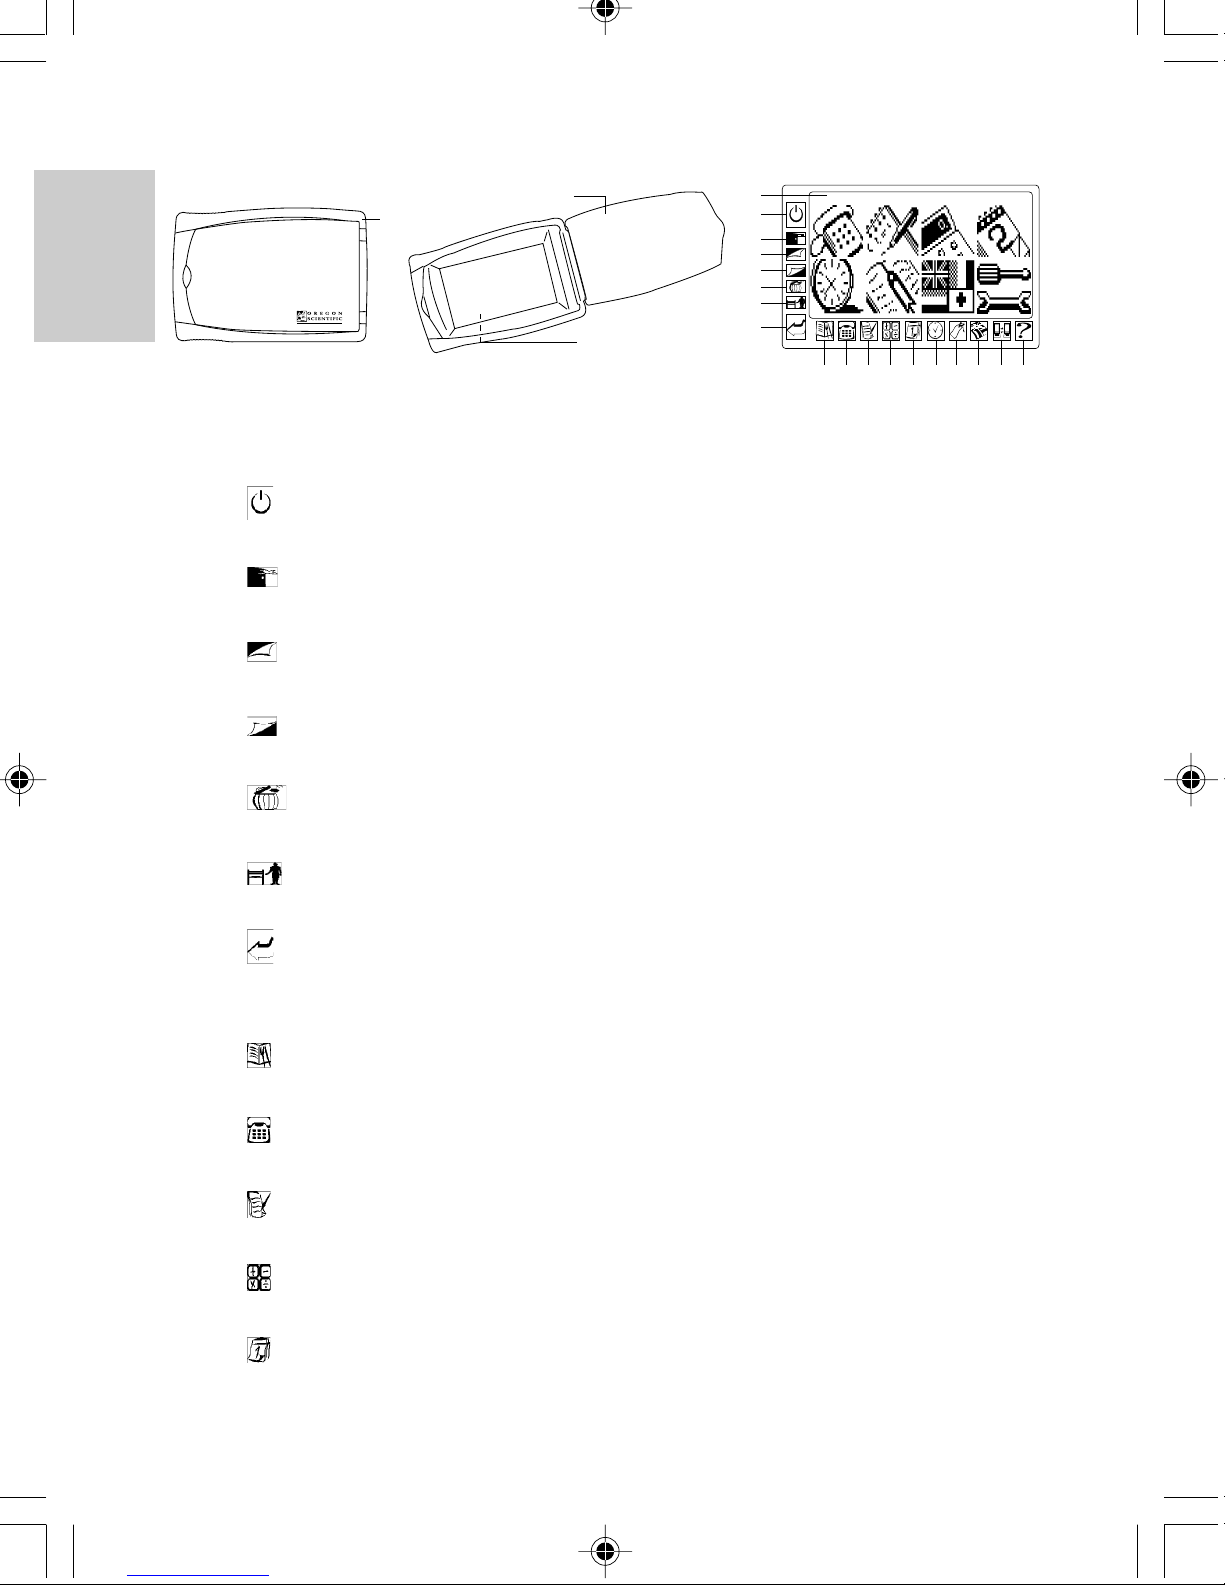
DESCPRITION OF PARTS
20
19
ENGLISH
21 & 22
1. Liquid Crystal Display (LCD) and Easy-Touch Display Buttons
• Large Touch-Screen Display with easy-to-read icons
• Touch-sensitive functional buttons
2. [ ] On/Off Button
Activates and deactivates the unit
FRENCH
3. [ ] Escape Button
Exits to the previous display
4. [ ] Page-Up Button
Scrolls upwards through records
5. [ ] Page-Down Button
Scrolls downwards through records
1
2
3
4
5
6
7
8
PDA
9 10 11 12 13 14 15 16 17 18
6. [ ] Delete Button
GERMAN
Erases information
7. [ ] Edit Button
Edits records or specific text fields
8. [ ] Enter Button
• Confirms a record entry
• Exits to a previous display
9. [ ] Menu Button
ITALIAN
Access to Main Menu Display
10. [ ] Phonebook Button
Access to Phonebook Mode
11. [ ] Notepad Button
Access to Notebook Mode
12. [ ] Calculator Button
Access to Calculator Mode
13. [ ] Calendar Button
SPANISH
Access to Calendar Mode
4
Page 7
14. [ ] Clock Button
Access to Clock Mode
15. [ ] Bookmark Button
Access to Bookmark Mode
16. [ ] Translator Button
Access to Translator Mode
17. [ ] PC-Link Button
Access to data tranfer
18. [ ] Help Mode
Access to help
19. Touch-Screen Pencil
For use when making selections
20. Front Cover
Provides protection to the unit and LCD
21. Battery Compartment
Main: Houses 2 (two) CR2032 3V lithium cells
Backup: Houses 1 (one) CR1220 3V lithium cell
22. Reset Button
Clears all information and resets the unit to its original factory values
ENGLISH
FRENCH
GERMAN
DESCRIPTION OF MAIN MENU DISPLAY ICONS
The Main Menu Display has eight (8) icons
Phonebook Notepad
Calcualator Calendar
Clock Bookmark
Translator Setup
5
ITALIAN
SPANISH
Page 8
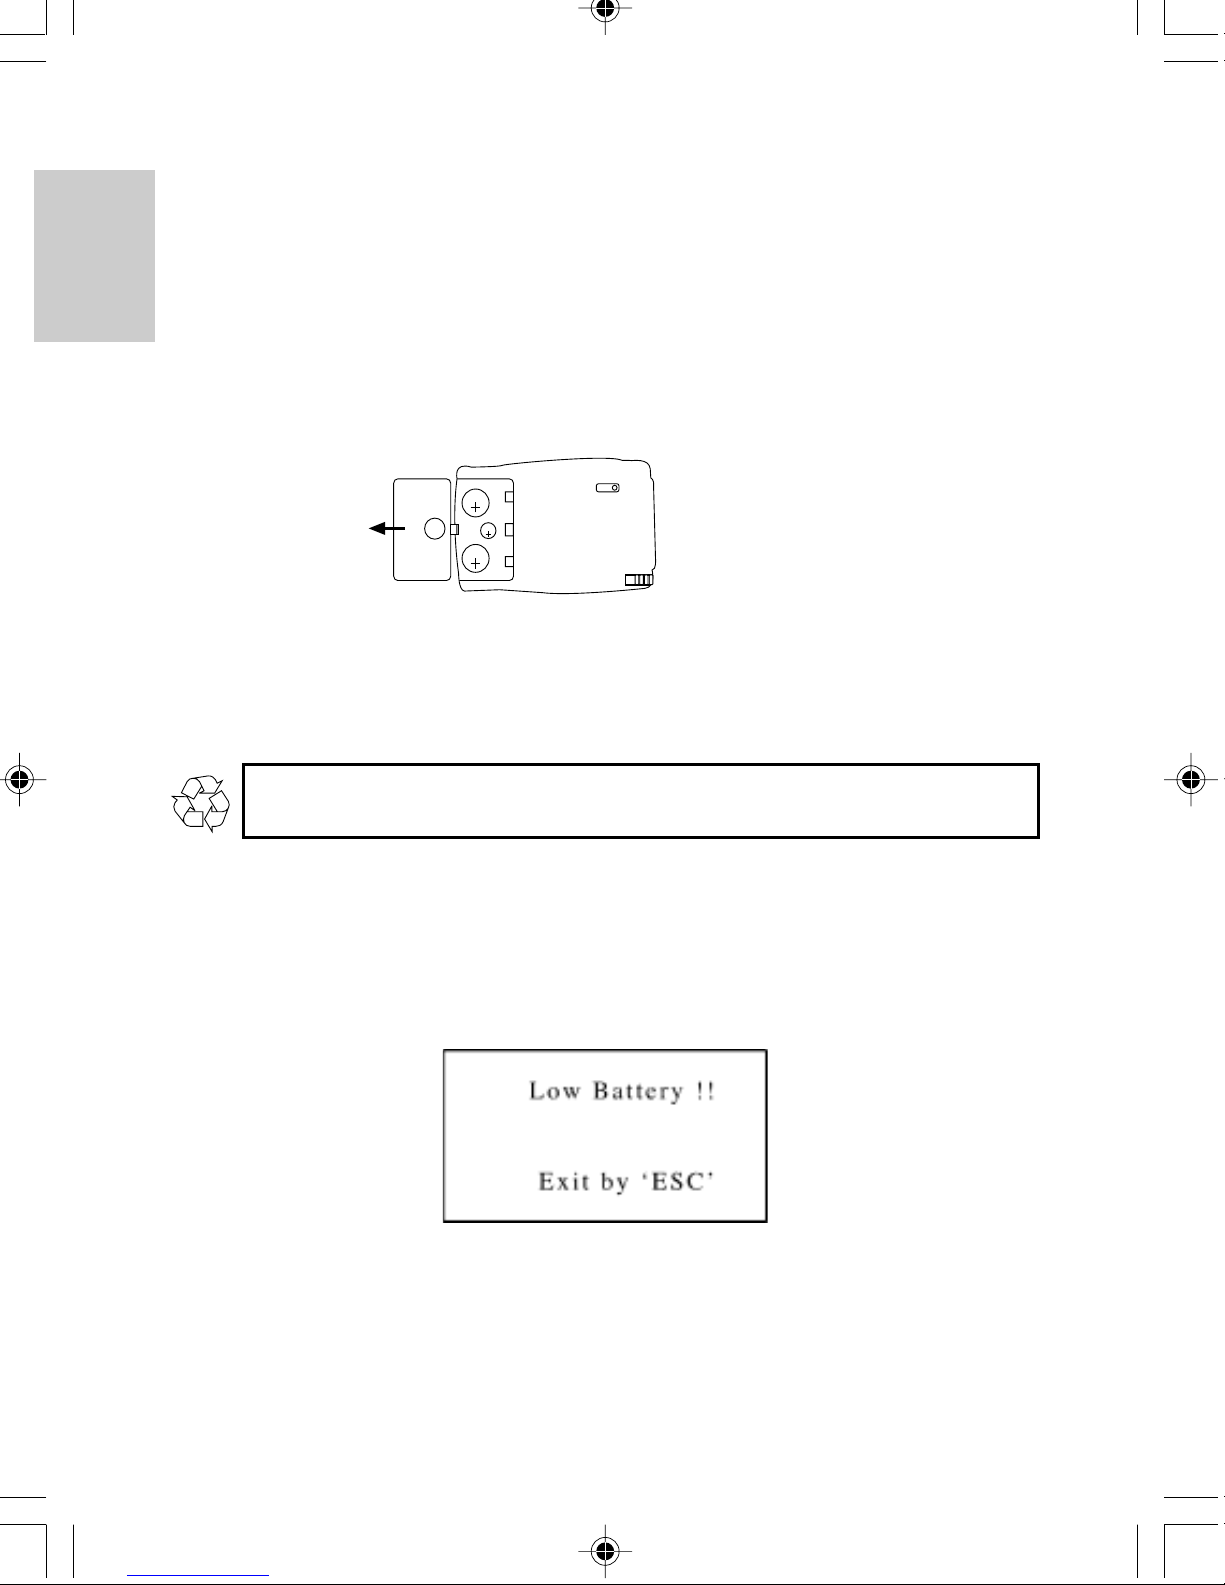
INSERTING THE BATTERIES
This unit is designed to have a main source of power and a backup source. The backup
power source functions to provide power while the main batteries are being replaced.
The PDA283 uses two (2) CR2032 3V lithium cells for the main power source, and one
ENGLISH
(1) CR1220 3V lithium cell as a backup source.
To install batteries:
1. Gently pull to open the battery compartment door.
CR2032
3V
CR1220
3V
CR2032
FRENCH
2. Insert 2 (two) new CR2032 lithium cells for the main power and 1 (one) CR1220
lithium cell for the backup battery into the appropriate locations.
3. Replace the battery compartment door.
3V
If not disposed of properly, batteries can be harmful. Protect the environment by
taking exhausted batteries to authorized disposal stations.
GERMAN
Replace batteries when they are low. A Low Battery message will show to inform the user
that the batteries need replacing.
Note: Generally the backup battery will not require replacing. When the Low Battery
warning message appears, replace the main batteries.
ITALIAN
SPANISH
6
Page 9
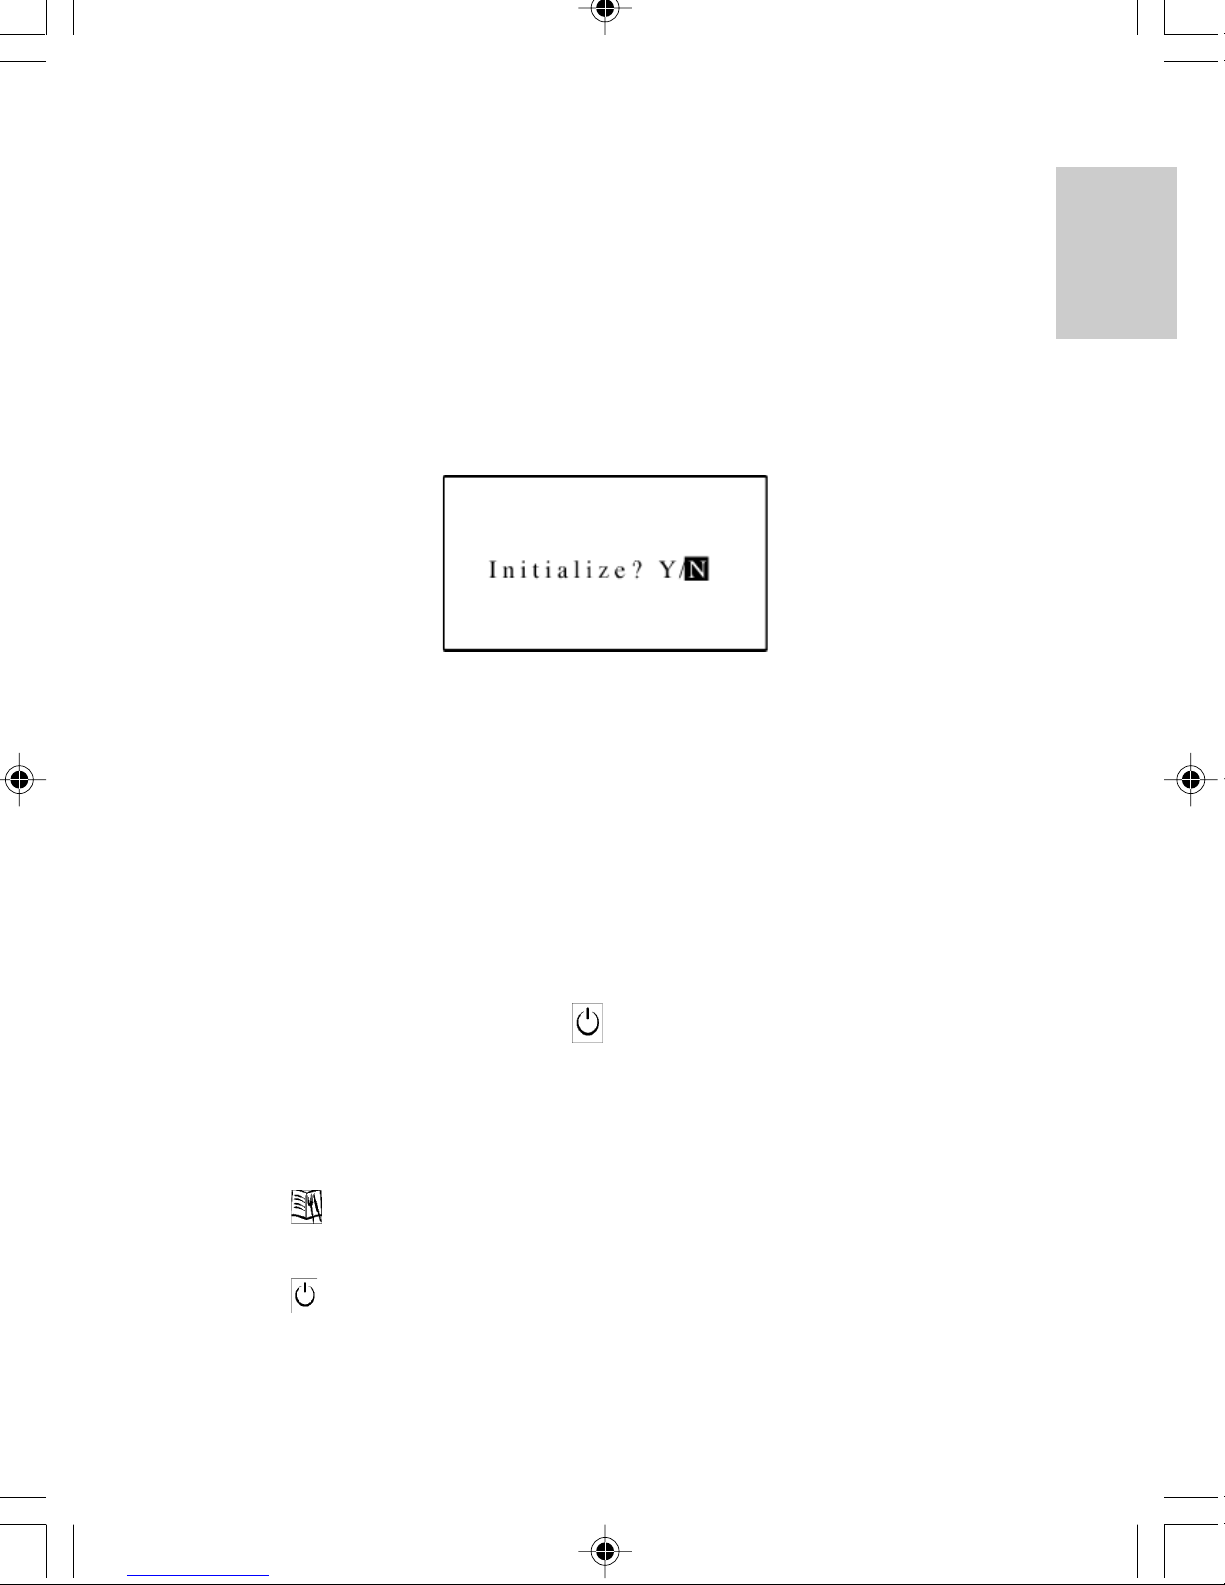
SELF INITIALIZATION
Once the batteries are inserted, the unit will activate. When replacing batteries, the user
will be asked to initialize the unit.
Warning: Initializing the unit will erase all information. To keep
stored information do not initialize the unit.
To keep stored information after replacing batteries:
1. Use the Easy-Touch Pencil and gently touch [N] two times. The unit will keep stored
information and advance to the Main Menu Display.
GETTING STARTED
THE EASY-TOUCH PENCIL
Use the Easy-Touch Pencil to enter information or to select a particular function. Taking
the pencil from it’s storage compartment in the upper corner of the unit, gently touch the
desired locations on the display.
ENGLISH
FRENCH
GERMAN
To start the unit:
1. Open the front cover.
2. Use the Easy-Touch Pencil to touch [ ] On / Off.
Note: When the unit is activated, it will enter the last display of use when previously
operated.
To enter the Main Menu Display:
1. Touch [ ] Menu.
To deactivate the unit:
1. Touch [ ] On / Off.
Note: Left untouched for about four (4) minutes, the unit’s power-conserve feature will
automatically deactivate the unit.
7
ITALIAN
SPANISH
Page 10

SYSTEM SETUP
Initially take a few minutes to personalize the system. Properly setting up the system
before use will improve functionality. Enter any of five categories: Keytone, Contrast
Level, Change Password, Delete Records, or PC Link, and enter the appropriate
information.
ENGLISH
To access System Setup:
1. In the Main Menu Display, touch [ ] System Setup. A pop-down box will show
the five categories of System Setup.
FRENCH
2. Touch the desired category to highlight it or touch [ ] or [ ] to move upwards or
downwards through the pop-down box.
3. Touch the highlighted category or [ ] Enter to access the selection.
GERMAN
KEY TONES
When the key tone function is active, a beep sound can be heard as the Easy-Touch Pencil
touches the LCD. The “beep” sound tells the user that the pen has properly contacted with
the panel.
To activate the Key Tones:
1. Enter System Setup and then touch [Keytone].
2. Touch [Keytone on] or touch the [ ] or [ ] to alternate between turning the key
ITALIAN
tone on and off.
To operate the unit without key tones, the key tone function needs to be deactivated.
To deactivate Key Tones:
Touch [Keytone off] or touch the [ ] or [ ] to alternate between turning the key tone
on and off.
SPANISH
8
Page 11

To return to System Setup:
1. Touch [ ] Escape or [ ] Enter and return to System Setup.
Note: Main Menu Display functions can be accessed at any time.
To return to the Main Menu Display or any of the seven primary Data Bank functions,
touch the respective icon. The unit will enter that display. For example: to return to the
Main Menu Display, touch [ ] Menu, the unit will instantly enter the Main Menu
Display.
DISPLAY CONTRAST CONTROL
The amount of dark / light contrast on the display can be adjusted with the Contrast
Control.
Moving the contrast bar to the extreme right, the LCD will become quite dark and the
screen icons and characters will be difficult to read. Moving the bar to the extreme left, the
screen becomes quite light. In this position, display icons and characters may also become
difficult to read.
ENGLISH
FRENCH
GERMAN
For best display contrast, position the contrast bar close to the center.
To alter the amount of Dark / Light contrast:
1. Enter Contrast Level in System Setup.
2. Touch the contrast bar on either the left or right side or touch [ ] or [ ] to alter the
contrast level.
3. When the desired amount of display contrast is achieved, touch [ ]Enter or [ ]
Escape to exit.
Note: The user can also complete a selection by touching the contrast bar to select the
desired dark / light level and then touching the same location on the bar a second time.
9
ITALIAN
SPANISH
Page 12

IMPORTANT
If by accident the user exits the Contrast Display while the contrast bar is positioned at
either the extreme right or the extreme left, it may de difficult the relocate the Contrast
Display.
To locate the Contrast Controls when the display is too dark or too light to read
ENGLISH
display information:
1. With the unit turned on, press RESET button. The unit will return to a factory set
contrast level. The unit will advance to the Self-Initialization Display.
2. Using the Easy-Touch Pencil, press “N”. This will save all stored information and
allow the user to enter the Contrast Control Display to alter the display contrast to the
desired level.
Note: In the Self-Initialization Display, only touch “Y” to initialize the unit.
FRENCH
When “Y” is touched, all stored information will be permanently lost.
SECURITY ACCESS
To limit access to information, use System Setup to enter or change a password that is
entered, it is used to access locked information. A password can be any combination of
numbers or letters to a total of eight (8) characters.
GERMAN
Once a password has been selected, it needs to be entered before accessing locked
information or changing to another password.
IMPORTANT
Do not forget a password. If a password is lost or forgotten, locked information can not be
accessed. To prevent losing information, memorize or store a password in safe place.
To input a password:
1. Enter System Setup and touch [Change Password].
ITALIAN
2. If no password is currently in use, enter a new password by touching the Key Map
Display on the desired letters or numbers.
SPANISH
10
Page 13

Note: For more information on how to use the Key Map Display, refer to the section Insert
A New Record located in the Phonebook section of this manual.
3. Touch [ ] Enter.
4. Touch [confirm!] to accept or [cancel!] to reject the new selection.
To change a password:
1. Enter System Setup and touch [Change Password].
2. Input the old password.
3. Touch [ ] Enter to terminate the old password.
Note: The unit will attempt to match the entered password with the current stored
password. When a match is made, “Enter New Password” will display and the user can
input a new password.
4. Input the new password.
5. Touch [ ] Enter.
6. Touch [confirm!] to accept or [cancel!] to reject the new selection.
ENGLISH
FRENCH
DELETING RECORDS
The entire contents of a category can be deleted in one step.
To delete all the records of a category:
1. Enter System Setup and touch [Delete Records].
2. Touch [Delete Records] again to enter the 5 categories of Delete Records.
3. Touch one of the 5 categories to highlight it or touch [ ] or [ ] to move upwards
or downwards through the pop-down box.
4. Touch the selection or [ ] Enter.
5. Touch [confirm!] to accept or [cancel!] to reject the selection.
6. Touch [ ]Escape to return to the System Setup Display.
PC LINK
This unit is designed to communicate with personal computers (PC). Saving records on a
PC can help to prevent accidental loss of information.
To link the PD283 to a PC:
1. Enter System Setup and touch [PC Link].
2. Touch [PC Link] again or [ ] Enter.
3. Touch [Transmit] or [Receive] from the pop-down box.
4. Touch the highlighted bar or [ ] Enter to confirm the selection.
11
GERMAN
ITALIAN
SPANISH
Page 14

Note: A link cable and Software, sold separately, are required for the PC Link.
If the user does not have the proper accessories, touch [ ]Escape to exit PC Link.
Remark: According to the version number this function will be upgraded to a PC Sync
function. To access this function, user must follow the operations in PC Software manual.
ENGLISH
This Software may be sold separately.
THE PHONEBOOK MODE
The phonebook is where names, telephone numbers, addresses, and other pertinent
information related to an individual is kept. A sequence of steps will direct the user to
input the appropriate information in a particular field.
FRENCH
To enter Phonebook Mode:
1. In the Main Menu Display, touch [ ] Phonebook
GERMAN
The Phonebook Display has 4 subsections. Each subsection is represented with an icon.
1: [ ] Category Icon 2: [ ] Lock Icon
3: [ ] Insert Icon 4: [ ] Search Icon
To enter one of the phonebook’s four (4) subsections:
1. Touch the appropriate icon.
ITALIAN
[ ] CATEGORIES
Categories further divides a Phonebook list into smaller subdirectories.
The subdirectories are: [ ] All, [ ] Business, [ ] Friend, and [ ]
Others
Note: By default, after Phonebook is selected the unit will enter the [ ] All category.
SPANISH
12
Page 15

To select a subdirectory:
1. Enter Phonebook Display and touch [ ] Categories to view a pop-down box with
the name and icon of the four subdirectories.
2. Touch one of the four subdirectories to highlight it or touch [ ] or [ ] to move
upwards or downwards through the pop-down box.
3. Touch the highlighted subdirectory or touch [ ] Enter to accept the choice.
If there is no record for the selected subdirectory, No Record will display on the LCD.
[ ] INSERT A NEW RECORD
The Phonebook contains twelve text fields for which information can be stored. Input
information into desired fields.
ENGLISH
FRENCH
The fields are: Name, Telephone Number, Home Address, Company Name, Company
Telephone Number, Company Address, Company Fax Number, Email Address, Mobile
Phone Number, Job Title, Birthday, and Remark.
To insert a new record:
1. Touch [ ] Insert to enter Name Edit Field.
Note: The Name Edit Field has three keyboard maps, each with a specific use.
Touch [ ] , to toggle between small letters and capital letters.
Touch [ ] , before entering numerical digits.
2. Touch the desired Key Map letters.
GERMAN
ITALIAN
Note: The unit will use the most suitable key map display as the default key map display
for each field.
SPANISH
13
Page 16

3. Touch [ ] Enter to access Telephone Number Edit field.
4. Input the telephone number or touch [ ] Enter to carry on to the next field.
5. Carry on, in the same manner inputting information into the remaining fields.
6. In the Remark field, the last field of a new record, input information specific to that
ENGLISH
person.
7. When finished, touch [ ] Enter.
It is not necessary to work through all of the fields. Enter the desired information and then
touch [ ] Escape to enter the Browsing Display. After all of the desired information is
entered, touch [ ] Escape and enter the Browsing Display.
BROWSING PHONEBOOK RECORDS
FRENCH
After inputting or editing information, the user can browse the information.
To browse a record:
1. Touch [ ] Page Up or [ ]Page Down to scroll through the information.
2. Touch [ ] Escape to terminate the browsing process. The message “Security ON/
OFF” will display.
3. Touch “Security ON” to protect the information or “Security OFF” to keep
information unprotected.
GERMAN
Note: If Security ON is touched, accessing the information will require a password.
4. To confirm the selection, select the highlighted item again or touch [ ] Enter.
The record is in the phonebook and can be accessed at any time.
VIEWING OR EDITING EXISTING PHONEBOOK RECORDS
ITALIAN
Records in the Phonebook can be viewed or edited at any time.
Note: The system categorizes records as subgroups that are either protected or
unprotected. When first entering Phonebook, by default, the system will display the
unprotected records.
To display locked records:
Touch [ ] Lock and enter the password.
SPANISH
14
Page 17

To view or edit a Phonebook record:
1. Touch [ ]Phonebook to enter the phonebook list.
2. Touch [ ]Page Up or [ ] Page Down to scroll the list.
3. Touch the desired item to highlight it.
4. Touch the highlighted item or [ ] Enter to browse the record’s fields.
5. Touch [ ] Page Up or [ ] Page Down to scroll the fields.
6. Touch [ ] Edit and follow the procedure as outlined in the section INSERTING A
NEW RECORD.
[ ] SEARCH
A record can be identified and located by remembering and inputting a few key words of
the record.
To search for a record with only a few key words:
1. Touch [ ] Phonebook.
2. Select the desired subdirectory.
3. Touch [ ] Search.
4. Input the key word.
5. Touch [ ] Enter to start the search.
6. The result(s) will be displayed.
ENGLISH
FRENCH
Note: The Insert function is not available in Search Mode.
7. Touch [ ] Escape to exit.
Note about editing a record in [ ] Search:
1. Locate the record by highlighting it.
2. Touch [ ] Enter and follow the procedure as outlined in the section, VIEWING OR
EDITING EXISTING PHONEBOOK RECORDS.
[ ] LOCK
Information can be classified as protected or unprotected. Information that has been
protected requires a password before it can be accessed.
For information and instructions on how to create a password refer to SECURITY
ACCESS in the section SYSTEM SETUP.
GERMAN
ITALIAN
SPANISH
15
Page 18

Note: The system categorizes records as subgroups that are either protected or
unprotected. When first entering Phonebook, by default, the system will display the
unprotected records.
To display locked records:
Touch [ ] Lock and enter the password.
ENGLISH
To protect a record:
1. In Phonebook Display, locate and highlight the record that is to be protected.
2. Touch the record again or touch [ ] Enter.
3. Touch [ ] Lock.
4. If [on] is not highlighted, touch [on] to highlight it.
5. Touch [ ] Enter.
FRENCH
The record is now locked and will require a password to access the information.
To unprotect information:
1. In Phonebook Display, access the locked record by entering the password.
2. Locate and highlight it.
3. Touch the record again or touch [ ] Enter.
4. Touch [ ] Lock.
5. Touch [off] to unlock the information.
6. Touch [ ] Enter or touch [OFF] again.
GERMAN
The record is now unlocked and will not require a password to access the information.
To select a protected record:
1. Touch [ ] lock to access a protected records list.
2. Input the password.
3. Locate the record to highlight it.
4. Touch the highlighted item or [ ] Enter.
ITALIAN
Note: If the password has never been setup, refer to SYSTEM SETUP for information on
setting or changing a password.
The password entered must correspond exactly to the password as it was entered in System
Setup.
To change an entry from the protected category to the unprotected category, the user
should:
1. In Phonebook Display access the locked record by entering the password.
SPANISH
2. Touch [ ] Lock and follow the procedure as listed above.
16
Page 19

NOTEPAD MODE
Important information can be kept as a note or message in Notepad Mode.
To access Notepad Mode:
1. In the Main Menu Display, touch [ ] Notepad.
Note: Lock, Insert, and Search functions are similar to those mentioned at the Phonebook
section.
INSERTING A NEW NOTE
Information or a note can be entered and stored as a note in Notepad.
ENGLISH
FRENCH
To insert a new note:
1. Touch [ ] Notepad to enter Notepad Mode.
2. Touch [ ] Insert to enter the title field.
3. Input a title for the note. A title can be up to 20 characters.
4. Touch [ ] Enter to confirm and to enter the note field.
5. Input the note or message.
6. Touch [ ] Enter to browse the information.
7. Touch [ ] Escape.
8. Touch Security [ON] to protect the information or [OFF] to keep information
unprotected. The selection becomes highlighted.
9. Touch [ ] Enter to accept.
Note: To edit the record, touch [ ] Edit after browsing the record, and follow the
procedure as outlined in the section INSERTING A NEW RECORD.
GERMAN
ITALIAN
SPANISH
17
Page 20

BOOKMARK MODE
The bookmark feature is ideal for storing Web Site addresses and related information about
a Web Site.
To access Bookmark:
ENGLISH
1. In the Main Menu Display, touch [ ] Bookmark.
Note: Lock, Insert, and Search functions are similar to those mentioned at the Phonebook
section.
INSERTING A WEB SITE ADDRESS
FRENCH
To insert a Web Site address:
1. Touch [ ] Bookmark.
2. Touch [ ] Insert to enter the address field.
3. Input the address for the web site.
4. Touch [ ] Enter to confirm and to enter the description.
5. Input a description or note pertaining to the Web Site.
6. Touch [ ] Enter to confirm and to enter the Web Site type.
7. Input the Web Site type.
8. Touch [ ] Enter to confirm and view the information.
GERMAN
9. Touch [ ] Escape to exit.
10. Touch Security [ON] to protect the information or [OFF] to keep information
unprotected.
11. Touch [ ]Enter to accept.
Note: To edit the record, press [ ] EDIT after browsing the record, and follow the
procedure as outlined above.
ITALIAN
TIME / DATE MODE
The Time Display has an analog clock icon with moving hour, minute and second hand.
The Time Display also has a City Bar, [ ] Local Time Icon, [ ] World Time
Icon, [ ] Alarm On / Off Icon, Date Bar, and numerical Time Bar.
SPANISH
18
Page 21

To access Time / Date Mode:
1. In the Main Menu Display, touch [ ] Clock.
CHOOSING A HOME CITY
Determine a Home City and then set the current local time and date for that location. After
a time and date have been determined for a home city, other Time / Date Display functions
can be utilized.
To enter the current time of a home city:
1. In Time / Date Display, touch the Local Bar to toggle between the [ ] Local Time
Icon and the [ ] World Time Icon.
2. Select [ ] Local Time.
3. Touch the City Bar to display a pop-down box that contains an index of 84 world
cities.
4. Touch [ ] Page Up or [ ] Page Down to view a new page.
5. Find the appropriate city from the list of 84 cities.
6. Highlight the appropriate selection.
7. Touch the highlighted selection or [ ] Enter to accept.
ENGLISH
FRENCH
GERMAN
TO ENTER OR EDIT THE HOME DATE AND HOME TIME
Once a Local City has been selected, the current date and time can be entered.
To enter the current date:
1. Touch Date Bar to edit the current date. Work from left to right along the date settings
or select a specific character to edit.
2. Touch [confirm!] when finished to automatically return to the Time Editing Display.
ITALIAN
SPANISH
19
Page 22

To enter the current time:
1. Touch Time Bar to edit the time. Work from left to right along the time settings or
select a specific digit to edit.
2. For 12-hour AM or PM format, press the AM or respective PM and enter the time by
pressing the appropriate time digits. For 24-hour time format press 24h and enter the
ENGLISH
FRENCH
appropriate time.
3. Touch [confirm!] when finished to automatically return to the Time / Date Display.
DAILY ALARM
A daily alarm can be set to activate at a given time.
To set the daily alarm:
1. Touch the [ ] Alarm located on the Local / World Time Bar.
2. Touch [YES] to set and activate the alarm and to set the desired alarm time.
3. Enter the desired alarm time. Work from left to right along the time settings or select a
GERMAN
specific character to edit.
4. Touch [confirm!] when finished to automatically return to the Time / Date Display.
Note: When the alarm is active, the alarm icon will change appearance to indicate that it is
now set to activate at a given time.
FINDING THE TIME OF CITIES AROUND THE WORLD
ITALIAN
Once the current time and date has been selected for a local city, the current time and date
for other cities around the world can be displayed.
To select a world time:
1. Touch Local / World Time Bar and select [ ]World Time.
2. Touch the City Bar to select the desired World City.
3. Touch [ ] Daylight Saving to observe the correct time if the daylight saving
SPANISH
schedule is in effect in that city.
4. Touch [ ] World Time to toggle back to [ ]Local Time and the respective
Local Time Display.
20
Page 23

CALCULATOR MODE
The calculator can perform standard numerical calculations, metric conversions, and make
currency exchange conversions.
To access Calculator Mode:
1. In the Main Menu Display, touch [ ] Calculator.
NUMERICAL CALCULATIONS
Like many standard calculators, this device can make calculations by adding, subtracting,
multiplying, and dividing. The calculator has a memory function and it can also perform
square root calculations.
To enter the Calculator Display:
Touch [ ] Calculator on the top bar to enter the Calculator Display.
ENGLISH
FRENCH
GERMAN
To solve arithmetic calculations:
1. Touch the numerical key map to enter the numerical sequence.
2. Touch [=].
[ ] METRIC CONVERSION
The unit provides 5 sub categories of units that metric / imperial conversions can be made.
They are Length, Area, Weight, Temperature and Volume.
21
ITALIAN
SPANISH
Page 24

To convert measurements between Metric and Imperial units:
1. In Calculator Mode touch [ ] Metric Conversion on the top bar to enter the
Conversion Display.
2. Touch the sub category list to select and highlight the desired units for conversion or
use the [ ] or [ ] to move upwards or downwards to select the desired conversion.
ENGLISH
Note: To initiate a conversion, the user needs to first specify the source unit and then the
target unit.
FRENCH
3. Touch the line starting with [>] and select the source unit of measurement.
4. Touch the line starting with [<] and select the target unit of measurement.
5. Input the value to be converted.
6. Touch [=] to obtain the conversion.
To reverse a conversion:
1. Touch [ ] icon to revert the conversion.
GERMAN
[ ] CURRENCY CONVERSIONS
The unit provides 12 sub categories of currency plus 4 (four) sections for additional
currencies from which exchange conversions can be made. In addition, the currency rate
for a given currency can be edited.
ITALIAN
To set a currency rate:
1. Touch [ ] Currency Conversion (located on the top bar) to enter Currency
Conversion Display.
2. Touch [Rate] to edit the currency rate.
SPANISH
22
Page 25

To convert a given amount of currency to another currency:
1. Touch [ ]Currency Conversion on the top bar to enter the Currency Conversion
Display.
2. Touch the line starting with [>] and select the source currency. Use the [ ] or [ ] to
move upwards or downwards to select the desired currency.
3. Touch the line starting with [<] to select the target currency. Again, use the [ ] or
[ ] to move up or down to select the desired currency.
4. Input the value to be converted.
5. Touch [=] to obtain the conversion.
CALENDAR MODE
ENGLISH
Use the Calendar in the same way that a day timer or scheduler is used to organize and
manage individual schedules.
To access Calendar Mode:
1. In the Main Menu Display, touch [ ] Calendar.
The Calendar Display has 4 subsections. Each subsection is represented with an icon.
1: [ ] Schedule Icon 2: [ ] Erase Past Schedule Icon
3: [ ] Anniversary Icon 4: [ ] Holiday Icon
VIEWING PAST OR FUTURE DATES
FRENCH
GERMAN
ITALIAN
Past and future date can be viewed in a variety of ways.
To view a past or future month in the current year:
1. Enter [ ] Calendar Mode.
2. Touch [ ] Page Up to select the previous calendar months.
3. Touch [ ] Page Down to select future calendar months.
Note: There is another way to view a past or future month.
SPANISH
23
Page 26

An alternate method of viewing past or future months:
1. Touch the Month to highlight it.
ENGLISH
2. Touch [ ] or [ ] to select the desired month.
3. Touch [ ] Enter or Month to confirm.
To view a past or future month in another year:
1. Select the desired month.
FRENCH
2. Touch Year to highlight it.
3. Use the [ ] or [ ] to move up or down to select the desired year.
4. Touch [ ] Enter or Year to confirm.
[ ] DAILY SCHEDULER
Use the Daily Scheduler to manage various activities during a given day, for example,
schedule appointments or indicate an important time.
GERMAN
To input Daily Schedules:
1. In Calendar Mode, locate the desired day.
2. Touch the day or [ ] Daily Schedule.
Note: If no schedules have been made for that day, a “No Record” message will appear.
Ignore the message and proceed.
3. Touch the time bar at the top of the display to enter the time duration of the
ITALIAN
appointment. Touch the arrows at each end to locate the appropriate time.
4. Touch the appropriate 15-minute time box to identify the beginning of the time period.
SPANISH
5. Touch the appropriate finishing box to identify the end of the time period.
24
Page 27

6. Input a title for the time period.
7. Touch [ ] Enter.
8. Touch [no] for no alarm and [yes] if an alarm is required to sound at the beginning of
the time period.
9. Touch [ ] Enter, then followed by [ ] Escape to return to the Daily Schedule
Display.
To view a schedule:
1. Touch the desired date in Daily Schedule Display.
Note: If schedules have been selected for a particular day, the date on the calendar will be
indicated with a dotted frame. A holiday is indicated with bold digits, and anniversary
dates are indicated with reverse digits.
ENGLISH
FRENCH
2. Touch the scheduled time that needs to be viewed.
3. Touch [ ] Enter.
[ ] ERASING PAST SCHEDULES
Schedules for dates that are now past can be erased in one step.
To erase schedules for past dates:
1. In Calendar Display, press [ ] Erasing Schedules.
2. Press [Yes] to erase past schedules and [No] to keep past schedules.
3. Press [ ] Enter to process.
[ ] ANNIVERSARY LISTS AND [ ] HOLIDAY LISTS
Special dates such as anniversaries, holidays, or other days of importance can be entered
into the Data Bank.
To enter a special date:
1. Touch [ ] Anniversary to enter the Anniversary Display, or [ ] Holiday to enter
the Holiday Display.
25
GERMAN
ITALIAN
SPANISH
Page 28

2. Touch [ ] Insert and enter the day and month of the special date.
3. Touch [Confirm!]
4. Input a title for the special occasion.
5. Touch [ ] Enter.
6. Input a note or information related to the occasion.
7. Touch [ ] Enter to view the information followed by [ ]Escape to return to
ENGLISH
the special date list.
Note: Once a special date has been selected, the date will be indicated on the calendar.
FRENCH
TRANSLATOR MODE
Your PDA283 is also a translator. Words can be translated into any of seven languages.
Each language can translate over 9,500 words.
To access Translator Mode:
GERMAN
1. In the Main Menu Display, touch [ ] Translator.
ITALIAN
To make a translation:
1. Touch the abbreviated language name in the upper left corner of the LCD to view a
pop down menu of the seven language choices.
Note: The abbreviations for the seven languages are as follows: [ENG] for English, [FRA]
for French, [GER] for German, [SPA] for Spanish, [ITA] for Italian, [POR] for Portuguese,
and [DUT] for Dutch.
SPANISH
26
Page 29

2. Touch one of the seven language choices to be the source language or touch [ ] or
[ ] to move upwards or downwards to select a language.
3. Touch [ ] Enter.
4. Input the word to be translated by touching the key map.
Note: Touch the [ä] accent symbol on the key map to open the accent key Map Display.
5. Touch [ ] Enter to start the translation. The result is then shown.
6. Touch the Language Bar to select a different target language from the one displayed.
7. Touch [ ] Escape twice to exit Translation Mode.
HELP MODE
A qucik-and-easy method for finding the purpose of a display icon, the [ ] Help
function can provide answers.
To access Help:
1. From within a display mode, press [ ] Help, a blinking question mark will appear at
the center of the LCD.
ENGLISH
FRENCH
GERMAN
2. Touch the display icon in question and obtain a description of the function.
Note: Simple operations may not have the “Help” function. For these operations no
blinking “question mark” will appear and the device will return to normal functioning.
3. When finished, touch [ ] Help or [ ] Escape to exit.
ITALIAN
SPANISH
27
Page 30

RESET
The RESET function will return all settings to factory values. Accessing the function is
required only when the unit is not operating in a favorable way such as in the rare case of a
malfunction.
ENGLISH
The RESET button is located at the back of the unit.
To reset the unit:
1. Place a blunt stylus onto the RESET button and press.
MAINTENANCE
FRENCH
When handled properly, this unit is engineered to give you years of satisfactory service.
Here are a few product care instructions:
• Do not immerse the unit in water. If the unit comes in contact with water, dry it
immediately with a soft lint-free cloth.
• Do not clean the unit with abrasive or corrosive materials. Abrasive cleaning agents
may scratch the plastic parts and corrode the electronic circuit.
• Do not subject the unit to excessive: force, shock, dust, temperature, or humidity. Such
GERMAN
treatment may result in malfunction, a shorter electronic life span, damaged batteries,
or distorted parts.
• Do not tamper with the unit’s internal components. Doing so will terminate the unit’s
warranty and may cause damage. The unit contains no user-serviceable parts.
• Only use new batteries as specified in this instruction manual. Do not mix new and old
batteries as the old batteries may leak.
ITALIAN
SPECIFICATIONS
Size: 117mm (H) X 78mm (L) X 13mm (D)
Weight: 103g (with batteries)
LCD Dimensions: 70mm (L) X 28mm (W)
Battery Type: Main: Houses 2 (two) CR2032 3V lithium cells
SPANISH
Backup: Houses 1 (one) CR1220 3V lithium cell
28
 Loading...