

Orbit Irrigation Product WT25 Users manual
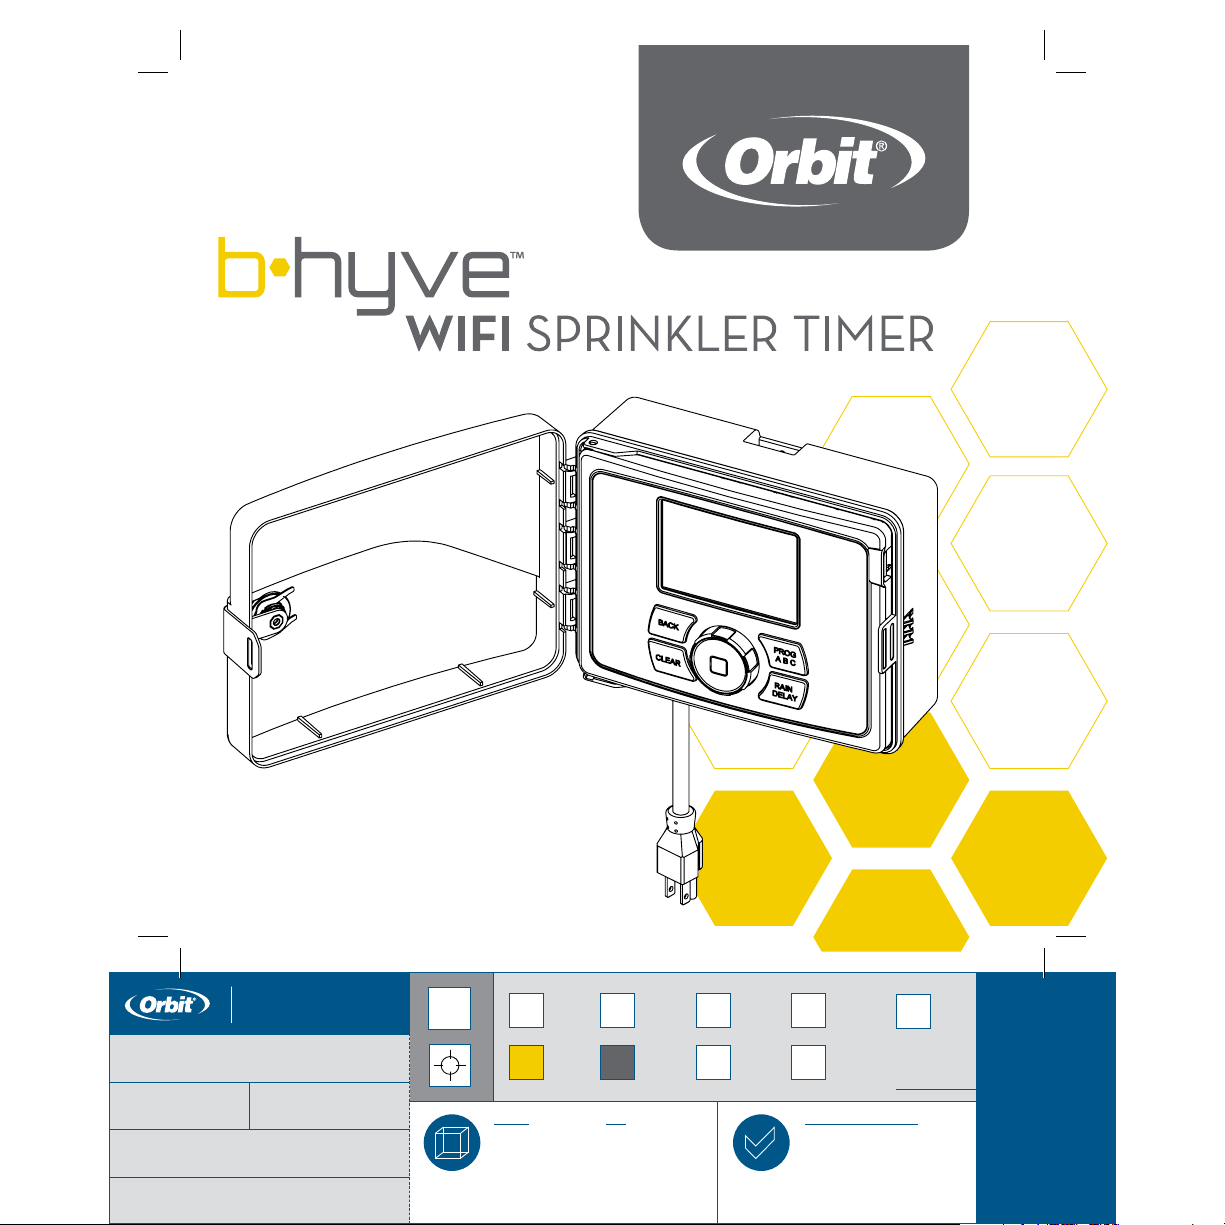
WIFI SPRINKLER TIMER
Users Manual
For:
57946, 57950, 91946, 91950, 04080, 04082
91946-50 rB
®
Orbit
1.801.299.5555
orbitonline.com
DATE: 10/09/2017
DESIGNER: KM MARKETING: MS
ARTWORK №: 91946-50 rB
SOFTWARE: Adobe Indesign CC
∙
∙
∙
∙
Product
Coverage
PMS
0000
PRINTE RS ARE
REQUIRED TO MATCH
ALL SPEC IFIED
PMS COLORS.
Dieline
PMS
7405
Folded Flat Additional Information
L:
000.000" W:
W:
H:
6.0"
Dims ./
Callout
PMS
Cool
Gray 10
Fold
PMS
0000
12.0"
H:6.0"
6.0"
Glue
Printers are responsible
for meeting print
production requirements.
Any changes must be
approved by Orbit
Printed piece must meet
designated specifications
on this form.
© 2014 Orbit Inc.
This work is the property
of Orbit
be used, reproduced or
distributed in any way
without their express
permission.
®
, and cannot
®
.

Welcome to B-hyve™ Connecting with B-hyve™ Table of Contents
Thank you for purchasing the Orbit®
B-hyve™ wifi sprinkler timer. At Orbit, we
share your passion for a beautiful landscape
while protecting our most valuable resource–
water. For over 40 years, this passion has
driven us to deliver top of the line irrigation
products to millions of customers all around
the world. Our slogan, “Conservation
through Innovation,” has driven our product
development in timers for decades and
continues to define our direction today with
the B-hyve™ smart wifi sprinkler timer.
This device complies with Part 15 of the FCC Rules and Industry Canada
license exempt RSS standards. Operation is subject to the following two
conditions: (1) This device may not cause harmful interference, and (2)
this device must accept any interference received, including interference
that may cause undesired operation. FCC Warning: Any changes or
modifications not expressly approved by the party responsible for
compliance could void the user’s authority to operate this equipment.
Note: This equipment has been tested and found to comply with the limits
for a Class B digital device, pursuant to Part 15 of the FCC Rules. These
limits are designed to provide reasonable protection against harmful
interference in a residential installation. This equipment generates, uses,
and can radiate radio frequency energy and, if not installed and used in
accordance with the instructions, may cause harmful interference to radio
Nature is a wonderful gardener and is always
subtly working with you to take care of your
landscape. Bees provide a great example
of this remarkable, unseen effort to help
your plants grow. The beehive is the central
hub where this effort is coordinated, and
the communication happens. While nature
does a great job, sometimes a little help is
needed. That is where we come in. When
you connect your B-hyve™ timer to your
wifi, you are plugging in to nature. The local
weather, along with some inputs about your
landscape, will work together to deliver
the right amount of water to your plants,
eliminating water waste and saving you
money. Thanks for connecting and welcome
to B-hyve™!
communications. However, there is no guarantee that interference will
not occur in a particular installation. If this equipment does cause harmful
interference to radio or television reception, which can be determined by
turning the equipment off and on, the user is encouraged to try to correct
the interference by one of the following measures:• Reorient or relocate the
receiving antenna.
• Increase the separation between the equipment and the receiver.
• Connect the equipment into an outlet on a circuit different from that to
which the receiver is connected.
• Consult the dealer or an experienced radio/TV technician for help.
This device meets the FCC and IC requirements for RF exposure in public
or controlled environments. The end user is advised to maintain a distance
of 20 cm from the controller and any personnel to ensure compliance with
RF exposure regulations.
This Class B digital apparatus complies with Canadian ICES-003
Contents in the Box ......................4
Getting Started ..........................5
Timer Installation.........................6
Uninstalling/Reinstalling ..................8
The B-hyve App ..........................9
Timer Controls/Features.................10
Simple Controls..........................11
Using the Dial ............................12
Using the Back and Clear Buttons .........13
Using the Program (PROG ABC) Button....14
Using the Rain Delay Button...............15
Timer LCD...............................16
Programming the Timer ...................17
Manual Operation.......................23
Remember, you can set your timer up with
the app. But, if you don’t have wifi or just
want to make an adjustment while you are
outside, you can do it at the timer. Timer
changes will be reflected in the app, and
app changes will be reflected at the timer.
For more detailed instructions or
troubleshooting information, visit
bhyve.orbitonline.com
Also, the app has help screens and
video to assist you with wifi connections,
programming, smart watering and other
general questions you may have.
If the app and the website don’t have what
you’re looking for, please call our technical
support line.
Help
1-800-488-6156 or 1-801-299-5555
www.orbitonline.com
bhyve.orbitonline.com
Before returning this sprinkler timer
to the store, contact Orbit® Technical
Service at: 1-800-488-6156, 1-801-299-5555
2 3
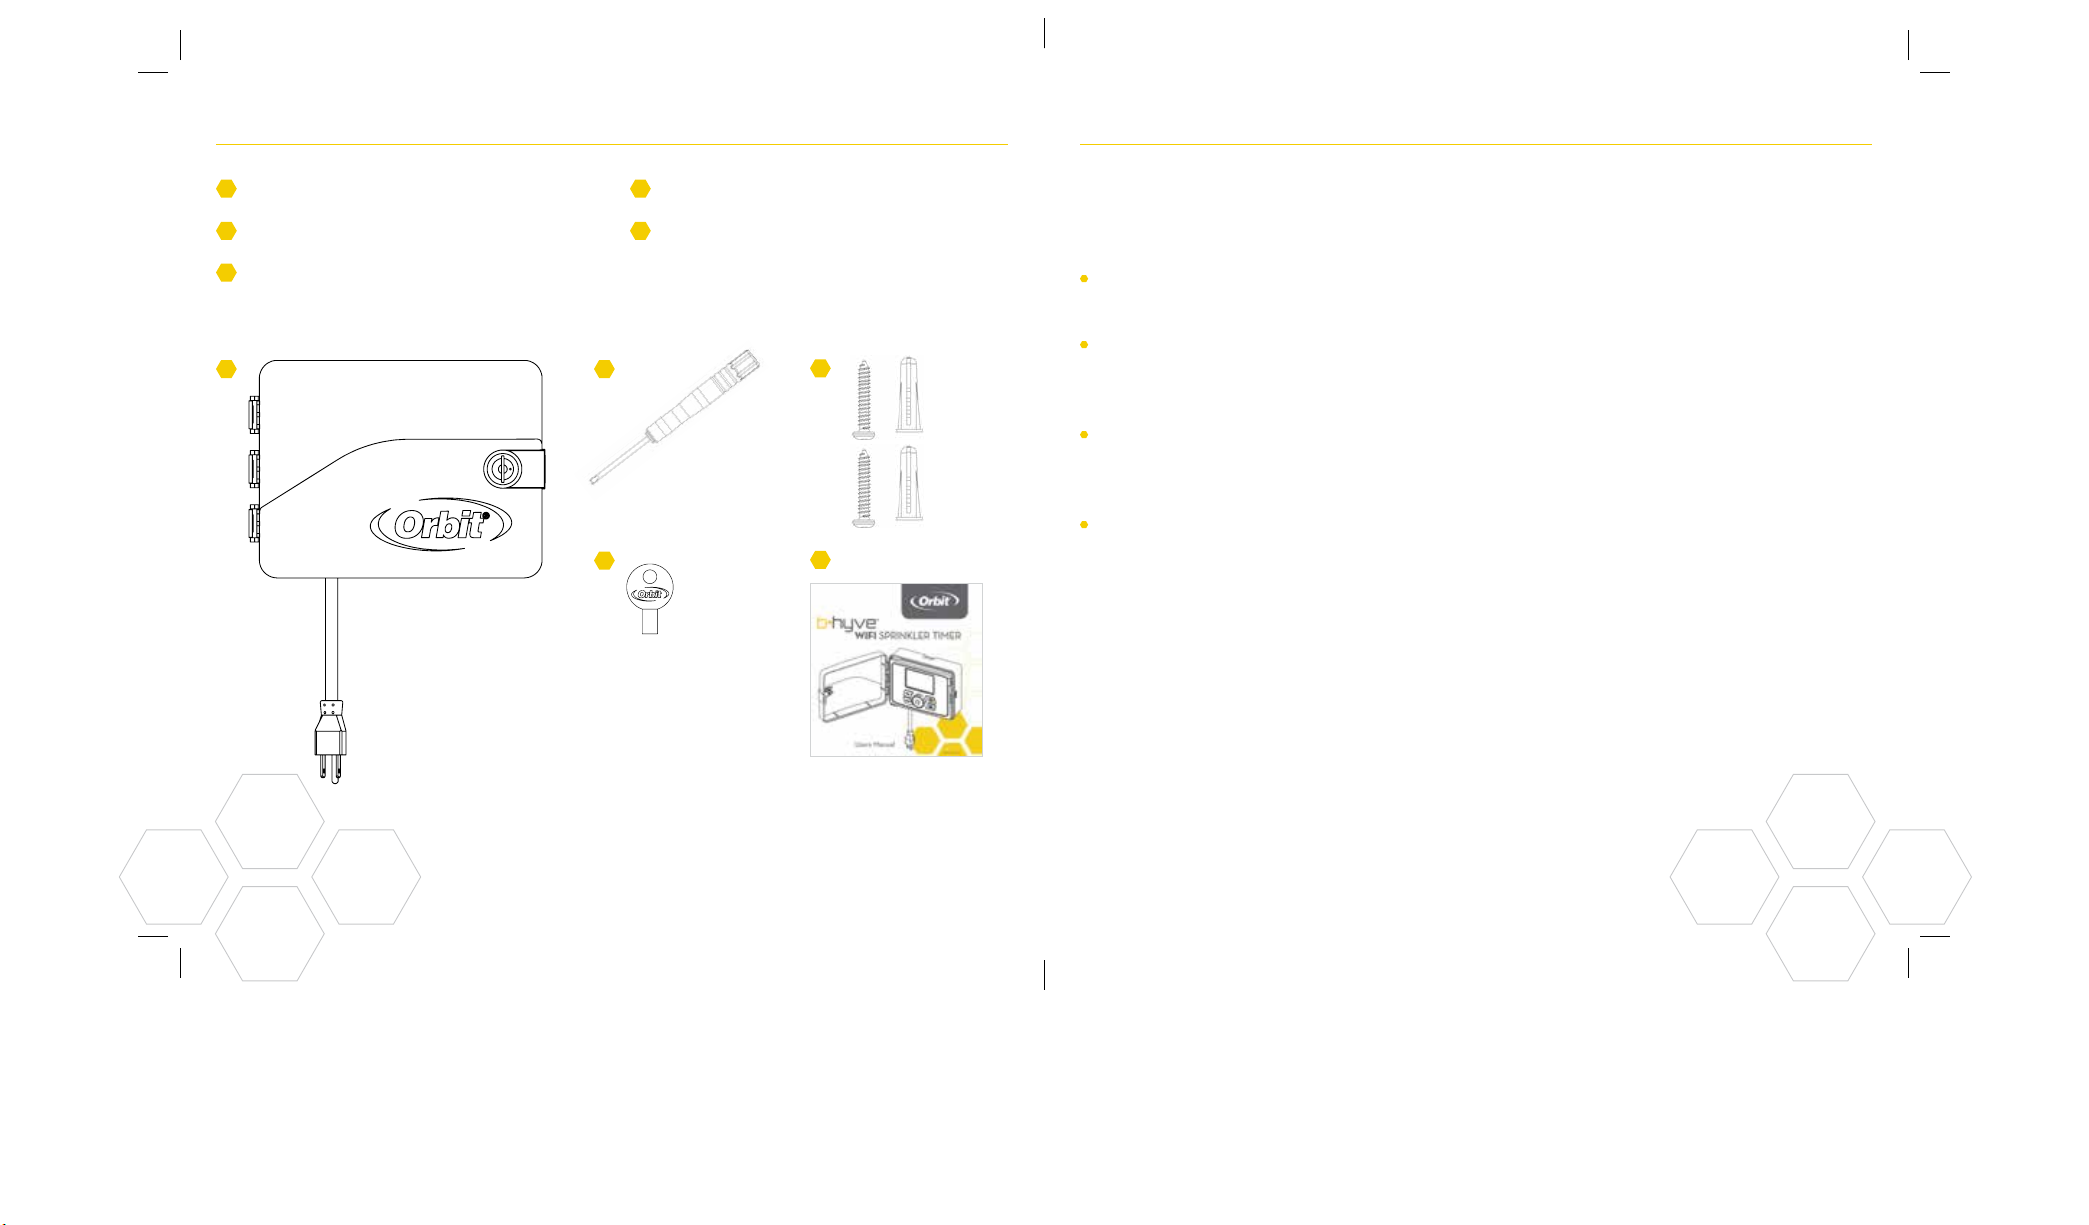
Contents in the Box Getting Started
A
Wifi Sprinkler Timer
B
Screwdriver
C
Installation Hardware
A
D
Keys
E
Quick Start Guide
B
D
Your B-hyve™ sprinkler timer is great for new installations or for
replacing an old sprinkler timer. Here are some basic steps to get
your timer set up and get you closer to saving water and money.
Install the timer
Choose a location on your property with a good wifi signal.
Install the B-hyve™ app on your smart device
C
You will need a smart device to connect the timer to wifi. After the
timer is paired, you can also use a computer to adjust your timer.
Setup your timer with the app or at the timer
Your timer works with and without wifi. It can be programmed
with your smart device or at the timer interface.
Note: If replacing a timer, it is helpful to take a photo of the wires
E
before you remove them from the old timer.
4 5
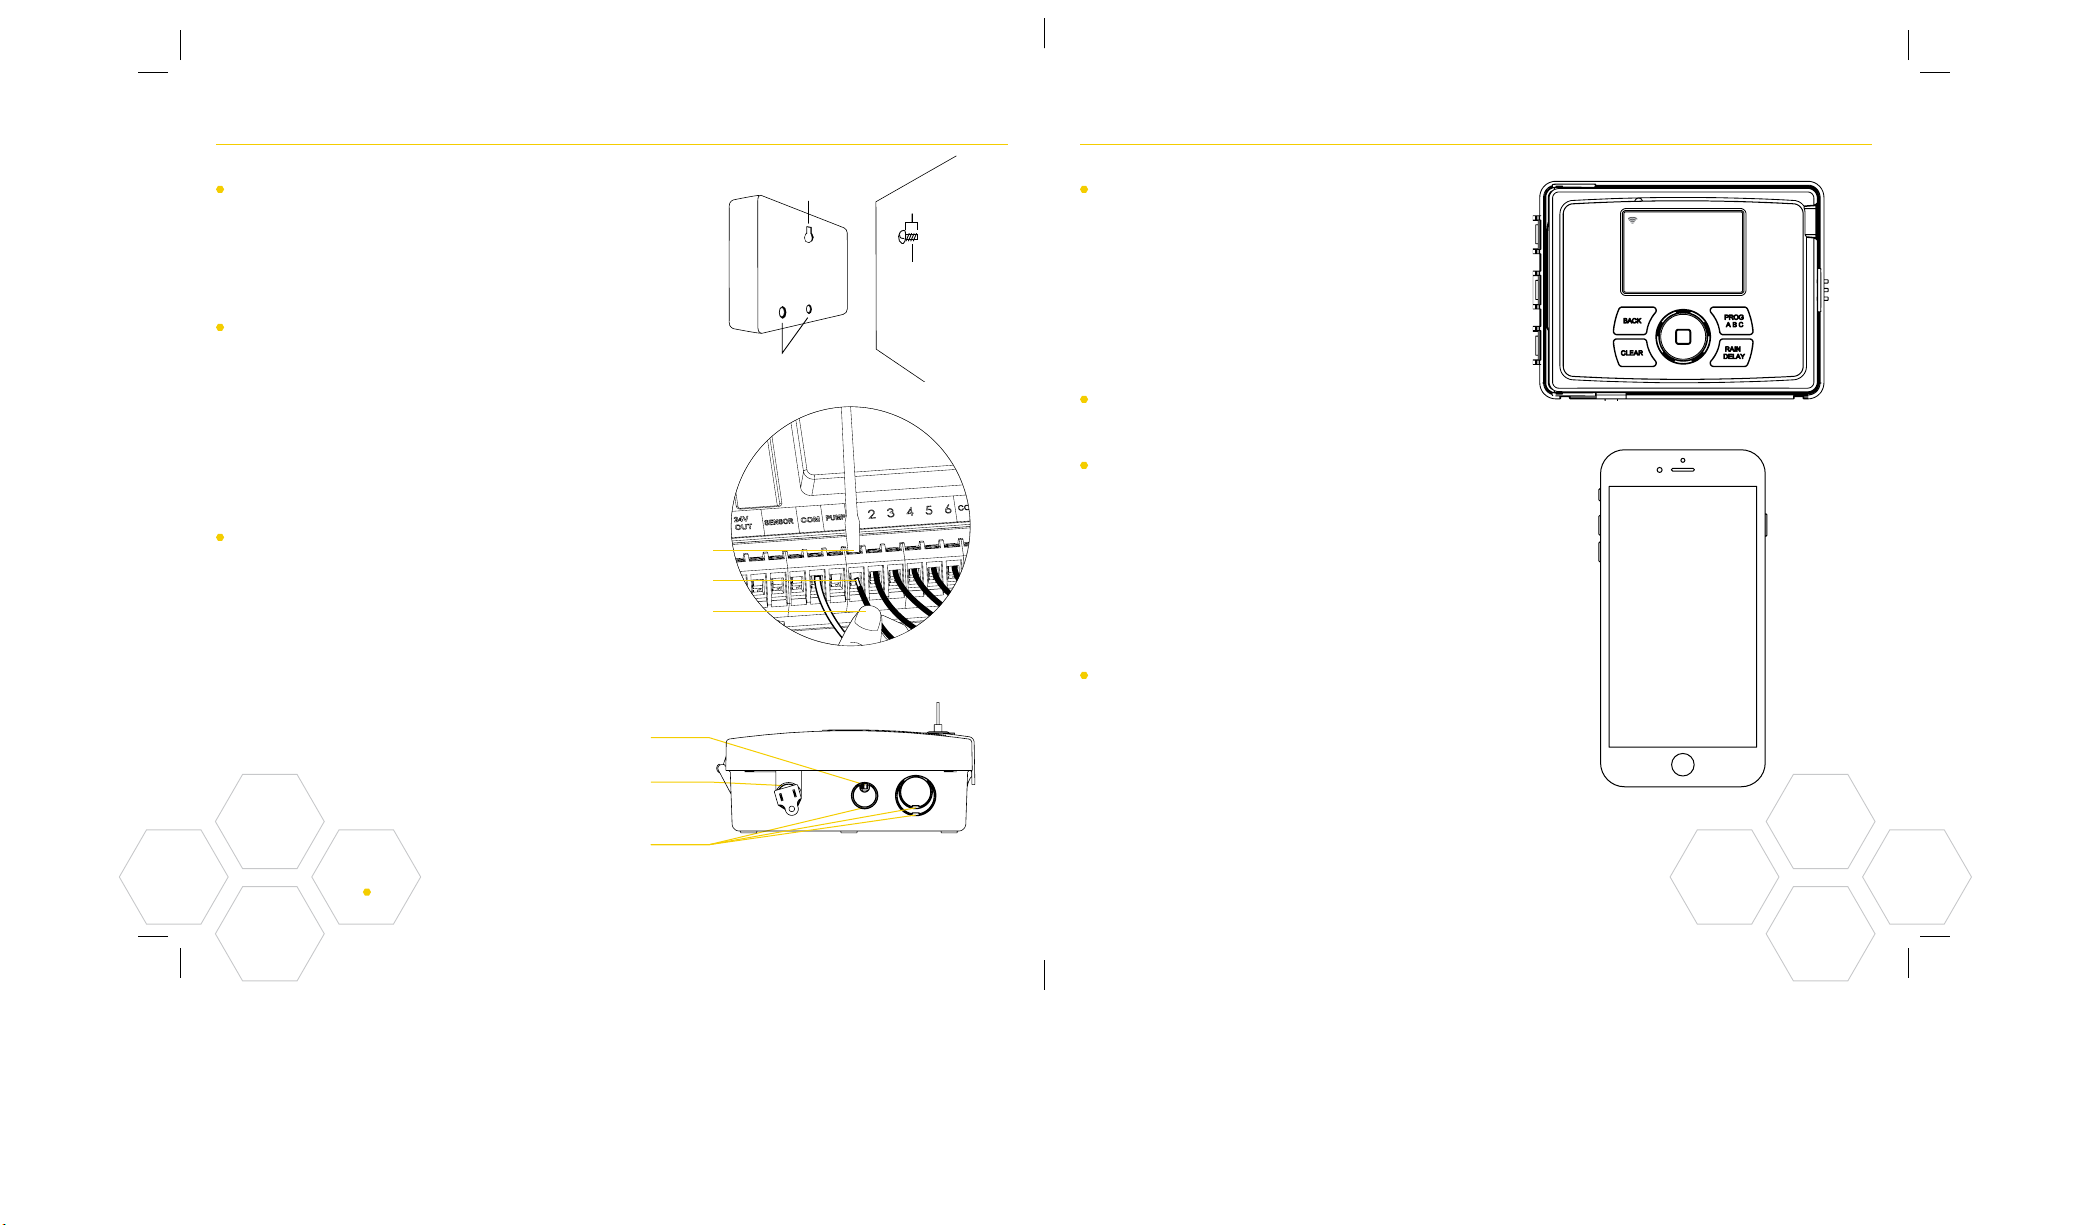
Timer Installation Timer Installation–Connecting to WIFI
Select a location
Choose a location near power and away
from direct sunlight, if possible. Make sure
to leave room for the timer door to open
completely.
Mount the timer
Install a screw (included) into the wall.
Use the expanding anchors (included) for
plaster, masonry or drywall installations.
Hang the timer on the installed screw using
the keyhole slot. Level the timer and use
the second screw in one of the preformed
mounting holes to secure the timer.
Connect valve wires
Strip 1/2" (12 mm) of insulation from each
wire. Connect one wire from each valve
to a “Common” (COM) wire and the other
wires to a numbered terminal (only one
wire per terminal.)
Small Hole–for running 5 or 7
strand wire straight into the box
Knock-out for hardwired installations
1/2", 3/4" and 1" knock-outs for larger
systems with more wire bundles
Loosen Screw
Strip Wire
Push In
Tighten Screw
Keyhole
Pre-formed
Mounting Holes
Bottom View
1/8"
No. 8 Screw
Wall
Plug in your Orbit® B-hyve™ timer
Once your Orbit® timer is plugged into the
power source, it will automatically look to
pair with your smart device. In the top left
corner of the timer screen the “wifi” icon
will begin a graduated blinking sequence.
This indicates that your timer is ready to
pair with a smart device.
Install the Orbit® B-hyve™ app and
create an account on your smart device
Find Orbit_SmartHome_XXXX
in your wifi list
The B-hyve™ timer will create its own
network that will appear in your list of
available wifi connections on your smart
device. Connect to the Orbit SmartHome
network and then return to the Orbit®
B-hyve™ app.
Enter your wifi settings
After returning to the app, you will see
a list of available networks. Choose your
network and then enter the password for
the network to connect your timer to your
wifi signal. When connected, the wifi icon
on the timer will stop blinking and show
solid lines.
Note: We recommend you consult an electrician for hardwired installations.
6 7

Uninstalling/Reinstalling The B-hyve™ App
How to re-pair with wifi
You can re-pair your smart device with
your B-hyve™ timer by turning the dial to
“Off” and pressing the reset button on the
back of the swing panel. The timer display
will show “Pair.”
Deleting the timer from the app
You may need to delete the timer from a
smart device. Go to settings to deauthorize
the timer, after which it will ask for
confirmation to remove the timer.
Timer Connected Symbol
Running Status/Messaging
Weather/Temp.
Stop Watering
Rain Delay
Calendar
Programs
Remote Control
or Home Button
Note: There is a wizard in the app to guide you through initial
set up of your sprinkler timer. In addition, there are help icons
throughout the app with more information and useful tips.
8 9
Next Zone
Settings
Zone List

Timer Controls/Features Simple Controls
Your timer was built to make installation
easy and fast, while providing convenient
controls to make adjustments directly
when you’re standing in front of the timer,
or from anywhere in the world with the
B-hyve™ app.
A
Lock and Latch
B
Weather Resistant
Cover
C
Dial
D
Digital Display
E
Swing Door Panel
F
Battery
Compartment
G
Transformer
H
Wiring Terminals
I
Reset Button
J
Line Cord
CAUTION: DANGER OF EXPLOSION IF
BATTERY IS INCORRECTLY REPLACED.
REPLACE ONLY WITH THE SAME OR
EQUIVALENT TYPE RECOMMENDED
BY THE MANUFACTURER. DISPOSE OF
USED BATTERIES ACCORDING TO THE
Programming at the timer can be done
whether you are connected to wifi or not.
It allows the gardener who left their phone
inside to run a manual cycle, or adjust
programming as needed and keep dirty
hands away from the phone.
MANUFACTURER’S INSTRUCTIONS.
B
D
A
C
E
Buttons Function
Scroll up or down, left or right and
push to make a selection
CLEAR To clear a setting
I
E
F
G
PROG ABC To move to different programs: A, B, and C
H
BACK To go back a step
RAIN DELAY
To pause operation for 1 to 32 days
due to rain or other factors
J
10 11
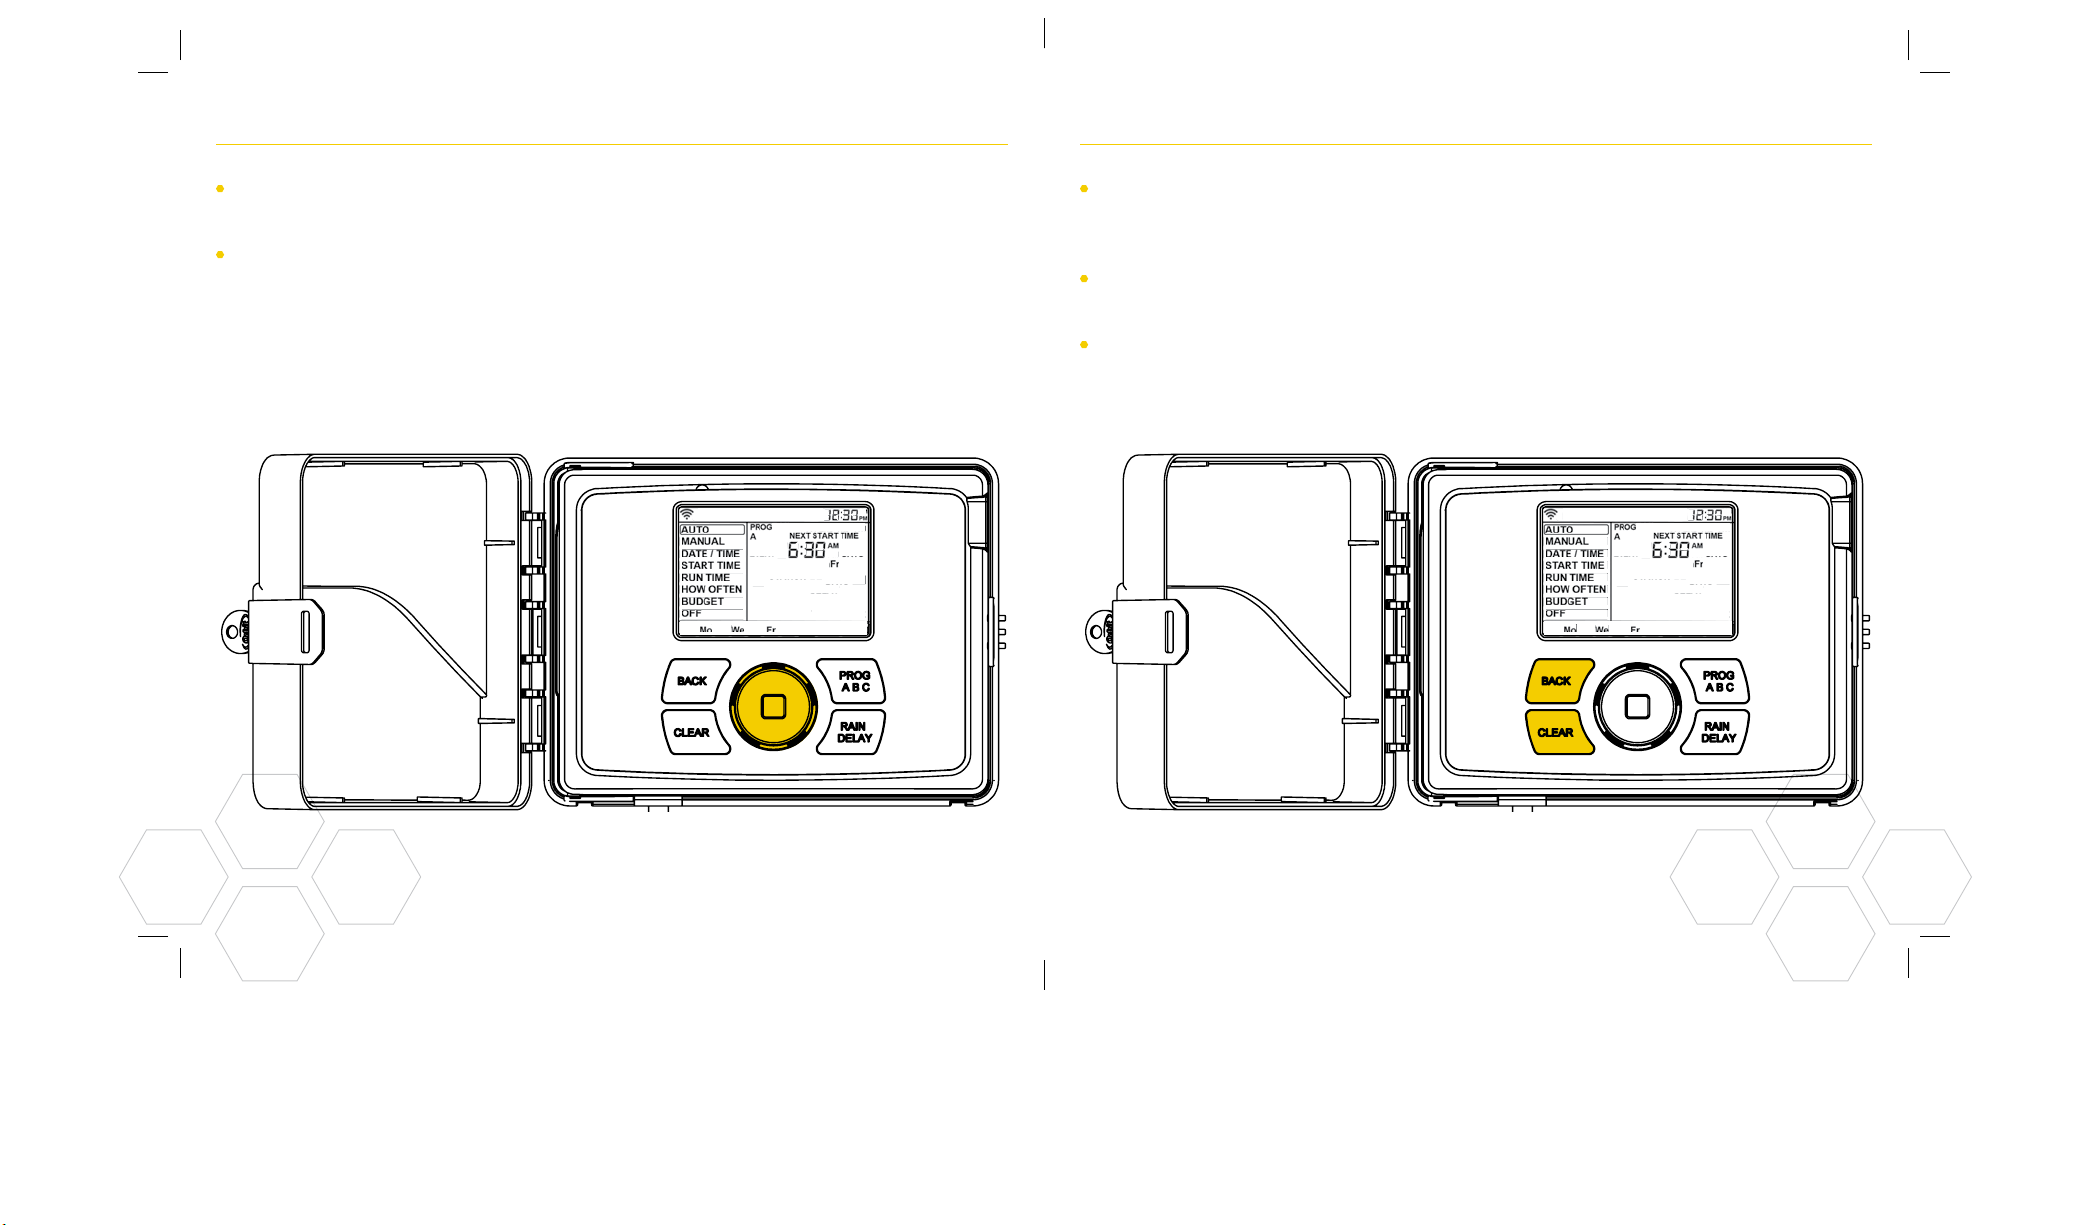
Using the DIAL Using the BACK and CLEAR Buttons
The DIAL can be used to scroll up or down, left
or right on menus, dates and times.
Press the DIAL to confirm a selection, to
deselect or to skip a running station.
The BACK button can be used return to
the main menu, or can be pushed twice to
return to auto.
The CLEAR button can be used to clear
entries in a selected screen.
The CLEAR button may also be used
to cancel Rain Delay, cancel a running
program or cancel a manual watering cycle.
12 13

Using the PROGRAM (PROG ABC) Button Using the RAIN DELAY Button
The A, B, C and Smart programs provide
the flexibility to set up and run different
programs for plants with different watering
needs. For example: you could set your lawn
zones to run on program A, your flowerbeds
to run on program B and your garden to run
on program C. Or, you can set up your zones
to use smart watering and the timer will use
local weather and on-site information to
automatically set a watering schedule for you.
The PROG ABC button toggles between
programs when setting up or modifying start
times, run times, how long and budget.
Press PROG ABC to turn on or off
programs that have been set-up. A, B, C or
Smart will illuminate to show programs that
are active and will water.
Note: To water in smart mode only, the
Phone icon is the only program that should
be showing in the LCD.
Note: If you do not see the program letter
(A, B, C or the phone) in the LCD, that
program will not water. Press PROG ABC
until you see the program(s) that you wish
to water.
The RAIN DELAY button can be used to
turn off all watering for a duration of 1 to
32 days.
Press RAIN DELAY repeatedly, or turn the
dial after pressing rain delay once, until the
desired number of days is showing in the
LCD.
To cancel a rain delay, press CLEAR.
14 15
 Loading...