


 Loading...
g{x Y|Çx TÜà Éy cÄtç|Çz `âá|v
Oracle Audio Technologies
Delphi MK V
Owner’s Manual

FOREWORD
This is your Delphi MKV Owner’s Manual. The following pages will describe as succinctly as possible the assembly of your new Delphi. Although some operations are self explanatory, we strongly suggest you read this booklet to better understand the importance of the different key adjustments.
Your Delphi is a precision instrument and its performance will be affected by the different adjustments. It is important to set up your Delphi with the utmost care so it can effectively convert record groove modulations into outstanding musical performance and enjoyment!
Total accuracy of your source system can only be achieved through minute details of turntable suspension calibration, tone arm installation and cartridge alignment.
A turntable is an art of geometry. Please take your time setting up your turntable.
FOR YOUR RECORDS
Oracle Delphi MK V Serial Number:
Power Supply Serial Number:
Dealers Name:
Dealers Address:
Dealer Phone:
Purchase Date:
We suggest you keep your sales slip together with this owner’s guide.
Oracle Audio Technologies |
2 |
Delphi MK V Installation Manual
TABLE OF CONTENTS |
|
Pack and unpack your Delphi................................................................................ |
4 |
Assemble the sub chassis..................................................................................... |
5 |
Adjust the plinth assembly..................................................................................... |
6 |
Install the tone arm and phono cartridge ............................................................... |
7 |
Align the phono cartridge ...................................................................................... |
8 |
Prepare the spring modules .................................................................................. |
9 |
Calibrate the suspension..................................................................................... |
10 |
Attach the phono lead ......................................................................................... |
11 |
Install the drive belt ............................................................................................. |
12 |
To remove the platter .......................................................................................... |
13 |
Connect the power supply................................................................................... |
13 |
Adjust the 33 / 45 speed...................................................................................... |
14 |
Attach the ground lead ........................................................................................ |
14 |
Install and calibrate the hinges............................................................................ |
15 |
Install the record clamp ....................................................................................... |
15 |
Level the Delphi MK V......................................................................................... |
16 |
Troubleshooting................................................................................................... |
17 |
Maintenance........................................................................................................ |
18 |
Specifications ...................................................................................................... |
19 |
Oracle Audio Technologies |
3 |
Delphi MK V Installation Manual
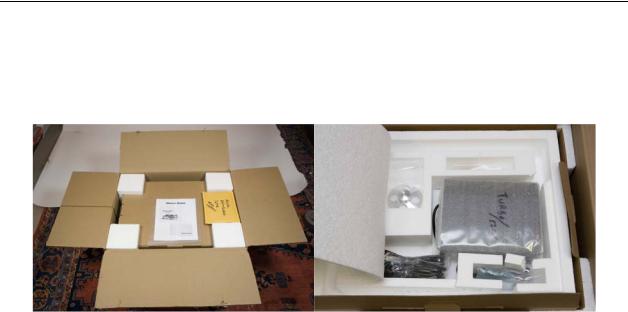
PACK AND UNPACK YOUR DELPHI
Your ORACLE’s packaging has been designed to protect it from the abusive handling normally encountered during shipping. Such packing materials are expensive and we recommend you save it for future shipping. When shipping the turntable, position each item in its allocated section. It is mandatory to use the original packaging for any return to the factory.
All the accessories are positioned strategically in the packaging to prevent them from coming loose and possibly damaging the turntable during shipping.
•Remove the inner box by lifting it straight up and out. Open the flaps on both ends and slide out the Styrofoam packaging.
•Lift the Styrofoam cover straight up so as to protect the corner reinforcement.
The following items are located in the upper section of packaging:
•Dust cover (optional item ordered separately)
•Calibrator disc
•Main bearing lubricating oil
•Oracle Power supply
•Accessories bag
o Drive belt
o Lint free cloth
o Suspension adjustment gauge
o Tools pouch (screw driver, allen keys, 9/64"-3/32"-5/64")
The following items are located in the bottom section of packaging:
•Plinth assembly
•Platter
•Record clamp
•Brilliance cleaner
•Hinges (supplied with the dust cover option)
•Strain relief clip
•Main bearing assembly
•One extra suspension spring
•Three suspension caps
Oracle Audio Technologies |
4 |
Delphi MK V Installation Manual
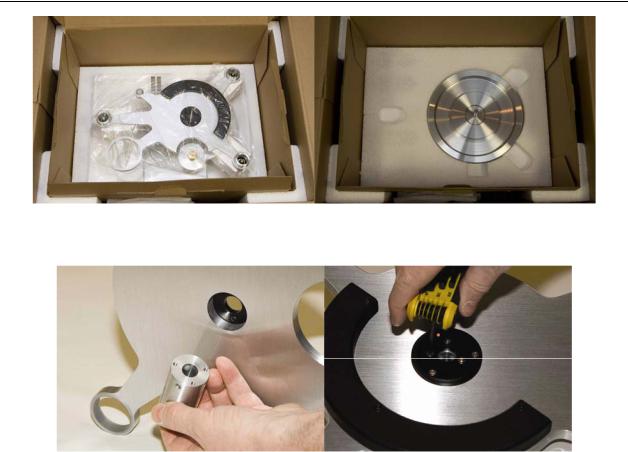
ASSEMBLE THE SUB CHASSIS
Note: Lift the acrylic base straight up so as not to damage the platter’s spindle protruding through.
•Locate the bearing assembly in the lower section of the packaging. Remove the 3 mounting screws.
•Locate the tool kit in the lower section and select the appropriate 9/64th“ allen key.
•Lift the sub chassis straight up and mount the bearing assembly from underneath (ground lug side). The bearing assembly can only be mounted in one position
Note: The main bearing mounting flange is marked with a red dot. When installed this red dot must be on the axis of the motor pulley and the platter spindle. Any other positioning will impair the operation of your Delphi.
Oracle Audio Technologies |
5 |
Delphi MK V Installation Manual
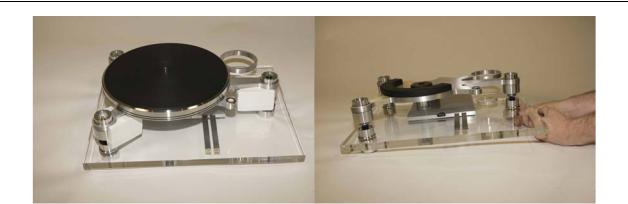
ADJUST THE PLYNTH ASSEMBLY
•Remove the styrofoam support blocks from around the suspension posts.
•Remove the suspension modules (i.e. the suspension housing, the spring and all related parts) remember that each module has or could have a different color coded spring. The modules have to go back on the same stem they came from.
•Remove the protective film from around the acrylic base.
•Level the plinth by turning the adjustable feet below.
Note: If you do not have a small carpenter's level to do this job, use the styrofoam blocks as they were originally installed around the three suspension posts. Seat the sub chassis evenly on the 3 blocks and use the spirit level on the sub chassis to level the plinth. The suspension modules are not required for this operation.
Oracle Audio Technologies |
6 |
Delphi MK V Installation Manual
Loading...