

Page 1

Oracle Unified Messaging
Installation Guide
Release 2.1.2 for Sun SPARC Solaris 2.6
January, 2001
Part No. A86091-02
Page 2

Unified Messaging Insta lla t ion G u id e , Rel e ase 2. 1. 2 for Sun SPARC Solaris 2.6
Part No. A86091-02
Copyright © 1996, 2001 Oracle Corporation. All rights reserved .
Primary Author: Ginger Tabora
Contributors: Byung Choung, Varouzhan Ebrahimian, Duane Jensen, Tom Kraikit, Jae Lee, Sunia Lin,
Allen Liu, Louise Lu o, Stefano Montero, Howard Narvae z, Ric ardo Rivera
The Programs (which include bo th t he so ft ware and documentation) con tain proprietary information of
Oracle Corporation; they are provided under a license agreement containing restrictions on use and
disclosure and are also protected by copyrigh t , paten t, and other intellectual and in d u strial property
laws. Reverse engineering, disassembly, or decompilation of the Programs is prohibited.
The information contained in this document is subject to change without notice. If you find any problems
in the documentat ion, please report them to u s in writing. Oracle Corporation does not wa rrant that this
document is error free. Except as may be expressly permitted in your license agreement for these
Programs, no part of these Programs may be reproduced or transmitted in any form or by any means,
electronic or mechanical, for any purpose, without t he e xp res s wri tt en permission of Oracle Corporation.
If the Programs are delivered to the U.S. Government or anyone licensing or using the programs on
behalf of the U.S . Government, th e following no tice is applicable:
Restricted Rights Notice Programs delivered subject to the DOD FAR Supplement are "commercial
computer software" and use , duplication, and disclo sure of the Prog rams, including docu me n t at ion,
shall be subject to the lice ns ing restrictions set forth in the appli cable Oracle license agreem e n t .
Otherwise, Programs delivered subject to the Federal Acquisition Regulations are "restricted computer
software" and use, duplic at ion, and disclosure of the Programs sh all be subject to the restrictions in FAR
52.227-19, Commercial Comput e r Soft w are - Rest ri ct e d Righ t s (Jun e, 1987). Oracle Corporation, 500
Oracle Parkway, Redwood City, CA 94065.
The Programs are not intended for use in an y nucle ar, aviation, mass transi t, me d ic al, or other inherently
dangerous applications. It shall be the licensee's responsibilit y to take al l approp riate fail-safe, backup,
redundancy, and other measures to ensure the sa fe u se of such applications if the Programs are used for
such purposes, and Oracle Cor p ora t ion disclaims liability for any damages caused by such use of the
Programs.
Oracle is a registered trademark, and Oracle Names, and Oracle Office are trademarks or registered
trademarks of Oracle Corporation. Other nam e s m e nt ioned may be trademarks of their respective
owners.
Page 3

Contents
Preface........................................................................................................................................................... vii
1 Preinstallation
Installation Overview ........................................................................................................................ 1-2
Installation Requirements ................................................................................................................ 1-2
System Requirements................................................................................................................... 1-2
Software Requirements................................................................................................................ 1-3
Preinstallation Tasks.......................................................................................................................... 1-3
Task 1: Back Up and Shut down Existing Database and Log Files....................................... 1-4
Task 2: Install and Configure the Oracle8 Universal Data Server......................................... 1-4
Task 3: Start the Processes Necessary for Installation............................................................. 1-4
Task 4: Configure Net8 (Database Node Installation) TNSLISTENER80 ............................ 1-5
Task 5: Configure Net8 (Multiple Instance Installations Only)............................................. 1-6
2 Installing and Configuring Oracle Unified Messaging
Installing Oracle Unified Messaging.............................................................................................. 2-2
Mounting the Product CD-ROM Manually........................................................................... 2-2
Running the Oracle Universal Installer.................................................................................. 2-2
Entering File Locations................................................................................................................ 2-5
Verifying Your Installation Settings .......................................................................................... 2-7
Starting the Configuration Assistant Manually................................................................ 2-9
Configuration Assistant Screen Buttons .......................................................................... 2-10
Specifying File Locations........................................................................................................... 2-11
Entering Passwords.................................................................................................................... 2-13
iii
Page 4

Specifying Oracle eMail Server Parameters............................................................................ 2-15
Specifying Oracle eMail Server Passwords............................................................................. 2-15
Entering LDAP Information...................................................................................................... 2-16
Exiting the Configuration Assistant......................................................................................... 2-19
3 Post Installation
Post Installation Tasks ....................................................................................................................... 3-2
Task 1: Create the Oracle Unified Messaging LDAP Schema................................................ 3-2
Task 2: Encoding the Helpdesk Password................................................................................ 3-3
Task 3: Configuring the oomgr RMI Process............................................................................ 3-4
Task 4: Starting the Oracle Unified Messaging Processes ...................................................... 3-4
Task 5: Configuring Apache Listener Port................................................................................ 3-4
Task 6: Configuring JServ............................................................................................................ 3-5
Task 7: Starting Apache JServ..................................................................................................... 3-5
Task 8: Configuring HelpDesk ................................................................................................... 3-5
Task 9: Updating Real Audio (only if Real Audio is installed).............................................. 3-6
Task 10: Updating the Tiff to Gif Executable (only if a Tiff to Gif executable is installed) 3-6
4 Troubleshooting
Log Files and Trace Files.................................................................................................................... 4-2
Troubleshooting Hints....................................................................................................................... 4-2
iv
Page 5

Send Us Your Comments
Oracle Unified Messaging Installation Guide, Release 2.1.2 for Sun SPARC Solaris 2.6
Part No. A86091-02
Oracle Corporation welcomes your comments and suggestions on the quality and usefulness of this
publication. Your input is an important part of the information used for revision.
■ Did you find any errors?
■ Is the information clearly presented?
■ Do you need more information? If so, where?
■ Are the examples correct? Do you need more examples?
■ What features did you like most about this manual?
If you find any errors or have any other suggestions for improvement, please indicate the chapter,
section, and page number (if available). You can send comments to us in the following ways:
■ Electronic mail: infodev@us.oracle.com
■ FAX: (650) 506-7228 Attn: Unified Messaging Documentation Manager
■ Postal service:
Oracle Corporation
Unified Messaging Documentation Manager
500 Oracle Parkway, Mailstop 4OP12
Redwood Shores, CA 94065
USA
If you would like a reply, please give your name, address, and telephone number below.
If you have problems with the software, please contact your local Oracle Support Services representative.
v
Page 6

vi
Page 7

The topics covered in this preface include:
■ Intended Audience
■ Oracle Unified Messaging Docume ntation
■ Related Documents
■ Notation Conventions
Preface
vii
Page 8

Intended Audience
The configuration and installation instructions in this document are intended for
anyone who is responsible for installing Oracle products on Sun SPARC Solaris.
While some command examples are provided, this document does not attempt to
teach Oracle or UNIX administration.
Oracle Unified Messaging Documentation
Oracle Unified Messaging document ation is available in HTML and PDF format on
the CD-ROM and installs automatica lly during product installation. Use your Web
browser to access $ORACLE_HOME/um/doc/index.html on your server. The following
documents are available:
Oracle Unified Messaging Ins tall a tion Guide
Oracle Unified Messagin g Client Developer’s Guide
Oracle Unified Messagin g Release Notes
Related Documents
This guide provides operating system-specific information for Oracle Unified
Messaging for Sun SPARC Solaris 2.6. This document refers to the following user
guides and reference manuals:
■ Oracle eMail Server 5.1 Installation Guide
■ Oracle eMail Server 5.1 Administration Guide
■ Oracle eMail Server 5.1 Release Notes
■ Oracle Internet Application Server 8i Installation Guide Release 1.0 for Sun SPARC
Ordering Related Documentation
To order documentation, call the appropriate number listed below.
■ In the United States, call Documentation Sales at: 1-800-252-0303.
■ In the United Kingdom, call Oracle Direct Response at: +44-990-332200.
■ In other European countries, contact your local Oracle Support office.
■ In the Asia-Pacific region, contact your Oracle sales representative.
viii Installation Guide
Solaris
Page 9

Notation Conventions
The following notational co nventions appear in this manual:
Convention Description
italic Italicized type identifies document titles.
Monospace Monospace type indicates commands.
bold Boldface type indicates script names, directory names, path names,
UPPERCASE Uppercase letters indicate parameters or environment variables (for
.
.
.
. . . In command syntax, horizontal ellipsis points indicat e r e petit ion of
< >
[ ]
{ }
and file names (for example, the root.sh script).
example, ORACLE_HOME).
In code examples, vertical ellipsis points indicate that information
not directly related to the example has been omitted.
the preceding parameters. The following command example
indicates that more than one input_file may be specified on the
command line.
command [input_file ...]
In command syntax, an gle brackets identify var iab les that the user
must supply. You do not type the angle brackets. The following
command example indicates that the user must enter a value for the
variable input_file:
command <input_file>
In command syntax, brackets enclose optional clauses from which
you can choose one or none. You do not type the brackets. The
following command example indicates that the variable output_file
is optional:
command <input_file> [output_file]
In command syntax, curly brackets indicate that a choice of two or
more items separated by a vertical bar or pipe ( | ). You do not type
the curly brackets. The following command example indicates a
choice of either a or b:
command {a | b}
$
The dollar sign represents the shell prompt in UNIX.
ix
Page 10

x Installation Guide
Page 11

1
Preinstallation
This chapter describes the preinstallation procedures for Oracle Unified Messaging.
Topics covered include:
■ Installation Overview
■ Installation Requirements
■ Preinstallation Tasks
Preinstallation 1-1
Page 12

Installation Overview
Installation Overview
Oracle Unified Messaging is a highly scalable, messaging framewo r k which
integrates messages from multiple sources into a single inbox. Prior to installation,
you should plan your implementation strategy an d be familiar with Unified
Messaging system components, concepts, and terminology described in the Unified
Messaging Client Developer’s Guide.
The installation process is composed of the follo wing steps:
1. Complete the necessary pre-installation tasks including b acki ng up your
existing system, configuring the UNIX environment, and preparing related
processes and products for the installation.
2. Use the Installer on the Oracle software CD to install or upgrade Oracle Unified
Messaging and related software products.
3. Perform the post installation steps.
4. Verify the configuration by starting processes and checking process logs.
Installation Requirements
You must meet the following system and softw are requirements to install Oracle
Unified Messaging.
System Requirements
■ 50 MB of disk space
■ 128 MB of memory
Software Requirements
Oracle Unified Messaging requires the following software components and
associated versions:
Software
Components Version Comments
Oracle eMail Server 5.2 Installed and running
Oracle8i Data Server 8.1.7 Installed and running
1-2 Installation Guide
State During Unified
Messaging Installation
Page 13

Installation Requirements
Software
Components Version Comments
Oracle Internet
Directory
Oracle Internet
Application Server
(Oracle HTTP Server)
Netscape
Communicator
Or:
Microsoft Internet
Explorer
JavaScript-enabled
browser
Real Audio Server
(optional)
Tiff to Gif Conversion
Tool (optional)
2.1.1 Ins ta lled an d ru nn ing
1.0.2.1 Required for Web
node only.
Oracle Inter net
Application Server
cannot share the same
ORACLE_HOME
with other Oracle
products. If you have
installed other Oracle
products, then Oracle
Internet Application
Server must be
installed in a different
ORACLE_HOME.
4.6 or 4.7
5.0.x
5.0 Required for real
audio streaming.
Required if your fax
server captures
images in .tiff format.
State During Unified
Messaging Installation
Installed and running
Either one installed
Installed and running
Installed and running
Preinstallation 1-3
Page 14

Preinstallation Tasks
Preinstallation Tasks
The following tasks must be performed prior to insta lling Oracle Unified
Messaging:
Task 1: Back Up and Shut down Existing Database and Log Files
Perform a full backup of your existing Oracle8 Universal Data Server before you
perform any new installation or upgrade. A full backup ensures that you can
recover from errors encountered during new installation or upgrade processes.
This backup should be taken with the database shut down cleanly. If you use SHUT
DOWN IMMEDIATE or SHUT DOWN ABORT to force users off the system, be
sure to restart the database in restricted mode, and then shut it down with normal
priority. See the Oracle8i Administrator’s Guide or Oracle8i Backup and Recovery for
more information.
Task 2: Install and Configure the Oracle8 Universal Data Server
Oracle Unified Messaging requires reconfiguration of specific database parameters.
Before starting this configuration, shut down the network listener and the database
where Oracle Unified Messaging will be installed.
To shut down the network listener:
To shut down the database:
Edit the init
reflect the following minimum values for the listed parameters:
Parameter Minimum Settings
job_queue_processes 10
job_queue_interval 60
1-4 Installation Guide
$ lsnrctl stop
$ svrmgrl
SVRMGR> connect internal
Connected.
SVRMGR> shutdown
SVRMGR> exit
<sid>
.ora file located in the $ORACLE_HOME/dbs directory to
Page 15

Task 3: Start the Processes Necessary for Installation
1. Start the database:
$ svrmgrl
SVRMGR> connect internal
Connected to an idle instance.
SVRMGR> startup
SVRMGR> exit
Start the network listener:
2.
$ lsnrctl start
Task 4: Configure Net8 (Database Node Installation) TNSLISTENER8 0
To install an Unified Messaging database node, a connect string must exist that
provides a connection to the Unified Messaging database using the sid.
1. Verify that the entry exists in the TNSNAMES.ORA file for the Unified Messaging
sid. If it does not exist, add the following:
<connect string > =
(DESCRIPTIO N=
(ADDRES S_LIST =
(ADDRES S = (PROTOCOL = t cp)
(HOST = <um host name>)
(PORT = <listener port>)
)
)
)
Example:
ORCL.world =
(DESCRIPTIO N=
(ADDRES S_LIST =
(ADDRES S = (community = tcp.world) (PROTOCO L =tcp)
(HOST = um.acme.com)
(PORT = 1521)
)
)
(CONNECT_DATA = (SERVICE_NAME = ORCL)
)
)
Preinstallation Tasks
Preinstallation 1-5
Page 16

Preinstallation Tasks
Task 5: Configure Net8 (Multiple Instance Installations Only)
If you are installing a separate Oracle Unified Messaging system from your Oracle
eMail Server database instance, then you must configure Net8 to enable the Oracle
Unified Messaging system to contact the Oracle eMail Server database.
1. Add the following entry for the Oracle eMail Server database system to which
you want to connect:
<connect string > =
(DESCRIPTIO N=
(ADDRES S=( PROTOCOL= TCP )(HOST= <ES host se rver name>)(PORT= 1521))
( C O N N E CT_ DAT A= ( SERVICE_NAME= < E S s i d > ) ) )
Example
esnode1=
(DESCRIPTIO N =
(ADDRES S = (PROTOCOL= TC P) (HOST= eshardwar e.acme.com)(PORT= 1521))
( C O N N E CT_ DAT A = ( SERVICE_NAME= o r c l ) ) )
Verify the modified tnsnames.ora file:
2.
$ tnsping host
3. Verify that the Oracle eMail Server database tnsnames.ora file has an Oracle
1-6 Installation Guide
Unified Messaging entry name that connects to the Oracle eMail Server
database instance.
Page 17

2
Installing and Configuring Unified
Messaging
This chapter describes Unified Messaging installation and configuration procedures
for both new installations and upgrades. Topics covered include:
■ Installing Unified Messa ging
Installing and Configuring Unified Messaging 2-1
Page 18

Installing Uni fi e d M es s a g i ng
Installing Unified Messaging
Mounting the Product CD-ROM Manually
The Oracle Product Installation CD-ROM is in RockRidge forma t. If you are using
the Solaris Volume Management software (installed by default on Sun SPARC
Solaris 2.x), the CD-ROM is mounted automatically when you put it into the disk
drive. If you are not using the Solaris Volum e Management software, use the
following procedure to mount the CD-ROM manually. You must have root
privileges to mount or unmount the CD-ROM manually. Be sure to unmount the
CD-ROM before removing it from the drive.
1. Place the Product Installation CD-ROM in the CD-ROM drive.
2. Log in as the root user:
$ su root
3. Create a CD-ROM mount point directory:
# mkdir
4. Mount the CD-ROM drive on the mount point directory and exit the root
mount_point_dir ectory
account:
# mount options
# exit
device_name moun t_point_director y
Running the Oracle Universal Installer
1. Log in as the user who installed oracle products on this machine and change to
the installation directory on the CD-ROM:
$ cd /cdrom/cdrom0
2. Make sure the DISPLAY environment variable is set to your display address.
C Shell:
% setenv DISPLA Y <hostname>:0.0
Bourne or Korn Shell:
$ DISPLAY=<host name>:0.0;export DISPLAY
2-2 Installation Guide
Page 19
Installing Unif i e d M e s sa ging
3.
Make sure xhost, while physically located on the host machine, is set to enable
access to the X server on your machine. Use the following command:
% /usr/openwin/ bin/xhost +
See the UNIX man pages for more information on xhost.
4. From the install directory on the CD-ROM, type the following command:
$ ./runInstalle r
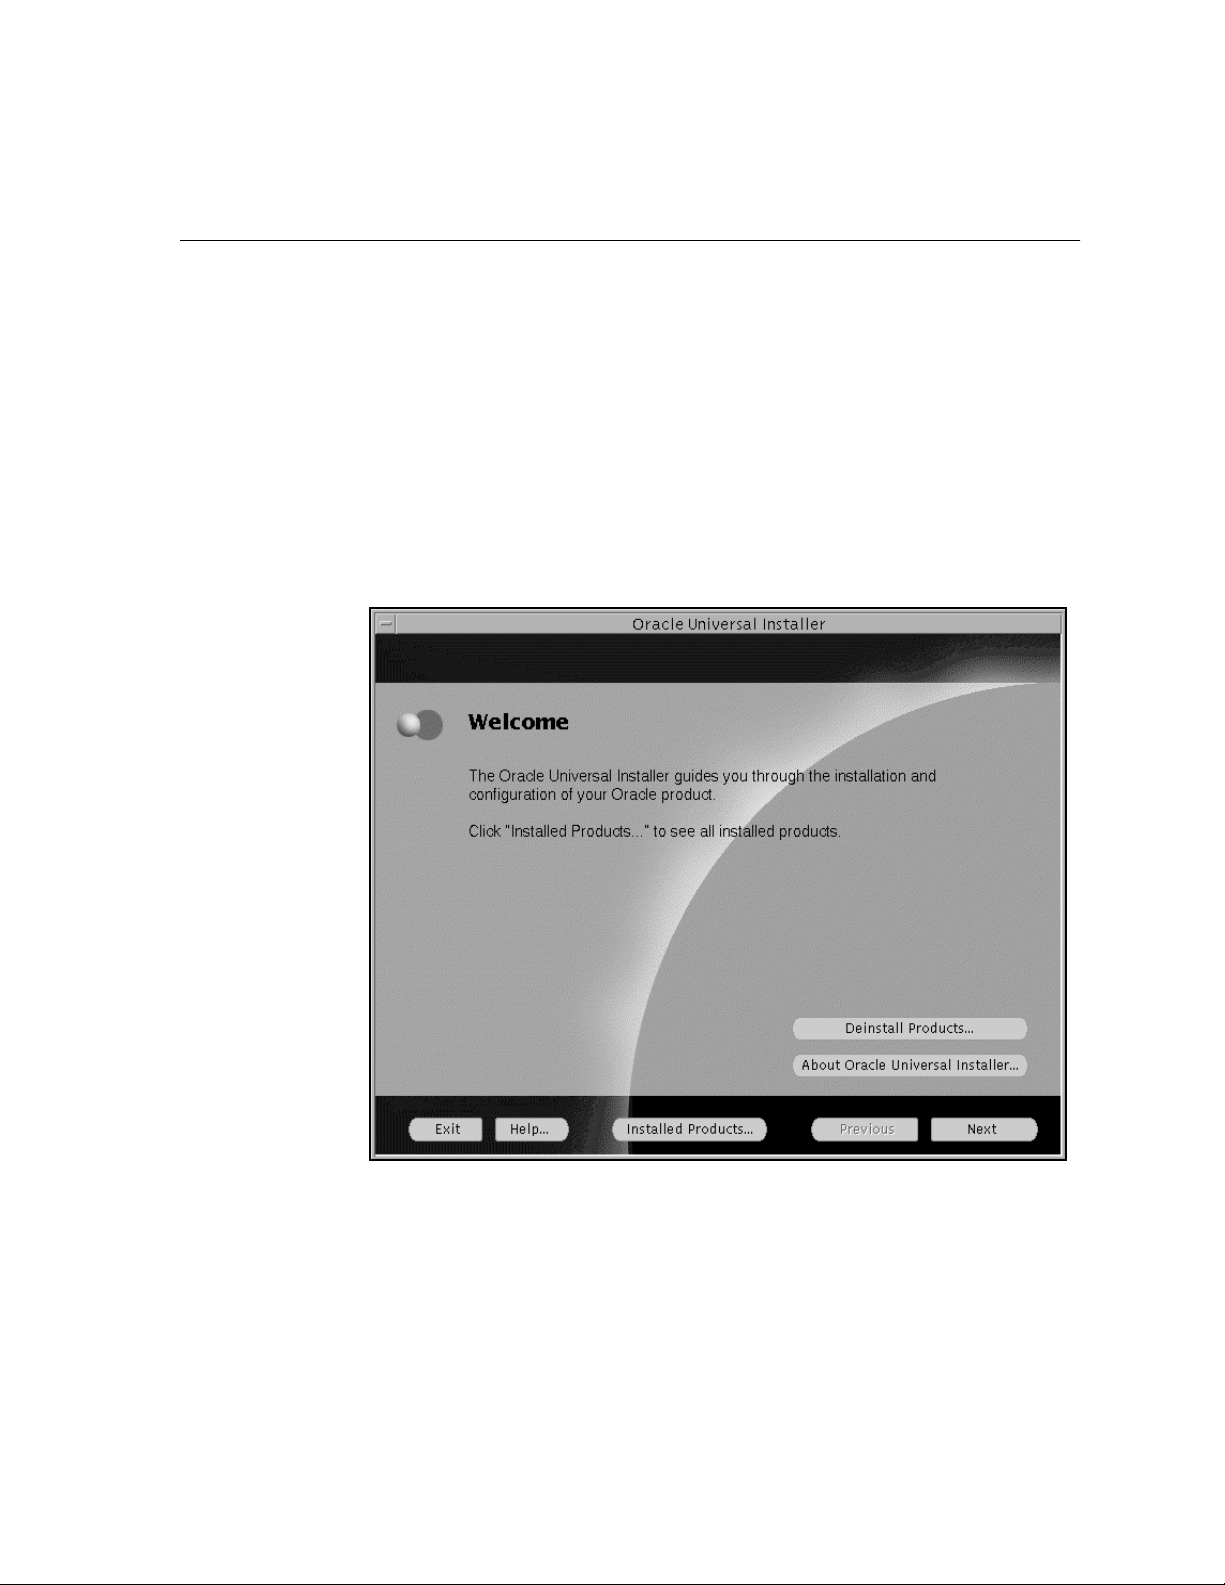
The ./runInstaller command launches the Oracle Universal Installer and the
Wel c om e dialog box displays.
Oracle Universal Installer Screen Buttons
This table gives you information about the Ora c le Universal Installer screen
buttons.
Installing and Configuring Unified Messaging 2-3
Page 20

Installing Uni fi e d M es s a g i ng
Screen Button What it Does
Deinstall Products Takes you to the Deinstall screen.
About Oracle Universal Installer Gives you the version number .
Exit Exits you out of the install session.
Installed Products Shows you what Oracle products you have installed.
Previous Takes you back to the previous screen.
Next Takes you to the next screen.
Cancel Enables you to cancel the installation process.
2-4 Installation Guide
Page 21

Entering File Locations
1. At the Welcom e screen, click Next. The File Locations screen displays.
Installing Unif i e d M e s sa ging
Enter the location of the source and destination. The Source is where the Unified
Messaging stage is located. The Destination is where the ORACLE_HOME is
located and where Unified Messaging will be installed.
2. Type in or use the Browse button to select the Source and Destination
directories for your installation.
3. Click Next. The Installation Types screen displays.
Installing and Configuring Unified Messaging 2-5
Page 22
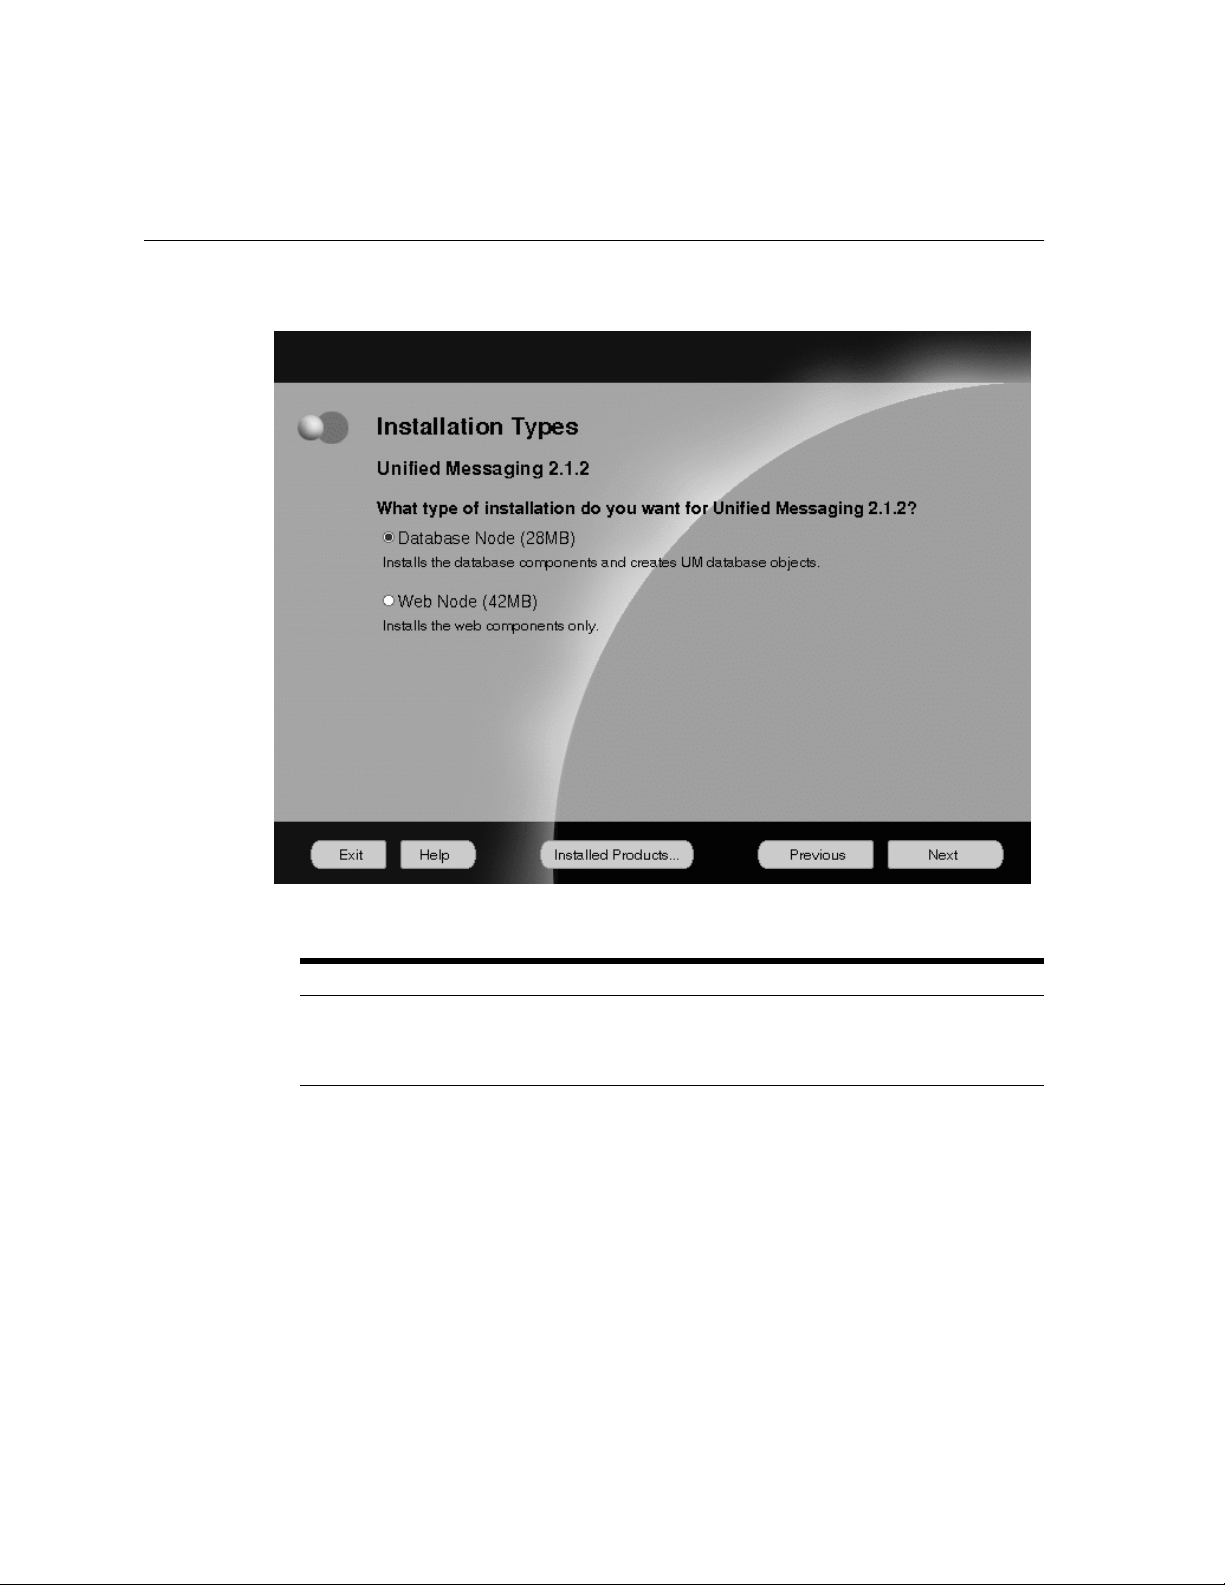
Installing Uni fi e d M es s a g i ng
Select your installation type.
Installation Type What it Does
Database Node Installs the database components and creates UM
Web Node
Click Next. The Summary screen appears.
2-6 Installation Guide
database objects.
Installs the web components only.
Page 23
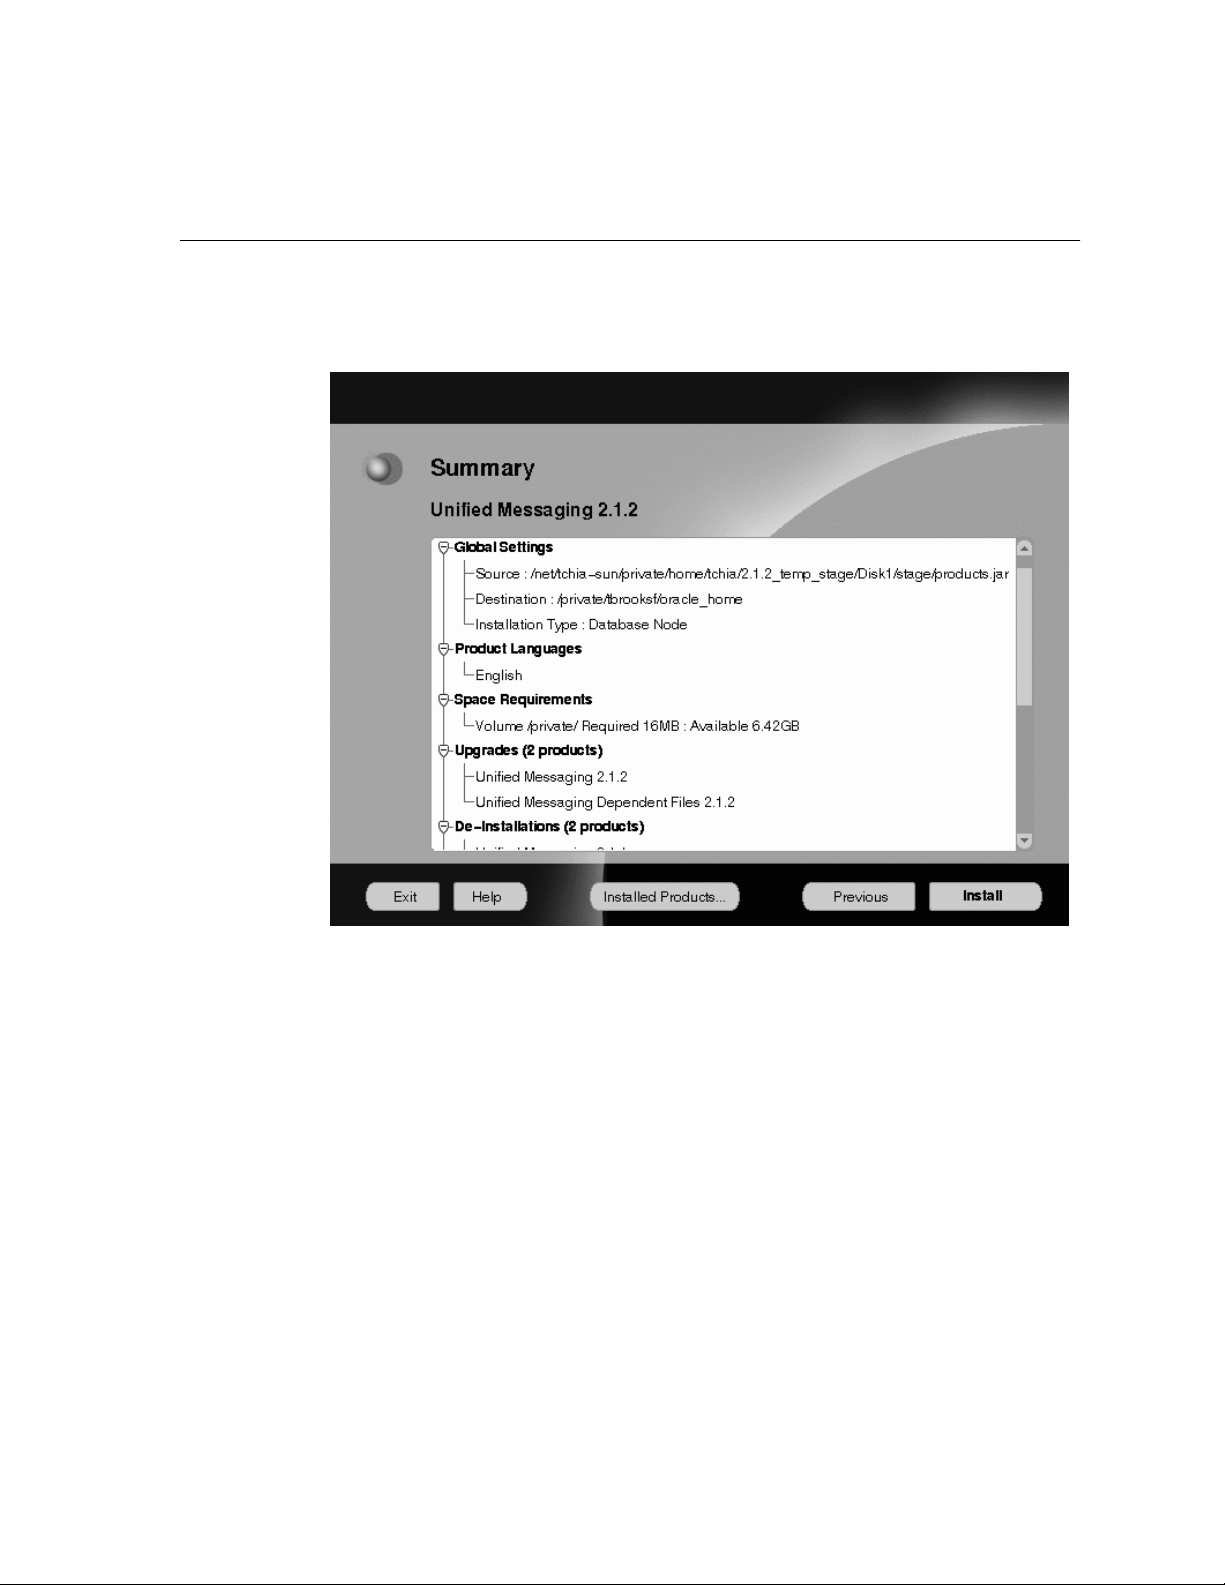
Verifying Your Installation Settings
Installing Unif i e d M e s sa ging
The Summary screen enables you to verify your installation settings. These settings
include the source and destinations locations you specified; the installation type
you selected; the product language; the space requirement for installation and the
space currently available; and the Unified Messaging products that w ill be installed.
Installing and Configuring Unified Messaging 2-7
Page 24

Installing Uni fi e d M es s a g i ng
To change your source or destination location, or installation type, click Previous to
return to the appropriate screen. Otherwise, click Install to begin installation. The
progress screen displays.
This screen shows the progress of your installation. To stop installation, click
Cancel.
2-8 Installation Guide
Page 25
Installing Unif i e d M e s sa ging
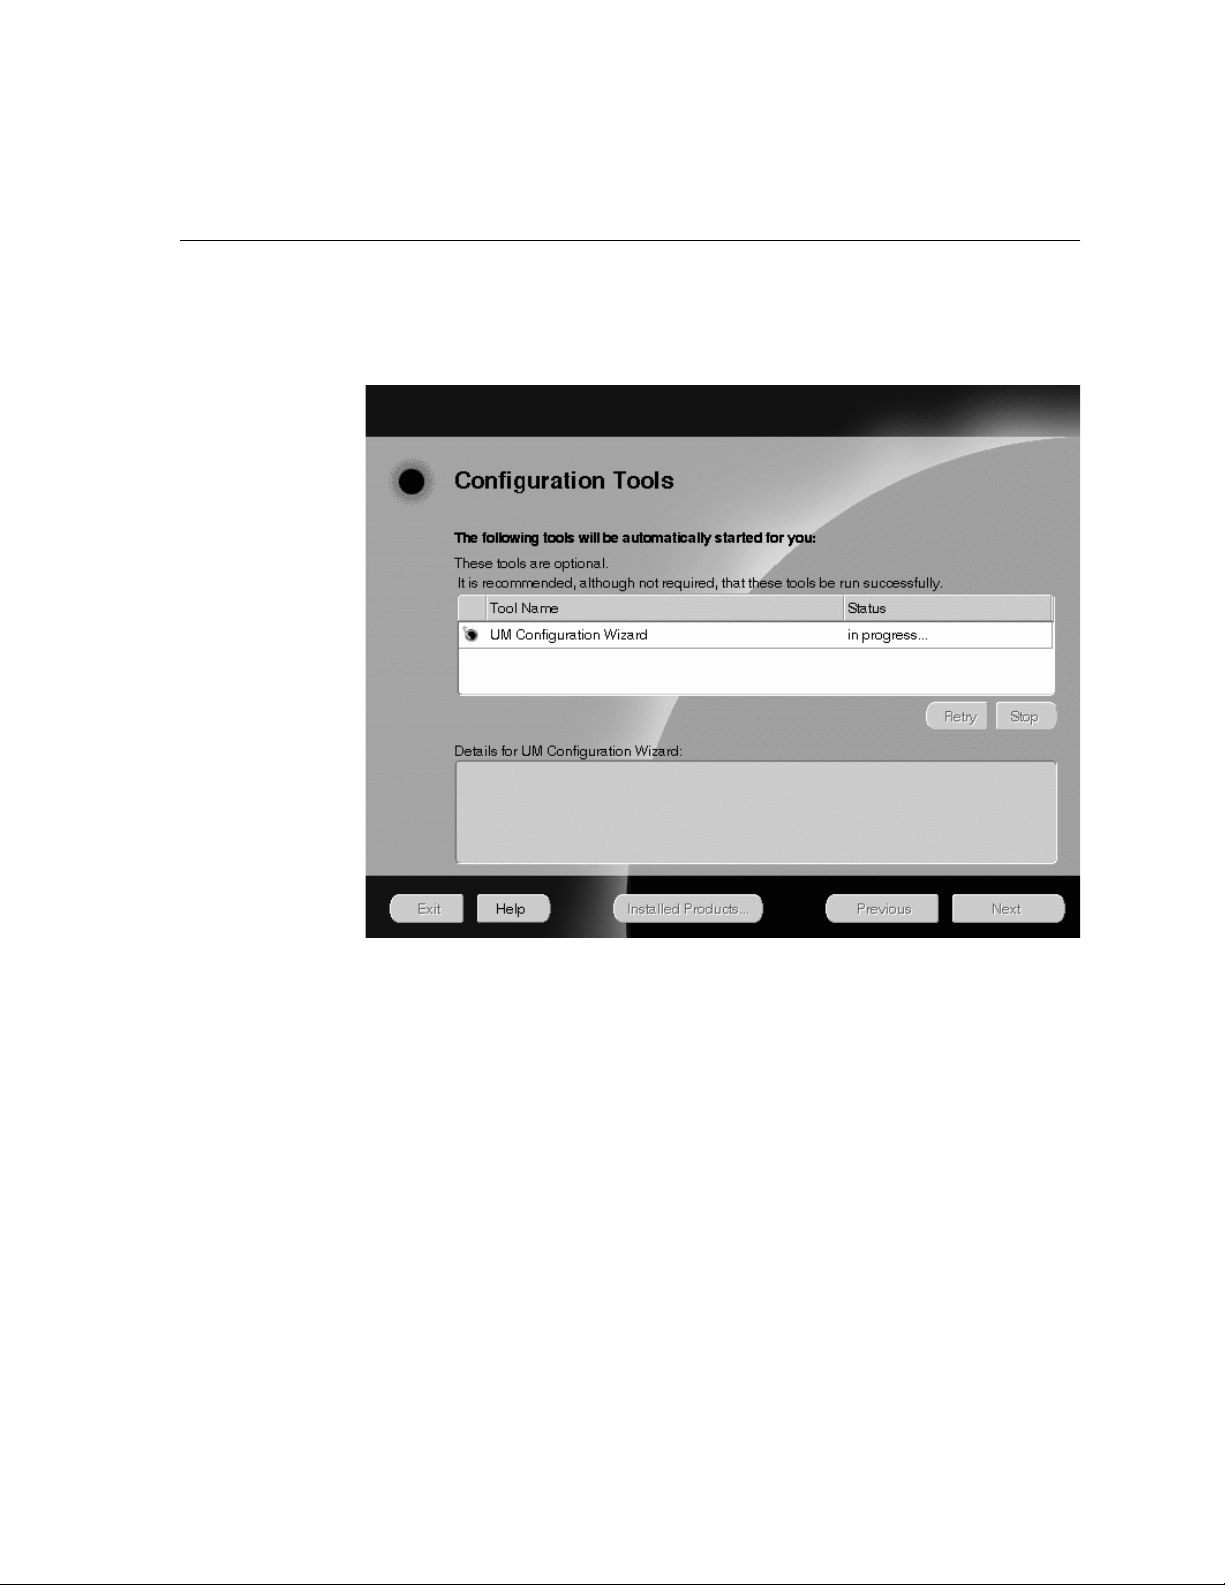
The products are installed in the specified location. When installation is complete,
the Configuration Tools screen appears.
If installation was successful, the U M 2.1.2 Configuration Assistant laun ches.
Starting the Configuration Assistant Manually
1. Define the ORACLE _HOME environment variable in the .login file (for the C
shell) or the.profile file (for the Bourne or Korn Shell):
login (C shell) setenv ORACLE_HOME <directoryName>
profile (Bourne or Korn shells) ORACLE_HOME=<directoryName>
export ORACLE_HOME
2. Run the .profile or .login file.
Installing and Configuring Unified Messaging 2-9
Page 26

Installing Uni fi e d M es s a g i ng
3.
Set your JAVA_HOME directory as shown:
ksh/bsh -- export JAVA_HOME=<
csh -- setenv JAVA_HOME <
At the Solaris prompt, enter the command:
4.
$ORACLE_HOME/um/bin/um_install.sh
jre install directory
jre install directory
>
>
Configuration Assistant Screen Buttons
This table gives you information about the Configuration Assistant screen buttons.
Click Next to proceed through the steps to configure Oracle Unified Messaging
2.1.2.
Screen Button What it Does
Cancel Exits you out of the Configuration Assistant.
Next Takes you to the next screen.
2-10 Installation Guide
Page 27

S
The ORACLE_HOME for Oracle UM 2.1.2 screen appears.
Specifying File Locations
On this screen you must specify the location of your Oracle Home, where Unified
Messaging is to be installed.
Installing Unif i e d M e s sa ging
Enter the directory path of the ORACLE_HOME where Unified Messaging is
installed and click Next. The ORACLE_SIDs for UM 2.1.2 screen displays.
Installing and Configuring Unified Messaging 2-11
Page 28
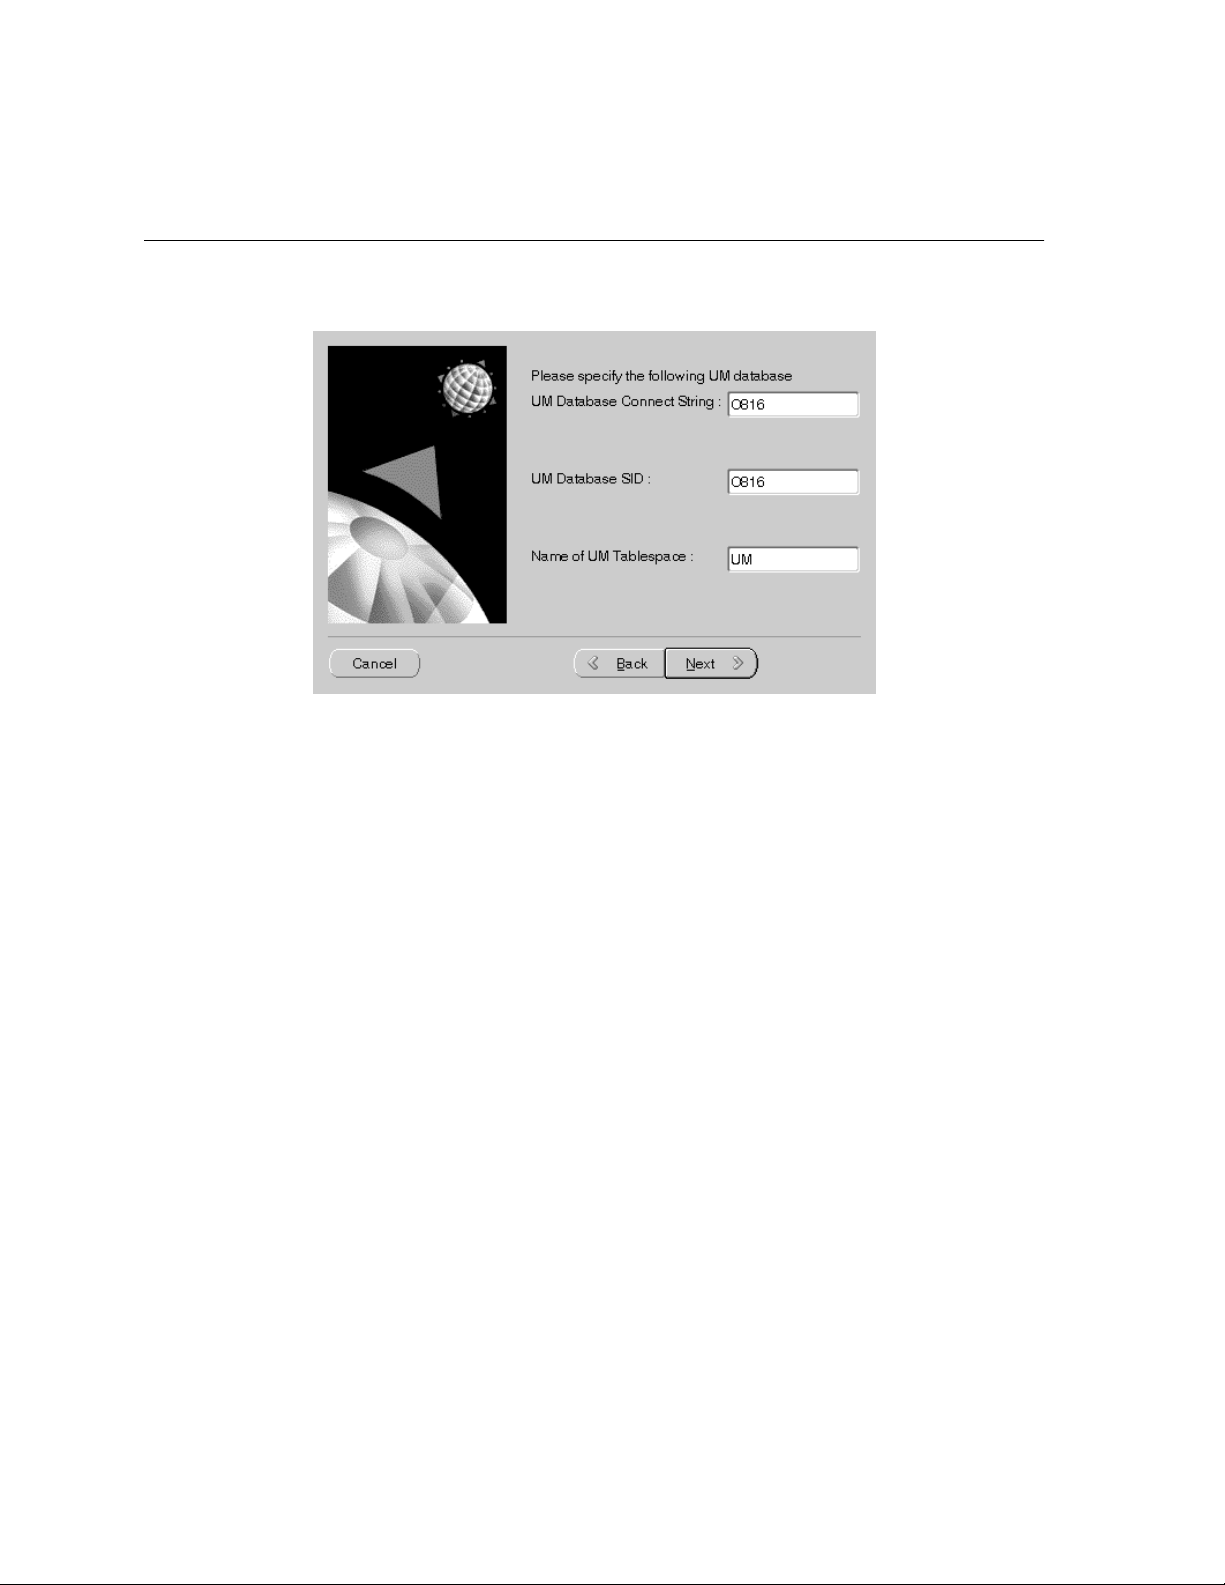
Installing Uni fi e d M es s a g i ng
On this screen you must enter the Oracle SID and connect string for Unified
Messaging, as well as the Unified Messaging tablespace name.
2-12 Installation Guide
Page 29
Installing Unif i e d M e s sa ging
* Enter the UM connect string, UM ORACLE_SID, and the Name of UM
Tablespace in the corresponding fields. See the table below for more
information.
ORACLE_SID What it Is
UM Connect String Connect string for the database that holds the Oracle Unified
Messaging objects.
UM ORACLE_SID SID for the database that holds the Oracle Unified Messaging
Name of UM Tablespace The name of the Unified Messaging tablespace on the database.
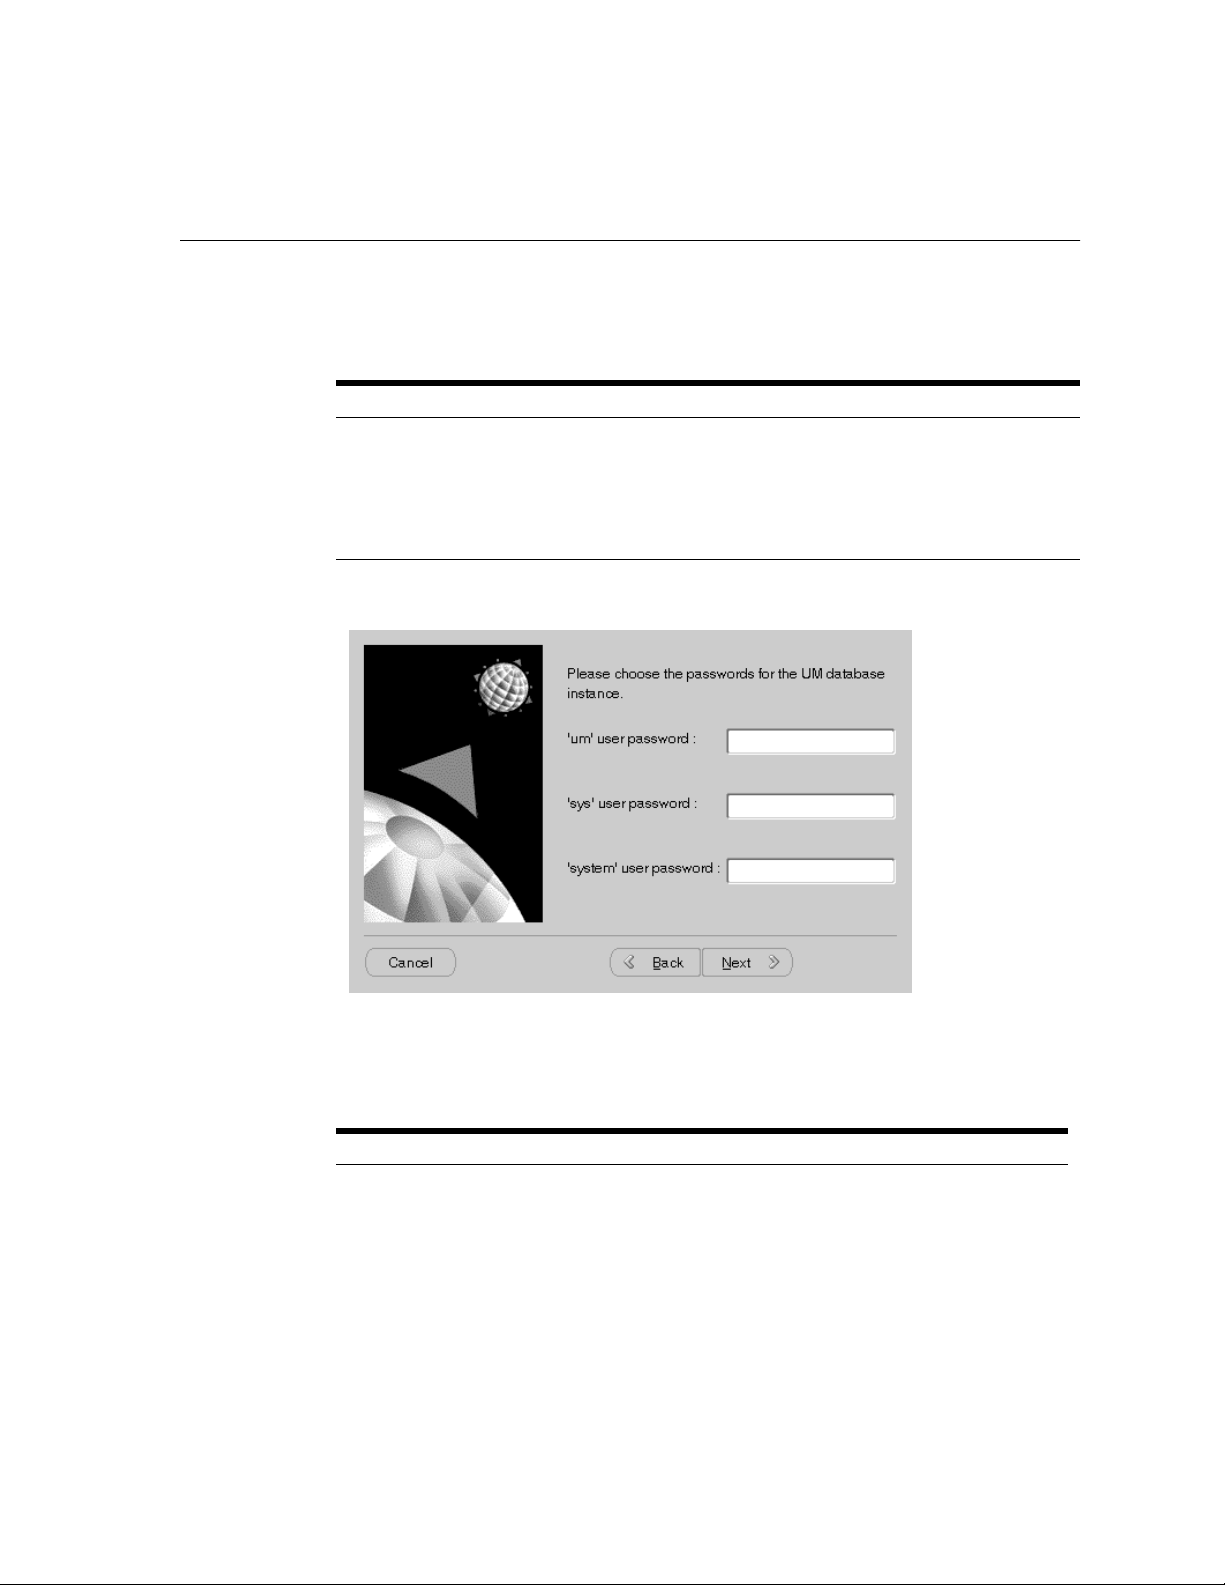
Entering Passwords
In this screen, you must enter three Unified Messaging database passwords.
objects.
Database Passwords What it Is
UM User Password UM database password for the UM user. All Unified Messaging
objects are owned by the UM user.
This user is created in the installation process, and the
password you enter here is the user’s new password.
Installing and Configuring Unified Messaging 2-13
Page 30

Installing Uni fi e d M es s a g i ng
Database Passwords What it Is
Sys User Password UM database password specified for the sys user. The
password already exists from the database installation. It
should be entered here.
System User Password UM database password specified for the system user.The
password already exists from the database installation. It
should be entered here.
Enter the passwords in the corresponding fields and click Next. The ES Parameters
screen displays.
2-14 Installation Guide
Page 31

Specifying Oracle eMail Server Parameters
In this screen, you must specify Oracle eMail Server parameters.
IM Parameters What it Is
ES Hostname Hostname and machine where ES is installed.
DNS Domain DNS domain where ES is installed.
ES Node Name Node name of the ES node.
ES Domain Name Fully qualified domain name for Unified Messaging
installation.
Installing Unif i e d M e s sa ging
Specifying Oracle eMail Server Passwords
In this screen, you must specify passwords for your Oracle eMail Server installation.
ES User Passwords What it Is
oo pwd for ES instance oo user password for the ES database instance. All Oracle
eMail Server objects are owned by the database user oo.
Installing and Configuring Unified Messaging 2-15
Page 32

Installing Uni fi e d M es s a g i ng
ES User Passwords What it Is
admin pwd for oomgr Admin user password for oomgr.
Enter the passwords and click Next. The LDAP Servers screen displays.
When you installed Unified Messaging, you were prompted to
enter a password for the ADMIN account. The ADMIN
account is the system administrator’s account (or superuser
account) from which you manage objects on a given node. In
addition, the ADMIN user can grant administrative privileges
to other users, so that they can administer the Unified
Messaging system. The ADMIN account cannot be deleted and
always retains superuser privileges.
Entering LDAP Information
In this screen you must specify your LDAP Servers Parameters.
PAB - Private Address Book
GSM - Global System for Mobile
LDAP Parameters What it Is
PAB Server Name of the LDAP server that will be used with UM. All UM's
2-16 Installation Guide
directory information will be stored within this server.
Page 33

LDAP Parameters What it Is
Installing Unif i e d M e s sa ging
PAB Port Port number of the LDAP server specified in PAB server. Defaults
GSM Server Name of the LDAP server to use for General Directory searching
GSM Server Port number of the LDAP server specified in GSM Server. Defaults
LDAP Type The type of LDAP server being used. Must be "oracle" for an Oracle
to 389.
capability in UM.
to 389.
Internet Directory.
Enter the parameters and click Next. The LDAP Domains screen displays.
Installing and Configuring Unified Messaging 2-17
Page 34

Installing Uni fi e d M es s a g i ng
In this screen you must specify your LDAP domains.
LDAP Domains What it Is
PAB Domain Name of the root of the LDAP domain where UM will store it’s
GSM Domain Name of the root of the GSM LDAP server from where all the
information.
search functions will start.
Enter the LDAP domains and click Next. The last screen displays.
2-18 Installation Guide
Page 35

Exiting the Configuration Assistant
Click Finish to exit the Configuration Assistant.
Installing Unif i e d M e s sa ging
Once you have completed installation, you must now complete the post-installation
tasks. See "Post Installation Tas ks" on pa ge 3-2 to begin post-installation tasks.
Installing and Configuring Unified Messaging 2-19
Page 36

Installing Uni fi e d M es s a g i ng
2-20 Installation Guide
Page 37

3
Post Installation
This chapter describes post installation procedures for Unified Messaging. Topics
include:
■ Post Installation Tasks
Post Installation 3-1
Page 38

Post Installation Tasks
Post Installation Tasks
Perform the tasks described in this section aft e r a Unified Messaging installation o r
upgrade.
Note: You must run the following tasks in a Korn shell
environment.
Note: Configure Oracle eMail Server to include two rewrite rules.
Please refer to chapter 10 of the Oracle eMail Server 5.1
Administration Guide.
Task 1: Create the Oracle Unified Messaging LDAP Schema
Use this procedure to create the schema the helpdesk will use in the LDAP server.
This procedure must be performed after completing the postinstallation chapter of
the Oracle eMail Server 5.1 Installation Guide.
Note: The following tasks should be completed on the machine
where Oracle Internet Directory is installed.
.ldif files are located in the following directory where Oracle Unified Messaging is
installed:
$ORACLE_HOME/um /admin/ldap
All .ldif files must be copied from the machine where Unified Messaging is
installed to the machine where Oracle Internet Directory is installed.
1. Edit the following files to specify the LDAP domains:
2. Create the domains in the directory tree, using oid_domain.ldif:
3.
3-2 Installation Guide
oid_setup.ldif
oid_acl.ldif
oid_domain.ldif
ldapmodify -D <user dn for directory admin> -w
<password> -a -f oid_domain.ldif
Create search catalogs:
Page 39

Post Installation Tasks
$cd $ORACLE_HOME/ldap/bin
Execute the following:
4.
catalog.sh -connect <connectString> -add -attr aliasedobjectname
catalog.sh -connect <connectString> -add -attr associateddomain
catalog.sh -connect <connectString> -add -attr dnqualifier
catalog.sh -connect <connectString> -add -attr homephone
catalog.sh -connect <connectString> -add -attr mobile
catalog.sh -connect <connectString> -add -attr pager
catalog.sh -connect <connectString> -add -attr owner
Setup the Helpdesk Administrators using oid_setup.ldif after changing
5.
the domains in this file. Currently, it creates HelpDesk administrators for the
domain dc=PAB,dc=UM_DOMAIN,dc=com.
ldapmodify -D <user dn for directory admin> -w
<password> -a -f oid_setup.ldif
6.
Setup the ACLs using oid_acl.ldif after changing the domains in this file.
Currently, it sets up ACLs for the domain dc=PAB,dc=UM_DOMAIN,dc=com
ldapmodify -D <user dn for directory admin> -w
<password> -f oid_acl.ldif
7.
Restart Oracle Internet Directory database and the Oracle Internet Directory
processes.
8. Stop Oracle Internet Directory:
oidctl connect=<connect string> server=oidldapd instance=1 stop
Start Oracle Internet Directory:
9.
oidctl connect=<connect string> server=oidldapd instance=1
configset=0 flags=’-p 389’ start
Task 2: Encoding the Helpdesk Password
Note: The following tasks should be performed on the machine
where the Unified Messaging server is installed.
1. Source the UM environment:
Post Installation 3-3
Page 40

Post Installation Tasks
$ . $ORACLE_HOME/um/admin/.umenv
Encode the password:
2.
$ $ORACLE_HOME/JRE/bin/jre -cp $UM_CLASSPATH $UM_PROPERTIES
oracle.um.util.EncPwd HELPDESK
Task 3: Configuring the oomgr RMI Process
The oomgr RMI process allows for Unified Messaging sessions to remotely share an
oomgr process to do administration on Oracle eMail Server accounts. The oomgr
RMI process can be run on either the Unified Messaging or the Oracle eMail Server
machine.
■ To run it on the Unified Messaging machine, oomgr executable and its message
files need to be installed on the Unified Messaging machine.
■ To run it on the Oracle eMail Server machine, Unified Messaging classes need to
be installed and configured with the wizard in the ORACLE_HOME where
Oracle eMail Server is installed.
■ On machines with Unified Messaging middle-tier installation, verify that the
oomgr.servername property in the properties file points to where oomgr RMI
process is running. The properties file is located in the following directory:
$ORACLE_HOME/um/config/<hostname>.properties
Task 4: Starting the Unified Messaging Processes
1. Start the Unified Messaging processes.
$ $ORACLE_HOME/um/bin/start_mls.sh
$ $ORACLE_HOME/um/bin/start_IOoomgrRMI.sh
Task 5: Configuring Apache Listener Port
The default listener port without SSL is 7777 a nd with SSL is 80.
To configure the Apache port:
$vi $ORACLE_HOME/A pache/Apache/conf/h ttpds.conf
and edit the parameter called Port.
3-4 Installation Guide
Page 41

Task 6: Configuring JServ
To configure JServ for Oracle Unified Messaging, you must edit
$ORACLE_HOME/Apache/JServ/etc/jserv.properties to add JVM
properties and CLASSPATHS.
To add Oracle Unified Messaging properties, Oracle recommends adding the
following lines in the same location where other properties are defined.
wrapper.bin.parameters=-DUM_HOME=<ORACLE_HOME>/um
wrapper.bin.parameters=-DPROPERTIES=<ORACLE_
HOME>/um/config/<MACHINE_HOST_NAME>.properties
To add Oracle Unified Messaging CLASSPATHs, Oracle recommends adding the
following lines in the same location where other CLASSPATHs are defined.
wrapper.classpath=<ORACLE_HOME>/jdbc/lib/classes111.zip
wrapper.classpath=<ORACLE_HOME>/um/lib/um.jar
wrapper.classpath=<ORACLE_HOME>/um/lib/jgl.zip
wrapper.classpath=<ORACLE_HOME>/um/lib/j2ee.jar
wrapper.classpath=<ORACLE_HOME>/um/lib/ldap.jar
Task 7: Starting Apache JServ
Go to $ORACLE_HOME/Apache/Apache/bin
Post Installation Tasks
To start: ’
apachectl start
To stop:
apachectl stop
Note: if the port is < 1024, you need to be root to start Apache.
Task 8: Configuring HelpDesk
1. Change directory to:
$ cd $ORACLE_HOME/um/admin
Run oomgr:
2.
$ oomgr admin/<password>
3. Execute helpdesk.oom
Post Installation 3-5
Page 42

Post Installation Tasks
iofcmgr> execute helpdesk.oom
Bring up your browser.
4.
5. Enter the following:
http://<hostname>:<port>/um/activatehelpdesk.jsp
6. Enter the helpdesk user account password. The default password is helpdesk.
Task 9: Updating Real Audio (only if Real Audio is installed)
If Real Audio is installed, you must update the following to enable Real Audio
streaming.
Update rma.home (home of RealAudio) and rma.server (server name and port
number of RealAudio) in <site name>.properties.
Task 10: Updating the Tiff to Gif Executable (only if a Tiff to Gif executable is
installed)
You must update your tiff to gif executable to enable your fax server to convert tiff
image files to gif image fil es.
Edit convert.tiff.gif.sh to call the tiff to gif converter executable.
3-6 Installation Guide
Note: The convert.tiff.gif.sh takes tw o arguments:
■ 1st = name of the tiff file
■ 2nd = destination of the gif file
Page 43

Troubleshooting
This chapter discusses troubleshooting informati on . Topics include:
■ Log Files and Trace Files
■ Troubleshooting Hints
4
Troubleshooting 4-1
Page 44

Log Files an d Trace Files
Log Files and Trace Files
■ For installation troubleshooting, refer to the log file in:
$ORACLE_HOME/um/log/install.log
■ For background Oracle Unified Messaging processes troubleshooting, refer to
trace files in:
$ORACLE_HOME/um/trace
■ For Oracle Unified Messaging classes troubleshooting, refer to log file in:
$ORACLE_HOME/um/log/<
Troubleshooting Hints
■ Make sure Oracle eMail Server is installed and working correctly,
1. Connect directly to the IMAP ports of Oracle eMail Server:
$ telnet <
2. If Oracle eMail Server is running imap4 correctly, login using:
a1 login helpdesk helpdesk
3. Response from the server should be:
a1 OK LOGIN completed
4. Log out of Oracle eMail Server:
a2 LOGOUT
■ Make sure that listeners on Oracle eMail Server and Oracle Unified Messaging
are working correctly (using tnsping from the machines).
■ Make sure that LDAP server is up and running correctly. You can issue the
following command using a browser:
date
>.txt
es machine name
> 143
4-2 Installation Guide
ldap://<
ldap machine name
>/uid=1,<
PAB_DOMAIN
>,
Page 45

Troubleshooting Hints
Note: ■<PAB_DOMAIN> selected during installation.
If the data for the helpdesk is returned, then LDAP is working fine. If the data for
the helpdesk is not returned, then resolve LDAP server issue using the
documentation provided by the LDAP server.
Troubleshooting 4-3
Page 46

Troubleshooting Hints
4-4 Installation Guide
 Loading...