

Page 1
12-1629.fm Page 1 Friday, August 6, 1999 10:01 AM
CR-329 AM/FM Cassette Clock Radio
Cat. No.
12-1629
Your Optimus CR-329 AM/FM Cassette Clock Radio offers you all the
conveniences of an alarm clock, an
AM/FM radio, and a cassette tape
player in one attractive and functional
package. You can wake to a sound,
the radio, a cassette tape, or a combination. You can fall asleep with the radio playing, and the radio
automatically shuts off at a preset
time.
Its features include:
Red Numeric Display with Brightness Control
— makes the clock easy
to read.
Sleep Timer
— plays the radio for up
to 1 hour and 59 minutes before it automatically turns off.
Snooze Feature
— temporarily silences the alarm for about 9 minutes so
you can get a few extra minutes of
sleep.
Battery Back-Up —
keeps the clock
running and the alarm set if power is
interrupted.
Auto-Stop
— reduces tape wear by
turning off and releasing the tapehandling parts when the tape reaches
its end.
WARNING:
shock hazard, do not expose this product
to rain or moisture.
To reduce the risk of fire or
CAUTION
RISK OF ELECTRIC
SHOCK. DO NOT OPEN.
CAUTION:
OF ELECTRIC SHOCK, DO NOT
REMOVE COVER OR BACK. NO
USER-SERVICEABLE PARTS
INSIDE. REFER SERVICING TO
QUALIFIED PERSONNEL.
!
TO REDUCE THE RISK
This symbol is intended to
alert you to the presence of
uninsulated dangerous voltage within the product’s
enclosure that might be of
sufficient magnitude to constitute a risk of electric
shock. Do not open the
product’s case.
This symbol is intended to
inform you that important
operating and maintenance
instructions are included in
the literature accompanying
this product.
!
© 1999 Tandy Corporation.
Optimus and RadioShack are registered trademarks used by Tandy Corporation.
All Rights Reserved.
Page 2
12-1629.fm Page 2 Friday, August 6, 1999 10:01 AM
PREPARATION
Connecting to AC Power
Plug the clock ra dio’s power co rd into a
standard AC outlet. The display flashes.
Caution:
any other powe r source might damage
the clock radio.
Connecting the clock radio to
2. Snap the battery onto the connector in the battery compartment
and place the battery in the compart ment.
3. Replace the cover.
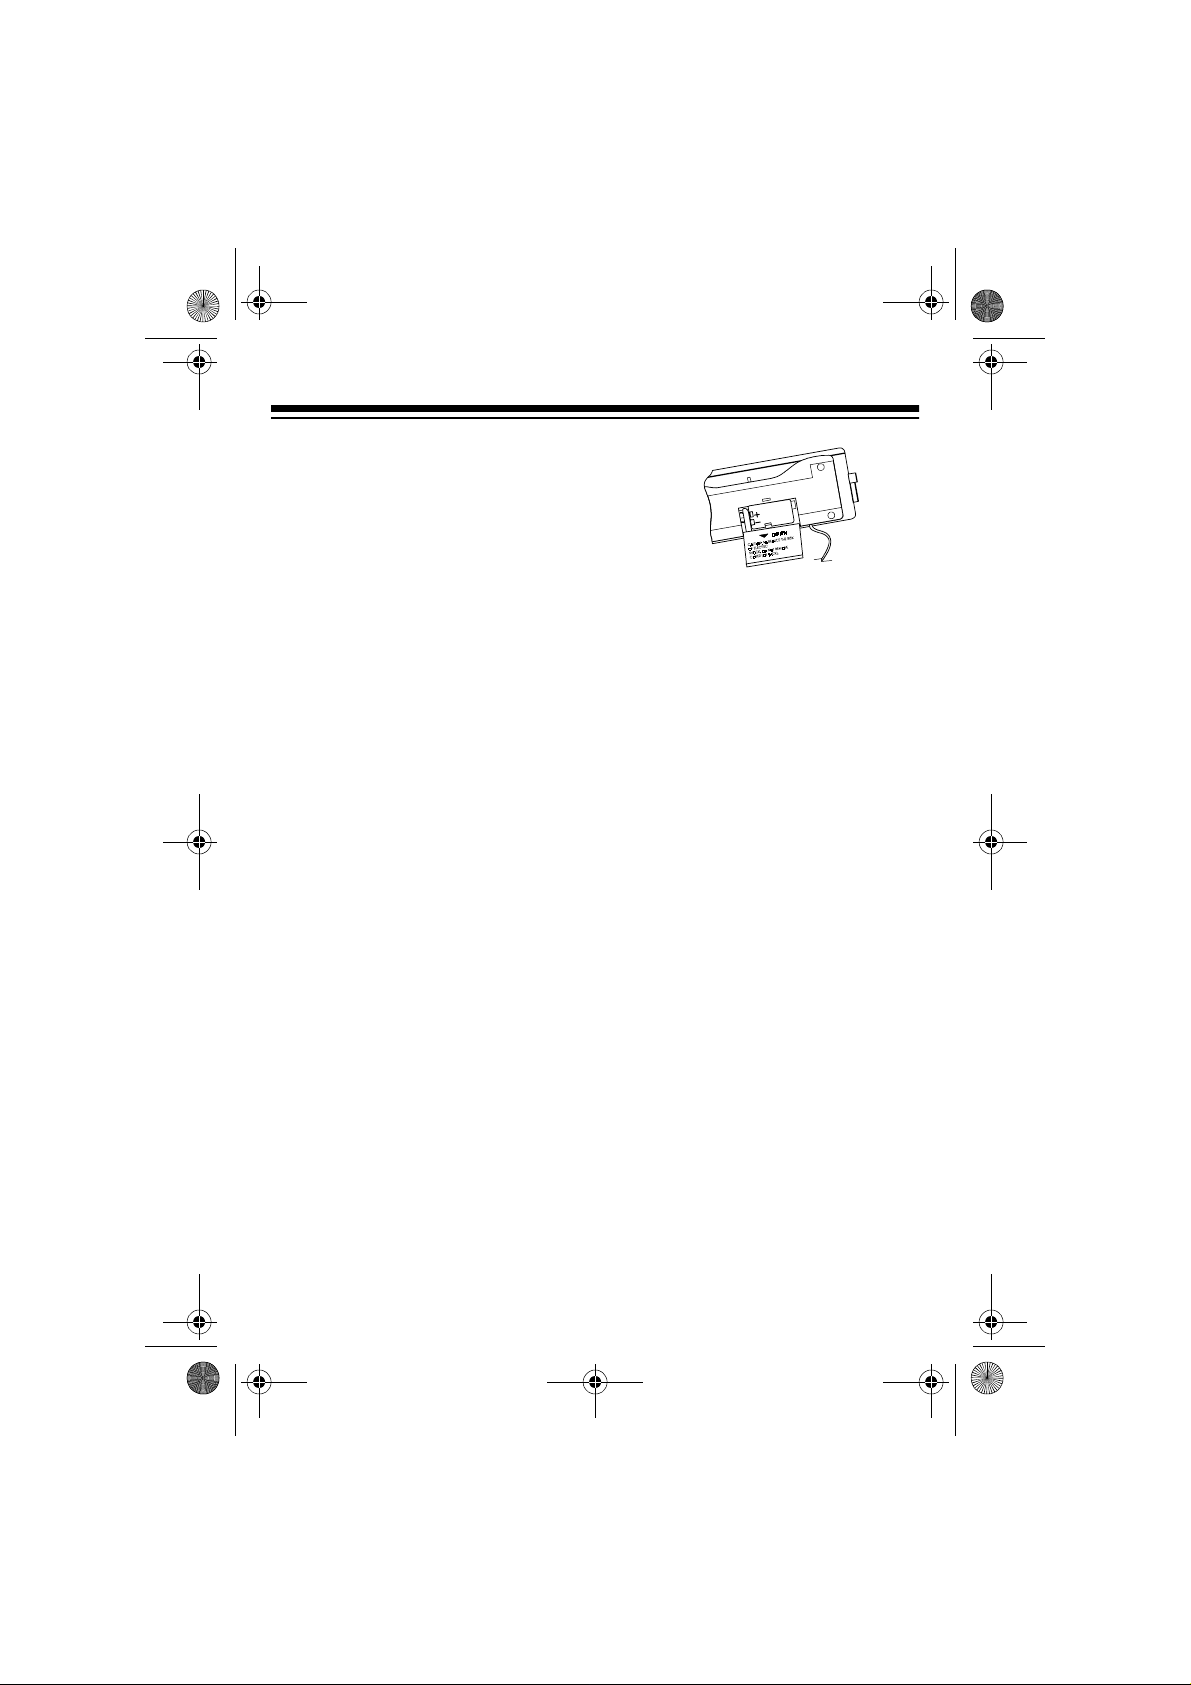
Installing a Back-Up Battery
To keep the clock running up to 8 hours
during an AC power failure, install a 9volt battery (not supplied) into the battery compartment. For the longest life,
we recommend a RadioShack alkaline
battery.
Caution:
the required size and recommended
type.
Note:
on the battery, plug in the power cord
then install the battery.
Follow these steps to install a back-up
battery.
1. Slide the battery compartment
2
Use only a fresh battery of
To prevent unnecessary drain
cover on the bot tom of the radio in
the direction of the arrow and
remove it.
Notes:
• The display does not light when
the CR-329 is operating only on
battery back-up power.
• If the alarm time occurs while the
CR-329 is operating from battery
back-up power, the selected
alarm (buzzer, radio, cassette
tape, or buzzer/cassette tape)
sounds for at least 10 minutes.
• A prolonged power failure can
drain the battery. If the display
flashes after an AC power failure,
the battery is too low to run the
clock. Replace the battery and
reset the clock. Normally, replace
the battery about every 6 months.
Warning:
battery promptly and properly. Do not
burn or bury it.
Caution
weak battery. Batteries can leak
chemicals that can destroy electronic
parts.
Always dispose of an old
: Always remove an old or
Page 3
12-1629.fm Page 3 Friday, August 6, 1999 10:01 AM
CLOCK OPERATION
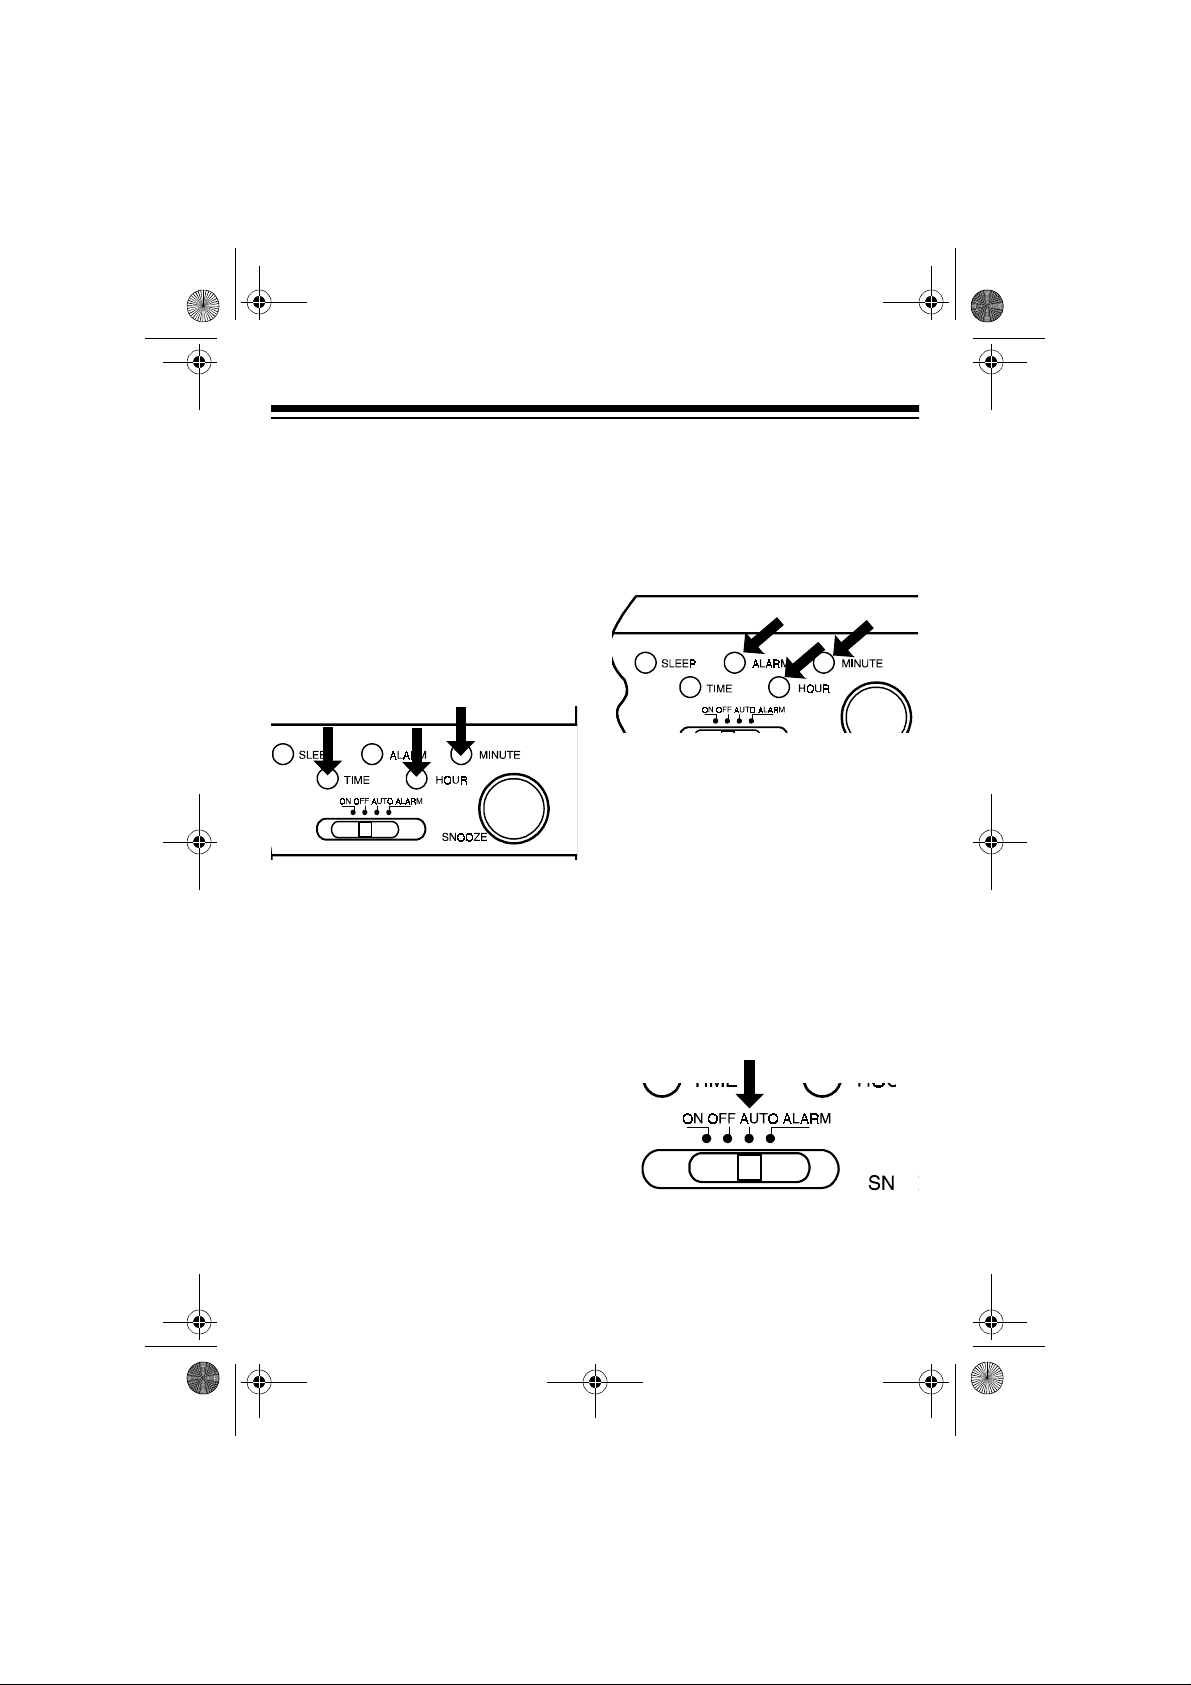
Setting the Time
Hold down
press (or hold down)
display shows the correct hour setting.
lights when you set a PM hour.
PM
Then hold down
press (or hold down)
display shows the correct minute setting.
To prevent changing the time
Note:
accidentally, always release
MINUTE
before you release
Changing the Display
Brightness
To change the brightness of the display, move
clock radio to HI or LO.
DIMMER
, then repeatedly
TIME
HOUR
, and repeatedly
TIME
MINUTE
on the back of the
until the
until the
HOUR
TIME
or
.
Hold down
press (or hold down)
desired hour appears. PM lights when
you set a PM hour. Then hold down
ALARM
hold down)
minute appears.
To view the alarm time at any time,
hold down
ALARM
, then repeatedly press (or
MINUTE
ALARM
, then repeatedly
until the
HOUR
until the desired
.
Turning the Alarm On/Off
Follow these steps to have the radio
turn on at the set alarm time.
1. Set the radio to the desired station and volume (see “Playing the
Radio” on Page 5).
2. Set
AUTO
ON/OFF/AUTO/ALARM
. ALARM lights.
to
Setting the Alarm Time
You can set an alarm for a specified
time so the buzzer sounds, the radio
plays, a cassette tape plays, or the
buzzer sounds and a cassette tape
plays.
At the preset alarm time, the radio
turns on and plays for up to 2 hours.
To turn off the radio, set
AUTO/ALARM
to
OFF
ON/OFF/
.
3
Page 4

12-1629.fm Page 4 Friday, August 6, 1999 10:01 AM
To have the buzzer sound at the set
alarm time
to
ALARM
, set
ON/OFF/AUTO/ALARM
. ALARM lights.
At the preset alarm time, the buzzer
sounds.
To stop the buzzer immediately, set
ON/OFF/AUTO/ALARM
to
OFF
.
To stop the buzzer and turn on the radio, set
AUTO
ON/OFF/AUTO/ALARM
to play the radio for about 2
to
hours or to ON to leave the radio on.
Follow these steps to have the buzzer
and cassette player turn on at the set
alarm time.
1. Load a cassette tape (see “Loading a Cassette Ta pe” on Page 5).
2. Set
ALARM
3. Press
ON/OFF/A UTO/ALARM
. ALARM lights.
.
PLAY
to
At the preset alarm time, the buzzer
sounds and the cassette plays.
To stop the cassette and buzzer immediately, set
ALARM
to
OFF
ON/OFF/AUTO/
and press
STOP
.
To stop the buzzer but have the cassette continue playing, set
AUTO/ALARM
to
AUTO
ON/OFF/
. The cassette
plays until it reaches the end of the
side, then it automatically stops. After
the cassette stops, the radio turns on
4
and plays for the rest of the ala rm period.
Follow these steps to have only the
cassette player turn on at t he set alar m
time.
1. Load a cassette tape (see “Loading a Cassette Tape” on Page 5).
2. Set
AUTO
3. Press
ON/OFF/AUTO/ALARM
. ALARM lights.
.
PLAY
to
At the pre set alarm time, th e cassett e
plays until it reaches the end of the
side, then it automatically stops. After
the cassette stops, the radio turns on
and plays for the rest of the ala rm period.
Using Snooze
To temporarily sil ence the alar m (buzzer, radio, cassette , or buzzer/cassett e),
press
SNOOZE
alarm for about 9 minutes.
You can repeat this cycle as many
times as you like. To turn off the alarm
so it does not sound again, set
OFF/AUTO/ALARM
. This silences the
ON/
to
OFF
.
Page 5

12-1629.fm Page 5 Friday, August 6, 1999 10:01 AM
RADIO OPERATION
Playing the Radio
1. Set
2. Set
3. Turn
4. Adjust
5. To turn off the radio set
Using the Sleep Timer
ON/OFF/AUTO/ALARM
.
ON
to the desired band.
FM/AM
Notes:
• The clock radio has a built-in
AM antenn a. For the b est AM
reception, rotate the radio.
• The FM antenna is b uilt into th e
power cord. For the best FM
reception, fully extend the
power cord.
TUNING
tion.
listening level.
AUTO/ALARM
to the desired sta-
VOL U M E
to a comfortable
to
OFF
ON/OFF/
.
to
2. Press
3. Hold down
The radio plays for the set length of
time then automatically turns off. To
turn off the radio before the programmed sleep time has elapsed,
press
SLEEP. 0:59
the display and the radio turns on.
SLEEP
press
HOUR
sleep time to 1 hour and 59 minutes, or repeatedl y press
to decrease the minutes setting.
SNOOZE
.
appears on
. Repeatedly
to increase the
MINUTE
CASSETTE OPERATION
Loading a Cassette Tape
1. Take up any slack in the tape by
turning one of the cassette’s hubs
with a pencil. (If you do not
remove excess slack, the tape
could tangle in the playback
mechanism.) Then open the cassette compartment door by gently
pulling open the front of the radio.
You can set the radio to play for up to
1 hour and 59 minutes then automatically turn off.
1. Set
ON/OFF/AUTO/ALARM
AUTO, ALARM
, or
OFF
to
.
5
Page 6

12-1629.fm Page 6 Friday, August 6, 1999 10:01 AM
2. Load the cassette into the cassette guides on the compartment
door. Insert it with its open edge
up and the full reel to the right.
The side facing you is the side
that plays.
3. Close the cassette compartment
door.
Playing a Cassette Tape
1. Set
2. Load a cassette tape.
3. Press
4. Adjust
5. Press
ON/OFF/AUTO/ALARM
.
ON
. The cassette plays
PLAY
until it reaches the end of the side,
then it automatically stops.
Notes:
•Press
rapidly wind the tape forward.
Press
to resume play.
• During fast-forwarding, the
tape does not automatically
stop when it reaches the end.
Press
tape-handling parts and protec t
the tape.
VOLUME
listening level.
STOP
before it automatically stops.
, then
STOP
STOP
STOP
to stop playback
FAST-F
, then
PLAY
to release the
to a comfortable
again
to
to
CARE
To enjoy your AM/FM Cassette Clock
Radio for a long time:
• Keep the clock radio dry. If it gets
wet, wipe it dry immediately.
• Use and store the clock radio only
in normal temperature environments.
• Handle the clock radio gently and
carefully. Don’t drop it.
• Keep the clock radio away from
dust and dirt.
• Wipe the cl ock radio with a da mp
cloth occasionally to keep it looking new.
Modifying or tampering with the clock
radio’s internal co mp one nts ca n c aus e
a malfunction and invalidate its warranty. If your clock radio is not performing as it should, take it to your
local RadioShack store for assistance.
6
Page 7

12-1629.fm Page 7 Friday, August 6, 1999 10:01 AM
FCC Information
Your radio might cause TV or radio interference even when it is operating
properly. To determine whether your
radio is causing the interference, turn
off your radio. If the interference goes
away, your radio is causing the interference. Try to eliminate the interference by:
• moving your radio away from the
TV or other radio
• connecting your radio to an outlet
that is on a different electrical circuit from the receiver
• contacting your local RadioShack
store for help
If you cannot eliminate the interference, the F CC requires tha t you stop
using the radio.
Cleaning the Tape-Handling
Parts
Dirt, dust or particl es of the tape ’s coating can accumulate on the tape heads
and other parts that the tape touches.
This can greatly reduce the performance of the cassette player. After every 20 hours of tape player operation,
clean the tape-handling parts with a
cassette deck cleaning kit or use the
following cleaning procedure.
1. Set
OFF
ON/OFF/AUTO/ALARM
.
to
2. Unplug the clock radio’s power
cord from the AC outlet.
3. Open the cassette compartment
door.
4. Press
handling parts.
5. Use a cotton swab dipped in
denatured alcohol or tape head
cleaning solution to cl ean the tape
head, pinch roller, tape guides,
and capstan
6. When you finish cleaning, press
STOP
partment door, then plug the cloc k
radio’s power cord into a st an da rd
AC outlet.
Your local RadioShack store sells a
complete line of cassette deck cleaning supplies.
to expose the tape-
PLAY
, close the cassette com-
Restoring Tape Tension and
Quality
After you play a cassette tape several
times, the tape might become tightly
wound on the reels. This can cause
playback sound quality to deteriorate.
To restore the sound quality, fastforward the tape from the beginning to
the end of one side, then turn it over
and fast-forward it to the end of the other side. Then loosen the tape reels by
gently tapping each side of the cassette’s outer shell on a flat surface.
7
Page 8

12-1629.fm Page 8 Friday, August 6, 1999 10:01 AM
Caution:
Be careful not to damage th e
cassette when tapping it. Do not touch
the exposed tape or allow any sharp
objects near the cassette.
Backup Battery ........................9V DC
Po wer Output (max.)..............500 mW
Speaker ........... 3 Inch, 8 ohm, 0.5 W
Dimensions
SPECIFICATIONS
(HWD): ........ 4
Frequency Range:
FM: ......................... 88–108 MHz
AM: .......................530–1710 kHz
Tape Speed ............................ 1
7
/8 ips
Power Source: 120V AC 60 Hz, 10 W
This product is warranted by RadioShack against manufacturing defects in material and workmanship under normal use
for ninety (90) days from the date of purchase from RadioShack company-owned stores and authorized RadioShack
franchisees and dealers. EXCEPT AS PROVIDED HEREIN, RadioShack MAKES NO EXPRESS WARRANTIES AND
ANY IMPLIED WARRANTIES, INCLUDING THOSE OF MERCHANTABILITY AND FITNESS FOR A PARTICULAR
PURPOSE, ARE LIMITED IN DURATION TO THE DURATION OF THE WRITTEN LIMITED WARRANTIES CONTAINED HEREIN. EXCEPT AS PROVIDED HEREIN, RadioShack SHALL HAVE NO LIABILITY OR RESPONSIBILITY
TO CUSTOMER OR ANY OTHER PERS ON OR ENTITY WITH R ESPECT TO ANY LIABIL ITY, LOSS OR DAMAGE
CAUSED DIRECTLY OR INDIRECTLY BY USE OR PERFORMANCE OF THE PRODUCT OR ARISING OUT OF ANY
BREACH OF THIS WARRANTY, INCLUDING, BUT NOT LIMITED TO, ANY DAMAGES RESULTING FROM INCONVENIENCE, LOSS OF TIME, DATA, PROPERTY, REVENUE, OR PROFIT OR ANY INDIRECT, SPECIAL, INCIDENTAL,
OR CONSEQUENTIAL DAMAGES, EVEN IF RadioShack HAS BEEN ADVISED OF THE POSSIBILITY OF SUCH
DAMAGES.
Some states do not allow the limitations on how long an implied warranty lasts or the exclusion of incidental or consequential damages, so the above limitations or exclusions may not apply to you.
In the event of a product defe ct dur ing th e warr anty peri od , take the p rodu ct and the RadioS hack sa les rece ipt as p roof of
purchase date to any RadioShack store. RadioShack will, at its option, unless otherwise provided by law: (a)correct the
defect by product repair wi tho ut cha rge for part s and l abor; ( b) r epl ace the prod uct wit h one of th e sam e o r sim ilar design;
or (c) refund the purchase price. All replaced parts and products, and products on which a refund is made, become the
property of RadioShack. New or reconditioned parts and products may be used in the performance of warranty service.
Repaired or replaced parts and products are warranted for the remainder of the original warranty period. You will be
charged for repair or replacement of the product made after the expiration of the warranty period.
This warranty does not cover : ( a) d amag e or fa ilu re c aused by o r at tributable to acts of God, abuse, acci den t, mi suse, im proper or abnormal usage, fa ilure to foll ow instru cti ons, im prop er insta l lation or maintenance, alteration, lightning or oth er
incidence of excess voltage or current; (b) any repairs other than those provided by a RadioShack Authorized Service
Facility; (c) consumables such as fuses or batteries; (d) cosmetic damage; (e) transportation, shipping or insurance
costs; or (f) costs of product removal, installation, set-up service adjustment or reinstallation.
This warranty gives you specific legal rights, and you may also have other rights which vary from state to state.
RadioShack Customer Relations, 200 Taylor Street, 6th Floor, Fort Worth, TX 76102
Limited Ninety-Day Warranty
Weight ................... 1 lb, 15 oz (850 g)
Specifications are typical; individual
units might vary. Specifications are
subject to change and improvement
without notice.
1
/2 × 89/10 × 31/10 Inches
(114 × 226 × 79 mm)
04/99
RadioShack
A Division of Tandy Corporation
Fort Worth, Texas 76102
08A99 Printed in China
 Loading...