

Page 1
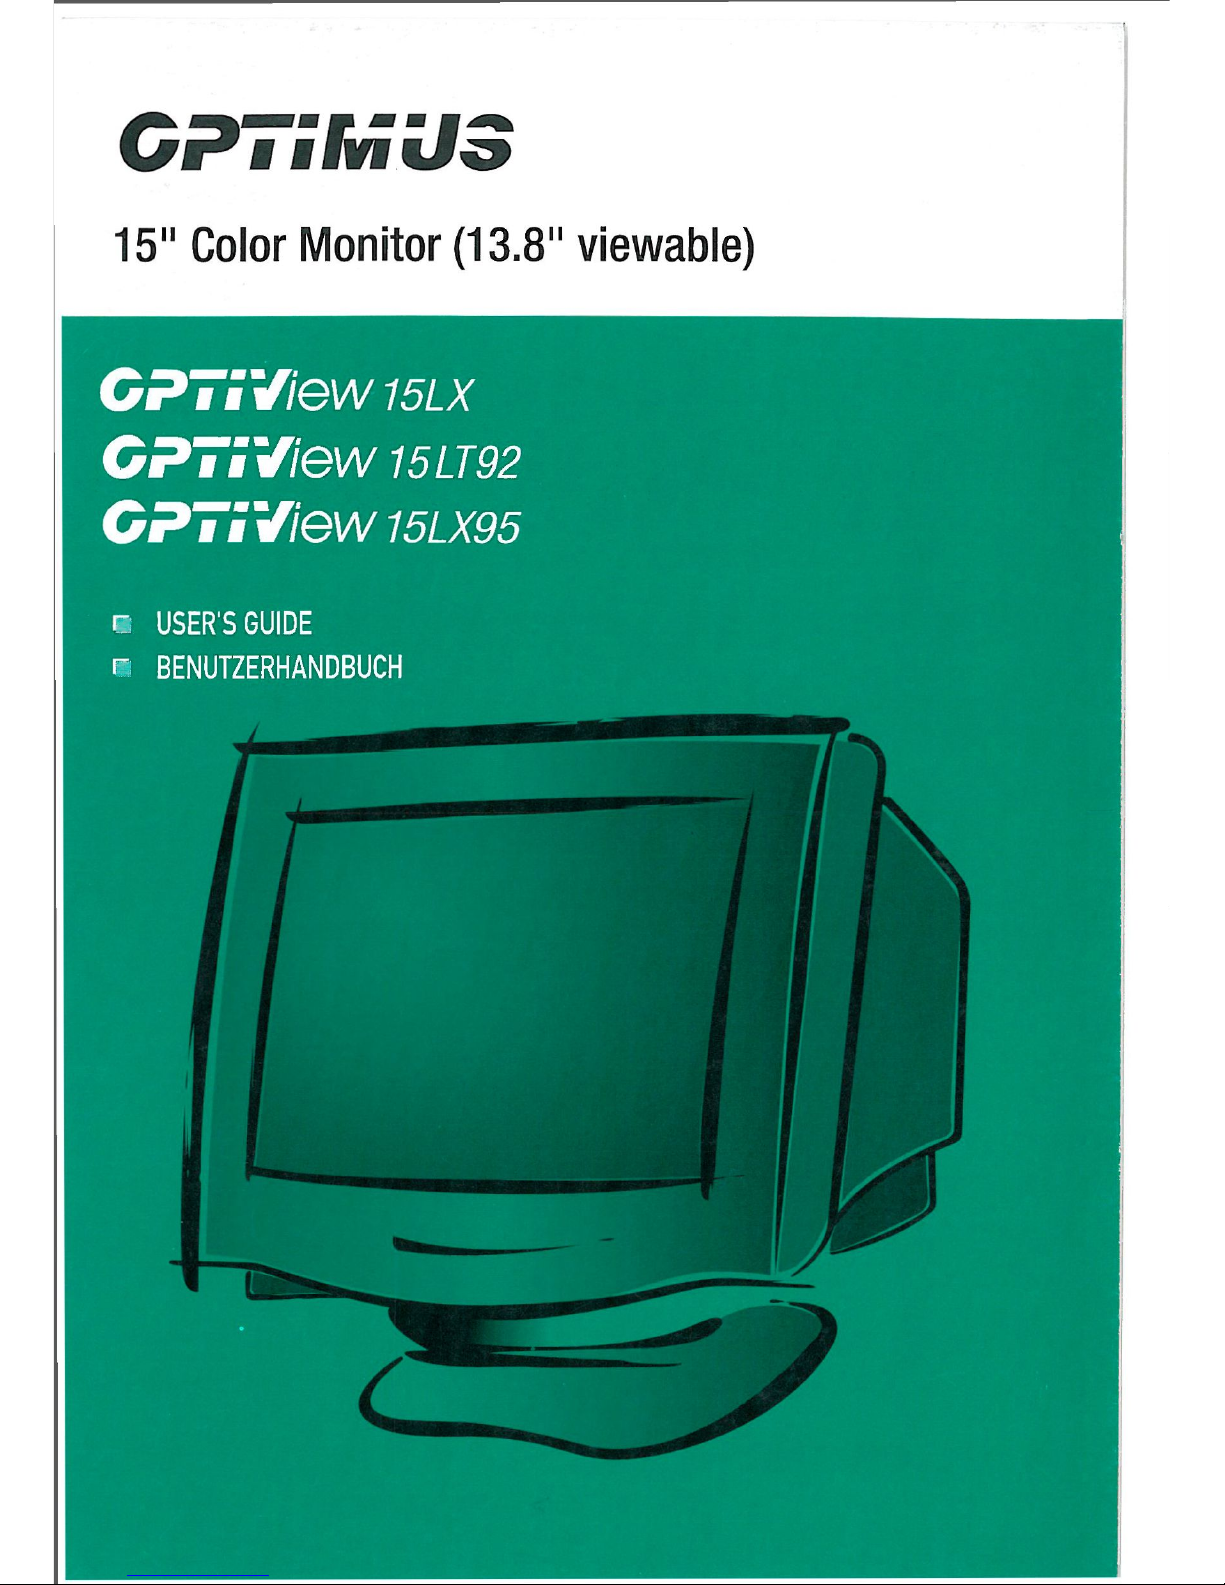
CPTSMU3
15" Color Monitor (13.8м viewable)
CPTSView
15LX
CPTSView 15LT92
CPTSView 15LX95
с USER'S GUIDE
* BENUTZERHANDBUCH
Page 2
U.S.A.
U.S.FEDERAL COMMUNICATIONS COMMISSION
RADIO FREQUENCY INTERFERENCE STATEMENT
INFORMATION TO THE USER
NOTE : This equipment has been tested and found to comply with the limits for a
Class В digital device pursuant to Part 15 of the FCC Rules.
These limits are designed to provide reasonable protection against harmful
interference in a residential installation.
This equipment generates, uses, and can radiate radio frequency energy and, if
not installed and used in accordance with the instructions, may cause harmful
interference to radio communications.
However, there is no guarantee that interference will not occur in a particular
installation.
If this equipment does cause harmful interference to radio or television reception,
which can be determined by turning the equipment off and on, the user is
encouraged to try to correct the interference by one or more of the following
measures:
• Reorient or relocate the receiving antenna.
• Increase the separation between the equipment and receiver.
• Connect the equipment into an outlet of a circuit different from that to which
the receiver is connected.
• Consult the dealer or an experienced radio/TV technician for assistance.
Changes or modification not expressly approved by the party responsible for
compliance could void the user's authority to operate the equipment.
Connecting of peripherals requires the use of grounded shielded signal cables.
Page 3
Standards and Recommendations
Safety and Radio Interference Approvals
This product is designed in conformity with the following standards or other
normative documents:
Safety : EN60950 / 1992+A1, A2, A3
EMC : EN55022 / 1994, EN 50082-1 / 1992
IEC 801-2 / 1991, IEC 801-3 / 1984, IEC 801-4 / 1988
to satisfy the basic requirements of Safety and EMC required by following
Directives:
• EMC Directive 89/336/EEC
• Low Voltage Directive 73/23/EEC & 93/68/EEC
Conformity with the above basic requirements is certified by means of the
CE marking on the product.
Manufacturer's Disclaimer
All responsibility is declined :
• If the product is stored, transported, installed, modified, or used in a way that
is different from that described in the documentation.
• If the product is used in conditions different from those described in the
documentation.
h If any repair is carried out by unauthorised personnel.
• For any damage caused by normal wear and tear, uncontrollable events
and/or connection to devices that are not original.
The manufacturer reserves the right to carry out modifications to the product
described in this documentation at any time and without notice.
Page 4
CPTSView
15LX
CPTSView 15LT92
CPTSView 15LX95
USER'S lilii
Page 5
Table of Contents
Introduction 1
Conventions Used in This Guide 1
General Features 1
Instructions for Use 1
Ergonomie Positioning of the Monitor 2
Illumination 2
Posture 2
Cleaning and Maintenance 3
Packing List 3
Assembly and Removal of the Tilt-and-Swivel Support 4
Fixing 4
Removing 4
Monitor Installation 5
Video Memory Modes 6
User setting area 6
Factory presetting area 6
Automatic save 6
DDC (Display Data Channel) 7
On screen controls and LED indicator 7
External controls 10
Main Menu 10
Power Management 16
Signal Cable Connection 16
Technical Specifications 16
Problems and Solutions 17
Autodiagnostics and Frequency Detection 17
Page 6
CPTSMU3
Introduction
This manual describes the most suitable procedures for installing and setting up the
monitor. It also indicates the main technical specifications and operating features.
Read this guide carefully before installing and using the monitor, in order to avoid
problems.
Conventions Used in This Guide
Associated with particularly important information, or information that is
useful under some circumstances.
Marks the start of a series of instructions to carry out in order to complete an
operation.
General Features
• 15" (13.8" max. viewable area) colour, multifrequency, digital-controlled
monitor.
• Anti-glare and anti-static screen.
• Low electromagnetic emission, in compliance with the MPRII & TCO 92/95
recommendations.
• Removable tilt-and-swivel support which enables you to position the monitor
according to your own needs.
• OSD (on-screen display) for regulating contrast, brightness, etc., via controls
on the front of the monitor.
• Possibility of restoring the factory settings, power button and LED indicator.
• 22 memory locations (refer to the video mode table further on in the text).
• +/- synchronizing polarities, in any combination.
• Controlled power consumption.
a DDC Feature (Plug and Play).
• Universal 100-240 V AC power supply.
Instructions for Use
This section provides a list of the precautions to be adopted and some tips to be
followed when installing or using the monitor, to avoid electrical shocks and
operating problems.
• The soft power key does not disconnect the monitor from the mains power.
In order to disconnect from the mains power, unplug the power cord from the
connector on the rear of the monitor.
• The power outlet must be located near the monitor and should be easily
accessible.
• Never open the monitor cabinet. This is dangerous due to presence of high
voltages. Any adjustment that-involves opening the monitor must be carried
out by specialized technical staff.
Page 7
User's Guide
• Make sure that the monitor is connected to a mains voltage with the
characteristics indicated in the technical specifications section.
в Avoid overloaded electrical sockets, power cable extensions, split plugs and
worn cables, as they could be dangerous.
• Do not place heavy objects on the power cable: this could damage the cable or
cause electrical shocks.
a Do not install the monitor in damp, dusty or dirty environments, near heat
sources, in direct sunlight or where light from other sources shines on to the
screen. The latter precaution will reduce eye strain.
• Never expose the monitor to rain or spill anything on it: if liquid penetrates,
serious damage could be caused to the electrical circuits.
• The monitor ventilation inlets are designed so that the heat generated during
use can easily be dispersed; it is therefore of fundamental importance that
these inlets remain free. Ensure that the installation area is surrounded by
sufficient ventilation space.
• Before moving the monitor, check that the video signal cable and the power
cable are disconnected from the computer and from the power supply
respectively.
Ergonomie Positioning of the Monitor
The monitor does not damage health, but should always be used correctly.
Therefore it is advisable to adhere to the following guidelines. Position the monitor at
least 50 cm from the eyes, an operation that also allows the keyboard to be
positioned correctly, that is at least 15 cm from the edge of the table. Locate it in
front of you, avoiding unnecessary and damaging rotation of the body and head.
Only locate the monitor to one side when it is necessary to concentrate on the
document rather than on the text displayed. To avoid unsuitable positions, do not
place the monitor on the basic unit, but place it directly on the table.
Illumination
The computer images displayed must be easy to read, without reflections from
artificial light sources or windows. For this purpose, position the monitor
perpendicularly to a window to avoid working against the light source. Adjust the
contrast and brightness according to environmental light conditions. A number of
adjustments could be required during daylight hours. Do not stare at the screen for
too long; every so often glance away and focus on another object in the room.
Posture
Hold your back straight, leaning the lower back against a backrest. Adjust the chair
height so that your feet rest comfortably on the floor without having to bend your
thighs. Do not maintain the same position for too long: get up at least once an hour.
Page 8

©P i i MUS
Cleaning and Maintenance
The monitor must be switched off and the power supply cable disconnected during
all cleaning operations.
• Use a damp cloth for cleaning the monitor.
• Do not touch the screen with your fingers, as the natural oils from your body
leave smears on the screen and tend to attract dust.
• Do not use petrol, alcohol, solvents or abrasives for cleaning the monitor.
These substances could corrode the external parts.
Page 9

User's Guide
Assembly and Removal of the Tilt-and-Swivel Support
Fixing
This product consists of the display monitor and the tilt and swivel. When fixing the
tilt and swivel to the display monitor, please follow the steps below.
1. Push the four hooks of the tilt and swivel into the four holes at the bottom of
the display monitor.
2. Then slide the tilt and swivel forward.
3. Then the latch is going to come above the tilt and swivel base, and it is fixed
firmly.
Removing
Please remove the tilt and swivel when transporting for repairing.
1. Push down the latch of the display monitor and pull out the tilt and swivel.
2. Slide backward the tilt and swivel from the front of the display monitor.
3. Pull out the tilt and swivel from the holes of the display monitor.
Page 10

GPTSMU3
Monitor Installation
Check that the computer is switched off before installing the monitor. The monitor is
equipped with a cable for connection to the computer. The cable for connection to
the power supply is provided with the computer. Follow the procedure described
below to make the monitor operational:
Connect the video signal cable (15-pin connector) to the
connector on the video board inside the computer, usually
located on the rear panel of the computer.
Connect the power supply cable to the monitor and then to
the power supply.
After powering on the computer, wait for 30 seconds, then adjust the display using
the various controls provided (see later). For further information on the installation
procedure, refer to the operating guide of the computer being used.
Page 11

User's Guide
Video Memory Modes
The monitor can recognise, and therefore automatically set itself to, one of the video
modes indicated in the following table. It is also possible to display any other video
mode with scanning frequencies within the following ranges:
a 30-70 KHz horizontal frequency
• 50-150 Hz vertical frequency
The system can recognize a total of 22 video modes. Of these 12 are supplied already
preset by the factory as shown in the table. Other modes can be added as they are
detected by the video card.
Mode
Horizontal
Resolution
Vertical
Resolution
Horizontal
Frequency
(KHz)
Vertical
Frequency
(Hz)
Interlaced
Mode
(Yes/No)
Synch.
Polarity.
V/H(+/-)
1
720
400
31.46
70.08 No +/-
2
640 480 31.46
59.95
No
-/-
3 640
480 43.26
85.00
No
-/-
4 640
480 50.60 100.10 No
-/-
5 640
480 63.65
120.11
No -/-
6
800
600 46.87 75.00 No +/+
"7
/ 800
600 53.67 85.06 No +/+
8
800 600
63.92 100.03 No +/+
9
1024 768
60.02 75.02
No +/+
10
1024 768
68.67
84.99 No
+/+
11
1152 864 67.50 75.00 No +/+
12 1280
1024 63.98
60.02
No
+/+
User setting area
The user can add nonstandard modes. If you adjust display image, the image is
saved automatically. Then the microcontroller always detects and displays the last
mode stored in the user setting area when the monitor is turned on.
The user setting area maintains the last 10 display modes set by the user in its
memory. When the user setting area is full (10 modes are registered), if new
nonstandard timing is registered, the oldest timing settings will be deleted.
Factory presetting area
There are 12 display modes stored in this area. These display modes are already
preset by the factory and include most of the display modes currently available.
You can also retrieve the factory preset mode by selecting the RECALL menu.
Automatic save
The monitor automatically saves the new setting after 1 second of inactivity.
Page 12

CPTSMU3
DDC (Display Data Channel)
This monitor includes the DDC feature, according to VESA standards. DDC is a
communication channel through which the monitor automatically informs the host
system of its characteristics (for example each supported resolution with its
corresponding timing). DDC uses a formerly unconnected signal pin in the 15-pin
VGA connector. The system will only be "Plug and Play" if both monitor and
computer include the DDC feature.
On screen controls and LED indicator
Menu/Select Key Adjust Dial
Page 13

User's Guide
Monitor control panel
The monitor's control panel consists of the Soft power key, Power LED, Function dial
(Adjust dial), Menu/select key, recall key, zoom key.
Soft power key
The soft power key is used to put the monitor into power down mode.
To enter power down mode, press the soft power key.
To return the monitor to normal operation, press the soft power key one more time.
Adjust dial
Adjust dial is used to select a OSD control from the OSD main menu and to adjust
selected function.
When the OSD menu is off, you can adjust contrast by rotating the adjust dial.
To increase the screen's contrast, rotate the dial clockwise; rotate
counterclockwise to decrease.
Recall key
1) The Recall key is used to exit OSD menu
When the OSD menu is displayed, if you press the recall key one time, OSD menu
is disappeared.
2) In a factory preset mode, the RECALL will reset the image size, position and
geometry settings to the factory presetting. In a user setting mode, this control
has no effect for the image size, position and geometry setting. But the contrast
will be reset to maximum luminance and brightness to cut-off level by selecting
this control in any modes.
Zoom key
The zoom key is used to increase or decrease H/V size simultaneously.
Power LED
When the main power switch on the rear panel (OPTION) and the soft power key on
the front panel are switched on, this LED lights in green.
• Normal mode : Power LED is lit green
• DPMS mode : This LED indicates different status when this unit operates in
different power saving modes.
• Soft power down: Power LED is not lit.
Main menu / select key
This key is used to bring Main menu and to select the function. Press the
menu/select key to access the main menu.
The resolution and frequency are displayed at the top of the menu box. When
nonstandard signal is detected, «USER MODE» message and the frequency is
displayed.
Page 14

©Рв !MU3
Select the menu which you wish to adjust by rotating the menu/select key to the
clockwise or counterclockwise.
Press the menu/select key and you can adjust selected function.
Exit main menu -
Press recall key one time.
Auto exit
The OSD images are disappeared automatically according to the setting time of
OSD display time (5,8,12,20,30 sec)
Auto save
This monitor automatically saves the new setting after 1 second.
Out of range
When an unsuitable signal is detected, the OSD images, OUT OF RANGE, is
displayed.
Check your system or setup video mode again.
Self Test Mode
The monitor has an enhanced level of self-diagnostics.
When the signal cable is removed or signal isn't detected, the monitor is operated to
OFF Mode. If the menu/select key is pushed on OFF Mode, the system has the
ability to generate on demand an RGB test pattern and the following OSD image is
displayed on screen.
NO SIGNAL
• SELF TEST MODE
• SELF TEST MODE
Page 15

User's Guide
External controls
Main Menu
Brightness / Contrast
SCREEN ADJUST
Ф BRIGHTNESS MAX
ф CONTRAST MAX
® lllllllllllllllllllllllllllll Ф
2.
4.
Press the menu/select key, and the OSD main menu
is displayed.
Place the cursor to the BRIGHTNESS/CONTRAST
menu by rotating the adjust dial.
Press the menu/select key, and the
BRIGHTNESS/CONTRAST menu is displayed.
You can select BRIGHTNESS or CONTRAST menu
by pressing the menu/select key. The selected
function is shown as the blinking letter.
You can adjust BRIGHTNESS or CONTRAST by
rotating the adjust dial.
10
Page 16

6. То go back to the OSD main menu, rotate the adjust dial after selecting
RETURN.
7. If you press the RECALL key only one time, the OSD menu is disappeared.
If you rotate the adjust dial in normal operation (OSD menu off), contrast menu
is displayed and you can adjust contrast by rotating the adjust dial.
H/V-Position
6.
7.
Press the menu/select key, and the OSD main menu
is displayed.
Place the cursor to the H/V-POSITION menu by
rotating the adjust dial.
Press the menu/select key, and the H/V-POSITION
menu id displayed.
You can select H-POSITION or V-POSITION by
pressing the menu/select key. The selected function
is colored red.
You can adjust H-POSITION or V-POSITION by
rotating the adjust dial.
To go back to the OSD main menu, rotate the adjust dial after selecting RETURN.
If you press the RECALL key only one time, the OSD menu is disappeared.
SCREEN ADJUST I
a
ш m
s
Ш H-POSITION 43
Q V-POSITION 53
RETURN
1.
2.
3.
4.
5.
H/V-Size
6.
7.
1. Press the menu/select key, and the OSD main menu
is displayed.
2. Place the cursor to the H/V-SIZE menu by rotating
the adjust dial.
3. Press the menu/select key, and the H/V-SIZE menu
is displayed.
4. You can select H-SIZE or V-SIZE by pressing the
menu/select key. The selected function is colored
red.
5. You can adjust H-SIZE or V-SIZE by rotating the
adjust dial.
To go back to the OSD main menu, rotate the adjust dial after selecting RETURN.
If you press the RECALL key only one time, the OSD menu is disappeared.
| SCREEN ADJUST I
Ш
m
в
ш
В H-SIZE
49
Ш V-SIZE
51
RETURN
Pincushion/Trapezoid
SCREEN ADJUST j
О
О О
о
Д PINCUSHION 44
О TRAPEZOID 46
RETURN
1. Press the menu/select key, and the OSD main menu
is displayed.
2. Place the cursor to the PINCUSHION/TRAPEZOID
menu by rotating the adjust dial.
3. Press the menu/select key, and the
PINCUSHION/TRAPEZOID menu is displayed.
4. You can select PINCUSHION or TRAPEZOID by
pressing the menu/select key. The selected function
is colored red.
5. You can adjust PINCUSHION or TRAPEZOID by
rotating the adjust dial.
11
Page 17

User's Guide
6. To go back to the OSD main menu, rotate the adjust
dial after selecting RETURN.
7. If you press the RECALL key only one time, the OSD menu is disappeared.
Press the menu/select key, and the OSD main menu
is displayed.
Place the cursor to the PARALLEL/PIN BALANCE
menu by rotating the adjust dial.
Press the menu/select key, and the
PARALLEL/PIN BALANCE menu is displayed.
You can select PARALLEL or PIN BALANCE by
pressing the menu/select key. The selected function
is colored red.
You can adjust PARALLEL or PIN BALANCE by
rotating the adjust dial.
- J 6. To go back to tne UbJJ mam menu, rotate the adjust dial after selecting
• RETURN.
7. If you press the RECALL key only one time, the OSD menu is disappeared.
Press the menu/select key, and the OSD main menu
is displayed.
Place the cursor to the CORNER PIN/ROTATION
menu by rotating the adjust dial.
Press the menu/select key, and the CORNER
PIN/ROTATION menu is displayed.
You can select CORNER PIN or ROTATION by
pressing the menu/select key. The selected function
is colored red.
You can adjust CORNER PIN or ROTATION by
rotating the adjust dial.
6. To go back to the OSD main menu, rotate the adjust dial after selecting RETURN.
7. If you press the RECALL key only one time, the OSD menu is disappeared.
1. Press the menu / select key, and the OSD main
menu is displayed.
2. Place the cursor to the H/V-MOIRE menu by
rotating the adjust dial.
3. Press the menu/select key, and the H/V-MOIRE
menu is displayed.
4. Place the cursor to ON by rotating the menu/select
key.
If you don't use this H/V-MOIRE function.
Comer Pm/Rotation
SCREEN ADJUST
i.
2.
О
О О]
О
i
•
О.
О CORNER PIN 90
4.
RH ROTATION 56
RETURN
5.
H/V-Moire
MOIRE CONTROL ]
Ш
H - MOIRE
OFF
MIN
V - MOIRE
MIN
U GO LEFT
RETURN
2
Page 18

a. Place the cursor to OFF by rotating the adjust dial.
b. Press the menu/select key
c. Place the cursor to RETURN by rotating the adjust dial.
d. Press the menu/select key to return to the OSD main menu.
e. If you press the RECALL key, the OSD menu is disappeared.
5. Press the menu/select key, and you can adjust the H-MOIRE by rotating the
adjust dial.
6. Press the menu/select key, and you can adjust the V-MOIRE by rotating the
adjust dial.
7. Press the menu/select key, and the cursor move to GO LEFT.
If you rotate the adjust dial, the cursor move to left menu (ON/OFF).
8. Press the menu/select key, and the cursor move to RETURN.
9. Rotate the adjust dial to return to the OSD main menu.
10. If you press the RECALL key only one time, the OSD menu is disappeared.
Don't use this moire function too exceedingly, (if you use this moire function
exceedingly, the figure will be shaken).
Degauss
1. Press the menu/select key, and the OSD main menu is displayed.
2. Place the cursor to the DEGAUSS menu by rotating the adjust dial.
3. Press the menu/select key to eliminate purity distortion or residual magnetism
(the OSD menu is disappeared).
Press the menu/select key, and the OSD main menu
is displayed.
Place the cursor the COLOR CONTROL menu by
rotating the adjust dial.
Press the menu/select key, and the COLOR
CONTROL menu is displayed.
Place the cursor to the color temperature which you
want (9300K, 6500K, USER) by rotating the adjust
dial.
Press the menu/select key, and the color
temperature is selected.
At the USER menu you can adjust red and blue color by rotating the adjust dial.
a. Place the cursor to USER by rotating the adjust dial.
b. Press the menu/select key, and you can adjust red color by rotating
the adjust dial.
c. Press the menu/select key, and you can adjust blue color by rotating
the adjust dial.
d. Press the menu/select key, and the cursor move to GO LEFT.
Color Control
I COLOR CONTROL
RED
930C
lllllllllllllllll
66
6500
GREEN
lllllllllllllilllllllllllll!
FIX
U?EH
BLUE
lllllllllllllllll
DGO LEFT
67
RETURN
Page 19

User's Guide
6.
7.
If you rotate the adjust dial, the cursor move to left menu
(9300K, 6500K, USER)
a. Press the menu/select key, and the cursor move to RETURN
b. Rotate the adjust dial to return to the OSD main menu.
Place the cursor to RETURN by rotating the adjust dial.
Press the menu/select key to return to the OSD main menu.
If you press the RECALL key only one time, the OSD menu is disappeared.
Mode Information
PRESET MODE
1. Press the menu/select key, and the OSD main menu
is displayed.
2. Place the cursor to the MODE INFORMATION
menu by rotating the adjust dial.
3. Press the menu/select key, and you can see the 12
factory preset modes and 10 user modes by rotating
the adjust dial. The using mode is colored magenta.
4. Press the menu/select key to return to the OSD
main menu.
5. If you press the RECALL key only one time, the OSD menu is disappeared.
Language
LANGUAGE
1.
6.
Press the menu/select key, and the OSD main menu
is displayed.
Place the cursor to the LANGUAGE menu by
rotating the adjust dial.
Press the menu/select key, and the LANGUAGE
menu is displayed.
Place the cursor to the language which you want by
rotating the adjust dial.
Press the menu/select key, and OSD main menu is
changed to the selected language. The selected language is colored magenta.
If you pres the RECALL key only one time, the OSD menu is disappeared.
2.
3.
4.
5.
OSD Display Time
Press the menu/select key, and the OSD main menu
is displayed.
Place the cursor to the OSD DISPLAY TIME menu
by rotating the adjust dial.
Press the menu/select key, and the OSD DISPLAY
TIME menu is displayed.
Place the cursor to the OSD display time which you
want by rotating the adjust dial. The selected time is
colored magenta.
5. Press the menu/select key, and the OSD main menu is displayed.
6. If you press the RECALL key only one time, the OSD menu is disappeared.
OSD DISPLAY TIME
1.
£
EE С
2.
8 SEC
12 SEC
3. 3.
20 SEC
30 SEC
4.
Page 20

&P ш BSvbqJ3
Press the menu/select key, and the OSD main menu
is displayed.
Place the cursor to the OSD ADJUST menu by
rotating the adjust dial.
Press the menu/select key, and the OSD ADJUST
menu is displayed.
Place the cursor to the OSD ADJUST menu which
you want to adjust by pressing the menu/select key.
The selected function is colored magenta.
You can adjust this selected menu by rotating the
adjust dial.
6. Place the cursor to RETURN by pressing the menu/select key.
7. Rotate the adjust dial to return to the OSD main menu.
8. If you press the RECALL key only one time, the OSD menu is disappeared.
1. Press the menu/select key, and the OSD main menu
is displayed.
2. Place the cursor to the DPMS SELECT menu by
rotating the adjust dial.
3. Press the menu / select key, and the DPMS SELECT
menu is displayed (VESA, NUTEK).
4. Place the cursor to the VESA or NUTEK by rotating
the adjust dial. The selected function is colored
magenta.
5. Press the menu/select key, and you can return to the OSD main menu.
6. If you press the RECALL key only one time, the OSD menu is disappeared.
Press the ZOOM key, and the ZOOM menu
is displayed.
Rotate the adjust dial to the clockwise, and
the display size becomes large.
Rotate the adjust dial to the
counterclockwise, and the display size
becomes small.
4. Press the zoom key one more time, and the ZOOM menu is disappeared.
OSD Adjust
\ OSD ADJUST I
llllllllllllllilh 44
N
OSD V-DELAY
11 33
OSD HEIGHT
MIN
RETURN
DPMS Select
Page 21

User's Guide
Power Management
This monitor complies with the EPA and NUTEK standards. The power saving is
only effective if connected to a personal computer that supplies signals in accordance
with the DPMS (Display Power Management Signalling) VESA standard. The
monitor provides the following functions:
States
Signal
Power
Consumption
Recovery
Time
LED
Indicator
States
H.S
V.S Video
Power
Consumption
Recovery
Time
LED
Indicator
ON Pulses
Pulses Active 75W
-
Green
Stand-
by
No
Pulses
Pulses Blank
60W
Within 1sec
Alternating
Green (1sec)/
Orange (1sec)
Selectable on
OSD menu
Stand-
by
No
Pulses
Pulses Blank
15W Within 3sec
Alternating
Green (1sec)/
Orange (1sec)
Selectable on
OSD menu
Suspend Pulses No Pulses
Blank
Less than 15W Within 3sec
Alternating
Green (0.5sec)/
Orange (0.5sec)
OFF No Pulses No Pulses
Blank
Less than 5W Within 15sec Orange
Signal Cable Connection
1. Red
О
©ООО©
ЭОООй
©ООО'
о
2. Green
3. Blue
4. Logical
ground
5
6. Red ground
7. Green ground
8. Blue ground
9. N.C. without
contact
Technical Specifications
DDC return 10. Logical
ground
11. Logical ground
12. SDA
13. Horizontal sync.
14. Vertical sync.
(VCLK)
15. SCL
Cathode tube
15 inches (13.8" viewable area)
Space between triads 0.28 mm
Resolution
Maximum resolution 1280x1024 non interlaced
Input signals
Analog RGB 0.7V p.p. 75 Ohm
Horizontal sync. Frequency: from 30 to 70 KHz
Vertical sync. Frequency from 50 to 150 Hz
Video bandwidth
95MHz(-3dB)
Video mode recognition Automatic
Signal connector
15-pin D SUB
Operating temperature 0° С - 40° С
External controls
Zoom, Recall, Menu / Select, Adjust dial, Power Led and switch.
Access to the On Screen Display (OSD).
16
Page 22

Power management
According to VESA DPMS protocol.
In accordance with NUTEK A and EPA\
Radio frequency disturbance
FCC Class В, CE
Safety Approved by UL, CSA, DHHS, N, D, FI, S, CE, PCBC.
Ergonomics
TUV-GS, IS0-9241-3
Ergonomics
Optiview 15LX
MPR II
Ergonomics
Optiview 15LT92
TC0 92
Ergonomics
Optiview 15LX95 TCO 95
Power supply unit
100-240 V AC 50/60 Hz (universal)
Typical absorption 75W
Size (H/W/D) mm 386x375x401
Weight
12 Kg
• Specification is subject to change without notice for performance improvement.
Problems and Solutions
Before calling technical servicing, it is advisable to check the following:
Problem
Action
The power supply LED is off.
Check the power supply connection and the
computer cable connection.
Set the power supply button to ON position.
There is no image but the power supply
LED is on.
The power management system is enabled.
Press any key and move the mouse.
Check the signals cable connection.
Adjust the brightness and contrast control.
The image is not centered.
Adjust the image position/size control.
The image is blurred or illegible.
Try setting a different video mode, using the video
controller software.
The image is disturbed by distorted
lines, flickering or rolling.
Remove all electromagnetic equipment, such
as fans and electric motors, away from the
monitor, or move the monitor.
Autodiagnostics and Frequency Detection
This monitor is capable of identifying the absence of an input signal and displays an
OSD Autodiagnostics message indicating its nature. Furthermore it is capably of
advising of the presence of a signal with frequency characteristics that exceed its limit.
In these situations a message is displayed showing the horizontal and vertical
frequencies (the wrong value blinks).
 Loading...