

Page 1

User Maintenance
Cleaning the scan window is the only maintenance
that is required.
♦ Do not allow any abrasive material to touch
the window.
♦ Remove any dirt particles with a damp
cloth.
♦ Clean the scan window using a soft cloth or
a cotton tipped swab moistened with water.
♦ Do not remove the nose of the scanner.
FCC Information
This equipment has been tested and is found to
comply with the limits for a Class A digital device,
pursuant to Part 15 of the FCC Rules. These limits
are designed to provide reasonable protection
against harmful interference when the equipment is
operated in a commercial environment. This
equipment generates, uses, and can radiate RF
energy and, if not installed and used in accordance
with the instruction manual, may cause harmful
interference to radio communication. Operation of
this equipment in a residential area is likely to cause
harmful interference, in which case the user will be
required to correct the interference at their own
expense.
Changes or modifications not expressly approved by
the party responsible for compliance could void the
users authority to operate this equipment.
Warranty
This scanner is guaranteed for a period of five (5)
years from date of shipment from Opticon, including
all defects in material and workmanship for the first
year and electronics only thereafter. Opticon will, at
its option, repair or replace products that prove to
be defective in material or workmanship under
proper use within the warranty period. Opticon will
consider any product out-of-warranty if the unit has
been subjected to misuse, accident or incorrect
installation. No other warranties are expressed or
implied, including but not limited to the implied
warranties of merchantability and fitness for a
particular purpose. Opticon is not liable for consequential damages.
If the scanner must be returned, please contact
Opticon to obtain an RMA (Return Merchandise
Authorization) number prior to returning the
product. The Customer Service Dept. may be
reached at 800-636-0090.
NOTE: Returned merchandise will NOT be accepted
without a RMA number indicated clearly on the
outside of the carton.
Technical Support
Opticons experienced technical staff are available
during regular business hours to answer questions
and assist you in every way possible in support of
our products, at (800) 636-0090.
When calling Opticon Technical Support, please
have the unit model number and several bar code
labels readily at hand. The model number is located
near the connector end of the cable.
8 Olympic Drive
Orangeburg, NY 10962
Tel 845.365.0090
Fax 845.365.1251
Quick Start
Guide
Handheld CCD Scanner
with USB Interface
25-USBQSTART-01
8 Olympic Drive
Orangeburg, NY 10962
Tel 845.365.0090
Fax 845.365.1251
www.opticonUSA.com
Page 2
Set Up
Unpacking
Remove the scanner from its packaging and inspect
it for damage. If the scanner was damaged in
transit, call the Opticon Customer Service Dept. at
800-636-0090.
Quick Start Procedure
Your new LGP scanner is easy to use and can be
installed and operative in a few minutes. Heres
how to set it up:
Plug the scanner into a USB port on the back of a
PC. There is no need to turn off or refresh power to
the PC. If more than one USB port is present, the
scanner can be plugged into any USB port.
On a PC running Windows 98 or higher, once the
scanner has been plugged in, the PC will recognize
that new hardware has been added and a dialog
box entitled Add New Hardware Wizard will
appear to guide you through installation. Click
Next.
At the prompt, What do you want Windows to
do?, select Search for best driver, then click
Next.
At the prompt, Windows will search its driver
database on your hard drive, click Next.
At the prompt, Windows located a USB Human
Interface Device, click Next.
At the prompt indicating that Windows has installed
a specific driver, click Finish.
Your scanner is now ready to scan bar codes! Try
scanning the bar code below:
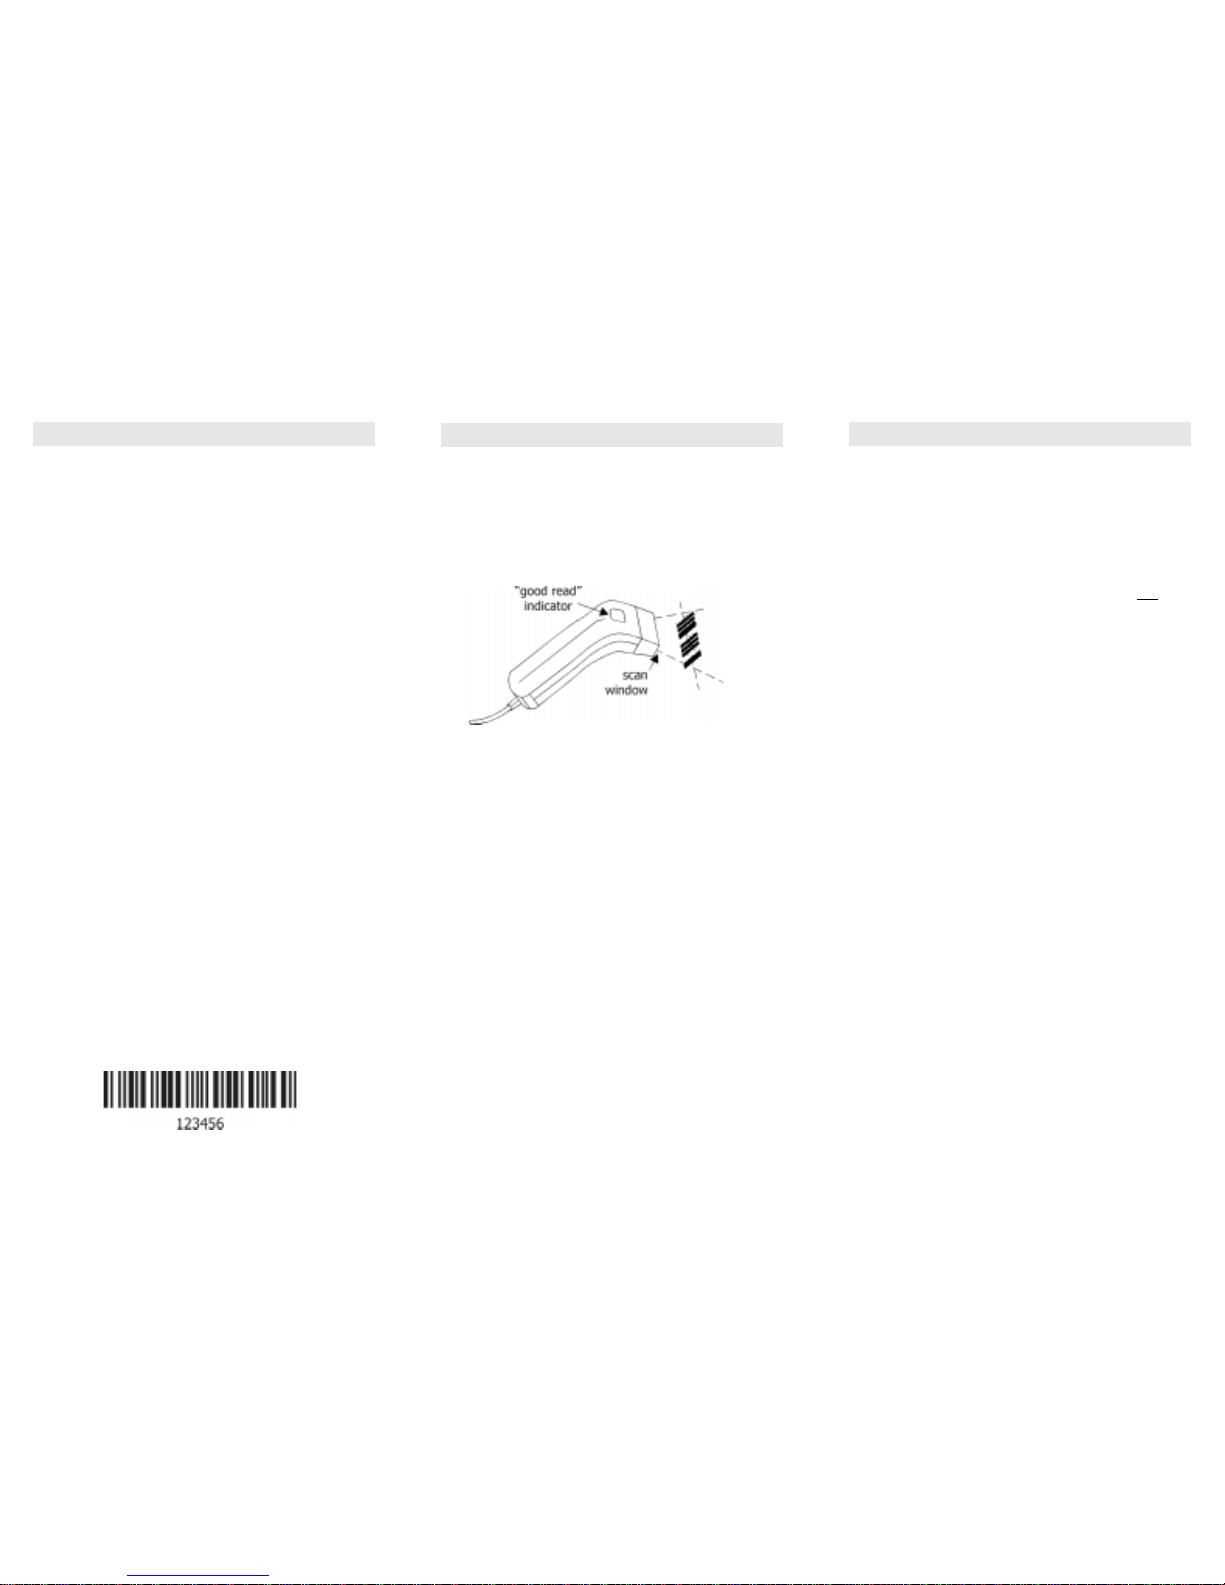
Scanning
If the scanner has a switch, depress button on
underside to turn the scanner on. Red LED illumination will emit from the scan window. If the scanner
does not have a trigger switch, then the LEDs will
automatically remain on as long as the computer
system is on.
NOTE: A CCD scanner will not read any bar code
label which is wider than the scan window.
Approach, point or touch the bar code label with the
scan window of the CCD scanner.
♦ Scan within a distance of 0 to 2" from the
bar code label.
♦ Center the CCD scan window on bar code
label for fastest read.
♦ The scanner will beep to indicate an
audible good read (if beeper has not been
turned off by a menu option).
♦ A green LED indicator will visually signal a
good read.
Troubleshooting
A. If LEDs do not light up when installation
instructions are followed:
♦ Make sure there is power to the scanner.
♦ Recycle computer power.
♦ Verify computer fuses are ok.
♦ Check for loose cable connections.
B. If LEDs light up, but good read beep is
not
heard and no data appears on the computer:
♦ Make sure the distance between the
scanner and bar code label is not greater
than the specified depth-of-field when
trying to read it.
♦ Verify the bar code label is readable and
meets bar code specification.
♦ Check to see if the scanner reads other bar
code labels (if yes, the non-reading label
may be a label which the scanner is not
programmed to decode.)
♦ Verify that the bar code label is not wider
than the CCD scan window.
C. If LEDs light up, good read beep is heard but
no data appears on the computer:
♦ Verify that the application software running
on the computer is setup to receive
keyboard data.
♦ Make sure the communication parameters
on both the scanner and the computer are
identical (i.e. baud rate, data bits, parity
and stop bits).
♦ Try scanning the data into a different
Windows application, such as Notepad.
NOTE: If after performing these checks, the
scanner is still not functioning, contact your distributor or call Opticon Technical Support at 800636-0090
 Loading...