

Page 1
December 13, 2016
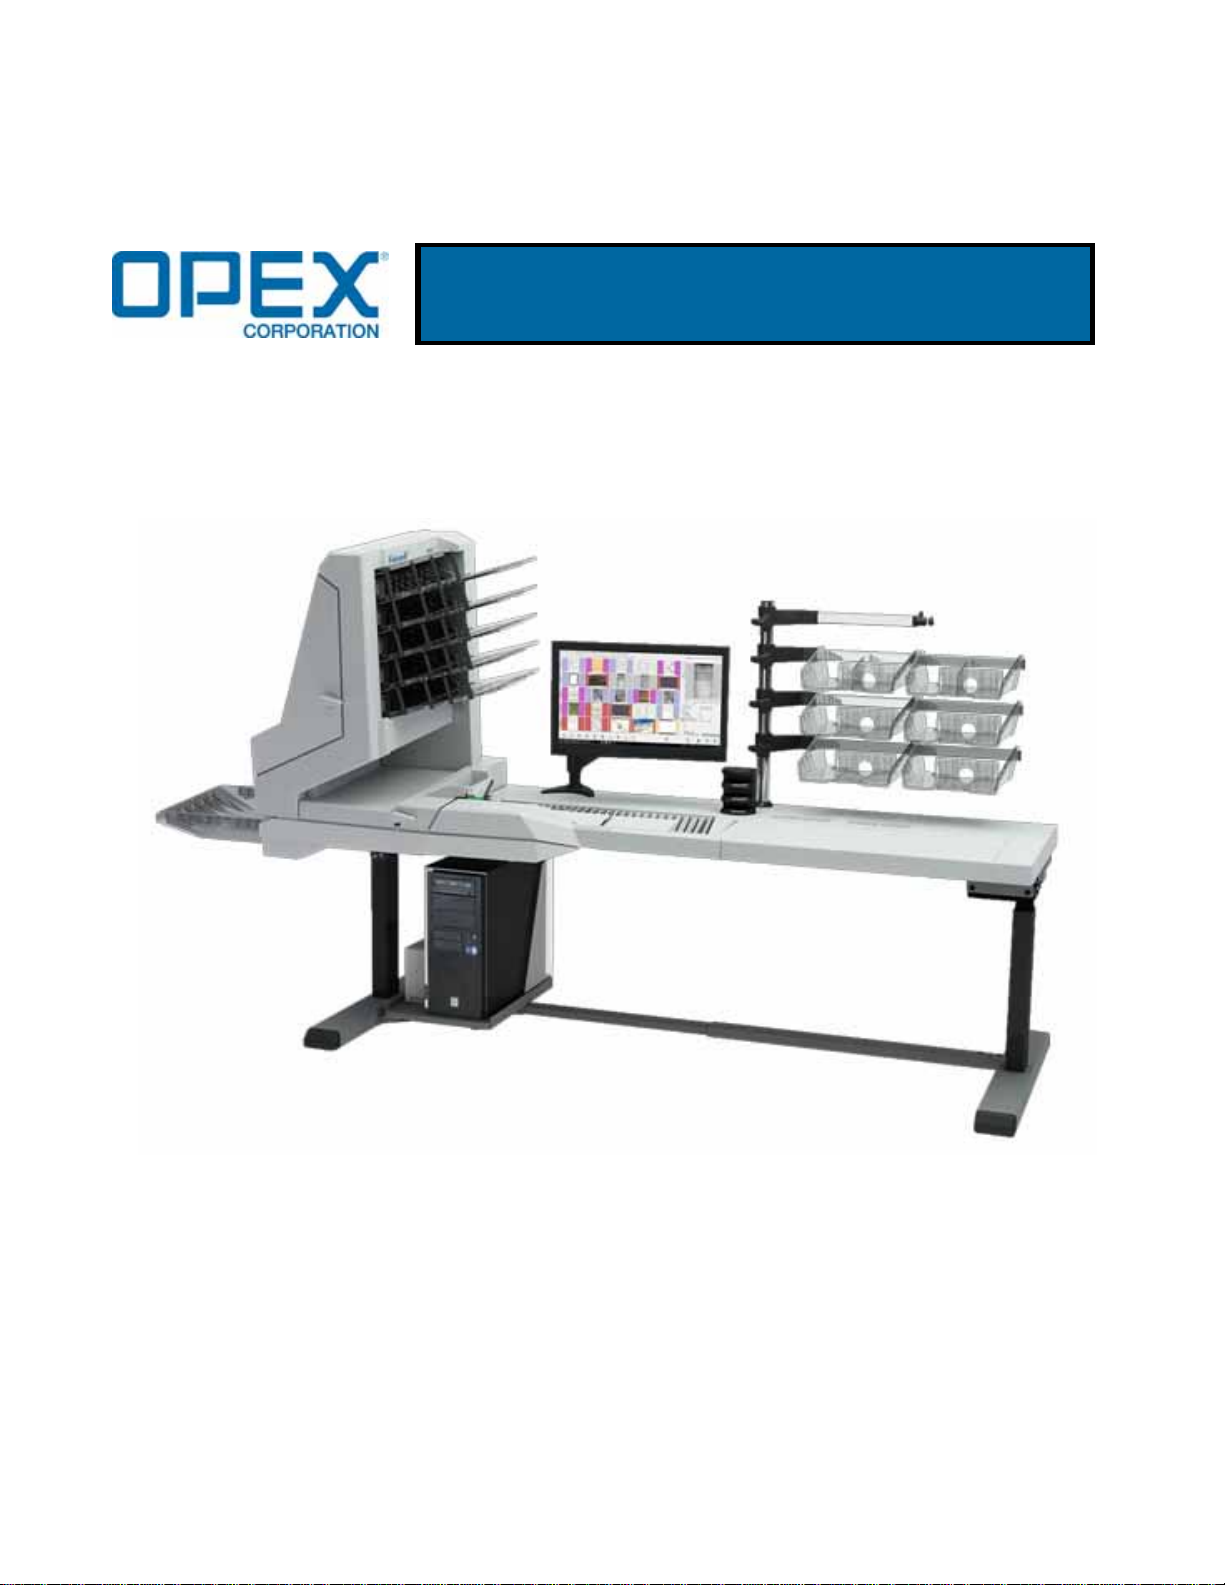
FalconV User Manual
Standard Scanning
Document Revision 16-01
© 2016 OPEX® Corporation
All rights reserved. This document is provided by OPEX for use by their customers, partners and dealers. No portion
of these materials may be reproduced, published, or stored in a database or retrieval system, other than for its intended use without the express, written permission of OPEX Corporation.
Page 2

Document History
Doc
Rev
16-01 Dec. 13, 2016 Initial Release.
If you find errors, inaccuracies, or any other issues or concerns with this
document, please contact the OPEX Technical Writers via email at:
Opex part no. 5083100
Date Changes
2
FalconV User Manual - Standard Scanning - OPEX Corporation
Page 3

Table of Contents
Document History ................................................................................................ 2
Table of Contents ................................................................................................ 3
Chapter 1
Introduction
About this Manual ................................................................................................ 8
Overview .............................................................................................................. 9
How the FalconV works ..................................................................................... 11
Software ........................................................................................................ 11
Jobs .............................................................................................................. 12
Page types .................................................................................................... 13
FalconV Specifications ...................................................................................... 13
Chapter 2
Operation
Overview ............................................................................................................ 16
Safety precautions ........................................................................................ 16
Ergonomics ................................................................................................... 17
Main Controls and System components ............................................................ 18
Getting Started .................................................................................................. 21
Navigating the FalconV CertainScan software .................................................. 23
Running Jobs ..................................................................................................... 25
Using the Run Screen ....................................................................................... 26
Thumbnail view tabs ..................................................................................... 33
Information window ....................................................................................... 47
Scanning items .................................................................................................. 63
Skew ............................................................................................................. 64
Assigning a page type ................................................................................... 67
Adjust image quality, alternate track speed, and alternate DPI .................... 69
Rescanning items .............................................................................................. 72
About the Rescan Feeder ............................................................................. 73
About the pre-feeder mechanism .................................................................. 75
FalconV User Manual - Standard Scanning - OPEX Corporation
3
Page 4

Deleting items from the batch ....................................................................... 77
Voiding items and sets .................................................................................. 77
Suspend and Resume Multiple Batches ....................................................... 80
Closing/Starting a batch and exiting the job .................................................. 81
Internal Batch Editor .......................................................................................... 83
Using Batch Editor to fix incomplete batches ................................................ 83
ID Assist ............................................................................................................ 85
Using IdAssist ............................................................................................... 85
IdAssist functions .......................................................................................... 86
About the Multi-slot ID Assist ........................................................................ 87
Key assist ...................................................................................................... 89
Clearing paper jams ...................................................................................... 89
Clearing the bins ........................................................................................... 92
Chapter 3
Maintenance
Touchscreen Monitor ......................................................................................... 94
Calibrating the monitor .................................................................................. 94
Removing/Replacing the printer cartridge ......................................................... 95
Accessing the printers ................................................................................... 95
Adjusting the printer carriage position ......................................................... 100
Attaching the bins and stacker fingers ............................................................. 102
Cleaning the system ........................................................................................ 106
Conveyor and transport assemblies ........................................................... 107
Contact image sensor ................................................................................. 107
Feed assembly ............................................................................................ 109
Chapter 4
Statistics
FalconV Statistics ............................................................................................ 112
Creating statistic reports ............................................................................. 112
General Information statistics ..................................................................... 116
Overall System Performance Measures statistics ...................................... 117
4
FalconV User Manual - Standard Scanning - OPEX Corporation
Page 5

Performance Details statistics ..................................................................... 119
FalconV User Manual - Standard Scanning - OPEX Corporation
5
Page 6

6
FalconV User Manual - Standard Scanning - OPEX Corporation
Page 7

Introduction
1
About this Manual . . . . . . . . . . . . . . . . . . . . . . . . . . . . . . 8
Overview. . . . . . . . . . . . . . . . . . . . . . . . . . . . . . . . . . . . . 9
How the FalconV works . . . . . . . . . . . . . . . . . . . . . . . . 11
Software . . . . . . . . . . . . . . . . . . . . . . . . . . . . . . . . . . . 11
Jobs . . . . . . . . . . . . . . . . . . . . . . . . . . . . . . . . . . . . . . 12
Page types . . . . . . . . . . . . . . . . . . . . . . . . . . . . . . . . . 13
FalconV Specifications . . . . . . . . . . . . . . . . . . . . . . . . . 13
FalconV
User Manual - Standard Scanning
Page 8
About this Manual
The purpose of this manual is to instruct operators of the FalconV in how to use
the scanner to perform tasks. This manual was written for standard scanning. If
you use the FalconV for remittance processing, please refer to the “FalconV
User Manual - Remittance Processing” document. For additional information
on how to set up jobs, page types, audit trails and other functions of the
machine, consult the appropriate FalconV CertainScan Manual (Standard or
Remittance).
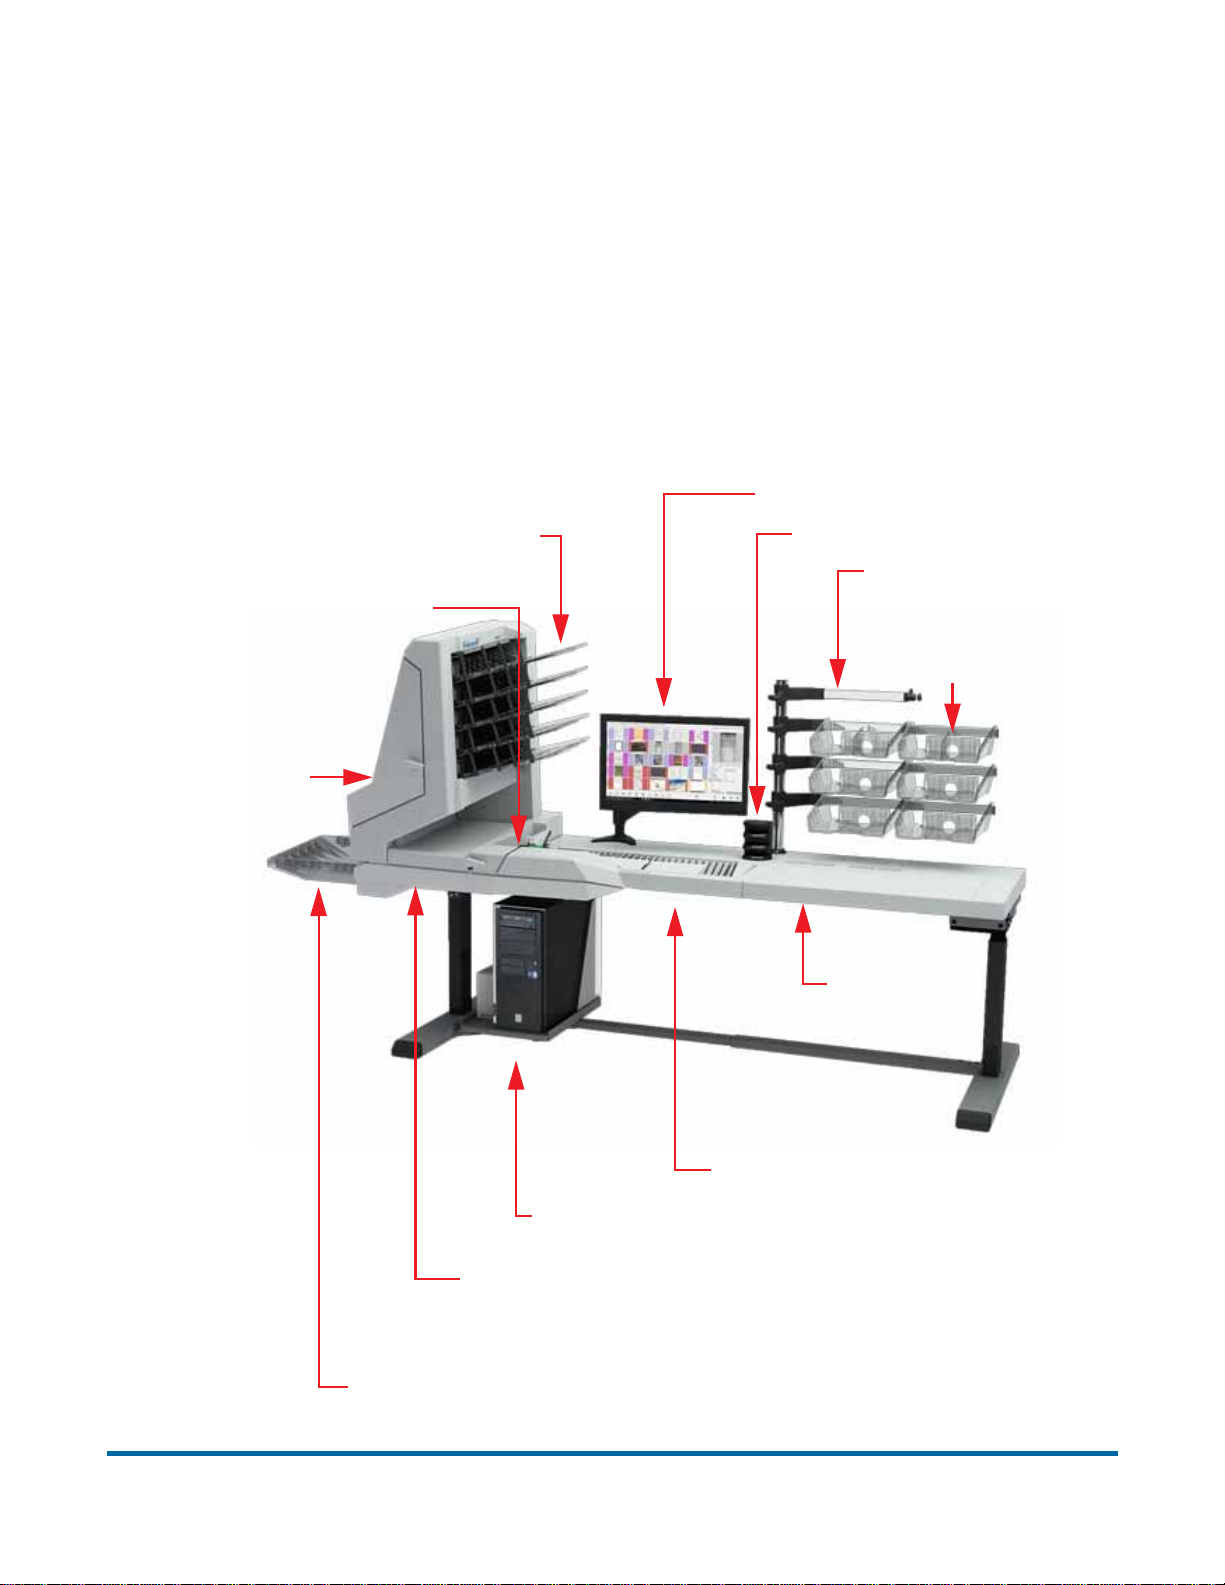
Touchscreen PC monitor
5 Programmable sort bins
Rescan feeder
Printer
Multi-slot ID Assist
External Digital
Capture support
Rack system
with bin trays
Integrated
Workstation
Conveyor/Feeder
CertainScan Windows 7 or 10 PC
In-line recognition:
MICR, OCR, BCR,
OMR, Thickness Detect
1 Programmable straight path sort bin
8 Introduction
FalconV User Manual - Standard Scanning - OPEX Corporation
Page 9

Overview
OPEX’s innovative one-step scanning process continues with FalconV™. With
five programmable sort bins and enhanced multi-feed detection, FalconV
increases the functionality and flexibility of its universal document scanning
workstations. FalconV combines the performance of a high-capacity
production scanner with OPEX’s unique prep-reducing process. Regardless of
your document scanning needs, FalconV is designed to attack the most difficult
and daunting workflow challenges.
This user manual is for both the FalconV™ (desktop) and the FalconV RED™
(integrated) universal document scanning workstations.
Features of the FalconV include:
• CertainScan 4.0 Software & Host PC available in Windows 7 or Windows 10,
32-bit or 64-bit systems
• Color 22” LCD display with touch-screen controls
• Duplex scanner with native 300 DPI scanning (600 DPI capability on
Windows 10 64-bit systems)
• Selectable color drop-out
• Front and back audit trail printers
• Automatic and one-touch page classification
• Automatic Deskew
• 7 Ultrasonic Multi-Feed Detectors
• Thick document sorting
• 5 programmable sort bins plus one bypass bin
• Robust stack feed capabilities
• Mixed document capture
• Packet Sensing technology
• Early Envelope Detect
• IDAssist
• Up to 12 unique page types
Introduction 9
FalconV User Manual - Standard Scanning - OPEX Corporation
Page 10

• Rescan Feeder - for rejected piece refeeds
• Available in two different platforms: Desktop and Integrated
OPTIONAL FEATURES
• External digital capture
• Multi-slot ID Assist
• Audit trail printers (front & rear)
• Rear graphics printer for signature and Code 39 barcode printing
• VRS* Technology Image Enhancement
• MICR reader
• Key Assist
• Reference ID
* VRS is a registered trademark of Kofax, Inc.
10 Introduction
FalconV User Manual - Standard Scanning - OPEX Corporation
Page 11

How the FalconV works
The FalconV scanner is controlled by a single Windows 7 or Windows 10
driven PC. The operator interacts with the system via the CertainScan software
and simply drops items onto the conveyor. The system scans the items based
on the current job parameters. The scanner can capture barcode, MICR and
OCR information, print audit trails on items, and sort them to a specified bin.
Software
The FalconV uses two software applications which control the system:
INtime Controller - The INtime Controller runs in the background of the
CertainScan software and controls all machine related functions, such as
monitoring sensors, triggering gates, and turning motors on and off. The INtime
Controller runs in its own real-time operating system, called INtime. You do not
need to access the INtime controller and should never close the INtime
window. INtime 6 is required when the underlying operating system is Windows
10. CertainScan 4.00 will still work properly on Windows 7 and INtime 4. Note
that each product and product configuration may have some feature limitations.
CertainScan - The CertainScan software interfaces with the Controller and
manages the non-machine related functions performed by the scanner.
CertainScan provides an interface for setting up jobs, page types, audit trails,
and for running jobs. This is the main interface with the machine.
Introduction 11
FalconV User Manual - Standard Scanning - OPEX Corporation
Page 12
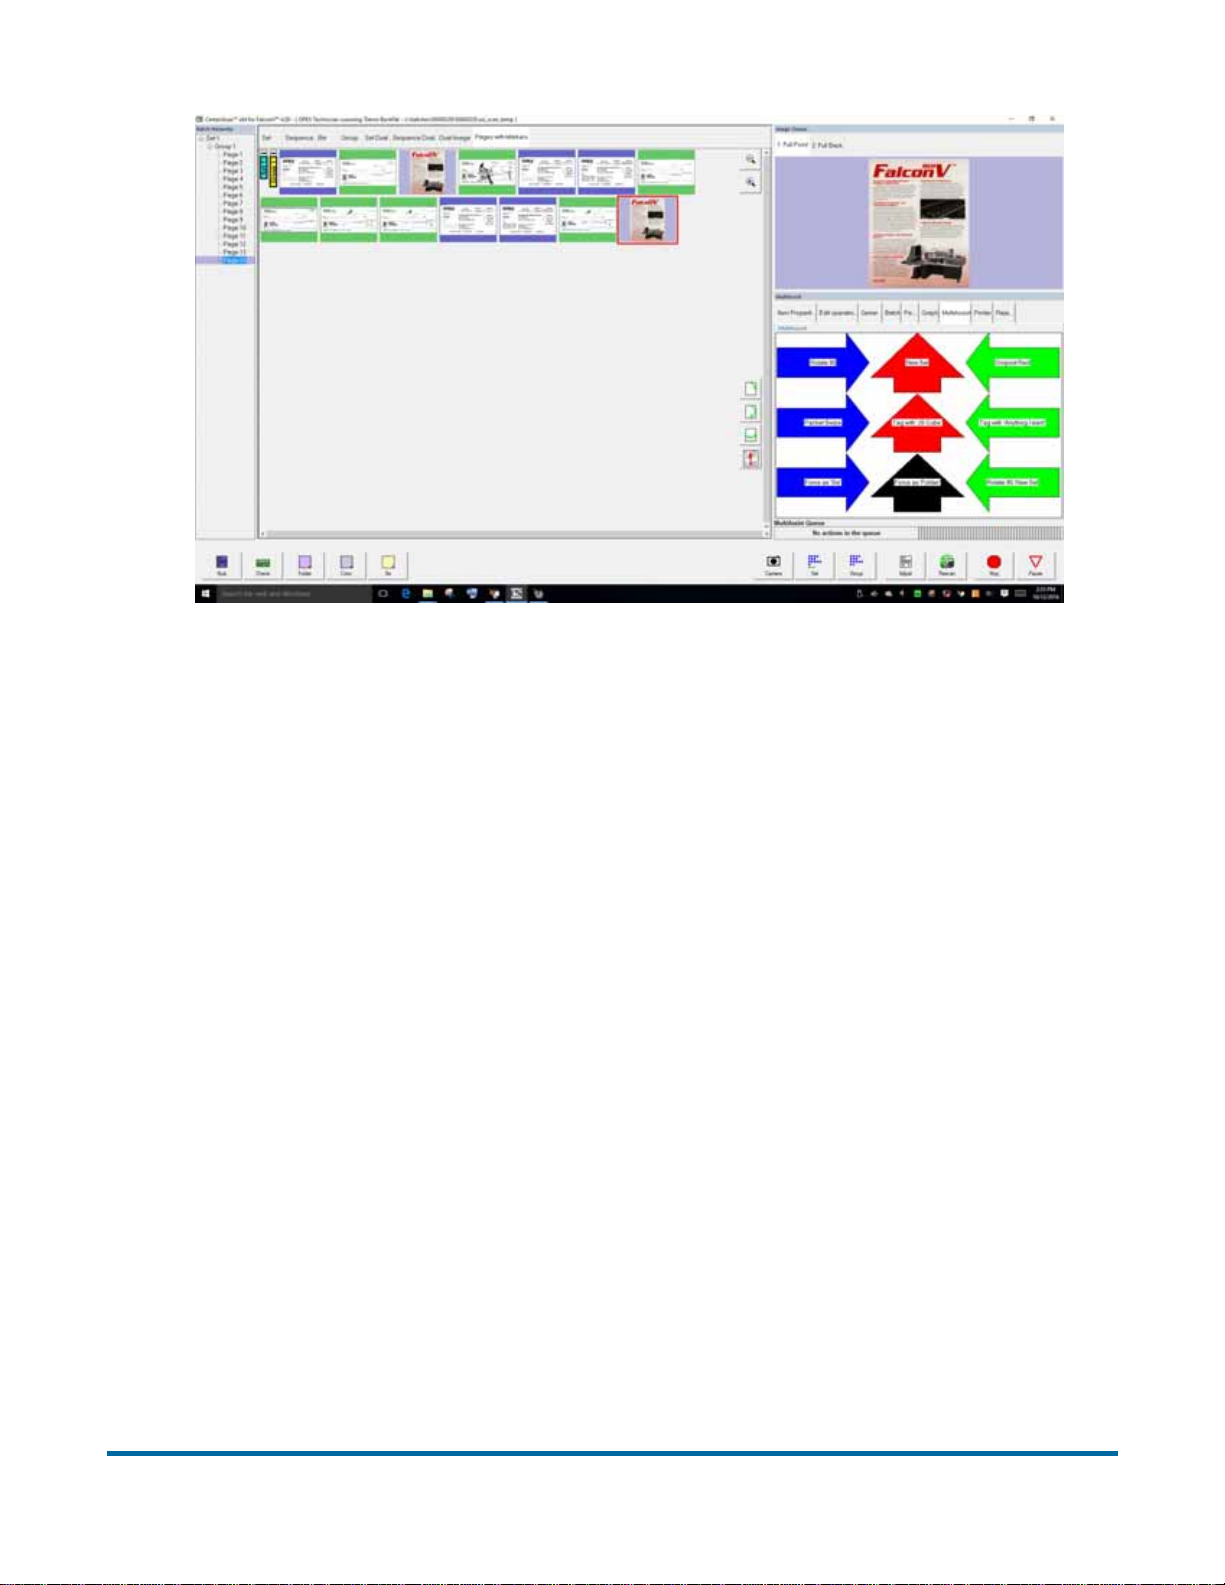
Figure 1: CertainScan Run Screen example
Jobs
A job is a collection of parameters the FalconV uses for scanning items. The
jobs you set up allow you to process items in a similar manner from run to run.
The scanner captures images of items and stores the information it collects in
batches, which consist of one or more sets. The definition of a set can vary
from customer to customer, and even from job to job. A set may consist of
several page types. For example, a folder, patch sheets, and the contents of
the folder.
Structured vs. Unstructured jobs
Structured jobs require you to scan items in a particular order. For example,
when running a structured job, the machine may prompt you to scan a folder
first, then a form, then a patch code, and/or another document, and finally
another patch code to signify the end of the set. If a page type is scanned out
of sequence or if the system is expecting a certain page type, the system will
alert you.
In an unstructured job, you can scan any of the expected page types in any
sequence. The only restriction is that the boundary, in most cases a patch
12 Introduction
FalconV User Manual - Standard Scanning - OPEX Corporation
Page 13

code, is scanned last. The boundary tells the system the current set is
complete and the next set will begin.
Page types
The term “page type” is used to specify a collection of criteria that a piece must
meet to be classified as a certain type of item; i.e., length, height, barcode,
mark detect, MICR, etc. The system uses the page type parameters set up by
your System Administrator to classify items that come into the system. When
the scanner processes items in a job, it gathers data (such as length and width)
on each item and compares the item to the page types you have designated for
that job. This is how the system identifies each item scanned into the system.
The system then collects the appropriate data from the item and sorts it
according to the current job parameters.
FalconV Specifications
Table 1: FalconV Specifications
High-capacity auto feed
Document Feeding
Document Specifications
Scanning Speed Up to 110 ppm / 220 ipm @ 300 dpi
In-line Recognition OCR, OMR, barcodes, document type ID
Media Detection
Continuous drop-feed
Packet feed
Rescan feed
Width: 2.0” to 12.23” (5.08 cm – 31.06 cm)
Length: 3.5” to 18.25” (8.89 cm – 46.36 cm)
if running Win 7 32-bit OS;
3.5” to 25.50” (8.89 cm – 64.77 cm)
if running Win 7 or Win 10 64-bit OS.
Multifeed detection, height, length, skew and
envelope detection
5 programmable output sort bins
Document Separation
Introduction 13
FalconV User Manual - Standard Scanning - OPEX Corporation
1 programmable straight-path sort bin for extra
thick and delicate items
Page 14

Table 1: FalconV Specifications (continued)
Daily Duty Cycle unlimited
FalconV - 71.5” x 102.0” x 32.5”
Maximum Dimensions
(H x W x D)
Weight
Electrical Specifications 100-240 VAC 50/60Hz
Power Consumption
Bundled Software
(181.61 cm x 259.08 cm x 82.55 cm)
FalconV RED - 61.50” x 111.0” x 42”
(156.21 cm x 281.94 cm x 106.68 cm)
• FalconV RED = 686lbs (311.164 kg)
• FalconV (adjustable height electric T) = 365lbs
(165.561 kg)
• FalconV (adjustable height manual T) =
355lbs (161.025 kg)
Idle: 120VAC - 1.15 amps, 138 Watts
Operating: 120VAC - 2.21amps, 265 Watts
CertainScan™ 4.0 64-bit host software,
CertainScan Edit™, OPEX Transform™, OPEX
standard barcode package, Windows 10 64-bit
OPEX-provided CertainScan PC
Additional Features
Optional Features
Available Models FalconV™, FalconV RED™
Flat-panel 22” touch-screen
Packet Sensing Technology
IDAssist™
Audit trail printing (front and rear)
Rear graphics printer (for signature and Code
39 barcode printing)
VRS* technology image enhancement
Key Assist™
Reference ID
MICR Reader
OPEX-provided generic mount for external
capture device
Multi-slot ID Assist
*VRS is a registered trademark of Kofax, Inc.
14 Introduction
FalconV User Manual - Standard Scanning - OPEX Corporation
Page 15

Operation
2
Overview. . . . . . . . . . . . . . . . . . . . . . . . . . . . . . . . . . . . 16
Main Controls and System components . . . . . . . . . . . . 18
Getting Started . . . . . . . . . . . . . . . . . . . . . . . . . . . . . . . 21
Navigating the FalconV CertainScan software . . . . . . . 23
Running Jobs . . . . . . . . . . . . . . . . . . . . . . . . . . . . . . . . 25
Using the Run Screen. . . . . . . . . . . . . . . . . . . . . . . . . . 26
Scanning items . . . . . . . . . . . . . . . . . . . . . . . . . . . . . . . 63
Rescanning items . . . . . . . . . . . . . . . . . . . . . . . . . . . . . 72
ID Assist . . . . . . . . . . . . . . . . . . . . . . . . . . . . . . . . . . . . 85
FalconV
User Manual - Standard Scanning
Page 16

Overview
This chapter provides safety precautions, user interface information, and basic
procedures on how to run the machine to process items with the Falcon.
Note: This manual describes operation of the FalconV scanner. If you have a
FalconRED™ (Model 72 Rapid Extraction Desk installed), refer to the
Model 72 Operator Guide before proceeding with this manual.
Safety precautions
Follow these safety precautions to avoid injury when operating the Falcon.
Failure to follow these precautions may result in severe personal injury or
damage to the machine.
• Be careful when working with AC power. Electrical wiring can be hot any
time the machine is plugged in. Failure to use caution may result in electric
shock or death.
• Do not set liquids (such as drinks) on the scanner that could spill into the
machine.
• Keep loose objects away from any exposed, moving parts of the machine.
The moving parts of the FalconV can become jammed and/or damaged by
foreign objects. Also, keep hands, hair, loose clothing or jewelry away from
the moving parts.
• Do not attempt to clean the machine while it is running. A cloth (or similar
material) should never be used to clean moving parts such as belts or
rollers. The use of such material on moving mechanisms can result in
damage to the machine or severe personal injury.
• Do not use flammable, high pressure, “canned air” to clean paper scraps and
dust from the machine.
• Do not move the machine while the power is on. Unplug the machine from
the power source first.
16 Operation
FalconV User Manual - Standard Scanning - OPEX Corporation
Page 17

Ergonomics
As in any occupation which requires you to perform the same motion
repeatedly during the course of your work, it is important to consider how you
perform your task. Always use proper operating procedures when operating
the Falcon. Follow the directions for using and adjusting your chair and
scanner. Using improper procedure can result in a potentially serious injury.
The FalconV scanner has been designed for safe operation by over 95% of the
user population. Operation by individuals with limited reach capability or who
cannot follow the suggestions listed should be avoided or limited in duration.
To reduce possible risks, we strongly urge you to follow these suggestions:
• Maintain an upright body posture. Avoid the tendency to slump in your chair.
The angle between your torso and thighs should always be close to 90
degrees.
• Adjust the seat height on your chair or the height of the scanner so that your
elbow is approximately even with the top of the work surface when your
arms are near your sides and your feet are flat on the floor.
• Adjust your chair position to allow your torso to touch the front edge of the
scanner work surface. Chairs with arm rests that prevent this body position
should not be used.
• If the touchscreen is used frequently during processing, adjust the screen’s
position to minimize your reach movements to the frequently touched areas.
• Your position should allow you to comfortably reach the frequent work pickup area(s) and the frequently touched areas of the screen without extending
either arm fully or changing your posture.
• Occasionally change the angle of your posture and, if possible, vary your
tasks to create short breaks from the most repetitive motions.
• If possible, avoid operating the machine for longer than a single 8-hour shift.
While no suggestions can guarantee completely against work-related injuries,
you will certainly increase your comfort and safety while operating the FalconV
if you put these suggestions into practice. The scanner has been designed with
you in mind. If it is operated correctly, you should find your work experience
comfortable and enjoyable.
Operation 17
FalconV User Manual - Standard Scanning - OPEX Corporation
Page 18
Main Controls and System components
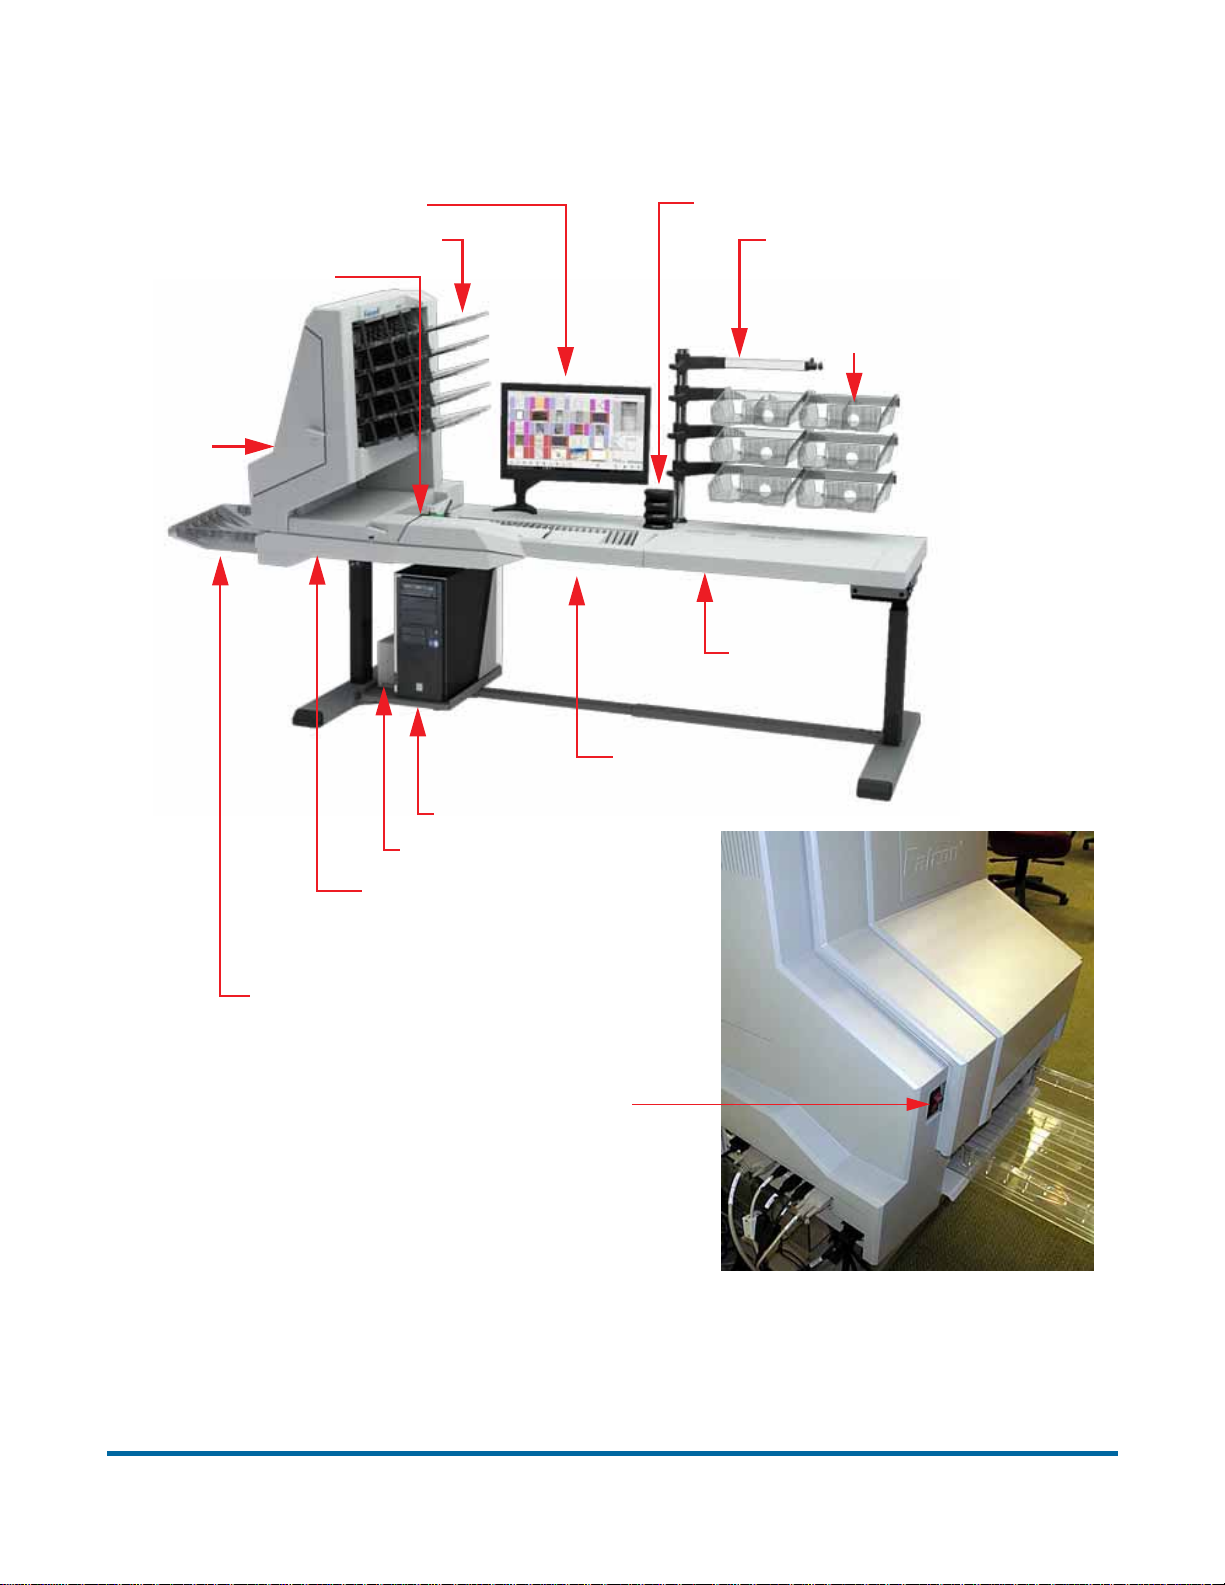
Touchscreen PC monitor
5 Programmable sort bins
Rescan feeder
Printer
Multi-slot ID Assist
External Digital
Capture support
Rack system
with bin trays
Integrated
Workstation
Conveyor/Feeder
CertainScan Windows 7 or 10 PC
UPS
In-line recognition:
MICR, OCR, BCR,
OMR, Thickness Detect
1 Programmable straight path sort bin
Main Power Switch
Figure 2: Main Controls and components
Descriptions of the main controls and components of the FalconV system can
be found on the following pages.
18 Operation
FalconV User Manual - Standard Scanning - OPEX Corporation
Page 19
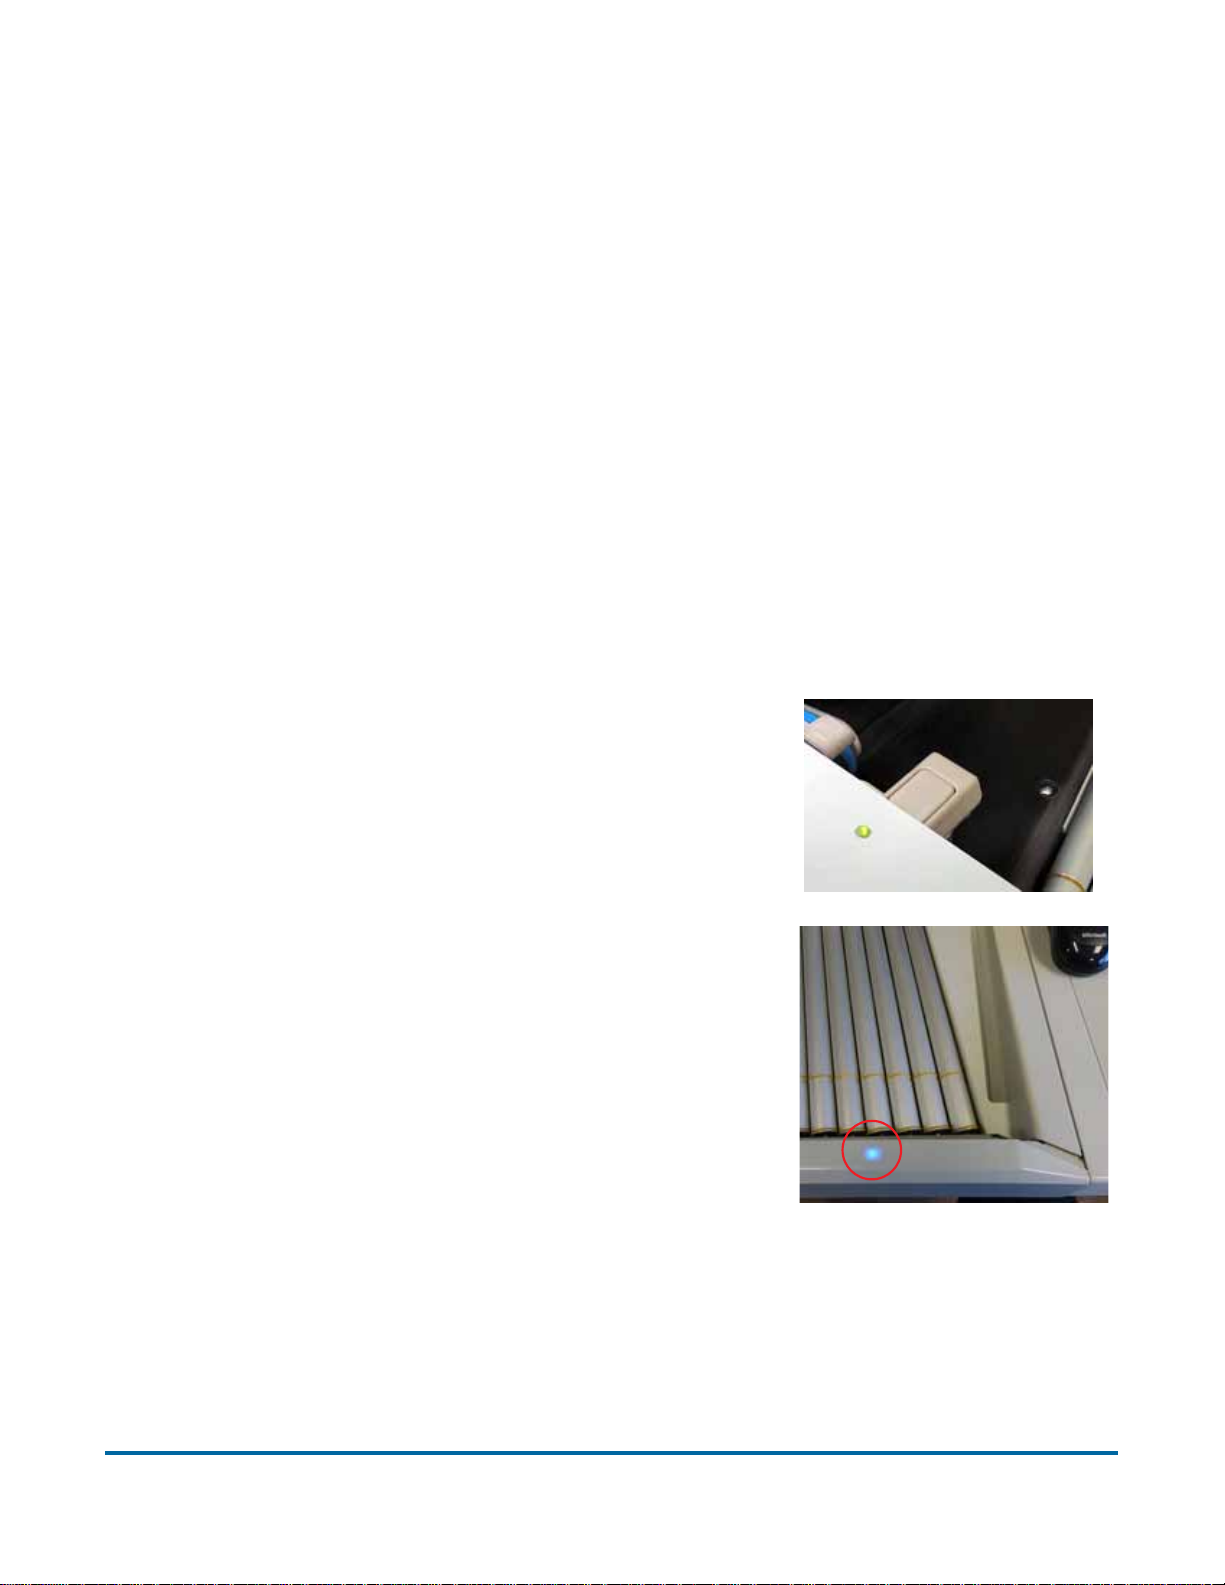
Main power switch The main power switch is located on the left cover, as
shown in Figure 2. This is the main “on/off” switch for the FalconV system.
UPS (Uninterrupted Power Supply) The APC UPS supplies battery power
to the PC and monitor to allow a controlled shutdown of the Windows operating
system. The scanner should be plugged into the “surge only” side of the UPS.
CertainScan PC The 64-bit PC with Windows 7 or Windows 10 operating
system houses OPEX’s feature-rich CertainScan 4 host software.
Touchscreen monitor Use the monitor to log in and out of the FalconV
system. The monitor’s touchscreen controls should be used to operate the
system and run jobs.
Keyboard/mouse Typically, the keyboard and mouse are only used for
setting up jobs and for use with other software. Use the touchscreen monitor
for running jobs and operating the machine.
MFD Override button The MFD override button
allows you to disable the ultrasonic multifeed
detector when you are scanning thicker pieces,
such as items with sticky notes attached.
IdAssist indicator The blue IdAssist indicator
LED will light up when running a job that includes
IdAssist. Also, when the operator triggers IdAssist
the LED will go out briefly, indicating to the
operator that IdAssist has been activated. For more
on using IdAssist, see “ID Assist” on page 85.
Multi-slot ID Assist (option) This option requires the use of an external
tower which has three slots. Multiple actions can be performed based on how
you swipe items in the tower’s three slots. For more on using the optional Multislot ID Assist feature, see “About the Multi-slot ID Assist” on page 87.
Operation 19
FalconV User Manual - Standard Scanning - OPEX Corporation
Page 20

External Capture device (option) An optional
pole and mounting arm are available for a camera
which can be used to capture images of items
unable to be scanned by FalconV and inserted
directly into the batch.
The external capture feature can be used without
stopping the track. If the track is running when this
feature is used, CertainScan will automatically
pause the feeder. When the external camera
images have completed processing, the feeder will
resume running.
Note: The camera is not included in this option,
just the pole, mounting arm, and software
needed.
Conveyor Angled roller system that edge justifies items before entering the
feeder.
Feeder The feeder uses a combination of electromechanical devices to
control how it will receive individual pieces or stacks, singulate them, and drive
them towards the scanner.
Rescan feeder A mechanism that allows the operator to feed (one at a time)
items into the machine which had been rejected or the auto-feeder is not able
to feed. See “About the Rescan Feeder” on page 73 for more details.
Audit trail front and back printers (option) The optional audit trail printers
are located behind the sort bins. Audit trails can be applied to the front and/or
back of each scanned item.
Rear graphics printer (option) In place of the standard rear audit trail
printer, this optional printer is capable of printing graphics such as signatures,
logos and Code 39 barcodes. Up to five different graphics can be sprayed.
Sort bins Scanned items are sorted into one of five programmable sort bins,
with an additional pass-through bin for sorting large or delicate items.
20 Operation
FalconV User Manual - Standard Scanning - OPEX Corporation
Page 21

Getting Started
Power up the system:
If the FalconV system is not already up and running, turn on the power:
1 Press the power button on the UPS. The monitor will turn on and the
computer will begin to boot up.
2 Turn on the main power switch (see Figure 2 for location).
3 Log in to Windows with your Windows/network user name and password. If
your FalconV is not connected to a network, you may not have to log in to
Windows first. Proceed to step 4. Once the computer has finished booting
Windows, it will launch the FalconV CertainScan application.
Note: If you mistakenly close CertainScan, double-click the icon on the
desktop to start it again.
Log in to the system:
4 On the main window, select the icon for your user account.
Note: If you do not have your own user account, ask your FalconV Adminis-
trator for assistance.
Operation 21
FalconV User Manual - Standard Scanning - OPEX Corporation
Page 22
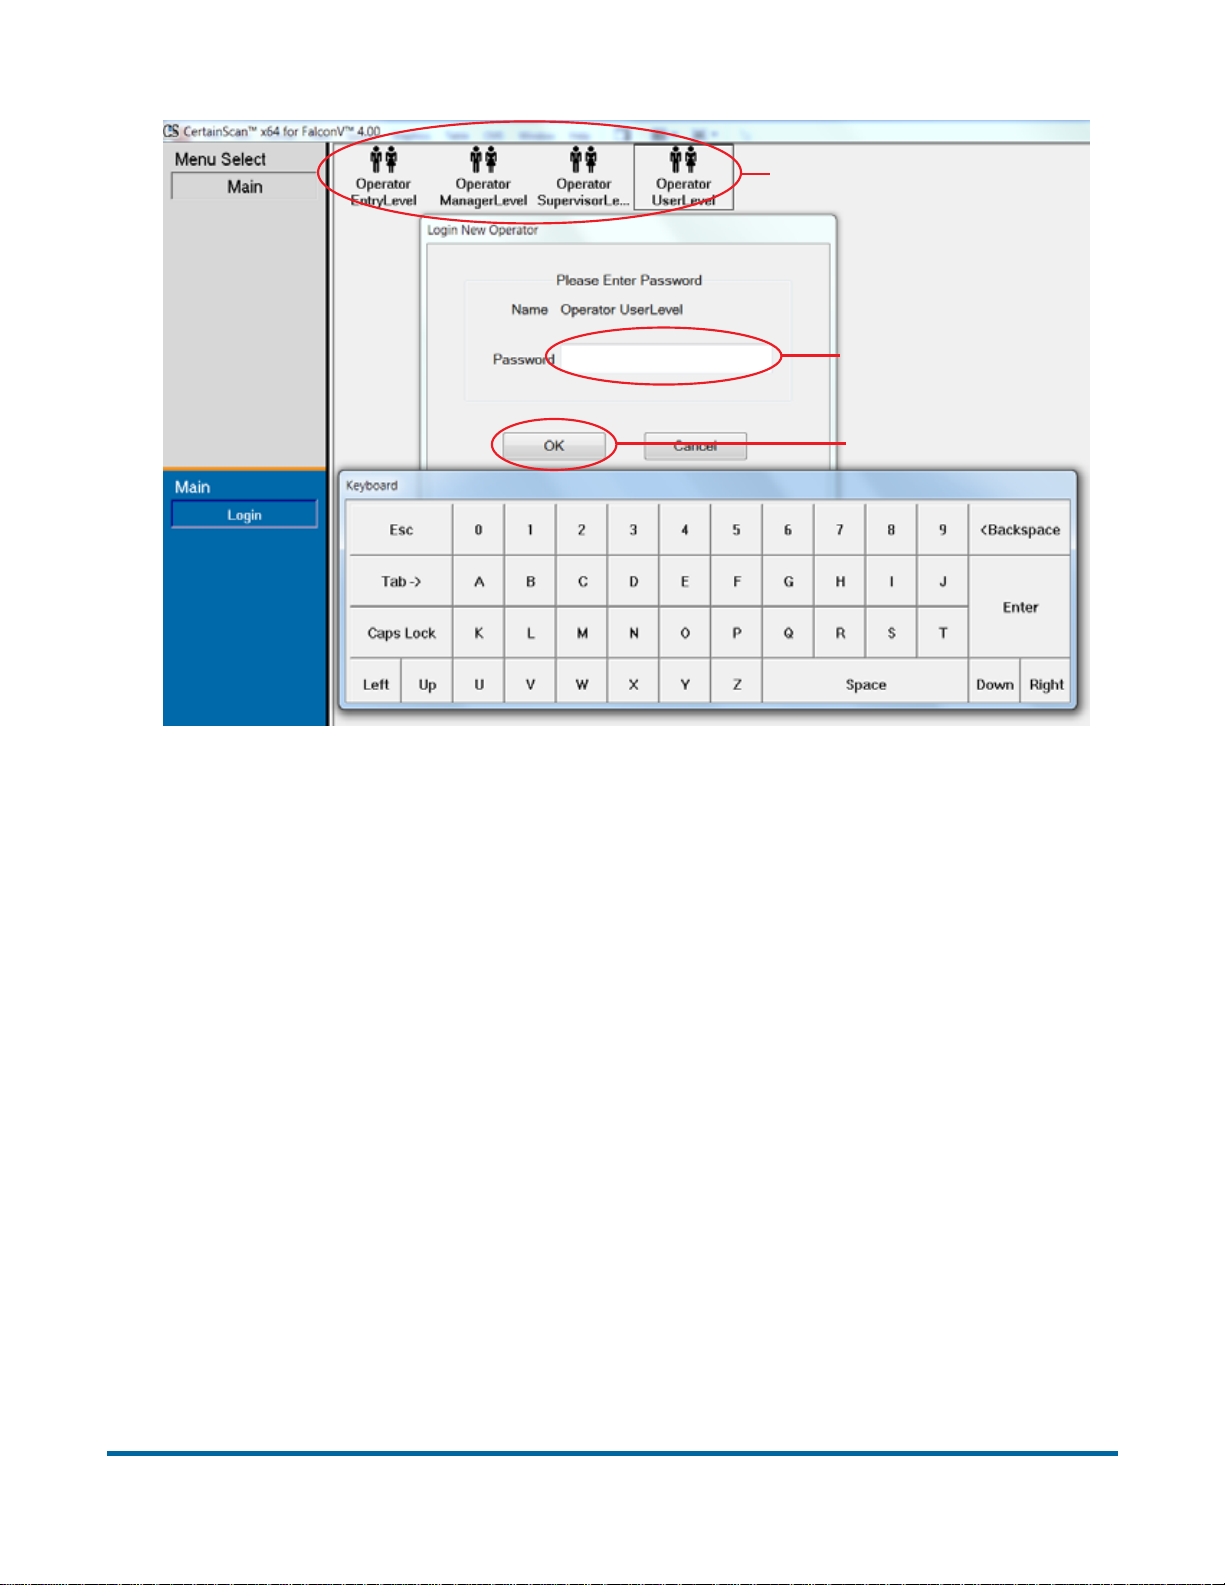
Select a user account icon
Enter password
Press OK
Figure 3: Login Screen
5 Enter your password using the on-screen or computer keyboard.
6 Press OK.
22 Operation
FalconV User Manual - Standard Scanning - OPEX Corporation
Page 23
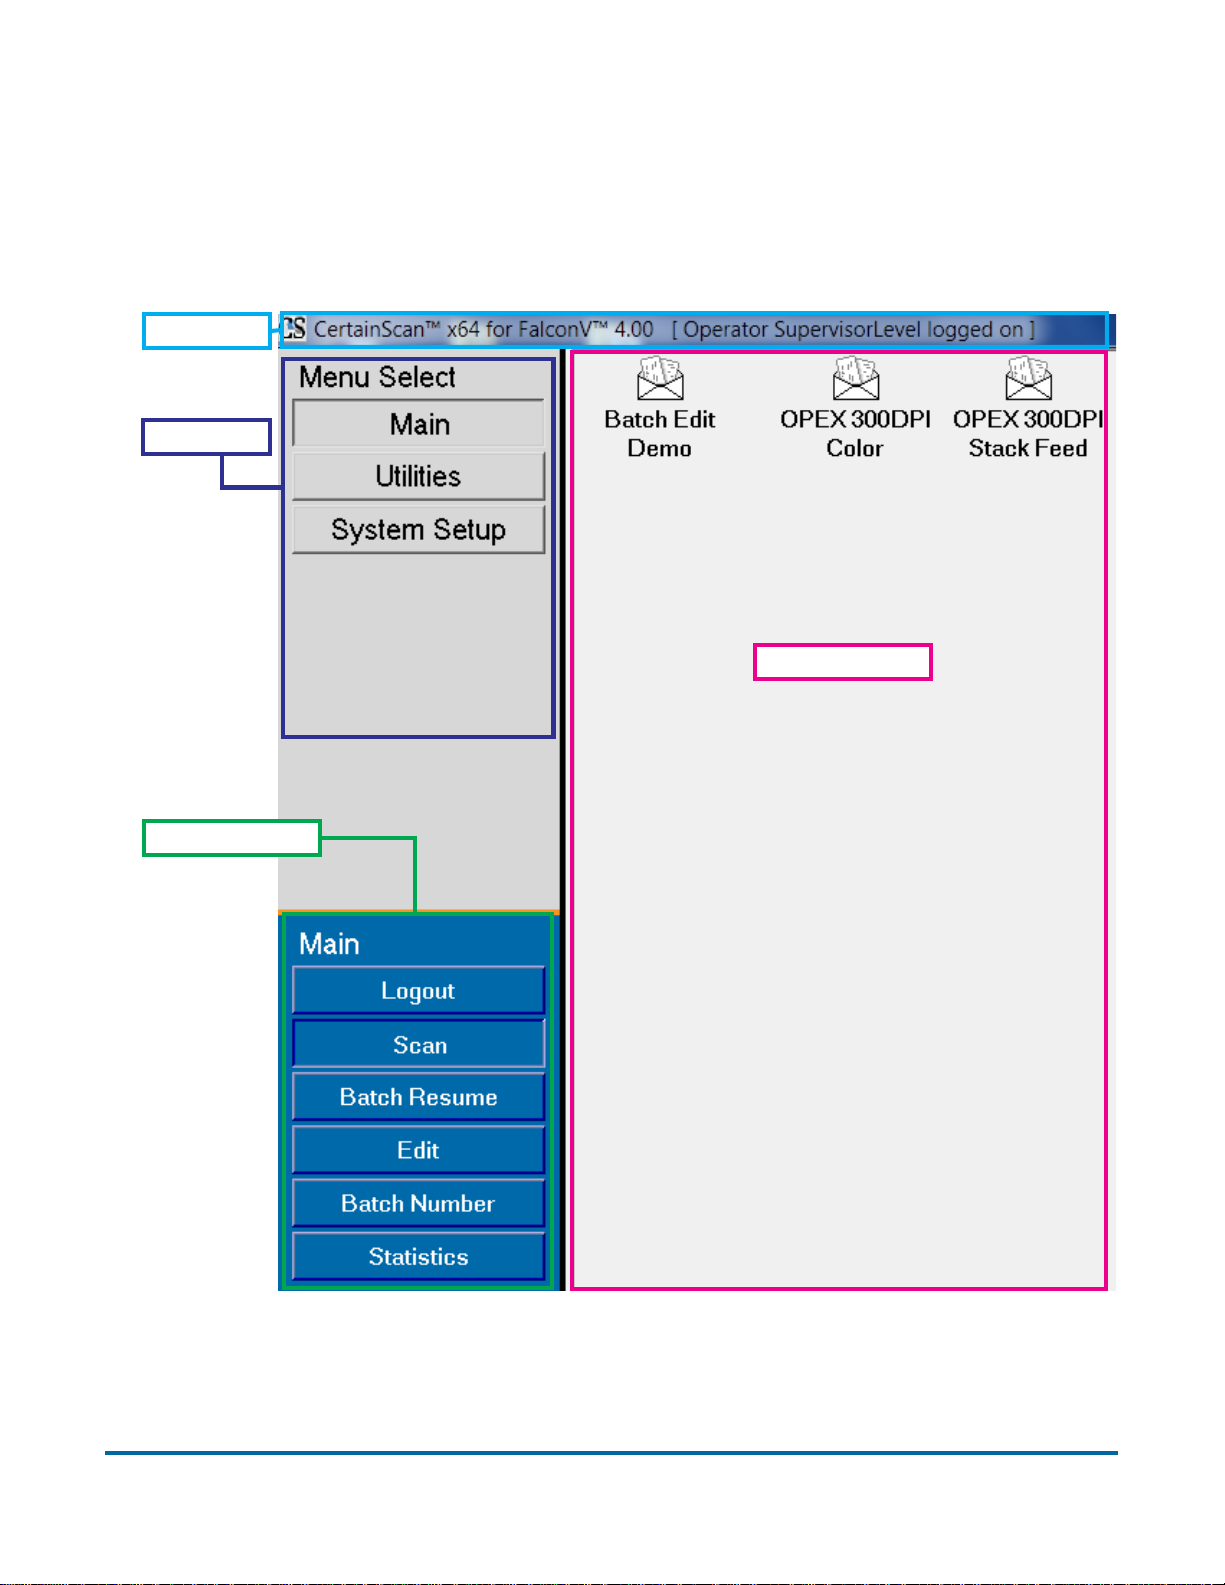
Navigating the FalconV CertainScan software
Once logged in, you are presented with the Menu Select window in which you
can begin using the features of CertainScan software. The list of menus
presented is determined by the user’s account-level permissions.
Title bar
Menu bar
Main window
Menu options
See descriptions of the above items on the following page.
Operation 23
FalconV User Manual - Standard Scanning - OPEX Corporation
Page 24

Title bar Displays the name of the current operator and other pertinent infor-
mation. Click the FalconV icon in the title bar to access the Windows functions
(Restore, Move, Size, Minimize, Maximize, Close), as well as the following
menus:
- The diagnostics menu is reserved for Opex technicians.
- The Help menu accesses the About screen, which provides version
information for the FalconV CertainScan software.
Menu bar Provides access to the main system functions. Select a category
from the menu bar and make selections from the main window or the menu
options bar.
Menu options The menu options provide subcategories for the selections in
the menu bar. The menu options bar will change based on the current menu
bar selection.
Main window View and adjust settings and parameters in the main window.
24 Operation
FalconV User Manual - Standard Scanning - OPEX Corporation
Page 25
Running Jobs
Now that you have logged into the system and taken some time to familiarize
yourself with the main controls and components, you are ready to begin
operating the machine. This section will give you a general outline of how to
use the CertainScan software to process items.
Select a job:
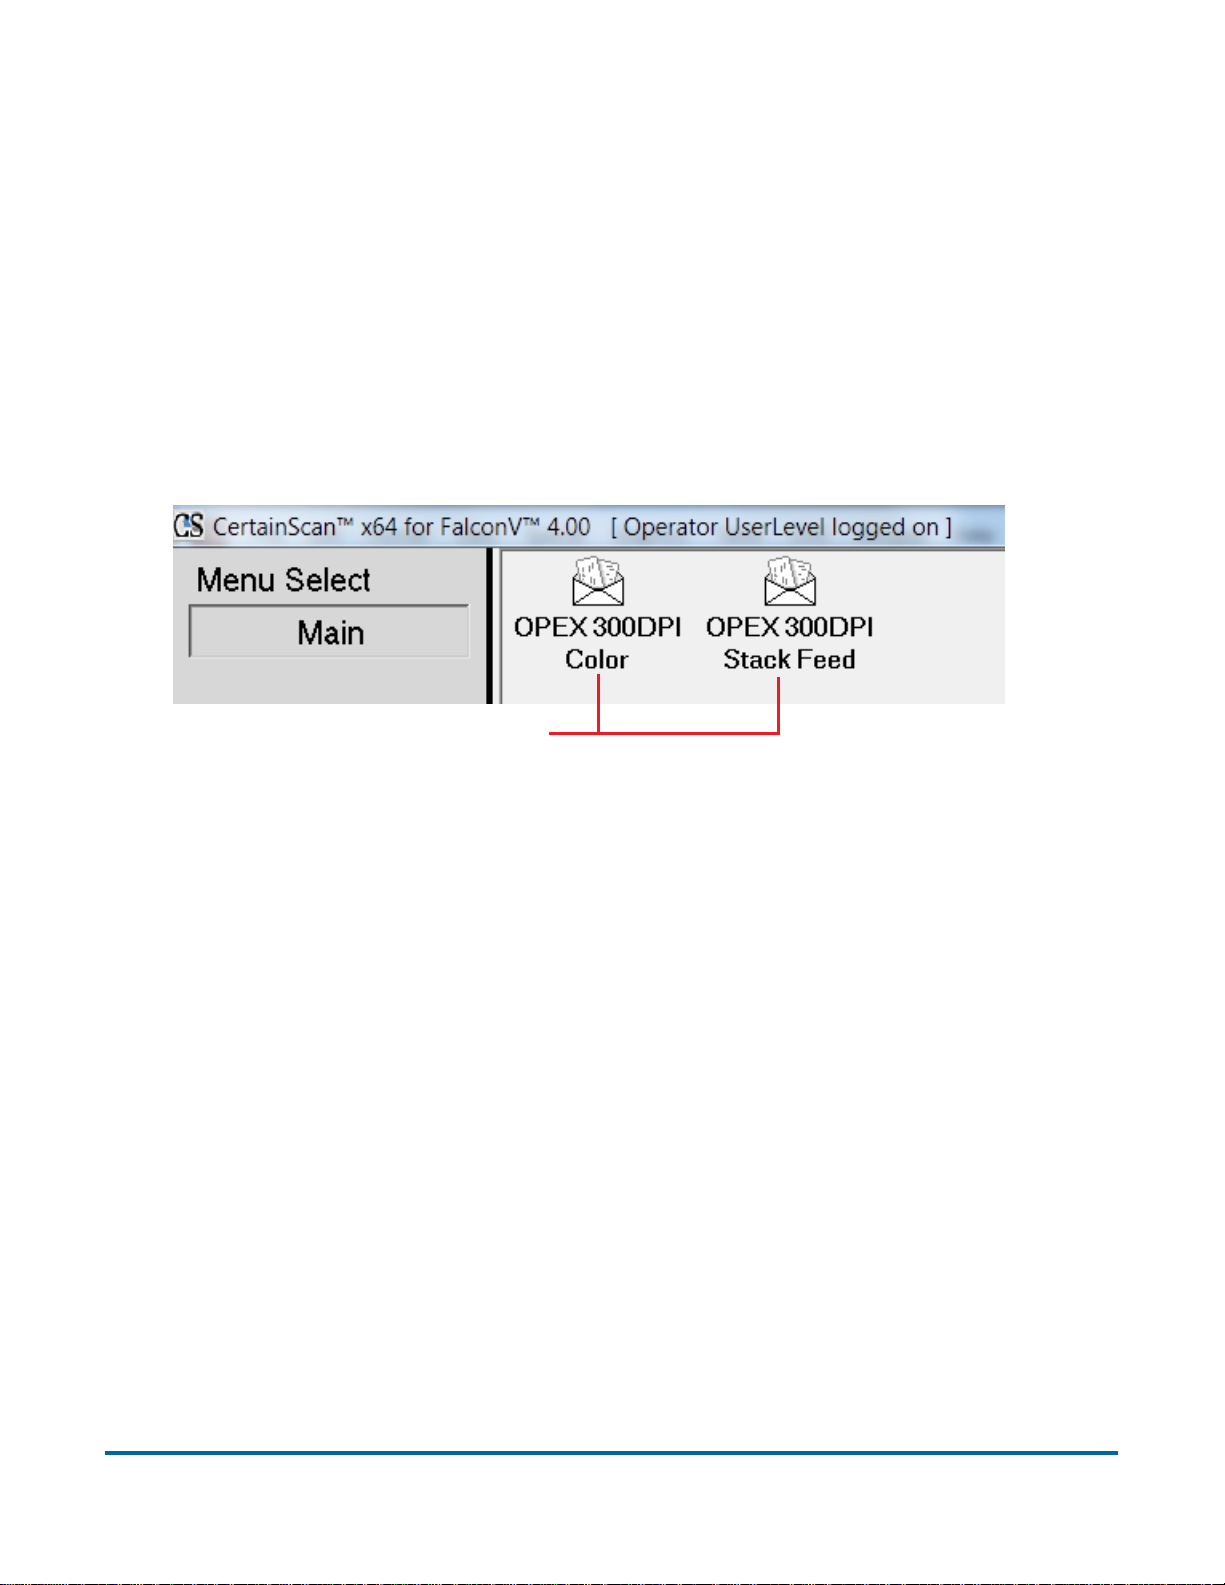
1 Select Main in the menu bar.
2 Click the icon for the job you want to run.
Job icons
Figure 4: Main Screen
Note: The jobs you see may be different than those shown in Figure 4.
Depending on how the job is set up, you will either see the Run screen (see
page 26), the Modify Batch Information screen (see page 31), or a prompt in
which the operator can enter a custom batch name (see page 32).
Operation 25
FalconV User Manual - Standard Scanning - OPEX Corporation
Page 26
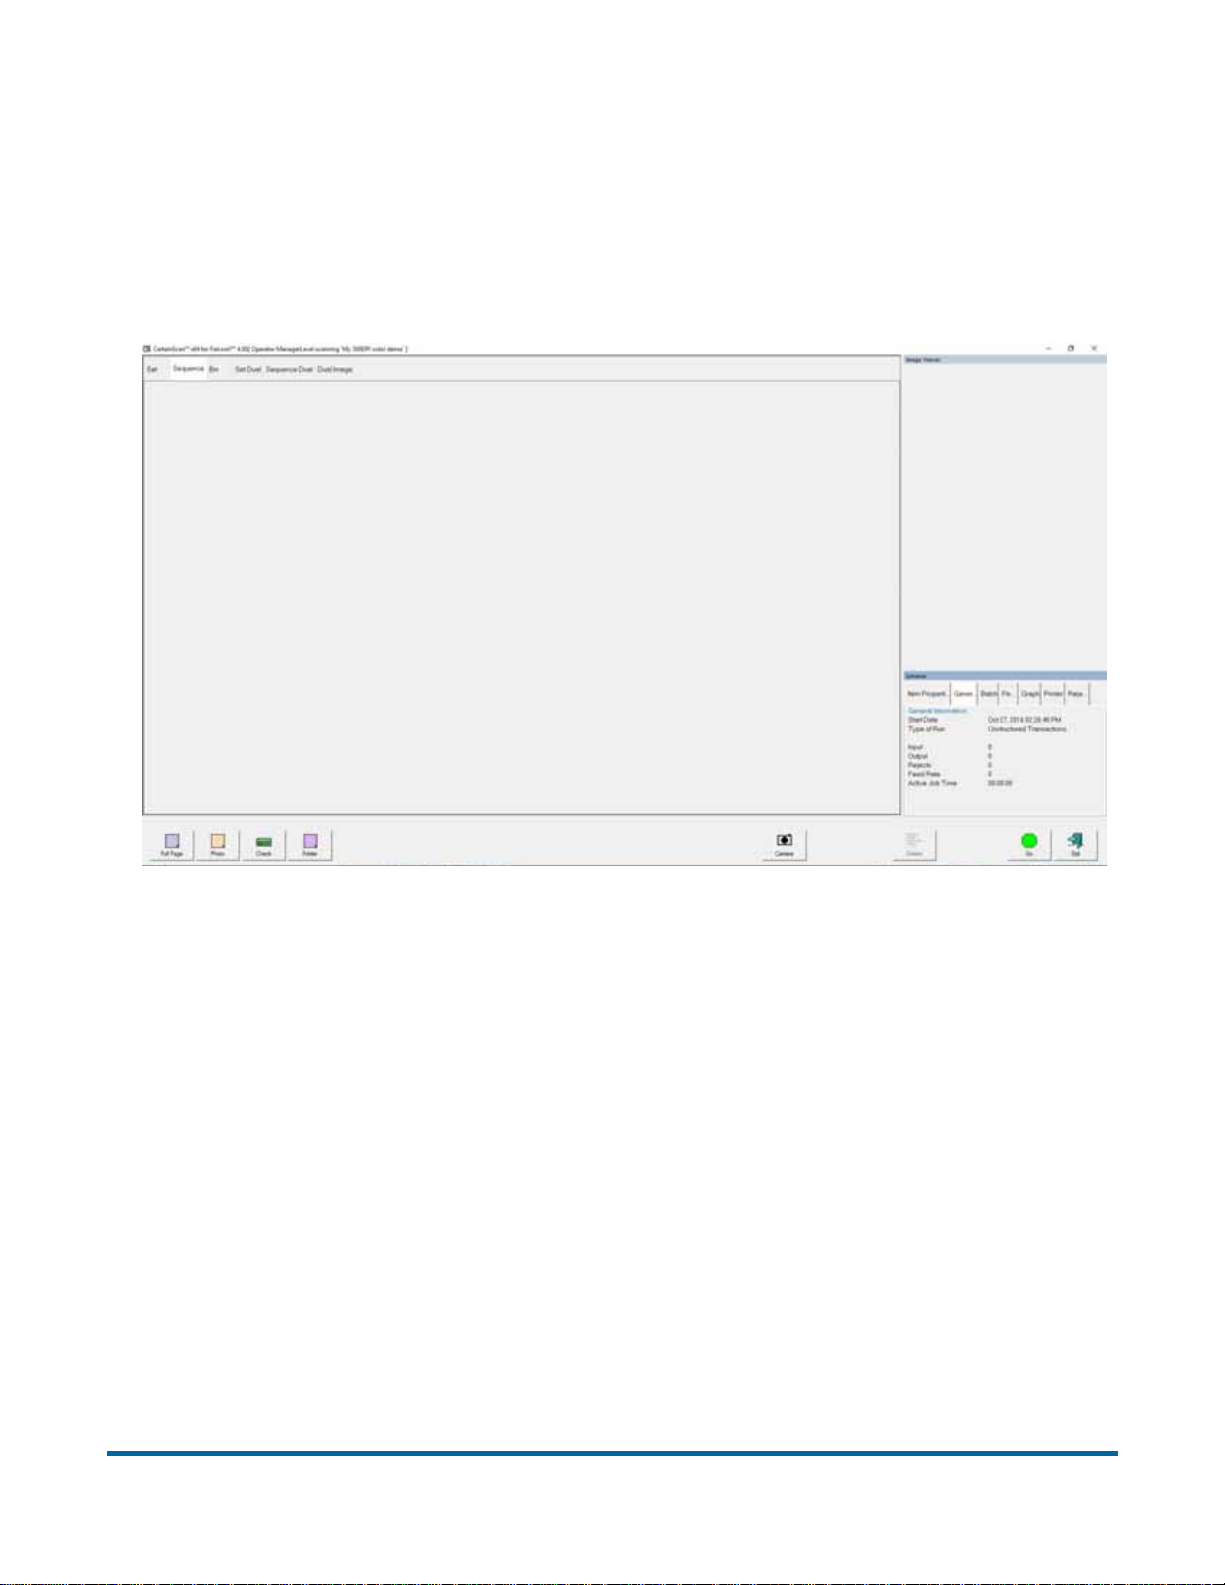
Using the Run Screen
The Run screen will appear after you select and open a job. This is the main
screen you will use for scanning items. If CertainScan Edit is installed and
enabled on your PC, you can also make instant edits to a live batch directly
from the Run screen (see the CertainScan Edit software manual for details).
Figure 5: Run screen
The Manager level has the ability to alter the appearance and layout of the run
screen. They can rearrange the information and preview windows to best suit
their job requirements. For more information on customizing the run screen at
the manager level, see the “CertainScan 4.0 Software Manual.”
26 Operation
FalconV User Manual - Standard Scanning - OPEX Corporation
Page 27
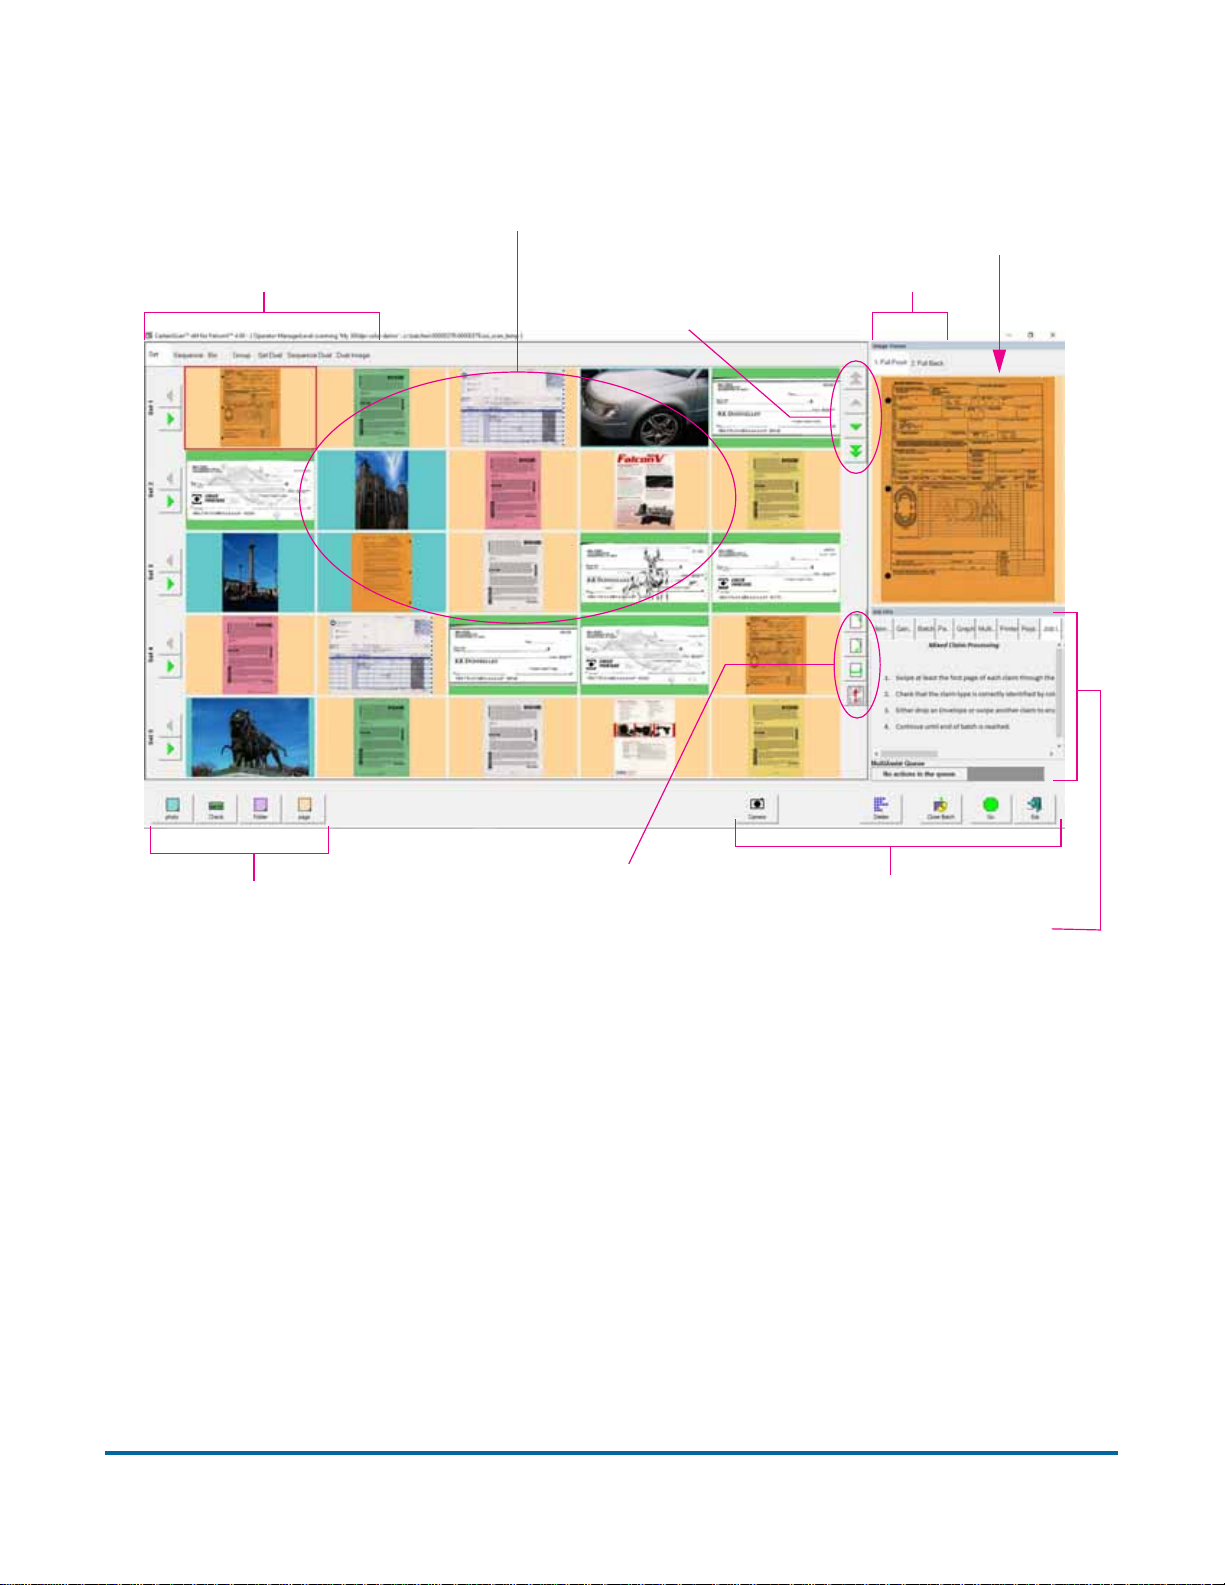
The example shown below is of the default run screen layout prior to any
customizing.
Thumbnail view tabs
(see page 33)
Thumbnail window
Scroll buttons for
thumbnail window
Preview window
(see page 45)
Preview tabs
Rotate image &
Page type buttons
See descriptions of Run screen buttons beginning on page 28.
image filter buttons
Job action buttons
Information window
(see page 47)
Operation 27
FalconV User Manual - Standard Scanning - OPEX Corporation
Page 28
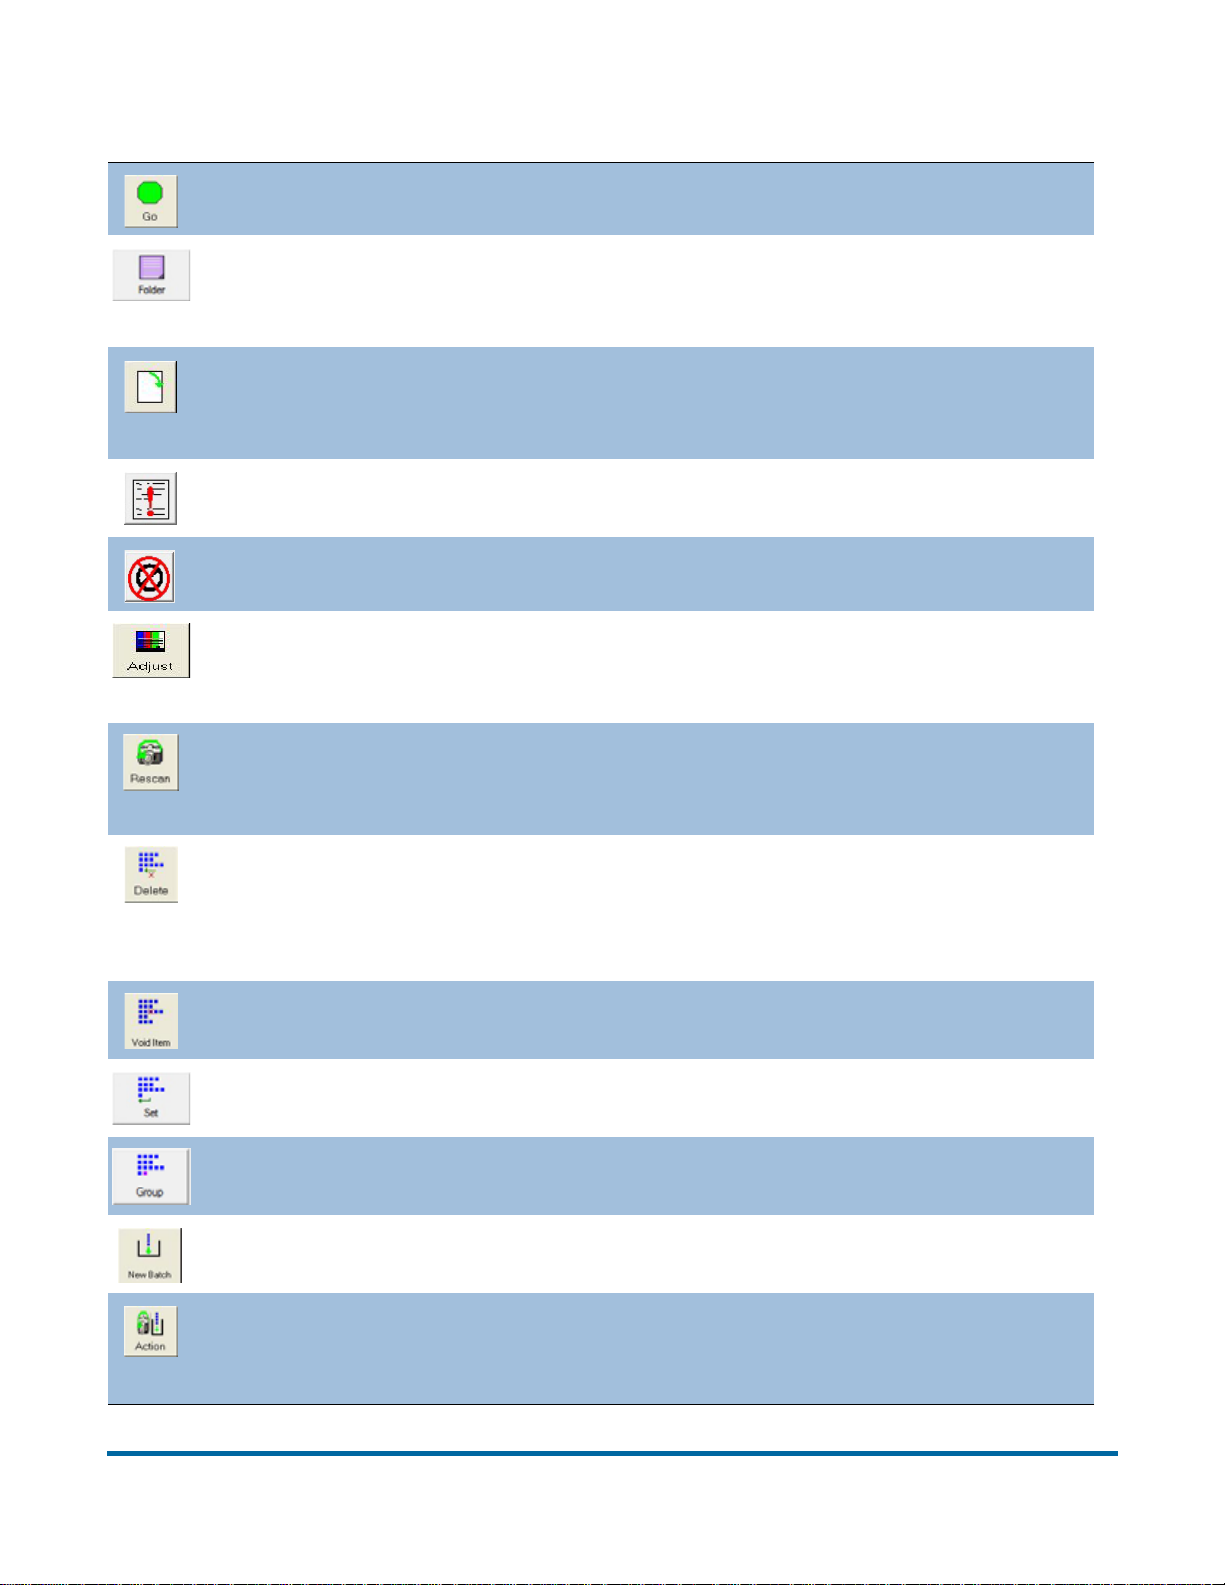
Run screen buttons
Press Go to start the scanner.
The Page Type buttons indicate the page types assigned to the current
job. The use of the buttons varies depending on the job setup. See
“Assigning a page type” on page 67 for more information.
Rotate the image of the selected item. Use the three buttons to rotate
the image 90 degrees clockwise, 180 degrees clockwise, and front to
back.
Press the Filter button to show only those items that require editing
using CertainScan Edit.
Press this button to filter blank images from the Thumbnail view.
Adjust the settings in the Capture Parameters window to enhance the
quality of the output images, select an alternate track speed and
alternate DPI mode. See page 69.
Press a Rescan button to replace a previously scanned image with a
new one. This button will only be available if it has been activated in the
batch parameters. See “Rescanning items” on page 72.
Delete last item from end of batch or range of items to end of batch.
This is only available when the scanner is stopped. This button will only
be available if it has been activated in the batch parameters. See
“Deleting items from the batch” on page 77.
Void the selected item or set. This button will only be available if it has
been activated in the batch parameters.
Start a new Set. This button is only available if it has been activated in
the batch parameters.
Start a new Group. This button is only available if it has been activated
in the batch parameters.
Start a New Batch. This button will only be available if it has been
activated in the batch parameters.
Press the Action button to access the Rescan, New Batch, and Void
buttons. The Action button only appears if two or more of these buttons
(Rescan, New Batch, Void) are enabled.
28 Operation
FalconV User Manual - Standard Scanning - OPEX Corporation
Page 29
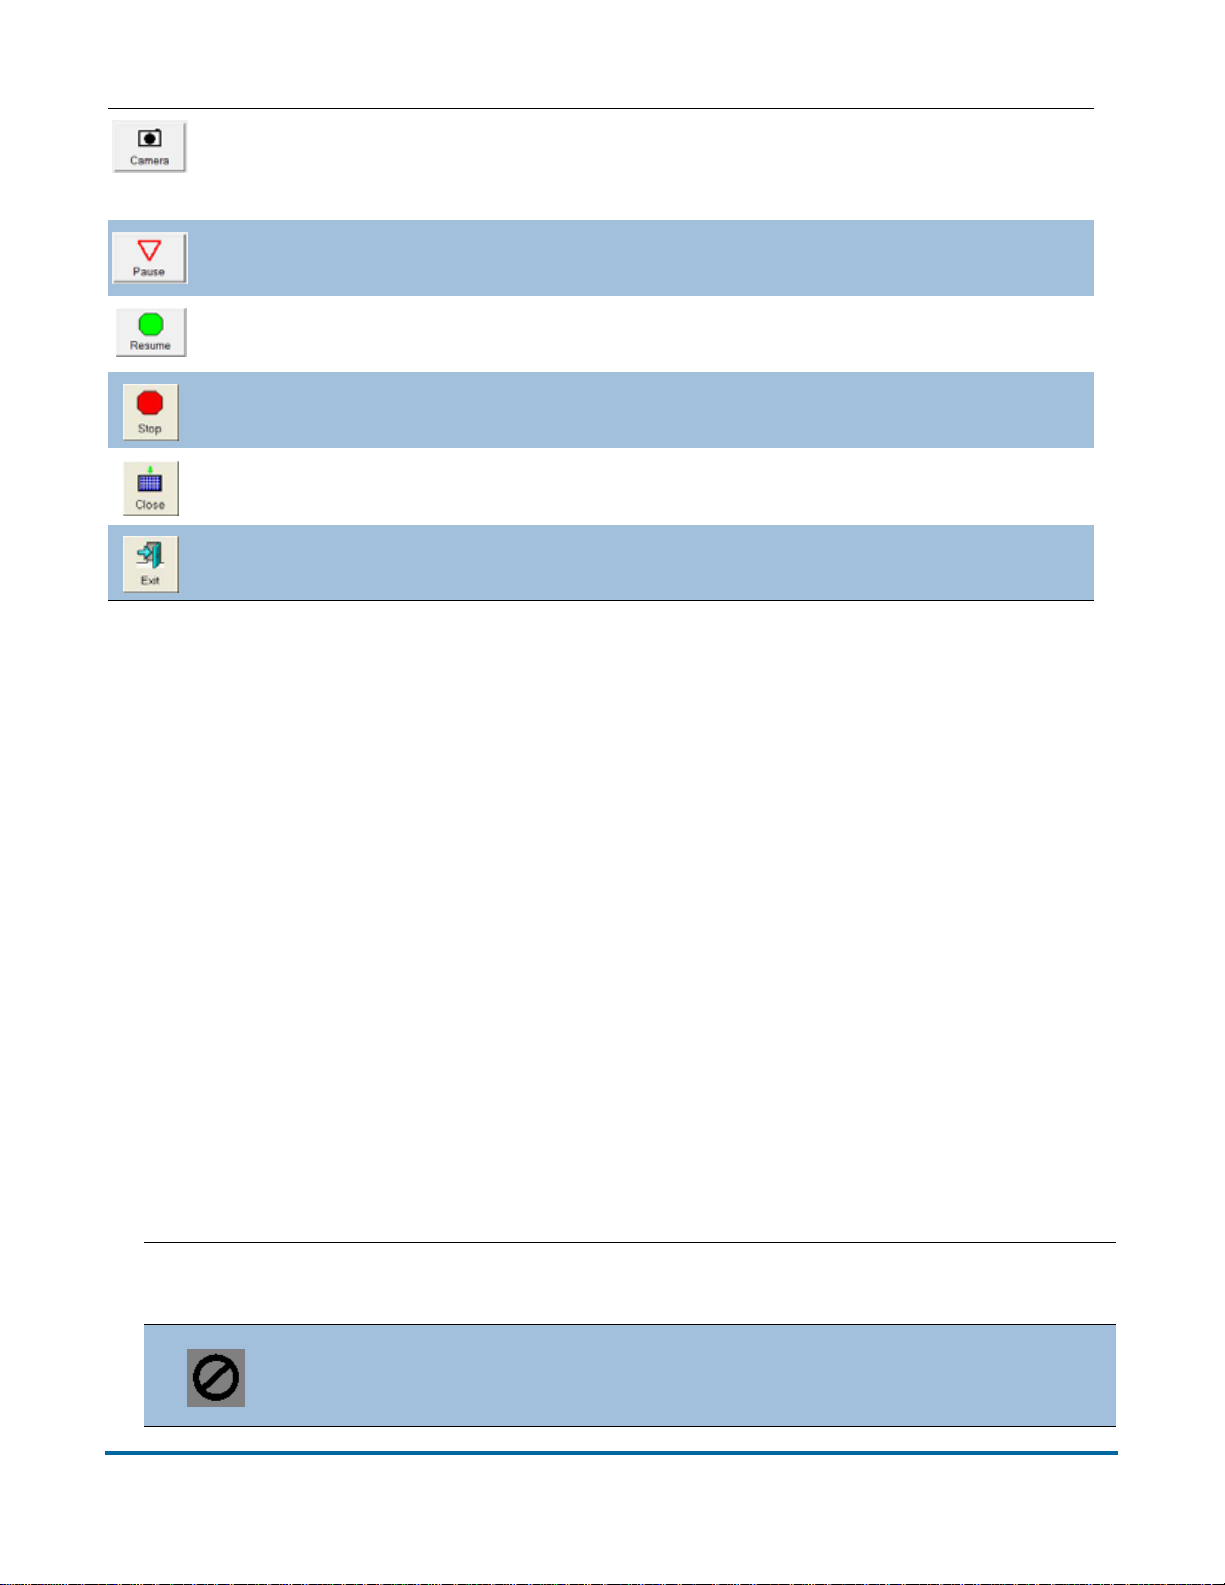
Press the Camera button to insert up to two images at a time from an
external camera into the batch. Additional information about using this
feature can be found in the CertainScan Advanced Features Manual.
Pause the machine. Once pressed, the Resume button appears.
Press to Resume scanning. Once pressed, the Pause button appears.
Stop the machine. This does not end the current batch or set.
Close the current batch. The Close Batch confirmation prompt appears.
Exit the current job and close the Run screen.
Runscreen Thumbnail and Preview Image Icons
While scanning items in CertainScan, the host software displays thumbnail
images in the main left panel and preview images in a smaller panel in the
upper right corner of the runscreen. When images are readily available in the
host software’s cache or when the system is not busy, images will display as
expected. Under some conditions, when images are not immediately available,
the host software will display one of the icons shown in Table 2 where the
image would have been.
Note: When a batch is opened in CertainScan Edit or CertainScan, a subset of
the same icons will appear . Whether or not it should appear is indicated in
the last column. Refer to the “CertainScan Edit” manual for more details
on using CertainScan Edit.
Table 2: Runscreen Thumbnail and Preview Image Icons
Icon Description
Appears in
CertainScan Edit?
Image Blank Image is known to be
blank according to batch’s image data.
Operation 29
FalconV User Manual - Standard Scanning - OPEX Corporation
Yes
Page 30
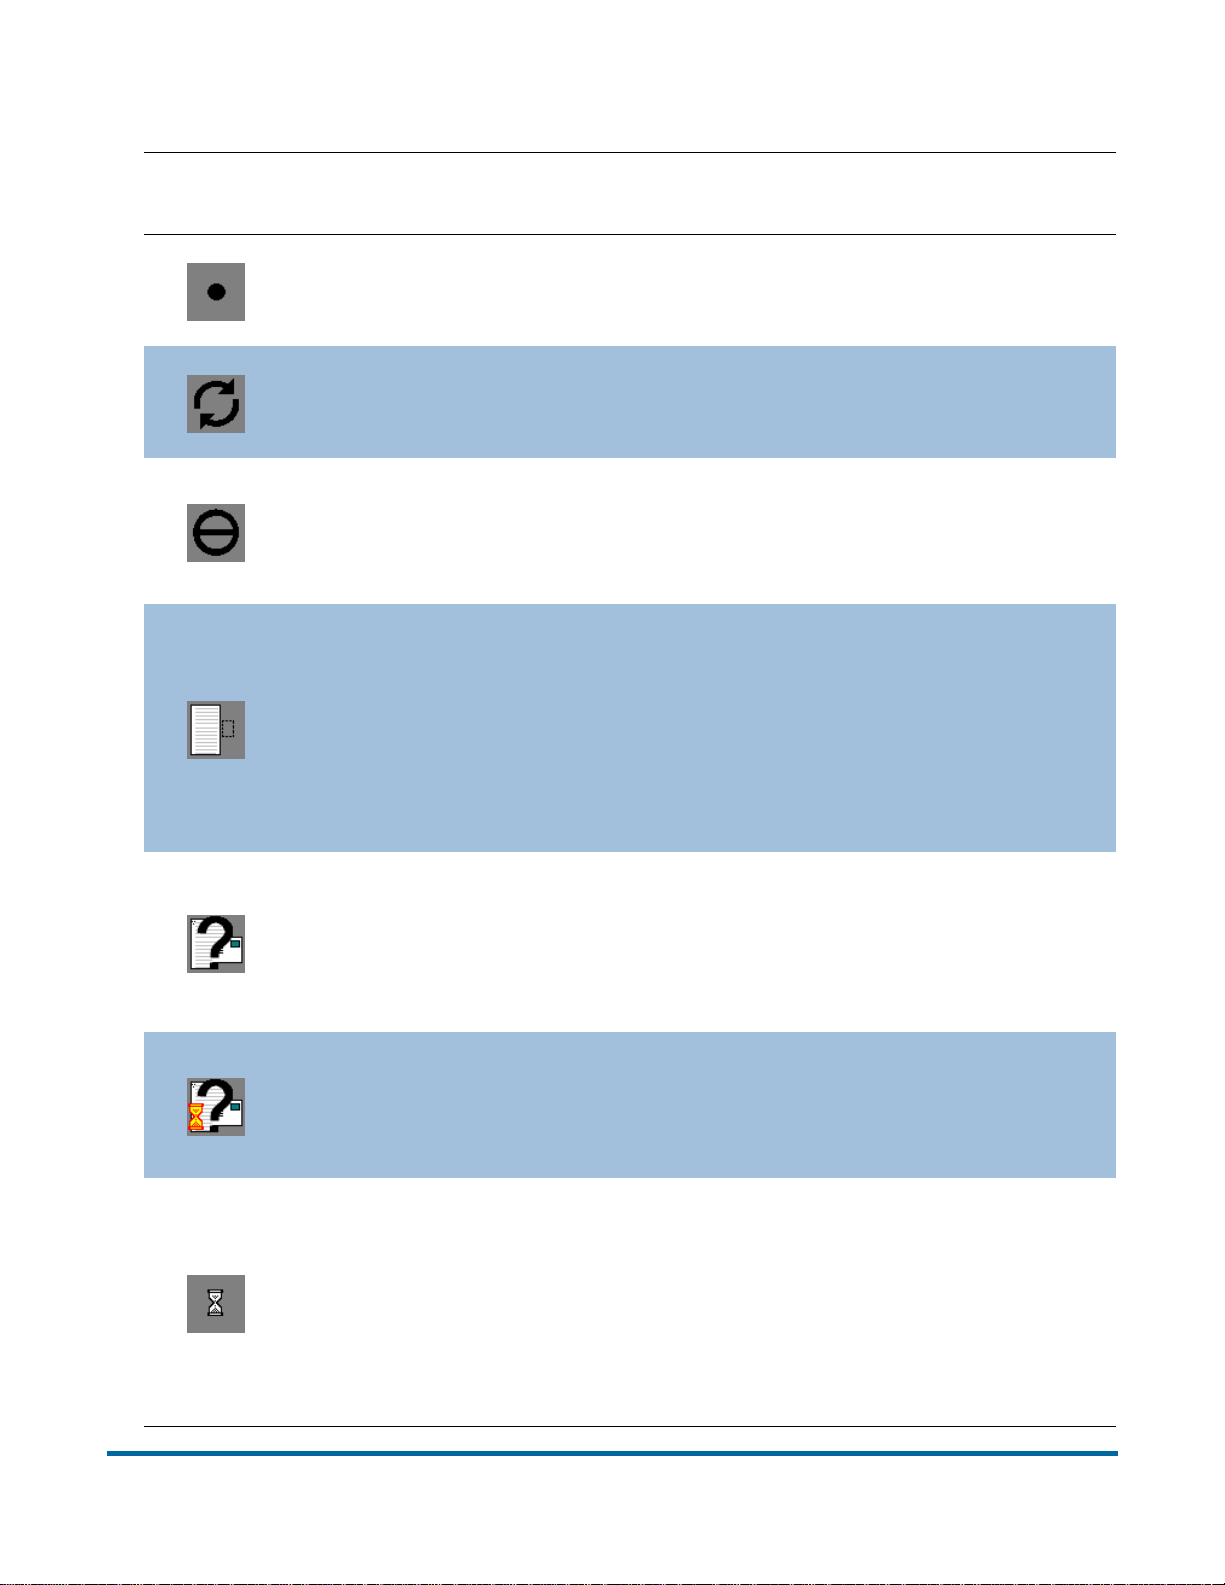
Table 2: Runscreen Thumbnail and Preview Image Icons (continued)
Icon Description
No Snippet Metadata Image
information was not saved in the batch.
This is configured in the page type.
Processing Underway Image is not yet
available. Most likely, it is still being
processed for the scan.
Image Not Saved This image has
metadata but has no image file. The page
type was configured to not save this image
to disk.
Snippet Out Of Bounds This image
was set up to not be the entire piece.
However , when trying to extract the image
for batch output, the specified region was
Appears in
CertainScan Edit?
Yes
Should not appear
Yes
Yes
found to lie completely outside the
boundaries of the item’s edges. No disk
image was written for this reason.
Image Unavailable Attempted to load
the image from disk but failed. The
request did not time out, so the disk to
which the image is stored may be down or
disconnected.
Image Timeout Attempted to load the
image from disk but the request timed out.
Network might be busy or the host might
be busy writing other active items to disk.
System Busy The image is not in the
cache but the system is too busy, so an
attempt was not made to load it from disk.
An attempt will be made when the system
is not busy. The host software is probably
Yes
Yes
Should not appear
in the middle of scanning or finishing up
writing the last scanned items to disk.
30 Operation
FalconV User Manual - Standard Scanning - OPEX Corporation
Page 31
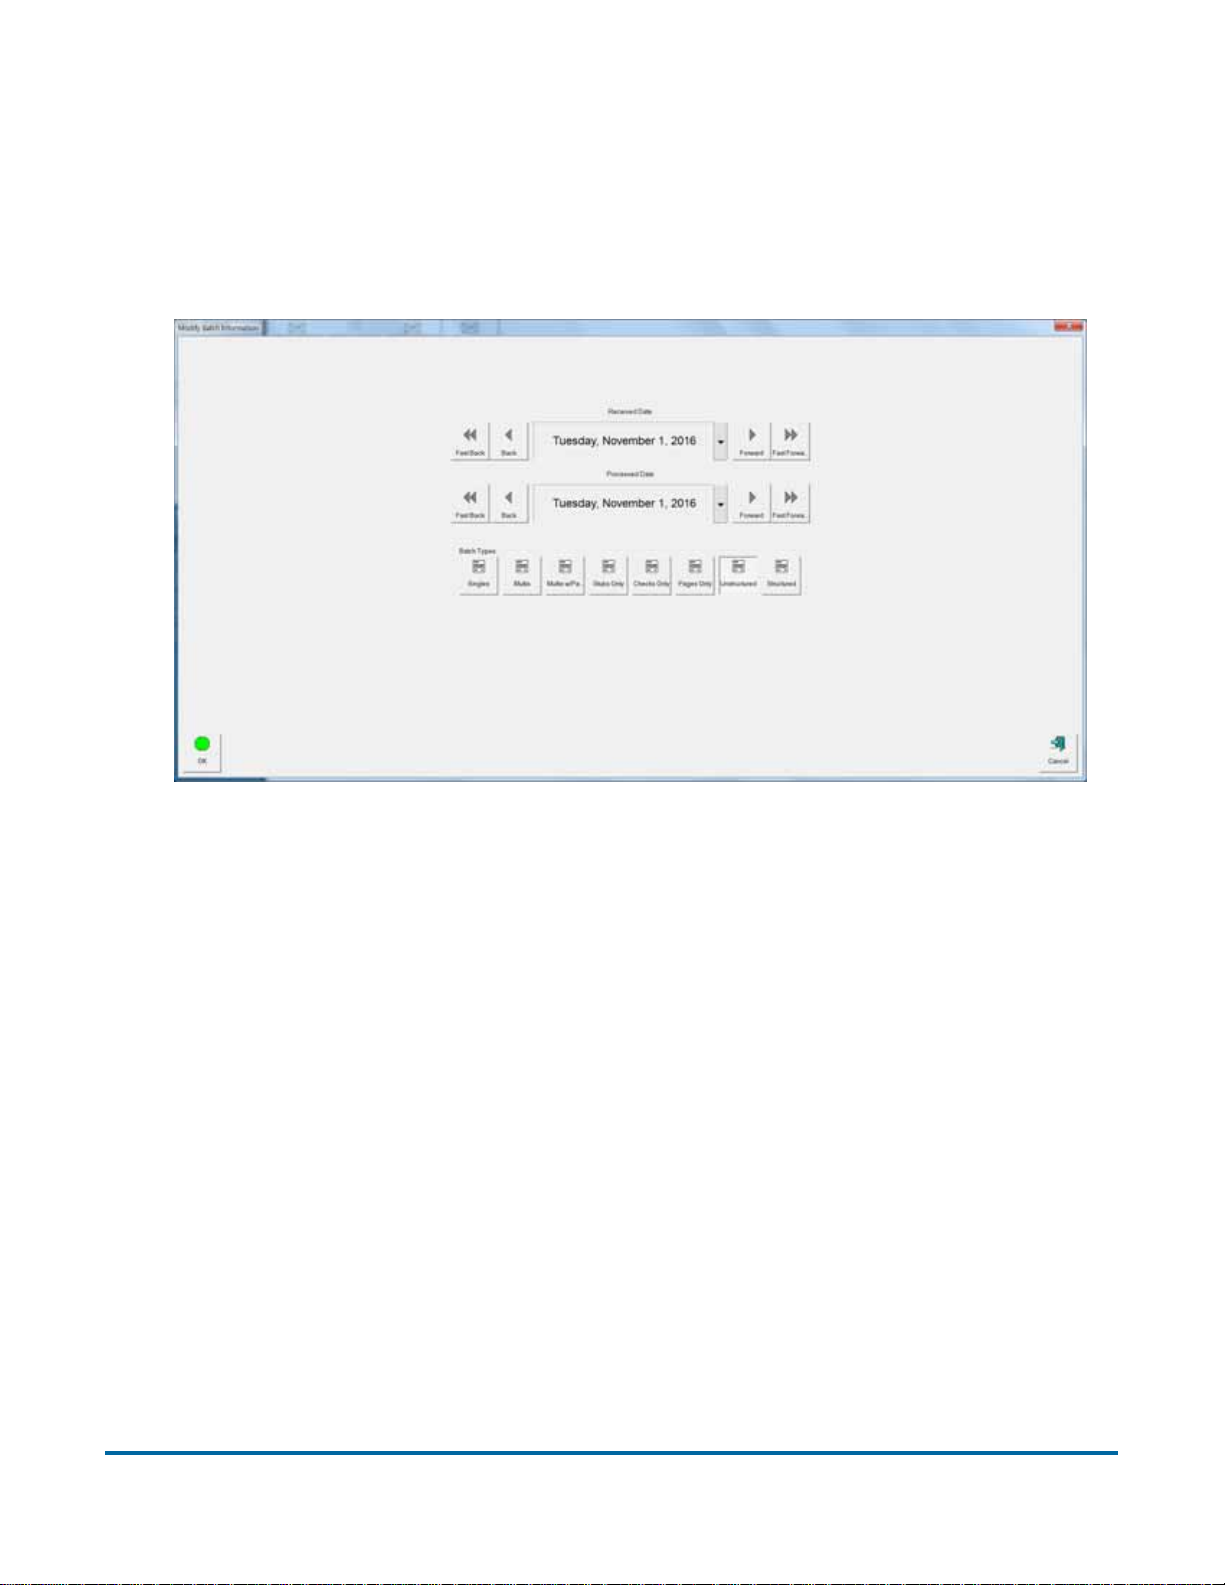
About the Modify Batch Information screen
The Modify Batch Information screen (Figure 6) can be enabled to appear at
the beginning of a job to prompt the operator to enter batch information such as
“processed” and/or “received” dates as well as select a “Batch Type” before
starting a new job.
Figure 6: Batch Information screen
Operation 31
FalconV User Manual - Standard Scanning - OPEX Corporation
Page 32
Flexible Batch Naming
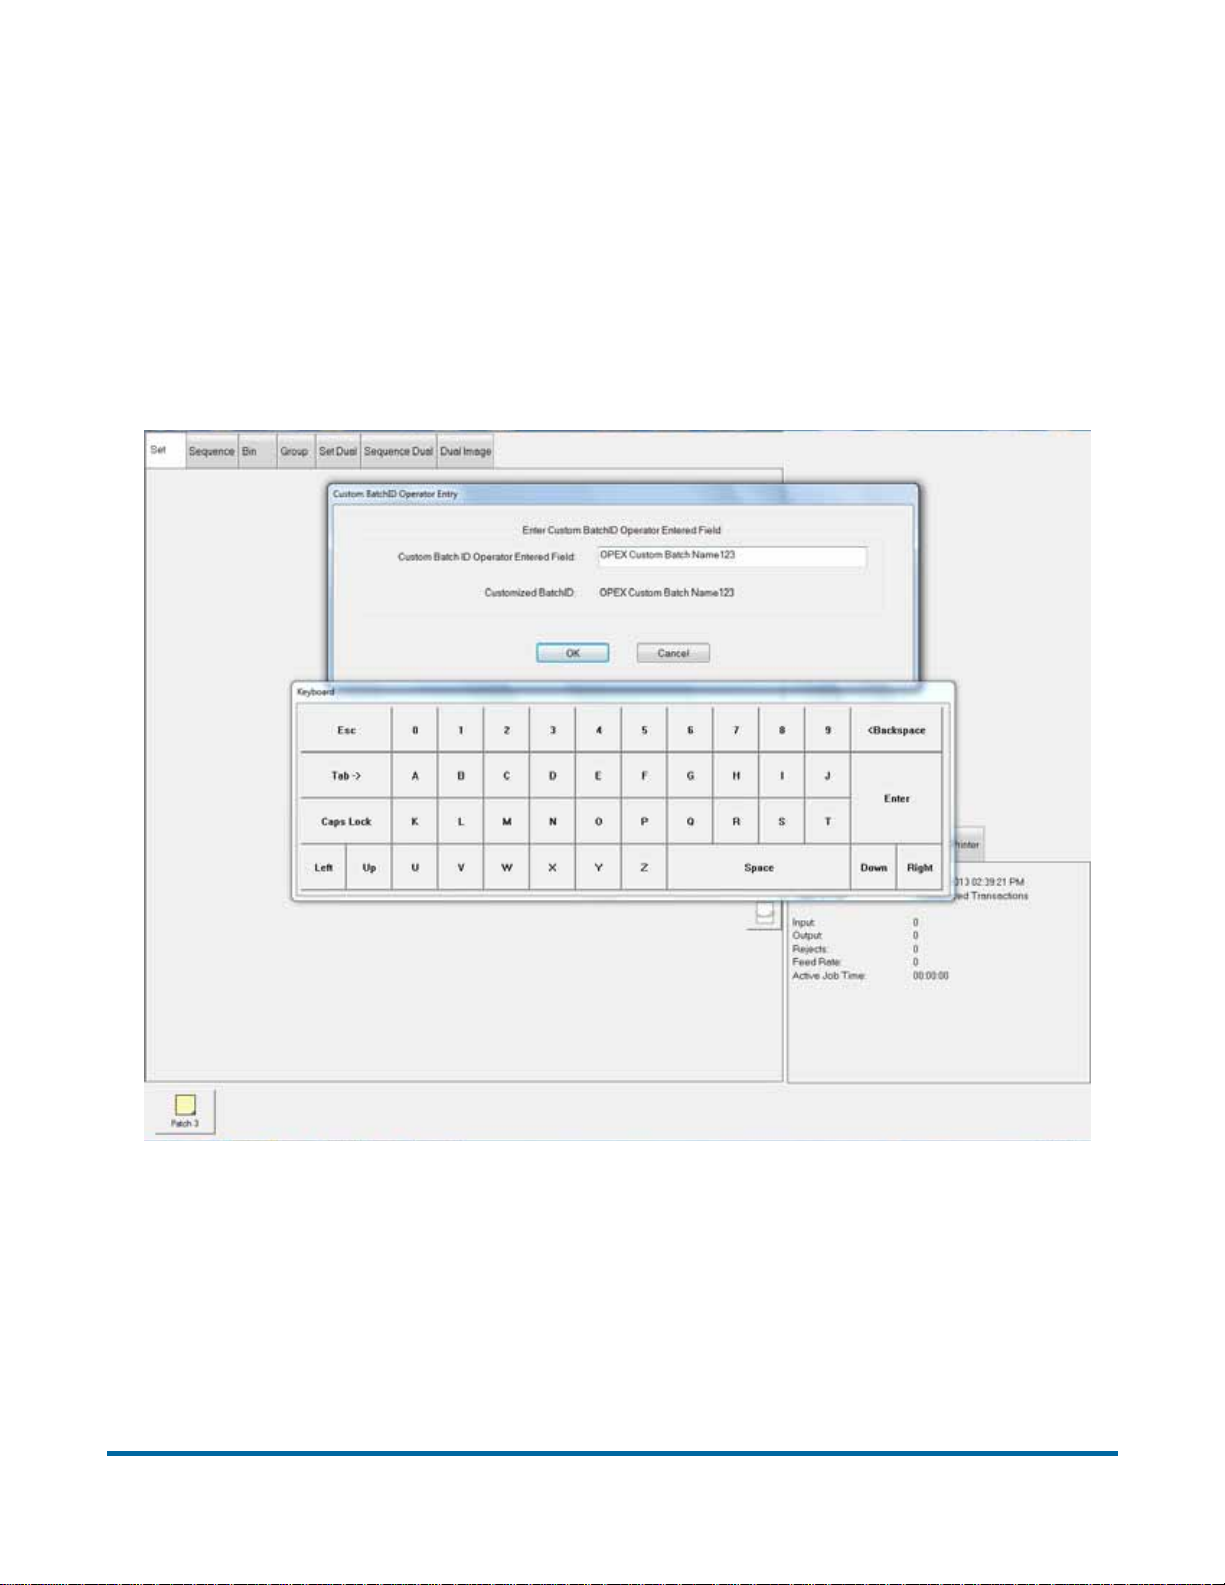
This feature allows you to place a prompt at the start of a new batch, in which
operators can enter a custom batch name. The name can be manually typed in
using the keyboard or touch-screen keypad, or scanned in from a barcode
scanner (from a box or lot number, for example).
Note: File names must be Microsoft Windows-compatible. That is, the file
names cannot contain the following characters:
" / \ [ ] : ; | = , + * ? < > .
Setup for this feature is described in the CertainScan Advanced Features
Manual.
32 Operation
FalconV User Manual - Standard Scanning - OPEX Corporation
Page 33
Thumbnail view tabs
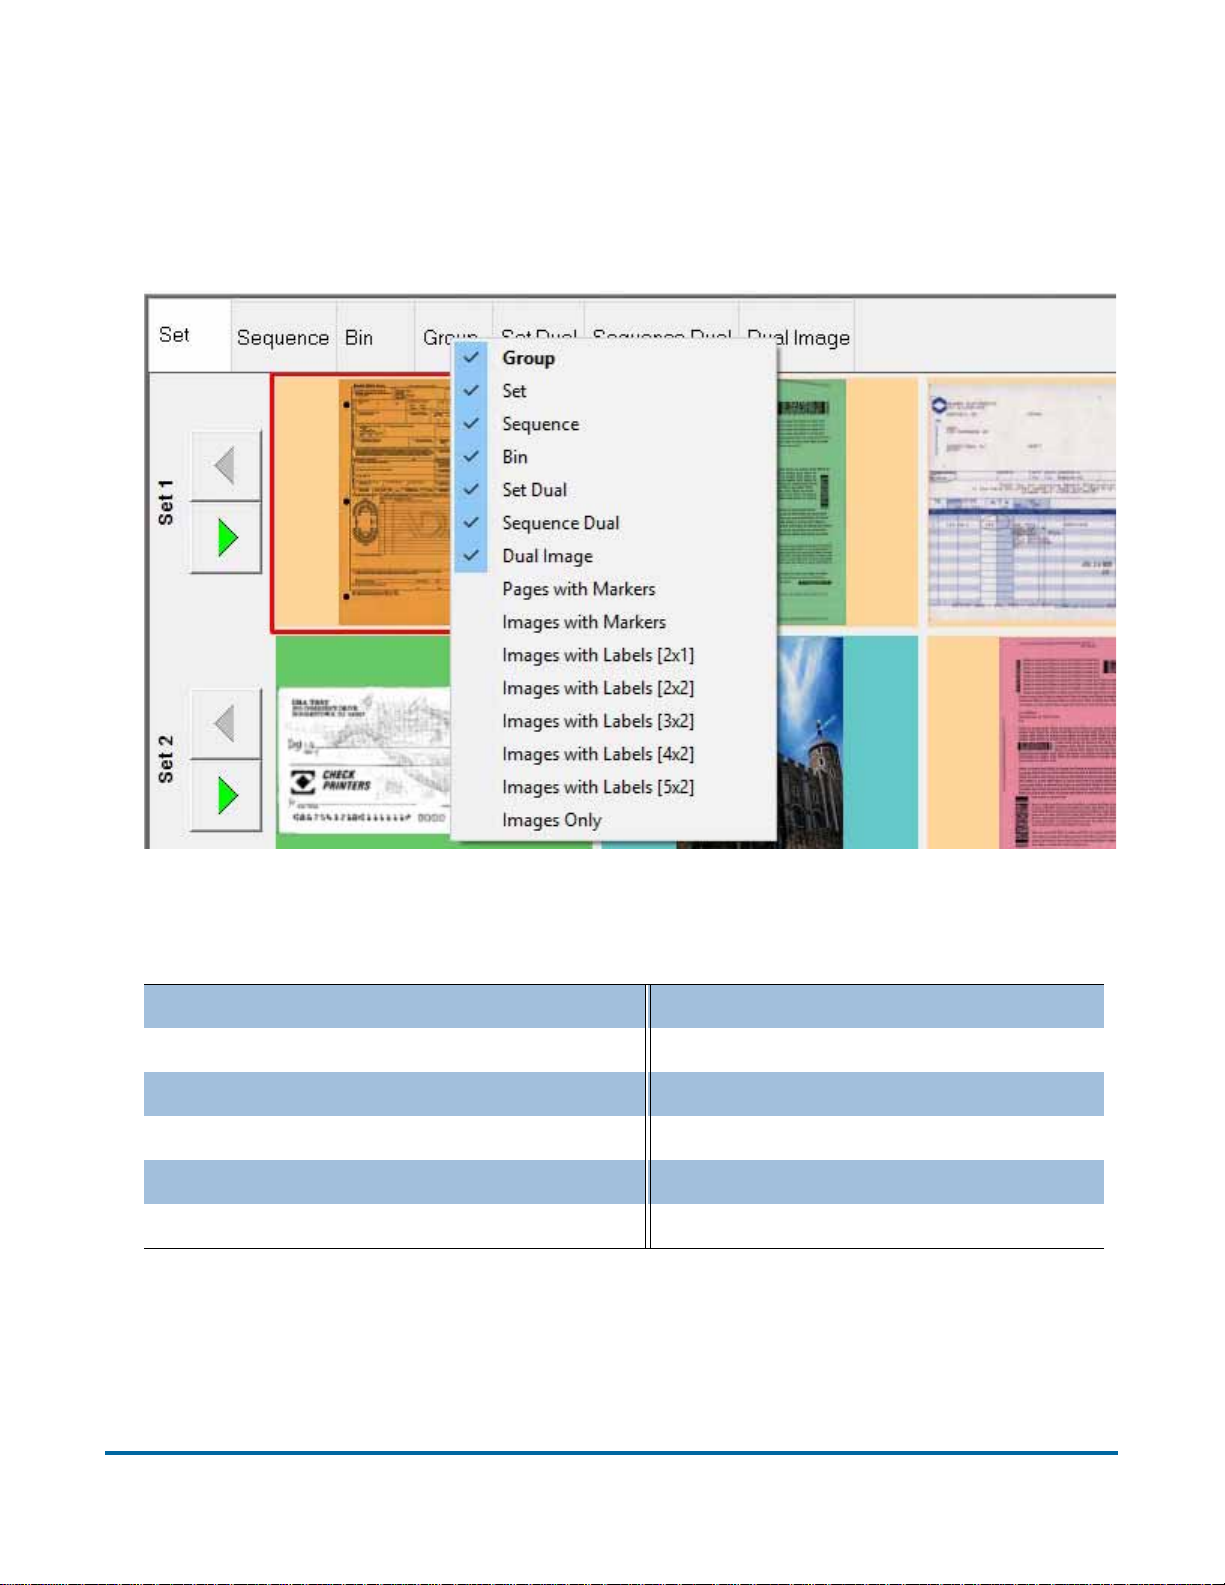
You can choose which thumbnail view tabs to display on the screen by rightclicking anywhere on the top bar of the Thumbnail view pane and selecting a
desired view tab from the menu (Figure 7).
Figure 7: View tab display menu
Use the tabs to arrange thumbnails in one of many available configurations:
Set (see page 34) Dual Image (see page 40)
Scan sequence (see page 35) Pages with Markers (see page 41)
Bin piece was sorted to (see page 36) Images with Markers (see page 42)
Group (see page 37) Images with Labels (see page 43)
Set Dual (see page 40) Images Only (see page 44)
Sequence Dual (see page 40)
Operation 33
FalconV User Manual - Standard Scanning - OPEX Corporation
Page 34
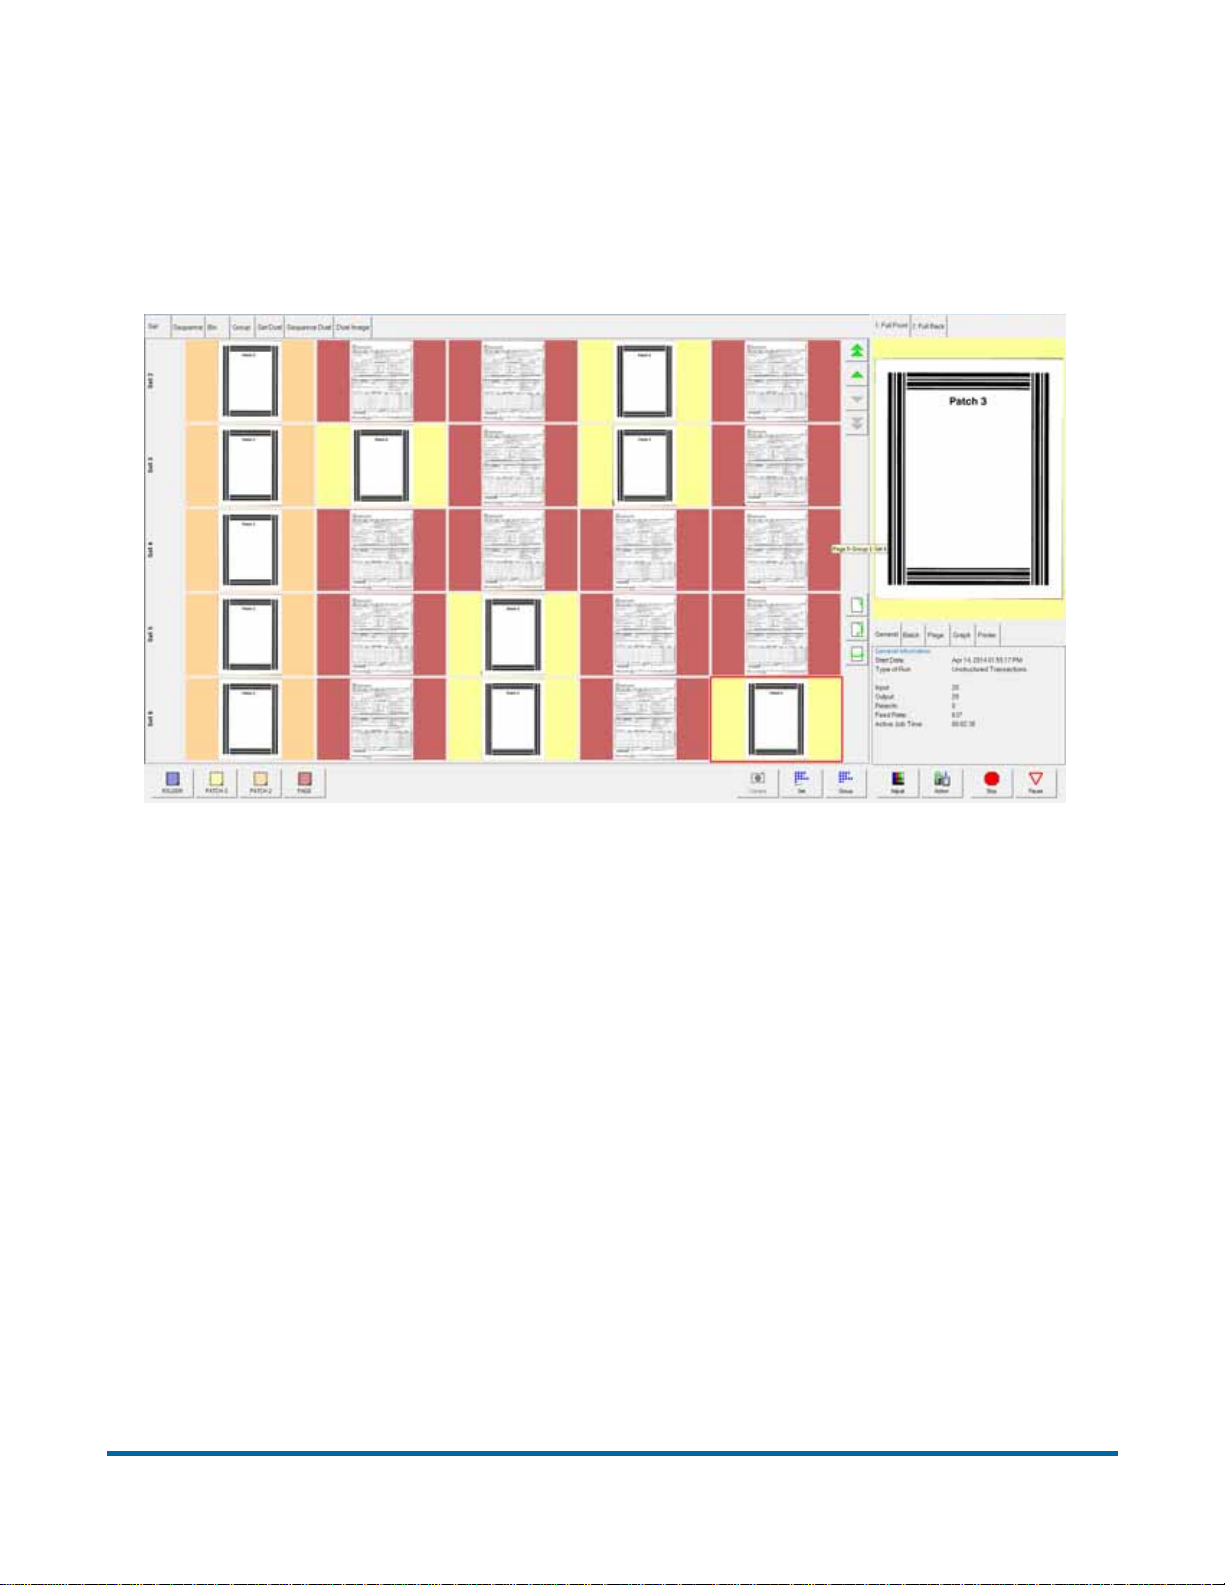
Set view
The set view groups thumbnails by set. All of the pieces are displayed in a
single row from left to right in the order they were scanned. One thumbnail is
displayed for each piece. Scroll buttons appear on the left of the Thumbnail
pane when the number of thumbnails in the set exceeds the pane width.
34 Operation
FalconV User Manual - Standard Scanning - OPEX Corporation
Page 35
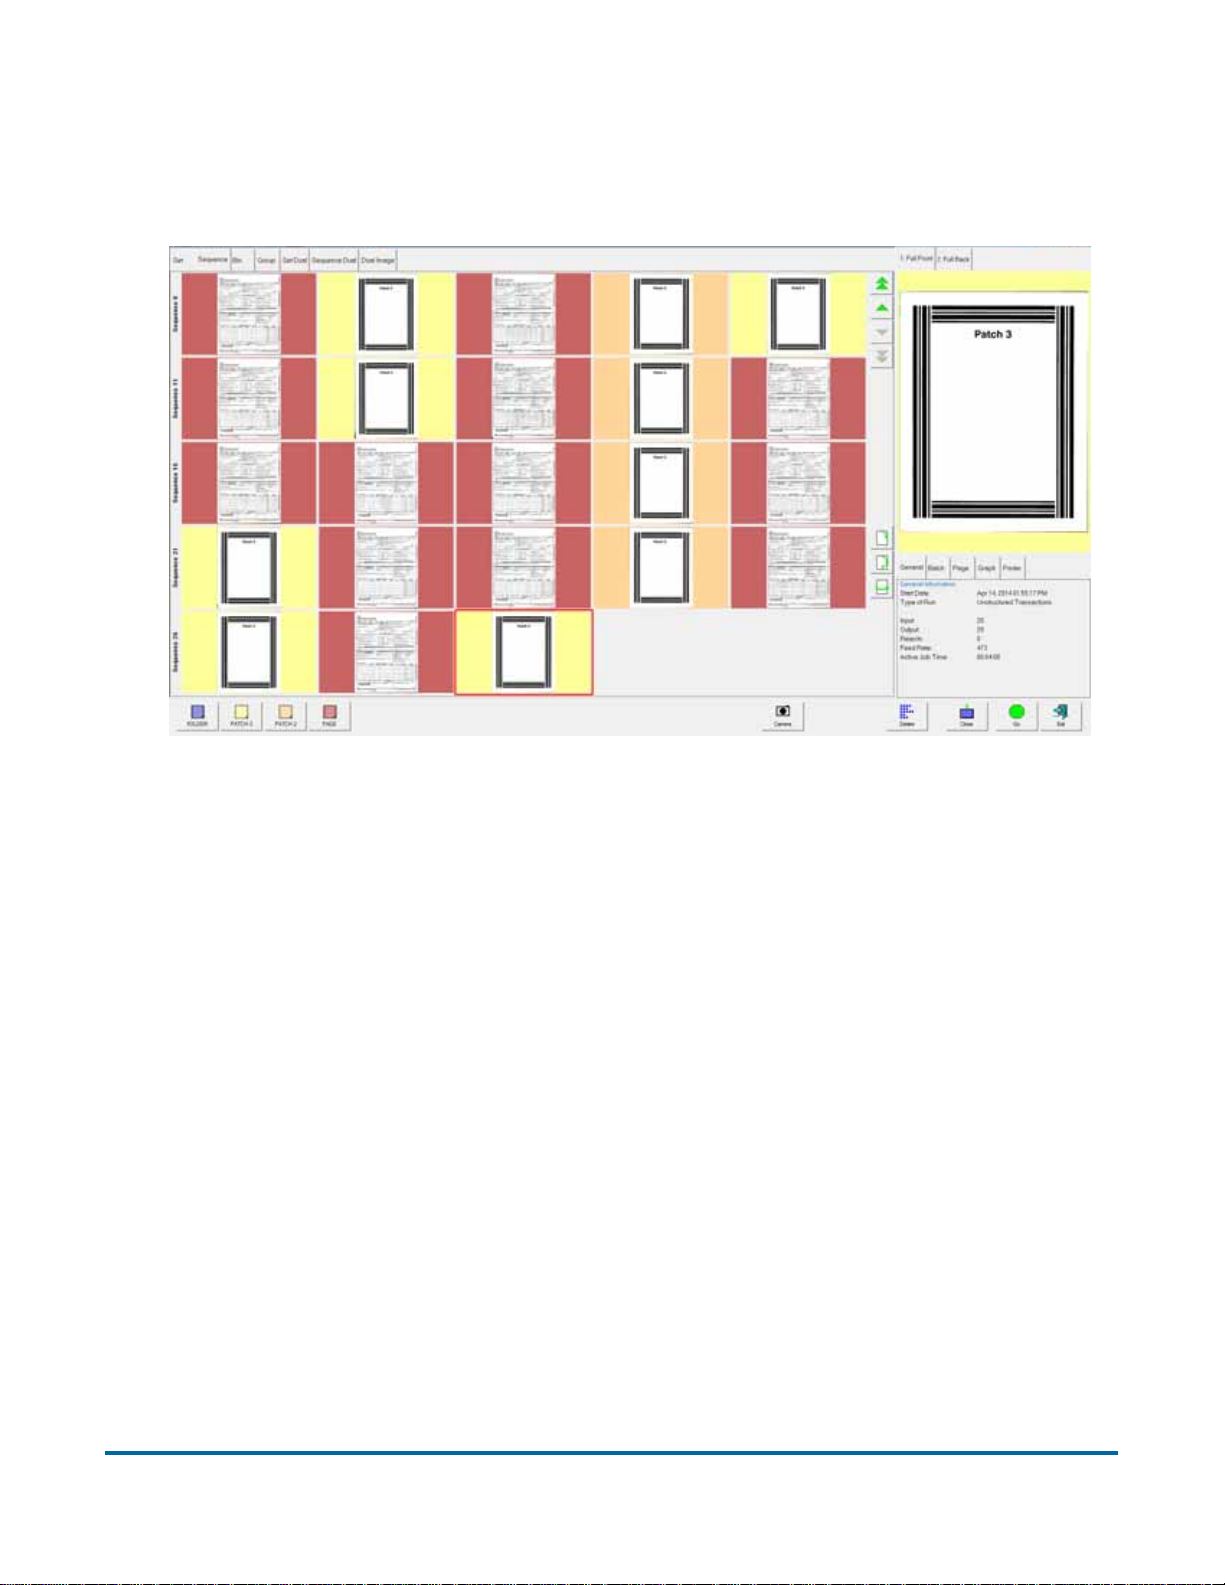
Sequence view
The sequence view displays all of the pieces in the order they were scanned
from left to right. A new row will start after the fifth piece.
Operation 35
FalconV User Manual - Standard Scanning - OPEX Corporation
Page 36
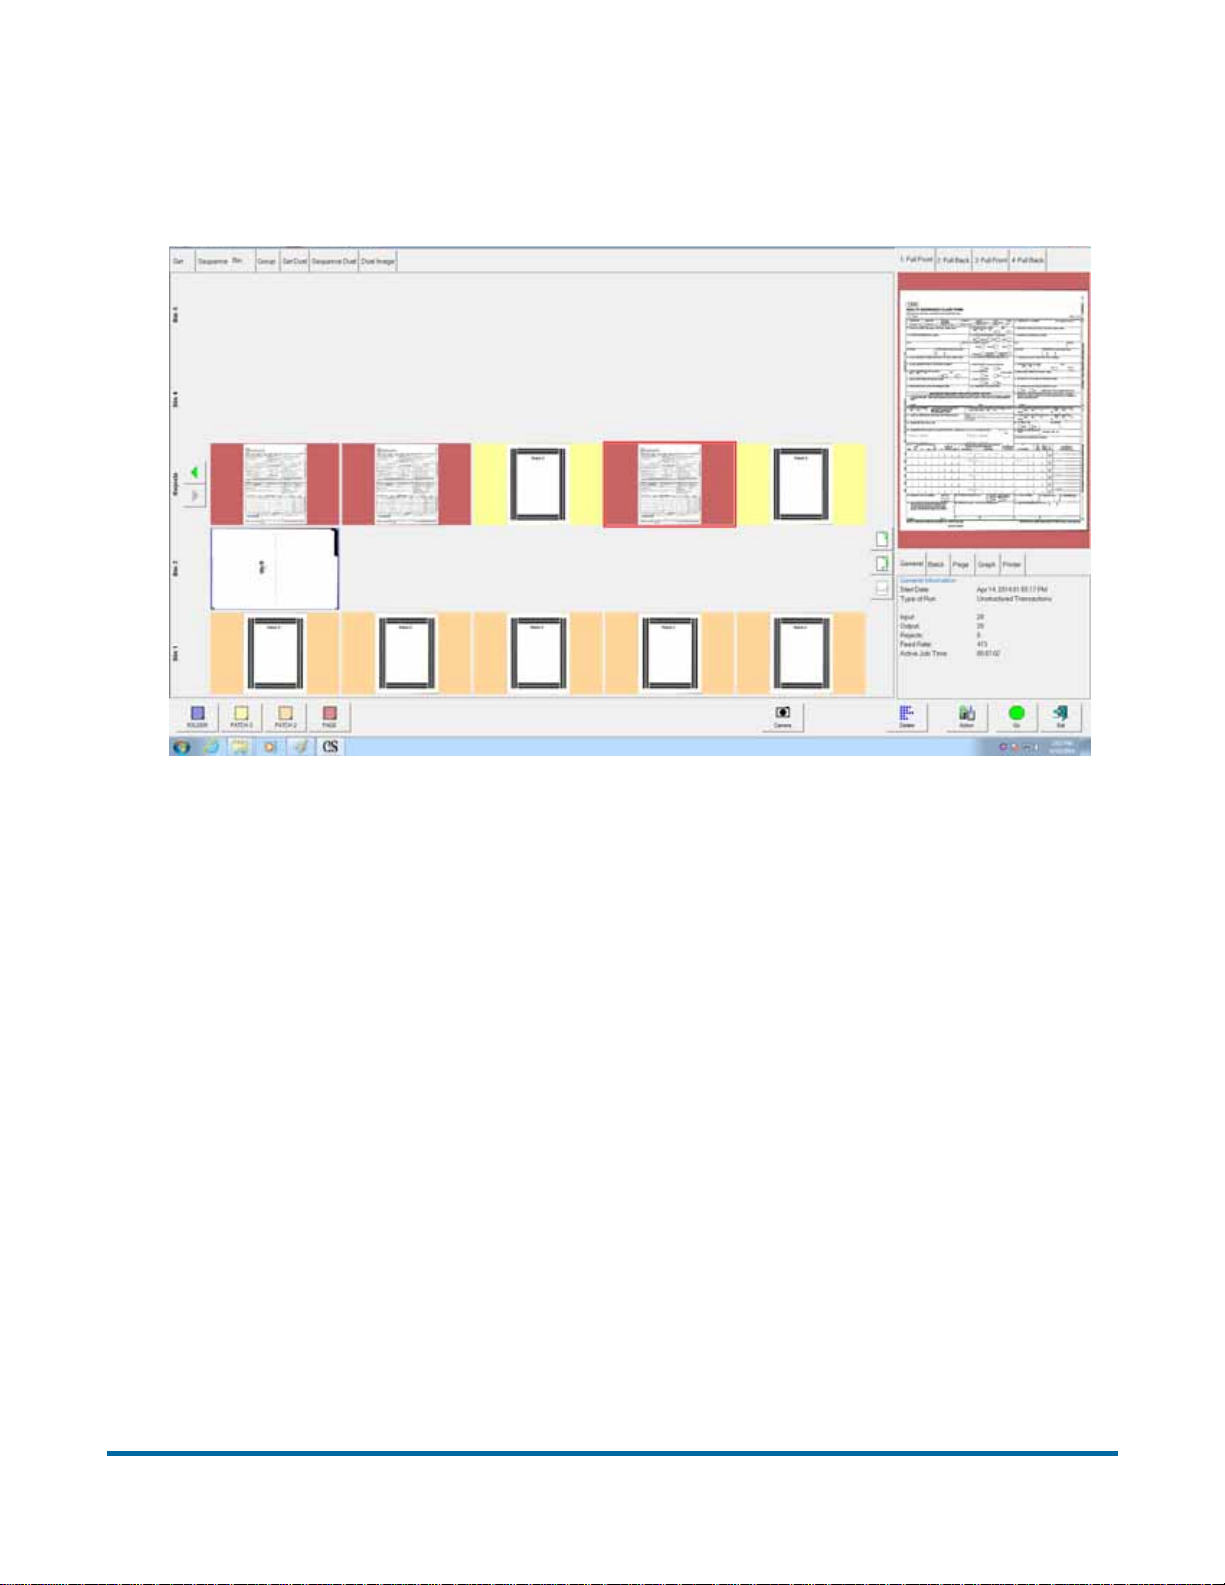
Bin view
In Bin view, each row represents a bin number that scanned items in that row
were sorted to.
36 Operation
FalconV User Manual - Standard Scanning - OPEX Corporation
Page 37
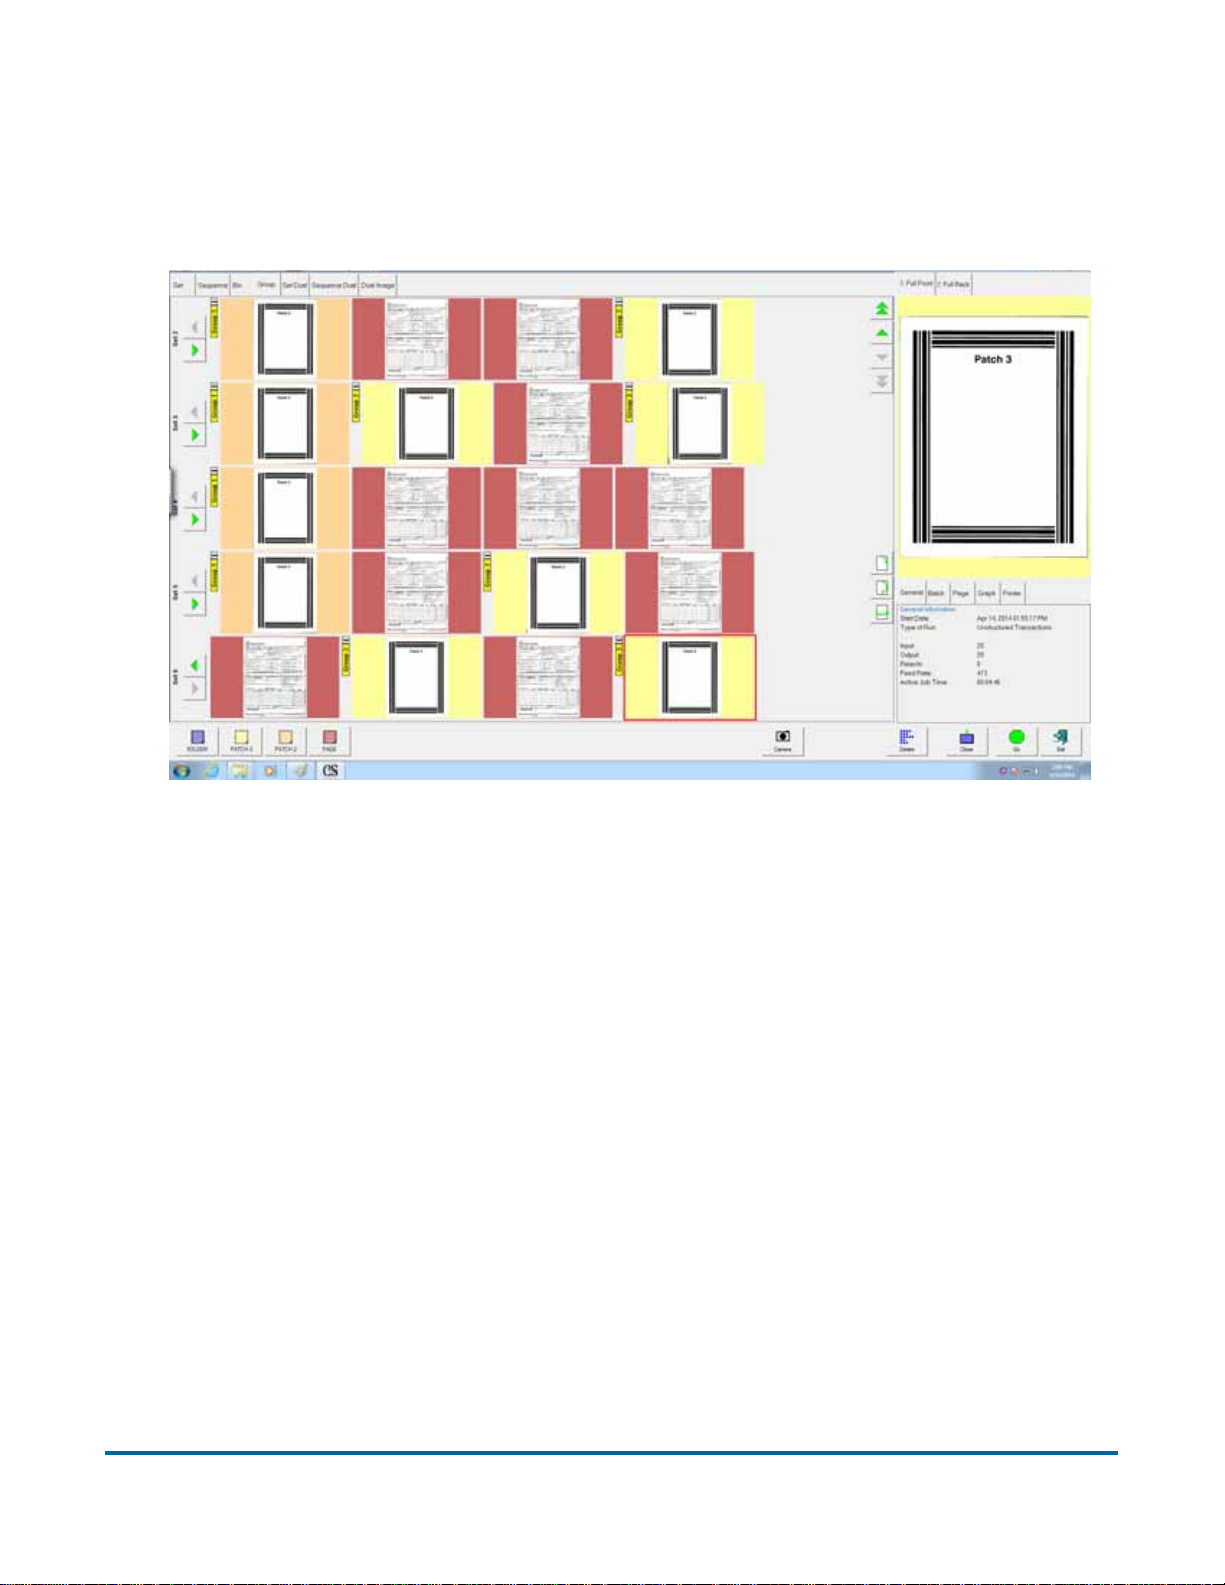
Group view
The Group view, similar to the Set view, also displays each of the group
separators (or markers).
Operation 37
FalconV User Manual - Standard Scanning - OPEX Corporation
Page 38
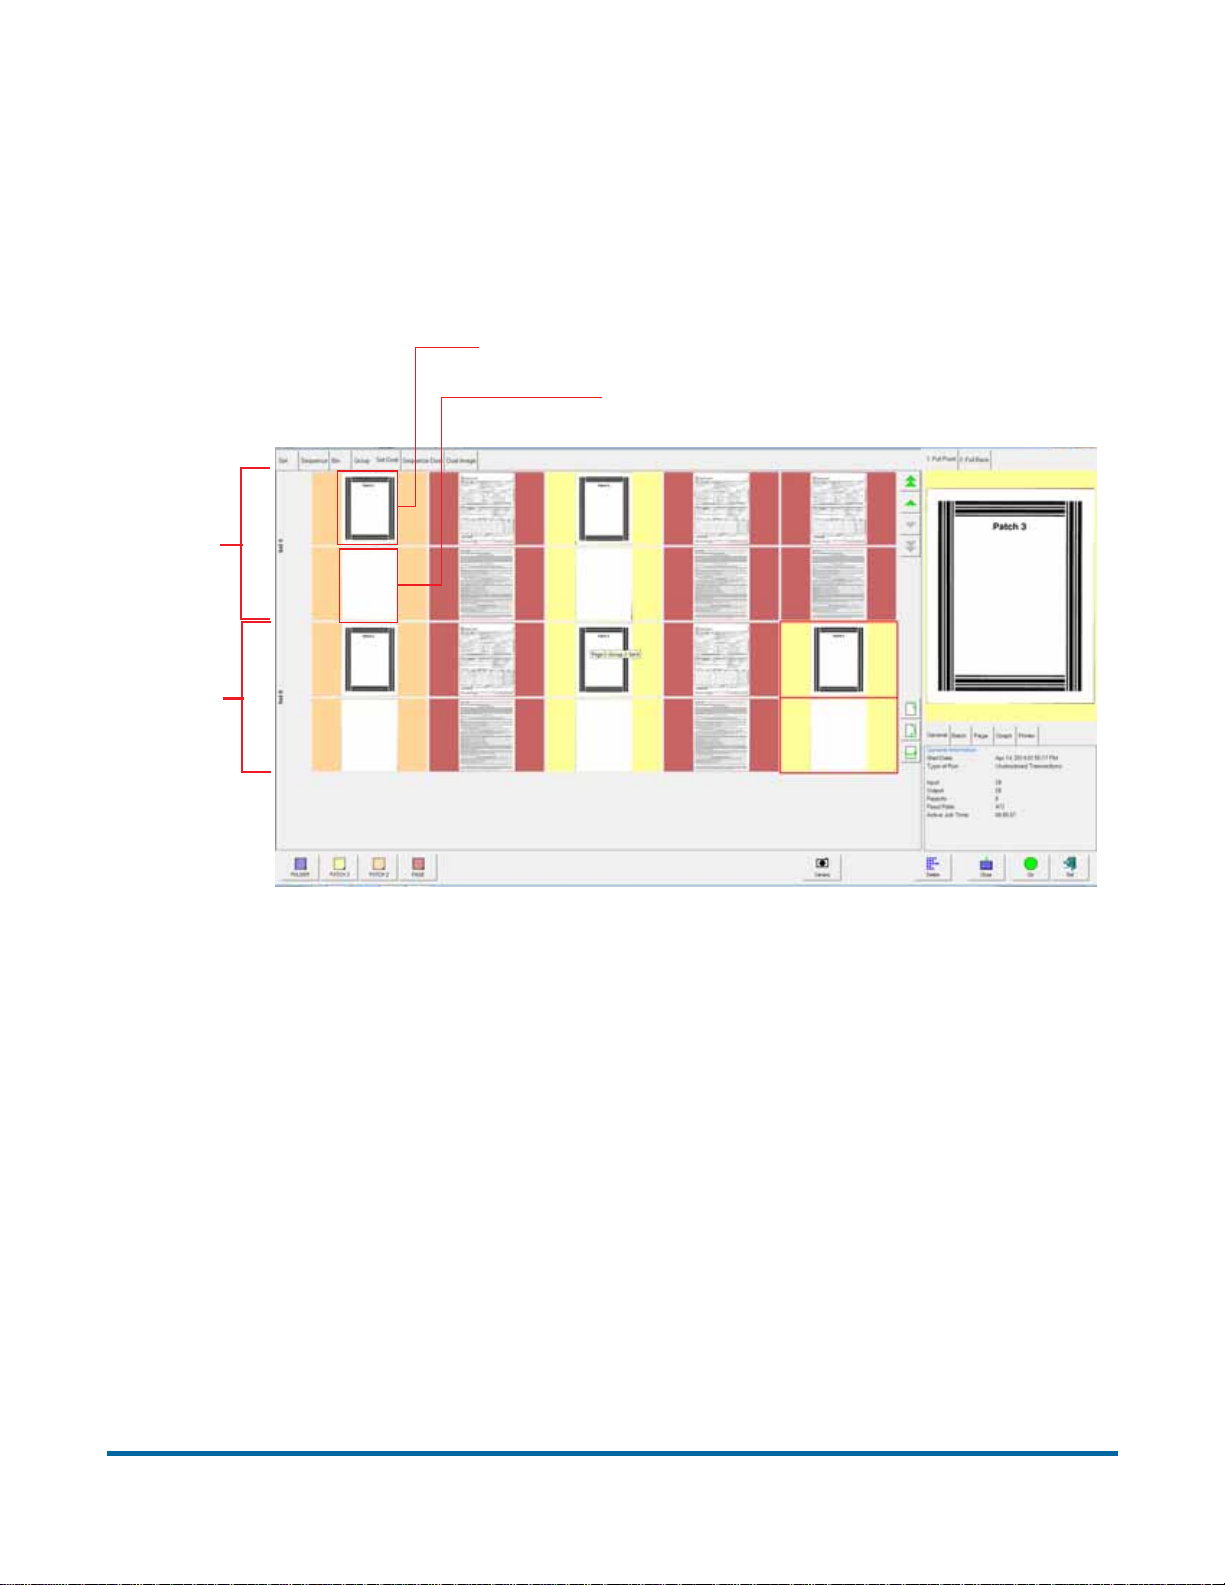
Set Dual view
The Set Dual view shows two thumbnails for each piece, grouped by set. The
first row will show one image; the following row will show the secondary image.
Set dual view will only work properly if the page types in your job are set up to
include a “secondary” thumbnail.
Image 1 (front)
Image 2 (secondary image)
Set 1
Set 2
38 Operation
FalconV User Manual - Standard Scanning - OPEX Corporation
Page 39
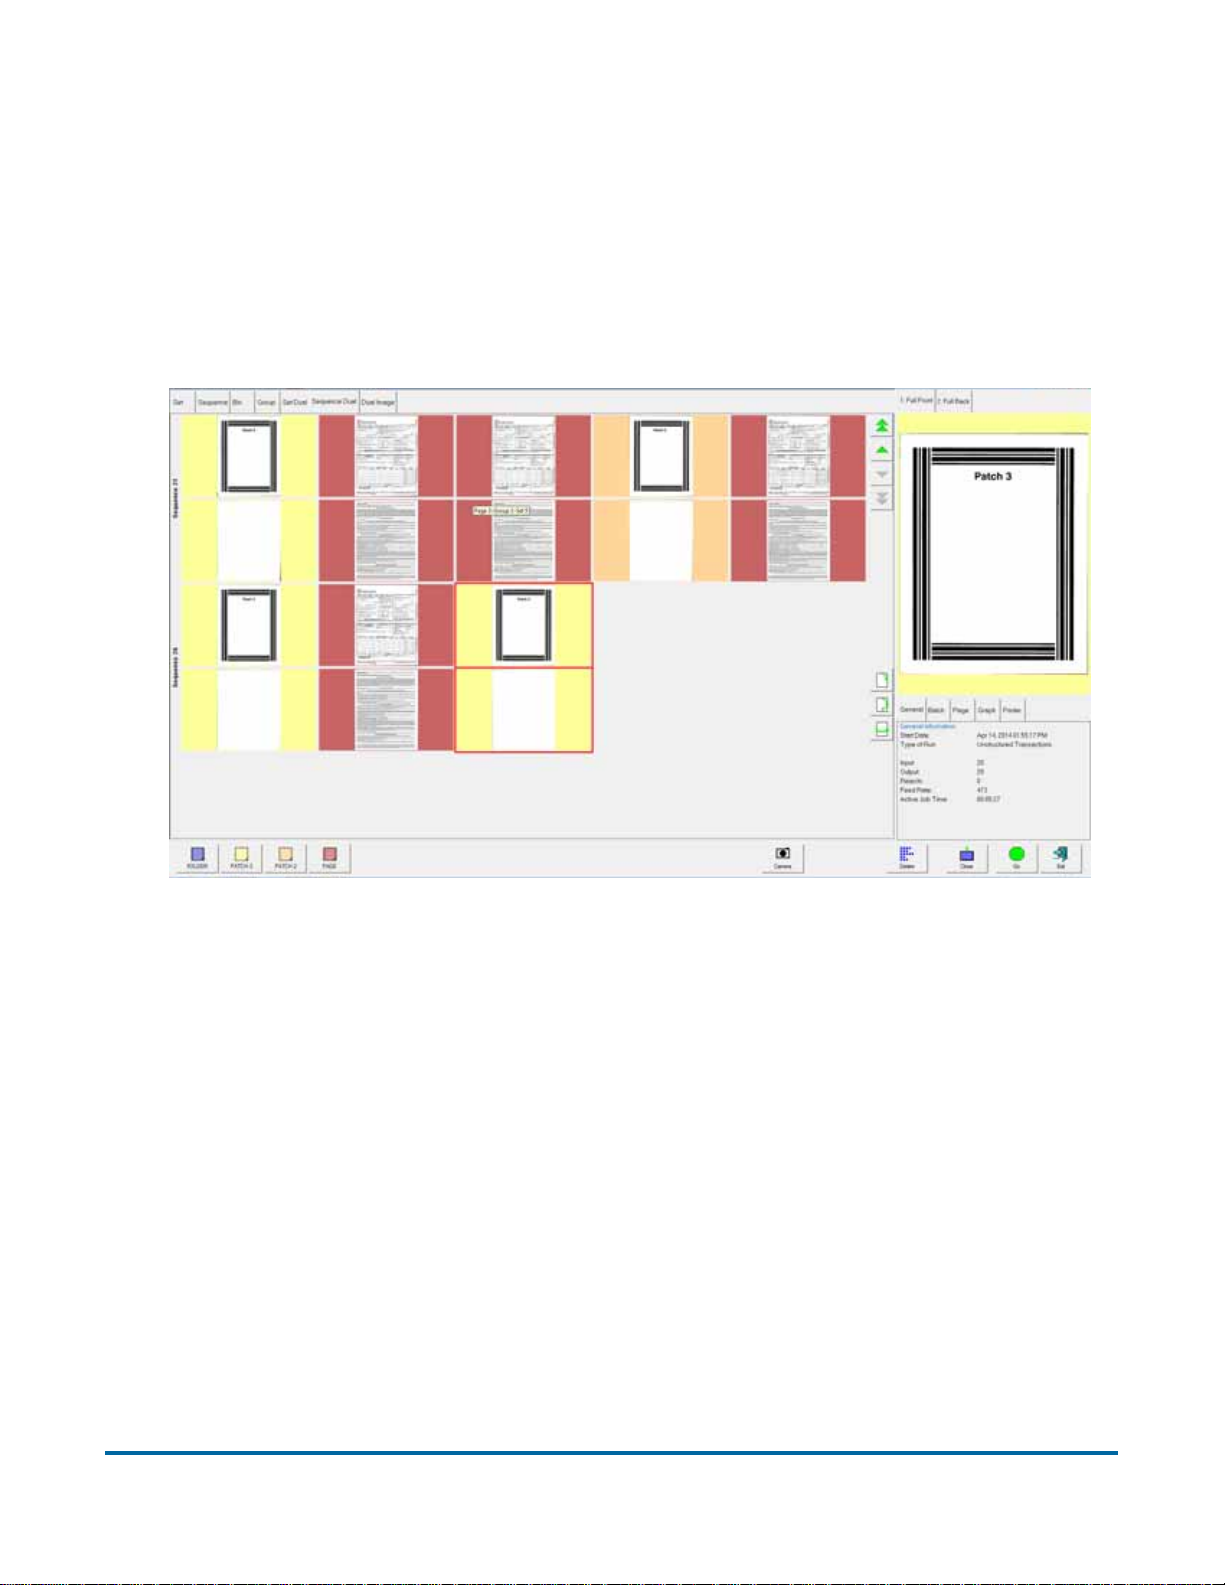
Sequence dual view
The sequence dual view shows two thumbnails for each piece, grouped in the
order they were scanned. Each piece is displayed on two rows, one for each
image.
Sequence dual view will only work properly if the page types in your job are set
up to include a “secondary” thumbnail.
Operation 39
FalconV User Manual - Standard Scanning - OPEX Corporation
Page 40
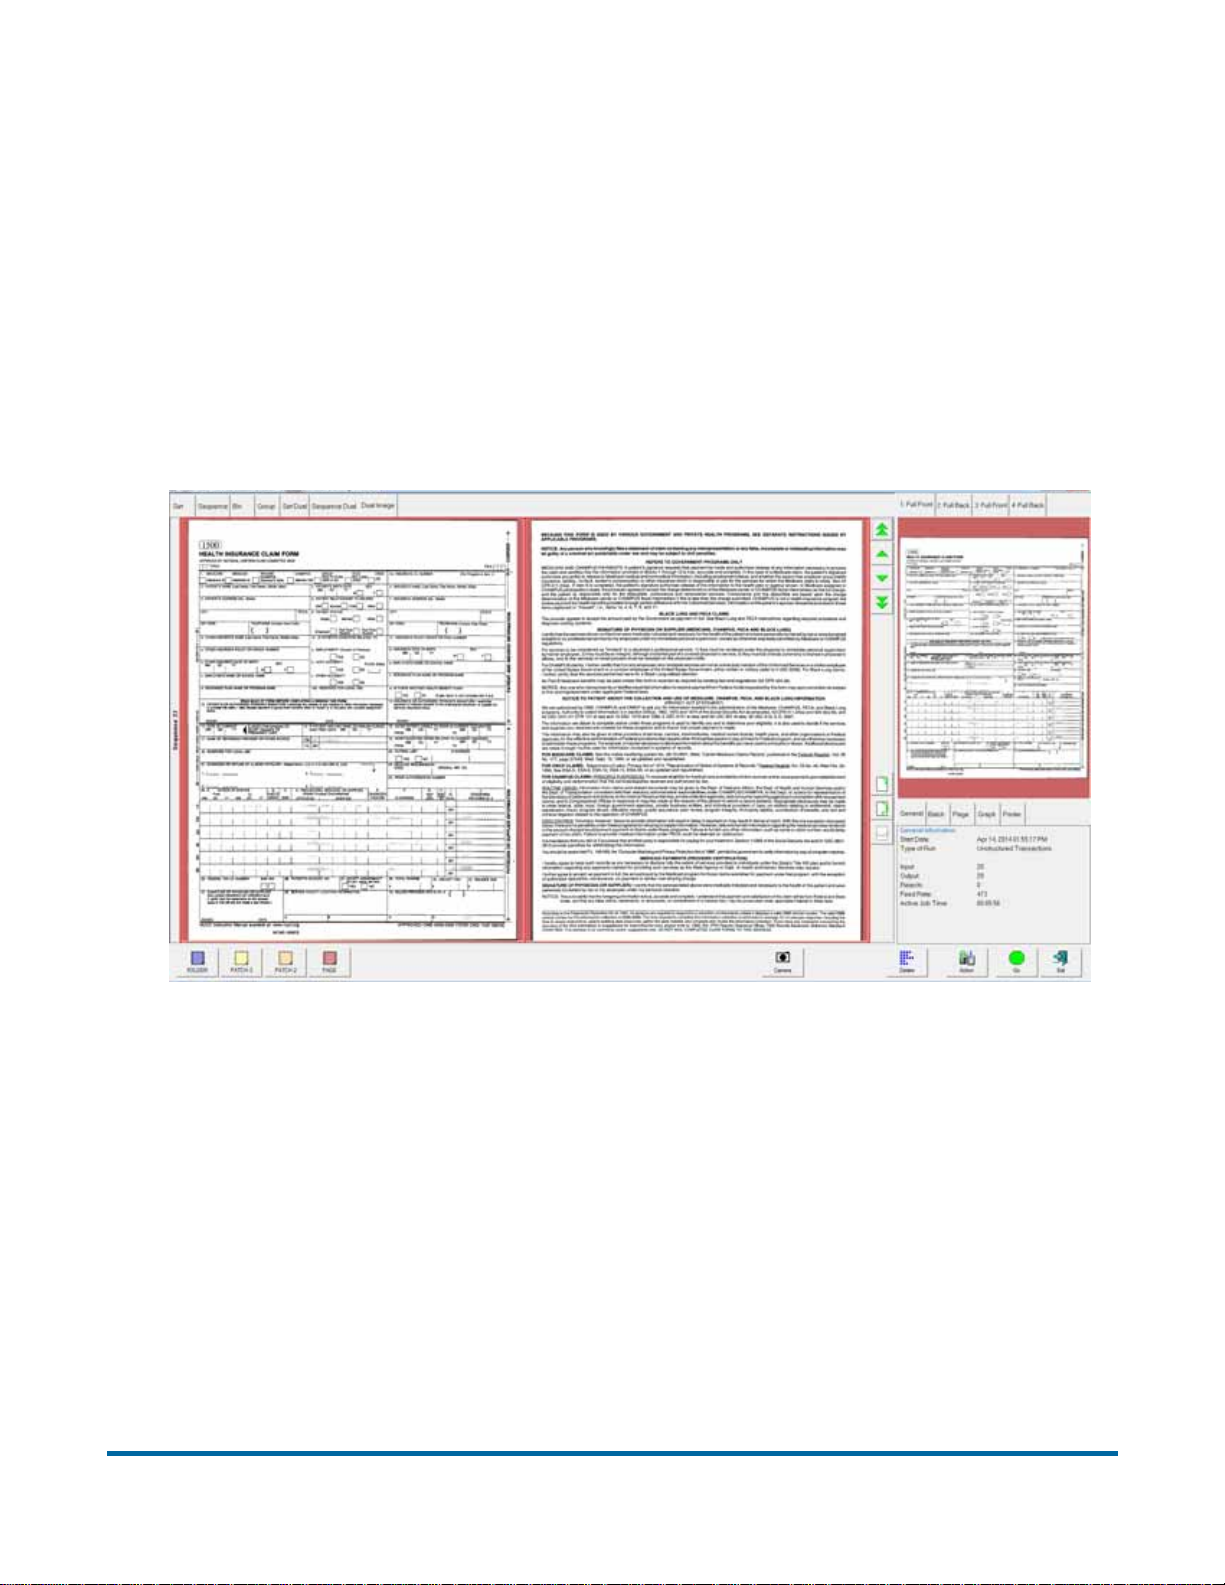
Dual Image view
This is a split-screen mode in which you can view two images of a single piece
at a time. The images displayed are those that you configure in Job Setup for
the Page Type. You can then select two images corresponding to the “Image
for Thumbnail” and “Secondary Image for Thumbnail” parameters in General
Page Type Parameters. If no secondary thumbnail is selected, only the first
thumbnail is displayed and the region where the second thumbnail would
appear is left blank.
In the following example, both front and back images of a page are displayed.
40 Operation
FalconV User Manual - Standard Scanning - OPEX Corporation
Page 41
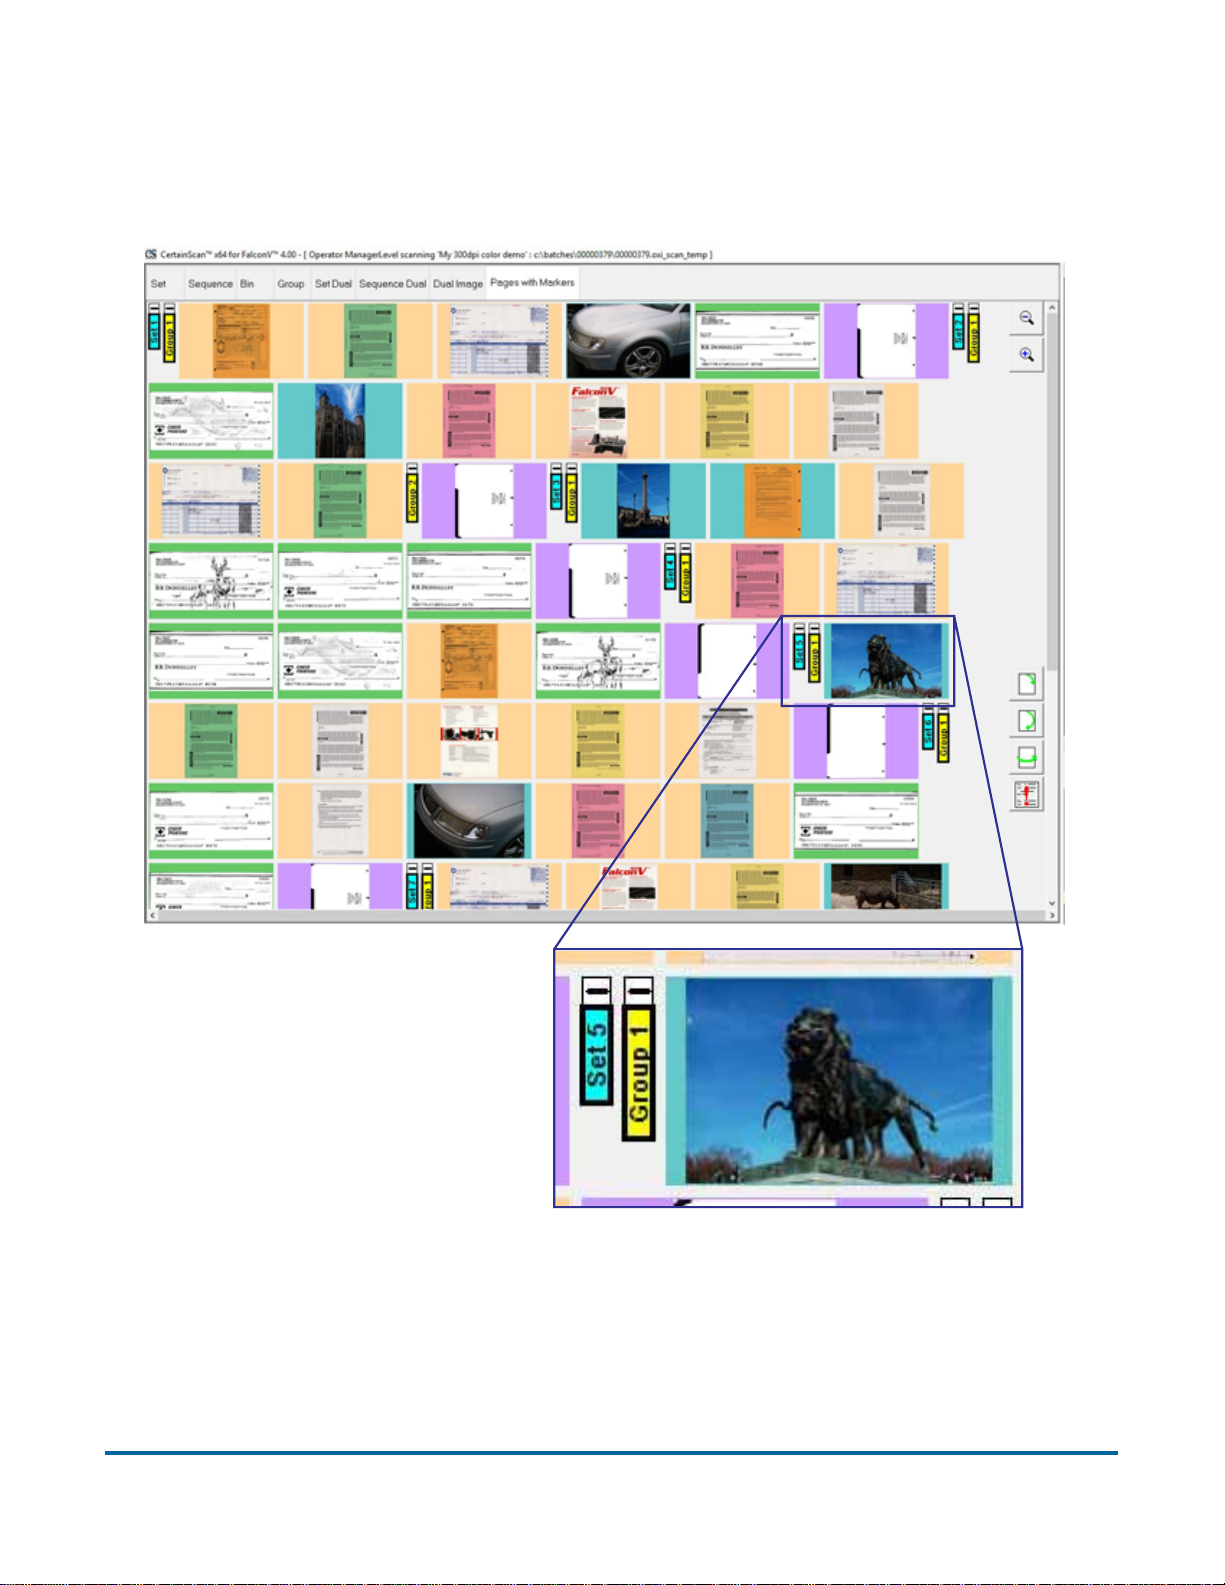
Pages with Markers view
Displays front views of all pages with color boundary markers showing the
separation of sets and groups in the batch.
Operation 41
FalconV User Manual - Standard Scanning - OPEX Corporation
Page 42
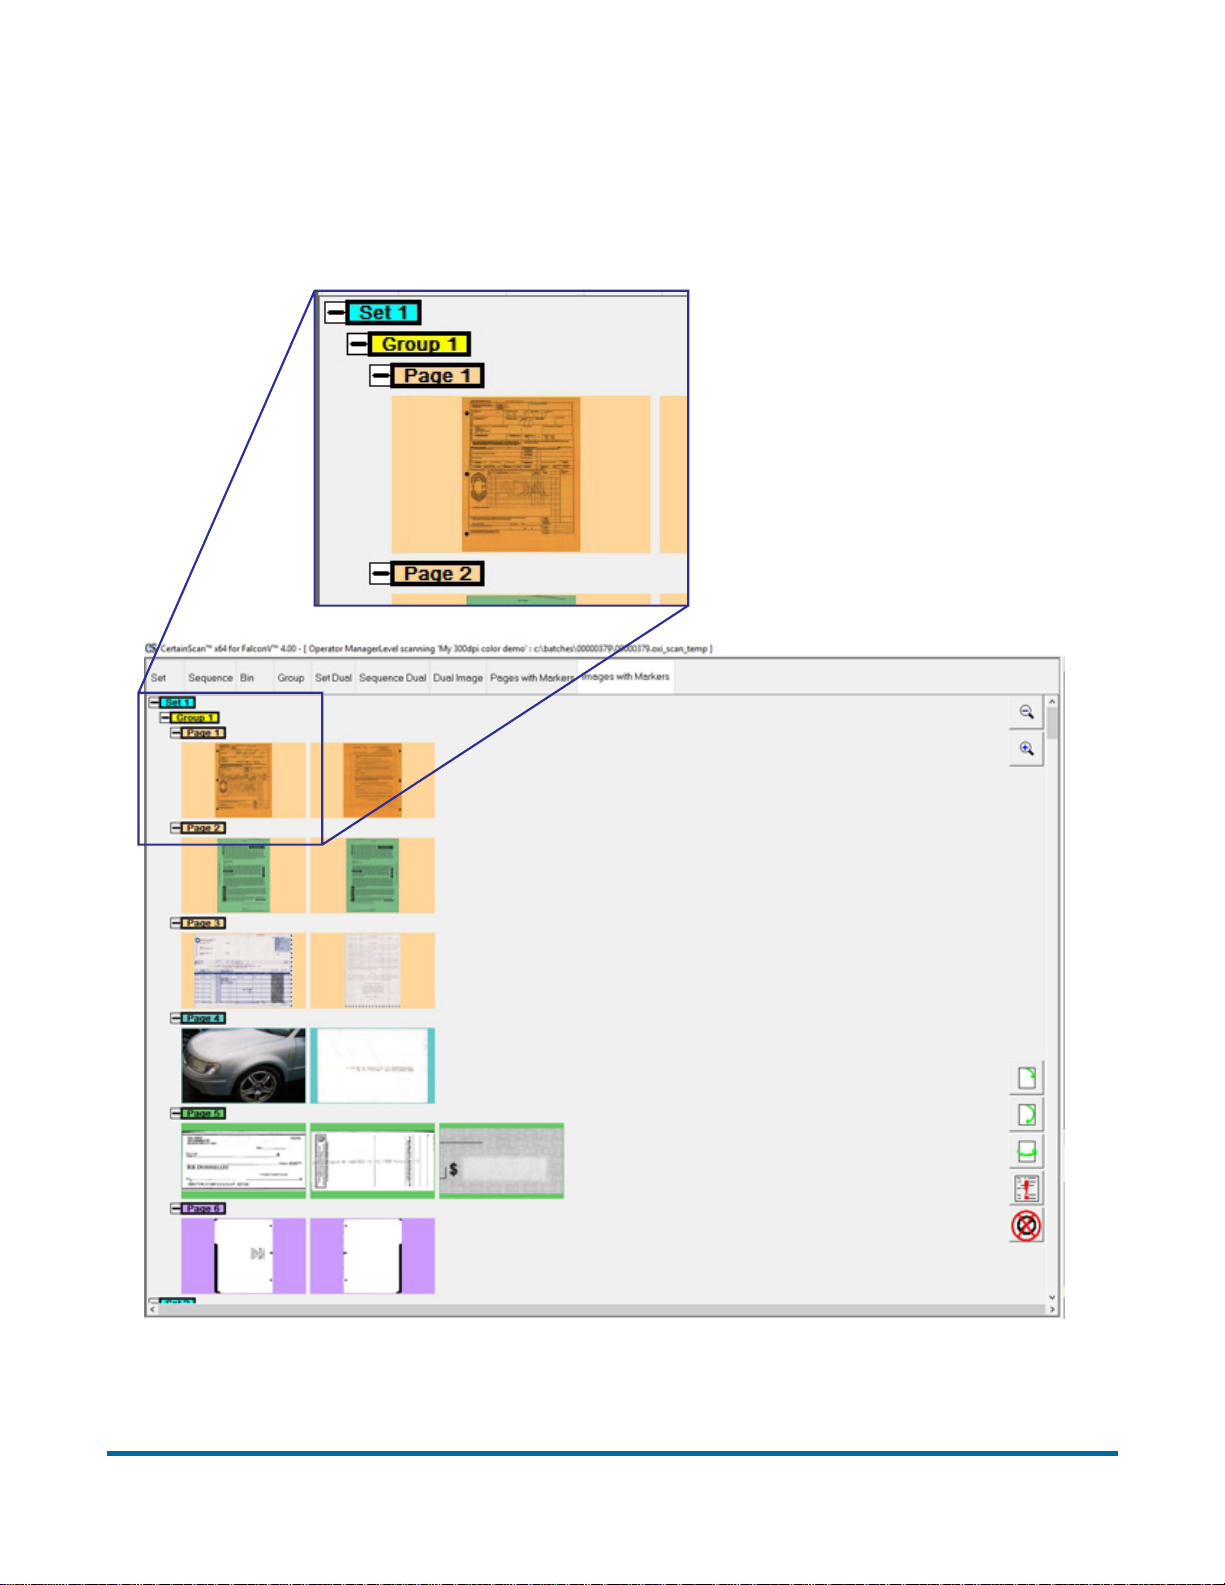
Images with Markers view
Displays all defined images for every page type with color boundary markers
showing the separation of sets, groups, and pages in the batch. Page markers
are color-coordinated to match colors used for page types.
42 Operation
FalconV User Manual - Standard Scanning - OPEX Corporation
Page 43
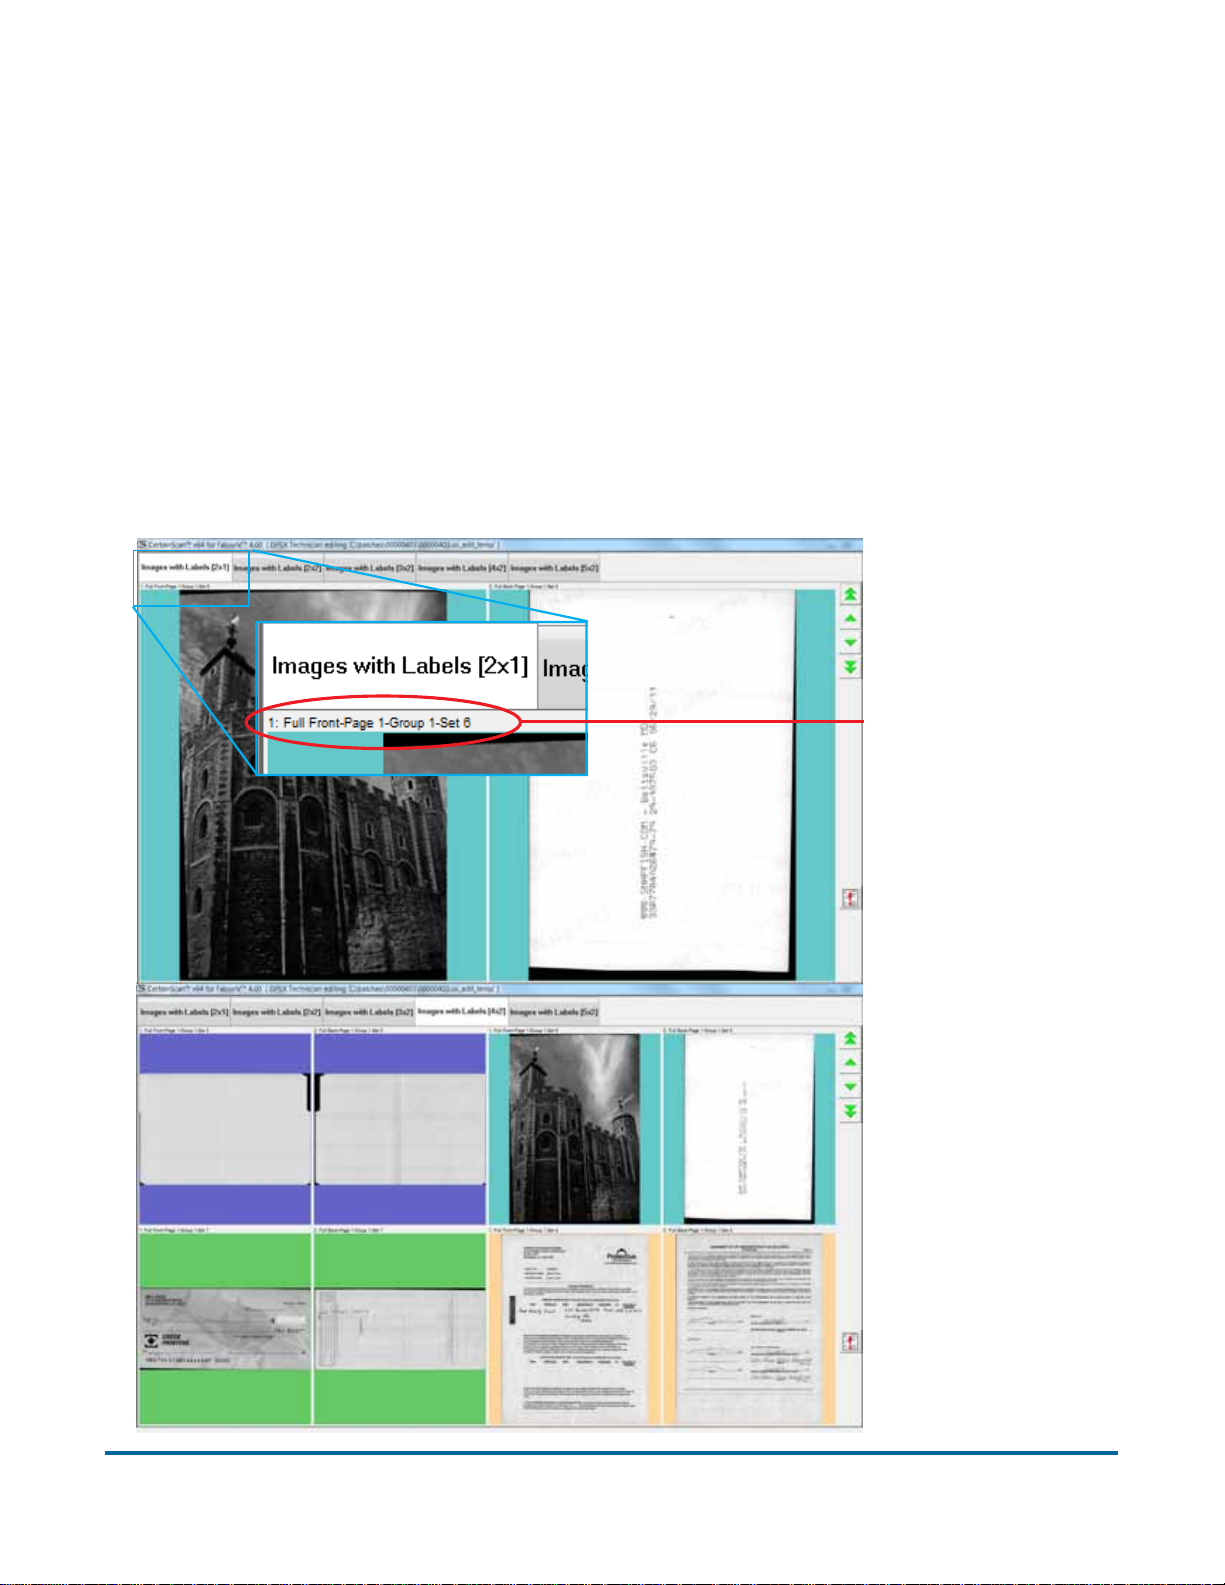
Images with Labels views
These views show images arranged by column and row configurations:
• Images with Labels [2x1] - images are arranged in 2 columns and 1 row
• Images with Labels [2x2] - images are arranged in 2 columns and 2 rows
• Images with Labels [3x2] - images are arranged in 3 columns and 2 rows
• Images with Labels [4x2] - images are arranged in 4 columns and 2 rows
• Images with Labels [5x2] - images are arranged in 5 columns and 2 rows
In all of these views, a label in the upper left corner of each image shows
information about the image.
Images with labels
2x1 view
Label showing
image information
Images with labels
4 x2 view
Operation 43
FalconV User Manual - Standard Scanning - OPEX Corporation
Page 44
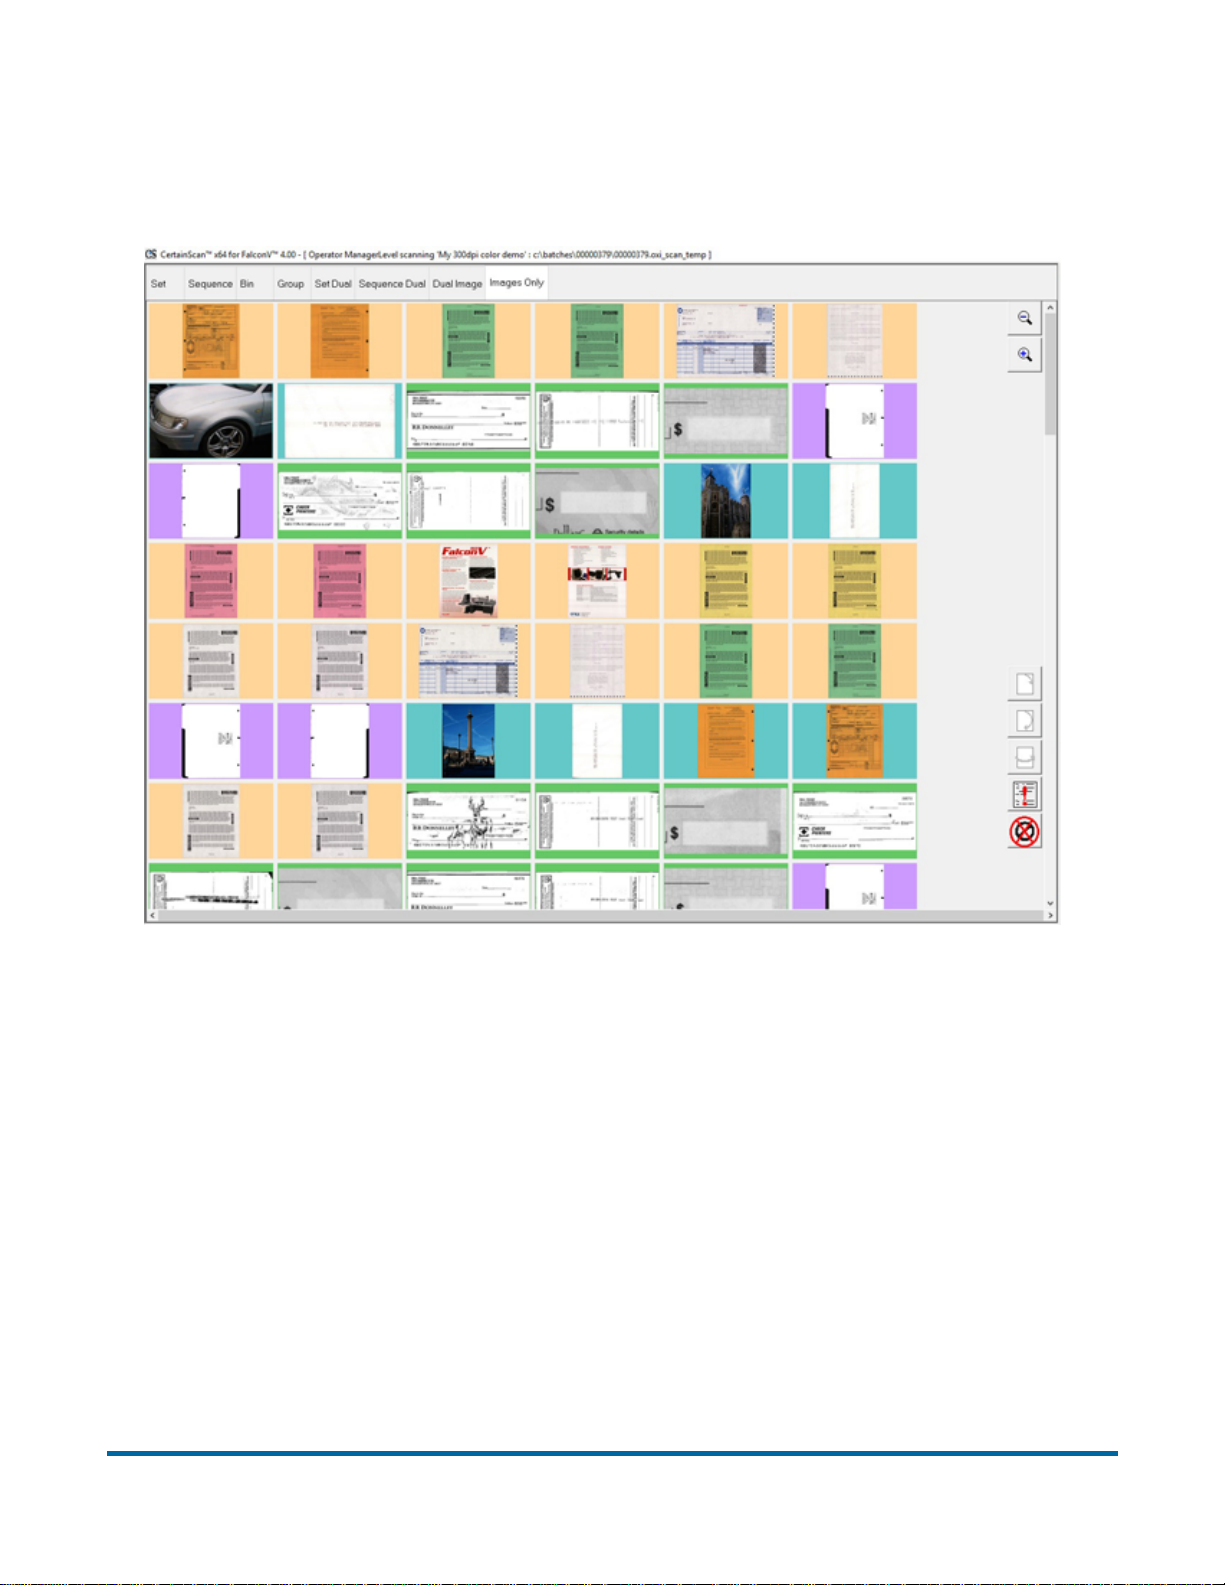
Images Only view
Displays all defined images for page types in the batch without labels or
boundary markers.
44 Operation
FalconV User Manual - Standard Scanning - OPEX Corporation
Page 45
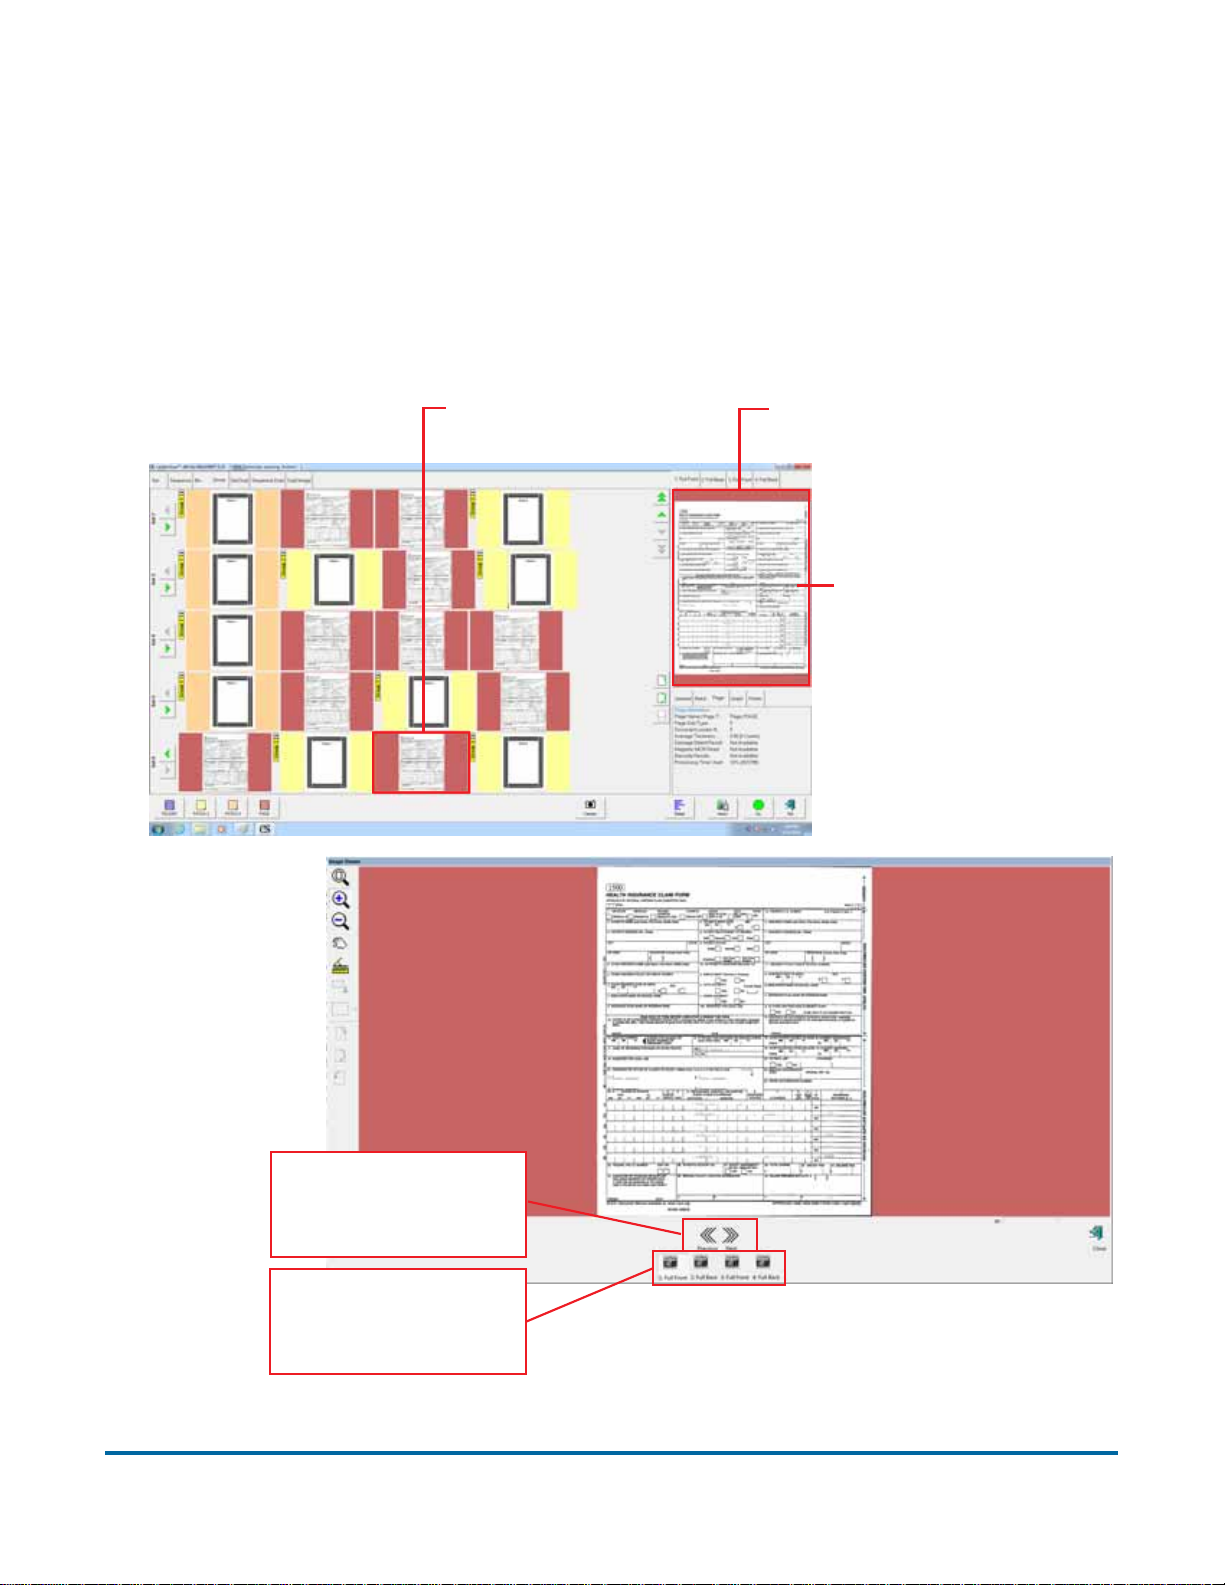
Preview Window/Image Viewer window
The Preview pane provides a large image of a scanned item. View an image in
the Preview pane by selecting its thumbnail. Touch the image in the Preview
pane to open the Image Viewer in full-screen mode, where you can enlarge or
reduce the image, and scroll through and examine all images in a batch, one at
a time. At the Manager level, the Preview window can be moved and resized
using built-in customization features.
1. Select a thumbnail.
The selected image appears
in the Preview window.
2. Click on or touch the
image to open it in the
Image Viewer window.
Use arrow buttons
to scroll through
the batch.
Select image of
page type you want
to view.
Figure 8: Preview Window/Image Viewer window
Operation 45
FalconV User Manual - Standard Scanning - OPEX Corporation
Page 46
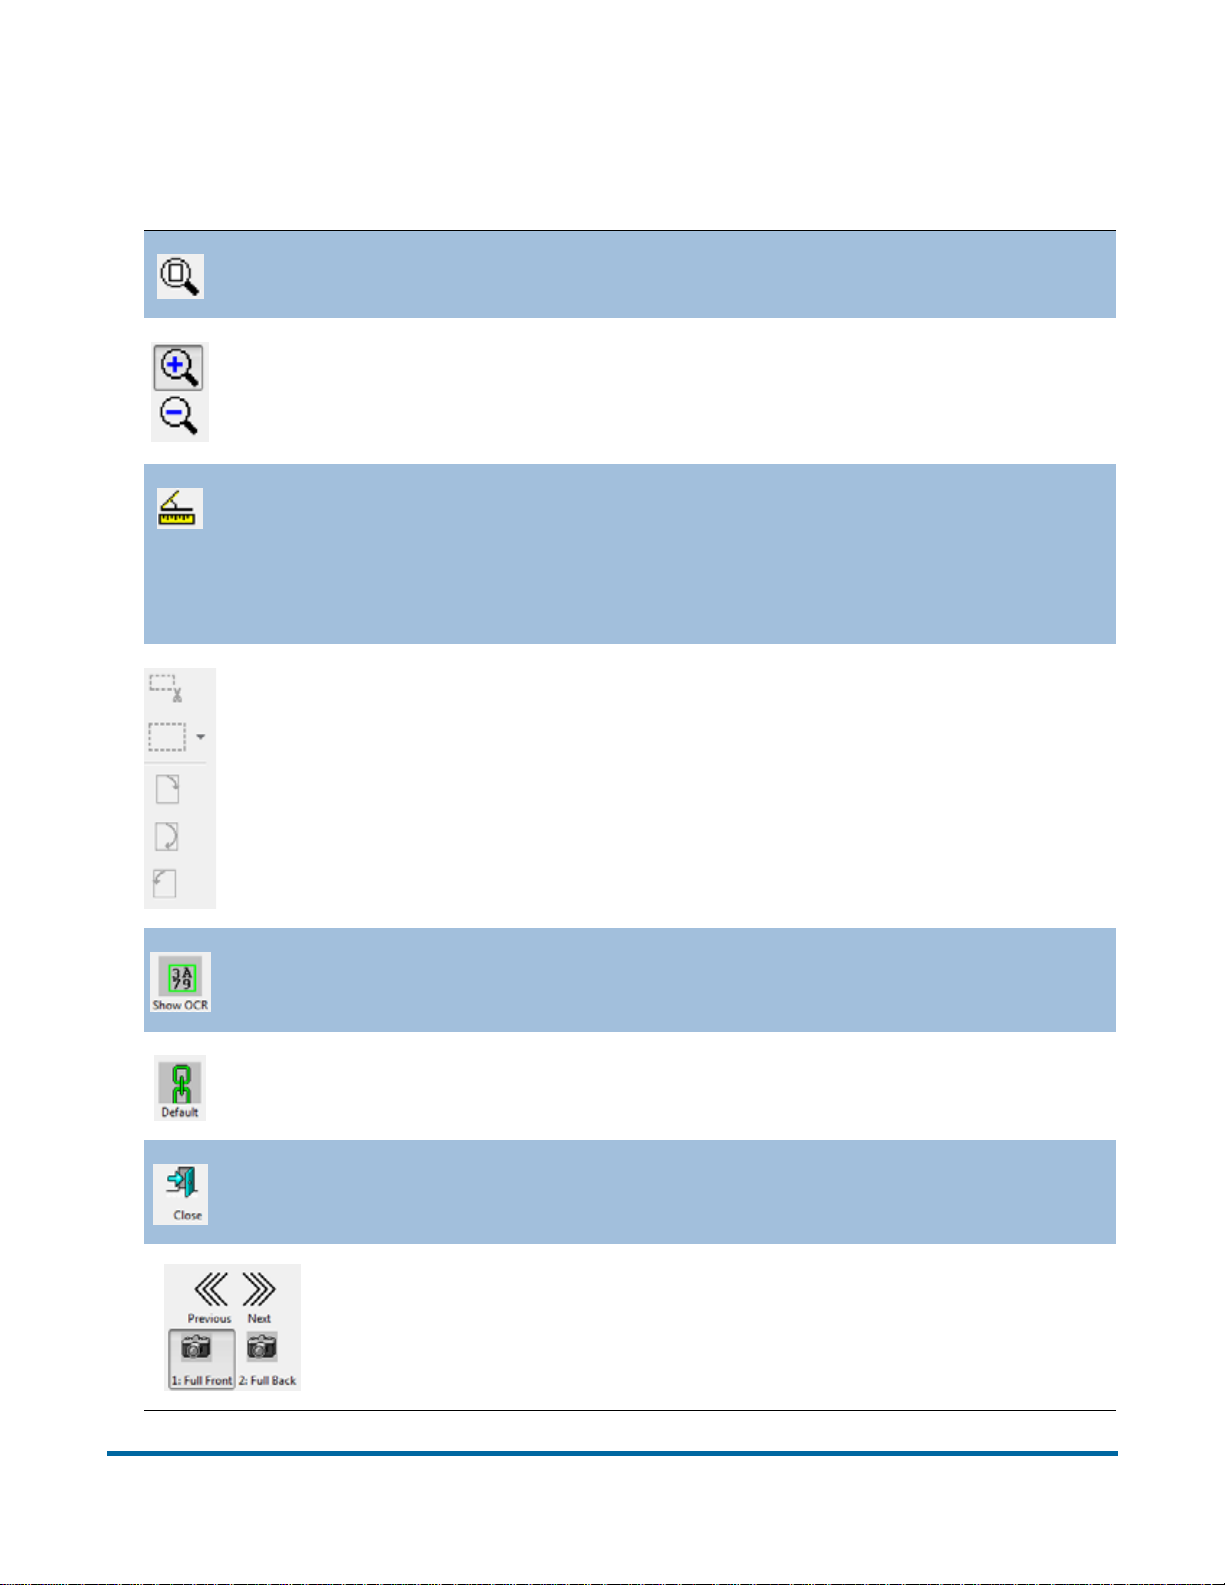
Touch the image in the Preview window to open the Image Viewer in fullscreen mode, where you can enlarge or reduce the image, and scroll through
and examine all images in a batch, one at a time.
The Reset Zoom/Pan button will return the image to its original state.
The Zoom In and Zoom Out buttons enlarge and reduce the image in
the Zoom screen. Re-center the zoom by touching the new center on
the monitor or use the mouse. You can also use the + and - keys on the
keyboard to zoom in and out.
Use the Ruler function to measure distance from one place to another
on the image. Use the mouse to click the Ruler button, then click and
hold the left mouse button on one location while you drag the cursor to
the other location. Notice that as you move the cursor from place to
place, its exact position is indicated in the field.
The Crop, Fill in/Redact, and Rotate buttons (which are carried over
from the Batch Editor) are disabled in the Preview window.
If enabled, displays the designated optical search area for the OCR &
MICR scan lines.
Clicking this button will make this image the Default for this page type.
Close the Preview window.
Use the Previous/Next arrow buttons to scroll through the
batch. Use the Full Front/Full Back (or Partial Front/Partial
Back) buttons to view images associated with the page type.
46 Operation
FalconV User Manual - Standard Scanning - OPEX Corporation
Page 47
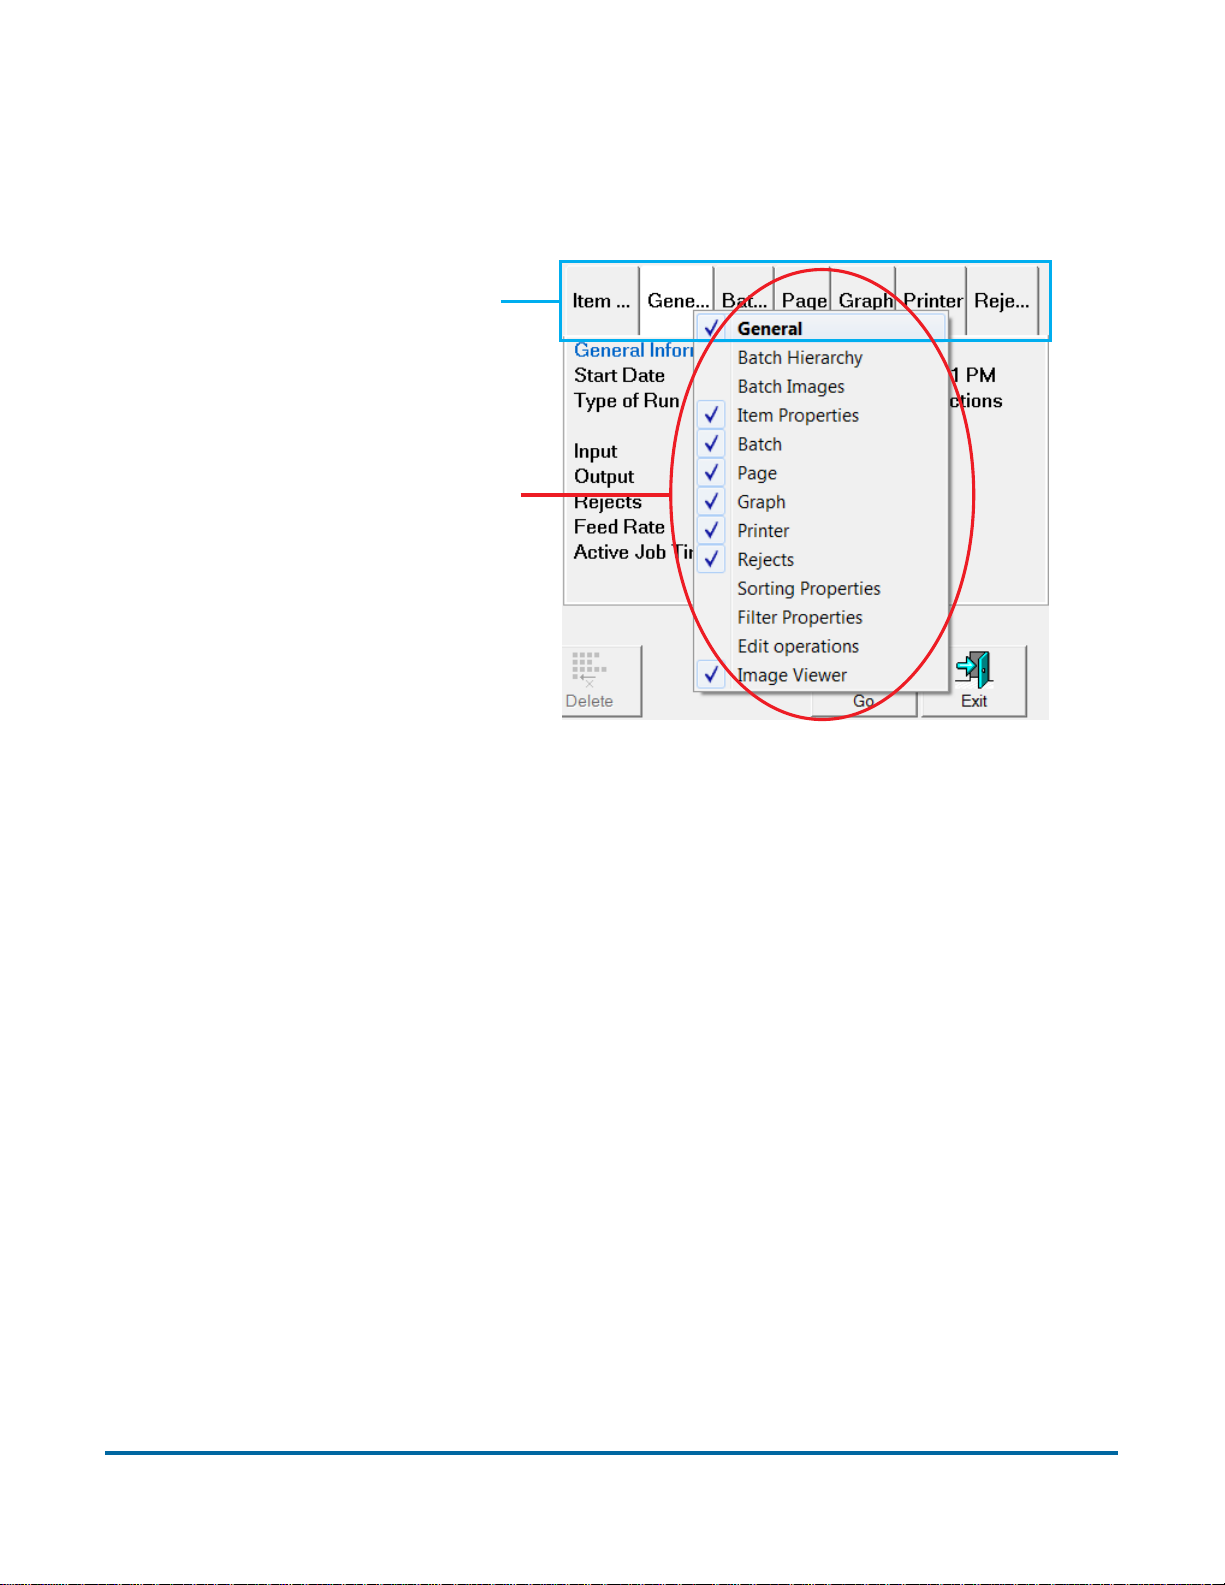
Information window
Right-clicking on the information tabs will display a menu of all available
categories based on the current job settings.
Right-click anywhere here
to bring up the list
Available info window tabs
Figure 9: Selecting info window tabs
The default location for the Information window is in the lower right corner of
the Run screen.
Operation 47
FalconV User Manual - Standard Scanning - OPEX Corporation
Page 48

Information tabs
Select the tabs in the Information window to display the following:
Batch Hierarchy (see page 49) Job Info (see page 61)
Batch Images (see page 49) Indexing (see page 61)
General (see page 50) Sorting Properties (see page 61)
Item Properties (see page 55) Filter Properties (see page 61)
Batch (see page 53) Edit Operations (see page 61)
Page (see page 56) Throttle (see page 60)
Graph (see page 58) Reference IDs (see page 62)
MultiAssist (see page 62) ScanLink (see page 62)
Printer (see page 59) WholesaleWorks 0 (see page 62)
Rejects (see page 59) WholesaleWorks 1 (see page 62)
Note: Touch or click in the Information window to bring up the detailed view. In
the detailed view, only the info set to YES will appear in the information
area.
48 Operation
FalconV User Manual - Standard Scanning - OPEX Corporation
Page 49
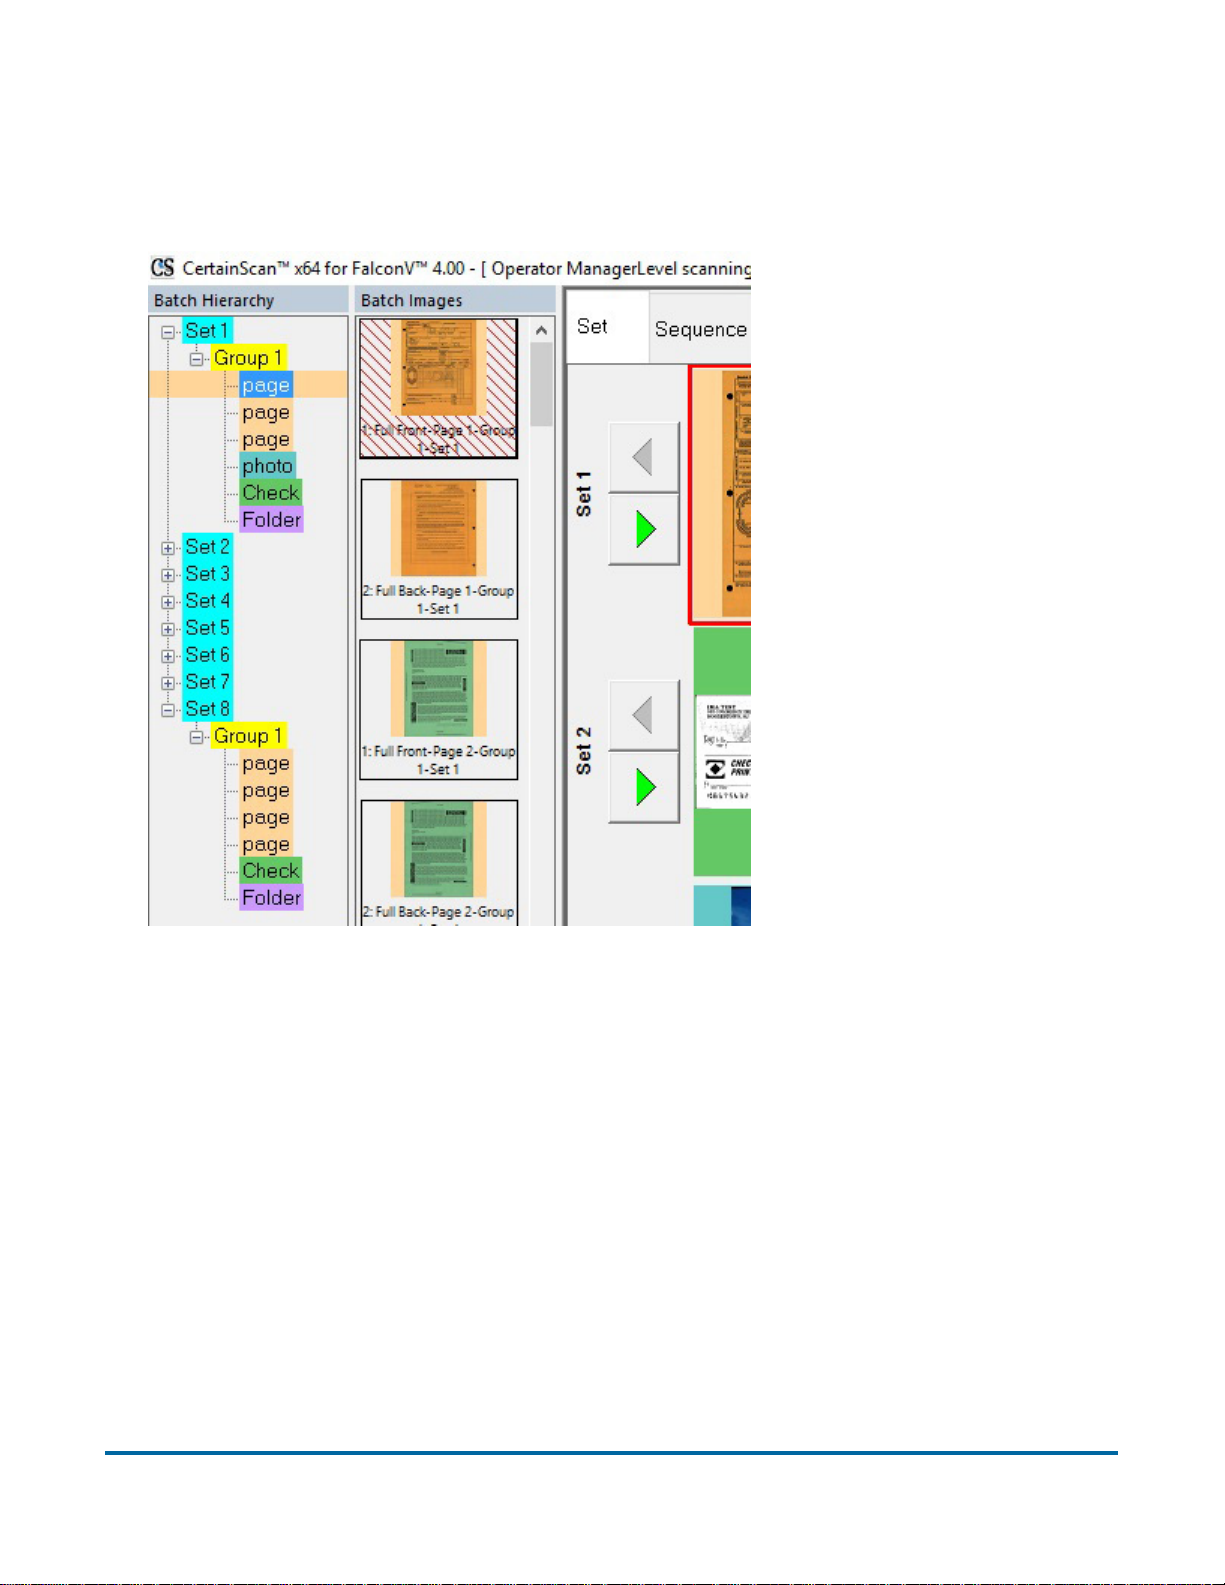
Batch Hierarchy and Batch Images views
The Batch Hierarchy and Batch Images views (Figure 10) provide aides for
quickly navigating the batch.
Figure 10: Batch Hierarchy and Images
• Batch Hierarchy provides a condensed view of the overall batch structure,
showing the Set-Group relationship in a branched file tree format. Clicking
on any piece in the list will move the cursor to that piece and display the
appropriate metadata.
• Batch Images provides condensed views of all of the images in the batch.
Clicking on any of these images will move the cursor to that piece and
display the appropriate metadata. At the Manager level, this tab can be repositioned, so it could be appear at the top or bottom of the Run screen and
display images horizontally (Figure 11 on page 50).
Operation 49
FalconV User Manual - Standard Scanning - OPEX Corporation
Page 50
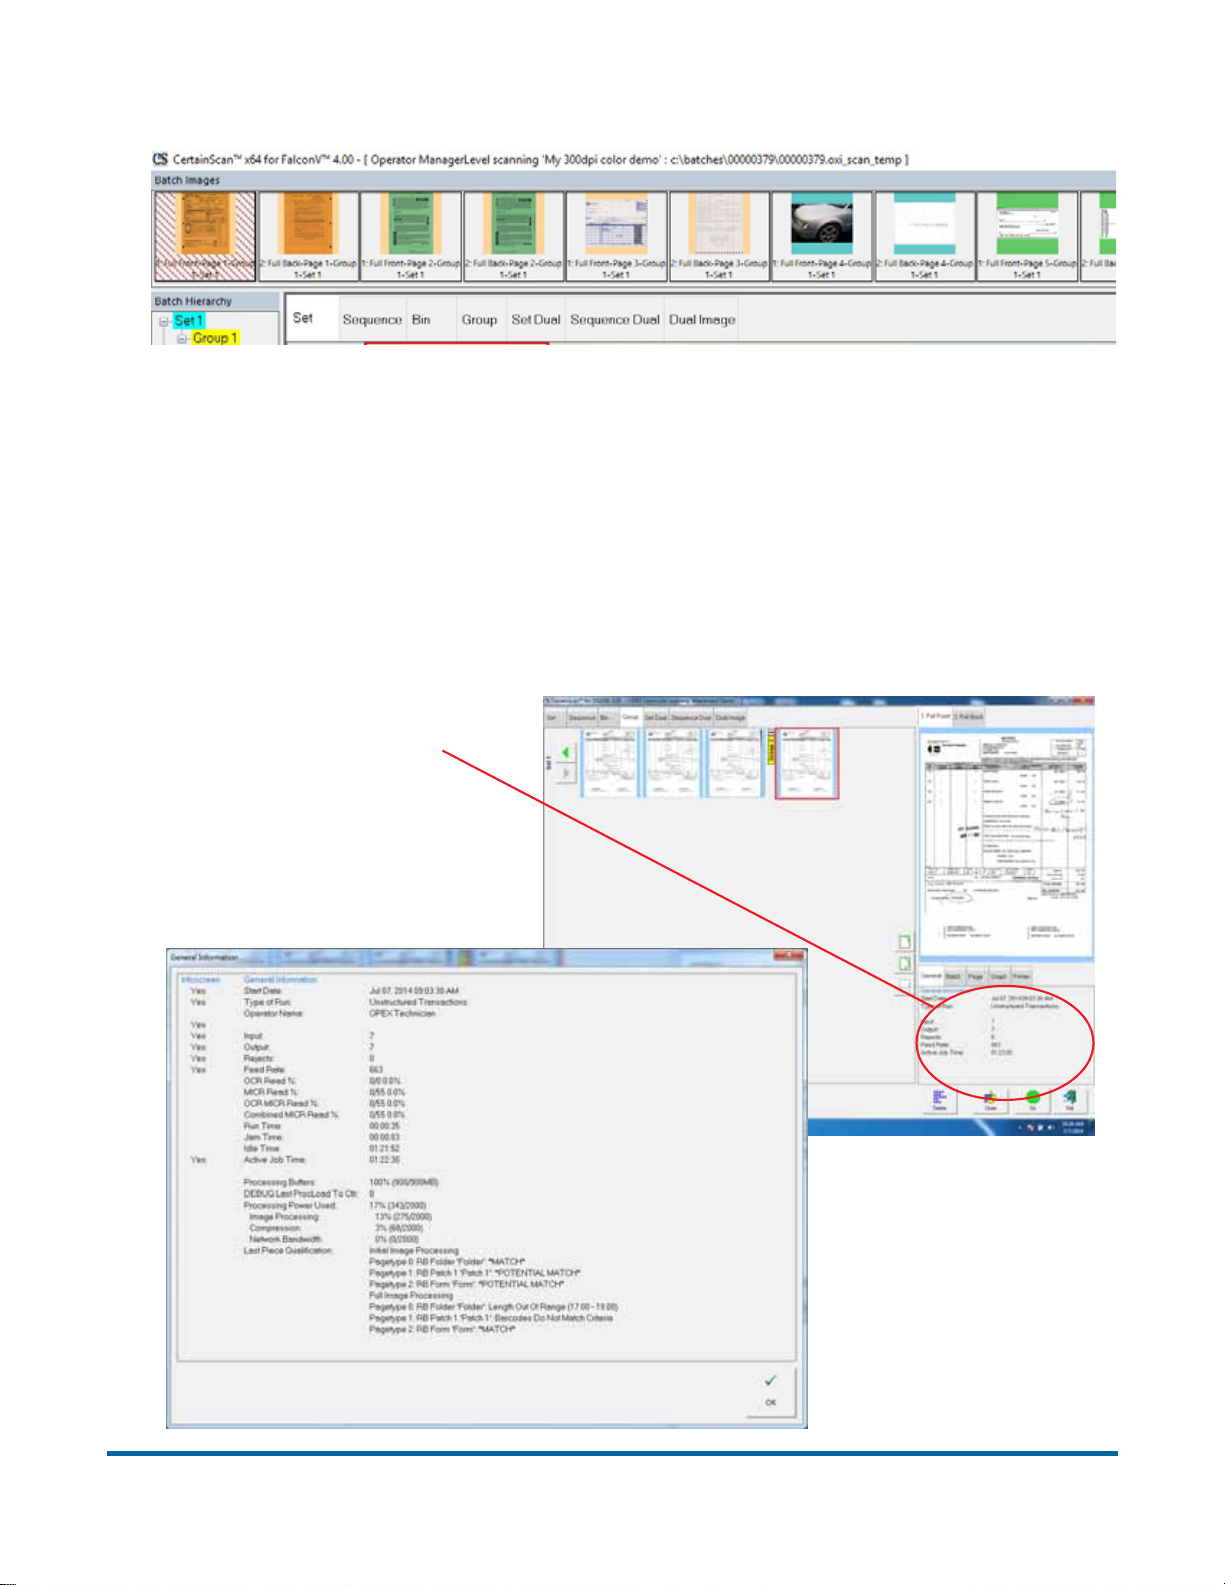
Figure 11: Batch Images viewed horizontally
General Information window
Displays job information such as the start time and operator name, see
page 51 for a complete list.
Click here...
...to display the General
Information detail window
50 Operation
FalconV User Manual - Standard Scanning - OPEX Corporation
Page 51

Table 3: General Information - infoscreen details
Parameter Description
Start Date
Type of Run
Operator
Name
Input Number of pieces processed for the current job.
Output Number of pieces placed in a batch for the current job.
Rejects Number of rejects for the current job.
Feed Rate Pages/hr for the current job.
OCR Read %
MICR Read %
Date and time at which the runscreen was entered. Displays
the date before pressing Go, displays the time after
Set in the job parameters, potentially reset when runscreen
was entered; Default job setting or selected by operator at the
start of the batch
Determined at login time.
Successful OCR Reads / Items with an OCR area defined, for
the current execution
Successful MICR Reads / Items with a MICR defined, for the
current execution
OCR MICR
Read %
Combined
MICR %
Run Time
Jam Time Sum of time that the jam dialog was shown for the current job
Idle Time
Active Job
Time
Processing
Buffers
Successful Optical MICR Reads / Items with a MICR defined,
for the current execution
Successful Combined MICR Reads / Items with a MICR
defined, for the current execution
Sum of time during which the track was running for the current
job
Sum of time during which the track was not running for the
current job
Sum of time between entering the runscreen and exiting the
runscreen
Regarding the ImageManager, used to store uncompressed
images as items are processed.
Operation 51
FalconV User Manual - Standard Scanning - OPEX Corporation
Page 52

Table 3: General Information - infoscreen details (continued)
Parameter Description
DEBUG Last
ProcLoad To
Ctrl
For Engineering use only
Processing
Power Used
Image
Processing
Compression
Network
Bandwidth
Percentage of estimated processing power used to process
this item. Because there are either two processors or hyperthreading, the maximum sustainable percentage is 200%.
Estimated average Image Processing Time, per item, in the
current execution.
Estimated Compression time, per item, in the current
execution.
Estimated average network write time, per item, in the current
execution.
52 Operation
FalconV User Manual - Standard Scanning - OPEX Corporation
Page 53
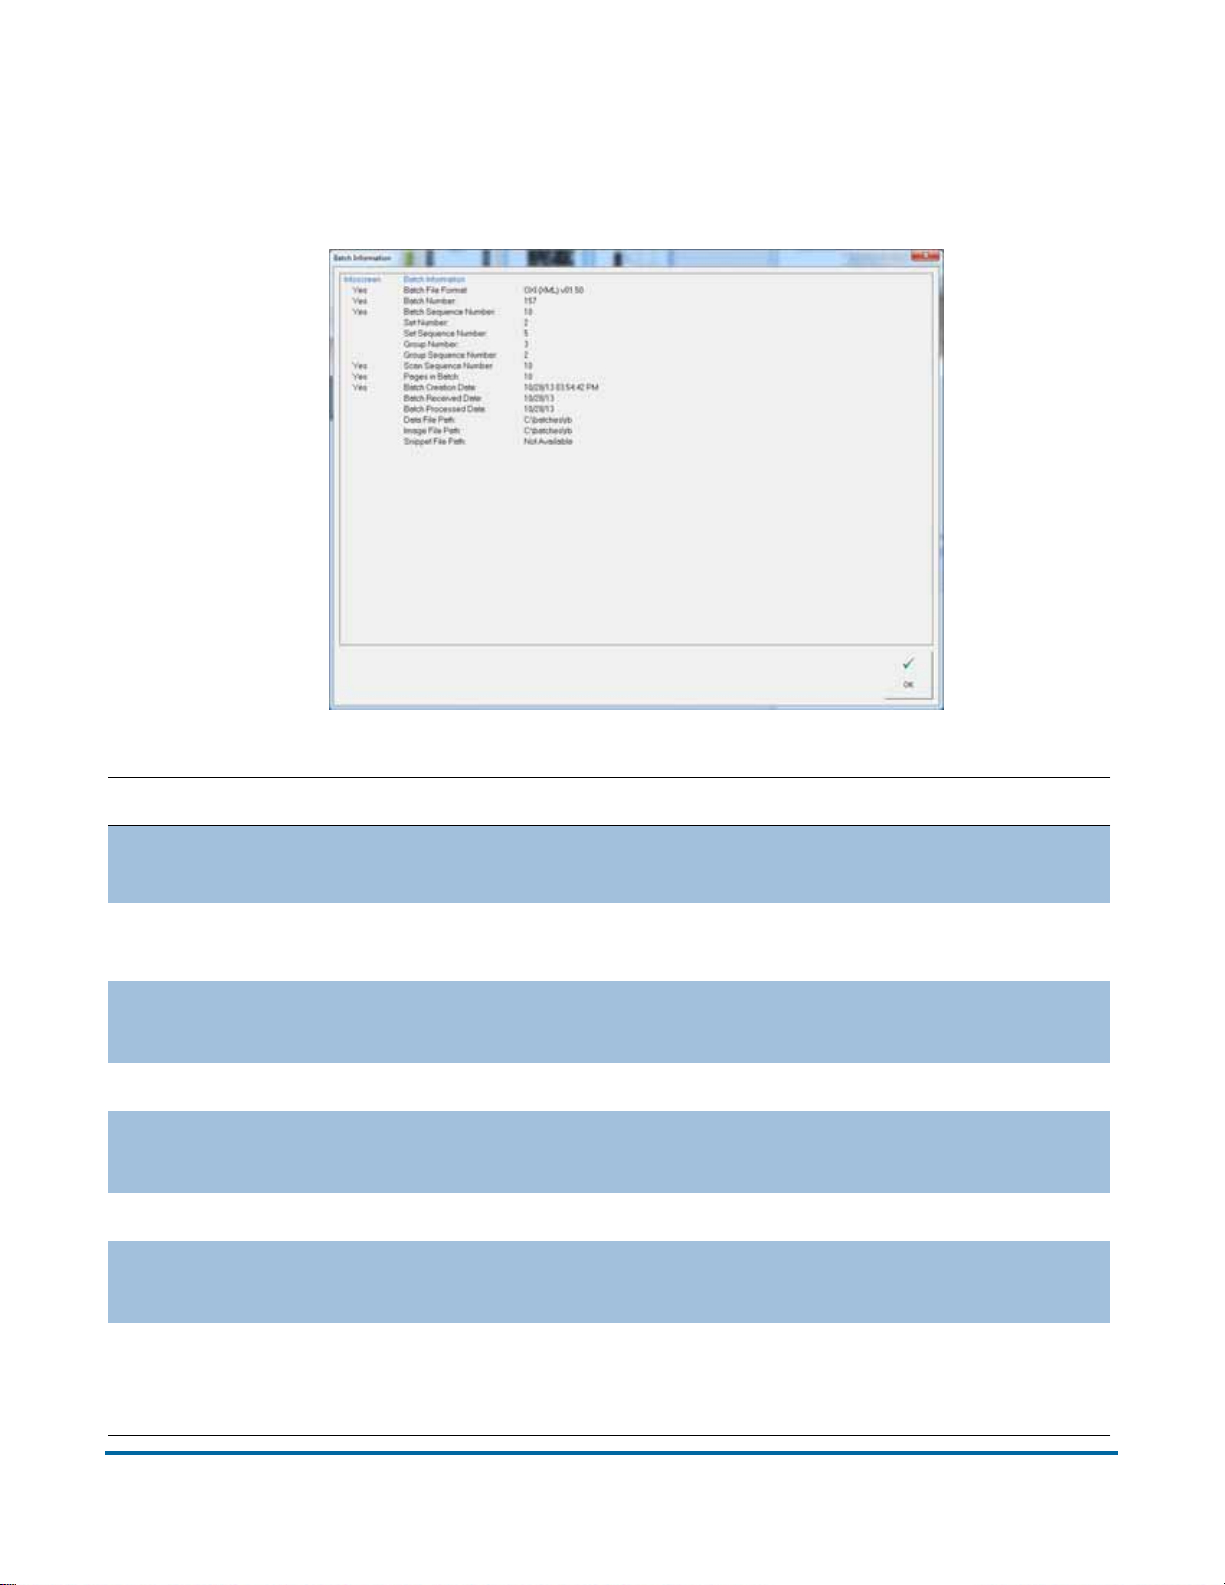
Batch Information window
Includes data such as the set number, pages in the batch, and the date and
time the batch was created, received, and processed.
Table 4: Batch Information - detailed view
Parameter Description
Batch File Format
Batch Number
Batch Sequence
Number
Set Number Number of sets, save the batch ticket set.
Set Sequence
Number
Group Number Number of groups
Group Sequence
Number
{DAT, ODI, OXI, OII} as set in batch parameters in job
setup
Determined by plug-in, operator entry, batch ticket or
system. Batch parameters in job setup.
For the selected item. 0 for batch tickets, then the
ordinal number of the item in the batch.
For the selected item. Ordinal number of selected item
within its set.
For the selected item. Ordinal number of selected item
within its group.
Scan Sequence
Number
Operation 53
FalconV User Manual - Standard Scanning - OPEX Corporation
For the selected item. Ordinal number with regard to
scanning. Rescans will change this number for a given
item.
Page 54

Table 4: Batch Information - detailed view
Parameter Description
Pages in Batch Including batch ticket & voided items.
Batch Creation Date
Batch Received Date Set by operator, otherwise today's date
Batch Processed
Date
Batch RefIDs
ScanLink Vendor
Batch ID
ScanLink Customer
Batch ID
Data File Path As per job's batch parameters.
Image File Path As per job's batch parameters.
Snippet File Path As per job's batch parameters.
Date (and time) the batch was created (when first
piece was scanned)
Set by operator, otherwise today's date
Shown only if RefID enabled configured in batch
parameters
Shown only if RefID enabled configured in batch
parameters
Shown only if RefID enabled configured in batch
parameters
54 Operation
FalconV User Manual - Standard Scanning - OPEX Corporation
Page 55
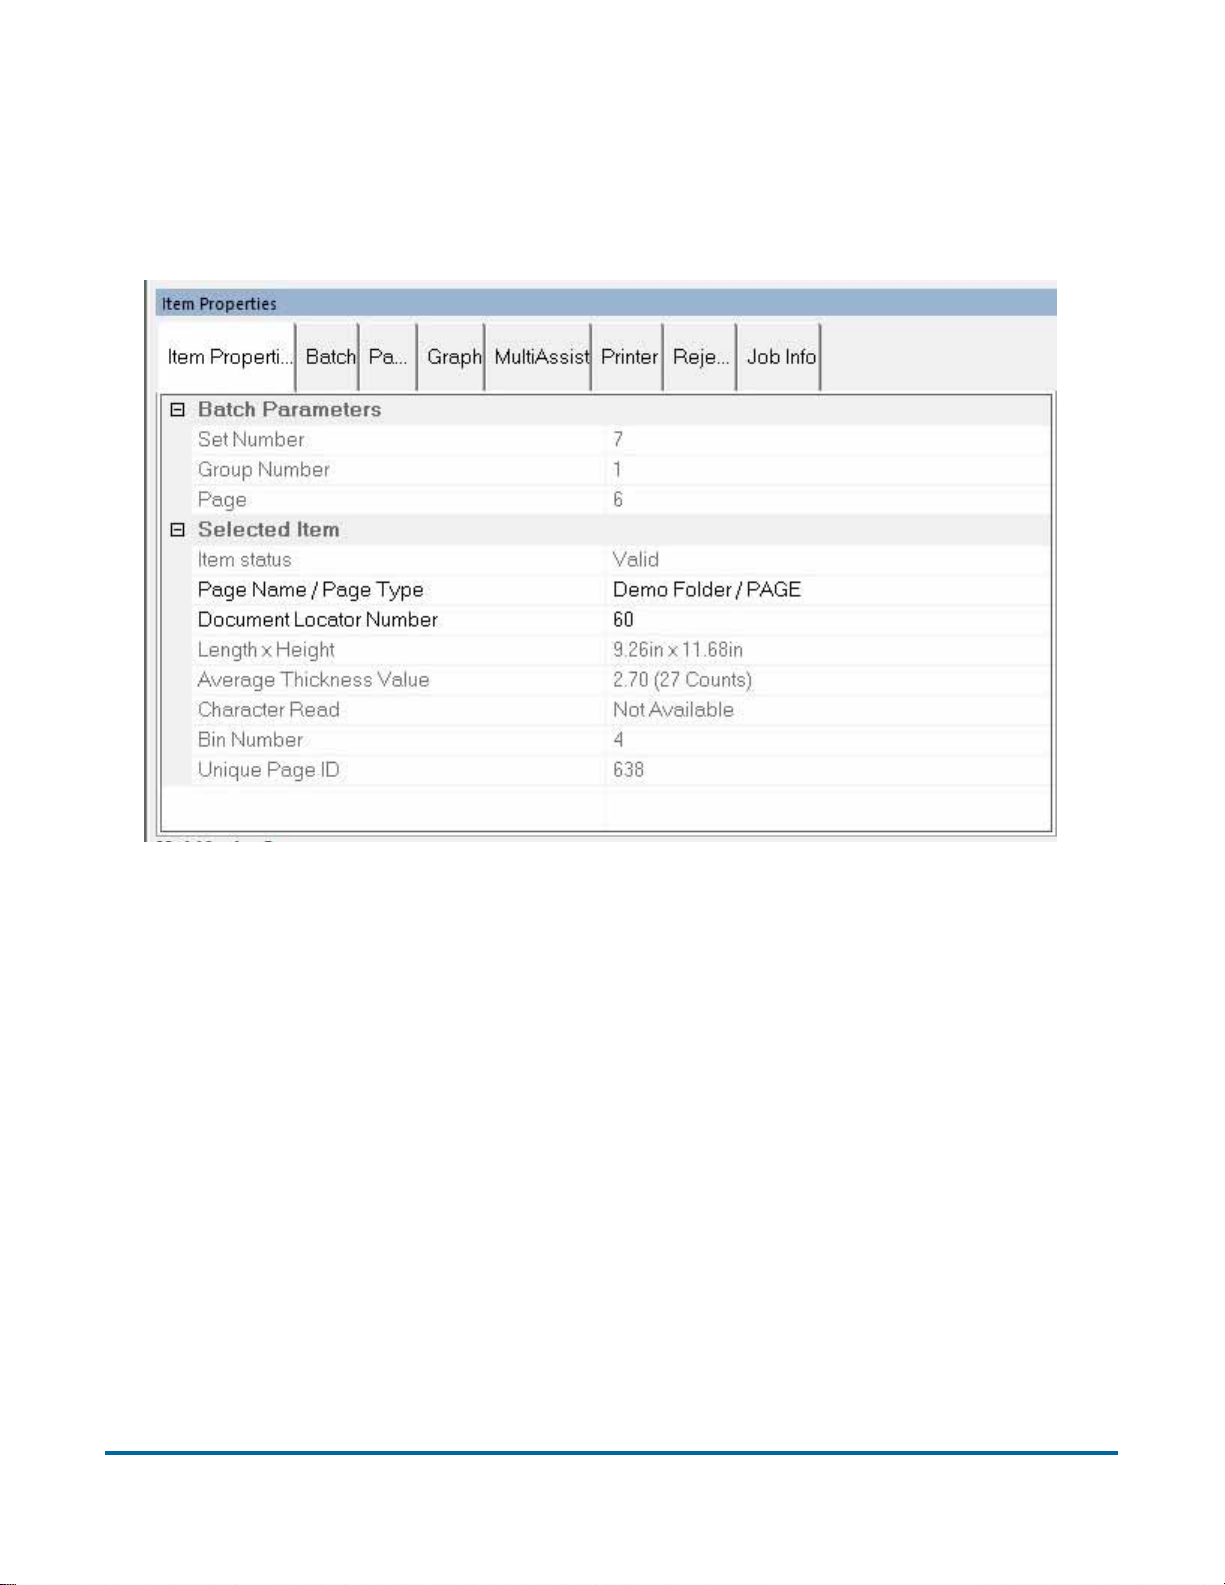
Item Properties window
Displays information about the currently-selected piece. Item Properties is a
component of Batch Edit. See the “CertainScan Batch Edit Manual” for more
details.
Operation 55
FalconV User Manual - Standard Scanning - OPEX Corporation
Page 56
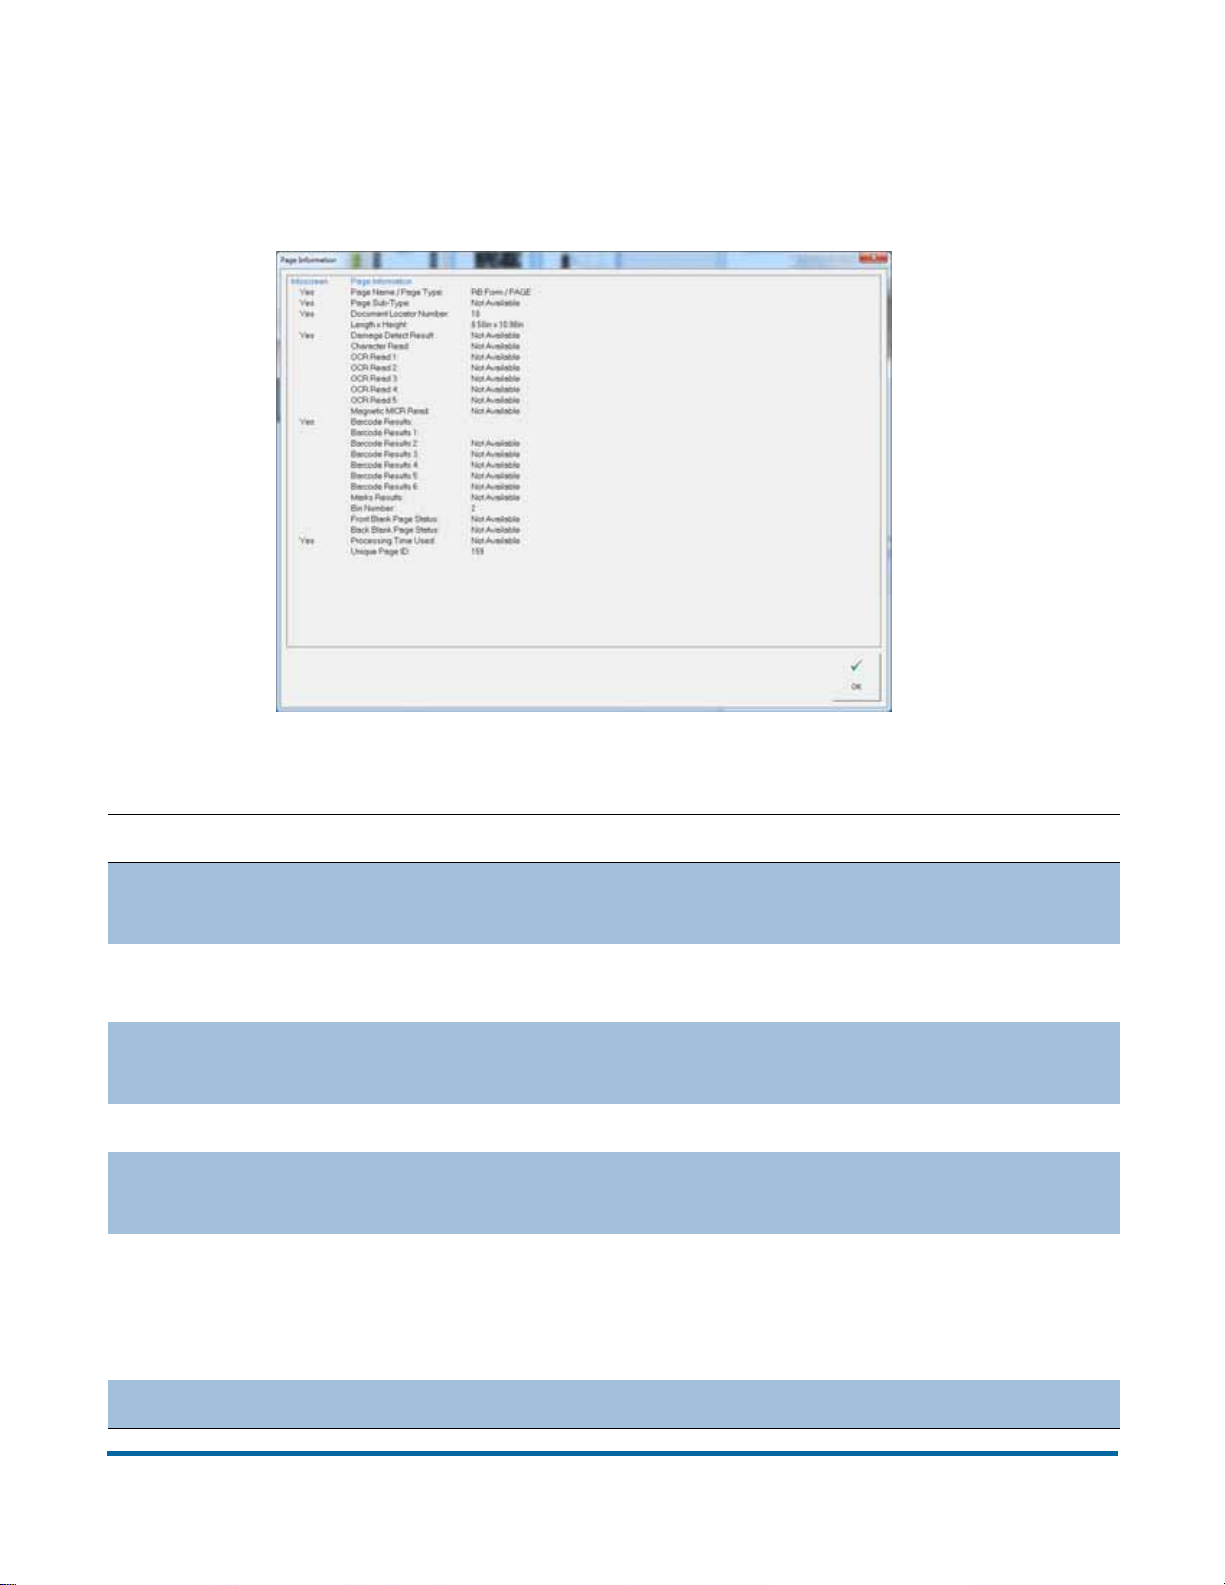
Page Information window
Provides information about the selected page. It may include the bin the piece
was sorted to, size dimensions, and page type.
Table 5: Page Information - detailed view
Parameter Description
Page Name / Page
Type
Page Sub-Type
Document
Location Number
Length x Height Determined for each piece scanned
Damage Detect
Result
Character Read
Corresponds to pagetypes configuration for job; Selected
in Job Setup
Corresponds to pagetypes configuration for job; Page type
sub-category (if available for current page type)
a unique number assigned to every piece of a batch.
Indicator for whether damage was found on the piece
Combined results of magnetic and optical MICR reads;
Generic display of OCR1 or MICR character reads on a
given piece to keep jobs consistent. If more info is desired,
bring up the info panel for all the OCR and MICR details.
OCR Read 1 - 5 Results of OCR regions 1-5, as per pagetype configuration
56 Operation
FalconV User Manual - Standard Scanning - OPEX Corporation
Page 57

Table 5: Page Information - detailed view
Parameter Description
Magnetic MICR
Read
Barcode Results
Barcode Results 1
Barcode Results
2-6
Marks Results
Bin Number Final destination of the selected piece.
Front Blank Page
Status
Back Blank Page
Status
Results of MICR region, as per pagetype configuration
Results of Barcode 1 (same as Barcode 1 below, but
visible by default)
Results of Barcode 1 (same as Barcode Results above, but
not visible by default)
Results of Barcode 2-6, as per pagetype configuration
Indicates whether or not a mark was detected for those
marks defined in the pagetype
Indicates whether or not the front side of the selected item
was judged blank. Also states what % of pixels were filled.
Indicates whether or not the back side of the selected item
was judged blank. Also indicates what percentage of pixels
were filled.
Page Ref ID 1
Page Ref ID 2
Page Ref ID 3
Processing Time
Used
Unique Piece ID Ordinal number per execution. Used mainly for diagnosis.
Page RefID. Visible in RunScreen if RefID #1 is defined in
Job. Always visible in Batch Editor.
Page RefID. Visible in RunScreen if RefID #2 is defined in
Job. Always visible in Batch Editor.
Page RefID. Visible in RunScreen if RefID #3 is defined in
Job. Always visible in Batch Editor.
Percentage of allowable time used for this piece. Allowable
time is a function of track speed.
Operation 57
FalconV User Manual - Standard Scanning - OPEX Corporation
Page 58
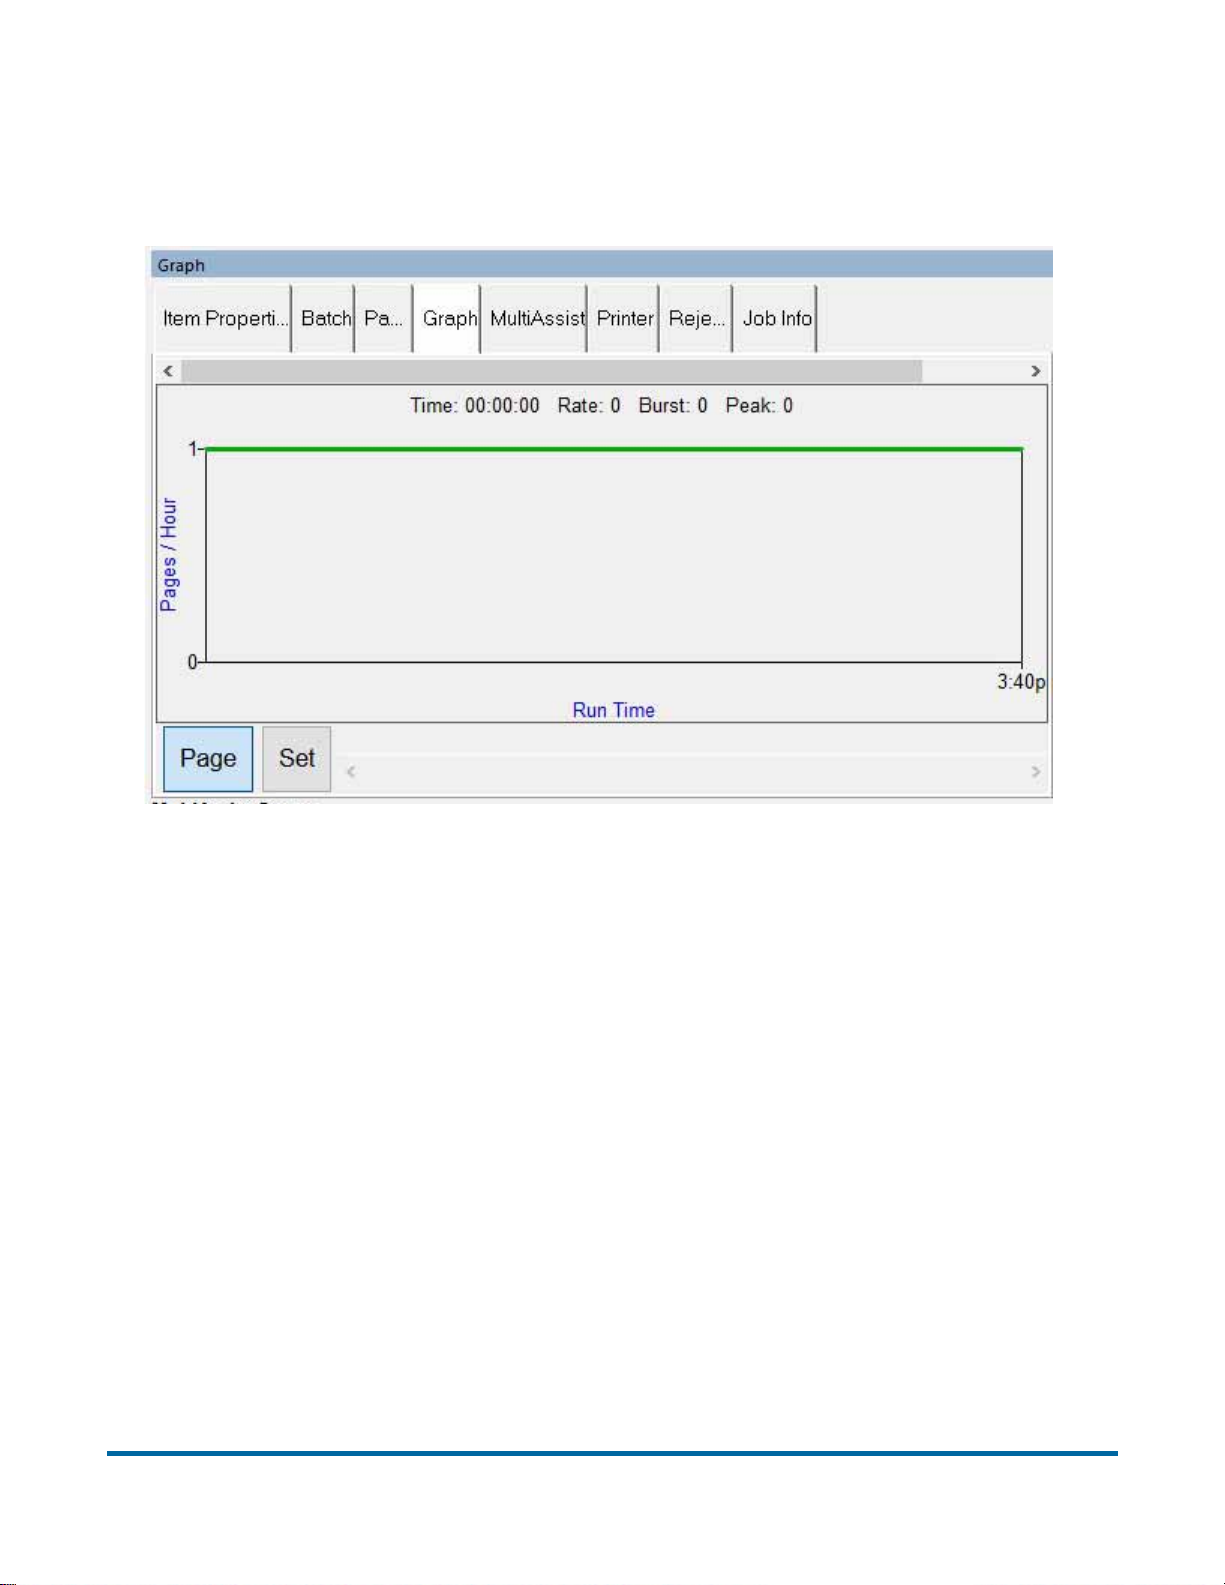
Graph window
Displays processing performance information such as run time, pages per hour
and sets per hour.
58 Operation
FalconV User Manual - Standard Scanning - OPEX Corporation
Page 59
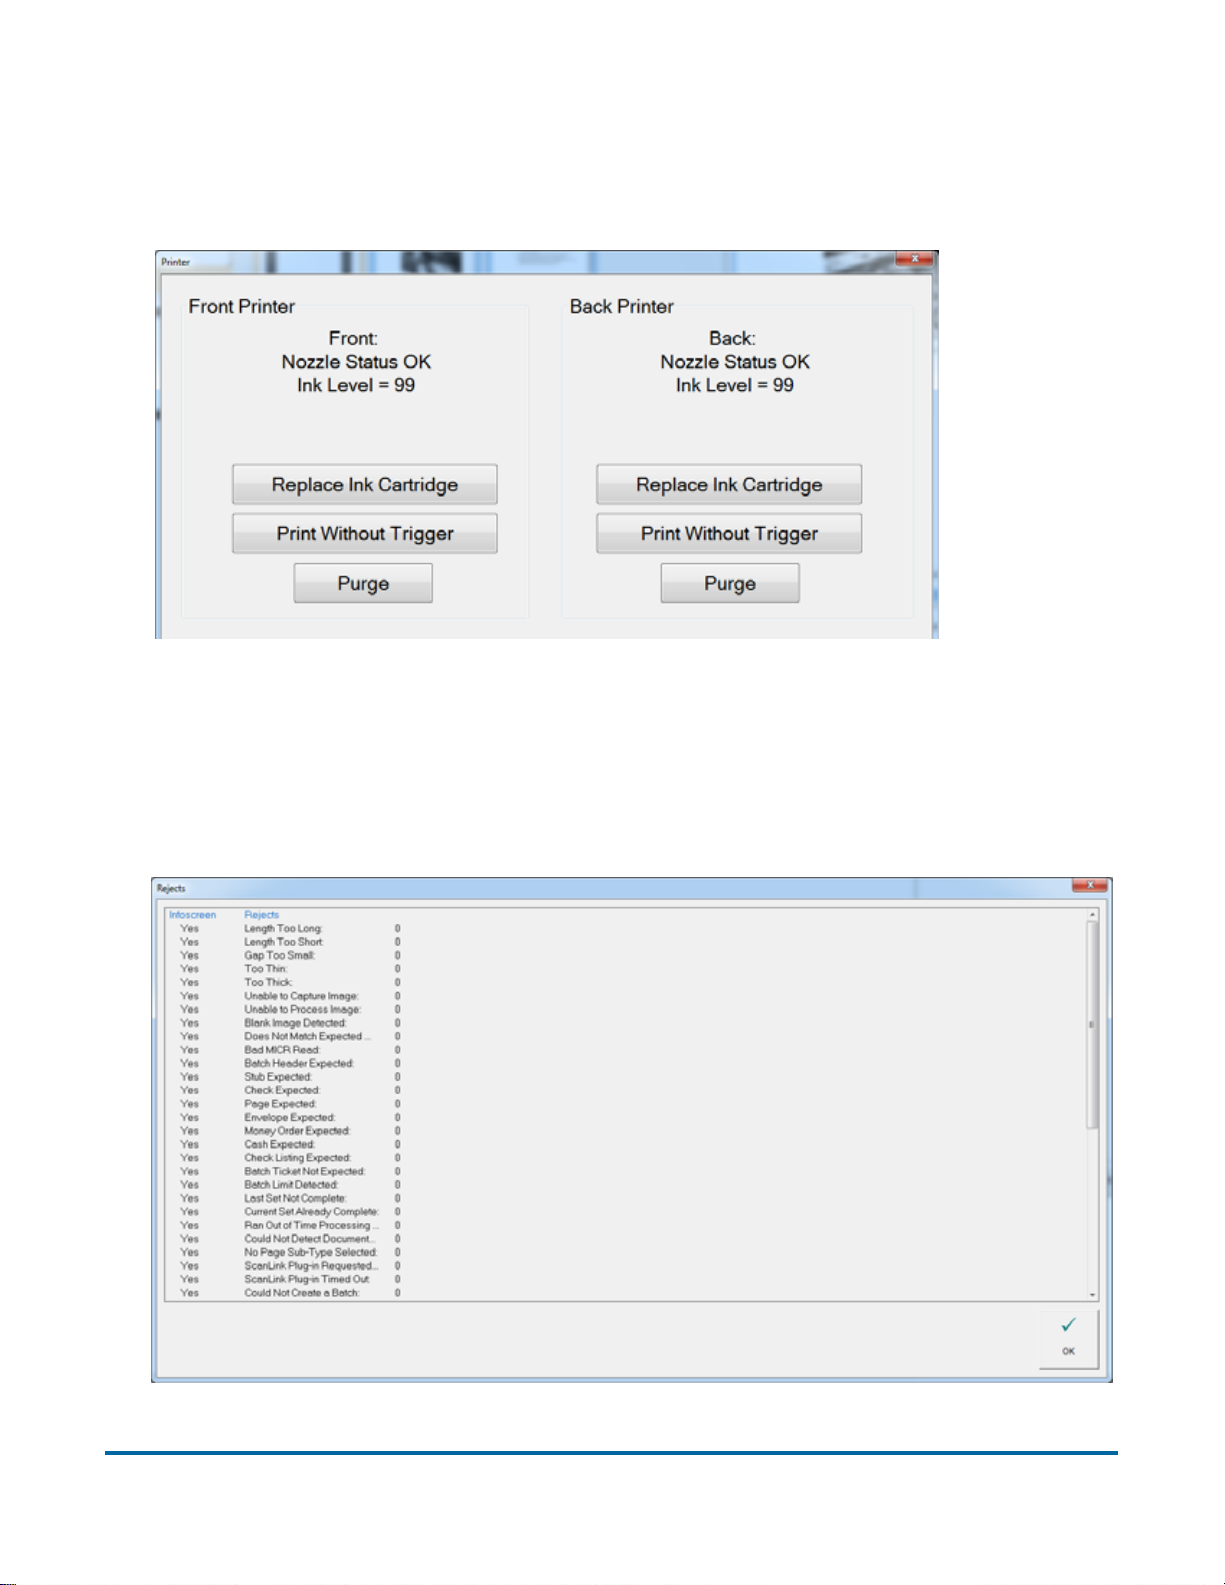
Printer Information window
The Printer Information window provides access to printer maintenance
features.
Rejects Information window
The Rejects Information window lists all of the possible rejects and shows how
many of each reject has occurred. See page 119 for a list of rejects.
Operation 59
FalconV User Manual - Standard Scanning - OPEX Corporation
Page 60
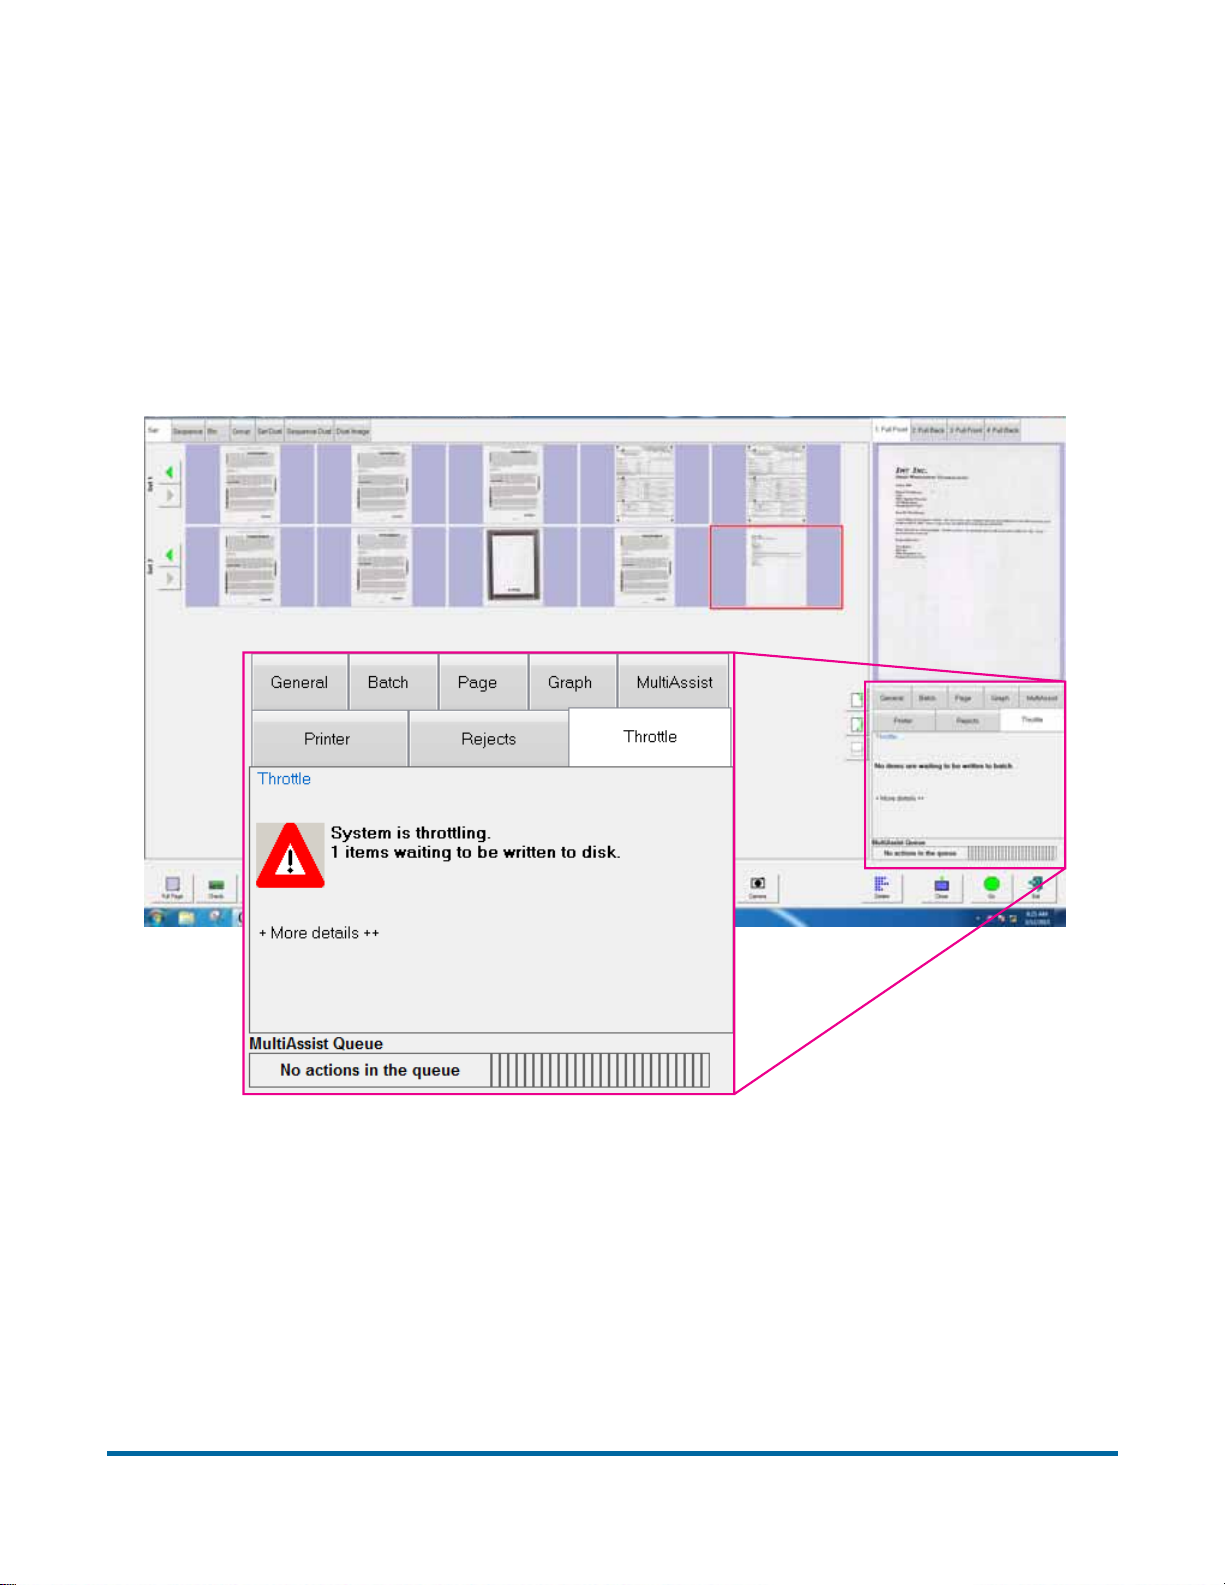
Throttling status window
Throttling status notifications are available in an optional tab on the Run screen
named “Throttle.” This optional information tab displays a notification showing
that the system is in a throttling state, along with information about how many
pieces are pending batching. Throttling is activated to pause the feeder and
conveyor when the system has reached capacity, either due to network
congestion or when extensive post-image processing is consuming available
buffers.
Figure 12: Run screen showing Throttle tab and example of notice
60 Operation
FalconV User Manual - Standard Scanning - OPEX Corporation
Page 61
Additional information windows
There may be additional information tabs that appear in the Run screen
window, based on job setup. These tabs include:
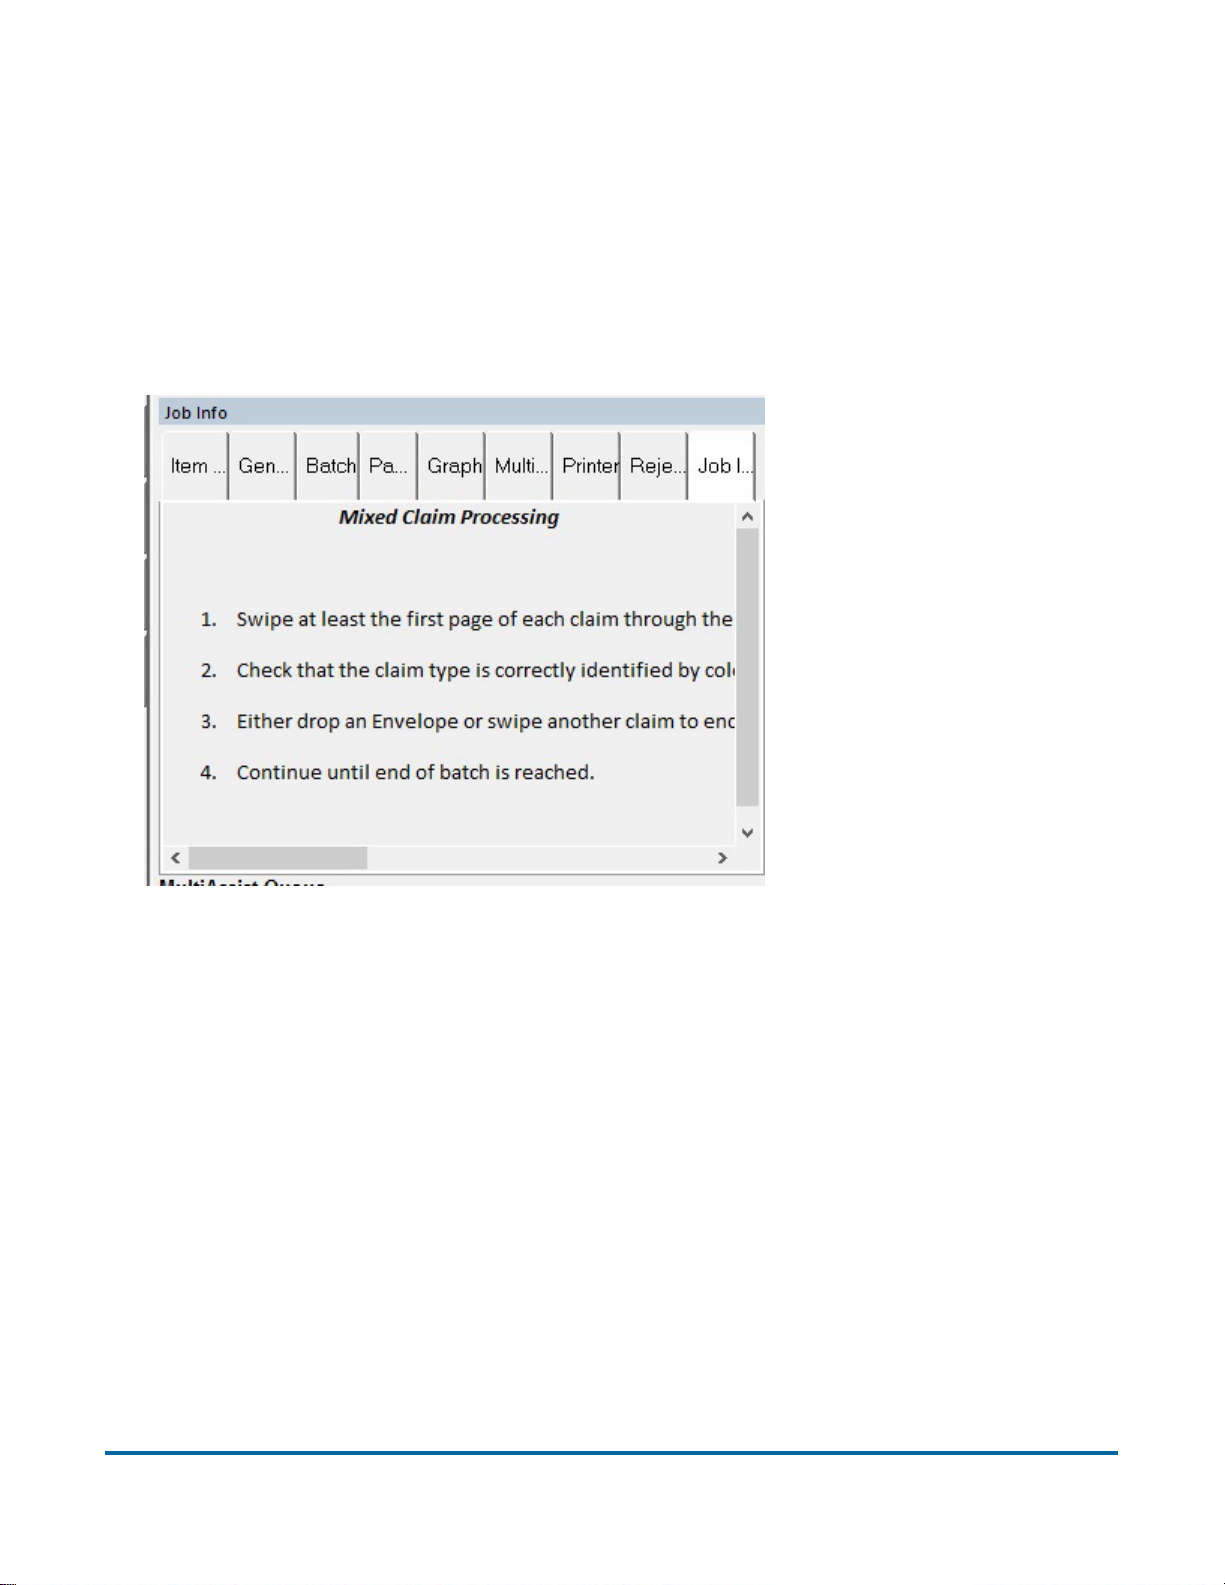
Job Information
A Job Info window displays instructions to the operator on how to process a
job.
This display references an RTF (rich text format) file that you can create using
MS Word or WordPad. Different font, sizes, styles, colors, etc, can be used.
Indexing
An indexing widow displays the index fields defined for this piece - along with
any batch, set, and group fields that were applied. See the “CertainScan
Advanced Features” manual for more information on indexing.
Sorting Properties, Filter Properties, and Edit Operations
These are editing windows that are available in the stand-alone batch editor.
See the “CertainScan Edit” manual for more information on batch editing.
Operation 61
FalconV User Manual - Standard Scanning - OPEX Corporation
Page 62

MultiAssist
The MultiAssist tab appears if the job is set up to use the optional Multi-Slot
IdAssist feature, and displays graphical information regarding which slot, swipe
method, and action has been programmed for the job. See Figure 29 on
page 88.
Reference IDs
Shows the reference IDs defined for the running job. Not visible if reference IDs
are not defined. The values in this window indicate how subsequent items will
be noted. It also indicates how the batch will be noted. Since the RefIDs for a
batch are not finalized until the batch is closed, batch RefIDs may be changed
at any time. Page RefIDs, however, may only be changed by rescanning the
item in question.See the “CertainScan Advanced Features” manual for more
information on Reference ID.
ScanLink
This window is controlled by the ScanLink plug-in for the running job. This
window is not visible if a plug-in is not defined.
WholesaleWorks 0
This window is controlled by the ScanLink plug-in for the running job. This
window is visible if the plug-in requests it. This window is also labeled by the
plug-in.
WholesaleWorks 1
This window is controlled by the ScanLink plug-in for the running job. This
window is visible if the plug-in requests it. This window is also labeled by the
plug-in.
62 Operation
FalconV User Manual - Standard Scanning - OPEX Corporation
Page 63
Scanning items
After you have selected a job, you are ready to scan items. Before you do, here
are a few things to remember:
Removing items from an envelope
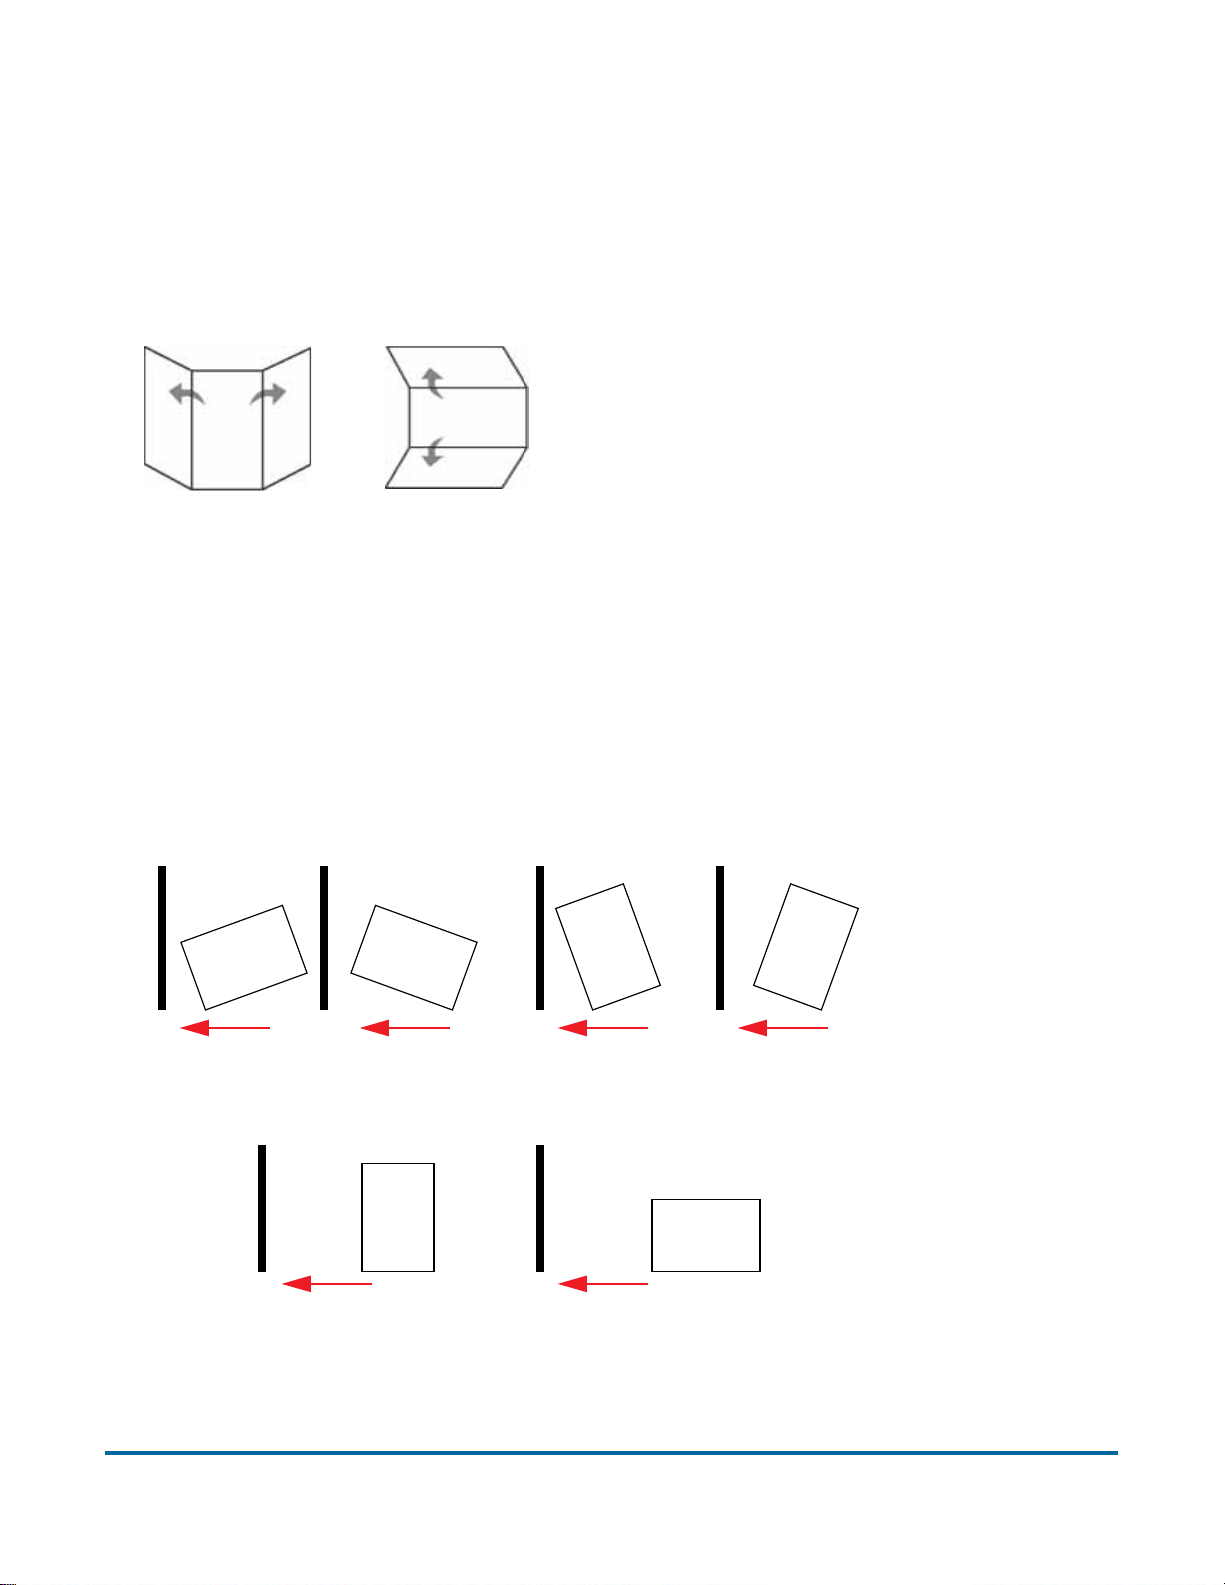
Items that are tri-folded tend to have the
top and bottom sections lifted up. Prior to
dropping any tri-folded items, flatten the
ends, allowing for a smoother feed.
As items are dropped onto the conveyor,
it’s important to drop them in such a way as to have the items fully justify to the
side rail prior to entering the feeder. The conveyor rollers are angled to assist
in justifying the items to the side rail as they are dropped. Drop the items far
enough back so that they will have time to straighten. If items are not fully
justified as they enter the feeder section, skew jams may occur. It should also
be noted that enough space gap should be allotted between items. At least ½
inch between items will provide for proper image capture.
Examples: When dropping items, give enough time for items to justify. The
thick line indicates feeder entrance. The arrow indicates the paper path.
WRONG - In these 4 examples, the items are dropped too close to the feeder to
be justified.
RIGHT - items should be as aligned as possible as they enter the feeder.
Operation 63
FalconV User Manual - Standard Scanning - OPEX Corporation
Page 64
Skew
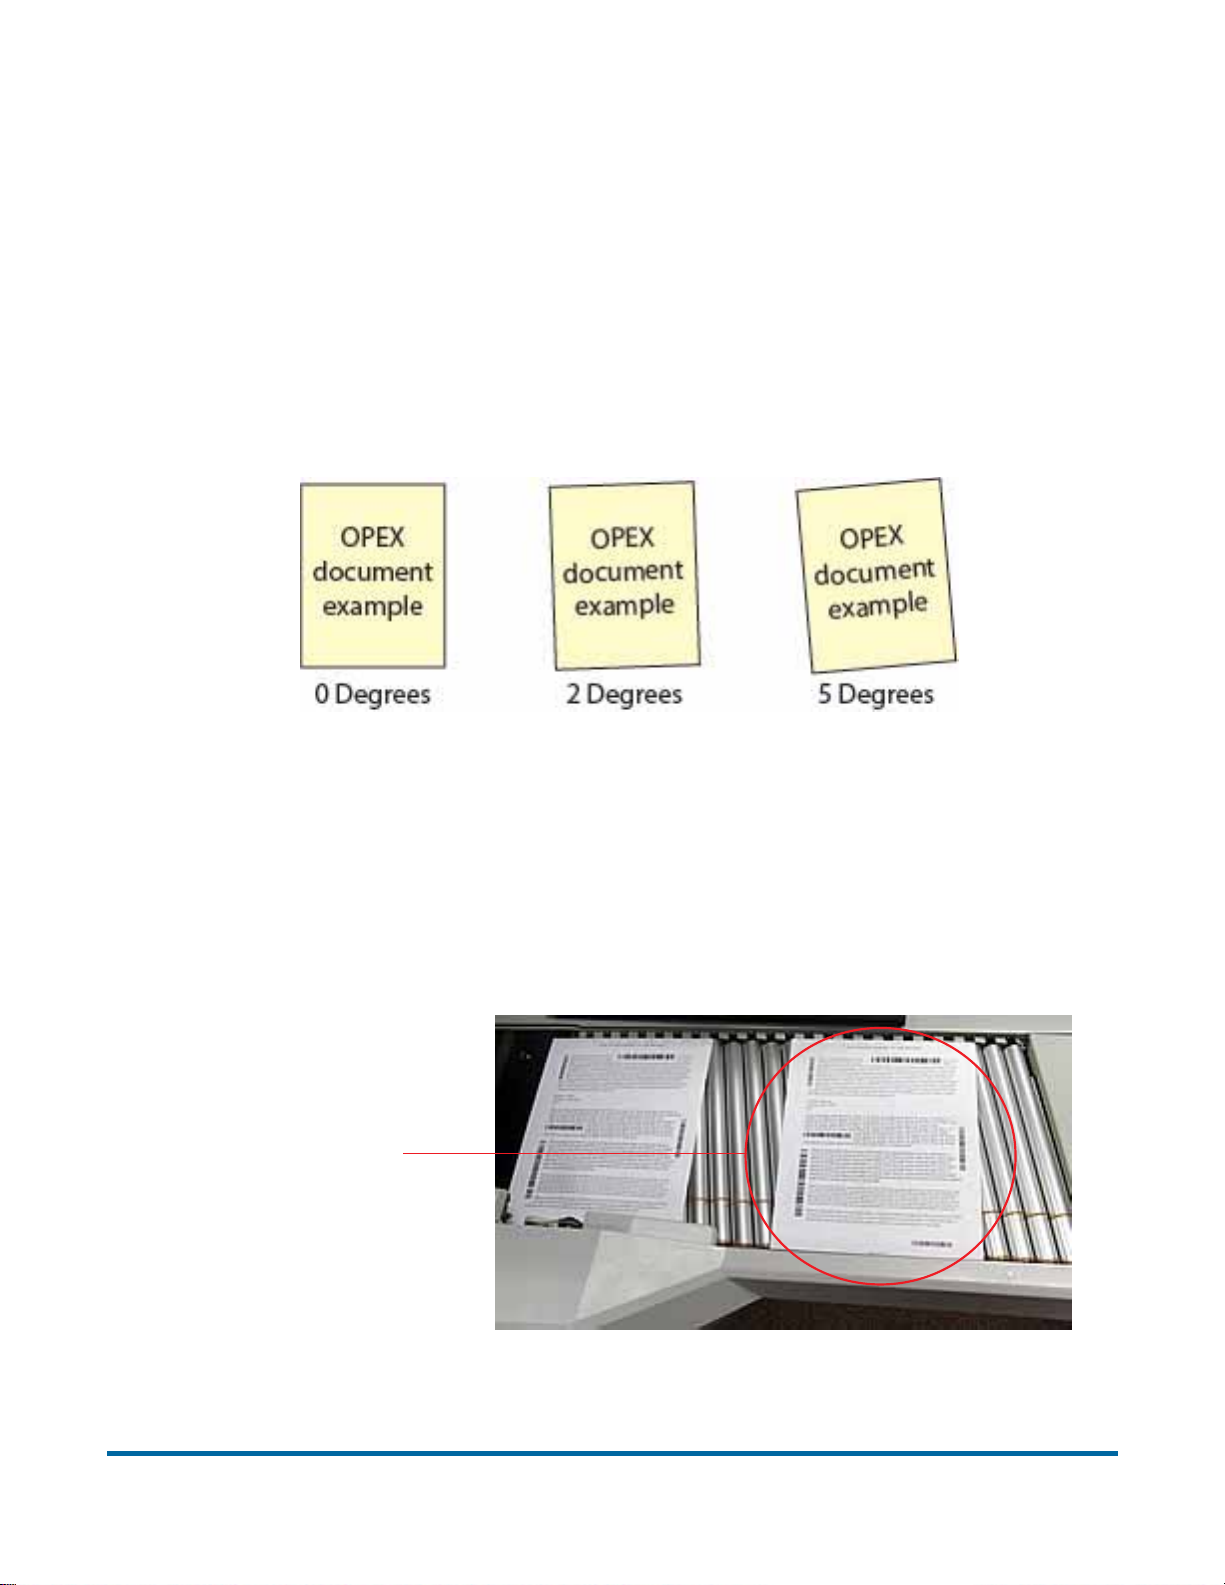
Skew is a term used to identify when an item is misaligned when scanned.
Typically, a skewed item prevents the scanned image from being read
properly.
Item skew is determined by the angle in which an item enters the scanner. The
angle is calculated by a set of LED transmit and receive parts that detect when
one sensor is uncovered for a while. If the angle is greater than 2 degrees, then
the system will jam for “too skewed”. If it jams for 5 degrees or more, contact
your Opex administrator.
Figure 13: Skew examples
To scan items into the system
After you have selected a job, you are ready to scan items.
1 Press Go on the Run screen.
2 Place the first item onto the conveyor as shown in Figure 14.
Drop items here
Figure 14: Ideal drop area
64 Operation
FalconV User Manual - Standard Scanning - OPEX Corporation
Page 65

The machine will scan the item and place a thumbnail of the image in the
set window. A large image of the item will appear in the Preview window.
3 Continue to place the items you want to scan onto the conveyor. The
scanner will scan and sort the items depending on the job parameters.
As the scanner processes items, check to make sure:
• Items are being scanned properly.
• All critical information (MICR line, OCR line, etc.) is being collected
properly.
• Items are being sorted to the correct bin.
Stack Feeding
Stacks of paper (approximately 1.1 inches) can be placed on the conveyor.
The conveyor rollers will carry the stack (or packet) over to the packet feeder
where the top piece will be singulated from the top of the stack and fed into the
scanner. The feeder will continue to pull the top page from the stack until the
last page is fed.
When the feeder detects a stack of paper, the conveyor will stop to allow for
the stack to pass through and will continue when the entire stack is fed. You
can place more stacks on the conveyor when it stops, but keep in mind that the
conveyor will only stop when the feeder encounters a stack.
Note: The conveyor operates differently depending on the Feed Mode job
parameter setting: Normal, Stack, Passive. Stack feeding can be accomplished in either Stack or Normal modes. Height sensors come into effect
in Stack mode as well.
Since the feeder pulls from the top of the stack, the lead sheet in the stack
must be the first to reach the feeder. If the bottom piece reaches the feeder
first, a paper misfeed is likely to occur. There are techniques for learning to
drop packets of paper consistently and effectively. The items do not have to be
perfectly aligned as long as the lead sheet is the top sheet. Review these
techniques with your FalconV Administrator or your OPEX Technician or Sales
Engineer.
Operation 65
FalconV User Manual - Standard Scanning - OPEX Corporation
Page 66
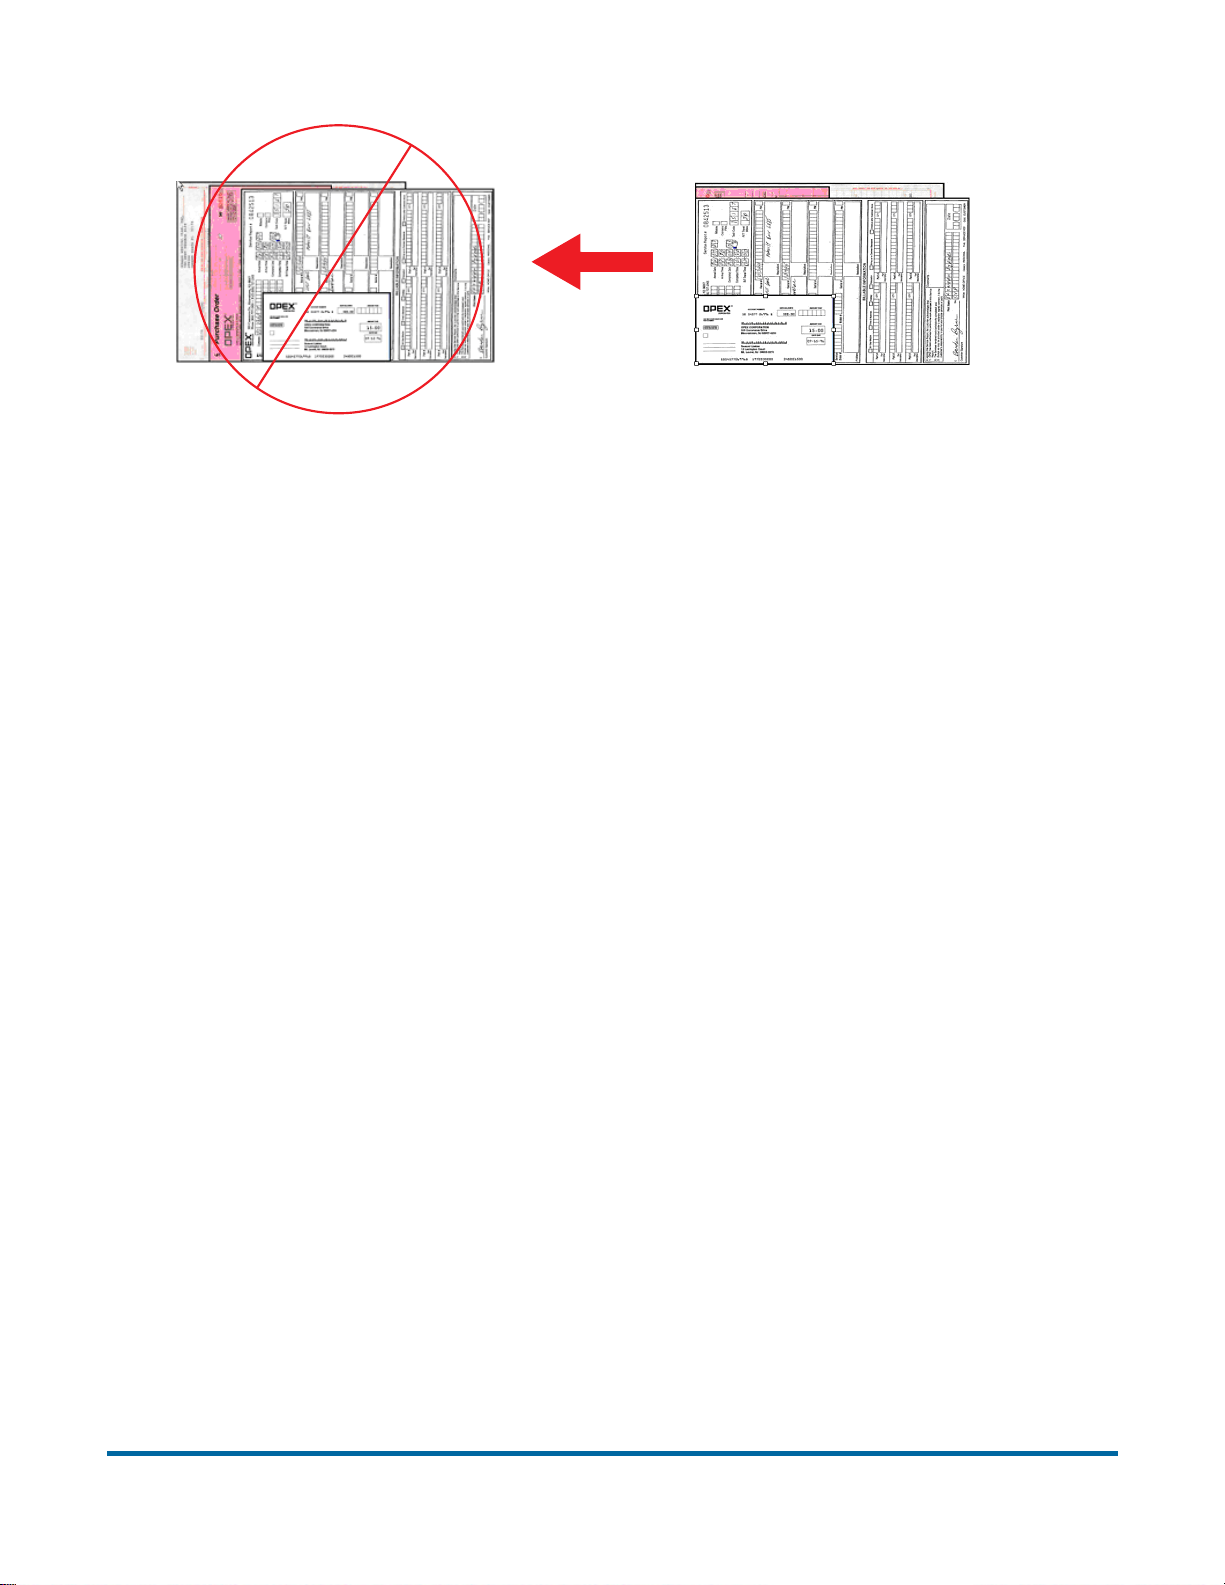
Feed Direction
CORRECT
Scanning tips
Make use of these techniques for properly handling paper and feeding items:
• Feed items with the correct side up. When searching for/reading MICR lines,
the scanner will assume the items are being fed face up, with the bottom
edge towards the operator.
• Make sure items are unfolded and place them on the conveyor directly in
front of the point of extraction. This will give the machine a chance to justify
each page dropped against the common edge and will assist in deskewing
the item before it reaches the feeder. For maximum effect, the paper should
be unfolded so that it is flat and makes contact with the conveyor rollers and
feed rings.
• 8-½ x 11” sheets can be scanned in portrait or landscape. The scanner is
outfitted with 12.25” image sensors and can accommodate larger pieces of
paper as well.
• Checks and remits should be dropped in the same orientation as if you were
reading them. Other landscape pages can also be automatically detected if
their page width or height is unique.
• To scan two or more items, such as a page with a sticky note attached, first
press the MFD Override button. This will disable the scanner’s ultrasonic
multifeed detector and allow the “2-page” piece into the system.
66 Operation
FalconV User Manual - Standard Scanning - OPEX Corporation
Page 67
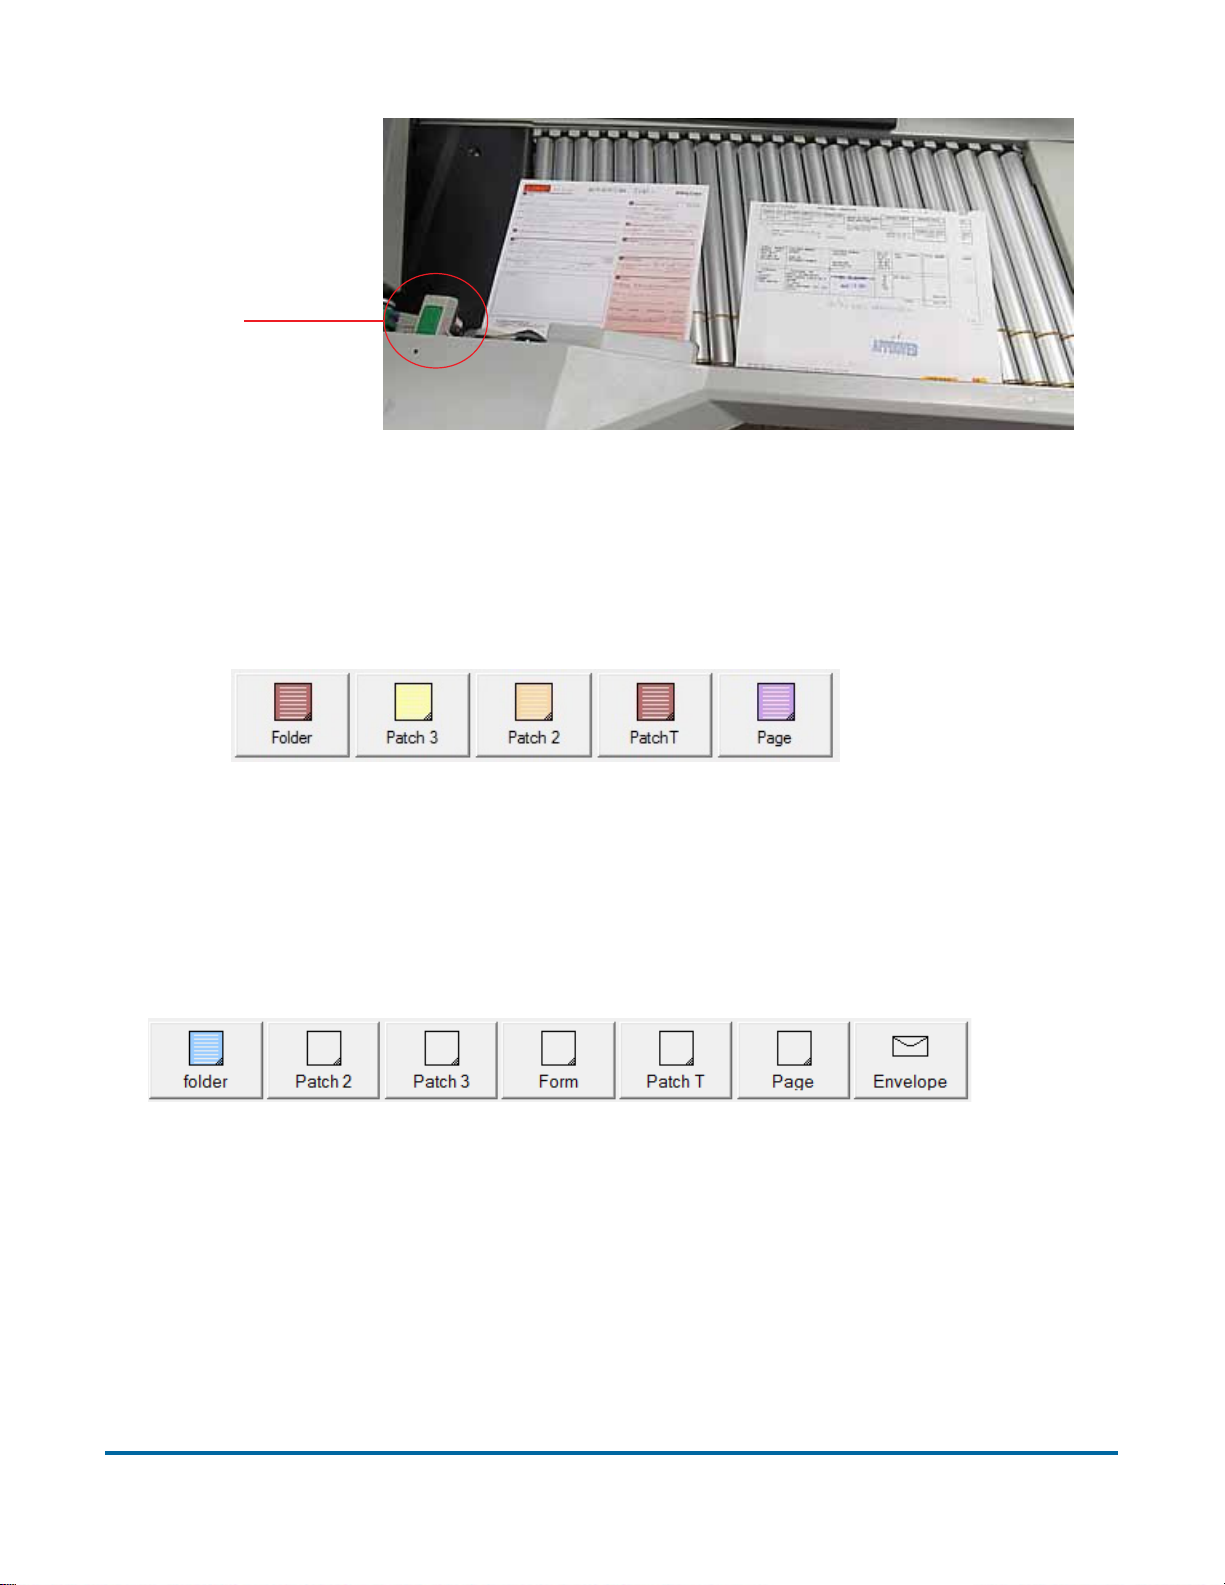
MFD Override
button
Assigning a page type
You can manually assign a page type to the next item you scan by pressing the
appropriate Page Type button. These buttons are only available if they have
been activated in the general job parameters.
Figure 15: Sample page type buttons
In a structured job, the page type buttons will also indicate which page types
the system expects to see next. For example, if the job expects to see a folder
to start a set, its corresponding page type button will appear in color (as shown
in Figure 16).
Figure 16: Sample page type buttons (structured job)
Page type locking
Depending on the job setup, you may also have the ability to apply a page type
to several items. With page type locking enabled, you can press the page type
button twice and “lock” the page type button down. Once the button is “locked,”
all the subsequent pieces will be classified as this page type until the end of the
set/transaction or when the lock is released.
Operation 67
FalconV User Manual - Standard Scanning - OPEX Corporation
Page 68
A red box around a page
type button indicates
that the lock is in place.
Assigning page sub-types
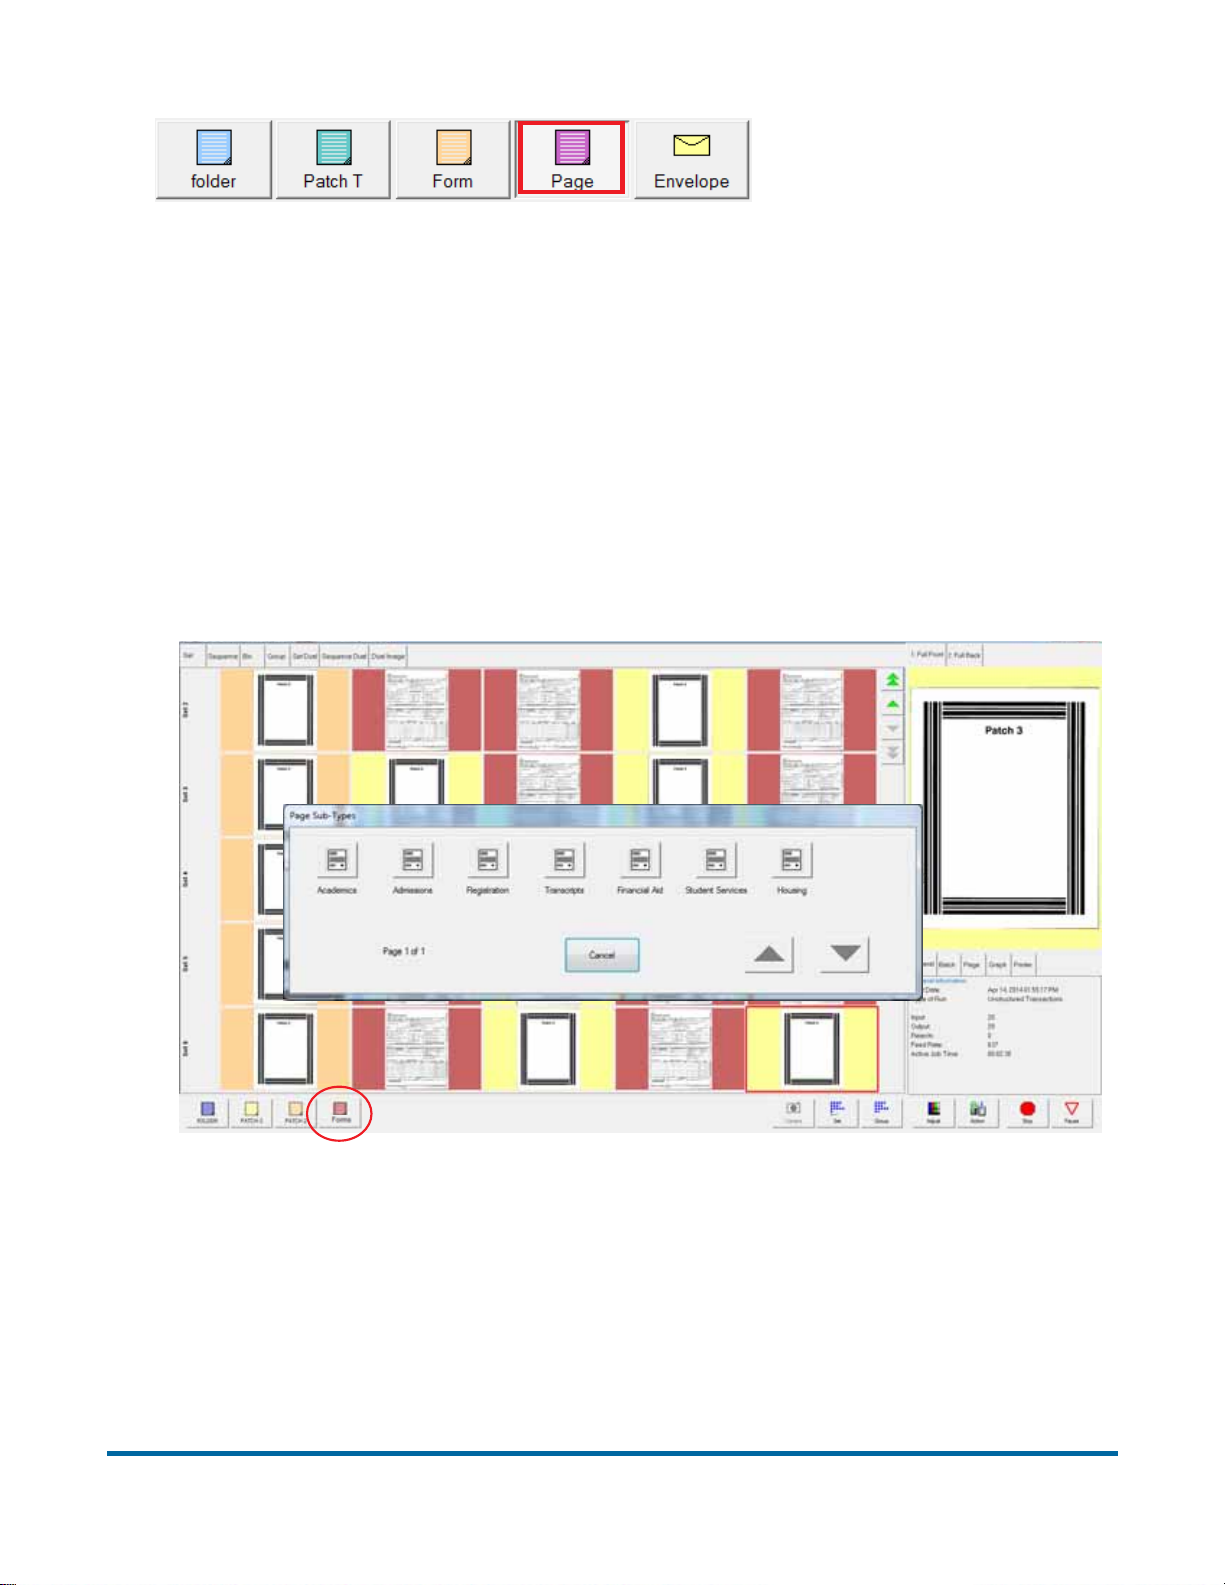
If one or more of the page types in your job contains sub-types, you must
assign the item a sub-type before scanning it into the system. Page Sub-Types
must be enabled in the General Page Type Parameters in order for this feature
to appear.
To assign a page sub-type:
1 While running a job, press the appropriate page type button. For example, if
you are scanning forms into the system, press the Forms page type button
(see Figure 17).
Figure 17: Assigning a page sub-type
2 Select from the available page sub-types.
3 Scan the item.
68 Operation
FalconV User Manual - Standard Scanning - OPEX Corporation
Page 69
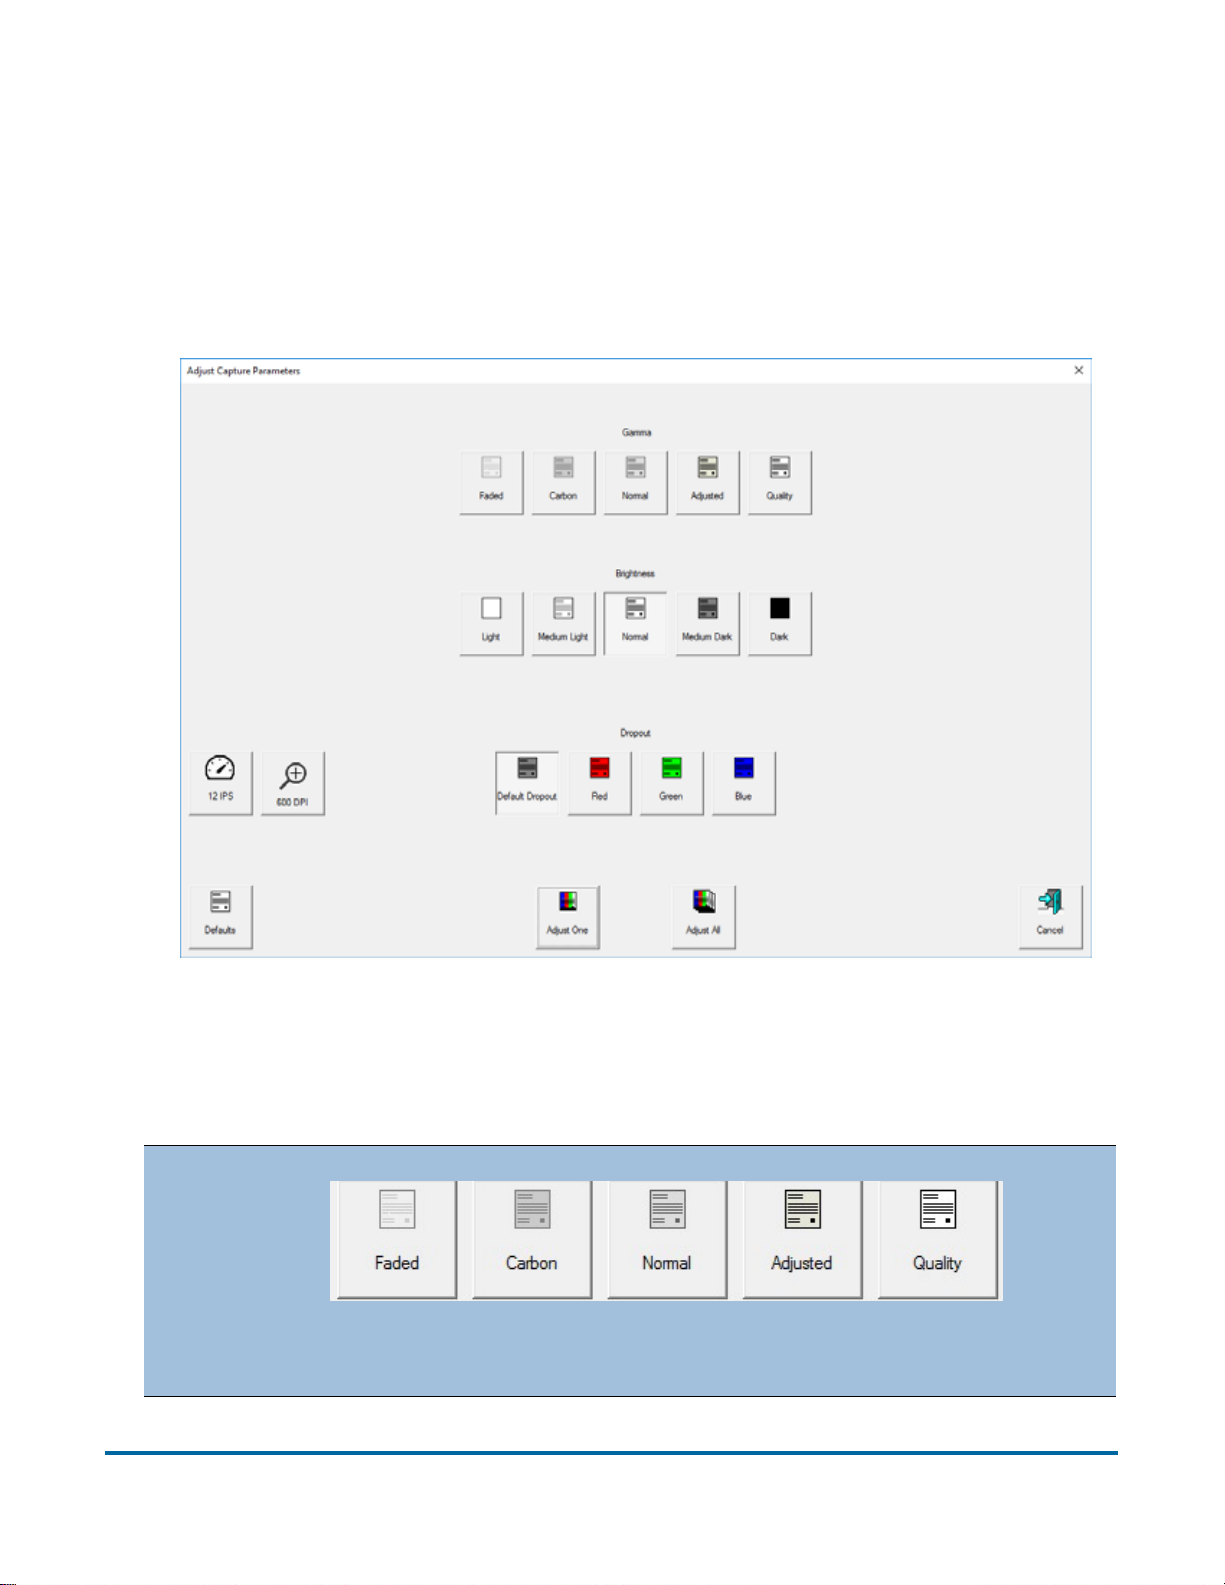
Adjust image quality, alternate track speed, and alternate DPI
Fine tune the quality of the item images by pressing Adjust on the Run screen.
The Adjust Capture Parameters screen will appear, where you can modify the
gamma, brightness and dropout colors for all or one image. Additional toggle
buttons may appear on this screen based on the job setup, allowing you to
switch to an alternate track speed and alternate image resolution output.
Figure 18: Adjust Capture Parameters screen
Table 6: Adjust Capture Parameters screen buttons
Gamma
When enabled, the Gamma buttons allow you to adjust the
balance between bright and dark areas of the image.
Operation 69
FalconV User Manual - Standard Scanning - OPEX Corporation
Page 70
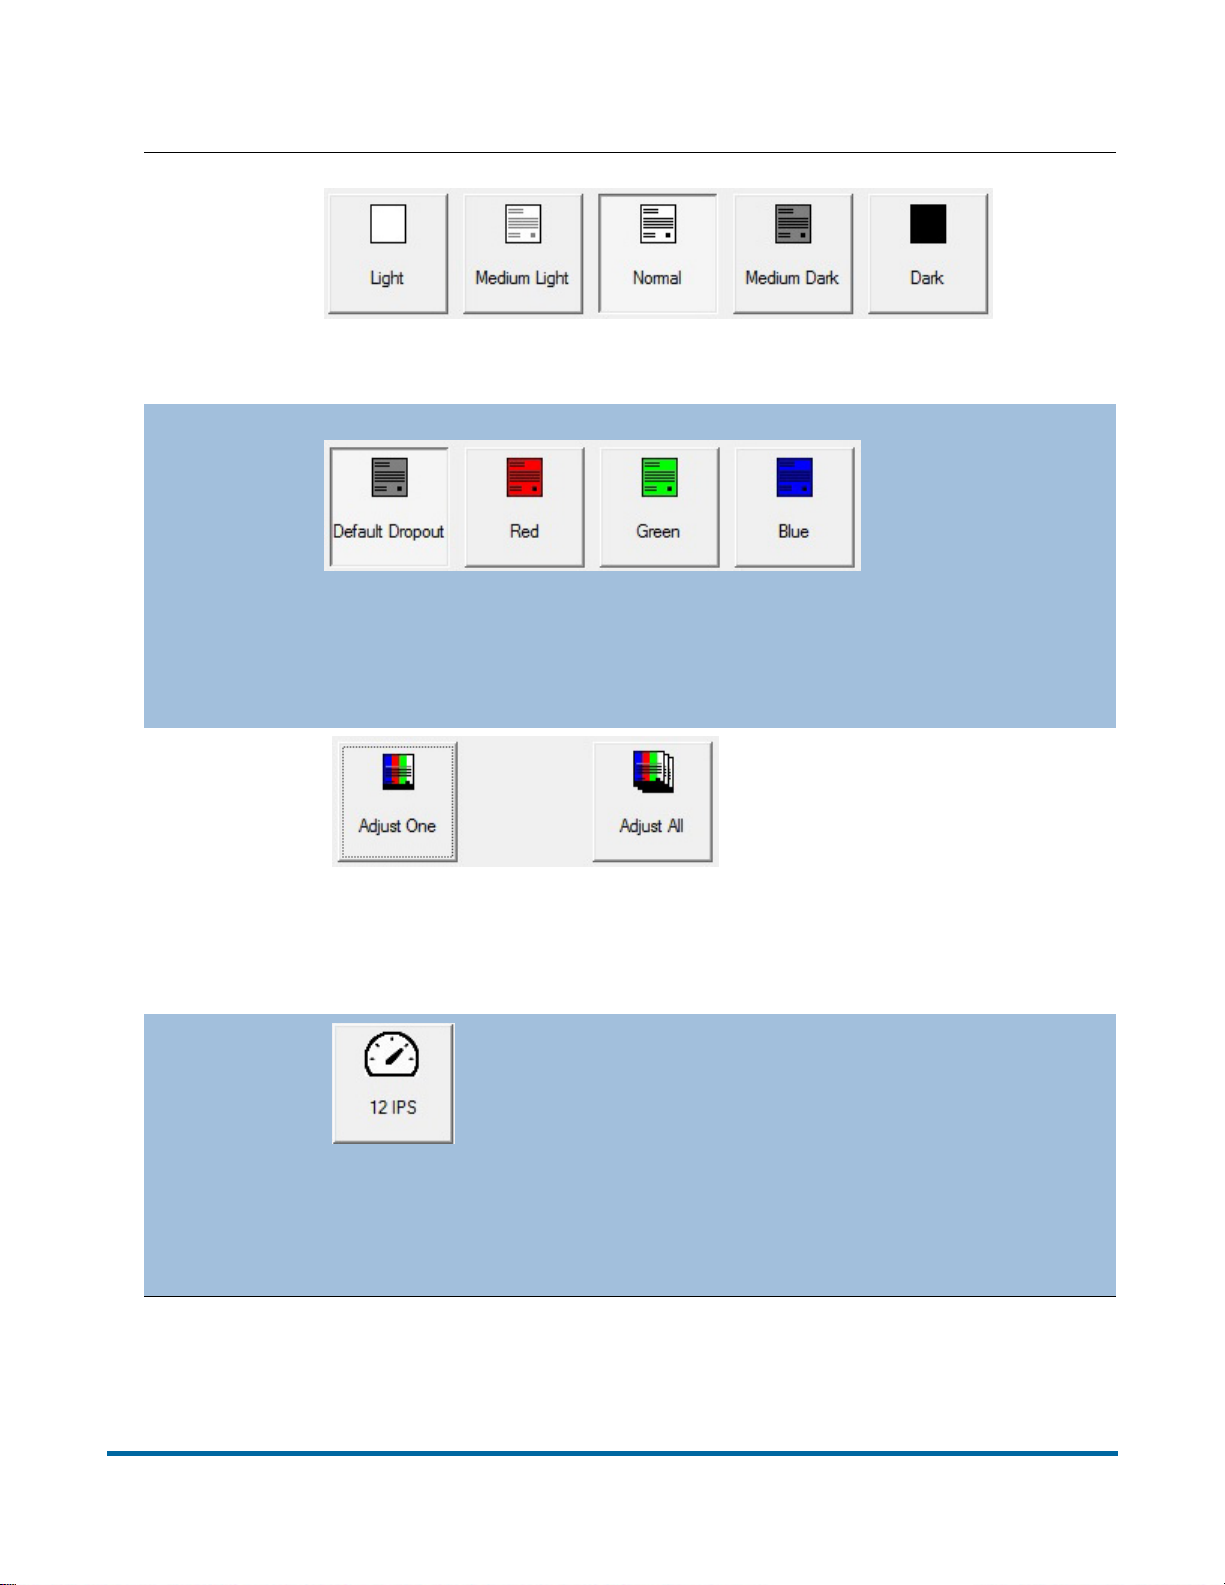
Table 6: Adjust Capture Parameters screen buttons (continued)
Brightness
Adjust the brightness of the item images from Light to Dark.
Press a button to adjust the brightness. The default is Normal.
Dropout
Remove a color (Red, Green, Blue, or White) from the item
image. The default is White.
Note: To use this feature, the items must be printed with a
Adjust All/
Adjust One
Alternate
Track
Speed
mode
specific dropout color.
Select Adjust All to apply the
image quality changes to all
the items in the current job, or
Adjust One to make the
adjustments only to the next
item scanned.
Note: These buttons have no affect on alternate track speed or
alternate DPI mode.
This button allows you to switch to an alternate
track speed mode. Useful when you encounter a
complicated item for which it is desirable to scan
at a lower track speed (for example, a document
requiring more processing time). The button works
like a toggle: selecting it enables the alternate track speed
mode. Once finished with the alternate mode, you must
deselect it to revert back to the normal track speed mode.
70 Operation
FalconV User Manual - Standard Scanning - OPEX Corporation
Page 71
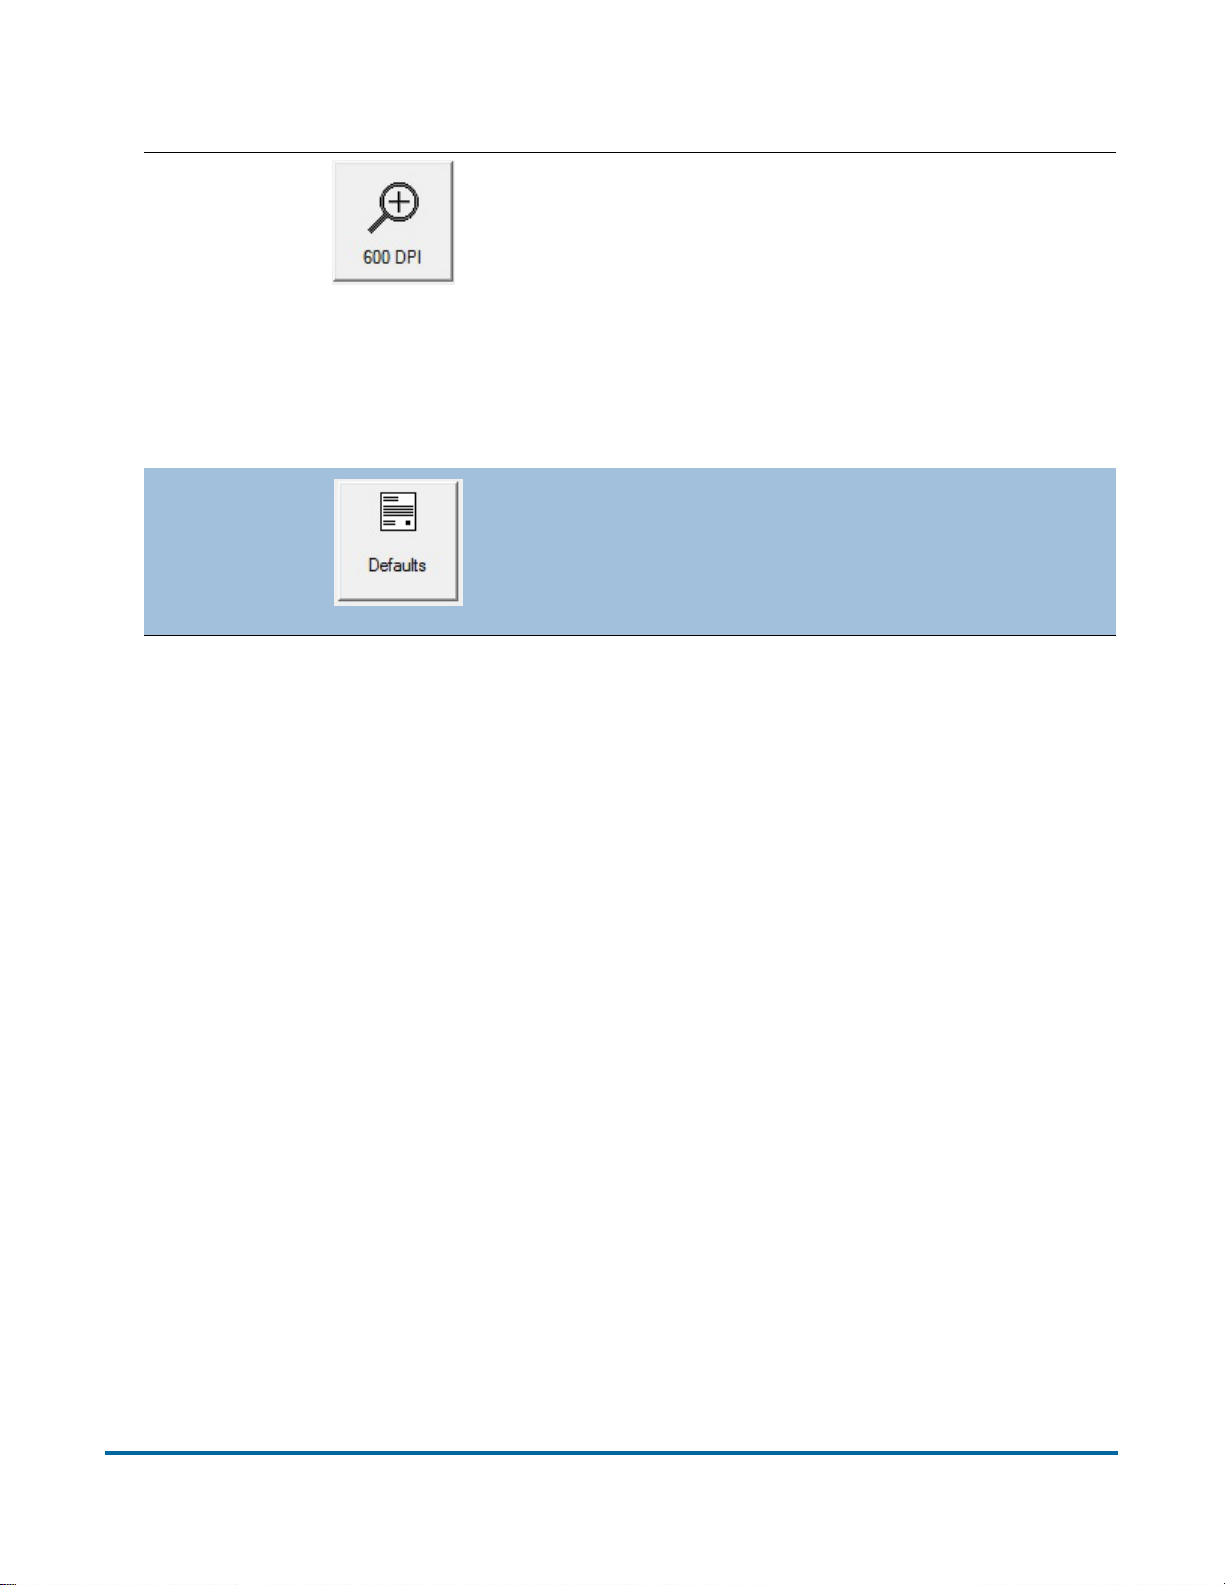
Table 6: Adjust Capture Parameters screen buttons (continued)
This button allows you to switch to an alternate
image output resolution. Intended for use with
scanning individual documents requiring 600 DPI
Alternate
DPI mode
Defaults
resolution at 7 ips. Once you click the 600 DPI
button, the machine slows to 7ips automatically
and stays at that speed until deselected. The button works like
a toggle: selecting it enables the alternate DPI mode. Once
finished with the alternate mode, you must deselect it to revert
back to the normal DPI mode.
Return to the default capture parameters.
Operation 71
FalconV User Manual - Standard Scanning - OPEX Corporation
Page 72

Rescanning items
There are a couple reasons and methods for rescanning items:
• Getting a better image - If you are not pleased with a particular image, you
can rescan the item while the job is running. CertainScan has a Rescan
button that allows you to replace a poor image or item scanned out of order
by using the normal feeder. Steps for this method are described below.
• If the system encounters a multi-feed reject - the feeder and conveyor will
stop, a jam dialog will appear on screen, the Rescan Feeder LEDs will flash
blue, and the Pre-Feed MFD Override LED will flash green. The flashing in
these two areas alerts you that either one may be chosen to re-feed the
rejects:
- Rescan Feeder - The FalconV Rescan Feeder is a mechanism that allows
the operator to feed (one at a time) items into the machine which had been
rejected or the auto-feeder is not able to feed. See “About the Rescan
Feeder” on page 73 for more details.
- Pre-Feed - The FalconV has another entry point at which the operator can
interject rejected sheets: this entry point is in the Pre-Feeder mechanism
and is primarily designed for multiple rejects to be stacked; alleviating the
need to insert them one at a time. See “About the pre-feeder mechanism”
on page 75 for more details.
To rescan an item:
1 Select the item’s thumbnail.
2 Take the item out of the sort bin.
3 Press Rescan to replace the item in the batch.
Note: If an audit trail was printed on the item the first time it was scanned,
you may press Rescan NP (no printing) to replace the item in the batch.
This way, no additional audit trails will be printed on the item.
4 Drop the item onto the conveyor.
5 Verify that the image is acceptable.
Note: The Rescan buttons will only be available if activated in the batch
parameters.
72 Operation
FalconV User Manual - Standard Scanning - OPEX Corporation
Page 73

About the Rescan Feeder
The Rescan Feeder consists of an illuminated slotted opening in the scan bed
cover and a button to activate/deactivate the mechanism directly to the right of
the slot.
Rescan Feeder illuminated slot
Rescan Feeder button
The Rescan Feeder can only be activated via the Rescan Feeder button when
the machine is in a jammed or paused state.
In the event of a jam, the Rescan Feeder slot will flash blue at a 0.5 second
interval; alerting the operator that it may be selected for use to re-feed any
rejected or jam sorted items. If the operator activates the Rescan Feeder, the
jam dialogue will disappear from the screen and the slotted opening in the scan
bed cover will become solidly lit blue; alerting the operator that the Rescan
Feeder is now active and the machine expects items to be injected there.
To use the Rescan Feeder without multi-feed detection in the event of a
jam:
This mode may be desired so that an item with a sticky note can be processed
through the scanner without the machine jamming for a multi feed.
1 When the Rescan Feeder slot is flashing, press the button located directly
to the right of the slot.
2 Wait for the jam dialog to disappear and the slot to become solidly lit.
3 Inject the item(s) one at a time into the slot.
Operation 73
FalconV User Manual - Standard Scanning - OPEX Corporation
Page 74
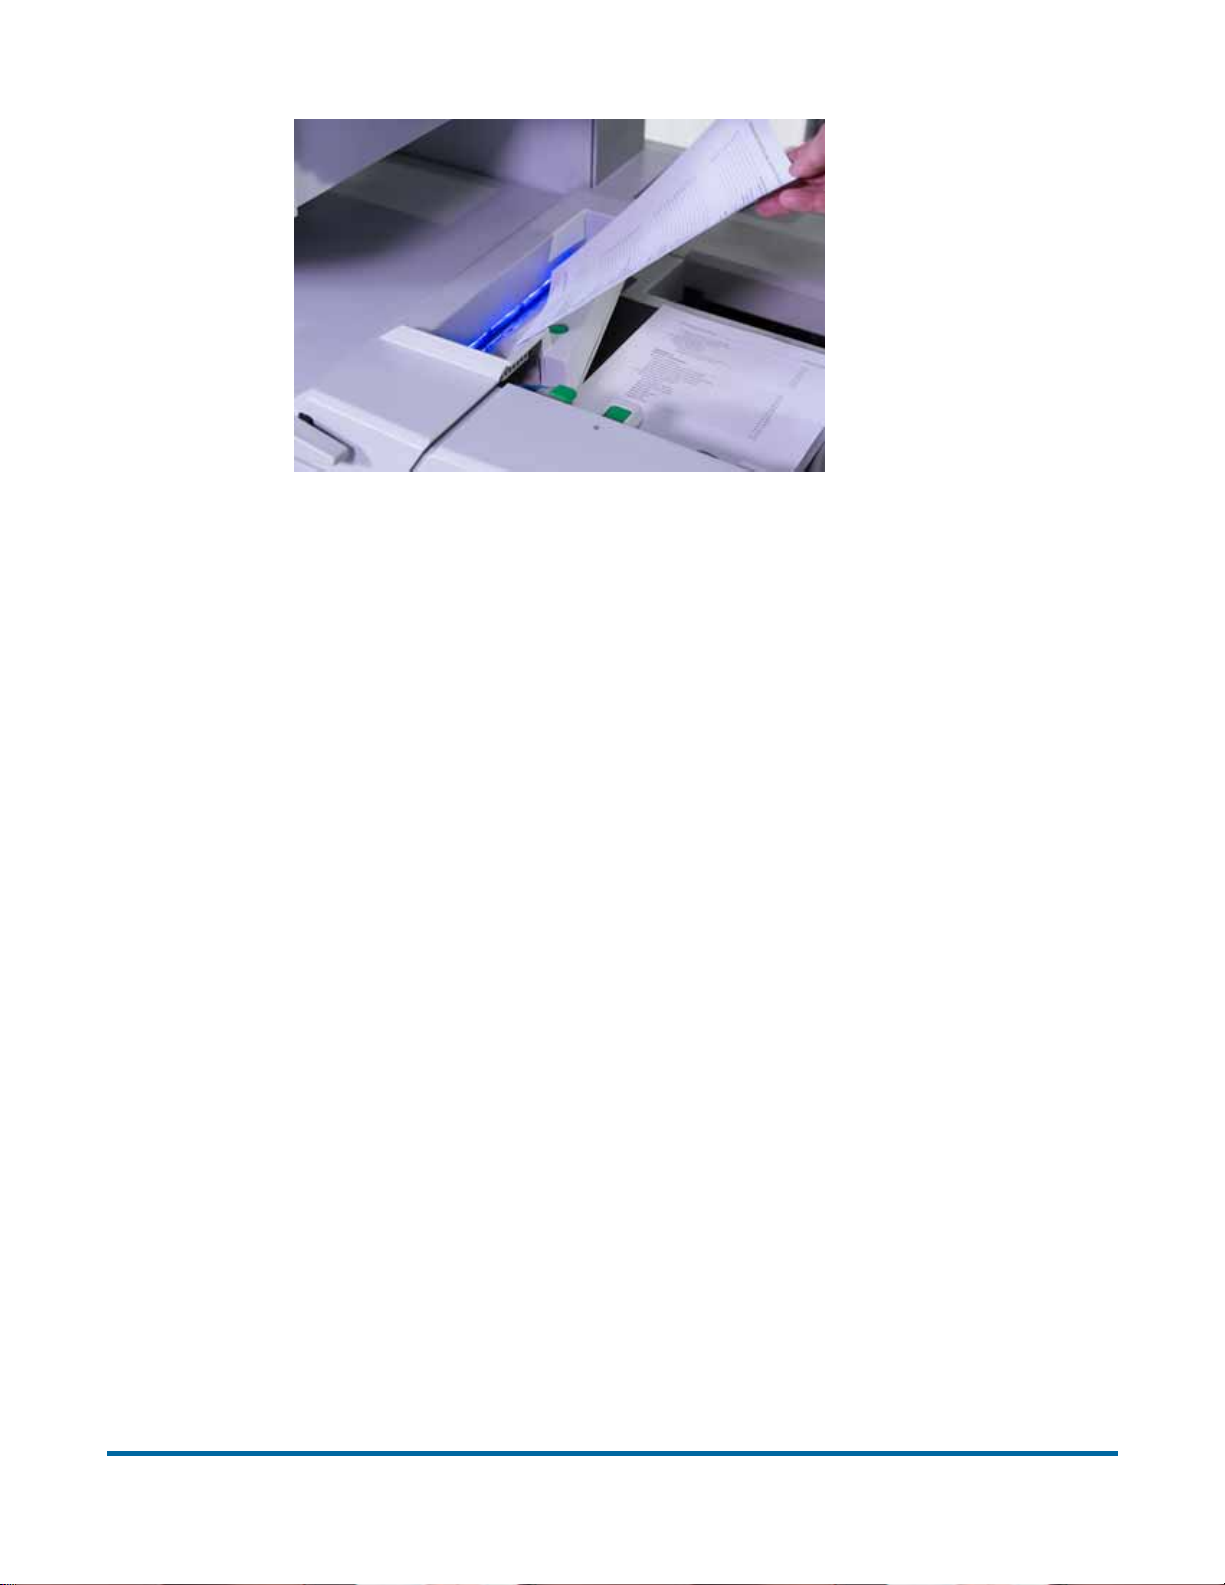
4 When finished, press the Rescan Feeder button again.
The slot will no longer be illuminated and feeding will resume at the auto-
feeder
To use the Rescan Feeder with multi-feed detection in the event of a jam:
1 When the Rescan Feeder slot is flashing, press and hold the Rescan
Feeder button until the Rescan Feeder slot begins to flash rapidly.
2 Wait for the jam dialog to disappear.
3 Inject the item(s) one at a time into the slot.
4 When finished, press the Rescan Feeder button again.
5 The slot will no longer be illuminated and feeding will resume at the auto-
feeder.
Using the Rescan Feeder when the machine is paused
If the operator pauses the machine from the run screen, the Rescan Feeder
slot will flash blue at a 0.5 second interval; alerting the operator that it may be
selected to inject a single or multiple items into the machine. If the operator
activates the Rescan Feeder, the slotted opening in the scan bed cover will
become solidly lit blue; alerting the operator that the Rescan Feeder is now
active and the machine expects items to be injected there.
To use the Rescan Feeder without Multi-Feed detection during the
paused state:
1 When the Rescan Feeder slot is flashing, press the Rescan Feeder button.
74 Operation
FalconV User Manual - Standard Scanning - OPEX Corporation
Page 75
2 Wait for the slot to become solidly lit.
3 Inject the item(s) one at a time into the slot.
4 When finished, press the Rescan Feeder button again.
The slot will no longer be illuminated and feeding will resume at the auto-
feeder.
To use the Rescan Feeder with Multi-Feed detection during the paused
state:
1 When the Rescan Feeder slot is flashing, press and hold the Rescan
Feeder button until the Rescan Feeder slot begins to flash rapidly.
2 Inject the item(s) one at a time into the slot.
3 When finished, press the Rescan Feeder button again.
The slot will no longer be illuminated and feeding will resume at the auto-
feeder.
About the pre-feeder mechanism
The pre-feeder mechanism consists of left and right pre-feeder wheels located
directly to the right of the feed belt and the MFD override LED and the MFD
override button.
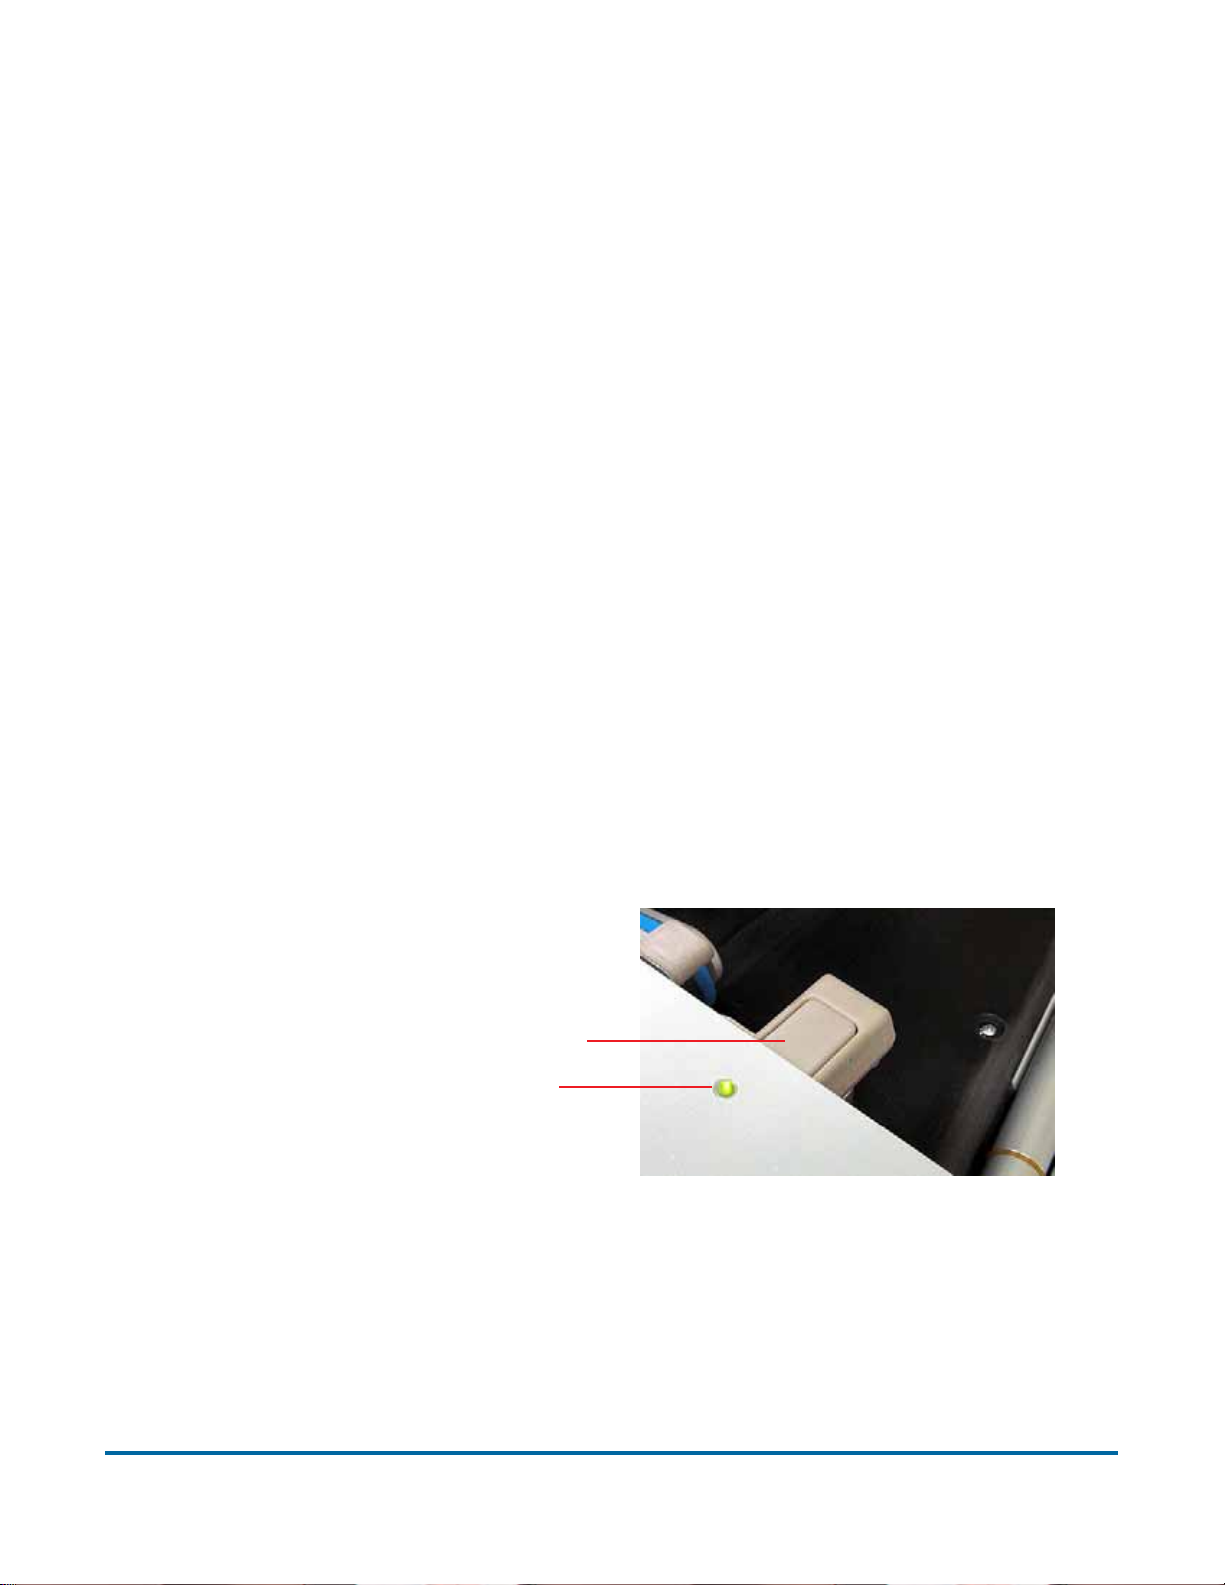
Pre-Feed MFD Override button
Pre-Feed MFD Override LED
The pre-feeder mechanism can only be activated via the MFD override button
when the machine is in a jammed or paused state. In the event of a jam, the
Pre-Feeder LED will flash green at a 0.5 second interval; alerting the operator
that it may be selected for use to re-feed any rejected or jam sorted sheets. If
the operator activates the Pre-Feeder, the LED will be solidly lit green and the
Pre-Feeder arms will raise to allow the item(s) to be placed under them.
Selecting the Pre-Feeder again will cause the Pre-Feeder LED to shut off, the
Operation 75
FalconV User Manual - Standard Scanning - OPEX Corporation
Page 76

jam dialogue to disappear from the screen, the pre-feed nip wheels will lower to
the top of the item(s) and feeding will resume.
To use the Pre-Feeder in the event of a jam:
1 When the Pre-Feed LED is flashing, press the Pre-Feed MFD Override
button.
2 Wait for the pre-feeder arms to be raised and the Pre-Feed LED to be
solidly lit.
3 Place all sheets to be fed under the pre-feeder arms.
4 Press the Pre-Feed MFD Override button or hit the continue button in the
jam dialogue.
The jam dialogue should disappear , the Pre-Feed LED will no longer be illu-
minated, and feeding should resume at the auto-feeder.
If the operator pauses the machine, the Pre-Feed LED will flash green at a
0.5 second interval; alerting the operator that it may be selected to inject a
single or multiple items into the machine. If the operator activates the PreFeeder , the LED will be solidly lit green and the pre-feeder arms will raise to
allow the item(s) to be placed under them. Selecting the Pre-Feeder again
will cause the machine to exit the paused state, lower the Pre-Feed nip
wheels onto the top of the item(s) and feeding will resume.
To use the Pre-Feeder during the paused state:
1 When the Pre-Feeder LED is flashing, press the Pre-Feed MFD Override
button.
2 Wait for the Pre-Feeder arms to be raised and the Pre-Feed LED to be
solidly lit.
3 Place all sheets to be fed under the pre-feeder arms.
4 Press the Pre-Feed MFD Override button or press the resume button.
The Pre-Feed LED will no longer be illuminated, and feeding should
resume at the auto-feeder.
76 Operation
FalconV User Manual - Standard Scanning - OPEX Corporation
Page 77
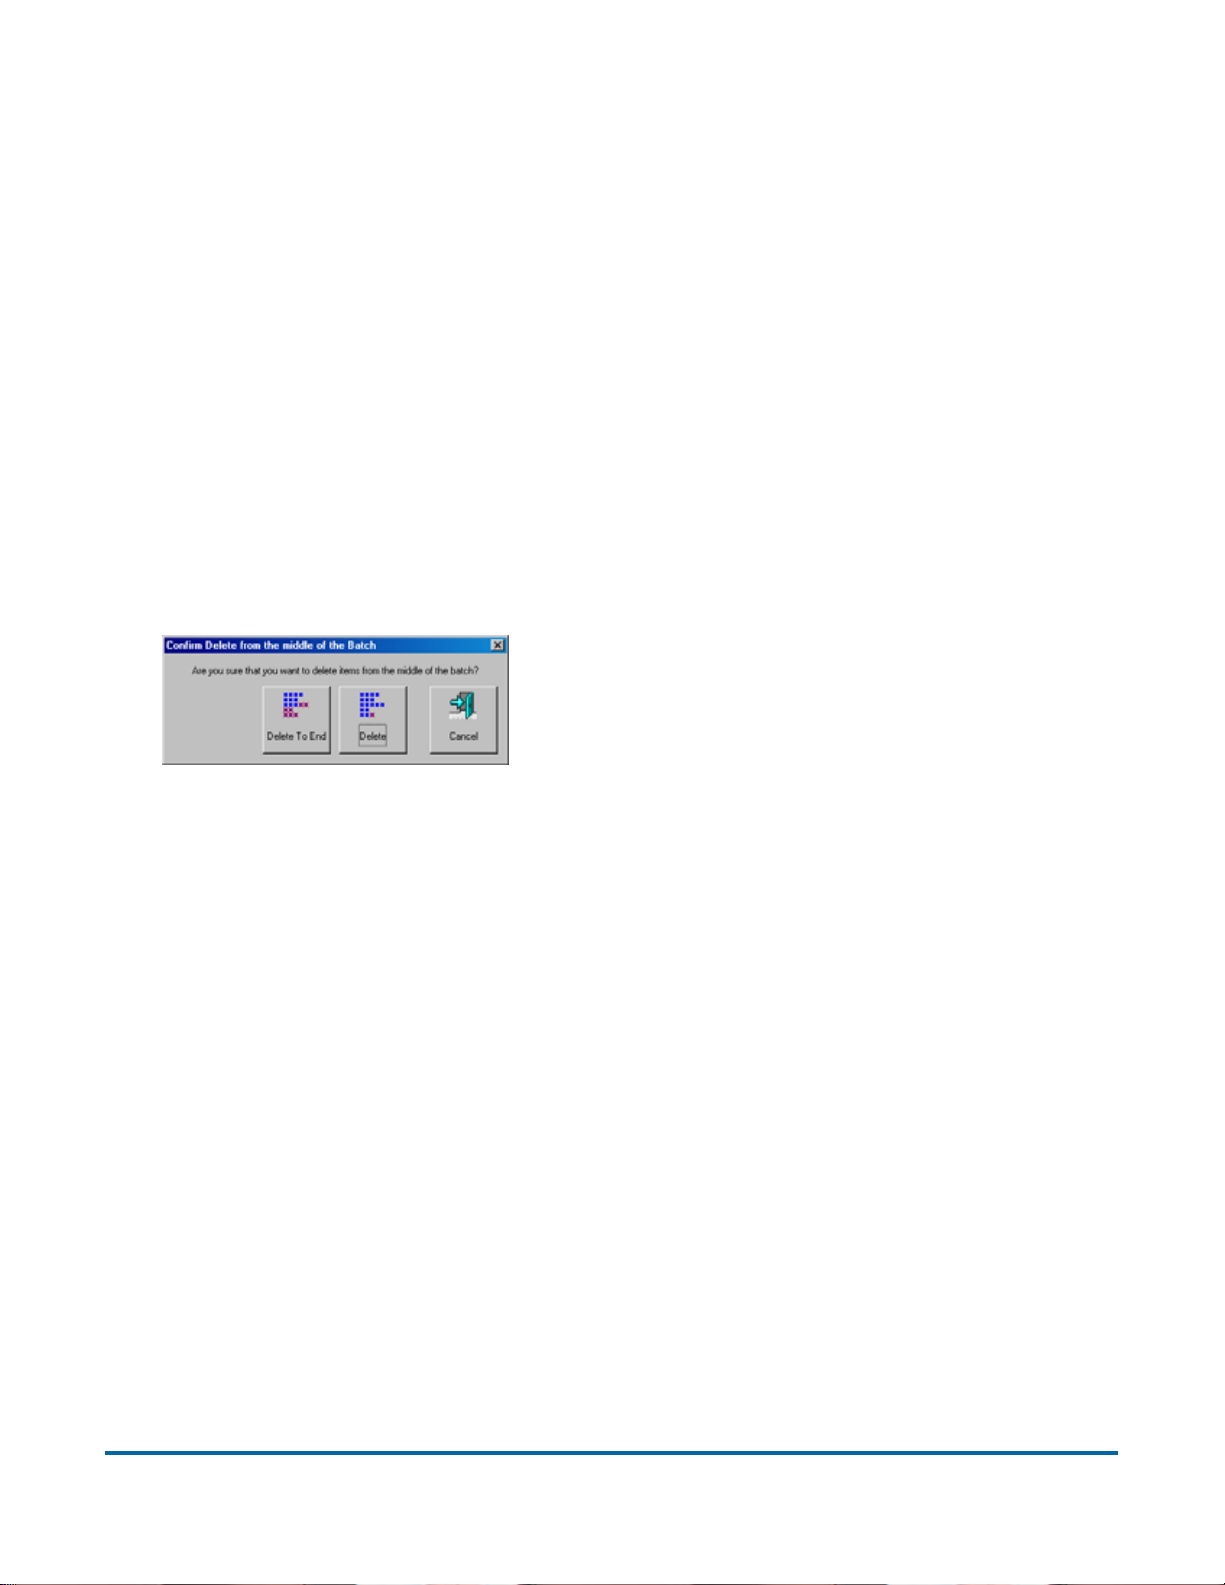
Deleting items from the batch
When the machine is stopped, you can delete items from the batch. Click the
Delete button to delete an item image.
Note: The Delete button will only be present if activated in the current job.
The action of the Delete button depends on the setting of the Allow Delete
batch parameter:
• If the parameter is set to Delete Last Item, you will only be able to delete the
most recently scanned item image from the batch. Press Delete to delete the
last image.
• If the Allow Delete parameter is set to Delete To End Of Batch, you can also
choose an item thumbnail and delete the selected item and all the items
scanned after the item. When the Delete button is pressed, the Confirm
Delete window (Figure 19) will appear.
Figure 19: Confirm delete
Note: It is not possible to delete a single item image from the middle of the
batch within CertainScan. If you need to delete an image from the middle
of the batch, you must also delete all the images to the end of the batch
as well.
Voiding items and sets
The void function allows the operator to mark a scanned item or set as invalid
by placing a VOID stamp over the item’s image(s). The void function can be
used to confirm that an item or set was scanned into the system and deemed
invalid.
Note: The Void buttons will only be present if activated in the batch
parameters.
Operation 77
FalconV User Manual - Standard Scanning - OPEX Corporation
Page 78
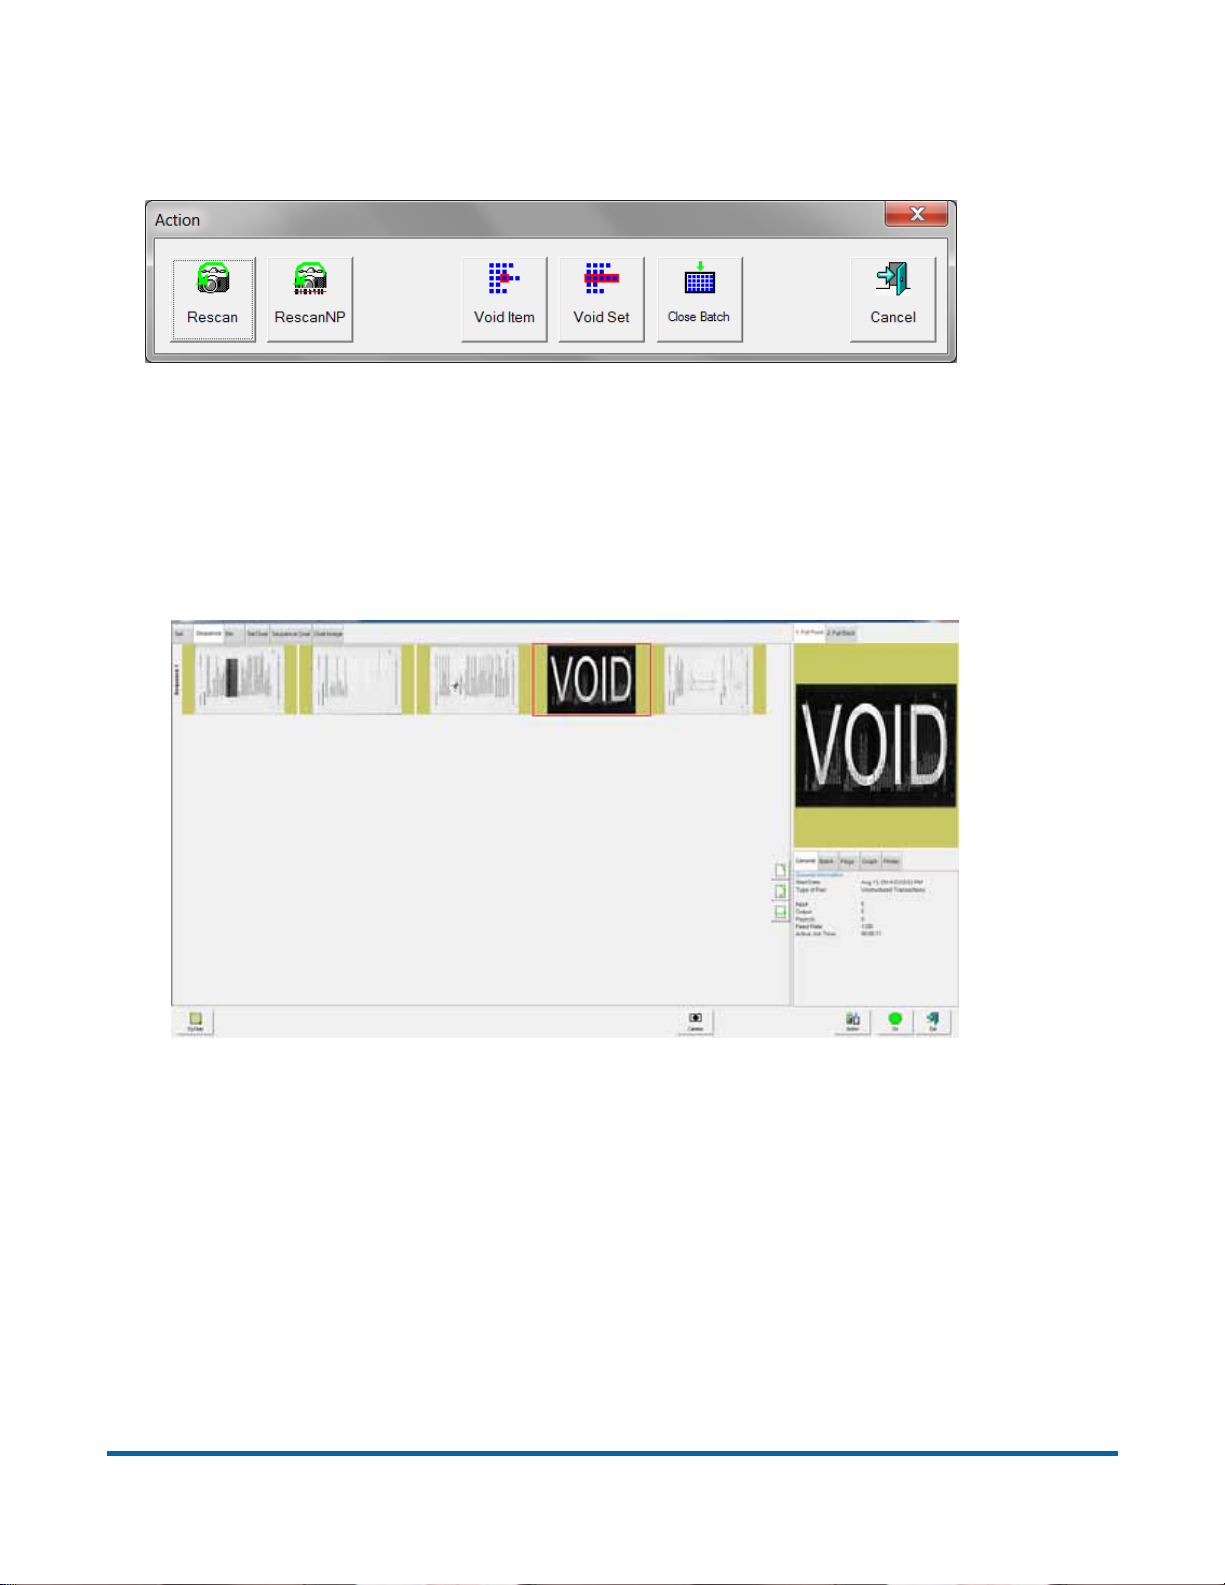
To mark an item as void, highlight the item’s thumbnail, and click Action. The
Action window will appear.
Press Void Item to void only the selected item, or Void Set to void the selected
item and all other items that are part of the set. The Cancel button is used to
close the Action window without performing any functions.
If the “Allow Void” Batch parameter is set to Yes with Marked Image, the VOID
stamp will appear over the image and the item will be designated as void in the
batch file (see Figure 20).
Figure 20: Voided item
If the “Allow Void” Batch parameter is set to Yes without Marked Image, the
VOID stamp will not appear over the image on the run screen. However, the
item will be designated with a Void status in the output file (see Figure 21).
78 Operation
FalconV User Manual - Standard Scanning - OPEX Corporation
Page 79
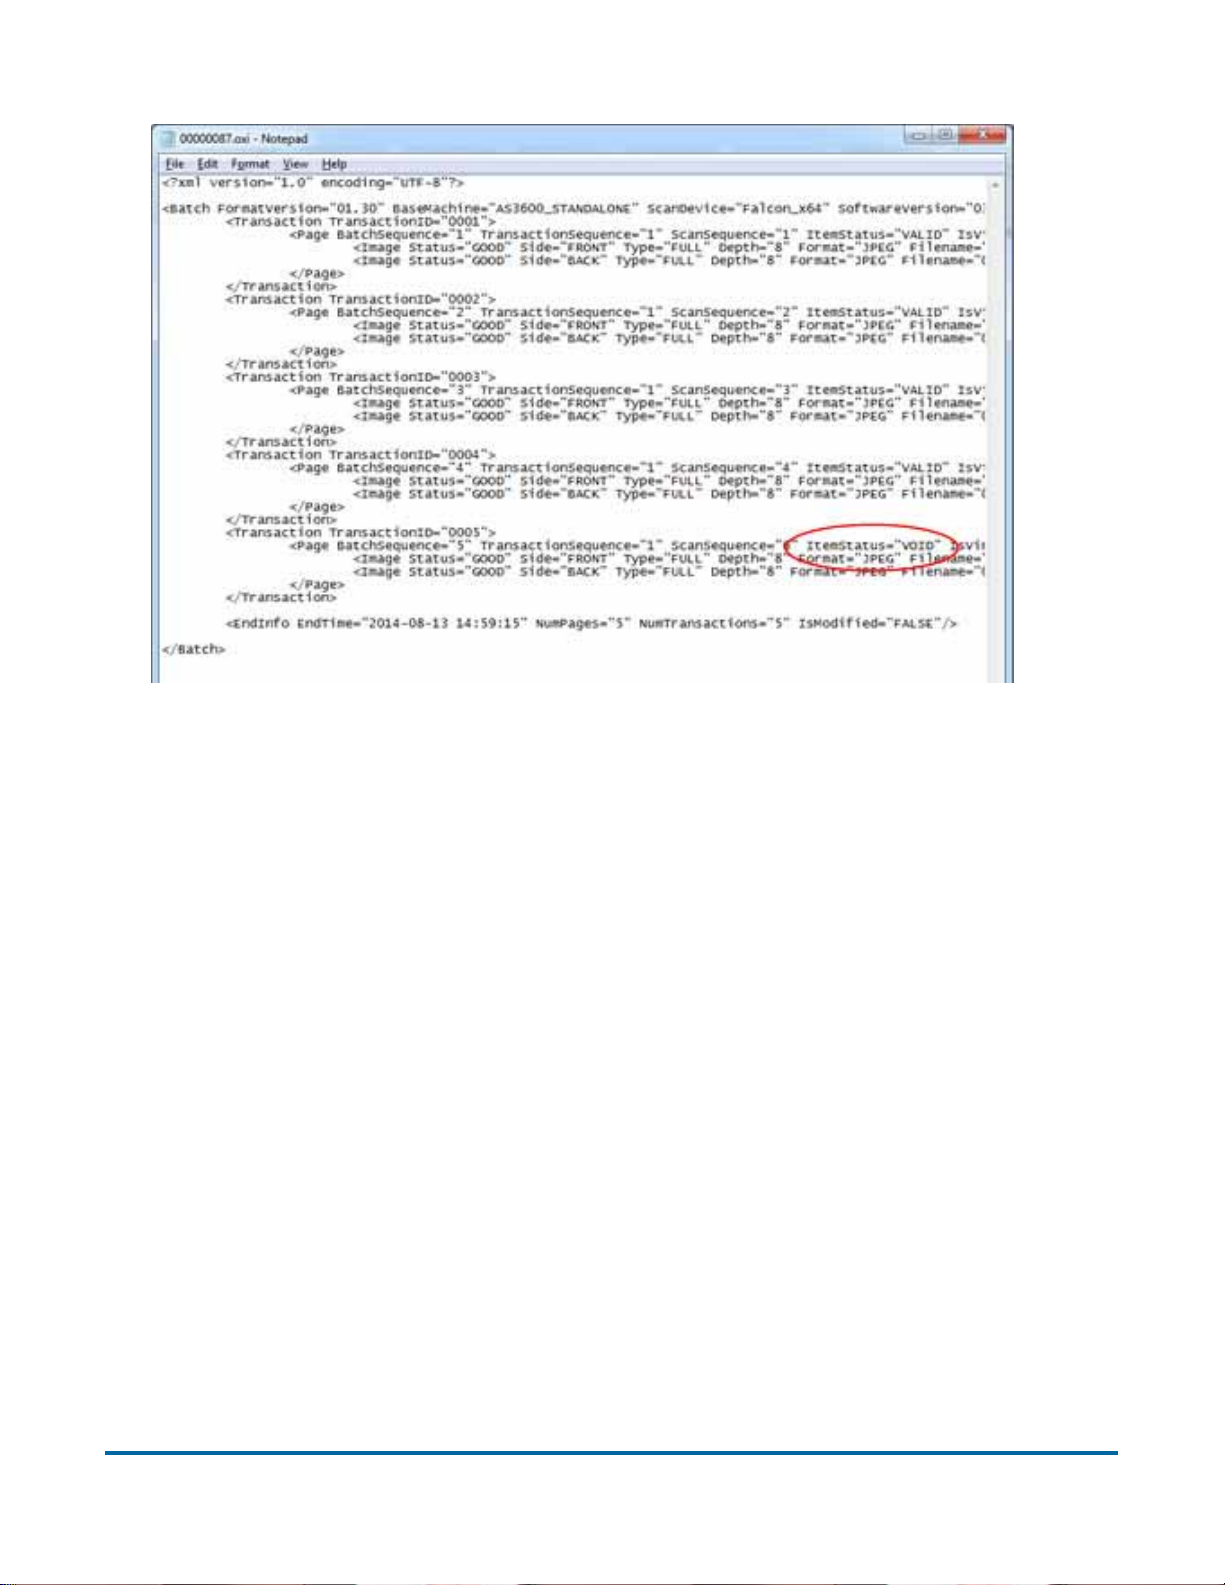
Figure 21: XML Batch Output file example
Operation 79
FalconV User Manual - Standard Scanning - OPEX Corporation
Page 80
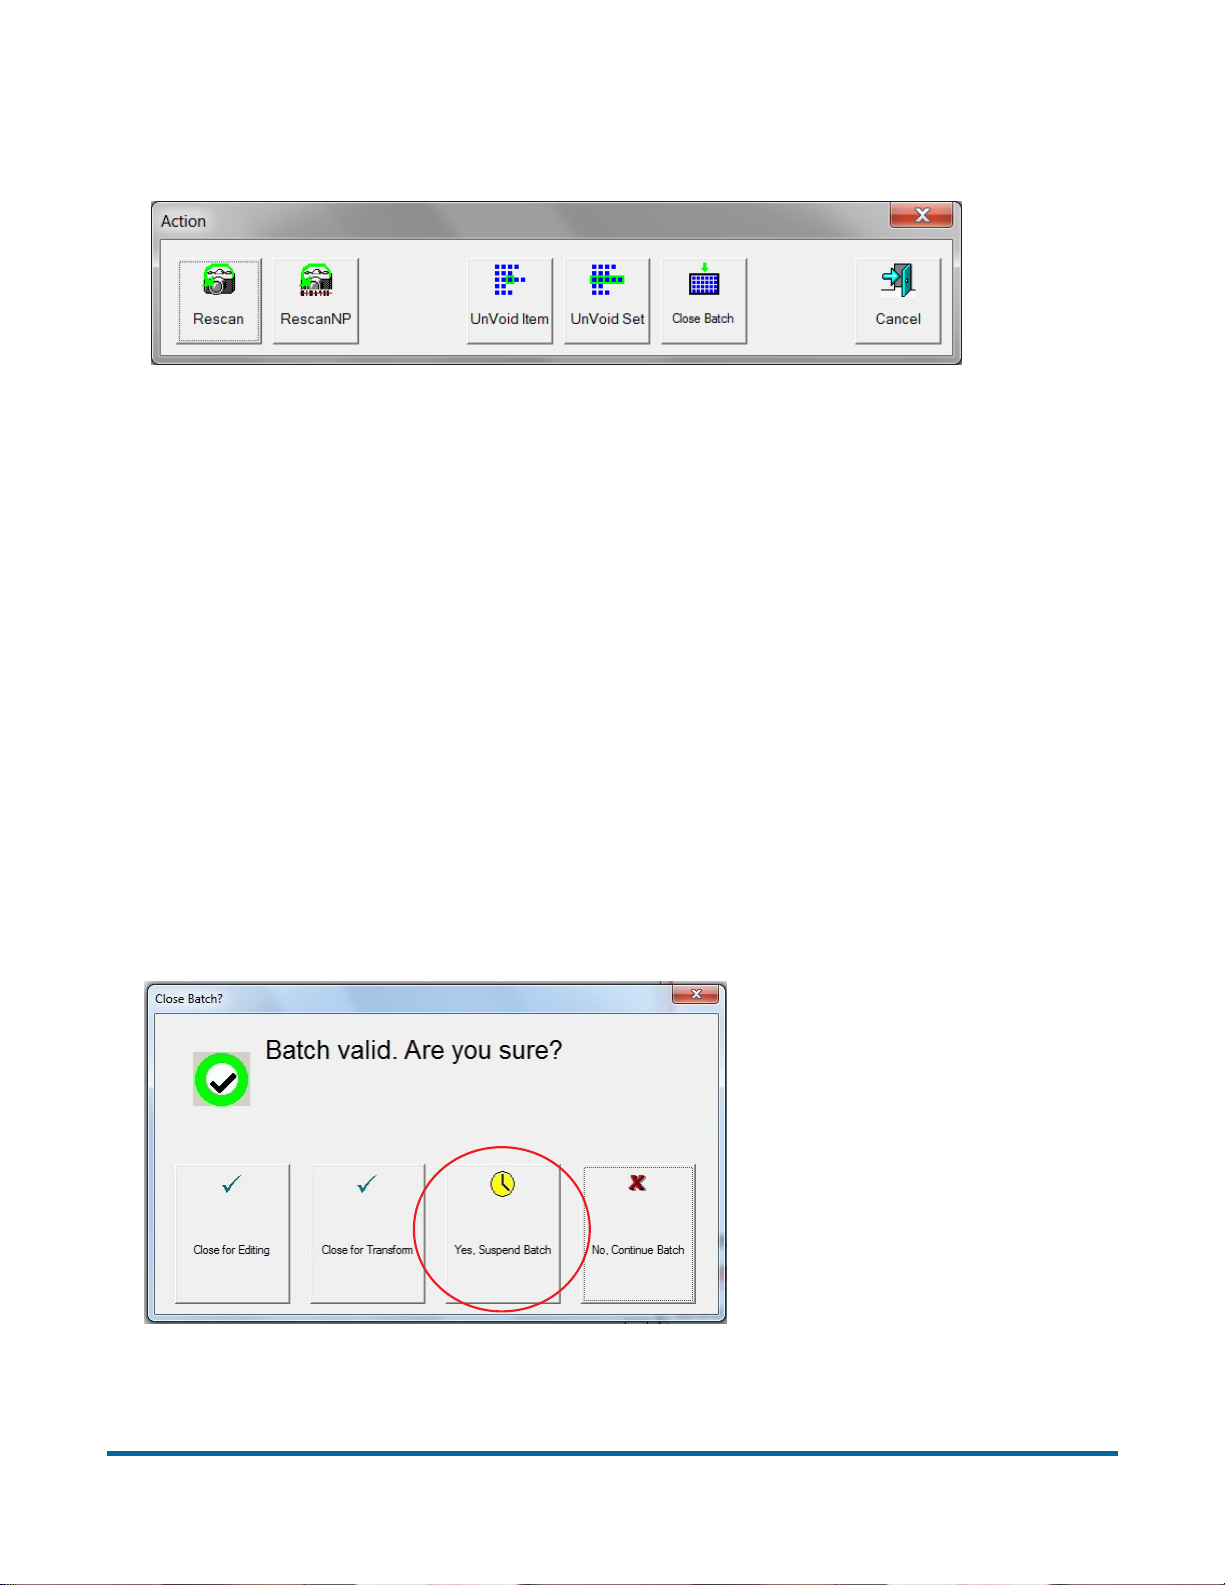
To “unvoid” an item, highlight the voided item’s thumbnail, and click Action.
The Action window will appear.
Press UnVoid Item to unvoid the selected item, or UnVoid Set to unvoid the
selected item and all other items that are part of the set. The Cancel button is
used to close the Action window without performing any functions.
Suspend and Resume Multiple Batches
CertainScan allows you to exit the job run screen without closing a batch. Additionally, CertainScan lets you open and suspend an unlimited number of
batches. You can even scan a different batch while leaving other batches
suspended. This has two main benefits:
1 Job and page type profiles can be created or edited without ending the job
and rescanning the batch.
2 For very large batches that cannot be completed in one shift, the operator
can suspend a batch and then resume it later.
With the multiple-batch feature enabled, you will be presented with the
Suspend Batch option upon exiting the Run screen (see Figure 22).
Figure 22: Close batch window
80 Operation
FalconV User Manual - Standard Scanning - OPEX Corporation
Page 81
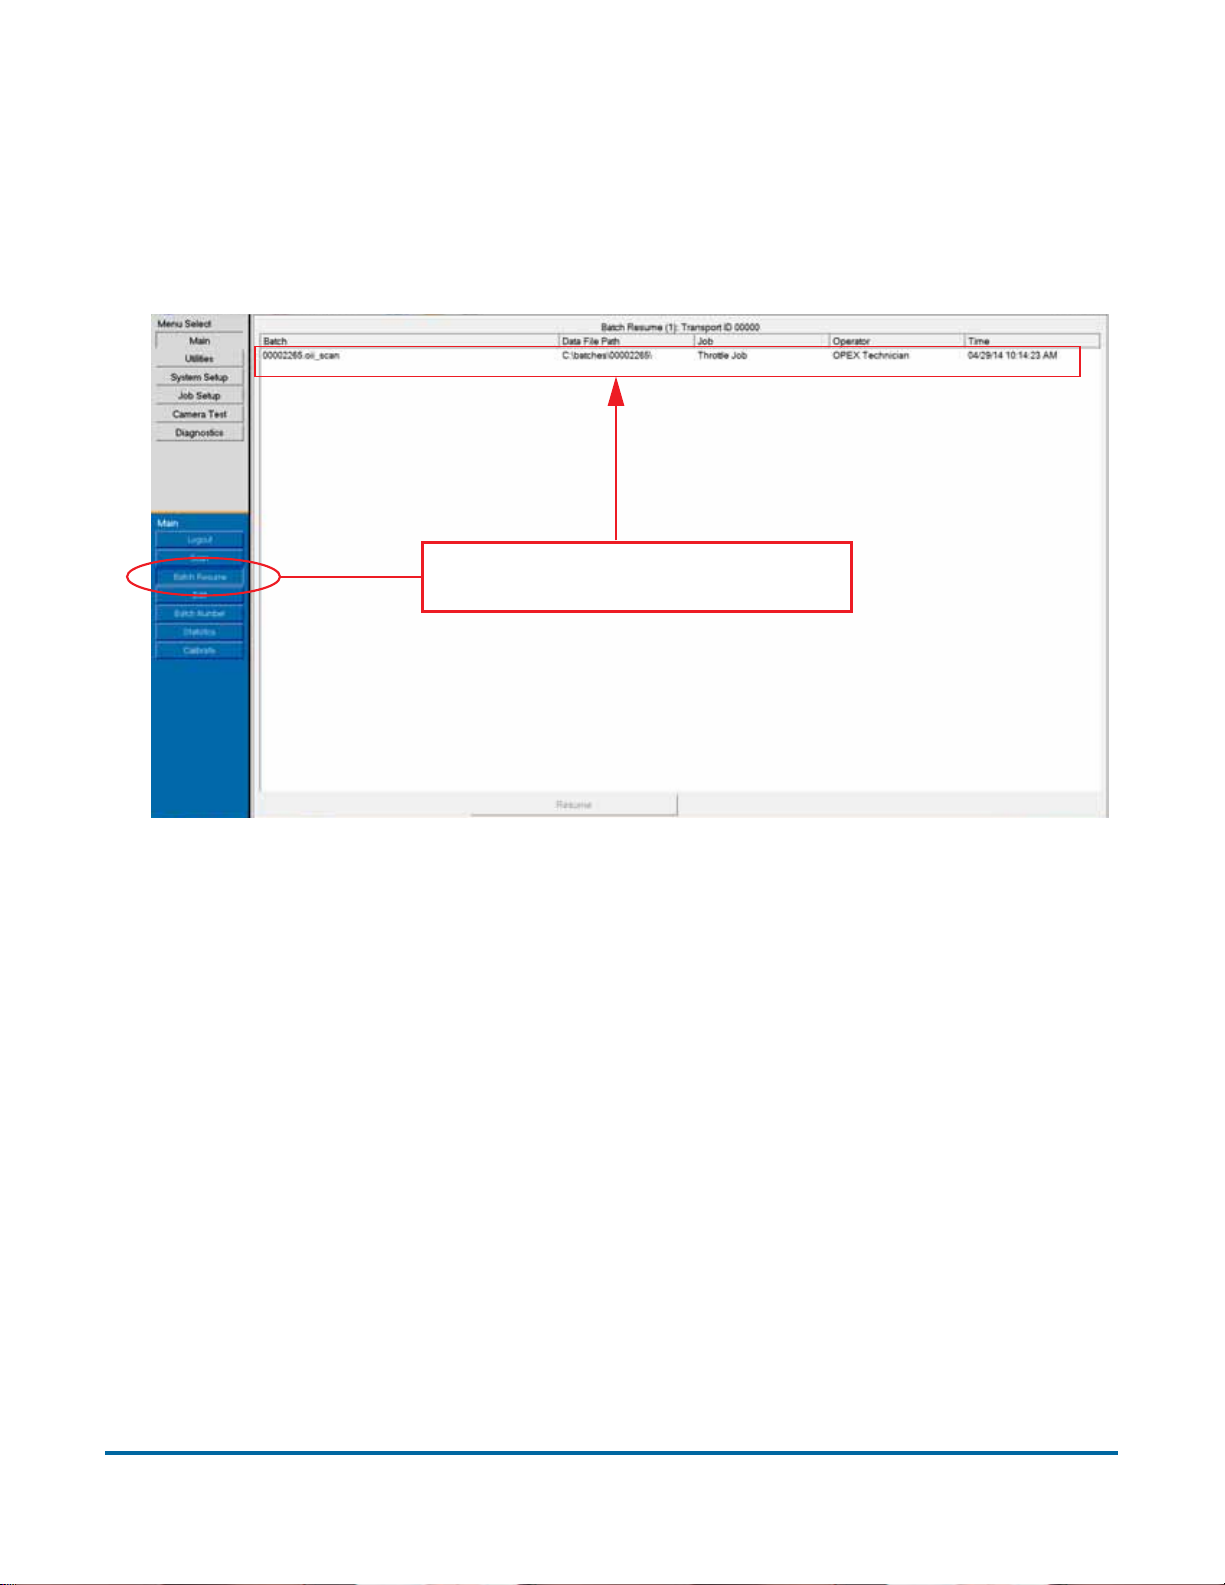
Note: CertainScan also retains the options of single-batch-only suspension
and of disabling batch suspension entirely.
You can view a list of suspended batches by clicking the Batch Resume button
from the Main Menu. From here you can select the desired batch and resume
scanning.
Clicking Batch Resume shows a
list of any suspended batches.
Figure 23: Batch Resume window
Closing/Starting a batch and exiting the job
When you have finished scanning items in a batch, press Stop to turn off the
motors. Select Close and select Yes, close Batch to the “Close Batch?” prompt.
Next you can either select Go to start a new batch or select Exit to exit the job
run screen and return to the Main job select screen.
Operation 81
FalconV User Manual - Standard Scanning - OPEX Corporation
Page 82
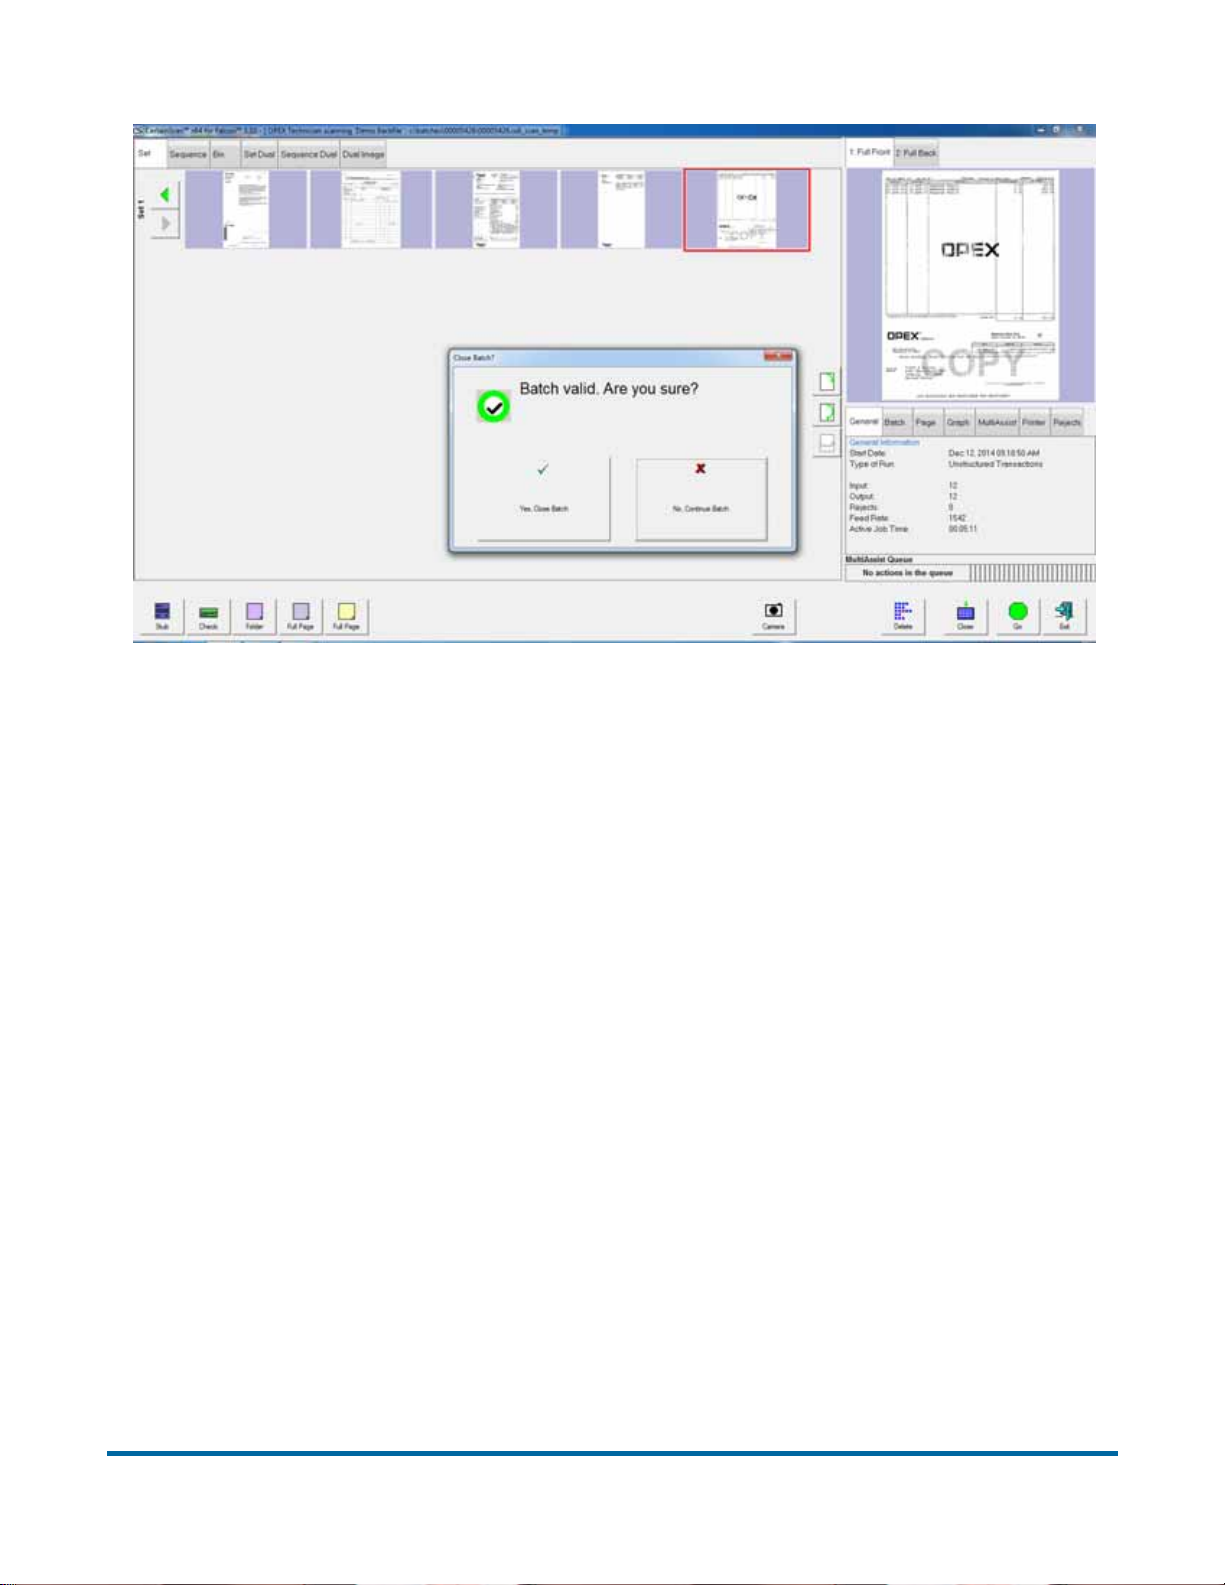
Figure 24: Ending the job
82 Operation
FalconV User Manual - Standard Scanning - OPEX Corporation
Page 83
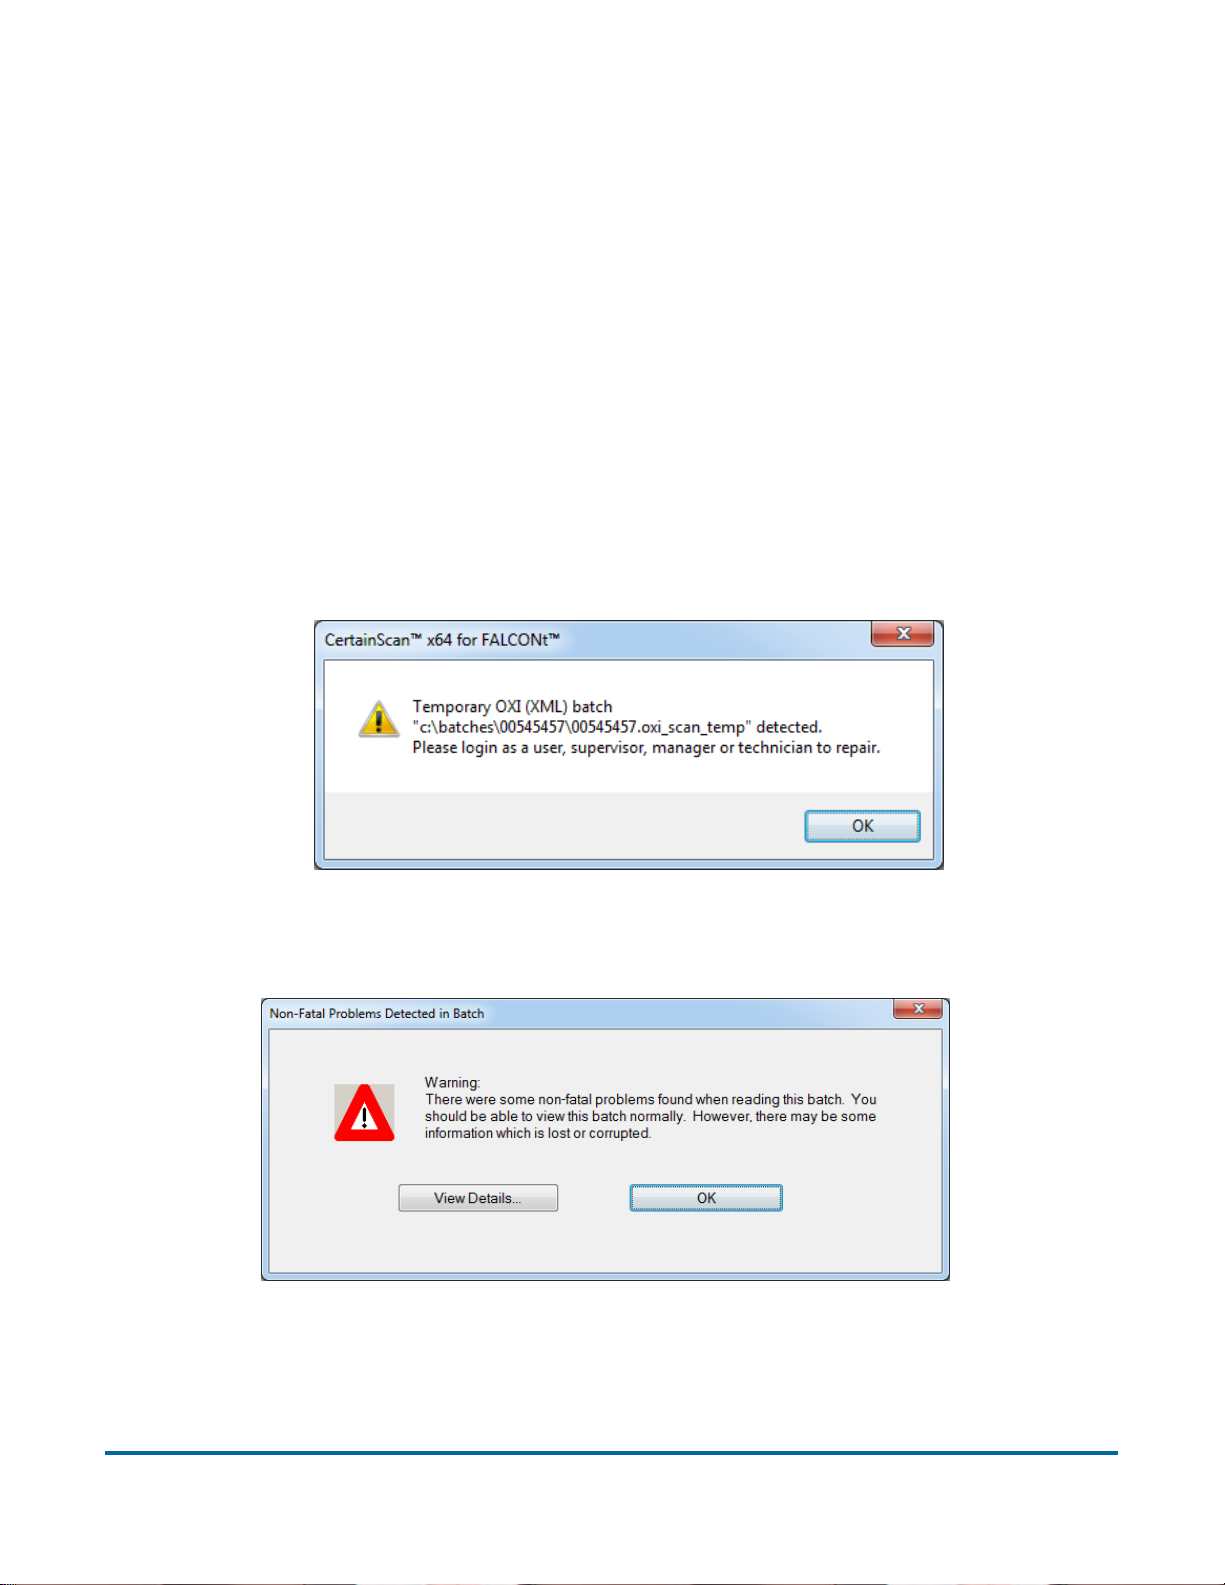
Internal Batch Editor
There is an internal Batch Editor that was introduced in an earlier CertainScan
software version. It should not be confused with the robust, separate Batch
Edit application introduced with CertainScan 3.0. The internal editor is typically
used to recover batches after a crash. Refer to the “CertainScan Edit” software
manual for complete information regarding the new application.
Using Batch Editor to fix incomplete batches
If there is a problem with the machine and/or CertainScan does not close
properly during a run, a batch may not be closed and saved properly. If this is
the case, you will be notified that a temporary batch file exists when restarting
CertainScan.
Click the OK button to continue, and log into the system.
After logging in, the following message will appear:
Figure 25: Non Fatal Problems Detected in Batch - error message
Click the OK button to continue.
Operation 83
FalconV User Manual - Standard Scanning - OPEX Corporation
Page 84
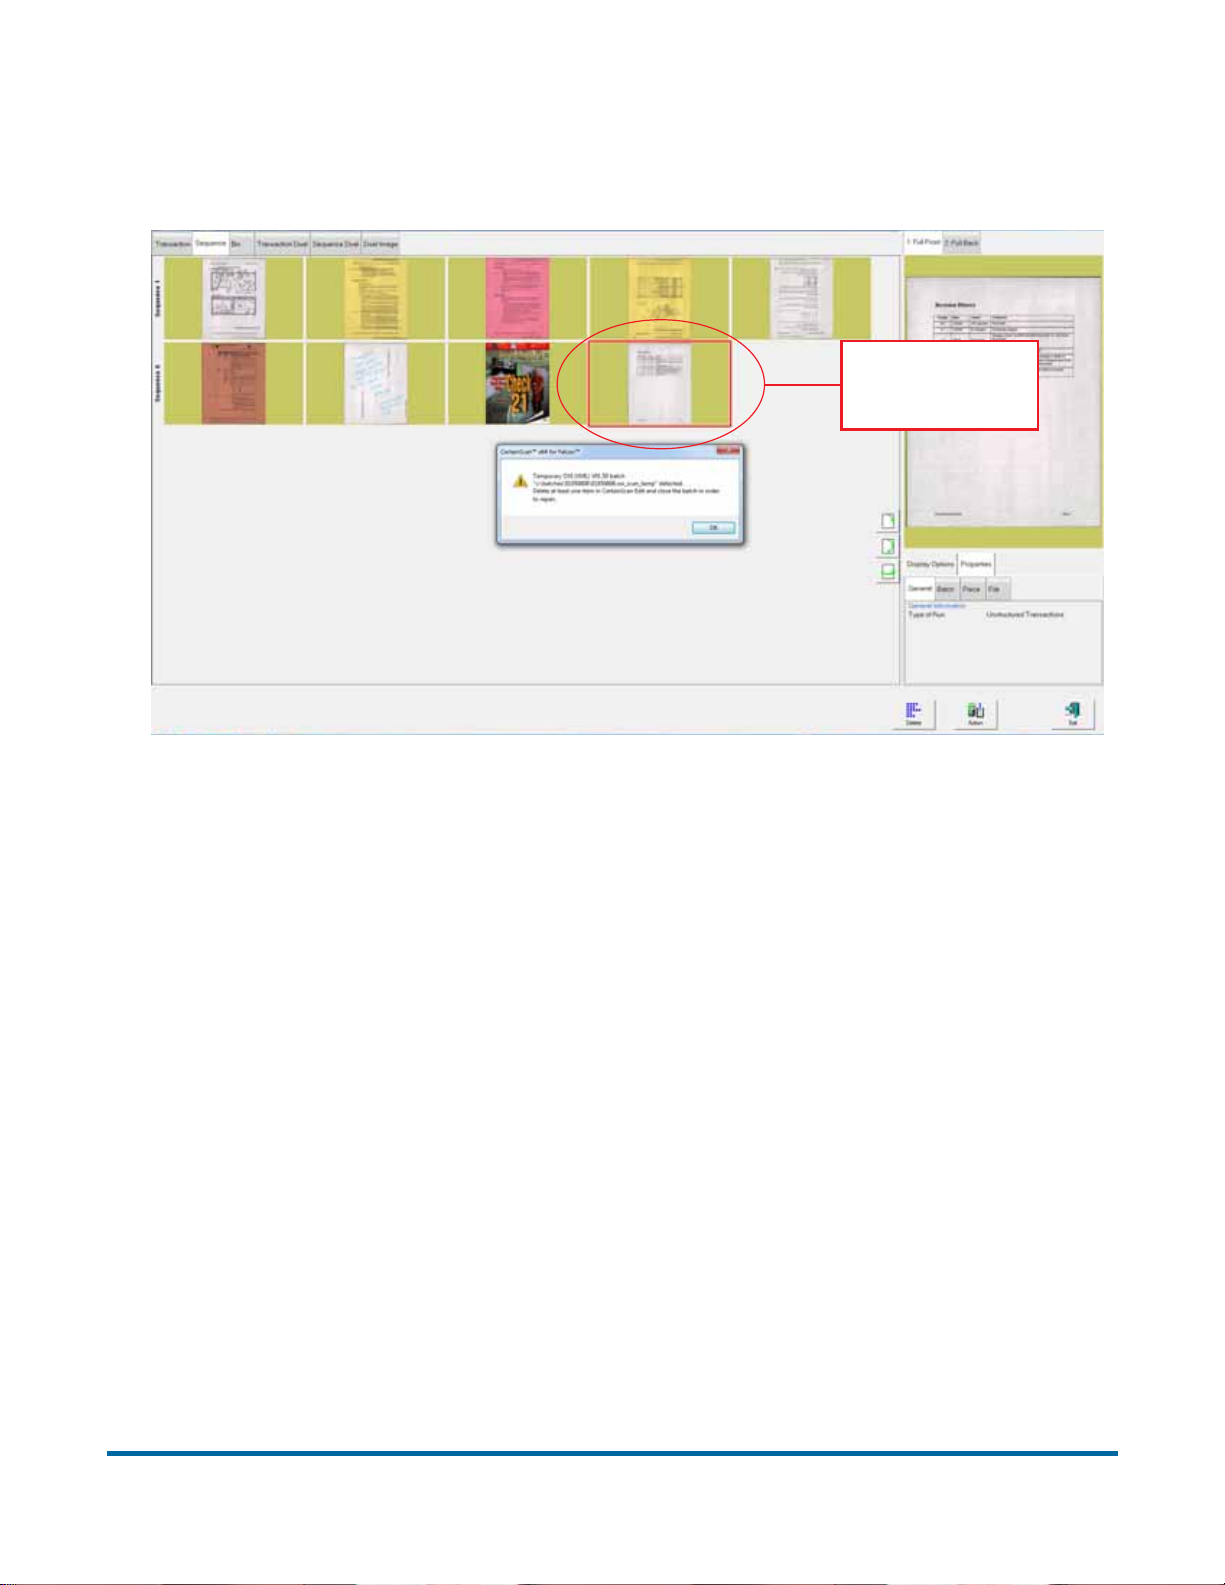
The Batch Editor opens with another error message instructing the operator to
delete at least one item (usually the last scanned item) and close the batch in
order to repair it.
Delete last
scanned item
Figure 26: Repairing invalid batches
Once you have deleted an item, click the Exit button to close the Batch Editor.
If the batch was repaired properly, a dialog box will appear notifying the
operator that the batch is now valid. At this point, you can close the batch
within batch edit.
84 Operation
FalconV User Manual - Standard Scanning - OPEX Corporation
Page 85
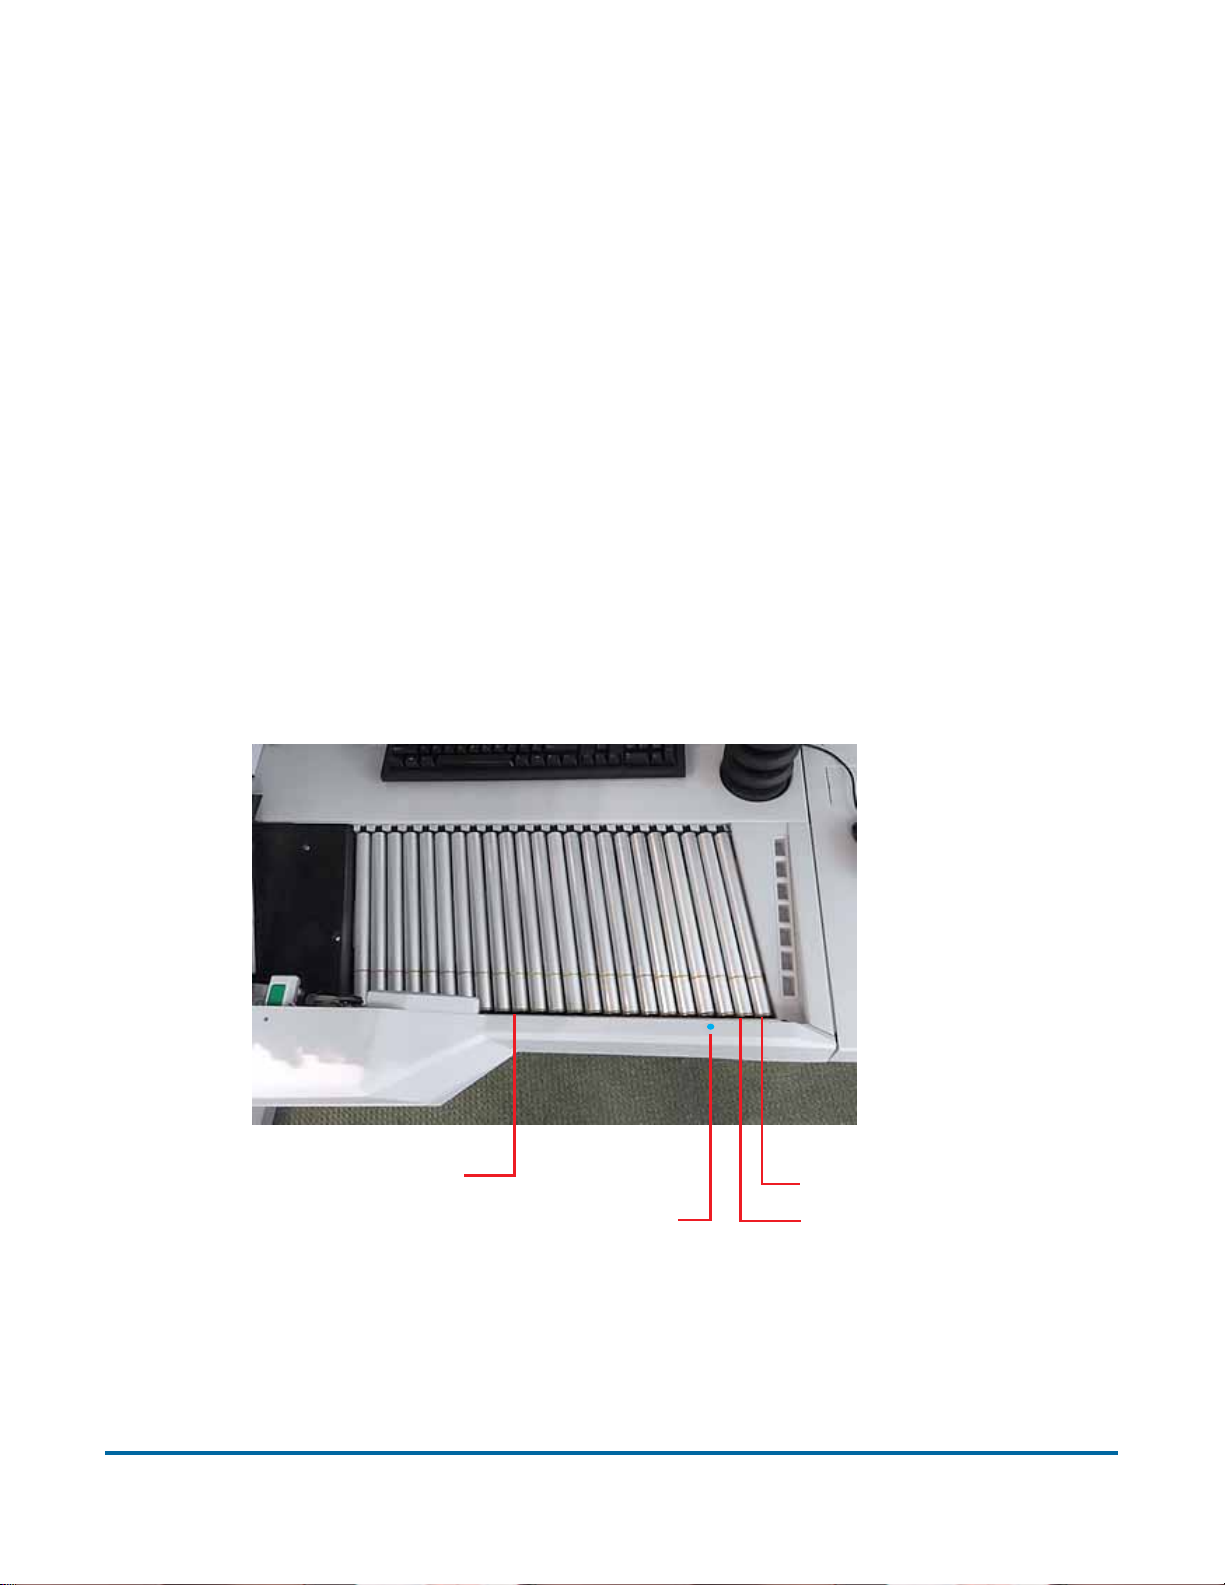
ID Assist
The ID Assist tracking system provides an additional method for identifying
and/or taking action on items to be scanned. IdAssist must first be enabled in
the job in order to use this feature. Note that ID Assist will NOT work in Stack
Feed mode.
ID Assist uses three through-beam sensors: ID Assist #1 and ID Assist Verify
are used together to initially enable the ID Assist feature. ID Assist #2 is used
for tracking of items that have been dropped.
Using IdAssist
To trigger IdAssist, swipe the item left to right in front of the IdAssist verify and
IdAssist #1 sensors (see Figure 27) and release. The IdAssist verify sensor
puts the IdAssist feature in an “alert” state waiting to see if the item will be
moved to the right, blocking IdAssist #1. If the item is not swiped left to right,
IdAssist will not be engaged.
IdAssist #2
IdAssist indicator LED
Figure 27: IdAssist sensors
When a job is run that uses IdAssist, the IdAssist indicator LED will be solidly
lit. When IdAssist is triggered, the indicator light will blink, indicating that
IdAssist was activated. Once the item is processed, IdAssist will be disabled.
Operation 85
FalconV User Manual - Standard Scanning - OPEX Corporation
IdAssist #1
IdAssist verify
Page 86

If you swipe left to right and do not release the item, or if you grab the item from
the conveyor after releasing it, the sensors will time out and the IdAssist
feature will be disabled.
IdAssist functions
IdAssist (and the optional Multi-slot ID Assist) can be used for the following
functions:
Color Dropout Option This allows you to trigger a specified color dropout for an
item. The default setting can be used to deactivate any image adjustments
being applied by the Adjust Panel (None, Default, Red, Green or Blue).
Page Rotation Option Tell the system to rotate the resulting image automati-
cally (None, 0, 90, 180, 270).
Batch Structure Option Use this trigger instead of the Set/Group button on the
run screen. The set/group boundary trigger will start a new set/group with the
item that triggers the sensor (None, New Set, New Group).
Page Type Requirement Use the gesture to identify a page type. This function
is very useful if you have two page types that are identical in every way or if
there are multiple sets of identical page types. In these cases, the page types
can be set up so that the only way one of the page types will be identified will
be if the operator triggers the IdAssist function. For example, in a job with two
identical documents, a check and a money order page type, the check and
money order can have the same exact attributes with the only distinction being
that money orders must have been triggered by the operator with IdAssist.
That way, the system will recognize the checks the operator scans normally as
belonging to the check page type.
Force as Page Type # Use the gesture to force as one of the page types
currently set up in your job.
Tag Option allow tagging a piece for back-end processing. No specific action is
taken by the scanner. The tag can contain a text string specified in the job. The
information is included in OXI V1.6 batches and available to transform profiles.
This can be used to pass operator meaningful instructions, such as “Poor
Quality Original”, “No Check”, “Cash Enclosed”, etc. Or it can be used to pass
a code to provide more information to the back-end processor (None, Tag
Batch Item with Custom String 1-6).
86 Operation
FalconV User Manual - Standard Scanning - OPEX Corporation
Page 87
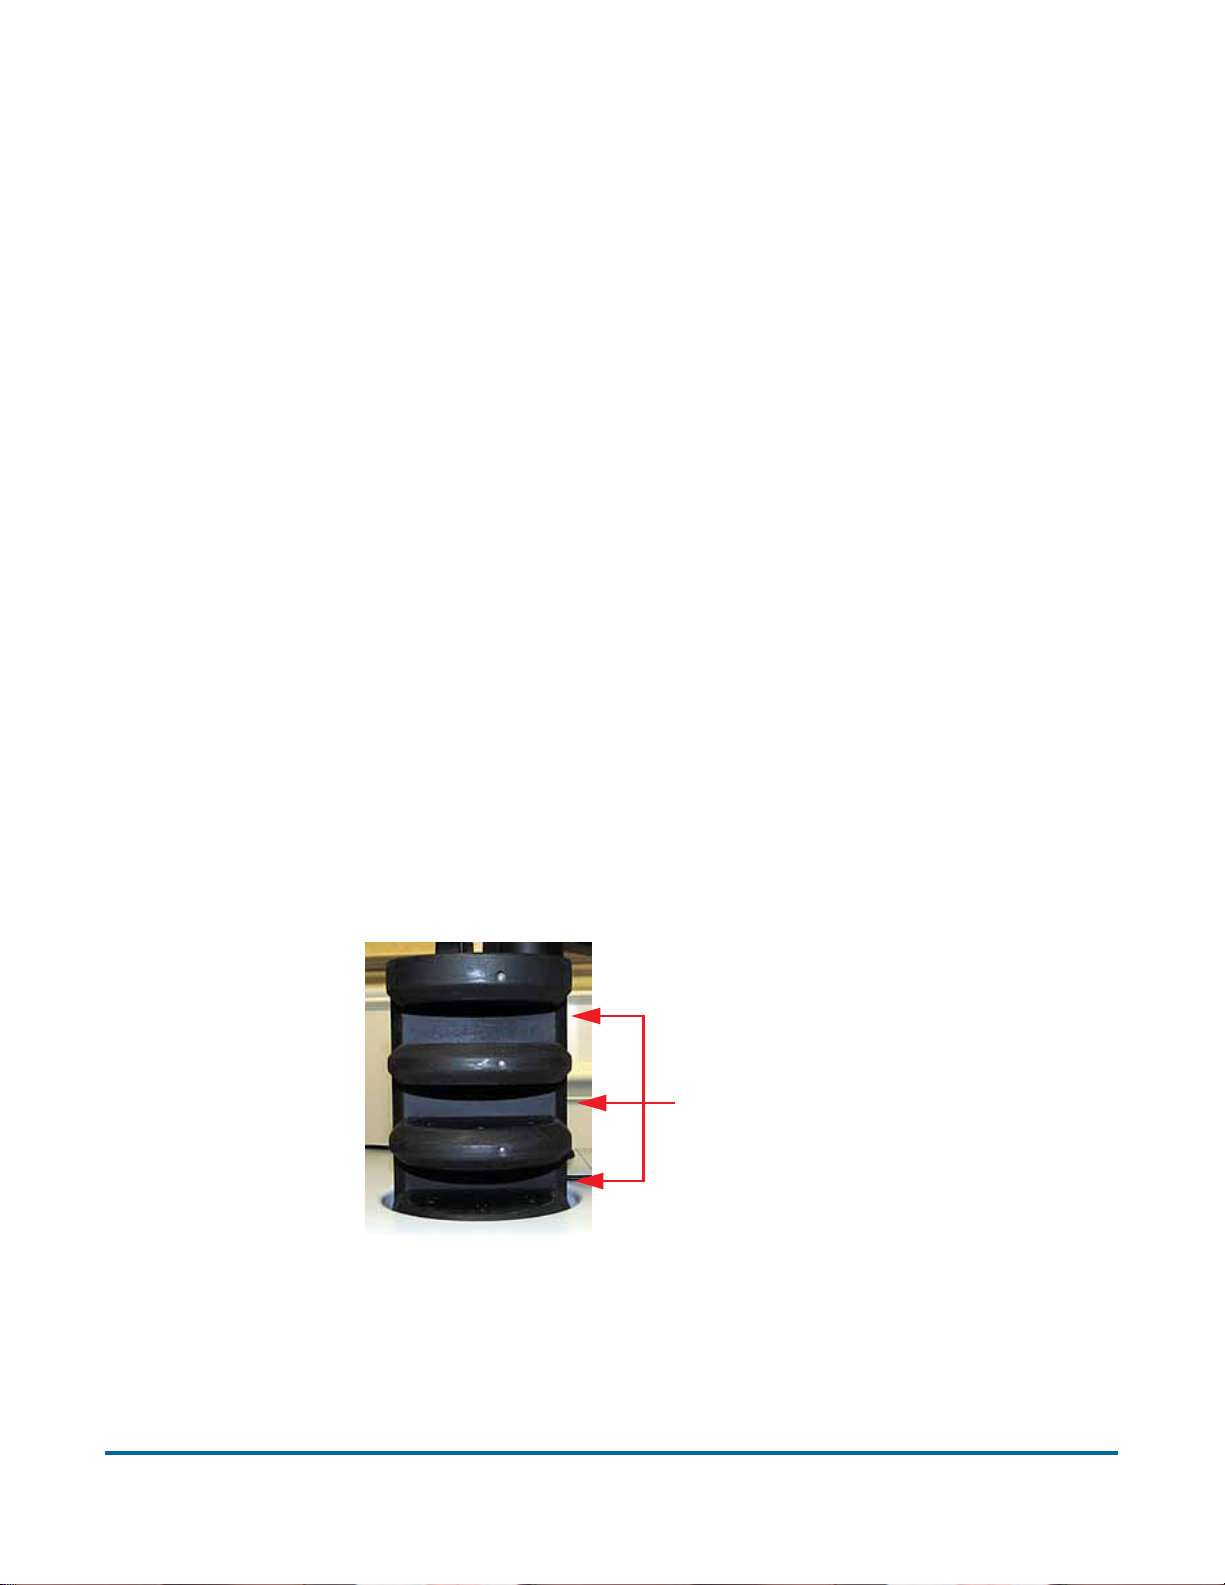
Page Sub-Type Select (IdAssist only) The page sub-type selection function is
useful in jobs that have a page type with many page sub-types. Use the trigger
to bring up the page sub-type selection screen so you can choose from among
the available sub-types (Yes, No).
Note: When using the “Page Sub-Type Selection” IdAssist function, you must
select the sub-type before the item enters the scanner . If a page sub-type
is not selected, the item will be assigned the default page sub-type. If no
default page sub-type has been assigned, the item will be rejected.
Override feed control This function allows you to disable multifeed detection
for thicker pieces that may not pass through normally (Yes, No).
Packet Swipe A stack of items (more than one item) is required for this function.
Packet Swipe allows a stack of items to be processed as 1 set or 1 group
where all single items in the job are processed as 1 set or 1 group.
Deactivate Page Type Override this function allows you to deactivate any
Locked Page Type Overrides (Yes, No).
About the Multi-slot ID Assist
The optional Multi-slot ID Assist is identical to IdAssist, but offers up to nine
different preassigned functions per job. Note that when Multi-slot ID Assist
usage is defined in a job, IdAssist is disabled, since the two systems use
different operator/piece tracking methods.
Three slots
Figure 28: Multi-slot ID Assist
The Multi-slot ID Assist has three slots, each offering three different function
selections. Depending on how the item is moved in these slots will trigger the
predefined function. The three methods to select specific functions per slot are:
Operation 87
FalconV User Manual - Standard Scanning - OPEX Corporation
Page 88
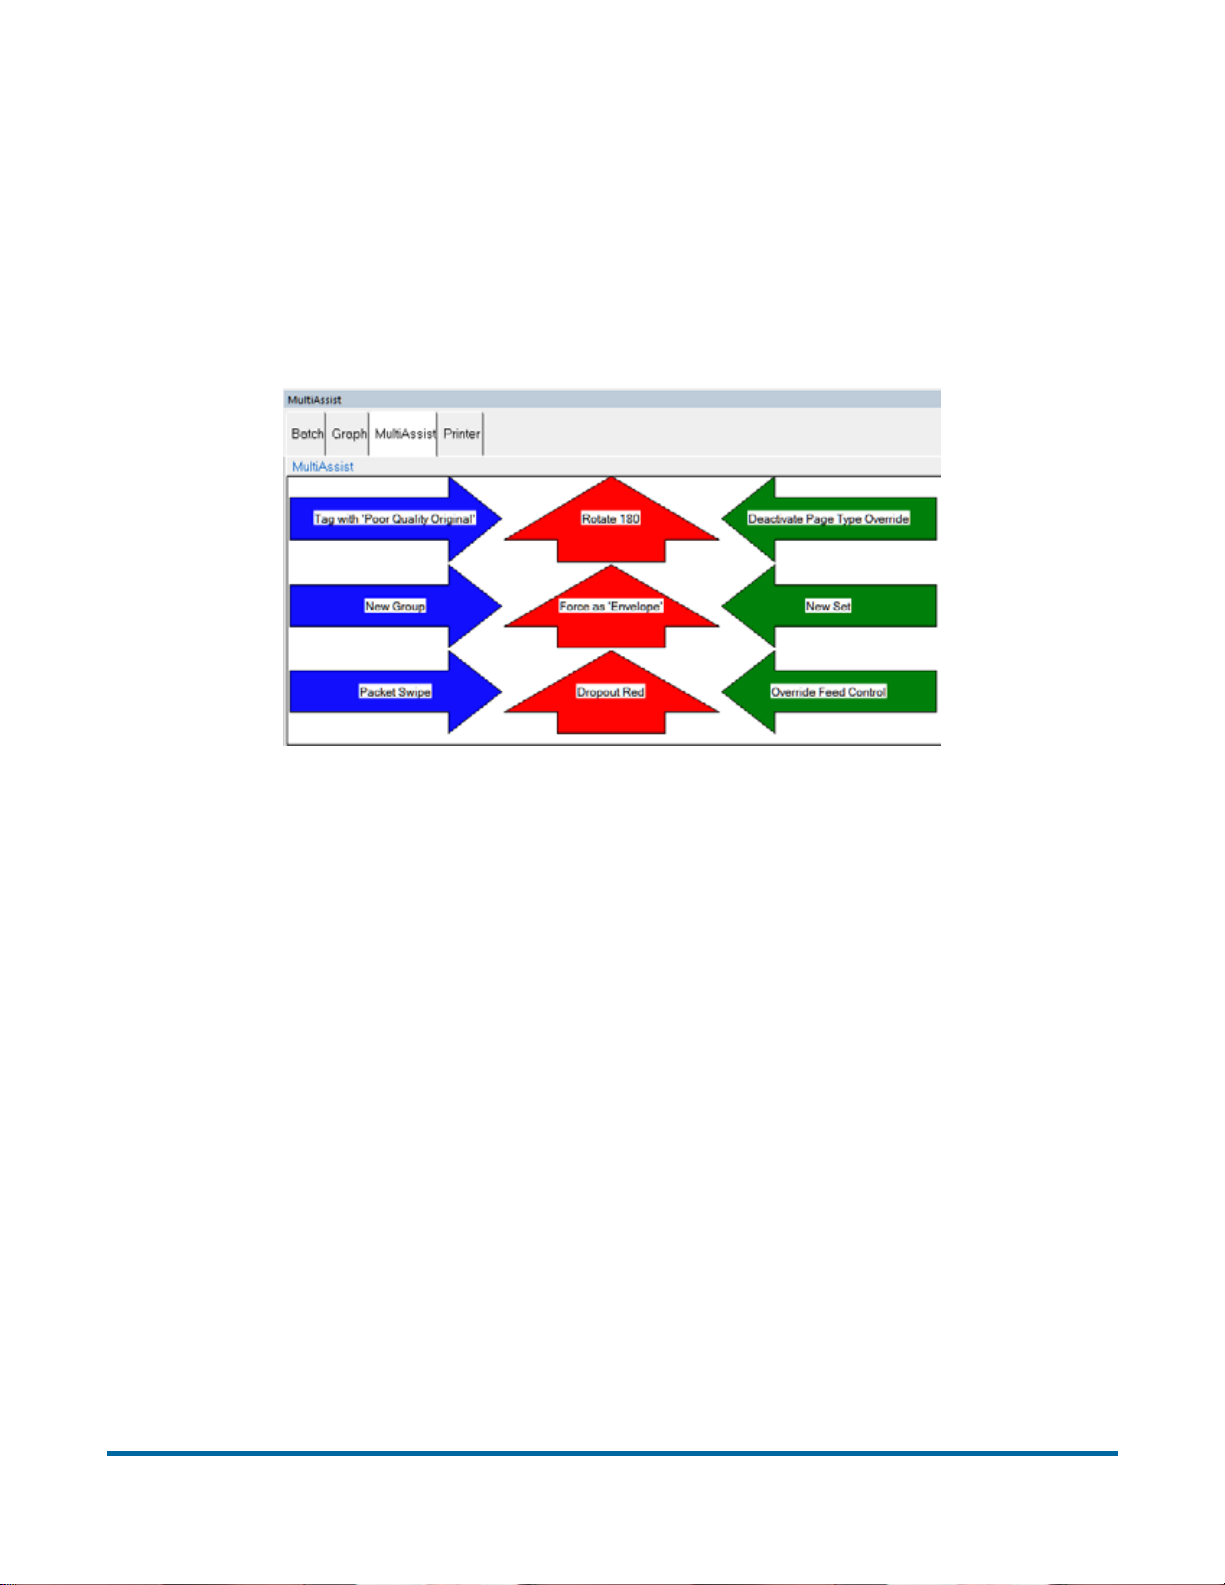
• Slide the item from left to right in the slot
• Slide the item from right to left in the slot
• Insert the item straight in and pull straight out
Multi-slot Assist instructions displayed on the info window to the operator while
scanning have been improved. A graphical image showing the colors and
direction to swipe the paper is now displayed.
Figure 29: Example of the info window for a Multi-slot ID Assist job
If you are using this optional feature, your Administrator should provide you
with information on its assigned functionality per job.
88 Operation
FalconV User Manual - Standard Scanning - OPEX Corporation
Page 89
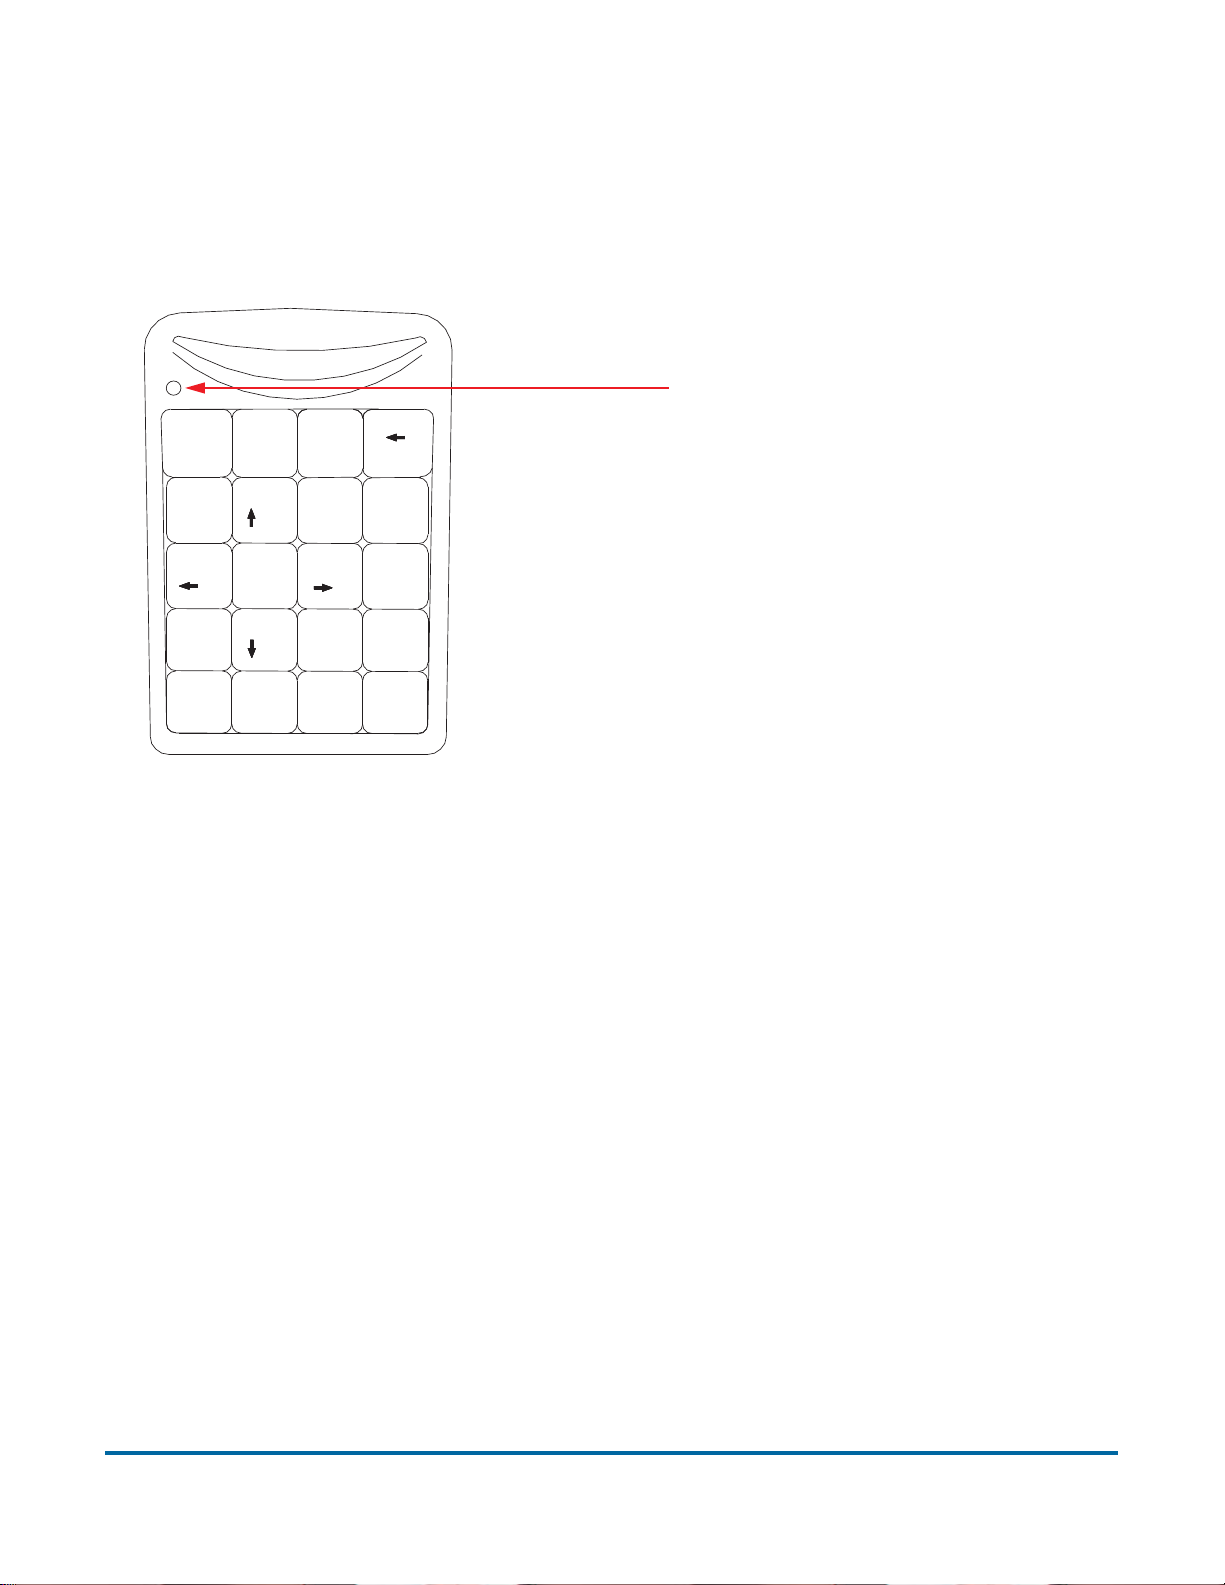
Key assist
KeyAssist, a purchasable option, allows you to use the keys on an external
keypad to perform specific functions in the Run screen, such as selecting a
page type, starting and stopping jobs, and rotating images. This feature
alleviates the repetitive motion of reaching to touch the monitor.
Make sure Num Lock
Num
Lock
/
*
Bk Sp
is enabled (LED lit)
7
Home
4
1
End
0
Ins
89
Pg Up
5
2
00
,
6
3
Pg Dn
*
Del
_
+
=
Enter
Figure 30: External keypad
For more on this feature, see the “CertainScan - Advanced Features” manual.
Clearing paper jams
During normal operation of the machine, you may encounter an error message
halting the scanner. The prompt on the machine will offer you two options: to
CONTINUE or to CANCEL. The error message is informing you of a paper jam or
a sensor error. If this is the case, check the machine for paper jams as
described here. After you clear the jam or ensure that the track is clear, press
the Continue button.
Note: The scanner may also reject items that are misfed, skewed, or because
the item was not properly identified. In these cases, the scanner will stop
after all the paper in the track has been sent to the reject bin. If the paper
doesn’t clear into the reject bin after selecting Continue, then you need to
open the cover(s) and remove the paper(s).
Operation 89
FalconV User Manual - Standard Scanning - OPEX Corporation
Page 90
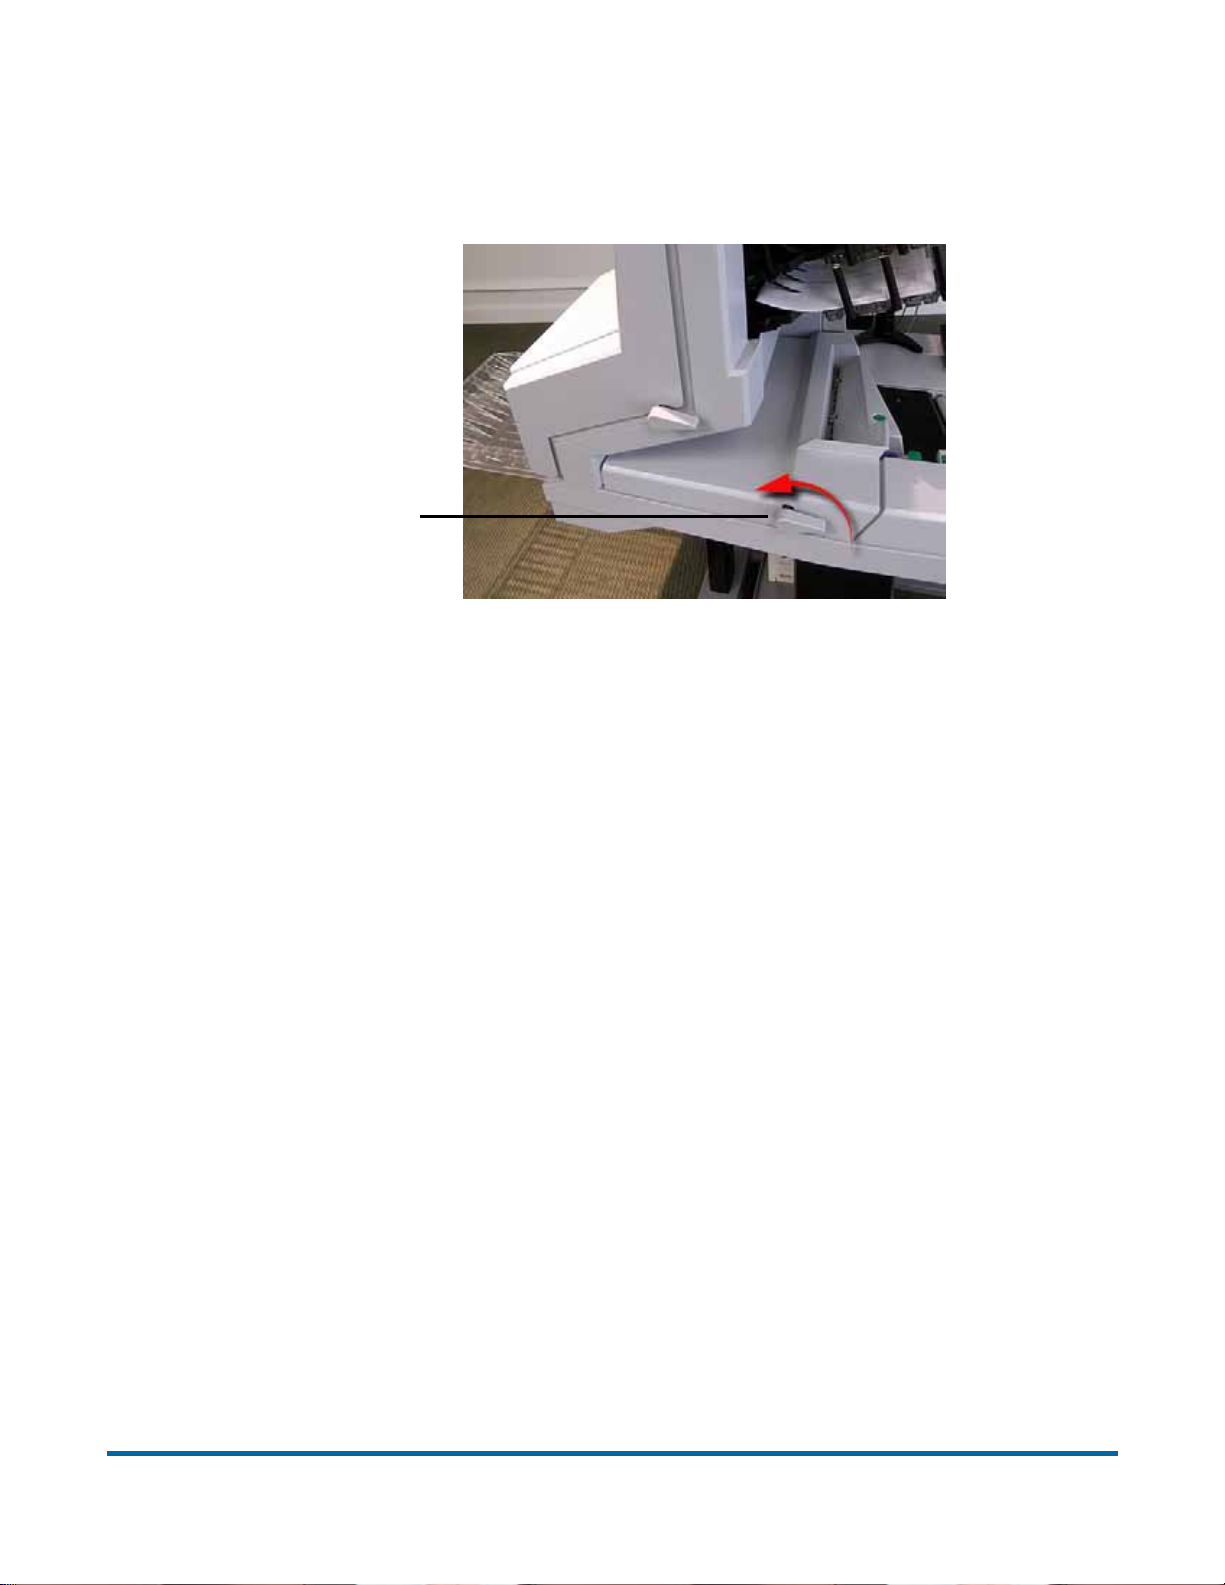
Access the scanner area:
1 Turn the latch counterclockwise to release the transport door latch. The
door will swing to the open position.
Transport door latch
2 Clear any jammed paper or debris in this area.
3 To close the transport door, hold onto the latch and gently pull the door
closed.
NOTICE: Slamming the door down can damage the image sensors.
4 When the door reaches the closed position, rotate the latch clockwise until
you hear the lock snap into place.
Access the stacker area:
1 Turn the stacker latch counter-clockwise and pull the stacker door away
from the scanner.
2 Clear any paper or debris that is caught in the transport area.
90 Operation
FalconV User Manual - Standard Scanning - OPEX Corporation
Page 91
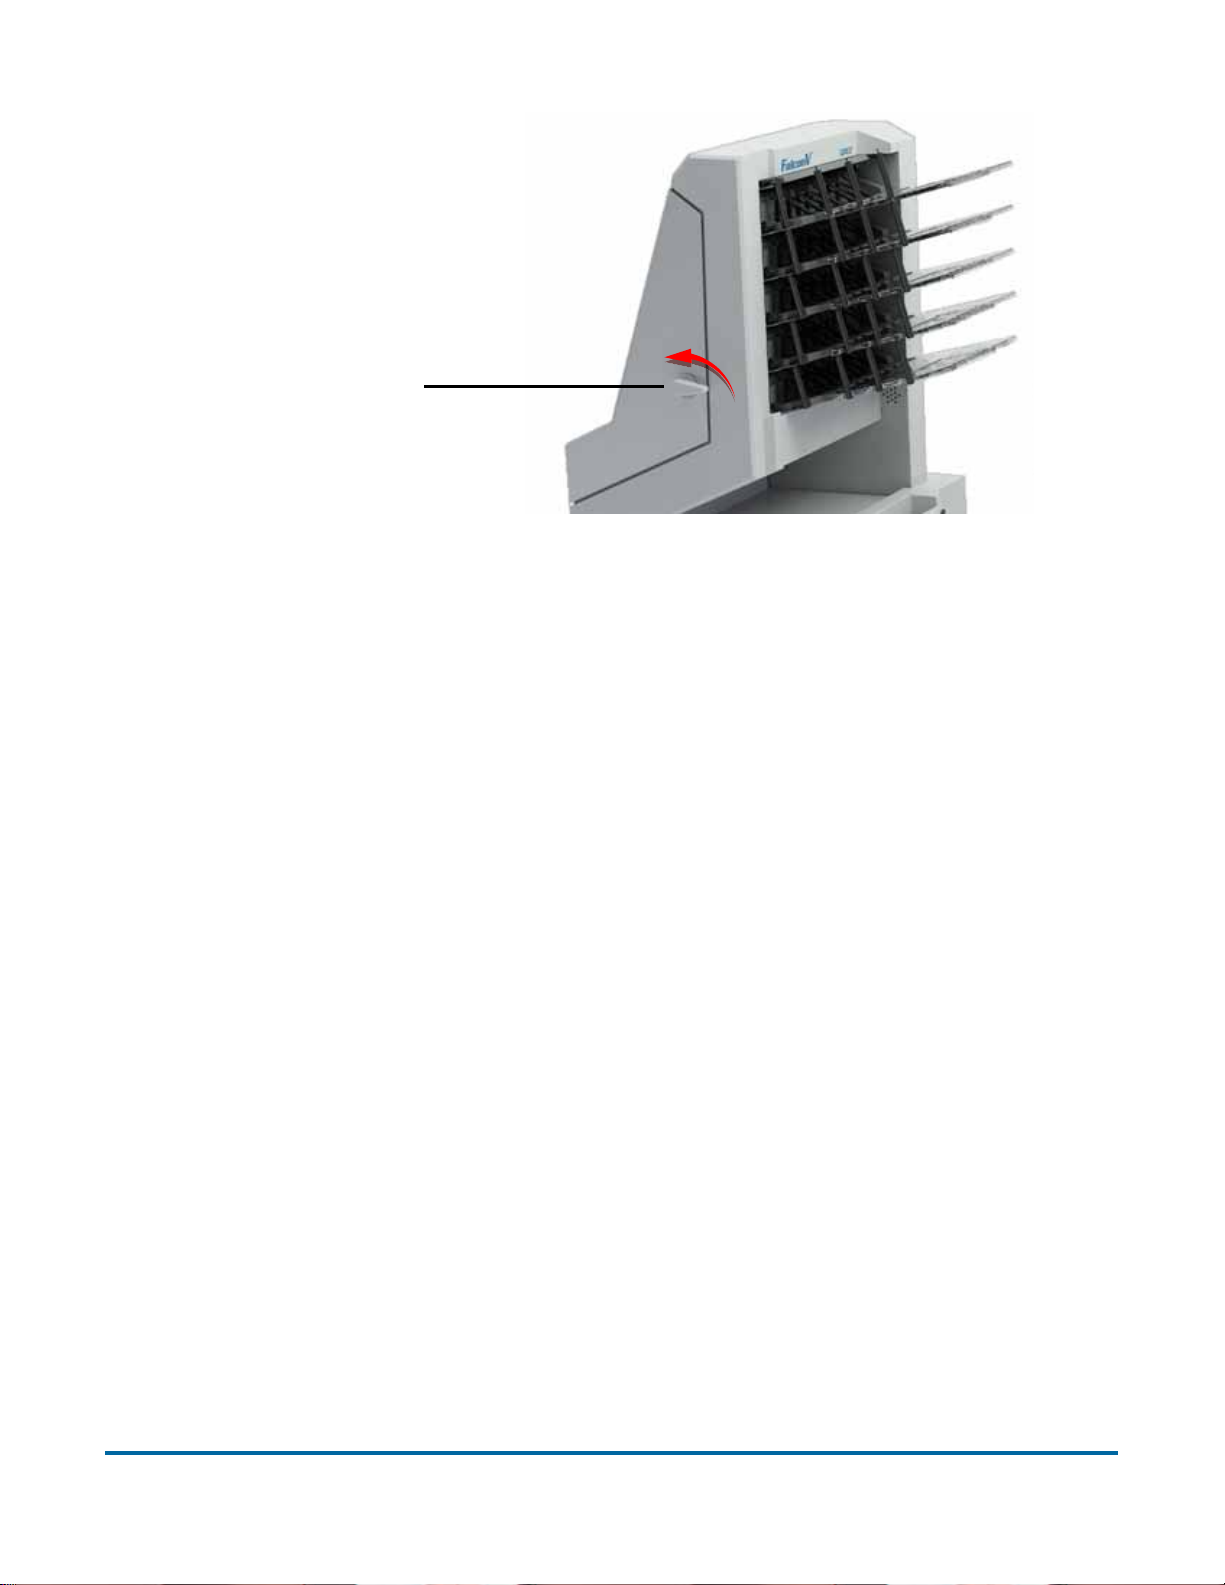
Stacker door latch
Figure 31: Opening the stacker door
3 To close the stacker door, hold onto the latch and gently pull the door
closed.
4 When the door reaches the closed position, rotate the latch clockwise until
you hear the lock snap into place.
Operation 91
FalconV User Manual - Standard Scanning - OPEX Corporation
Page 92
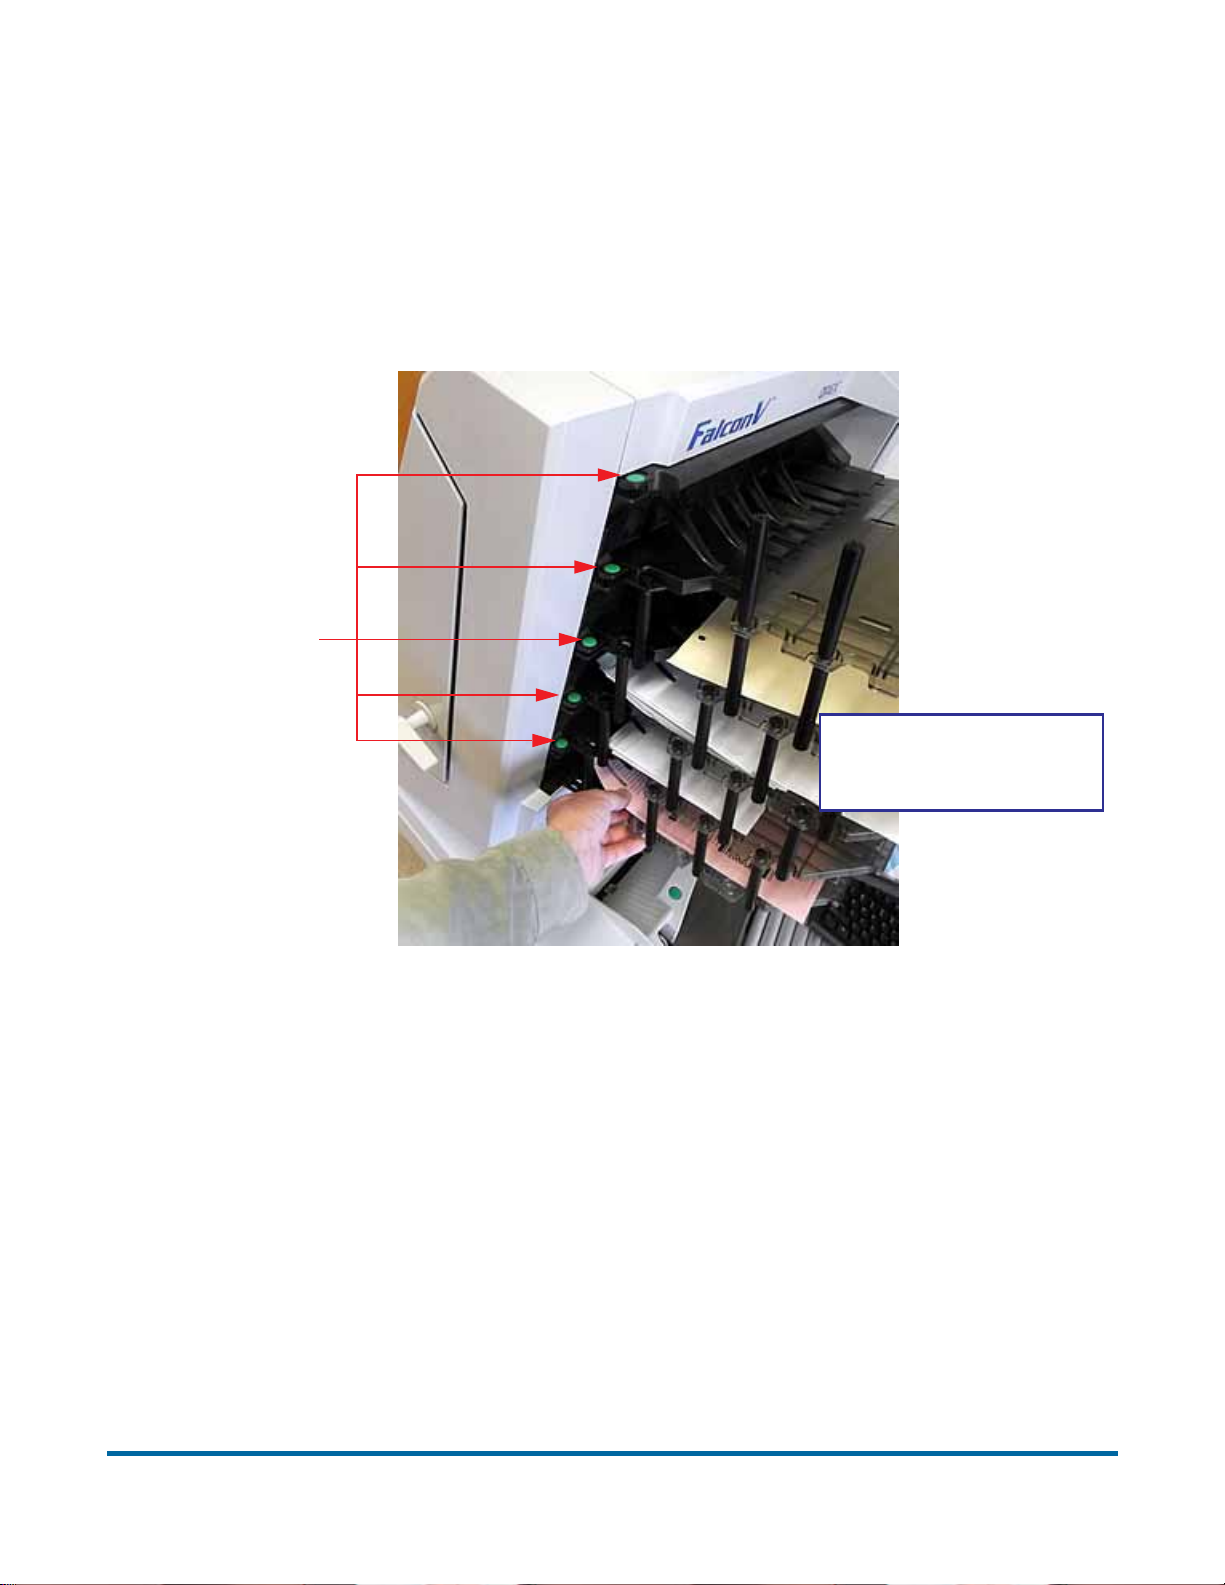
Clearing the bins
When removing the paper from the output bins, pull the item from the side of
the bins. The bins have been designed to allow access to the smallest of
pages. Pressing the green release buttons (one for each bin) will lift the knockdown tabs (the top fingers), which are designed to easily re-insert a item that
may have jammed in the transport or stacker section.
Press to lift
knock-down
tabs
Remove paper from
the side of the bins.
92 Operation
FalconV User Manual - Standard Scanning - OPEX Corporation
Page 93

Maintenance
3
Touchscreen Monitor . . . . . . . . . . . . . . . . . . . . . . . . . . 94
Calibrating the monitor . . . . . . . . . . . . . . . . . . . . . . . . 94
Removing/Replacing the printer cartridge. . . . . . . . . . . 95
Accessing the printers. . . . . . . . . . . . . . . . . . . . . . . . . 95
Adjusting the printer carriage position. . . . . . . . . . . . 100
Attaching the bins and stacker fingers . . . . . . . . . . . . 102
Cleaning the system . . . . . . . . . . . . . . . . . . . . . . . . . . 106
Conveyor and transport assemblies . . . . . . . . . . . . . 107
Contact image sensor. . . . . . . . . . . . . . . . . . . . . . . . 107
Feed assembly . . . . . . . . . . . . . . . . . . . . . . . . . . . . . 109
FalconV
User Manual - Standard Scanning
Page 94

Touchscreen Monitor
Calibrating the monitor
The FalconV uses a ViewSonic® Touchscreen Monitor (Opex # 2887800). This
21.5 inch LED backlit touchscreen monitor features a 3-sensor optical touchscreen, and is calibrated for its touch sensitivity before it leaves Opex.
However, you may need to recalibrate, especially if it is in use for an extended
period of time.
To calibrate the monitor
1 The monitor must be kept clean to operate properly . Use canned air to blow
off dust and debris, especially along the edges and seams in the encircled
areas as highlighted in Figure 32.
Figure 32: Touchscreen monitor
2 Make sure the USB cable is connected from the computer to the monitor.
3 Access the Tablet PC Settings window.
- For Windows 7: Select Start > Control Panel > Tablet PC Settings.
- For Windows 10: In the Search field in the Windows 10 taskbar, type
“Tablet PC Settings” and hit Enter.
Note: The Tablet PC Settings control panel will only appear after a
connected touchscreen monitor is recognized by the operating system.
94 Maintenance
FalconV User Manual - Standard Scanning - OPEX Corporation
Page 95
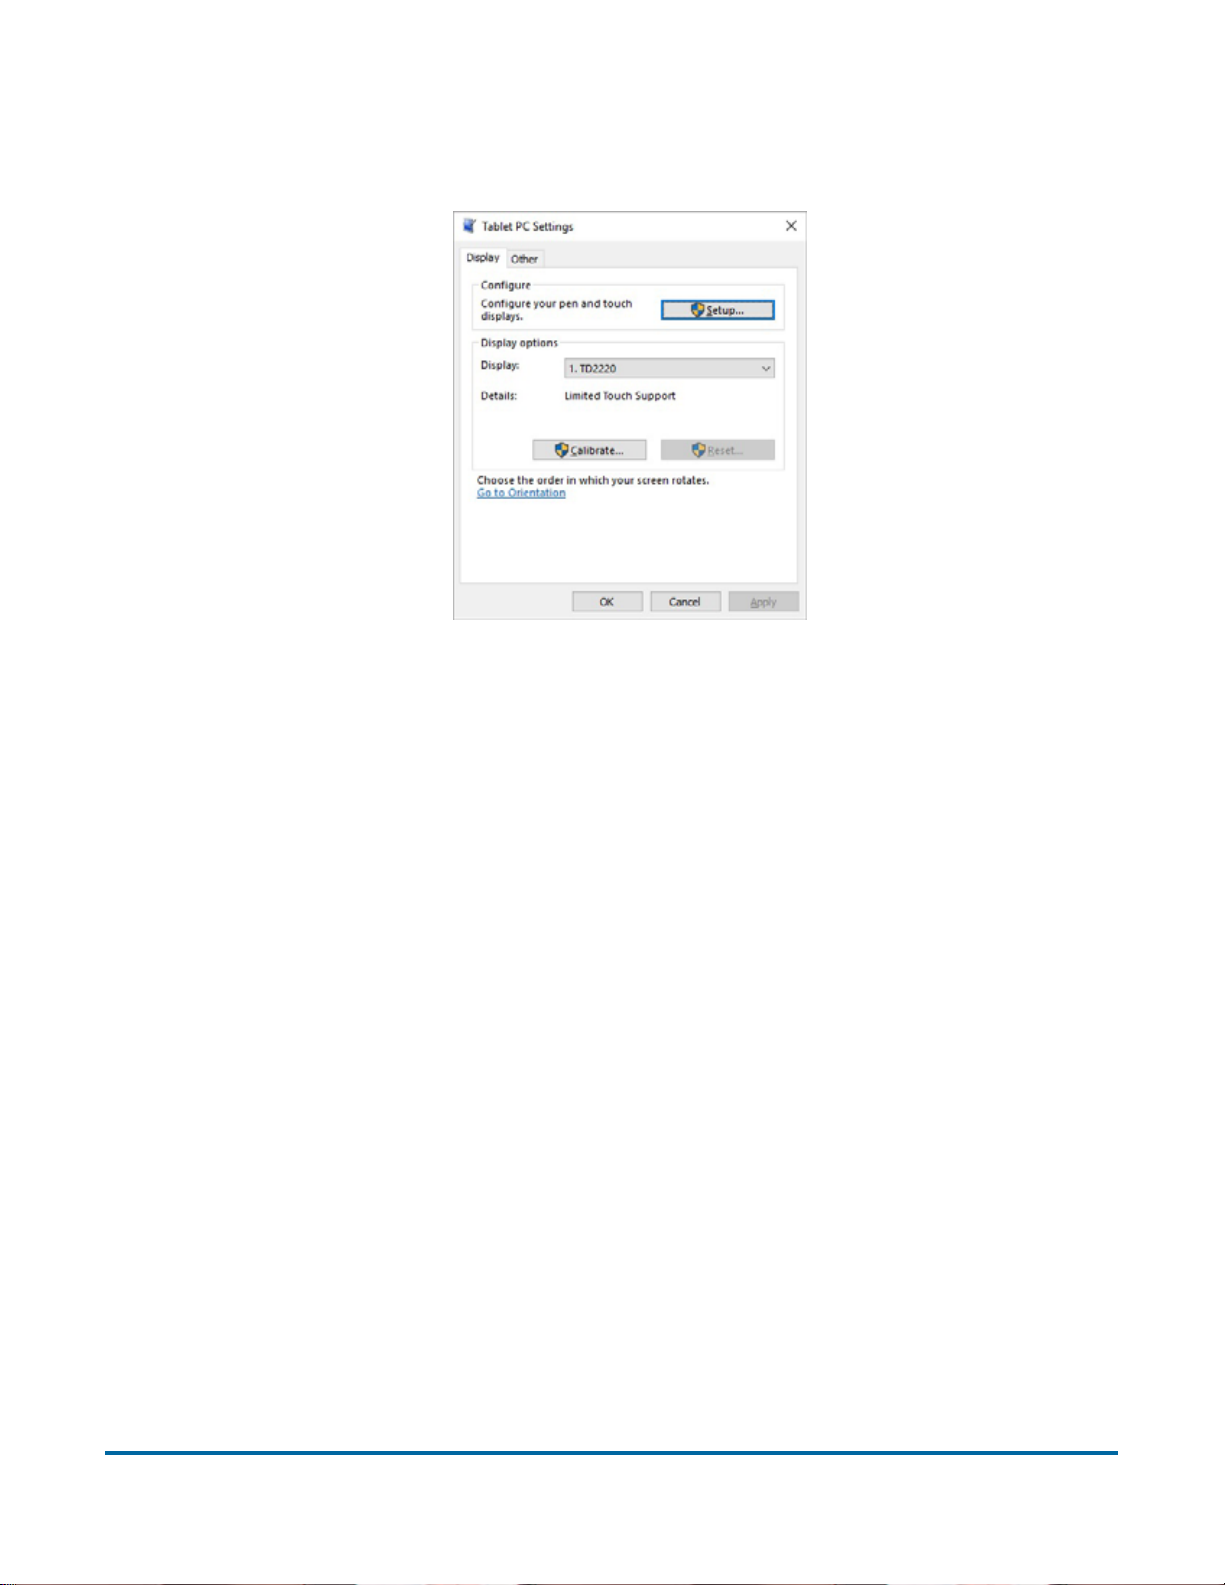
4 On the Display tab in the Tablet PC Settings window , select the name of the
monitor you want to calibrate from the drop-down menu.
Figure 33: Select the display
5 Click the Calibrate… button and follow the on-screen instructions.
Removing/Replacing the printer cartridge
The scanner’s imprinter and HP ink cartridge are accessible when the stacker
area is open. When you remove a cartridge, pay close attention to the position
and orientation of the cartridge so it can be replaced properly.
When you install a new printer cartridge, first check the expiration date of the
new cartridge you plan to use. The FalconV printer cartridges (in sealed
containers) have a shelf life of two years from the date of manufacture.
Accessing the printers
1 Open the stacker door by disengaging the latch handle.
2 To access the back or front standard printer:
a. Press the appropriate hinged paper guide to release the latch (see
Figure 34). The optimal location for pressing the guide is between the
two small screws.
Maintenance 95
FalconV User Manual - Standard Scanning - OPEX Corporation
Page 96
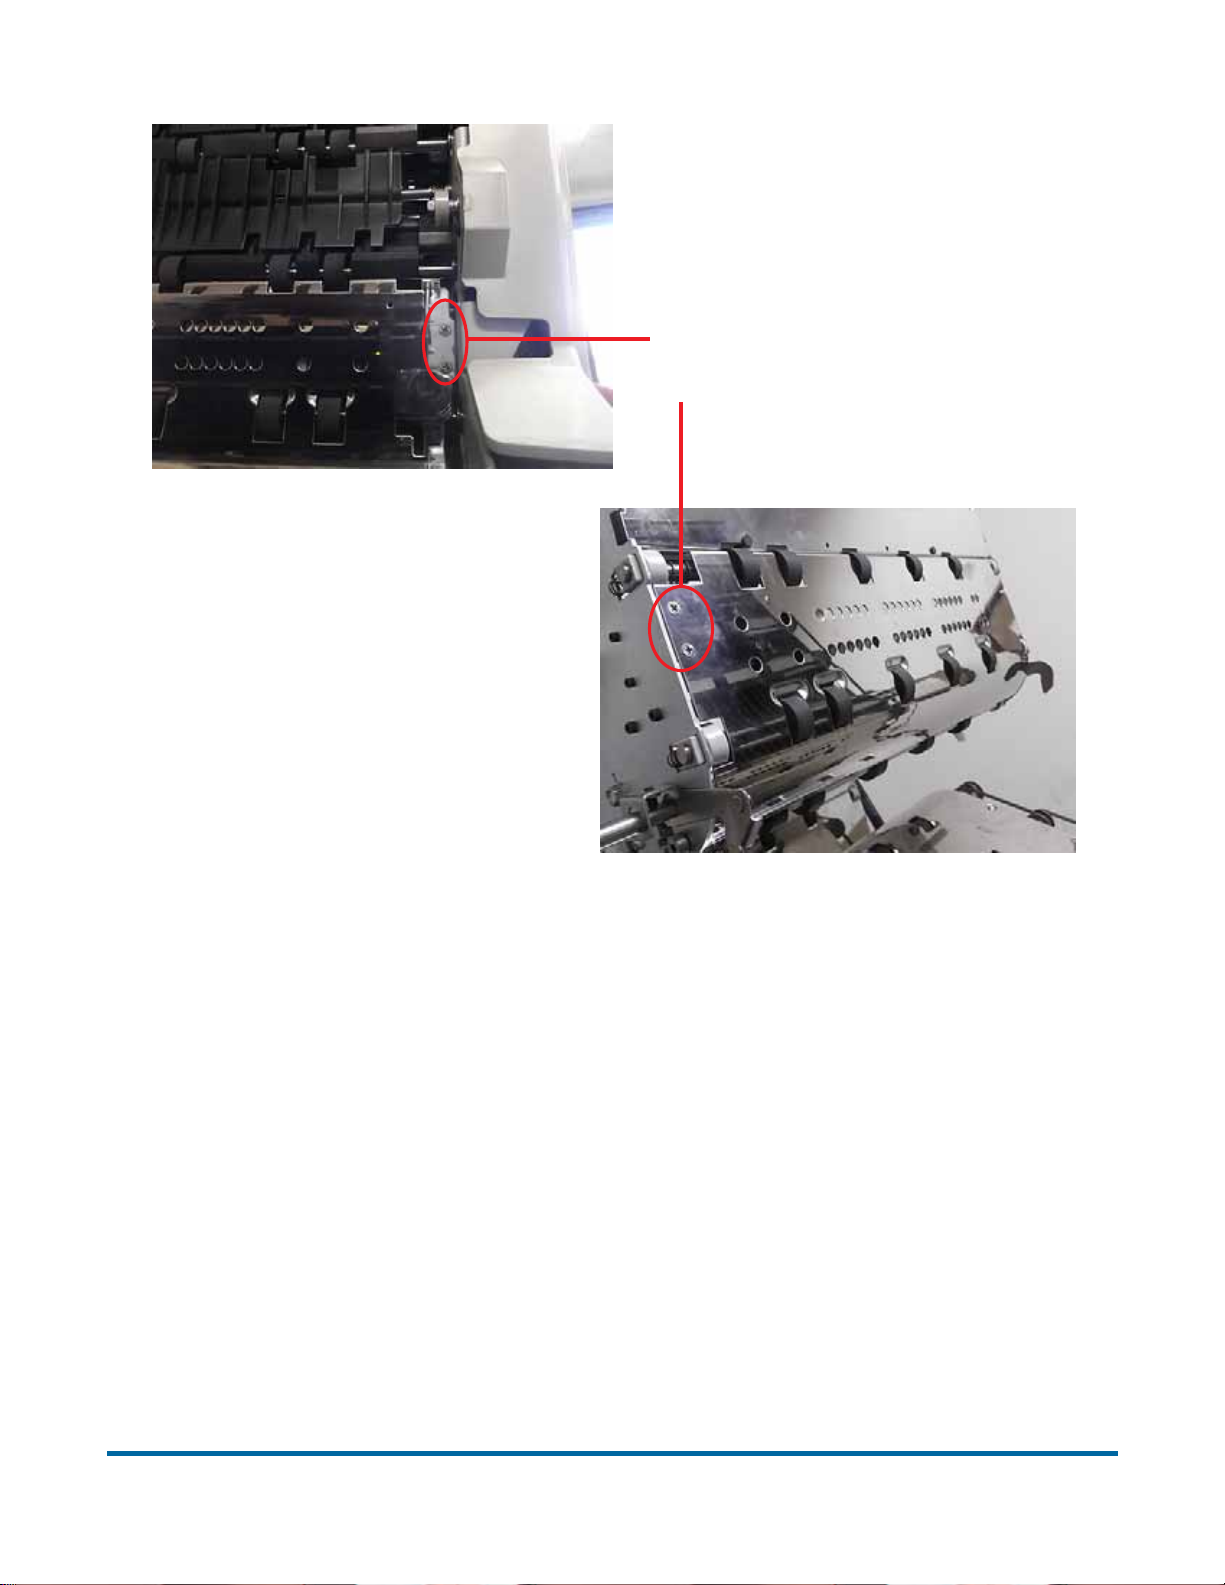
Press the hinged
paper guide here
Front Printer Access
Figure 34: Printer access
b. Swing open the paper guide to expose the printer assembly.
Note: If you have the optional graphics printer installed, see “To remove/
replace the graphics printer:” on page 97 for directions.
Back Printer Access
To remove/replace a standard printer cartridge:
1 Pull the tab on the rear of the printer cartridge and rotate outward, as shown
in the figure below.
96 Maintenance
FalconV User Manual - Standard Scanning - OPEX Corporation
Page 97
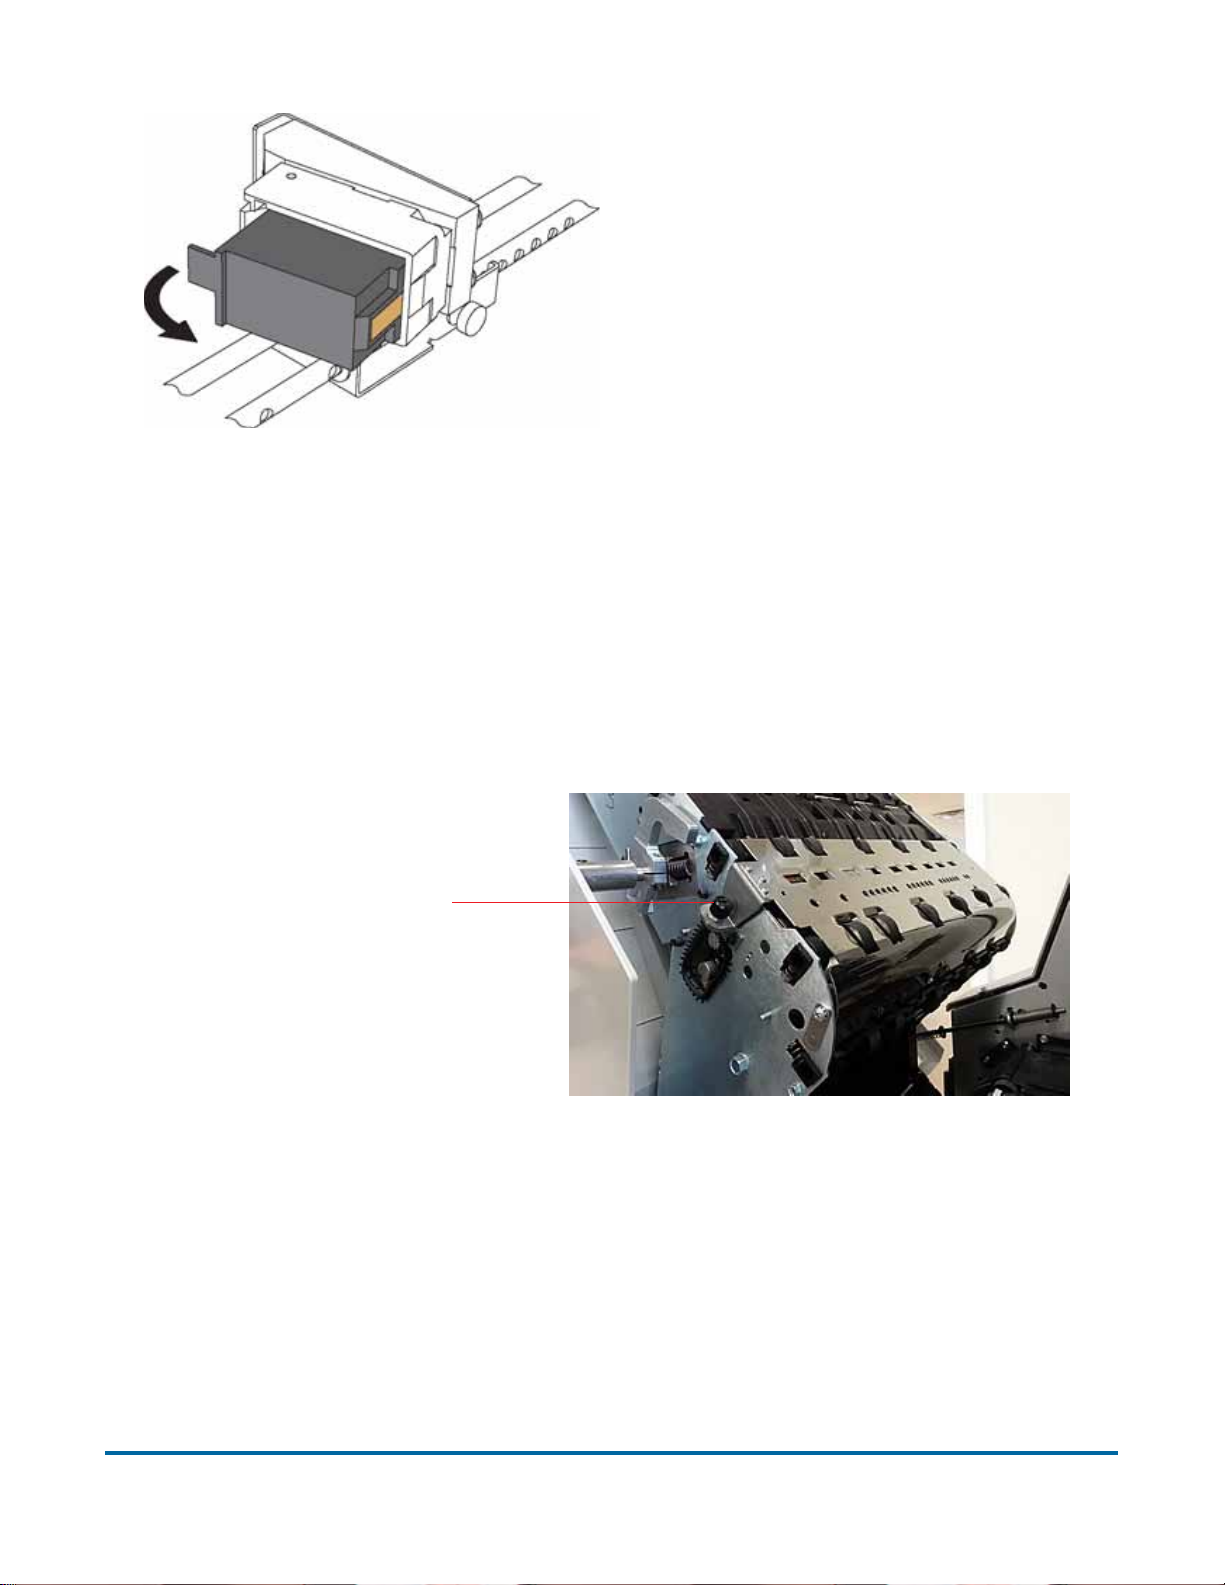
2 Insert the new cartridge by tipping the front end of the cartridge in first, and
then pushing in the rear of the cartridge until it “clicks” into place.
3 Go to Diagnostics > Printer and click Replace Ink Cartridge to reset the ink
drop count to zero.
To remove/replace the graphics printer:
1 Open the stacker door by disengaging the latch handle.
2 Loosen the thumbscrew shown in the following figure.
Loosen thumbscrew
Figure 35: Loosen graphic printer thumbscrew
3 Swing open the paper guide to expose the graphics printer assembly, as
shown in Figure 36.
Maintenance 97
FalconV User Manual - Standard Scanning - OPEX Corporation
Page 98
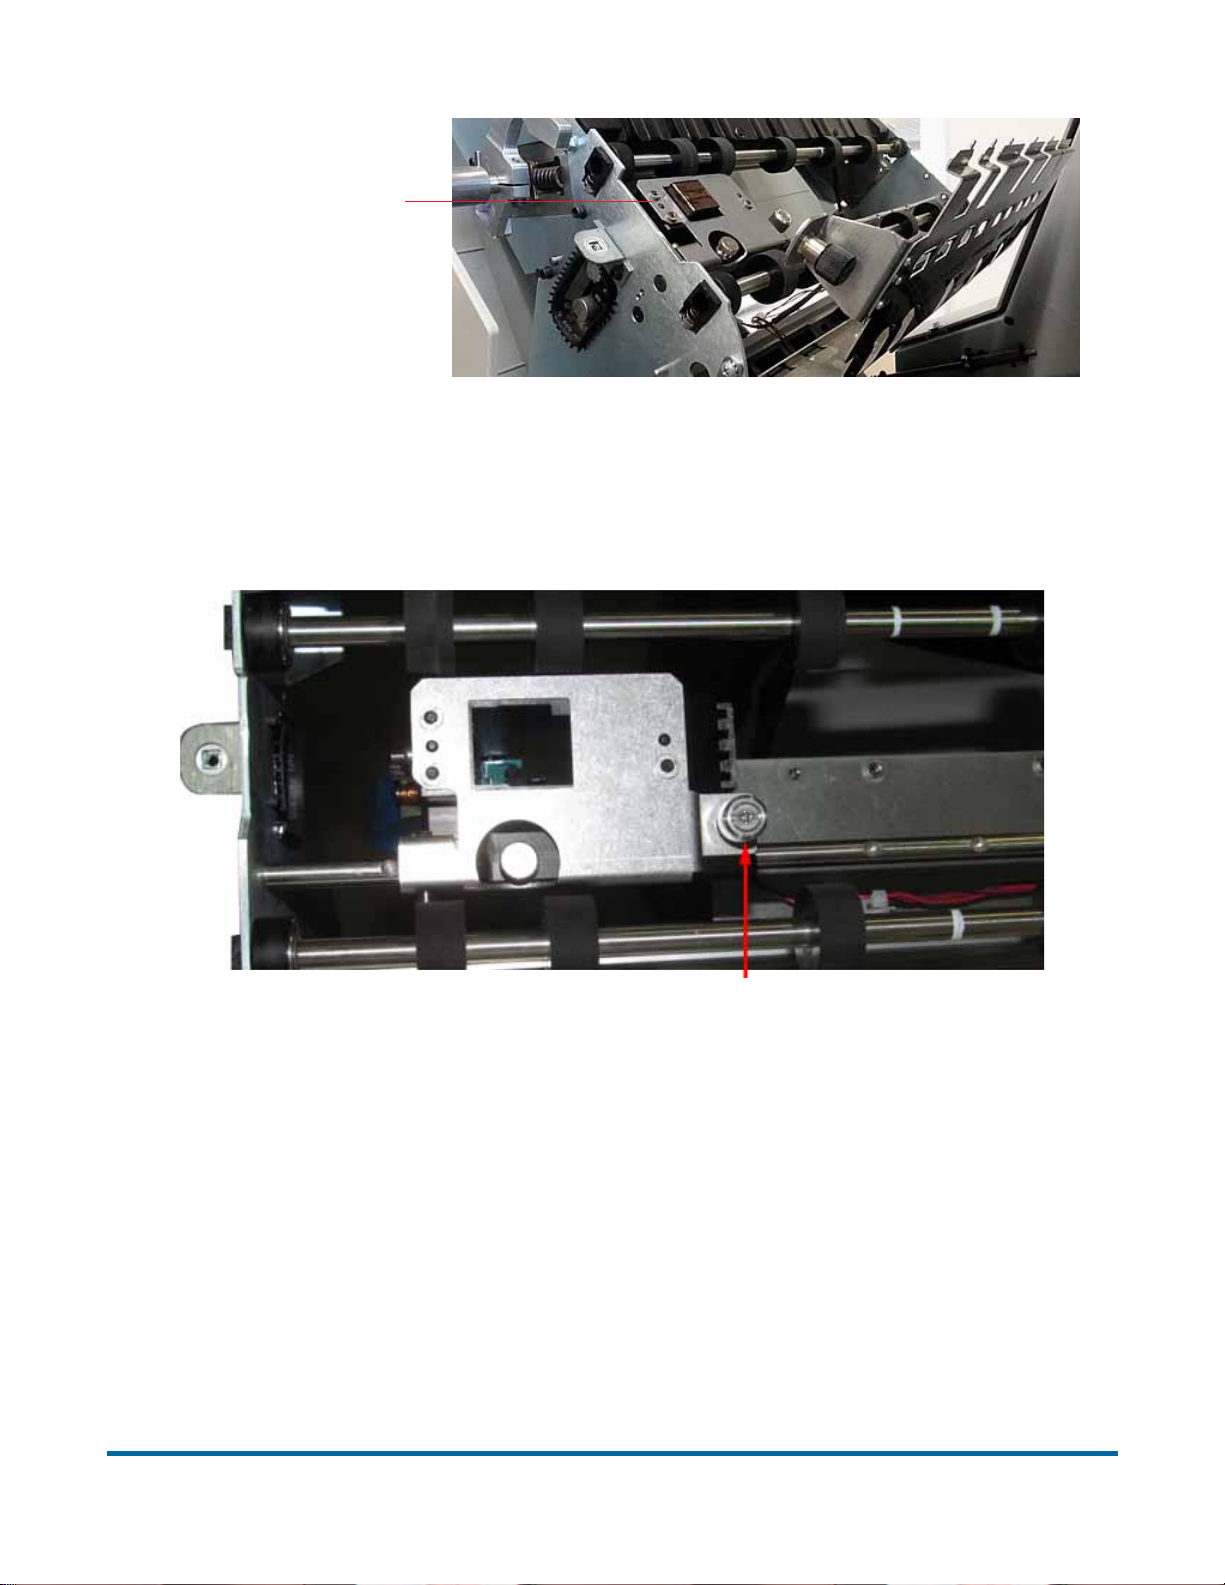
Graphics Printer
assembly
Figure 36: Graphics Printer Assembly
4 Loosen the thumbscrew on the IMTECH Graphics printer assembly shown
in Figure 37.
Thumb screw must be fully engaged to print
Figure 37: Loosen thumbscrew
5 Pivot the printer assembly towards you.
6 Push the cartridge release lever out of the way (see Figure 38).
98 Maintenance
FalconV User Manual - Standard Scanning - OPEX Corporation
Loosen thumbscrew
Page 99
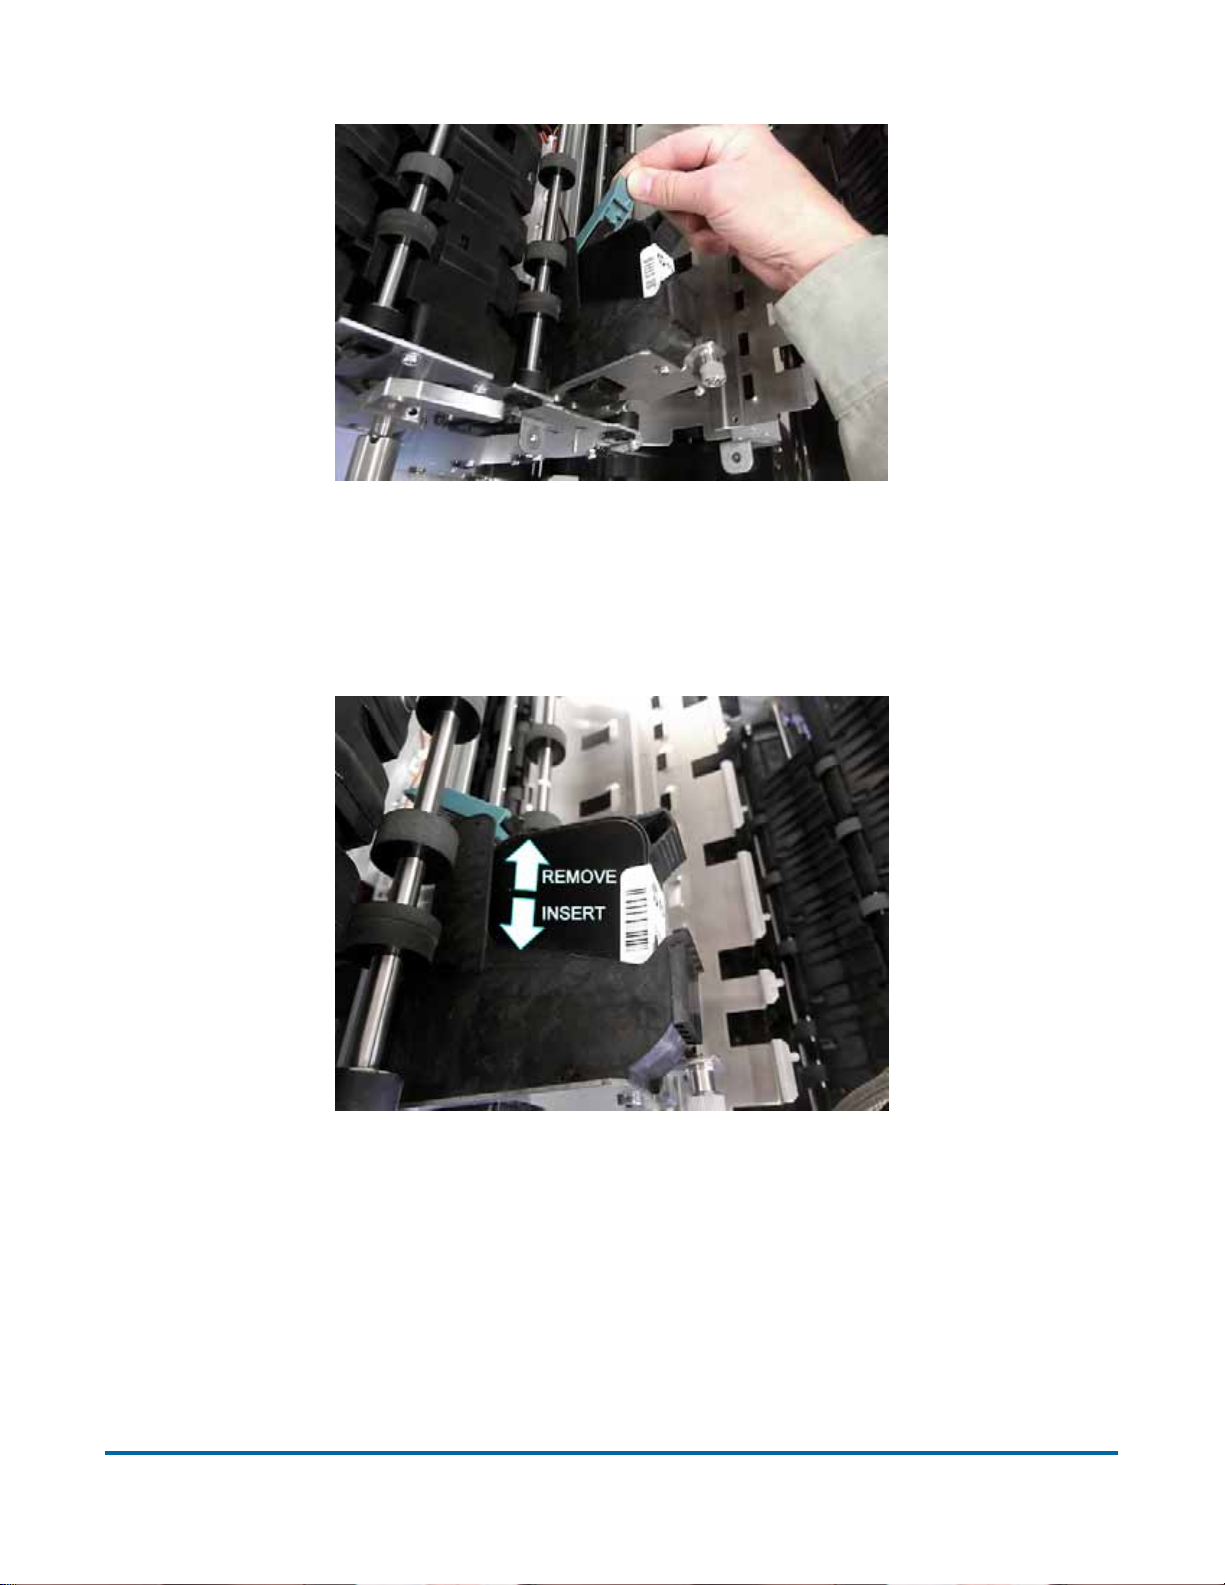
Figure 38: Cartridge release lever
7 Once the lever is out of the way, the printer cartridge can be removed from
the assembly by pulling it towards the back of the machine.
Figure 39: Removing/Inserting the printer cartridge
8 Insert a new cartridge into the assembly in the direction shown in Figure 39.
9 Flip the release lever up to hold the cartridge in place.
10 Pivot the assembly back into the stacker cover and tighten the thumbscrew .
The IMTECH printer features an interlock on its door , which goes into effect
when the thumbscrew is not fully engaged (see Figure 40).
Maintenance 99
FalconV User Manual - Standard Scanning - OPEX Corporation
Page 100
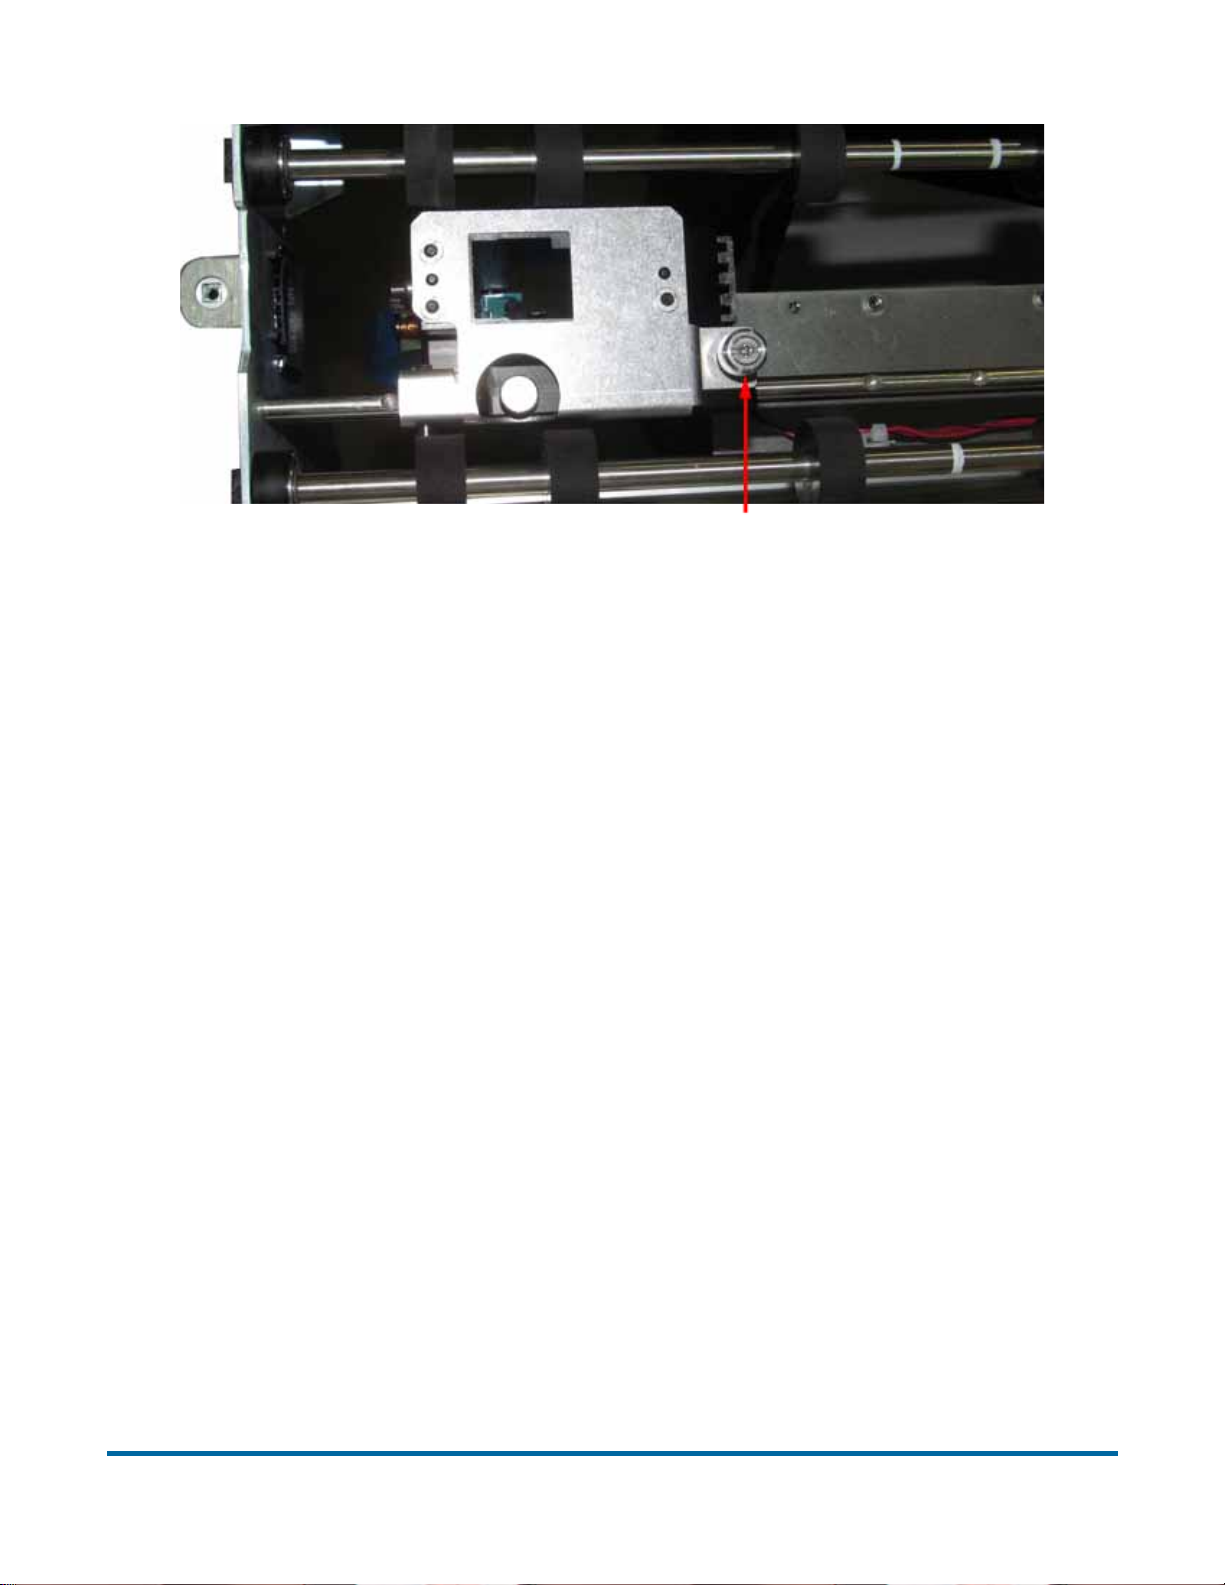
Thumb screw must be fully engaged to print
Figure 40: Graphics printer interlock
11 Swing the paper guide back over the graphics printer, and tighten its
thumbscrew (shown in Figure 35).
12 Close the stacker cover.
Adjusting the printer carriage position
You can adjust the vertical print position on items by moving the printer
carriage. The printer carriage is fixed to a shaft with detents that position the
printer so it sprays ink through the holes in the paper guide. A thumb screw
holds the printer in the detents. If you do not position the printer in a detent, the
thumb screw sticks out, preventing you from closing the paper guide.
To adjust the carriage position, loosen the thumb screw, slide the carriage to a
new detented position on the shaft, and then retighten the thumb screw.
100 Maintenance
FalconV User Manual - Standard Scanning - OPEX Corporation
 Loading...