

Page 1

OpenOffice.org User Guide
for Version 2.x
[OpenOffice.org User Guide for 2.x]
[0.2]
First edition: [2005-04-11]
First English edition: [2005-04-11]
Page 2

Page 3

Copyright and trademark information
The contents of this Documentation are subject to the Public Documentation License, Version
1.0 (the "License"); you may only use this Documentation if you comply with the terms of
this License. A copy of the License is available at:
http://www.openoffice.org/licenses/PDL.rtf.
The Original Documentation is “OpenOffice.org User Guide for Version 2.x”.
Contributor(s): G. Roderick Singleton.
Portions created by G. Roderick Singleton are Copyright © 2005, 2006. All Rights Reserved.
All trademarks within this guide belong to legitimate owners.
[Note: a copy of the PDL is included in this template and is also available at:
http://www.openoffice.org/licenses/PDL.rtf.]
Feedback
Please direct any comments or suggestions about this document to:
grsingleton@openoffice.org
Acknowledgements
I wish to recognize the Technical Writers of Sun Microsystems for the fine model they have
provided for organizing this document. I also wish to thank Erwin Tenhumberg for his blog,
Mary Ellen Dawley for her indexing effort, Ross Johnson for his editing/correctionsand
manitoban for the docking text in chapter 2.
Page 4

Page 5

Modifications and updates
Version Date Description of Change
[0.9] [2005-11-11] [grs: 9th draft issued for comment – switched to master doc,
stewart's amendments and added a chapter on XML usage
(flat file)]
[0.10] [2005-11-11] [grs: 10th draft issued for comment – fix page numbering
[0.11] [2006-01-31] [grs:11th draft issued for comment – updated index
[0.12a] [2006-02-20] [rj: 12th draft issued for comment – corrections for 2.0 to
replace 1.1.x references
[0.13] [2006-02-21] [grs 13th draft issued for comment – integrated Ross Johnson's
changes and edited for consistent grammar.
[0.14] [2006-03-02] [grs:14th draft issued for comment – document layout to be
more bookish
[0.15] [2006-04-10] [grs:15th draft issued for comment – Added POSTNET section
[0.16] [2006-06-19] [grs:16th draft issued for comment – Added file recovery info
to Troubleshooting chapter
[0.17] [2006-06-27] [grs:17th draft issued for comment – Corrected Overview
[0.18a] [2006-07-19] [grs:18ath draft issued for comment – updated concordance
file section and added JMF section to Chapter 14 and wps
how-to.
[0.19] [2006-07-31] [grs:19th draft issued for comment – Added new export PDF
feature
[0.20] [2006-08-16] [grs:20th draft issued for comment – Fixed many legacy terms
and added language/writing aids and comment on style
painter
[0.21] [2006-10-18] [grs:21st draft issued for comment – Integrated ztyx and
walteram updates to chapters 3, 4 and 10
[0.22] 2007-03-06 [grs:22
keyboard shortcuts to Chapter 5 – Impress and minor
changes.
[0.23] [2007-04-09] [grs:23rd draft issued for comment — Fixed pagnination errors
nd
draft issued for comment — added more info on
Page 6

Page 7

Contents
Overview................................................................................................... ........................1
Using the Guide...........................................................................................................................1
Important Features with 2.x.......................................................................... ..................3
Open Standards XML File Format (OASIS OpenDocument)....................................................3
New Multi-pane View.................................................................................................................3
New CustomShapes (compatible with Microsoft AutoShapes) ..................................................3
More Slide Transitions and Animation Effects...........................................................................3
Enhanced PDF Export.................................................................................................................3
New enhanced Database Features...............................................................................................5
Mail Merge Wizard.....................................................................................................................5
Enhanced Word Count Feature ...................................................................................................5
Support for Nested Tables...........................................................................................................5
Digital Signatures Support ..........................................................................................................5
XForms Support..........................................................................................................................5
WordPerfect® Filters..................................................................................................................6
Calc now has 65,536 Rows.........................................................................................................6
Enhanced DataPilot Support.......................................................................................................6
Native Installers..........................................................................................................................6
Native Desktop Integration.........................................................................................................6
Floating Toolbars........................................................................................................................6
Style Paint Brush.........................................................................................................................6
Quickstarter for *NIX Operating Systems..................................................................................7
Multiple Language Support .........................................................................................................7
New Charting Module.................................................................................................................7
Chapter 1: Using OpenOffice.org Help..........................................................................9
OpenOffice.org Step-by-Step Help.............................................................................................9
Tips............................................................................................................................................10
Turning tips on and off.........................................................................................................10
Extended Tips.......................................................................................................................10
Turning extended tips on and off.....................................................................................10
OpenOffice.org User Guide for 2.x i
Page 8

Help Agent................................................................................................................................10
Turning the Help Agent on and off......................................................................................11
Chapter 2: Working With OpenOffice.org............................................................... ....13
The User Interface................................................................................................................13
Starting OpenOffice.org.......................................................................................................13
The OpenOffice.org Writer Window...................................................................................14
Toolbars in the OpenOffice.org Window.............................................................................14
The Title Bar....................................................................................................................14
The Menu Bar..................................................................................................................15
The Toolbars....................................................................................................................15
Examples of Floating Toolbars........................................................................................16
Using Floating Toolbars..................................................................................................17
The document window....................................................................................................17
Docking toolbars..............................................................................................................17
Docking windows............................................................................................................18
Changing the Visibility of Buttons on Toolbars..............................................................18
Opening and Saving Documents ...............................................................................................19
Opening Documents.............................................................................................................19
Saving Documents....................................................................................................................22
Changing the Work Directory..............................................................................................23
Saving Documents Automatically........................................................................................23
Backup a File Automatically...........................................................................................23
Saving Recovery Information Automatically Every 'n' Minutes.....................................23
OpenOffice.org File Formats....................................................................................................24
XML file format names........................................................................................................24
OpenOffice.org XML file structure......................................................................................25
Definition of the XML formats............................................................................................26
Setting Tabstops...................................................................................................................26
Sending Documents as E-Mail ..................................................................................................27
Single Messages...................................................................................................................27
MailMerge............................................................................................................................27
Printing Documents...................................................................................................................28
OpenOffice.org User Guide for 2.x ii
Page 9

Displaying Print Previews....................................................................................................29
Reduced Printing of Documents...........................................................................................30
To print two pages beside one another on one sheet of paper.........................................30
Printing in Black and White .................................................................................................30
Printing text and graphics in black and white ..................................................................30
Printing all Draw and Impress documents in black and white ........................................30
Printing only text in black and white ...............................................................................31
Printing all Writer documents with black and white text ............................................31
Printing the current Writer document with black and white text ................................31
Printing Brochures................................................................................................................31
Spellcheck.................................................................................................................................32
Automatic Spellcheck ...........................................................................................................32
Checking Multilingual Texts................................................................................................33
Starting Spellcheck ...............................................................................................................34
Excluding Text From the Spellcheck ..............................................................................35
Adding Writing Aids for Other Languages...............................................................................35
Getting New Writing Aids....................................................................................................35
Using Automatic Functions.......................................................................................................40
Using AutoCorrect and AutoFormat .........................................................................................40
Turning off URL Recognition by AutoCorrect ....................................................................42
Undo URL recognition ....................................................................................................42
Turn off URL recognition ................................................................................................42
Other AutoCorrect functions ................................................................................................42
Creating a Letter Template With the Wizard............................................................................44
Find & Replace.........................................................................................................................45
Finding a Word in Text........................................................................................................45
Searching for Whole Words Only........................................................................................46
Match Case......................................................................................................................46
Searching for Text With Wildcards.................................................................................46
Searching Backward........................................................................................................47
Current Selection Only....................................................................................................47
Searching for Styles.........................................................................................................47
OpenOffice.org User Guide for 2.x iii
Page 10

Searching for Text Attributes..........................................................................................47
Searching for Special Formats ........................................................................................48
Similarity Search.............................................................................................................48
List of Regular Expressions..................................................................................................48
Digital Signatures and Printing or Exporting Documents .........................................................51
Only “open password”, no restriction..................................................................................53
“open password”, restricted..................................................................................................53
Permission restricted only....................................................................................................53
PDF without restriction (Default behaviour)........................................................................53
Permissions available................................................................................................................53
Printing.................................................................................................................................53
Changes................................................................................................................................53
Enable copy..........................................................................................................................54
Enable accessibility..............................................................................................................54
Programming PDF Security in Macros ...............................................................................54
Chapter 3: Managing Text Documents With Writer ..................................................57
The OpenOffice.org Writer Functions......................................................................................57
Writing..................................................................................................................................57
Designing and Structuring....................................................................................................57
Desktop Publishing with OpenOffice.org Writer.................................................................58
Calculations..........................................................................................................................58
Creating Drawings................................................................................................................58
Inserting Graphics................................................................................................................58
Customizable Program Interface..........................................................................................58
Drag&Drop...........................................................................................................................58
Extensive Help Functions.....................................................................................................58
The OpenOffice.org Writer Window........................................................................................59
Windows® of OpenOffice.org Writer..................................................................................59
Entering and Formatting Text ...................................................................................................60
Entering New Text...............................................................................................................60
To enter new text:............................................................................................................60
Line breaks.......................................................................................................................60
OpenOffice.org User Guide for 2.x iv
Page 11

Automatic correction.......................................................................................................60
Word completion.............................................................................................................60
Inserting Text........................................................................................................................60
Switching Between Insert Mode and Overwrite Mode........................................................61
Using the keyboard:.........................................................................................................61
Using the mouse:.............................................................................................................61
Entering Text Anywhere on a Page......................................................................................61
Selecting and Deleting Text .................................................................................................62
Deleting characters..........................................................................................................62
Deleting text.....................................................................................................................62
Selecting text to delete with the mouse.......................................................................62
Selecting text to delete with the keyboard..................................................................62
Deleting non-adjacent pieces of text...........................................................................62
Status bar uses..................................................................................................................63
Setting the Viewing Zoom Factor...............................................................................63
Editing or Activating Hyperlinks ................................................................................63
Applying Various Fonts ......................................................................................................63
Keyboard Navigating and Selection in Writer.....................................................................64
Inserting Special Characters .................................................................................................64
Inserting Protected Spaces, Hyphens and Conditional Separators .......................................65
Non-breaking spaces........................................................................................................65
Non-breaking hyphen......................................................................................................65
Hyphen, em-dash and en-dash .........................................................................................65
Manual Hyphenation.......................................................................................................65
Emphasizing Text.................................................................................................................66
Changing the colour of Text .................................................................................................66
Rotating Text........................................................................................................................66
Defining Borders..................................................................................................................67
Choose Format from the menu bar, Borders tab page.....................................................67
Use the Borders floating toolbar with Tables ..................................................................69
Superscripts and Subscripts..................................................................................................71
Applying subscripts/superscripts retrospectively............................................................72
OpenOffice.org User Guide for 2.x v
Page 12

Writing in Uppercase or Lowercase .....................................................................................72
Moving Text Sections in Documents...................................................................................72
Resetting Font Attributes While Typing..............................................................................73
Example procedure for resetting Font Attributes ............................................................73
Quick Formatting Using the Adjacent Paragraph Format....................................................73
Using Sections......................................................................................................................73
Sections and Columns..........................................................................................................75
Inserting Sections.................................................................................................................75
Editing Sections....................................................................................................................75
Formatting Text With and Without Styles................................................................................76
Direct Formatting or Formatting With Styles......................................................................76
The Style Concept in OpenOffice.org.......................................................................................77
The Styles in the Styles and Formatting Window................................................................77
Paragraph Styles...................................................................................................................77
Paragraph Style.....................................................................................................................78
Character Styles....................................................................................................................80
Hierarchical Styles................................................................................................................80
Numbering Styles ................................................................................................................81
Creating New Character Styles or Paragraph Styles............................................................81
Creating Document Templates .............................................................................................82
The Advantages of the Styles and Formatting Window.......................................................83
Formatting Multiple Paragraphs...........................................................................................83
Changing a Style the Easy Way...........................................................................................83
Page Styles and Page Numbers............................................................................................84
Create Page Styles...........................................................................................................84
Editing Page Styles..........................................................................................................88
Page Breaks as Paragraph Formats..................................................................................88
Changing the Format of Page Numbers...........................................................................89
Page Styles Summary......................................................................................................91
Defining default Templates.......................................................................................................92
Templates and Styles.................................................................................................................93
Copying Styles Between Templates and Documents...........................................................93
OpenOffice.org User Guide for 2.x vi
Page 13

New Style from Selection.....................................................................................................94
Transferring Formats With Fill Format Mode ......................................................................94
Updating Styles From Selections.........................................................................................94
This is how to update a Style:..........................................................................................94
Style can also be updated by using drag and drop:..........................................................95
Entering and Formatting Text Automatically .......................................................................95
Disabling the AutoCorrect Function ................................................................................95
ASCII Quotation marks are replaced with Custom Quotes .............................................95
Sentences always begin with a capital letter ....................................................................95
Three identical characters will become a whole line.......................................................96
Automatic Spellcheck ...............................................................................................................96
To exclude words from Spellcheck ......................................................................................96
Using AutoText .........................................................................................................................97
Defining AutoText ................................................................................................................98
Using AutoText in Networks ................................................................................................99
Printing AutoTexts...............................................................................................................99
AutoText With AutoComplete ................................................................................................100
Exceptions in AutoCorrect .................................................................................................100
Example.........................................................................................................................100
Text Frames.............................................................................................................................101
Inserting, Editing and Linking Text Frames.......................................................................101
Inserting Text Frames....................................................................................................101
Editing Text Frames......................................................................................................102
Linking Text Frames......................................................................................................102
Using Text Animation .............................................................................................................104
Drawing Lines in Text ............................................................................................................107
Editing Text With FontWork ..................................................................................................108
Aligning Text With Lines.......................................................................................................110
Aligning text on a free form line........................................................................................110
Aligning text with straight lines..............................................................................................110
The Navigator..........................................................................................................................111
Jumping From One Object to Another in Text...................................................................111
OpenOffice.org User Guide for 2.x vii
Page 14

Jumping to a Specific Page.................................................................................................112
Chapters in Navigator.........................................................................................................113
Indexes and Tables of Contents in Writer...............................................................................114
Defining Index/Table of Contents Entries..........................................................................114
Editing or Deleting Index and Table Entries......................................................................115
Creating a Table of Contents..............................................................................................116
Creating Alphabetical Indexes...........................................................................................117
Creating User-Defined Indexes..........................................................................................117
Using a Concordance File ..................................................................................................119
Preparation.....................................................................................................................119
Entering Data.................................................................................................................119
Example file...................................................................................................................120
Creating Bibliographies......................................................................................................122
Updating, Editing and Deleting Indexes and Tables of Contents ......................................123
Editing the Format of an Index/Table of Contents.............................................................123
Indexes Covering Multiple Documents..............................................................................124
Headings and Numbering........................................................................................................125
Numbering and Numbering Styles.....................................................................................125
Turning Bullets On and Off................................................................................................125
Turning Numbering On and Off.........................................................................................126
Example numbered list with sublevels:.........................................................................127
Outline Numbering.............................................................................................................127
Automatic Bullets and Numbering.....................................................................................128
Numbering Illustrations by Chapters..................................................................................129
Defining Number Ranges...................................................................................................129
Using Master Documents and Subdocuments.........................................................................131
Importing Lists From Other Text Programs............................................................................136
Changing Numbering via the Keyboard.............................................................................136
Interrupting and Continuing Numbering.................................................................................137
Delete the automatic numbering .........................................................................................137
Formatting the paragraph...................................................................................................137
Continuing numbering with a new starting value...............................................................137
OpenOffice.org User Guide for 2.x viii
Page 15

Numbering Lines.....................................................................................................................138
Line Numbering for All Paragraphs...................................................................................138
Line Numbering for Particular Paragraphs.........................................................................138
Tables in Text..........................................................................................................................139
Inserting Tables..................................................................................................................139
Inserting an empty table using the mouse:....................................................................139
Inserting an empty table via the Insert menu or floating toolbar:..................................139
Inserting a single row table by typing ++... or ||............................................................139
Inserting from OpenOffice.org Calc with the clipboard................................................139
Inserting from OpenOffice.org Calc using drag-and-drop............................................140
Deleting Tables...................................................................................................................140
Inserting Paragraphs Before Tables at Start of Page..........................................................141
Resize columns, rows, and cells....................................................................................141
Table AutoFormat..........................................................................................................141
Table properties in general............................................................................................141
Calculating in Text Documents...............................................................................................143
Formulae in Text Documents.............................................................................................143
Formula Options............................................................................................................143
Basic Calculation Functions......................................................................................143
Basic Functions in the Submenu...............................................................................143
Operators...................................................................................................................143
Statistical Functions..................................................................................................144
Trigonometric Functions ..........................................................................................144
More Defined Values................................................................................................145
Calculating in Text.............................................................................................................145
Calculating With formulae Located in Text .......................................................................146
Conditional Text.................................................................................................................147
Defining and using conditional text – by example ........................................................147
Defining a conditional variable .................................................................................147
Type “Reminder” in the document, and then add space................................................147
Defining a condition and the conditional text: ..........................................................148
Displaying the conditional text: .....................................................................................149
OpenOffice.org User Guide for 2.x ix
Page 16

Calculating in Text Document Tables................................................................................150
Calculating Across Multiple Tables...................................................................................151
Calculating Cell Totals in Tables .......................................................................................152
Merging and Splitting Cells ................................................................................................152
Merging Cells in OpenOffice.org Writer.......................................................................152
Splitting Cells in OpenOffice.org Writer.......................................................................152
Merging Cells in OpenOffice.org Calc OLE Objects....................................................152
Cancelling the merging of cells in OpenOffice.org Calc OLE Objects........................152
Inserting or Deleting Rows/Columns Using the Keyboard ................................................153
Repeating Multiple Heading Rows in a Table...................................................................153
Enlarging and Reducing Cells in Text Tables....................................................................153
Adapting Table Widths.......................................................................................................154
Images, Drawings, Clipart and FontWork ..............................................................................156
Positioning Objects.............................................................................................................156
Captions and Number Ranges ............................................................................................157
Defining Captions ..........................................................................................................157
Editing or deleting captions ...........................................................................................157
Inserting an object in a number range............................................................................157
Numbering Illustrations by Chapters..................................................................................158
Inserting Graphics..............................................................................................................158
Inserting Graphics via dialogue.....................................................................................158
Inserting Graphics From OpenOffice.org Draw or Impress..........................................159
Inserting Graphics via Drag and Drop From the Gallery ..............................................159
Adding Graphics To the Gallery via Drag and Drop.....................................................160
Inserting Graphics With a Scanner................................................................................160
Inserting a Chart From OpenOffice.org Calc.....................................................................160
Dragging and Dropping the Chart with Move or Copy.................................................160
Charts with Linked Data................................................................................................161
Inserting Decorative Horizontal Lines...............................................................................161
Headers, Footers and Footnotes..............................................................................................162
Some Notes Concerning Headers and Footers ...................................................................162
Inserting Page Numbers in Footers....................................................................................162
OpenOffice.org User Guide for 2.x x
Page 17

Formatting Headers and Footers ........................................................................................165
Defining Different Headers ................................................................................................165
Inserting Page Numbers of Continuation Pages.................................................................165
Inserting Lines Under Headers ...........................................................................................166
Footnotes and Endnotes......................................................................................................167
Inserting and Editing Footnotes..........................................................................................168
Inserting a footnote via an icon.....................................................................................168
Inserting a footnote via a dialogue.................................................................................168
Tips for Working with Footnotes..................................................................................169
Spacing Between Footnotes...............................................................................................169
Spellcheck , Dictionaries, Hyphenation ...................................................................................170
Controlling Spellcheck via the dialogue .............................................................................170
Automatic Spellcheck .........................................................................................................171
To exclude words from the Spellcheck : ........................................................................172
Removing Words From User-Defined Dictionaries ...........................................................172
Hyphenation.......................................................................................................................172
Automatic hyphenation..................................................................................................172
Manual Hyphenation.....................................................................................................173
Thesaurus............................................................................................................................174
Form Letters, Business Cards and Labels...............................................................................176
Creating Form Letters.........................................................................................................176
Brief Instructions (For Quick Results)..........................................................................176
Fixed and Variable Fields..............................................................................................176
Creating and Printing Labels and Business Cards ..............................................................178
Designing Business Cards via dialogue.........................................................................178
Designing Labels and Business Cards ...........................................................................179
Printing Labels With Serial Numbers ............................................................................179
Printing Address Labels .................................................................................................180
Avoiding Blank Paragraphs................................................................................................181
Newsletters..............................................................................................................................183
Creating a Newsletter From a Template.............................................................................184
Creating Page Styles......................................................................................................184
OpenOffice.org User Guide for 2.x xi
Page 18

Editing Headers .............................................................................................................184
Editing Columns............................................................................................................184
Editing Paragraph Styles................................................................................................185
Working with Frames....................................................................................................186
Formatting a Frame .......................................................................................................186
Anchoring Frames.........................................................................................................186
Defining a Frame Wrap ................................................................................................186
Defining a Wrap Region ....................................................................................................187
Using coloured or Graphic Backgrounds ..........................................................................188
Creating a Table of Contents .............................................................................................188
Further Information............................................................................................................191
Using Automatic Hyphenation ......................................................................................191
Letters With Envelopes...........................................................................................................192
Using a Ready-Made Letter Template...............................................................................192
Creating a Letter Template Using the Wizard....................................................................192
Creating an Envelope Template.........................................................................................193
Inserting an Envelope into a Document.........................................................................194
Adjusting the Printer for the Printout ...........................................................................195
Creating and Printing a Letter With an Envelope..............................................................195
Creating an Single Envelope..............................................................................................195
Adding a POSTNET Bar Code to an Envelope..................................................................196
Get a POSTNET font.....................................................................................................196
Building a Complete POSTNET Bar Code for Printing................................................196
Adding More Languages to OpenOffice.org..........................................................................197
Setting Text Language ........................................................................................................197
Adding More Text Languages............................................................................................198
Setting UI Language ...........................................................................................................200
Adding Multiple Language Support using Language Packs ...................................................200
Chapter 4: Spreadsheets in Calc..................................................... ............................203
Overview of the Functions in Calc..........................................................................................203
Calculating..........................................................................................................................203
Database Functions.............................................................................................................203
OpenOffice.org User Guide for 2.x xii
Page 19

Arranging Data...................................................................................................................203
Examining and Extrapolating Data ....................................................................................203
What-If Calculations..........................................................................................................203
Dynamic Charts..................................................................................................................204
Importing and Exporting Data............................................................................................204
Importing into Calc........................................................................................................204
Exporting from Calc......................................................................................................205
Referencing Data in Networks and the Internet.................................................................205
The Calc Window ..................................................................................................................206
Structure of a Spreadsheet..................................................................................................206
Rows and Columns.............................................................................................................207
Multiple Sheets in a Document..........................................................................................208
Inserting Sheets..............................................................................................................208
Renaming Sheets...........................................................................................................208
Values and Formulae as Cell Contents...................................................................................210
Calculating in Spreadsheets................................................................................................210
Using Built-in Functions....................................................................................................212
A Short Description of What Cells Can Contain................................................................213
Text.....................................................................................................................................213
Numbers.............................................................................................................................215
Calculating With formulae......................................................................................................218
Calculating With Dates and Times.........................................................................................219
Inserting and Editing Notes................................................................................................220
Handling Multiple Sheets........................................................................................................221
Displaying Multiple Sheets................................................................................................221
Working With Multiple Sheets...........................................................................................221
Printing Spreadsheets.........................................................................................................222
Formatting a Spreadsheet........................................................................................................223
Formating Numbers............................................................................................................223
Dates..............................................................................................................................223
Formatting Cells and Sheets...............................................................................................224
Using AutoFormat for Tables .............................................................................................224
OpenOffice.org User Guide for 2.x xiii
Page 20

Layout of Spreadsheets...........................................................................................................225
Designing Spreadsheets Clearly.........................................................................................225
Formatting Text in a Spreadsheet.......................................................................................226
Formatting Numbers in a Spreadsheet...............................................................................226
Formatting Borders and Backgrounds for Cells and Pages ................................................226
Addressing Cells.....................................................................................................................227
Addresses and References, Absolute and Relative.............................................................227
Relative Addressing.......................................................................................................227
Absolute Addressing .....................................................................................................227
When to Use Relative and Absolute References...........................................................227
Addressing by Name..........................................................................................................229
Recognizing Names as Addressing....................................................................................229
Only Copy Visible Cells .....................................................................................................230
Referencing a Cell in Another Document..........................................................................231
Using References in formulae.................................................................................................232
References to Other Sheets.................................................................................................233
Using Charts............................................................................................................................235
Editing Chart Titles ............................................................................................................238
Editing Chart Legends........................................................................................................238
Adding Texture to Chart Bars ............................................................................................239
Editing Chart Axis..............................................................................................................239
Database Functions in Calc.....................................................................................................240
Defining Database Ranges.................................................................................................240
Creating Records in a Spreadsheet.....................................................................................240
Defining Database Ranges.................................................................................................242
Sorting Database Ranges....................................................................................................242
Filtering Database Ranges..................................................................................................243
Grouping Database Ranges and Calculating Subtotals......................................................245
Transferring Data From a Data Source to a Spreadsheet ...................................................246
Opening a Database File in Calc ...................................................................................246
Evaluating Data With Calc......................................................................................................249
DataPilot.............................................................................................................................249
OpenOffice.org User Guide for 2.x xiv
Page 21

What use is the DataPilot?..................................................................................................250
Creating DataPilot Tables...................................................................................................250
Selecting DataPilot Output Ranges....................................................................................252
Editing DataPilot Tables.....................................................................................................252
Filtering DataPilot Tables...................................................................................................252
Updating DataPilot Tables.................................................................................................252
Deleting DataPilot Tables...................................................................................................252
Consolidating Data..................................................................................................................253
Applying Goal Seek................................................................................................................255
Naming Cells......................................................................................................................255
Start Goal Seek...................................................................................................................256
Applying Multiple Operations............................................................................................256
Multiple Operations in Columns or Rows.....................................................................256
Examples........................................................................................................................256
Calculating With One Formula and One Variable........................................................257
Calculating with Several formulae Simultaneously......................................................257
Multiple Operations Across Rows and Columns...............................................................257
Calculating with Two Variables....................................................................................258
Using Scenarios.......................................................................................................................259
Using Ready-Made Scenarios............................................................................................259
Creating Personal Scenarios...............................................................................................259
Validity of Cell Contents........................................................................................................261
Using Cell Contents Validity..............................................................................................261
Sample macro:....................................................................................................................263
Printing or Exporting Spreadsheets.........................................................................................264
Printing Sheet Details.........................................................................................................264
Defining Number of Pages for Printing..............................................................................264
Printing Sheets in Landscape Format.................................................................................265
Printing Rows or Columns on Every Page.........................................................................265
Saving and Opening Sheets in HTML....................................................................................267
Saving Sheets in HTML.....................................................................................................267
Opening Sheets in HTML..................................................................................................267
OpenOffice.org User Guide for 2.x xv
Page 22

formulae and Values as CSV Files..........................................................................................268
Exporting formulae and Values as CSV Files....................................................................268
Importing a CSV File.........................................................................................................268
AutoFill...................................................................................................................................270
Applying Sort Lists.............................................................................................................270
Automatic Row Filling.......................................................................................................270
Protecting Sheets................................................................................................................271
Creating a Reference..........................................................................................................272
Further Information............................................................................................................272
Inserting a note ..................................................................................................................273
Inserting a sheet into another document ............................................................................273
Displaying formulae ..........................................................................................................273
Using print ranges ..............................................................................................................273
Freezing Columns...............................................................................................................273
Splitting a Calc Window....................................................................................................273
Conditional Formatting......................................................................................................273
Defining Validity................................................................................................................275
Creating Input Help............................................................................................................275
Linking Sheet Information.................................................................................................276
Chapter 5: Creating Presentations With Impress......................................................277
OpenOffice.org Impress Toolbars and Windows®.................................................................278
How to Create a Basic Presentation........................................................................................279
Creating a Presentation With the Wizard...........................................................................279
Creating a Simple Presentation Without the Wizard..........................................................284
Switching Presentation Views............................................................................................285
Arranging Slides.................................................................................................................286
Incorporating Slide Show Effects.......................................................................................287
In-Slide Effects..............................................................................................................287
Showing a Presentation......................................................................................................287
Editing Presentations...............................................................................................................288
Defining Background colours .............................................................................................288
Switching Page Styles........................................................................................................289
OpenOffice.org User Guide for 2.x xvi
Page 23

Presentation Styles..............................................................................................................289
Using Outline View.................................................................................................................290
Slide Transitions, Effects and Animation...............................................................................291
Automatic Slide Transition.................................................................................................291
Effects for Objects..............................................................................................................291
Selecting Hidden Objects...................................................................................................292
Individual Presentations.....................................................................................................292
Exporting, Printing and Presenting.........................................................................................294
Printing a Presentation Slide..............................................................................................294
Exporting Presentations as Web Pages...............................................................................295
Exchanging Data via the Clipboard....................................................................................296
Creating a Business Report.....................................................................................................297
Creating a Business Report in Presentation Form..............................................................297
Entering Text in the Outline View.....................................................................................298
Changing the Slide Layout.................................................................................................298
Designing Slides.................................................................................................................298
Creating a Slide Show.............................................................................................................300
Defining or Changing Slide Order.....................................................................................300
Creating Cross-Fade Effects ..............................................................................................300
Starting Presentations ........................................................................................................300
Working with Connectors.......................................................................................................302
"Edge to Edge” Connectors................................................................................................302
"Middle to Middle” Connectors.........................................................................................303
Editing Connectors.............................................................................................................303
Using a Snap Grid .............................................................................................................303
Editing Glue Points ............................................................................................................304
Hints and Tips for a Successful Presentation..........................................................................305
Using the Mouse as a Pointer.............................................................................................305
Changing Bullet Symbols in Outline View........................................................................305
Inserting, Deleting and Renaming Slides ...........................................................................305
Creating and Printing Handouts.........................................................................................306
Organizing and Printing Notes...........................................................................................306
OpenOffice.org User Guide for 2.x xvii
Page 24

Using the Navigator............................................................................................................307
Edit Jump Targets...............................................................................................................307
Modifying Object Size.......................................................................................................307
Creating Additional Objects ..............................................................................................307
Changing Font and Font Size ............................................................................................307
Modifying colours .............................................................................................................307
Keyboard Navigating and Selection in Impress.................................................................308
Chapter 6: Creating Drawings with Draw ................................................................ ..309
OpenOffice.org Draw Functions.............................................................................................309
Creating and Publishing Vector Graphics ..........................................................................309
Creating 3D Objects...........................................................................................................309
Manage Organization Charts ..............................................................................................309
Drawing..............................................................................................................................309
Export.................................................................................................................................310
Construct.............................................................................................................................310
Integrate..............................................................................................................................310
The OpenOffice.org Draw Window........................................................................................311
Toolbars and Windows® in OpenOffice.org Draw............................................................311
Drawing Rectangles and Ellipses and Entering Text .........................................................312
Rotating and Resizing Objects ...........................................................................................314
Arranging and Aligning Objects .............................................................................................315
Arranging Objects..............................................................................................................315
Aligning Objects.................................................................................................................315
Drawing Sectors and Segments ..........................................................................................316
Entering Text......................................................................................................................317
Normal Text........................................................................................................................317
Fitting Text to Frames........................................................................................................317
Callouts...............................................................................................................................318
Converting Text Into 3D....................................................................................................318
Drawing, Editing and Converting...........................................................................................319
Curves and Objects.............................................................................................................319
Drawing Curves.............................................................................................................319
OpenOffice.org User Guide for 2.x xviii
Page 25

Editing Curves....................................................................................................................320
Vectorizing Bitmaps...........................................................................................................321
Converting Text Characters to Curves...............................................................................322
Converting to Curves, Polygons, 3D..................................................................................323
Working With Objects............................................................................................................326
Duplicating Objects............................................................................................................326
Cross-Fading Between Two Objects ..................................................................................327
Grouping Objects ..........................................................................................................328
Entering Groups.............................................................................................................328
Exiting Groups...............................................................................................................328
Navigating Between Objects of a Group.......................................................................329
Combining Objects and Constructing Shapes.........................................................................330
Combining Objects.............................................................................................................330
Constructing Shapes...........................................................................................................330
Shapes - Merge..............................................................................................................331
Shapes - Subtract...........................................................................................................331
Graphic Objects in Drawings and Presentations.....................................................................332
Inserting Bitmaps................................................................................................................332
Editing Bitmaps..................................................................................................................332
Applying Text to Bitmaps.............................................................................................332
Saving Bitmaps...................................................................................................................333
Working With colours.............................................................................................................335
The colour Bar ....................................................................................................................335
Defining Custom colours ....................................................................................................336
Replacing colours using the Eyedropper............................................................................338
Gradients and Patterns for Objects and Background ..............................................................340
Defining Gradients.............................................................................................................340
Defining a custom colour Gradient ....................................................................................340
Interactively Defining a colour Gradient ............................................................................341
Organizing the Attribute Tables.........................................................................................342
3D Globe.................................................................................................................................343
Creating Texture on a 3D Object........................................................................................343
OpenOffice.org User Guide for 2.x xix
Page 26

Using Illumination..............................................................................................................345
More 3d Effects..................................................................................................................345
3D Effects: Favourites...................................................................................................345
3D Effects: Geometry....................................................................................................346
3D Effects: Shading .......................................................................................................346
3D Effects: Illumination................................................................................................347
3D Effects: Textures and Material ................................................................................347
Designing 3D Objects From Font Characters.........................................................................348
First Step:.......................................................................................................................348
Second Step:..................................................................................................................349
Third Step: ....................................................................................................................350
Fourth Step:...................................................................................................................352
Fifth Step:......................................................................................................................353
Using a Grid.......................................................................................................................355
Mechanical or Construction Drawings ....................................................................................356
Creating a Construction Plan..............................................................................................357
Using Snap Lines...........................................................................................................361
Using Dimension Lines......................................................................................................361
Working With Multiple Layers..........................................................................................362
Using One colour per Layer ...............................................................................................363
Chapter 7: Databases and Data Sources .....................................................................364
Creating a database file ...........................................................................................................364
Creating a table.......................................................................................................................365
Creating a related table............................................................................................................366
Creating a relationship between tables....................................................................................367
Creating a data entry form.......................................................................................................367
Making data entry easier.........................................................................................................368
Modifying a date field ........................................................................................................368
Adding a list box to a form.................................................................................................369
Adding a combo box to a form ...........................................................................................370
Changing the tab order of a form.......................................................................................371
Viewing Data..........................................................................................................................372
OpenOffice.org User Guide for 2.x xx
Page 27

Copying the form...............................................................................................................372
Changing the form's properties...........................................................................................372
Setting a sort order for a form............................................................................................372
Creating a query to find today's appointments........................................................................373
Add a sort order to the query..............................................................................................374
Changing the Join type in the query...................................................................................374
Creating a report......................................................................................................................375
Some tips for using the Calendar database.............................................................................376
Adding data to a related table.............................................................................................376
Open the form for the related table................................................................................376
Open the Data Sources window .....................................................................................376
Refreshing the form.......................................................................................................377
Filtering Data......................................................................................................................377
Registering a Data Source .......................................................................................................378
Connecting to other types of databases...................................................................................378
Address Books........................................................................................................................379
Registering an Address Book .............................................................................................379
Using the Wizard to import an Address Book ...................................................................379
Manually Registering an Existing Address Book .............................................................379
System Address Book as Data Source................................................................................380
Importing and Exporting Data in Text Format ...................................................................380
Exporting in CSV Text Format..........................................................................................381
Form Design............................................................................................................................382
Forms in OpenOffice.org....................................................................................................382
Available controls..........................................................................................................383
Customizing controls.....................................................................................................384
Creating a group of option buttons................................................................................385
Do any other controls have an wizard?..............................................................................385
Attaching a data source to a form..................................................................................385
Associating data with a field..........................................................................................386
Activating form controls in a document ........................................................................386
How to use the form......................................................................................................387
OpenOffice.org User Guide for 2.x xxi
Page 28

Searching in Tables and Form Documents ............................................................................388
Searching With a Form Filter ............................................................................................389
Operators........................................................................................................................389
Commands ....................................................................................................................390
Chapter 8: Customizing OpenOffice.org.................................................. ..................392
Modifying and Customizing the User Interface of OpenOffice.org.......................................392
Configuring the Keyboard..................................................................................................392
Configuring Menus.............................................................................................................393
Changing Toolbars.............................................................................................................394
Inserting, Moving and Deleting Icons on Toolbars ............................................................394
Changing Icon Views.........................................................................................................395
Changing the Look of the User Interface................................................................................396
Selecting Measurement Units .............................................................................................396
Moving, Deleting or Copying Icons...................................................................................396
Sending Faxes and Configuring OpenOffice.org for Faxing ..................................................397
Creating a LAN Friendly Faxing Solution under Linux....................................................397
Creating a LAN Friendly Faxing Solution under Windows...............................................397
Sending a Fax via dialogue.................................................................................................398
Configuring OpenOffice.org for Faxing via Icon...............................................................398
Further Information.................................................................................................................398
Chapter 9: Advanced Techniques...................................................... .........................399
Copying and Moving Data Using Drag and Drop ..................................................................399
Dragging and Dropping Within a OpenOffice.org Document...........................................399
Inserting Objects From the Gallery ....................................................................................399
Inserting an object as a copy..........................................................................................399
Inserting an object as a link...........................................................................................400
Inserting an object as a background graphic ..................................................................400
Inserting an object as a texture (pattern) for another object..........................................400
Copying Graphics From the Gallery ..................................................................................400
Inserting Graphics From a Document in the Gallery.........................................................400
Copying Graphics Between Documents.............................................................................401
Copying Draw Objects into Other Documents...................................................................401
OpenOffice.org User Guide for 2.x xxii
Page 29

Inserting a Draw object in a text document ........................................................................402
Inserting a Draw object in a spreadsheet ............................................................................403
Drag and Drop With the Data Source View ............................................................................404
Using data in a text document............................................................................................404
Applying data to a table document.....................................................................................404
Inserting controls in a text form.........................................................................................404
Copying Sheet Areas to Text Documents...............................................................................405
Inserting Data From Spreadsheets......................................................................................405
Inserting Data From Text Documents................................................................................405
Copying Text Using Drag and Drop ..................................................................................406
Revision Marking Function.....................................................................................................407
Recording and Displaying Changes...................................................................................407
Accepting or Rejecting Changes........................................................................................408
Comparing Versions of a Document..................................................................................409
Merging Versions...............................................................................................................409
Recording Changes.............................................................................................................409
Version Management..............................................................................................................410
Protecting Contents in OpenOffice.org...................................................................................411
Protecting All Documents When Saving............................................................................411
Turning on protection ...................................................................................................411
Turning off protection ...................................................................................................411
Protecting Revision Marking..............................................................................................411
Turning on revision protection .....................................................................................411
Turning off revision protection .....................................................................................411
Protecting Cell Ranges in Calc...........................................................................................411
Protecting Sections in Writer..............................................................................................412
Turning on protection ...................................................................................................412
Turning off protection ...................................................................................................412
Protecting Cells in a OpenOffice.org Writer Table............................................................412
Automatic Protection of Indexes and Tables......................................................................413
Turning on protection ...................................................................................................413
Turning off protection ...................................................................................................413
OpenOffice.org User Guide for 2.x xxiii
Page 30

Protecting frames, graphics and OLE objects....................................................................413
Protecting Drawing Objects and Form Objects..................................................................413
Turning on protection ...................................................................................................413
Turning off protection ...................................................................................................413
Protecting Records..............................................................................................................414
Digital Signatures and Encryption ..........................................................................................414
Overview............................................................................................................................414
Certificates..........................................................................................................................414
How to get a Certificate? ...............................................................................................414
Self-signed certificates..............................................................................................415
Certificates from a Certificate Authority ..................................................................415
Integrating a Certificate with OpenOffice.org ....................................................................415
Changing Defaults and Other Configuration Items................................................................416
Saving Configuration With Document...............................................................................416
Inserting and Editing Tab Stops.........................................................................................416
Moving Tabs on the Ruler.............................................................................................417
Changing the Properties of Tabs....................................................................................417
Deleting Tabs.................................................................................................................417
Changing the Defaults...................................................................................................417
Changing the colour of Text ...................................................................................................418
Inserting Landscape pages into a Portrait-oriented Document...........................................418
More on Templates.................................................................................................................419
Changing Default Templates..............................................................................................419
Modifying Default Templates............................................................................................419
Resetting Default Templates..............................................................................................419
Using Custom Templates ...................................................................................................419
Using OpenOffice.org over a Network..............................................................................420
Chapter 10: Introducing OpenOffice.org Basic and Macros ....................................421
Accessing the Sample Macros................................................................................................421
Calling the Sample Macros................................................................................................421
Editing the Sample Macros................................................................................................422
The Sample Macros.................................................................................................................423
OpenOffice.org User Guide for 2.x xxiv
Page 31

AutoText.............................................................................................................................423
ChangeAllChars.................................................................................................................423
GetTexts.............................................................................................................................423
ReadDir...............................................................................................................................423
Userfields............................................................................................................................423
Chapter 11: Using OpenOffice.org Math...................................................................424
Formula Entry.........................................................................................................................424
Tool bar..............................................................................................................................424
Command Icon Box............................................................................................................425
Command dialogue Box.....................................................................................................425
Creating an Equation with dialogue Commands.....................................................................426
Special Formating...................................................................................................................427
Exponentiation:...................................................................................................................427
Subscripting:.......................................................................................................................427
Leading and trailing superscript and subscript: ..................................................................427
Centre subscript / superscript: ............................................................................................427
Under brace / Over brace:...................................................................................................428
Various types of Brackets...................................................................................................428
Special Characters...................................................................................................................429
Special Operators....................................................................................................................430
Integral Sign:......................................................................................................................430
Summation Character:........................................................................................................430
Product Character:..............................................................................................................430
Vectors and Matrices...............................................................................................................431
Vector.................................................................................................................................431
Matrix.................................................................................................................................431
Formatting...............................................................................................................................432
Size.....................................................................................................................................432
Colour.................................................................................................................................432
Layout.................................................................................................................................432
Alignment...........................................................................................................................433
Examples.................................................................................................................................434
OpenOffice.org User Guide for 2.x xxv
Page 32

Chapter 12: Building Forms with Xforms .................................................................435
Step-by-Step Procedure...........................................................................................................435
Chapter 13: Xml Enhancements.................................................................................446
Flat XML filter........................................................................................................................446
Creating a new Docbook Filter...............................................................................................451
Chapter 14: Troubleshooting Common Problems.....................................................452
Error Message contains “Get Storage: "No Content"”............................................................452
Under Windows®...............................................................................................................452
Multi-user installations:.................................................................................................452
Single-user installations:................................................................................................452
UNIX systems....................................................................................................................453
Outline numbering is not retained after a save........................................................................453
How get the page count to not count a title page?
Or How do I offset the page count ? ........................................................................................454
What to do when document prints or exports with blank pages ............................................454
What to to do with a General error General input/output error ..............................................455
How to recover content from a Openoffice.org file ...............................................................455
Steps for recovering a damaged Openoffice.org file:.........................................................455
How to get sounds under Linux? ...........................................................................................456
Overview............................................................................................................................456
Starting...............................................................................................................................456
Installing the JRE...............................................................................................................457
Activating the JRE in OpenOffice.org...............................................................................457
Installating the JMF............................................................................................................457
Integration of the JMF in OpenOffice.org .........................................................................458
Registration of the Plugins in the JMF..........................................................................459
Integration of the Plugins in OpenOffice.org................................................................459
Time for the second test.................................................................................................460
Integration of the Plugins in OpenOffice.org................................................................461
Time for the third test....................................................................................................461
What to do if it fails?..........................................................................................................462
How to open Microsoft Works Documents in OpenOffice.org 2.x........................................462
OpenOffice.org User Guide for 2.x xxvi
Page 33

Index.................................................................................................................. ............464
Public Documentation License, Version 1.0...............................................................472
OpenOffice.org User Guide for 2.x xxvii
Page 34

Page 35

Overview
The OpenOffice.org User's Guide attempts to provide answers to questions about working
with OpenOffice.org. It is focused on OpenOffice.org 2.x releases, but it should also be
useful with 1.9 and 1.1.x releases. Graphics are, for the most part, those using the older style
icons rather than the newer Crystal graphics, which are currently only in the en_US and
de_DE releases of 2.0.x. Some are also from the 1.1.x user guide where they are similar to
existing ones. All these will change frequently as the 1.9/2.0 cycle progresses.
In addition, use of the OpenOffice.org Help facility is also covered. Through Help, users can
get detailed answers to all questions at any time by pressing (F1), opening the Help menu or
clicking the Help buttons. More information on using OpenOffice.org Help can be found in
Chapter 1, “Working with OpenOffice.org”.
Other sources of support are available through the users@openoffice.org mailing list, the
OpenOffice.org support newsgroups provided by gmane.org and the latest news about
OpenOffice.org at www.openoffice.org.
Overview
Using the Guide
This User's Guide is designed for users who are already familiar with the basic functions of
their computer. Where there are differences in certain functions between supported operating
systems, these differences are explained. If functions described here are not available on a
particular platform, this is a system-related limitation caused by the platform in use.
OpenOffice.org User Guide for 2.x 1
Page 36

Overview
OpenOffice.org User Guide for 2.x 2
Page 37

Important Features with 2.x
Important Features with 2.x
Open Standards XML File Format (OASIS OpenDocument)
Beginning with version 2.0 OpenOffice.org uses the open standard OASIS OpenDocument
XML format as the default file format. The OASIS OpenDocument format is a vendor and
implementation independent file format, and thus guarantees freedom and independence.
In addition to OpenOffice.org itself, the open source office suite KOffice as well as
OpenOffice.org derivatives like the StarOffice software support the OASIS OpenDocument
file format. The OASIS OpenDocument file format is also one of the file formats
recommended by the European Commission.
New Multi-pane View
The new Multi-pane view increases the productivity and usability of OpenOffice.org. The
Multi-pane view provides all important tools and windows through one coherent, integrated,
and simple user interface. Former Microsoft PowerPoint users should find OpenOffice.org
2.0 easy to use.
New CustomShapes (compatible with Microsoft AutoShapes)
OpenOffice.org now supports CustomShapes which are very similar to Microsoft's
AutoShapes. As a consequence, AutoShapes are imported and displayed correctly.
CustomShapes are shapes that cannot only change their size but also their appearance.
More Slide Transitions and Animation Effects
OpenOffice.org now supports many more animation effects and slide transitions. Now users
have more options to give their presentations a professional appearance. In addition, the
extended support for effects improves the Microsoft PowerPoint compatibility.
Enhanced PDF Export
OpenOffice.org 1.1 introduced the PDF export feature. Version 2.x now extends the basic
export feature. With the new version it is possible to define the compression levels of
embedded images. In addition, the PDF support now correctly handles thumbnail images and
hyperlinks.
In addition, with the release of 2.0.4, OpenOffice.org has added a number of security
features, These are:
1. A new Security tab to the Export as PDF feature as shown below:
OpenOffice.org User Guide for 2.x 3
Page 38

Important Features with 2.x
2. Encryption is compatible with PDF v1.4, only ARCFOUR (RC4 compatible) 128-bit
encryption is provided.
3. Permissions settings are those supported by the Standard PDF security handler. PDF
readers and viewers are expected to support these features; however, some may not.
OpenOffice.org User Guide for 2.x 4
Page 39

Important Features with 2.x
New enhanced Database Features
OpenOffice.org always had database frontend tools, but in past versions they were very
hidden. OpenOffice.org 2.x starts to handle databases like any other application, i.e. a new
database can be created via the "File > New" menu. For novice users OpenOffice.org
provides a new Table Wizard that allows to create database tables without any knowledge of
databases and SQL. The new embedded Java technology based HSQLDB database engine
allows to create "database documents". These simple database files don't require a backend
database server like MySQL or Adabas D. All information (table definitions, data, queries,
forms, reports) is stored in one XML file.
Query-in-Query is available with OpenOffice.org 2.0.4 as database queries are an essential
feature of any database management system. This feature provides the user with the
possibility to customize the view to the data. A database query now assembles, filters, and
sorts information spread over multiple tables of the relational database.
Mail Merge Wizard
The new Mail Merge Wizard will make it very easy to do mailings to hundreds of recipients.
The wizard guides users step by step through the process. Different data sources can be used
for the address information. There are differences though from 1.1.x.
Enhanced Word Count Feature
With 1.1.x, it was only possible to find document statistics under "File - Properties ..." or by
installing a word count macro to count the number of words in a selection. OpenOffice.org
2.0 eliminates this restriction. Now a new word count dialogue can be found in the "Tools"
menu.
Support for Nested Tables
With OpenOffice.org 2.0 it is now possible to create tables within tables (nested tables). This
increases the overall usability, but also improves the Microsoft Word compatibility.
Digital Signatures Support
Another new feature is the support of digital signatures. OpenOffice.org uses certificates
stored in the regular repositories.
XForms Support
OpenOffice.org 2.0 now allows to create forms based on the open W3C XForms standard.
With XForms it is very easy to implement simple logic without any programming.
OpenOffice.org User Guide for 2.x 5
Page 40

Important Features with 2.x
WordPerfect® Filters
OpenOffice.org 2.0 includes a WordPerfect® filter developed by the open source community.
Developers are invited to contribute to this project.
Calc now has 65,536 Rows
OpenOffice.org 1.1.x supported only 32,768 rows in spreadsheet documents, which caused
Microsoft Excel interoperability issues. The new version now takes OpenOffice.org to the
same level as Microsoft Excel.
Enhanced DataPilot Support
With the DataPilot in OpenOffice.org 2.0 (similar to Microsoft Excel's PivotTable feature) it
is now possible to create new groups, filter data based on values, show differences and
percentages instead of absolute values, etc.
The new DataPilot features turn OpenOffice.org Calc into a very powerful tool for data
analysis.
Native Installers
OpenOffice.org 2.0 supports the native installation mechanisms. For example, .MSI and
.CAB files are provided on Microsoft Windows, RPM, and .deb files are available for Linux.
For users with more sophisticated management requirements, Sun provides configuration
management tools as part of the StarOffice software. StarOffice 8 will also introduce Macro
migration tools.
Native Desktop Integration
OpenOffice.org 2.0 integrates nicely into the desktop environment. Thus, OpenOffice.org
looks and behaves like any other application on a given platform. On Windows XP it looks
like a Windows application, and on Linux it uses the same UI widgets as GIMP or Evolution.
Floating Toolbars
Toolbars are much more flexible in OpenOffice.org 2.0. It is now very easy to attach and
detach toolbars, move them around and customize them.
Style Paint Brush
An new icon has been added to the Standard toolbar. This icon is a shortcut to the style
painter in the Style and Formatting Window.
OpenOffice.org User Guide for 2.x 6
Page 41

Important Features with 2.x
Quickstarter for *NIX Operating Systems
The release of OpenOffice.org 2.0.4, now adds quickstart capability to the *NIX releases in
the same manner as quickstart under Windows®.
Multiple Language Support
OpenOffice.org 2.x brings an easier way to have OpenOffice.org support multiple languages
by means of the use of language packs. OpenOffice.org has in excess of 92 languages in
process at the time of writing. Language packs are, fro the most part, created by their
associated Native Language Community (NLC). Please check the NLC website that supports
the language needed.
New Charting Module
The target for the new charting module is OpenOffice.org2.3. (For details, see
http://graphics.openoffice.org/chart/chart.html ) The following is a summary of what one can
expect with this new feature:
● New Chart Wizard that simplfies the creation of charts and provides a live preview.
● Flexible Source Ranges that allow users to choose separate data ranges for single parts of
single series now. For exampl, selection of different x-values for different series.
● Settings for 3D charts mde easier via a single dialogue that now contains easier access to
simple and realistic look and simplified perspective settings.
● Enhanced logarithmic scales that permit users to choose minimum, maximum and major
intervals.
● Pie segment offset for 3D charts that allow users to drag out single 3D pie segments and
donut segments.
● Enhanced automatic scaling so that automatic minimum and maximum values improve
appearance of generated charts.
● Improved automatic axis label layout.
● Improved selection handling.
● Regression curves are now also available for 2D line charts, 2D bar and column charts and
2D area charts
● Additional sub chart types: 2D Lines subtype 'points only', 2D net subtype 'points only',
3D XY, 3D smooth lines, 3D donut
OpenOffice.org User Guide for 2.x 7
Page 42

Important Features with 2.x
OpenOffice.org User Guide for 2.x 8
Page 43

Chapter 1: Using OpenOffice.org Help
Chapter 1: Using OpenOffice.org Help
Different kinds of help are available in OpenOffice.org.
● Step-by-step instructions with full references via the Contents and Index selections
of OpenOffice.org Help
● Help Tips that pop up next to the mouse pointer
● Extended tips with more detailed explanations than provided with Tips
OpenOffice.org Step-by-Step Help
To access Help, use the Help menu item or click the Help buttons in the individual dialogues.
OpenOffice.org User Guide for 2.x 9
Page 44

Chapter 1: Using OpenOffice.org Help
OpenOffice.org Help is context-sensitive. This means that, when Help is opened in Writer it
is specific to Writer. Similarly, to get help about Calc, either first open a spreadsheet and only
then look for help, or select Help for the specific module from the pull-down list at the top of
the Help window. The pull-down list at the top of the Help window sets the selected module
as the current section for searching.
Tips
Tips are on at installation by default and it is recommended that this feature should always be
switched on. With Tips activated one can , for example, let the mouse pointer rest on an icon
so that its name is displayed. Tips may also be seen in many other places in OpenOffice.org.
For example, when scrolling through a table, the tip shows the row or column.
Turning tips on and off
Select Tools > Options > OpenOffice.org > General > Tips to enable or disable this
feature.
Extended Tips
Switch on the Extended Tips during the first few weeks of OpenOffice.org usage. Enabling
this option gives a brief description of each item on the screen when the mouse pointer is
hovered over the item for a moment.
Turning extended tips on and off
Choose Tools > Options > OpenOffice.org > General > Extended Tips to turn extended
tips on and off. The command is checked when the Extended Tips function is switched on.
Press Shift+F1 to turn Extended Tips on temporarily. The pointer turns into the
Extended Tips pointer. Now see the Extended Tips for any element on the
screen as the mouse pointer is moved. As soon as the mouse is clicked or a key pressed, the
pointer returns to the normal mouse pointer.
Help Agent
When certain actions are performed in OpenOffice.org, the Help Agent
automatically appears. This is a small window in a corner of the document.
The Help Agent normally remains visible for 30 seconds. When clicked, it is replaced by a
help window providing some helpful advice about the current topic. If a Help Agent dealing
with the same topic is repeatedly ignored or closed instead of being clicked, it does not
appear again for this topic. Resetting the Help Agent restores it to the way it was when
OpenOffice.org was first installed.
OpenOffice.org User Guide for 2.x 10
Page 45

Chapter 1: Using OpenOffice.org Help
Turning the Help Agent on and off
1. Choose Tools > Options > OpenOffice.org > General > Help Agent to have the Help
Agent appear. If the command is checked, the Help Agent is automatically displayed when
certain actions are performed in OpenOffice.org. Also, by accessing Tools > Options >
OpenOffice.org > General from the main toolbar, users can reset the Help Agent.
OpenOffice.org User Guide for 2.x 11
Page 46

Chapter 1: Using OpenOffice.org Help
OpenOffice.org User Guide for 2.x 12
Page 47

Chapter 2: Working With OpenOffice.org
Chapter 2: Working With OpenOffice.org
OpenOffice.org is reasonably intuitive but is sufficiently different to other suites that a period
of familiarization required before use is fluid and effective. This chapter starts with a general
explanation of the most common control features in OpenOffice.org, such as toolbars,
floating toolbars and dockable windows. This is followed by information on functions that
can be used in most of the program modules of OpenOffice.org.
The User Interface
OpenOffice.org provides not only the usual control elements found in other applications,
such as menus and icons, but a host of other special features besides. For example, many of
the special OpenOffice.org features can be accessed via a context menu, opened by rightclicking on the selected objects. Other user-friendly functions are available by dragging and
dropping with the mouse.
Starting OpenOffice.org
Under Windows® , once the program is installed (see the separate setup guide that is part of
the download image and is on most CDs),the OpenOffice.org group should be on the
Windows® Start menu under Programs. Under *NIX, its location depends upon where it is
installed and which window manager is used; however, under Gnome and KDE, the
OpenOffice.org group may be found in the Main menu. To create a blank text document in
Writer, click Text Document. For a blank spreadsheet in Calc, click Spreadsheet, and so on.
NOTE: Under Windows®, the OpenOffice.org Quickstarter should be in the Windows® task bar. The
icon may be double-clicked or right-clicked to open its context menu. Right-clicking Quickstarter opens a submenu
from which a new, blank document can be opened. Double-click Quickstarter to open the Templates and
Documents dialogue.
OpenOffice.org User Guide for 2.x 13
Page 48

Chapter 2: Working With OpenOffice.org
The OpenOffice.org Writer Window
A text document is displayed and edited in the Writer window. Spreadsheet, presentations or
drawings are displayed in very similar windows, except the menus and icons change
automatically depending on the context.
Toolbars in the OpenOffice.org Window
The Title Bar
The title bar shows the name of the program, OpenOffice.org, and usually the file name of
the current document. If a document title is entered in File > Properties > Description , this
title is displayed rather than the file name.
OpenOffice.org User Guide for 2.x 14
Page 49

Chapter 2: Working With OpenOffice.org
The Menu Bar
At the top of the OpenOffice.org window, immediately under the title bar, is the menu bar.
Point with the mouse to a command on the menu bar and press the left mouse button. The
menu opens, allowing one to choose a command from the submenu by clicking it. The menu
bar can also be accessed from the keyboard, by pressing the Alt key.
The menus are organized into basic functions. The Edit menu, for example, provides the
functions needed to edit the current document (cut, copy, paste, undo changes and so on),
while the View menu has functions that allow control of the view of the elements displayed
on the screen. In other words, the commands used for editing, viewing, sequencing,
formatting and printing a document can only be used when the document is open and active.
Active, in this sense, means that the document is front of any others on the screen. If the
commands should correspond to an object in the document, then that object has to be
selected. In addition, the menus are context sensitive,. This means that only those menu
commands that are relevant to the current work will be available . For example, if the cursor
is located in a text document, then only the text editing menu commands are available.
Likewise, if graphics are selected in a document, then only the menu commands that can be
used to edit graphics will be available. The other inactive menu items are hidden. By
choosing Tools > Options >OpenOffice.org > View, one can select the Show inactive menu
items field and then see the inactive menu items as gray entries in menus.
OpenOffice.org lets the user change and customize the menu bar the way as desired. Many of
the toolbars and the status bar may so be modified to suit personal requirements.
The Toolbars
Below the menu bar is the Standard toolbar. This toolbar contains icons for several
important commands and functions that can be used in OpenOffice.org to open a document,
export to PDF, undo and redo, access the navigator, or gallery or print the current document.
Immediately above the horizontal ruler is the Formatting toolbar. This offers features that
are always appropriate to the current context such as alignment, font styles, lists and
indenting. For example, if a piece of normal text is selected , one will see different icons from
those within a text table.
On the left edge of the document is the main toolbar. This varies depending on the
document type (text, spreadsheet, presentation, drawing or formula).
Other toolbars such as the option bar and colour bar will be described later.
It is easy to change the position of the toolbars. For example, if the position of the main
toolbar should be on the right edge of the document instead of on the left, simply drag the
knurled handle at the far left in the toolbar to a new location around the edge of the main
window.
Note: under Windows®, one only needs to use
(Alt).
OpenOffice.org User Guide for 2.x 15
Page 50

Chapter 2: Working With OpenOffice.org
Some icons have small triangles to indicate that there are more functions available. These are
called floating toolbars. When a long click is applied to these icons, a new window opens
giving access to all those features associated with that icon. Short clicks deliver different
behaviour than a long click but give the same functionality.
Examples of Floating Toolbars
OpenOffice.org User Guide for 2.x 16
Page 51

Chapter 2: Working With OpenOffice.org
Using Floating Toolbars
When editing a text document, the Insert icon is in the Tools toolbar. Do a long click on this
icon. This opens a floating toolbar containing further icons.
The user now has a few choices to make: either to click the icon to activate the feature, or to
grab the window by its title bar and drag it away from the main toolbar while holding down
the left mouse button (remember to first release the mouse button that was clicked to open the
popup otherwise the title bar cannot be grabbed with the mouse). Notice that the icon, that
was used previously, is still there. If one now clicks the From File icon, notice that this icon
has replaced the original icon a the top of the main toolbar. Use a short click to open the
directly visible function and a longer click to reopen the floating toolbar .
The document window
At the top left hand edge of the document window are the toolbars that are needed for work,
and that these vary depending on the document type and context. At the bottom edge is the
status bar. The status bar contains different fields displaying information appropriate to the
type of document. Some of these fields give access to special functions, either by doubleclicking or by opening the relevant context menu. For more detailed explanations, refer to
Help.
Docking toolbars
All toolbars may be positioned as either floating windows or dockable panes. These floating
windows may be docked on any of the edges of the OpenOffice.org window. On each edge
several toolbars may be docked alongside each other. To undock and re-dock, drag the handle
at the left or top (if vertical) of the toolbar.
In the floating state, the window floats above the workplace so that the windows below it are
partially covered. Switch to the locked state to display the docked window next to the workplace. If
the window is docked to the left of the workplace, the following buttons appear depending on
the state:
Unhide
A hidden window can be un-hidden (shown) by clicking the arrow
button.
OpenOffice.org User Guide for 2.x 17
Page 52

Unhide
Hide
Lock
Floating
Docking windows
Chapter 2: Working With OpenOffice.org
Click the arrow button to hide a window.
Click this button to lock a floating window.
Click this button to change a locked window to a floating window.
Some tools in OpenOffice.org open in popups that are dockable, such as the Styles and
Formatting window, the Navigator and the Gallery. These floating windows may be docked at
either the left or right edges of the main OpenOffice.org window.
To dock one of these windows, drag the title bar of the window to the edge until an outline
appears. This outline indicates the size and position of the pane that will contain the tool
when the mouse button is released. Another window may also be docked adjacent to one
which is already docked. Users can choose to have one on top of the other or side by side. As
a window is moved, note that an outline displays showing where the window will dock and
how big it will be.
To undock a tool and make it a floating window again, point to the grey area of the tools
toolbar and drag the tool away from the edge until the outline indicates that it is no longer
attached.
Changing the Visibility of Buttons on Toolbars
Tools and functions are initially grouped together on a default set of toolbars. Not all buttons
are visible by default.
To quickly make a button visible or not on its toolbar:
1. Click on the small down arrow at the far right of the toolbar and select Visible Buttons.
2. Toggle the checked status of the button. Make sure to click the down-arrow appropriate
to the toolbar because toolbars may be placed side-by-side.
Note: While buttons may be moved or duplicated across toolbars, or new toolbars may be created or removed
completely, we will start with just the OpenOffice.org provided toolbars.
OpenOffice.org User Guide for 2.x 18
Page 53

Chapter 2: Working With OpenOffice.org
Opening and Saving Documents
There are multiple methods of loading or opening documents. For example, by using the File
> Open dialogue, the Open icon on the Standard toolbar or the File > New menu.
NOTE: Under Windows®, a system dialogue is automatically displayed when opening and saving OpenOffice.org
documents. Choose Tools > Options >OpenOffice.org > General and check Use OpenOffice.org dialogues. This
enables a user to be presented with the OpenOffice.org dialogues shown in this guide.
Opening Documents
To open an existing document that was saved on the hard drive or on a removable disk,
there are three possibilities. Either choose File > Open, click the Open File icon on the
Standard toolbar, or use the Ctrl+O shortcut keys.
Is each case, the Open dialogue is displayed.
This dialogue is described in detail in the OpenOffice.org Help. However, here are a few tips:
Change the size of the dialogue by dragging the borders of the dialogue with
the mouse.
Click the Default Directory icon to go straight to one's work directory. To
define a work directory, see the Changing the Work Directory section
Long-click or short-click the Up One Level icon. A short click takes the user
one directory higher. A long click opens a submenu with a choice of
superordinate directories.
To only see files containing a certain name, enter the name with wildcards in
OpenOffice.org User Guide for 2.x 19
Page 54

Chapter 2: Working With OpenOffice.org
the File name pull-down list and press Enter. If *.txt, for example, is
used only the files having .txt at the end of their names will be displayed.
If s* is used , all names beginning with the letter s will be displayed.
Documents may be opened with write-protection enabled. To edit a read-only
document, click the Edit File icon on the Standard toolbar.
The Templates and Documents dialogue
The Templates and Documents dialogue can be regarded as a kind of command centre for
OpenOffice.org documents. It provides easy access to a user's work directory and to any
supplied sample documents. Here find all document templates - both the supplied ones and
any personally created ones. To open the dialogue, choose File > New > Templates and
Documents or press Shift+Ctrl+N. In Windows®, double-click the OpenOffice.org
Quickstarter icon on the task bar.
The dialogue offers the following areas, which can be selected by clicking one of the
offerings in the shortcut bar on the left:
• New Document - A way to create a new, empty document from a set of prepared
templates.
• Templates - Choose from the many ready-to-use document templates.
OpenOffice.org User Guide for 2.x 20
Page 55

Chapter 2: Working With OpenOffice.org
• My Documents - A quick route to the documents in a work directory. A work directory
may be defined by selecting Tools > Options >OpenOffice.org > Paths and entering the
path required for My Documents.
• Samples – This is an empty folder when installed; however, some examples may be
downloaded from
http://documentation.openoffice.org/Samples_Templates/User/template/ index.html. (See
New Document for example templates)
OpenOffice.org User Guide for 2.x 21
Page 56

Chapter 2: Working With OpenOffice.org
Saving Documents
Saving the current document can be done in three ways, using File > Save command, the
Save Document icon on the Standard toolbar, or just press Ctrl+S.
For a first time save, use File > Save as. A dialogue box pops up to allow choosing where to
store the file.
With File > Save as, one assigns the document a name whereas the other two options save
without asking for the file to be named. Therefore, using the Save as feature is especially
important when saving files for the first time. For the most part, choose any name desired
(limited only by the restrictions imposed by the operating system). When the document is to
be opened later, find it under that name.
Save documents regularly as work progresses. The simplest way is to save the current
document by pressing Ctrl-S. This replaces the document on the data medium with the
current document.
Note: An untitled document must be given a unique name for AutoSave to obey the settings in Tools > Options >
Load and Save > General. Disabling AutoSave is not recommended.
OpenOffice.org User Guide for 2.x 22
Page 57

Chapter 2: Working With OpenOffice.org
Changing the Work Directory
When the Open dialogue comes up, the work directory is displayed. The user can change this
directory as follows:
1. Select Tools > Options >OpenOffice.org > Paths.
2. Double-click My Documents to open the edit dialogue.
3. In the Select Path dialogue, enter the work directory wanted and click Select.
4. Close with OK.
Likewise, other directories can be selected using the same method. For example, to display a
different default directory for inserting graphics, change the path for the entry Graphics.
Saving Documents Automatically
Backup a File Automatically
To create a backup copy of a document every time a document is saved:
1. Select Tools > Options > Load/Save > General.
2. Check Always create a backup copy.
If the current document is saved, using the same path and file name with which it was first
opened, using File > Save or Ctrl+S, the old version will be overwritten by the new
version. If the Always create backup copy is checked, the old version is first copied to the
backup directory.
• The default backup directory is $HOME/OpenOffice.org<release>/user/backup.
Change this, as described above, in Tools > Options >OpenOffice.org > Paths >
Backups entry.
• The backup copy retains the same name as the document, but the extension is changed to
.BAK. If the backup folder already contains such a file, it is overwritten without warning!
Saving Recovery Information Automatically Every 'n' Minutes
1. Select Tools > Options > Load/Save > General.
2. Check Save AutoRecovery information every and select the time interval in the list box.
OpenOffice.org User Guide for 2.x 23
Page 58

Chapter 2: Working With OpenOffice.org
OpenOffice.org File Formats
OpenOffice.org uses an XML file format as the default for saving and opening documents.
XML file format names
In saving and opening OpenOffice.org documents if no other file type is
selected,OpenOffice.org uses the following XML formats:
Application File extension
OpenOffice.org Writer *.odt
OpenOffice.org Writer templates *.ott
HTML Document *.html
HTML Document Template *.oth
OpenOffice.org Calc *.ods
OpenOffice.org Calc templates *.ots
OpenOffice.org Impress *.odp
OpenOffice.org Impress templates *.otp
OpenOffice.org Draw *.odg
OpenOffice.org Draw templates *.otg
OpenOffice.org Formula/Math *.odf
Master documents *.odm
These file name extensions permit reasonable differentiation when searching though a lot of
files of different file types in a directory. Since these are compressed XML files , it should be
evident that these must first be unpacked before being manipulated, for example, by a text
editor.
Note: If a user wants to work permanently with another file format, define this as the default. Select Tools >
Options > Load/Save > General for alternative file formats that can be selected for each OpenOffice.org document
type.
OpenOffice.org User Guide for 2.x 24
Page 59

Chapter 2: Working With OpenOffice.org
OpenOffice.org XML file structure
The OpenOffice.org XML file formats follow the OASIS OpenDocument standard and are
compressed and packed using ZIP. Use an unpacking program, such as WinZip on
Windows® or unzip on *NIX, to unpack the contents of an XML file. The structure is similar
to the following illustration.
Archive: example.odt
Length Method Size Ratio Date Time CRC-32 Name
-------- --------- ------ ------- ------- ------- ------- -------30 Stored 30 0.00% 15/05/05 15:25 3931a5e1 mimetype
4260 Stored 4260 0.00% 15/05/05 15:25 a10af03b Pictures/ 100 010 DA222DD884.gif
9022 Defl:N 2147 76.00% 15/05/05 15:25 cd8d 5105 content.xml
2447 Defl:N 954 61.00% 15/05/05 15:25 08c57cab Basic/~wizard/Create.xml
1586 Defl:N 642 60.00% 15/05/05 15:25 55c931dc Basic/~wizard/Save.xml
389 Defl:N 223 43.00% 15/05/05 15:25 756d8953 Basic/~wizard/script-lb.xml
287 Defl:N 193 33.00% 15/05/05 15:25 528021b8 Basic/Standard/script-lb.xml
405 Defl:N 225 44.00% 15/05/05 15:25 95c3869e Basic/script-lc.xml
59152 Defl:N 5041 92.00% 15/05/05 15:25 e86699c4 st yles.xml
13 81 Stored 13 81 0.00% 15/05/05 15:25 70e3c0fc meta.xml
6674 Defl:N 0 0.00% 15/05/05 15:25 af1ecee5 Thumbnails/thumbnail.png
6841 Defl:N 1230 82.00% 15/05/05 15:25 0d922df6 settings.xml
1602 Defl:N 349 78.00% 15/05/05 15:25 8e61970e META-INF/manifest.xml
-------- ------- --- -------
87402 16 675 81.00% 12 files
Note: Under Windows®, output should be similar to the above.
• The text content of the document is located in content.xml. This file can be viewed with,
for example, a pure text editor.
By default, content.xml is stored without indents or any other type of formatting so
that the time needed for saving and opening is minimized. By unchecking Tools >
Options > Load/Save > General > Size optimization for XML format this procedure
can be changed so that the lines saved are structured in a more human readable format.
• meta.xml contains the meta information on the document, which is entered via File >
Properties.
In documents saved with security, meta.xml remains unsecured.
• settings.xml contains further information on settings for this document, for example
on the printer, on the recording of changes, the associated data sources and so on.
• st yles.xml retains the styles defined for the document. For example, these can be seen
in the Styles and Formatting window.
meta-inf/manifest.xml file describes the structure of the XML file.
OpenOffice.org User Guide for 2.x 25
Page 60

Chapter 2: Working With OpenOffice.org
Additional files can be contained in the packed file format. For example, Graphics can be
found in the Pictures subdirectory, Basic code in the Basic subdirectory and linked Basic
libraries are found in further subdirectories of Basic.
Definition of the XML formats
The DTD (Document Type Description) files can be found in
$HOME/OpenOffice.org<release>/share/dtd.
Note that the formats are subject to certain licenses. Notes on the licenses are found at the start of the DTD files.
More detailed information can be found on the OpenOffice.org website.
Setting Tabstops
OpenOffice.org offers multiple ways by which one can set and edit the tabstops used in a
document. The procedures for setting and editing tabstops are described in Help >
OpenOffice.org Help > Index > Search term > tab stops and are quite complete.
OpenOffice.org User Guide for 2.x 26
Page 61

Chapter 2: Working With OpenOffice.org
Sending Documents as E-Mail
Single Messages
Working in OpenOffice.org, one can send the current document as an e-mail attachment
providing that the default e-mail program up is set up correctly.
Note: To set up this feature, select Tools > Options >Internet > E-Mail and configure the program to use.
1. Choose File > Send > Document as E-mail.
2. When the e-mail composer window appears, enter a recipient, subject and any text and
send the e-mail.
MailMerge
As of OpenOffice.org 2.0.1, providing that python is enabled at setup time (default), users
have the opportunity to use email to send messages to multiple recipients. This feature also
allows printing of these for delivery by post.
1. Choose Tools > Mail Merge Wizard
2. Follow the dialogues.
OpenOffice.org User Guide for 2.x 27
Page 62

Chapter 2: Working With OpenOffice.org
Printing Documents
Upon creating a document, normally one will want to print it out on paper for distribution.
Print the current document either directly to a printer, or”to file”. When printing to a file, all
the information that would otherwise be sent to the printer is initially written to a file. On
another computer, the file can then be copied directly to the printer connected to it.
Note: OpenOffice.org Writer always formats documents so that they are printed as well as possible with the
selected printer. Therefore, always define a default printer, even if there is no available printer.
Click the Print File icon on the Standard toolbar to print the current document without
the intervention of a dialogue.
To retain finer control of printing, either select File > Print, or use the keyboard shortcut
Ctrl+P.
In the File > Print dialogue, select a specific printer (if there is more than one installed
printer). Under Print range, determine how many pages to print (or only certain pages), and
how many copies are wanted.
In addition to the general printing options already mentioned, one can choose special printer
options for the different document types in OpenOffice.org using additional dialogues that
allow the user to control the way the contents or the pages of the document are printed.
Define these printer options for the current print job by clicking the Options button in the
Print dialogue. Select Tools > Options > (name of document type) > Print to create a
general definition for normal use.
OpenOffice.org User Guide for 2.x 28
Page 63

Chapter 2: Working With OpenOffice.org
Note: There are many different printers with widely varying properties. The printing functions differ according to
the operating system, printer driver and printer model used. The selected printer defines the width and height of the
characters, and hence also the line and page breaks. OpenOffice.org Writer and Calc always format the pages in
the way they will appear when printed.
Displaying Print Previews
Before printing out a document, reviewing how the printed document will appear on paper is
often a good idea. OpenOffice.org offers a Print Preview feature for this purpose thereby
allowing adjustment of margin widths, optimization of page breaks et cetera.
1. Switch to the document for preview.
1. Select File > Page Preview.
2. Use the icons on the object bar to zoom in or out.
3. Use the arrow keys or object bar icons to scroll through the pages of
the document and check how they will appear in print.
OpenOffice.org User Guide for 2.x 29
Page 64

Chapter 2: Working With OpenOffice.org
Reduced Printing of Documents
To get a reduced printout of a text document, choose File > Page Preview. Here, decide
whether to have two, four or any number of pages beside and on top of each other.
To print two pages beside one another on one sheet of paper
1. Choose File > Page Preview.
2. Locate the Page Preview icon . If there are more or fewer pages than desired, long
click the icon to the right of the grayed out Page Preview: Two Pages on the object bar
and select the number of pages needed for previewing.
3. Click on the Print page view icon.
Clicking the Print options page view icon opens a dialogue where one can enter
settings for reduced printing.
4. Click OK to confirm.
Printing in Black and White
If there is a colour printer installed but printing should be restricted to black and white only,
use one of the following options:
Printing text and graphics in black and white
1. Select File > Print. This opens the Print dialogue.
2. Click on Properties. This opens the properties dialogue for the printer.
3. Choose the option to print in black and white. For further information, refer to the help for
the printer or read the printer manual.
4. Confirm the Properties dialogue and click OK in the Print dialogue.
5. The current document will be printed in black and white.
Printing all Draw and Impress documents in black and white
1. Choose Tools > Options > OpenOffice.org Impress or Tools > Options >
OpenOffice.org Draw, as appropriate.
2. Then choose Print.
3. Under Quality select either Grayscale or Black & White and click OK. From now on, all
presentations or drawings will be printed without colour.
Selecting the Default quality option allows documents to be printed in colour again later
on.
Grayscale converts everything to a maximum of 256 gradations from black to white.
Black & White converts everything into the two values black and white.
OpenOffice.org User Guide for 2.x 30
Page 65

Chapter 2: Working With OpenOffice.org
Printing only text in black and white
In Writer, the user can choose to print colour-formatted text in black and white. This can be
specified either for all text documents to be printed subsequently, or only for a printing
process of the current text document.
Printing all Writer documents with black and white text
1. Choose Tools > Options > OpenOffice.org Writer or Tools > Options >
OpenOffice.org Web/Writer.
2. Then choose Print.
3. Under Contents mark Print black and click OK.
All text documents or HTML documents will from now on be printed with black text.
Printing the current Writer document with black and white text
1. Choose File > Print. This opens the Print dialogue.
2. Click the Options button. This opens the Printer Options dialogue.
3. Under Contents mark Print black and click OK.
The text document or HTML document now being printed will be printed in black text.
Printing Brochures
OpenOffice.org text documents consisting of more than one page can be printed
automatically as a brochure. Two pages of a text document will be reduced in size and
printed next to each other on a page in landscape (horizontal) orientation. Both sides of the
page will be printed (most printers require that users take out the paper after the first half of
the printing process and feed it in again n such a way as to print on the blank side).
OpenOffice.org will automatically print the pages so that they can be read as a brochure.
OpenOffice.org automatically arranges the pages in such a way that the text can be read
continuously by laying the pages together, fold them in the centre and stapling them in the
fold.
To make a brochure using the current document, select File > Print. In the dialogue that
opens, do the following;
1. In Printer > Properties make sure Orientation is set to landscape
2. While still in this dialogue, set the Paper size of the *document* to A4 or US letter, as
needed.
3. Click OK to close the dialogue.
4. Click the Options button in the lower left of the Print dialogue.
5. Next select whether to print right and left pages all at once, right pages or left pages.
The following should provide sufficient information to make a decision:
OpenOffice.org User Guide for 2.x 31
Page 66

Chapter 2: Working With OpenOffice.org
(a) If the printer is capable of duplex printing, choose Left and Right pages and
brochure.
(b) With a single sided printer:
i. choose Left or Right and brochure.
ii. Click OK then go to step 6.
iii. When printing is complete, take the pages from the output tray and put them
into the input tray in such a way as to print on the blank side and choose the
opposite Page setting as in step 1. Repeat step (ii).
6. Click OK
7. Click OK
Spellcheck
OpenOffice.org has an automatic spellcheck which can be active while typing, or activated
manually.
Automatic Spellcheck
The automatic spellcheck can be turned on and off by clicking the AutoSpellingCheck
on/off icon on the Standard toolbar. With automatic checking enabled, words recognized as
incorrect are highlighted with a wavy red underline.
Incorrect words are recognized as incorrect if all the following conditions are met:
• a spellcheck module is installed for the language of the word,
• this module is enabled,
• the word is not found in the installed dictionaries.
• the word is not in any active user dictionary.
OpenOffice.org User Guide for 2.x 32
Page 67

Chapter 2: Working With OpenOffice.org
Users can create any number of custom/user dictionaries.
Create a user dictionary by selecting Tools > Options > Language Settings > Writing Aids.
As text is proofread, the wavy red underlines draw attention to possible spelling mistakes. Of
course, Spellcheck will not catch spelling mistakes that form other recognizable words (such
as “fun” instead of “run”). As long as the automatic spellcheck is activated, the red markings
can be seen on the screen but are not printed.
The easiest way to correct a red-underlined word is to right-click it. This opens a context
menu that offers suggested corrected spellings, and options to add the word to the dictionary
or to ignore it. Simply click the correct suggested spelling to replace the red-underlined word.
Spellcheck not only replaces the red-underlined word with the suggestion selected, it also
remembers this replacement while the document is open. If the same typing error is made
again, Spellcheck automatically replaces the mistyped word with the corrected spelling.
If the word is spelled correctly, it may be added to a dictionary by clicking Add and
specifying to which dictionary it is to be added. To ignore a correctly spelled, but
infrequently used word, click Ignore All.
Checking Multilingual Texts
OpenOffice.org Writer can manage spellcheck(plus thesaurus and hyphenation) in multiple
languages (33 at the time of writing). The OpenOffice.org setup program offers this via
“Custom Installation” and, after installation via the “Modify” option in setup,
where one can choose which language modules to install.
OpenOffice.org User Guide for 2.x 33
Page 68

Chapter 2: Working With OpenOffice.org
Select the language of an entire text document with Tools > Options > Language Settings >
Languages. If it applies to the user's needs, check For the current document only. For all
paragraphs formatted with the same Paragraph Style, apply a language via the Paragraph
Style. A language can be defined for individual words via Character Styles, or directly with
Format > Character.
In Tools > Options > Language Settings > Writing Aids , check the option Check in All
Languages. Now, Spellcheck will take all installed languages into account. Words that are
correctly typed in any of the installed languages are regarded as correctly typed, irrespective
of their language attribute. In multilingual texts, the automatic checking that was enabled by
clicking the icon on the Standard toolbar, offers another facility as well. In the context menu
of a red-underlined word that is recognized as incorrect, specify that the word or the whole
paragraph is one of the other installed languages. The language of the underlined characters
or all characters of the paragraph is automatically assigned as a character format.
Starting Spellcheck
To check the entire text for spelling mistakes in the “classic” way (i.e. letting Spellcheckgo
through the whole document on its own), go to the Tools menu and choose Spellcheck. The
Spellcheck dialogue will only appear if there are words in a text unknown to the Spellcheck.
The various options to be seen in the Spellcheck dialogue are described in detail in the
OpenOffice.org Help. In the Spellcheck dialogue, if an unrecognized word is included in a
user dictionary, the user can also define the permitted hyphens for the automatic hyphenation.
Enter the hyphens in the word as an equals sign (=).
Note: placing an equals sign at the end of the word means that this word will not be automatically hyphenated.
OpenOffice.org User Guide for 2.x 34
Page 69

Chapter 2: Working With OpenOffice.org
Excluding Text From the Spellcheck
If certain areas, words or tables should not be spell checked because they are, say, in a
foreign language for which there is no installed module, then specify "Unknown" as the
language to be checked by Spellcheck. Do this by either using direct formatting by selecting
the text and then choosing Format > Character > Font or by modifying the corresponding
St yle for the text (e.g. open the context menu and choose Edit Paragraph Style...).
Adding Writing Aids for Other Languages
OpenOffice.org offers users the opportunity to change the language of the user interface as
well as providing a wizard to install more dictionaries, hyphenation dictionaries and
thesauruses.
This allows use of more than one language in a document as as attribute of the entire
document or a group of words.
As an adjunct to the addition of writing aids in various languages, users can change the
default language used either generally or for a single document by means of selecting that
language in Tools > Options > Language settings > Languages. Remember that the writing
aids must be installed first.
Getting New Writing Aids
1. Select File - Wizards - Install new dictionaries ... to start the process to install more
languages.
2. Click the language needed on this page for instructions in that language.
OpenOffice.org User Guide for 2.x 35
Page 70

Chapter 2: Working With OpenOffice.org
3. Click the big button in the middle of the document page to start the installation
process:
OpenOffice.org User Guide for 2.x 36
Page 71
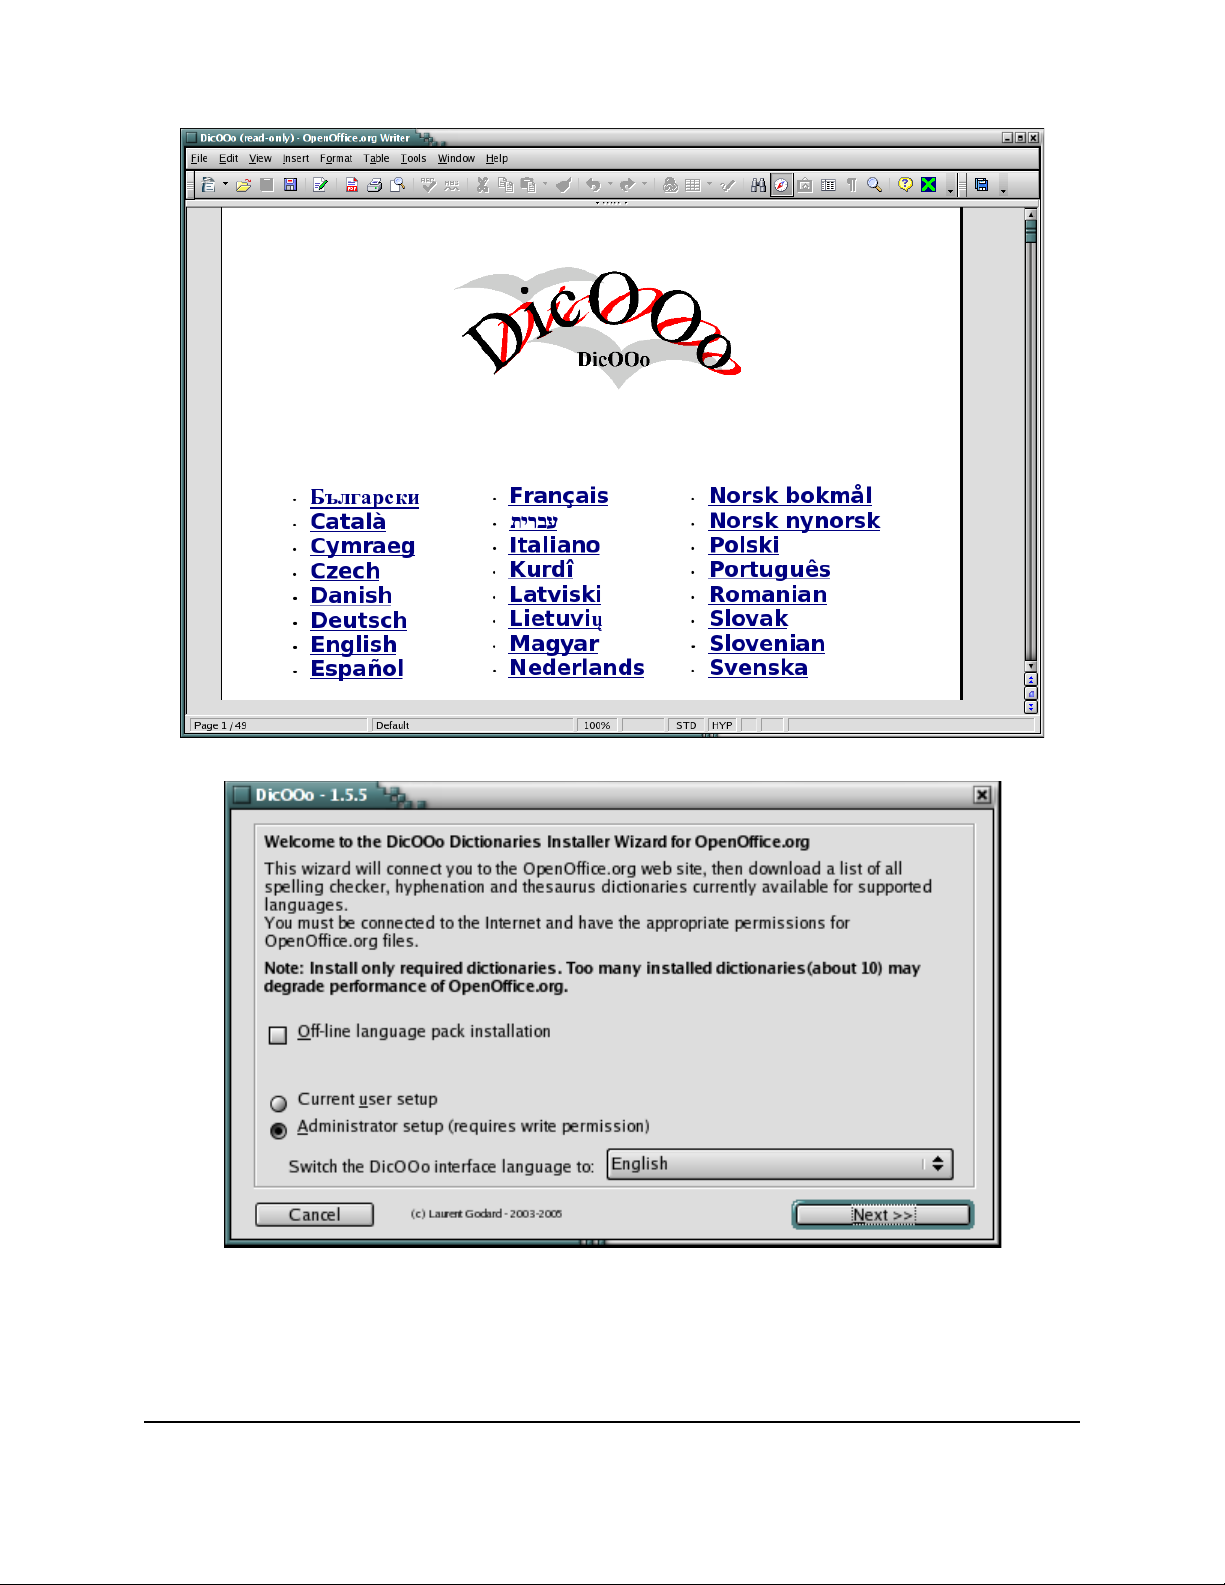
Chapter 2: Working With OpenOffice.org
4. The following dialogue opens to begin the selection of the needed components:
5. Click Next
6. Click “Retrieve the list” and select those needed:
OpenOffice.org User Guide for 2.x 37
Page 72

Chapter 2: Working With OpenOffice.org
7. Click Next and select the Hyphenation dictionaries needed and click Next when done:
8. Click Next and select the Thesauruses needed and click Next when done
OpenOffice.org User Guide for 2.x 38
Page 73

Chapter 2: Working With OpenOffice.org
9. Clicking Next, starts the download and installation of the items selected in the
previous steps.
OpenOffice.org User Guide for 2.x 39
Page 74

Chapter 2: Working With OpenOffice.org
Using Automatic Functions
OpenOffice.org has all kinds of intelligent assistants to help, all of which have names
beginning with “auto”.
The section introduces a few of these auto-functions. For detailed explanations, refer to the
OpenOffice.org Help.
Using AutoCorrect and AutoFormat
In addition to catching typing errors, OpenOffice.org can format documents while typing or
afterwards. AutoFormat and AutoCorrect permit the user to draft documents much more
efficiently by automatically formatting and correcting common errors while the user types.
Here are a couple of examples.
• AutoCorrect is useful if one often makes the same typing errors. For example, if one tends
to capitalize not only the first letter of some words but also the second, simply select the
AutoCorrect function that corrects mistakes of this sort while typing.
• AutoFormat formats texts. One AutoFormat feature automatically will detect paragraphs
beginning with a hyphen followed by a tab or space, and reformat the paragraph as a bullet
point. The automatic bulleting is then applied to any paragraphs that follow as well.
Automatic bulleting ends when the user enters a blank paragraph containing only a
Return.
In text documents, toggle AutoFormat on or off by selecting Format >AutoFormat. A
submenu with three selections appears. To automatically format while typing, check the
While Typing selection. To have Writer automatically format the entire document or the
current selection at a later time, check the menu selection Apply. Selecting Apply and Edit
Changes lets the user see all document changes made via AutoFormat. The user then may
accept or reject all changes or may review each change separately.
One may also select and set the options in Tools > AutoCorrect. AutoCorrect offers many
options that can be selectively turned on and off. Some of these offer different methods for
formatting while typing and post-processing. The Replace and Exceptions lists are language
dependent. OpenOffice.org first searches in the list of the language of the text, then the list
for the higher ranking language family, and finally in all installed languages (For example,
first in "English (US)", then in "English", then in "All Languages").
OpenOffice.org User Guide for 2.x 40
Page 75

Chapter 2: Working With OpenOffice.org
The following graphic shows the various functions available in this dialogue. A detailed
explanation of each function is given in OpenOffice.org Help.
In addition to the functions shown here, one can also select Custom Quotes. This means that
all quotation marks entered as a simple computer character with Shift+2 are automatically
turned into correct typographer's quotes. Users can choose the characters to be used for this
purpose.
OpenOffice.org User Guide for 2.x 41
Page 76

Chapter 2: Working With OpenOffice.org
Turning off URL Recognition by AutoCorrect
When text is entered,OpenOffice.org automatically recognizes a word that may be a URL and
replaces the word with a hyperlink. OpenOffice.org formats the hyperlink with direct font
attributes (colour and underline) the properties of which are obtained from certain Character
Styles.
If OpenOffice.org should not automatically recognize URLs while typing, turn off this
feature using one of the following methods.
Undo URL recognition
1. Press Ctrl+Z to undo text that has been automatically converted into a hyperlink.
2. Select the hyperlink and choose Format > Default if this conversion is not noticed until
later.
Turn off URL recognition
1. Load a document of the type in which URL recognition is to be modified. For example, if
modifying URL recognition for text documents, open a text document.
2. In OpenOffice.org Writer select Tools > AutoCorrect ... .
3. In the AutoCorrect dialogue, choose the Options tab.
4. Deselect URL Recognition, so that words will no longer be automatically replaced with
hyperlinks.
In Writer there are two checkboxes in front of URL Recognition. The field in the first
column is for modifying in a post-edit session while the field in the second column
enables AutoCorrect to make the corrections while typing.
Other AutoCorrect functions
The Tools > AutoCorrect > Replace tab has a default list of items that will be automatically
replaced provided that Use replacement table on the Tools > AutoCorrect > Options tab
page is checked. One can add all of their most frequent typos to this list and have
AutoCorrect replace them with the right text. Also use this feature to enter special
characters or phrases that are keyboard intensive to do normally. For example, (C) is
immediately turned into the copyright symbol.
Note: The fonts supplied with OpenOffice.org include the Euro symbol. If working with other fonts, one can easily
insert the Euro symbol from another font using AutoCorrect. When working in a text document, choose Insert >
Special Character. Look for the Euro symbol and click OK.
Enter in the Abbreviation text box eu, for example. The Text only box should not be marked. Click New. Now close
the dialogue. As soon as the eu is entered followed by a space or at the end of a sentence, a Euro symbol will be
inserted.
On the Exceptions tab, enter any exceptions for the two types of automatic correction:
OpenOffice.org User Guide for 2.x 42
Page 77

Chapter 2: Working With OpenOffice.org
• Assuming the Replace option is enabled to automatically start each sentence with a
capital (uppercase) letter, and“e.g.” is entered and is followed by a lowercase “d” then
the “d” would be capitalized. So to compensate for this behaviour, enter “e.g.” into the
Exception list to prevent this type of correction.
• Again, assuming the Replace option is enabled to automatically convert the second of two
capital letters at the beginning of a word to a lowercase letter, enter any exceptions that are
correctly written with two capital letters, such as PC and CD.
These exceptions can also be automatically included by selecting the Autoinclude
checkboxes on the Exceptions tab. When this feature is enabled and one then uses an idiom
in the text that is automatically corrected but which should not be corrected, immediately
press Ctrl+Z. Doing this not only undoes the automatic “correction”, but also sees to it that
this particular “correction” will not be made automatically again in the session.
AutoCorrect can also be used to replace one word or abbreviation with something more
appropriate. For example, replace “ASAP” with the text “as soon as possible”;
however, the OpenOffice.org AutoText function is a better choice for doing this.
OpenOffice.org User Guide for 2.x 43
Page 78

Chapter 2: Working With OpenOffice.org
Creating a Letter Template With the Wizard
If one is writing a personal letter, the Wizard and standard AutoTexts are not essential, but in
formal business correspondence these aids can save a lot of time and make work much easier.
Note: To produce a standard letter, have a look at the supplied templates. Simply press the shortcut keys
Shift+Ctr+N
Start the Wizard with the File > Wizards > Letter menu command.
or choose File > New > Templates and Documents.
Treat this section as a tutorial on the OpenOffice.org template Wizard. Although the Wizard
does produce a document that can immediately be filled in, printed, and sent, using the
Wizard is really meant to help create customized templates. Customized templates for such
things as business letters, faxes and other types of documents for which there is a Wizard
ensures that correspondence has a consistent format.
While one may, there is no need to go through all the steps of the Wizard each time one
wants to write a letter. However, in order to get the most from the following, it is
recommended that one accept all the defaults provided without changing them, and then print
the result. Click Next on each dialogue page, so that every page is seen at least once during
the learning process. Examine each of the Wizard pages while going through the process of
creating a letter template. Enter data or modify options on each page as necessary. Each page
allows modifications according to each user's preferences including sender and recipient
addresses, both of which can also be entered manually. (For example, sender information is
automatically taken from the personal details that each user enters at the time of installation.
These details may be changed at any time by selecting Tools > Options >OpenOffice.org >
User Data and entering new information or editing existing details.) Predefined elements will
appear but users always have the final say on what to include in their letter.
Thanks to the Wizard, one doesn't have to start from scratch but can use preexisting texts
when creating custom templates, whether for business letters, faxes, memos, or other
documents.
OpenOffice.org User Guide for 2.x 44
Page 79

Chapter 2: Working With OpenOffice.org
Find & Replace
When working with a computer it is often useful to be able to locate certain pieces of text
quickly. The Find function in OpenOffice.org Writer, Calc, Impress and Draw is the tool to
use for this purpose. Find can also locate variations in the given search term or limit the
search to certain places in the document, such as the beginning of a word or the end of a
paragraph.
Text strings found in the text can be replaced by other strings with or without confirmation,
although sometimes manual editing is still necessary where, for example, there are deviations
in gender found in other languages.
Finding a Word in Text
Let's say the word “Holland” appears somewhere in a long text and the user wishes to locate
it. Activate the Find function with Ctrl+F. Enter the string one wants to find in the Search for
field and press Enter. OpenOffice.org starts searching from the current cursor position toward
the end of the document. Upon reaching the end of the document, a new dialogue appears
asking whether or not to continue the search at the beginning of the document. Tap the Enter
key to confirm. If the text string is found, it is highlighted.
OpenOffice.org starts searching from the current cursor position toward the end of the
document. Upon reaching the end of the document, a new dialogue appears asking whether
or not to continue the search at the beginning of the document. Click the Enter key to
confirm. If the text string is found, it is highlighted.
OpenOffice.org User Guide for 2.x 45
Page 80

Chapter 2: Working With OpenOffice.org
The Find & Replace dialogue can remain open without interfering with text entry and it
can be moved to any place on the screen. However, when it is closed, it remembers the
previously entered strings so they do not need to be reentered for the next search, but can be
selected from the list box.
One very useful feature is the multi-selection facility Find All. For instance, using Find All,
one could set every occurrence of the word “document” in the text to boldface. Enter the
search term in the Search for field and then click Find All. All occurrences are now
selected. Place the cursor in the Replace field, and click the Bold icon in the text object
bar to boldface all occurrences of the search term.
The dialogue graphic above illustrates that there are several ways of expanding or restricting
searches by combining selections from the Options group box and the buttons. Examples for
each option are described below.
Searching for Whole Words Only
Select the Whole words only option to find whole words that match the searched for word.
For instance, if the word “in” is entered as the search term in the Search for field, all
instances of “in,” or “In,” as stand-alone words in the text will be found. Words like “bin”
or “chin” will not be found if this checkbox is selected. If searching using regular
expressions or for Styles, do not select this option.
Match Case
When this checkbox is selected, the search is case-sensitive to uppercase and lowercase
letters. So if searching for “in,” it will be found, but not the word “In,” Combine a Match
case search with the Whole words only option as needed.
Searching for Text With Wildcards
1. Start Find by selecting Edit > Find & Replace dialogue or use Ctrl+F.
2. Check the More Options > Regular expressions box.
3. Enter the search term with the desired wildcards and click Find.
Regular expressions are entered using text combined with keyboard characters and symbols
that have special meaning in this context:
• The wildcard for any number of a given character is the character itself followed by an
asterisk (*). Note that this is different to the way '*' is used in file names.
Example: Enter “Hawai*” in the Search for field. This means that any number of “i's”,
including none at all, may follow “Hawa”. Thus the words “Hawa”, “Hawai” and
“Hawaii” will be found.
• The wildcard for a single character is the period or dot (.). This is equivalent to the
wildcard '?' in file names.
• Combining the above two rules, the wildcard for several unspecified characters in
succession is '.*' (period and asterisk). This is equivalent to the wildcard '*' in file names.
OpenOffice.org User Guide for 2.x 46
Page 81

Chapter 2: Working With OpenOffice.org
• A paragraph end can be found with the dollar sign ($), and the first character at the
beginning of a paragraph with the string '^.' (caret and period).
• Regular expressions may only be searched within paragraphs.
There are many other wildcards that can be used that are listed in Help > OpenOffice.org
Help with a search term of “Regular expression”. This complete List of Regular
Expressions is included in this document.
If you need more information of Regular Expressions, please see
http://www.opengroup.org/onlinepubs/009695399/basedefs/xbd_chap09.html.
Searching Backward
When locating a frequently appearing word in a long text, the user might click find once too
often by mistake. Check the Backward box and click again on Find to return to the
location of the previously found item.
Current Selection Only
Check the Current selection only box option to limit the search rather than causing the
entire document to be searched. The search will be restricted to the lines that are highlighted
in the document. If text is selected before activating the Find command, the search will
automatically take place only within that selected range.
Searching for Styles
Quickly reformat all or part of a text using this feature. For example, text formatted with the
Style “Heading 2” can be replaced with the Style “Heading 3.” Select the Paragraph
Style in the list box under Search for. Then select the new Paragraph Style in the Replace
with field. Start the replacement process with the Replace button. All matching styles found
in the text will be displayed in sequence. The user can decide each time whether or not to do
the single replacement, replace all matching styles found in the text, or to cancel the process.
Searching for Text Attributes
Select Attributes to open a dialogue from which to select those text attributes to be
employed to search within a document. OpenOffice.org then finds all attributes that differ
from the format of the Paragraph Style. For example. in this dialogue, if the Font Weight
checkbox is selected, the program can find all words that have a heavier font than normal.
These could be words that have has the Bold attribute applied, either through direct or
indirect formatting, or that have been highlighted with a font previously defined as a bold
font, such as ones containing the words "Bold" or "Black" in their name. By default, Find
searches only for direct attributes. However, after searching for the attributes, one may enable
the Including Styles checkbox in the groups section of the Find & Replace dialogue where
Search for Styles was previously. Then, the search extends from the direct attributes we
selected previously to include indirect attributes, such as. those set with styles.
OpenOffice.org User Guide for 2.x 47
Page 82

Chapter 2: Working With OpenOffice.org
Searching for Special Formats
By clicking the Format button, one opens a dialogue from which to select the specific
formats in the search. For example, if one has manually centered a few lines in the text, find
them using the options of Format in the Find & Replace dialogue. Now let's say that the
found attribute must be replaced with another, to do this take the following steps:
1. Position the cursor in the Replace with field.
2. Click the Format button.
3. Choose the replacement attribute.
The chosen attributes are listed under the Search for and Replace with fields. If no
replacement is indicated for the attribute found in the text, the default settings are
automatically applied.
Similarity Search
This function seeks not only for the search term, but also for similarly typed words. As
needed, fine-tune the degree of similarity by clicking the button immediately to the right of
the “Similarity search” checkbox.
List of Regular Expressions
This list is also in Help but is included here as a convenience.
Character Result/Use
. Represents any single character. The search term "sh.rt" finds both "shirt" and "short".
^ Using ^Peter will find this search term only if it appears at the beginning of a paragraph.
Special characters (for example, blank spaces and character-anchored frames) at the
beginning of a paragraph are ignored.
$ This symbol represents the paragraph mark for use in a regular expression. For example,
using $ will only find the search term if it appears at the end of a paragraph. So, if one
searches for, say, Peter at the end of a paragraph, enter Peter$ in the Search for box.
Special characters (for example, blank spaces and character-anchored frames) at the end
of a paragraph are ignored.
^$ Enter ^$ in the Search box to find empty paragraphs.
* Finds zero or more of the character immediately in front of the "*". For example,
"Ab*c" finds "Ac", "Abc", "Abbc", "Abbbc", and so on.
+ The character before this symbol must appear at least once: "AX+4" finds "AX4",
“AXX4”, but not "A4".
? Finds zero or one of the characters in front of the "?". For example, "Texts?" finds the
words "Texts" and "Text".
\ Only finds the character (no digits) that is specified. Used to turn off any special
interpretation of the character by OpenOffice. For example, if one searches for “\*+” ,
”*”, “**” and “***” will be found. That is, the regular expression interpretation of '*' is
turned off only for that one instance.
OpenOffice.org User Guide for 2.x 48
Page 83

Chapter 2: Working With OpenOffice.org
Character Result/Use
\n Finds a hard row break that was inserted with Shift+Enter. To change row breaks into
paragraph breaks, enter \n in the Search for and Replace with boxes, and then click the
Replace all button.
\t
\> Only finds the search term if it appears at the end of a word. For example, "book\>"
\< Only finds the search term if it appears at the beginning of a word. For example,
^$ Searches for empty paragraphs.
^. Searches for the first character of a paragraph.
&
[abc123] Finds the characters that are between the brackets.
[a-e] Finds the characters that are between a and e.
[a-eh-x] Finds the characters that are between a-e and h-x.
[^a-s] Finds all characters except for a-s
\xXXXX Finds a special character based on its four-digit hexadecimal code (XXXX).
| Finds the search terms that occur before and after the "|". For example, "this|that" finds
{2} Defines the number of times that the character in front of the opening bracket occurs.
{1,2} Defines the number of times that the character in front of the opening bracket can occur.
( ) Defines the characters inside the brackets as a reference. One can then refer to the first
[:digit:]? Finds a single digit number. To find a number with more than one digit, use [:digit:]*.
[:space:]? Finds white space such as spaces and tabs.
[:print:]? Finds printable characters.
[:cntrl:]? Finds nonprinting characters.
[:alnum:]? Finds alphanumeric characters (numbers and text characters).
[:alpha:]? Finds alphabetic characters.
[:lower:]?
[:upper:]?
Finds a tab space. Users can also use this expression in the Replace with box.
finds "checkbook", but not "bookmark".
"\>book" finds "bookmark", but not "checkbook".
Use this character in the Replace with box to add the characters that matched the search
criteria when a replacement is made.
For example, if one enters "window" in the Search for box and "&frame" in the
Replace with box, the word “window” is replaced with "window frame".
Users can also enter a “&” in the Replace with box to modify the Attributes or a
different Format of the search criteria entered in the Search for box.
The code for the special character depends on the font used. Users can view the codes
by choosing Insert - Special Character.
both "this" and "that" in the search.
For example, "tre{2}" finds "tree".
For example, "tre{1,2}" finds both "tree" and "treated".
reference in the current expression with "\1", to the second reference with "\2", and so
on.
For example, if the text contains the number 13487889 and one searches using the
regular expression (8)7\1\1, "8788" is found.
Finds lowercase characters if Match case is selected in the Options area.
Finds uppercase characters if Match case is selected in the Options area.
OpenOffice.org User Guide for 2.x 49
Page 84

Chapter 2: Working With OpenOffice.org
Note: The longest possible text within the paragraph is always found. If the paragraph contains the text “AX4 A4”,
the search term “A.*4” finds the first A to the last 4, i.e. “AX4 A4”.
Note: The '()' and '\1..\9' reference RE combinations will be familiar to programmers who have used standard RE's,
however the OpenOffice.org version is confined to the search term. The '\1..\9' cannot be used in the replace term as
would normally be expected for standard REs. Use '&' to transfer the entire matching search term to the replace
term
OpenOffice.org User Guide for 2.x 50
Page 85

Chapter 2: Working With OpenOffice.org
Digital Signatures and Printing or Exporting Documents
There are many print options for putting documents on paper, including printing to file. Other
ways of distributing documents are to publish in HTML format, XHTM, TeX, bib, docbook
or as PDF files. These should be familiar to most users as they have been a part of
OpenOffice.org for some time.
What is new is that, as of OpenOffice.org 2.0.4, export to PDF has some added security
features beyond digital signing. These are encryption and some digital rights management
(DRM) features such as copy, printing options, changes options and accessibility. For more
information on PDF export, see the specification.
The following graphic shows these options.
With the new PDF Export security tab the user has the following possibilities:
● create a PDF document that can be opened only with the correct password, once
password-opened the user can do whatever it likes with it (see Only “open password”,
no restriction);
OpenOffice.org User Guide for 2.x 51
Page 86

Chapter 2: Working With OpenOffice.org
● create a PDF document that can be opened only with the correct password, but with
restricted permissions; for example the document cannot be printed, or any of the
selections from 6 to 9 in ( see “open password”, restricted);
● create a PDF document that can be opened by anyone, but with restricted
permissions; for example the document cannot be printed, or any of the selections.
● create a PDF document without restrictions, everything is allowed (see PDF without
restriction).
OpenOffice.org User Guide for 2.x 52
Page 87

Chapter 2: Working With OpenOffice.org
Only “open password”, no restriction
To create a PDF document that can be opened by users having the correct password and to
enable those users to do anything they want with the PDF, do as follows:
1. Select “Encrypt the PDF document”
2. Click “Set Open Password” to set and confirm the password; the password can be
empty or up to 32 characters long;
3. Deselect “Restrict permission”
Note: An empty open password means that the PDF document can be opened by anyone.
“open password”, restricted
1. Select “Encrypt the PDF document”
2. Click “Set Open Password” to set and confirm the password; the password can be
empty or up to 32 characters long.
3. Select “Restrict permission” to set and confirm the password. As above, the password
can be empty or up to 32 characters long.
4. Select the permissions as desired, see Permissions available. for a description of
available permissions.
Permission restricted only
1. Deselect “Encrypt the PDF document”
2. Select “Restrict permission” to set and confirm the password. As above, the password
can be empty or up to 32 characters long.
3. Select the permissions as desired, see Permissions available. for a description of
available permissions.
PDF without restriction (Default behaviour)
1. Deselect “Encrypt the PDF document”
2. Deselect “Restrict permission”
Permissions available
The following is a description of the available permissions. These will only effect the PDF
document wheref the chosen viewer respects the settings.
Printing
Point (6) in . The user can choose if the document can be printed or not. The “Not permitted”
selection will disable the printing.
Changes
Point (7) in . The changes allowed to the PDF document can be selected here, they are self
descriptive.
OpenOffice.org User Guide for 2.x 53
Page 88

Chapter 2: Working With OpenOffice.org
The “Not permitted” selection will disable all the changes (but copy, see Enable copy).
Enable copy
Point (8) in . Enable copy (selection) of text and images to be used in other documents
(through paste). It can be selected independently from the other permissions.
Enable accessibility
Point (9) in . Enable the use of accessibility tools with the PDF document. It can be selected
independently from the other permissions.
Programming PDF Security in Macros
The following table lists the property values that can be used in programming. For more
information on programming with macros, see Chapter 10.
OpenOffice.org User Guide for 2.x 54
Page 89

Chapter 2: Working With OpenOffice.org
Name Type Default
value
EncryptFile
DocumentOpenPassword
RestrictPermissions
PermissionPassword
Printing
Changes
boolean false specifies that the PDF document should be
String empty the password that a user will need to read the
boolean false specify that PDF related permissions of this
String Empty the password that a user will need to change
int 2 specifies what printing is allowed:
int 4 specifies the changes allowed to the document.
Notes
encrypted while exporting it, meaniful only if
the “DocumentOpenPassword” property is not
empty.
It corresponds to item (1) in .
exported PDF, should be in clear text. Must be
used with the flag “EncryptFile” above.
It corresponds to item (2) in .
file must be restricted. It is meaningfull only if
the “PermissionPassword” property below is
not empty.
It corresponds to item (4) in .
the permissions of the exported PDF, should be
in clear text. Must be used with the flag
“RestrictPermissions” above.
It corresponds to item (5) in .
• 0 meaning that the document cannot
be printed
• 1 meaning the document can be
printed at low resolution only,
• 2 meaning the document can be
printed at maximum resolution.
It corresponds to item (6) in .
• 0 meaning the document cannot be
changed
• 1 meaning inserting, deleting and
rotating pages is allowed
• 2 meaning filling of form field is
allowed,
• 3 meaning filling of form field and
commenting is allowed,
• 4 meaning all the changes of the
previous selections are permitted,
with the only exclusion of page
extraction.
It corresponds to item (7) in .
EnableCopyingOfConte
nt
boolean true specifies that the pages and the document
content can be extracted to be used in other
documents (copy from the PDF document,
OpenOffice.org User Guide for 2.x 55
Page 90

Chapter 2: Working With OpenOffice.org
Name Type Default
value
EnableTextAccessForA
ccessibilityTools
boolean true specifies that the document content can be
Notes
paste elsewhere).
It corresponds to item (8) in .
extracted to be used in accessibility
applications.
It corresponds to item (9) in .
OpenOffice.org User Guide for 2.x 56
Page 91

Chapter 3: Managing Text Documents With Writer
Chapter 3: Managing Text Documents With Writer
In this chapter, the user will learn about the OpenOffice.org word processing module, called
Writer. Starting with the basics, it will introduce the more sophisticated functions and, lastly
provide an explanation of some of the templates and sample documents that are part of the
distribution.
Remember to examine other chapters in the guide for other important information on
working in Writer:
• Usage of menus, windows, floating toolbars et cetera is described in Chapter 1.
• Information about customizing the user interface of OpenOffice.org, working with data
sources, e.g. for form letters, and about the revision marking function is contained in a
separate chapter “Advanced Techniques”.
The OpenOffice.org Writer Functions
This section contains a brief overview of the functionality and capabilities of OpenOffice.org
Writer.
Writing
Writer helps users to create all sorts of written documents. One can produce personal letters,
form letters, brochures, faxes, and even professional manuals. Documents that are used often
can be saved as templates, for example, an invoice form. Spellcheck and thesaurus functions
are at one's disposal. If desired, have the AutoCorrect and hyphenation functions active while
typing.
There is no restriction to the length of a text document in OpenOffice.org. Use the Navigator
to move around easily and quickly within the document. OpenOffice.org Writer comes with a
variety of templates for almost every purpose. Also users can create their own using the
Wizard.
Designing and Structuring
OpenOffice.org offers a wide variety of options to design documents. Use the Styles and
Formatting window to create, assign and modify styles for paragraphs, individual characters,
frames and pages. In addition, the Navigator can help create structured texts and also allows
modification of the structure, for instance, by shifting paragraphs from one position to
another.
Additionally, various indexes and tables can be created in text documents. One can define the
structure and appearance of the indexes and tables according to individual needs. Live
hyperlinks and bookmarks allow jumping directly to the corresponding items in the text.
OpenOffice.org User Guide for 2.x 57
Page 92

Chapter 3: Managing Text Documents With Writer
Desktop Publishing with OpenOffice.org Writer
OpenOffice.org Writer contains numerous functions to assist in creating perfectly styled
documents. Text can be formatted multi-columnar, and have text frames, graphics, tables, etc.
integrated into it. The text frames can be linked all over the place, even beyond page limits to
create a newspaper format. Functions such as making lines register-true, flow of contours
through and around graphics, and defining of characters, paragraphs and tables in any colour
complement the tools to lend documents a professional look.
Calculations
Text documents in OpenOffice.org have an integrated calculation function that helps one to
execute sophisticated calculations or logical links. Tables in a text document can easily be
created in order to perform calculations.
Creating Drawings
Draw, vector drawing tool, lets users create drawings, graphics, legends, et cetera directly in
text documents.
Inserting Graphics
Pictures with different formats can be inserted into a text document, including graphics with
a JPG or GIF format. The most common formats can be edited directly in a text document
with the image editor. In addition, the Gallery provides a collection of clipart graphics
organized by theme.
Customizable Program Interface
The design of OpenOffice.org's program interface is such that each user can configure it
according to individual preferences. The various windows (Styles and Formatting window,
Navigator, et cetera) can be positioned as floating windows anywhere on the screen and some
can be docked to an edge. Visible icons and menus can be customized as well.
Drag&Drop
The drag-and-drop feature enables users to work even more quickly and efficiently with text
documents in OpenOffice.org. For instance, one can drag graphics directly from the Gallery
into an active document.
Extensive Help Functions
The program provides an extensive Help function which serves as a reference guide to the
program elements in OpenOffice.org as well as includes a variety of instructions for simple
and complex tasks.
OpenOffice.org User Guide for 2.x 58
Page 93

Chapter 3: Managing Text Documents With Writer
The OpenOffice.org Writer Window
Windows® of OpenOffice.org Writer
The above graphic shows the various windows and toolbars available for use in managing
documents and where their associated icons are located. For clarity, the windows, listed
counter-clockwise, are Insert floating toolbar, Insert Fields “submenu, Insert Object
floating toolbar, Form Functions floating toolbar, Draw Functions floating toolbar,
Navigation Window, Navigator Window and Styles and Formatting window Window.
OpenOffice.org User Guide for 2.x 59
Page 94

Chapter 3: Managing Text Documents With Writer
Entering and Formatting Text
There is no prescribed sequence in which to work. One can enter text and, let us say,
underline it or italicize it while typing or choose to do this later. Users can also decide
whether or not to split a section of text into two columns immediately or to delay the action.
Text never has to be deleted and retyped simply because formatting needs changing.
Basically, to edit text, first select it and then choose the relevant command, such as the one to
format the text in italics. There are several ways of selecting text, for example, using the
arrow keys whilst holding down the Shift key, or with the mouse whilst keeping the mouse
button depressed. Often there are different ways of choosing a command, for example, with a
menu command, with a toolbar icon or with shortcut keys.
Entering New Text
To enter new text:
1. Open an existing text document or create a new one.
2. Enter text using the keyboard.
When special characters, such as the copyright symbol or accented characters that are not
available on the keyboard are to be entered, select Insert > Special Character and chose
what is needed from the table.
3. Press Enter to begin a new paragraph.
Line breaks
Users never need to worry about line breaks as the software inserts these automatically. Only
press Enter at the point to start a new paragraph.
Automatic correction
OpenOffice.org Writer includes a configurable auto-correction tool that can make various
corrections while typing. For example, automatically capitalizing the start of every sentence.
Word completion
The automatic word completion function helps when entering text. For example, let's say,
there's an often used long word. In this case, Writer suggests a word it recognizes as
matching what has been typed so far. If the suggestion is what is wanted, Press Enter (or
define another key) to accept it.
Inserting Text
1. Open an existing document.
2. place the cursor at the point where text is to be added using either the mouse or the arrow
keys, and enter the new text.
OpenOffice.org User Guide for 2.x 60
Page 95

Chapter 3: Managing Text Documents With Writer
Insert mode is enabled by default, thus any text, following the insertion point, is shifted as
new text is entered. To overwrite the existing text at this point, select Overwrite mode by
clicking the INSRT field in the status bar as shown below.
Switching Between Insert Mode and Overwrite Mode
Using the keyboard:
If the keyboard has an Ins key, press it to toggle between overwrite mode and insert mode.
The current mode is displayed on the status bar.
Using the mouse:
On the status bar, click in the fourth field from the left, which indicates the current mode, to
switch to the other mode:
• INSRT
Insert mode is enabled. The text cursor is a blinking vertical line. Click in the field to
enable overwrite mode.
• OVER
Overwrite mode is enabled. The text cursor is a blinking block. Click in the field to enable
insert mode.
default layout of the status bar:
Note: the area that is clicked to change from insert to overwrite
After clicking
Entering Text Anywhere on a Page
Writer enables one to enter text at any position within the type area in the text document.
This is the direct cursor function:
1
.
2
.
Click the Direct Cursor on/off icon on the Tools toolbar. Clicking the icon
turns the direct cursor on and off. When the icon appears pressed, the direct
cursor is enabled.
Click on a free space in the text document. The shape of the mouse pointer
shows how the text that is entered will be aligned.
Align Left
OpenOffice.org User Guide for 2.x 61
Page 96

Chapter 3: Managing Text Documents With Writer
Centre Align Right
3
.
Enter the text. OpenOffice.org automatically inserts the requisite number of
blank lines, tabs and spaces.
Selecting and Deleting Text
Some basic steps to start.
Deleting characters
• To delete one character to the left of the cursor, press Backspace (above the Enter
key).
• To delete one character to the right of the cursor, press the Delete key (may be labelled
Del).
Deleting text
Selecting text to delete with the mouse
1. Left-click to set the cursor on the first character to be deleted.
2. Keeping the mouse button depressed, drag the pointer to the last character to be deleted.
The characters will be highlighted.
3. Release the mouse button.
4. Press the Delete key to delete the selected text.
Selecting text to delete with the keyboard
1. Use the arrow keys to go to the first character to be deleted.
2. Hold down the Shift key.
3. Using the arrow keys, move the cursor to just after the last character to be deleted.
4. Release the Shift key. The text is highlighted.
5. Press the Delete key to delete the selected text.
Note: To put the selected text into the clipboard for use later or to put elsewhere in the document, press
Ctrl+X
wherever and as often as desired, “press
rather than
Delete
. This “cuts” out the text and places it on the clipboard. To paste it back in,
Ctrl+V
when the cursor is set to the correct location.
Deleting non-adjacent pieces of text.
1. Press Ctrl and keep it pressed.
2. Left-click “to set the cursor at the first character of the first piece of text to be deleted.
3. Press the left mouse button and drag the pointer to the last character of the text to be
deleted.
OpenOffice.org User Guide for 2.x 62
Page 97

Chapter 3: Managing Text Documents With Writer
4. Release the mouse button and the Ctrl key.
5. Repeat steps 1 to 4 for each piece of text to be deleted.
6. Press the Delete key to delete the selected text.
Status bar uses
Setting the Viewing Zoom Factor
Note: the area that is Right-clicked to change the Zoom factor
By right-clicking in the area shown above, the user can select the display Zoom factor for the
document. The optimal setting is particularly useful when the Styles and Formatting window
or Navigator are docked and opened, off and on, during a session in that the full width page
of text is always displayed.
Editing or Activating Hyperlinks
Clicking in this field on the status bar switches the text hyperlinks in the document from active (HYP) to edit
(SEL).
Display Effect
HYP
SEL
Click a Hyperlink to load the corresponding URL.
Click a Hyperlink text and edit it as with normal text.
To edit the URL instead of the Hyperlink text, the status bar must have HYP displayed in this
field. Point to the Hyperlink, then click and hold down the mouse button as the Hyperlink is
dragged to the Hyperlink Bar. Both the text and URL can be edited from here.
If the Hyperlink is inserted as a button rather than as text (see Link button), the Hyperlink
can only be editeid if one changes the properties of the control field: Select the button, open
its context menu and choose the Control command and then edit the text on the button and
the URL from the Properties dialogue of the button.
Click a hyperlink in a document, brings up a dialogue asking to open the linked document.
Applying Various Fonts
Modify the Paragraph Style to permanently change the font size and style for all paragraphs
with that particular paragraph format. First, position the cursor in the text that to be modified
and select the command Edit Paragraph Style in the context menu.
OpenOffice.org User Guide for 2.x 63
Page 98

Chapter 3: Managing Text Documents With Writer
The Paragraph Style dialogue opens, with various tabs. Click on the Font tab and specify
the type, size, and style of the font.
Note: If one wants to emphasize a particular passage in a letter, simply select the text and click the Bold or Italic
icon. To format only a single word, simply place the cursor anywhere in the word and click Bold or Italic.
Make any other necessary changes, then click the Save Document icon and close the
document template.
Note: When creating a template, remember not to type a text for a particular letter. The main purpose of a
template is to define the general layout of a document. Use the documents based on the template to add text for
a letter.
Keyboard Navigating and Selection in Writer
Navigating and selection using the keyboard is done using the arrow keys. One can also use
Home, End, PgUp and PgDn. Certain keys have different functions depending on whether
they are simply pressed or are used in combination with the Ctrl key. The following table
provides an overview of the keys used for navigation.
Key Function +Ctrl key
Right/left arrow
keys
Up/down arrow
keys
Home Go to the beginning of the current line Go to the beginning of the
Home In a table Go to the beginning of the current cell 1. Go to the beginning of the current
End Go to the end of the current row Go to the end of the document
End In a table Go to the end of the current cell 1. Go to the end of the current cell
PgUp Scroll one page up the screen Switch to the header and back
PgDn Scroll one page down the screen Switch to the footer and back
Go one character to the left or right Go one word to the left or right
Go one line up or down Move the current paragraph up or
down
document
cell 2. Go to the beginning of the
table 3. Go to the beginning of the
document
2. Go to the end of the table 3. Go to
the end of the document
Inserting Special Characters
This is how to insert special characters (such as check marks, boxes, telephone symbols etc.)
in text:
• Select Insert > Special Characters to view the selection of characters available.
• In the large selection field select the desired character or more than one by clicking with
the mouse or by navigating by keyboard in succession. The characters are displayed at the
bottom of the dialogue box. Upon closing the dialogue with OK, all displayed characters in
the selected font are inserted in the current document at the cursor.
OpenOffice.org User Guide for 2.x 64
Page 99

Chapter 3: Managing Text Documents With Writer
• If a special character is required in any text input field (such as in the URL field of the
Standard toolbar or in the input fields in the Find&Replace dialogue), press
Shift+Ctrl+S to pop up the Special Characters dialogue.
Inserting Protected Spaces, Hyphens and Conditional Separators
Non-breaking spaces
To prevent two words from being separated at the end of a line, press the Ctrl key while
“typing the space between the words. This is important, for example, between a title and the
person's name.
Non-breaking hyphen
An example of a non-breaking hyphen would be in a company name such as A-Z. Obviously
having A- appear at the end of a line and Z at the beginning of the next line is not usually
desired. To solve this problem, press Shift+Ctrl+ minus sign. In other words, hold
down the Shift and Ctrl keys and press the minus key.
Hyphen, em-dash and en-dash
To enter longer dashes, add the character sequences and replacement under Tools >
AutoCorrect > Replace.
NOTE: There is a Replace dashes under the Options tab but be aware that this selection is for creating paragraph
borders when a sequence of three hyphens or three equals signs are entered these are replaced by a single line
border and a double line border respectively.
Here is a method to use:
1. Open a text document and place the cursor in a convenient location.
2. Use the Special Character dialogue to find the long (em) dash to use and insert it in the
document.
3. Copy the character.
4. Open Tools > AutoCorrect > Replace.
5. Paste the dash character into the With field
6. Enter the desired character sequence into the Replace field. For example, two hyphens
(- -) to trigger the replacement.
Now there is a shortcut that defined that automatically replaces the user-defined input
sequence with the optional dash selected. This dash can also be in another font.
Manual Hyphenation
Although OpenOffice.org offers automatic hyphenation by entering a separator inside a word,
users can override this feature by entering Ctrl+ minus. Thus the word can be
hyphenated at the end of the line regardless of the state automatic hyphenation for this
paragraph.
OpenOffice.org User Guide for 2.x 65
Page 100

Chapter 3: Managing Text Documents With Writer
Emphasizing Text
There are many ways of emphasizing text in a special way. Here are some of them:
• Use the icons in the Object bar for regular Formatting needs. For example, change the
text to bold or to another font style, change the text colour and background, or centre the
text.
• Whole paragraph can be emphasized using borders. Place the cursor in the paragraph that
is to be emphasized, right-click to its context menu and select Paragraph, then click on,
for example, the Borders tab. At this point,a border may be selected to frame the
paragraph, and also with shadow shading, if desired. If necessary the distance between the
border and the paragraph text can be adjusted under Spacing to contents.
• Using a Text Frame, provides the following possibilities:
a) Text can receive a border
b) Text can be placed outside of the text margin on the side of the page.
c) Text frames can be linked when text should flow from one frame to another.
• Choose Format > Paragraph > Background to apply a background colour to the
paragraph.
• Use the Draw Text “function: Open the Draw function toolbar (on the Standard
toolbar), select the Text icon , drag open a frame and enter the text. This text can be
positioned as desired, which includes rotating at various angles, or curving and slanting
the text with the help of Format > Object > FontWork.
Changing the colour of Text
Click the little down arrow of the Font colour icon in Writer and other modules to obtain a
floating toolbar from which to choose a colour from the range of colours. Alternatively, longclick the icon itself.
Font colour icon. Note the colour name is shown in the bar at the bottom.
When using a short-click with no text selected, the mouse pointer changes its appearance to a
tilted paint can pouring paint. Drag the hot spot of the mouse pointer across the target text
area. This text area now takes on the selected colour. The function remains active for as long
as the icon is active (looks depressed), or until simply clicking without dragging, or until the
(Esc) key is pressed.
Rotating Text
Text can be rotated by entering it into a text frame as follows:
OpenOffice.org User Guide for 2.x 66
 Loading...