

Page 1

BOOX NoteAir
Mighty E-ink Tablet
User Manual
Page 2

1. About ONYX
BOOX is presented by Onyx International, which has a group of
professionals who dedicate themselves in designing state-of-the-art
reading terminal. The beauty of the BOOX is embodied in both its
simplicity and its power. As we are going to show you, BOOX is an open
and flexible platform for both consumers and content providers.
BOOX is powered by a 16-level grayscale e-ink screen that looks and
feels like paper. Passive lighting and diffuse surface relax your eyes and
reduce eye strain. By the hand-writing system, you can take notes while
reading and sketch up ideas that happen to emerge. BOOX takes full
advantage of new-generation e-ink screens: extremely low power
consumption without reflection and backlight. Each full charge can sustain
a few weeks' reading. By reducing paper consumption while providing a
realistic paper-like reading experience, digital content helps to protect
the environment without sacrificing convenience or lifestyle.
For content partners, we also provide support for custom formats and
digital rights management solutions. All of our viewers have standard
features such as layout management, font adjustment, full-text-search,
Page 3

zooming, and page flow.
For a next-generation information device, connectivity is essential. The
user can connect to the Internet by built-in Wi-Fi, 3G module or other
add-on modules to download new content or surf the web. Customized
for the e-ink screen, WebKit, the same software engine as some powerful
desktop browsers such as Safari and Chrome, is the web browser of
BOOX.
BOOX gives you a new reading experience.
(Note: The E-books in the following illustration are not pre-stored)
Page 4

2. Standard Accessories
(1) BOOX NoteAir x1
(2) Stylus Pen x1
(3) Type-C Cable x1
(4) Quick Start Guide x1
(5) Warranty Sheet x1
Optional Accessories (purchased separately)
(1) Adapter
(2) Protective case
Page 5
3. Safety Guide
Please read the Safety Guide carefully before you start to use the device.
Contact your BOOX retailer if you have any technical problem, or you can
dial our official service line at 4008-400-014 or 4008-860-830.
Screen protection
The device is equipped with E-ink screen, which is very fragile. Please
have no shocking, squeezing, pressing against the screen, or dropping the
device from a higher place. If the screen is already broken, stop using it
and contact the professional or other qualified staff to replace the screen
for you. Please don’t dismantle the device without our permission.
Standard accessories
Only the battery, adapter, and other accessories meeting our standard
safety rules can be used for the device. For details, please refer to
Product Specification. We will not be responsible for any damage caused
by incompatible accessories.
Page 6
Stay away from liquids
The device is not waterproof. Don ’ t expose the device to a humid
environment or use it in the rain. Please keep it away from any corrosive
liquids.
Don’t dismantle the device
Please don’t dismantle the device in case of any damage.
Inappropriate battery model may cause explosion. Please contact official
after-sale team for battery replacement if needed. Users shall undertakes
the responsibility and deal with the obsolete battery if users replace
batteries themselves.
Using environment
The using environment of the device is 0°C-50°C.
Page 7
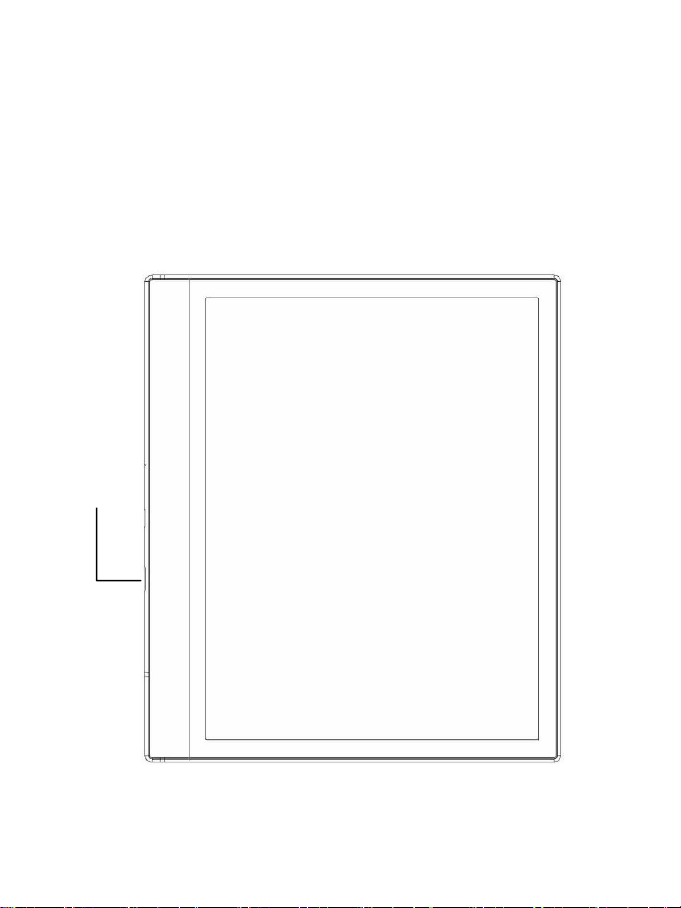
4. Product Views
Power
Front View
Page 8
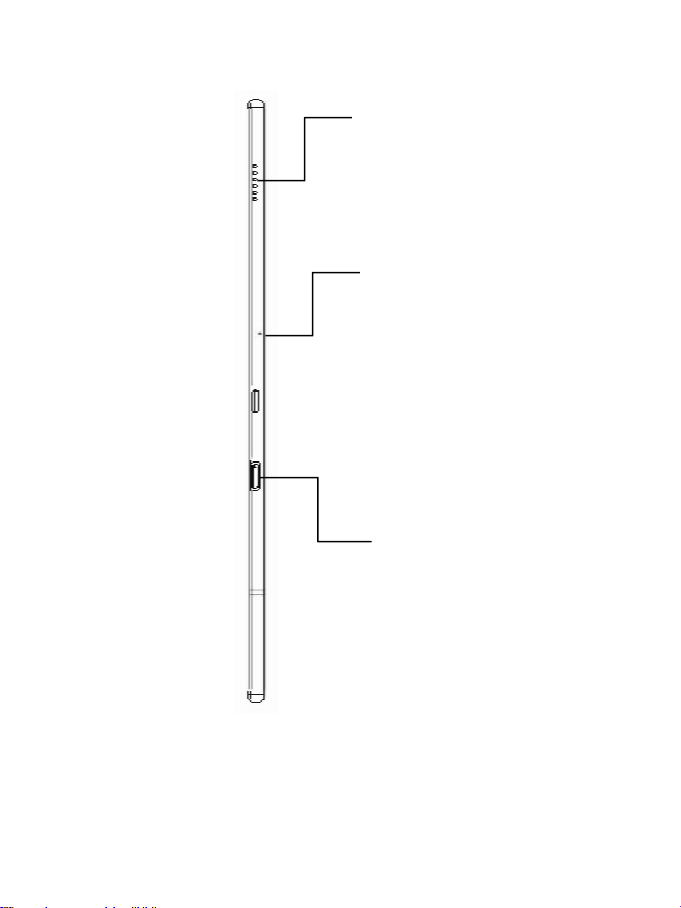
Leftside View
Mic
Speaker
Type-C
Page 9

Button Function
Power/
sleep Button
⚫ Press the power button to turn on the device
⚫ Long-press the power button for2secs, then select
“Power off” in the menu to turn off the device
⚫ Press the power button and release quickly to let the
device goes into sleep mode
⚫ Press it again to wake up
⚫ Long-press for 10 secs to force shutdown
Microphone
⚫ Record voice
⚫ Recognize speech
Type-C Port
⚫ Connect the device with PC to transfer data or charge
device.
⚫ Support Type-C earphone
⚫ Support OTG USB drive
Page 10
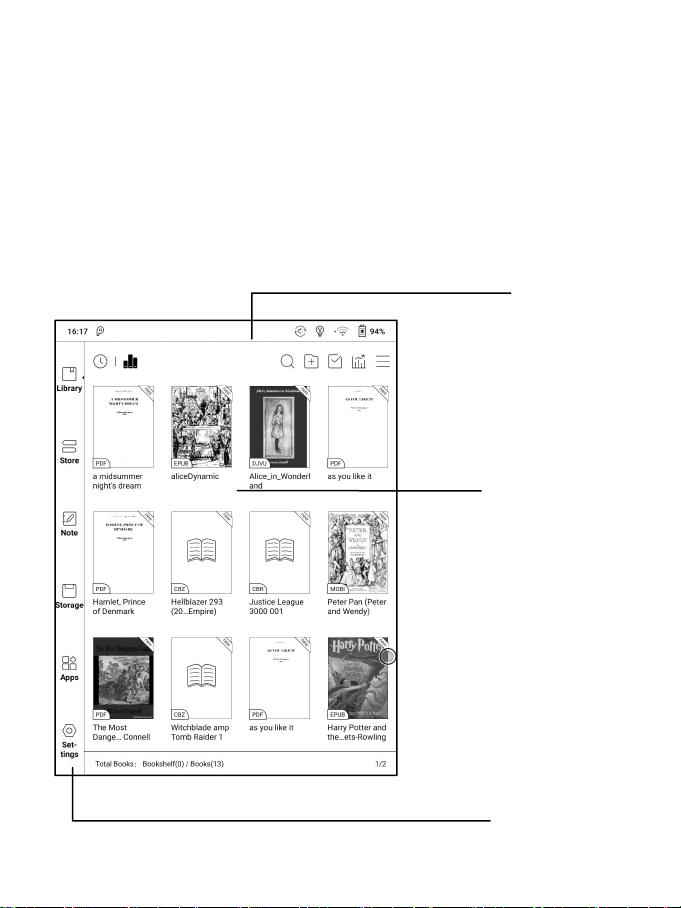
5. Main Interface
Content Area
Function Area
Status Bar
The main interface contains a status bar, content area, and function area.
The function area contains certain modules.
Double-click icons in function area can return to the main page of the
specific module.
Page 11

Status Bar
This section displays the current state of the device, including: Time,
Notification, Refresh Mode, Wi-Fi Connection, Battery Usage. It is only
for status indication.
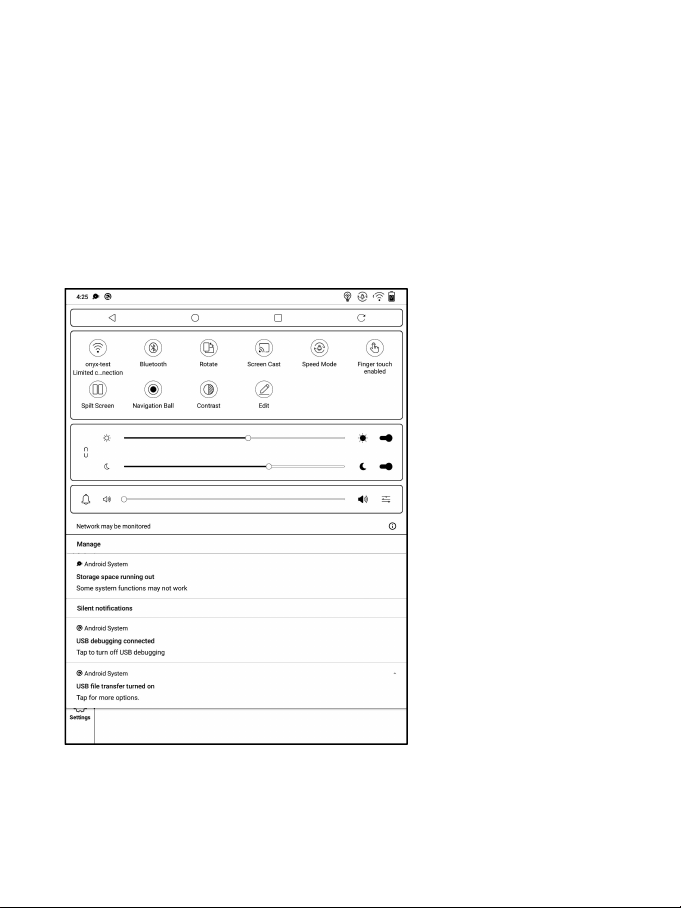
Notification Interface
Click or pull down the Status Bar to expand a menu, which includes:
Android Shortcuts: Back button, Home button, Multi-tasking switching
Button, Full refresh button.
Function Management: Wi-Fi, Bluetooth, Rotation, Refresh Mode, Finger
Touch, etc. Further customize those frequent functions by pressing the
“Edit” button.
Volume Adjustment: Easily adjust the media volume by moving the sliding
control. Customize the notification sounds and adjust the volume of the
alarm, notification and others.
Notifications: Turn on / off notifications for connecting USB, push
notification from third-party apps, etc. Jump to the corresponding page
Page 12
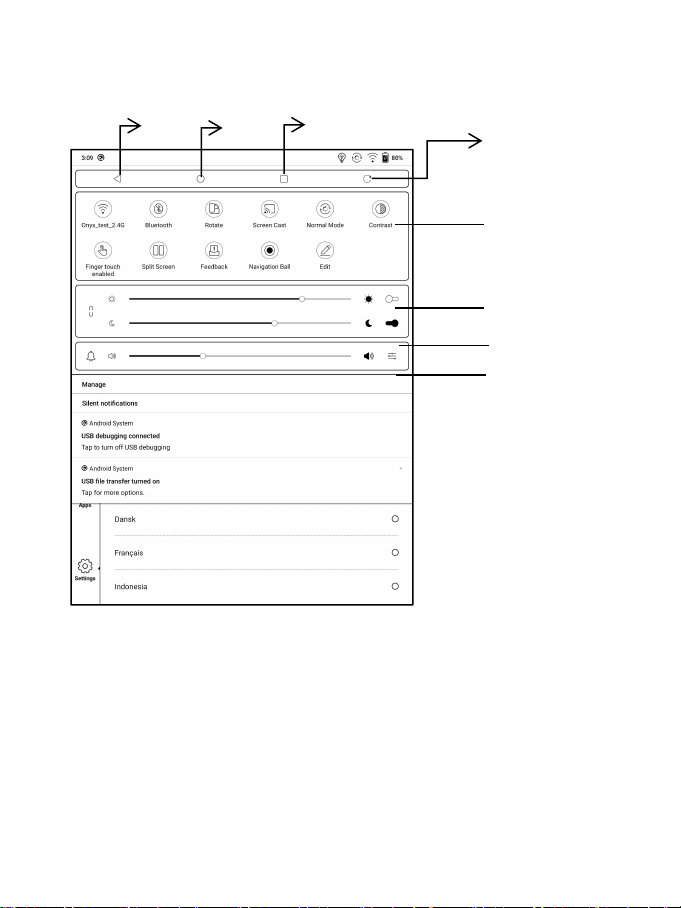
by pressing the specific notification.
System shortcut switch
Volume control
Notifications
Frontlight control
Back
Home
Multi-tasking
Full Refresh
Edit
The icon in status drop-down menu can be adjusted, like add,
remove, and re-order.
Page 13

Multi-tasking switching
Clicking this icon, pop up the Android multi-task list to check the running
applications in the background, one key to clear up all the applications to
speed up the device.
Wi-Fi Setting
When using at the first time, you should enter into the Wi-Fi setting
interface to get a accessible connection. Then click the icon to turn on/off
the auto connection.
Bluetooth Setting
When using for the first time, you should enter into the Bluetooth setting
interface to match a device you want. The matched earphone, page turner
can be auto-connected by clicking the icon. Certain devices do not
support auto connection after disconnected.
Rotation
Easily change the orientation of the screen by clicking the direction you
want. Support auto-rotation.
Page 14

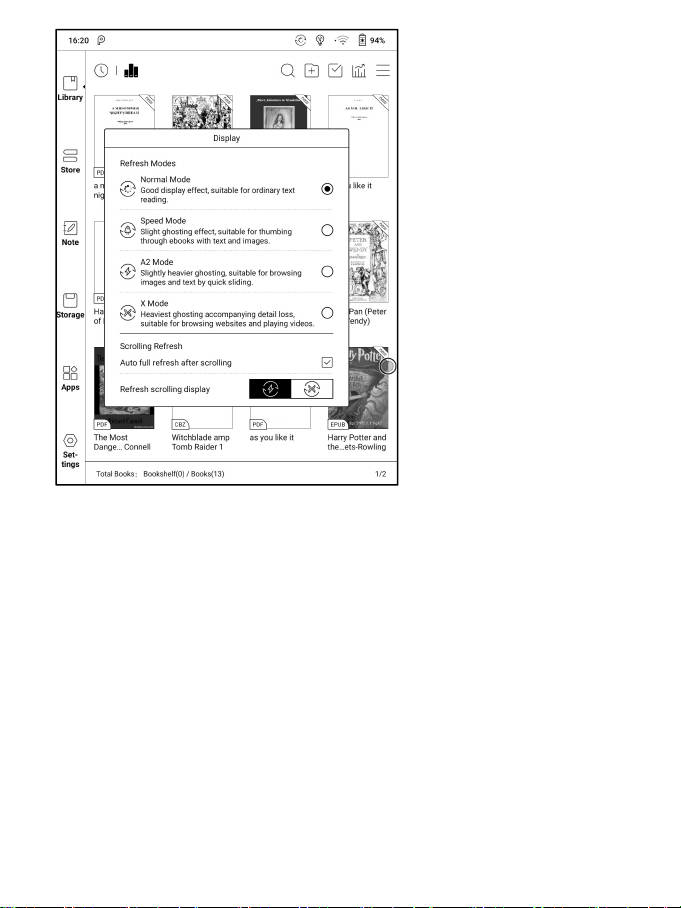
Refresh Mode
Four levels of refresh mode are available.
Normal Mode: good display effect, suitable for general text reading.
Speed Mode: with slight ghosting, suitable for quickly reading image and
text.
A2 Mode: Ghosting may exist, suitable for scrolling pages with image and
text.
X Mode: May cause serious loss of details, suitable for web pages and
video.
Normal mode is the default mode; Speed mode is used while scrolling
pages;
After selecting a new mode, to adjust the contrast could get a better
effect;
General contrast works for all interfaces, and other contrast adjustment in
App optimization may cause superimposed effect. It is recommended to
only use one of them.
Page 15
Hand Touch
For palm rejection, hand touch can be turned off (except for the status bar).
The default hand touch is on after reboot.
Page 16
ScreenCast
1. This only supports Windows10. Win7/XP and MacOS are not
supported currently.
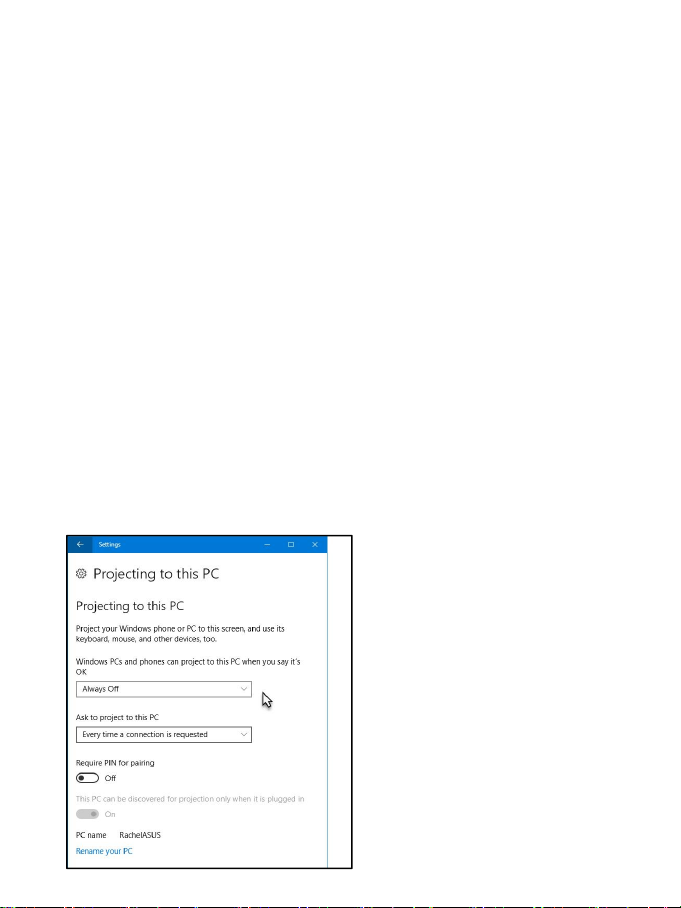
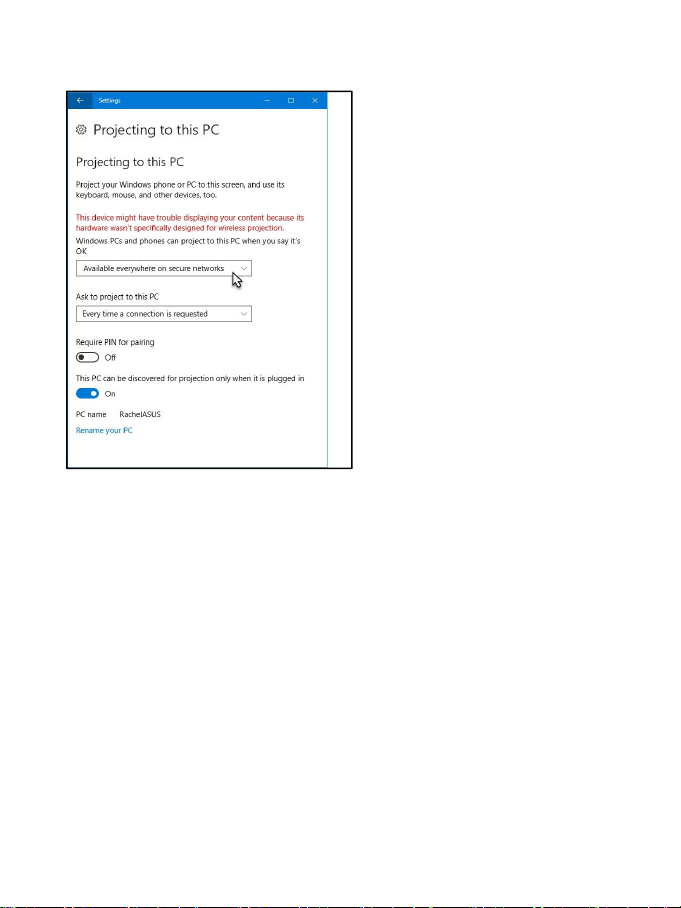
2. Please make sure that the computer itself supports the screencast
function, which can be checked in the computer system settings:
System-Projecting to this PC.
Please pay attention to the 4 related settings, which will affect the results
of searching the computer on the device side and the confirmation of the
connection request;
This computer can support the state of screen projection
Page 17
This computer does not support screen projection
3. Please make sure that the computer and your BOOX are in the same
Wi-Fi environment.
If a desktop computer is connected to Wi-Fi via wireless network card,
please confirm whether it is supported in step 2.
Some computer configurations and wireless network cards do not support
this function;
Page 18
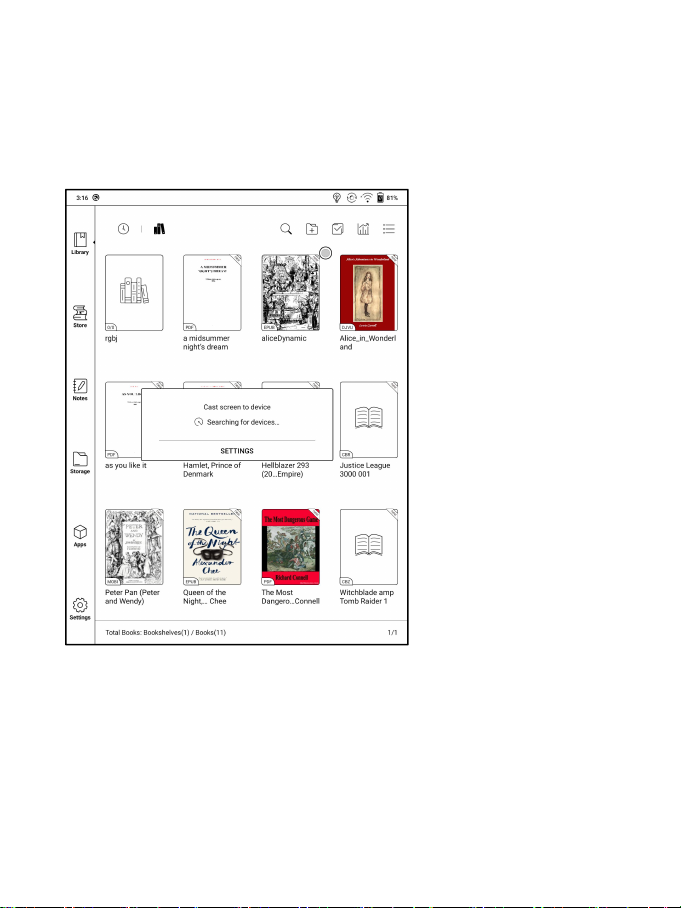
4. On the device side, select screencast from the system drop-down list.
Then the automatic search will start, and the name of the computer will be
shown when found.
Page 19
5. In the search window, select the found computer. If there are multiple
supported computers, click Settings to enter the list of supported
computers. Then select the computer that you want to project to from the
list.
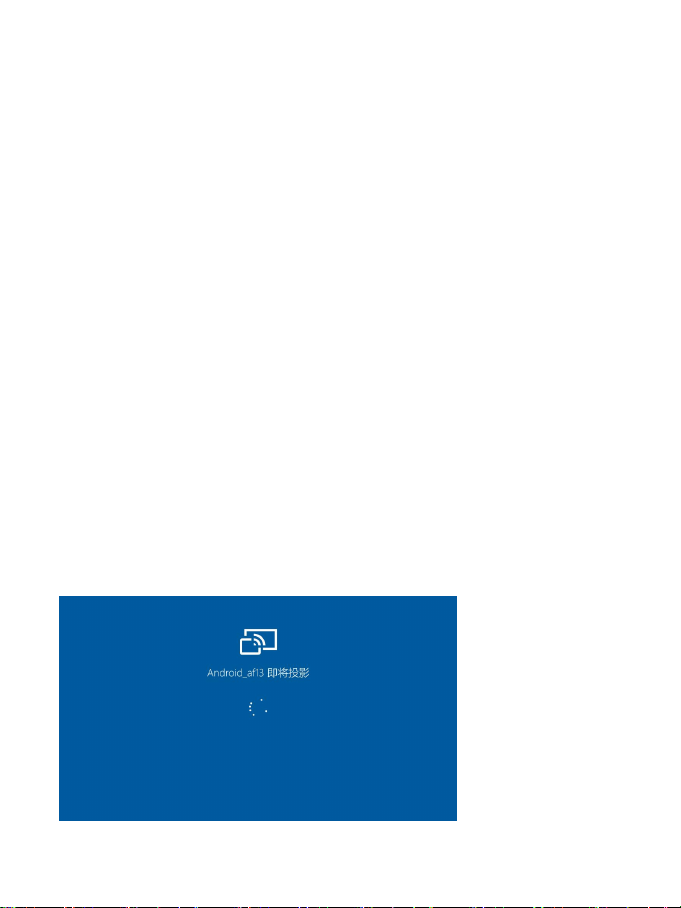
6. After you select the computer that you want to project to, the
computer will pop up a notice to confirm whether to accept the projecting
request;
7. After you confirm it, it will automatically connect and the screen will be
mirrored successfully;
Page 20

If the "Unable to view protected content on this device" appears on the
screen, the connection may be unsuccessful. Please disconnect the
device, and request the screencast connection again.
8. When the devices are connected, please tap the system bar of the
device- Screencast again, and select “disconnect”. The computer
cannot disconnect the connection.
If the computer supports screencast but cannot receive the request,
please restart the computer and try to reconnect again and check whether
the computer configuration rejects the request (see step 2).
Page 21

Function Area
The function area includes Library, Store, Note, Storage, Apps, and
Settings.
The default Homepage is Library. Double-tap the Navigation Ball to
return to the Homepage
Users can go to Settings / More Settings to set any of the other
function pages as a default Homepage.
Content Area
The contents are sorted by time by default. The contents includes the
following items.
Library
All books in supported format from internal storage are displayed here.
The scanning path can be modified via Library Settings.
Store
Enter into an online eBook store. Users can view more book information
and make a purchase. Purchased books will be added to the list of Library.
Page 22

Note
Users can create a new note here, create folders for sort management, and
export note files to third-party apps.
Storage
All folders from internal storage will be displayed here. Users can manage
documents and folders from the page.
Apps
All third-party apps are displayed here. Users are allowed to manage or
optimize the apps.
Settings
The list of system settings help to manage the device.
Page 23
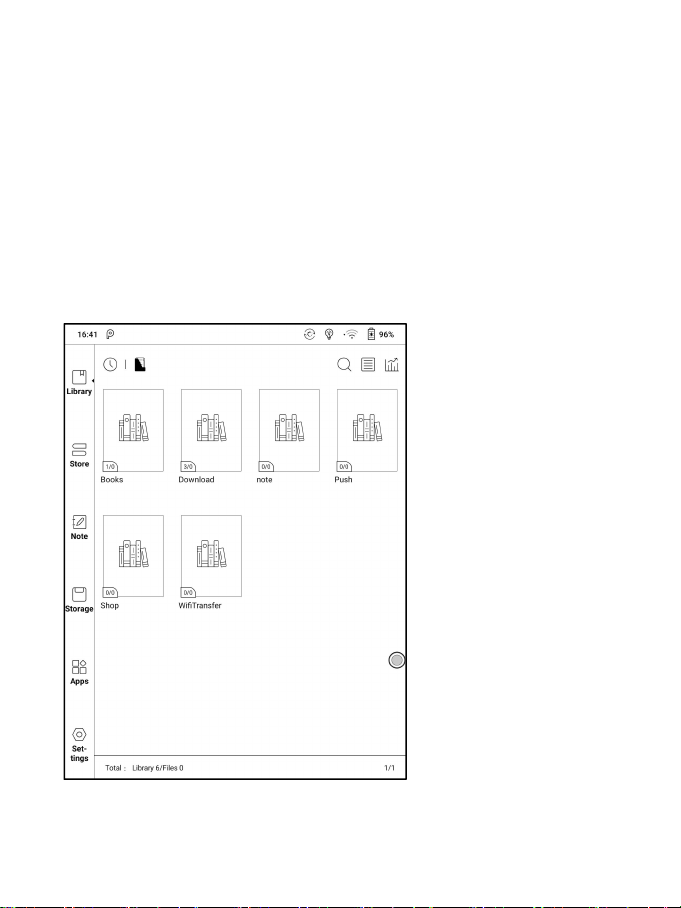
6. Library
The library only displays E-book documents in supported formats in the
storage. Book cover thumbnail is displayed by default. E-books are sorted
by the creation time.
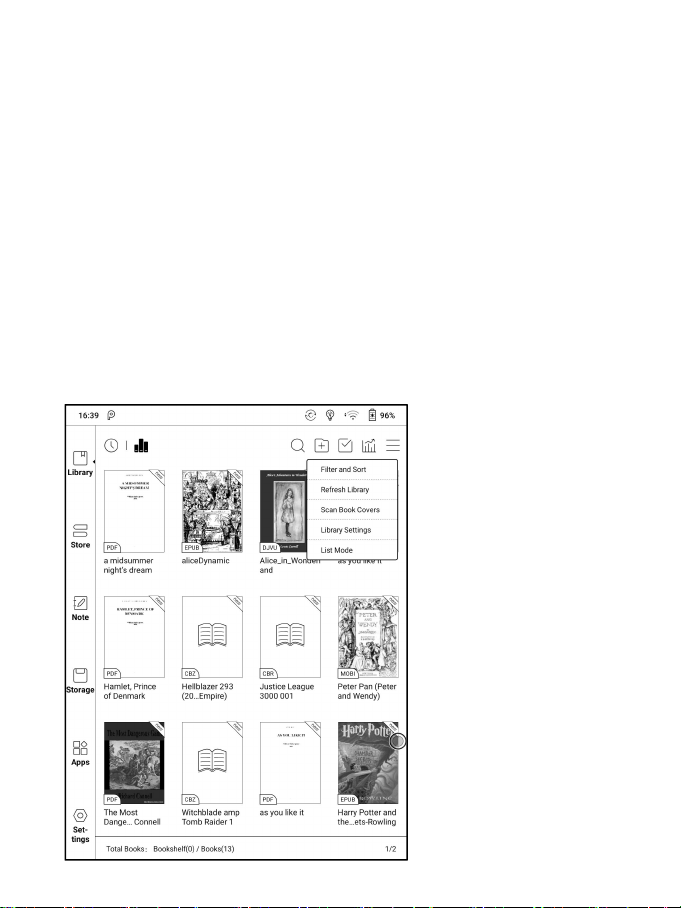
On the upper right working area of the Library, users can search, create a
new bookshelf, manage books in bulk, check Reading Statistics, pop up
the drop-down menu ( including Filter, Refresh Library, Scan Covers,
Library Setting, Switch to List View)...etc.
Page 24
Library Display Switch
Click on these icons to switch the library display. By default, it
auto-scans and loads all the supported documents in specified paths,
sorted by a specified way.
Another one is to display the content based on the structure of storage.
The icons change after clicking on it.
Page 25
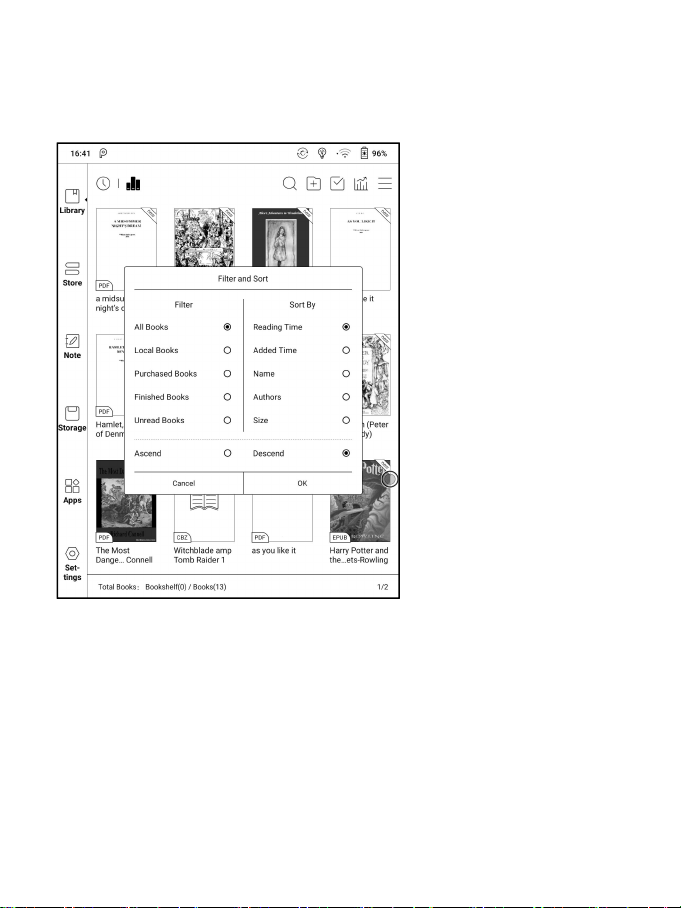
Filter & Sort
By default, it shows all books in descending order.
Refresh Library
“Refresh Library” gets all documents in supported formats scanned and
rebuild library list. This function does not delete the reading history.
Page 26
Create Sub-library
It helps to manage books by file manager.
Library Settings
Users can set book file scanning path here. It only scan the specific
folders (Books, Store, WifiTransfer, Push).
Users can also select scan all folders but it would slow down the loading
speed of Library.
Page 27

Users can select showing books title or file name.
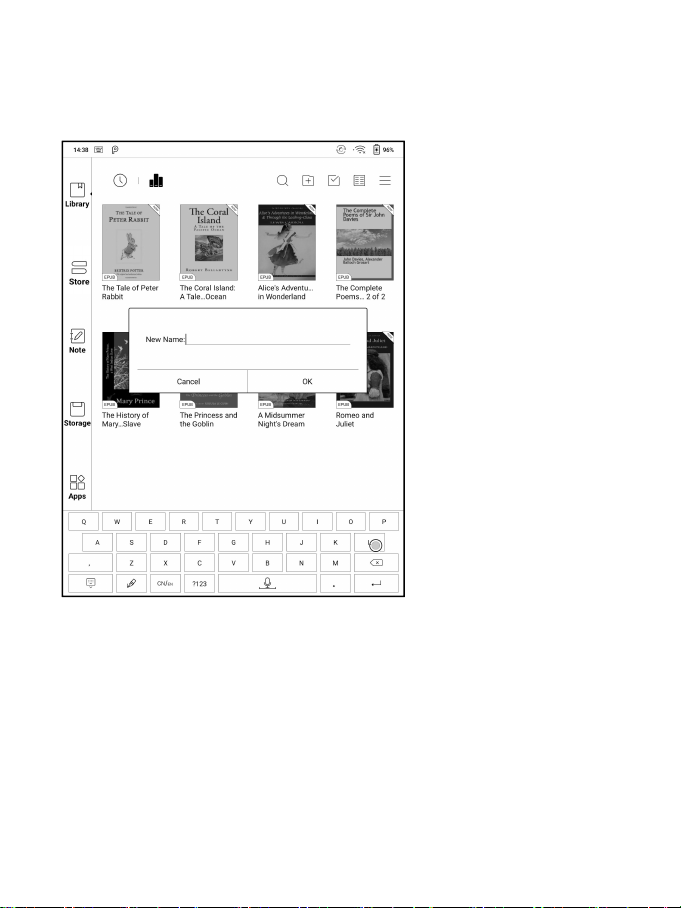
Sub-library Attribute
Long-press on sub-library cover to view more information about
sub-library. To delete or rename sub-library are allowed. When deleting
sub-library, the containing books will be moved to Library and will not be
deleted with the sub-library.
Page 28
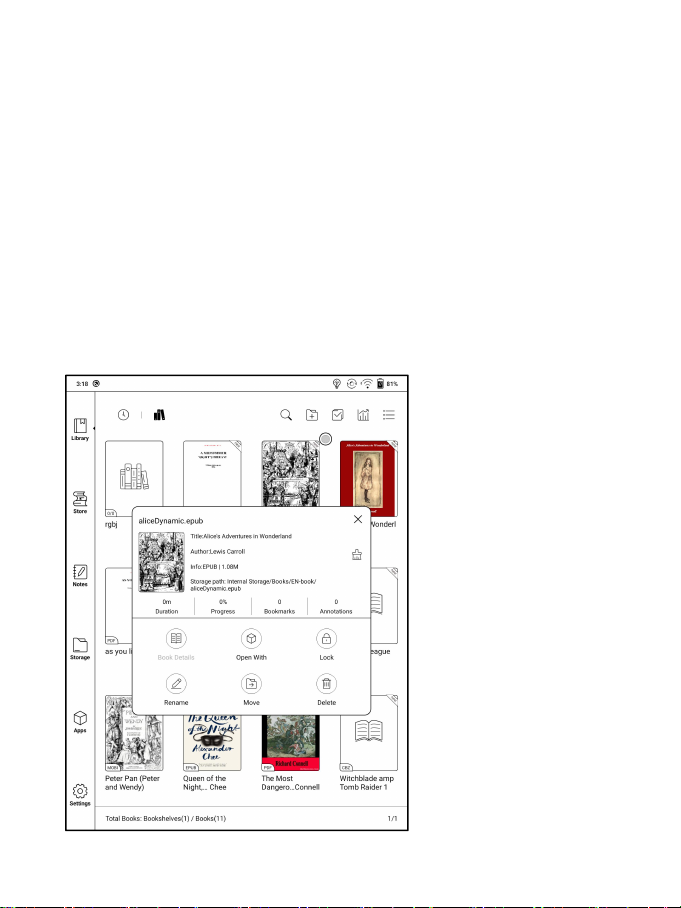
E-book Attribute
Long-press on book cover to view more information about E-book name,
author, format, size, reading progress, book detail(only available for the
E-books of Store), open way, Lock 、 rename, move(to sub-library) and
delete. One E-book only can be added to one Sub-library.
As for the books purchased from the Store, is allowed to view book details
by jumping to the Store page.
Page 29

Lock ( Reading Password)
User can add (reading) Password to lock each file in order to protect
personal reading data;
The Password is used to open the file,but it only applies to the same
device and NoeReader. If you copy and export the file to other devices or
Apps, the Password will become invalid.
You can use the same Password as the Screen Lock. Or you can set a
different digits Password.
Digits Password only support one Password. After you have set the
digits Password, you do not need to set another digits Password and only
need to add the Lock.
Reading Password cannot be recovered. If you forget the Password,
you can only reset it through ONYX Account.
Reading Password supports individual setting or setting in bulk
( setting in bulk is to add Locks). Currently It does not support to add
Passwords to all files directly.
If you choose to use this Password Setting by default, you can add
Password to other files quickly and do not need to re-select the Add Lock
Option every time after the Password is set for the first time.
Page 30

Reading Statistics
Reading Statistics is to summarize personal reading data, including
Today’s Reading Time, Books that have been read, books that have been
finished, Total Reading Hours, Highlights and Annotations and Average
Reading Time Distribution.
Average Reading Time Distribution includes the reading time of all
days since Reading Statistics is turned on.
Page 31

Under Reading Statistics, only highlights and annotations can be
jumped to and the books that recently have been finished can be opened.
Other data is only for analysis purpose.
The reading data of each device can only be available on the same
device. You can not check the statistics of this device on another device.
Page 32

7. Reader
Enable/disable stylus
Dictionary
Search
Other functions
TTS
Slideshow
Page Thumbnail view
Undo, redo
Frontlight Control
Tap any E-book cover to open an E-book. Full-screen reading without
showing status bar is set by default.
To pull down from the top of the screen can call out the status bar.
To tap on the center of the screen can call out the menu bar for switch
among different documents or other functions
Page 33
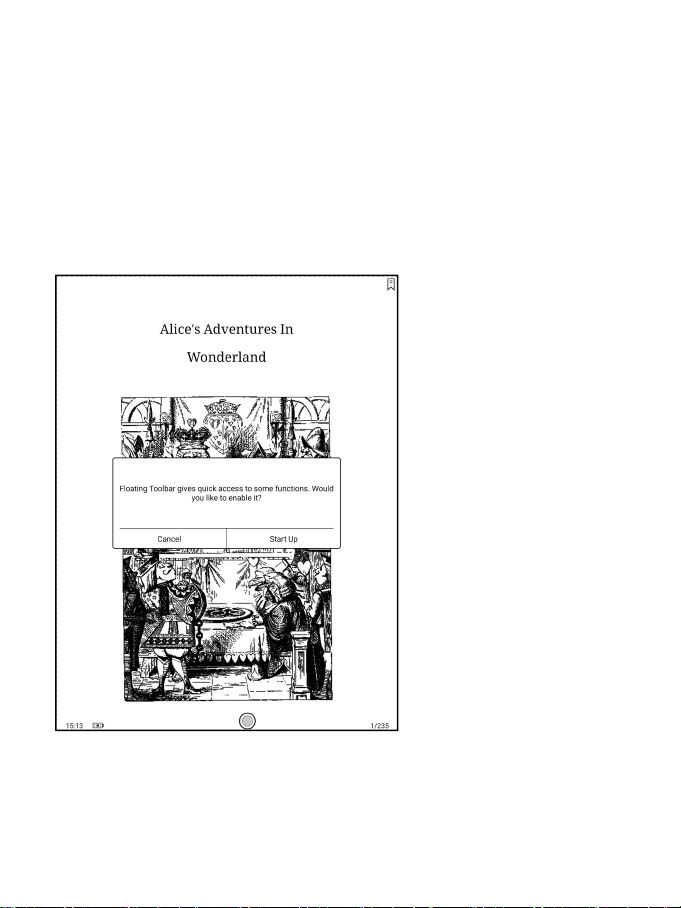
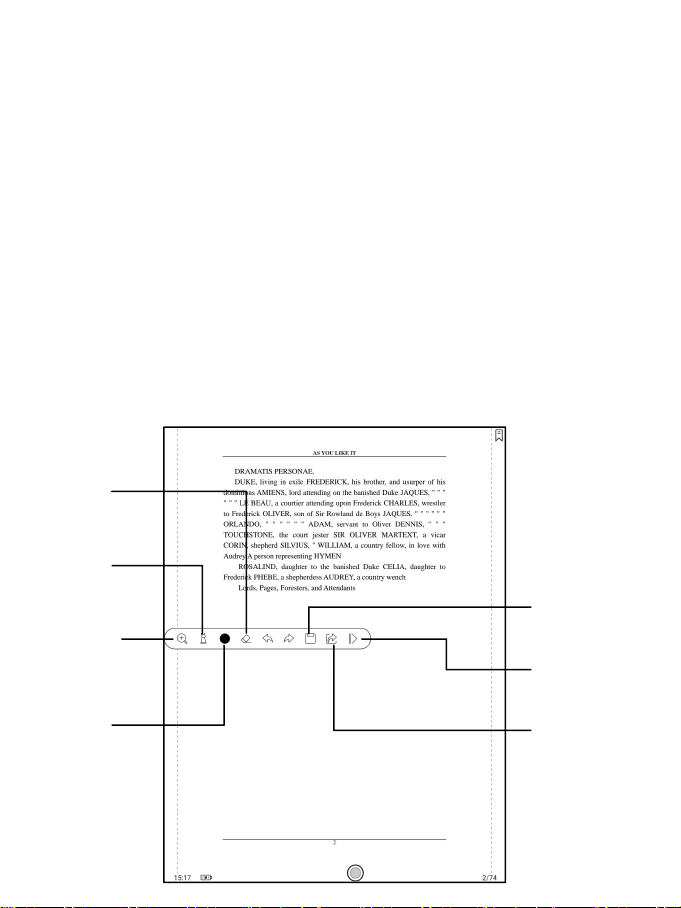
Floating Toolbar
You can choose to activate the Floating Toolbar for the first time
when you open a file. Or you can go to
Settings
Toolbar.
to enable it and customize the function buttons in the Floating
Settings / Floating Toolbar
Page 34

The Floating Toolbar includes: Hide, Scribble, Enable Palm Rejection,
Menu, Prev Page, Next Page, Cancel (Progress)
Long press on the Floating Toolbar, you can drag it around on the screen.
You can expand or contract the Toolbar to the edge to avoid cover any
text on the screen. When you need it, just swipe from either side of edge
to the other side to expand it.
When the page is zoomed in, the Floating Toolbar would automatically
expand proportionally in order to manage the zoomed-in page better.
Page 35

Under zooming status, singe tap on the screen is set for turning
sub-pages of each page( each original page will require several time
page-turns to be completed). But tapping the virtue page-turn buttons on
the Floating Toolbar is set for turning the whole original page.
Page 36
You can disable the Floating Toolbar by going to Setting - General
Setting. When it is contracted to the edge, you can swipe from either side
of edge to the center of the screen to expand it.
When palm rejection is enabled from the Floating Toolbar, it only
applies to the reading document. The Floating Toolbar still supports hand
touch, but it can remove the interference of hand when you write on the
reading document.
Page 37
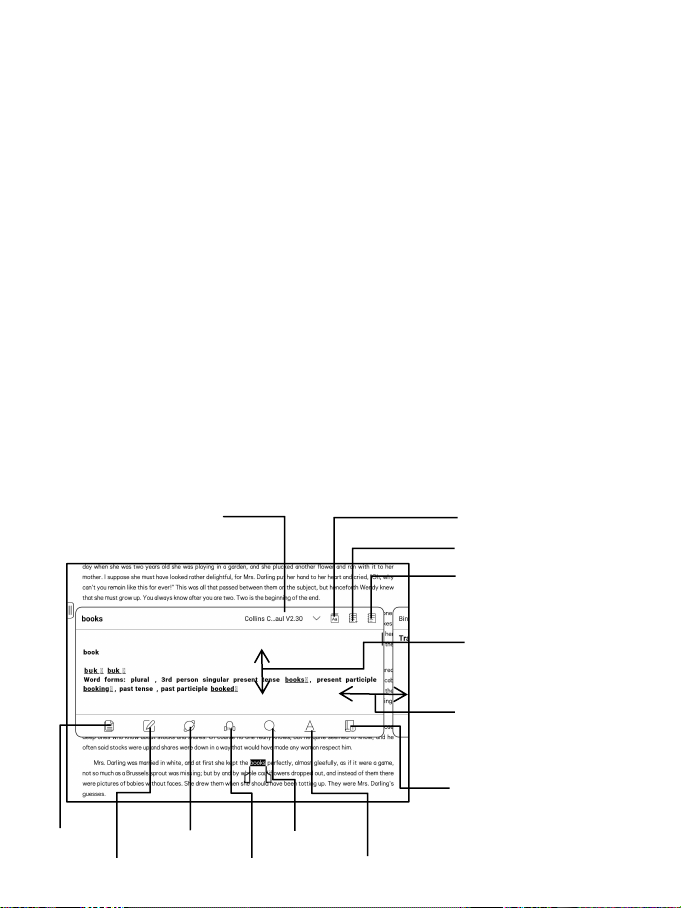
Word Menu
Switch Dictionary
Jump to Dict App
Add to Vocabulary Builder
Jump to Vocabulary Builder
Turn page
Swipe to translation
window
Third-party Dict
(Required to install separately)
Search
Highlight
Web search
TTS
Copy
Annotation
Long-press on the word to pop up dictionary dialog for look-ups.
English word recognition and look-ups are supported.
Through the drop-down list on the top right of the dialog, the dictionary
can be switched to others.
Users can download and install the dictionary themselves. Put dictionary
file on the path root directory\dicts\xxx (e.g
Storage\dicts\English-French), or download dictionary online directly.
Dictionary is available to use after being installed.
Tap on any position out of the dialog to exit the dialog.
Page 38

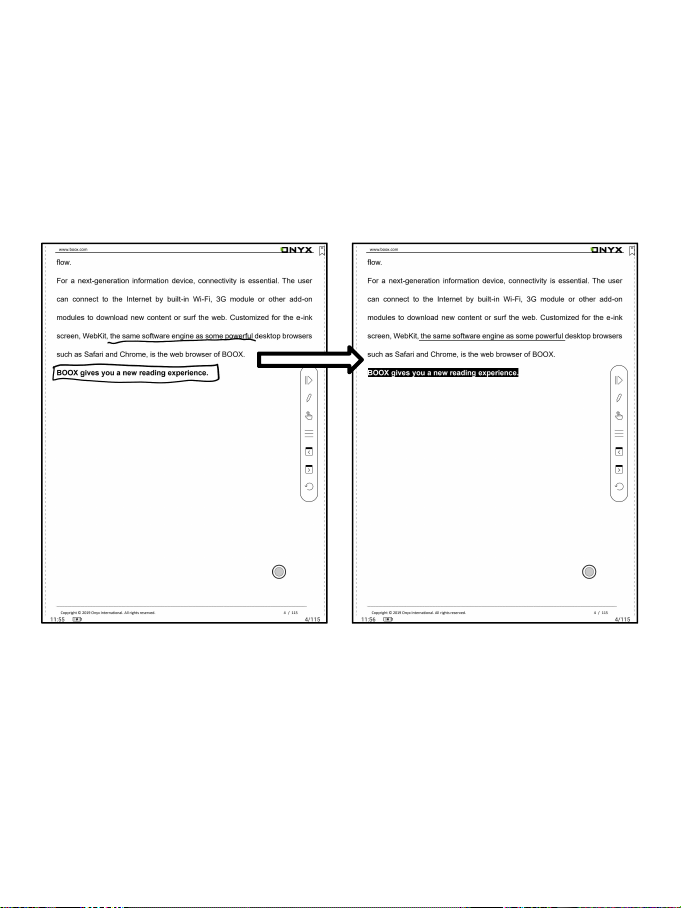
Long press on any word and drag to select the text you want to mark.
Delete highlight
Switch translation
Third-party Dict
(Required to install
separately)
The highlight is set by default for selected text. Users can switch among
highlight, underline and others, the color highlight can be in black or grey.
The mark setting remains after a change. The marks before the change will
not be affected.
Tap on any position out of the dialog to exit the dialog.
Choose “Annotation” to pop out a text box to add notes if needed.
Page 39

Handwriting recognition
Double-tap the handwritten text or shapes to start AI Recognition.
In the state where hand touch is disabled, double-tap can also be
used to initiate the AI Recognition
The text and shapes with 0.5cm spacing and straight lines with 0.3cm
spacing can be recognized as one content area. If the spacing exceeds
either of the two spacings, the content will be recognized as a different
content area.
Page 40
The boxes or lines near the text can be converted into underline and
highlight after being double-tapped. That offers great convenience to add
highlights to the converted content.
If users do not want it to be converted into highlights, you can disable
this function from Handwriting recognition settings. The handwriting
content will be only converted into images.
Page 41

Converted to adding Bookmarks
Use stylus to click the upper right corner to add a bookmark
This area does not support page-turn by stylus.
Page 42

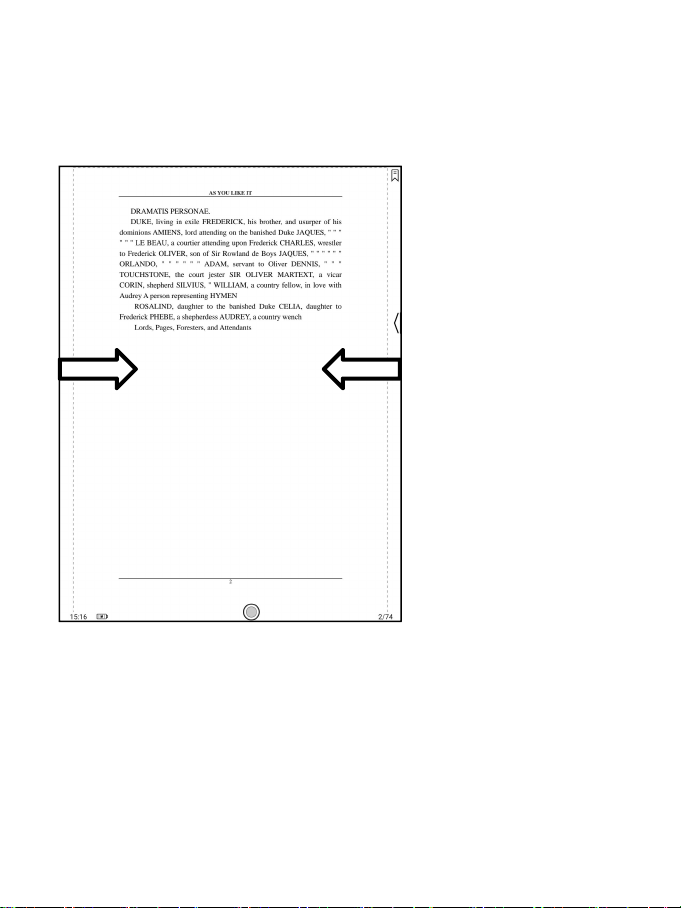
Page-turns
Users can use the stylus to tap the 3 corners of the content area for
turning pages. This offers convenience to page-turn when hand touch is
disabled.
This function is on by default.
Page 43

Bottom Menu Bar (PDF format)
Order
Full screen
TOC, Progress, Format, Navigation Mode, and Scribble are included.
TOC
TOC contains Table of Content, Bookmark, Annotation, and Scribble.
TOC supports three-layer hierarchy. The current layer is underlined. Jump
to the corresponding page when tapping any of the layers.
Tap on any position out of the TOC to exit.
Page 44

Bookmarks
Without calling out the menu, bookmark the reading page by simply
tapping a tag on the top right corner of the screen. Tap it again to
un-bookmark the page.
The bookmarks can be checked under the path of Doc-Bookmark, where
users can delete bookmarks.
Jump to the corresponding page by tapping any of the bookmarks.
Annotation
All highlighted/underlined/annotated content would be listed under the
page of Doc-Notes for further searching, editing and deleting.
Jump to the corresponding page/content by tapping any of the lists.
All contents on the Annotation page can be exported in txt format.
Exported files are saved under the directory folder Storage\Note\(same
name as the source file).
Scribble
All scribble and sidenote can be viewed under the page of Doc-scribble
for further searching and deleting.
Page 45

Jump to the corresponding page by tapping any of the pages.
All scribble contents can be exported in Png format and saved under the
same directory folder Storage\Note\(same name as the source file).
Progress
It displays the chapter name (book name if no chapter), page progress,
last/next chapter, page number, slideshow, undo, and redo.
Tap on the page number to enter a quick-flip interface. Click the page
numbers again and input number to jump to the page directly.
Page 46

Format
Display, Contrast, and Reflow are included. This module is just available
for the E-books in the formats of PDF\DJVU\CBR\CBZ.
Display
It contains Layout, Orientation, Zoom, Crop, and Margin.
Layout: Single page, double pages 1, double pages 2 , double page only in
landscape mode .
Orientation: Allowed to switch to four different orientations, the word
orientation is the same as the orientation of “T”.
Crop: Auto-crop according to the margin set by users.
Margin: The empty space at the sides of book content for auto crop.
Zoom: Zoom in, zoom out, and partial zoom are supported. Users can also
pinch fingers together or apart to zoom out or in on the reading pages.
Page 47

Contrast
Watermark, Sharpen, Image Contrast, Text Contrast, and Embolden are
included. Certain functions are just available for scanned documents.
Page 48

Reflow
Reflow is only available for PDF/DJVU/CBR/CBZ documents.
Reflow allows users to further customize the layout of documents
including: Line Spacing, Margin, Text Direction, Font Size, Columns, and
Skew Correction (for italic documents).
Page 49

Navigation
Navigation allows users to have options of Reset, Comic Mode, Article
Mode, and More Settings including Crop, Split, and Subpage Order.
Comic Mode: the screen will be divided into four subpages and the
reading order is upper right – upper left – bottom right – bottom left.
Article Mode: the screen will be divided into four subpages and the
reading order is upper left – bottom left – upper right – bottom right.
Page 50

More settings
Manually adjust the settings of area cropping, page split, and subpage
order.
Crop: Manually select the cropping area for single or double pages.
Split: Split the pages into specified subpages in different ways.
Order: Decide the initial position and reading order for subpages.
Page 51
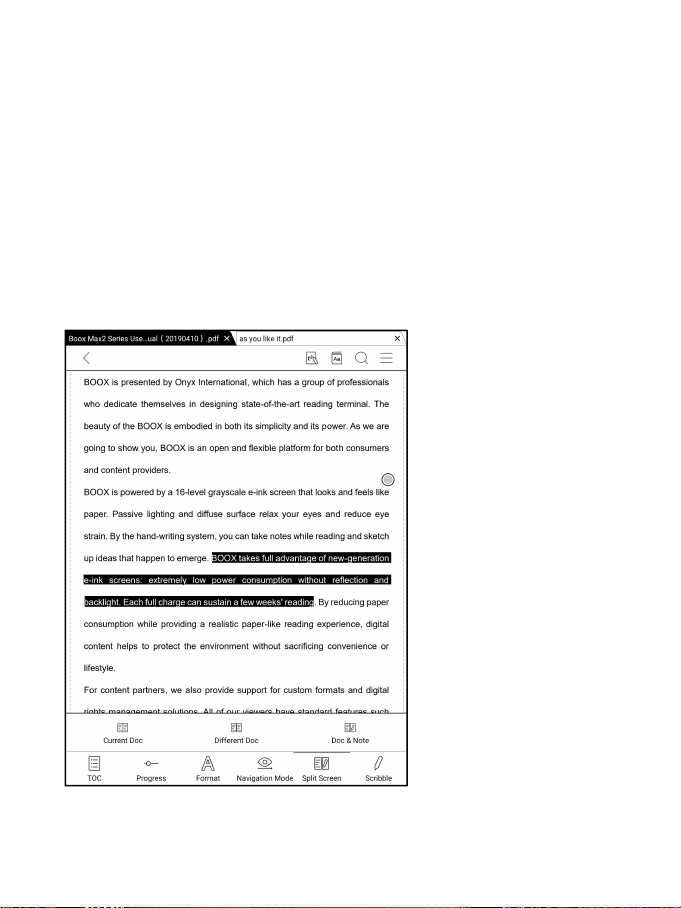
Split View
It allows to respectively open current document, two different documents,
or one document & Note at the same time 、 Split-View ( Doc &
Translation )
This function is only available in landscape mode, the later open
document/Note will appear at the right side. The sides can be swapped.
Page 52
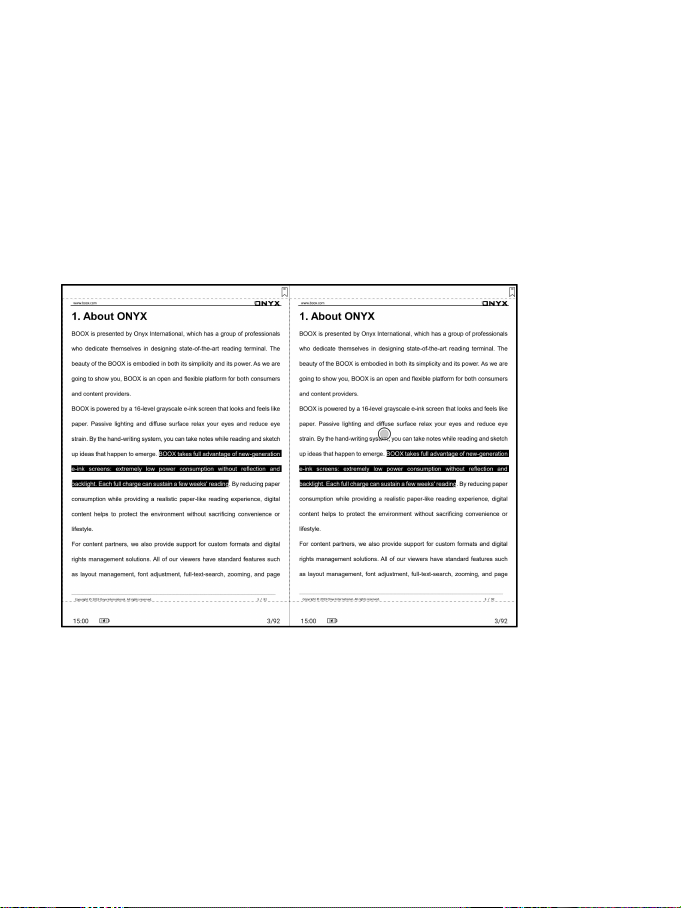
Current Doc (same doc)
The two documents are totally independent. Users can respectively turn
pages and save them.
The scribble, highlight, annotation, bookmark would be synchronized to
each other after page refresh.
Page 53
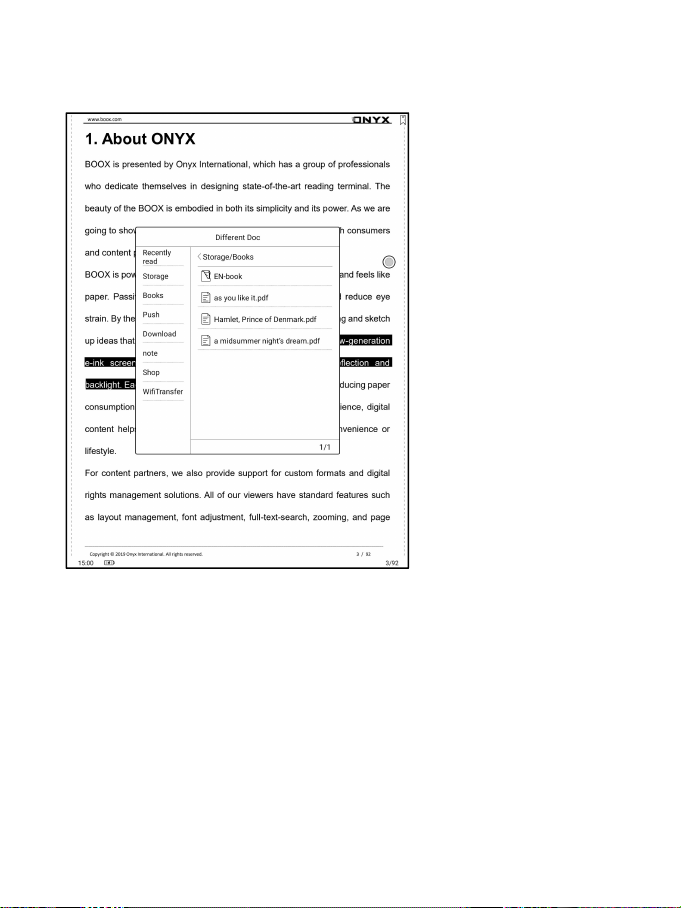
Different Docs
Choose a document different from the current document.
Page 54

Similar to the Current Doc, these two documents can be respectively
operated. The display is also swappable. For PDF document, please try to
swap them if part of them is not writable.
Page 55

Doc & Note
Likewise, they are swappable.
And the Note will be created with a name same as the document. It
associates with the document and can be edited in Note app.
Every document can only have an associated note. Changing the name of
the note does not affect the association.
Page 56

Split-View (Doc & Translation)
This supports Baidu Translate and Bing Translate and provides full
page translation.
This also supports multiple target languages
Your BOOX needs to stay connected with internet
Page 57
Scribble
Export
Hide the Menu
Pen Brush
Undo and Redo
Eraser
Color
Save
Zoom
The Scribble toolbar is floating on the screen. You can long press on
it and drag it around on the screen.
Scribble is enabled by default. You can enable / disable it by tapping
the Scribble icon located on the upper part of the screen.
You need to pop up the Scribble toolbar by tapping the Scribble icon
located on the right bottom of the screen. Or you can also enable it from
the Floating Toolbar.
Page 58

The handwritten notes are embedded to the original documents by
default. It support to embed to original PDF and export as a new PDF.
The embedded PDF will be saved as the original document while the
exported PDF will be saved as a new PDF file and retain the handwritten
notes.
The embedded handwritten notes can be checked and edited on some
PC applications such as Adobe acrobat、WPS、chrome. The notes can also
be checked and edited on other BOOX devices.
Page 59

Write and Erase
Click on the brush and eraser icons for the writing and erasing functions.
Double-click them to expand the sub-menu.
In the state of stroke erasing, you need to switch to the brush for go on
writing.
For the “erase all”, you do not need to switch back to the brush.
Color
Black, gray, and white strokes are shown as their authentic colors. Other
colors are shown as black on devices, and as their original colors after
being exported to PC.
Page 60

Bottom Menu (other format)
First line
indent
Line break
hyphen switch
TOC, Format, Progress and Split screen are included. It supports the
formats of EPUB\TXT\MOBI\AZW3,etc.
Format
The settings include Font Face, Display and Spacing.
Loading font face in the directory Storage\fronts is supported.
The settings for font size, font face, contrast, bold, spacing work on all
newly opened documents, but not work on the documents before settings.
Page 61

Screenshot
Diagonally tap on two corners of the screen to capture the screen in PNG
format. The function is only available on the reading page.
The screenshot will be saved to the local, or shared by scanning QR code.
The save path is Storage\Screenshots.
Page 62

WeChat and browser scanning are supported for screenshot sharing.
Page 63

Refresh
Tap the hamburger menu located at the upper right corner to choose
Refresh and other related settings of refresh
Regal refresh and partial refresh are by default
When scrolling the page, speed mode is by default.
Page 64

Settings
There are General Settings, Touch Settings, TTS Settings, Export Settings,
Screenshot Settings, Floating Toolbar Settings、and Version Name.
Page 65
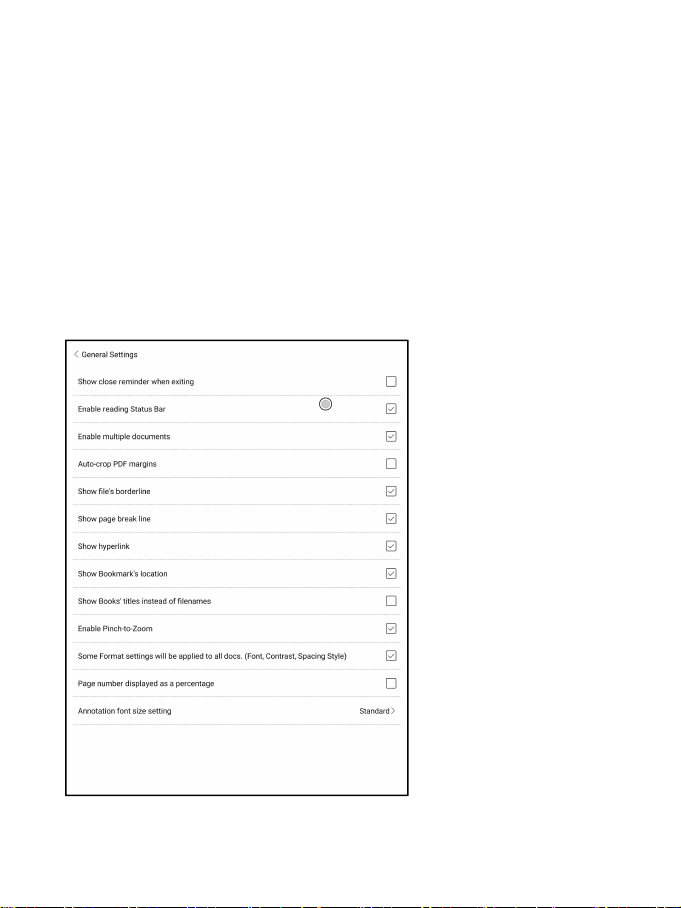
General Settings
There are Enable page close reminder, Enable system status bar, Enable
reader status bar, Enable multiple documents, Show file borderline, Enable
Floating Toolbar, Show hyperlink, Show bookmark position, Enable pinch
to scale, Apply certain options to all documents 、Annotation Font Size
Setting;.
Page 66

Touch Settings
Users are able to customize the touch settings for different areas. There
are six default touch modes can be chosen and users can customize three
more.
Page 67

TTS Settings
The built-in Baidu TTS is set by default. English is supported. A network
connection is required at first use.
Switching to third-party TTS system is allowed. The built-in TTS
settings are not synchronized with the system TTS settings. The system
TTS settings work on the third-party TTS by default.
Page 68
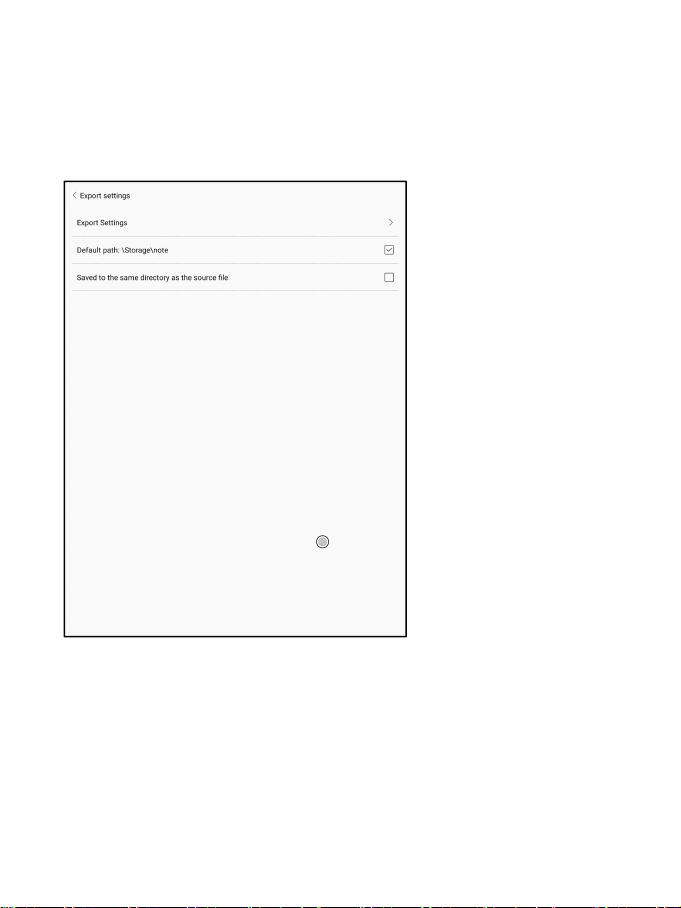
Export Settings
The default storage path is Storage\Note.
The export files can be also saved to the same directory as the source file.
Page 69
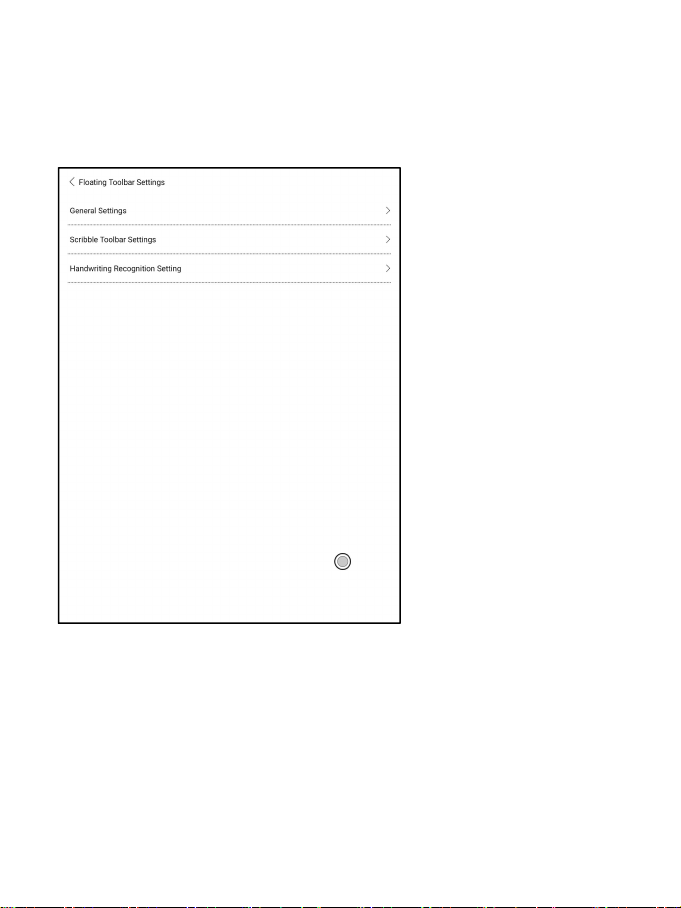
Floating Toolbar Settings
This page offers General Settings of Floating Toolbar, Scribble
Settings, and Handwriting Recognition Settings;
Page 70

Floating Toolbar Settings
It is enabled by default and can be turned off manually. After disabled, it
can no longer be called out;
It can be customized whether the indicator is displayed after it is
collapsed. Call out the Floating Toolbar by swiping from the screen edges.
The Toolbar’s size, display style and functions buttons are customizable.
Custom function buttons support up to 11 in horizontal style and up to 14
in vertical style;
Press and hold the function button icon to display the definition of the
function button;
Page 71
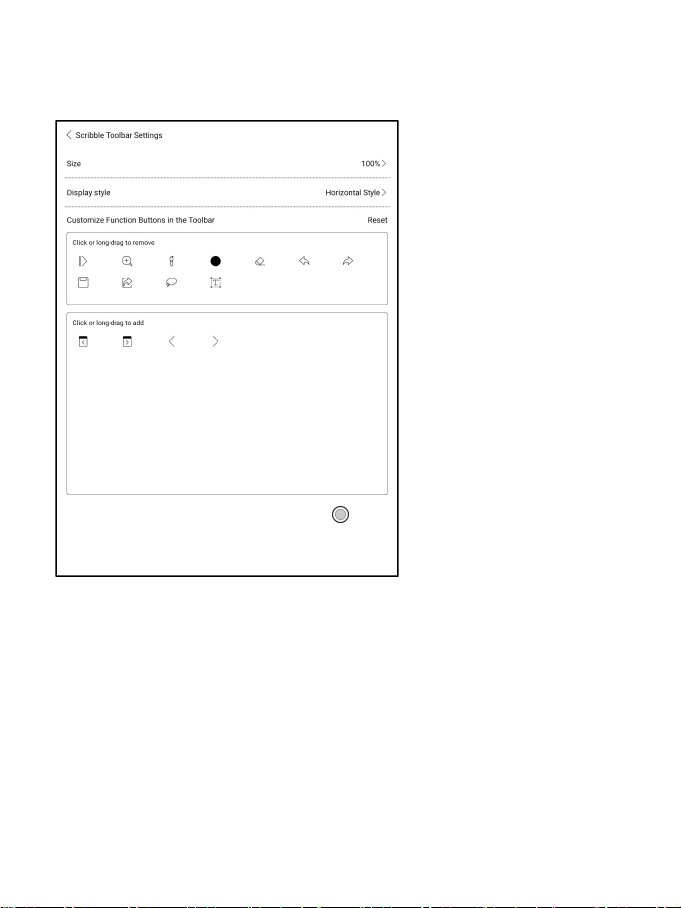
Scribble Toolbar Settings
The Toolbar’s size, display style and function buttons are customizable.
Page 72
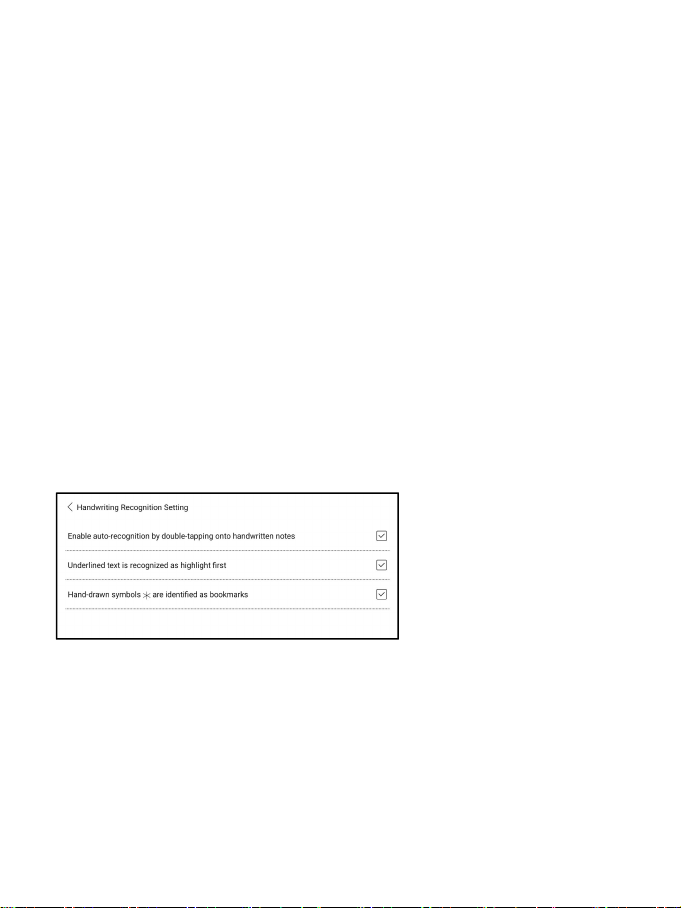
Handwriting Recognition Settings
It is enabled by default and can be disabled manually. After disabled, it will
no longer support double-tap recognition
The underline can be recognized as highlight first. It is enabled by
default, and it can be turned off. After it is turned off, it is only recognized
as an image;
You can set the recognition of hand-drawn symbols as adding bookmarks.
It is disabled by default and can be manually enabled. After enabling,
double-tap recognition of the symbol will automatically convert to adding
bookmarks;
Page 73
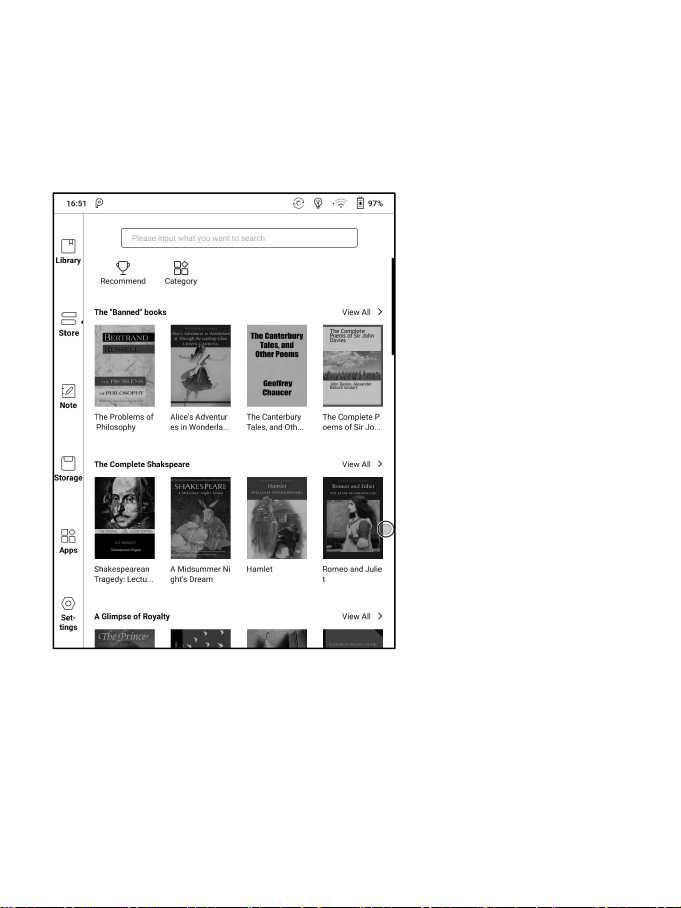
8. Store
In the language of non-Chinese, the Store is offering free
publications E-books from the Internet.
Page 74

Category
Books can be screened according to different categories.
Page 75

Book Detail
Click a book cover to open up book detail. The specific book information.
Click “Full Edition Download” to download the book, then you can see
this book cover in Library .
Page 76

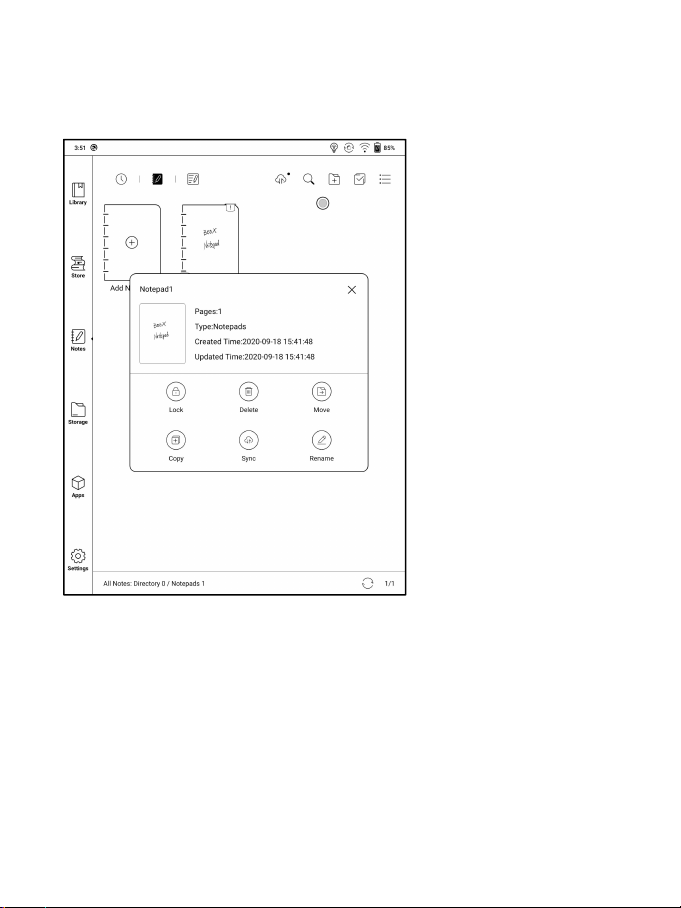
9. Notes
Multiple Selection
More Options
Create new folder
Local Notepads
Reading Notepads
Recent Notepads
Search
Onyx Cloud Sync
This includes Recent Notepads, Local Notepads, and Reading Notes.
Recent Notepads include 12 Notepads that have been opened recently,
including local notepads and reading Notes
The Reading Notes include the Notes created under Split View when users
are reading books.
Page 77

Cloud Sync ( in bulk)
Notes Cloud Sync requires logging in to Onyx Account.
The individual notepad can be synced automatically when being exiting
or opening. Go to More Options / Notes Sync Setting to choose whether
to enable this function. The Notes will be automatically synced when
exiting by default.
Sync in bulk, including Notes list, all Notes. Users can manually sync
all notes in bulks.
Cloud Sync includes two-way sync between Cloud end and BOOX
device. When there is any change to the Notes on either end, the other
end will sync all the changes.
The deleted Notepads can be recovered within 10 days from website
trash bin. If you delete the notepads by mistake, you can recover them
from the trash bin, which will be emptied after 10 days.
After Notes are synced, users can check the synced notes from
push.boox.com by logging in the same Onyx Account.
Currently PDF templates can not be synced and only PNG templates
can be synced.
Page 78

More Options
It includes Notes Sync Setting, Filter and Sort and Settings.
Page 79

Notes Sync Setting
This includes ONYX Cloud Notes and export to other accounts.
When you export the Notes to third-party Accounts, the Notepads
will be in PDF format and can not be edited.
If you export your notes to other bound accounts, the notes will be
automatically synchronized to other bound cloud accounts of yours when
you exit the Note. The sync icon is only applicable for the ONYX account
cloud sync.
Page 80

Backup and Recover
It supports backup and recover for handwritten documents in local or to
the Cloud.
To delete backup files is allowed.
Note: The action Recover will recover the backup data, which will cover
the current data. Please be careful.
Page 81

Settings
These are general settings for Stylus Calibration, Account Sync and
Backup, AI recognition, Note password settings, Show Erasing Trace,
Auto-turn on Wi-Fi to sync Notes, Auto-generate PDF documents after
exiting Note, Auto refresh after lifting stylus.
If this device is bound with third-party accounts for file sync, and Wi-Fi
is connected, the Note files will be auto-uploaded to the accounts with a
PDF or PNG attachment.
If “auto-turn on Wi-Fi to sync Notes” is enabled for notes sync, the
device will connect with Wi-Fi automatically and sync notes to the Cloud
when exiting the Note app. If it is disabled, users need to sync to account
manually by clicking an upload icon on book covers.
For the “Auto refresh after lifting stylus”, the display would refresh after
users lift stylus away from the screen, making the strokes smoother.
Page 82
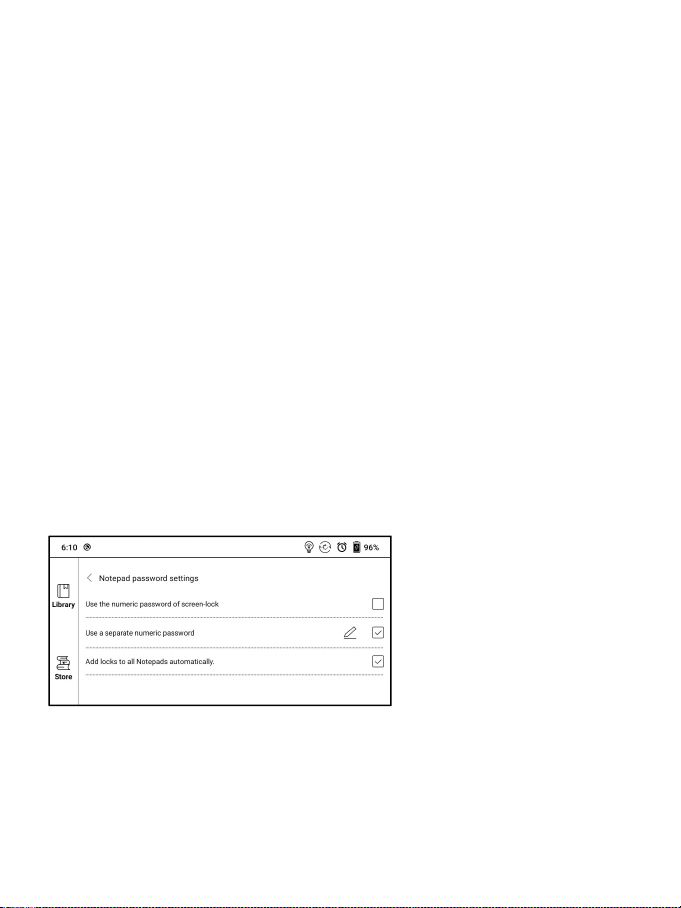
Note Password Settings
This password is only used for protecting files on the device, not
encrypting files. So the password does not work out of the device. Now
this function does not support multiple passwords for one file.
This function supports specific password, which are available for all note
files. Users can also set a specific password for a single file. To add, edit
and remove password are allowed here.
The specific password can be different from the system password.
You can select whether to add locks to all Notepads. If you deselect this
option, you need to add locks to each Notepad manually.
Page 83
The note file has no cover thumbnail after locked.
Long-press the note file to remove and add password in the dialog.
Page 84
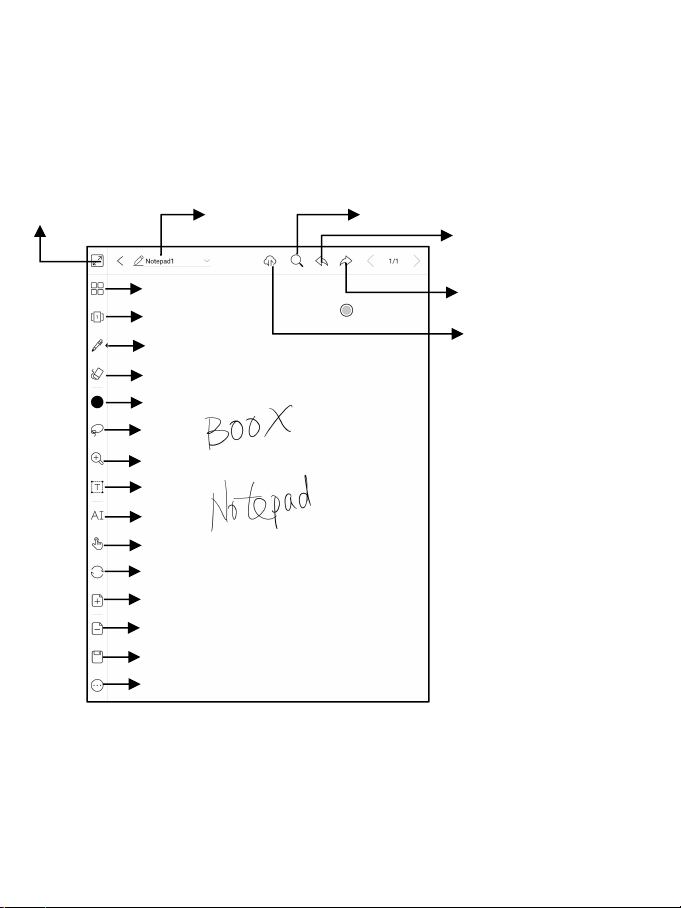
Scribble Interface
Undo
Thumbnail View
Pen
Eraser
Colors
Lasso tool
Zoom
Text Input
Enable/disable palm rejection
Refresh
More
Save
AI Recognition
Delete current Page
Add a new Page
Fullscreen
Name
Search
Onyx cloud Sync
Redo
Layers
Files can be saved automatically and manually when to quit the Note.
Tap on the page number to jump to the specified page quickly.
Page 85

Layers
Move layer
Show layer
Delete layer
Hide layer
Select template
This supports template layer, 5 custom layers, hiding and adjusting
layer order.
Hidden layers will not be displayed during export and recognition;
Templates can only be added at the template layer, and the template
layer cannot be deleted;
You can add 5 custom layers to the inserted images
Page 86

Template
It includes built-in templates, local templates(PDF\PNG format) and the
Cloud templates.
The directory of the local templates is Storage\note Template.
The directory of the templates downloaded from the Cloud is
Storag\noteTemplate\cloud.
The built-in templates will be used if the local template are deleted.
Page 87
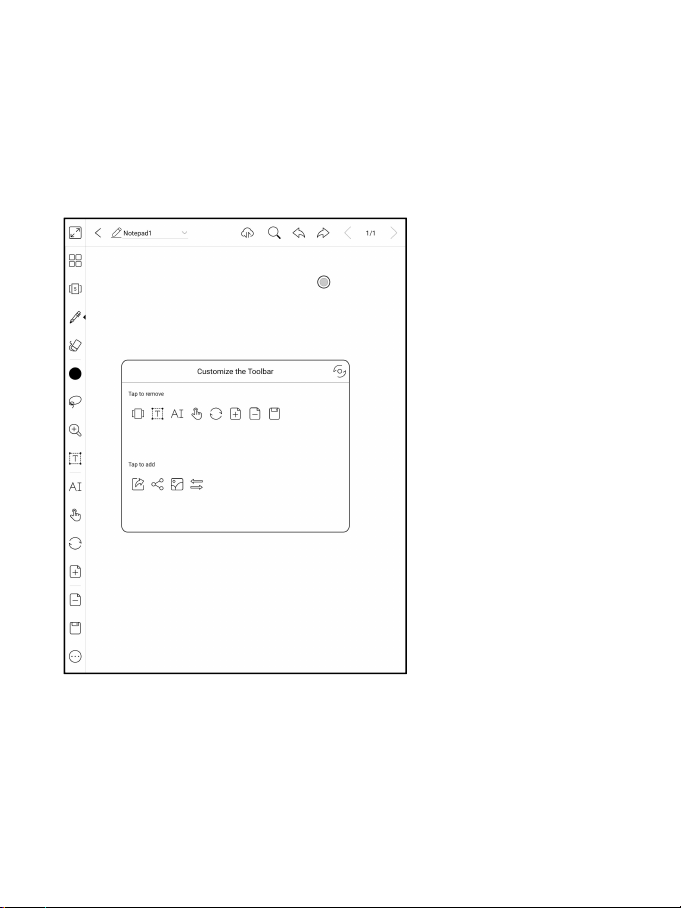
Custom Toolbar
Besides the default tools like scribble, erase, fullscreen, select, users can
add, remove, adjust other tools on the toolbar.
Page 88
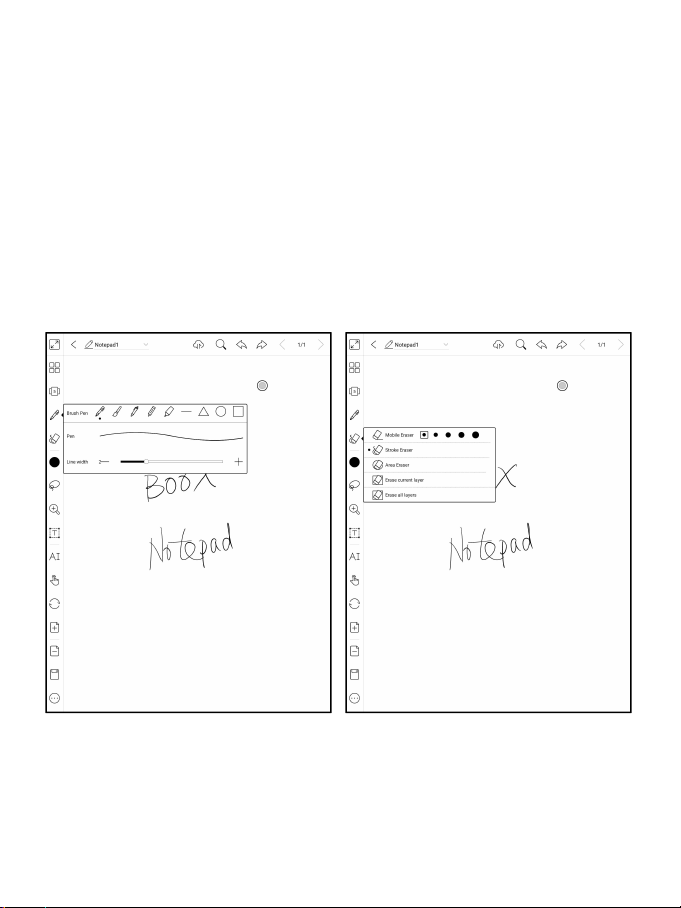
Write and Erase
Click on the brush icons for the writing and erasing functions.
Double-click them to expand the sub-menu.
In the state of stroke erasing, you need to switch to the brush first and
then write.
For the “erase all”, you do not need to switch back to the brush.
Page 89

Lasso
In the Lasso mode, circle an area on the screen, then users can zoom,
move, duplicate and remove the selected area.
Page 90

Text Input
Users are allowed to key in words on the note by a Bluetooth keyboard.
The input box can be moved everywhere.
Users can adjust the font, line spacing, bolding, underline, italic, copy and
delete.
stylus touch for icons is desensitized by default, so it is better to use
your fingers to adjust the position of the Navigation Ball;
when using full-screen the square icon to exit full-screen mode.
Page 91

AI Recognition
Click the icon “AI” to switch to recognize the handwriting text. English
is supported. To download the corresponding language package is
required for other language recognition.
This function contains original recognition and reflow recognition.
Original recognition only does conversion but not changes the position of
words, while reflow recognition reflows words after conversion. Users
need to manually add space, line break and font size.
Page 92

The text flows automatically after reflow. Users can manually make space,
newline, and font size after that.
The accuracy of recognition depends on how normal the handwriting is.
AI recognition works based on the handwriting. If the handwriting content
changes, please re-enter the function to let it convert once again. For
saving the converted content, please export it.
Page 93

Insert Image
Users can remove, zoom, duplicate the images inserted from the local.
Select the image and then edit.
Share
Share all pages of a note in PDF format or current page in PNG format.
Page 94

Full screen mode of Notes
When you switch to full-screen mode, you can choose whether to
display the Floating Toolbar.
When it is collapsed, you can call it out by swiping from the screen
edges.
Note: The full-screen mode is an independent note-taking mode. If you
exit, you will exit the Notepad directly. If you need a non-full-screen
mode, you can switch on the Toolbar;
Page 95

The default Floating Toolbar only includes Fullscreen, Pen, Color,
Eraser, Collapse, and More. You can tap the “More” icon to customize
the icons on the Floating Toolbar.
Page 96
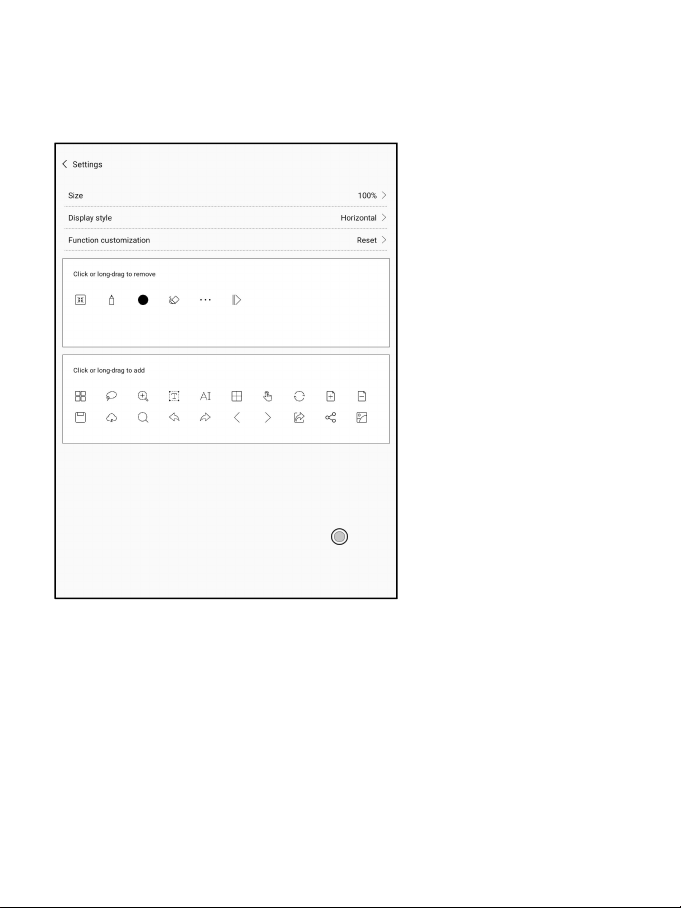
Floating Toolbar Settings
The Toolbar’s size, display style and function icons can be customizable.
Page 97
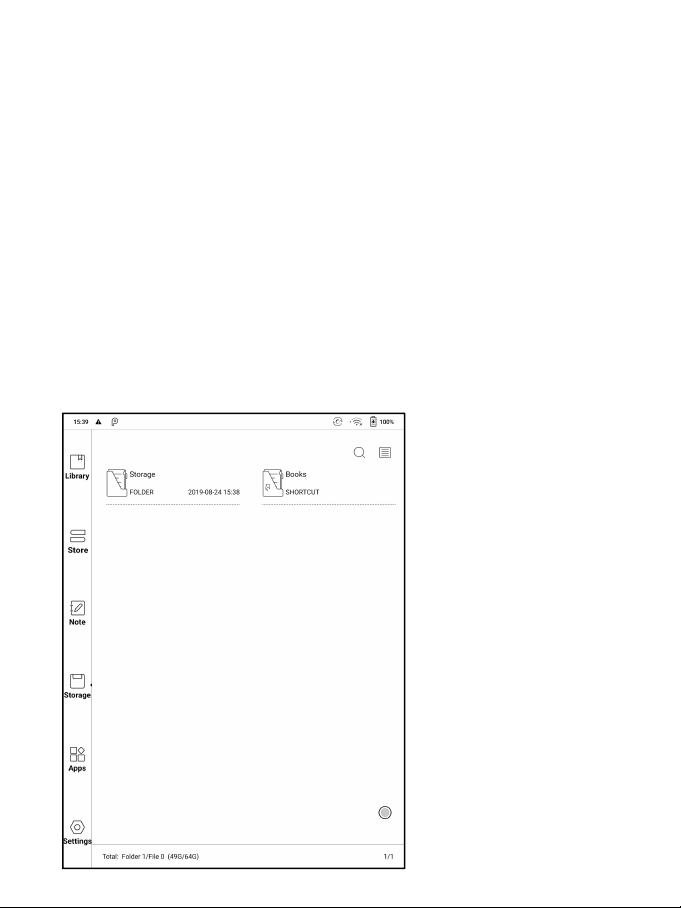
10. Storage
Storage displays all files from internal storage.
Files will be displayed in alphabetical order by default. It can be switched
to file type, size, create time. The files can be viewed in thumbnail or list.
Multiple selections are allowed.
Users can customize shortcut for folders in storage and place it in the
storage interface.
The way to make a shortcut: long press the folder > set a shortcut.
Page 98

OTG USB drive
OTG is supported. Users can connect the device with USB drive through a
Type-C cable. The device will detect USB drive afterwards.
The OTG feature would consume more power since it supplies power to a
USB drive.
It supports analog and digital Type-C earphones ( You can use 3.5mm
audio jack converter);
Page 99
Low storage space warning
Please reserve at least 300M of available storage space to ensure the
normal operation of the system and saving related data;
When it is lower than 300M, a warning icon will be displayed in the system
bar, indicating that the storage space is insufficient;
Page 100

11. Apps
All installed apps are displayed in alphabetical order A-Z by default. Users
can choose their preferred order.
Long press on each APP icon to pop up the Apps menu to delete or
optimize. Pre-installed apps on devices are not allowed to delete.
 Loading...