

Page 1
1
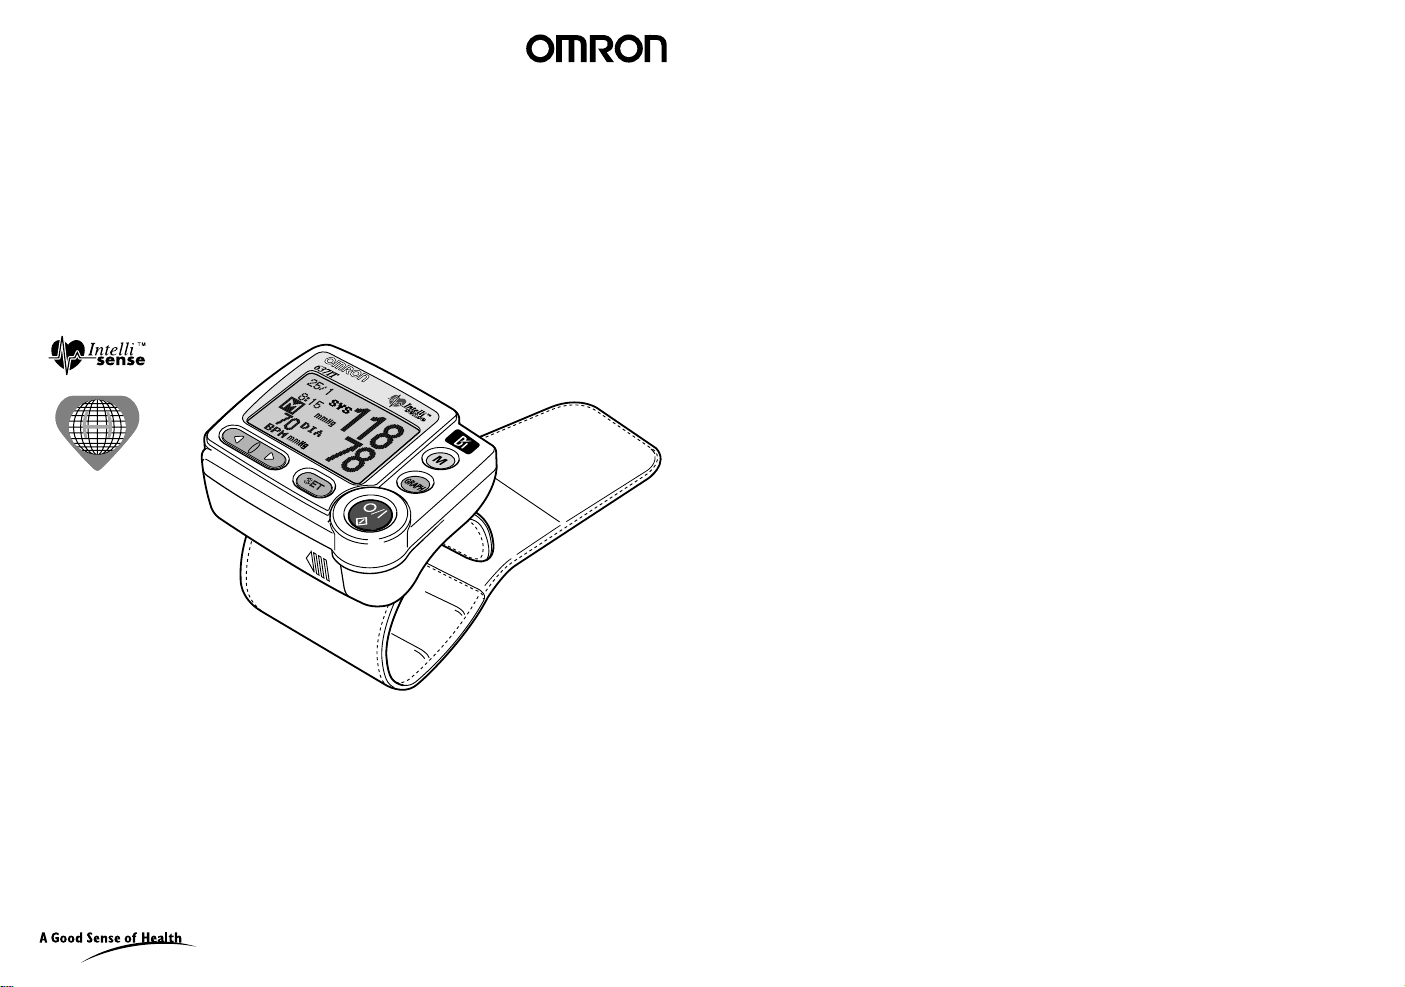
Instruction Manual 637IT Fully automatic blood pressure monitor for measurement at the wrist
Gebrauchsanweisung 637IT Vollautomatisches Blutdruckmeßgerät zur Messung am Handgelenk
Gebruiksaanwijzing 637IT Volledig automatische bloeddrukmeter voor de pols
Manuel d'instructions 637IT Tensiomètre entièrement automatique pour prise de mesure au poignet
Manual de instrucciones 637IT Aparato completamente automático para medir la presión arterial en la muñeca
Manuale di instruzioni 637IT Misuratore della pressione per il polso completamente automatico
English • Deutsch • Nederlands • Français • Italiano • Español
637IT Vers.01/07/02
Page 2
3
English
2
Table of Contents
Dear Customer
Thank you for purchasing this OMRON product. OMRON products are known for their reliability and
advanced technology. By buying this OMRON 637IT wrist blood pressure monitor with USB computer
interface and position sensor you have chosen for a high quality and innovative instrument. We hope
that you will be fully satisfied with your new blood pressure monitor.
Please take your time to read
this instruction manual carefully before using it for the first time. If you still have questions
please contact your OMRON dealer or the distributor as mentioned on the packaging. They will be
pleased to help you.
We wish you a healthy future!
Before Measuring Your Blood Pressure . . . . . . . . . .3
Notes on Safety . . . . . . . . . . . . . . . . . . . . . . . . . . . 4
Names and Functions of the Parts . . . . . . . . . . . . . 5
How to Insert the Batteries . . . . . . . . . . . . . . . . . . . 6
How to Set the Date and Time . . . . . . . . . . . . . . . . 7
How to Measure Blood Pressure Correctly . . . . . . .7
Correct Posture . . . . . . . . . . . . . . . . . . . . . . . . . . . 9
How to Measure Blood Pressure . . . . . . . . . . . . . . 10
How to Use the Memory Function . . . . . . . . . . . . . 11
How to Use the Graph Function . . . . . . . . . . . . . . 12
How to change the settings . . . . . . . . . . . . . . . . . . 13
Auto memory . . . . . . . . . . . . . . . . . . . . . . . . . . . . 14
Position sensor. . . . . . . . . . . . . . . . . . . . . . . . . . . 15
Left or right wrist measurement. . . . . . . . . . . . . . . 15
Alarm . . . . . . . . . . . . . . . . . . . . . . . . . . . . . . . . . . 15
Time. . . . . . . . . . . . . . . . . . . . . . . . . . . . . . . . . . . 16
Delete data. . . . . . . . . . . . . . . . . . . . . . . . . . . . . . 16
Reset settings. . . . . . . . . . . . . . . . . . . . . . . . . . . . 16
How to use the computer interface . . . . . . . . . . . . 17
What Is Blood Pressure? . . . . . . . . . . . . . . . . . . . 20
Blood pressure at the upper arm and wrist . . . . . . 21
Maintenance and storage . . . . . . . . . . . . . . . . . . . 22
Error indication . . . . . . . . . . . . . . . . . . . . . . . . . . . . 2 3
Troubleshooting . . . . . . . . . . . . . . . . . . . . . . . . . . 24
Spare parts and accessories . . . . . . . . . . . . . . . . . 25
Specifications . . . . . . . . . . . . . . . . . . . . . . . . . . . . 25
Notes on Safety Please read thoroughly before using this monitor.
Before Measuring Your Blood Pressure
• The warning signs and the sample icons shown here are listed for you to use the product safely
and correctly as well as to prevent the risk of damage to you and others.
• The icons and meanings are shown as follows.
Warning sign
Contents
Indicates matters in which bodily harm or material damage* may arise as a
result of incorrect handling.
Caution
The icon indicates prohibitions (what you cannot do). Matters involving actual prohibitions are indicated by text or pictures in or near .
The left icon refers to "prohibition to disassemble".
The icon indicates something compulsory (always follow). Matters involving actual
compulsory actions are indicated by text or pictures in or near .
The left icon refers to "general compulsion".
* Material damage refers to a wide range of damage involving your house,
household goods, domestic animals, and pets.
Examples of signs
Self-diagnosis of measured results and treatment are dangerous. Please follow the
instructions of your doctor.
• Self-diagnosis may worsen the disease.
• When the arterial sclerosis proceeds due to diabetics, hyperlipemia, or hyperten-
sion, it may cause peripheral circulatory disturbance. For these cases, blood pressure may differ greatly between measurement at the wrist and the brachial.
Do not use this monitor for the infant or the person who cannot express one's intention.
• They may suffer accident or trouble.
Do not use this monitor for purposes other than measuring blood pressure.
• You may suffer accident or trouble.
Do not use portable phones near this monitor.
• The monitor may operate erroneously.
Do not disassemble or modify the main unit or the wrist cuff of the blood pressure
monitor.
• Correct measurement will be impossible.
Caution
Page 3
5
English
4
Notes on Safety
Important instructions for obtaining meaningful readings
Avoid eating and drinking (alcohol), smoking, sport and taking medicines before measuring your
blood pressure as this could affect your blood pressure level.
Before you start sit comfortably on a chair and relax. It is recommended to check your blood pressure
at least twice a day, in the morning after getting up and in the evening after work, or as advised by
your doctor.
Do not move and do not speak while the measurement is being taken. Avoid measuring your blood
pressure while you are in a moving vehicle.
Allow an interval of at least three minutes between readings. Otherwise congestion of blood might
occur and distort the readings. Always remove the cuff between readings.
Bare your wrist and take of your watch and jewellery before applying the cuff. Do not constrict the
flow of your blood if you push up your sleeve.
Cautions
Blood pressure measurement is not suitable in case of serious arteriosclerosis (hardening of the
arteries).
The pulse rate indicator is not suitable for monitoring the frequency of cardiac pacemakers.
If you suffer from disorders of heart rhythm, known as arrythmia, you should only use this blood pres-
sure monitor in consultation with your doctor. In certain cases oscillometric measurement methods
can produce incorrect readings.
Pregnant women should only measure their own blood pressure in consultation with their doctor since
the readings may be changed by the pregnancy.
Please remember: Self-measurement is not the same as medical treatment!
You should never
change the dose of medicines as prescribed by your doctor!
Before using your OMRON 637IT for the first time
Your blood pressure monitor: the benefits
The OMRON 637IT is a compact fully automatic wrist blood pressure monitor. Operating on the oscillometric principle it measures your blood pressure and pulse rate comfortable and quickly from the
wrist. It contains an intelligent system for “fuzzy” controlled inflation, known as “Intellisense”. This is
an advanced method of oscillometric measurement. No pre-setting of re-inflation is necessary.
The OMRON 637IT has a Position Sensor. The Position Sensor is able to determine the optimal
height of your wrist (heart level) for the blood pressure measurement. Measuring at the heart level is
extremely important since measuring at a higher or lower position will give wrong results.
The OMRON 637IT has a large DOT matrix display enabling you to enlarge the digits and showing
you graphs. Together with the USB computer interface and the built in alarm function for same time
measurements or pill intake your OMRON 637IT is the optimal device to manage your blood pressure.
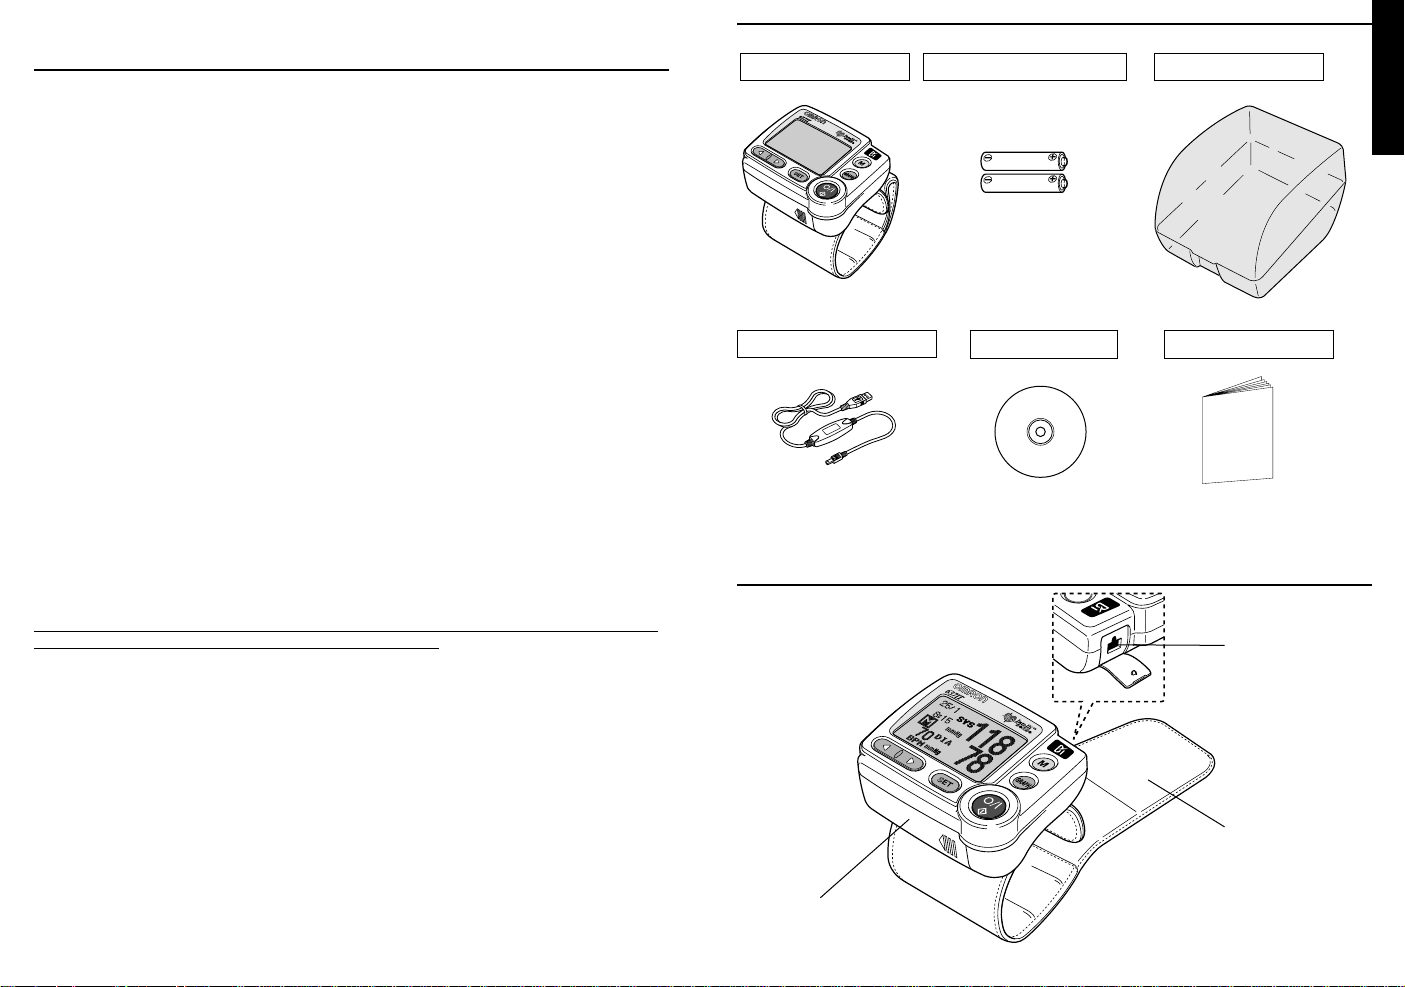
Main unit
Storage caseBatteries for monitoring
Instruction Manual
(Two LR03 alkaline batteries)
CD-ROM
USB computer interface cable
Names and Functions of the Parts
Data Transfer Port
Connects your 637IT
with your PC.
Battery Cover
Wrist Cuff
Main unit
Page 4
7
English
6
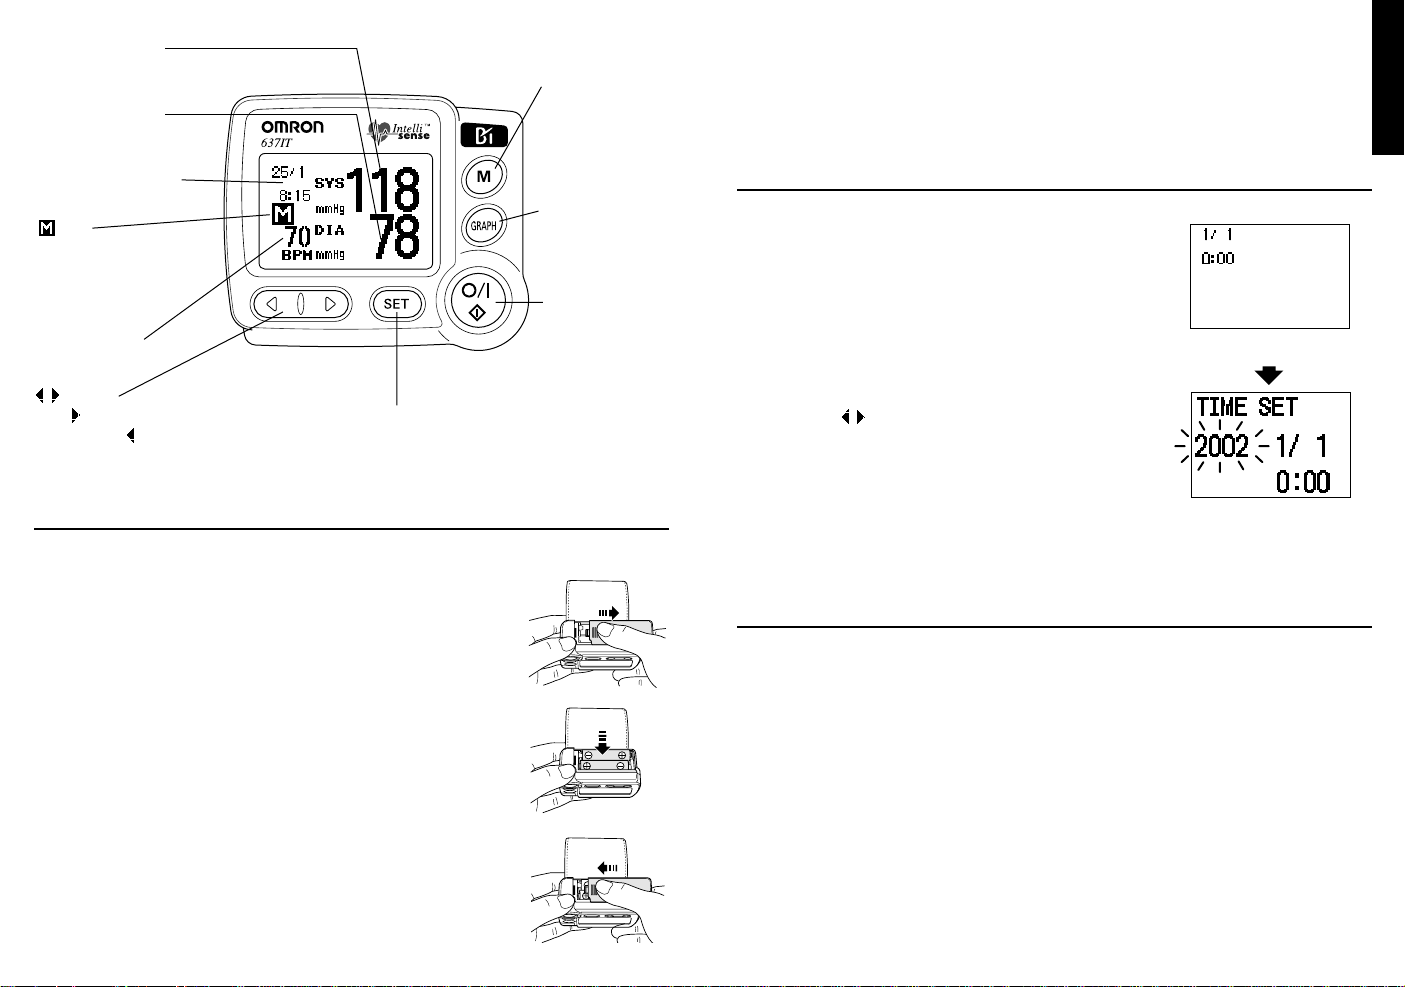
Systolic Blood
Pressure Display
Diastolic Blood
Pressure Display
Date/Time Display
Pulse Display
button
Push to move the displayed item
forward. Push to move the displayed item backward.
Mark
Displayed when a stored
measurement is shown.
SETTING button
Push this button to set
various items on the monitor such as time and date.
GRAPH CALL
button
Push this button to
see the graph.
MEMORY
RECALL button
Push this button to
see the measured
values stored in
the monitor.
ON/OFF button
Push this button to
measure your
blood pressure or
to switch the monitor off.
How to Insert the Batteries
Use this monitor after inserting batteries in the main unit.
1. Open the battery compartment.
2. Insert the batteries (Type LR03 / AAA) as shown in the figure.
Ensure the polarity (+/-) of the batteries is correct.
3. Close the battery cover.
Please disconnect your 637IT from your PC when you replace the batteries.
With new batteries (long life alkaline batteries) you are able to measure app. 300 times under normal
conditions. Please switch of the monitor after using it. If you forget to switch the monitor off it will
switch off itself after app. 2 minutes. Please take the batteries out of the monitor if you intend not to
use the monitor for a long period (app. 2 months).
How to Set the Date and Time
Before using your OMRON 637IT for the first time, you have to
set the date and time. After turning the monitor on by pushing the
O/I button the initial screen (see picture) will be available for a
few seconds. After the initial screen you will proceed automatically to the TIME SET screen. (For instruction how to set the date
and time refer also to page 16 in Chapter How to change the settings.)
After reaching the time screen you will see the Gregorian calendar (year day/month). The year will be flashing.
1. By using the ( ) buttons you can set the current year.
2. By pushing the SET button you will lock the year and proceed
to the next item.
For setting the month, date and time repeat step 1 and 2. After
setting the minutes you will proceed to the DELETE DATA
screen. Please turn off your monitor by pushing the O/I button.
Your OMRON 637ITis ready for use now.
Initial Screen
Time Screen
How to Measure Blood Pressure Correctly
How to wrap the cuff
In order to measure your blood pressure correctly it is needed to wrap the cuff around your wrist in a
correct way. If not, correct measurements are not possible. Please follow the coming instructions (left
wrist):
1) Make sure that your wrist is bare and will be wrapped over your skin.
2) Make sure that you clothing is not constraining the flow of your blood.
3) Make sure that the wrist (left or right) to measure is selected from the settings menu (see also
page 15). The left wrist is preset.
Page 5

9
English
8
10~15mm
4) Place the cuff over your left wrist with your thumb facing upwards.
Leave app 10-15 mm between the cuff and the bottom of the palm of your
hand as shown in the figures.
1
2
4) Pull the wrist cuff upward and close the cuff firmly with the Velcro tape
as shown.
You can use your 637ITalso on your right hand after selecting right wrist
measurement in the SETTING MODE.
People with a slender wrist (wrist circumference of less than 145mm) may
feel loose because the cuff may not be wrapped firmly. Please do not force
the cuff it will not affect the measurement.
3
Correct Posture
Incorrect Posture
How to obtain a correct posture
Achieving a correct posture before measuring your blood pressure is important since an incorrect
posture might give you incorrect readings. To achieve a correct posture please follow the instructions
(see pictures):
1) Sit down and stretch your back.
2) Relax yourself by relieving the stress from your shoulders and arms.
3) Breath several times deeply and return to natural respiration.
4) Do not sustain your wrist with your other hand and avoid stress in your hand by making firm grips
or large extensions.
Measuring your blood pressure and pulse
If you have achieved the correct posture you can start the measurement. When you measure for the
first time the Position Sensor and the Signal will be ON and measuring at the left wrist will be pre set.
• Push the O/I button to activate your
637IT and the Position Sensor
Screen will be displayed.
Page 6

11
English
10
How to Measure Blood Pressure
Inflation Start Screen
Inflation in Progress
Screen
Mark
Indicating
Inflation in
Progress
Pulse
Rate
Mark
• Sustain your elbow with your other hand
or a table to avoid movement.
• Adjust the height of your wrist by using your elbow as a fulcrum. When the ( ) will reach the
( ) signyou will hear a beeping sound indicating that your blood pressure monitor is at the correct
height (heart height). The ( ) sign will change in the ( ) sign and the measurement will start.
Deflation Start Screen
Measurement Results
Display Screen
Deflation
Mark
• Do not move until the measurement results are
displayed!
• The screens (see picture) will be shown during the
measurement.
When the measurement is finishes, the deflation mark
( ) flashed and the cuff deflates.
How to enlarge the reading
• The results will be shown on your display. By pushing the ( ) buttons you can enlarge the
readings.
How to Use the Memory Function
Date and
Time of
Measurement
Your OMRON 637ITblood pressure monitor is able to store maximum 90 measurements including date and time. When your blood
pressure monitor is holding 90 measurements the oldest will be
deleted to store a new measurement.
Press the (M) memory button when your blood pressure monitor is
switched off. The latest measurement will be displayed. Each time
you push ( ) button an earlier measurement will be displayed. By
pushing the ( ) button a later reading is displayed.
By pushing the GRAPH button the selected measurement is displayed in a weekly graph (see also How to use the graph function).
Push the memory button to return to the memory display again.
Page 7

13
English
12
Night Data Graph
Night
Data
Mark
Push the GRAPH CALL button again to display the
Evening Data Graph.
• Each time you push the GRAPH CALL button, All,
Morning, and Evening data are displayed in that
order repeatedly.
How to use the graph function
This monitor has the possibility to display the stored measurements as a graph. In order to get a clear
history of your blood pressure the measurements are put in time zones:
• Morning: Measurements made between 0:00 and 9:59
• Daytime: Measurements made between 10:00 and 17:59
• Evening: Measurements made between 18:00 and 23:59
The last measurement in each time zone will be displayed. For example if you measure 3 times in the
same time zone on the same day only the third reading will be displayed. On the other hand all readings will be stored in the memory (See also page 11).
There are three different graphs available:
• All data graph: displays all measurements per week
• Morning data graph: displays all morning measurements per week
• Evening data graph: displays all evening measurements per week
No graph display is provided for daytime data only.
To display the graph push the GRAPH CALL button.
All Data Graph is displayed.
Push the GRAPH CALL button again to display the
Morning Data Graph.
All Data Graph
Morning Data Graph
Morning
Data
Mark
Date of
Measurement
Month/Days of a Week
Pulse
Rate
Blood Pressure Values (systolic/diastolic) (mmHg)
Detail Screen of Data
in Flashing Display
Display screen where the
systolic blood pressure
values higher than 170
mmHg are measured
twice
Graph Display Screen of
Hypertension Type
The systolic blood pressure is higher than
170mmHg
When a systolic blood pressure above 170
mmHg is measured twice the ( ) symbol is
displayed in the graph.
When a systolic blood pressure above 170
mmHg is measured three times the ( ) symbol disappears and the screen automatically
changes to the “hypertension display”. The
maximum displayed blood pressure value
(y-axis) will change from 170 mmHg to 210
mmHg.
When you push the memory button in the
graph display the details of the measurement
will appear. Pushing the graph button again will
bring you back the graph display. You can use
( ) the arrows in the graph and memory display to leaf through the measurements.
How to change the settings
The settings of your OMRON 637IT blood pressure monitor can be changed according to your own
preferences and comfort.
To enter the setting menu please press the SET button when your blood pressure monitor is switched
off. By using ( ) you can select your preference. By pressing the SET button again you lock your
preference and proceed to the next item as shown in the figure. The on/off button (O/I) can be used to
switch the monitor off again.
Explanation of the graph display
When the GRAPH button is pushed the latest
measurement will appear in a flashing display.
In the example the measurement is made on
January 31 at 22:40. The graph shows 140
mmHg for systolic and 95 mmHg for diastolic
(top and bottom of vertical bar) and a pulse rate
of 90 beats a minute.
Page 8

15
English
14
Automatic Memory Setting
(Refer to Page 14.)
Position Sensor Setting
(Refer to Page 15.)
Measuring (Wrist) Setting
(Refer to Page 15.)
Alarm Setting
(Refer to Page 15.)
Time Setting
(Refer to Page 16.)
All Memory Erasure
(Refer to Page 16.)
Reset Settings
(Refer to Page 16.)
Automatic Memory
Screen
Automatic Memory
OFF Screen
Auto memory
You can either enable (ON) or disable (OFF) the memory function of your
blood pressure. When the auto memory function is switched off the measurement will not be stored. When using your OMRON 637IT monitor with more
than one person it is recommended to disable the auto memory function. The
auto memory function mode is ON when you purchased your OMRON 637IT
(factory preset).
• If you push the SETTING button while the power is turned off,
the Setting Screen is displayed in the order shown in the picture.
• You can select the setting or set the date and time with the
buttons.
• To finish the setting, push the ON/OFF button.
Position Sensor Screen
Position Sensor OFF
Screen
Position Sensor ON and
SIGNAL OFF Screen
Position sensor
The position sensor of your OMRON 637IT can be switched ON or OFF. In
the factory preset the position sensor is enabled. If the position sensor is
switched ON you can choose to have the optimal wrist height supported by
an acoustic sound (SIGNAL ON or OFF).
Measuring (Wrist) Screen
Measuring (Wrist) Right Wrist Screen
Left or right wrist measurement
Normally blood pressure is measured on the left wrist (factory preset). With your OMRON 637IT you
can choose to use the monitor either on your left or right wrist. It is recommended to use the same
wrist when for optimal comparisons of your blood pressure fluctuations.
Alarm Screen
Alarm
Your blood pressure monitor has the possibility to set an alarm twice a day. The alarm function can
be used to monitor your blood pressure at the same time every day or as a reminder for pill intake.
The alarm will sound for 2 minutes. By pushing the O/I button the alarm will stop. The alarm will not
sound when the blood pressure monitor is used (e.g. for measuring or graph display) at the moment
the alarm is set.
You can set the requested hour by pushing ( ) when flashing. Press SETto lock the hour and proceed with the minutes. By pushing the ( ) you can set the minutes. Press SET to confirm and to
proceed. Push either ( ) to enable ( ) or disable ( ) the alarm. Press SET to lock the settings.
Screen of indicating that
the alarm is sounding
Page 9

17
English
16
Time Screen
Time
You can change the time and date setting of your blood pressure monitor.
When reaching the time screen you will see the Gregorian calendar. The
year will be flashing.
1. By using the ( ) buttons you can set the current year.
2. By pushing the SET button you will lock the year and proceed
to the next setting.
For setting the month, date and time repeat step 1 and 2. After setting
the minutes you will proceed to the DELETE DATA screen.
All Memory Erasure
YES Screen
Are You Sure YES
Screen
Data Deleted (Blank)
Screen
Delete data
In this screen you are able to delete all stored measurement from you
OMRON 637IT. Please be careful that deleted data cannot be restored.
The factory preset is NO. If you choose YES the monitor will ask for a
confirmation “ARE YOU SURE?”. To cancel select NO to confirm
DELETE DATA select YES.
After deleting all stored measurements the “Data Deleted Screen” will be
shown. All the stored measurements are deleted and the monitor will be
turned off.
If the stored measurements are not deleted you will proceed to the
RESET SETTINGS screen.
Reset Settings YES
Screen
Are You Sure YES Screen
Reset settings
In this menu you can choose to reset all the settings to the “factory preset” settings. The factory preset for this menu is NO. If you choose YES
by using the ( ) button the monitor will ask you for a confirmation “ARE
YOU SURE?” After confirmation by selecting YES all the settings will be
changed to the factory mode.
The monitor will return to the AUTO MEMORYSCREEN. You can turn off
your monitor by pushing the O/I button.
How to use the computer interface
This blood pressure monitor has a computer interface and is supplied with software to transfer the
memory of the blood pressure monitor to your personal computer.
Required operating environment
The following operating environment is required to operate the communication software as supplied
on the CD-ROM.
Personal computer : PC/AT compatible with CPU of 80486 or above or with
any Pentium processor.
OS : Windows 98SE/ME/XP/2000
Memory (RAM) : 16 MB or more
Hard disk : Free area of 10 MB or more is necessary
Display : 640 x 480 pixels or more
Disk drive : CD-ROM drive
Connection port : Free USB connection port
How to install the software
1) Turn on your personal computer
......Your windows desktop is displayed
2) Insert the CD-ROM in the disk drive
3) Open the control panel
• Click the “Start” button.
• Point the mouse pointer to “Settings” on the menu.
• Click “Control Panel”
4) Open the “Add/Remove Programs” by double clicking the icon
5) Execute the installation
• Click the “install button”
• Follow the instructions
• The software is installed on your personal computer
How to uninstall the software
1) Open the control panel
• Click the “Start” button
• Choose “Settings”
• Click “Control Panel”
2) Open the “Add/Remove Prograns” icon by double clicking
3) Delete the application
• Click “BPFile” from the list
• Click the Add/Remove button
• .....The confirmation screen is displayed
• Click “Yes”
• .....”BPFile” is deleted
• Click “OK”
Page 10

19
English
18
How to connect your 637IT blood pressure monitor to your PC
Connect your 637IT blood pressure monitor with your PC using the included USB cable. The mini
USB connector (small connector) should be connected to your 637IT blood pressure monitor and the
normal USB connector (large connector) should be plugged into your personal computer.
How to use the software
Open the BPFile application from the program list or your desktop and the following screen is shown
on the screen.
• By pressing the “DATA” button your are able to transfer the memory of your 637IT blood
pressure monitor to your personal computer.
• By pressing the “TIME” button you are able to set the date and time in your 637IT blood
pressure monitor.
• By pressing the “ID” button you are able to set your personal name in your 637IT blood
pressure monitor.
• By pressing the “CLOSE” button you are closing the program.
How to set the time
• Press the “TIME” button on your screen.
...The time and date are read from your 637IT blood pressure monitor
• Change the time and date if applicable in the white field
How to create a data file
• Press the “DATA” button on your screen
• Press the “Dir” button on your screen and
name the file.
• Press “OK”
• The file can be opened in most windows
programs like Excel, Word
Page 11

21
English
20
What is blood pressure?
Blood is pumped to artery by the beat (contraction and expansion) of a pump called the
heart. The pressure to pump out blood to
artery is called the "systolic blood pressure."
The pressure when the heart expands as the
blood having circulated the whole body
returns is called the "diastolic blood pressure."
Health and blood pressure
Blood pressure fluctuates being affected by
everyday life and age. Hypertension is a sign
that can cause dangerous diseases such as
cerebral apoplexy or myocardial infarction to
occur easily. By understanding the state of
your blood pressure, review your health and
lifestyle.
Systolic blood pressure
Diastolic blood pressure
Blood is pumped out.
Blood returns to heart.
Artery
Vascular
wall
Contraction
Pressure
to vascular
wall
increases.
Vein
Vascular
wall
Expansion
Pressure to
vascular wall
drops.
Lifestyle
Excessive intake of salt,
Excessive consumption of alcohol,
Obesity, Lack of exercise
Hypertension
Arterial sclerosis
Danger of Cerebral apoplexy, Myocardial infarction
(mmHg)
According to the blood pressure classification by the WHO/ISH* (revised in 1999)
* International Society of Hypertension
(mmHg)
80 85
90 100 110
120
130
140
160
180
Systolic blood pressure
Diastolic
blood
pressure
Optimal blood
pressure
(target value)
Normal blood pressure
Normal systolic value
Mild hypertension
Moderate hypertension
Severe hypertension
Hypertension guide
The World Health Organization (WHO) and the
International Society of Hypertension (ISH) established the Blood Pressure Classification. Use this
Classification as the guide to know the state of your
blood pressure. However, if you are concerned with
your blood pressure, be sure to follow the instructions
of your doctor.
• There is no universally accepted definition of
hypotension. Generally speaking, those with the
systolic pressure below 100 mmHg are considered
to be hypotension.
• This classification is made based on the
blood pressure values measured at upper
arm by sitting on the chair in the hospital
regardless of the age.
Wrist Blood Pressure Monitor
Blood pressure at the upper arm and wrist
Blood pressure is usually measured at brachial artery.
As the wrist arterial vessel is connected to the brachial vessel, wrist blood pressure values are close to brachial ones
and reflect the change of brachial blood pressures.
However in case there is a circulatory disorder such as
arterial infarction, fairly large difference is observed
between the brachial and the wrist blood pressure values.
After consulting with your doctor, use the wrist blood pressure together with the brachial pressure for your health
management.
Brachial
artery
Wrist artery
(Radial artery)
(Ulnar artery)
Heart
Page 12

23
English
22
Diabetes, hyperlipemia, or hypertension accelerates arterial
sclerosis, which causes dangerous disease such as cerebral
apoplexy or myocardial infarction or induces arterial stenosis
or peripheral circulatory disorder.
In these cases, the wrist and brachial blood pressure values
may differ greatly. (Even in healthy people, a difference of 20
mmHg may occur if the measuring conditions are not proper.
Therefore do not try to diagnose the measurement values by
yourself, but be sure to follow the instructions of your doctor.)
In addition, difference of wrist and brachial blood pressure values may somewhat get affected by the physiological conditions at the time of measurement. However, the blood pressure values measured at wrist and upper arm usually fluctuate
in the same manner.
Therefore, you can check the fluctuation tendency of blood
pressure by measuring the wrist blood pressure.
Differences between blood pressure measured at home and at the doctor’s office
Normally blood pressure measured at home tends to be lower than when measured at the doctor’s
office. This can be as much as 20 mmHg due to that you feel more relaxed at home and feel slightly
tense when visiting the doctor. To manage your blood pressure it is important to monitor and register
your blood pressure at home.
Since blood pressure is fluctuating from beat to beat and is influenced by daily activities measurements can differ from measurement to measurement.
Maintenance and storage
• For cleaning the monitor only use a soft, lightly moistened cloth.
• Do not use petroleum spirits, thinners or similar solvents!
• Stains on the cuff can be carefully removed using a moist cloth and soapy water.
• Do not wash the cuff or make it wet. Please make sure no water will enter the main unit!
• Keep your monitor in the storage case protected from extreme temperatures and humidity.
• Do not carry out repairs of any kind yourself. If a defect occurs consult your OMRON dealer or dis-
tributor.
• Please take the batteries out if the monitor is not used for a long period (app. 2 months or more).
• Electro Magnetic fields can influence the measurement. Do not use a protable phone near the unit.
Disposal of this product and used batteries should be carried out in
accordance with the national regulations for the disposal of electronic
products.
Diseases influencing blood pressure values
Error indication
If the measurement is not made correctly, the following error can be displayed.
Cause How to correct
You moved your wrist
during measurement.
Measure your blood pressure again without moving
your wrist until the measurement is completed.
(Refer to Page 10.)
Error
After several seconds
You moved your arm or
body, or talked during
measurement.
Measure your blood pressure again without moving
your arm or body.
(Refer to Page 10.)
After several seconds
You moved your arm or
body extensively during
measurement.
Measure your blood pressure again without moving
your arm or body.
(Refer to Page 10.)
After several seconds
Batteries are worn out.
Replace both batteries with
new ones.
(Refer to Page 6.)
Battery replacement mark flashes.
Trouble caused by abnormality in function.
Please contact the nearest
OMRON dealer.
Only E and numerals are displayed.
• If you cannot resolve the problem even after taking the above-mentioned measures, please contact the nearest OMRON dealer.
Page 13

25
English
24
Troubleshooting
Possible cause
How to correct
Batteries are worn out.
Replace the batteries with new ones.
(See to Page 6.)
Nothing is displayed when
you push the ON/OFF
button.
Measurement cannot be
made.
Or the blood pressure
values are displayed abnormally high (low).
The wrist cuff is not held
at the level of the heart.
Measure your blood pressure again in
correct posture.
(Refer to Page 9.)
Trouble
You are talking or moving
your hands during measurement.
Be still and make measurement.
The directions of polarities
of inserted batteries
(+ and -) are wrong.
Insert the batteries correctly.
(Refer to Page 6.)
The wrist cuff is not
wrapped firmly.
Wrap the wrist cuff correctly. (Refer to
Page 7.)
Too much stress is applied
on your shoulder or arm.
Relax yourself and make measurement.
Contact the store where the
unit was sold or the nearest
OMRON distributor.
Refer to the section on "Wrist Blood Pressure Monitor."
(Refer to Page 21.)
The blood pressure values
differ from the values measured at brachial.
Air is leaking from the wrist cuff.
Blood pressure values are
displayed before the monitor
inflates to the required
value.
Blood pressure value tends to fluctuate depending on the mental
state during measurement or the measuring time. Breathe deeply to
relax yourself and make measurement again.
(Refer to Page 22.)
Blood pressure value fluctuates each time of measurement.
Or the blood pressure values are displayed abnormally high (low).
• If you cannot resolve the problem even after taking the above-mentioned measures, please contact
the nearest OMRON dealer or distributor.
Spare parts and accessories
OMRON considers, due to the used high company and quality standards, the main unit as a
non-serviceable part because of the necessity of proper calibration after replacement of high-tech
components.
The cuff can be replaced by an authorised expert.
Specifications
Name : OMRON Fully Automatic Blood Pressure Monitor
for measurement on the wrist
Model : 637IT
Display : Dot matrix LCD display
Measurement : Oscillometric method
Measurement Range : Pressure; 0 to 299 mmHg, Pulse rate; 40 to 180 /min.
Accuracy : Pressure; within +/-3 mmHg, Pulse rate; within +/-5% of reading
Inflation : Automatic inflation with pump
Deflation : Automatic rapid deflation
Pressure Detection : Electrostatic capacity semi-conductor pressure sensor
Power supply : Two LR03 batteries (AAA)
Battery Life : Approximately 300 times of measurement when using alkaline
batteries (In case of the monitor is used three times a day inflat-
ing to 170 mmHg at the room temperature of 22°C)
Operating Temperature
and Humidity : +10° to +40°C, 30 to 85% RH
Storage temperature
and humidity : -20° to +60°C, 10 to 95% RH
Measurable
circumference of wrist : 135 to 215 mm
Weight of Main Unit : Approximately 150 g (not including batteries)
External Dimensions : 78 (W) x 65.5 (H) x 37.2 (D) mm (not including the wrist cuff)
Electric Shock Protection : Internal power supply appliance type B
Accessories : Two LR03 alkaline batteries for monitoring use, storage case,
Instruction Manual, USB cable, software
• In the interest of product improvement, specifications are subject to change without notice.
EU-Representative: OMRON Healthcare Europe B.V.
Kruisweg 577
NL-2132-NA Hoofddorp
=Type B
 Loading...