

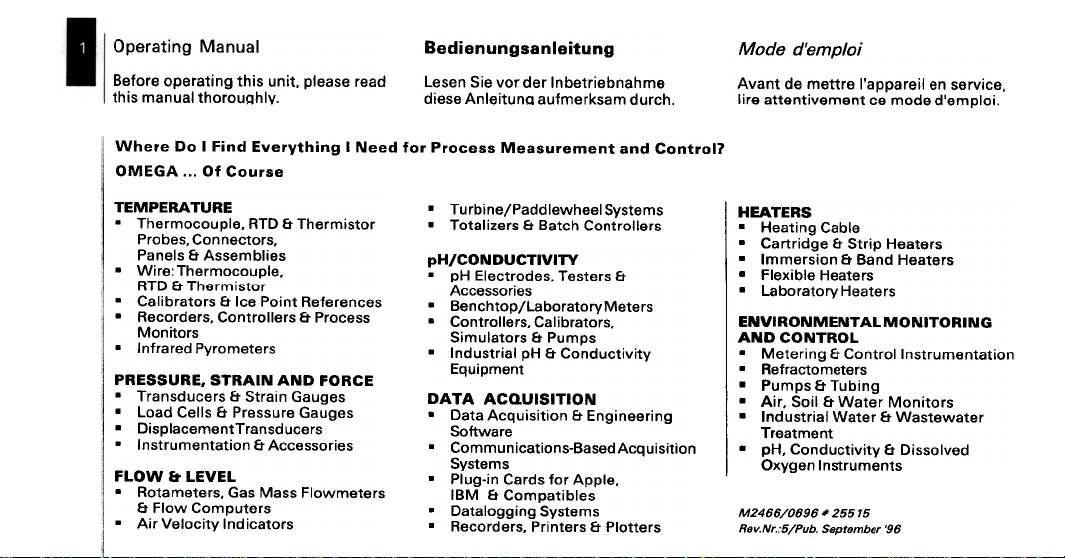
Page 1

Page 2
lenuel/'J 6u!~eJado
.AI4IjnOJO4~ lenuew S!4~
peBJ BSeBld '~!Un S!4~ 6U!~eJBdo BJOJB8
6UnJ!8IUes6unU8!paa
9w4euq9!J~9qul J9p JO/\ 9!S u9s91
'4:JJnp WeS>tJ9W!ne nUm!9IUV 9S9!P
!O/dW8,P 8PO/IV
U9 1!9Jedde,1 9Jtt9W 9P tuel\V
'!OldW9,p 9pOW 9:> tU9W91\!tu9tte 9J!1'9:>!I\J9S
llOJJuo:) pue JuawaJnseal/ll ssa~OJd JoJ peeN I 6u!LlJAJaA3 PU!:I I 00 aJaLlM
aSJno:) JO ..."931/110
3Hn.1VH3dW3.1
JO~S!WJ94.L ~ aJ.~
SJO~!UO~
13A31 -Ii MO1~
'SJO~:>9UUO:) 's9qOJd
S9!lqw9SSV ~ sI9ued
'9Idno:>oWJ94J. :9J!M .
SJ9~9WOJAdP9JeJ!UI .
JO~S!WJ94J. ~ aJ.~ '9Idno:>oWJ94J. .
A.L1/\1.L:JnONO:J/Hd
S9:>U9J9!9~ ~U!Od 9:>1 ~ sJo~eJq!le:) .
ss9:>OJd ~ SJ9110J~uO:) 'SJ9pJO:>9~ .
3:)HO~ ONV NIVH.1S '3HnSS3Hd
s96ne~ u!eJ~S ~ SJ9:>npSUeJJ. .
s96ne~ 9JnSS9Jd ~ S119:) peal .
SJ9:>npSUeJJ.~U9W9:>eldS!a .
S9!JOSS9:>:>V ~ UO!~e~U9WnJ~SUI .
se!Josse:>:>v
sdwnd ~ sJo~elnw!s
~uewd!nb3
NOI.LISln'O:JV V.LVO
eJeMI,I°S
swe~sAs
sJ9~ndwo:) Mol:! ~
SJ9~9WMOI:! sse~ se~ 'SJ9~9We~O~ .
SJo~e:>!pUI A~!:>OI91\ J!V .
selq!~edwo:> ~ VlJ81
swe~sAs 6u!66ole~ea .
sw9~sAS 1994M9IPped/9U!qJnl. .
SJ9110J~UO:> 4:>~e8 g SJ9Z!le~°l. .
~ sJe~seJ. 'sepoJ~:>eI3 Hd .
sJe~eVIJAJo~eJoqel/do~4:>ue8 .
'sJO~eJq!le:> 'SJeIlOJ~uo:> .
A~!I\!~:>npuo:> ~ Hd le!J~snpul .
6u!Jeeu!6u3 ~ Uo!~!s!nb:>v e~ea .
Uo!~!s!nb:>vpese8-SuO!~e:>!unwwo:> .
'elddv JoJ spJe:> u!-6nld .
SJe~~Old ~ sJe~u!Jd 'sJepJo:>e~ .
SH3.LY3H
9lqe:J 6U!~e9H .
10H.LNO:>ONY
SJ9~9WO~:>eJ~9H .
~U9W~e9J.L
SJ9~e9H 9Iq!X91:1 .
91 99Z'# 9690/99t'Z'W
SJ9~e9H d!J~S J3 96P!J~e:J .
SJ9~e9H pueg J3 UO!SJ9WWI .
SJ9~e9H AJo~eJoqel .
9NIHO.LINOW1Y.LN3WNOHIAN3
UO!~e~U9WnJ~SUIIOJ~U°:J J3 6U!J9~91/1J .
6u!qn.L J3 sdwnd .
SJO~!uol/IJ J9~eM J31!OS 'J!'\f .
J9~eM9~SeM J3 J9~eM le!J~snpUI .
S~U9wnJ~SUI u96AxQ
96, ./9qW9ld9S 'qnd/9:./N'1I9/J
P9/\IOSS!a J3 A~!/\!~:>npuo:J 'Hd .
Page 3
Table of Contents
Introduction
General 4
AccessQries
(supplied as standard) 4
Accessories (optional) 5
Parts identification 5
Preparations
Power from internal batteries 7
Changing from Alkaline to
rechargeable batteries 8
Recharging 9
Operating from 115VAC
or 230VAC (50 or 60 Hz) 10
Operating the Calibrator 11
Working with the menu's 13
Measurement and output
.functions 14
Manipulating output signals 16
In all output modes 16
In mA source and XMTR
simulation mode 17
Setting up frequency measure-
ments and pulse outputs 17
Frequencymeasurements 17
Inhaltsverzeichnis
Einleitung
Allgemein 4
Grundausstattung ' 4
Zusatzausstattung (optional) 5
Teilebezeichnung 5
Vorbereitung
Stromversorgung durch interne
Batterien 7
Wechseln van Alkali- zu
wiederaufladbarenBatterien 8
Aufladen 9
Arbeiten mit Netzversorgung van
115V oder230V (50 oder 60 Hz) 10
Arbeitsweise des Kalibrators 11
Die Benutzerfuhrung durch
das Menue 13
MeBfunktionen und Ausgabe-
funktionen 14
Einstellen eines Ausgangssignal 16
In alien Ausgangsfunktionen 16
Der mA- und der Transmitter-
simulator-Modus 17
Einstellung zur Frequenzmessung
und zum Pulse-Ausgang 17
Frequenzmessung 17
Table des matieres
Introduction
Presentation 4
Accessoiresstandard 4
Accessoiresoptionnels 5
Identification des elements 5
Operations preliminaires
Alimentation interne par piles 7
Remplacement des piles alcalines
par des piles rechargeables 8
Recharge 9
Alimentation a partir d'un secteur
alternatif 115V ou 230V
(50 ou 60 Hz) ~
Utilisation du calibrateur 11
Utilisation des Menus 13
Fonctions mesures et simulation.. 14
Fonction du signal de sortie 16
Dans tous les modes de
.simulation 16
Mode source de mA et simulation
de transmetteur 17
Mesure de frequency et
generation d'impulsion Mesure de frequence
10
17
17
Page 4
lndlno as/nd/.baJ.:/
8L """"""(lnduf)Jaluno.?A.?uanbaJ.:/
O"l '.""""""""""""""'.'.'...(snonufluo.?)
L"l (Jaluno.?) lndlno as/nd/'baJ.:/
"l"l SUO!J:»unj le!:»ads
E"l sdals a/qewweJBoJd
9"l BUfdweJ /euBfS
BueBsnV-8s/nd/.b8J.:/
BueBsnV-8s/nd/'b8J.:/
a Buf/e.?s
"lE JaJJfwsueJ.l
J!n:».I!:» JndJno ~ Jndul
EE swe.l6e!p
vE sJ.led pue .I!eda.l 'a:»!1\.l9S
vE ~u9we:>eldeJ esnJ ~ndu! dwe!ll!lIIJ
6u!pu!J ~lneJ pue uo!~eJq!le:)
9E eJnpe:>oJd
Ev uo!~:>unJlelllJ
9v uo!~ewJoJu! 6u!JepJo s~ed
09 suo!Je:»!J!:»ads
L9 H31/\11~:)Slal A.LN~H"M
8 L BueBuf3-J8/l/!1zzu8nb8J.:/
Ol (l/:Jf/J8fnufJuoJ/J
L l (8s/ndwf/8zUf3J
II ueuo!~1JUnJle!zeds
£l 81JfJl/:JS8JeqJ8fWWeJBoJd
9l uofJJ{unjuadwey
a '.."." '...'..Buf/e:Js /euBfS
l£ uOfJJ{unj.l81JfWSueJ.L
-ues6ue6sn" pun -s6ue6u!3
££ ..., "."."..,.., 9u~ld9nl'4:)S
17£ e'4:)ns"ol'4e~ pun 6unJ,leM
J[)~ 6UnJ94:>!S J9p UI9S4:>9Msn'!
17£ 6ue6u!3-'!W U9p
9£ 94:>nSJ9149:J pun 6UnJ9!JQ!le'tn9N
1717 uo!Ptun~149:J
917 9~S!II!9~Z~esJ3
19 uouo!Je>ly!zodS
L9 H311\11~:>SIO/A.LNV\lH"M
8L ""Jnaldwo:> apownp uo!leS!/!ln
uo!s/ndw! 9:>uanbj1JjJnaleJj1Uj19
LL (nU!luo:»
uo!s/ndw!/a:>uanbj1Jj uo!leJj1uj19
OZ (nU!luo:»
uo!s/ndw! a:>uanbj1Jj uo!leJj1uj19
LZ (Jnaldwo:»
ZZ Sele!o,ds su°!J°uo~
£Z sa/qewweJ6oJdsed
9Z sadweJ sap UO!leWweJ6oJd
a"""""""""""""'" a//al/:>j1.1? as!vv
Z£ JnajJawsueJ.L
e,"Ju,.P S'U!ldw!s ew'4os
££ a!J.los ap Ja
v£ ...eoue"'J'" 'uo!Je..ed,.. 'eo!A.les
Jns alq!sn! np Juawa:>eldwaij
sap uo!J:>aJap Ja uo!JeJq!le:)
v£ vw ap aJnsaw a~JJua,1
9£ """""""""'sJuawauuo!J:>uo!s!ellnew
9v Juawauuo!J:>uo!s!ellne~
9v suo!JewJo!ul
v9 sanb!Js!"'Joe..e:>
L9 H31/111'fl:>SIOI A.LN'tIHH'tIM
Page 5
General Introduction
The Multi-Calibrator model CLF-II has
been designed for calibration of
process instrumentation and portable
equipment. The unit provides data to
comply with the ISO 9002
requirements for calibration.
The CLF-II can be used to measure and
output analogue signals often used in
an industrial environment.
Measurement and output/simulation
functions can be operated and read
simultaneously.
Accessories standard supplied
The standard CLF-II Calibrator
is packed together with the
following parts.
.Operating Manual (1X)
.Test leads (4X)
.Carrying Case with shoulder
strap (1X)
.Alkaline Batteries LR 14 or C (4X)
.Spare fuses 400mA (1 X)
.Calibration certificate
Allgemeine Beschreibung
Der Multikalibrator CLF-II wurde als
tragbares Mess- und Kalibriergerat zur
Einstellung und Kalibrierung van
Prozessi nstrumenten entwickelt.
Die Einheit erfullt den nach ISO 9002
geforderten Standard fur die
Kalibrierung van Instrumenten.
Der CLF-II kann zum Messen und
Simulieren van Analogsignalen. wie sie
im Industriellen Bereich vorkommen.
verwendetwerden.
Das Gerat ermoglicht Gleichzeitiges
Messen und Simulieren van Signalen.
Grundausstattung
Der Kalibrator CLF-II wird
standardmaBig in folgender
Ausstattung geliefert:
.Bedienungsanleitung(1x)
.Testleitungen (4x)
.Tragetasche mit
Schulterriemen (1x)
.Alkalibatterien LR14 oder C (4x)
.Ersatzsicherungen 400mA (1 x)
.Kalibrierzertifikat
Presentation
Le multicalibrateur CLF-II est conyu
pour Ie controle et retalonnage des
instruments de processus et des
appareils de mesure portatifs.
L'appareil fournit to utes les donnees
necessaires pour assurer la conformite
avec les exigences de la norme ISO
9002 concernant les operations.
Le CLF-II permet de mesurer et de
generer des signaux analogiques
souvent utilises dans un environ-
nement industriel. On peut afficher
simultanement les signaux de sortie ou
de simulation et les mesures.
Accessoires standard
Le calibrateur CLF-II standard est livre
avec les accessoires suivants:
.Manuel d'utilisation (1x)
.Cordons de mesure (4x)
.Etui de transport avec bretelle (1 x)
.Piles alcalines LR 14 ou C (4x)
.Fusibles 400 mA de rechange
(1x)
.Certificatd'etalonnage
Page 6
S9!.lOSS9:»:»e leuo!Jdo
9LL/Sd81:J
/Jo~dep\f eu!lI\O£l .
O£l/Sd81:JJe6Je4:J
Je6Je4:J/Jo~dep\f eu!11\9 L L .
:..eq"8J8!1 'I:J!lzJ!snz
O£l/Sd81J
9LL/Sd81J
~!!J969pel/-z~8N /\ O£l .
~!!J969pel /-z~9N /\ 9 L L .
SleUUo!~do se.l,osse:»:»v
Jn96Je4:>/Jna~:>8s8pJn8~e~depv .
OEZ/Sd81::> 9:>uaJ~~~J I\OEZ
Jna6Je4:>/Jna~:>asapJna~e~depv .
9 L L /Sd81::> a:>uaJ~~~J 1\9 L L
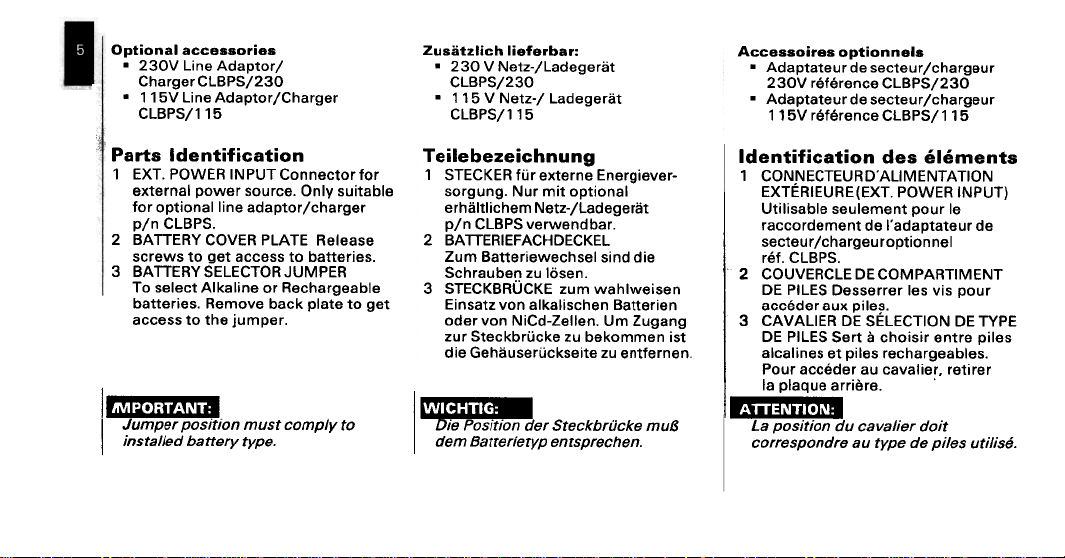
IOl A/dwo:J lsnw UO!l!sod J9dwnr
UO!JeO!l!Juapl SJ,led
"Sd81:)U/d
H3dV'Jnr HO1:)313S AH311V8 E
'Jedwnf e4~ o~ sse:>:>e
~~,'~.,~:[.r:I'.".1
"9dAl AJ9lJeq p9//elSU!
JoJJo~:>euuo:)1ndNI H3MOd "1X3 L
elqe~!ns AIUO "e:>Jnos JeMod leuJe~xe
Je6Je4:>/ Jo~depe eu!lleUO!~do JoJ
eseeleH 31Vld H3/\O:) AH311V8 Z
"se!Je~~eq o~ sse:>:>e ~e6 o~ SMeJ:>S
elqee6Je4:>eH JO eu!le)jIV ~:>eles 01
~e6 o~ e~eld )j:>eq el\oweH 'se!Je~~eq
Ignw 9J/:JIlJQJ/:J9JS J9~,~: ,~...,
13>1:)30H:)V:J3Iij3ilV8 l
"U9S91 nz u9qneJlj:>S
-J9119!6J9U3 9UJ91.X9 Jr!! ij3>1:)3.lS L
leUo!1.do 1.!W JnN "6un6Jos
1.~J969pel/-z1.9N W9lj:>!I1.I~ljJ9
"Jeqpu9MJ911 Sd81:) u/d
9!P PUIS 19S1j:>9M9!J91.1.e8 wnz
U9S!9MlljeM wnz 3>1:)nij8>1:)3.lS £
U9!J91.1.e8 U9lj:>S!le'tle UOII z1.esu!3
6ue6nz wn "U9119Z-P:)!N UOII J9pO
1.S! U9WW°'t9q nz 9't:>r!Jq't:>91.S JnZ
U9UJ9!1.U9 nz 91.!9S't:>r!J9Sn~lj9~ 9!P
'Sd81::> '~~J
'S91!d xne J9p~:>:>e
m,'('I'.,'~'.~'.
.U91/:J9JdSJU9 dAJ9!J9JJeg W9p
19UUO!~doJn96Je4:>/ Jn9~:>9S
.'9J~!JJe 9nbeld el
J!OP J8!fel\e:J np uo!J!sod e7
6unu'l:)!azaqal!aJ.
s~uaw'I' sap uo!~e:)!J!~uapl
NOI.lV.lN3V\JIlV.Oijn3.l::>3NNO::> L
(.lndNI ij3MOd '.lX3)3ijn3Iij3.lX3
91 Jnod ~U9W91n9S 9IQeS!I!~n
9P Jn9~e~depe.1 9P ~U9W9pJO:>:>eJ
.lN3V\JI.lijVdV\JO::> 30 31::>ij3/\nO::> "l
Jnod S!" S91 J9JJ9SS90 S31ld 30
3dA.L 30 NOI.l::>313S 30 ij3IlV/\V::> £
S91!d 9J~U9 J!S!O4:> ~ ~J9S S31ld 30
's9IQe96Je4:>9J S91!d ~9 S9U!le:>le
J9J!~9J .J9!lelle:> ne J9p~:>:>e Jnod
'§IS!/!Jn S8f!d 8P 8dAJ ne 8JpUOdS8JJO:J
Page 7
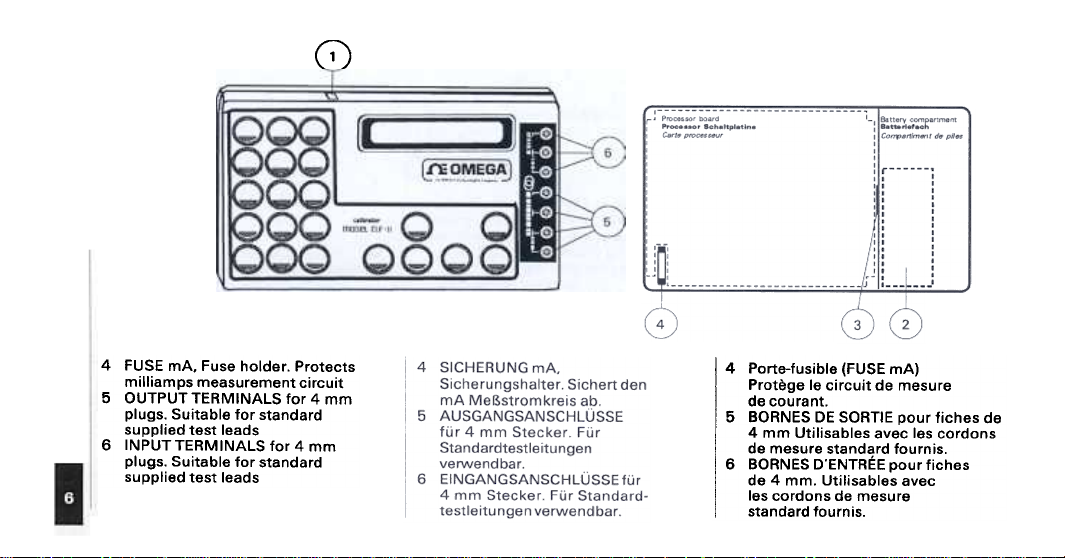
G)
4 FUSE mA. Fuse holder. Protects
milliamps measurement circuit
5 OUTPUT TERMINALS for 4 mm
plugs. Suitable for standard
supplied test leads
6 INPUT TERMINALS for 4 mm
plugs. Suitable for standard
supplied test leads
4 Porte-fusible (FUSE mAl
Protege Ie circuit de mesure
de courant.
5 BORNES DE SORTIE pour fiches de
4 mm Utilisables avec les cordons
de mesure standard fournis.
6 BORNES D'ENTREE pour fiches
de 4 mm. Utilisables avec
les cordons de mesure
standard fournis.
Page 8
SUO!leJedaJd
"ez!s :) JO Aqee
"uo!~elle~sU! eJo!eq seiad
se!Je~~eq eu!le>lIV!o esn
(pJepue~s se pe!lddns)
"Jo~e:>!pu! ".lve " 6u!>lU!lq
6u"J!aJaqJoJ\
se!.le~~eq leu.le~u! WO.lJ .leMod
9'L Xv WOJ! peu!e~qo S! JeMod leuJe~ul
s~lol\ z" L Xv JO se!Je~~eq eu!le>lIV s~lol\
'v L ~ lepo~ "se!Je~~eq elqee6Je4:>eJ
noA eJo!eq !!O Jo~eJq!le:> e4~ 4:>~!MS
e4~ eAowe~ "se!Je~~eq Meu Ile~su!
4~oq eseeleJ pue ese:> 6u!AJJe:>
AJe~~eq e4~!O SMeJ:>S 6u!~unow
e4~ uedo "JeAO:> ~uew~edwo:>
Meu e4~ e:>eld pue ~uew~edwo:>
uo pe~:>nJ~su! se uo!~!sod U! se!Je~~eq
AJe~~eq ueel:> JO! >I:>e4:) "e~eldeweu e4~
~es euo 4~!M pe!lddns S! Jo~eJq!le:> e4.l
e:>elde~ "se!Je~~eq eu!le>lIV Xv !O
e4~ SMo4s ueeJ:>s e4~ ue4M Se!Je~~eq
U8!J8»eg
.az!s :) J9pO Aqea
.aloda!Ja~~ea aJaqnes
8UJ8JU! 'IoJnp 6un6JoSJ8AWOJJS
uasseI6un6JosJa/\wOJ~S auJa~u! alP JQ,j
ua!Ja~~ea 94:Js!le>tle 1\ 9'l x v 4:J!S
aJeqpel~neJapa!M 1\ Z'l x V Japo
'v ll:ll19pOI/\J .uapuaMJa/\ U9!Ja~~ea
wap JO/\ Jo~eJq!le)/ uap 9!S u9~le4:JS
sep a!s u9w4aN .sne las4:JaMa!Jauea
pun a4:Jse~96eJ.l Jap sne ~!!Ja~
.la>t:J9p4:Je~a!Jauea U9p a!s UaUJ9~~U9
~ne Jap U! U9!Ja~~ea alP 9!S uaz~as
UO!~!SOd u9~lla~sa6Jep PI!4:JsuadA.l W9p
~ne U9Z~9SU!3 wap JO/\ 9!S ua~4:J'v' .u!a
ua!Jauea u94:Js!le>tle uo/\ 6unpuaMJal\
(6ue~w nJ9~9!l Ja6!~!!w pJepue~s)
ua4:Js!le>tle V ~!W pJ!M Jo~eJq!le)/ Jaa
Jap ~ne uuaM .~a~a!la6 Ua!J9~~ea
'~U!a4:JSJa" .l'v'a ,,6unplal/\J alP a6!azu'v'
.UJanaUJa nz ua!Ja~~ea alP puIS
1\"l'L ap s91qe9BJe40aJ
"(:) no 17 L H adA~)
"S9JdoJd ~UOS s~oe~uoo
(pJepue~s 9Jn~!UJnoJ)
"S9U!leOle S9)!d 17 9P
S9,1!eU!W!lfj,ld suo!Je,lfjdo
S91!d .led 9U.l9JU! UO!JeJu9W!IV
sal!d 17 Jed ~~uaw!le ~sa l!aJedde.1
S91!d 17 no I\g' L 9P sau!leOle
Sal!d S9p 90eld U9 aJ~~9W ap ~ue/\v
SJ04 Jn9~eJq!leo a) 9J~~9W 's9/\nau
~odsueJ~ 9P !n~~.1 JaJ!~aH "uo!sua~
uo!~eX!J ap S!/\ xnap sa) JaJJ9SSap ~a
9P ~uaw!~edwoo np alOJa/\noo np
ap ~u9w!~Jedwoo al J!J/\no 'sal!d
s9/\nau Sal!d sal J9sods!p ~9 S91!d
anbeld el Jns ~nb!pu! awwoo
S91 9nb JaJnsse.s "anb!~~leuB!s
sau!leOle S91!d ap uo!~eS!I!~n
n9[ un 09/\e !uJnoJ ~sa Jna~eJq!leo a1
Jn9~eO!pU!.1 puenb S91!d S91 J90eldwaH
ueJO~.1 Jns ~!eJedde ~ue~ouB!IO "l.V8 "
Page 9
Changing from Alkaline to
Rechargeable batteries
Remove the Alkaline batteries.
Release the 4 coverplate screws and
take the coverplate off. Remove the
alkaline batteries. Place the jumper
next to the compartment in the
" CHARGE" position. Install 4x
rechargeable batteries (purchased
locally) and reinstall the coverplate.
Recharge batteries when the screen
shows the blinking" BAT" indicator
or when the screen remains blank
when switching on.
.'.'I:.':I,'II.'[~
Never use alkaline or other nonrechargeable batteries when you
have put the jumper into
"CHARGE" position.
I Wechsel von alkalischen- zu
wiederautladbaren Batterien
Entfernen Sie die alkalischen Batterien.
Losen Sie die 4 Gehiiuseschrauben und
entfernen Sie die Gehiiuseruckseite.
Setzen Sie die Steckbrucke an der
Batteriefachseite in Position
" CHARGE" und legen Sie die
wiederaufladbaren Batterien in das
Batteriefach. Montieren Sie die
Gehiiuseruckseite wieder. Wenn auf
der Anzeige" BAT" erscheint oder
wenn das Display nach dem
Einschalten dunkel bleibt, mussen die
Batterien nachgeladen werden.
.'It]:i-"1[~:.--
Verwenden SiB niemals alkalische
oder niGht aufladbare Batterien. wenn
siGh die Steckbriicke in Position
"CHARGE" befindet.
Remplacement des piles alcalines
par des piles rechargeables
Retirer les piles alcalines. Desserrer les
4 vis du couvercle. Mettre Ie cavalier
de selection du type de piles dans la
position" CHARGE ". Mettre en place
4 piles rechargeables (achetees
localement) et revisser Ie couvercle.
Recharger les piles quand I'indicateur
" BAT" clignotant apparait sur I'ecran
ou si I'ecran n'affiche rien a la mise
sous tension,
.~~_..3"..[']"18
Ne jamais utifiser de piles alcalines
ou autres piles non rechargeables
quand Ie cavalier est dans la position
" CHARGE ".
Page 10
6u!6.1eLj08Y
Sd81:) N/d JEl6Je4:)/Jo1-depv El41- Elsn
9sneo Aew 1-uElwd!nbEi JEl41-0 :AIUO
941- '1oEl4:) "Jo1-eJq!leo El41- 01- El6ewep
Eloeld pue 96e1-10/\ 9U!1 pEl1-eo!pu!
..3DHVH:) ..El41- U! 4°1-!MS JEl6Je40
El1-e!JdoJdde 941-1-0Eluuo:) "UO!1-!SOd
El41- 01- s6nld J96Je4:)/ Jo1-depv
Jo1-depe sV "Jo1-eJq!leO El41- 01- pue 9U!1
Alln! 9Je Suo!1-0un! J96Je40 pue
941-' JEl41-0 40eEl WOJ! 1-UEIpuEidElpU!
"6u!6Je40 ElI!4M pEisn Elq ueo Jo1-eJq!leo
El1-Elldwoo WOJ! ElW!1- 6u!6Je409H
spo!JEld JO! El6Je40 Aew noA
"sJn04 V L ue41- JEl6uOI
1-uEl!qwe JElMOI1-e 1-e41- El1-°N
'sJn04 V L S! El6Je40 Iln! 01- El6Je40S!p
P:)-!N !O A1-!oedeo El41- sElJn1-eJEldwEl1-
"JElMOI AI1-ueO!!!u6!s S! SEI!JEl1-1-eq
J!El41- 40eElJ 1-0U II!M SEI!JEl1-1-eq El41-!1
sJn04 V L e JEI»e A1-!oedeo lewJou
"SElW!1- "l1-seElI1-e JO! 6u!6Je40
pue 6u!6Je40S!p ElloAo 'po!JEld 6u!6Je40
'" 3~~VH:> " UO!~!SOd
'~4:>!U ~~J9~ W9p
U9pel!nv wnz 9!S U9pU9MJ9/\
~~J969pel/-z~9N sep 4:>!199!14:>ssne
U9uu9>t 9~~J969pel 9J9pUV 'Sd81:> u/d
'U9J4!)! Jo~eJq!le>l we u9P~4:>S nz
~~J969pel/-Z~9N we 9!P qo 9!S U9!!)Jd
~S! 6!~4:>!J 6un6JoSJ9AZ~9N 9U9q9696ue
U! J9~le4:>S U9p 9!S U949Jp pun
U!9 J9>t:>9~SZ~9N U9p unu 9!S U9>t:>9~S
~~J969pel/-z~9N sep 9!S U9PU!qJ9A pun
pJ!M ~~J9~ sea 'Jo~eJq!le>l W9p ~!W
uue>t Jo~eJq!le>l J9a 'u9pe196 unu
~~nu9q s6ue6JoA9pel S9p PU9J4~M
U!9 J!)! ~!9z9pel 9!a 'U9pJ9M
~ L 'e:> ~6~J~9q ~~J9~ s9U9pel~U9
u9pe4:>s U9~!9Z9pe19J96u~1 'U9pun~s
-96wn 96!Jp9!U gep '9!S u9~4:>e98
UOA ~~~!zede>l 9!P U9Jn~eJ9dw9~s6unq
UU9M 'UJ96U!JJ9A 4:>!I~n9p U9119Z-P:>!N
~~J9~ sep ~!9z9pel U9pun~s ~ L 4:>eu
~4:>!9JJ9 ~~~!zede>l 91ewJOu 9U!9S ~4:>!U
'sep 9!S u9pel pun u9pel~u9 os '~e4
uepelJ"V
aO.le't:»eH
'S9Jn9lj vL
9P Jn9~e~depe.1 ~U9W9/1!snl:>X9 J9S!I!~n
~no.l"Sd81:J ujd "~~J Jn96Jelj:>jJn9~:>9S
91 J9JO!J~~~p 9P 9nbs!J 1!9Jedde 9J~ne
Jn9~:>9S UO!SU9~ el J9!~!J~1\ "Jn9~eJq!le:>
"" 3~~'V'H:J " Uo!~!sod el suep
Jn96Jelj:> np Jn9~e~nwwo:> 91 9J~~9W ~9
ne Jn96Jelj:>j Jn9~e~depe,1 J9pJo:>:>e~
S91 9WW°:J "Jn9~eJq!le:> ne ~9 Jn9~:>9S
~UOS Jn96Jelj:> ~9 Jn9~e~depe SUO!~:>UOI
9P 9un.1 S9~uepU9d~pu! ~U9W9Ie~0~
~S!I!~n 9J~~ ~n9d Jn9~eJq!le:> 91 '9J~ne,1
S9Jn9lj V L ~ne~ II "96Jelj:> el ~uepu9d
~U9W9~~ldwo:> S91!d S9p J96Jelj:>9J Jnod
S91 J9SS!e! z9/1nod snol\ "s9~6Jelj:>~p
9P snld ~uepu9d 96Jelj:> U9 S91!d
S9Jn~eJ~dw9~ S9p ~.nb J9~OU 'V'
S91!d S9p ~~!:>ede:> el 's9sseq S9~Ue!qwe
"9JpU!OW ~U9W9~~9U ~S9 P:)-!N
Jn91 sed ~U9u6!9~~e,U S91!d S91 !S
9P 96Jelj:> 9Un s~Jde 91eWJOU ~~!:>ede:>
"Xn9p SU!OW ne J9m:>9~~9 'S9Jn9lj vL
Page 11

If batteries remain weak they should
be replaced. No particular brand for
Ni-Cd is recommended although cells
rated at 2.0 AH have preference over
generally available 1.8 AH cells.
Operating from 115V or
230V line voltage
(50 or 60 Hz)
Use the Adaptor/Charger PIN ClapS
only; other equipment may cause
damage to the calibrator. Check the
indicated line voltage. Connect the
appropriate Adaptor/Charger plugs to
the line and to the calibrator.
Gerat mindestens zweimal
hintereinander. So lite dies nicht helfen,
so sind die NiCd-Zellen zu wechseln.
Es ktinnen aile handelsublichen NiCdZellen verwendet werden. Es sind
jedoch Zellen mit einer Kapazitat
van 2,0 Ah den gangigen Zellen mit
1,8 Ah vorzuziehen.
Arbeiten mit Netzversorgung
230/115V
(50 odor 60 Hz)
Verwenden Sie zum Aufladen ausschlieBlich das Netz-/Ladegerat
pin CLBPS. Andere Ladegerate ktinnen
zu Schaden am Kalibrator fuhren.
Prufen SiB ob die am Netz-/Ladegerat
angegebene Netzversorgung richtig ist.
Stecken Sie nun den Netzstecker Bin
und verbinden Sie das Netz-/Ladegerat
mit dem Kalibrator.
cycles de decharge et de recharge.
Si les batteries restent faibles,
il taut les remplacer. La marque de pile
Ni-Cd est indifferente, mais les piles
de 2,0 AH sont preferables aux piles
de 1,8AH.
Alimentation a partir d'un secteur
altern at if 115 V ou 230 V
(50 ou 60 Hz)
Utiliser exclusivement radaptateur de
secteur/chargeur ref. pin CLBPS.
Tout autre appareil risque de deteriorer
Ie calibrateur. Verifier la tension
secteur indiquee. Raccorder
radaptateur de secteur/chargeur au
secteur et au calibrateur.
Page 12
.lnale.lq!le:>
.lo~e.lq!le:J 94~ Uo!~e.l9do
sap as!aMSI,!aq.lY
np UO!leS!I!ln
s.lol,e.lq!le>l
s!sou6e!p !19S 941. 'uo ~!un 94~ 4:1~!MS
leUJ9~U! S>I:l94:1 pue s~e~s 9Jnp9:10Jd
:SMO4S U99J:lS 941.
IrdlJ 13aO~Ve3~O
SISON9VIOdl3$
,
Nbli:)Nn~l'VV\I
.S6U!U9S OJ9Z pue s96e~IO/\ 9:1U9J9!9J
SMO4S ~lnS9J 91\!~e69U len~U91\9 UV
E/!P 1-81-SE/1- '4:>Jnp 1-SE/1-1-SqI8S
...
NOll~Nn:J.1'v'1!IJ
:Aelds!o sep 1.6!az s1.sa1.1.sqlas
JE/1-seJ. WE/p 1-!W 1-~JE/~ SlIp E/!S uE/1-le4:>S
UE/U!E/ unu 1-J4!1~ 1-~JE/~ sea 'U!8 NO
4:>s!1-ewo1-ne 1-11E/1-S pun 6unuueds8Pl11
:1-6!E/Z Aelds!a sea 'U!E/ 1->fundllnN. U8p
'uO!~eS!le!~!U!,P :>!~sou6e!p
11-:11:) 1300W 'tJD3V'JO
94:>nO~) UO!SU9~ snos 1!9JeddeJ 9J~~9~
uos sJole 9n~:>9U9 11-~1:) 91 lNO
:9~ue/\!ns UO!~e:>!pU!J Jed ~!J:>~p ~S9 !:>9:)
SISONDV10 :l13S
sap s!uqa6J3 wal\!1.e6au "11.IIa !aa
~ueweuuo!~:>uoJ s!e/\new len~ue/\~ un
:Jed ~nb!pu! ~!eJes
.
NO.1+0Nna'V~
Page 13
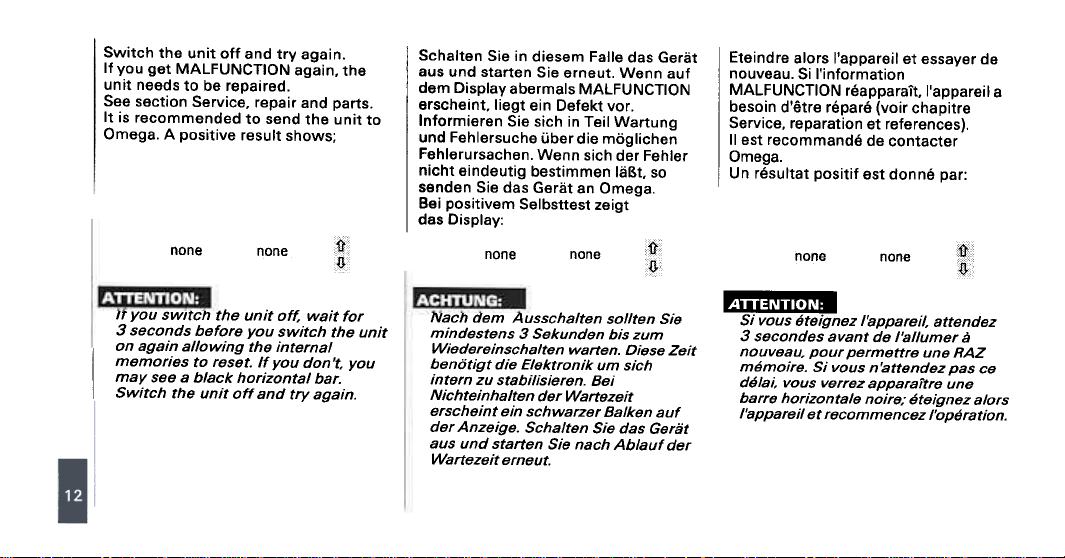
Switch the unit off and try again.
If you get MALFUNCTION again. the
unit needs to be repaired.
See section Service. repair and parts.
It is recommended to send the unit to
Omega. A positive result shows;
none
none
Schalten Sie in diesem Faile das Gerat
BUS und starten Sie erneut. Wenn auf
dem Display abermals MALFUNCTION
erscheint liegt ein Defekt vor.
Informieren Sie sich in Teil Wartung
und Fehlersuche uber die moglichen
Fehlerursachen. Wenn sich der Fehler
nicht eindeutig bestimmen laBt so
senden Sie das Gerat an Omega.
Bei positivem Selbsttest zeigt
das Display:
none
none
Eteindre alors I'appareil et essayer de
nouveau. Si I'information
MALFUNCTION reapparait, I'appareil a
besoin d'etre repare (voir chapitre
Service, reparation et references).
II est recommande de contacter
Omega.
Un resultat positif est donne par:
none
none
IT you swltcn the unit oft; wait for
3 seconds before you switch the unit
on again allowing the internal
memories to reset. If you don't. you
may see a black horizontal bar.
Switch the unit off and try again.
Nach dem Ausschalten sollten SiB
mindestens 3 Sekunden bis zum
Wiedereinschalten warten. Diese Zeit
ben6tigt die Elektronik um sich
intern zu stabilisieren. Bei
Nichteinhalten der Wartezeit
erscheint ein schwarzer Balken aut
der Anzeige. Schalten Sie das Gerat
r.!I..~.'..['],'-
Si vous eteignez f'apparei/, attendez
3 secondes avant de f'a//umer a
nouveau, pour permettre une RAZ
memoire. Si vous n'attendez pas ce
de/ai, vous verrez apparaitre une
barre horizonta/e noire; eteignez a/ors
f'apparei/ et recommencez f'operation.
aus und starten Sie nach Ablaut der
Wartezeit erneut.
~~~
Page 14
s.nU9W 9'1~ 'I~!M 6u!".lOM
enuewsep
Ue9JOS 0:>1 e4~ uo suo!~eo!pu! 94l.
94~ JO ~Jed 40!4M noA SM04S 19Z9q
e~ep ~U9W9JnSe9W e4~ S~U9S9Jd U99JOS
"e~ep ~nd~no e4~ ~ed 40!4M pUB
ueeM~9q (SJe~OeJe40 6U!>jU!lq)
19P!S pue4 ~46!J) ~nd~no
"eO!04° Meu JnoA e>jew pUB
JOSJnO e4~ S9110W Ae>j +--+ 94~ 6U!SS9Jd
pUB (9P!S pue4 lJ91) ~U9W9JnSe9W
SpJeMJoJ S~U9!P9J6u! nU9W 94~ IIOJOS
".,. JO ..6u!sseJd Aq SpJeM>joeq JO
"eo!04° JnoA WJ!Juoo o~ ~3l.N3 SS9Jd
U! uo!~ounJ e pe~0919s 911e4 noA JI
e4~ o~ >joeq de~s o~ 3:>/:> sseJd 'JOJJ9
pesseJd 3:>/:> PloH "uo!~oeles sno!lIeJd
sJeedde UO!~OeleS Sno!lIeJd e4~ 1!~Un
'U8PU!!8Q 4:>!S
"80!9ZUV J8p 9J!9S
.u8Qe4 J4:>!8JJ8
.u80ue180
'I:J.lnp 6un.l'l"l.Iez~nue8 e!c
'9!S JJ8!WJO!U! 90!8ZUV-a~1 8!a
J9pO -99~ S9p 1!8.L w94:>18M U!
8!S S9wweJooJdsoueosnv S9p
U9J4:>9J80eeM 9!P 8!S U8>1:>!)Ja
(~O.L~n~IS ~O 3~~nOS)
Aelds!a W9p !nv "U9119JsnZU!9
J8p !8q 4:>!S 8!S U9JIIOS
9qeoU!3 9J4:>eW80 JzJ91nz 8!P
os u8uu9>1 8!S .4:>S9180 pJ!M
N3~3Iln~IS !ne J8pO (3~nSV3~)
U9PU9>1U!IQ 9!P !9QJ8!4 U19S4:>8M
8PU94:>9JdSJU8 9!P !ne 810QwASI!8!d
u9JseJI!9!d U8J4:>9J>lU9S U9p J!~
SJJ!1M>I:>!)J J9pO SJJ!1MJOA 9!S U8UU9>1
""UJ9JJ!1IQ" wweJOOJd sep 4:>Jnp
UU9M '~3.LN3 9Jse.L 9!P 9!S U9>1:>!)Ja
os 'u8qe4 JJJ!8014eMSneWWeJOOJd
pun 3~/~ 9Jse.L 8!P 9!S U8>1:>!)Jp
N3SS3~ !ne J!1J9~ sep wn u9JseJI!8!d
J>lundwweJOOJd U9J4:>SU!)M90 U8p 9!S
8nU8WJdneH wnz >I:>!)Jnz 8S!8MJJ!J4:>S
snuew sap UO!Je8!1!Jn
snaIl a:>l Jn94:>!ue.1 9P suo!~e:>!pu! sel
Jn94:>!lle,1 9P 9!~ed 9119nb ~U9J~UOW
.uo!~elnw!s el 9I1J9SUO:>
.uo!~elnw!S ~ 9JnS9W 9P
.X!04:> 9J~01l J9WJ!luo:>
9!~ed 9119nb '9JnS9W el 9I1J9SUO:>
J9ssed 9P ~U9~~9WJ9d +-+ s94:>~11 sel
91 ~U9~~9WJ9d '" ...S94:>91J sel
S~~!I!q!ssod S9~U9J~U!P 9P ~U9W91!J~P
'!S!04:> 9pOW 91 suep nU9W np
Jnod H3J.N3 Jns 9~!nSU9 z9Andde
UO!~:>uol 9un ~UUO!~:>91~s Z911e snaIl !s
Jnod 3:>/:> Jns z9Andde .Jn9JJ9 Jed
94:>no~ el Z9U9~U!el/lJ .9J~!JJe U9 J!U9119J
el 9nb 9:> ~,nbsnr z9:>uolu9 '3:>/:>
~9 9ss!eJedde 9~U9P~:>~Jd UO!~:>91~S
.X!04:> ne911nOU 9J~01l S9~!el
Page 15
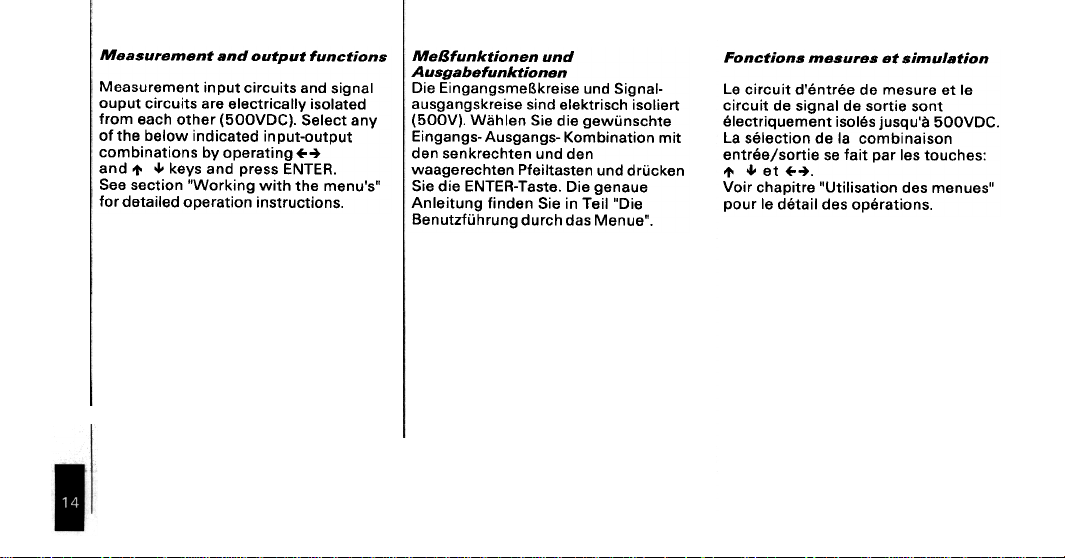
Measurement and output functions
Measurement input circuits and signal
ouput circuits are electrically isolated
from each other (500VDC). Select any
of the below indicated input-output
combinations by operating +-+
and l' -I- keys and press ENTER.
See section "Working with the menu's"
for detailed operation instructions.
MeBfunktionen und
Ausgabefunktionen
Die EingangsmeBkreise und Signalausgangskreise sind elektrisch isoliert
(500V). Wahlen Sie die gewunschte
Eingangs- Ausgangs- Kombination mit
den senkrechten und den
waagerechten Pfeiltasten und drucken
Sie die ENTER-Taste. Die genaue
Anleitung linden Sie in Teil "Die
Benutzfuhrung durch das Menue".
Fonctions mesures et simulation
Le circuit d'entree de mesure et Ie
circuit de signal de sortie sont
electriquement isoles jusqu'a 500VDC.
La selection de la combinaison
entree/sortie se fait par les touches:
.,. ...et ~-t.
Voir chapitre "Utilisation des menues"
pour Ie detail des operations.
Page 16
"ZHOOI
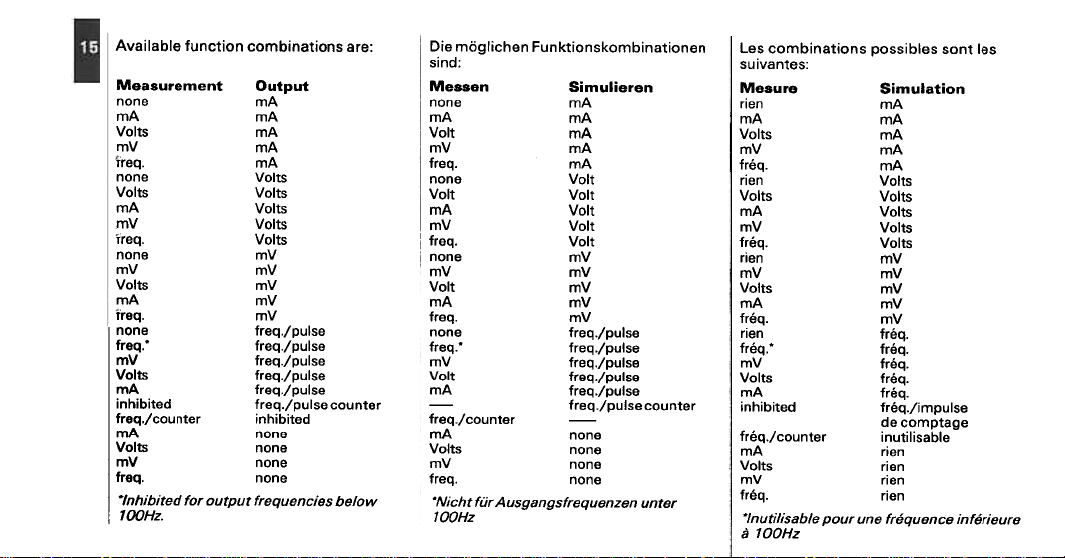
:9Je SUO!~eU!qwo:l UO!~:lUn~ 9)qel!eI\V
:pU!S
~nd~no ~uawa..nseew
VW euou
Vw Vw
Vw s~lo/\
Vw /\w
Vw "beJ~
s~lo/\ euou
s~lo/\ s~lo/\
s~lo/\ Vw
s~lo/\ /\w
s~lo/\ "beJ~
/\w suou
/\w /\w
Aw s~lo/\
Aw VW
Aw "bsJJ
eslnd/,beJJ euou
eslnd/,beJJ :bsJJ
eslnd/,beJJ Aw
eslnd/,beJJ SlloA
eSlnd/,beJJ Vw
pe~!q!4u! Je~uno:>/'bsJJ
euou vw
suou SlloA
euou Aw
auou "bsJJ
Je~uno:> eslnd/"beJJ pe~!q!4U!
Molaq sa!:Juanba.lj lndlno .lOj pal!q!lIul.
ZHOOt
VW euou
Vw VW
Vw ~loA
Vw Aw
VW "baJI
~loA 9UOU
~loA ~loA
~loA Vw
~loA Aw
~loA "beJI
Aw euou
Aw Aw
Aw ~loA
Aw Vw
Aw 'beJI
eslnd/"beJI euou
eslnd/"beJI ;beJI
eslnd/'beJI Aw
eslnd/"beJI ~loA
eslnd/"beJI VW
-Je~uno:l/"beJI
euou VW
euou s~loA
euou Aw
euou 'beJI
U9UO!~eU!qwo>lsuo!~>lun~ U94:1!logw B!G
:so~Uel\!nS
USAS!lnW!S usssaw
Je~UnO:leslnd/"beJI -
JOIUn uozuonboJJsfJuefJsn'l( J!JJ ll/a!N.
ZHOOl (!
'tjw U9!J
'tjw 'tjw
'tjw s~loi\
'tjw i\w
'tjW .b~J!
s~loA U9!J
s~loi\ s~loA
s~loi\ 'tjW
s~loi\ Aw
s~loi\ .b~J!
i\w UO!J
i\w i\w
i\w s~loi\
i\w 'tjw
i\w .b~J!
'b~J! UO!J
.b~J! .'b~J!
.b~J! i\w
.b~J! s~loi\
.b~J! 'tjw
UO!J 'tjW
U9!J S~IOi\
U9!J i\W
UO!J .b~J!
SOl ~UOS solq!ssod suo!~eu!qwo:J sol
UO!JelnW!S 8.lnsew
OSlndw!/"b~J! PO~!q!4U!
o6e~dwo:J op
°lqeS!I!~nU! Jo~uno:J/"b~J!
9Jn9!J~JU! 9:JU9nb~JJ 9Un Jnod 9IqeS!/!Jnul.
Page 17
Manipulating output signals
After you entered an output function,
you can alter the output value as
follows:
In all output modes
Press the l' 0 r ~ keys to increase or
decrease the "set" value (manual
up/down ramp). Two ramp speeds are
selectable by pressing the "slow/fast"
key. Press ENTER to send the displayed
"set" value to the output terminals.
Theactual outputvalue can be increased
or decreased in the same way.
The 0 to 9 keys are used to dial directly
the desired output. Press ENTER to send
your displayed dialed value tothe output
terminals. A typing error maybe corrected
by the C/CE key by removing the last
entered digit. Do not hold the C/CE-key
longer than necessary otherwise the
screen display will jump back to the
previous display.
Press the PROG-key to enter the special
functions menu. See section "Special
functions" for details.
Einstellen eines Ausgangssignal
Nachdem Sie eine Ausgangsfunktion
gewahlt haben. kbnnen Sie den
Ausgangswert wie folgt einstellen.
In aI/en Ausgangsfunktionen
Drucken Siedie Pfeiltasten-t- odel'l-zur
Erhbhung oder Verringerung des Ausgangswertes(man uelle Rampenfun ktion).
Mit derTaste FAST/SLOW kbnnen zwei
Ra m pe ngesc hwi nd igkeite n ei ngestellt
werden. DruckenSiedieENTER- Tasteum
so den eingestellten MeBwert auf die
Ausga ngsterm i nalszu senden. De raktuelle
Wert kann in gleicherWeise erhbht oder
verringert werden. Die Tasten 0 bis 9
dienen zur Direkteinstellung eines
beliebigen Ausgangswertes. Der so
eingestellte Wertwird wiederum mitder
ENTER. Tasteaktiviert. BeifalscherEingabe
kann der jeweilig letzte Schritt mit der
C/CE. Taste zuruckgenommen werden.
Halten Sie den C/CE-Taste nicht langer
als nbtig gedruckt. da das programm
sonst wieder an seinen Anfang
zuruckspringt. Die Spezialfunktionen
kbnnen mitderTaste PROGR aufgerufen
werden. Die genaue Anleitung finden
Siehe in Teil "Spezialfunktionen".
Fonction du signal de sortie
Apres avoir choisi une fonction de
sortie. vous pouvez choisir et changer
la valeur comme vous Ie souhaitez.
Page 18
.sleU!WJB~
9pOW UO!IB/nW!B
.SW40 006 PBB:>XB
H.LWX pUB 93.1nOB b'W U/
ue:> noA AB>t Sd3J.S a3XI:I B4~ 4~!M
G L '8 'v s9nre/\ ~9S-9Jd B4~ AI~:>BJ!P lie:>
B4~ ~e4~ 9JnS B>teV'J .vwOl pue '9 L
~ou SBOp doOI ~UBJJn:> B4~ U! B:>ue~S!SBJ
BJ!M-l VWOl -V B~elnW!S OJ.
's~ndu! WB~sAs pBJBMOd uo SJB~~!WSUeJ~
~J.V'JX B4~ BSn pue ~nd~no Vw ~:>BIBS
.lap pun -!7'W .laa
'ue VWOZ pun
'ess!114:>suV
snp°W-.l°IBI nw!s.lall/wsuB.I.L
-vwOZ -v UOI\ uo!~elnW!S Jnz
Jeu!e qle4JBUU! uJe~~!wsueJ.l
B!S ue4:>eJds Sd3.lS G3XI,j e~se.lJep ~!V\I
'9 L G L '8 'v eJ'tundJe!Jq!le)l e!p ~'teJ!p
BPJ!18 BU!e gep 'Je4:>!s B!S uBlle~s
'pJ!M ue"!J4:>sJeq!1 ~4:>!U 'Q'006 UOI\
eJ!eI4:>S-Je~!el-Z uB~s!edse6pweJJ
pun VW 6ue6snv uep e!s uel4!1M
ue~eu4:>!ezeq ~.lV\lX ~!w e!s uez~nueq
.lne"eWBue.l' ep
el 9nb snOIl-Z9JnSSV 'vwoz !9
'sw4° 006 sed 9ssed~p
'~lLl'.lX leU!WJ9! 91 Z9S!I!!n
UO!IB/nW!B Ie IfW ep e3.1nOB epow
(~X!J sed) Sd31S 03XI:I S9p 9p!e,1 V
S9p !U9W9!:>9J!P J919dde Z911nod snaIl
'9 L G L '8 'v :S9~UUO!!:>91~S~Jd sJn91ell
9U !ueJno:> 9p 91:>noq el 9P 9:>ue!S!S~J
!9 SI!J Z Jn9!!9WSUeJ! un J9lnw!s JnOd
!9 VW X!04:> 91 Z9UUO!!:>91~S 'VWOZ -V
s~nd~no
A.:>uanba.ll dn 6u!~~as
aslnd pUB s~uawa.lnseaw
BIUBWB.lnBeBWA:JUBnbB.I:/
'UO!~:>un~ S!4~ p9J9~U9 9/\e4 noA J9~IV
96e~IO/\ 94~ ~9S O~ .,. ...sA9>! 94~ SS9Jd
SS9Jd pue (19/\91 UO!~:>9~9p) PIO4S9J4~
zH66'66 -0 WOJ~ 6u!6ueJo~nv '1:I31N3
'96ueJ zHOOO 0 L -00 L o~ 96ueJ
6ue6sn"
Bunssawzuanb9.l;/
.u!e 6!~!1~sqles
-zuanba.l,i .lnz 6unlla~SU!3
-aslnd wnz pun 6unssaw
snpOwgeV\l-zuenbeJ,j uep l' '"
'u!e ~3.lN3 pun ue~se~l!eJd
4:>!S ~lle~s zHOOO 0 L -00 L S!q
e~se.l-~4:>eJ'tuesl!eJdJep~!w e!s wep4:>eN
e!p e!s uelle~s 03~,j ueqe4 ~14!1Me6ue
uep ~!W (1\9 ...ZO'O) e4g4uepn~!ldwv
ZH66'66 -0 4:>!eJeqgeV\l e6!~4:>!J JeG
eouenb'.lJ epe.lnS9W
Ja A:Juanba.lJ ap a.lnsaw
UO!Slndw!.p uo!Je.laua6
'UO!~:>UO! 9~1-9:> !S!O4:> J!o/\e S~Jd'V'
Jnod '" '" s94:>nO1- S91 Jns z9Andde
el Jnod UO!SU9~ 9P ne9/\!U 91 J!S!O4:>
9wwe6 el 9P UO!~:>91~S el .UO!~:>9~~p
~9 zH66'66 ~9 0 9J~U9 9:>U9nb~J! 9P
.9nb!~ewo~ne ~S9 zHOOO 0 L -00 L
Page 19

Frequency counter (input)
After you have entered this function.
press the l' '" keys to set the voltage
threshold (detection level) and press
ENTER. Select with l' '" keys the
following ranges:
.Continuouscounting
.Counts/minute
(with elapsed time indicator)
.Counts/hour
(with elapsed time and overflow
indicator)
F,equenzziihler-Einga ng
Nachdem Sie mit der Pfeilsenkrecht-
Taste und der ENTER-Taste den
Frequenz-MeBmodusangewahlt haben
(FREQ). stellen Sie die Amplitudenhohe
(0.02 -5V) mit den Pfeiltasten und
ENTER ein. Nun konnen Sie mit den
Pfeilsenkrecht- Tasten die folgenden
Moglichkeitenanwahlen:
.Kontinuierlich zahlen
"continuous counting"
.Impulse pro Minute "counts/
minute" (mit MeBzeitanzeige )
.Impulse pro Stunde
(counts/hours)
(mit meBzeitsanzeige und
Uberlaufanzeige)
Utilisation du mode compteur
Apres avoir choisi cette fonction,
utilisez les touches... et. pour
selectionner Ie niveau de detection et
appuyez sur ENTER. Selectionnez la
gamme voulue par les touches... .:
I .Comptage continu
.Impulsions/minute
.Impulsions/heure
Page 20

u94M s~e~s J9~uno:> ew!~ p9sdel9 94.1
"sJeeddes!p pe/\!e:>eJ 9slnd ~SJ!! e4~
Aq p9~~9S9J eq ue:> J9~uno:> 94.1
pesdel9 94~ ue4M .0 :A9>j 6u!sseJd
WOJ! se6ue4:> Jo~e:>!pu! Je~uno:> 9W!~
/s~uno:> e4~ U! spuo:>es 09 o~ 69
J9~uno:> s91nd 94~ 'epow S9~nU!W
"(uo!~:>un! 4:>~eM-do~s) 6u!~uno:> sdo~s
Jno4/9slnd 94~ U! S9!ldde 9wes 94.1
"SPUO:>9S 009£ o~ 669£
"9POW Jno4/9slnd
WOJ! s96ue4:> Jo~e:>!pu! 94~ U94M 9pOW
U94M sJe9dde Jo~e:>!pu! MOI!J9/\O 94.1
P99:>X9 Aew s~uno:>!o J9qwnu 94~
9W!~ p9~:>919S 94~ U! s~uno:> 666 666 6
uo!!>jun!14~Z 9!P ddo!s
.u9pun>j9S 009£
.pJ!M U9U!J4:JSJ9qO
0 9!Se.L J9p !!W uue>j 96!9ZUV
!ne 669£ uo/\ U19S4:>9M W!9Q
!!W !UU!69Q 6unI4~Z!!9Z~9VIJ 9!a
94:>!916 sea "(uO!PlUn!J4nddo!s)
9U!9 !U!94:JSJ9 Aelds!a W9p !nv
9PO!J9d U9!14~M96 J9p Qle4J9UU!
9!a .s9slndwl U9!SJ9 S9p 6ue6u!3
9! p UU9M .U9pJ9M !Z!9S96>j:>!)Jnz
u9pun>j9S 09 !ne 69 uo/\ !!9z!nel
.19S4:>9M "9!nU!WAuno:>,, snpoVIJ W!
"Jno4/9slnd" snpoVIJ W! !49!4:>S96
"eJne4 Jed e6e1-dwo:>
9!P UU9M '(MOI!J9/\O) 96!9ZUe!neIJ9Qn
u9sIndwi 666 666 6 uo/\ 14ezuv
"666 666 6 essed~p
1-S9 l!eJedde,l 9P 9UJe1-U! e601JO4,1
9J~!W9Jd el1-!o6eJ 1!,nbsJOI e~4:>u91:>~P
eJ1-~ 1-ned Jn91-dwo:> e1 "UO!Slndw!
"0 :e4:>nO1- el Jed OJ~Z ~ S!W9J
enbsJOI ~ddo1-s 1-S9 Jn91-dwo:> 91
sepuo:>es 09 ~ 69 9P 9ssed e601JO4,1
"91-nU!W Jed e6e1-dwo:> un,p SJOI
e6essed ne 1-!npoJd es eso4:> ew~w e1
un Jnod sepuo:>es 009£ ~ 669£ ep
1-!eJedde 1-uewessed~p ep Jo1-e:>!pu!,l
SUO!Slndw! sap eJqwou el enbsJOI
Page 21

Freq./pulse output
{continuous}
After you have entered this function
press the keys to set the amplitude
and press ENTER.
Select with... ..keys the frequency
range and press ENTER:
.0 -100.00Hz
.0-10000Hz
.0 -6000 pulses/minute
.0 -36 000 pulses/hour
Press ENTER to start the pulse output.
To adjust the amplitude during pulse
generation. press I/O to return to the
amplitude indicator.
Use the... ..keys to alter the
amplitude. Press I/O again to return to
the frequency indicator.
Freq./Pulse-Ausgang
{kontinuierlich}
Nachdem Sie diesen Modus mit den
Pfeilsenkrecht-Tasten und mit ENTER
angewiihlt und die Amplitudenhohe in
gleicherWeise eingestellt haben,
selektieren Sie mit Pfeilsenkrecht- und
ENTER-Taste den gewunschten Bereich
unter den folgenden Moglichkeiten:
.0 -100.00Hz
.0-10000Hz
.0 -6000 Pulses/Minute
.0 -36 000 Pulses/Stunde
Starten SiB mit ENTER den
Impulsausgang. Die Einstellung der
Amplitudenhohe kann wiihrend der
Impulsausgabevorgenommen
werden. Drucken SiB hierzu die Taste
I/O und stellen SiB mit den
Pfeilsenkrecht- Tasten den gewunschten
Wert langsam oder schnell
(FAST/SLOW) Bin.
Genera te U r frequ ence/im p u I_ion
{continu}
Apres avoir choisi la fonction. appuyez
sur les touches l' ...pour choisir
I'amplitude et appuyer sur ENTER.
Selectionnez avec l' ...la gamme de
frequence et appuyez sur ENTER.
.0 -100.00Hz
.0-10000Hz
.0 -6000 impulsions/minute
.0 -36 000 impulsions/heure
AppuyezsurENTERpourgenererla
fonction choisie. Pour ajuster
I'amplitude pendant I'operation.
appuyez sur I/O pour retourner
a I'affichage de I'amplitude.
Utilisez l' ...pour changer I'amplitude.
Appuyez une nouvelle fois I/O pour
retrouver I'indication de frequence.
Page 22

(.lBIUno3)
.~no pel I!! eq
,nd,no BB/nd/"ba.l.:l
uo!~:>un! S!4~ peJe~ue e/\e4 noA Je~!v
.~3l.N3 sseJd pue
seslnd !O JeqwnN .
peeds UO!ss!wsueJl. .
epn~!ldwe e4~ ~es o~ sAe>t e4~ sseJd
o~ Pie!! e4~ sAe>t l' ~ 4~!M ~:>eles
(puo:>es/seslnd = spneq)
8ue8sn!1'-8s/nd/"ba.l:/
(as/ndw!/aZU!3J
'uelle~Su!e (e~eJpne8)
uep ~!w snpoVII uese!p e!s wep4:1eN
(.lna,dwo:J)
ij3.LN3 ~!w pun ue~se.L -~4:1eJ)juesl!e!d
e4g4uepn~!ldwv e!p pun ~14~Me6ue
'ueqe4 ~lle~se6u!e es!eM Je4:1!e16 U!
e!p pun 14ezueslnd e!s ueuug)j
~!e)j 6! pu !M4:1Se6s6u n 6eJtJeq 0
:Aelds!a wep !ne ue4es e!s
:1' ...:>al\e Jauuo!~:>al~S
SUO!Slndw!,paJqwoN .
uo!B,ndw! a:Juanb§'.lj .lnale.l§'u§,D
zaAndde 'UO!~:>uo~ el !S!O4:> J!ol\e s~JdV
J!S!O4:> Jnod l' ...sa4:>no~ sal Jns
"H31N3 Jns zaAndde ~a apn~!ldwe,1
UO!ss!wsueJ~ ap assa~!1\ .
(apuo:>as/SUO!Slndw! = spneq)
S9Slnd = 0000000
pneq ~ 00000
pue s9slnd !O J9qwnu le!o
O~ ~31.N3 SS9Jd 'P99ds UO!ss!wsueJ~
s9slnd lie J9~!'v' '~nd~no 9slnd 94~ ~Je~s
SUJn~9J Aelds!p 94~ '~no ~U9S U99q 91\e4
Ape9J S! ~!un 941. 'UO!~!SOd ~Je~s 94~ o~
'S9SInd !O "~o4S,, M9U e JO!
S9SInd = 0000000
pneq = 00000
'"s9slnd" ~OM sep ~>tU!lq ~s4:J~unz
9!P 6 S!q 0 U9~seJ. U9p ~!W 9!S U9119~S
U9J9qO J9p U! 14ez9slnd 9~4:JSUOM96
~!W uuep 9!S U19S4:J9M pun U!9 94!9H
9J9~Un 9!P U! u9~seJ. -~4:J9J>tU9SI!9!d U9p
~JOM sep ~>tU!lq unN 96!9ZUV J9p 94!9H
J94:J!916 U! unu 9!S u9119~S '"pneq"
U!9 (:J9s/9slnd) 9~eJpne8 9!P 9S!9M
.9~seJ.-H3J.N3 J9p ~!W 9!S u9~e~s pun
.~S! U9pJOM u96eJ~9qo 9slnd
J9p 14ezuv 9~14~M96JOA 9!P w9p4:JeN
U9U!9 JO! ~n9UJ9 ~~J9~ sep uue>t
.U9pJ9M ~9~e~S96 !neI4:JJna U9J9~!9M
-.'-1 = 0000000
pneq = 00000
el t9 SUO!Slndw!,p 9JqWOU 91 Z9SS!S!O4:J
Jns z9Andde t9 UO!SS!WsueJt 9P 9SS9t!/I
"uo!teJ~do,1 J9:>U9WWO:> Jnod ~3l.N3
S91 S9tnOt S!WSueJt J!O/le SyJdV
UOS ~ tU9!/l9J 96e4:>!JJe,1 'sUO!Slndw!
Jnod t@Jd tS9 1!9Jedde,1 "Ieu!wou tet~
"SUO!Slndw! S9p !O/lU9 19/1nou un
Page 23

Special functions
The special functions menu can only
be called after you have entered an
input-output combination. Press the
PROG-key to call the special functions
menu and scroll the ingredients with
the.,. or'" keys.
The following special functions
are available:
In all source and simulation modes:
.PROGRAMMABLE STEPS
.SIGNAL RAMPING
.TRANSMITTER
In all mA and frequency measurement.
source and simulation modes:
.SCALING.
Spezialfunktionen
Die Spezialfunktionen konnen nur
nach Anwiihlen einer EingangsAusga ngskombi nation a ufgerufe n werden.
Drucken Sie hierzu die Taste PROG und
stellen Sie mit den Pfeiltasten den
gewunschten Modus ein.
Die folgenden Spezialfunktionen stehen
zurVerfugung:
In alien Schleifen und
Simulationseinstellungen:
.ProgrammierbareSchritte
PROGRAMMABLE STEPS
.Rampenfunktion
SIGNAL RAMPING
.Transmitterfunktion
TRANSMITTER
In alien mA und FrequenzMeBeinstellungen und in alien
Schleifen und Simulationseinstellungen:
.Zuordnung eines beliebigen
MeBbereiches. analog zum
eingestellten Signal SCALING
Fonctions speciales
Les fonctions speciales du Menu ne
peuvent etre appelees qu'apres avoir
choisi une combinaison d'EntreejSortie.
Appuyez sur PROG pour appeler ce
menu et faites defiler les differentes
possibilites par l' Les fonctions speciales possibles sont:
Dans taus les modes de generation et
de simulation:
.Pas programmes
PROGRAMMABLESTEPS
.Rampe
SIGNAL RAMPING
.Transmitteur
TRANSMITTER
Pour la mesure de mA et de
frequence:
.SCALING
(mise a I'echelle).
Page 24

nu9w~
Sd91S 9/qewwe.lBD.ld
Sd31S 318Vll\JlI\JV!j~O~df1i
"e:>uenbes ewes e4~ u!
i8JO~S o~ s8nle/\ Jo J8qwnu)
.sde~s 9 O~ l le!p Aew noA
:SMO4S Aelds!p ~X9U 941. .J9~U9
'senle/\ 9 o~ llle:>8J pue 8JO~S ue:> noA
le!p 'uo!~:>unJ S!4~ p8J8~U8 noA Je»v
wJoJJed o~ ~ueM noA Sd8~S Auew Mo4
DU!MOIIOJ 84~ ~3.lN3 DU!SS8Jd Je»v
(I\W JOJ 8ldweX8) :sJe8dde Aelds!p
L :d315 135
AwOOO.OOO
pue 9JO~S o~ ~ueM noA 9nle/\ 94~ U! II!:J
Z :d3.LS .LnO
I\WOO'OOO
a3XI:J sseJd 'senlell peJo~s e4~ Ile:>eJ °.L
e4~ 'Ae>l S!4~ sseJd noAew!~ 4:>e3 'Sd3.LS
u! enlell peJo~s ~xeu e4~ ~nd~no II!M ~!un
peJo~s e4.L 'peJe~ue se e:>uenbes e4~
Alle:>!~ewo~ne~no~ues eq osle ue:>senlell
sB/qewwe.l8o.ld sed BII!.lI/:JS B.leq.lB!WWe.l8o.ld
nuaw nuaw fJ;
Sd31S ~18'V"LllJLIIJ'V"I;J~O~d Sd31S 318'V"LllJLIIJ'V"~90I;Jd if
ap J91addeJ ~a Ja>l:)o~s za/\nod sno/\ a~JaM~sa:l 9 S!q l uauu9>1 9!S
~uuo!~:)al~s J!o/\e s~Jd'V .sJnale/\ 9 ~ l 'ua!nJqe J9pa!M pun uJalj:)!ads
aJqwou al Z9SS!S!Olj:) 'UO!~:)UO! a~~9:) uo!~>lun:l asa!p a!s waplj:)eN
9~!nSUa Jauuop ~a Ja~n:)~xa ~ sed 9P alP 9!S uallj~M 'uaqelj ua!nJa6!ne
.awweJ6oJd ap sed 9nbelj:) ap Jn9le/\ el uuaM "19 S!q l) a~aM~s9:1 Jap Iljezu'V
.sed 9 ~ lap anbJ!s!olj:l za/\nod au sno/\ ~U!9lj:lSJa 'ua>l:l!)Jp ij3.LN3 a~se.L a!p 9!S
ueJ:I~.1 'ij3.LN3 Jns ~Andde J!o/\e s~Jd'V "I/\w J!)! la!ds!as) :Aelds!o wap !ne
"I/\W Jnod .xa) :~!eJedde ~ue/\!ns
,~
9iP J9pUeU!94:>eu 9!S u9q9~
pun U!9 9~9M~S9,j U9~4:>SUr!M96
"qe ~J9M U9p 9~se.l-1:I3.lN3 Jep
:~6!9Z 96!9ZUV 9pU9610~ unu 9!a
l :d3.lS 13S
AWOOO'OOO
U9)j:>r!Ja 4:>Jnp SI!9M9! 9!S UJ94:>!9ds
"l :d3.lS .lno
I\WOO'OOO
9~Se.l 9iP J9qr! U9UUq)j 9~9M~S9,j 9!a
4:>eN 'U9pJ9M U9~nJ96qe Sd3.lS a3XI,j
U9p ~~J9~ sep ~q!6 )j:>nJpU9~Se.l W9pe!
'6ue6snv U9p ~ne ~J9M~S9,j u9~S4:>~U
L :d315 135
"WOOO'OOO
~9 SJn91ell SOli S9~nO~ !SU!e Z9SS!S!04:>
:~S9 ~Uell!nS ueJ:>~,l
'J9~d9:>:>e s91 Jnod ~31N3 Jns z9Andde
l :d3J.S Ino
/\wOOOOO
c,
zaAndde snaIl anb S!0Ianbe4:> 'Sd3J.S
Jns 9!01lUa l!aJedde,1 'a4:>no~ a~~a:> Jns
-weJ60Jd' ap S'ed np' Jn91ell el ai~Jos el
"aSIJOW9W a~a e Inb ~UelllnS 9W
s~uaJ~II!p sap SJnalell sal JaladdeJ Jnod
03XI:I Jns zaAndde 'awweJ60Jd ap sed
Page 25

To start this operation and to select
the interval time:
Press the appropriate numerical key as
indicated below;
Key Interval
(seconds)
1 10
2 20
3 30
4 40
5 50
6 60
7 70
8 80
9 90
0 100
A count-down indicator shows you how
many seconds are left before the next
value will appear.
AuBerdem konnen Sie die Festwerte
automatisch sanden. Zum Start dieser
Funktion und zur Festlegung der
Intervallzeit betatigen Sie den
Nummerntasten 0 bis 9.
Die Tasten sind wie folgt Belegt:
Taste Intervall
(Sekunden)
1 10
2 20
3 30
4 40
5 50
6 60
7 70
8 80
9 90
0 100
Eine "Count-Down-Anzeige" zeigt
Ihnen. wieviel Zeit noch bis zum
nachsten Schritt verbleibt.
Pour commencer cette operation et
selectionnerun intervalledetempsentre
chaque pas de programme, appuyez sur
la touche numerique appropriee comme
indique ci-dessous:
Touche
1 10
2 20
3 30
4 40
5 50
6 60
7 70
8 80
9 90
0 100
Una indication de decomptage vous
mantra combien de temps il rests
avant que la valeur suivante soit
envoyee sur la sortie.
Intervalle
(seconde)
Page 26

6u!dwe.lleu6!s
uo!p/unjuadweH
DNlclWI1'H 711'NDIS
DNldWtl'H 7t1'NDIS
sadwe.l sap UO!lewwe.l6o.ld
nuaw
~NldtI\JVij lVN~IS
O~ noA sMolle Uo!~:>un~ dweJ e4.L
ue Alle:>!~eWo~ne eseeJ:>ep JO eseeJ:>u!
.ew!~ 4~!M leUO!~odOJd enle/\ ~nd~no
uo!~:>unl S!4~ peJe~ue e/\e4 noA Je~v
.s~!W!1 dweJ e4~ ~nO-II!~ pUB
:SMO4S Aelds!p 94.L
sAe>j '" ...e4~ 4~!M sPle!~ e4~ ~:>eles
e4~ ~es O~ eJnpe:>oJd ewes e4~ MOII°:J
:Je~ue pUB eW!~ IleMp pUB le/\eJ~
nU9W
DNldl/lJ'\f~I'\fNDIS
ueu41 ~40!169wJe uo!~>\unJuedwe~ e!G
e6!WJ9JuedweJ 'e40S!~eWo~ne e!p
'se~eM ueueqe6e6Jo/\ seu!e eqe6sn'\f
'~!ez ue~lle~se6u!e Jeu!e nz leUO!~JodoJd
puelleJ Jepo pue6!e~s uue>\ edwe~ e!G
e!s wep4oeN 'UepJeM ueqe6e6sne
'ueqe4 ueJnJe6Jne uo!~un:l ese!p
e~eM ue~40SuOMe6 e!p e!s ueuu9>\
'uelle~su!e e6!ezu'\f
:Aelds!G wep Jne ue4es e!s
Jep I!e.l uepue>\u!lq SI!eMe[ wep Jne
Aa'\7'3~ lIIJ'\f~DO~ddlllJ'\7'~
V\r'" ,(}fJ \ '" is J
..=y
/ "
nuew
:>!~~e ueJ:J~,l
d~V~
:sJole 94
lI'JVHOOH~
\ "'11
DNldVIJVH1VNDI$
S9p ~9WJ9d sno/\ UO!~:lUO! 9~~9::>
el Jns s9/\!~e6~u no S9/\!~!sod s9dweJ
ne S9119UUO!!JodOJd ~UOS !nb '9!!JOS
9U9:1 ~UUO!~:l91~S J!o/\e S~JdV 'SdW9~
~9 l' .&. S94:1nO~ S91 Jed UO!~:lUO!
el 9P S9~!W!1 S91 !S!O4:1 ~9 H3.lN3
9Jnp~:loJd 9W~W el Z9S!I!~n '9dweJ
9P SdW9~ 91 ~9 9~U9d el J!S!O4:1 Jnod
'H3.lN3 Jns J9Andde ~9 9~~UOW
Aa'\f3H
\AI", 1:>11
Page 27

Press '" key to start the ramp for
signal increase and press'" to start
the ramp for signal decrease.
Press '" and'" or'" and '" direct
after each other to start a continuous
up and down ramp with dwelling at
the high and low ends.
Press the "0" key to FREEZE the ramp
action. To restart press ~ or '"
NOTES:
Measurements are inhibited in the
ramp mode. Frequency ramping has
a resolution of 1Hz.
Durch Drucken der Pfeilsenkrecht
starten Sie die Rampenfunktion
wie folgt:
l' = Rampe lauft aufwarts
'" = Rampe lauft abwarts
l' und'" = Rampe lauft
wellenformig. wobei am Ende
angekommen die vorgewahlte
Verweilzeit (dwell time)
eingehalten wird.
Drucken Sie die "0"- Taste um den
Rampenverlauf zu stoppen. Durch
drucken der l' oder '" Taste kann die
Rampe waiter gefahren werden.
ANMERKUNG:
In der Stellung "Messen" (MEASURE)
liiBt siGh die Rampenfunktion niGht
anwiihlen. Frequenzrampen haben
eineAufl6sung von 1Hz.
Appuyez sur l' pour obtenir una
rampe a penta positive; sur'" pour
una penta negative.
Appuyer sur l' et '" 0 u '" et l'
pour obtenir successivement una
rampe a penta positive puis negative
de maniere continue.
Appuyer sur la touche "0" pour
arreter Ie signal de la rampe.
Appuyer sur la touche l' ou '"
pour redemarrer la rampe.
REMARQ.UE:
La fonction mesure n'est pas
possible dans ce mode d'utilisation.
La fonction rampe en generation de
frequence a une resolution de 1Hz.
Page 28

6uye3S
U96!q9!/9q S9U!9 6unup.lonz
U/nz 6o/eue 'S'l3!9.19qfj9U/
9N/71t':JS /eu6!s U91/191S96U!9
(6u!/e:Js) 9lf9Lf:JB,/ e 9S!W
nU9W~
--v
nuewn
~Nnv:>s
U! peeJ O~ Se(e:>s 9>teW ue:> J9Sn
pue VW 4~oq uo s~!un 6U!J99U!6ue
"ij3.LN3 SS9Jd l~nd~no
pue ~U9WeJnSe9W) se6ueJ A:>uenb9Jl
cj}
pun -~eV'J UJ! U9UUQ>j 9!S
uep !eq snpoUJJe!lnUJ!S
zu9nbeJ:I ue~>jundUJUJeJ6oJd
UJUJeJ6oJdJ9~Un sese!p VUJ pun
~NI1'v'JS
Jep U9>j:loJa UJ9p 4:1eN .U9JnJJne
uep ~!UJ e!s U9UUQ>j e~se.L -H3.LN3
JepO s~~~ne ue~se.L -~4:1eJ>juesl!eJd
.uJe~~~lq nueV'J sep 4:1Jnp S~J~Mqe
nU$W~
It
.~3.LN3Jns
DNfl'lf:JS
91194:>!},I ~ 9S!W el ~!el Jn9~eS!I!~n,1
9~!nSU9 z9Anddv .uo!~elle~sU!,I 9P
J9JnS9W ~ no 9J~~9W!} ~ SJn91eJ\ S9p
s9nb!sA4d SJn9pueJ6 S9p UO!~:>uol U9
Page 29

Scroll the ranges with l' + keys.
The possible functions are:
4-20mA input/lin
4-20mA input/flow
Q-20mA input/lin
Q-20mA input/flow
4-20mA output/lin
4-20mA output/flow
0-20mA output/lin
Q-20mA output/flow
Impuls./min. output
Impuls./houre output
Freq. output
Freq. input
NOTES:
Only applicable ranges are displayed
in the menu.
Den folgenden Signalen konnen
beliebige MeBbereiche zugeordnet
werden:
4-20mA input/lin
4-20mA input/flow(quadratisch)
Q-20mA input/lin
0-20mA input/flow (quadratisch)
4-20mA output/I in
4-20mA output/flow (quadratisch)
Q-20mA output/I in
Q-20mA output/flow (quadratisch)
Impuls./min. output
Impuls./Stunde output
Freq. output
Freq. input
ANMERKUNG:
Nur anwendbare Bereiche werden
im Menu angezeigt.
Selectionner la gamme avec les
touches", "'.
Les fonctions possibles sont:
4-20mA entree/lineaire
4-20mA entree/flux non lineaire
Q-20mA entree/lineaire
Q-20mA entree/flux non lineaire
4-20mA sortie/lineaire
4-20mA sortie/flux non lineaire
Q-20mA sortie/linea ire
Q-20mA sortie/flux non lineaire
Impuls./min. sortie
Impuls./heure sortie
Frequence sortie
Frequence entree
REMARQUE:
Seules les gammes utilisabes sont
visualisees sur Ie menu.
Page 30

~ooJ-eJenbs 4~!M ~nd~no '\1w uo 6u!le:JS
Alle:J!~eWo~ne II!M d!4SUO!~eleJ (MOl!)
~nd~no '\1W sde~s pex!! e4~ ~depe
senlell e~e!JdoJdde e4~ o~ uo!~:Jun!
"MOl! %00 L pue
"0000 speeJ U! pall!!
'%9L '%09 '%9l '%0 o~ 6u!6uoleq
"Aelds!p ueeJ:Js 6U!MOIIO! e4~ U! II!:J
ue:J noA Ae>t ~-+ pue l' ~ e4~ 4~!M
e4~ ~:Jeles O~ JOSJn:J 6u!>tU!lq e4~ allow
S~!W!I ueds ele:JS "U! pall!! eq O~ Pie!!
"6666+ pue 6666- ueeM~eq ~es eq ue:J
00 L < eq ~snw sueds ele:JS pue e6ue~
~es eq AIUO ue:J u6!s snu!w e41"s~!6!p
eq O~ gUll e4~ ue4M Ae>t -0 e4~ 4~!M
.ua6e!1 6666+ pun
ue4e~s uJeqe6>1:>nJP>lJ!M !eq
uap pun -~4:>aJ>luesl!eld
.uella~su!a ~eMuale>lS
.ue6!ezue 0000 Je4Jo/\ ~nw
Jnz uo!~>lun;j Je4:>si~eJpenb ~!W
uaJa~un pun ueJaqo uap os pun
e!p ~nw ue~eM ue/\!~e6eu uo/\
osle 'MO1;j/ .Lnd.LnO vw 4:>!eJea wI
Ueleu6!s~nI14:>Jna uo/\ 6unJe!s!JeeU!1
'%9Z '0 e~>lund~se;j eiP 4:>s!~eWo~ne
.6un6!)IJaJ\ Jnz %00 L pun '%9L '%09
a3XI;j a~se.L e!p Jaq!) uauu9>1 a!s
uep ~!V\I 'UapJeM UalnJa6qe Sd3.LS
a!s ueuu9>1 ua~Se.L-~4:>aJa6eeMI!ald
Aelds!a W! JosJn:) uepue>lu!lq uep
ue6eMaq alla~s e~4:>sU!)Ma6 e!p lne
6666- ue4:>S!MZ uue>l ~eMuale>lS Jea
Je~9J6 ~nw 4:>!eJequele>ls~wese~ Jea
eqe6u!3 Jep !ea .u!es s~!6!p 00 L SIB
ElP JnEl~eJ~u~6 U9 911940~,1 ~ 9S!W el
sed SEll ~U9W9nb!~ewo~ne EI~depe Vw
xne (Sd31S 03XI:I) 9wweJ6oJd ElP
'%9Z '%0 ~ s9~uepuodsElJJoo sJn91ell
"ElI1940~,19p %OOL '%9L '%09
"sueJo~ S~U9J~J!!P SEll ZElSS!ldwEI~
snail Eo+ ~EI '" '" sEl4ono~ SEll OElIIV
~EI ~ue~ou6!IO JnElSJno Ell JElOeld~p sEI~!eJ
"J!ldw9J ~ dwe40 Ell Z9UUO!~OElI~S
s9JnEl!J~lu! ~9 sElJnEl!J~dns S9~!W!1 SEll
"6666+ ~9
Aelds!a sea .uepJeM ~>1:>!)Jpe6 0 e~se.L
6666- ~UOS ElIIEl40~,1 ~ ElS!W el ElP
JnEl!J~dns ElJ~@ ~!Op ElIIEl40~,1 ElP ~ne4 91
ElP ~9WJEld 0 El4ono~ el "00 L ~
'0000 ~SEI EI~4o!J!e JnEllell el
puenb 911!~e6~u Jn91ell Elun J9UUO!~OElI~S
Page 31

For scaling on mA:
LO 4.00mA = 0000 *
Hi 20.00mA = 0000 *
For scaling on frequency range
0 -100Hz:
Lo 000.00 Hz = 0000 *
.
HI 000.00 Hz = 0000 #
For scaling on frequency range
0 -10 OOOHz:
Lo 00000 Hz = 0000 *
Hi 00000 Hz = 0000 *
For scaling on pulses/ minute
(output only):
Lo 000000 p/m = 0000 *
Hi 000000 p/m = 0000 *
Fur die Skalierung im mA-Bereich:
400mA ; 0000 *
20.00mA ; 0000 *
Fur die Skalierung im Frequenzbereich
0-100Hz:
000.00 Hz; 0000 *
00000 Hz ; 0000 *
Skalierung im Frequenzbereich
OOHz:
00000 Hz ~OOOO *
00000 Hz ; 0000 #
Skalierung im Bereich
min: (nur Ausgang)
000000 p/m = 0000 #
000000 p/m ; 0000 #
Pour la mise a I'echelle en mA:
Lb 4,00mA = 0000 #
Hi 2O.00mA = 0000 #
Pour la mise a I'echelle avec la
gamme 0 -100Hz:
Lo 000.00 Hz = 0000 #
Hi 000.00 Hz = 0000 #
Pour la mise a I'echelle avec la
gamme 0 -10 OOOHz:
Lo 00000 Hz =0000 #
Hi 00000 Hz =0000 #
Pour la mise a I'echelle en impulsions/
minute (seulement en sortie):
Lo 000000 p/m = 0000 #
Hi 000000 p/m~ 0000 #
Page 32

:(AIUO
~ndu!) Jno4/SElSlnd uo 6u!le:>s Jo,j
01
!H
isenle/\ peleos)
# 0000 = 4/d 000000
# 0000 = 4/d 000000
6u!leOS e4~ e~eldwoo O~ ij3.lN3 SS9Jd
u!e6e "ij~Oijd sseJd "6u!wweJ6oJd
~! eJnpeooJd ewes e4~ MOIIO~ pUB
~nd~no pUB e~ep ~ndu! 4~Oq ~UeM noA
e4~ ~o eu!1 Jeddn e4~ uo "peleos e~ep
peleos e4~ peeJ MOU ueo noA AeldS!p
MOU ueo senle/\ ~nd~no is)enle/\
s~!un 6u!Jeeu!6ue U! pele!p eq AIUO
:(6ue6snv Jnu) Jno4
"UepJeM ~e!I\!~)je
/9Slnd 4:J!9J9a W! 6UnJ9!le>lS siP JO:l
/suO!Slndw! ue elle4:J~,1 ~ es!w el Jnod
:(e!~JOS ue ~ueWelneS) eJne4
# 0000 = 4/d 000000 01
# 0000 = 4/d 000000 !H
"e~se.l-H3.lN3 e!p a!s U9)j:JOJp
BunJe!le)jS Ua~llj!!M9B J9p aqeBu!3 Jnz
U9lj:J!IBgw Jap W9U!e a!s uu9M
nz BunJe!le)jS eU!9 9lj:J!aJaqsBueBu!3
9!P 9!S ua)j:JOJp os 'uaiIOM ueupJO
J9p ~!w unu ueuug)j e!s "HDOHd 9~se.l
S9p BunJe!le)jS e!p Jnp9Z0Jd U9lj:J!9IB
"ueJ lj OJlj:JJ n P selj:J!aJaqsBu eBu!3
Jep U! unu a!s u9ljes Aelds!a wep Jnv
alP) ~9Muele)jS uep 9lj!eH UeJ9qo
9~eMsBueBsnv e!a ie~9Mu9Ie)jS
e~JeM a~Je!le)js sle unu ueuug)j
e~se.l-H3.lN3 Jep ~!W pun 'ueqeBeBu!e
.sse:>oJd ep ~l!un
# 0000 = 4/d 000000 °1
# 0000 = 4/d 000000 !H
el J9U!WJel Jnod ij3.lN3 Jns zeAnddv
.91194:>~,1 ~ es!w el 9P UO!leWweJ6oJd
19 DOijd Jns ne911nou ~ z9Anddv
snail !S eJnp~:>oJd 9W~W el ZeS!I!ln
9!lJOS ep 19 9~Jlue,p eI194:>~,1 zelnoll
ep eJn9!J~dns eu6!1 el Jns "elqw9su9
sap sJole eJ!1 zellnod snail ueJ:>~,1
.elle4:>~,1 ~ es!w ep sJnelell
ue e~uuo!l:>el~s lse e!lJOS ep Jnelell el
Page 33

Transmitter
trmenu
IJ TRANSMITTER
"
The unit can be programmed as a
signal converter. The converter input
and output are defined by the input-
output combination previously
selected. Press ENTER. The next
screen shows you 4 fields in which
you can fill in the zero and span
settings for both input and
output. The displayed units will be in
accordance with the input-output
combinations previously selected.
EXAMPLE:
Screen display for a Volts to mA
converter.
Lo 00.00 Hz = 4,00 #
Hi 1.0.00 Hz = 20.00 #
Press ENTER to start the converter
operation.
NOTE:
Can vetter can be programmed for "direct"
as well as for "reverse" outputs.
T,ansmitterlunktion
cc
cciJcmenu c
cc;'!
!:)ic TRANSMITTER
Das Gerat kann in dieser Funktion als
meBumformer eingesetzt werden.
Den Eingang und den Ausgang konnen
Sie in der" input-output-Kombination"
definieren: Nach dem DrUcken der
ENTER-Taste sehen Sie 4 Felder auf
dem Display. Hier konnen Sie den
Nullpunkt und den Endwert des
gewUnschten Bereiches fUr den
Eingang und den Ausgang bestimmen.
BEISPIEL:
Anzeige auf dem Display fur einen
meBumformer fur Eingang in m V und
einen Ausgang in mA.
lo 00.00 Hz = 400 #
Hi 10.00 Hz = 20,00 #
Sie starten die Funktion der ENTER-
Taste.
ANMERKUNG:
Sie kdnnen die Transmitterfunktion fur
direkten oder inversen Ausgang
programmieren.
Transmetfeur
1:tmenu
.
JJ TRANSMITTER
ccc cc c c
L'appareil peut etre utilise comma
con-vertisseur de signal. L'entree et la
sortie du convertisseur sont definies par
la com bi naison d'entree/ sortie choisie au
debut. Appuyez su rENTER. L'ecran suivant
vous montre 4 champs dans lesquels
vous pouvez remplir Ie haut et Ie bas de
I'echelle pour la plupart des entrees/
sorties. Les unites affichees sont en
concords nce avec la co m bi naison de ntree/
sortie choisie precedemment.
EXEMPLE:
Ecran affiche pour la combinaison
convertisseur volts/mA.
00.00 Hz = 4.00 #
1000 Hz = 20.00 #
AppuyezsurENTERpourdebuterle
fonctionnement du convertisseur.
REMARQUE:
Le convertisseur peut-etre programme
en direct ou en inverse de sortie.
Page 34

:~
/\!;+
~-
-~=~>-I
~
" 39"Z I
I
oiL/
VW
~n~'oT 1\99'
:!nL"oT
zHOL-O
"tWZ9-0 '[)9J,j )fOOL
I\wOZL-O
I\vZ-O
AWO~L-O
AlL-O 300L-
sweJ6e!p ~!n:JJ!:J ~nd~no 13 ~ndul .
eu~ld~le4:Jss6ue6snv pun -s6ue6u!3 ..
u! VWj"b9J:I ;-- 0---
e!~os ep ~e e~J~ue,p s~!n:JJ!:J sap e!!!ldw!s ewe4:JS ...
u! GN9 ~ vwOOv i
u! /\II\W
~ ~~~~--JOZ L -0
NOI.L'IflOSI :)01\009 ::nd~~~_N_~.LVln~IS ONV 3:)~nOS
~no 'b9J~/l\vZ ~ ZH~~~:g "L~ ~ l <:;t::-
~IS'.l~X '1fwvZ-o l\a1 +
~ ~...~~n ~ r-- .~
InoONEJ ~
Ino /\JAw ~W~~~:g f I 300L <!;t;-
Page 35

Service. repair and parts
IMPORTANT NOTE:
If the unit has to be repaired or
recalibrated in the warranty period,
please send it back to Omega.
Non-authorized intervention may void
manufacturers warranty. This does not
apply for fuse replacements.
Wartung und Fehlersuche
WICHTIGER HINWEIS:
Wenn innerhalb der
Gewiihrleistungszeit ein Defekt
auf tritt, so senden Sie das Geriit zu
Omega. Bei einem Reparaturversuch
durch nichtautorisierte Personen
erlischt die Garantie.
Dies gilt nicht fur das Auswechseln
von Sicherungen.
Service. reparation et
references
REMARQUE IMPORTANTE:
Si /'appareil avait besoin d'etre repare
ou recalibre dans la periode de garantie,
renvoyez-le a Omega.
route intervention non autorisee peut
annuler la garantie. Ceci ne s'applique
pas pourleremplacementdes fusibles.
route intervention non autorisee ne
sera pas prise sous garantie. Ceci n 'est
pas applicable a u changemen t de fusible.
Milliamp input fuse replacement
Remove the cover plate to have
access to the fuse. The fuse has
special characteristics and should only
be replaced by an equivalent fuse.
contact Omega for details.
Auswechseln der Sicherung fiir
den mA-Eingang
Entfernen Sie die ruckseitige
Abdeckeplane um Zugang zum
Sicherungshalterzu bekommen.
Sie sollten ausschlieBlich Sicherungen
des Herstellers verwenden.
Remplacement du fusible sur
I'entree mesure de mA
Enlevez Ie couvercle avoir acces au
fusible. Le fusible a des caracteristique
speciales et ne peut etre remplace que
par Particle d'Omega.
Page 36

e.lnpaoo.ld
("sweJ6e!p
6u!pu!J ~,neJ pue uo!~e.lq!,e:)
.~!>I alqe:> uo!sua~xa ue paau
'sl!e~ap JO~ e6awo >IS,,!
'salqe:> UO!SUa~Xa a4~
noA ~!un a4~ a:>!/lJas JO a~eJq!le:>aJ 01
a4~ ~e4~ aJns a>lew pUB ~!un a4~ uado
JO paZ!p!XO ~OU ale SUo!~:>auuo:> AJa~~eq
a:>eldaJ JO uealJ 'UO!SOJJO:> Aq pa~:>a~~e
6u!~unoW asealal:j 'AJessa:>au ~! stJed
~!n:>J!:> pa~u!Jd a4~ a/lOWaJ pUB SMaJ:>S
a~eJadas pUB AI~ua6 Alqwasse pJeoq
Ile~sul '~SaJ a4~ WOJ~ pJeoq JaMod a4~
~!n:>J!:> ~nd~no pUB ~ndUI" UO!~:>as aas)
S9119!Z9ds U!9 9!S U96!~RU9Q
84:»nS.l8149,1 pun 6Un.l9!.lq!le>jn9N
S9~~J9~ S9p 6UnJ9!JQ!le>jn9N Jnz
e69WO !9Q 9!S u96eJ,j 'I9Qe>j~rii4:1SUV
u9119~S pun ~~J9~ sep 9!S U9U!!O '4:1eu
9ss!JI4:1sUe9!J9~~e8 9!P ~ep 'J94:1!S 9!S
J9pO U96!U!9~ 'PUiS ~9!pAxo ~4:1!U
6!~RU S9!P UU9M '91!9.L 9!S UJ9n9UJ9
-96e~uoV'J 9!P 9!S U9SR' '~U!94:1SJ9
6!~4:1SJOA 9!S U9UU9J~ pun u9QneJ4:1S
u9~>j:lnJp96 J9p ~!W 9u!~eld 9!P
W9p ~!W 9u!~eld J9p UOA 6un~le4:1S
9!S U9~9!14:1S 'I!9~s6un6JoSJ9A
U9PU!qJ9A 'ue 19qe>jle!Z9ds sep unu
s6ue6u!3 S9p ~nl4:1sues6unpJ3 U9p 9!S
pun punoJ6~ndu!) s6ue6snv S9p pun
1!9.L 949!S) J9pUeU!9~!W (punoJ-~nd~no
i"9U!1ld~le4:1ss6ue6snv pun -s6ue6u!3"
.S9~ 9P s9Iq~:>
sap UO!.:Ja.ap .a uoI.e.lqlle:>
s.u9wauuoI.:JUOJ SleAnew
'1!9Jedde,1 J9!!!J~/\ no J9q!le:>9J JnOd
9Iq~:> un,p U!OS9q Z9/\e sno/\
Jnod e69WO ~ Z9pueW9a 'UO!SU9~X9,P
-Z9JnSSe ~9 1!9Jedde,1 Z9J/\no 'sl!e~~p
S9!J9~~eq S9p SJn9~:>9UUO:> S91 9nb sno/\
el Jed S9~6UOJ !U 's9~pAxo !U ~U9!OS 9U
!S S91-Z9:>eldw9J no z9AoU9N 'UO!SOJJO:>
U9!~U!eW 9P S!/\ S91 Z9/\91U9 '9J!eSS9:>~U
led!:>u!Jd ~W!Jdw! ~!n:>J!:> 91 Z9UJnO~9J ~9
np uo!~e~U9W!le,p 9~Je:> el z9Jed~s ~9
'UO!SU9~X9,p 9Iq~:> el z9l1e~sul '9~S9J
9~J~U9,p ~!n:>J!:> np 9ssew el Z9~:>9UUOJ
J!O/\) J!~OS 9P ~!n:>J!:> np 9119:> ~
s~!n:>J!:> S9p 9!!!ldw!s ew94:>S" 9J~!de4:>
S9p un :>9/\e (,,9!~OS 9P ~9 9~J~U9,p
Page 37

Connect input ground to output ground
with one of the test leads. All voltage
readings are related to ground.
Perform each line and see whether
you can obtain the expected readings.
If a reading differs, adjust reading
with the appropriate trimmer. If you
can't get the right reading, replace the
printed circuit board and try again.
Please note that every "board"
replacement implies a full recalibration.
Readings with a .are readings on the
calibration standard (certified external
calibration device) otherwise on the
display of the unit. Calibration must be
performed in the following sequence:
Prufen Sie nun aile Anschlusse durch
und schauen Sie. ob auf dem Display
die erwarteten Werte angezeigt
werden. Wenn sich eine Abwichung
zeigt. stellen Sie den Wert mit dem
zustandigen Trimmer nacho Wenn sich
die gewunschten Werte nicht
einstellen lassen. montieren Sie die
Platinen wieder und wiederholen Sie
den Vorgang. Beachten SiB. daB jeder
Teiletausch auf den Platinen eine
vollstandige Neukalibrierung
erforderlich macht. Die Neukalibrierung
muB in folgenden Sequenzen erfolgen.
Toutes les tensions lues referecees par
rapport a la masse. Connectez toutes
les lignes et verifier que vous obtenez
les lectures appropriees. Si la lecture
differe. ajustez-la avec Ie potentiometre
conserve. Si vous ne pouvez pas
obtenir une lecture correcte. remplacer
Ie circuit imprime et essayez de
nouveau. Remarquezquechaque
changement de carte necessite une
recalibration complete. les lectures
sont lues avec la calibration standard
(appareil certifie). La calibration doit
etre effectuee de la fayon suivante:
Page 38

epow
,Iaww!,I.1
pJeoq"t:J9Jea I +JOU J! :6U!pe9Y
:a.lnpaoo.ld UO!~e.lq!le:>
~no I\W OJ9Z I\WO ~no
~no I\W ueds I\WOl L ~no
I I\l L ~no
~no 1\ OJeZ 1\0 ~no
I ~no 1\ ueds
(xl.) a/\oqe ~eadaH
"3Hna3:)OHd NOI.lVH8IlV:) ::10 aN3
.l\wO
.l\wOlL
.1\0
.I\l L
'I\WOl ~e Plo4seJ4~ ~:>eles pUB SleU!WJe~ ~ndu! A:>uenbeJ~ ~!n:>J!:> ~O4S
JOss9:JOJd
Joss9:JOJd
Joss9:JOJd
Joss9:JOJd I
JOsse:>oJd .VWO ~no VW OJeZ VWO ~no
JOsse:>oJd .VWOl ~no VW ueds VWOl ~no
en60leUe I\WO U! I\W OJeZ I\WO UI
JOsse:>oJd I\WOlL U!I\W ueds I\WOlL UI
en60leUe VWOl U! VW ueds VWOl UI
JOsse:>oJd 1\0l L U! 1\ ueds 1\0l L UI
en60leUe Ld.l I\WO PIO4SeJ4.l Moleq BUll ees
Page 39

Mode I Trimmer
Frequency range check points
In freq. ---
Out 100Hz --Out 10.000Hz --Out pulse .-In 20KHz ---
Power supply check point
On 5Vis,adj.
On ---
On --On .-On ". .On ---
On displ.angle
Miscellaneous
On
On ---
1 ---
Reading: if not -+
aut. range at 100Hz
100.00Hz.
10.000Hz.
counter.
OHz
+5VTP'*
-5V TP2*
+ 15VTP3*
+ 26V TP4*
+ 5V TP5*
-5V TP6*
view angle
no display
black horz. bar
I Defect.board
processor
analogue
analoguejproces
processor
I analogue
power
power
power
power
power
power
I display
I power/keyboard
display/process
Page 40

I
snpowl
I:.lnpezo.ld uone.lq!18>1
IJOSS9Z0Jd .VWO ~no VW OJ9Z VWO ~no
U910".l9P9!M xI.
1.Plo4S9J4~ 9!S u914~M pun ZJn>l 9Bu~Bu!9ZU9nb9J~ 9!P 9!S U999!14:>S
JaWW!J.L
I I\l L ~no
:a6!azuv
IS9J>l9Jea
+- .4:>!U UUaM
91.18)1
JOSS9Z0Jd .I\WO ~no I\W OJ9Z I\WQ ~no
JOSS9Z0Jd .I\WOl L ~no I\W ueds I\WOl L ~no
JOSS9Z0Jd .1\0 ~no 1\ OJ9Z 1\0 ~no
JOSS9Z0Jd I .I\l L ~no 1\ ueds
JOSS9Z0Jd .VWOl ~no VW ueds VWOl mo
BOleuv I\WO U! I\W OJ9Z I\WO u,
JOSS9Z0Jd I\WOlL U!I\W ueds I\WOlL UI
BOleuv VWOl U! VW ueds VWOl ul
JOSS9Z0Jd 1\0l L U! 1\ ueds 1\0l L UI
BOleuv Ld.L I\WO PIO4S9J4.L Mol9q U!I 99S
.~Nn~31~8IlV>l ~nz ~na3:JO~d ~3a 3aN3
Page 41

Anzeige:
wenn nicht -+
I Defekte Karte
I
aut.range at 100Hz
100.00Hz'
10.000Hz'
counter'
OHz
+ 5VTP1.
-5V TP2*
+ 15VTP3.
+ 26V TP4*
+ 5V TP5*
-5V TP6.
Anzeigewinkel
keine Anzeige
schw. Balken
Prozessor
Analog
Analog/Prozessor
Prozessor
Analog
power
power
power
power
power
power
Anzeige
I power/Tastatur
AnzeigejProzessor
Page 42

apol/\I
SnSS9p"!:>
.laww!.I.L
1:9Jn~Oe,
(,oUOU .8
asnanJ:JaJ~p aJJe:>
:eBeuuOle~a.p e..npe~o"d
I\w 9!~JOS OJ~Z I\wO 9!1JOS
I\w 9!1JOS 91194:>3 I\wOZ L 9!1JOS
1 1\Z L 9!1JOS
1\ 9!1JOS OJ~Z 1\0 9!1JOS
I 1\ 9!~JOS 91194:>3
.l\wO
.l\wOlL
.1\0
.I\l L
Jnesse:>oJd
Jnesse:>oJd
Jnesse:>oJd
Jnesse:>oJd
(xLI8n889p-!~ e..np,~o..d el..e~edeH
Vw 9!~JOS OJ~Z vwO 9!1JOS
Vw 9!1JOS 91194:>3 vwOZ 9!1JOS
I\w 9~J~U3 OJ~Z I\wO 9~J~U3
I\w 9~J~U3 91194:>3 I\WOZ L 9~J~U3
VW 9~J~U3 91194:>3 vwOZ 9~J~U3
l!n9S 9U6!1 J!OI\
1\ 9~J~U3 91194:>3 I\OZ L 9~J~U3
.vwO
.vwOl
J\wO
J\wOlL
vwOl
J\OlL
Ld.L J\wO
Jnesse:>oJd
Jnesse:>oJd
enb!6oleUe
Jnesse:>oJd
enb!6oleUe
Jnesse:>oJd
enb!6oleUe
3~V~8IlV::> 3a 3~na3::>O~d 30 NI:J
"l\wOZ ~ l!n9S 91 J9UUO!~:>91~S '9:>U9nb~J~ 9~J~U9,1 J9~!n:>J!:>-1Jno::>
Page 43

Mode Trimmer
Lecture: si non -+ I C8rtedefectueuse
Points de reglage en frequence
Freq. entree ---I gammeautomatique
Sortie 100Hz 100.00Hz*
Sortie 10.000Hz 1000Hz*
Sortie impuls. counter*
Entree 20KHz OHz
Points de reglage pour I'alimentation:
On 5V is. adj. + 5V TP*
On 5V TP*
On ---+ 15V TP3*
On ---+ 26VTP4*
On ---+5VTP5*
On 5V TP6*
On angle affichage angle de vue
Divers
On On
I ~ ~ ~
8100Hz
pas d'affichage
barre noire hor.
processeur
analogique
analogiquejprocesseur
processeur
I analogique
alimentation
alimentation
alimentation
alimentation
alimentation
alimentation
affichage
I alimentation/clavier
affichage/process
Page 44

:UO!~y
6 SS9Jd
6 SS9Jd
6 SS9Jd
6 SS9Jd
6 SS9Jd
6 SS9Jd
6 SS9Jd
6 SS9Jd
6 SS9Jd I
pJeoq"J>laJaa
(~xau o~ 06)
Jossa:>oJd
an60leue
an60leue
Jossa:>oJd
Jossa:>oJd
an60leue
s!sou6e!p lies e4t 10 eu!1 4:1ee 46noJ4t dets
an60leUe/JaMOd
an60leUe/JaMOd
an60leue/ JaMod
...
~ JOU l! :Jlns9H
spuo:>es OL ~e ~es Jew!~
£ > peeJ ~snw :1\0'0 ::I3H
£ > peeJ ~snw :1\0'0 :>va
£ > peeJ ~snw :1\0'0 :>av
)/:>3H:> 5131\31 AH3ilVa
1\9'£ < lewJoN
I\"l'£ < 1\9'£ > Mol
I\"l'£ > e:>eldeH
spuo:>es 0 L 4:>~eM do~s pue Jew!~ ~e~s
0000 L < peeJ ~snw :1\9'"l ::I3H
000 L L > 000 0 L < peeJ ~snw :1\9'"l :>va
uo!~eJedo lewJou O~U! >I:>eq sewo:> ~!Un
Page 45

Fehlfunktion
Wenn auf dem Display das Wort MALFUNCTION erscheint, gehen Sie schrittweise aile Kreise im Selbsttest durch.
Sie finden so die defekte Platine.
Schritt: Ergebnis: wenn nicht -+ defekte Platine:
Taste 9 Timer setzt 10 sec. (Gehe zu Schritt 2)
Taste 9 Timer lauft ab (10 sec.) Prozessor
Taste 9 REF 2,5V; muB > 10 000 Analog
Taste 9 REF O,OV; muB < 3 Analog
Taste 9 DAC 2,5V; muB > 10 000 < 11 000 Prozessor
Taste 9 DAC O,OV; muB < 3 Prozessor
Taste 9 ADC O,OV; muB < 3 Analog
Taste 9 BATTERIECHECK
Normal> 3,5V power/Analog
Low < 3,5V > 3,2V power/Analog
Replace < 3,2V power/Analog
Taste 9 Das Gerat schaltet zum Normalmodus zuruck
Page 46

a~uel\!ns aJnp~:>oJd el Jas!I!~n 'r
:UO!J:>'V !
6 Jns JeAnddv
6 JnsJeAnddv
6 Jns JeAnddv
6 Jns JeAnddv
6 Jns JeAnddv
6 JnsJeAnddv
6 JnsJeAnddv
6 JnsJeAnddv
6 JnsJ9Anddv I
+- au !s :~lns~H
odwe~ el ep e6eJJew~a
£ > eJn~:>el :1\0'0 '!~~
£ > eJn~:>el :1\0'0 :>va
£ > eJn~:>el :1\0'0 :>av
1\9'£ < lewJoN
I\l'£ < 1\9'£ > see
spuo:>es 0 L ~uuo!~:>el~S-~Jd odwel
0000 L < eJn~:>el :1\9'l '!~~
000 L L > 000 0 L < eJn~:>el ~1\9'l :>va
531~3l.LVe 531 ~3:>'v'1dIl',l3~
I\l'£ > se!Je~~eq sel Je:>eldwe~
eleWJOU el ~ ~ue!l\eJ l!eJedde.1
enb!6oleUV
enb!6oleUV
enb!6oleUV
8SnantO8J'p 8JJe:)
(~uel\!ns sed ne JeIIV)
Jnesse:JoJdoJ:J!V\I
Jnesse:JoJdoJ:J!V\I
Jnesse:JoJdoJ:J!V\I
enb!6oleue/uO!~e~UeW!IV
enb!6oleue/uO!~e~UeW!IV
enb!6oleue/UO!~e~UeW!IV
Page 47

Parts ordering information:
Extension cable kit
Test leads and fuse
Line adaptor/charger 115/230V Hz
50 ., 60 Hz
Ersatzteilliste:
Verla ngeru ngskabelei n heit
Testleitungen und Sicherungen
Netz-/Ladegerat 115/230V 50 ..60 Hz
Part No. Assy. DEC
Part No. Assy. FTL
Part No. CLBPS specify line voltage
Teil Assy. DEC
Teil Assy. FTL
Teil CLBPS
Reference Assy. DEC
Reference Assy. FTL
Reference CLBPS (preciser la tension secteur)
Page 48

pJeoq JeMod s~u!od ~se~ ~ sJe~ewo!~ue~od ~no-Ael .
e~e>fs6un6JosJel\ ePlund~se.L ~ Je~ewo!~ue~od ~no-Ael ..
uo!~e~ueW!le e~e:> s~se~ ep s~u!od ~e seJ~ewo!~ue~od uo!~e~Ueldwl ...
Page 49

.Lay-out potentiometers & test points analogue board
..Lay-out Potentiometer & Testpunkte Analogkarte
...Implantation potentiometres et points de test carte analogique
«
> E >
E s- S-
O "a;""a;
" ---
-~,,~ ~
> .,.- "« "
E N> ., E .,
., ., .,
0 'Q) "-Q) ,,-~
~ ~ CO ~ CO ~
.",0."0.,,
Nw\/)w\/)w
.: :
.
Page 50

pJeoq Josse:>oJd SJe~eWO!~u9~Od ~no-Ael .
e~e>tJossezoJd Je~ewo!~ue~od ~no-Ael ..
s~:>OJd e~e:> seJ~ewo!~ue~od uo!~e~Ueldwl ...
!nO \fw ueds "
JJ 01104"0 O!IJOS ""
!nO \fW OJOZ "
\fW OJ9z O'IJOS ""
Page 51

Model CLF-II Specifications
Function Rango
Measure mVolts 0 -120mV
Output mVolts 0 -120mV
Measure Volts 0 -120V
Output Volts 0 -1 2V
Measure mA 0 -52mA
Output mA 0 -24mA
Transmitter Simulation 0 -24mA
Measurefrequency 0 -10KHz aut. rang.
Counter input 0 -107 -1 counts
Counted pulse output 0 -107 -1 counts
Pulse output low freq. 0 -100Hz
Pulse output high freq. 0 -10 OOOHz
Thresholds freq./counter input
Pulse output level
Output pulse form
Pulse output transmission speed
Pulse output frequency
Special functions
Resolution Accuracy Remarks
O,01mV :to,025% R -input> 20MO
O,01mV :to.025% R -output 0.20
O,01V :to.05% R -input 1 MO
% of span
0.001V :to.025% R -output 0.20
0.01mA :to.05% R-input3,50fused
0.01mA :to.05% R -max. 9000
0.01mA +0.05% V -max. ext. 56 Volts
O,01Hz.f<100 +0.01 Hz >300KO,100KOat>7,5V
1 Hz. f > 100 Hz. :t1Hz > 300KO, 100KO at > 7.5V
1 count infinite > 300KO, 1 OOKO at> 7.5V
1 count infinite 0 -24V/34mA max.
O,01Hz :to.01Hz 0 -24V/34mA max.
1Hz :t1Hz 0 -24V/23mA max,
Selectable at 0.02. 0.05. 0.1.0,2.0.5, 1.0,2.0, 5,0 Volts
Adjustable from 0.1 to 24 Volts with a resolution of 0.1 Volts
AC symmetrical square wave, -50mV zero based
Adjustable from 1 to 10 000 bauds
Selectable in Hz. Pulses/min and Pulses/hour
1. Programmable steps (2 to 6 steps manual/auto)
2. Signal ramping (up/dwell/down)
3. Scaling (engineering units)
4. Transmitter (signal converter)
Page 52

9:>u9J919~
uo!~eJq!le:)
A~!I!qe~s WJ9~ 6uOl
9W!~ dn wJeM
~!P!Wn4 9/\!~eI9~
96e~IOI\ ~nd~no
IAlddns J9MOd J9U!WSUeJ.l
~U9JJn:) ~nd~no
~no-pe9~
S9!J9uea
9~!1 AJ9uea
SUO!~:>9UUO:)
UO!~:>9~OJd
6u!snOH
9Z!S
~46!9M
S9!:>eJn:>:>ep9~e:>!pUI
9Jn~eJ9dw9~6u!~eJ9do
9Jn~eJ9dw9~96eJo~s
UO!~:>9~OJd ~nd~no/~nd ul
UO!~elos! ~nd~no/~ndul
UO!~e:>!pU! AJ9ueq MOl
Alddns J9MOd leUJ9~x3
>I ~+ (:J09' ~ L) :>oll
JeeA/e6ueJ !O %£0'0+
snonu!~uo:> :>a1\009
spJepue~s leuo!~eN o~ elqee:>eJ.l
PSI ~+ :S~!W!I ese4~ ep!s~no "(:J096) :>09£ o~ (:Jo09) :>09 ~ JO! pe!!!:>eds
(:Joll ~ o~ :Jov ~) :>009 + o~ :>00~-
(:J089 ~ o~ :Jov-) :>oOL+ o~ :>oOl-
A:>eJn:>:>e pe~eJ o~ se~nu!w l
6u!suepuo:l-uou %06 o~ 0
ueds uo :>o/ueds!o %~OO'O+ pUB OJel UO .xew
~ndu! s~lol\ uo S~\ol\ DOl 's~nd~no uo S~IOI\ O£ '~ndu! ~\OIl!II!W uo S~IOI\ OL
.e:>ue~s!seJ peal Mol OO~. sAelds!p 'JO~!UOW peal Aq pe~:>e~OJd
.doo! >I:>e4:>. sAe\ds!p 'JO~!UOW peal Aq pe~:>e~oJd
vwv£ ~e pe~!w!1 ~ueJJn:>/:>al\vl :Jesn JO! elqel!ellV
senlell ~nd~no pUB ~ndu! !O ~no-peeJ snoeue~lnw!s
4S!16u3 U! en60le!a "e6ueJ pe~:>eles e4~ uo 6u!puedep 's~!6!p z;. v JO ./.£
P:>!N elqee6Je4:>eJ JO (eU!le>lle :> ellS JO Aqes) v ~ Hl edA~ '~Iol\ 9' ~ x v
peal vwOl 4~!M sJno4 L '(:J089) :>oOl ~e se!Jeueq eu!le>lle 4~!M SJno4 II
sdo~s ~!Un se~nu!w 9 ~ "xoJdde Je~v ".~eq. se4sel! Ale~euJe~le 6U!UJeM-eJd
.se!Je~~eq e:>eldeJ. Apee~s se~e:>!pu! pUB 6U!>lJOM
lH09/09 -1\9 ~ ~/O£l SdSl:> u/d Jo~depe eU!I/Je6Je4:> leUo!~do AS
£9 dl
s6nld ~se~ WWv JO! elqe~!ns
:>!~Seld SSV ~:>edw!-46!4 peJn~xe.l
ese:> 6u!AJJe:> ~nO4~!M (.£' ~ X.L 'v x.O'8) wwl£ x L ~ ~ x DOl
speel ~se~ pUB ese:> 6u!AJJe:> 'Se!Je~~eq 6u!pnl:>U! (spunodl) 6>16'0
Page 53

Modell CLF-II Spezifikationen
Function Bereich Auflosung Genauigkeit Anmerkung
Messen mVolts 0 -120mV 0,01 mV :1:0,025% R -in > 20m!},
Ausgang mVolts 0 -120mV 0,01 mV :to.025% R -out 0,2.0.
Messen Volts 0 -120V O,01V :to.05% R -in 1 M.o.
Ausgang Volts 0 -12V 0.001V :to.025% R -out 0,2.0.
Messen mA 0 -52mA 0,01 mA :to,05% R -in 3,5.0. abgesichert
Ausgang mA 0 -24mA O,01mA :to.05% R -max. 900.0.
Transmitter Simulator 0 -24mA 0,01 mA :to.05% V -max. ext. 56 Volts
Messen Frequenz 0 -10KHz aut. rang. 0.01 Hz, f < 100 :tHz > 300K.o., 100K.o. bei > 7,5V
Pulse Eingang 0 -107 -1 Puis 1 Puis unbegr. > 300K.o., 100K.o. bei > 7,5V
Pulse Ausgang 0 -107 -1 Pu Is 1 Puis unbegr. 0 -24V /34mA max.
Pulse Ausgang kleine Freq. 0 -100Hz O,01Hz :to,01Hz 0 -24V/34mA max.
Pulse Ausgang hohe Freq. 0 -10 OOOHz 1 Hz :t1 Hz 0 -24V /23mA max.
Amplitudenhbhe/Pulse Eingang wahlbar 0.02. 0.05, 0.1. 0.2. 0.5,1.0,2.0.5.0 Volt
Ausgangsimpulse Einstellbar von 0.1 to 24 Volt mit einer Auflbsung von 0.1 Volt
Negativer level ist Fest -50mV
Ausgangsimpulsform AC symetrische Rechtecksignal
ImpulsausgangObertragungsgeschw. Einstellbar von 1 bis 10000 baud
Impulsausgang bei kleinen Freq. Einstellbar in Hz. Pulses/min und Pulses/hour
Sonderfunktionen 1. Feste Schritte "programmable steps" (2 bis 6 Schritte manuel/autom.)
1 Hz. f > 100 Hz. :t1 Hz > 300K.o., 100K.o. bei > 7,5V
2. Rampenfunktion "signal ramping" (AufwartsjVerweilzeit/ Abwarts)
3. Skalierung "scaling" (technische Einheiten)
% yom Bereich
4. Transmitterfunktion
Page 54

zuaJa!a~
BunJa!Jq!le}l
~!ezwJ~M!nv
e6!ezuv
Ue!Je»eg
essOl4:JSuV
~e~n4:>S
esn~4e~
ue6unssewqv
~4:>!Me~
~~~!I!qe~s~!azBue,
~!a>lB!neuaBaB!azuv
Jn~eJedwe~s~!eqJV
Jn~eJedwe~e6el
e~4:>n9:1 e/\!~ele~
6unuueds6ue6snv
WOJ~S 6ue6snv
Jenepsueqele!J9»eg
96!ezuv-~eg-Mol
UO!~eIOS!s6ue6snv j-s6ue6u!3
6u n 6JosJei\Je»! wsu eJl.
e!6Jeues!I!H euJ9~3
>I L+ (:l09'L L)::>o"l"l
Jljer/S91j:>!aJ9a sap %EO'O+
(:lo"l"lL o~ :lovL) ::>009 + S!q ::>oOL-
(:1089 L o~ :lov-) ::>oOL+ S!q ::>00"l-
~!e4Je4:>!ss6ue6snv j-s6ue6u!3
1j:>!IJa!nu!~u°>l ::>a1\009
E9 dl
6unJa!suapu°>l auljo %06 S!q 0
6ue6u!3-~IOI\ we ~IOI\ 00"l
6ue6snv vwO"l !aq uapun~s L
Ja>l:>a~s~sa.L wwv JOI puassed
sa6ueJ an60leue uo (:10) ::>o/ueds 10 (%9000"0)
~!a>l6!neua~ ualloll Jap ualj:>!aJJ3 wnz ua~nu!VIJ "l
.doOI >I:>alj:>. 6unplawAelds!a Ij:>Jnp ~Jalj:>!sa~
vwvE lne ~a!~!w!1 6ue6snewoJ~s/::>al\v"l
a6eIU!aaqaMa~ ~!W sav sa~SaI6ellj:>SIj:>OH
.LSIN nz ~!1~!WJOlu°>l ~!W pJepue~s ::>33 wap pU91j:>9Jd~U3
'::>0/ 1j:>!9Jaa wall % LOO'O+ pun ~>lundllnN we ~!6!a L+
'ua6u!16snv uap ue ~Iol\ OE '6ue6u!3 ~IOII!II!VIJ we ~101\ OL
.a:>ue~s!saJ peal MOl oo~. 6unplawAelds!a Ij:>Jnp ~alj:>!sa~
a~aMs6ue6snv pun -s6ue6u!3 Jap a6!azuv aue~lnw!s
'(:1089) ::>00"l ua!Ja~~ea ualj:>s!le>lle ~!W uapun~s "l"l
alj:>se~a6eJ.L auljo (.E' LX.L 'v x.O'8) ww"lE x L L LX 00"l
ua6un~!al~Sa.L pun alj:>se~a6eJ.L 'ua!Ja~~ea "I:>U! 6>16'0
:uaZU9J~ J9Sa!p qleljJ99nv "{:l096) ::>09E S!q (:1009) ::>09 L ~9!Z!I!z9dS
IjS!16ua U! ~xa.L "1j:>!aJaa ua~IIj!1Ma6 wall 6!6u!1ljqe 's~!6!p "I, v Japo "lEE
uallaz-p::>!N aJeqpellne Japo (az!s Japo Aqea) v L Hl adA~ '~IOI\9' L x v
ua~nu!VIJ 9 L eM~3 ".~eq. 6unpualqU!3 apuaJlja>lJapa!M Ij:>Jnp 6unuJeMJol\
.sa!Ja~~eq a:>eldaJ. ~aplaw pun u!a UO!~>lun:l aulas ~!1Ja~ sep ~lla~s Ja~!1ds
zH09/09 -1\9 L L /OE"l Sdal::> ~!1Ja6apel/-z~aN waJeqJala!lleUO!~do ~!VIJ
Page 55

Caracteristiques
Fonction Etendue d'echelle
Mesure de mVolts 0 -120mV
Generation de mVolts 0 -120mV
Mesure de Volts 0 -120V
Generation de Volts 0 -12V
Mesure de mA 0 -52mA
Generation de mA 0 -24mA
Simulation de transmetteurs 0 -24mA
Mesuredefrequence 0 -10KHz
Entree de comptage 0 -107 -1 coup
Sortie rafale d'impulsions 0 -107 -1 coup
programmee
Generation d'impulsions 0 -100Hz
bassefrequence
Generation d'impulsions 0 -10 OOOHz
haute frequence
Seuil d'entree frequence/comptage
Amplitude des impulsions de sortie
Niveau negatif
Forme des impulsions de sortie
Vitesse de transmission des impulsions
Basse frequence d'impulsions
echelle autom.
Resolution
0,01mV
0,01mV
0,01V
0,001V
0,01mA
0,01mA
0.01mA
0.01 Hz, f < 100
1 Hz, f > 1oO Hz.
1 coup
1 coup
0.01 Hz
1Hz
Precision en Remarques
% d'echelle
:!:O,025% R -entree> 20MQ
:!:O,025% R -sortie o,m
:!:O,05% R -entree 1 MQ
:!:O,025% R -sortie o,m
+0,05% R -entree 3,5Q fusible
::t:O,05% R -maxi. 900Q
:!:O,05% V -maxi. ext. 56 Volts
:!:0.01 Hz > 300KQ, 100KQ sous > 7.5V
:!:1 Hz > 300KQ, 1 OOKQ sous > 7,5V
infinie > 300KQ, 100KQ sous > 7,5V
infinie 0 -24V /34mA maxi.
:!:O,01Hz 0 -24V/34mA maxi.
:!:1Hz 0 -24V/23mA maxi.
Programmable a 0.02. 0.05. 0.1. 0.2. 0.5.1.0.2.0.5.0 Volts
Reglable de 0.1 a 24 Volts avec une resolution 0.1 Volts
Fixe a -50mV
Rectangulaire symetrique. niveau negatif de reference -50mV
Reglable 1 a 10 000 bauds
Programmable en Hz. impulsions/minute et impulsions/heure
Page 56

sel!d
9:JU9Jr}!r}H
9Beuuole~3
eBe4:>!H'f
9!WOUO~nV'
S9Ie!:lf}ds SUO!~:lUO~
(senb!sAljd s~l.!un) 91Ielj:>~.1 ~ es!V\I "£
>I L + (:109' L L) :)o"l"l
9WJ9~ BuOI ~ r}~!I!qe~s
s9r}nb!pu! SUO!S!:Jr}Jd
~ueweuuo!~:>uo~ ep eJn~eJ~dwel.
eBe>l:>o~s ep eJn~eJ~dwel.
eBe~~ne4:> ep sdwel.
ell!~eleJ ~~!P!wnH
se!~os/se~J~ue sap uo!~:>e~oJd
e!~os ep uo!suel.
ue/91Ielj:>~.1 9P %£0'0+
(:lo"l"lL ~ :IovL) :)009+ ~ :)oOL-
(:1089 L ~ :lov-) :)oOL+ ~ :)00"l-
uo!l.esuepuo:> sues %06 ~ 0
nu!l.uo:> ew!5~J ue= :)G/\009
e!~os ep ~ueJno:)
JneuewsueJ~ np uo!~e~uew!I'f
selQee5Jelj:>eJ P:)!N Sel!d no
9nb!~ewo~ne,p U!J 9P UO!~e:)!pUI
(ex!~ e5essew)
vwO"l ep e5Jelj:> eun :>elle seJnelj L
(enb!l.ewol.ne no lenuew 9 ~ "l) sex!! SI.U!Od "L
(ell!l.e6~u/Je!led/911!I.!sod) edweJ UO!I.:>u°:l ""l
(xneu6!s ep Jness!l.Jelluo:» JneI.1.9WSUeJ.l"v
.lSIN uo!l.el~JJo:> :>elle :)33 seWJOU xne ~1.!I!Qe~eJ.l
(%9000'0) %LOO'0+1.9 OJ~Z ne I.JoddeJ Jed "!xew PSI L+
senb!50leUe sewwe5 sel Jns :)0/eJnS9W ep enpuel.~.1 9P
eleu!wou UO!s!:>~Jd el 9JpU!9ue Jnod sel.nu!w "l
" e5Jelj:> ep e:>uell!eIlJns ep l.!n:>J!:> Jed uo!l.:>el.oJd
"eIQ!e! doJI. e5Jelj:> ep e:>uel.s!s~J" e5esseV\l
(:) l.ewJo! no seJnl.e!u!w) V L ~l edAI. 11°/\ 9' L x v
'(:1089) :)00"l ~ seU!le:>le sel!d :>elle seJnelj "l"l
:SI.!W!1 sa:> ep sJoljep u3 "(:1096) :)09£ ~ (:1009) :)09LJnod se~!!!:>~dS
Sl.lo/\ e~Jl.ue.l Jns Sl.lo/\ 00"l 'se!I.Jos sel Jns Sl.lo/\ Of: 'e~Jl.u9.1 Jns sl.lo/\ OL
vwv£ ~ ~1.!W!ll.ueJno:>/= Sl.lo/\ v"l :Jnel.es!I!l.n.l Jnod eIQ!uods!G
no 000"l e!l.Jos ep I.e e~Jl.ue,p sJnepueJ6 sap ~uel.lnW!S e5elj:>!!!V
S!el6uv ue el.xe.l "sl.!5!p zh v no "1.£ npuel.~.1 uoles 'sl.u!od 000 O"l
'sel.nu!w 9 L l.uel.ou5!1:> "e!wouol.ne,p U!! ep elj:>oJdde" e5esseV\l
"Sel!d set Je:>eldweJ" enb!pu! I.e Jeuuo!l.:>uo~ ep el.~JJe,s l!eJedde.l
"el:>noQ el Je!!!J~II" e5esseV\l 'e6Jelj:> ep e:>uell!ellJns ep l.!n:>J!:> Jed uo!l.:>el.oJd
Page 57

Alimentation exterieure
Raccordement
Degre de protection
Boitier
Dimensions
Poids
Par chargeur/adaptateur de secteur, reference CLBPS 230/115V -50/60Hz
Fiches de test 4mm
IP 53
Plastique ABS texture resistance aux chocs
200 x 117 x 32mm (8,O"x 4, 7"x 1,3") sans etui de transport
O,9kg avec piles, etui de transport et cordons de mesure
Page 58

H311\1IVl:>SICI A.!.N'VHH'VM
s~UeJJeM ":)NI'~NI~33NI~N3 V~3~O
U! s~:Ja~ap ~o aaJ! aq o~ ~!un S!4~
e JO~ d!4Suew)jJOM pue sle!Je~ew
~o a~ep WOJ~ BI4~UOW &1. ~o po!Jad
ue sppe A~ueJJeM V~3~O "aSe4:JJnd
po!Jad a:JeJ6 4~uOW (L) QUO leUO!~!ppe
~~npo.ld .leel. (I.)euo lewJou a4~ o~
pue 6u!IPUe4 Jal\o:J o~I.~Ue.l.leM
~e4~ saJnsua S!4.L "aw!~ 6u!dd!4S
"~:JnpoJd 4:Jea uo a6eJal\o:J
JO~ AJo~:Je~ a4~ o~ pauJn~eJ eq
wnw!xew al\!a:JaJ SJewo~sn:J s.V~3~O
~snw ~! 'uo!~:Jun~lew Plno4s ~!un a4~ ~I
a:J!I\Jes Jewo~sn:) s. V~3~O "uo!~enlel\a
paz!Jo4~nv ue anss! II!M ~uewlJedaa
uodn Ale~e!paww! Jeqwnu (~V) uJn~e~
uodn "~senbeJ Ua~~!JM JO euo4d
S! ~!Un e4~~! 'V~3~O Aq uo!~eu!wexe
aq II!M ~! al\!~:Ja~ap eq O~ puno~
"a6Je4:J ou ~e pe:JeldaJ JO paJ!edeJ
Aldde ~ou saop A.LNV~~VM s.V~3~O
~o uo!~:Je Aue WOJ~ 6u!~lnSeJ s~:Ja~ap o~
pe~!w!1 ~ou ~nq 6u!pnl:JU! 'Jese4:JJnd e4~
'6u!:JeJJe~u! JadoJdw! '6u!IPUe4S!W o~
'S~!W!I u6!sap ~o ap!s~no uo!~eJado
P8Z!JO4~neUn JO' J!ed9J JadoJdw!
S! A.lN't/HH't/M S!4.l'UO!~e:>!!!pOW
!O 8:>Uap!/\8 SMO4S ~!Un 84~!! 0101\
SMO4S JO 4~!M paJadwe~ U88q 6u!/\e4
e se p86ewep 6U!8q !O 8:>U8P!/\8
JO :UO!SOJJO:> 8/\!SSa:>xa!O ~lnS8J
:UO!~eJq!/\ JO 8Jn~S!OW '~e84 '~U8JJn:>
:uO!~e:>!lddes!w :uO!~e:>!!!:>8ds J8dOJdW!
'IOJ~UO:> S."~3LIIJO ~O 8p!S~nO
SUO!~!PUO:> 6U!~eJ8do J84~O JO 8SnS!W
~OU 8Je Je8M 4:>!4M s~uauodwo:>
P8~!W!1 ~OU ~nq 6u!pnl:>U! 'p8~UeJJeM
's:>e!J~ pUB 'S8Sn~ 's~U!Od ~:>e~uo:> O~
YO S31.1N~HY~M
.lallo OJ paseald S! "93l1li0
SJ! lO asn aLlJ uo suo!Jsa66ns
'.leAaMoH .sJ:>np°.ld SnO!.leA
sewnsse .laLlJ!au "93l1li0
SUO!SS!WO Aue .l°l AJ!I!q!suodsa.l
.l°l AJ!I!qe!1 sawnsse .IOU s.lo.l.la .1O
aLlJ wO.ll J.nsa.l JeLlJ sa6ewep Aue
a:>uep.lo:>:>eu!sJ:>np°.ldsJ!loasn
Aq pap!Ao.ld u°!Jew.l°lu! LIJ!M
.uaJJ!.lM .1O leq.laA .laLlJ!a -"93l1li0
aLlJ JeLlJ AluO sJue.l.leM "93l1li0
aq II!M J! Aq pa.lnJ:>elnuew sJ.led
.se6ewep le!39ds
.sJ:>alap lO aa.ll pue pau!:>ads se
Y3H.10 ON S3>1~W ~93WO
ONI>I AN~:lO SNOI.1~.1N3S3Yd3Y
YO 03SS3YdX3 'Y3J\30S.1~HM
'3'.11.1:10 .1~H.1 .1d3:>X3 'O31'dWI
S31.1N~YY~M 031'dWI ,,~ ONV
:10 A.LN~YY~M AN~ 9Nlon':>NI
SS3N.1I:1 ON~ A.L1'IB~.1N~H:>Y3W
3Y~ 3S0dynd Y~'n:>I.1Y~d ~ YO:l
NOI.1~.1IWI' .O3WI~:>SIO AB3Y3H
Jo sO!paWaA 9L1.1 :A.1I'IBVn :10
9Ae u!aAaLl LIJAoJ Jas AaseLl3And
Jo A~!I!qe!lle~O~ °LlJ pue aA!snl3Xa
'AOPAO S!LI~ OJ J3adsaA LIJ!M V93WO
'J3eAJU03 UO paseq AaLlJaLlM
'a3ua6!16au 'AJueAAeM
AO AJ!I!qe!1 J3!AJS 'UO!Je3!J!UWapu!
aLlJ paa3xa JOU IleLls 'as!MAaLlJo
Ju9uodw03 aLlJ JO a3!Ad aseLl3And
UI .paseq S! AJ!I!qe!1 LI3!LIM uodn
alqe!1 aq V93WO IleLls JUaAa OU
AO le~U9p!3U! 'le!~uanb9SU03 AOJ
Aq PloS ~uewd!nb3 :SNOIIIONOJ
'pesn eq o~ pepue~u! ~ou S! V~3V\10
:J!se8" e se (L) :pesn eq~! IIe4s JOU
'(JHN) L Z H:!J 0 L Jepun "~ueuodwoJ
uo!~elle~Su! Jeel:Jnu Aue 4~!M JO u! pesn
Page 59

, or activity; or (2) in medical
applications or used on humans. Should
any Product(s) be used in or with any
nuclear installation or activity. medical
application. used on humans. or
misused in any way. OMEGA assumes
no responsibility as set forth in our
basicWARRANTY /DISCLAIMER
language. and additionally, purchaser
will indemnify OMEGA and hold
OMEGA harmless from any liability or
damage whatsoever arising out of the
use of the Product(s) in such a manner.
RETURN REQUESTS!
INQUIRIES
Direct all warranty and repair requests/
inquiries to the OMEGA Customer
Service Department.
BEFORE RETURNING ANY PRODUCT(S)
TO OMEGA. PURCHASER MUST OBTAIN
AN AUTHORIZED RETURN (AR) NUMBER
FROM OMEGA'S CUSTOMER SERVICE
DEPARTMENT
I (IN ORDER TO AVOID PROCESSING
DELAYS). The assigned AR number
should then be marked on the outside
of the return package and on any
correspondence.
The purchaser is responsible for
shipping charges. freight. insurance and
proper packaging to prevent breakage
in transit.
FOR WARRANTY RETURNS. please
have the following information
available BEFORE contacting OMEGA:
1. P.O. number under which the
product was PURCHASED.
2. Model and serial number of the
product under warranty. and
3. Repair instructions and/or specific
problems relative to the product.
FO R NON-WARRANTY REPAIRS.
consult OMEGA for current repair
charges. Have the following
information available BEFORE
contacting OMEGA:
1. P.O. number to cover the COST
of the repair.
2. Model and serial number of product.
and
3. Repair instructions and/or specific
problems relative to the product.
OMEGA's policy is to make running
changes, not model changes,
whenever an improvement is possible.
This affords our customers the latest
in technology and engineering.
OMEGA is a registered trademark of
OMEGA ENGINEERING, INC.
@ Copyright 1996 OMEGA
ENGINEERING, INC. All rights reserved.
This document may not be copied,
photocopied, reproduced, translated, or
reduced to any electronic medium or
machine-readable form, in whole or in
part, without prior written consent of
OMEGA ENGINEERING, INC.
Page 60

.. ~~
I
~CD
~'I
0
~~
.a:~
..
>~
~~
~o
~~
ID ~.
e,"" ~..."..",~ii
ao
a.
~ ~..~ --!...~ ;'..~ "",.,<""~- ",x",,'" --0 :.
~;
;,tn
aID
e 3.
'"
ID
~
'0
~n
m "
S' ...~
a~
~ID
ae
e~
~e
"'..
a ~.
e-
a1/f
~';"&.. '" ~g' ~
~~rn> a 0- 8
'l " -" l ~ = "'... ". " ="'-c" ="'"," -.~""'" '" '" 0 "'-
I ~ a ~~~ ~ ~ -'oJ~ ~
O=' to ..~ to U' °U'
~~ 0 =' ~ =' )( > =' ~>
~~ C) ~ (:) ~ ~ ~ 1"1
~ to ~ '" ='" !!. ~. ~ ~ ..
g.5 ~:<:5'
=0 ~"Ow
~'-'c~=
i < 0 " -"0 -
>-'0 1"1 0 ".
0"::: ..3
~~. n ~ 3
B. Co c ~ =' _0 B.
,., ...=' '")(., ..,.,
"5'
=00 c ..., '"
,.,Co ..!! -c 0 ~ ..-
."'< to ,. Co "II "
"'s~'~'as'~'J~s::~~~~~s.~~i ~~5'~S ~ ffi~~;;;p.~ S.
rg'~(JOl ~ ~~~ ~"'~; =-e;~ 9 ~~'t ft. :?; ~Qq [~ ft. ~{ ':pq" a
5Of~~~~
i3[0's.~
.o. ,,~o
9~ .~ ~. ~ -8 ~,,~ C 0-< X g > ;r:" ~
8R-o ~ 9~ 9~o8~~'"8 ~~ ~ 1ft ~ "';:.
~ ~ m ~ ~ i ~ ~.~ ~ ~ ~j. f ~ ~ ~ ~ ~ ~ j. 6 ~ I~' i ; ~ ~ § ~ f f
~~o~~~
0 0 "-,0.
.,~<o"
,,-g"--
9=""-c,,, 9=,,"~ 9=,,"" ~"":; 98:,,"~ "" "" "5 ~;; i ,,"<0- ""
'P5';;i!;;~ 'P5';;io 'P5';;i,-c 'P;;iQ 'P--!;;i"" ;;' ;;jg'ng' ;- ;;'~~ ;;'~~ X'
='!~c Qq,!-~'1"!- n~"2.'!-~ _.."",,~... ~ ~
£ -
3 w~o
~o- "
"it' ~ °"0
-'o~ 6m=
~'o ~o
.;g~e~
.~~=~CI
'o--~~
,0, Clw
8.~.}oB~
~.i ~"m
~~o m--
'0' -,,~
o,_o.~~
'-"0.:<:0
S"~"O"
~.~"i~0
m.R .3
-,0 n~"O
~~3 m_,:<:
&'~ 3.s~
~.- ~
'<" ~ ~
o.-~ ~
~ 9- ~ OJ ;; ~~"., -'oJ 3
8 a'~~ ~~o ~9 3
i ~ ~ ; ~ ~ ~ ~1 ~' ~ ~ 'I ~ ~ ~ ~::: s' ~ ~ ~o
8 aot"
-s o."~
'i~~ ii~:<
"0 ~~~
~..""OW
s." ~o"
", '" C 0 ~ Q W
. > ~..[ ..;s .~~, ~ ~... A
m ~ ~~ ~ § ~z i~~~6 e ~ iii
...~ '"'I' '" ,., ~;! ~ ~,';"--! ~::J ~ ..
~~m"
-Ofc " ~ ~
.",o"ot~
o.~<~o.
~=mnOm
og"..~~
~-, Om
"""~"i
-" ~ .0- ' o.~"'~ .0- 'PC
~05"a-
~~. ;~ ~ = ~f ~ f;;~~~ ;. ~ ;:j
nS~ ~,,~
0" -,,~
'" -~~ ,.. :: ~.. ~
a: ~ -:t~ 3
11 > ~ ..
N a ~ ~ .."'8. ~ ~--! ~ ~
..w
& "g ~ g
~!t[~~
~ R }o~
~ 0 "'"
,; ~ ~ ~
!" 0
0 ~
, "
,. ~
 Loading...