

Page 1
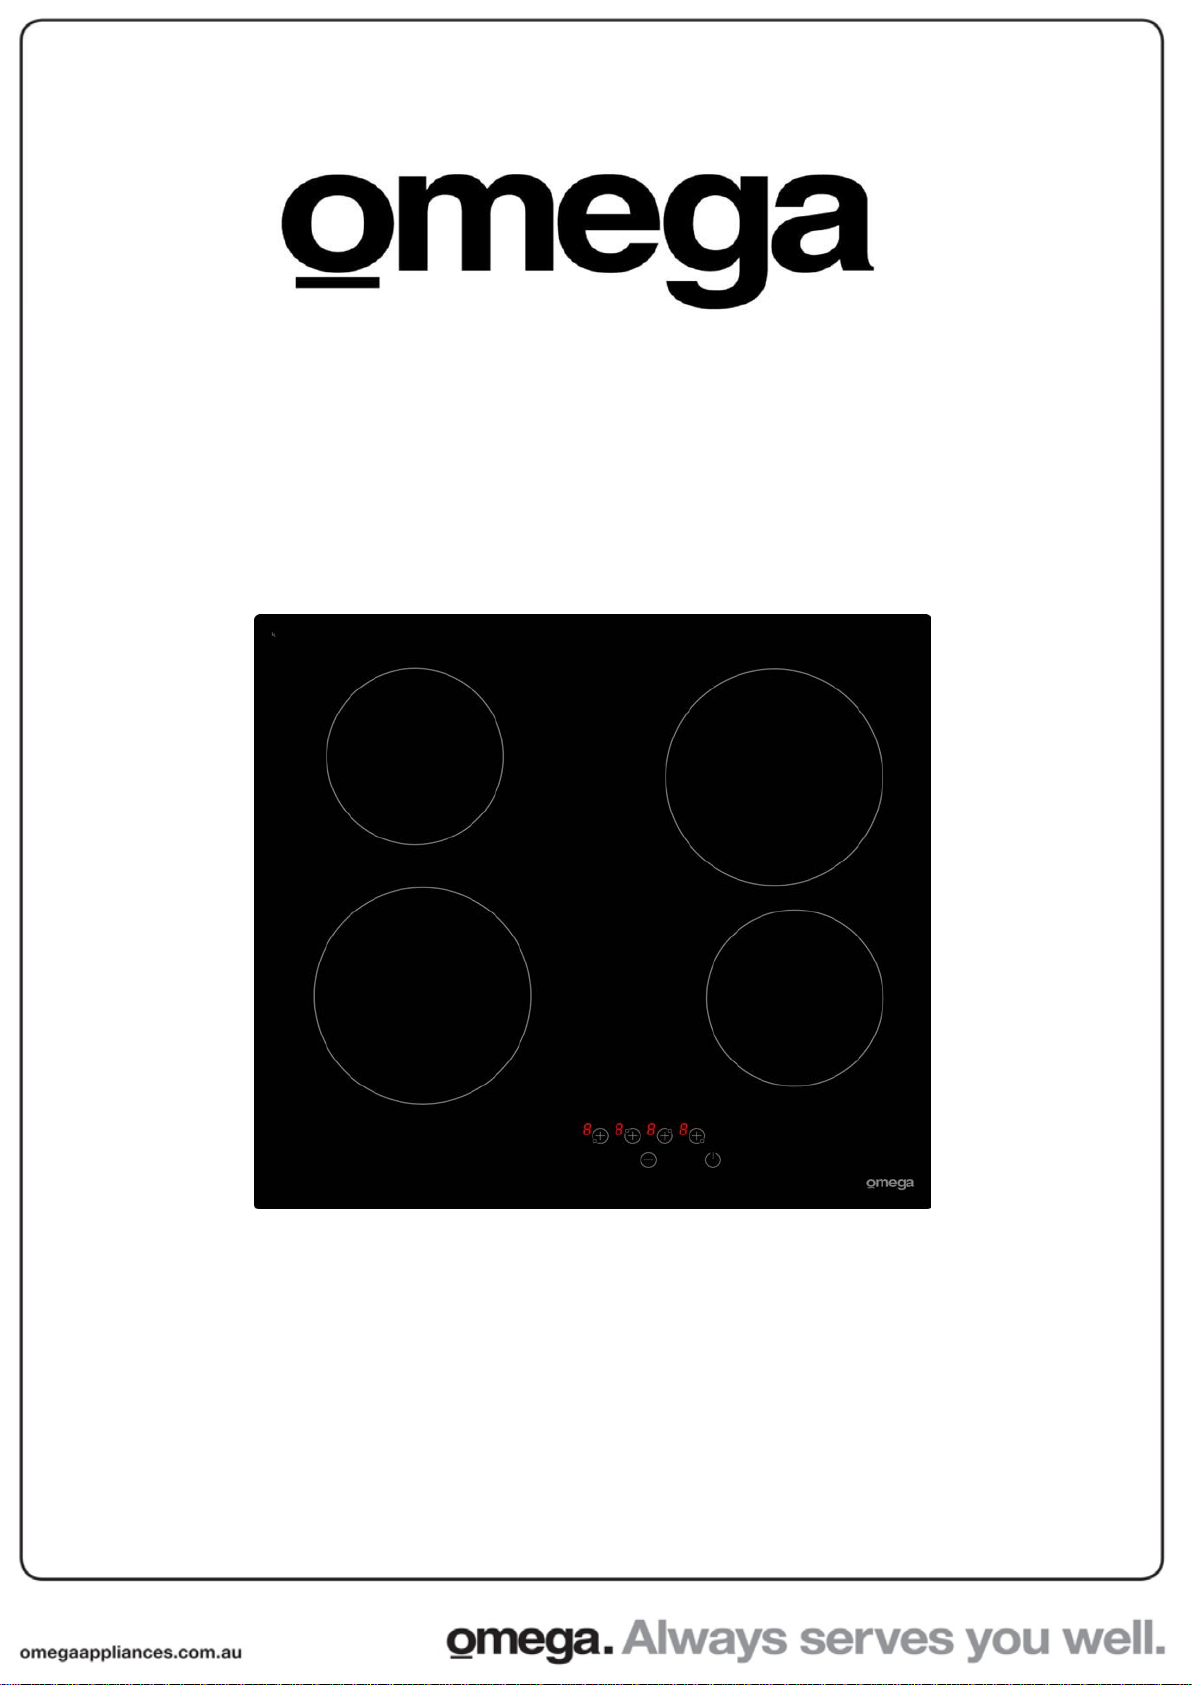
Instruction Manual f or Cook t op O CC6 4 TZ
Page 2
Thank you for introducing our family to yours
At Omega, we understand that cooking, cleaning and washing may not
be your favourite things in the world. That's why we created a range of
no-nonsense, reliable products that always get the job done for you. With
the features you need and nothing you don't. What's more, they're made
to fit perfectly into your home life and your wallet. You are welcoming an
Omega appliance into your place and you can be sure it'll always serve
you well.
We aim
our products you will find a range of icons that visually represent our
products key features. Visit our website to learn more about these icons
and the features and ben efits of our products.
For warrant
click the “Support” tab of our website omegaappliances.com.au.
We value
think about your new addition! Simply go to the relevant appliance page
of our website and click on "Write a Review".
If you want to know more about promotions, receive cool tips and
participate in our giveaway challenges, simply connect with us on social
media; like omegaappliances on Facebook and follow
omegaappliances_aus on Instagram.
Enjoy y
to simplify any further appliance purchases. When researching
y, instruction manuals, specifications and catalogues, please
your opinion, so please take a few minutes to tell us what you
our new appliance and remember, we’re only one click away!
omegaappliances.com.au
omegaappliances.co.nz
omegaappliances
omegaappliances_aus
Page 3

TABLE OF CONTENTS
Section
S
afety
Description
Installation
Display
How to use
Cooking Advice
M
aintenance Trouble Shooting
Technical Data
Cleaning
Electrical Connections
Page
1-2
2
3-4
5
6
7
8
9
10
11
Page 4

IMPORTANT SAFETY INSTRUCTIONS
IMPORTANT: Read the assembly instruction section and safety precautions of this booklet carefully
before removing the contents of this carton.
1.
This cooktop is not intended for use by persons (including children) with reduced physical, sensory or mental
capabilities, or lack of experience or knowledge, unless they have been given supervision or instruction
concerning the use of the cooktop by a person responsible for their safety. Children should be supervised to
insure that they do not play with the cooktop.
2.
After removing the packaging, make sure to check if there is any damage to the cooktop. If there is any damage,
never attempt to use the cooktop and immediately contact your Authorised Service Centre. As packaging materials
can be dangerous to children, they need to be collected immediately and put out of reach.
3.
In certain circumstances electrical appliances may be a safety hazard. Check the conformity of voltage and power
settings, which are specified on the information plate attached to the cooktop and/or packaging, with the usage
conditions available.
4.
Do not place heavy objects in or on these appliances, use for storage or as a cutting surface as sharp edges can
damage the surface. This cooktop is designed for cooking food only. Use flat based, stable, inductive cooking rated
Cookware only.
5.
This cooktop is designed for domestic household use only and for the cooking of domestic food products. Use
as a commercial cooktop will void the warranty. It should not to be used in a marine environment or outdoors and
must be fully built-in. Do not use the appliances until fully installed.
6.
A means for disconnection must be incorporated in the fixed wiring in accordance with the wiring rules.
7.
The electrical connection must be accessible after installation. The cooktop must be electrically isolated before
any maintenance can be performed.
8.
The cooktop is not intended to be operated by means of an external timer or separate remote control system.
9.
Electrical connection must be made as per local wiring rules and regulations. Do not disconnect the
cooktop with wet hands or bare feet, and do not disconnect the power cord with extreme force.
10.
Ensure that the kitchen is well ventilated or mechanical ventilation is in use while cooking on this cooktop.
11.
Do not store or use flammable materials or aerosols near the cooktop. Items made from aluminium, plastic, plastic
film & sugar based foods should also be kept away from the cooktop, as they may fuse to the surface.
12.
Heat from the underside of the unit will be expelled by inbuilt fans – do not block. It is essential that the installation
instructions relating to ventilation are followed, otherwise the cooktop can fail.
13.
WARNING - The cooktop will become hot during and directly after use. Do not touch the surface during this time, as
it may be hot and can cause burns. To avoid burns, children should be kept away.
14.
Cleaning may only be commenced on the cooktop once it has cooled down and is turned off. Failure to clean properly
can damage the unit. Do not use a steam jet or any other high pressure cleaning equipment to clean the cooktop.
15.
When the cooktop is not being used, turn the cooktop off. Do not cover with any type of protection sheet or cloth,
as these may ignite and burn.
16.
Where this cooktop is installed in a caravan, it shall NOT be used as a spaceheater.
17.
Do not modify this cooktop. Remove all labels from the glass cooktop before operating.
18.
Do not use harsh abrasive cleaners or sharp metal scrapers to clean the glass surface as they can scratch the
surface, which may result in the glass shattering. Clean the glass using a warm damp cloth (e.g. dishcloth) and dry
it with a soft dry tea towel.
19.
Do not install this cooktop above a dishwasher or clothes dryer, as the steam may damage the internal circuitry.
20.
If any cracking or chipping is noticed on the cooktop, turn the cooktop off immediately and call your Authorised Service
Centre.
1
Page 5
21.
Power
Display
All cabinetry and materials used in the installation must be able to withstand a minimum temperature of 100°C above
ambient temperature whilst in use. Certain types of vinyl or laminate kitchen furniture are particularly prone to heat
damage or discolouration at temperatures below the guidelines given above. Any damage caused by the cooktop
being installed without adhering to the temperature limits set out above will be the liability of the owner. To avoid any
hazards, limit access to the under-bench section of the cooktop.
22.
The cooktop must be installed and put into operation by an authorised person under the conditions provided by
the manufacturer in this manual. The manufacturer cannot be held responsible for any damage that might occur due
to faulty installation.
23.
Damage can occur to bench tops if pots and pans are allowed to overlap the bench top. This can result in heat being
transferred to the bench top. Ensure that correct sized pots & pans are used. Pans should be lifted on and off the
cooktop surface and not dragged. Cooking zones should not be switched on without cookware placed on it. Do not
place empty cookware onto the cooking zones when in use.
24.
Do not leave the cooktop unattended while cooking with solid or liquid oils. There may be flaming up in conditions of
extreme heating. Never pour water onto the flames occurring from oil. Immediately turn the cooktop off and cover the
pan with a lid or fire blanket in order to smother the flame.
25.
Users with pacemakers should keep their upper body at least 30cm away from any operational inductive
cooking zone. If in doubt, please consult your doctor before use.
26.
Do not place metal objects such as spoons or pan lids onto the cooktop as they may become hot or cause
damage to the surface.
27.
A small amount of noise will sometimes be heard as elements turn on & off during operation. This is normal & not a
fault. The sound of the fans will vary depending on cooking zone usage.
DESCRIPTION
Total power - 6000W
Front Left Cooking Zone
Nominal power - 1800W
Size 190mm
Rear Left Cooking Zone
Nominal power - 1200W
Size - 155mm
Rear Right Cooking Zone
Nominal power - 1800W
Size - 190mm
Front Right Cooking Zone
Nominal power - 1200W
DO NOT
DO NOT
DO NOT
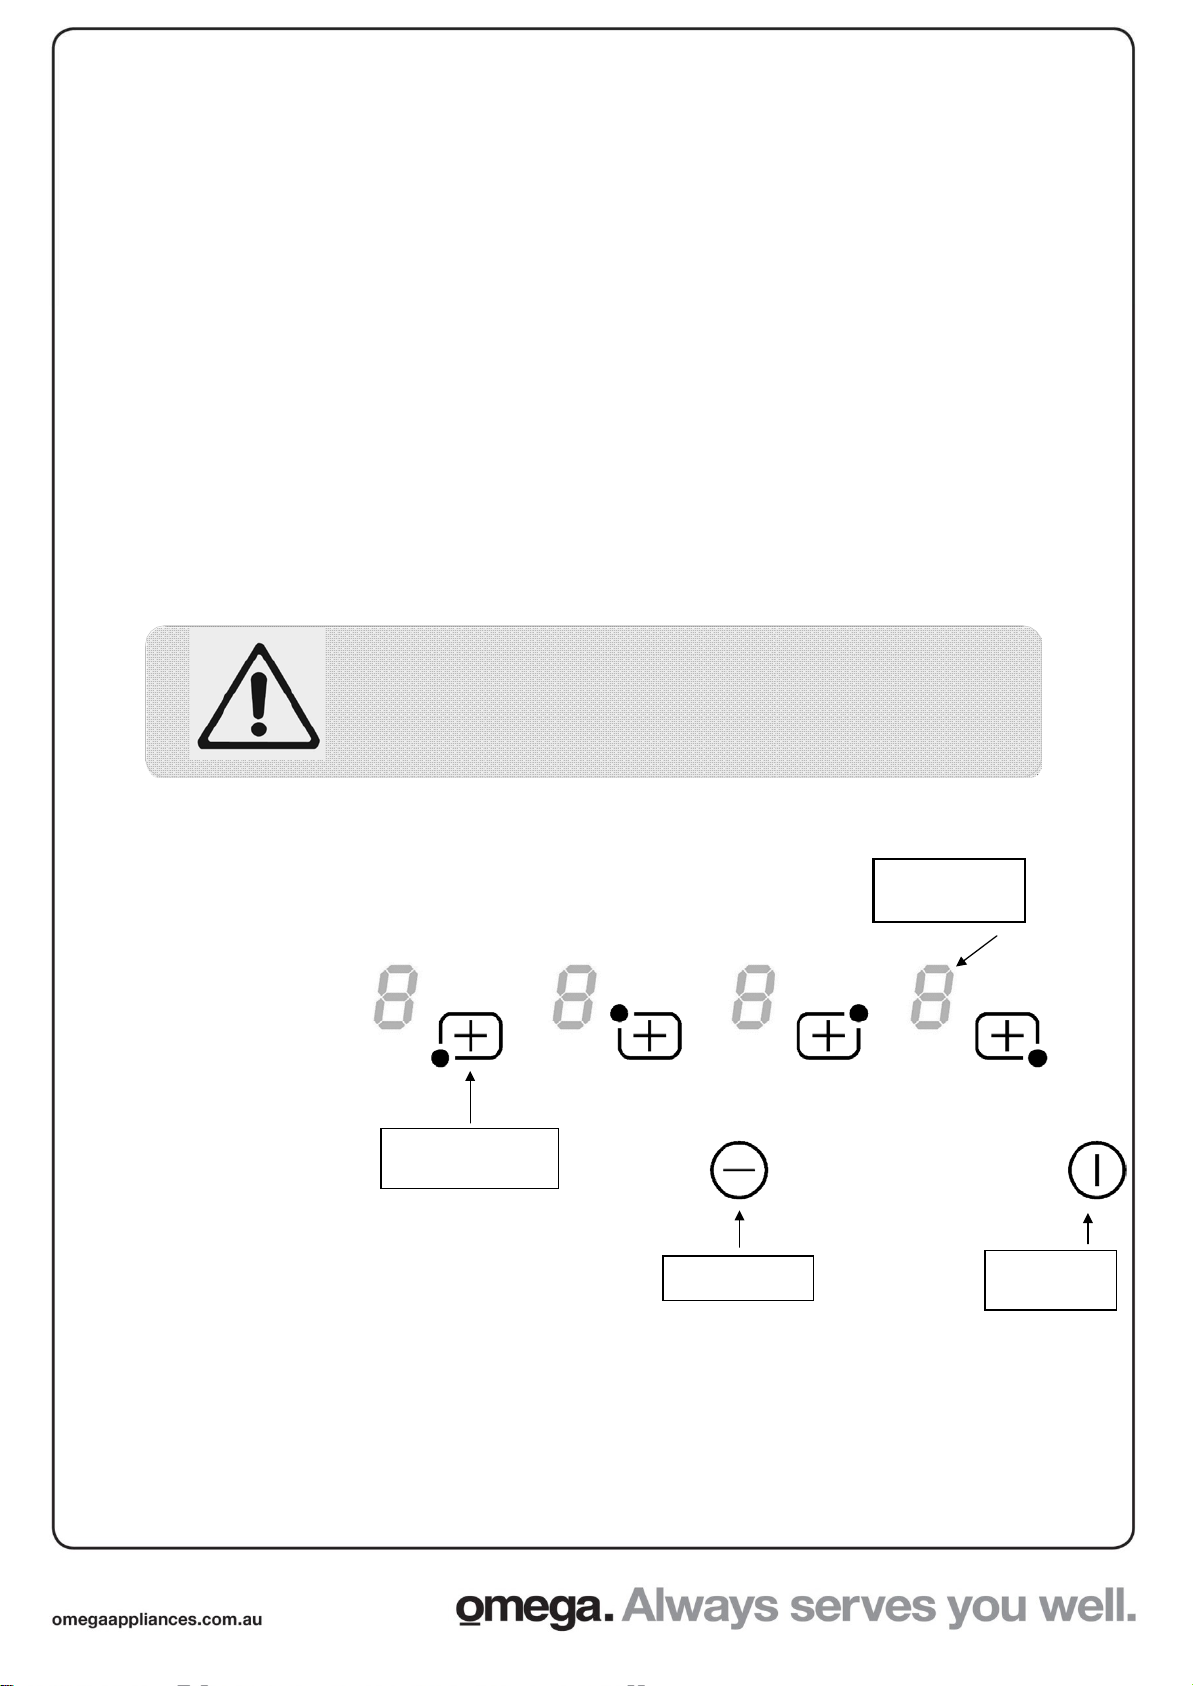
Selection
Key Plus Key
OPERATE THIS COOKTOP BEFORE READING
THE INSTRUCTION BOOKLET
PLACE ARTICLES ON OR AGAINST THIS
COOKTOP STORE CHEMICALS OR FLAMMABLE
MATERIALS OR SPRAY AEROSOLS NEAR THIS
COOKTOP
Size - 155mm
*
calculated according to the method of measuring
performance (EN 60350-2).
2
Minus Key
On/Off Key
Page 6

INSTALLATION
The adjacent furniture must be able to withstand a minimum temperature rise of 100°C above
the ambient temperature of the room it is located in, during periods of use. The power supply to
the cooktop must be cut off before any adjustments or maintenance work is done on it. The
cooktop must be well ventilated (as per this manual) otherwise the cooktop will overheat.
PREPARATION FOR INSTALLATION AND USE
Manufactured with best quality parts and materials, this modern, functional and practical cooktop will
meet your needs in all respects. Make sure to read the manual to obtain successful results so as not to
experience any problems in the future. The information given below contains rules that are necessary f or
correct positioning and service operations. They should be read without fail, especially by the technician
who will position the cooktop.
CHOOSING A LOCATION FOR THE COOKTOP
There are several points to pay attention to when choosing a location for your cooktop. Make sure to take
into account our recommendations below in order to prevent any problems and dangerous situations,
which might occur later!
When choosing a location for the cooktop, attention should be paid that there are no flammable or
combustible materials in the close vicinity, such as curtains, oil, cloth etc. which quickly catch fire.
Ensure a distance between the cooktop edge and rear or side walls of at least 50mm. Furniture
surrounding the cooktop must be made of materials resistant to temperatures above 100°C. Required
changes to wall cabinets and exhaust fans above a built-in cooktop as well as minimum heights from the
cooking surface are shown in Figure 1. Accordingly, the exhaust fan should be at a minimum height of
65cm from the cooktop. If there is no exhaust fan the height should not be less than 70cm.
3
Page 7

INSTALLATION OF BUILT IN COOKTOP
In order to prevent leakage of any liquids on the work bench and fix the cooktop to the bench, a special
sealing tape is supplied together with your oven. Place the cooktop glass down on a clean cloth on a
stable flat surface & apply this seal around the bottom edge of the cooktop (see below). Rem
backing from the sealing tape and then place the cooktop in position. If the sealing tape is not enough t o
fully seal the cooktop to the bench, use a small bead of clear high temperature resistant silicone sealant.
This cooktop can be installed into a workbench 30-40mm thick. When cutting the hole in the work
bench, keep in mind the correct space and ventilation which are shown in the diagrams below.
ove the
A board must be placed a minimum of 20mm
below the cooktop that prevents anyone from
touching the underside of the cooktop. Take care
that there is adequate ventilation for air exchange
to the inductive elements (at least 20mm).
NOTE: INDUCTIVE COOKTOPS GENERATE A
LOT OF HEAT INTERNALLY WHEN IN
OPERATION. THE BOTTOM OF THE COOKTOP
MUST HAVE A CLEAR PATHWAY TO VENT
THIS HEAT OUT VIA THE BOTTOM FANS TO
THE OPEN AIR IN ORDER TO KEEP ITSELF
COOL. FAILING TO PROVIDE ADIQUATE
VENTILLATION W ILL DA MAGE THE COOKTOP
AND VOID YOUR WARRANTY. THE ABOVE
DIMENSIONS SHOULD BE CONSIDERED THE
MINIMUM VENTILLATION REQUIRED.
4
Page 8

DISPLAY
Sensitive touches
Your ceramic cooktop is equipped with electronic controls with sensitive touch keys. When your finger
touches the key, the corresponding command is activated. This activation is validated by a control light,
a letter or a number in the display and/or a “beep” sound.
Touch only one key at
a time.
Display
0
1...9
A
E
H
L
Residual heat indication
After the switch-off of the cooktop, the heating zone is still hot and indicates [ H ] on the display. The
symbol [ H ] disappears when the heating zone may be touched safely.
When the residual heat indicator light is on, don’t
object on them. There are risks of burn and fire.
Designation
Zero
Power level
Heat accelerator
Error message
Residual heat
Locking
Function
The heating zone is activated
Selection of the cooking level
Automatic cooking
Electronic failure
The heating zone is hot
The control panel is locked
touch the heating zone and don’t put any heat sensitive
STARTING UP THE APPLIANCE
Before using your new cooktop
Clean your cooktop with a damp cloth, and then dry the surface thoroughly. Do not use detergent which
risks causing blue-tinted colour on the glass surface.
Starting-up
If no action is made within 20 second the electronics returns to standby mode.
To start the cooktop, press the On/Off Key, this will cause all displays to show "0". To stop or
turn off the cooktop, press the On/Off Key. The displays will either show nothing, or "H" if the
cooking zone is still hot.
To set a cooking setting for a cooking zone, hold down the Plus Key for the cooking zone you
wish to use.
Once the power display for that zone is illuminated, increase the cooking zone setting by pressing
the Plus Key (1-9), or decrease the cooking zone setting by pressing the Minus Key (9-1).
To sto p a cooking zone, hold down the Plus Key for the cooking zone you wish to stop, then
repress the Plus Key while pressing the Minus Key at the same time.
5
Page 9

USE
Automatic cooking
1
01:00
2
03:00
3
04:48
4
06:30
5
08:30
6
02:30
7
03:30
8
04:30
9
00:15
1
6
2 6 3
5
4
5
5 4 6
7
8
9
Automatic cooking
All the cooking zones are equipped with an automatic “go and stop” cooking device. The cooking zone
starts at full power during a certain time, then reduces automatically its power on the preselected
level.
To begin automatic cooking, select a cooking zone and set the Power Display to 9. Once set at 9
repress the Plus Key, the Power Display will begin to flash "A". Using the Plus and Minus Keys, select
the setting desired (see table below). Once set, the Power Display will flash "A" alternately with the
cooking zone setting.
Selected power
To stop automatic cooking, press the Plus Key of the relevant cooking zone, then press the Minus
Key until to Power Display reads "0" or "H".
Control panel locking
To avoid modifying a setting of cooking zones, in particular with within the framework of cleaning the control
panel can be locked (with exception to the On/Off Key.
To lock the cooktop, press the Minus Key and the Plus Key of the front left cooking zone
simultaneously, then repress the Plus Key of the front left cooking zone. All power displays will now
show "L".
To unlock the cooktop, press the On/Off K e y if the cooktop is off, then press the Minus Key and the
Plus Key of the front left cooking zone simultaneously, then repress the Minus Key.
time (Min:S)
Operating time
Each cooki
operating time limitation: the cooking zone is
automatically switched off after a certain time
without any change of settings. This time is
varying according to the selected power level
as described in the table below.
ng zone is equipped with an
Power level
6
Max operating time
(hours)
1.5
1.5
1.5
1.5
Page 10

COOKING ADVICE
Examples of power setting:
(The values below are indicative)
1 to 2 Melting, Reheating
2 to 3 Simmering, Defrosting
3 to 4 Steam Vegetables, fish, meat
4 to 5 Water Steamed potatoes, soups, pasta, fresh vegetables
6 to 7 Medium cooking, Simmering Meat, liver, eggs, sausages,
7 to 8 Cooking Potatoes, fritters, waffles
9 Frying, Roasting, Boiling water Steaks, omelettes, fried dishes, water
Sauces, butter, chocolate, gelatine dishes prepared
beforehand
Rice, pudding, sugar syrup
dried vegetables, fish, frozen products
MAINTENANCE
Switch-off the appliance before cleaning.
Do not clean the cooktop if the glass is too hot because they are risk of
burn.
• Remove light marks with a damp cloth with washing up liquid diluted in a little water. Then rinse
with cold water and dry the surface thoroughly.
• Highly corrosive or abrasive detergents and cleaning equipment likely to cause scratches
must be absolutely avoided.
• Do not ever use any steam-cleaner or pressure washer.
• Do not use any object that may scratch the ceramic glass.
• Ensure that the cooktop is dry and clean. Ensure that there are no grains of dust on your ceramic
cooktop or on the pan. Sliding rough saucepans will scratch the surface.
• Spillages of sugar, jam, jelly, etc. must be removed immediately. You will thus prevent the surface
being damaged.
7
Page 11

TROUBLESHOOTING
The cooktop or the cooking zone doesn’t start-up:
• The cooktop is badly connected to the electrical system.
• The protection fuse has blown.
• The locking function is activated
• The sensitive keys are covered by grease or water.
• An object is covering the control panel
The symbol [ E ] displays :
• Call the After-sales Service.
One or all cooking zones cut-off:
• The safety system has engaged
• You forgot to cut-off the cooking zone for a long time.
• One or more sensitive keys are covered.
• The pan is empty and has overheated.
The automatic cooking system « go and stop » doesn’t start-up:
• The cooking zone is still hot [ H ]
• The highest power level is set [ 9 ]
• The cooking level was engaged with [ - ]
.
The symbol [ L ] displays :
• Refer to the chapter control panel locking page.
The control panel displays [ Er03 ] :
• An object or liquid covers the control keys. The symbol disappears as soon as the key is
released or cleaned.
The control panel displays [ ER21 ] :
• The cooktop is overheated, let it cool and then turn it on
again.
The control panel displays [ U400 ], [ Er25 ]or [ U4 ] :
• The cooktop is not connected to the network. Check the connection and reconnect
the cooktop.
If one of the symbols above persists, Call the After-sales Service.
ENVIRONMENT PROTECTION
• The packaging material is ecological and can be recycled.
• The worn appliances contain certain noble metals. Apply to the local government about the
possibilities of recycling.
D
on' t
•
•
di s
household waste
Get in touch with the waste collection centre of your local council
that control the recycling of household appliances.
o f your appliance with general
pos e
8
Page 12

TECHNICAL DATA
Mains
Connection
Cable diameter
Cable
Protection calibre
H 05 VV - F H
• The installation of this appliance and the connection to the electrical network should be
entrusted only to an electrician perfectly to the fact of the normative regulations and which
respects them scrupulously.
• Protection against the parts under tension must be ensured after the building-in.
• The data of connection necessary are on the stickers place on the cooktop casing near the
connection box.
• The connection to the main must be made using an earthed plug or via an omnipolar
circuit breaking device with a contact opening of at least 3 mm.
• The electrical circuit must be separated from the network by adapted devices, for example:
circuit breakers, fuses or contactors.
• If the appliance is not fitted with an accessible plug, disconnecting means must be
incorporated in the fixed installation, in accordance with the installation regulations.
.
Caution!
This appliance has only to be connected to a network 230 V~ 50/60 H z. Always
connect the earth wire.
Respect the connection diagram.
The connection box is located underneath at the back of the cooktop casing. To open the cover use
a medium screwdriver. Place it in the slits and open the cover.
230V~ 50/60Hz 1 Phase + N 3 x 2.5 mm²
400V~ 50/60Hz 2 Phases + N 4 x 1.5 mm²
* calculated with the simultaneous factor following the standard EN 60 335-2-6
Connection of the cooktop
Setting up the configurations:
For the various kinds of connection, use the brass bridges which are in the box next the terminal
Monophase 230V~1P+N
Put a bridge between terminal 1 and 2.
Attach the earth to the terminate “earth”, the neutral N to terminal 4, the Phase L to one of the terminals
1 or 2.
Biphase 400V~2P+N
Attach the earth to the terminate “earth”, the neutral N to terminal 4, the Phase L1 to the terminals 1 and
the Phase L2 to the terminal 2.
Caution! Be careful that the cables are correctly engaged and tightened.
We cannot be held responsible for any incident resulting from incorrect connection or which
could arise from the use of an appliance which has not been earthed or has been equipped
with a faulty earth connection.
05 RR - F
H 05 VV - F H
05 RR - F
25 A *
16 A *
9
Page 13

CLEANING
NOTE: Cleaning and maintenance operations must only be carried out when the cooktop is
cool (all residual he at i n dicators are off).
The cooktop should be disconnected from the power outlet or turned off at your isolation
switch before commencing any cleaning process.
Do not use plastic, plastic coated or aluminium cooking equipment on this
cooktop.
CLEANING THE COOKTOP
Cookware with rough bases should not be used as they can scratch the glass ceramic surface. The base
of the good cookware should be as thick and flat as possible.
Before use, make sure that cookware bases are clean and dry.
Always place the cookware on the cooking zone before it is switched on. If possible, always place the
lids on the cookware. The base of any cookware used must not be smaller or larger than the cooking
zones; they should be the proper size as indicated below, so as not to waste energy.
Before cleaning the cooktop, first isolate the cooktop from the power. Once done, ensure that there is no
residual heat stored in the cooktop. The glass is very resistant to high temperature and overheating. If
there is residual heat stored in the cooktop, the related residual heat indicator lamp will be on. In order
to avoid burns, let the cooktop cool down.
Remove all spilt food and fat with a clean damp, warm, slightly soapy, dishcloth. Rinse cloth and wipe
cooktop again until clean, then wipe the cooktop dry with a clean tea towel or dry soft cloth.
If aluminium foil
immediately removed from the hot cooking area with a scraper specifically for glass. This will
avoid any possible damage to the surface. This also applies to sugar or food containing sugar that
may be spilled on the cooktop. Enamelled steel, aluminium & copper will leave a residue on the
surface that should be removed immediately or permanent damage may occur.
In the event of other food melted on the cooktop surface, remove the dirt when the cooktop
has cooled down. Use cleaner for glass ceramic or stainless steel when cleaning the surface.
Do not use abrasive sponges to clean the glass surface. These materials may damage the surface.
Do not use chemical detergents, sprays or spot removers on the glass surface. These materials may
cause fire or the glass colour to fade. Clean with a damp, warm, slightly soapy, dishcloth.
WARNING: Using cookware that is too large can cause discolouration or damage to the cooktop
surface around the cooking zones, which is NOT covered under warranty.
or plastic items are accidentally melted on the glass surface, they should be
10
Page 14

ELECTRICAL CONNECTIONS
LOCAL AUTHORITY REQUIREMENTS
Installation is only permitted by a licensed electrici an, and carried out according to instructions
provided by the manufact urer. Incorrect installation mig ht cause harm and damage, for which
the manufacturer accepts no responsibility.
ELECTRICAL INSTALLATION
Before carrying out the connection to the power supply, the voltage rating of the cooktop (stamped on the
cooktop identification plate) must be checked for correspondence to the available m ains supply voltage, and
the mains electric wiring s houl d be capable of handling the oven’s power ratin g (also indica ted on the
identification plate). If you have any doubts, call in a qualified technician.
NOTE: For connections to the mains power supply, never use adapters, reductions or multiple power points as
these may overheat and catch fire. Do not install separate timers.
After having installed the cooktop, the switched outlet must alway s be in an accessible position.
The electrical safety of this cooktop can only be guaranteed if the cooktop is correctly and efficiently earthed,
always ensure that the earthing is efficient; if you have any doubts call in a licensed electrician to check the
system. The manufacturer declines all responsibility for damage resulting from an installation w hich has not
been correctly earthed.
WARNING: If any damage oc curs to the power cable during or af ter installation, it must be replaced
immediately by a licensed electrician with a replacement cable from your Service Centre.
The cooktops can be connected to either a single phase 220-240Vac 50 Hz supply, or 2 phase 380-415Vac
50Hz.
SINGLE PHASECONNECTION
First, a bridge connection must be made between terminals 1 and 2 (live) and between 3 and 4 (neutral).
Connect the pairs to the live and neutral power supply cables. Connect the ground terminal to the ground
supply cable.
TWO PHASE CONNECTION
First remo ve any bridge connection between ter minals 1 and 2 (live). Place a bridge connection between 3
and 4 (neutral). Connect ter minals 1 and 2 to the live power supply cables. Connect either te rminal 3 or 4 to
the neutral power supply cable. Connect the ground terminal to the grou nd supply cable.
The mains terminal block is located on the underside of the cooktop and the terminals are accessible by
removing the terminal block cover using a small flat s crewdriv er.
The cooktop is designed for fixed connection to the mains. During installation, an all pole disconnector should
be included inside the supply circuit w ith a contact opening of at least 3mm (rated 32A, delay fun ctioni ng type) .
The power supply cord must not touch against any hot surfaces and must be placed so that its temperature
does not exceed 75 °C at any point along its length.
IMPORTANT: The cooktop must NOT be connected to the mains supply by means of a 10A, 15A or 20A
plug and socket.
The maximum current drawn in a single phase installation is 32A, and 2x16A for a two phase installation. Only
use cables Tmax 90C types H05RN-F, H07RN-F, H05RR-F, H07RR-F etc.
11
Page 15

Head office: 104 Vanessa Street, Kingsgrove NSW 2208.
Phone: (02) 9415 5000.
Customer care: 1300 739 033.
Address: 231 Bush road, Albany, North Shore City,
Auckland, New Zealand 0632.
Phone: (09) 415 6000.
 Loading...