

Page 1
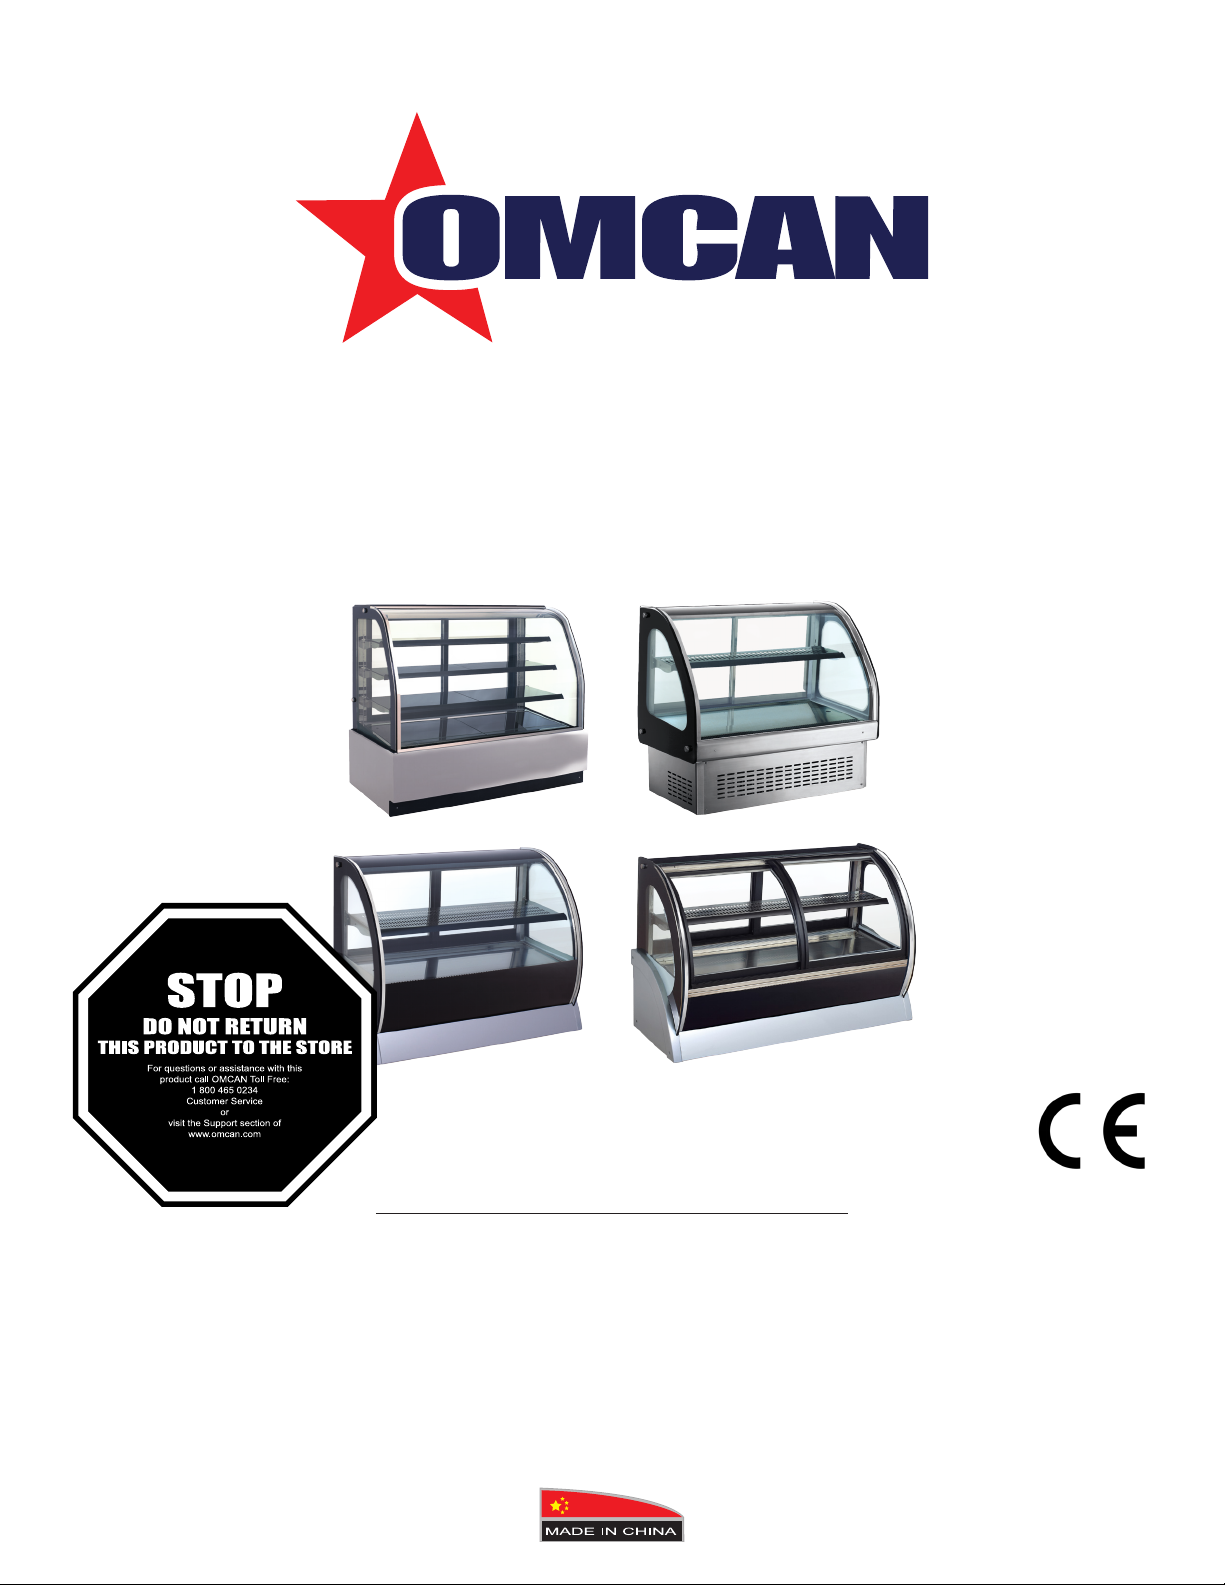
Refrigerated Display Cases
Instruction Manual
Revised - 9/15/2014
Toll Free: 1-800-465-0234
Fax: 905-607-0234
Email: sales@omcan.com
www.omcan.com
Page 2

Table of Contents
Model RS-CN-0349 / Model RS-CN-0491 / Model RS-CN-0633 / Model RS-CN-0776
Model RS-CN-0115-R / Model RS-CN-0155-R / Model RS-CN-0200-R
Model RS-CN-0115-F / Model RS-CN-0155-F / Model RS-CN-0200-F
Model RS-CN-0128 / Model RS-CN-0173 / Model RS-CN-0218
Section
General Information
Safety and Warranty
Technical Specications
Installation
Operation
Maintenance
--------------------------------------------------------------------------------------- 5 - 6
----------------------------------------------------------------------------------------- 7 - 8
------------------------------------------------------------------------------------- 8 - 9
-------------------------------------------------------------------------------- 3
--------------------------------------------------------------------------- 3 - 4
Page
---------------------------------------------------------------------- 4 - 5
Troubleshooting
Parts Breakdowns
Electrical Schematics
Warranty Registration
------------------------------------------------------------------------------- 9 - 10
-------------------------------------------------------------------------- 11 - 16
---------------------------------------------------------------------- 17 - 18
---------------------------------------------------------------------------- 19
2
Page 3

General Information
Omcan Manufacturing and Distributing Company Inc. and Food Machinery of America, Inc. dba Omcan
are not responsible for any harm or injury caused due to any person’s improper or negligent use of
this equipment. The product shall only be operated by someone over the age of 18, of sound mind, and
not under the inuence of any drugs or alcohol, who has been trained in the correct operation of this
machine, and is wearing authorized, proper safety clothing. Any modication to the machine voids any
warranty, and may cause harm to individuals using the machine or in the vicinity of the machine while
in operation.
CHECK PACKAGE UPON ARRIVAL
Upon receipt of an Omcan shipment please inspect for external damage. If no damage is evident on the
external packaging, open carton to ensure all ordered items are within the box, and there is no concealed
damage to the machine. If the package has suffered rough handling, bumps or damage (visible or concealed),
please note it on the bill of lading before accepting the delivery and contact Omcan within 24 hours, so we may
initiate a claim with the carrier. A detailed report on the extent of the damage caused to the machine must be
lled out within three days, from the delivery date shown in the shipping documents. Omcan has no recourse
for damaged products that were shipped collect or third party.
Safety and Warranty
1. This unit is a showcase refrigeration, objects placed in this unit should already be cooled.
2. This instruction manual must be read before operating the unit and must be kept for future reference.
3. WARNING: Never use this unit for applications which are not described in the instructions or under
conditions which are not similar to those described in the instructions. Otherwise, sever injuries may occur.
4. This unit should only be used for the purpose for which it was designed. Any other use is inappropriate and
therefore dangerous. Omcan will not be held responsible for any damage caused by improper use.
5. Before installing and operating the machine, carefully read this manual.
6. Keep the unit out of reach of children. Do not allow children to play with the unit.
7. Unplug the unit from the outlet when not in use, before assembly or disassembly and before cleaning.
8. Be sure to unplug the unit if not using for a long period of time.
9. If the supply cord is damaged, the cord should be replaced by the manufacturer, authorized service agent
or similarly qualied persons.
10. Do not use the unit in a dusty environment or ammable or explosive substances.
11. Disable the unit immediately if defective. Dispose of the unit according to the regulations of local law.
Please see instructions for disposal in this manual.
12. Other than cleaning mentioned in this instruction manual, no additional maintenance or servicing of this unit
is required.
13. The motor is permanently lubricated and will require no oil.
14. Repairs, when necessary, must be performed at an authorized service facility.
15. The unit is suitable for indoor use only.
16. Basic safety rules:
• Do not touch the unit when hands or feet are wet.
3
Page 4
Safety and Warranty
• Do not use the unit when barefoot.
• Do not allow the unit to be used by children or untrained persons.
• Do not leave the unit outside.
• Do not pull on the electrical cord when unplugging the unit.
• Omcan reserves the right to modify the construction or appearance of the unit without notice.
WARNING:
The packaging components are classied as normal solid urban waste and can therefore be disposed of
without difculty.
In any case, for suitable recycling, we suggest disposing of the products separately (differentiated
waste) according to the current norms.
DO NOT DISCARD ANY PACKAGING MATERIALS IN THE ENVIRONMENT!
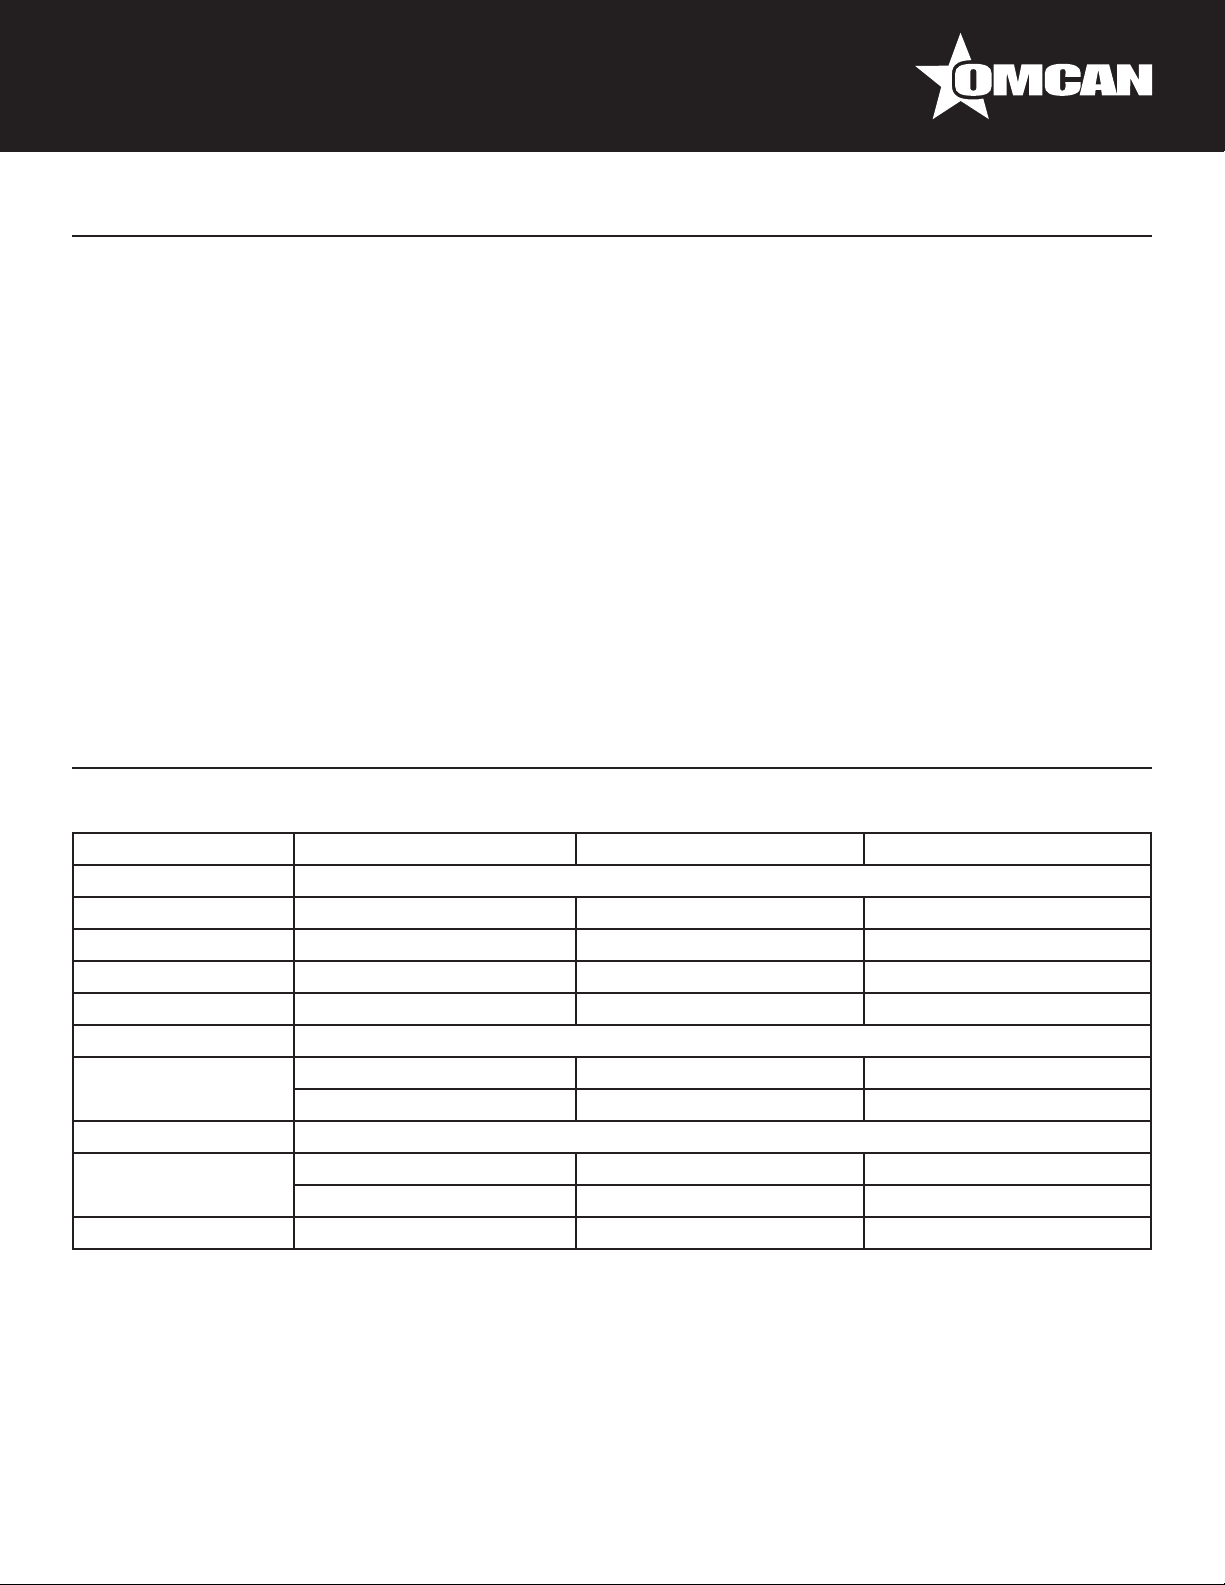
Technical Specications
Countertop Drop In Showcases
Model RS-CN-0128 RS-CN-0173 RS-CN-0218
Temperature Range 2°C - 8°C / 35.6°F - 46.4°F
Capacity (L / cu. ft) 128 L / 4.52 cu. ft. 173 L / 6.1 cu. ft. 218 L / 7.70 cu. ft.
Power (W) 345 408 420
Current 4.42A 4.12A 4.24A
Refrigerant R134a, 200g R134a, 270g R134a, 300g
Number of Shelves 2
Interior
Dimensions
Electrical 110V/60/1
Dimensions (DWH)
Weight 90 kg. / 198.5 lbs. 105 kg. / 231.5 lbs. 120 kg. / 264.5 lbs.
14.25” x 33” x 15” 14.25” x 41” x 15” 14.25” x 52.75” x 15”
362 x 838 x 381mm 362 x 1041 x 381mm 362 x 1340 x 381mm
21.25” x 35.5” x 31” 21.25” x 47.25” x 31” 21.25” x 59” x 31”
540 x 902 x 787mm 540 x 1200 x 787mm 540 x 1499 x 787mm
4
Page 5
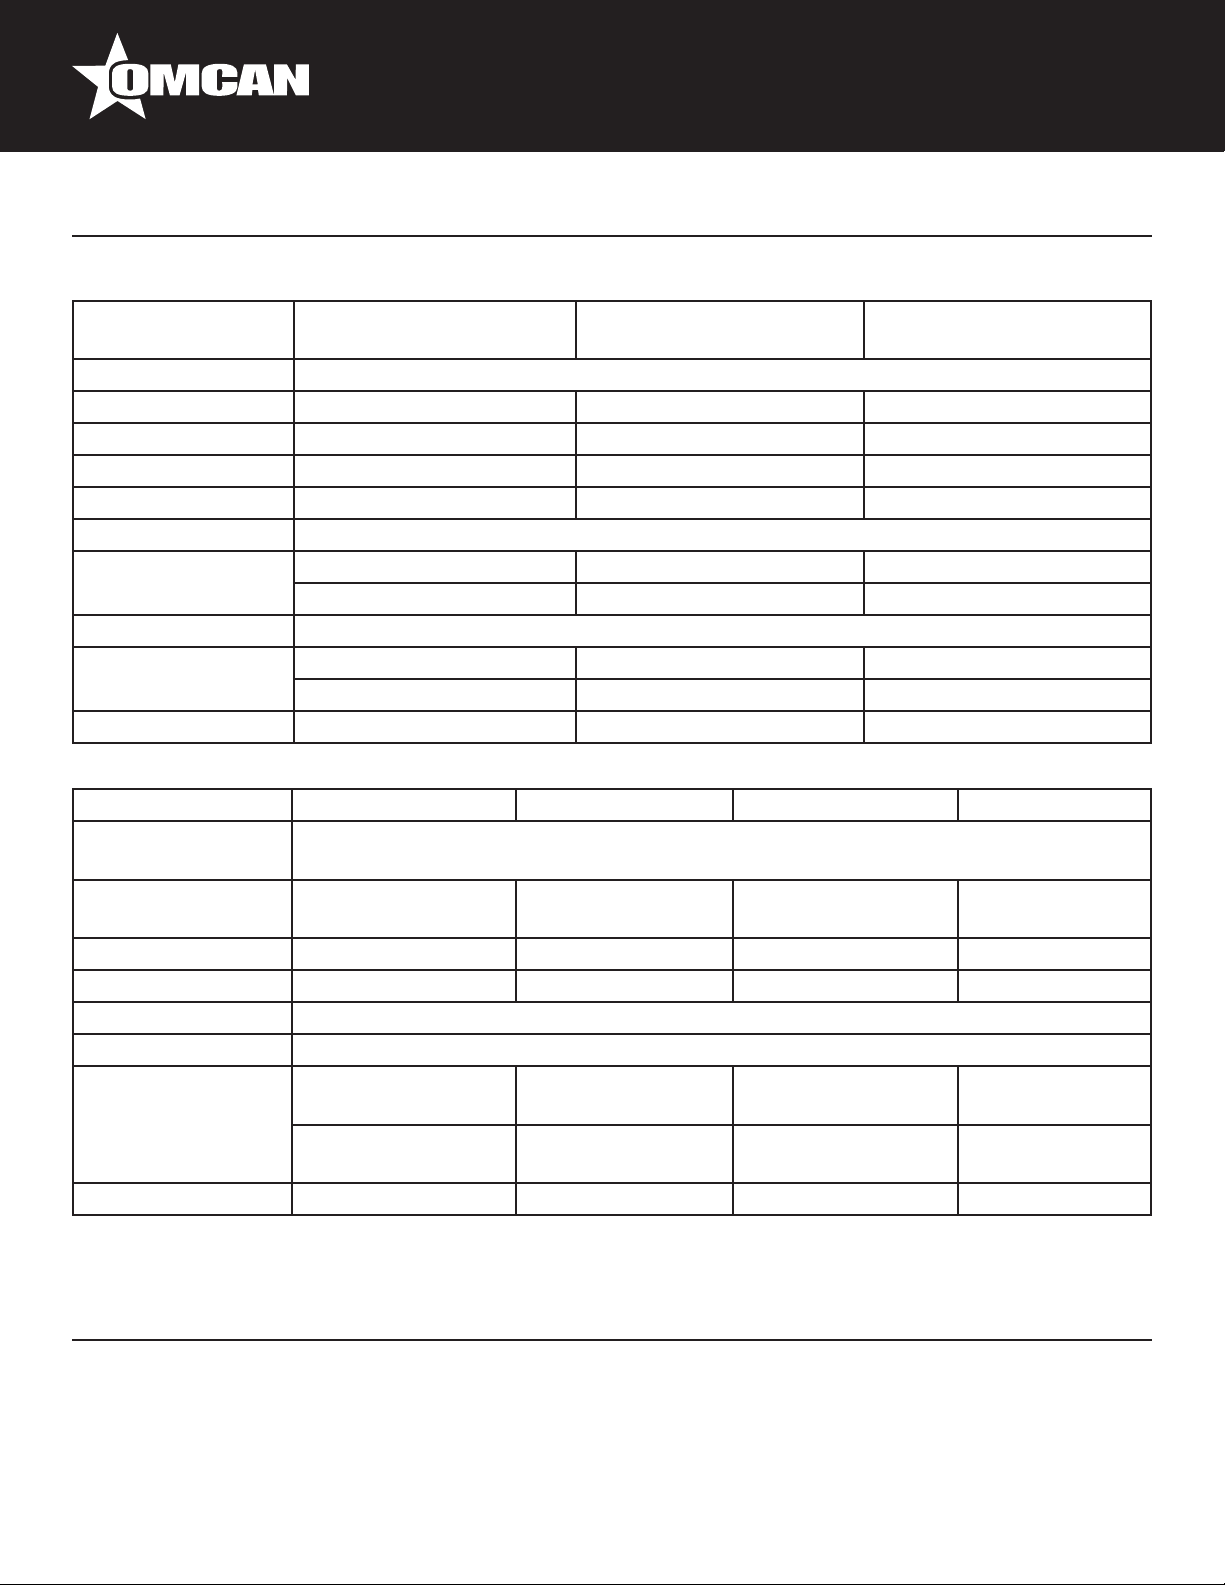
Technical Specications
Countertop Cold Deli Showcases
Model
Temperature Range 2°C - 8°C / 35.6°F - 46.4°F
Capacity (L / cu. ft) 115 L / 4 cu. ft. 155 L / 5.47 cu. ft. 200 L / 7 cu. ft.
Power (W) 420 453 479
Current 4.82A 4.58A 4.84A
Refrigerant R134a, 185g R134a, 270g R134a, 300g
Number of Shelves 2
Interior
Dimensions
Electrical 110V/60/1
Dimensions (DWH)
Weight 95 kg. / 209.5 lbs. 105 kg. / 231.5 lbs. 120 kg. / 264.5 lbs.
Refrigerated Floor Showcases
Model RS-CN-0349 RS-CN-0491 RS-CN-0633 RS-CN-0776
Temperature
Range
Capacity (L / cu. ft)
Current 7.9 A 10.4 A 11.4 A 12.9 A
Refrigerant R134a R134a R134a R134a
Number of Shelves 4
Electrical 110V/60/1
Dimensions (DWH)
Weight 210 kg / 463 lbs. 250 kg / 551.25 lbs. 290 kg / 639.25 lbs. 330 kg / 726 lbs.
RS-CN-0115-R
RS-CN-0115-F
15.75” x 35.5” x 14.5” 15.75” x 47.25” x 14.5” 15.75” x 59” x 14.5”
400 x 902 x 368mm 400 x 1200 x 368mm 400 x 1499 x 368mm
21.25” x 35.5” x 31” 21.25” x 47.25” x 31” 21.25” x 59” x 31”
540 x 902 x 787mm 540 x 1200 x 787mm 540 x 1499 x 787mm
348.86 L /
12.32 cu. ft.
29.25” x 35.5” x
51.75”
743 x 902 x 1314mm
490.70 L /
17.33 cu. ft.
29.25” x 47.25” x
743 x 1200 x
1314mm
RS-CN-0155-R
RS-CN-0155-F
2°C - 8°C / 35.6°F - 46.4°F
632.88 L /
22.35 cu. ft.
51.75”
29.25” x 59” x 51.75”
743 x 1499 x
1314mm
RS-CN-0200-R
RS-CN-0200-F
776 L /
27.40 cu. ft.
29.25” x 70.86” x
51.75”
743 x 1800 x
1314mm
Installation
TRANSPORTATION
1. In order to prevent the oil contained in the compressor from owing into the cooling circuit, it is necessary
5
Page 6

Installation
to always carry, store and handle the unit in a vertical position and follow the instructions found on the
packaging.
2. If the unit was accidentally or purposely placed in a non-vertical position during transport, before operating
the unit, keep the unit in a vertical position for approximately 24 hours, to allow the oil to ow back into the
compressor.
UNPACKING
Remove the wooden case board and plastic covering. Make sure that the unit has not been damaged. Remove
the plastic lm from all the stainless steel panels if applicable.
IMPORTANT: The packaging should be kept away from children as it is potentially dangerous. Dispose
of the packaging according to the regulations from the local authorities.
POSITIONING
1. Never clean the unit with pressurized water jets.
2. Place the unit on a at and stable surface.
3. Install the unit in a location where it can be overseen by trained personnel.
4. For good ventilation, keep a distance of 20 cm (7 inches) between unit and walls or other objects. Increase
the distance if the objects are a heating source. When the dispenser is in place, press the brake on the
wheels in order to keep it from moving.
ASSEMBLY
1. Remove the bottom pallet from the unit.
2. Fix the shelves on the unit.
ELECTRICAL CONNECTION
Before inserting the plug into the electrical socket, carefully read the following precautions:
1. Make sure that the unit is properly connected to an properly grounded outlet, in compliance with current
safety standards.
2. Make sure that the voltage is in accordance with what is indicated on the rating label.
3. The current available is sufcient for the maximum required by the unit.
4. If necessary, use multiple outlets which are properly grounded, in compliance with current safety standards.
If in doubt, only consult qualied technicians.
THE REFRIGERATED SHOW CASE MUST BE CONNECTED TO AN ELECTRICAL SOCKET WITH A
GROUND.
6
Page 7

Operation
Before using, the unit should be completely cleaned as it comes into contact with food.
1. Make sure that the main switch is in the (I) position, then plug in the unit.
2. Before starting the unit, ensure the sliding doors are properly closed.
3. Turn the main switch to the (I) position, the condensing unit will automatically start.
4. For lighting, press the lighting button. The lighting button is located on the thermostat.
5. If there is some condensation in front of the curved glass, please turn the switch to (I) position for
defogging.
6. Allow the unit to reach proper temperature before loading with product.
WORKING TEMPERATURE ADJUSTMENT
To reset the temperature inside the showcase, please follow as below:
CAUTION: You are suggested not to reset the temperature controller frequently.
1. Set Temperature
• Press the SET button, the set temperature is displayed.
• Press the or button to modify and store the display value, press the SET button to exit and display
the cold room temperature.
• If no button is pressed within 10 seconds, the cold room temperature will be displayed.
2. Illumination: Press button, it lights. Press it again and it will stop.
3. Manual start/stop defrost: Press and hold for 6 seconds to defrost or stop defrost.
4. Display Evaporation temperature: Press button and hold for 6 seconds, the evaporation temperature is
displayed. After 10 seconds, the cold room temperature will be displayed.
5. Working LED: During the course of refrigeration, the LED is on. When the cold room temperature is
constant, the LED is off. During the delay start, the LED ashes.
6. Defrost LED: during defrosting, the LED is on. When it stops defrosting the LED is off. During the delay
display of defrost, the LED ashes.
7. Parameter Setup:
• Press the SET button and hold for 6 seconds to enter the parameter setup mode while E1 ashes.
7
Page 8

Operation
• Press SET again to select sequential from the 10 parameters: E1, E2, E3, E4, E4, E5, F1, F2, F3, F4.
• Press the or button, the different parameters will be displayed and can be modied and stored.
• If no more buttons are pressed within 10 seconds, the cold room temperature will be displayed.
Parameter Function Set Range
E1 Lower set point limit. -45°C ~ Set temp.
E2 Higher set point limit. Set temp. ~ 45°C.
E3 Temp. hysteresis. 1 - 10°C.
E4 Comp. start delay time. 0 - 10 mins.
E5 Offset on room temp. -5 - 5°C.
E6 Offset on evap. temp. -5 - 5°C.
F1 Max. defrost duration. 1 - 60 min.
F2 Defrost interval time. 0 - 24 Hr.
F3 Defrost termination temp. 0 - 20°C.
F4 Display during defrost. 0 = normal display.
1 = last value before defrost.
Maintenance
CLEANING
For health standards and good quality of beverages or foods, clean interiors of the unit as often as possible.
CAUTION: Do not clean the unit by means of a water jet or pressurized washer.
1. Before carrying out cleaning, turn the unit off and remove the power plug.
2. Do not use abrasive powders that might damage the interior parts of the showcase.
3. Use neutral soap and warm water to wash the interiors. Rinse carefully with water in order to remove any
soap residues.
4. To maintain a high standard of working performance, leave the unit turned on during the night and day to
avoid deposits.
CAUTION: Do not use any damaging solvents (petrol, alcohol, etc.) for cleaning the unit. The unit may
get damaged. Do not use and sharp objects for cleaning. The unit may be cleaned with a damp towel
but should never directly come in contact with water. After cleaning the unit, make sure all parts are
dried completely.
INSTRUCTIONS FOR DISPOSAL
When replacing your old unit with a new one, comply with the following information: Old units are not to be
8
Page 9

Maintenance
disposed of as regular waste. Valuable raw materials can be obtained by recycling old units.
Render your old unit unusable:
1. Pull out the mains plug.
2. Cut off the mains cable and discard with the mains plug.
Caution: Substances and gases in the thermal insulation must be disposed of professionally. Ensure
that refrigeration tubing is not damaged prior to disposal. Please discard the unit according to the
regulations of local law.
Troubleshooting
Symptom Possible Reasons Solution Remark
No power input/power
direction lamp does not
light.
Compressor does not
work.
Broken fuse. Replace. As for authorized service
Poor connection of plug
and socket.
Failure in input control
circuit.
Thermostat does not
work.
Thermostat is not on the
working position.
Poor contract of
thermostat.
Loose plug pins in the
starter.
Broken compressor. Replace.
Broken starter or
capacitor.
Repair or replace the
socket.
Replace.
Turning to the working
position.
Insert the plug tightly.
Insert the plug tightly.
Repair or replace.
department to check and
repair.
9
Page 10

Troubleshooting
Compressor runs, but
the temperature in the
showcase is high.
Condenser fan does not
run.
Compressor starts/stops
frequently.
The fan of the evaporator
does not work.
Circulating temperature is
too high.
Too much dust and dirt on
the condenser.
Frost on the evaporator is
too thick.
Thermostat is out of work. Replace.
The capacitor of the fan is
out of work.
The ball-bearing of the
fan motor lacks oil.
The winding of the fan
motor is damaged.
The winding of the
compressor is short
circuit.
Poor contact of the
socket.
The fan motor is
damaged.
Adjust the thermostat
properly.
Clean it on time.
Stop the machine
to defrost. Set the
temperature higher.
Replace.
Fill oil.
Replace.
Check with a multi meter,
replace the compressor.
Repair or replace.
Replace.
Ask for authorized service
department to check and
repair it.
Warning: If the machine has any problems or has been damaged, do not try to repair or replace it by
yourself. Please contact Omcan technical service at 1-800-465-0234.
10
Page 11

Model RS-CN-0349 27942
Model RS-CN-0491 27943
Model RS-CN-0633 27944
Model RS-CN-0776 37930
Parts Breakdown
11
Page 12

Parts Breakdown
Model RS-CN-0349 27942
Model RS-CN-0491 27943
Model RS-CN-0633 27944
Model RS-CN-0776 37930
Description Position Description Position Description Position
Sliding door 1 Light cover 11 Evaporator 21
Ventilation grill 2 Second shelf 12 Compressor 22
Controll panel 3 Second shelf bracket 13 Curved glass 23
Digital thermostat 4 Third shelf 14 Left side glass 24
Switch 5 Third shelf bracket 15 Right side glass 24-A
Power Switch 6 Front s/s air grill 16 Small Front bottom panel 25
Automatic expension valve 7 Bottom shelf 17 Condenser 26
Top shelf 8 Rear s/s air grill 18 Condenser fan motor 27
Top shelf bracket 9 Evaporator fan motor 19 Dry lter 28
Light 10 Evaporator cover 20
12
Page 13

Model RS-CN-0115-R 31406
Model RS-CN-0115-R 31815
Model RS-CN-0200-R 31818
Model RS-CN-0115-F 31865
Model RS-CN-0115-F 31866
Model RS-CN-0200-F 31867
Parts Breakdown
13
Page 14

Parts Breakdown
Model RS-CN-0115-R 31406
Model RS-CN-0115-R 31815
Model RS-CN-0200-R 31818
Model RS-CN-0115-F 31865
Model RS-CN-0115-F 31866
Model RS-CN-0200-F 31867
Description Position Description Position Description Position
Sliding Door 1 Light 10 Left Glass 19
Back Air Grill 2 Light Cover 11 Decoration Front Panel 20
Controller Board 3 Bottom Stainless Steel Shelf 12 Decoration Left Panel 21
Digital Thermostat (PHEZSOP100)
Switch (SC791) 5 Rear S/S Air Grill 14 Condenser Fan Motor 23
Switch SC767 6 Evaporator Fan Motor 15 Compressor 24
Top Shelf 7 Evaporator Cover 16 Bottom Panel 25
Right Side Glass 8 Evaporator 17
Top Shelf Bracket 9 Curved Glass 18
4 Decoration Right Panel 13 Condenser 22
14
Page 15

Model RS-CN-0128 31406
Model RS-CN-0173 31815
Model RS-CN-0218 31818
Parts Breakdown
15
Page 16

Parts Breakdown
Model RS-CN-0128 31406
Model RS-CN-0173 31815
Model RS-CN-0218 31818
Description Position Description Position Description Position
Front Decorating Panel 1 Left Side Glass 9 Decorating Right Panel 16-A
Front Curved Panel 2 Right Side Glass 9-A Condenser 17
Bottom Stainless Steel Shelf 3 Light 10 Digital Thermostat 18
Rear S/S Air Grill 4 Top Shelf 11 Power Switch SC767 19
Evaporator Fan Motor 5 Top Shelf Bracket 12 Switch SC791 19-A
Evaporator Cover 6 Front Bottom Panel 13 Controller Board 20
Evaporator 7 Compressor 14 Back Panel 21
Left Sliding Door 8 Condenser Fan Motor 15
Right Sliding Door 8-A Decoration Left Panel 16
16
Page 17

Model RS-CN-0349 27942
Model RS-CN-0491 27943
Model RS-CN-0633 27944
Model RS-CN-0776 37930
Electrical Schematics
17
Page 18

Electrical Schematics
Model RS-CN-0115-R 31406
Model RS-CN-0115-R 31815
Model RS-CN-0200-R 31818
Model RS-CN-0115-F 31865
Model RS-CN-0115-F 31866
Model RS-CN-0200-F 31867
Model RS-CN-0128 31406
Model RS-CN-0173 31815
Model RS-CN-0218 31818
18
Page 19

Warranty Registration
Thank you for purchasing an Omcan product. To register your warranty for this product, complete the information below, tear off the card at
the perforation and then send to the address specied below. You can also register online by visiting:
www.omcan.com/warrantyregistration.html
For mailing in Canada For mailing in the US
OMCAN INC.
PRODUCT WARRANTY REGISTRATION
3115 Pepper Mill Court,
Mississauga, Ontario
Canada, L5L 4X5
PRODUCT WARRANTY REGISTRATION
4450 Witmer Industrial Estates, Unit 4,
Niagara Falls, New York
OMCAN
USA, 14305
Purchaser’s Information
Name: Company Name:
Address:
Telephone:
City: Province or State: Postal or Zip: Email Address:
Country: Type of Company:
Restaurant Bakery Deli
Dealer from which Purchased: Butcher Supermarket Caterer
Dealer City: Dealer Province or State: Institution (specify):
Invoice: Other (specify):
Model Name: Model Number: Serial Number:
Machine Description:
Date of Purchase (MM/DD/YYYY): Date of Installation (MM/DD/YYYY):
Thank you for choosing Omcan
19
Page 20

Over the last 65 years, Omcan has grown to become a leading supplier to the food
service industry in Canada and the USA. Our success over these many years is
directly attributed to our established relationships with all of our valued customers
and through providing them with Diverse, Dependable and Proven products.
Omcan continues to help our customers remain competitive.
With associates in North America, Europe, Asia, and South America, our global
footprint continues to expand as we hold to the principle that clients benet from
the accessibility and familiarity of our sales team. In 2013 as our geography and
brand recognition continued to grow, we changed to one name Omcan Food
Machinery.
In over 200,000 sq ft of warehouse space we stock over 2,500 quality food
equipment and supplies for the food preparation market.
 Loading...