

Olympus MAJ-1901 Instruction Manual

Department Confidential
Drawing
number
P1
Model No.
MAJ-1901
Product Specification
Section 15. Instruction Manual
Instruction Manual
MAJ-1901
Quick Start Guide

Department Confidential
Drawing
number
P2
Model No.
MAJ-1901
Product Specification
Section 15. Instruction Manual
Copyright 2010 Olympus Technologies Singapore Pte Ltd. All rights reserved.
Olympus and Olympus logo are tra demarks of Oly mpus Technologies Singapore Pte Ltd. Other product and brand names may be tradem arks or register ed
trademarks of their respective owners.
Olympus Technologies Singapore Pte Ltd assumes no responsibility for any dama ge or loss resulting from the use of this guide. Olympus Technologies
Singapore Pte Ltd assumes no res ponsibility f or any loss or claims by third parties w hich may ar ise through th e use of this produc t. Olympus Technologies
Singapore Pte Ltd assumes no responsibility for any damage or loss caused by deletion of data as a result of malfunction, dead battery or repairs. To protect
against data loss, be sure to make backup copies (on other media) of all important data.
Important: Please read the End User License Agreement for t his product before using t he device or accompa nying software program(s). Us ing the device
or any part of the software indicates that you accept the terms of the End User License Agreement.

Department Confidential
Drawing
number
P3
Model No.
MAJ-1901
Product Specification
Section 15. Instruction Manual
Content and Additional Resources
To help you get started with your MAJ-1901 PDA, this guide features:
- Hardware Overview
- Getting Started
- Regulatory Information
For additional product details, visit www.olympus.com.sg
For software updates and information, visit www.microsoft.com.
Department Confidential
Drawing
number
P4
Model No.
MAJ-1901
Product Specification
Section 15. Instruction Manual
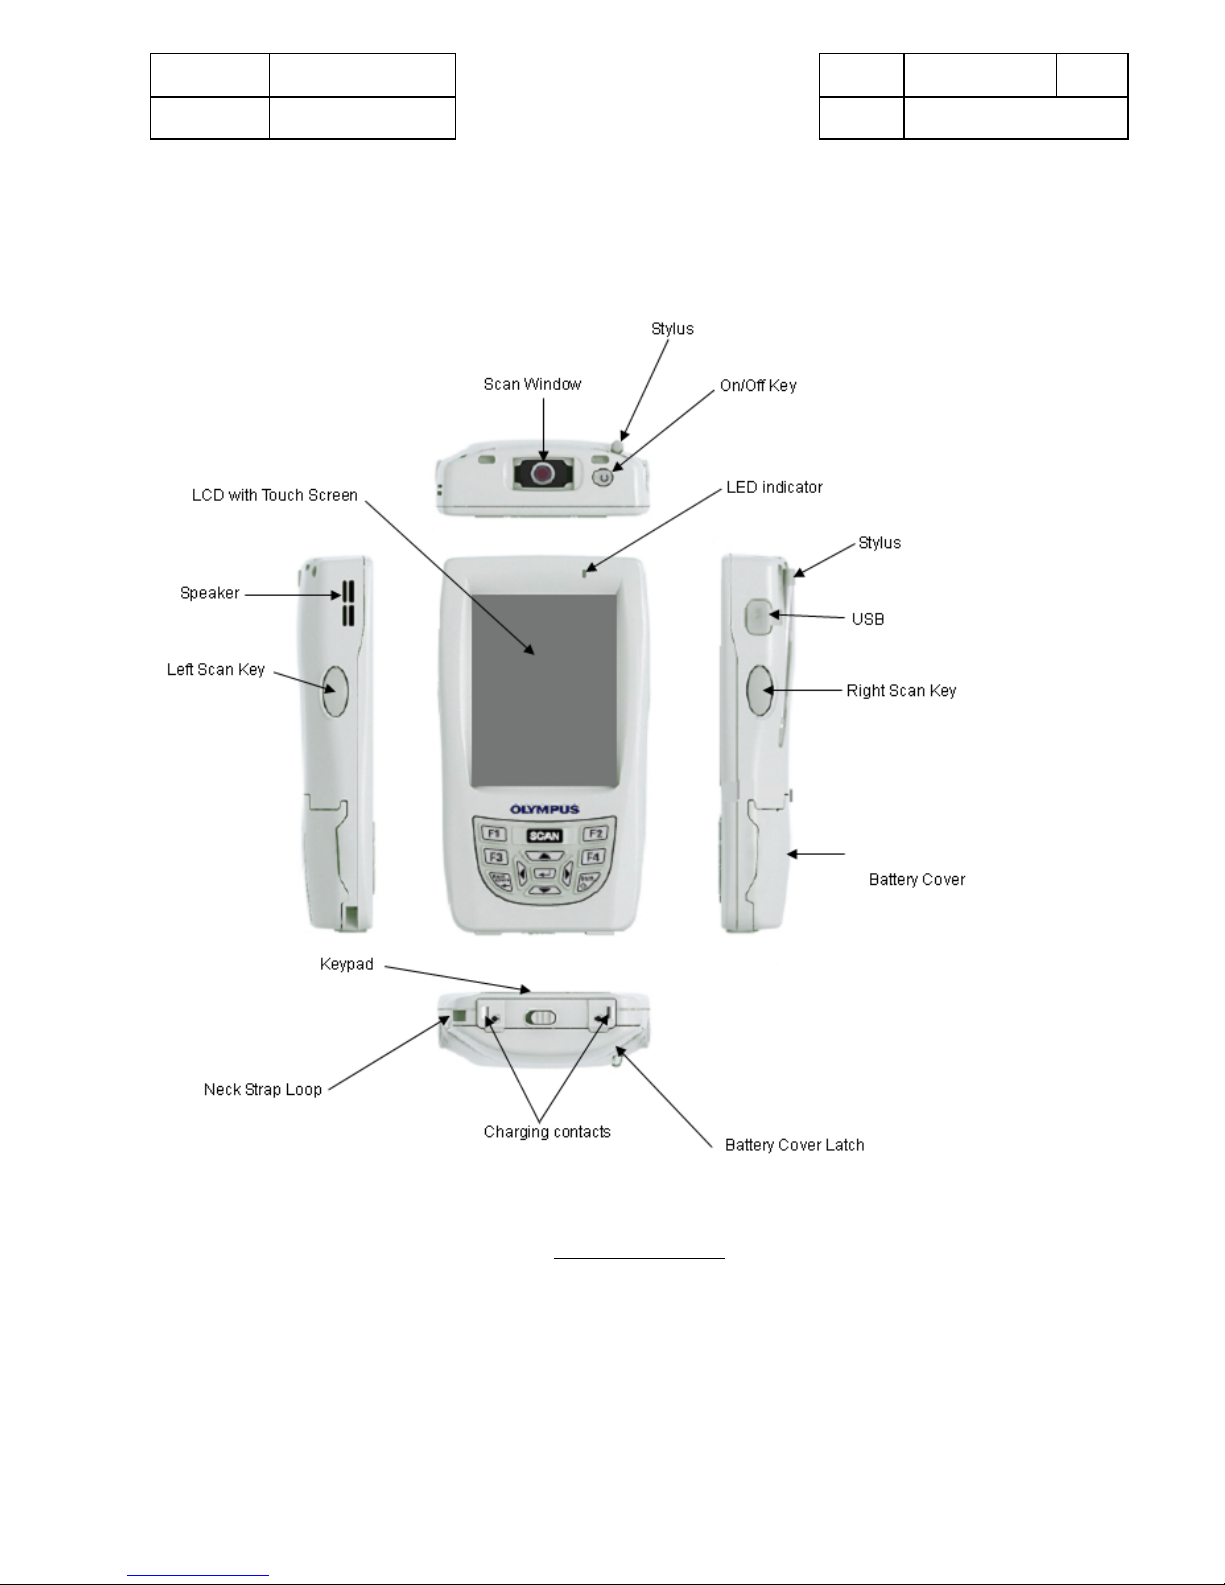
Hardware Overview
Figure 1: PDA Layout
Department Confidential
Drawing
number
P5
Model No.
MAJ-1901
Product Specification
Section 15. Instruction Manual
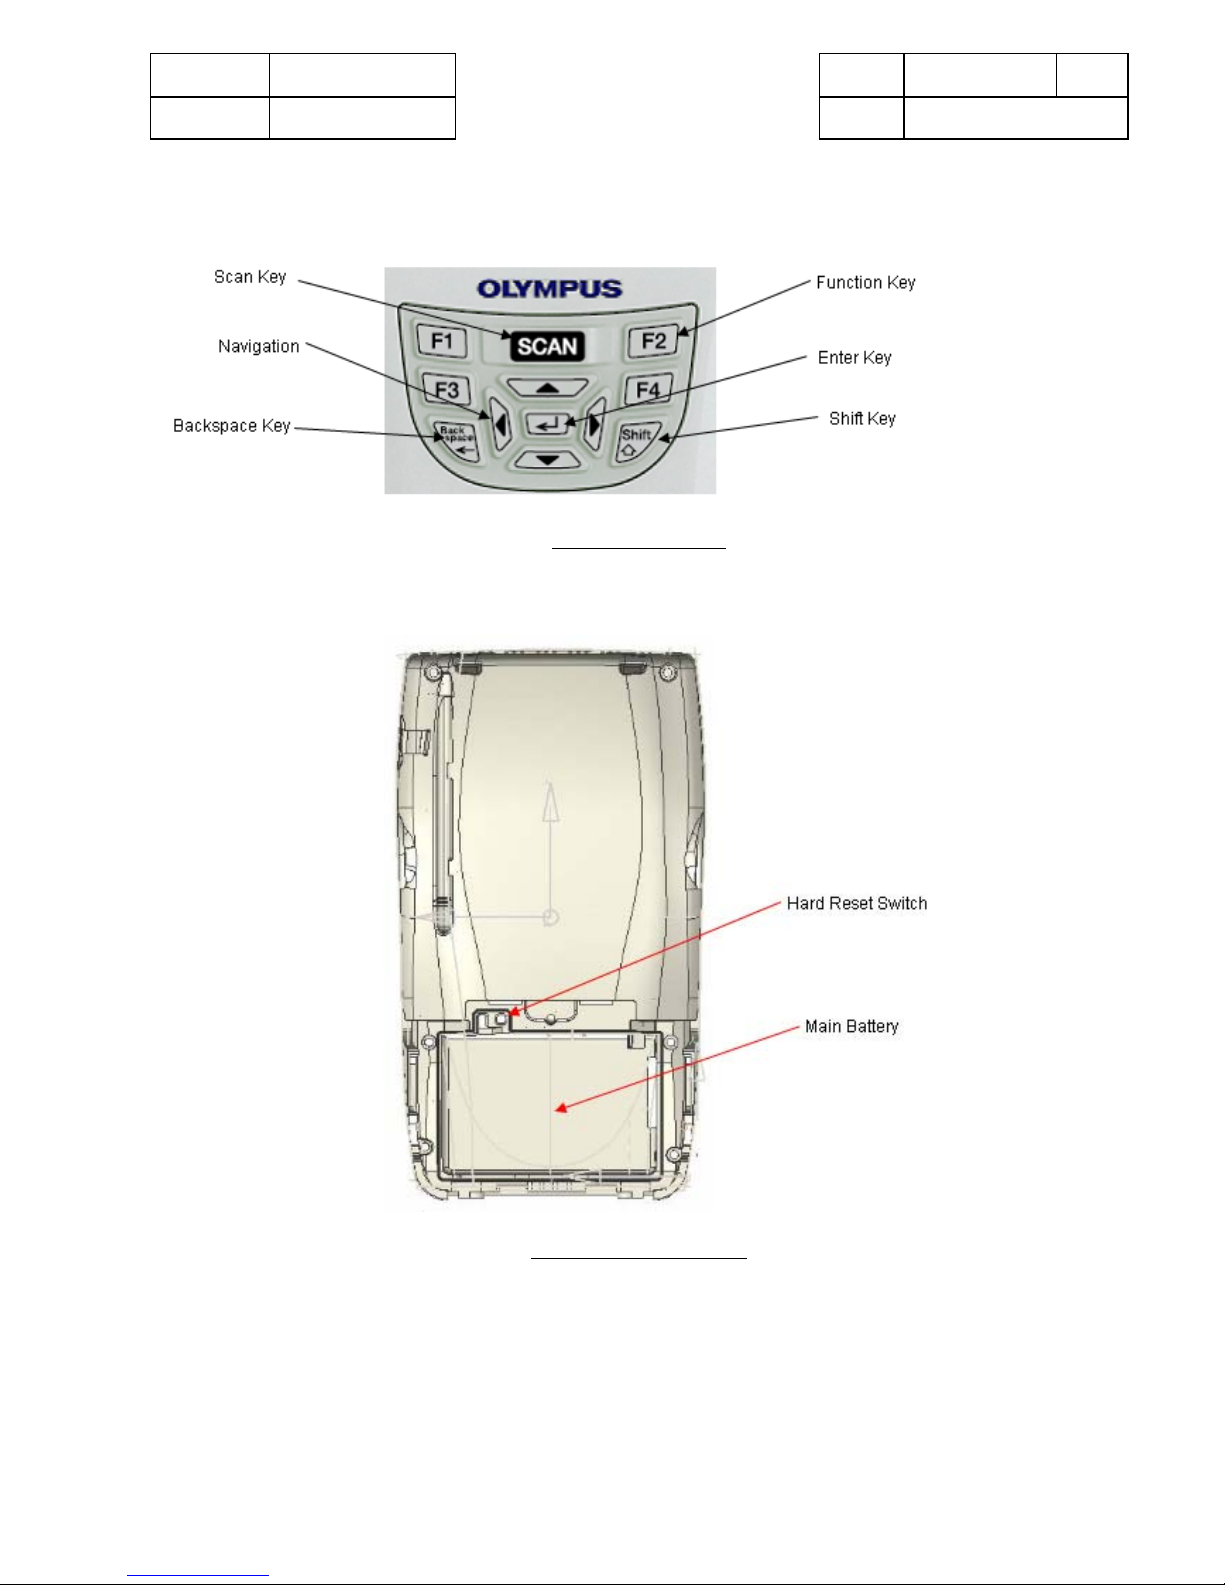
Figure 2: Keys Layout
Figure 3: PDA Back Layout
Department Confidential
Drawing
number
P6
Model No.
MAJ-1901
Product Specification
Section 15. Instruction Manual
Getting Started
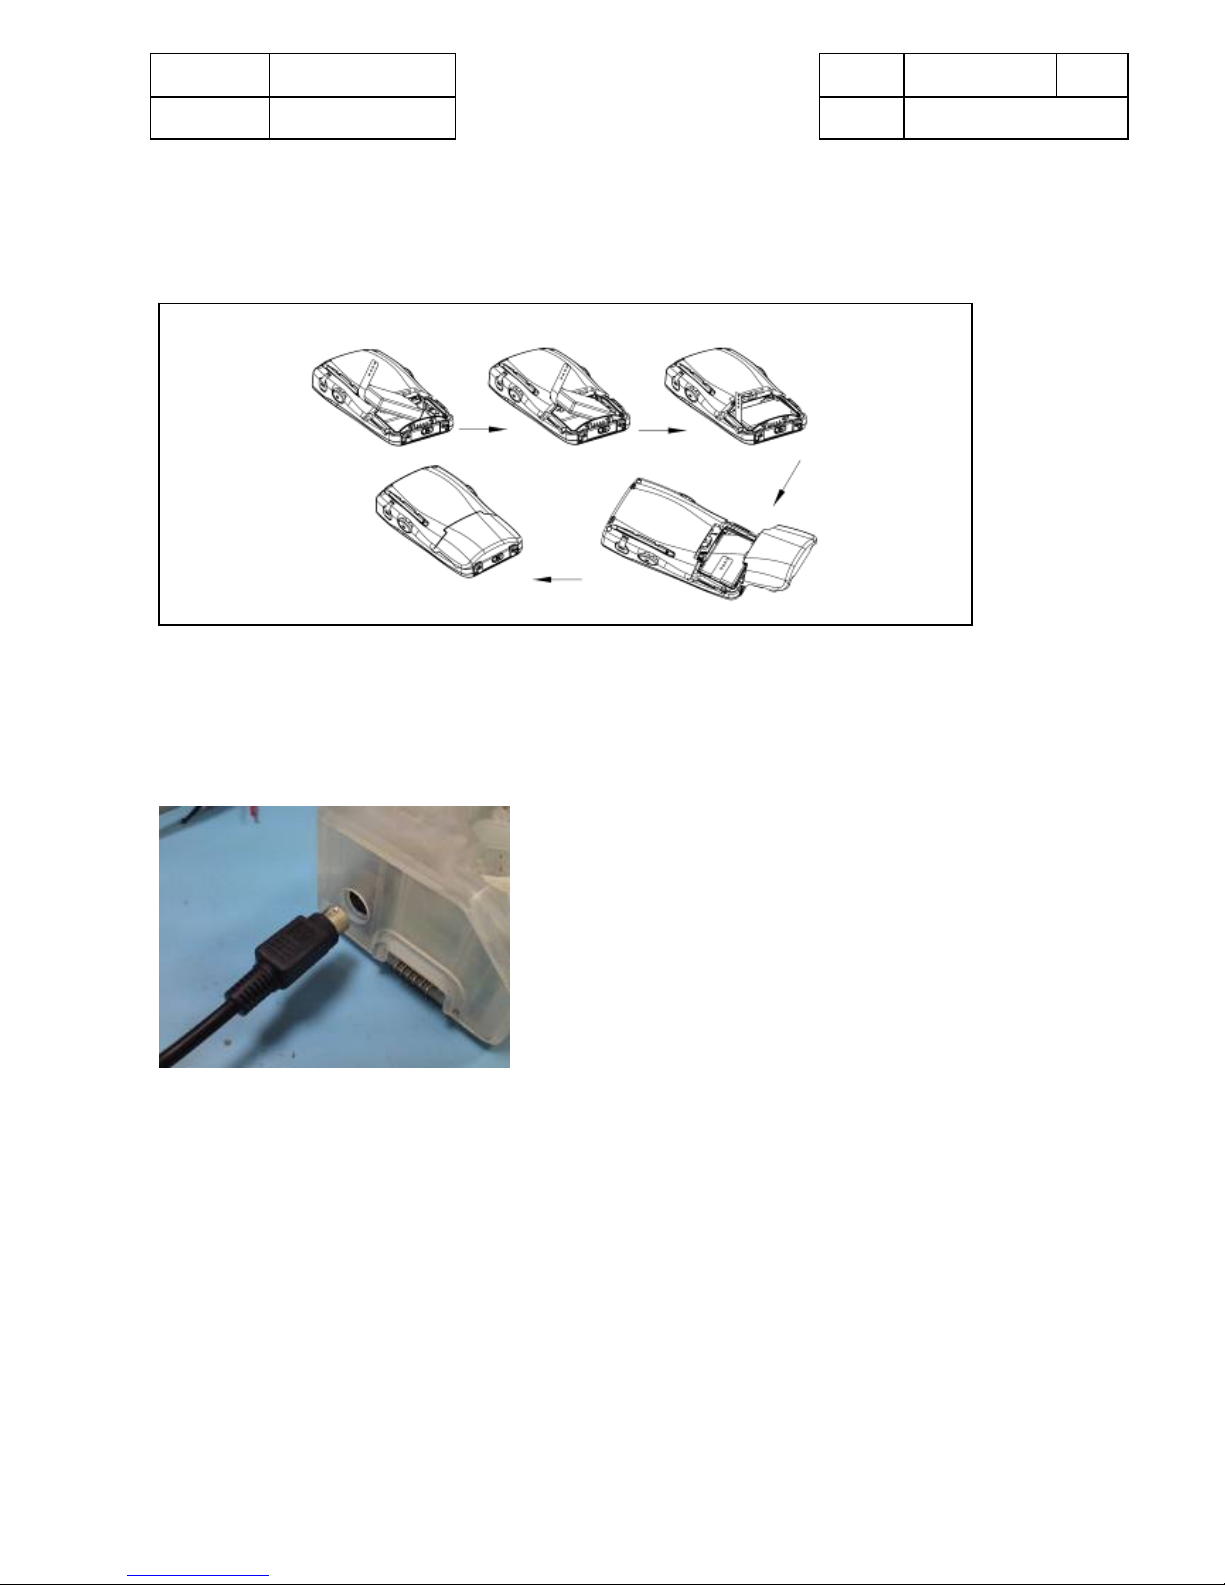
Installing/Replacing the Main Battery
The main battery is replaceable after removing the battery cover located at the back of the PDA.
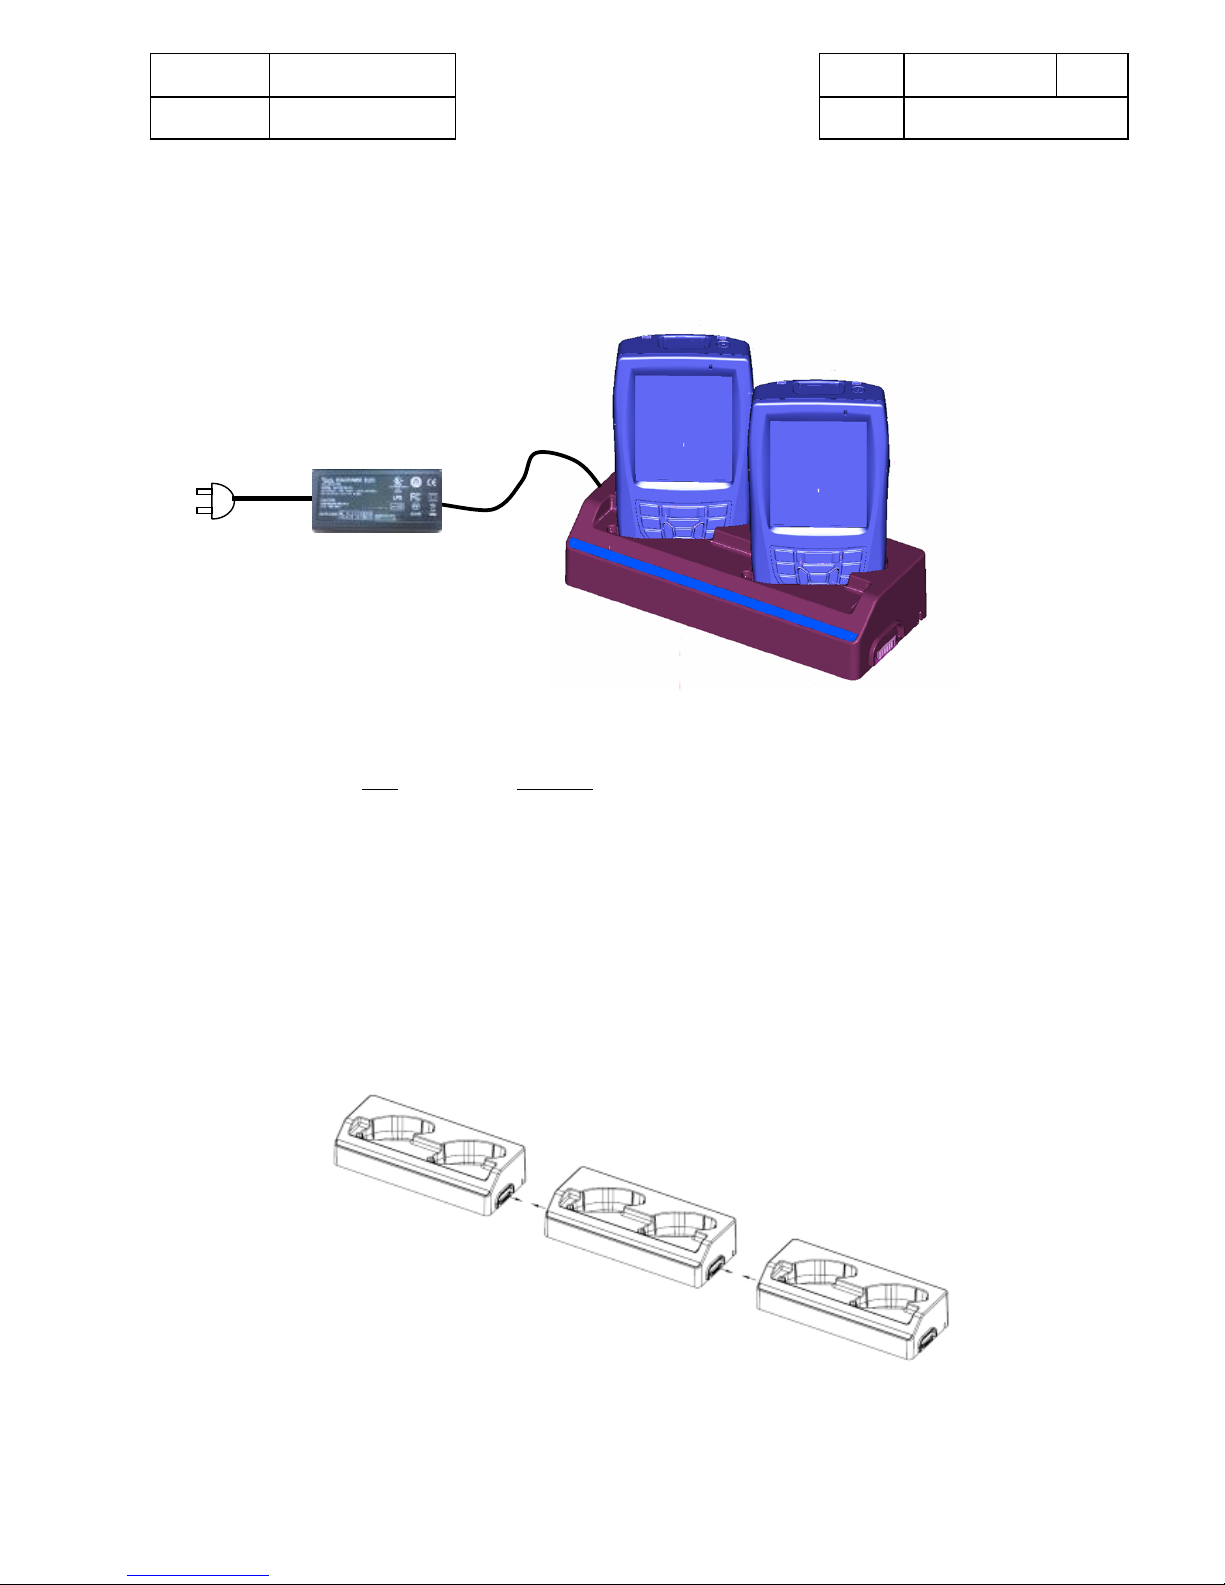
Charging the PDA (Main Battery)
1) Plug the power jack into cradle connector in the direction as shown.
Department Confidential
Drawing
number
P7
Model No.
MAJ-1901
Product Specification
Section 15. Instruction Manual
2) Switch on the power and ensure the Green LED on power adapter light up. Place the PDA in the cradle as shown, observes the amber LED at
the top right corner of PDA:
The LED charging indicator is shown below:
Mode
Amber LED
Charging Solid ON
Charge Full OFF
Charging Fault Blinking
3) Up to 3 cradles can be cascaded using the L-Bracket and sc rews provided to for m a single gang cr adle (refer to dia gram below), and it is ab le to
charge up to 6 PDA simultaneously. Note: If a fourth cradle is cascaded, the fourth cradle will not work at all.
 Loading...