

Page 1

DIGITAL CAMERA
BASIC MANUAL
ENGLISH
Page 2

● Thank you for purchasing an Olympus digital camera. Before you start to use your new
camera, please read these instructions carefully to enjoy optimum performance and a
longer service life.
● This manual explains shooting and playback basics. For details on functions, read the
advanced manual. Keep this manual in a safe place for future reference.
● We recommend that you take test shots to get accustomed to your camera before taking
important photographs.
● The screen and camera illustrations shown in this manual were produced during the
development stages and may differ from the actual product.
For customers in North and South America
For customers in USA
Declaration of Conformity
Model Number : E-300
Trade Name : OLYMPUS
En
Responsible Party :
Address : 2 Corporate Center Drive, PO Box 9058, Melville,
New York 11747-9058 U.S.A.
Telephone Number : 1-631-844-5000
Tested To Comply With FCC Standards
FOR HOME OR OFFICE USE
This device complies with Part 15 of the FCC rules. Operation is subject to the
following two conditions:
(1) This device may not cause harmful interference.
(2) This device must accept any interference received, including interference
that may cause undesired operation.
For customers in Canada
This Class B digital apparatus meets all requirements of the Canadian
Interference-Causing Equipment Regulations.
For customers in Europe
“CE” mark indicates that this product complies with the European requirements
for safety, health, environment and customer protection.
“CE” mark cameras are intended for sales in Europe.
Trademarks
• IBM is a registered trademark of International Business Machines Corporation.
• Microsoft and Windows are registered trademarks of Microsoft Corporation.
• Macintosh is a trademark of Apple Computer Inc.
• All other company and product names are registered trademarks and/or trademarks of their respective
owners.
• The standards for camera file systems referred to in this manual are the “Design Rule for Camera File
System/DCF” standards stipulated by the Japan Electronics and Information Technology Industries
Association (JEITA).
2
Page 3
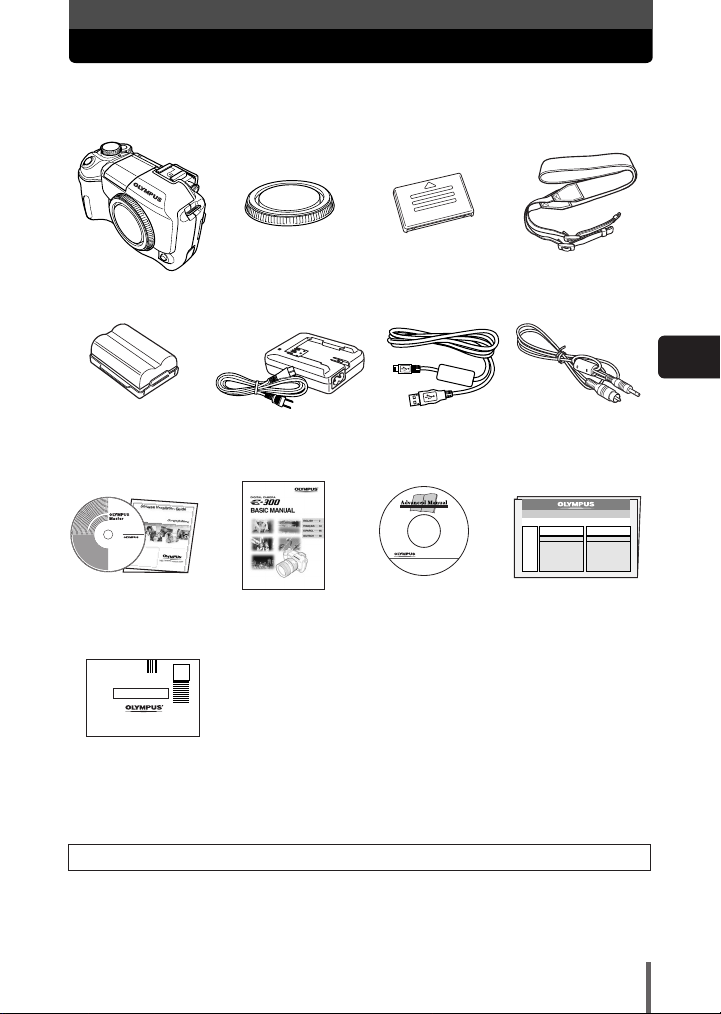
Unpacking the box contents
If any accessories are missing or damaged, contact the dealer from whom you
purchased the camera.
Digital camera Body cap Eyepiece cover Strap
En
Lithium ion battery
(BLM-1)
OLYMPUS Master
CD-ROM
Registration card
Registration card is not
provided in some areas.
Lithium ion battery
charger (BCM-2)
Basic manual Advanced manual
USB cable Video cable
(CD-ROM)
Warranty card
Contents vary depending on the area where you purchased this camera.
3
Page 4
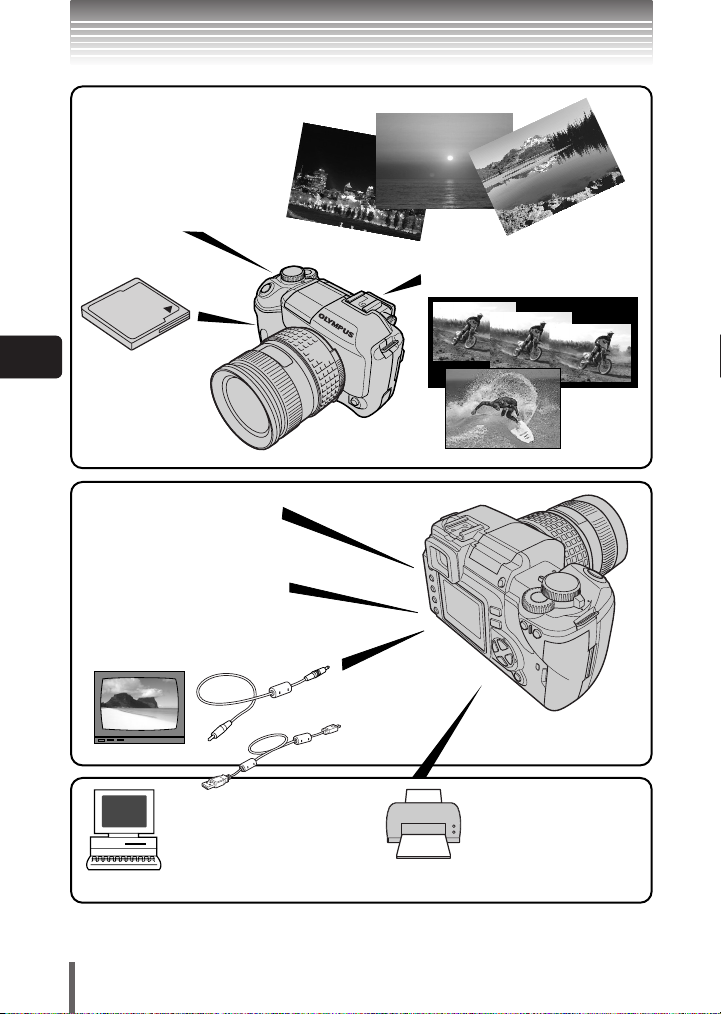
What you can do with this camera
You can choose from more than 10 different
types of scene shooting modes,
making it easy to set the
appropriate shooting mode for a
variety of shooting situations!
Once you’ve selected the
shooting mode, just press the
shutter button to take the
picture.
You can take sequential shots.
Pictures are stored
on the Compact
Flash.
Images recorded in RAW mode
can be converted to, and saved
in, other record modes.
You can view images using
slideshow and check shooting
information, etc.
Images can be played back
on a TV with the video cable.
When the camera is
connected to a PC or printer...
Once you’ve transferred images to
your PC, you can take advantage
of many more editing, viewing and
printing functions with the provided
OLYMPUS Master.
You can print out stored
pictures directly with a
PictBridge-compatible printer
without using your PC.
En
4
Page 5
Contents
This manual explains shooting preparation and easy techniques for shooting and
playback. This manual is only for quick reference and should be read first to learn
basic camera operation
Safety precautions. . . . . . . . . . . . . . . . . . . . . . . . . . . . . . . . . . . . . . . . . . 6
Attaching the strap . . . . . . . . . . . . . . . . . . . . . . . . . . . . . . . . . . . . . . . . 12
Charging the battery . . . . . . . . . . . . . . . . . . . . . . . . . . . . . . . . . . . . . . . 13
Loading the battery . . . . . . . . . . . . . . . . . . . . . . . . . . . . . . . . . . . . . . . . 15
Attaching a lens to the camera. . . . . . . . . . . . . . . . . . . . . . . . . . . . . . . 17
Usable lenses. . . . . . . . . . . . . . . . . . . . . . . . . . . . . . . . . . . . . . . . . . 17
Inserting a card . . . . . . . . . . . . . . . . . . . . . . . . . . . . . . . . . . . . . . . . . . . 20
Usable cards . . . . . . . . . . . . . . . . . . . . . . . . . . . . . . . . . . . . . . . . . . 20
Power on. . . . . . . . . . . . . . . . . . . . . . . . . . . . . . . . . . . . . . . . . . . . . . . . . 23
Adjusting the viewfinder’s diopter . . . . . . . . . . . . . . . . . . . . . . . . . . . . 25
Shooting . . . . . . . . . . . . . . . . . . . . . . . . . . . . . . . . . . . . . . . . . . . . . . . . . 26
Playback . . . . . . . . . . . . . . . . . . . . . . . . . . . . . . . . . . . . . . . . . . . . . . . . . 28
Power off. . . . . . . . . . . . . . . . . . . . . . . . . . . . . . . . . . . . . . . . . . . . . . . . . 29
What you can do with OLYMPUS Master software . . . . . . . . . . . . . . . 30
Information . . . . . . . . . . . . . . . . . . . . . . . . . . . . . . . . . . . . . . . . . . . . . . . 31
Specifications — Camera . . . . . . . . . . . . . . . . . . . . . . . . . . . . . . . . 31
Specifications — Provided accessories . . . . . . . . . . . . . . . . . . . . . . 33
For other functions not described here, read the
advanced manual.
En
The advanced manual explains the following:
Shooting methods except the P mode
Selecting the situation-related shooting modes
Manually adjusting focus, exposure, image and image quality to suit
your own tastes.
Methods of viewing and editing recorded images
Customizing functions for more efficient operation
Transferring recorded images to a computer
Printing recorded images
5
Page 6
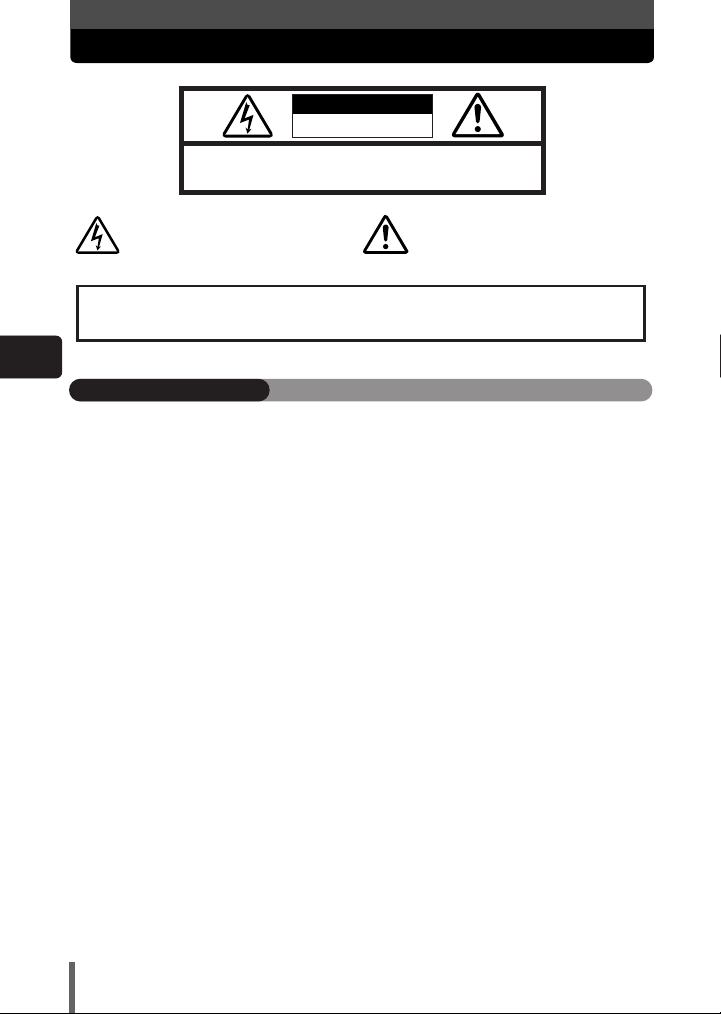
Safety precautions
CAUTION: TO REDUCE THE RISK OF ELECTRICAL SHOCK, DO NOT
REMOVE COVER (OR BACK). NO USER-SERVICEABLE PARTS INSIDE.
REFER SERVICING TO QUALIFIED OLYMPUS SERVICE PERSONNEL.
RISK OF ELECTRIC SHOCK
DO NOT OPEN
CAUTION
Lightning flash with an arrowhead,
enclosed in a triangle, alerts you to the
presence of uninsulated voltage points
inside the product which could cause a
serious electrical shock.
WARNING!
TO AVOID THE RISK OF FIRE OR ELECTRICAL SHOCK, NEVER EXPOSE THIS PRODUCT TO
WATER OR OPERATE IN A HIGH HUMIDITY ENVIRONMENT.
An exclamation mark enclosed in a triangle
alerts you to important operating and
maintenance instructions in the
documentation provided with the product.
En
General precautions
Read All Instructions — Before you use the product, read all operating instructions. For
more information on accessories such as the lithium ion battery, refer to the manuals
provided with those products.
Save These Instructions — Save all safety and operating instructions for future reference.
Heed Warnings — Read carefully and follow all warning labels on the product and those
described in the instructions.
Follow Instructions — Follow all instructions provided with this product.
Cleaning — Always unplug this product from the wall outlet before cleaning. Use only a damp
cloth for cleaning. Never use any type of liquid or aerosol cleaner, or any type of organic
solvent to clean this product.
Attachments — For your safety, and to avoid damaging the product, use only accessories
recommended by Olympus.
Water and Moisture — Never use this product around water (near a bathtub, kitchen sink,
laundry tub, wet basement, swimming pool or in the rain).
Location — To avoid damage to the product and prevent personal injury, never place this
product on an unstable stand, tripod, bracket, table or cart. Mount only on a stable tripod,
stand, or bracket. Follow the instructions that describe how to safely mount the product,
and use only the mounting devices recommended by the manufacturer.
Power Sources — Connect this product only to the power source described on the product
label. If you are not sure about the type of power supply in your home, consult your local
power company.
Refer to instruction pages for information on using the product with a battery.
Grounding, Polarization — If this product is used with a specified AC adapter, the adapter
may be equipped with a polarized alternating current line plug (a plug with one blade wider
than the other). This safety feature allows the plug to fit into the power outlet only one way.
If you cannot insert the plug into the wall outlet, pull it out, reverse it, and then reinsert it. If
the plug still fails to fit, contact an electrician and have the receptacle replaced.
Protecting the Power Cord — The power supply cord should be placed so it will not be
walked on. Never put a heavy object on the power cord or wrap it around the leg of a table
or chair. Keep the area around the power cord connection points, at the power outlet, and
at the product connection, free of all AC adapter or accessory power cords.
6
Page 7

Safety precautions
Lightning — If a lightning storm occurs while using a specified AC adapter, remove it from the
wall outlet immediately. To avoid damage from unexpected power surges, always unplug
the AC adapter from the power outlet and disconnect it from the camera when the camera
is not in use.
Overloading — Never overload wall outlets, extension cords, power strips, or other power
connection points with too many plugs.
Foreign Objects, Liquid Spillage — To avoid personal injury caused by fire or electrical
shock from contact with internal high voltage points, never insert a metal object into the
product. Avoid using the product where there is a danger of spillage.
Heat — Never use or store this product near any heat source such as a radiator, heat register,
stove, or any type of equipment or appliance that generates heat, including stereo
amplifiers.
Servicing — Refer all servicing to qualified personnel. Attempting to remove the covers or
disassemble the product, could expose you to dangerous high voltage points.
Damage Requiring Service — If you notice any of the conditions described below while
using a specified AC adapter, unplug it from the wall outlet and refer servicing to qualified
service personnel:
a) Liquid has been spilled onto the product or some other object has fallen into the product.
b) The product has been exposed to water.
c) The product does not operate normally despite following operating instructions. Adjust
only the controls described in the operating instructions as improper adjustment of other
controls could damage the product and require extensive repair work by a qualified
technician.
d) The product has been dropped or damaged in any way.
e) The product exhibits a distinct change in performance.
Replacement Parts — When replacement parts are required, make sure that the authorized
service center uses only parts with the same characteristics as the originals, as
recommended by the manufacturer. Unauthorized substitution of parts could result in fire,
electrical shock, or create other hazards.
Safety Check — Upon completion of servicing or repairs, ask the service technician to
perform safety checks to determine that the product is in good working order.
En
DANGER
WARNING
CAUTION
If the product is used without observing the information given
under this symbol, serious injury or death may result.
If the product is used without observing the information given
under this symbol, injury or death may result.
If the product is used without observing the information given
under this symbol, minor personal injury, damage to the
equipment, or the loss of valuable data may result.
7
Page 8

Safety precautions
Handling the camera
WARNING
Do not use the camera in areas exposed to flammable or explosive gases.
● A fire or explosion may result.
Do not use the flash on people (infants, small children, etc.) at close range.
● When you fire the flash, you must be at least 1 m (3 ft) away from the faces of your
subjects. Firing the flash too close to the subject’s eyes could cause a momentary loss of
vision.
Keep young children and infants away from the camera.
● If not, the following dangerous situations may occur:
– Becoming entangled in the camera strap or power cords, causing strangulation. If this
happens, follow the doctor’s instructions.
– Accidentally swallowing the battery or other small parts.
– Accidentally firing the flash into their own eyes or those of another child.
En
– Accidentally being injured by the moving parts of the camera.
Do not use or store the camera in dusty or humid places.
● Using or storing the camera in dusty or humid places may result in a fire or electric
shock.
Do not cover the flash with a hand while firing.
● Do not cover the flash or touch it after it has just been fired sequentially. It may be hot
and cause minor burns.
Do not take apart or modify the camera.
● Never attempt to disassemble the camera. The internal circuits contain high voltage
points which could cause serious burns or electrical shock.
Do not let water or foreign objects inside the camera.
● A fire or electric shock may result. If the camera is accidentally dropped in water, or if
liquid is spilled into the camera, stop using it, allow it to dry, and then remove the battery.
Contact the nearest authorized Olympus service center.
Do not touch the battery or the battery charger while battery charging is in progress.
Wait until charging is complete and the battery has cooled.
● The battery and battery charger become hot while charging. The specified AC adapter
also becomes hot when used for a long time. At these times, they may cause minor
burns.
Do not use a non-specified lithium-ion battery and/or charger.
● Use of a non-designated lithium-ion battery and/or re-charger may lead to camera or
battery failure as well as other unexpected accidents. Any accidents resulting from use of
non-designated equipment will not be compensated.
CAUTION
Stop using the camera immediately if you notice any unusual odors, noise, or smoke
around it.
● If you notice any unusual odors, noise, or smoke around the camera during operation,
switch it off immediately —and disconnect the specified AC adapter (if attached). Allow
the camera to sit idle for a few minutes to cool. Take the camera outdoors, away from
flammable objects, and carefully remove the battery. Never remove the battery with bare
hands. Contact the nearest Olympus service center immediately.
Do not use the camera with wet hands.
● Damage or electric shock may result. Also, do not connect or disconnect the power plug
with wet hands.
8
Page 9

Safety precautions
Be careful with the strap when you carry the camera
● It could easily catch on stray objects —and cause serious damage.
Do not leave the camera in areas subject to extremely high temperature.
● Doing so may cause parts to deteriorate and, in some circumstances, cause the camera
to catch fire.
Use only the AC adapter specified by Olympus.
● Using a different AC adapter may damage the camera or power source, or result in
accidents or fire. Ensure the adapter used is designed for your region or country. For
more information, contact the nearest Olympus service center or the store of purchase.
Olympus makes no representations or warranties regarding any damages caused by AC
adapters not recommended by Olympus.
Handle the camera with care to avoid getting a low-temperature burn.
● When the camera contains metal parts, overheating can result in a low-temperature
burn. Pay attention to the following:
– When used for a long period, the camera will get hot. If you hold on to the camera in
this state, a low-temperature burn may be caused.
– In places subject to extremely cold temperatures, the temperature of the camera’s
body may be lower than the environmental temperature. If possible, wear gloves when
handling the camera in cold temperatures.
Do not damage the AC adapter’s cable.
● Do not pull on the AC adapter’s cable or add another cable to it. Be sure to connect or
disconnect the AC adapter’s cable while holding the power plug. If the following cases
occur, stop using and contact an Olympus dealer or customer support center.
– The power plug or cable produces heat, burning smell, or smoke.
– The power plug or cable is cracked or broken. The contact is bad on the power plug.
Battery handling precautions
Follow these important guidelines to prevent the battery from leaking, overheating,
burning, exploding, or causing electrical shocks or burns.
DANGER
Never heat or incinerate the battery.
Do not connect the (+) and (-) terminals to each other using metal objects.
Do not carry or store the battery where it may come into contact with metal objects
such as jewelry, pins, fasteners, etc.
Never store the battery where it will be exposed to direct sunlight, or subjected to
high temperatures in a hot vehicle, near a heat source, etc.
Never attempt to disassemble the battery or modify it in any way, such as by
soldering.
● Doing so may break the terminals or cause battery fluid to splash, resulting in potential
fire, explosion, battery leakage, overheating or other damage.
If battery fluid gets in your eyes, loss of eyesight may result.
● If battery fluid gets in your eyes, do not rub them. Flush them immediately with clear, cold
running water and seek medical attention straight away.
En
9
Page 10

Safety precautions
WARNING
Keep the battery dry at all times. Never allow it to come into contact with fresh or
salt water.
Do not touch or hold the battery with wet hands.
If the rechargeable battery does not recharge within the specified time, stop
charging it and do not use it.
● If you do not, fire, explosion, ignition or overheating may result.
Do not use the battery if it is cracked or broken.
● Doing so may cause explosion or overheating.
Never subject the battery to strong shocks or continuous vibration.
● Doing so may cause explosion or overheating.
Never attempt to modify the battery compartment on the camera, never insert
anything (other than the specified battery) into the compartment.
If the battery leaks, becomes discolored or deformed, or appears abnormal in any
way during operation, stop using the camera immediately.
● Contact your dealer or an authorized Olympus service center. Continued use may result
En
in fire or electric shock.
If the battery leaks fluid onto your clothing or skin, remove the clothing and flush the
affected area with clean, running cold water immediately. If the fluid burns your skin,
seek medical attention immediately.
CAUTION
Do not remove the battery from the camera immediately after operating the camera
on battery power for a long time.
● Doing so may cause burns.
Remove the battery from the camera if it is not going to be used for a long time.
● Otherwise, battery leakage or overheating may cause a fire or injury.
Charger handling precautions
DANGER
Do not put the charger in water or use it when wet. Do not touch or hold it with wet
hands.
● Doing so may cause malfunction or electric shock.
Do not use the charger if it is covered with cloth such as a blanket.
● Do not use the charger if something is covering it (such as a blanket). Heat may be kept
in, causing the charger to deform. This may cause fire, ignition or overheating.
Do not disassemble or modify the charger.
● This may cause electric shock or injury.
Use an charger designed to operate on the AC voltage in the area where you are
using the camera.
● Otherwise, fire, explosion, smoke, overheat, electric shock or burns may result.
10
Page 11

Safety precautions
WARNING
Do not damage the charger’s cable.
● Do not pull on the charger’s cable or add another cable to it. Be sure to connect or
disconnect the charger’s cable while holding the power plug. If the following cases occur,
stop using and contact an Olympus dealer or authorized customer support center.
– The power plug or cable produces heat, burning smell, or smoke.
– The power plug or cable is cracked or broken. The contact is bad on the power plug.
CAUTION
Unplug the charger’s cable from the outlet before cleaning the camera.
● Otherwise, electric shock or injury may result.
FCC Notice
● Radio and Television Interference
Change or modifications not expressly approved by the manufacturer may void the user’s
authority to operate this equipment. This equipment has been tested and found to comply with
the limits for a Class B digital device, pursuant to Part 15 of the FCC Rules. These limits are
designed to provide reasonable protection against harmful interference in a residential
installation.
This equipment generates, uses, and can radiate radio frequency energy and, if not installed
and used in accordance with the instructions, may cause harmful interference to radio
communications.
However, there is no guarantee that interference will not occur in a particular installation. If
this equipment does cause harmful interference to radio or television reception, which can be
determined by turning the equipment off and on, the user is encouraged to try to correct the
interference by one or more of the following measures:
– Adjust or relocate the receiving antenna.
– Increase the distance between the camera and receiver.
– Connect the equipment to an outlet on a circuit different from that to which the receiver is
connected.
– Consult your dealer or an experienced radio/TV technician for help.
Only the OLYMPUS-supplied USB cables should be used to connect the camera to
USB-enabled personal computers (PC).
Any unauthorized changes or modifications to this equipment would void the user's authority
to operate.
En
11
Page 12

Attaching the strap
Thread one end of the strap through
1
the strap eyelet on the camera.
Ring
Thread the end of the strap through
2
the ring, then thread it through the
stopper as indicated by the arrows.
En
Thread the strap back through the
3
other hole of the stopper.
Pull the other side of the strap tight,
4
making sure that it is fastened
securely.
Repeat steps 1 - 4 to attach the other
5
end of the strap to the other eyelet.
Note
● Be careful with the strap when you carry the camera, since it can easily
catch on stray objects, causing injury or damage.
● Attach the strap correctly as shown above so that the camera does not fall
off. If the strap is attached incorrectly and the camera falls off, Olympus is
not responsible for any damage.
Stopper
Strap eyelet
12
Page 13

Charging the battery
This camera uses an Olympus lithium ion battery (BLM-1). Never use any other
type of battery.
The battery is not fully charged when purchased. Before use, be sure to charge
the battery with the specified provided charger (BCM-2).
Note
Use only the specified charger (BCM-1 or BCM-2). For details, refer to the
charger's manual.
Connect the AC cable.
1
Charger
AC wall outlet
AC cable
Attach the battery to the charger.
2
● Charging starts. The battery will be fully recharged in about 5 hours.
Lithium ion
Charging indicator
battery
En
Align the battery with the arrow.
Remove the protection cap from
the battery.
13
Page 14

Charging the battery
Charging indicator
Charging indicator status Charging status
Red Charging
Green Charging completed
Blinking red Charging error (time-out, temperature error)
Note
● Power consumption varies greatly depending on usage and operating
conditions.
● The charger can be operated within the range of AC 100 V to AC 240 V
En
(50/60 Hz). When using the charger abroad, you may need a plug adapter to
convert the plug to fit the shape of the AC wall outlet.
For details, ask your local electrical dealer or travel agent.
Using a converter for traveling (commercially available) may cause a
malfunction to the charger.
● Be careful not to lose the battery protection cap, since it is needed when
storing the battery.
● If the charging indicator blinks in red, unplug the AC cable and contact
Olympus customer support center.
● Before charging the battery, be sure to read “Safety precautions” (~P. 6)
14
Page 15

Loading the battery
Make sure that the camera's power
1
switch is set to OFF.
Power switch
Slide the battery compartment lock to
2
and open the battery compartment
cover.
Battery compartment cover
Load the battery as shown in the
3
illustration.
Direction indicating mark
Unloading the battery
● Make sure the power switch is set to
OFF and the card access lamp is not
blinking.
● Tilt the camera while holding in the
battery. Carefully remove the battery
without dropping it.
Battery compartment lock
En
15
Page 16

Loading the battery
Slide the battery compartment lock to
4
.
Battery compartment cover
When using the optional power battery
holder, remove the battery compartment
cover by sliding the detaching pin in the
En
direction of the arrow.
Other power sources
AC Adapter
T The optional AC Adapter (AC-1) lets you use the camera without worrying
about remaining battery power. The AC adapter is useful for time-consuming
tasks such as shooting for a long period or downloading images to a
personal computer.
Power Battery Holder
T The optional Power Battery Holder allows you to use the camera for a long
period.
For details about attaching the battery holder to the camera, refer to the
power battery holder manual.
Battery compartment cover
detaching pin
16
Page 17

Attaching a lens to the camera
Usable lenses
Select the lens that you want to shoot with.
Use a specified Four Thirds lens (Four Thirds mount*). When a non-specified lens
is used, AF (auto focus) and light metering will not function correctly. In some
cases, other functions may not work either.
*Four Thirds mount:
Standard developed by Olympus. Lens mount of Four Thirds system. Developed
from the ground up, these all-new interchangeable lenses are based on optic
engineering exclusively for digital cameras.
Four Thirds system interchangeable lens
Designed to withstand severe professional use. The Four Thirds system makes it
possible for a fast lens to be compact and lightweight as well.
The Four Thirds system interchangeable lens lineup includes the following
products:
ZUIKO DIGITAL 14mm-54mm f2.8-3.5:
Standard zoom lens equivalent to 28-108 mm on a 35 mm lens
ZUIKO DIGITAL ED 50mm-200mm f2.8-3.5:
Super telephoto zoom lens equivalent to 100-400 mm on a 35 mm lens
ZUIKO DIGITAL ED 40mm-150mm f3.5-4.5:
Telephoto zoom lens equivalent to 80-300 mm on a 35 mm lens
Note
● When you attach or remove the body cap and lens from the camera, keep
the lens mount on the camera pointed downward. This helps prevent dust
and other foreign matter from getting inside the camera.
● Do not remove the body cap or attach the lens in dusty places.
● Do not point the lens attached to the camera toward the sun. This may
cause the camera to malfunction or even ignite due to the magnifying effect
of sunlight focusing through the lens.
● Be careful not to lose the body cap and rear cap.
● Attach the body cap to the camera to prevent dust from getting inside when
no lens is attached.
En
17
Page 18

Attaching a lens to the camera
Make sure the power switch is set to
1
OFF.
Remove the body cap from the
2
camera.
En
Remove the rear cap from the lens.
3
Power switch
Body cap
18
Rear cap
Page 19

Align the lens attachment mark (red)
4
on the camera with the alignment
mark (red) on the lens, then insert the
lens into the camera’s body. Rotate
the lens clockwise until you hear it
click.
Alignment mark (Red)
Remove the lens cap.
5
Removing the lens from the camera
Make sure the power switch is set to
1
OFF.
While pressing the lens release
2
button, remove the lens from the
camera by rotating it
counterclockwise.
Attaching a lens to the camera
Lens attachment mark (Red)
En
Lens cap
Lens release button
19
Page 20

Inserting a card
Usable cards
“Card” in this manual refers to a recording medium. This camera can use a
Compact Flash or Microdrive (optional). An xD-Picture Card can also be used with
a card adapter (optional).
Compact Flash
A Compact Flash is a large-capacity
solid state flash memory card. You can
use commercially available cards.
En
Precautions when using a Microdrive
A Microdrive is a medium that uses a compact hard disk drive. Because the
disk drive rotates, a Microdrive is not as resistant to vibration or impact as
other cards. Special care is needed when using a Microdrive (especially during
recording and playback) to make sure the camera is not subjected to shock or
vibrations. Be sure to read the following precautions before using a Microdrive.
Also, refer to the manuals provided with your Microdrive.
• Be very careful when putting the camera down during recording. Place it
gently on a firm surface.
• Be careful not to hit the camera against anything when carrying it by the
strap.
• Do not use the camera in places subject to vibrations or excessive shock,
such as at a construction site or in a car while driving along a bumpy road.
• Do not take a Microdrive close to areas where it may be exposed to strong
magnetism.
• Microdrives confirmed for use with this camera (as of October, 2004):
Hitachi
DSCM-1100 (1 GB) HMS360404D5CF00 (4GB)
DSCM-10512 (512 MB) HMS360402D5CF00 (2GB)
DSCM-10340 (340 MB)
Microdrive
A Microdrive is a medium that uses a
large-capacity compact hard disk drive.
You can use a Microdrive that supports
CF+Type II (Compact Flash extension
standard).
20
Page 21

Open the card cover.
1
Inserting a card
Card cover
Insert the card fully with the ßmark
2
side facing toward the monitor side
(the camera’s rear side) as illustrated.
● If you cannot see the ßmark on the card,
make sure the card is facing the correct way.
Close the card cover.
3
En
ß Mark
Eject button
21
Page 22

Inserting a card
Removing the card
Make sure that the card access lamp
1
is not illuminated.
Open the card cover.
2
En
Press the eject button gently and let it
3
pop out, then press it again all the
way in.The card will be ejected a short
way so that you can pull it out.
● If you press the eject button too hard, the
card may jump out of the camera.
● Pull out the card.
Close the card cover.
4
Card access lamp
Eject button
22
Page 23

Power on
SSWF indicator
Set the power switch to ON.
● To turn off the power, set the
power switch to
OFF.
Set the mode dial to P.
–.– – – –.– .–
P
ESP
ISO
AUTO
FP
WB
S-AF
FOCUS
AF ILLUMINATOR
DRIVE
HQ
24483264
Monitor
When the camera is turned on, the control
AUTO
AUTO
panel screen is displayed on the monitor.
~ “Advanced manual”
sRGB
Battery check
When the camera is turned on or when remaining battery power is low, the battery check
mark varies.
BATTERY EMPTY
Lights (green)
Remaining power
level: High
*1
Lights*2(red)
Remaining power level: Low.
Charge the battery.
Remaining power level:
Exhausted. Charge the battery.
*1 Your digital camera's power consumption varies greatly depending on usage and
operating conditions. Under some operating conditions, the camera may turn off without
warning when the battery power is low. If this occurs, re-charge the battery.
*2 Blinks in the viewfinder.
is displayed.
En
Dust reduction function operation
The dust reduction function is automatically activated when the camera is turned
on. Ultrasonic vibrations are used to remove dust and dirt from the CCD surface.
The SSWF indicator blinks while dust reduction is working.
Date/time setting
Images will be stored with date/time data. The date/time information is used as
the basis for assigning file numbers to recorded images. ~ “Advanced manual”
23
Page 24

Power on
Holding the camera
Hold the camera's grip with your right
1
hand and keep your elbow at your
side.
Rest your elbow gently against your
2
body and hold the lens section firmly
from underneath with your left hand.
Take a picture.
3
● Putting one leg a little forward helps stabilize
En
your upper body.
● Keep your fingers and the strap
away from the front of the lens.
Vertical grip
Note
Bad technique
Lens
24
Page 25

Adjusting the viewfinder’s diopter
While looking though the viewfinder, rotate
the diopter adjustment dial little by little.
When you can see the AF frame clearly,
adjustment is complete.
Diopter adjustment dial
Eyecup
You can remove the eyecup attached to the
viewfinder’s eyepiece and replace it with a
different one.
To attach the provided eyepiece cover,
remove the eyecup from the camera as
illustrated.
AF frame
Viewfinder
En
25
Page 26

Shooting
–.– – ––.– .–
ESP
P
AUTO
FP
FOCUS
AUTO
AUTO
ISO
DRIVE
S-AF
AF ILLUMINATOR
HQ
24483264
WB
sRGB
Place the AF frame on the subject
1
while viewing through the viewfinder.
AF frame
Viewfinder
En
Adjust the focus.
2
Press the shutter button gently (halfway).
● The focus is locked. The AF confirmation
mark and the AF focusing frame light up in
the viewfinder.
● The shutter speed and aperture value that
have been set automatically by the camera
are displayed.
● The control panel screen is not displayed
when the shutter button is pressed.
Release the shutter.
3
Press the shutter button all the way (fully).
● When a picture is taken, a shutter sound is
output.
● The card access lamp blinks and the camera
starts recording the picture.
● After 1 minute without any operation being
performed, the monitor turns off and the
camera stops operating. To wake up the
camera, simply press any button, e.g. the
shutter button. After about 1 hour without
being used, the camera will turn off
automatically. Turn on the camera again.
Shutter button
Card access
lamp
Halfway down
AF confirmation mark
All the way down
Memory gauge
26
Page 27

Shooting
Each time you press the shutter button, the memory gauge lights on the
control panel screen, indicating that the picture you have just taken is being
recorded onto the card. The memory gauge changes according to how many
pictures the camera is processing.
Shoot ShootShoot
Wait
Before taking
any pictures
(Off)
After taking one
picture
(Lit)
After taking
several pictures
(Lit)
Maximum reached
(All lit)
Wait until the indicator
turns off again before
taking more pictures.
Note
● Press the shutter button gently. If it is pressed hard, the camera may move and pictures
may come out blurred.
● Never remove the battery, card or AC adapter while the card access lamp mark is
blinking. Doing so could destroy stored pictures and prevent storage of pictures you
have just taken.
● When taking pictures against strong backlight, the area of the picture in shadow may
appear colored.
En
27
Page 28

Playback
SQ
’04. 01. 01 00:00
100–0015 15
MENU
Press the (playback mode) button.
1
● The monitor turns off after about 1 minute if
no operations are performed. After about 1
hour without being used, the camera will turn
off automatically. Turn on the camera again.
The last recorded image appears.
En
Use the arrow pad to select images you want to view.
2
Displays the frame that is stored 10 frames back.
Displays the previous
frame.
Displays the frame that is stored 10 frames ahead.
● Pressing the shutter button halfway resumes the shooting mode.
button
Arrow pad
Displays the next
frame.
28
Page 29

Power off
Set the power switch to OFF.
En
29
Page 30

What you can do with OLYMPUS Master software
December
Sun
Man
Tue
Wed
Thu
Fri
Sat
The provided software CD includes OLYMPUS Master
software for viewing and editing images. Once installed, you
can take advantage of viewing and editing your images as
shown below. For information on how to use OLYMPUS
Master software, see Help after installation.
Editing images
You can rotate, trim, or compensate for
the image distortion.
A variety of printing
formats
En
Grouping and
organizing images
You can arrange images
by grouping or by creating
photo albums.
You can create a
calendar or postcard with
the recorded pictures.
Transferring images
from a computer to the
camera
Images and movies
selected with OLYMPUS
Master software can be
transferred to the camera.
Transferring images from the camera to your
computer
Albums created on the camera can be transferred
to your computer and played back with
Transferring images from the
camera or removable media to
your computer
OLYMPUS Master*.
* Install OLYMPUS Master on your computer from the provided CD-ROM.
OLYMPUS Master allows you to register as the camera’s owner. Doing so will
enable you to receive information on software or firmware upgrades from
Olympus.
30
Page 31

Information
Specifications —Camera
Product type
Product type : Single-lens reflex digital camera with interchangeable lens
system
Lens : Zuiko Digital, Four Thirds System Lens
Lens mount : Four Thirds Mount
Equivalent focal length
on a 35 mm film camera : Approx. twice the focal length of the lens
Image pickup element
Product type : 4/3 type full frame transfer primary color CCD
Total no. of pixels : Approx. 8,880,000 pixels
No. of effective pixels : Approx. 8,000,000 pixels
Screen size : 17.3 mm (H) x 13.0 mm (V) (0.9" x 0.5")
Aspect ratio : 1.33 (4 : 3)
Viewfinder
Product type : Eye-level single-lens reflex viewfinder
Field of view : Approx. 94% (for field of view on recorded images)
Viewfinder magnification : 1.0x (–1 m–1, 50mm lens, infinity)
Eye point : 20 mm (0.8") (–1 m–1)
Diopter adjustment
range : –3.0 - +1.0 m–1
Optical path fraction : Quick return half mirror
Depth of field : To be checked with the OK button (when PREVIEW registered)
Focusing screen : Fixed
Eyecup : Interchangeable
Monitor
Product type : 1.8" TFT color LCD
Total no. of pixels : Approx. 134,000 pixels
En
Shutter
Product type : Computerized focal-plane shutter
Shutter : 1/4000 - 30 sec. (1/3, 1/2, or 1 EV step)
Manual mode: Bulb (Limit: 8 min.)
Autofocus
Product type : TTL phase-contrast detection system
Focusing point : 3-point multiple AF (left, center, right)
AF luminance range : EV 0 - EV 19
Selection of
focusing point : Auto, Optional
AF illuminator : The built-in flash provides light.
31
Page 32

Information
Exposure control
Metering system : TTL full-aperture metering system
Metering range : (1) EV 2 - 20 (Digital ESP metering, Center weighted average
Exposure mode : (1) P: Program AE (Program shift can be performed)
ISO sensitivity : 100 - 400 (High ISO values (800 and 1600) are available)
Exposure compensation : Exposure can be adjusted in 1/3, 1/2 or 1 EV step within a range
En
White balance
Product type : CCD
Mode setting : Auto, Preset WB (8 settings), customized WB (4 settings can be
Recording
Memory : CF card (Compatible with Type I and II)
Recording system : Digital recording, TIFF (non-compression), JPEG (in accordance
Applicable standards : Exif 2.2, Digital Print Order Format (DPOF), PRINT Image
(1) Digital ESP metering
(2) Center weighted average metering
(3) Spot metering (approx. 2% for the viewfinder screen)
metering)
(2) EV 3 - 17 (Spot metering)
(At normal temperature, 50 mm F2, ISO 100)
(2) A: Aperture priority AE
(3) S: Shutter priority AE
(4) M: Manual
of ± 5 EV.
registered), One-touch WB
Microdrive compatible (Compatible with FAT 32)
with Design rule for Camera File system (DCF)), RAW Data
Matching II, PictBridge
Playback
Playback mode : Single-frame playback, Close-up playback, Index display, Image
Information display : Information display, Histogram display
Drive
Drive mode : Single-frame shooting, Sequential shooting, Self-timer,
Sequential shooting : 2.5 frames/sec. (Max. no. of storable sequential pictures: 4
Self-timer : Operation time: 12 sec., 2 sec.
Optical remote control : Operation time: 2 sec., 0 sec. (instantaneous shooting)
Flash
Synchronization : Synchronized with the camera at 1/180 sec. or less
Flash control mode : TTL-AUTO (TTL pre-flash mode), AUTO, MANUAL
External flash attachment : Hot shoe
rotation, slideshow
Remote control
frames in RAW/TIFF)
32
Page 33

Information
External connector
USB connector (mini-B), DC-IN jack, VIDEO OUT jack
Power supply
Battery : BLM-1 Lithium-ion Battery
AC power supply : AC-1 AC adapter (optional)
Dimensions/weight
Dimensions : 146.5 mm (W) x 85 mm (H) x 64 mm (D) (5.8" x 3.3" x 2.5")
(excluding protrusions)
Weight : Approx. 580 g (1.3 Ib.) (without battery)
Operating environment
Temperature : 0 - 40°C (operation)/–20 - 60°C (storage)
Humidity : 30 - 90 % (operation)/10 - 90 % (storage)
Specifications — Provided accessories
BLM-1 Lithium ion battery
Type : Lithium ion battery
Standard voltage : DC 7.2 V
Standard capacity : 1500 mAh
Battery life : Approx. 500 full recharges
*Varies depending on the battery temperature.
Recommended : 0°C – 40°C/32°F –104°F (charging)
temperature -10°C – 60°C/14°F – 140°F (operation)
-20°C – 35°C/-4°F – 95°F (storage)
Dimensions : 55 mm (W) x 39 mm (D) x 21.5 mm (H) (2.2" x 1.5" x 0.8")
Weight : Approx. 75 g/2.6 oz.
En
BCM-2 charger
Input voltage : AC100 - 240V, 50/60Hz
Charging time : Approx. 5 hours
Operating environment : 0 - 40˚C (32 - 104˚F)
Storage environment : –20 - 60˚C (14 - 140˚F)
Dimensions : 62 mm (W) x 83 mm (D) x 26 mm (H) (2.4" x 3.3" x 1.0")
Weight : Approx. 72 g/2.5 oz. (excluding the power cable)
SPECIFICATIONS ARE SUBJECT TO CHANGE WITHOUT ANY NOTICE OR OBLIGATION ON THE PART
OF THE MANUFACTURER.
*Varies depending on the battery temperature.
33
Page 34

http://www.olympus.com/
Shinjuku Monolith, 3-1 Nishi-Shinjuku 2-chome, Shinjuku-ku, Tokyo, Japan
Two Corporate Center Drive, PO Box 9058, Melville, NY 11747-9058, U.S.A.
Tel. 1-631-844-5000
Technical Support (USA)
24/7 online automated help: http://www.olympusamerica.com/E1
Phone customer support: Tel. 1-800-260-1625 (Toll-free)
Our phone customer support is available from 8 am to 10 pm
(Monday to Friday) ET
E-Mail: e-slrpro@olympusamerica.com
Olympus software updates can be obtained at: http://www.olympus.com/digital
Premises: Wendenstrasse 14-18, 20097 Hamburg, Germany
Tel. +49 40 - 23 77 3-0 / Fax +49 40 - 23 07 61
Goods delivery: Bredowstrasse 20, 22113 Hamburg, Germany
Letters: Postfach 10 49 08, 20034 Hamburg, Germany
European Technical Customer Support:
Please visit our homepage http://www.olympus-europa.com
or call our TOLL FREE NUMBER*: 00800 - 67 10 83 00
for Austria, Belgium, Denmark, Finland, France, Germany, Italy, Luxemburg,
Netherlands, Norway, Portugal, Spain, Sweden, Switzerland, United Kingdom
* Please note some (mobile) phone services/provider do not permit access or
request an additional prefix to +800 numbers.
For all not listed European Countries and in case that you can’t get connected to
the above mentioned number please make use of the following
CHARGED NUMBERS: +49 180 5 - 67 10 83 or +49 40 - 237 73 899
Our Technical Customer Support is available from 9 am to 6 pm MET (Monday to
Friday)
© 2004
Printed in China
VE835201
 Loading...