

Page 1
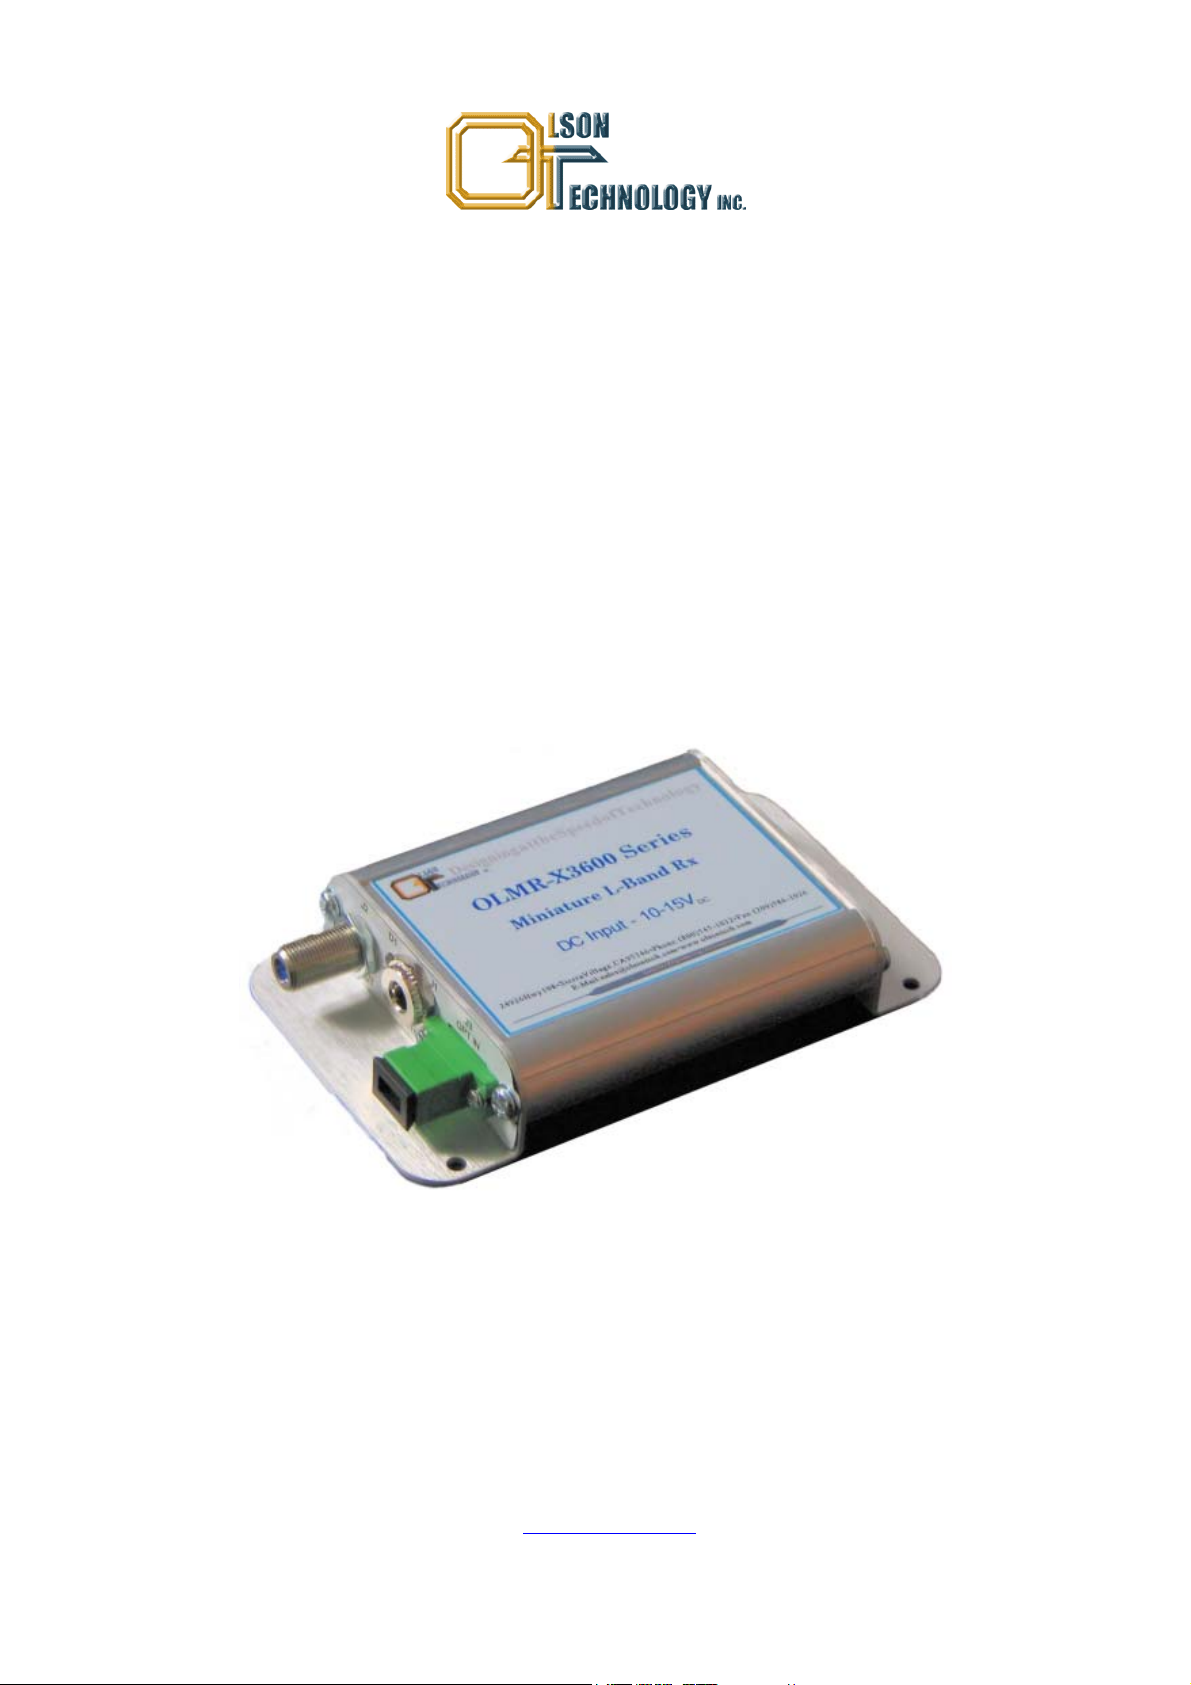
SatellitePlus Model OLMR
Mini L-Band Receiver
10-3,600 MHz
OPERATING MANUAL
24926 Highway 108
Mi-Wuk Village, CA 95346
Phone: (800) 545-1022
Fax: (209 586-1022
025-000565 Rev. X9 E-Mail: [email protected]
09/04/13
Page 2

Table of Contents
SAFETY ...............................................................................................................................2
Safety Precautions ··························································································· 2
Laser Safety Procedure····················································································· 2
GENERAL FEATURES······················································································· 3
RECEIVER DESCRIPTION.................................................................................................. 3
POWER SUPPLY DESCRIPTION........................................................................................ 3
RF PERFORMANCE ............................................................................................................ 4
OPTICAL PERFORMANCE................................................................................................. 4
Optical Loss Budget························································································· 4
Figure 1 - Dimensioned Assembly···································································· 5
DC POWERING and INDICATORS..................................................................................... 5
INSTALLATION································································································· 6
Optical Connectors··························································································· 6
Cleaning Optical Connectors ············································································· 6
Mounting & Powering Up··················································································· 7
Table 1 - Noise Figure Performance ································································· 7
TYPICAL APPLICATIONS................................................................................................... 8
MDU (Multiple Dwelling Unit) Application ···························································· 8
Figure 2 - Typical Multiple Dwelling Unit····························································· 8
ORDERING INFORMATION ................................................................................................ 8
025-000565 Rev. X9 www.olsontech.com 1
Page 3

SAFETY
Safety Precautions
The optical emissions from the units are laser-based and may present eye hazards if im-
properly used. NEVER USE ANY KIND OF OPTICAL INSTRUMENT TO VIEW THE OP-
TICAL OUTPUT OF THE UNIT. Be careful when working with optical fibers. Fibers can
cause painful injury if they penetrate the skin.
Laser Safety Procedure
ALWAYS read the product data sheet and the laser safety label before powering the product.
Note the operation wavelength, optical output power and safety classifications.
If safety goggles or other eye protection are used, be certain that the protection is effective at
the wavelength emitted by the device under test BEFORE applying power.
ALWAYS connect a fiber to the output of the device BEFORE power is applied. Power
should never be applied without an attached fiber. If the device has a connector output, a
connector should be attached that is connected to a fiber. This will ensure that all light is
confined within the fiber waveguide, virtually eliminating all potential hazard.
NEVER look at the end of the fiber to see if light is coming out. NEVER! Most fiber optic la-
ser wavelengths (1310 nm and 1550 nm) are totally invisible to the unaided eye and will
cause permanent damage. Shorter wavelengths lasers (e.g., 780 nm) are visible and are
very damaging. Always use instruments, such as an optical power meter, to verify light output.
NEVER, NEVER, NEVER look into the end of a fiber on a powered device with ANY sort of
magnifying device. This includes microscopes, eye loupes and magnifying glasses. This
WILL cause a permanent and irreversible burn on your retina. Always double check that
power is disconnected before using such devices. If possible, completely disconnect the unit
from any power source.
If you have questions about laser safety procedures, please call Olson Technology before
powering your product.
025-000565 Rev. X9 www.olsontech.com 2
Page 4

GENERAL FEATURES
The Olson Model OLMR Miniature L-Band Receiver offers a high performance, versatile
receiver in a very compact package. The Model OLMR Miniature L-Band Receiver has been
engineered to meet today’s high performance standards for L-Band transport. Its extreme
bandwidth range allows the system to handle the next generation of satellite signals. The
receiver may be used with any L-Band transmitter from Olson Technology, Inc. It is ideal for
a wide variety of communications applications including L-Band satellite antenna remoting,
trunking radio, telemetry tracking, plus GPS time and frequency reference signal distribution.
The extended frequency range to 3.6GHz allows this system to accommodate additional
transponders coinciding with common European satellite communication applications. The
expanded RF bandwidth to 3.6GHz facilitates stacked LNB applications to accommodate
additional transponders. These may contain enhanced programming services (e.g., HDTV,
local channels, etc.) for DBS television signal distribution in campus, fiber-to-the-premise
(FTTx), and multiple dwelling unit (MDU) environments over single-mode fiber. The receiver
offers 75Ω or 50Ω output impedance. Optical connector options include FC/APC and
SC/APC. Power is via an Olson Model OTPS-12A power supply.
RECEIVER DESCRIPTION
The OLMR Mini L-Band Receiver can handle 10MHz to 3,600MHz RF signals. Optical input
power ranges from -15dBm to +3dBm in the wavelength range of 1270-1610nm. The receiver is available with a PIN detector that offers excellent performance for most applications.
A high-sensitivity option is available with an APD detector. This offers maximum optical link
budget, typically improving sensitivity by 7dB. A built-in LED indicator allows the receiver to
be easily set up and maintained.
POWER SUPPLY DESCRIPTION
The Model OTPS-12A Universal AC Power Supply outputs +12 Volts DC, 1.5 Amps.
025-000565 Rev. X9 www.olsontech.com 3
Page 5

RF PERFORMANCE
The specifications are cited below with 12dB link optical loss and >-55dB optical
back-reflection. If the link optical loss differs from 12dB, the RF gain will change 2dB for
each 1dB of optical loss (i.e., a link with a 6dB of optical loss will have a minimum RF gain of
+3dB.) Also, when optimizing the RF performance, the main concern involves setting the RF
signal level. Typically, the optimal total RF power into the transmitter should be near -37dBm
per transponder, assuming 32 transponders; this corresponds to a total RF input power level
of -22dBm. Due to the wide dynamic range of this system, the RF input power can deviate
from this optimal value and still provide good results.
Item Specifications @ +25°C
RF Frequency Range 10-3,600MHz
Gain Flatness (>50MHz) ± 1.5dB for any 500MHz
± 0.35dB for any 40MHz
Return Loss 10dB typical
I/O Connector F-Type Female (75Ω) or SMA (50Ω)
Link Gain (PIN Detector)
Link Gain (APD Option)
Noise Figure 15dB to 45dB
Rx Output 1dB Compression >-20dBm
Note: Link gain is typical when used with the Olson OLRT-X3613-D5-75-SA, L-Band transmitter.
-4 ± 5dB
+3 ± 5dB
OPTICAL PERFORMANCE
Item Specification
Optical Fiber Single Mode 9/125µm (SMF-28 or Equiv.)
Rx Wavelength 1270-1610nm
Rx Optical Input Power (PIN Detector) -15dBm to +3dBm
Rx Optical Input Power (APD Option) -22dBm to -4dBm
Rx Optical Return Loss >55dB typical
Rx Optical Connector SC/APC (Standard) FC/APC (Optional)
Optical Loss Budget
Tx Laser Power/Type +4dBm DFB +5dBm DFB +10dBm DFB/DWDM
Optical Loss Budget (PIN Detector) 1 to 19dB 2 to 20dB 7 to 25dB
Optical Loss Budget (APD Option) 8 to 26dB 9 to 27dB 14 to 32dB
025-000565 Rev. X9 www.olsontech.com 4
Page 6
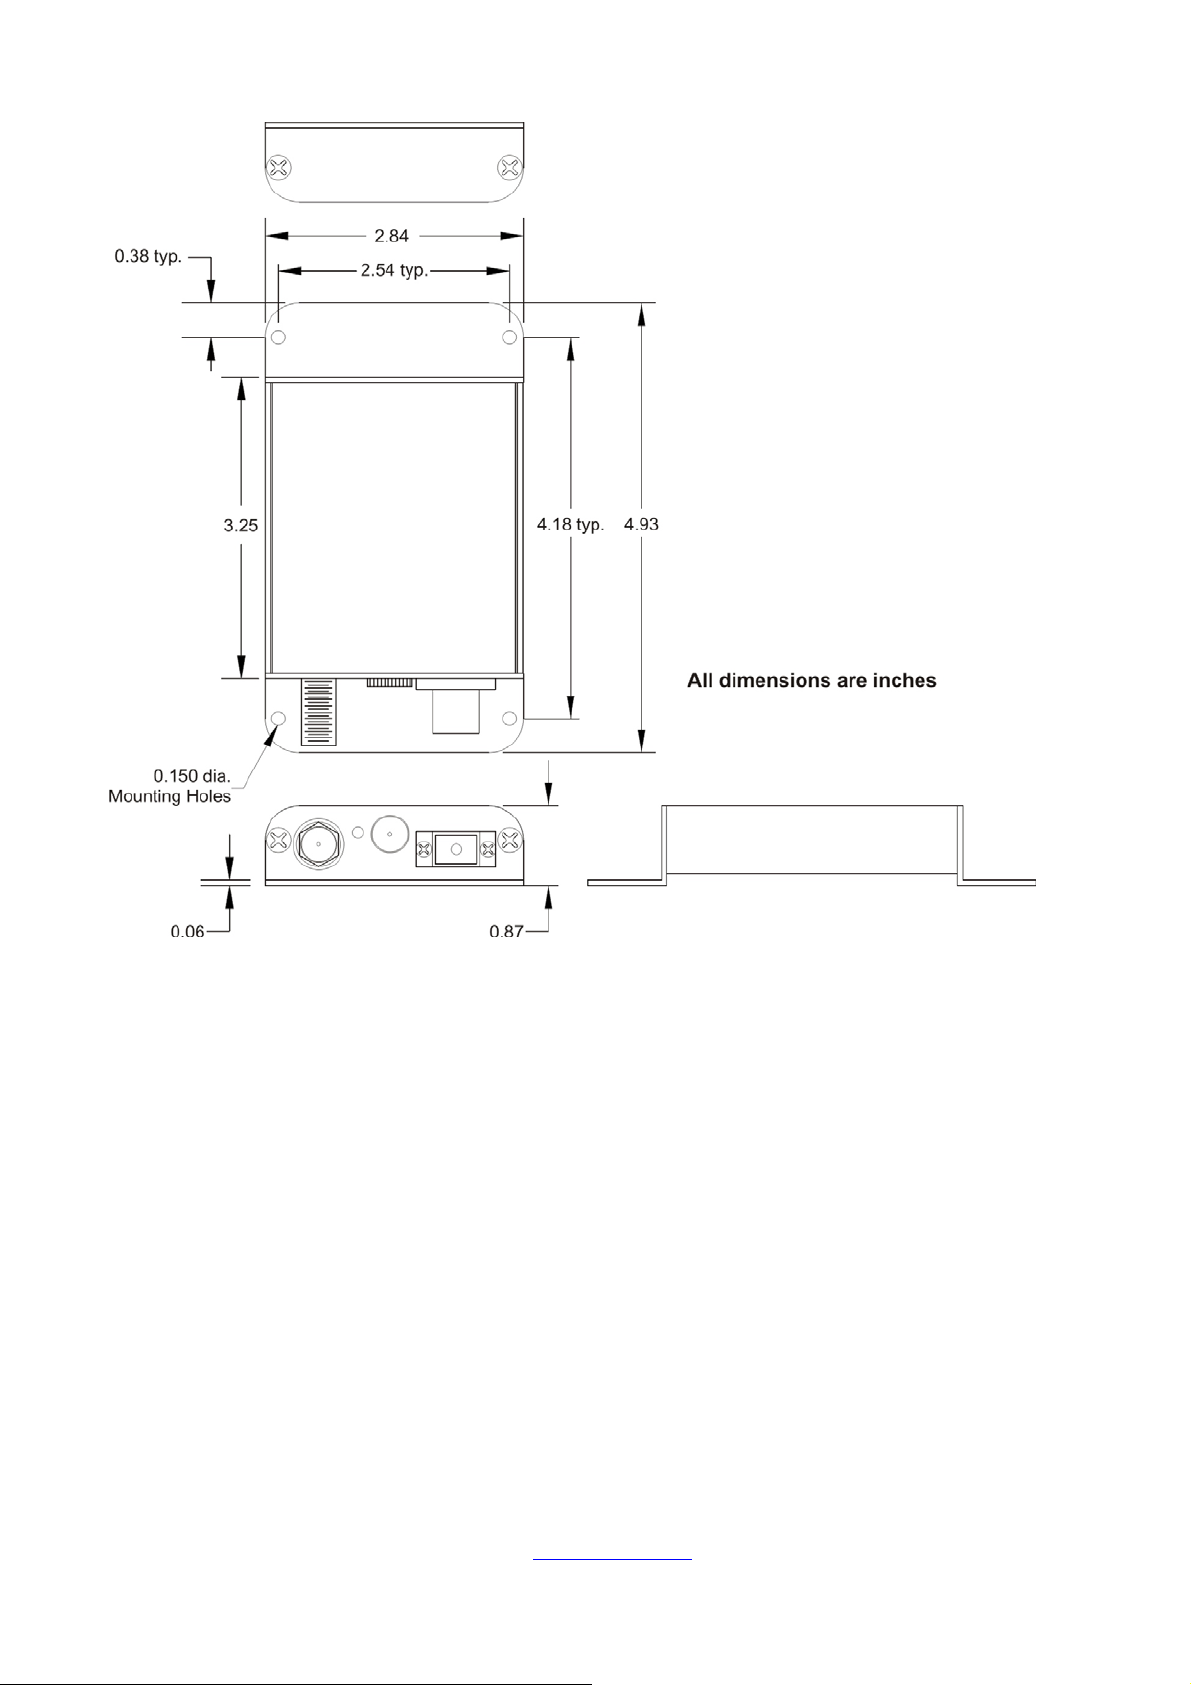
Figure 1 - Dimensioned Unit
DC POWERING AND INDICATORS
The unit operates with the OTPS-12A AC/DC power supply. The typical current requirements
for the receiver with that power supply is 150mA. The current draw for other voltages is as
follows:
Input Voltage 10VDC 12VDC 15VDC
Rx Current
An LED indicator is provided for easy setup and maintenance. The tri-color indicator LED is
yellow when the optical input is too low, red when the optical input is too high and is green
when the optical input is in the usable range. This range is approximately -15dBm to +3dBm.
for the PIN detector style receiver. The levels vary widely with the APD option receivers.
200mA 150mA 120mA
025-000565 Rev. X9 www.olsontech.com 5
Page 7
INSTALLATION
Optical Connectors
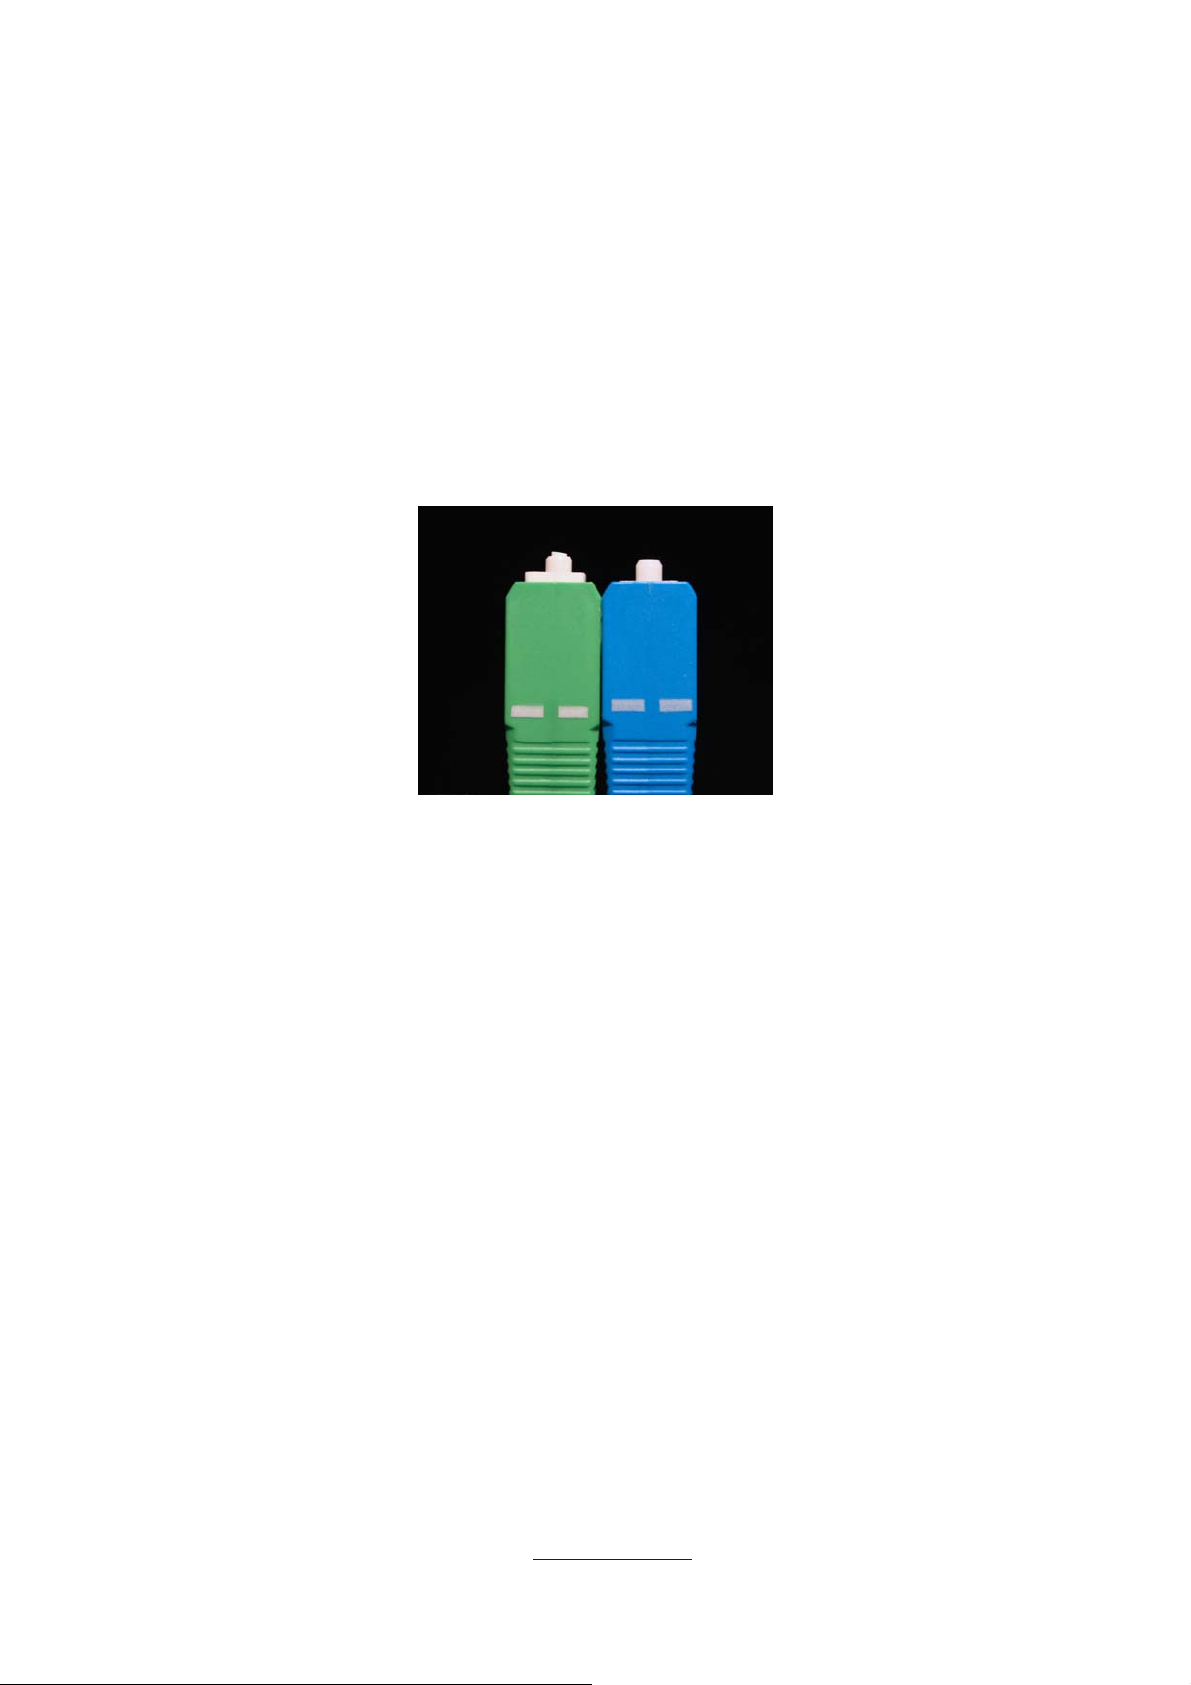
There are many types of optical connectors on the market. There are also different variations on the same type of connector such as “Flat” and “Angled”. For instance, the two types
most often encountered are SC/UPC (Ultra-Polished Connector, considered to be a "Flat"
type). SC/UPC connector bodies are usually blue. SC/APC (Angled Polished Connector)
which is the "Angled" variety. It usually has a green body. All Olson L-Band links are only
offered with SC/APC and FC/APC types of optical connectors. The reason for this is that all
analog signals transmitted over optical fibers can be seriously degraded by optical reflections. The advantage of the APC types of connectors is that the reflections are controlled
and are always very low.
Comparison of SC/APC and SC/UPC Connectors
One of the most common errors encountered in the field is the use of the wrong type of
connectors. The most common is using SC/UPC (Blue/Flat) with SC/APC (Green/Angled).
The connectors will fit together, but the optical loss will be high and the performance is unpredictable and unstable. When Flat and Angled connectors are mated, both may be permanently damaged. Such damage is considered abuse and is not covered by the warranty.
Cleaning Optical Connectors
Never clean a fiber optic connector if light is emanating from the connector. Doing so may
severely damage or destroy the connector.
Fiber optic connectors on the cable come pre-terminated should be clean and capped, so
one can usually remove the cap and make the connection without cleaning the connector,
but, if there is any doubt it is good practice to clean the optical connectors before making the
connection. Once the connection is made, there should be no need clean the connector as
long as the connector remains connected.
025-000565 Rev. X9 www.olsontech.com 6
Page 8
The fiber ends can be damaged by the insertion of contaminated connectors. Some types of
customer damage to connectors are not covered under warranty. Fiber connectors should
never be left uncovered. Pre-packaged alcohol wipes are a convenient means of cleaning
optical connectors. Clean alcohol and lint free wipes, such as Kim-Wipe type 34155, or
swabs may also be used.
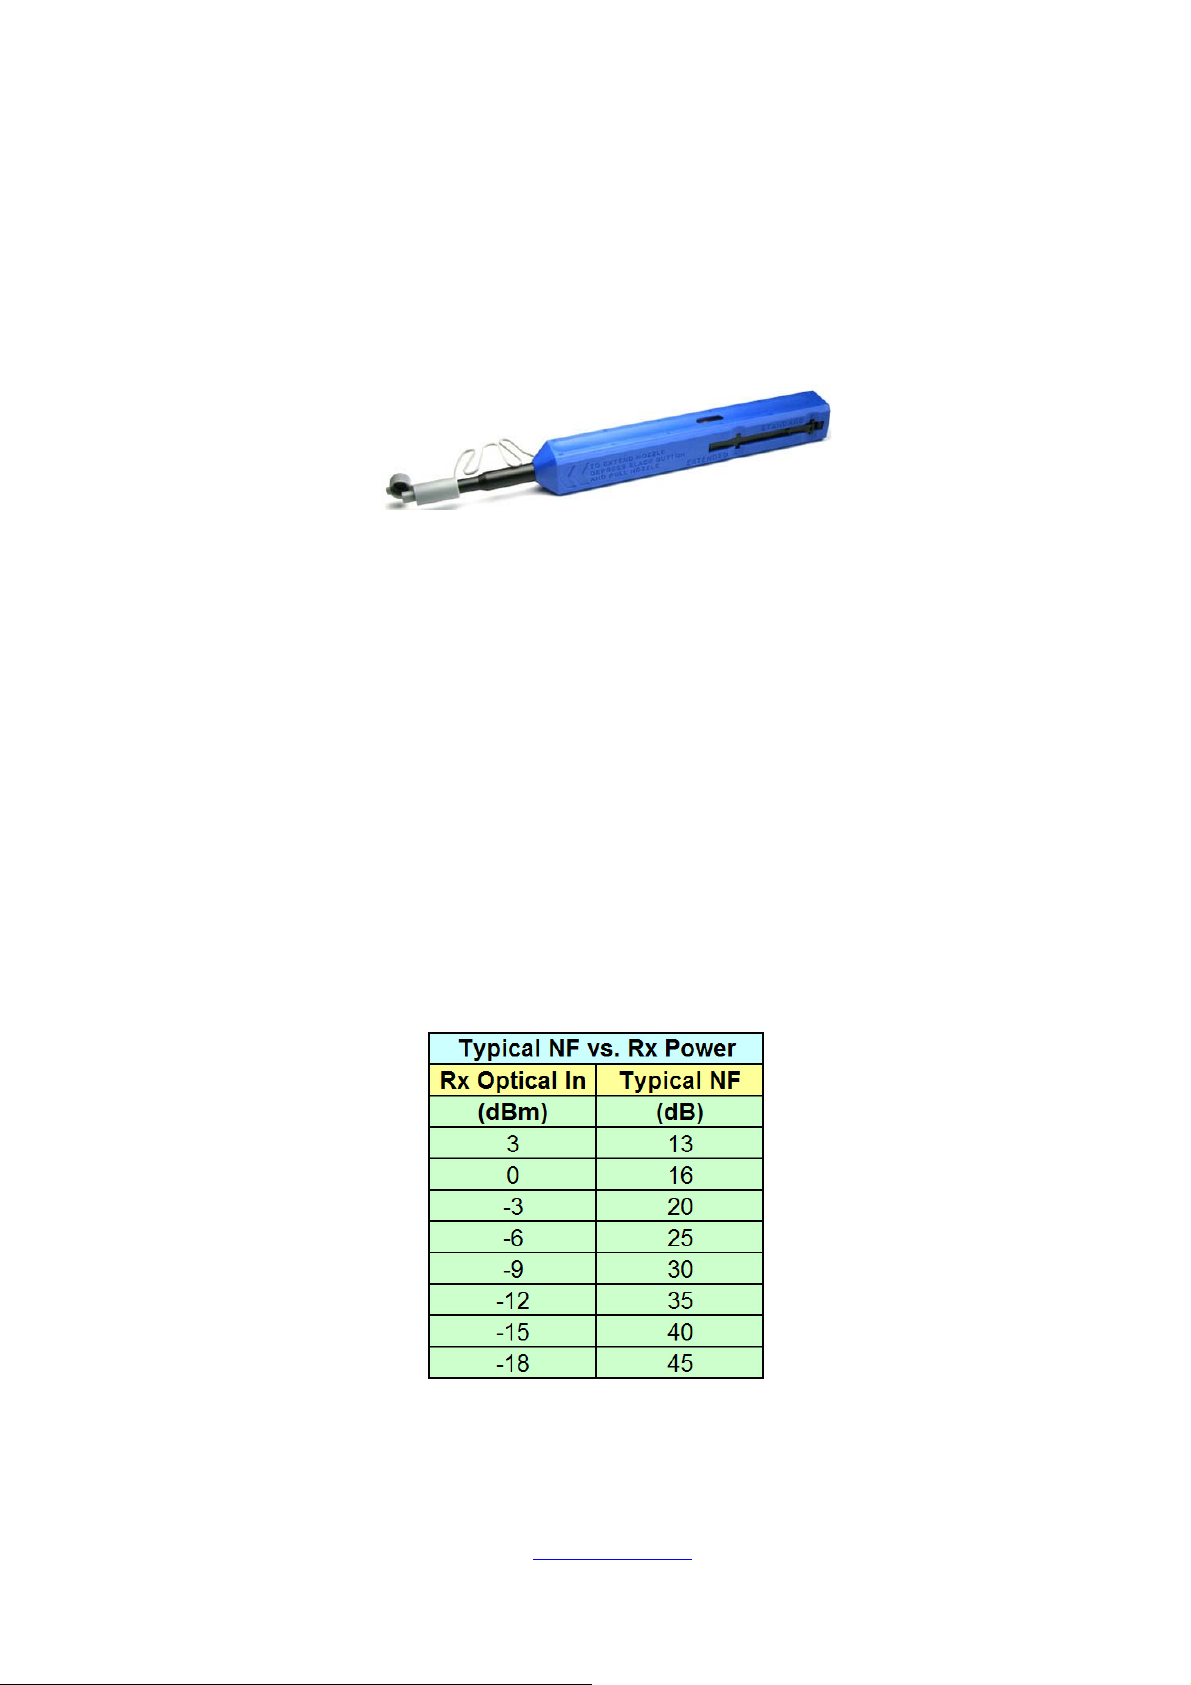
More sophisticated fiber optic connector cleaners, such as the Senko SmartCleaner
(SCK-SC-250) are very effective for cleaning external and internal fiber optic connectors.
They remove a lot of the guesswork and skill required by other cleaning methods.
Senko SmartCleaner
Mounting and Powering Up
Mount modules to enclosure using #6 screws and split lock washers. It is suggested that the
modules be mounted in a watertight enclosure with the RF and Optical connectors mounted
down to prevent moisture from entering the connectors. Apply power to the receiver, the
system should now be operational as there are no user adjustments required on the modules. The LED will give an indication of the optical input level. If the LED is RED, then the
optical input power is too high and will overload the receiver. If the LED is YELLOW, then the
optical input power is too low and poor signal quality may result. If the LED is GREEN, then
the optical input power is within the optimum range. Good signal quality will result assuming
that the transmitter is operating properly and has the correct RF input levels and that there
are no optical backreflections in the fiber path.
Table 1 - Typical Noise Figure Behavior
025-000565 Rev. X9 www.olsontech.com 7
Page 9
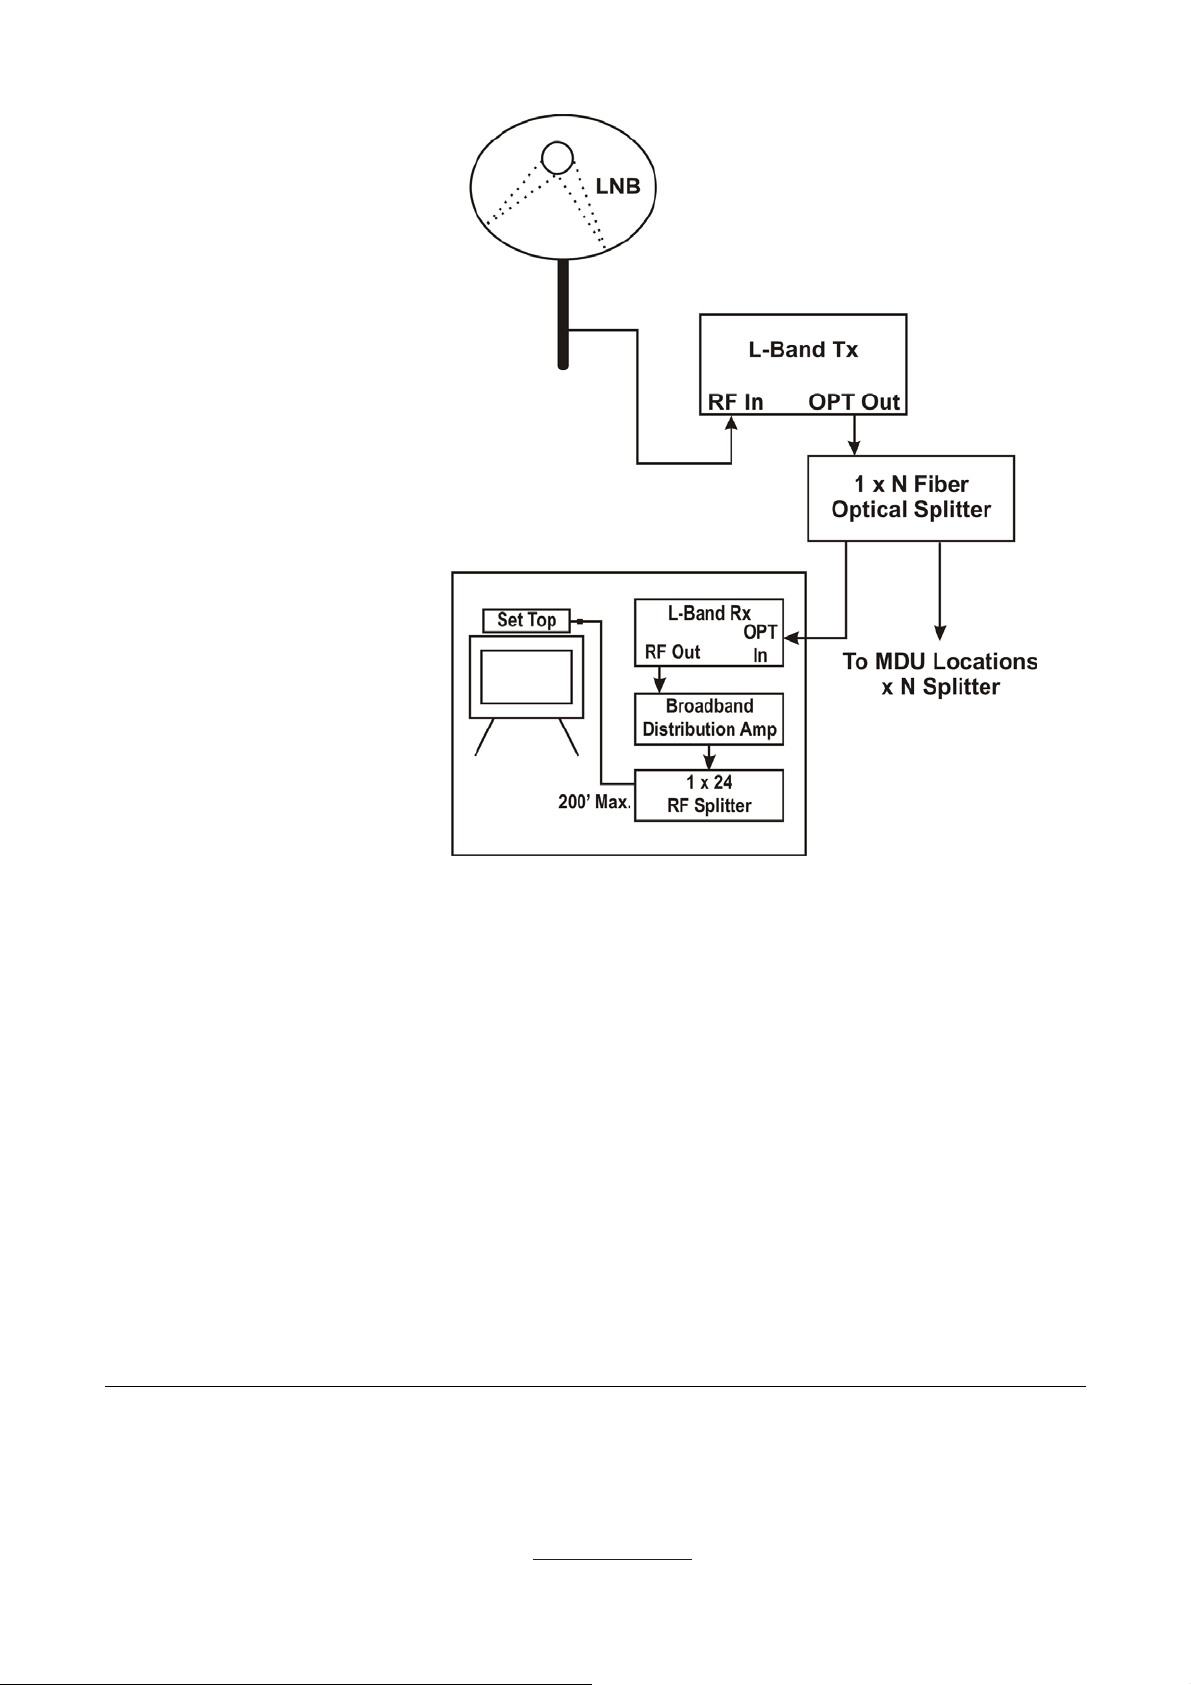
TYPICAL APPLICA TION
MDU (Multiple Dwelling Unit)
Figure 2 - Typical Multiple Dwelling Unit Application
ORDERING INFORMATION
Model Number Description
OLMR-X3600-75-SA Receiver, 10MHz-3.6GHz, PIN Detector, SC/APC Optical Conn, 75Ω (F)
OLMR-X3600-75-FA Receiver, 10MHz-3.6GHz, PIN Detector, FC/APC Optical Conn, 75Ω (F)
OLMR-X3600S-75-SA Receiver, 10MHz-3.6GHz, High Sens APD, SC/APC Optical Conn, 75Ω (F)
OLMR-X3600S-75-FA Receiver, 10MHz-3.6GHz, High Sens APD, FC/APC Optical Conn, 75Ω (F)
OLMR-X3600-50-SA Receiver, 10MHz-3.6GHz, PIN Detector, SC/APC Optical Conn, 50Ω (SMA)
OLMR-X3600-50-FA Receiver, 10MHz-3.6GHz, PIN Detector, FC/APC Optical Conn, 50Ω (SMA)
OLMR-X3600S-50-SA Receiver, 10MHz-3.6GHz, High Sens APD, SC/APC Optical Conn, 50Ω (SMA)
OLMR-X3600S-50-FA Receiver, 10MHz-3.6GHz, High Sens APD, FC/APC Optical Conn, 50Ω (SMA)
Model Number Description
OTPS-12A Universal AC Power Supply, +12 Volts, 1.5 Amps
025-000565 Rev. X9 www.olsontech.com 8
 Loading...