

Page 1
DP-5000 Metallic and Colour Desktop Printer
Setup Guide
Page 2

Preface
EEC compatibility
Every effort has been made to ensure that the information in this document is complete, accurate, and up-todate. Oki assumes no responsibility for the results of errors beyond its control. Oki also cannot guarantee that
changes in software and eq uipment made by other manufacturers and referred to in this gui de will not affect
the applicability of the information in it. Mention of
software products manufactured by other companies
does not necessarily constitute endorsement by Oki.
Copyright 1999 by Oki. All rights reserved.
Oki is a registered trademark of Oki Electric Industry
Company Ltd.
Energy Star is a trademark of the United States Envi-
ronmental Protection Agency.
Microsoft, MS-DOS and Windows are registered trade-
marks of Mi crosoft Corporation.
Apple, Macintosh, Mac, MacOS and True Type are reg-
istered trademarks of Apple Computer Corporation.
This product complies with the requirements of the Council Directives
89/336/E EC and 73 /23/EEC a mended by 93/68/EEC on the approximation of the laws relating to
electromagnetic compatibility and
low voltage.
Energy Star
As an Energy Star Partner, Oki
has determined that this product
meets the Energy Star guidelines
for energy efficiency.
ii Oki DP-5000
Page 3

Table of contents
English
Preface . . . . . . . . . . . . . . . . . . . . . . . . . . . . . . . . . . . . . ii
EEC compatibility . . . . . . . . . . . . . . . . . . . . . . . . . . . . ii
Energy Star. . . . . . . . . . . . . . . . . . . . . . . . . . . . . . . . . . ii
Table of contents . . . . . . . . . . . . . . . . . . . . . . . . . . . . . iii
Safety instructions . . . . . . . . . . . . . . . . . . . . . . . . . . . . .1
Unpacking. . . . . . . . . . . . . . . . . . . . . . . . . . . . . . . . . . . .3
Contents . . . . . . . . . . . . . . . . . . . . . . . . . . . . . . . . . .3
Packaging . . . . . . . . . . . . . . . . . . . . . . . . . . . . . . . . .3
Printer features . . . . . . . . . . . . . . . . . . . . . . . . . . . . . . . .4
Features. . . . . . . . . . . . . . . . . . . . . . . . . . . . . . . . . . .4
Printing modes . . . . . . . . . . . . . . . . . . . . . . . . . . . . .4
Standard printing. . . . . . . . . . . . . . . . . . . . . . . . .4
VPhoto printing. . . . . . . . . . . . . . . . . . . . . . . . . .4
Dye sublimation (optional) . . . . . . . . . . . . . . . . .5
Printing metallic foil and white. . . . . . . . . . . . . .5
Overlay printing . . . . . . . . . . . . . . . . . . . . . . . . .5
Options . . . . . . . . . . . . . . . . . . . . . . . . . . . . . . . . . . .5
Preparation. . . . . . . . . . . . . . . . . . . . . . . . . . . . . . . . . . . 6
Removing packaging . . . . . . . . . . . . . . . . . . . . . . . . 6
Printer location. . . . . . . . . . . . . . . . . . . . . . . . . . . . . 7
Computer connection. . . . . . . . . . . . . . . . . . . . . . . . 7
Power connection. . . . . . . . . . . . . . . . . . . . . . . . . . . 8
Ink cartridges . . . . . . . . . . . . . . . . . . . . . . . . . . . . . . 8
Installing. . . . . . . . . . . . . . . . . . . . . . . . . . . . . . . 8
Usage guidelines . . . . . . . . . . . . . . . . . . . . . . . 11
Loading Paper . . . . . . . . . . . . . . . . . . . . . . . . . . . . 11
Paper and media types . . . . . . . . . . . . . . . . . . . . . . 12
Installing the printer driver . . . . . . . . . . . . . . . . . . . . . 13
Turning on the power. . . . . . . . . . . . . . . . . . . . . . . 13
Installing Windows printer driver . . . . . . . . . . . . . 13
Installing Macintosh printer driver . . . . . . . . . . . . 13
Index . . . . . . . . . . . . . . . . . . . . . . . . . . . . . . . . . . . . . . 15
Setup Guide iii
Page 4

iv Oki DP-5000
Page 5

Safety instructions
English
This printer has been carefully designed to give years of
safe, reliable performance. As with all electrical equipment, however, there are a few basic precautions t hat
should be taken to avoid personal injury or damaging
the printer:
• Read this setup guide carefully and save it for
future reference.
• Read and follow all warning and instruction
labels on the printer itself.
• Disconnect the printer before cleaning. Use only
a damp cloth. Do not use liquid or aerosol cleaners to clean the printer.
• Place the printer on a firm, solid surface. If the
printer is placed on something unsteady, it may
fall and become damaged or injure someone. If
the printer is placed on a soft surface, such as a
rug, sofa, or bed, the vents may become blocked
causing the printer to overheat.
• Do not put the printer on or near a heat source,
such as a radiator or heat register. Keep it out of
direct sunlight. Allow enough room around the
printer for adequate ventilation and easy access.
• Do not use the printer near water, or spill liquid
of any kind into it.
• Make sure that the power source matches the rating listed on the back of the printer. If you are not
sure, check with your dealer or with your local
power company.
• This printer has an earthed plug as a safety feature and will only connect to an earthed outlet. If
this plug cannot be connected to a power outlet,
then it is possible that the power outlet is of the
older, non-earthed type. Contact an electrician to
have the power outlet replaced. Do not use an
adapter to defeat the earthing.
• To avoid damaging the power cable, do not put
anything on it or place it where it will be walked
on. If the cable becomes damaged or frayed,
replace it immediately.
• If an extension cable or power strip is being used
with the printer, make sure that the total of the
amperage rating required by all the equipment is
less than the rating of the extension cable or
power strip. The total ratings of all equipment
Setup Guide 1
Page 6

plugged into the outlet should not exceed 13
amperes.
• The power outlet into which the printer is connected must remain accessible at all times.
• Opening any cover may expose hot surfaces.
These are clearly labelled. Do NOT touch them.
• Do not insert anything into the ventilation s lots
on the printer; you could get a shock or cause a
fire.
If anything happens that indicates that the printer is not
working properly or has been damaged, disconnect the
printer from the power source and contact your dealer.
These are some of the things to look for:
• The power cable or plug is frayed or damaged.
• Liquid has been spilled in to the printer, or it has
been exposed to water.
• The printer has been dropped, or the cabinet is
damaged.
• Aside from the routine maintenance described in
the user’s guide, do not try to service the printer
• The printer does not function normally when following the operating instructions.
yourself. Opening a cover may expose you to
shocks or other hazards.
• Do not make any adjustments other than those
outlined in the user’s guide as damage may be
caused to the printer.
2 Oki DP-5000
Page 7

Unpacking
English
Contents
Please check the contents of the printer package. It
should contain the following items;
• DP-5000 Metallic and Colour Desktop Printer.
• Output paper tray.
• Paper extension tray .
• Power cable.
• Ink cartridge kit (comprising seven cartridges).
• Print media sample kit.
• OKI installation CD-ROM Disk, which contains
the printer driver software, the setup guide and
user guide in PDF format.
• DP-5000 Setup Guide (this document).
• USB Interface Kit Setup Guide (if USB Interface
option has been purchased).
•Dust cover.
Packaging
The printer is shipped with tape, spacers, and other
packing materials to prevent delicate parts from being
damaged while in transit. Remove, but do not discard,
these packing materials before using the printer. Damage to the printer or malfunction may occur if the printer is used while these packing materials are still present.
It is important to retain the packaging material to protect the printer during transit if the printer has to be
moved. Please refer to Transporting in the User Guide
on how to reinstall the packaging materials.
Setup Guide 3
Page 8

Printer features
Features
• High quality output at resolutions up to 2400 dpi,
with variable dot sizes and different printing
modes.
• Double sided page printing capability.
• Traditional CMYK colour and special colour
printing using sil ver and gold spot colours, glossy
finishes and white ink.
• Flexible media handling using many grades of
paper and card.
• Easy to change ink cartridges.
• Maximum paper size of 224 x 355 mm with a
maximum print area of 216 x 330 mm.
• Works in Macintosh and Windows environments
with an iMac compatibility option.
Printing modes
Note:
For full details on the various printing modes.
please refer to the User Guide.
Standard printing
600 dpi printing o n plain paper, high gr ade media or
overhead transparencies.
VPhoto printing
VPhoto pri nt in g i s a hi gh qua li t y me th od o f pr inting at
2400 dpi using variable dot size technology:
• VPhoto film - gives high quality output using 16
dot sizes on super smooth glossy media.
• VPhoto mode without primer - when Laser Paper
(Oki High Grade or equivalent) is selected, the
need for using a primer is removed. Printing resolution is at 2400 dpi using 4 dot sizes.
• VPhoto mode with primer - selected when plain
paper or card is selected. The primer smooths out
the uneven surface of the paper or card first
before printing. Printing resolu tion is at 2400 dpi
using 4 dot sizes.
4 Oki DP-5000
Page 9

Dye sublimation (optional)
English
Overlay printing
Dye sublimation printing is an optiona l upgrade which
allows continuous tone (i .e. no do ts) print ing at 600 d pi
resolution. Special dye sublimation media and ink cartridges are required. This m ode of printin g offers the ultimate in printing quality for the DP-5000 printer.
Printing metallic foil and white
Selecting the following colours in your application and
checking
Use Spot Colour
you to print gold and silver metallic foil, as well as normal colours. A white spot colour ink cartridge is also
available for printing on coloured paper or overhead
transparencies.
Note:
Foil and white spot ink cartridges cannot be
used on VPhoto media.
Spot/Foil
Colours
White 909090230230230
Gold Foil 88 63 0 225 160 0
Silver Foil 74 76 77 189 193 197
RGB settings (n100%) RGB settings (n255)
RGBRGB
in the printer driver, allows
Selecting
Overlay
in the printer driver leaves the paper
in the printer after printing is completed in order for you
to change cartridges and print additional colours on the
same page. By using O
, creative output can be
verlay
achieved either using a metallic foil as a base colour
and printing on top wit h convent ional colours , or building up an image in a series of layers to create embossing
or other effe cts.
Options
• USB interface kit for use and connection with
iMac or Windows 98 computers.
• SCSI interface kit for connection with Macintosh
computers.
• Dye sublimation upgrade for ultra high quality
printing using dye sublimation media and special
ink cartridges.
Setup Guide 5
Page 10

Preparation
Caution:
Operating the printer without first re moving the packing
materials may damage the printer.
Removing packaging
1. Lift the printer out of its container. Remove the
packing materials from the printer.
2. Remove the three pieces of tape (1) from the outside of the printer before using.
1
3. Open the front cover (1) by pushing the front
cover release button (2) to releas e the intern al
1
2
lock. Gently lower the front cover with your
hand.
4. Remove the two pieces of carriage packing material (1) from inside the printer.
6 Oki DP-5000
Page 11

5. Press down on the release lever (2)
6. Remove the tape (3) from the metal frame, and
move the smaller packing piece (1) to the left
7. Remove the other tape (4) from the carriage
Caution:
Do not remove the white pad (1) or t he cleani n g pa d (2) at
the left end of t he platen (3). They are there to clean the
print head. Removing them can cause the printer to malfunction. Do not touch the cover o pen sensor ( 4), wh ich is
located on the left side of the printer.
4
English
8. Carefully close the front cover after removing all
the carriage packing material.
Note:
Retain the packaging material to protect the
printer during transit if the printer has to be
moved. Please refer to the User Guide.
Printer location
After removing the packing material and reading the
safety precautions, choose a location which offers a stable, firm surface for your printer. Try to a void places
which are subject to extremes of heat, cold, s unlight and
damp. Also, choose a location from which you can run
the power cables safely to suitable nearby connection
points.
1
3
2
Computer connection
Caution:
Power to the printer and computer must be turned off and
the power cables unplugged before connecting or discon-
Caution:
Always close the front cover carefully, never slam it shut.
necting the printer c able to prevent a ny damage or malfunction from occurring.
If the cover is closed with too much force the ink cartridges
can become dislodged and damage to the printer may result.
Setup Guide 7
Page 12

Connect the printer to the computer with a bi-directional printer cable. Secure the printer cable (1) to the connectors on the printer (2) and on the computer (3).
2
1
3
Note:
When using your pr int e r w ith a Macintosh computer, connect the printer to the Macintosh using a SCSI interface module. See Appendix A in
the User Guide for more information.
Note:
Power to the printer is completely cut off only
when the power cable is disconnected. Place the
printer where you can easily disconnect it from
the power source.
Ink cartridges
Power connection
1. Insert the power cable into the power socket on
the printer. Make sure that the power cable is
securely seated in the socket.
2. Insert the free end of the power cable into a suita-
Installing
Caution:
You must leave at least one cartridge holder empty for the
printer to operate properly. Do not install more than 7 ink
cartridges.
ble AC power source (such as a wall socket).
You may install any ink cartridge in any of the 8 cartridge holders using a maximum of 7 ink cartridges.
8 Oki DP-5000
Page 13

The printer automatically recognizes which type of car-
1
tridge is installed in each holder
Caution:
Move the carriage only at the points indicated by the large
arrows below. DO NOT push or move the the carriage by
its print head (1), spindles (2), or ribbon posts (3). These
components are easily damaged.
2
English
D
N
I
W
2. Insert a pencil from the side marked “B” and turn
the pencil slowly to take up any slack in the ribbon.
3. Open the front cover, gently lower the cover with
your hand.
1
3
Install ink cartridges by following the steps below.
Caution:
The ink cartridges may be put in any holder but DO NOT
put ink cartridges directly into the carriage. Doing so may
result in damage to the printer.
1. The cartridge has a stopper (1) to prevent slack in
the ribbon. Remove this stopper from the ink cartridge.
Setup Guide 9
Page 14

4. Insert the left end of the ink cartridge with the letter “B” and the manufacture r’s logo facing
upward into the ink cartridge holder, while pushing the left side latch of the holder slightly to the
left along with the cartridge.
Note:
The printer carriage can select and pick up the
necessary ink cartridge from any holder. You
can place up to 7 cartridges of the same colour
in the holders to reduce the need to change ink
cartridges.
5. Push down the right side of the ink cartridge.
Make sure that the ink cartridge is securely
locked into the holder, and that there is no slack
in the ribbon.
6. Place a second ink cartridge on top of any ink
cartridge already installed. Gently push down on
the centre.
7. To remove an upper cartridge, grasp the cartridge
by the edges and gently push it towards its moveable cartridge clip until t he pedestal pops up and
the cartridge is released.
10 Oki DP-5000
Page 15

Usage guidelines
Caution:
Use dye sublimation ink cartridges only with dye sublimation paper. Failure to do so ca n damage the printer and the
ink cartridge ribbon. Refer to the User Guide for m ore information.
Colours
& Coatings
Cyan, Magenta,
Yellow, Blac k,
Overcoat
Printing Mode Properties
Dye
Sublimation
For use only with dye sublimaton
upgrade kit. Dye sublimation inks
offer continuous tone photographic
quality results. O vercoat ink acts as
a protective cover for the other inks.
English
Refer to the following table for guidelines on using the
different types of ink cartridges that are available.
Colours
& Coatings
Cyan, Magenta,
Yellow, Black
VPhoto Primer Standard
Finish II Standard
Gold and Silver
foil
Econoblack Standard Low cost black and white text proof
White Standard Appli ed in a s imilar way to f oil col-
Setup Guide 11
Printing Mode Properties
Standard
VPhoto
VPhoto
VPhoto
Standard
VPhoto
Inks are resin based. Fade resistant,
waterproof and smudgeproof
Paper primer. Printing at 2400 dpi on
plain paper in VPhoto mod e.
Glossy finish to prints. Software
selectable; glossy and ma tt finishes
on the final image.
Glossy foil, metallic text and graphics on plain paper or other media
ideal for spot text, graphics or logos.
printing at lower quality than standard black.
ours. Primer base for coloured
media or as a spot colour on OHT
film.
Loading Paper
IMPORTANT:
DO NOT USE INK JET PAPER WITH THIS PRINTER.
Doing so will result in poo r print qualilty and damage to
the printer. Ink jet paper is coated and is not compatable
with the DP-5000 printer.
Note:
When loading paper, use only one typ e of paper at a
time .
There are two modes of paper feeding; automatic and
manual. Use automatic feed mode for continuou s printing as follows:
Page 16

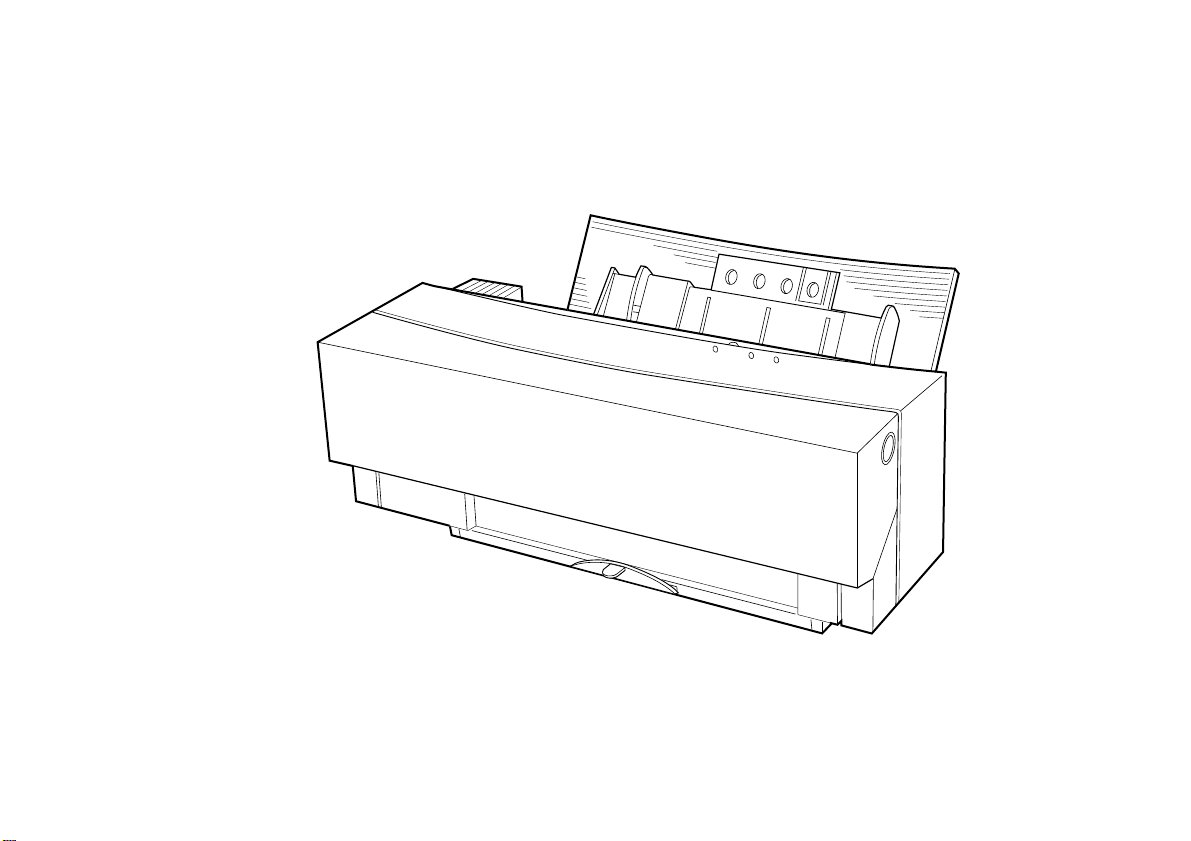
1. Pull up the paper support upwards.
2. Select the paper feed mode by switching the
it just touches the paper.
paper feed switch to position “A”.
Paper and media types
Media type Properties
4. Adjust the position of the paper feed guide so that
VPhoto film (A4) Photo film that produces high quality
High grade paper (A4 +) High quality paper with very smooth finish
OHT film (A4) Clear film that produces high quality over-
Dye sublimation media Provides maximum quality using dye subli-
3. Fan the paper once and place the paper in the
sheet feeder.
Note:
Do not use creased or c urled paper, this can
cause the paper to misfeed.
12 Oki DP-5000
images from printng at 240 0 dpi.
producing high qualit y im a ges.
head projection transparencies.
mation printing.
Page 17

Installing the printer driver
English
Before you can use your printer, you need to install the
correct printer driver software into your computer so
that it can operate with the printer.
Turning on the power
Turn your printer and computer on or off in the following order;
1. Push the power button on the printer to turn it on.
2. Turn on your computer.
Installing Windows printer driver
To install the printer driver so ftware for Windows 95 /
®
98
follow these steps.
1. Insert the OKI DP-5000 installation disk into
your CD-ROM drive. If a window does not
appear automatically, double-click the OKI
installation disc to open it, and then double-click
the
setup.exe
2. In the window that appears, choose
Driver.
file.
Install
3. Choose the language of the printer driver that you
wish to install.
4. Follow the instructions on-screen to complete the
installation
Installing Macintosh printer driver
To install the printer driver software onto your Macintosh computer, follow these steps:
1. Insert the OKI DP-5000 installation disk into
your CD-ROM drive.
2. Open the
on the
3. Follow the instructions on-screen to complete the
installation.
English
OKI DP-5000
folder, and then double-click
icon.
Setup Guide 13
Page 18

14 Oki DP-5000
Page 19

Index
English
C
Computer connection . . . . . . . . . . . . . . . . . . . . . . . . . . .8
D
Dye sublimation printing . . . . . . . . . . . . . . . . . . . . . . . .5
I
Ink cartridges
Installing . . . . . . . . . . . . . . . . . . . . . . . . . . . . . . . . .8
Useage guidelines . . . . . . . . . . . . . . . . . . . . . . . . .11
L
Loading paper. . . . . . . . . . . . . . . . . . . . . . . . . . . . . . . .11
M
Macintosh printer driver. . . . . . . . . . . . . . . . . . . . . . . .13
Media types . . . . . . . . . . . . . . . . . . . . . . . . . . . . . . . . .12
Metallic foil printing. . . . . . . . . . . . . . . . . . . . . . . . . . . .5
O
Overlay printing . . . . . . . . . . . . . . . . . . . . . . . . . . . . . . .5
P
Packaging. . . . . . . . . . . . . . . . . . . . . . . . . . . . . . . . . . . . 3
Paper types. . . . . . . . . . . . . . . . . . . . . . . . . . . . . . . . . . 12
Power connection . . . . . . . . . . . . . . . . . . . . . . . . . . . . . 8
Preparation
Computer connection . . . . . . . . . . . . . . . . . . . . . . . 8
Installing ink cartridges . . . . . . . . . . . . . . . . . . . . . 8
Installing printer driver. . . . . . . . . . . . . . . . . . . . . 13
Loading paper. . . . . . . . . . . . . . . . . . . . . . . . . . . . 11
Paper and media types . . . . . . . . . . . . . . . . . . . . . 12
Power connection. . . . . . . . . . . . . . . . . . . . . . . . . . 8
Printer location. . . . . . . . . . . . . . . . . . . . . . . . . . . . 7
Removing packaging . . . . . . . . . . . . . . . . . . . . . . . 6
Printer driver
Macintosh. . . . . . . . . . . . . . . . . . . . . . . . . . . . . . . 13
Windows. . . . . . . . . . . . . . . . . . . . . . . . . . . . . . . . 13
Printer features. . . . . . . . . . . . . . . . . . . . . . . . . . . . . . . . 4
Printer location . . . . . . . . . . . . . . . . . . . . . . . . . . . . . . . 7
Printer options . . . . . . . . . . . . . . . . . . . . . . . . . . . . . . . . 5
Setup Guide 15
Page 20

Printing modes
Dye sublimation printing . . . . . . . . . . . . . . . . . . . . 5
Metallic foil and white . . . . . . . . . . . . . . . . . . . . . . 5
Overlay printing . . . . . . . . . . . . . . . . . . . . . . . . . . . 5
Standard printing . . . . . . . . . . . . . . . . . . . . . . . . . . 4
VPhoto printing . . . . . . . . . . . . . . . . . . . . . . . . . . . 4
R
Removing packaging. . . . . . . . . . . . . . . . . . . . . . . . . . . 6
S
Safety. . . . . . . . . . . . . . . . . . . . . . . . . . . . . . . . . . . . . . . 1
Standard printing. . . . . . . . . . . . . . . . . . . . . . . . . . . . . . 4
U
Unpacking
Contents . . . . . . . . . . . . . . . . . . . . . . . . . . . . . . . . . 3
Packaging . . . . . . . . . . . . . . . . . . . . . . . . . . . . . . . . 3
V
VPhoto printing. . . . . . . . . . . . . . . . . . . . . . . . . . . . . . . 4
OKI SYSTEMS COMPANIES
Oki Systems (UK) Limited
550 Dundee Road, Slough Trading Estate
Slough, Berks SL1 4LE
Tel: +44 (0) 1753 819 819
Fax: +44 (0) 1753 819 899
http://www.oki.co.uk
Oki Systems (Ireland) Limited
The Square Industrial Complex
Tallaght, Dublin 24
Tel: +353 (01) 459 8666
Fax: +353 (01) 459 8840
http://www.oki.ie
Hawthorn Business Centre
Adelaide Industrial Estate
Falcon Road, Belfast BT12 6HP
Tel: +44 (01232) 572 355
Fax: +44 (01232) 572 350
W
White spot printing . . . . . . . . . . . . . . . . . . . . . . . . . . . . 5
Windows printer driver . . . . . . . . . . . . . . . . . . . . . . . . 13
16 Oki DP-5000
http://www.oki.ie
 Loading...