

Ohsung Electronics URCTKP9600 User Manual

Order Number
: GETEC-C1-18-270
FCC Part 15 Certification
Test Report Number
: GETEC-E3-18-017 Page 1 / 1
APPENDIX G
: USER’S MANUAL
FCC ID.: OZ5URCTKP9600
EUT Type: Network keypad
TKP-9600
Owner’s Manual
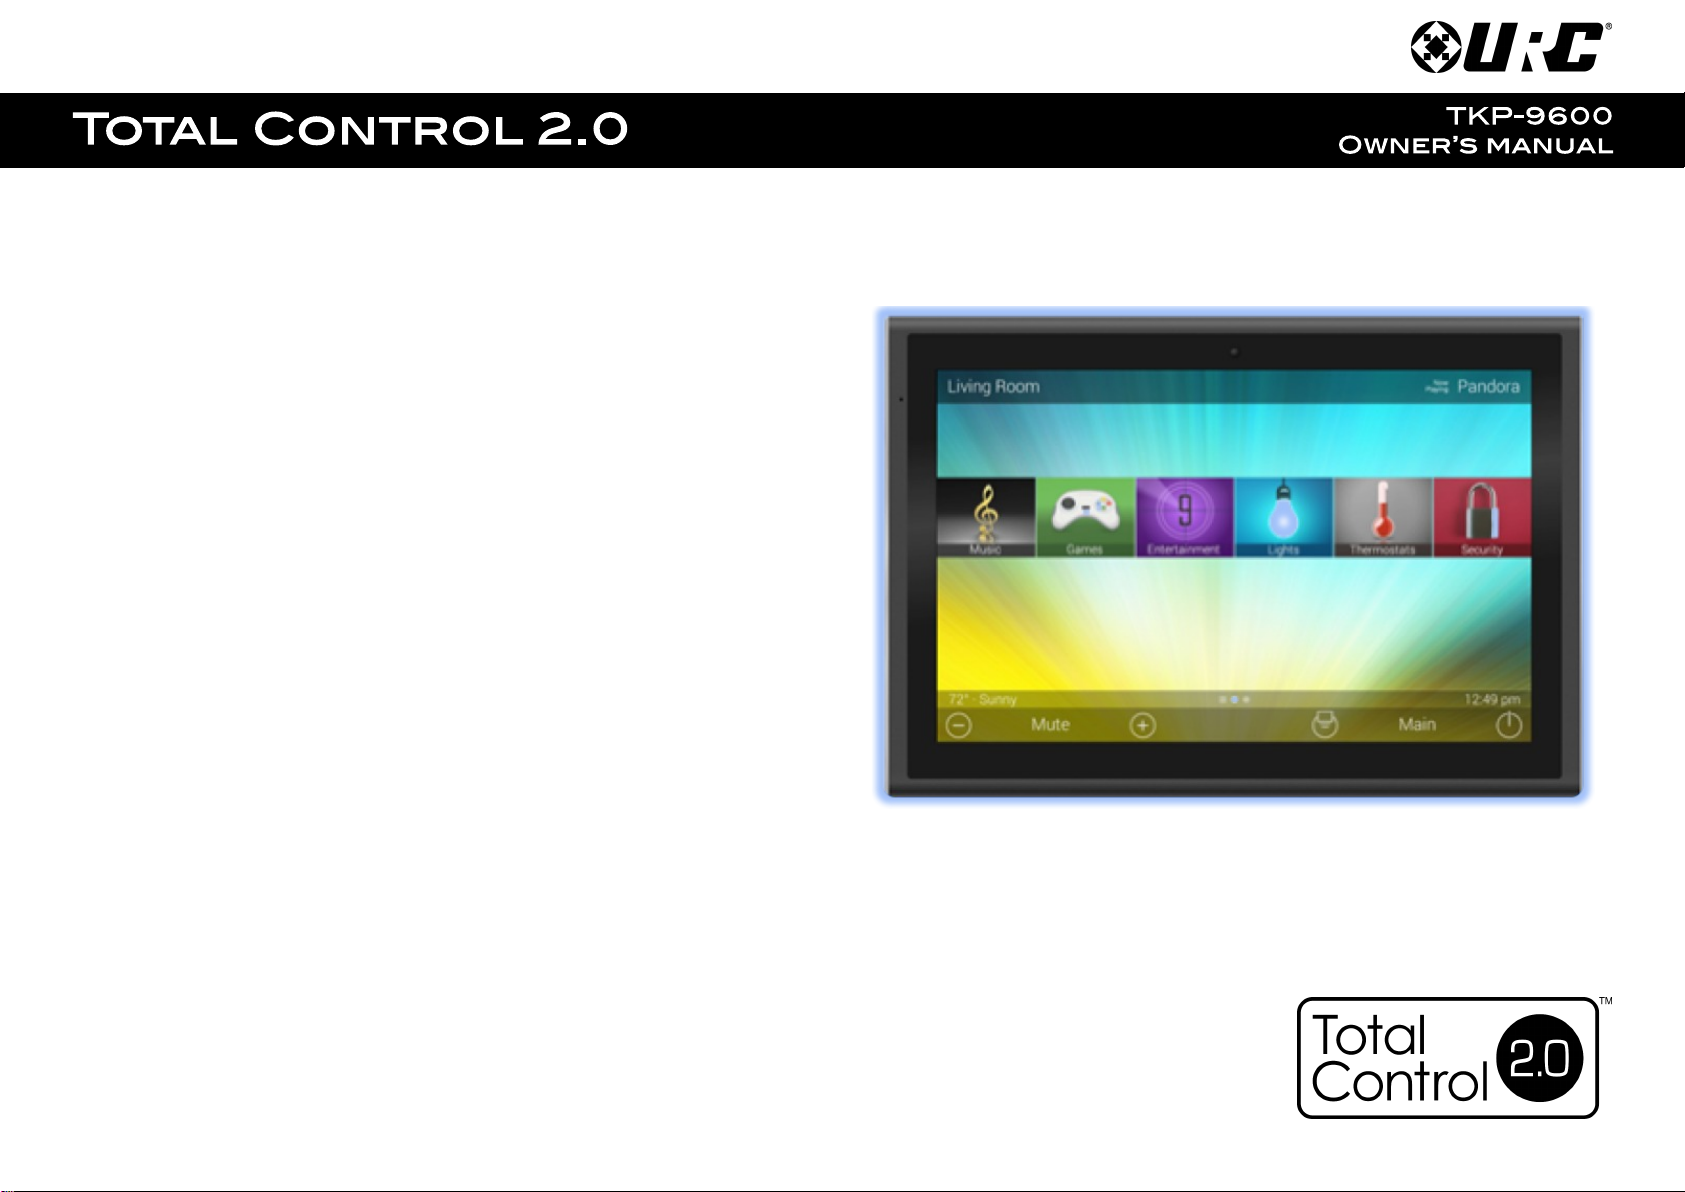
Introducing the TKP-9600
Thank you for purchasing URC’s TKP-9600 In-Wall Network Keypad. Its easy and intuitive
use helps to simplify your life while adding control of more things than thought possible.
Table of Contents
Features and Benefits..........................................................................................1
Online Help:
Visit the URC Home Page for downloads, training materials, and frequently asked questions.
Contact Support:
Total Control is a URC product sold direct or through distribution. For questions or
assistance contact your Custom Installer/Programmer.
My Installer/Programmer:
or URC Technical Support at: techsupport@universalremote.com
(914) 835-4484
Universal Remote Control, Inc.
500 Mamaroneck Ave
Harrison, New York 10528
Toll Free: (800) 901-0800
Parts List.................................................................................................................3
Installation.............................................................................................................4
Main Menu: Navigation.......................................................................................6
Title Bar..................................................................................................................7
Room’s Menu...................................................................................................9
Room Linking.................................................................................................10
Now Playing..................................................................................................11
Core Buttons.........................................................................................................12
Shortcut Popup Menu..................................................................................13
Status Bar......................................................................................................15
Intercom................................................................................................................17
Navigating the Intercom Menu..................................................................19
Making Calls: Audio-Video........................................................................20
Making Calls: Audio Calls..........................................................................22
Making Calls: Baby Monitor......................................................................24
Making Calls: Audio Broadcast.................................................................26
Do Not Disturb Mode...................................................................................28
Scenes Menu.......................................................................................................29
Settings Menu......................................................................................................30
Specifications......................................................................................................39
Limited Warranty Statement.............................................................................39

Features and Benefits:
The TKP-9600 In-Wall Network Keypad is one of URC’s most advanced devices that is
optimized for usage with Total Control 2.0.
Enjoy these key features:
Updated User Experience:
This device has the capability of using URC’s Total Control 2.0 software suite. Using
this software provides this device with a modern “look and feel” giving the end-user
an improved user experience in terms of graphics, performance, and features.
Audio-Video Interface:
Communicate with any other URC Intercom-Enabled device in the system with this
feature. The end-user can make Audio-Video, Audio, or Baby Monitor calls directly
from the TKP-9600.
1

2
Proximity Sensor:
This feature allows the TKP-9600 to spring into action automatically. Utilizing
its proximity sensor, the keypad can detect distances from up to three (3) feet
away. This setting can be adjusted in the device’s Settings menu.
Flexible Orientation:
The TKP-9600 offers the ability to display the device in either portrait or
landscape mode making it the perfect keypad for almost any room. This feature
can only be set from within the Accelerator 2.0 software, speak to a custom
home professional prior to installation.
3
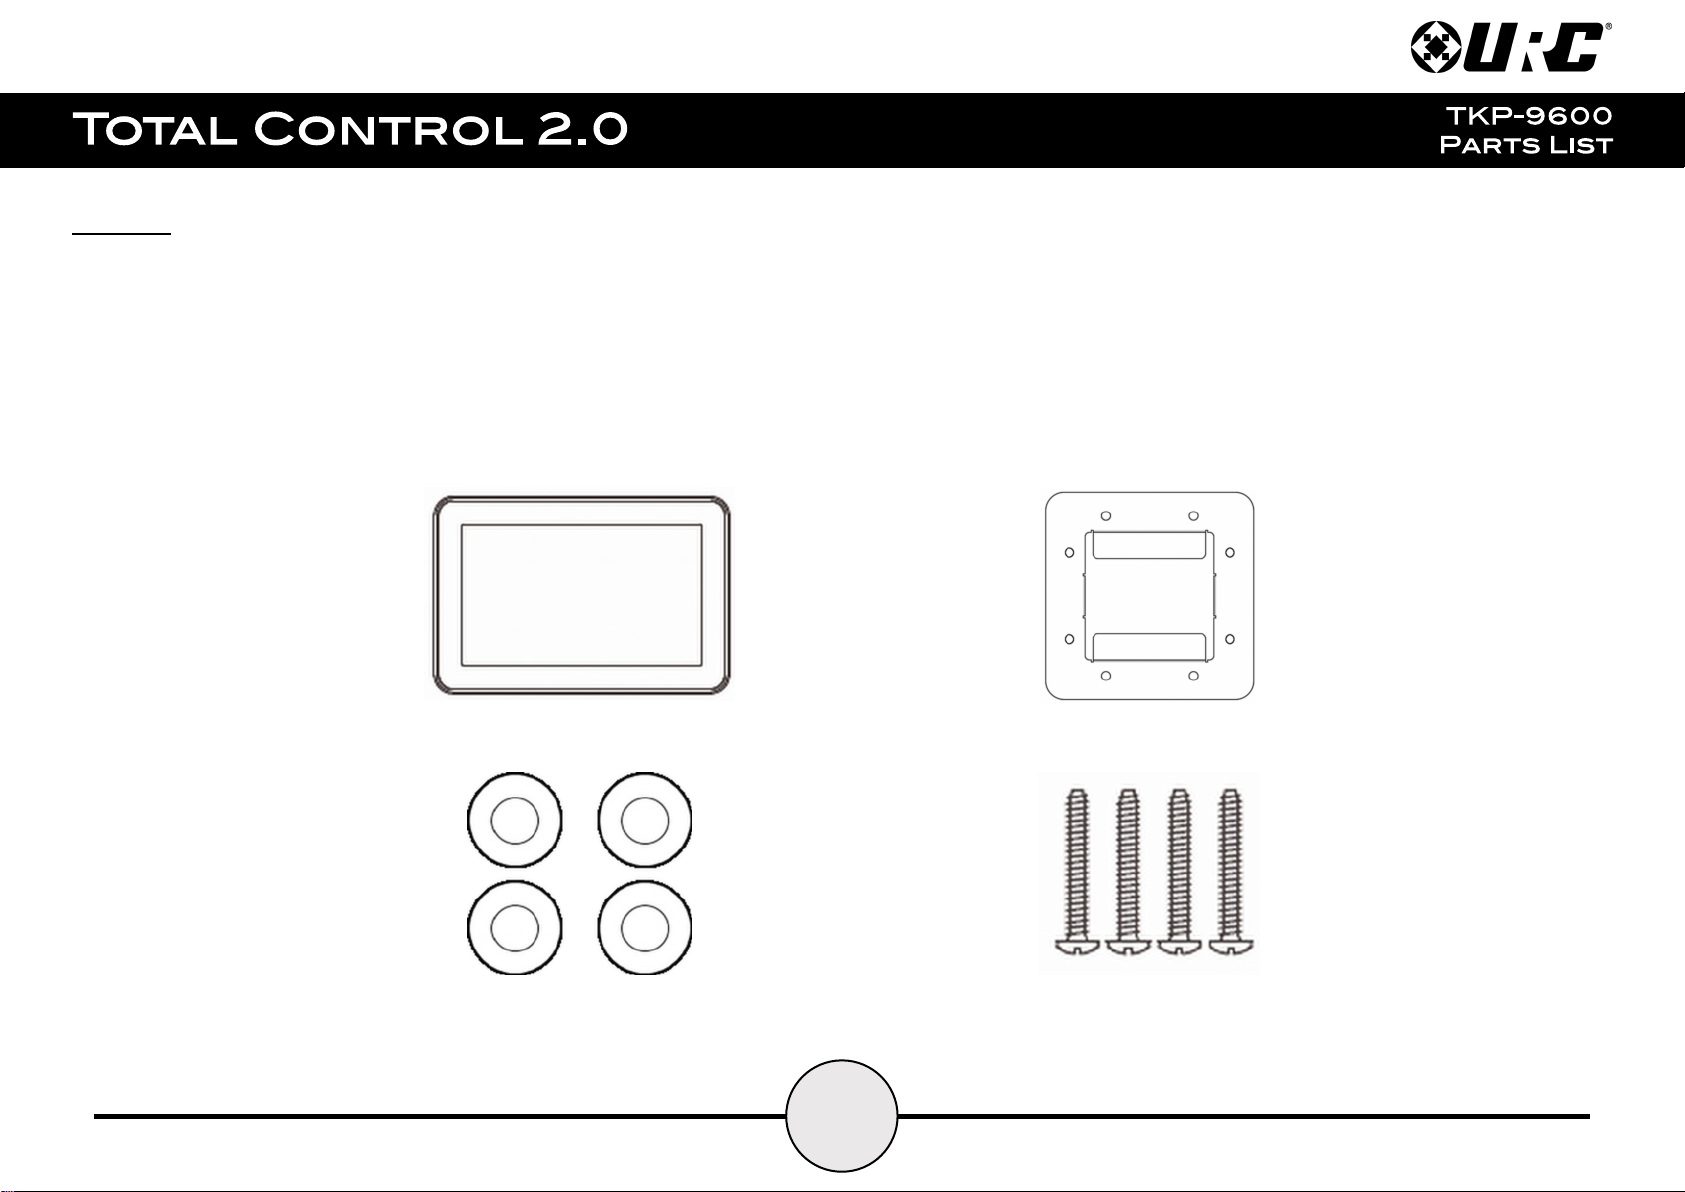
Part List:
TKP-9600
Mounting Ring
Spacers
Mounting Screws
Included in the TKP-9600:
1x - TKP-9600 Network Keypad
1x - Mounting Ring
4x - Mounting Screws
4x - Spacers
4
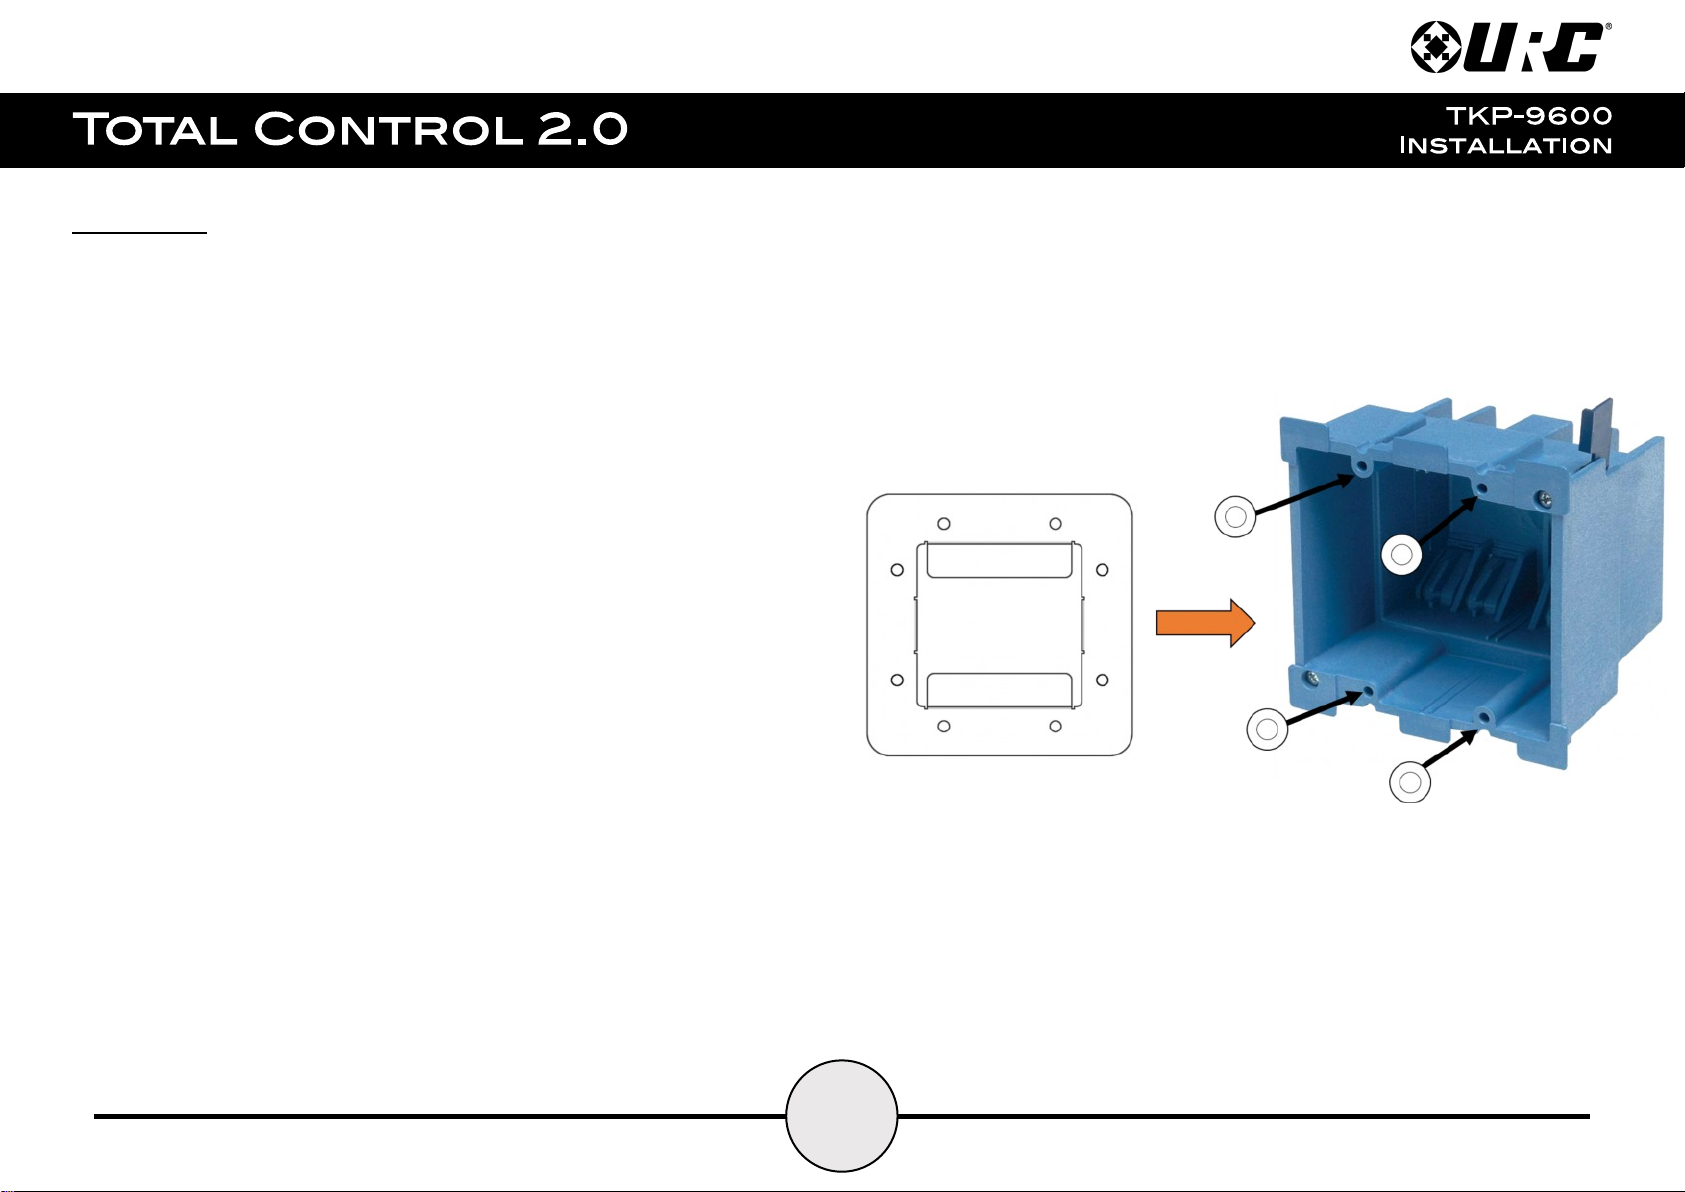
Installation:
Mounting Ring
Spacers
Dual-Gang
The TKP-9600 is wall mountable and fits into a standard dual gang (J-box or Mud Ring)
opening. Prior to installation, make sure power is available at the preferred location.
Power can be supplied to the TKP-9600 through an Ethernet (RJ45) cable connected to a
PoE (Power over Ethernet) in either of the following ways:
● Router/Switch
● PoE Injector
Power over Ethernet describes a system that passes electrical power safely, along with
data, along Ethernet cabling. A shielded Ethernet cable is preferred. The IEEE standard
for PoE requires a Category 5 or higher for high power levels.
Using the Spacers:
Use the spacers when installing the mounting ring on to a gang box. The spacers are
NOT needed when using a p-ring.
Included in the box are four (4) spacers that are to be used at specific installation
sites. Most new homes are retrofitted with plaster ring boxes (p-ring) that allow the
TKP-9600 to be mounted flat and flushed to the wall without the user of spacers.
However, in some instances, the only boxes that are in the home are dual-gang
boxes. In those situation spacers are REQUIRED in order to install the TKP-9600.
Use the spacers as a buffer between the mounting ring and the dual-gang box, this
can be done by using a screw to secure the mounting ring to the box.
With this the TKP-9600 can sit flush and flat on its mount without the risk of
bending or breaking the dual-gang box.
5
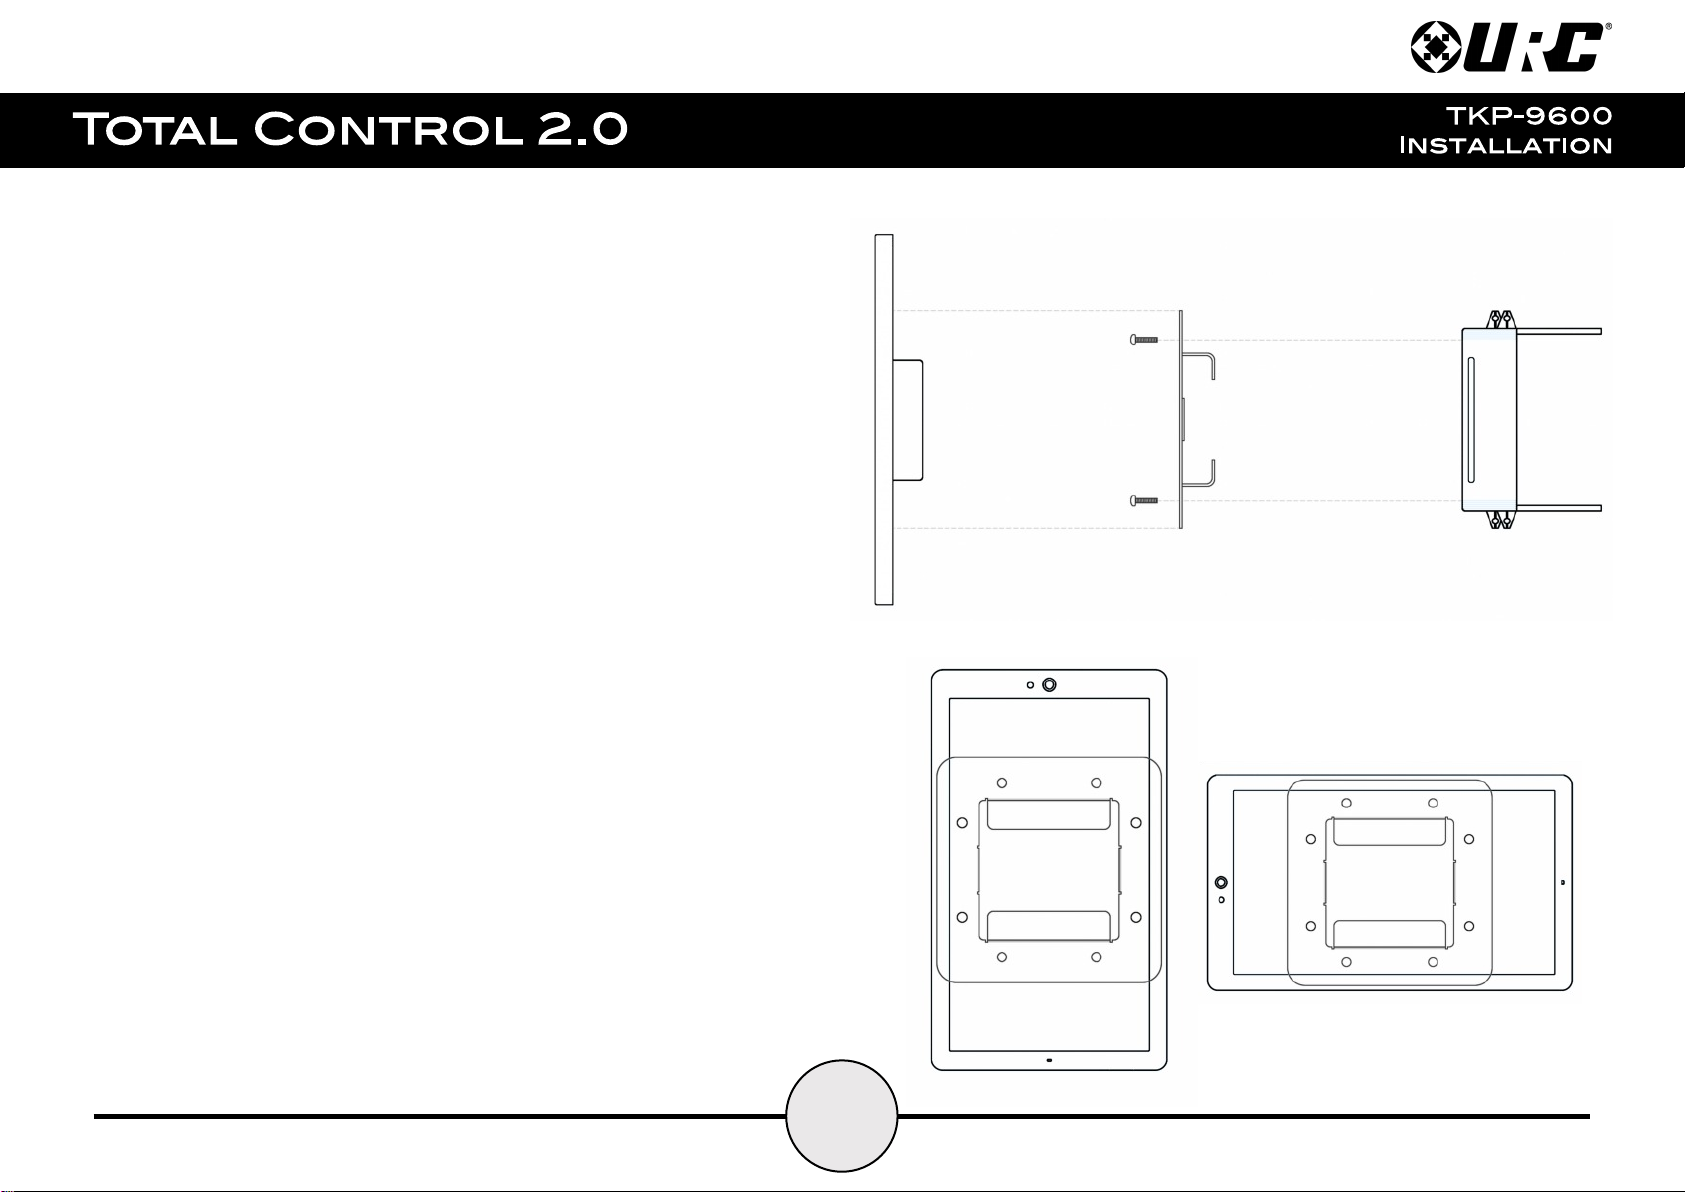
Wall Mounting:
Mounting Ring
TKP-7600
Dual-Gang Box
Landscape
Portrait
Follow the steps below for installation:
1. Assure the dual-gang opening is fitted with the standard two-gang
retro-box (available at almost any electronic supplier).
2. Mount the wall-plate to the two-gang retro-box.
3. Connect the Ethernet cable to the rear of the supplied TKP-9600.
4. The TKP-9600 easily snaps into the wall-plate.
The keypad mount rotates to accommodate landscape or portrait viewing
modes. The viewing mode is set from within the Accelerator 2.0 software.
6
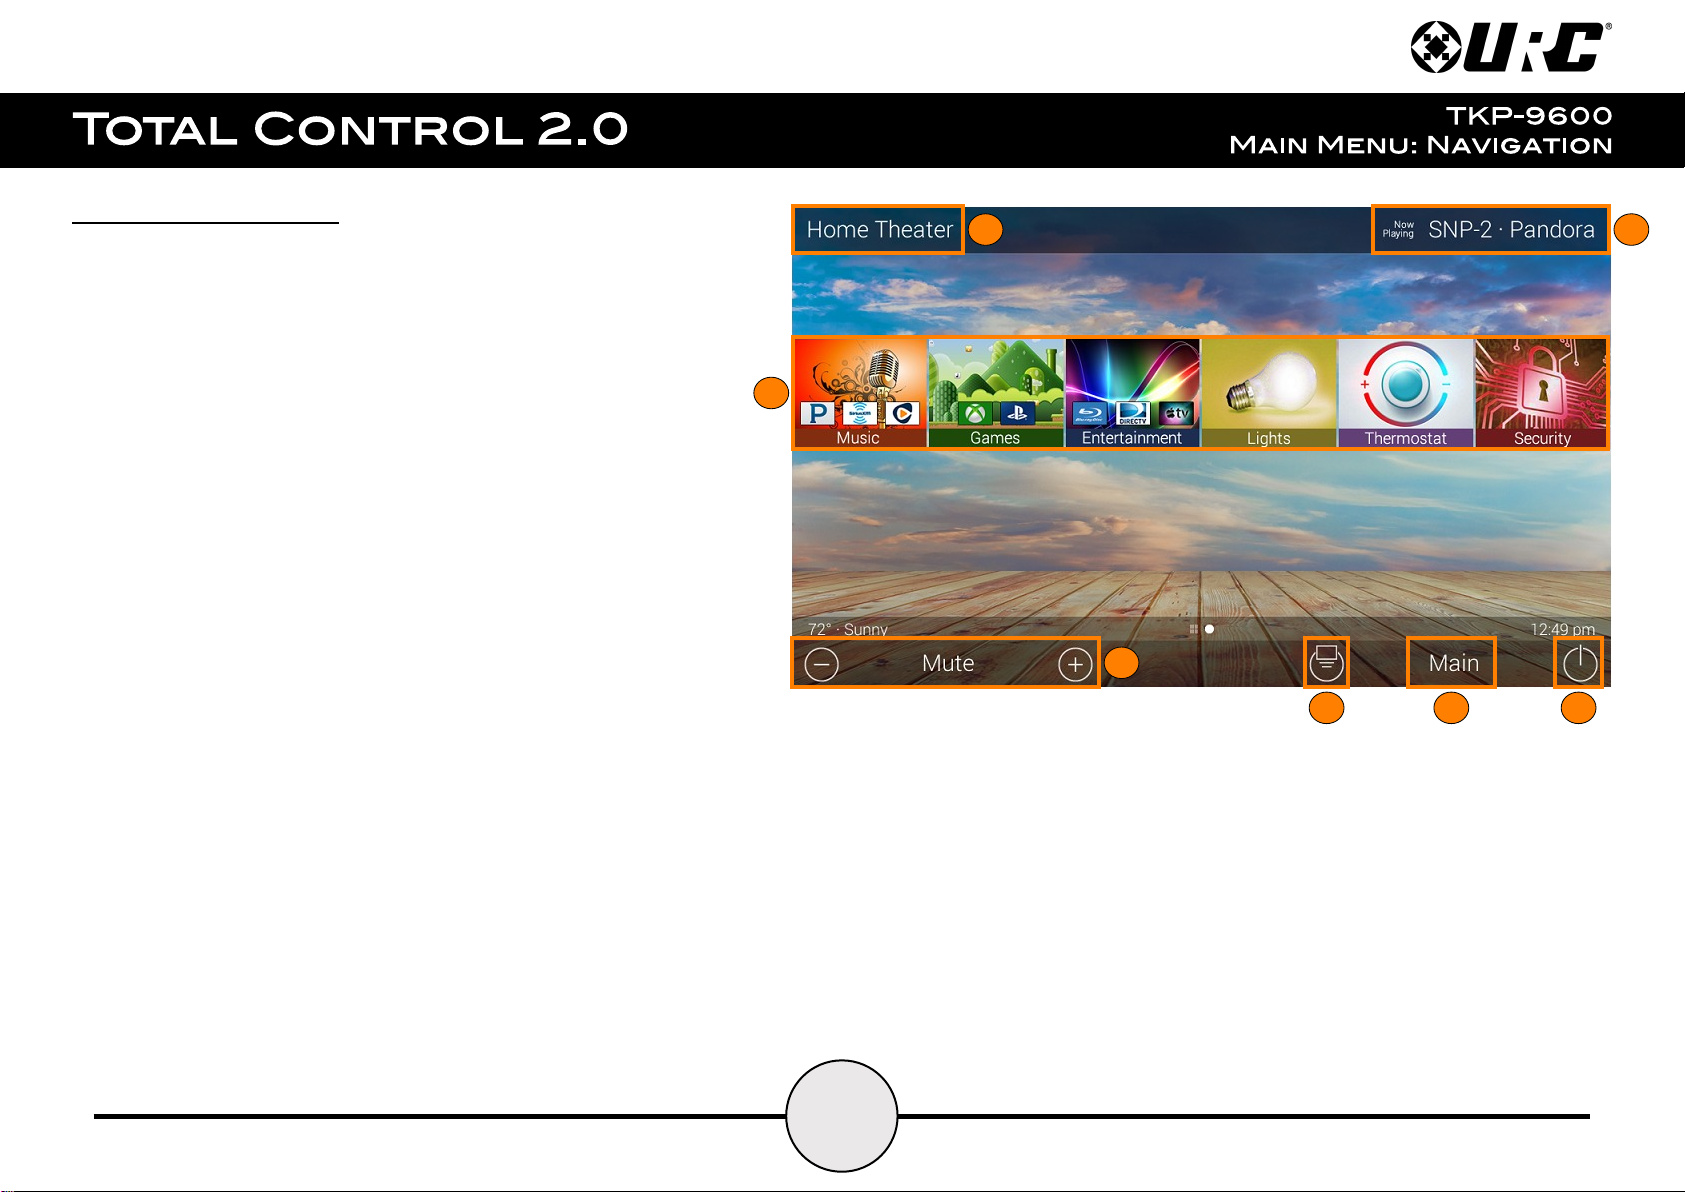
Main Menu Navigation:
1234567
Although specific screen design and certain options are dictated by the
custom integrator that programmed the Total Control 2.0 system, the general
layout remains the same.
Actual navigation is performed via screen swipes:
● Left Swipe: Swipe left to reveal additional Main Menu pages. The
amount of pages available on the Main Menu is dictated by the
custom integrator.
● Right Swipe: Swipe right to reveal the Scenes Menu. The Scenes
Menu contains URC Scenes that are created by the custom
integrator. Return to the Main Menu by swiping left from the
Scenes Menu.
● Button Tapping: On the Main Menu selecting each of these areas
provide the end-user with control:
1. Category/Device Ribbon: Select a Category button to reveal
the associated submenu OR select a Device located here to
access that devices menu. This is dictated by the
custom integrator.
5. Main: Select this to return to the Main Menu regardless of what page the device is
currently on. This can be changed to return to the Scenes Menu, speak with the custom
integrator to program the TKP-9600 this way.
2. Rooms Menu: Select the Room Name to access the
Room’s Menu. This menu allows the end-user to control another
room and more.
3. Volume Control: Tap the minus (Vol-) to lower the volume, plus
(Vol+) to increase the volume, and Mute to mute the volume.
4. Shortcuts: Select this button to reveal the Shortcuts Popup
menu. The end-user can add up to six (6) items on this menu.
6. Room Power Off: Select this button to turn off the current room.
7. Now Playing: Select the Now Playing button at the top to instantly jump into that
device/activity’s menu pages.
7
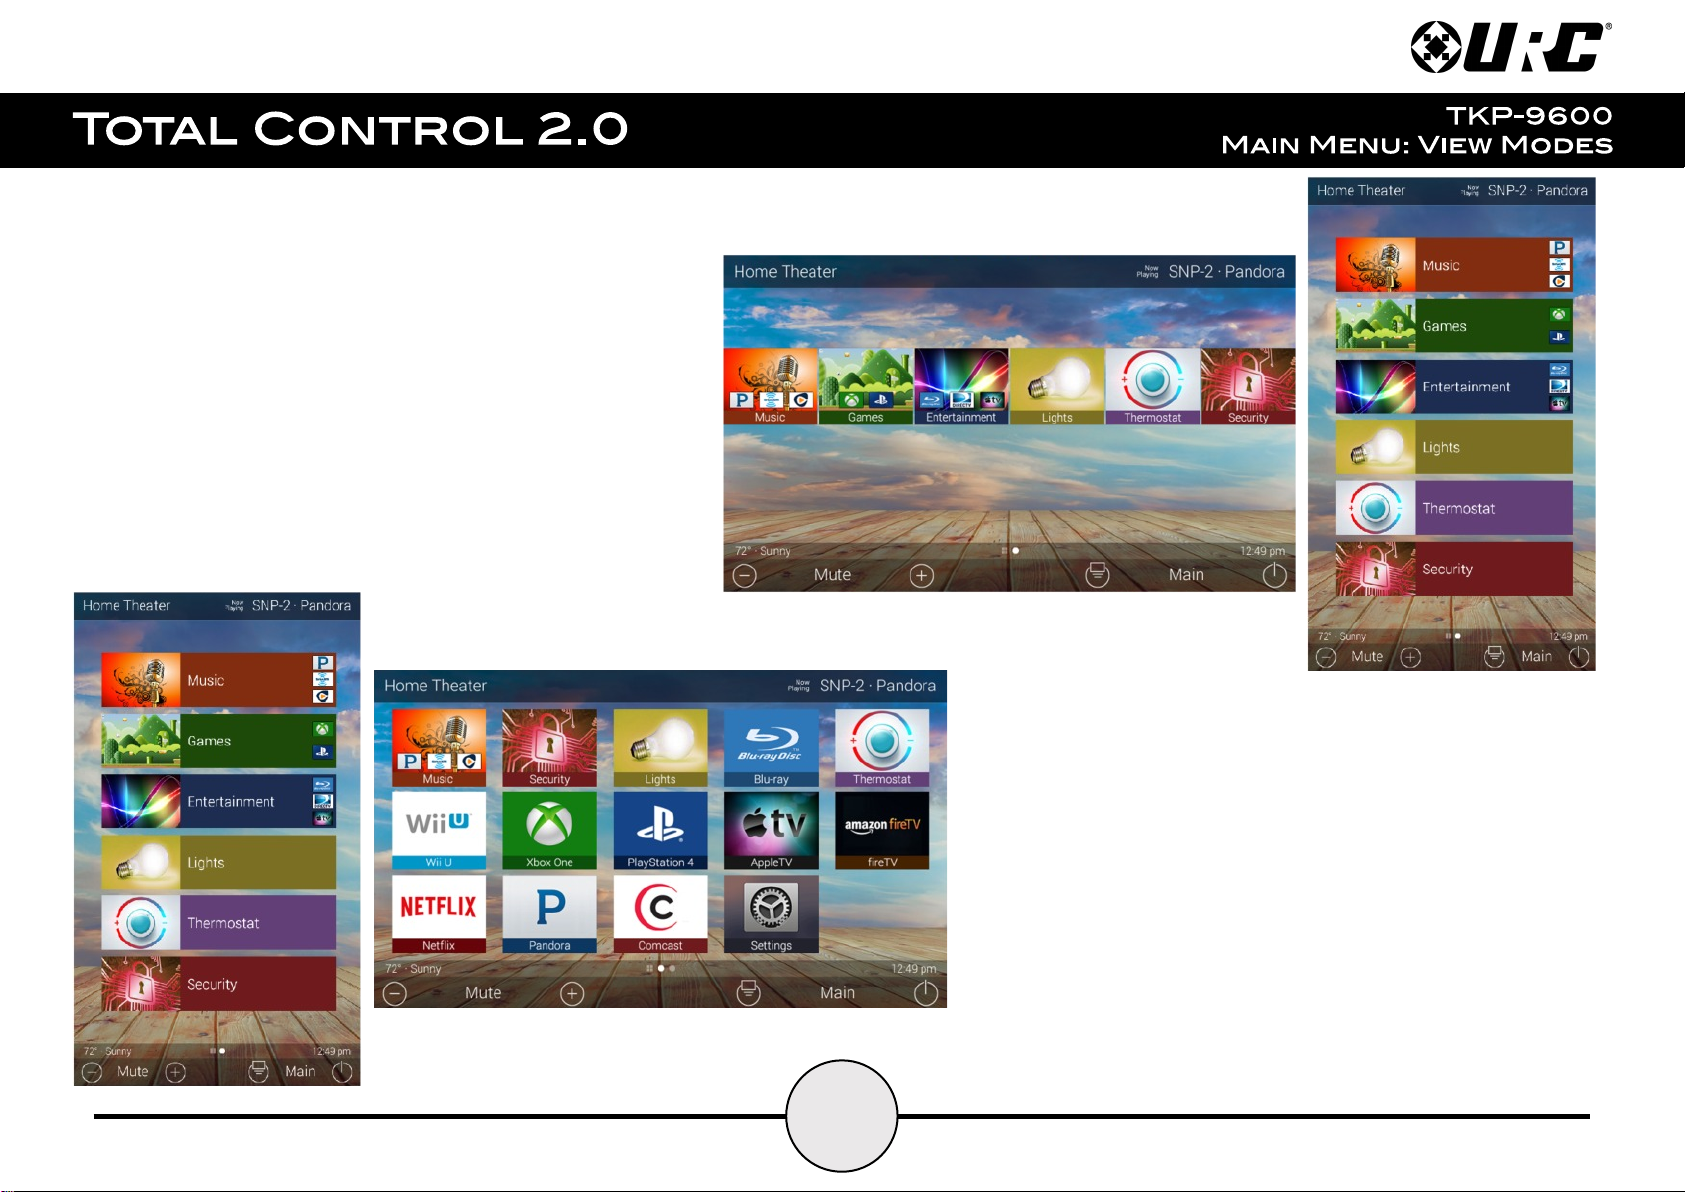
Main Menu: View Modes
Total Control 2.0 features two different view modes for the
TKP-9600. Each view mode has its own unique properties that
compliment the user experience.
The view mode must be programmed from within the
Accelerator 2.0 software, speak to a custom home integrator for
more details.
1. Ribbon View: This is the default view mode and it
contains up to six (6) items per page.
Grid View (Landscape & Portrait):
Ribbon View (Landscape & Portrait):
2. Grid View: This view mode contains up to
fifteen (15) items per page.
8
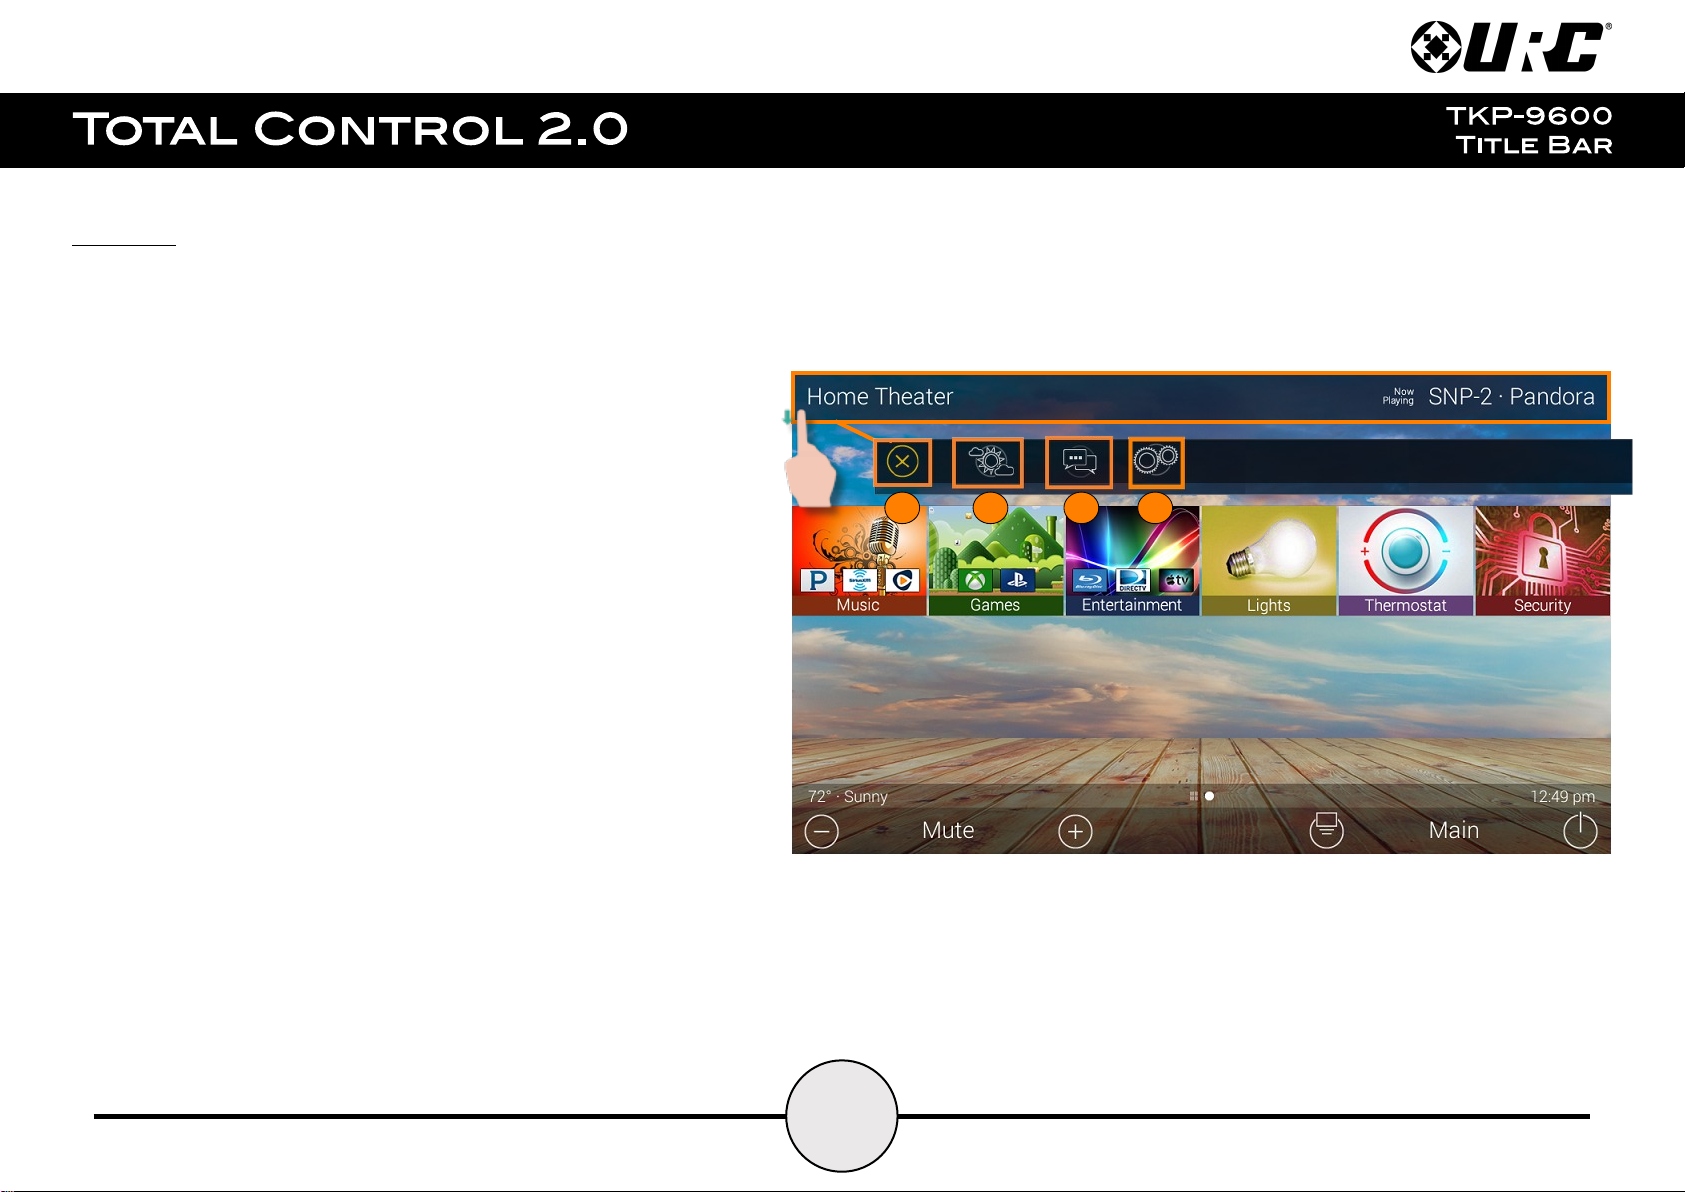
Title Bar:
Current Room
Now Playing
123
4
The Title Bar is always present regardless of what menu and/or room the
TKP-9600 is currently using.
On the left of the Title Bar, the current room the TKP-9600 is controlling is
displayed. Selecting it reveals the Rooms Menu.
At the right of the Title Bar is the Now Playing area. This displays which
device/activity is currently active. Selecting it returns the interface to the
device/activity’s menu for control.
The Title Bar is located at the very top of the display. To access its menu,
swipe down as depicted on the image to the right. There are three (3)
selectable options here:
1. Close: Select this to hide the Title Bar Menu.
2. Weather Module: Select this to display the Time and Weather
Module, this feature requires the home location. This location is set
from within the Accelerator 2.0 software.
3. Intercom: Select this button to display the Intercom Menu. This
menu displays all available Intercom-Enabled device (clients). Please
see this documents Audio-Video Intercom section for more details.
4. Settings: Select this button to access the TKP-9600’s
Settings Menu. The various parts of the Settings Menu are
explained in detail in a later section of this document.
9
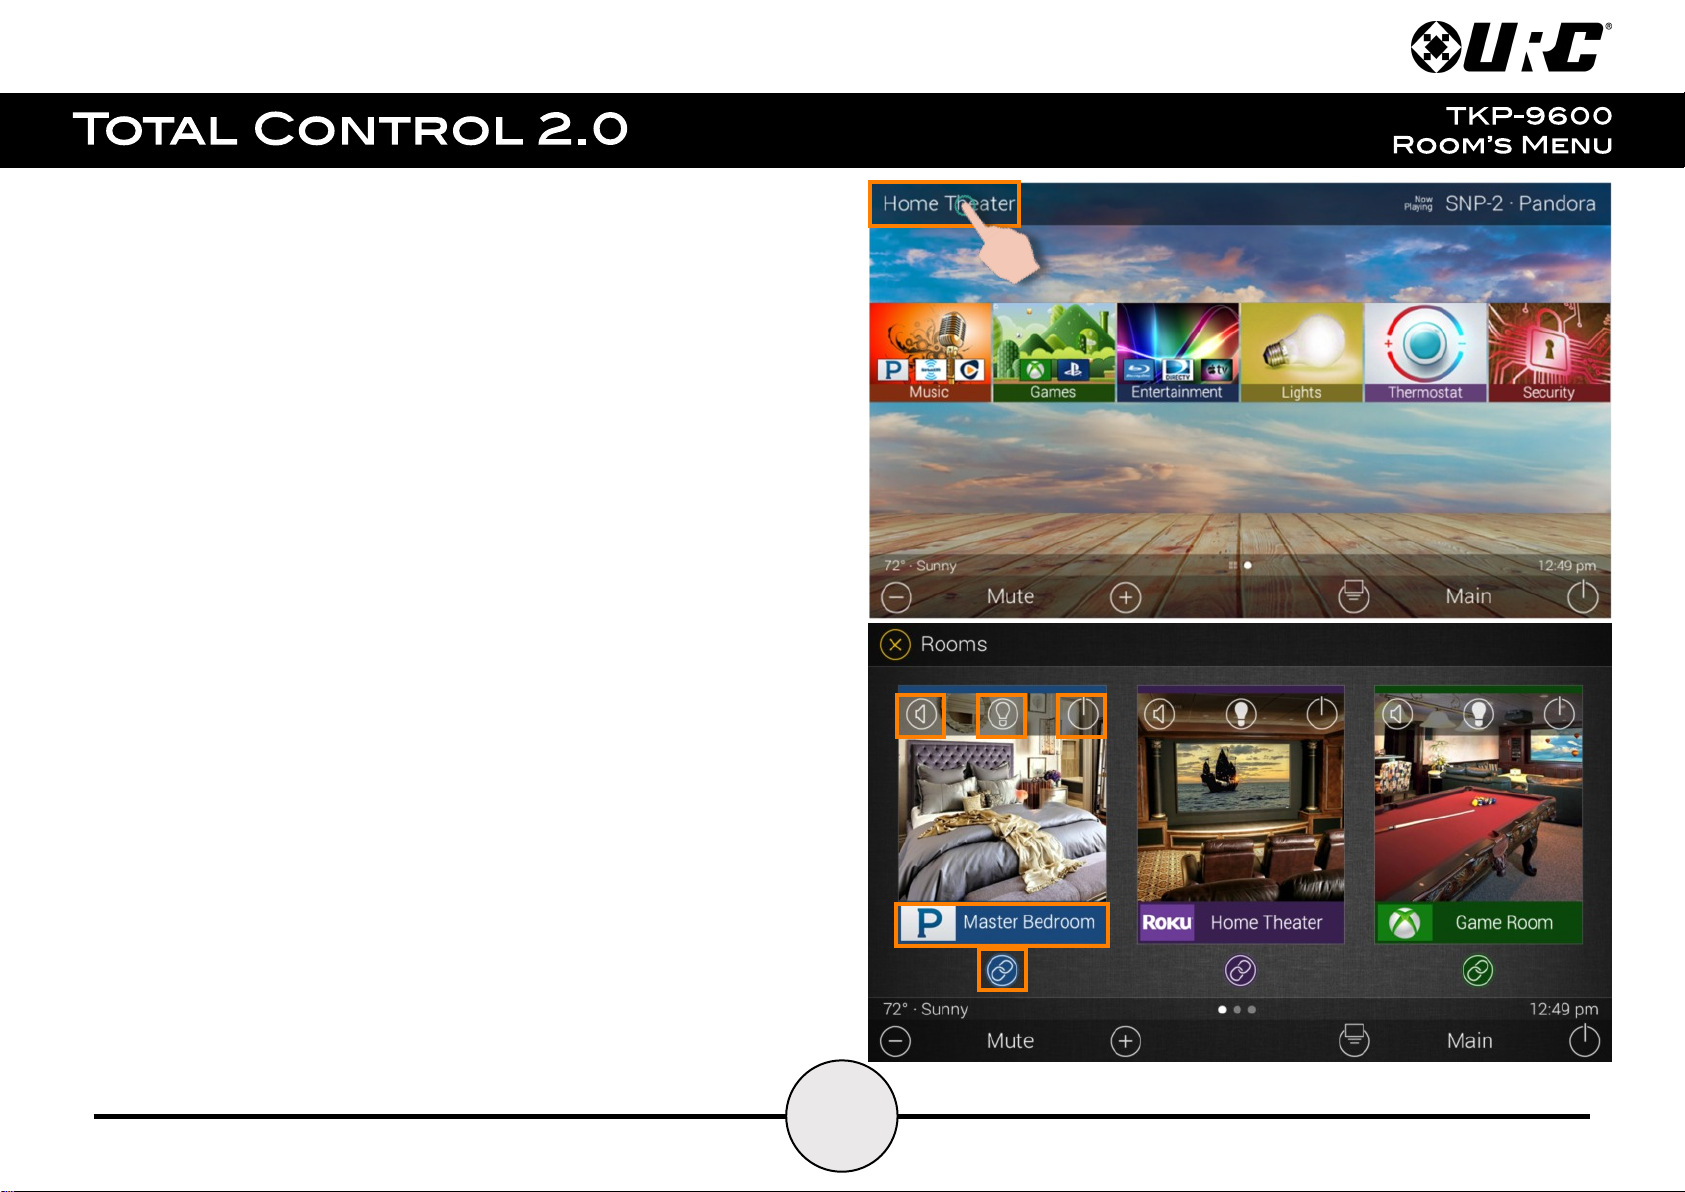
Room’s Menu:
Tap on the Room Name located on the left in the Title Bar to display the
Room’s Menu.
The Room’s Menu contains every room programmed into the system. Specific
rooms may be hidden from certain interfaces, speak to the custom home
integrator for that option.
Each room is given a Room Name and customized image to represent that
room. Additionally, the Room’s Menu can be used for controlling volume,
turning off the lights, or completely powering off a specific room.
Here are the selectable buttons in the Room’s Menu:
1. Volume Control: Select this button to reveal the Vol +, Vol -, and
Mute icons. This button is available on any room with audio sources.
2. Lights Off Action Command: This button is programmed by the
custom integrator and can be set to turn off all the lights in a
particular room.
3. Room Off: Select this button to turn off all the devices in that
particular room. This button can only be used to turn off a room.
4. Now Playing: This section displays what device/activity is currently
active in that room. Selecting this jumps the TKP-9600 to that
device/activity’s menu for control.
5. Room Linking: This feature is only available on DMS Audio device.
It is used to link DMS Zones/Areas. This means having one menu
that controls volume for multiple zones simultaneously or individually.
10
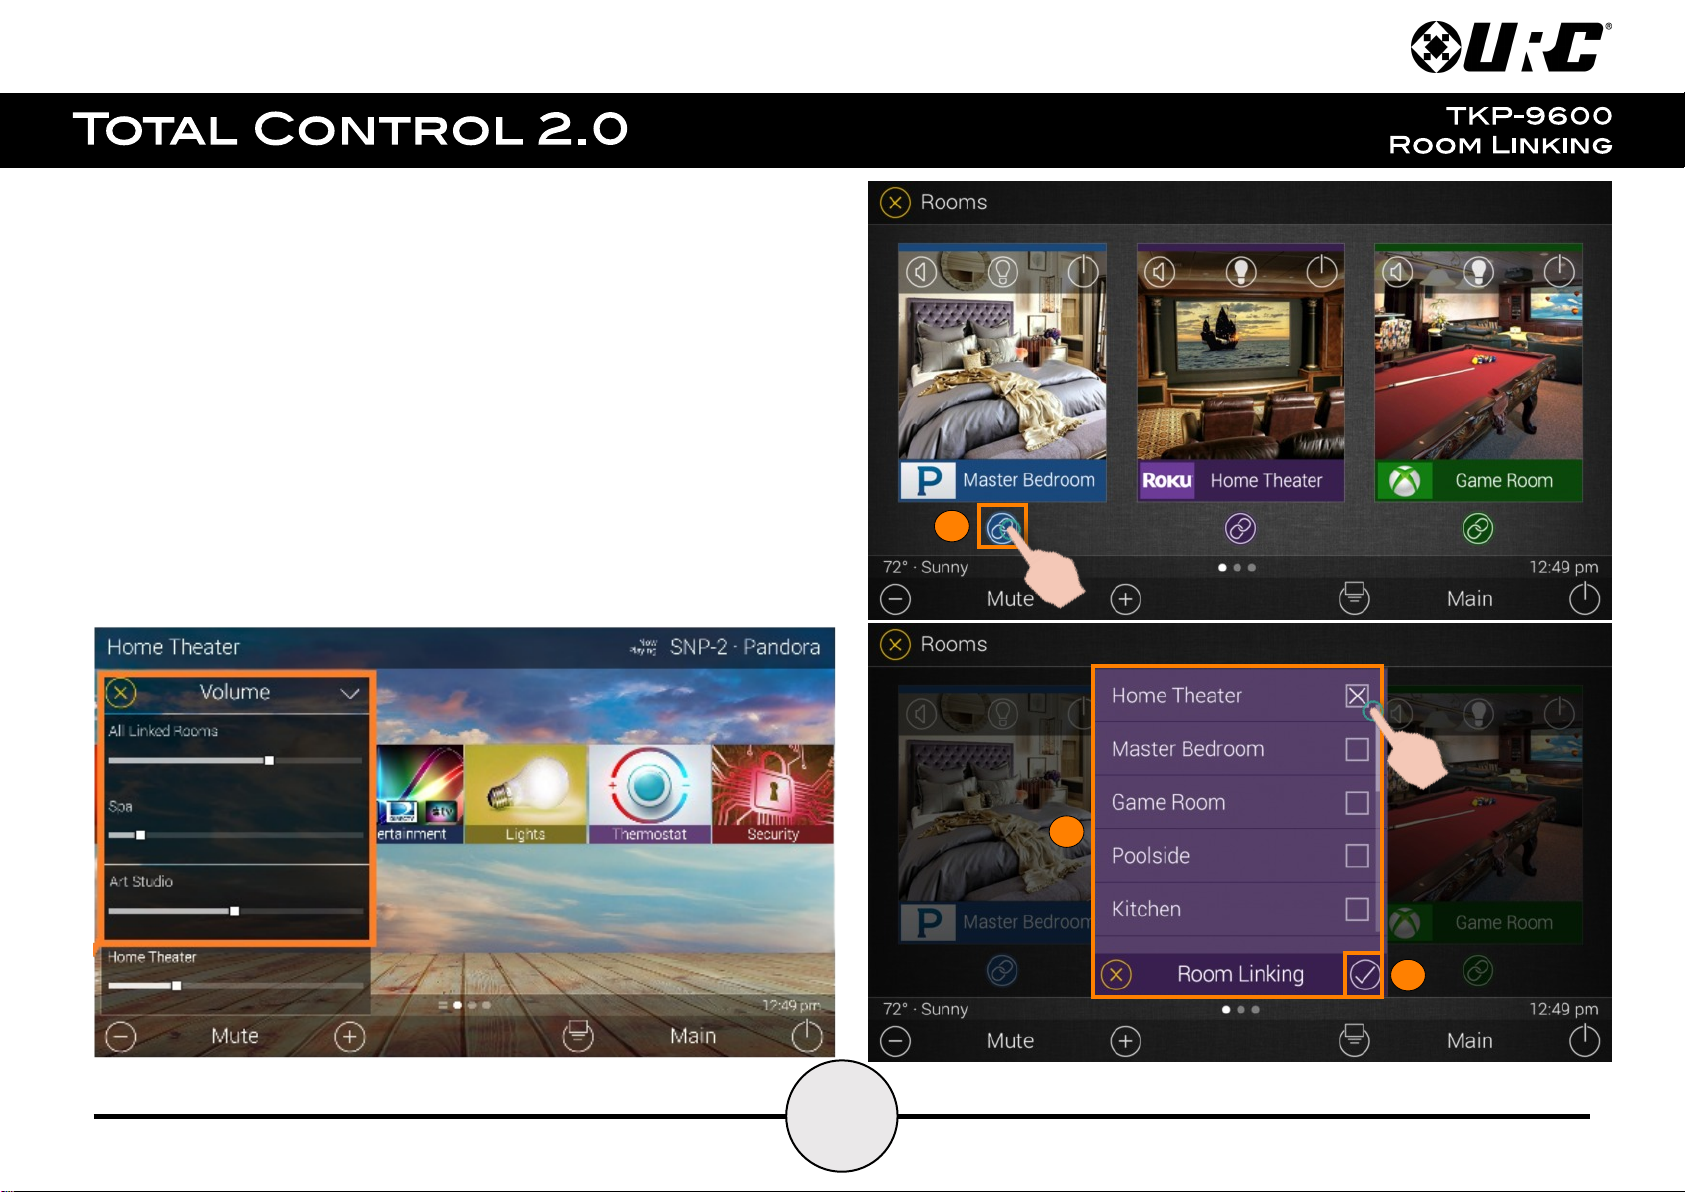
Room Linking:
123
Remember, Room Linking can only be used by DMS Zones/Areas. The
following steps take place from within the Room’s Menu:
1. Select the Room Link button, this displays the Room Linking Menu.
2. Select which rooms in the system to link. Only rooms that are
DMS Zones/Areas appear on the Room Linking Menu.
3. Select the Check to confirm.
These rooms are now linked. It is possible to control volume on all of
these rooms from one menu (see below). Control the volume of each
Linked Zone/Area individually or simultaneously using the
All Linked Rooms volume slider.
11
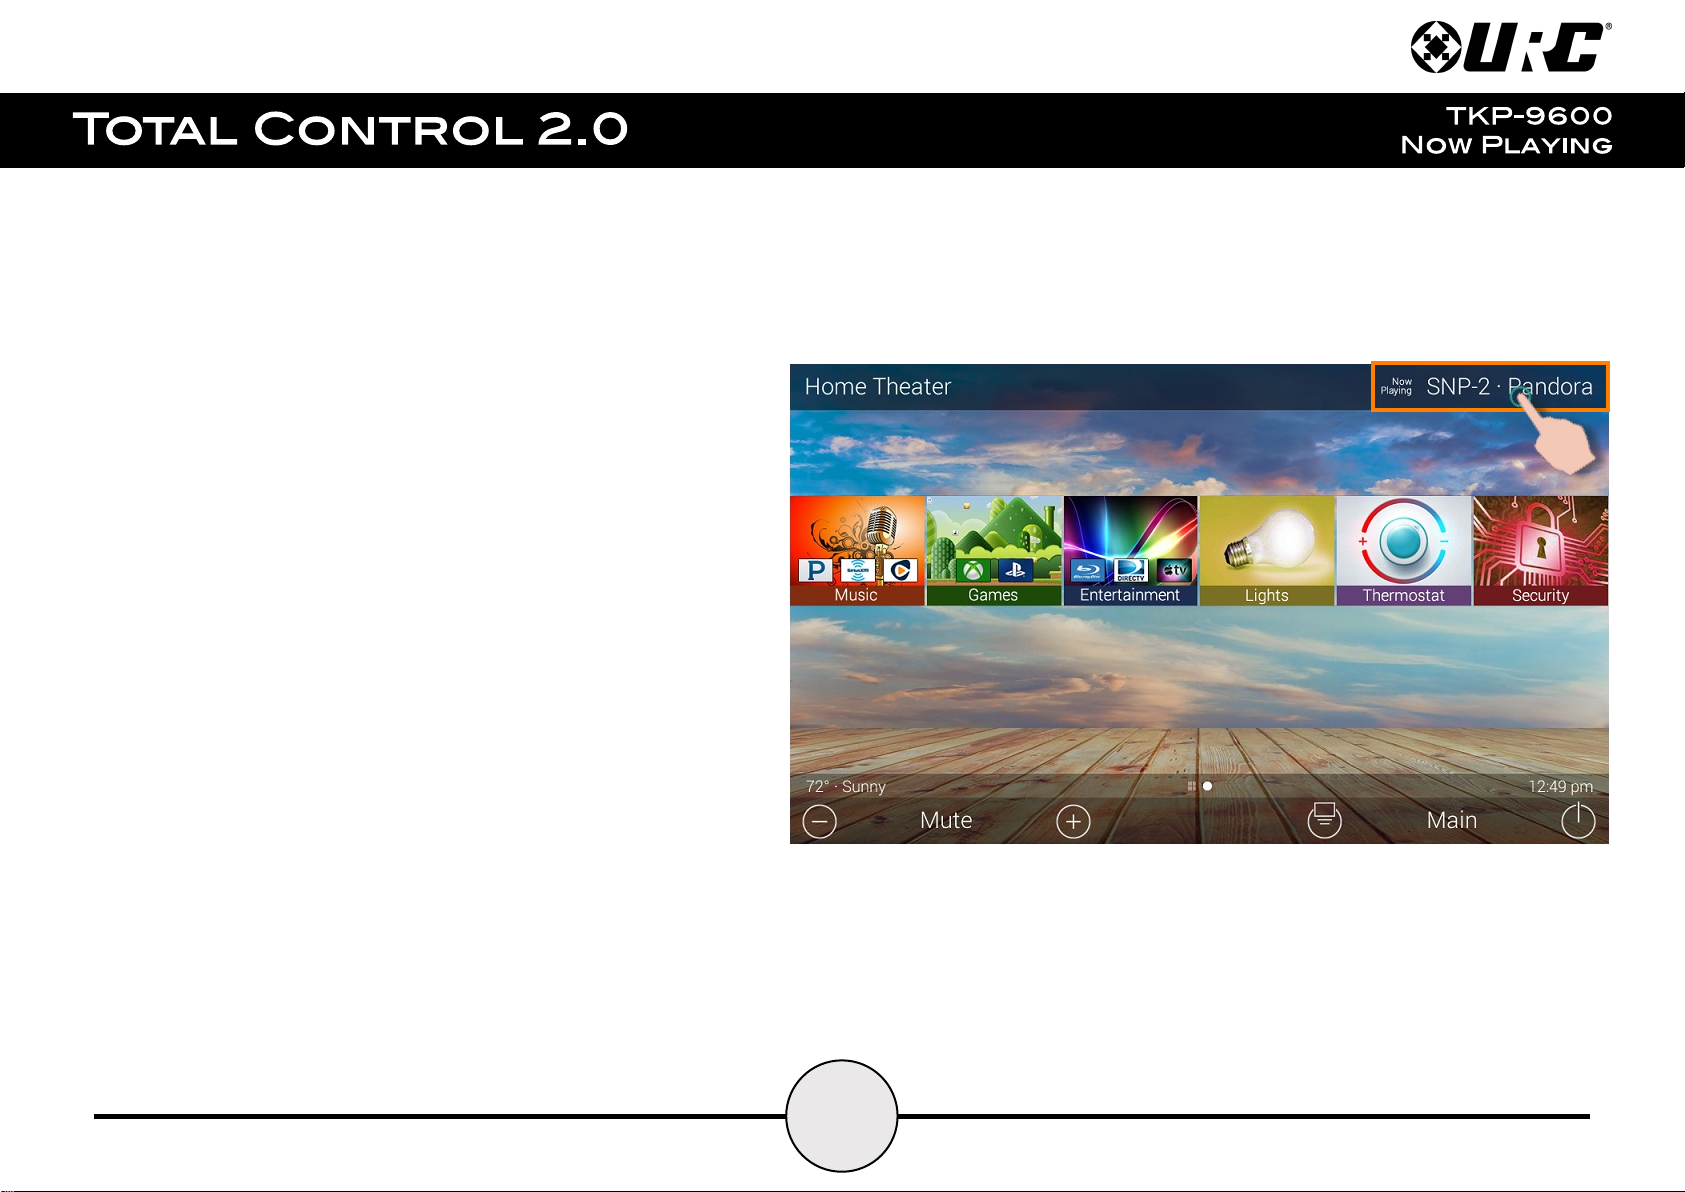
Now Playing:
On the right hand side of the Title Bar is the Now Playing area. The
Now Playing area always dictates what activity is currently playing in
the room.
In the example at the right, Now Playing reads “SNP-2 Pandora”.
This means that in the Home Theater the SNP-2 is using
Pandora currently.
Tapping the Now Playing area jumps the TKP-9600 to the menu for
the device in that section. In the example this mean that, once
tapped, the interface jumps to the SNP-2 device menu for control.
 Loading...