


42SWP22
22 cu ft LAWN SWEEPER
U.S. Patent No. 7,610,646
READ AND FOLLOW ALL SAFETY RULES AND OPERATING INSTRUCTIONS BEFORE USING THIS EQUIPMENT
6003311 - REV A 11/14

Safety Rules
This is the safety alert symbol. It is used to alert you to potential personal injury hazards. Obey all safety messages that follow this symbol to avoid possible injury or death.
Read and understand all safety rules and operating instructions before using this tractor attachment.
Follow all safety rules and operating instructions provided by your tractor's manufacturer when using attachment.
Never allow children or untrained persons to operate tractor or attachment. Reduce tractor speed to slowest setting when towing or operating on slopes. Operate up and down slopes, never across the face of slopes.
Do not carry passengers on tractor or attachment. Avoid sudden turns or maneuvers.
Use caution when backing up to prevent damaging attachment. Do not tow attachment on public roadways.
Do not remove warning decals from product.
Check product for worn, loose, or damaged parts before each use. If any damage is present, repair the product before using.
Check product for loose or missing fasteners before each use. Tighten or replace fasteners as needed before using.
Do not fasten rope to any part of your body or clothing.
Do not hold rope while tractor and Lawn Sweeper are in motion. Do not use Lawn Sweeper near fire or smoldering debris.
Always fasten rope to tractor to avoid contact with wheels and brushes.
Always empty hopper before storing to avoid spontaneous combustion of contents.
Do not exceed tractor speed of 6 miles per hour when towing or operating Lawn Sweeper.
1

Carton Contents
|
|
(x1) |
|
|
|
46 (x1) |
|
|
|
|
|
|
|
||
|
|
|
|
45 (x1) |
|
|
|
42 (x2) |
|
40 (x2) |
|
39 (x1) |
|
47 (x2) |
|
|
|
|
|
|
|
||
|
|
|
|
|
|
|
|
|
|
|
|
25 (x2) |
|
26 (x2) |
|
|
|
|
|
|
|
|
|
|
44 (x2) |
|
|
|
|
|
|
|
|
|
|
55 (x2) |
|
57 (x1) |
|
|
|
|
|
|
|
|
|
5 (x2) |
|
|
|
|
|
|
17 (x1) |
|
|
|
|
|
|
|
|
|
6 |
(x2) |
4 |
(x1) |
3 (x1) |
|
|
|
|
|
|
||||
|
|
|
|
|
|
||
31 (x2) |
49 (x2) |
|
50 (x2) |
|
|
|
|
|
|
|
|
|
|
53 (x2) |
38 (x8) |
27 (x4) |
|
|
|
|
|
|
|
|
|
|
|
|
|
54 (x2) |
|
|
30 (x2) |
|
|
|
|
|
|
|
32 (x3) |
|
|
60 (x4) |
28 (x10) |
29 (x11) |
|
TOOLS REQUIRED FOR ASSEMBLY: |
|
|
|
|
|
||
• |
9/16" Wrench and Socket |
|
|
|
|
|
|
|
|
|
|
2 |
|
|
|
Assembly Instructions
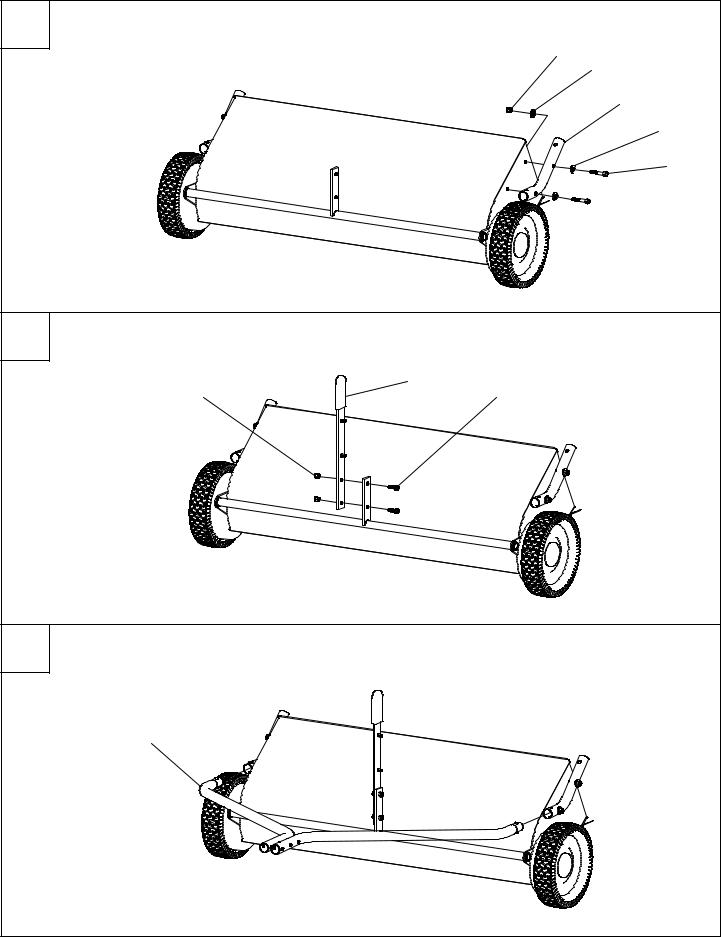
1Attach Short Hitch Tubes to Sweeper Assembly and tighten hardware.
29 60
26 28
27
DO NOT OVERTIGHTEN.
2Attach Handle to Height Adjustment and tighten hardware.
29 |
3 |
31 |
|
3 Insert Long Hitch Tubes into Short Hitch Tubes and snap into position.
25
3
Assembly Instructions
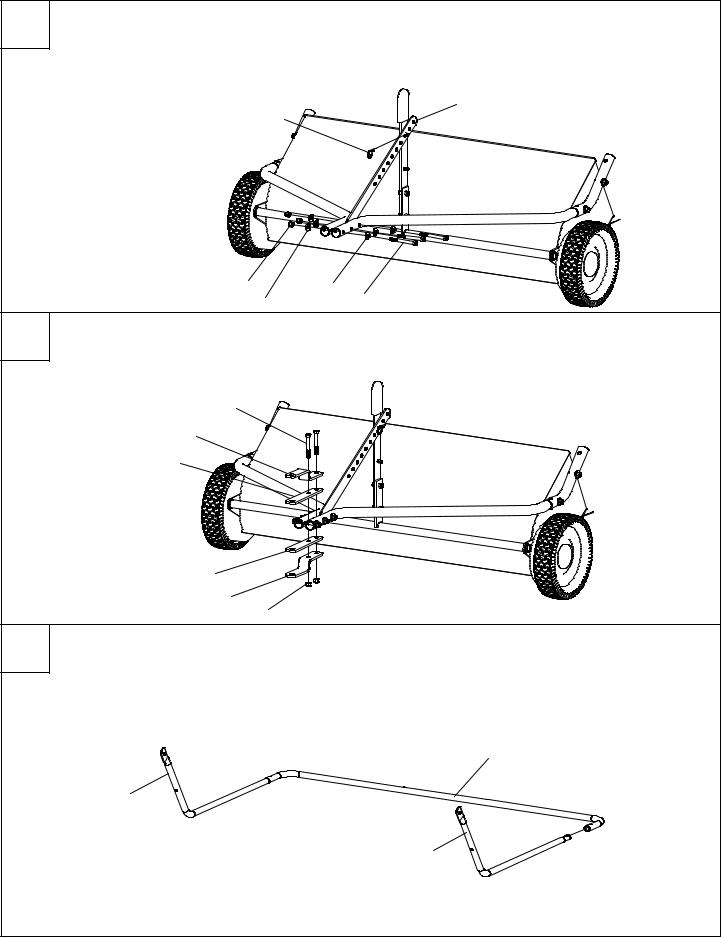
4Install hardware through front two holes of Long Hitch Tubes as shown. Hold Adjustment Lever in position and install third bolt as shown.
Pin Adjustment Lever to Handle.
4
38
DO NOT TIGHTEN |
|
|
AT THIS TIME. |
2928 |
28 32 |
|
5Install Clevis Bars as shown; Clevis bolts pass between Hitch Tube bolts. Tighten Hitch Tube hardware first, then tighten Clevis hardware.
30
6
5
5
6 29
6Insert Bottom Frame Tubes into Rear Frame Tube and snap into position.
44
40
40
4
 Loading...