

Page 1
Version 0
USA/CAN
Page 2

Thank you for selecting an Océ solution for your document production
and management needs. The following information will help you get the
most productive and reliable use out of your system.
Océ brand supplies are designed for Océ multi-function copy/print/fax
systems to ensure maximum product performance and quality.
Substituting other supplies may result in inferior image quality and
machine malfunction.
To order supplies call the Océ Supply Line:
1-800-462-6797 (US)
1-866-462-4478 (CAN)
Should your system develop a problem that cannot be remedied by using
the maintenance or troubleshooting procedures out-lined in this manual,
please contact Océ Technical Support by calling:
1-800-243-5556 (US)
1-866-462-4478 (CAN)
For faster service, please have your machine model and serial number
available before call
Model: VL3200x
Serial Number:
Note: The serial number is on the back of the unit or you can check the
serial number by pressing Menu, 8, 1. Press Stop/Exit when finished.
Page 3

Meter Reading Instructions
If your monthly Océ invoices are calculated based on your product usage. You can help ensure
accurate billing by providing us with accurate meter reads every month.
There are three methods to enter meter readings:
1 If your equipment is networked and your organization has an SMTP mail server, you can set
up the product to automatically share the meter information with Océ. This is the most popular,
and least time-intensive method for you. To download set-up instructions, go to
www.oceusa.com and open the Drivers and Support page for this model.
2 Use the Océ “E-Z Reading” web site to enter your monthly readings. We can even set you up
to receive a monthly e-mail reminder. Go to www.oceusa.com and click on Meter Reads.
3 Enter your readings by phone by calling 800-945-9708.
Checking the page counters
You can check the machine’s total page counters on the back of your machine.
Record the Total counters and enter them on the Océ “E-Z Reading” web site.
i
Page 4

Océ numbers
IMPORTANT
For technical help, you must call the country where you bought the machine. Calls must be
made from within that country.
Océ Technical Support
In USA: 1-800-243-5556
In Canada: 1-866-462-4478
Internet address
Océ USA web site: http://www.oceusa.com
ii
Page 5

Compilation and Publication Notice
Under the supervision of Océ North America Document Printing Systems, this manual has been
compiled and published, covering the latest product descriptions and specifications.
The contents of this manual and the specifications of this product are subject to change without
notice.
Océ reserves the right to make changes without notice in the specifications and materials
contained herein and shall not be responsible for any damages (including consequential) caused
by reliance on the materials presented, including but not limited to typographical and other errors
relating to the publication.
This product is designed for use in a Professional Environment.
iii
Page 6

Table of Contents
Section I General
1 General information 2
Using the documentation.......................................................................................2
Symbols and conventions used in the documentation ....................................2
Accessing the Software User’s Guide and Network User’s Guide ........................3
Viewing documentation ................................................................................... 3
Control panel overview ..........................................................................................6
Status LED indications .................................................................................... 9
2 Loading paper and documents 10
Loading paper and print media ............................................................................10
Loading paper in the Upper Tray...................................................................10
Loading paper in the multi-purpose tray (MP tray) ........................................12
Unprintable area ............................................................................................14
Acceptable paper and other print media..............................................................15
Recommended paper and print media ..........................................................15
Type and size of paper ..................................................................................16
Handling and using special paper .................................................................17
Loading documents .............................................................................................21
Using the automatic document feeder (ADF) ................................................21
Using the scanner glass ................................................................................22
3System Setup 23
Mode Timer..........................................................................................................23
Paper settings......................................................................................................23
Paper Type ....................................................................................................23
Paper Size .....................................................................................................24
Tray Use in copy mode.................................................................................. 25
Tray Use in fax mode ....................................................................................25
Tray Use in print mode ..................................................................................26
Tray use for Printing reports ..........................................................................26
Volume settings ...................................................................................................27
Ring volume...................................................................................................27
Beep volume..................................................................................................27
Speaker volume.............................................................................................27
Automatic daylight savings time .......................................................................... 28
Ecology features ..................................................................................................28
Save Toner ....................................................................................................28
Sleep Timer ...................................................................................................29
Turning off the scanner lamp ...............................................................................29
LCD Contrast .......................................................................................................30
Dial Prefix ............................................................................................................30
Setting up the prefix number .........................................................................30
Changing the prefix number ..........................................................................31
iv
Page 7

4 Security features 32
Secure Function Lock 2.0.................................................................................... 32
Setting the password for the administrator ................................................... 32
Changing the password for the administrator................................................33
Setting up the public user mode .................................................................... 33
Setting up restricted users.............................................................................34
Turning Secure Function Lock on/off.............................................................35
Switching Users............................................................................................. 35
Setting Lock.........................................................................................................36
Setting up the password................................................................................ 36
Changing your Setting Lock password ..........................................................37
Turning Setting Lock on/off............................................................................37
Restricting dialing ................................................................................................ 38
Dial pad restriction.........................................................................................38
One Touch restriction .................................................................................... 38
Speed Dial restriction .................................................................................... 38
LDAP server restriction.................................................................................. 38
Section II Fax
5 Sending a fax 40
How to fax............................................................................................................ 40
Entering fax mode ......................................................................................... 40
Sending a single-sided fax from the ADF ...................................................... 40
Sending a 2-sided fax from the ADF .............................................................40
Sending a fax from the scanner glass ........................................................... 41
Faxing A4/Legal/Folio size documents from the scanner glass .................... 42
Canceling a fax in progress ........................................................................... 42
Broadcasting ....................................................................................................... 43
Canceling a Broadcast in progress................................................................43
Additional sending operations..............................................................................44
Sending faxes using multiple settings ...........................................................44
Electronic cover page.................................................................................... 44
Contrast .........................................................................................................46
Changing Fax Resolution .............................................................................. 46
Dual access ...................................................................................................47
Real Time Transmission................................................................................47
Overseas Mode .............................................................................................48
Delayed Send................................................................................................48
Delayed batch transmission .......................................................................... 48
Checking and canceling waiting jobs.............................................................49
Sending a fax manually ................................................................................. 49
Sending a fax at the end of a conversation ................................................... 49
Out of memory message ...............................................................................49
v
Page 8

6 Receiving a fax 50
Choose the correct Answer Mode .......................................................................50
Using answer modes ...........................................................................................51
Fax Only ........................................................................................................51
Fax/Tel...........................................................................................................51
Manual...........................................................................................................51
External TAM.................................................................................................51
Answer Mode settings .........................................................................................52
Ring Count.....................................................................................................52
F/T Ring Time
(Fax/Tel mode only)...................................................................................52
EXT. Tel. RX..................................................................................................53
Setting the Print Density ................................................................................53
Additional receiving operations............................................................................54
Printing a reduced incoming fax .................................................................... 54
Duplex (2-sided) printing for Fax mode .........................................................54
Setting Receive TTI .......................................................................................55
Setting the Substitute RX .............................................................................. 55
Receiving a fax at the end of a conversation.................................................55
Printing a fax from the memory ..................................................................... 55
7 Telephone services and external devices 56
Telephone line services .......................................................................................56
Voice Mail ......................................................................................................56
Unique Ring...................................................................................................56
Connecting an external TAM (telephone answering machine) ............................ 59
Connections...................................................................................................60
Recording an outgoing message (OGM).......................................................60
Special line considerations ............................................................................60
Multi-line connections (PBX) .........................................................................62
External and extension telephones......................................................................62
Using external and extension telephones......................................................62
For Fax/Tel mode only...................................................................................63
Connecting an external or extension telephone ............................................63
Using a cordless external handset ................................................................63
Using Remote Codes ....................................................................................63
8 Dialing and storing numbers 65
How to dial ...........................................................................................................65
Manual dialing ...............................................................................................65
One Touch dialing .........................................................................................65
Speed dialing.................................................................................................65
Search ........................................................................................................... 66
LDAP search .................................................................................................66
Fax redial.......................................................................................................66
vi
Page 9

Storing numbers .................................................................................................. 67
Storing a pause ............................................................................................. 67
Storing One Touch dial numbers................................................................... 67
Storing Speed Dial numbers..........................................................................69
Changing One Touch and Speed Dial numbers............................................ 70
Setting up Groups for Broadcasting ..............................................................70
Dialing access codes and credit card numbers .............................................72
Pause ............................................................................................................72
Tone or Pulse ................................................................................................72
9 Remote Fax Options 73
Fax Forwarding.................................................................................................... 73
PC Fax Receive................................................................................................... 74
Changing Remote Fax Options ...........................................................................75
Turning off Remote Fax Options ................................................................... 75
Remote retrieval .................................................................................................. 76
Setting a R R Passcode ................................................................................ 76
Using your R R Passcode ............................................................................. 77
Retrieving fax messages ...............................................................................77
Remote fax commands........................................................................................78
10 Polling 79
Polling receive ..................................................................................................... 79
Sequential polling ..........................................................................................79
Polled transmit.....................................................................................................80
Setup for polled transmit................................................................................ 80
11 Printing reports 81
Fax reports........................................................................................................... 81
Job status report............................................................................................ 81
Fax Journal.................................................................................................... 82
Reports ................................................................................................................82
How to print a report...................................................................................... 83
vii
Page 10

Section III Copy
12 Making copies 86
How to copy .........................................................................................................86
Entering copy mode.......................................................................................86
Making a single copy .....................................................................................86
Making multiple copies ..................................................................................86
Stop copying.................................................................................................. 86
Copy options (temporary settings).......................................................................87
Enlarging or reducing the image copied ........................................................87
Improving copy quality...................................................................................88
Sorting copies using the ADF ........................................................................88
Changing text copy resolution .......................................................................88
Adjusting Contrast and Brightness ................................................................89
Making N in 1 copies (page layout) ...............................................................90
Duplex (2-sided) copying .....................................................................................91
Duplex Copy (long edge flip) .........................................................................91
Advanced Duplex Copy (short edge flip) .......................................................92
Tray selection ......................................................................................................93
Out of memory message .....................................................................................94
Section IV Direct printing
13 Printing data from a USB Flash memory drive or a digital
camera supporting mass storage 96
Supported file formats..........................................................................................96
Creating a PRN or PostScript
Printing data directly from the USB Flash memory drive or digital
camera supporting mass storage .....................................................................97
Understanding the error messages .....................................................................99
®
3™ file for direct printing....................................96
Section V Software
14 Software and Network features 102
viii
Page 11

Section VI Appendixes
A Safety and legal 104
Choosing a location ........................................................................................... 104
To use the machine safely................................................................................. 105
Important safety instructions........................................................................109
Libtiff Copyright and License .............................................................................111
Trademarks........................................................................................................ 112
B Options 113
Options ..............................................................................................................113
Optional paper tray (6429913)........................................................................... 114
Memory board.................................................................................................... 114
Installing extra memory ............................................................................... 115
C Troubleshooting and routine maintenance 116
Troubleshooting.................................................................................................116
If you are having difficulty with your machine ..............................................116
Improving the print quality ........................................................................... 125
Setting Dial Tone detection .........................................................................132
Telephone line interference......................................................................... 132
Error and maintenance messages..................................................................... 133
Transferring your faxes or Fax Journal report .............................................138
Document jams............................................................................................ 139
Paper jams ..................................................................................................140
Routine maintenance.........................................................................................148
Cleaning the outside of the machine ...........................................................148
Cleaning the scanner...................................................................................149
Cleaning the laser scanner window............................................................. 149
Cleaning the corona wire.............................................................................151
Cleaning the drum unit ................................................................................152
Replacing the consumable items....................................................................... 154
Replacing a toner cartridge .........................................................................155
Replacing the drum unit...............................................................................158
Replacing periodic maintenance parts............................................................... 160
Machine Information .......................................................................................... 160
Checking the Serial Number........................................................................160
Checking the Page Counters.......................................................................160
Checking the remaining life of parts ............................................................ 161
Reset ...........................................................................................................161
How to reset ................................................................................................ 162
Packing and shipping the machine .................................................................... 162
ix
Page 12

D Menu and features 164
On-screen programming....................................................................................164
Menu table................................................................................................... 164
Memory storage...........................................................................................164
Menu keys .........................................................................................................164
How to access the menu mode ...................................................................165
Menu table .........................................................................................................166
Entering text.......................................................................................................186
E Specifications 188
General ..............................................................................................................188
Print media.........................................................................................................190
Fax.....................................................................................................................192
Copy ..................................................................................................................193
Scan...................................................................................................................194
Print ...................................................................................................................195
Interfaces ...........................................................................................................196
Direct Print feature............................................................................................. 197
Computer requirements .....................................................................................198
Consumable items .............................................................................................200
Ethernet wired network ......................................................................................201
Ethernet wireless network..................................................................................202
Authentication and encryption for wireless users only.................................203
Wireless one-push configuration .................................................................205
F Glossary 206
G Index 210
x
Page 13

Section I
General I
General information 2
Loading paper and documents 10
System Setup 23
Security features 32
Page 14
1
General information 1
Using the documentation 1
Thank you for buying a Océ machine!
Reading the documentation will help you
make the most of your machine.
Symbols and conventions used in the documentation 1
The following symbols and conventions are
used throughout the documentation.
Bold Bold style identifies keys on the
machine control panel or
computer screen.
Italics Italicized style emphasizes an
important point or refers you to
a related topic.
Courier
New
Courier New font identifies the
messages shown on the LCD
of the machine.
WARNING
Warnings tell you what to do to prevent
possible personal injury.
CAUTION
Cautions specify procedures you must
follow or avoid to prevent possible minor
injuries.
IMPORTANT
IMPORTANT describes procedures you
must follow or avoid to prevent possible
machine problems or damage to other
objects.
Electrical Hazard icons alert you to a
possible electrical shock.
Hot Surface icons warn you not to
touch machine parts that are hot.
Notes tell you how you should
respond to a situation that may arise
or give tips about how the current
operation works with other features.
2
Page 15
General information
Accessing the Software User’s Guide and Network User’s Guide
This User’s Guide does not contain all the
information about the machine such as how
to use the advanced features of Fax, Printer,
Scanner, PC Fax and Network. When you are
ready to learn detailed information about
these operations, read the
Software User’s Guide and
Network User’s Guide.
Viewing documentation 1
Viewing documentation (Windows®) 1
To view the documentation, from the Start
menu, point to Océ, VL3200x from the
program group, and then click
User’s Guides.
If you have not installed the software, you can
find the documentation by following the
instructions below:
a Turn on your PC.
Insert the Océ CD-ROM labeled
Windows
®
into your CD-ROM drive.
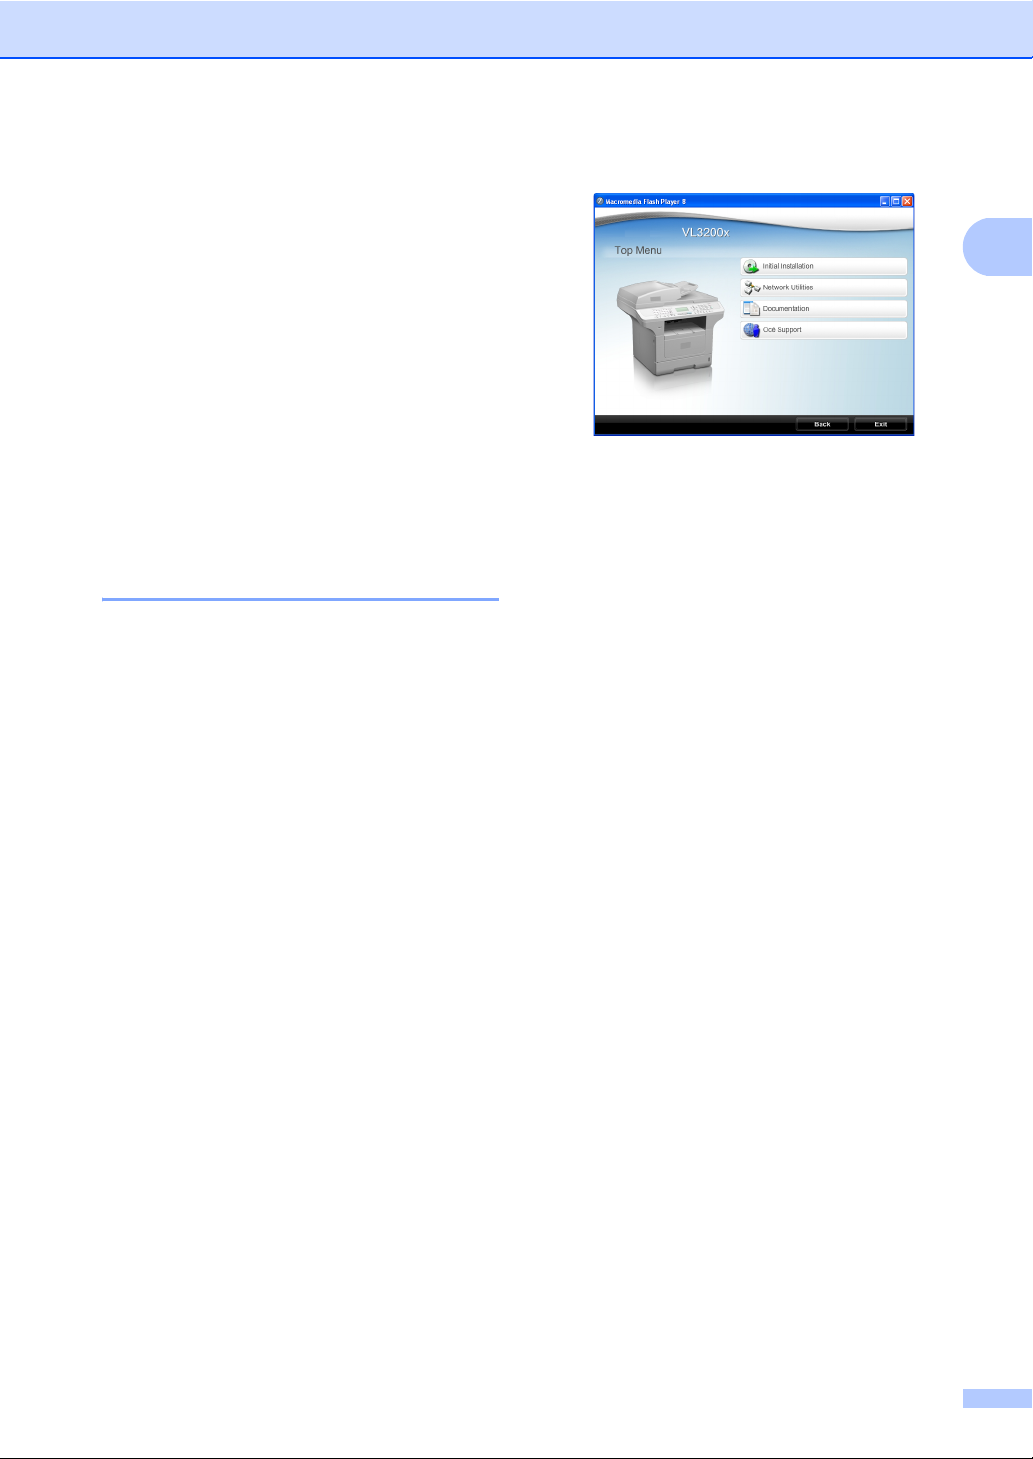
c The CD-ROM main menu will appear.
1
If this window does not appear, use
®
Windows
start.exe program from the root directory
of the Océ CD-ROM.
Explorer to find and run the
d Click Documentation.
e Click the documentation you want to
read:
Setup Guide:
Setup and software installation
instructions.
User's Guide (3 manuals):
User’s Guide for stand-alone
operations, Network User’s Guide
and Software User’s Guide.
1
b When the language selection screen
appears, click your language.
3
Page 16
Chapter 1
How to find scanning instructions 1
There are several ways you can scan
documents. You can find the instructions as
follows:
Software User’s Guide: 1
Scanning a document using the TWAIN
driver in Chapter 2
Scanning a document using the WIA
driver (Windows
Chapter 2
Using ControlCenter3 in Chapter 3
Network Scanning in Chapter 4
®
XP/Windows Vista®) in
ScanSoft™ PaperPort™ 11SE with OCR How-to-Guides:
The complete ScanSoft™ PaperPort™
11SE with OCR How-to-Guides can be
viewed from the Help selection in the
ScanSoft™ PaperPort™ 11SE
application.
How to find Network setup instructions
Your machine can be connected to a wireless
or wired network. You can find basic setup
instructions in the Quick Setup Guide. If your
wireless access point supports automatic
wireless setup (SecureEasySetup™,
AOSS™, etc.), follow the steps in the Quick
Setup Guide. For more information about
network setup please see the Network User's
Guide.
Viewing documentation (Macintosh) 1
a Turn on your Macintosh.
Insert the Océ CD-ROM labeled
Macintosh into your CD-ROM drive.
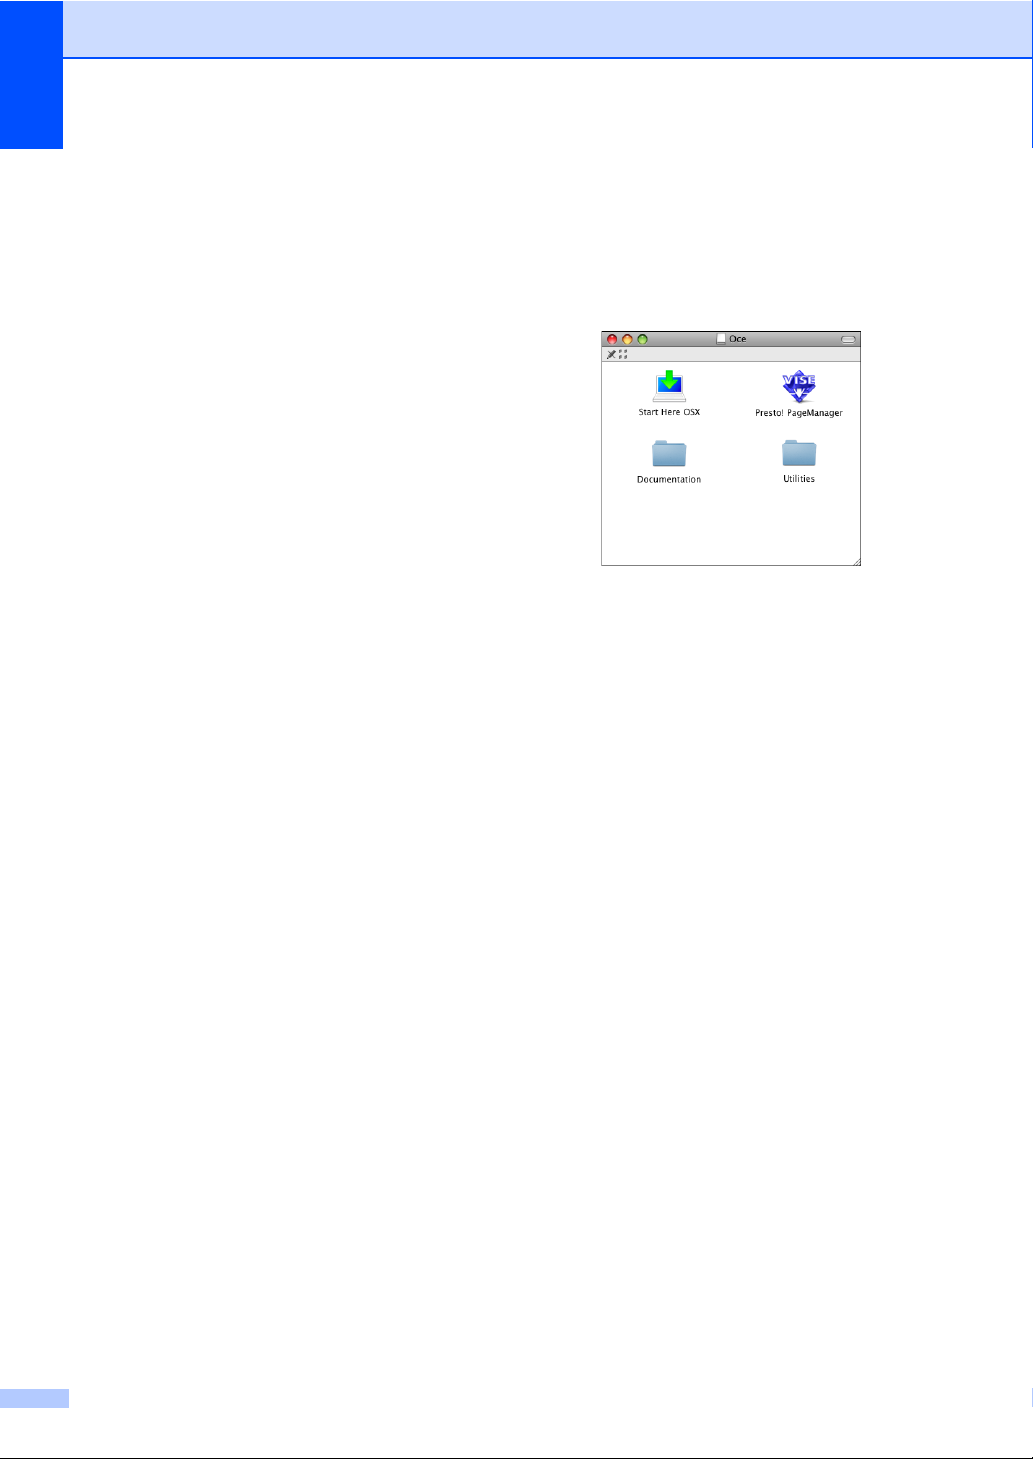
b The following window will appear.
c Double-click the Documentation icon.
1
d If the language selection screen
appears, double-click your language.
e Double-click the documentation you
want to read.
PDF documents (4 manuals):
1
User’s Guide for stand-alone
operations, Software User’s Guide,
NetworkUser’sGuide and
Quick Setup Guide.
4
Page 17

How to find scanning instructions 1
There are several ways you can scan
documents. You can find the instructions as
follows:
Software User’s Guide: 1
Scanning in Chapter 9
Using ControlCenter2 in Chapter 10
Network Scanning in Chapter 11
Presto! PageManager User’s Guide: 1
The complete Presto! PageManager
User’s Guide can be viewed from the Help
selection in the Presto! PageManager
application.
How to find Network setup instructions
General information
1
1
Your machine can be connected to a wireless
or wired network. You can find basic setup
instructions in the Quick Setup Guide. If your
wireless access point supports automatic
wireless setup (SecureEasySetup™,
AOSS™, etc.), follow the steps in the Quick
Setup Guide. For more information about
network setup please see the Network User's
Guide.
5
Page 18
Chapter 1
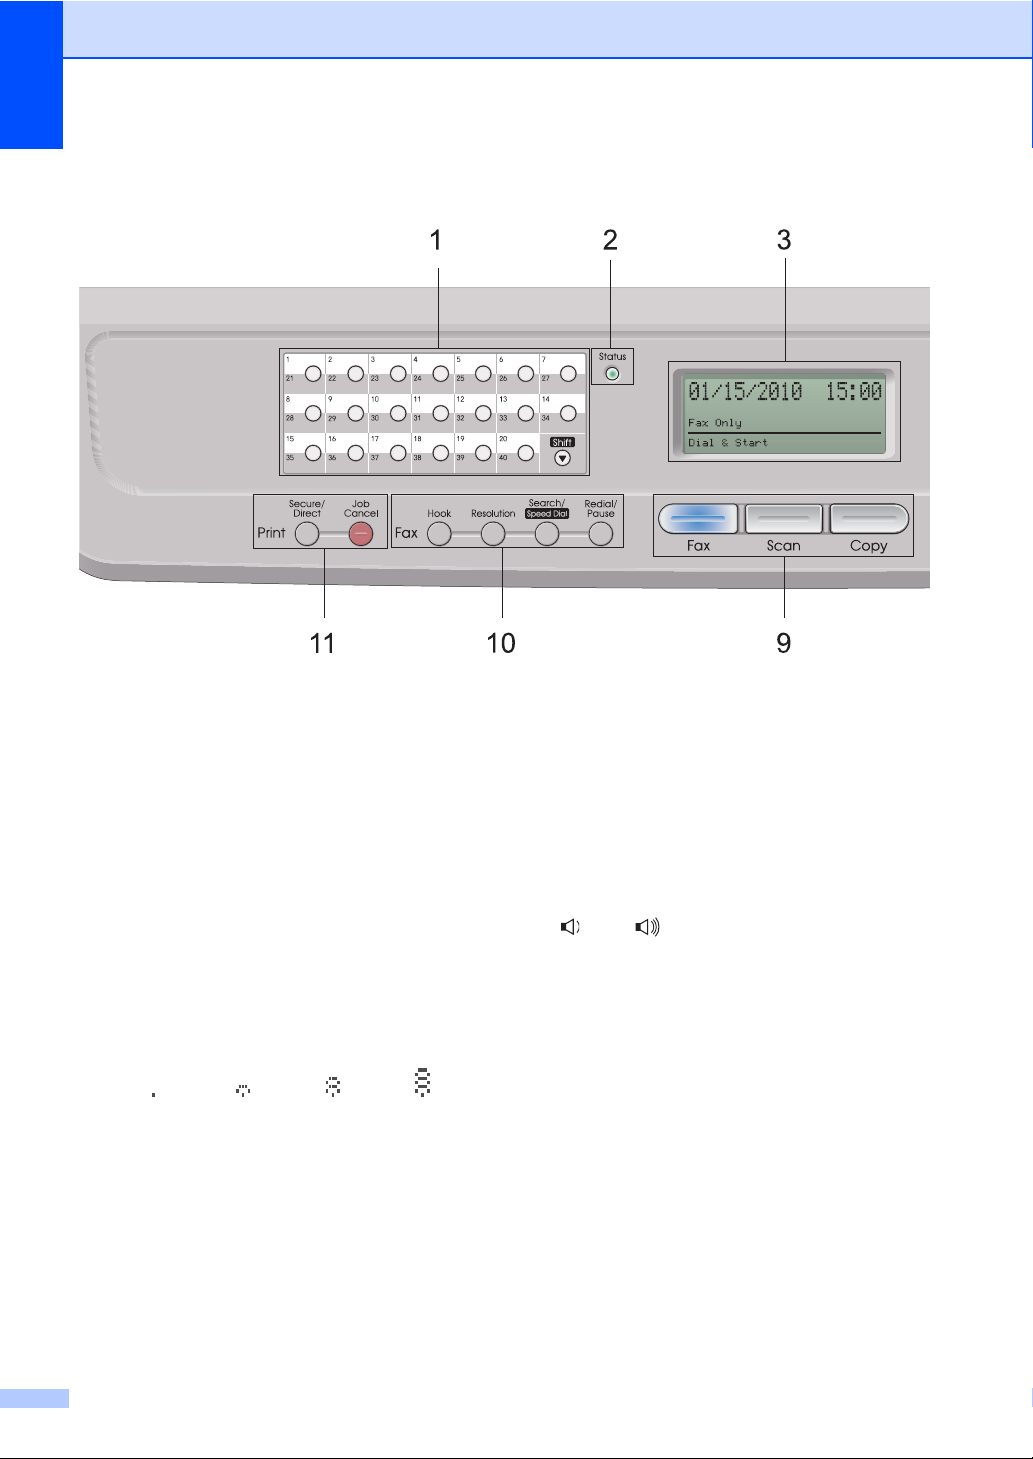
Control panel overview 1
1 One Touch keys
These 20 keys give you instant access to 40
previously stored numbers.
Shift
Lets you access One Touch numbers 21 to 40
when held down.
2Status LED
The LED will flash and change color depending
on the machine status.
3LCD
Displays messages to help you set up and use
your machine.
A four level indicator shows the current
wireless signal strength if you are using a
wireless connection.
0Max
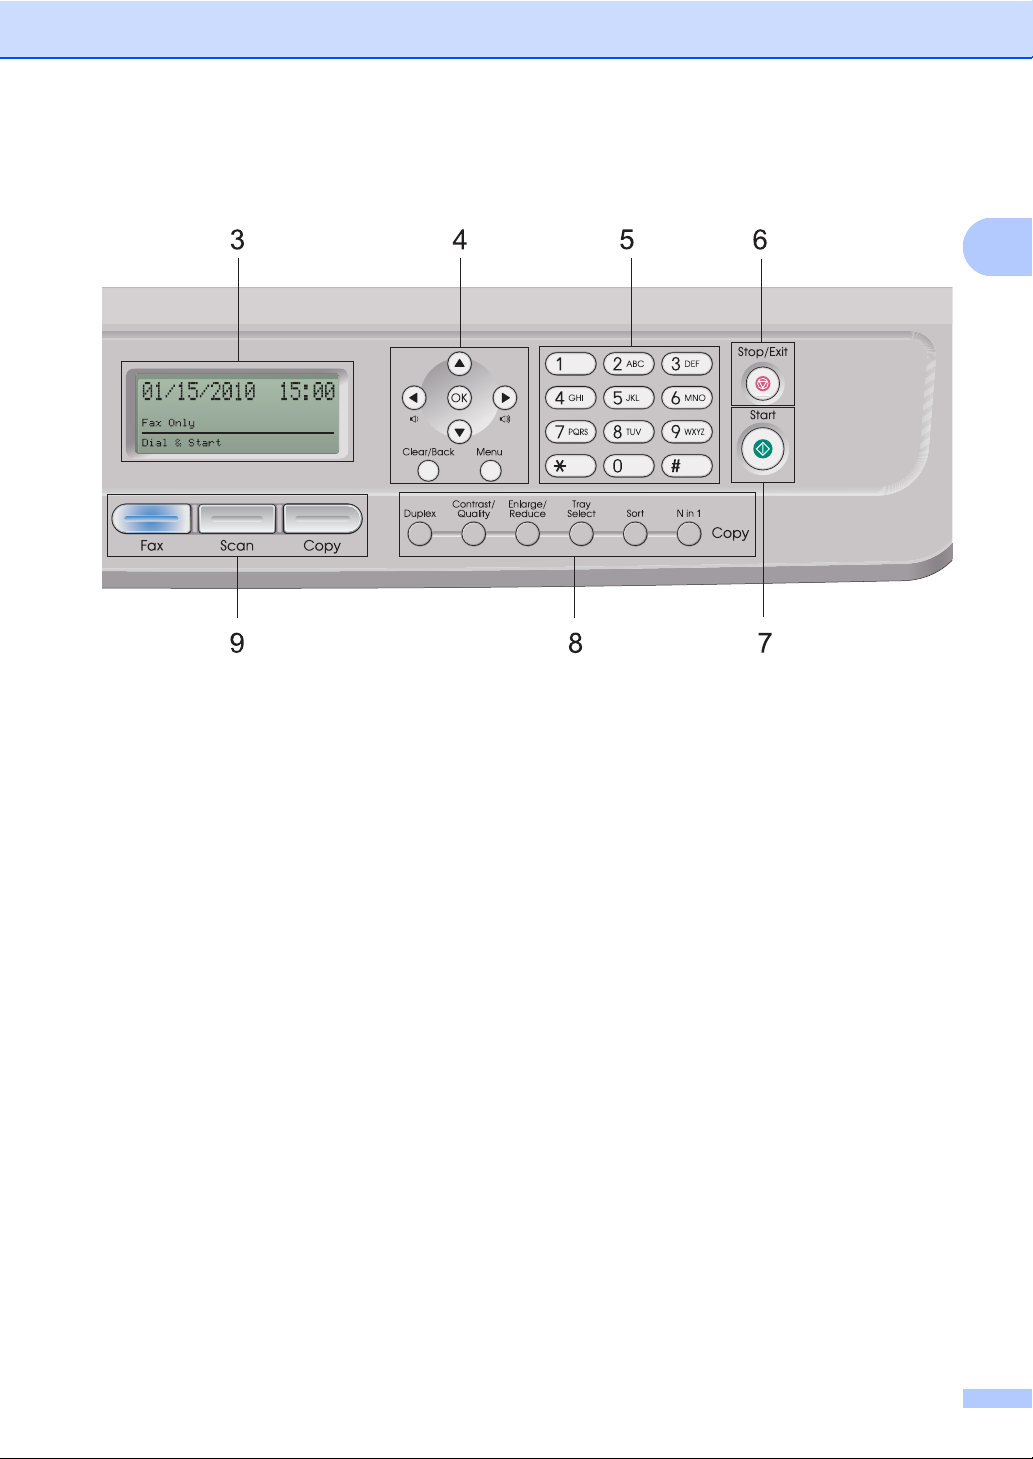
4 Menu keys:
Menu
Lets you access the Menu to program your
settings in this machine.
Clear/Back
Deletes entered data or lets you cancel the
current setting.
OK
Lets you store your settings in the machine.
Volume keys
d or c
Press to scroll backwards or forwards through
menu selections. Press to change the volume
when in fax or standby mode.
a or b
Press to scroll through the menus and options.
5Dialpad
Use these keys to dial telephone and fax
numbers and as a keyboard for entering
information into the machine.
The # key temporarily switches the dialing
mode from Pulse to Tone during a telephone
call.
6
Page 19
General information
1
6Stop/Exit
Stops an operation or exits from a menu.
7Start
Lets you start sending faxes, making copies or
scanning.
8 Copy keys:
Duplex
You can choose Duplex to copy on both sides
of the paper.
Contrast/Quality
Lets you change the quality or contrast for the
next copy.
Enlarge/Reduce
Reduces or enlarges copies.
Tray Select
Lets you change which tray will be used for the
next copy.
Sort
Sorts multiple copies using the ADF.
Nin1
You can choose N in 1 to copy 2 or 4 pages
onto one page.
9 Mode keys:
Fax
Puts the machine in Fax mode.
Scan
Puts the machine in Scan mode.
(For details about scanning, see the Software
User’s Guide.)
Copy
Puts the machine in Copy mode.
7
Page 20

Chapter 1
10 Fax and telephone keys:
Hook
Press before dialing if you want to make sure a
fax machine will answer, and then press Start.
Also, press this key after you pick up the
handset of an external telephone during the
F/T ring (fast double-rings).
Resolution
Sets the resolution when sending a fax.
Search/Speed Dial
Lets you look up numbers stored in memory. It
also lets you access speed dial numbers
directly if you hold down the Shift key and
press Search/Speed Dial, and then enter a
three digit number.
Redial/Pause
Redials the last number called. It also inserts a
pause when programming quick dial numbers
or when dialing a number manually.
11 Print Keys:
Secure/Direct
This key has two functions.
Secure
You can print data saved in the memory
when you enter your four-digit password.
(For details about using the Secure key,
see the Software User’s Guide.)
When using Secure Function Lock, you can
switch restricted users by holding down
Shift as you press Secure. (See Secure
Function Lock 2.0 on page 32.)
Direct
Lets you print data from a USB Flash
memory drive that you can connect directly
to the machine. The Direct key will be
active when a USB Flash memory drive is
connected to the machine’s USB direct
interface.
(See Printing data directly from the USB
Flash memory drive or digital camera
supporting mass storage on page 97.)
Job Cancel
Cancels a programmed print job and clears it
from the machine’s memory.
To cancel multiple print jobs, hold down this
key until the LCD shows
Job Cancel (All).
8
Page 21
General information
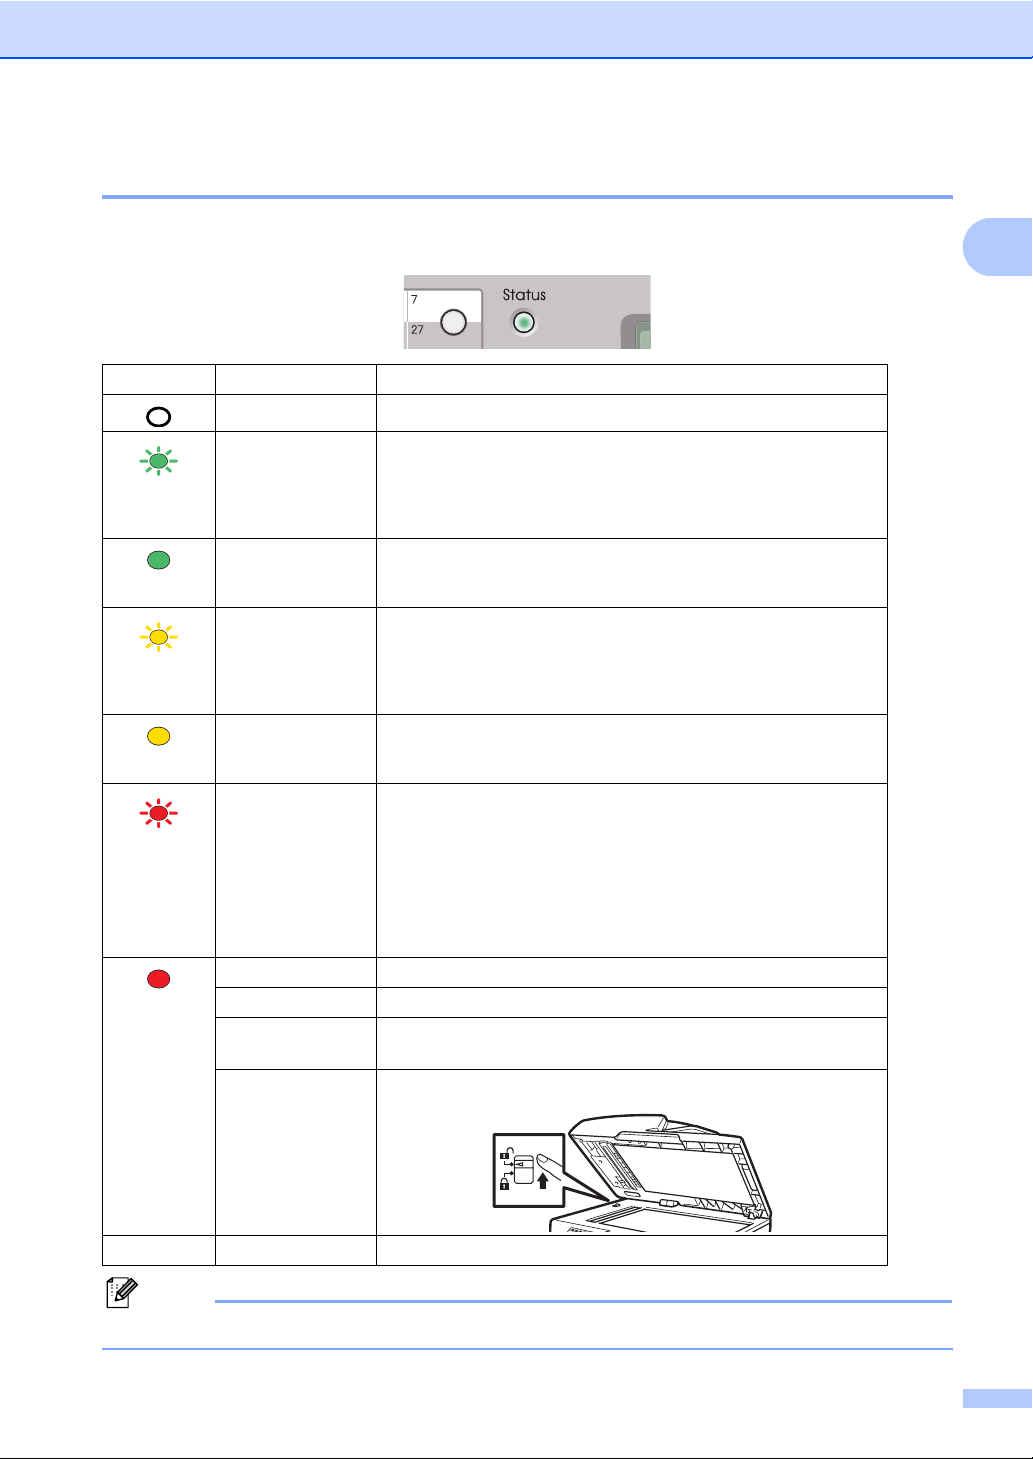
Status LED indications 1
The Status LED (light emitting diode) will flash and change color depending on the machine’s
status.
LED Machine Status Description
Green
(blinking)
Green
Yellow
(blinking)
Yellow
Red
(blinking)
Red
Sleep Mode The power switch is off or the machine is in Sleep mode.
Warming Up The machine is warming up for printing.
Ready The machine is ready to print.
Receiving Data The machine is either receiving data from the computer,
processing data in memory, or printing data.
Data Remaining
Print data remains in the machine memory.
in Memory
Service error Follow the steps below.
1. Turn off the power switch.
2. Wait a few seconds, and then turn it back on and try to print
again.
If you cannot clear the error and you see the same service call
indication after turning the machine back on, please call Océ
Technical Support. (See Océ Technical Support on page ii.)
Cover open The front cover or fuser cover is open. Close the cover.
Toner Life End Replace the toner cartridge with a new one.
Paper error Put paper in the tray or clear the paper jam. Check the LCD
message.
Scan lock Check that the scanner lock lever is released.
1
Others Check the LCD message.
Note
When the power switch is off or the machine is in Sleep mode, the LED is off.
9
Page 22
2
Loading paper and documents 2
Loading paper and print media 2
The machine can feed paper from the Upper
Tray, optional Lower Tray or Multi-purpose
tray.
When you put paper into the paper tray, note
the following:
If your application software supports
paper size selection on the print menu,
you can select it through the software. If
your application software does not
support it, you can set the paper size in
the printer driver or by using the control
panel buttons.
Loading paper in the Upper Tray 2
Printing on plain paper, thin paper, recycled paper or transparencies from the paper tray
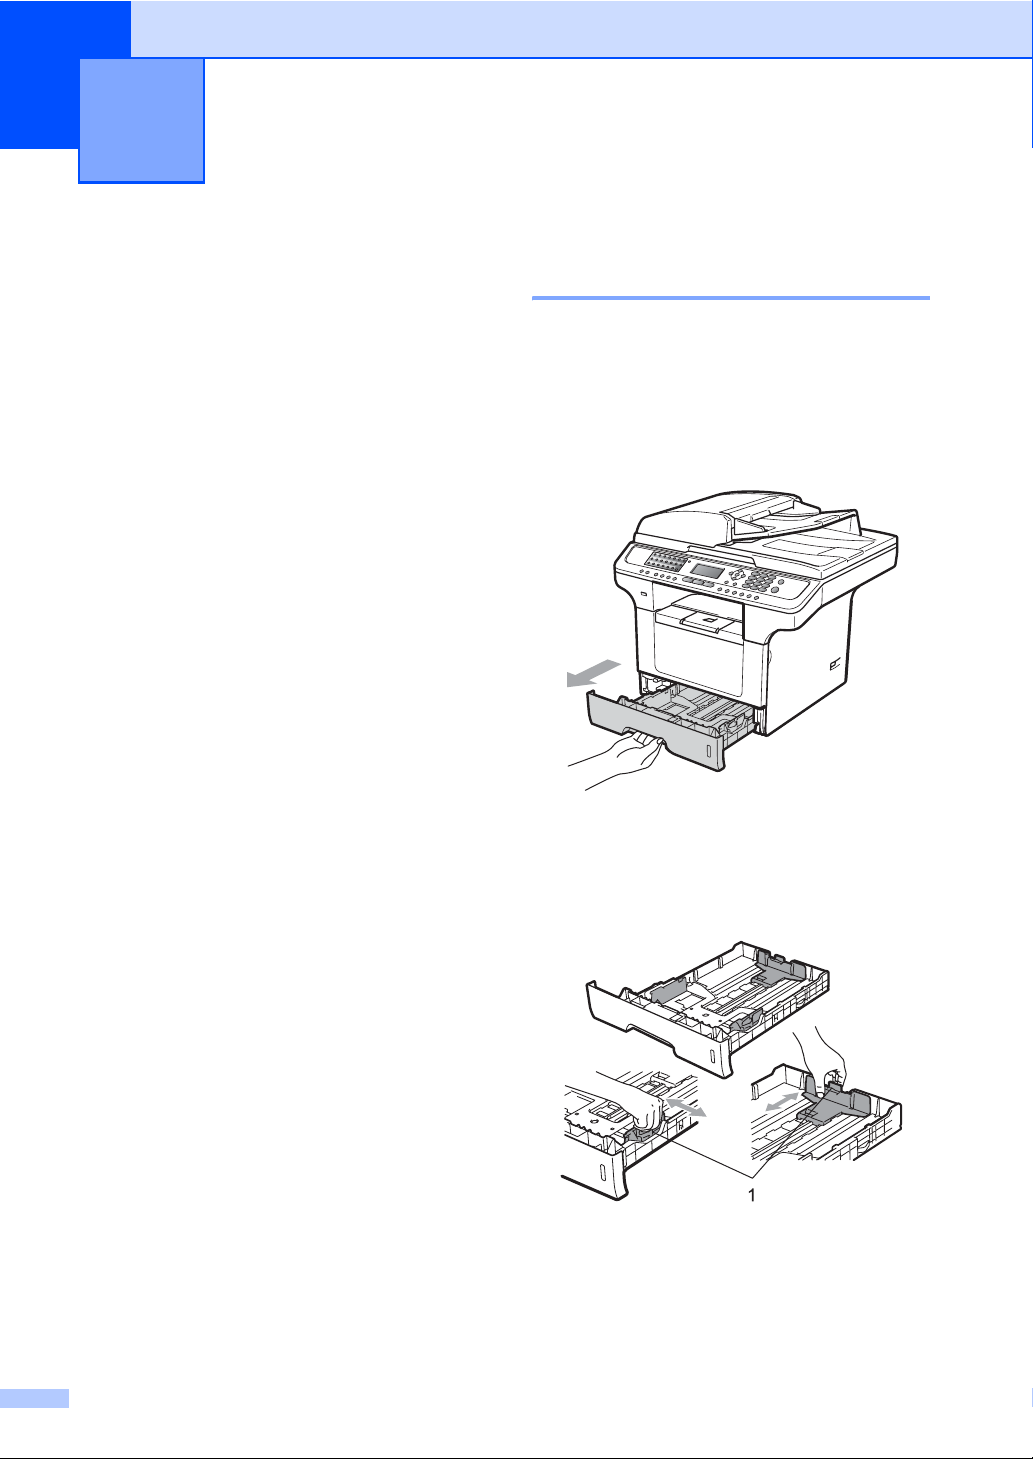
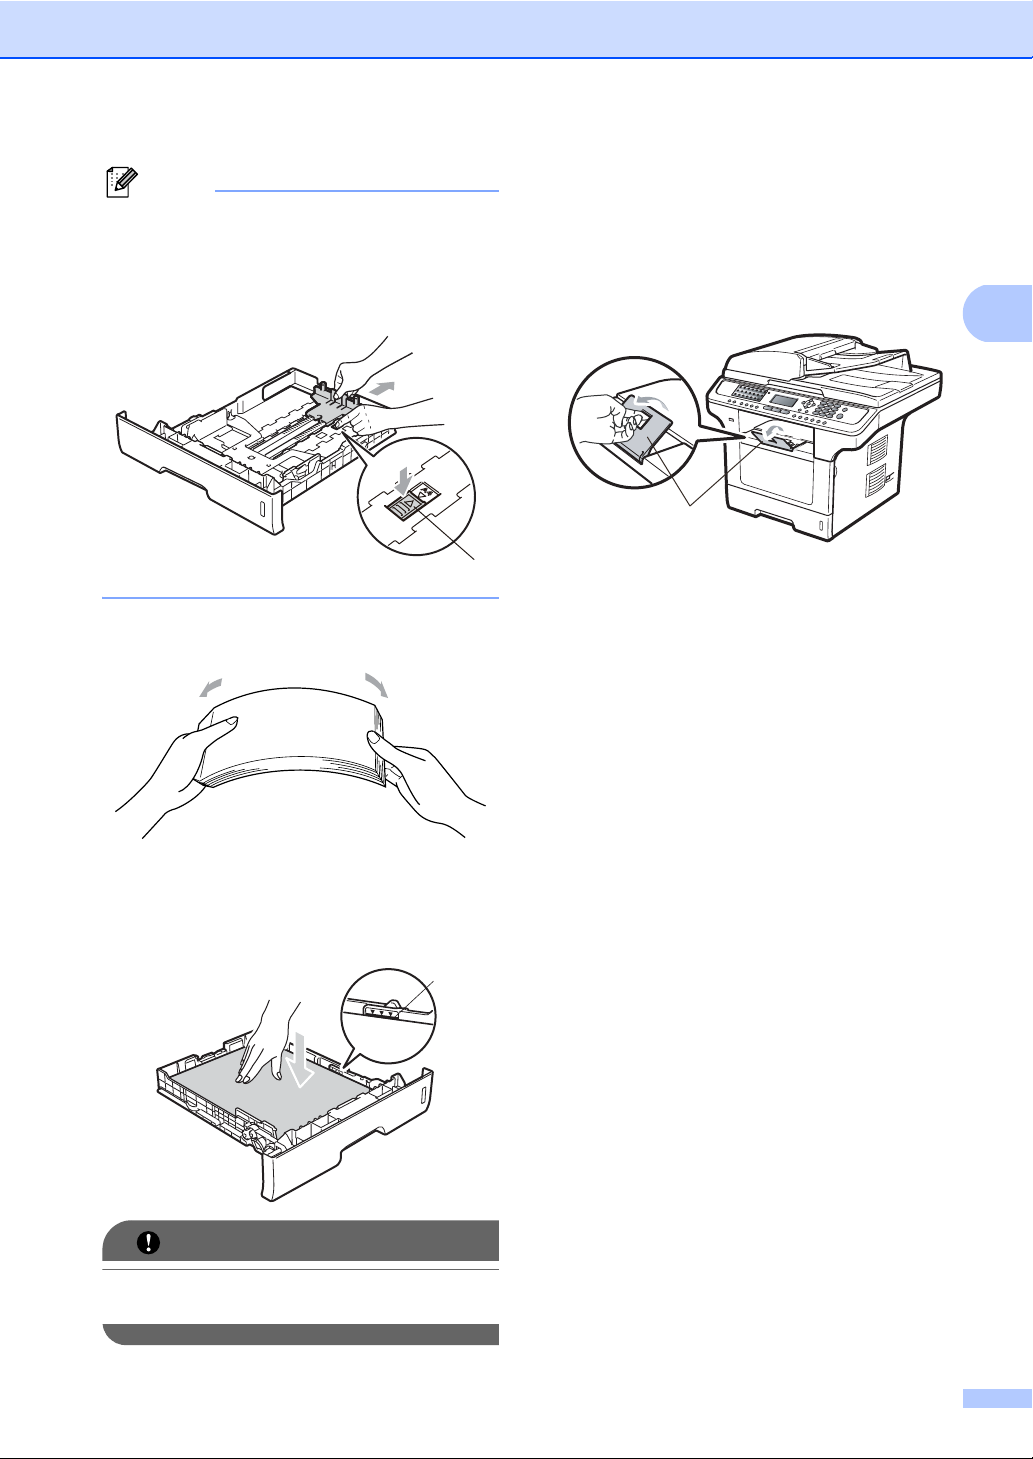
a Pull the paper tray completely out of the
machine.
b While pressing the blue paper-guide
release lever (1), slide the paper guides
to fit the paper size you are loading in
the tray. Make sure that the guides are
firmly in the slots.
2
10
Page 23
Loading paper and documents
Note
For Legal and Folio size paper, press the
release button (1) in the bottom of the
paper tray and then pull out the back of the
paper tray. (Legal or Folio size paper are
not available in some regions.)
c Fan the stack of paper well to avoid
paper jams and misfeeds.
e Put the paper tray firmly back in the
machine. Make sure that it is completely
inserted into the machine.
f Unfold the support flap (1) to prevent
paper from sliding off the face-down
output tray.
1
1
2
d Put paper in the tray, and make sure that
the paper is below the maximum paper
mark (1). The side to be printed on must
be face down.
IMPORTANT
Make sure the paper guides touch the
sides of the paper so it will feed properly.
1
11
Page 24
Chapter 2
Loading paper in the multi-purpose tray (MP tray) 2
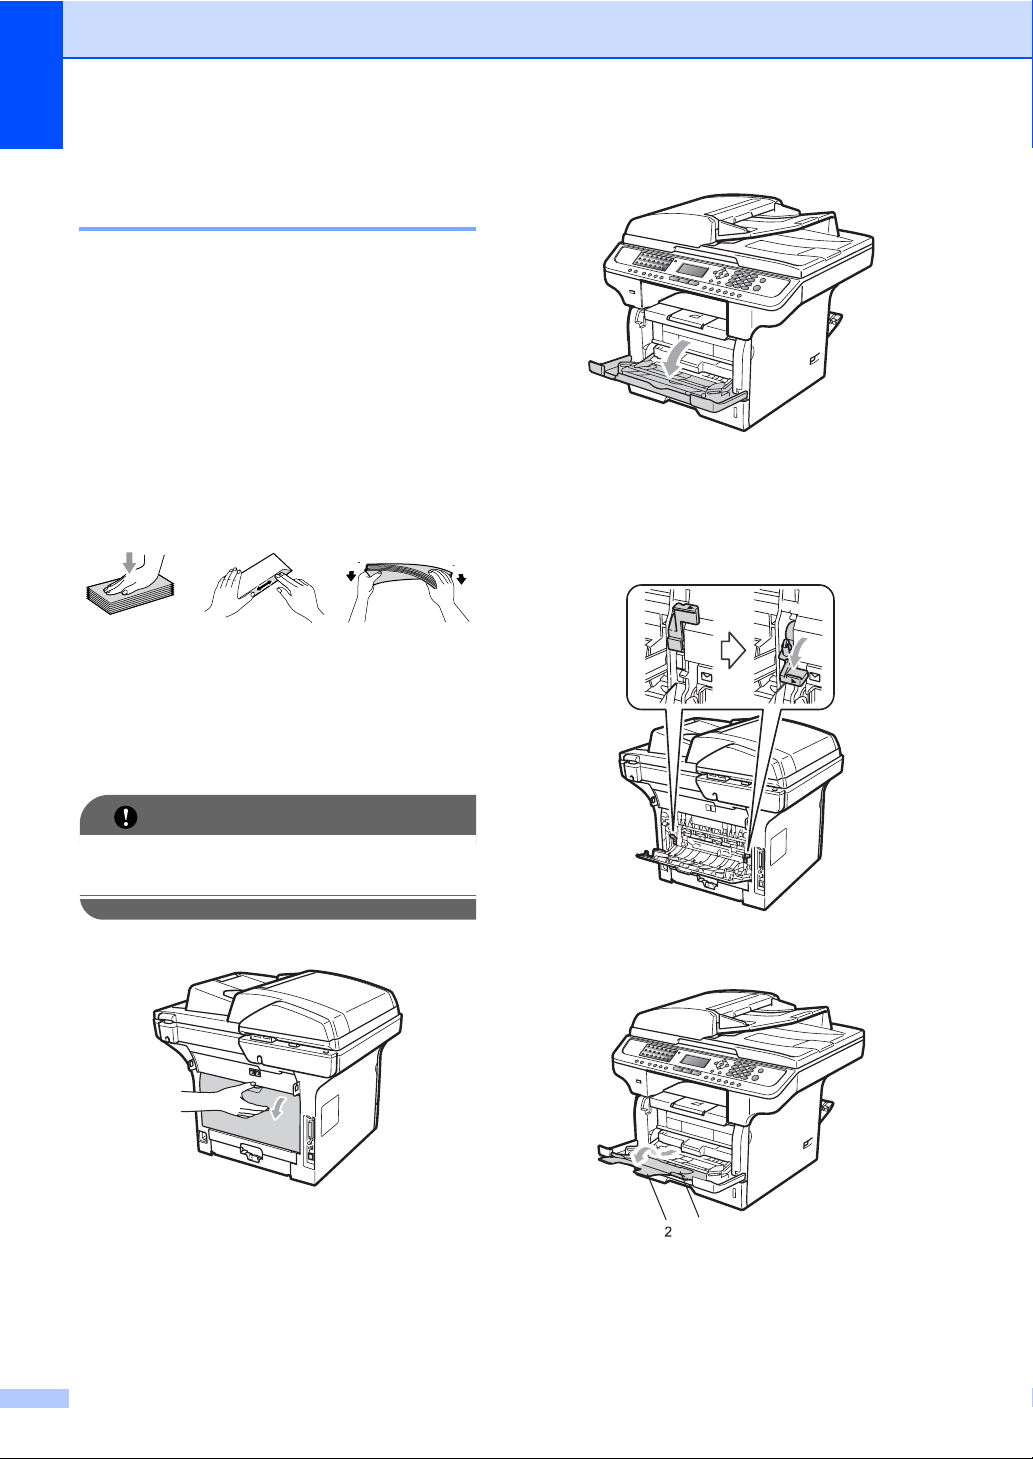
You can load up to 3 envelopes or special
print media in the MP tray or up to 50 sheets
of plain paper. Use this tray to print or copy on
thick paper, bond paper, envelopes, labels or
transparencies.
Printing on thick paper, bond paper, envelopes, labels and transparencies
Before loading, press the corners and sides
of the envelopes to make them as flat as
possible.
When the back output tray is pulled down, the
machine has a straight paper path from the
MP tray through to the back of the machine.
Use this paper feed and output method when
you want to print on thick paper, bond paper,
envelopes, labels or transparencies.
b Open the MP tray and lower it gently.
2
c <For printing envelopes only> Pull down
the two blue levers, one on the left-hand
side and one on the right-hand side,
toward you as shown in the illustration
below.
IMPORTANT
Remove each printed sheet or envelope
immediately to prevent a paper jam.
a Open the back cover (back output tray).
12
d Pull out the MP tray support (1) and
unfold the flap (2).
1
Page 25
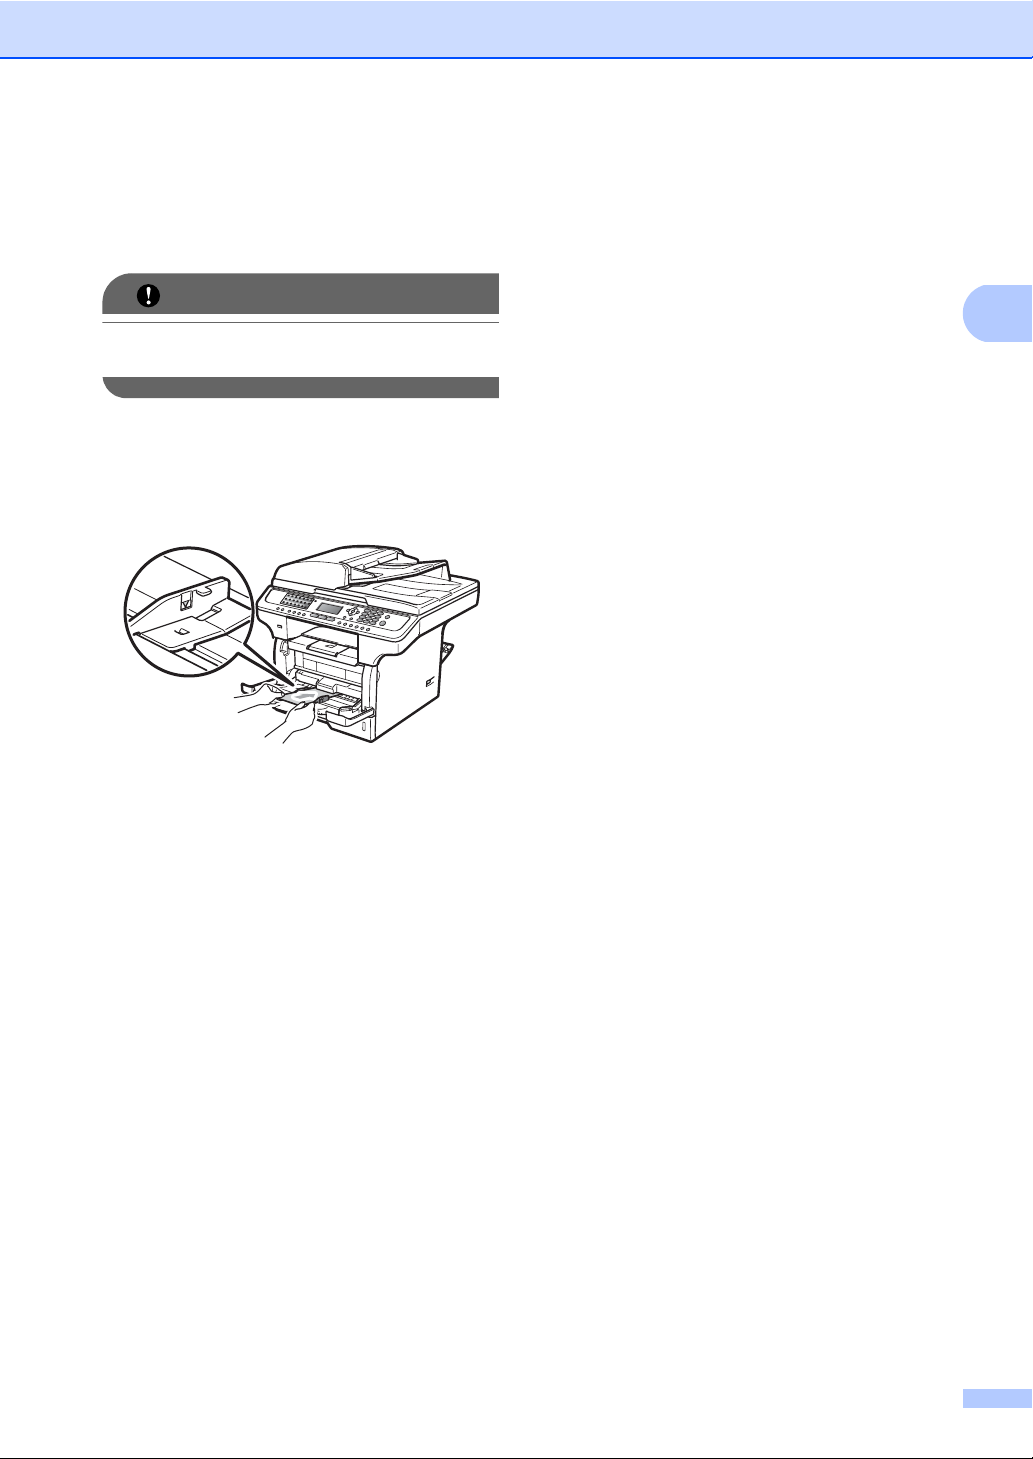
e While pressing the paper side guide
release lever, slide the paper guides to
fit the width of the paper that you are
going to use.
Loading paper and documents
IMPORTANT
Make sure the paper guides touch the
sides of the paper so it will feed properly.
f Put the envelopes (up to 3), thick paper,
labels or transparencies in the MP tray
with the top edge first and the print side
face up. Make sure that the paper stays
under the maximum paper mark (b).
2
13
Page 26
Chapter 2
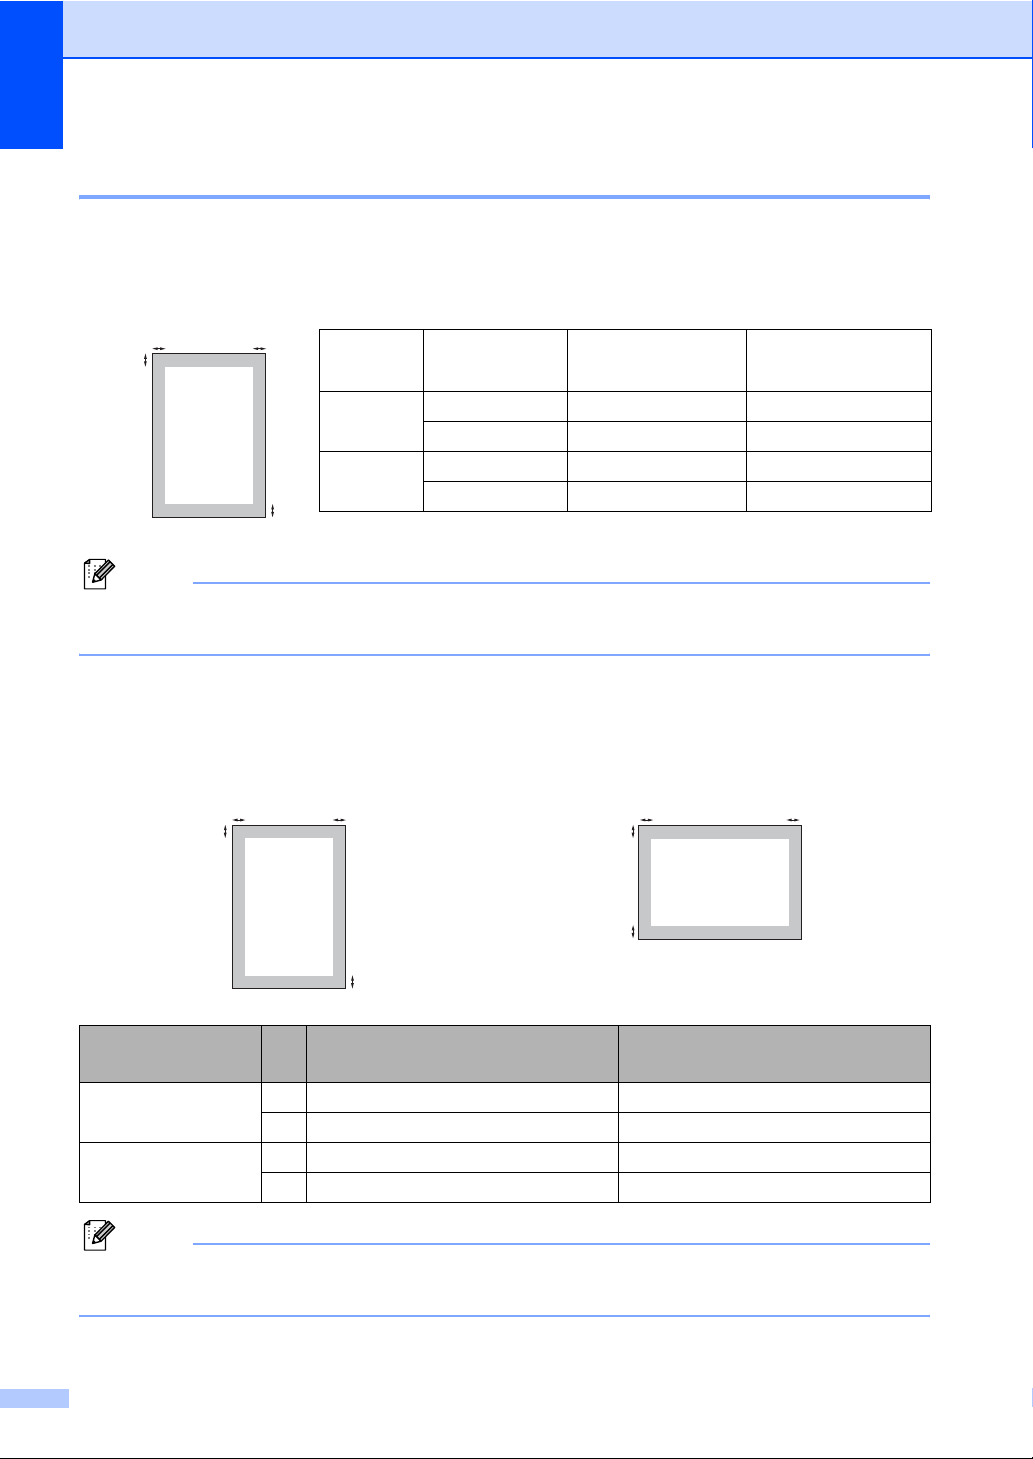
Unprintable area 2
Unprintable area for faxes and copies 2
The figures below show unprintable areas.
2
1
Note
This unprintable area shown above is for a single copy or a 1 in 1 copy using Letter size paper.
The unprintable area changes with the paper size.
Unprintable area when printing from a computer 2
2
Usage Document Size Top (1)
Bottom (1)
Left (2)
Right(2)
Fax Letter 0.12 in. (3 mm) 0.16 in. (4 mm)
A4 0.12 in. (3 mm) 0.04 in. (1 mm)
Copy Letter 0.12 in. (3 mm) 0.16 in. (4 mm)
1
A4 0.12 in. (3 mm) 0.08 in. (2 mm)
When using the driver the printable area is smaller than the paper size, as shown below.
Portrait Landscape
2
1
2
1
Windows® printer driver and
Macintosh printer driver
2
1
1
2
BRScript Driver for Windows
and Macintosh
Portrait 1 0.16 in. (4.23 mm) 0.16 in. (4.23 mm)
2 0.25 in. (6.35 mm) 0.16 in. (4.23 mm)
Landscape 1 0.16 in. (4.23 mm) 0.16 in. (4.23 mm)
2 0.20 in. (5.08 mm) 0.16 in. (4.23 mm)
Note
The unprintable area shown above is for Letter size paper. The unprintable area changes with
the paper size.
®
14
Page 27
Loading paper and documents
Acceptable paper and other print media 2
Print quality may vary according to the type of
paper you are using.
You can use the following types of print
media: thin paper, plain paper, thick paper,
bond paper, recycled paper, transparencies,
labels or envelopes.
For best results, follow the instructions below:
Use paper made for plain paper copying.
Use paper that is 16 to 28 lb (60 to
105 g/m
Use labels and transparencies which are
designed for use in laser machines.
DO NOT put different types of paper in the
paper tray at the same time because it
may cause paper jams or misfeeds.
For proper printing, you must choose the
same paper size from your software
application as the paper in the tray.
2
).
Recommended paper and print media 2
To get the best print quality, we suggest using
the following paper.
Paper Type Item
Plain Paper Xerox 4200DP 20 lb
Hammermill Laser Print
(24 lb=90 g/m
Recycled Paper No specific brand
recommended
Transparency 3M CG3300
Labels Avery laser labels white
#5160
Envelope No specific brand
recommended
2
)
2
Avoid touching the printed surface of the
paper immediately after printing.
When you use transparencies remove
each sheet immediately to prevent
smudging or paper jams.
Use long grain paper with a neutral Ph
value, and a moisture content of approx.
5%.
15
Page 28
Chapter 2
Type and size of paper 2
Multi-purpose tray (MP tray) 2
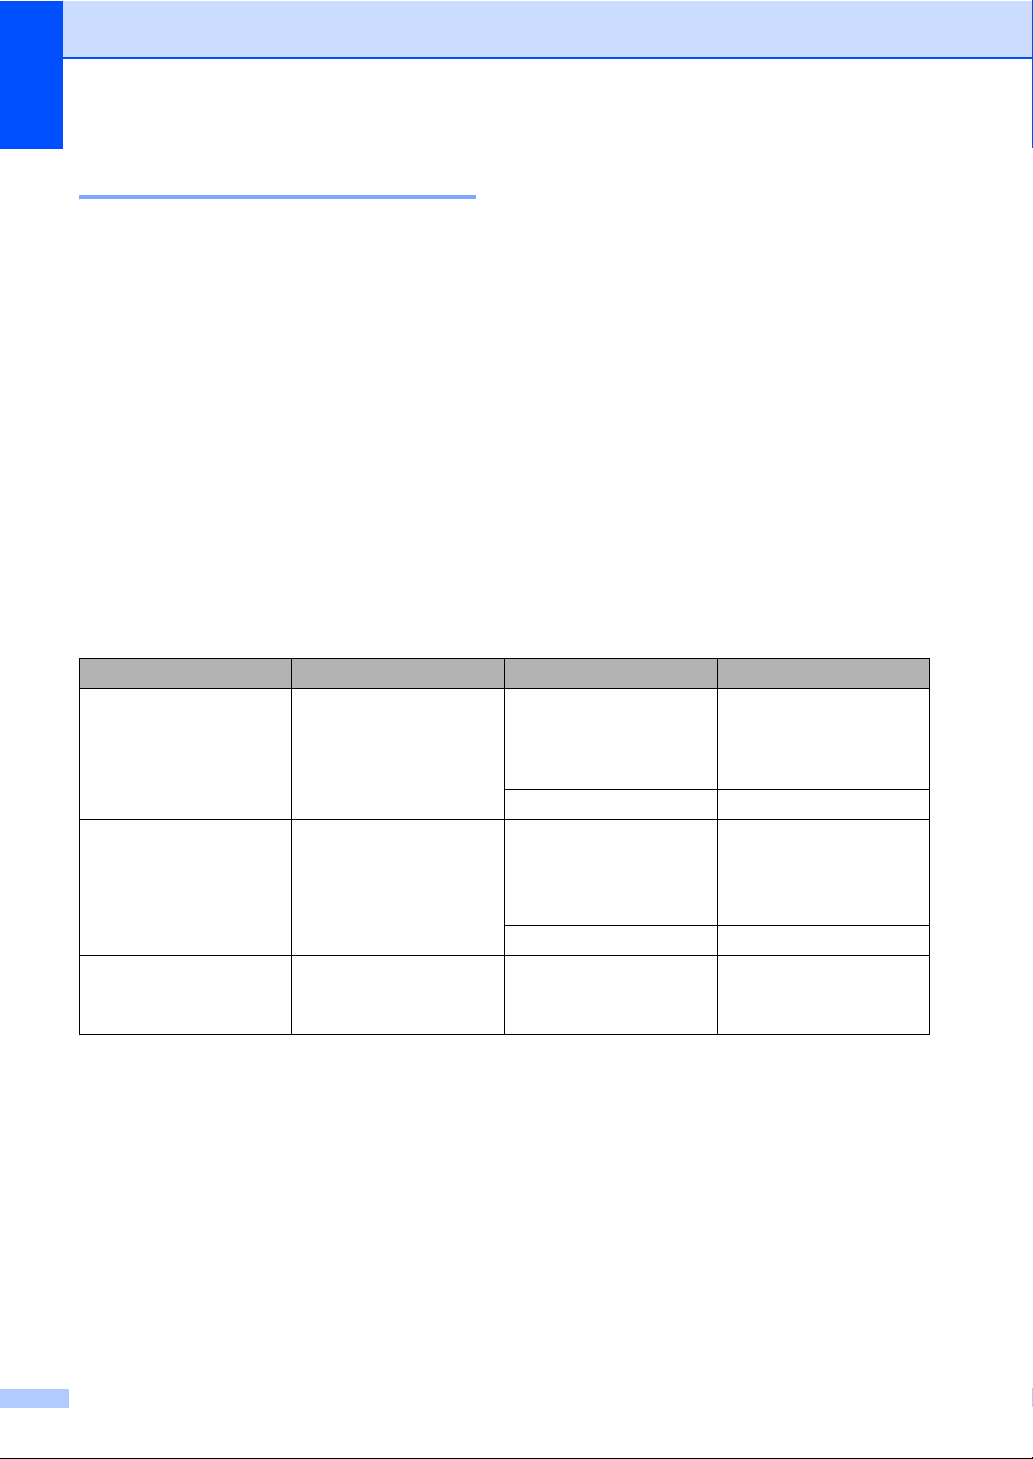
The MP tray can hold up to 50 sheets of plain
The machine loads paper from the installed
Upper Tray, optional Lower Tray or
Multi-purpose tray.
Upper Tray 2
Since the Upper Tray is a universal type, you can use any of the paper sizes (one paper type and size at a time) listed in the table in Paper capacity of the paper trays on page 16. The Upper Tray can hold up to 250 sheets of Letter/A4, Legal or Folio size paper (20 lb or
80 g/m
2
). Paper can be loaded up to the
paper (20 lb or 80 g/m
Paper can be loaded up to the maximum
paper mark on the sliding paper width guide.
Optional Lower Tray (6429913) 2
The optional Lower Tray can hold up to 250
sheets of Letter/A4, Legal and Folio size
paper (20 lb or 80 g/m
up to the top line of the maximum paper mark
on the sliding paper width guide.
2
) or up to 3 envelopes.
2
). Paper can be loaded
maximum paper mark on the sliding paper
width guide.
Paper capacity of the paper trays 2
Paper size Paper types No. of sheets
Paper Tray
(Upper Tray)
Multi-purpose tray (MP tray)
Paper Tray
(Lower Tray)
A4, Letter, Legal,
Executive, A5, A5 (Long
Edge), A6, B5, B6 and
1
.
Folio
Width: 2.75 to 8.5 in.
(69.8 to 216 mm)
Length: 4.57 to 16 in.
(116 to 406.4 mm)
A4, Letter, Legal,
Executive, A5, B5, B6
and Folio
1
.
Plain paper, Thin paper,
Bond paper and
Recycled paper
Transparency up to 10
Plain paper, Thin paper,
Thick paper, Bond
paper, Recycled paper,
Envelopes and Labels.
Transparency up to 10
Thin paper, Plain paper,
Bond paper and
Recycled paper
up to 250
20 lb (80 g/m2)
up to 50
20 lb (80 g/m
up to 3 (envelopes)
up to 250
20 lb (80 g/m2)
2
)
1
Folio size is 8.5 in. × 13 in. (215.9 mm x 330.2 mm)
16
Page 29
Loading paper and documents
Recommended paper specifications 2
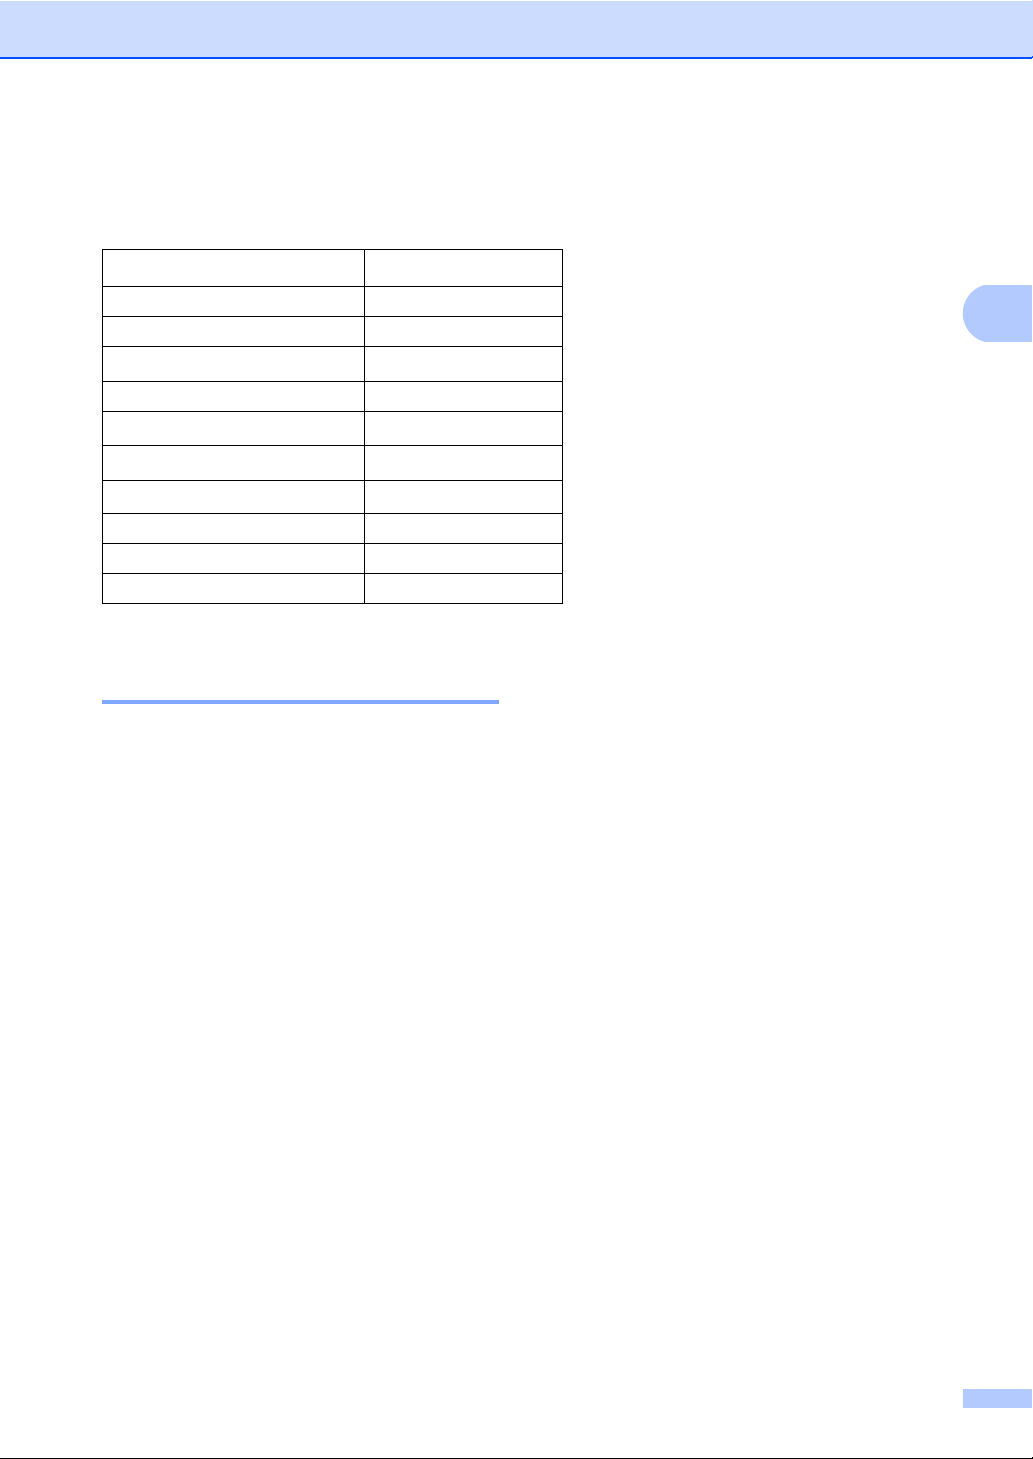
The following paper specifications are suitable for this machine.
Basis weight
Thickness 80-110 µm
Roughness Higher than 20 sec.
Stiffness
Grain direction Long grain
Volume resistivity
Surface resistivity
Filler CaCO
Ash content Below 23 wt%
Brightness Higher than 80%
Opacity Higher than 85%
20-24 lb (75-90 g/m
3
90-150 cm
9
10e
9
10e
/100
-10e11 ohm
-10e12 ohm-cm
(Neutral)
3
Handling and using special paper 2
The machine is designed to work well with
most types of xerographic and bond paper.
However, some paper variables may have an
effect on print quality or handling reliability.
Always test samples of paper before
purchasing to ensure desirable performance.
Store paper in its original packaging and keep
it sealed. Keep the paper flat and away from
moisture, direct sunlight and heat.
Some important guidelines when selecting
paper are:
Do not use inkjet paper because it may
cause a paper jam or damage your
machine.
2
)
2
Preprinted paper must use ink that can
withstand the temperature of the
machine’s fusing process (200 degrees
centigrade).
If you use bond paper, paper having a
rough surface or paper that is wrinkled or
creased, the paper may exhibit degraded
performance.
17
Page 30
Chapter 2
Types of paper to avoid 2
IMPORTANT
Some types of paper may not perform well
or may cause damage to your machine.
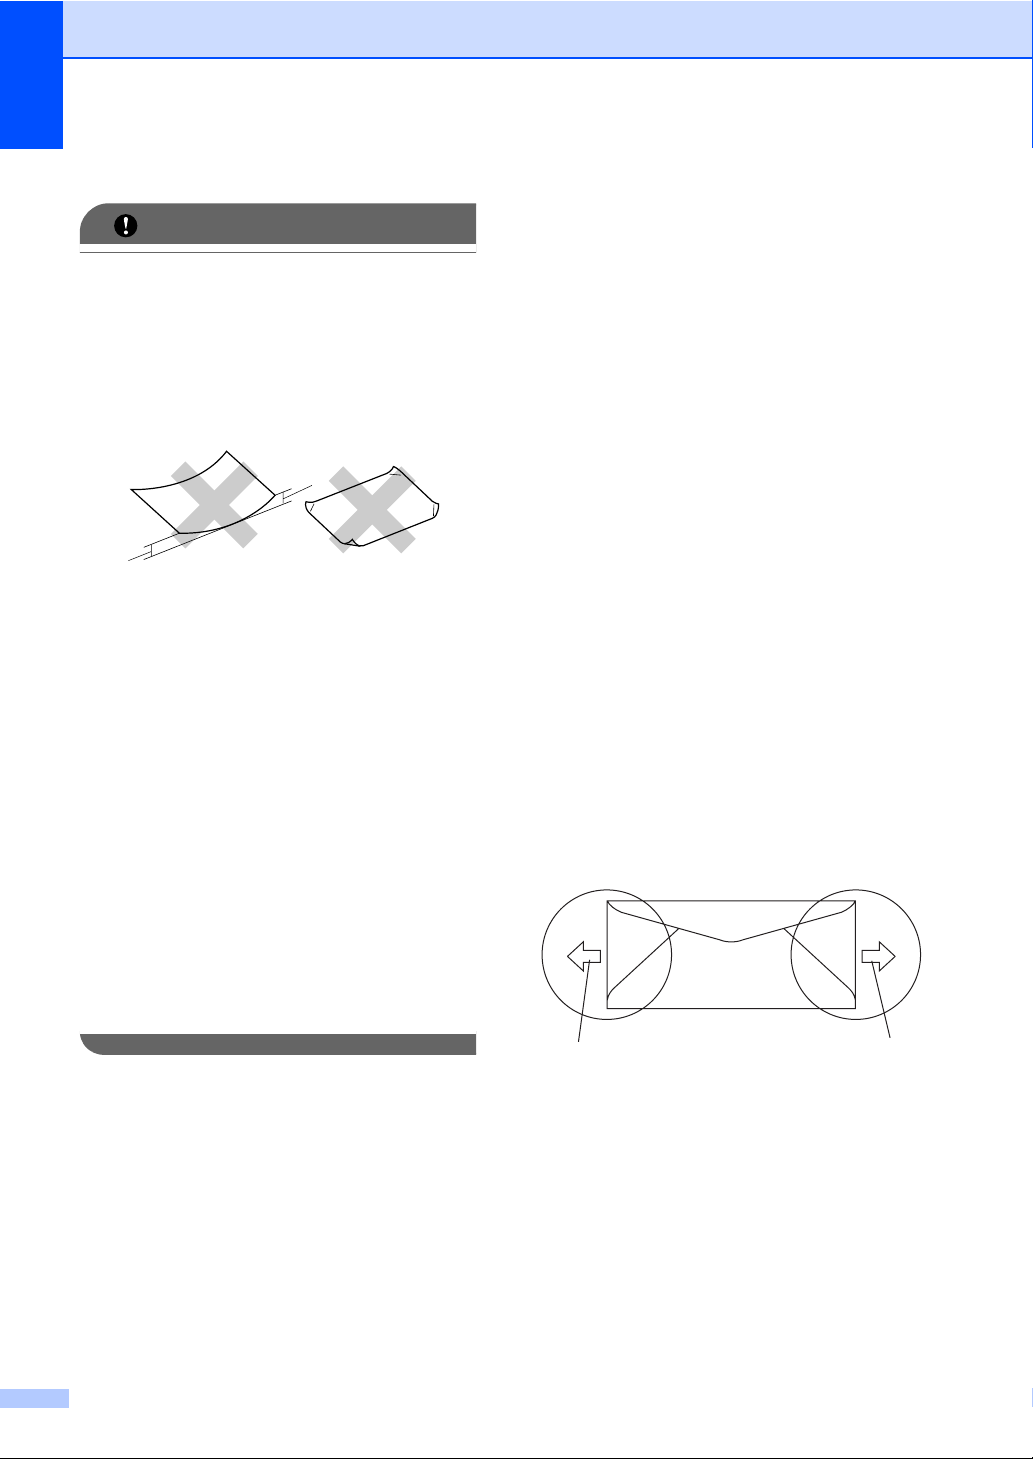
DO NOT use paper:
• that is highly textured
• that is extremely smooth or shiny
• that is curled or warped
1
1
1 0.08 in. (2mm) or greater curl may
cause jams to occur.
• that is coated or has a chemical finish
• that is damaged, creased or folded
• that exceeds the recommended weight
specification in this guide
• with tabs and staples
• with letterheads using low temperature
dyes or thermography
• that is multipart or carbonless
• that is designed for inkjet printing
If you use any of the types of paper listed
above, they may damage your machine.
This damage is not covered under any
Océ warranty or service agreement.
Envelopes 2
Most envelopes will be suitable for your
machine. However, some envelopes may
have feed and print-quality problems
because of the way they have been made. A
suitable envelope should have edges with
straight, well-creased folds and the leading
edge should not be thicker than two sheets of
paper. The envelope should lie flat and not be
of baggy or flimsy construction. You should
buy quality envelopes from a supplier who
understands that you will be using the
envelopes in a laser machine.
Envelopes can only be fed from the MP tray.
Do not print envelopes using duplex printing.
We recommend that you print a test envelope
to make sure the print results are what you
want before you print or purchase a large
quantity of envelopes.
Check the following:
Envelopes should have a lengthwise
sealing flap.
The sealing flaps should be folded crisply
and correctly (irregularly cut or folded
envelopes may cause paper jams).
Envelopes should consist of two layers of
paper in the area circled in figure below.
18
1
1 Feeding direction
Envelope joints that are sealed by the
manufacturer should be secure.
We recommend that you do not print
within 0.6 in. (15 mm) of the edges of
envelopes.
1
Page 31
Loading paper and documents
Types of envelopes to avoid 2
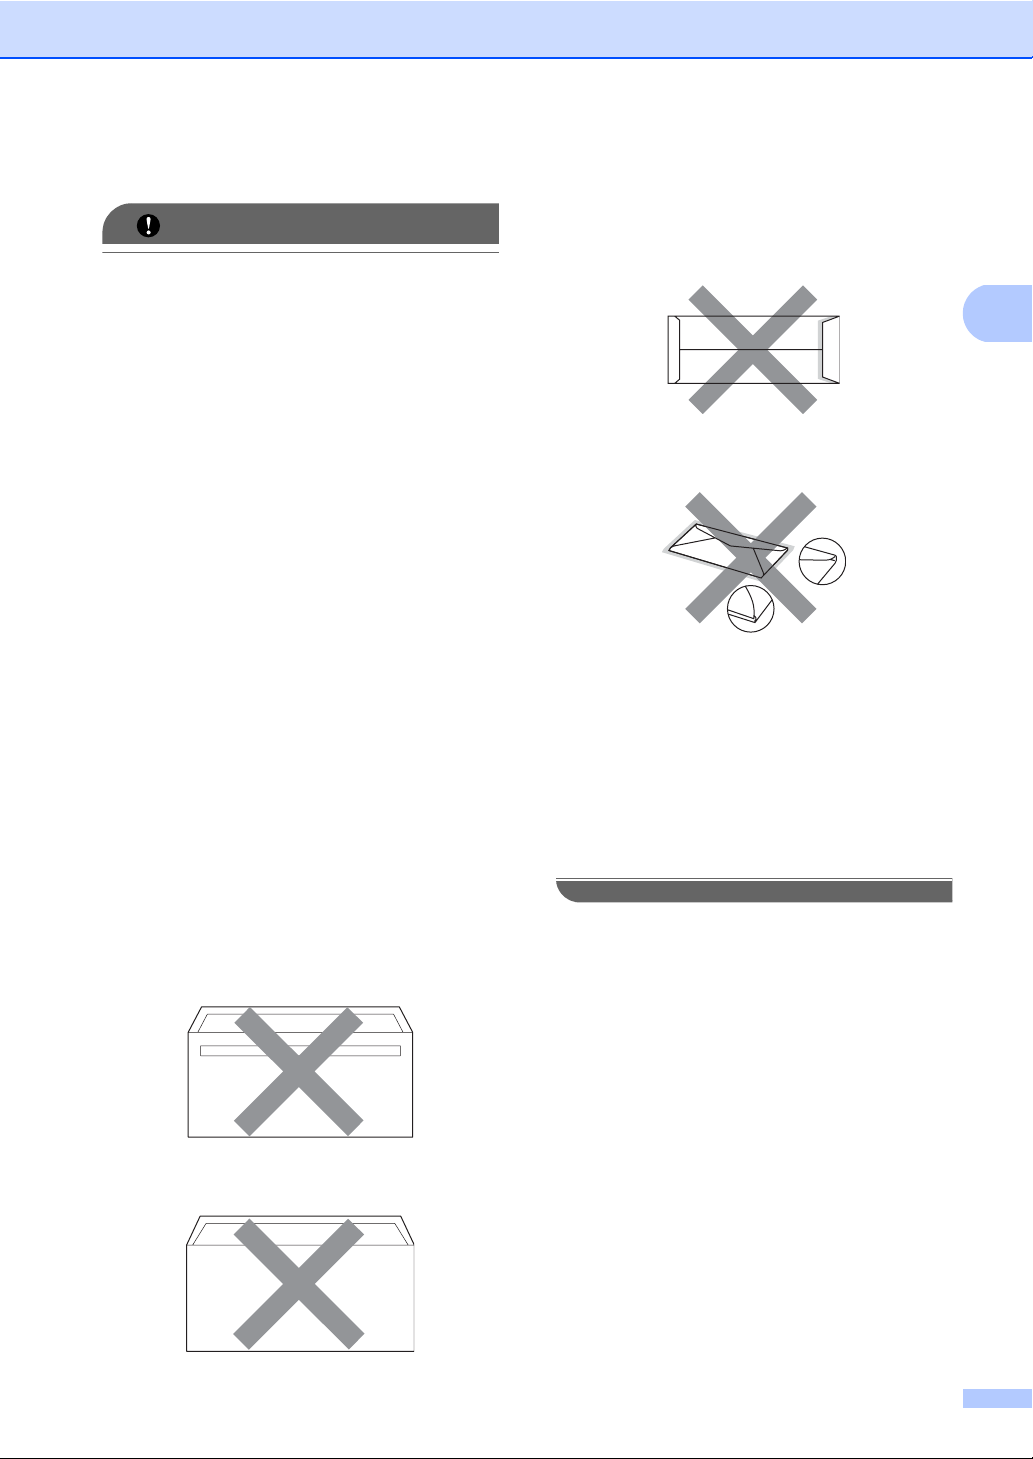
IMPORTANT
DO NOT use envelopes:
• that are damaged, curled, wrinkled or
an unusual shape
• that are extremely shiny or textured
• with clasps, staples, snaps or tie
strings
• with self-adhesive closures
• that are of a baggy construction
• that are not sharply creased
• that are embossed (have raised writing
on them)
• that were previously printed by a laser
machine
• that are pre-printed on the inside
• that cannot be arranged neatly when
stacked
• that are made of paper that weighs
more than the paper weight
specifications for the machine
• with edges that are not straight or
consistently square
• with windows, holes, cut-outs or
perforations
• with glue on surface as shown in figure
below
• with sealing flaps that have not been
folded at purchase
• with sealing flaps as shown in figure
below
2
• with each side folded as shown in
figure below
If you use any of the types of envelopes
listed above, they may damage your
machine. This damage is not covered
under any Océ warranty or service
agreement.
Occasionally you may experience paper
feed problems caused by the thickness,
size and flap shape of the envelopes you
are using.
• with double flaps as shown in figure
below
19
Page 32
Chapter 2
Labels 2
The machine will print on most types of labels
designed for use with a laser machine. Labels
should have an adhesive that is acrylic-based
since this material is more stable at the high
temperatures in the fuser unit. Adhesives
should not come in contact with any part of
the machine, because the label stock may
stick to the drum unit or rollers and cause
jams and print quality problems. No adhesive
should be exposed between the labels.
Labels should be arranged so that they cover
the entire length and width of the sheet. Using
labels with spaces may result in labels
peeling off and causing serious jams or print
problems.
All labels used in this machine must be able
to withstand a temperature of 392 degrees
Fahrenheit (200 degrees centigrade) for a
period of 0.1 seconds.
Label sheets should not exceed the paper
weight specifications described in this User’s
Guide. Labels exceeding this specification
may not feed or print properly and may cause
damage to your machine.
Labels can be fed from the MP Tray.
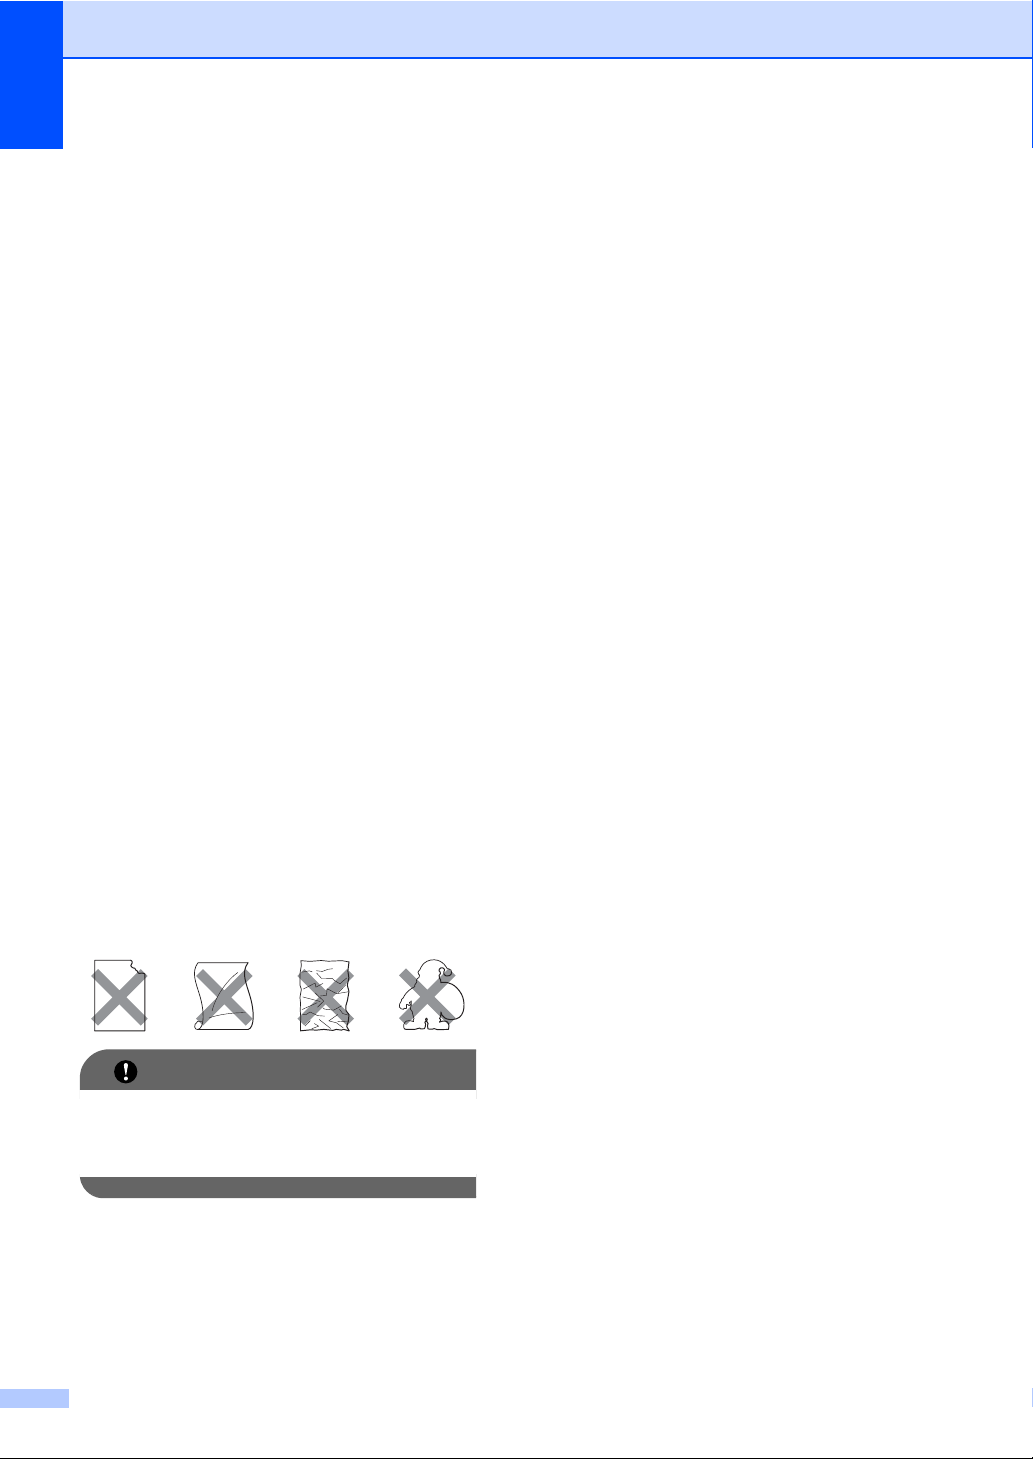
Types of labels to avoid 2
Do not use labels that are damaged, curled,
wrinkled or an unusual shape.
IMPORTANT
Avoid feeding labels with the carrier sheet
exposed because your machine will be
damaged.
20
Page 33
Loading paper and documents
Loading documents 2
Using the automatic document feeder (ADF) 2
The ADF can hold up to 50 pages and feeds
each sheet individually. Use standard 20 lb
(80 g/m
before putting them in the ADF.
Recommended environment 2
2
) paper and always fan the pages
Temperature: 68° F to 86° F (20 to 30° C)
Humidity: 50% - 70%
Paper: Xerox 4200 (20 lb/Letter)
IMPORTANT
• DO NOT leave thick documents on the
scanner glass. If you do this, the ADF may
jam.
• DO NOT use paper that is curled,
wrinkled, folded, ripped, stapled, paperclipped, pasted or taped.
• DO NOT use cardboard, newspaper or
fabric.
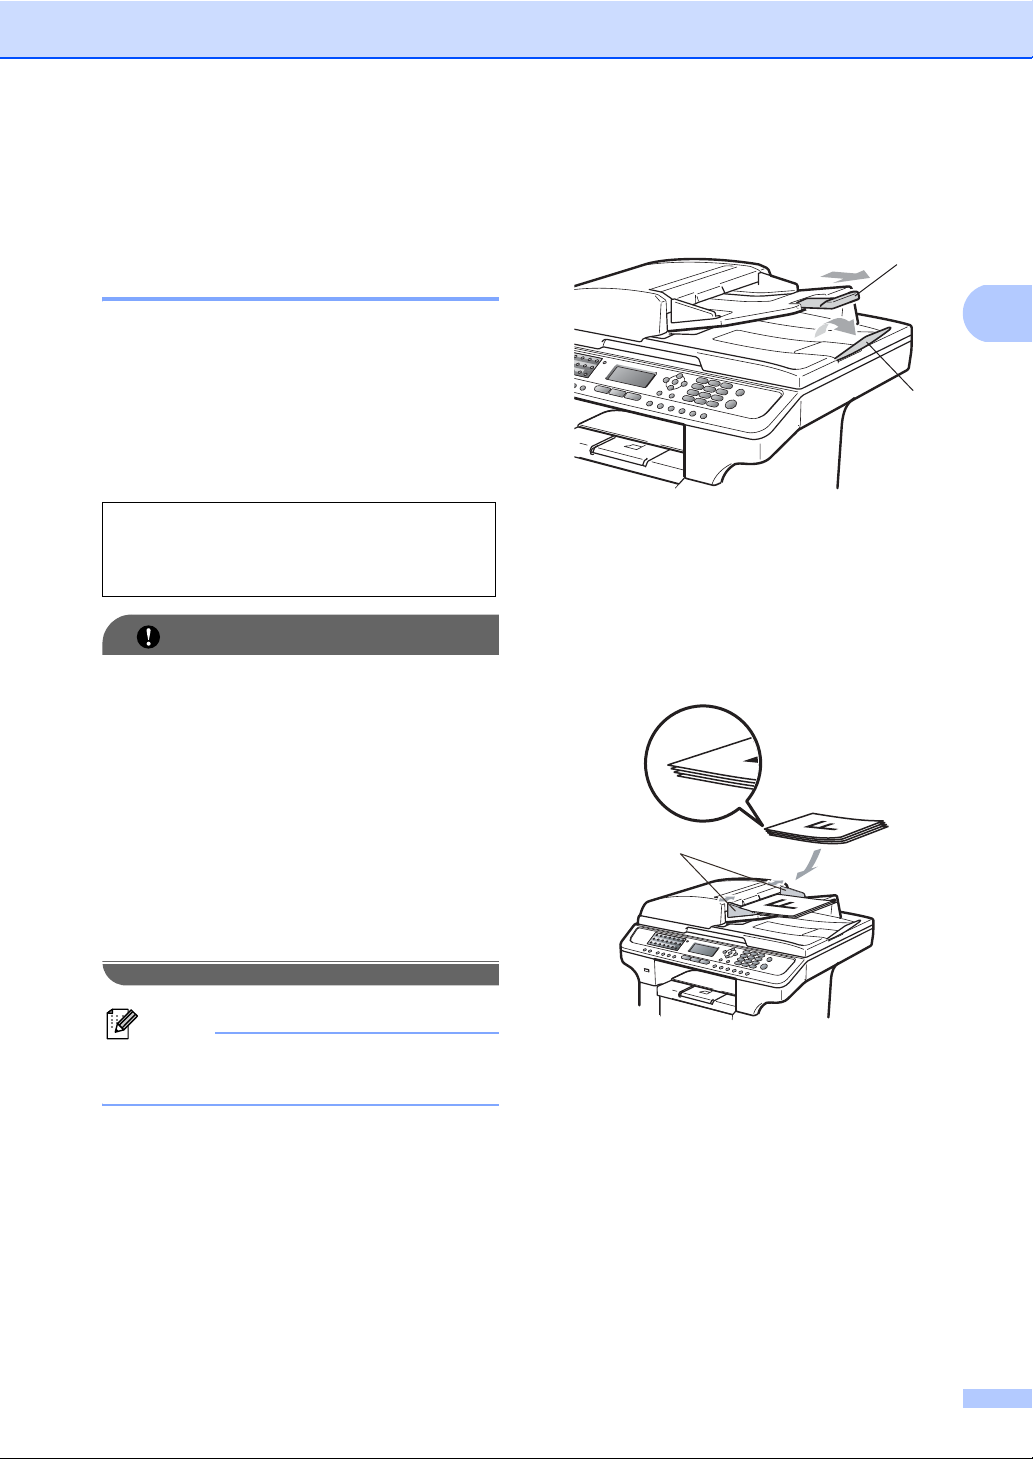
a Unfold the ADF document output
support flap (1) and the ADF support
flap (2).
2
1
b Fan the pages well.
c Place your document face up, top edge
first in the ADF until you feel it touch the
feed roller.
d Adjust the paper guides (1) to fit the
width of your document.
1
2
• To avoid damaging your machine while
using the ADF, DO NOT pull on the
document while it is feeding.
Note
To scan non-standard documents see
Using the scanner glass on page 22.
Make sure documents written with ink are
completely dry.
Documents to be faxed must be from 5.8
to 8.5 in. (148 to 215.9 mm) wide and from
5.8 to 14 in. (148 to 355.6 mm) long, and
of a standard weight [20 lb (80 g/m
2
)].
21
Page 34
Chapter 2
Using the scanner glass 2
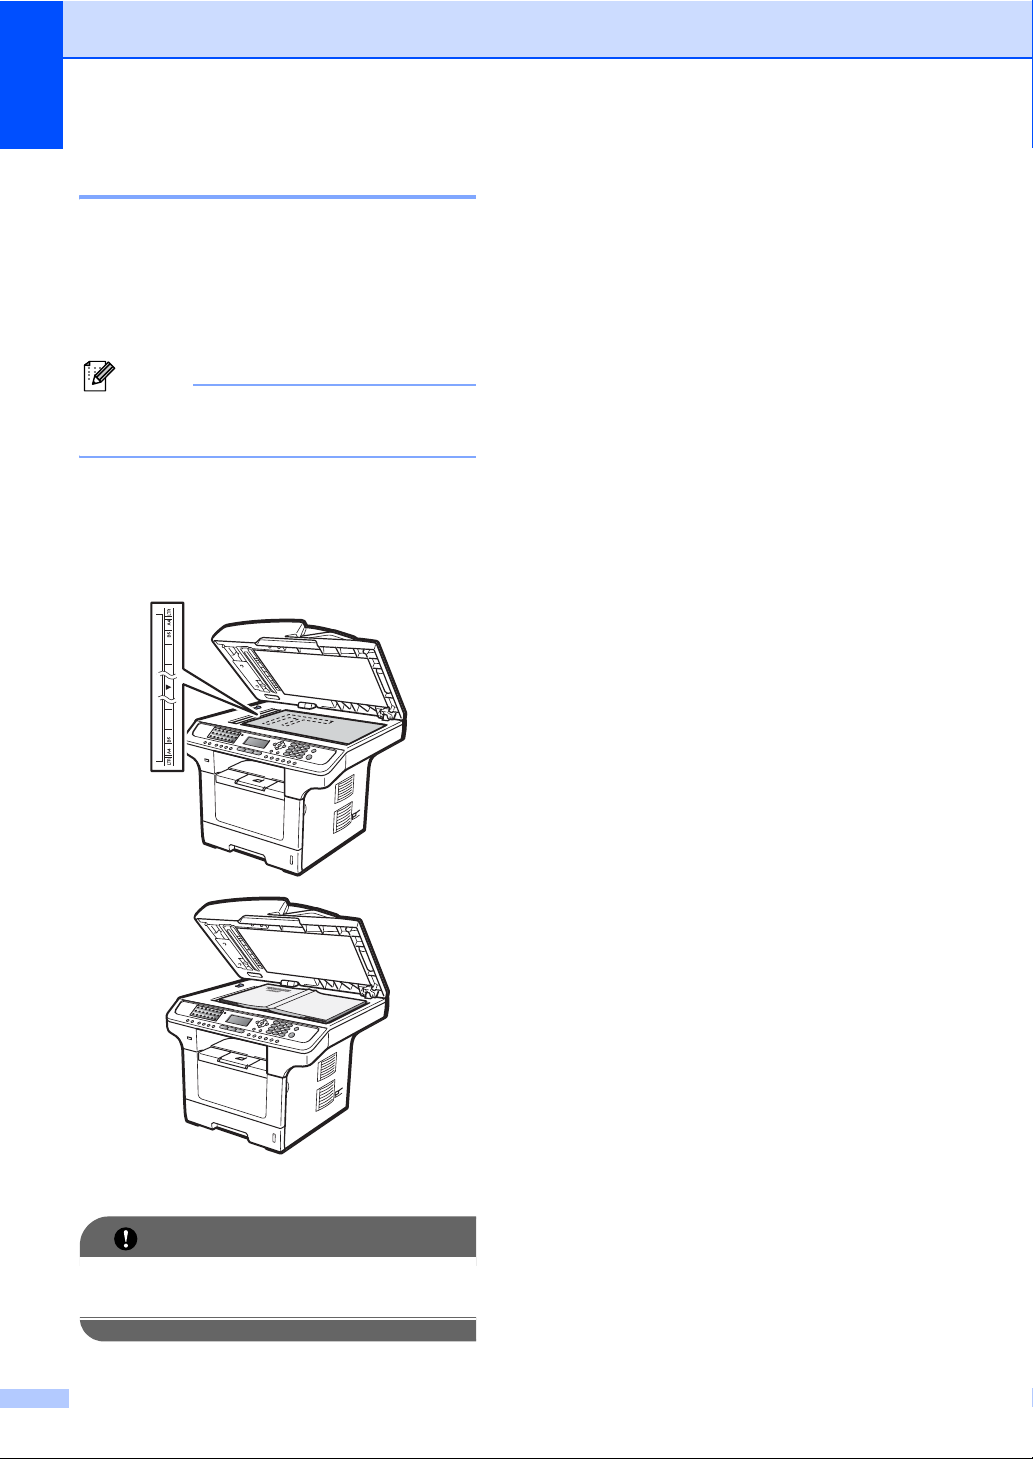
You can use the scanner glass to fax, copy or
scan pages of a book or one page at a time.
Documents can be up to 8.5 in. wide and
14 in. long (215.9 mm wide and 355.6 mm
long).
Note
To use the scanner glass, the ADF must
be empty.
a Lift the document cover.
b Using the document guidelines on the
left, center the document face down on
the scanner glass.
c Close the document cover.
IMPORTANT
If the document is a book or is thick do not
slam the cover or press on it.
22
Page 35
3
System Setup 3
Mode Timer 3
The machine has three mode keys on the
control panel: Fax, Scan, and Copy.
You can set how much time the machine
takes after the last Copy or Scan operation to
return to Fax mode. If you choose Off, the
machine will stay in the mode you used last.
This setting also sets the time the machine
will change from individual user to the Public
user when using Secure Function Lock. (See
Switching Users on page 35.)
a Press Menu, 1, 1.
11.Mode Timer
a 2 Mins
5 Mins
b Off
Select ab or OK
b Press a or b to choose 0 Sec,
30 Secs, 1 Min, 2 Mins, 5 Mins or
Off.
Press OK.
c Press Stop/Exit.
Paper settings 3
Paper Type 3
Set up the machine for the type of paper you
are using. This will give you the best print
quality.
a Do one of the following:
To set the paper type for the
MP Tray press Menu, 1, 2, 1, 1.
To set the paper type for
Upper Tray press Menu, 1, 2, 1, 2.
To set the paper type for
Lower Tray
3 if you installed the optional tray.
1
Lower Tray Only or Lower appears
only if the optional tray is installed.
21.Paper Type
1.MP Tray
a Plain
b Thick
Select ab or OK
b Press a or b to choose Thin, Plain,
Thick, Thicker, Transparency or
Recycled Paper.
Press OK.
1
press Menu, 1, 2, 1,
3
c Press Stop/Exit.
Note
You can choose Transparency for
Upper Tray and the MP Tray.
23
Page 36

Chapter 3
Paper Size 3
You can use ten sizes of paper for printing
copies: Letter, Legal, Executive, A5, A5 L,
A6, B5, B6, Folio and A4 and four sizes for
printing faxes: A4, Letter, Legal or
Folio (8.5"×13").
When you change the size of paper in the
tray, you will also need to change the setting
for paper size at the same time so your
machine can fit the document or an incoming
fax on the page.
a Do one of the following:
To set the paper size for the
MP Tray press Menu, 1, 2, 2, 1.
To set the paper size for
Upper Tray press Menu, 1, 2, 2, 2.
To set the paper size for
Lower Tray
3 if you installed the optional tray.
1
Lower Tray Only or Lower appears
only if the optional tray is installed.
22.Paper Size
1.MP Tray
a Letter
b Legal
Select ab or OK
1
press Menu, 1, 2, 2,
Note
• Any size appears only when you choose
the MP tray.
• If you choose Any for the MP Tray Paper
Size: You must choose MP Only for the
Tray Use setting. You cannot use the Any
Paper Size selection for the MP tray when
making N in 1 copies. You must choose
one of the other available Paper Size
selections for the MP tray.
• A5 L and A6 size are not available for the
optional Lower Tray.
• If you chose Transparency for the
Paper Type you will only be able to
choose Letter, Legal, Folio or A4
size paper in step b.
b Press a or b to choose , Letter,
Legal, Executive, A5, A5 L, A6, B5,
B6, Folio, A4 or Any.
Press OK.
c Press Stop/Exit.
24
Page 37
System Setup
Tray Use in copy mode 3
You can change the priority tray that the
machine will use for printing copies.
When you choose Upper Tray Only,
MP Only or Lower Tray Only
1
, the
machine pulls the paper only from that tray. If
the selected tray is out of paper, No Paper
will appear on the LCD. Insert the paper in the
empty tray.
To change the tray setting follow the
instructions below:
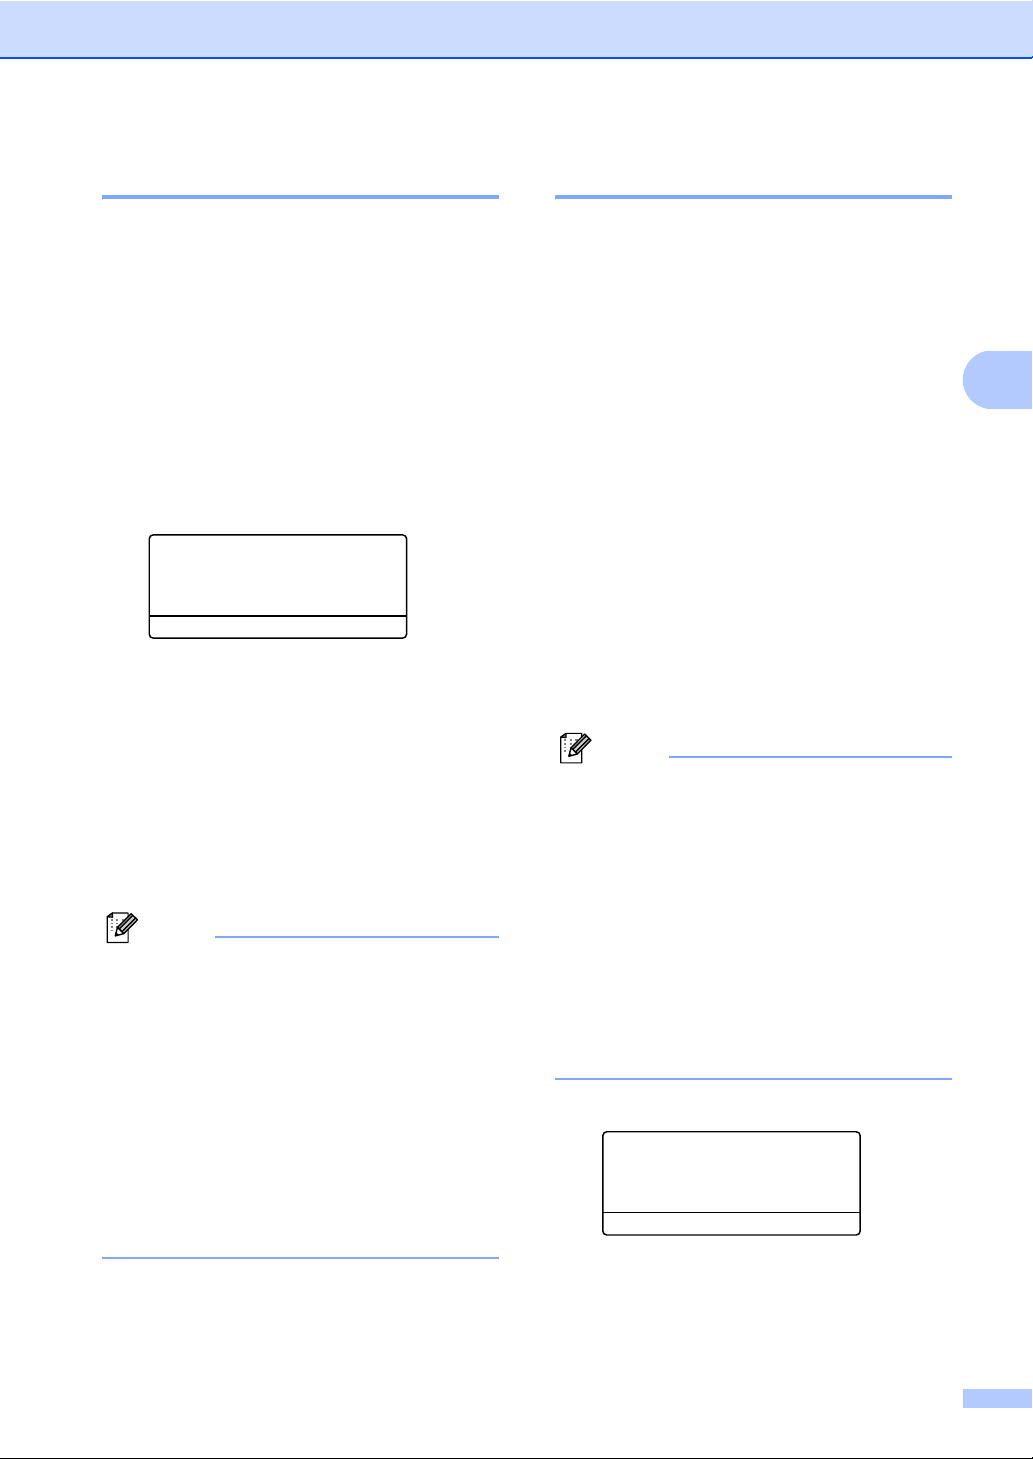
a Press Menu, 1, 6, 1.
16.Tray Use
1.Copy
a MP>Upper
b Upper>MP
Select ab or OK
b Press a or b to choose
Upper Tray Only,
Lower Tray Only
MP>Upper>Lower
Upper>Lower
Press OK.
1
Lower Tray Only or Lower appears only if
the optional tray is installed.
1
>MP.
1
, MP Only,
1
or
c Press Stop/Exit.
Note
• When loading the documents in the ADF
and MP>Upper>Lower or
Upper>Lower>MP is selected, the
machine looks for the tray with the most
suitable paper and pulls paper from that
tray. If no tray has suitable paper, the
machine pulls paper from the higher
priority tray.
• When using the scanner glass, your
document is copied from the higher
priority tray even if more suitable paper is
in another paper tray.
Tray Use in fax mode 3
You can change the default tray that the
machine will use for printing received faxes.
When you choose Upper Tray Only,
MP Only or Lower Tray Only
machine pulls the paper only from that tray. If
the selected tray is out of paper, No Paper
will appear on the LCD. Insert the paper in the
empty tray.
When you choose Upper>Lower
machine pulls paper from Upper Tray until it
is empty, then from Lower Tray, and then
from the MP tray. When you choose
MP>Upper>Lower
1
, the machine pulls
paper from the MP tray until it is empty, then
from Upper Tray, and then from Lower Tray.
Auto Separation allows the machine
always to print the first page of the fax
document from Upper Tray. All the remaining
pages are printed from the Lower Tray.
Note
• You can use four sizes of paper for
printing faxes: A4, Letter, Legal or Folio.
When a suitable size is not in any of the
trays received faxes will be stored in the
machine’s memory and Size Mismatch
will appear on the LCD. (For details, see
Error and maintenance messages
on page 133.)
• If the tray is out of paper and received
faxes are in the machine’s memory,
No Paper will appear on the LCD. Insert
paper in the empty tray.
a Press Menu, 1, 6, 2.
16.Tray Use
2.Fax
a MP>Upper
b Upper>MP
Select ab or OK
1
, the
1
>MP, the
3
25
Page 38
Chapter 3
b Press a or b to choose
Upper Tray Only,
Lower Tray Only
MP>Upper>Lower
Upper>Lower
Auto Separation
Press OK.
1
Lower Tray Only, Lower or
Auto Separation appears only if the
optional tray is installed.
1
1
>MP or
1
, MP Only,
,
1
.
c Press Stop/Exit.
Tray Use in print mode 3
You can change the default tray the machine
will use for printing from your computer.
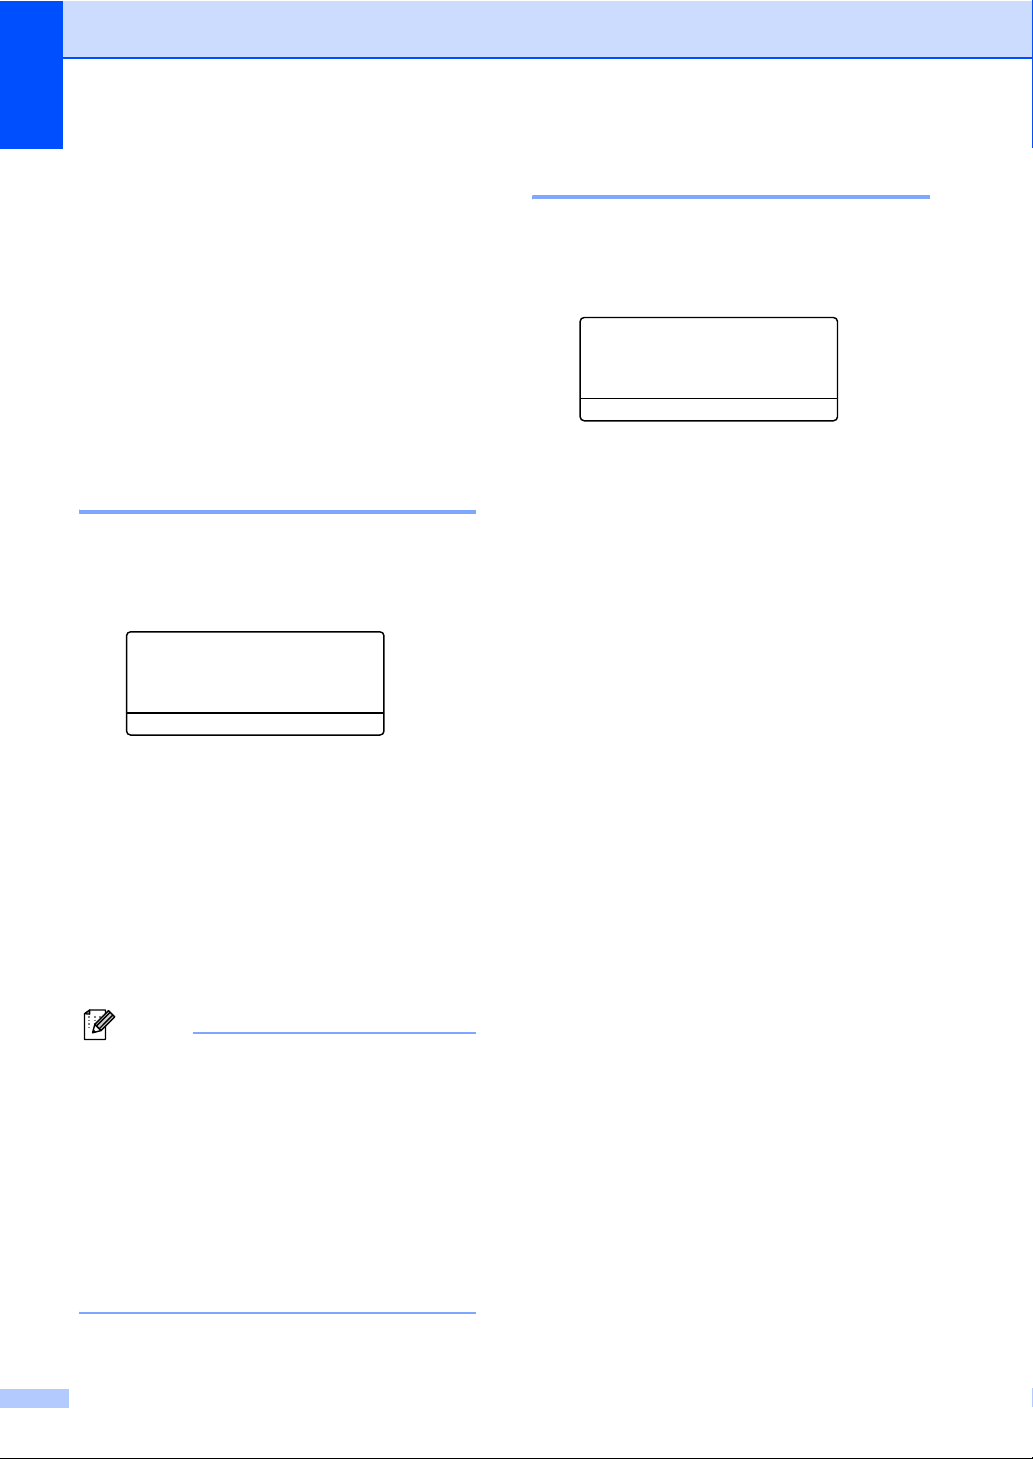
a Press Menu, 1, 6, 3.
16.Tray Use
3.Print
a MP>Upper
b Upper>MP
Select ab or OK
Tray use for Printing reports 3
You can change the default tray the machine
will use for printing reports.
a Press Menu, 1, 6, 4.
16.Tray Use
4.Report
a MP>Upper
b Upper>MP
Select ab or OK
b Press a or b to choose
Upper Tray Only,
Lower Tray Only
MP>Upper>Lower
Upper>Lower
Press OK.
1
Lower Tray Only or Lower appears only if
the optional tray is installed.
1
>MP.
1
, MP Only,
1
or
c Press Stop/Exit.
b Press a or b to choose
Upper Tray Only,
Lower Tray Only
MP>Upper>Lower
Upper>Lower
Press OK.
1
Lower Tray Only or Lower appears only if
the optional tray is installed.
1
>MP.
1
, MP Only,
1
or
c Press Stop/Exit.
Note
• The setting in the printer driver will take
priority over the setting made on the
control panel.
• If the control panel is set to
Upper Tray Only, MP Only or
Lower Tray Only
Auto Select in the printer driver, the
machine pulls the paper from that tray.
1
Lower Tray Only appears only if the optional tray
is installed.
1
and you choose
26
Page 39
System Setup
Volume settings 3
Ring volume 3
You can choose a ring volume level from a
range of settings, from High to Off.
While in Fax mode press or to adjust
the volume level. The LCD will show the
current setting, and each key press will
change the volume to the next level. The
machine will keep the new setting until you
change it.
You can also change the ring volume through
the menu:
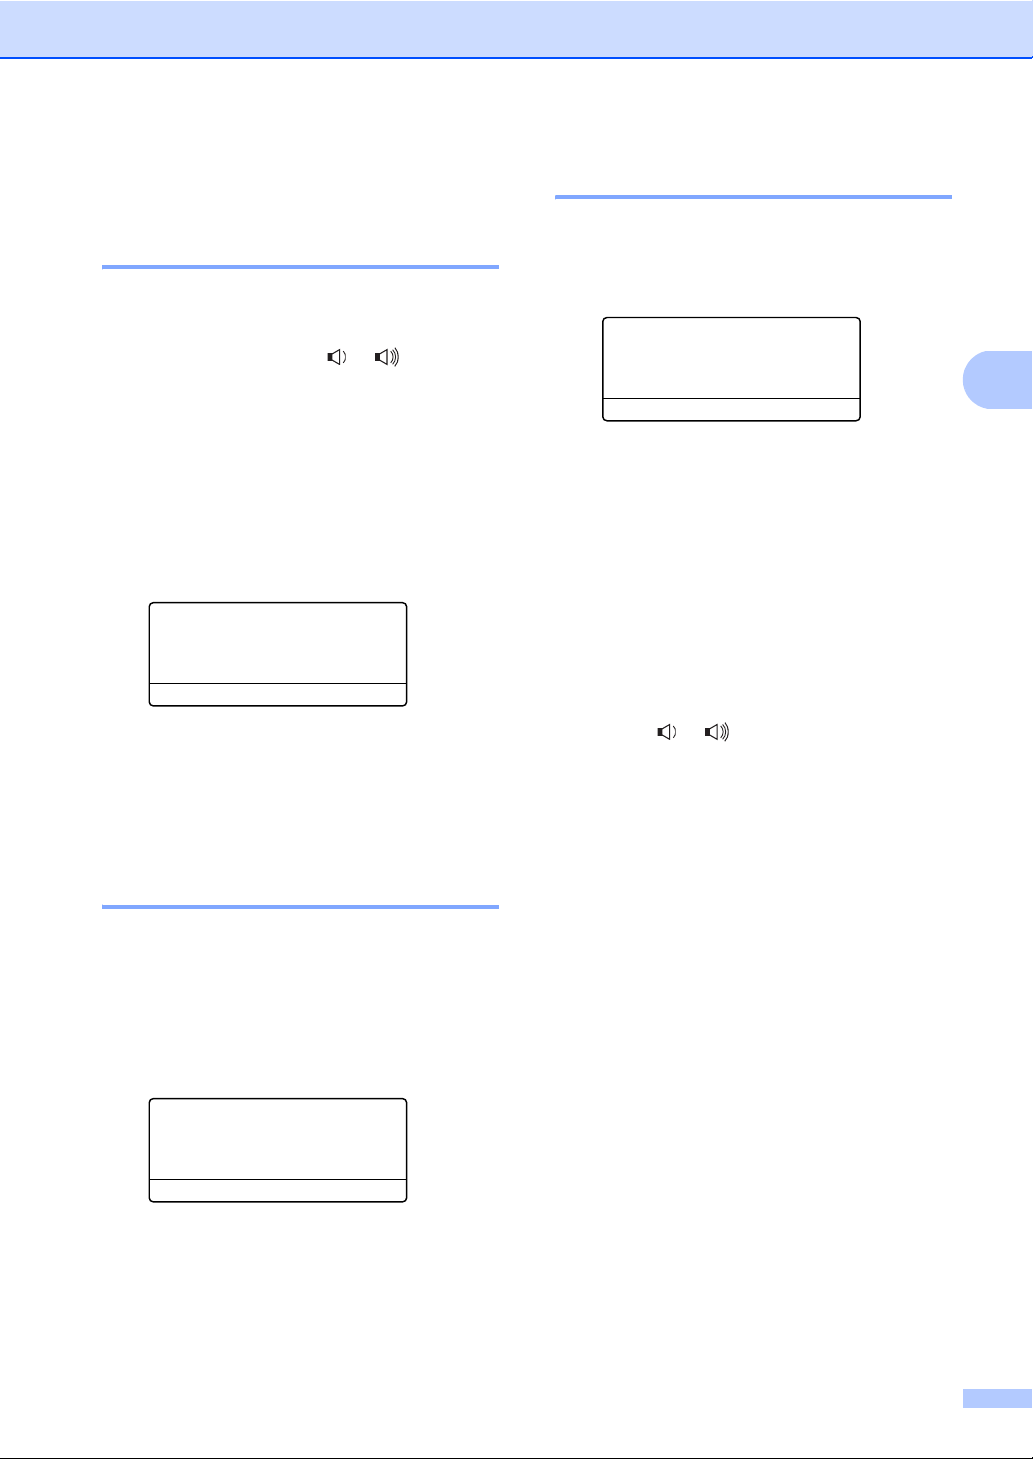
a Press Menu, 1, 3, 1.
13.Volume
1.Ring
a Med
b High
Select ab or OK
b Press a or b to choose Off, Low, Med or
High.
Press OK.
Speaker volume 3
You can choose a range of speaker volume
levels, from High to Off.
a Press Menu, 1, 3, 3.
13.Volume
3.Speaker
a Med
b High
Select ab or OK
b Press a or b to choose Off, Low, Med or
High.
Press OK.
c Press Stop/Exit.
You can also adjust the speaker volume with
the control panel keys.
a Press Fax.
b Press Hook.
c Press or .
This setting will stay until you change it
again.
3
c Press Stop/Exit.
Beep volume 3
When the beep volume is on, the machine will
beep when you press a key, make a mistake,
or after you send or receive a fax. You can
choose a range of volume levels, from High
to Off.
a Press Menu, 1, 3, 2.
13.Volume
2.Beep Vol.
a Med
b High
Select ab or OK
b Press a or b to choose Off, Low, Med or
High.
Press OK.
c Press Stop/Exit.
d Press Hook.
27
Page 40
Chapter 3
Automatic daylight savings time 3
You can set the machine to change
automatically for Daylight Savings Time. It
will set itself forward one hour in the Spring,
and back one hour in the Fall.
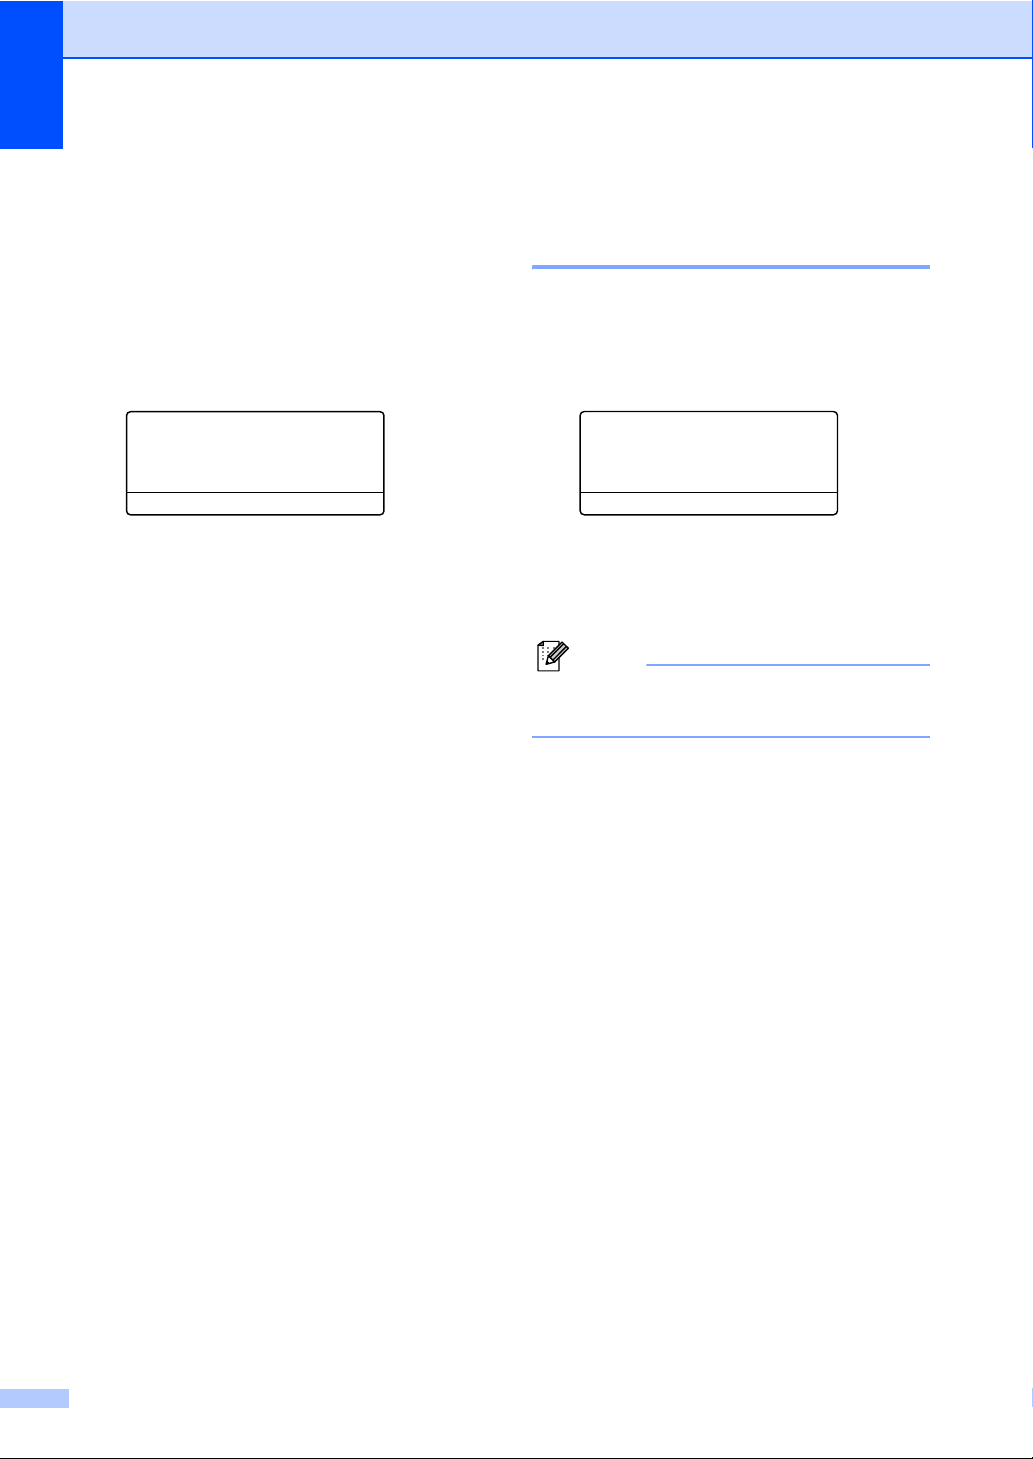
a Press Menu 1, 4.
14.Auto Daylight
a On
b Off
Select ab or OK
b Press a or b to choose On or Off.
Press OK.
c Press Stop/Exit.
Ecology features 3
Save Toner 3
You can save toner using this feature. When
you set Save Toner to On, print appears
lighter. The default setting is Off.
a Press Menu, 1, 5, 1.
15.Ecology
1.Save Toner
a On
b Off
Select ab or OK
b Press a or b to choose On or Off.
Press OK.
c Press Stop/Exit.
Note
We do not recommend Save Toner for
printing Photo or Gray Scale images.
28
Page 41
System Setup
Sleep Timer 3
The Sleep Timer setting can reduce power
consumption by turning off the fuser while the
machine is idle.
You can choose how long the machine must
be idle before it goes into sleep mode. When
the machine receives a fax, computer data, or
makes a copy, the timer will be reset. The
default setting is 5 minutes.
When printing or copying in sleep mode,
there will be a short delay while the fuser
warms up.
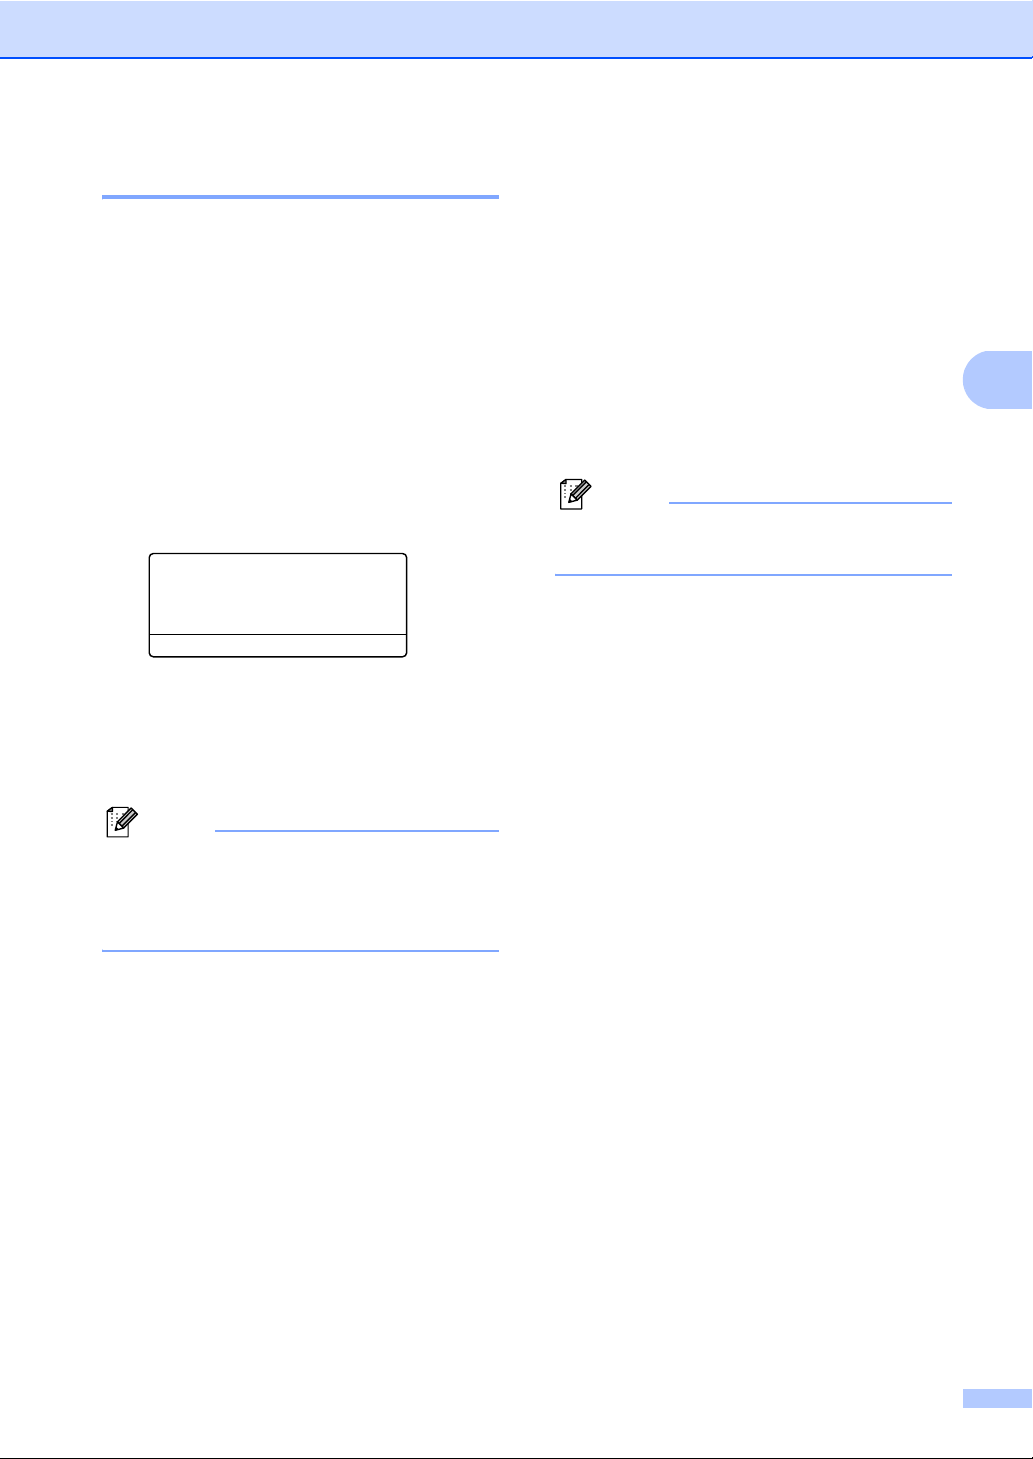
a Press Menu 1, 5, 2.
15.Ecology
2.Sleep Timer
005Min
Enter & OK Key
b Enter the length of time the machine is
idle before entering sleep mode.
Press OK.
Turning off the scanner lamp 3
The scanner lamp stays on for 16 hours
before automatically switching off to preserve
the life of the lamp and reduce power
consumption.
To turn the scanner lamp off manually press
the d and c keys simultaneously. The scanner
lamp will remain turned off until the next time
you use the scanning feature.
Note
Turning the lamp off regularly will reduce
the lamp’s life.
3
c Press Stop/Exit.
Note
To turn off sleep mode, press
Secure/Direct and Job Cancel at the
same time in step b. Press a or b to
choose Off. Press OK.
29
Page 42

Chapter 3
LCD Contrast 3
You can change the contrast to make the
LCD look lighter or darker.
a Press Menu, 1, 7.
17.LCD Contrast
-nnonn+
Select dc&OK
b Press d to make the LCD lighter. Or,
press c to make the LCD darker.
Press OK.
c Press Stop/Exit.
Dial Prefix 3
The Dial Prefix setting will automatically dial a
predefined number before every fax number
you dial. For example: If your telephone
system requires a 9 to dial an outside number
use this setting to automatically dial 9 for
every fax you send.
Setting up the prefix number 3
a Press Menu, 0, 6.
b Enter the prefix number (up to 5 digits)
on the dial pad.
Press OK.
Note
• You can use the numbers 0 to 9, #, l and
!. (Press Hook to display “!”.)
You cannot use ! with any other numbers
or characters.
If your telephone system requires a timed
break recall (hookflash), press Hook to
enter the break.
• If the pulse dialing mode is on, # and l are
not available to use.
c Press Stop/Exit.
30
Page 43

Changing the prefix number 3
a Press Menu, 0, 6.
b Do one of the following:
To change the prefix number, press
1.
To exit without making a change,
press 2 and go to d.
c Enter a new prefix number using the dial
pad (up to 5 digits), press OK.
d Press Stop/Exit.
System Setup
3
31
Page 44

4
Security features 4
Secure Function Lock 2.0
Secure Function Lock lets you restrict Public
access to the following machine functions:
PC Print
USB Direct Print
Copy
Fax Tx
Fax Rx
Scan
This feature also prevents users from
changing the Default settings of the machine
by limiting access to the Menu settings.
Before using the security features you must
first enter an administrator password.
Access to restricted operations can be
enabled by creating a restricted user.
Restricted users must enter a user password
to use the machine.
Make a careful note of your password. If you
forget it, you will have to reset the password
stored in the machine. For information about
how to reset the password call Océ Technical
Support.
4
Note
• Secure Function Lock can be set manually
at the control panel or by using Web
Based Management. We recommend
using Web Based Management to
configure this feature. For more
information, see the Network User’s
Guide.
• Only administrators can set limitations
and make changes for each user.
• When Secure Function Lock is on, you
can only use 1.Contrast and
7.Cover Sheet in the Fax menu.
If Fax Tx is disabled, you cannot use any
function in the Fax menu.
• Polling Receive is enabled only when both
Fax Tx and Fax Rx are enabled.
Setting the password for the administrator 4
The password you set in these steps is for the
administrator. This password is used to set
up users and to turn Secure Function Lock on
or off. (See Setting up restricted users
on page 34 and Turning Secure Function
Lock on/off on page 35.)
a Press Menu, 1, 8, 1.
18.Security
1.Function Lock
New Passwd:XXXX
Enter & OK Key
b Enter a four-digit number for the
password using numbers 0-9.
Press OK.
c Re-enter the password when the LCD
shows Verify:.
Press OK.
d Press Stop/Exit.
32
Page 45
Security features
Changing the password for the administrator 4
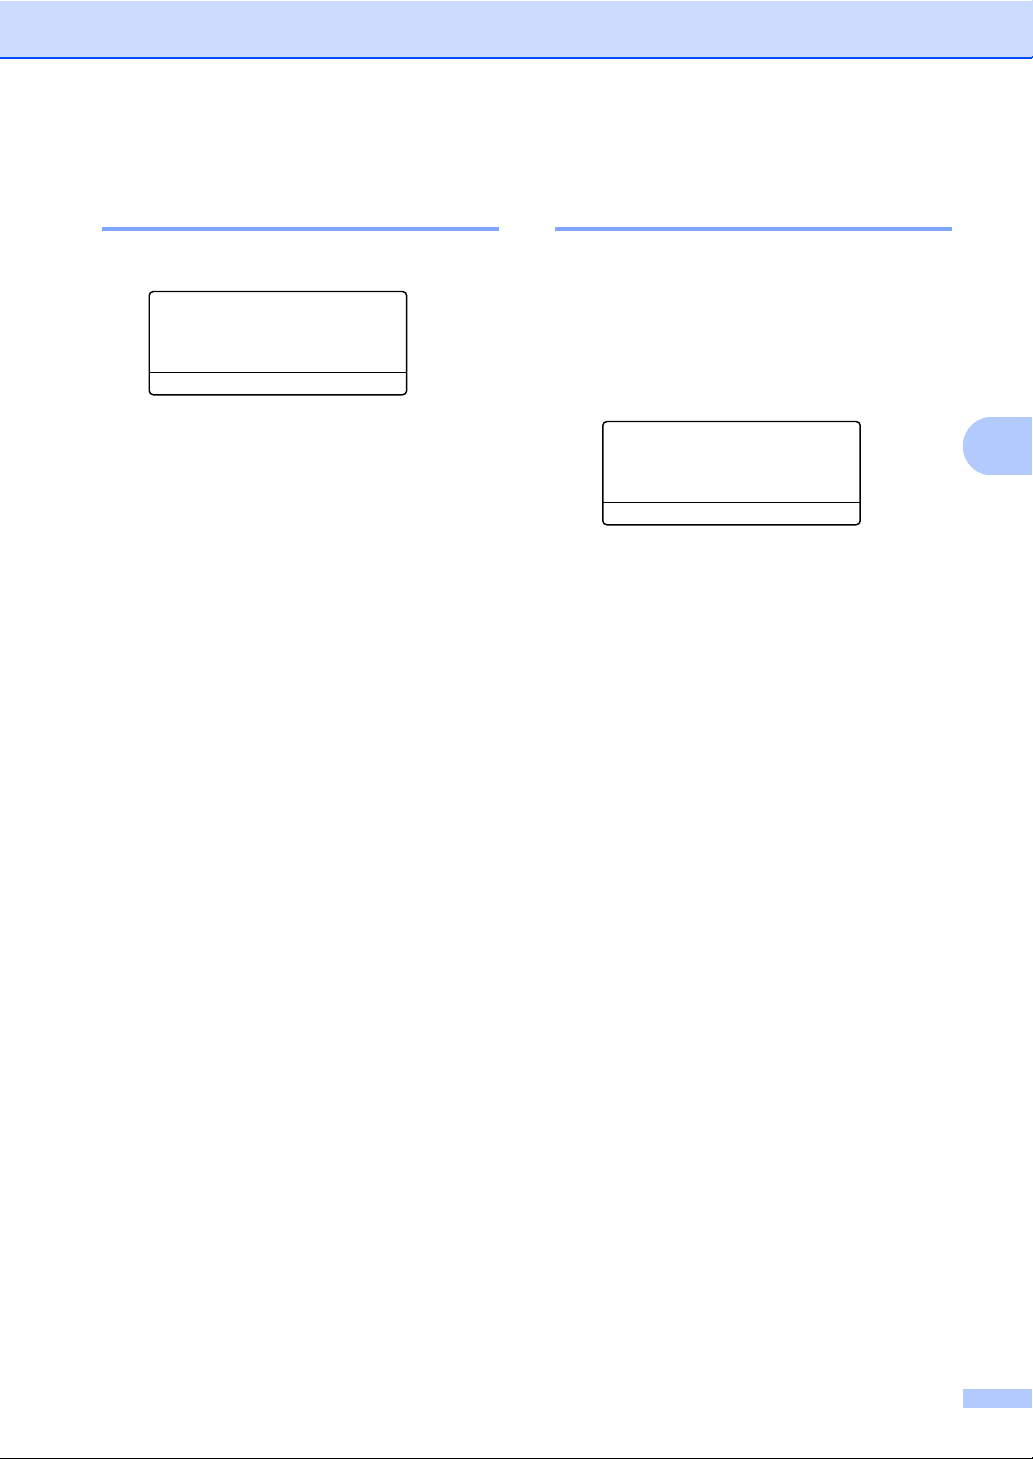
a Press Menu, 1, 8, 1.
18.Security
1.Function Lock
a Lock OffiOn
b Set Password
Select ab or OK
b Press a or b to choose Set Password.
Press OK.
c Enter the registered four-digit password.
Press OK.
d Enter a four-digit number for the new
password.
Press OK.
e If the LCD shows Verify: re-enter the
new password.
Press OK.
f Press Stop/Exit.
Setting up the public user mode 4
Public user mode restricts the functions that
are available for Public users. Public users do
not need to enter a password to access the
features made available through this setting.
You can set up one Public user.
a Press Menu, 1, 8, 1.
18.Security
1.Function Lock
a Lock OffiOn
b Set Password
Select ab or OK
b Press a or b to choose Setup ID.
Press OK.
c Enter the administrator password.
Press OK.
d Press a or b to choose Public.
Press OK.
e Press a or b to choose Enable or
Disable for Fax Tx.
Press OK.
After you have set Fax Tx, repeat this
step for Fax Rx, Copy, Scan,
USB Direct and PC Print.
When you have finished changing
settings press d or c to choose Exit
and press OK.
4
f Press Stop/Exit.
33
Page 46
Chapter 4
Setting up restricted users 4
You can set up users with restrictions and a
password for functions that are available to
them. You can set up more advanced
restrictions, such as by page count or PC
user login name, through Web Based
Management. (For more information, see the
Network User’s Guide.) You can set up to 25
restricted users with restrictions and a
password.
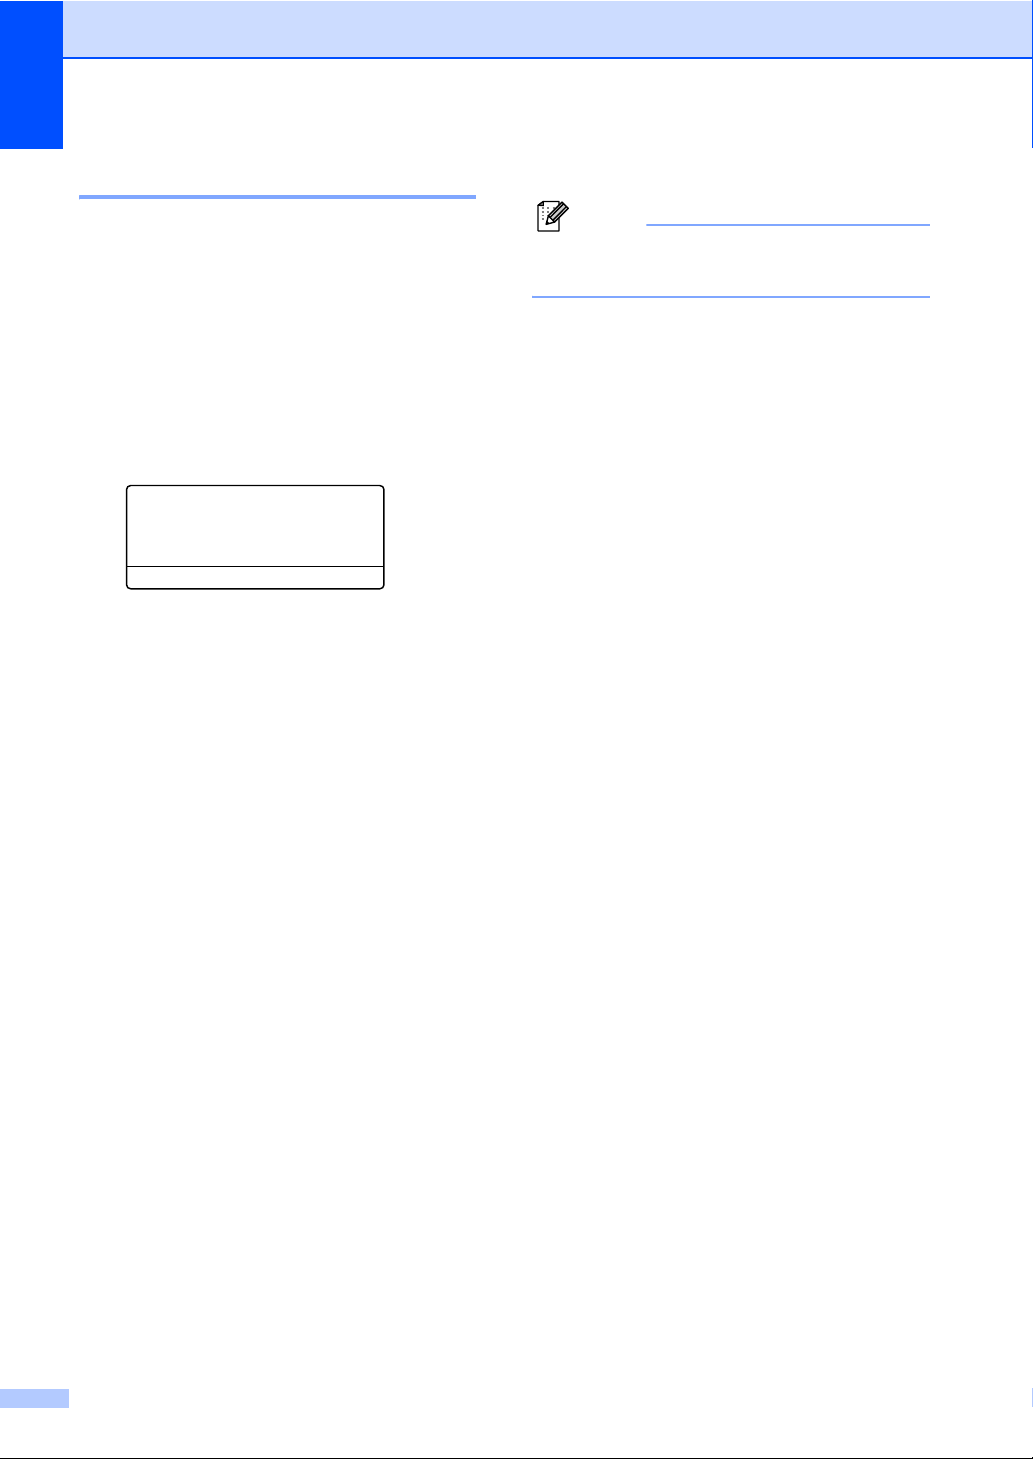
a Press Menu, 1, 8, 1.
18.Security
1.Function Lock
a Lock OffiOn
b Set Password
Select ab or OK
b Press a or b to choose Setup ID.
Press OK.
c Enter the administrator password.
Press OK.
i Press Stop/Exit.
Note
You cannot use the same name as
another user’s name.
d Press a or b to choose User01.
Press OK.
e Use the numeric keys to enter the user
name. (See Entering text on page 186.)
Press OK.
f Enter a four-digit password for the user.
Press OK.
g Press a or b to choose Enable or
Disable for Fax Tx.
Press OK.
After you have set Fax Tx, repeat this
step for Fax Rx, Copy, Scan,
USB Direct and PC Print.
When you have finished changing
settings press d or c to choose Exit
and press OK.
h Repeat steps d to g for entering each
additional user and password.
34
Page 47
Security features
Turning Secure Function Lock on/off 4
If you enter the wrong password, the LCD will
show Wrong Password. Re-enter the
correct password.
Turning Secure Function Lock on
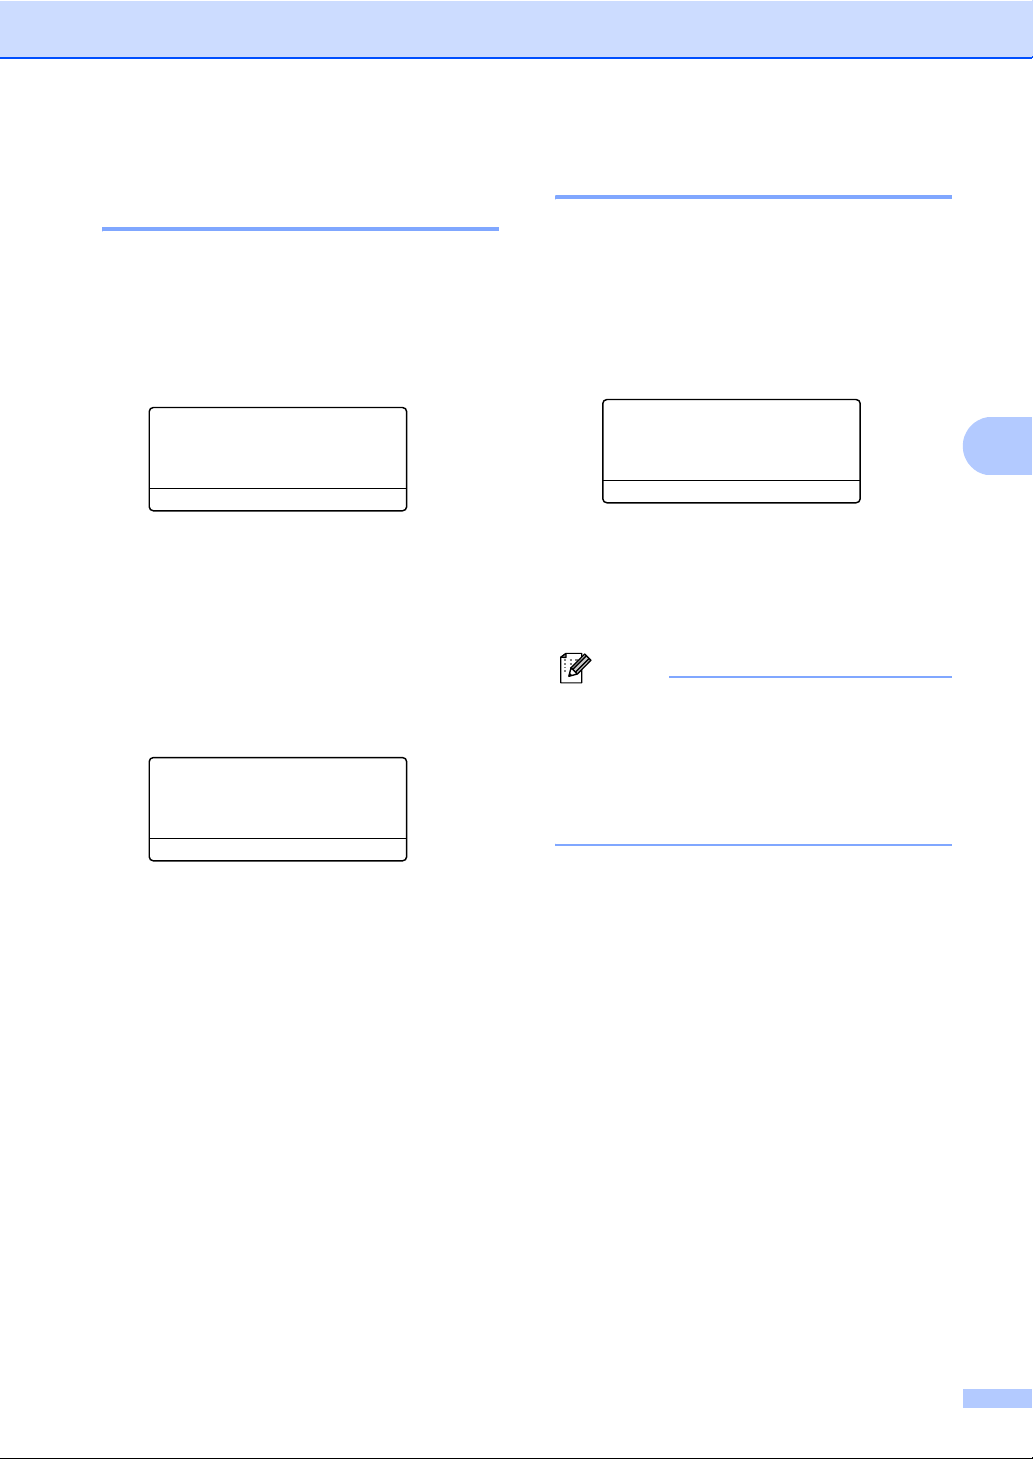
a Press Menu, 1, 8, 1.
18.Security
1.Function Lock
a Lock OffiOn
b Set Password
Select ab or OK
b Press a or b to choose Lock OffiOn.
Press OK.
c Enter your four-digit administrator
password.
Press OK.
Turning Secure Function Lock off
a Press Menu, 1, 8, 1.
18.Security
1.Function Lock
a Lock OniOff
b Change ID
Select ab or OK
b Press a or b to choose Lock OniOff.
Press OK.
c Enter your four-digit administrator
password.
Press OK.
Switching Users 4
This setting allows you to switch between
registered restricted users or Public mode
when Secure Function Lock is turned on.
Changing to the restricted user Mode
a Hold down Shift as you press
Secure/Direct.
Function Lock
Change ID
a JOHN
b MARY
Select ab or OK
b Press a or b to choose your name.
Press OK.
c Enter your four-digit password.
Press OK.
Note
If you press a Mode key that is restricted,
Access Denied will appear on the LCD
and then the machine will ask your name.
If you are a restricted user with access to
this Mode, press a or b to choose your
name and enter your four-digit password.
Changing to the Public Mode
After a restricted user has finished using the
machine, it will return to the Public setting
within the same time as the Mode Timer
setting (Menu, 1, 1). (See Mode Timer
on page 23.) You can also exit from the
restricted user mode by pressing the current
Mode key you are in. Then the LCD will ask
you Go to Public?.
Press aor b to choose 1.Yes.
Press OK.
4
35
Page 48

Chapter 4
Setting Lock 4
Setting Lock lets you set a password to stop
other people from accidentally changing your
machine settings.
Make a careful note of your password. If you
forget it, you will have to reset the passwords
stored in the machine. Please call your
administrator or Océ Technical Support.
While Setting Lock is On, you cannot change
the following settings without a password:
Date/Time
Machine ID
Dialer Setting
Mode Timer
Paper Type
Paper Size
Volume
Auto Daylight
Ecology
Tray Use
Setting up the password 4
a Press Menu, 1, 8, 2.
18.Security
2.Setting Lock
New Passwd:XXXX
Enter & OK Key
b Enter a four-digit number for the
password using numbers 0-9.
Press OK.
c Re-enter your password when the LCD
shows Verify:.
Press OK.
d Press Stop/Exit.
LCD Contrast
Document Scan
Setting Lock
Secure Function Lock
Dial Restriction
36
Page 49
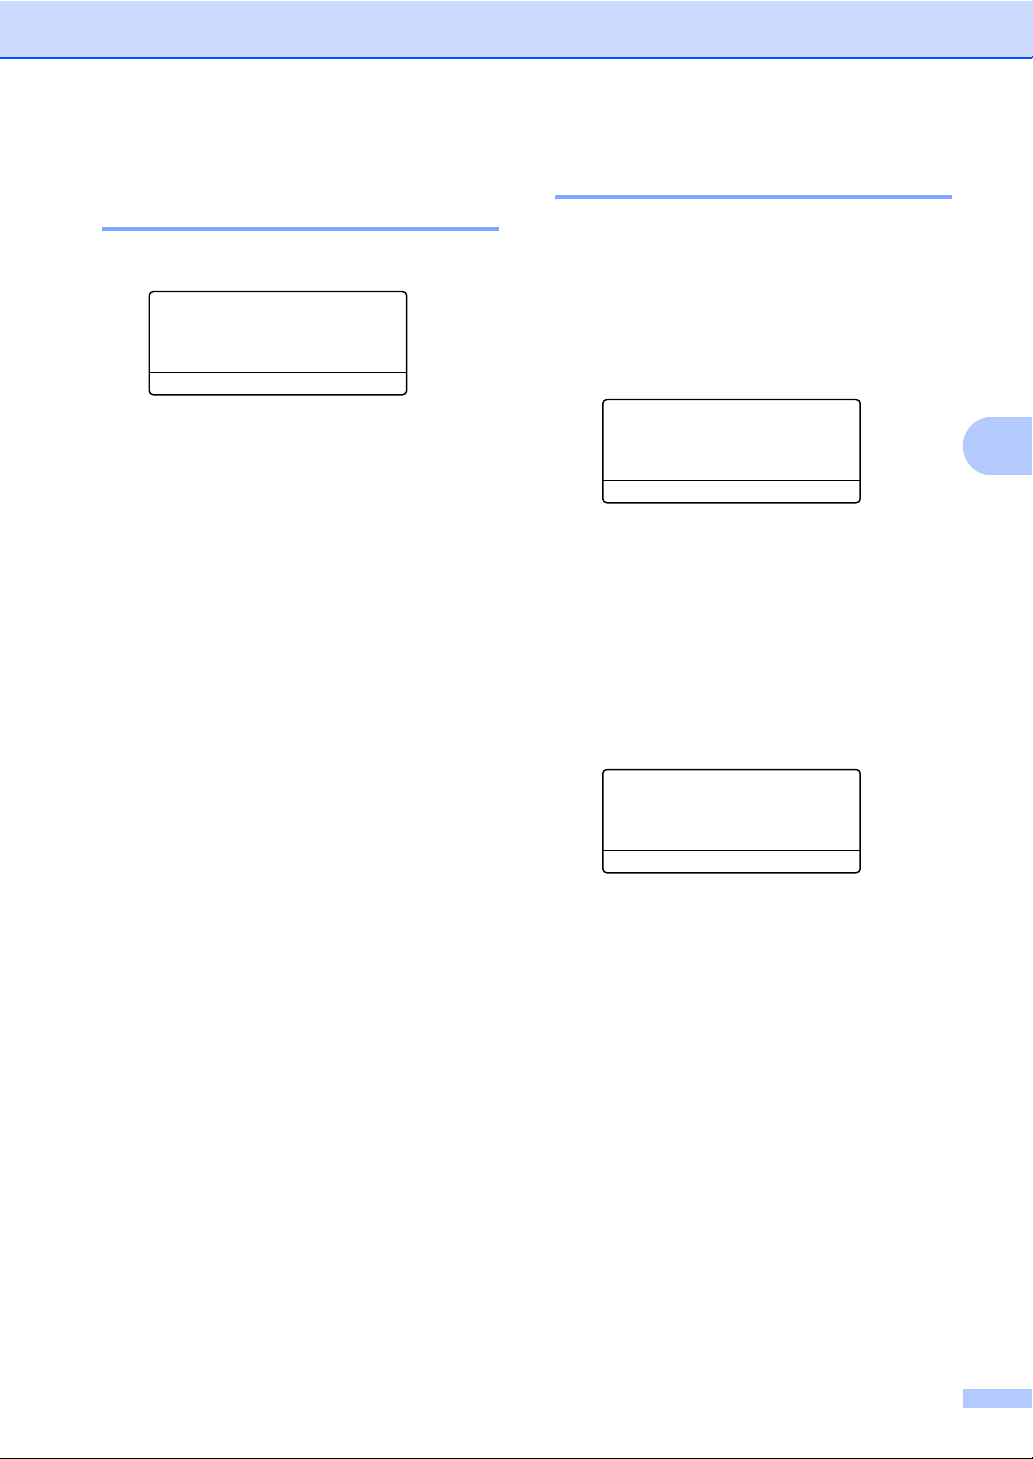
Security features
Changing your Setting Lock password 4
a Press Menu, 1, 8, 2.
18.Security
2.Setting Lock
a On
b Set Password
Select ab or OK
b Press a or b to choose Set Password.
Press OK.
c Enter your four-digit password.
Press OK.
d Enter a four-digit number for the new
password.
Press OK.
e Re-enter your new password when the
LCD shows Verify:.
Press OK.
f Press Stop/Exit.
Turning Setting Lock on/off 4
If you enter the wrong password when
following the instructions below, the LCD will
show Wrong Password. Re-enter the
correct password.
Turning Setting Lock on
a Press Menu, 1, 8, 2.
18.Security
2.Setting Lock
a On
b Set Password
Select ab or OK
b Press a or b to choose On.
Press OK.
c Enter your four-digit password.
Press OK.
d Press Stop/Exit.
Turning Setting Lock off
a Press Menu, 1, 8, 2.
18.Security
2.Setting Lock
4
Password:XXXX
Enter & OK Key
b Enter your four-digit password.
Press OK twice.
c Press Stop/Exit.
37
Page 50
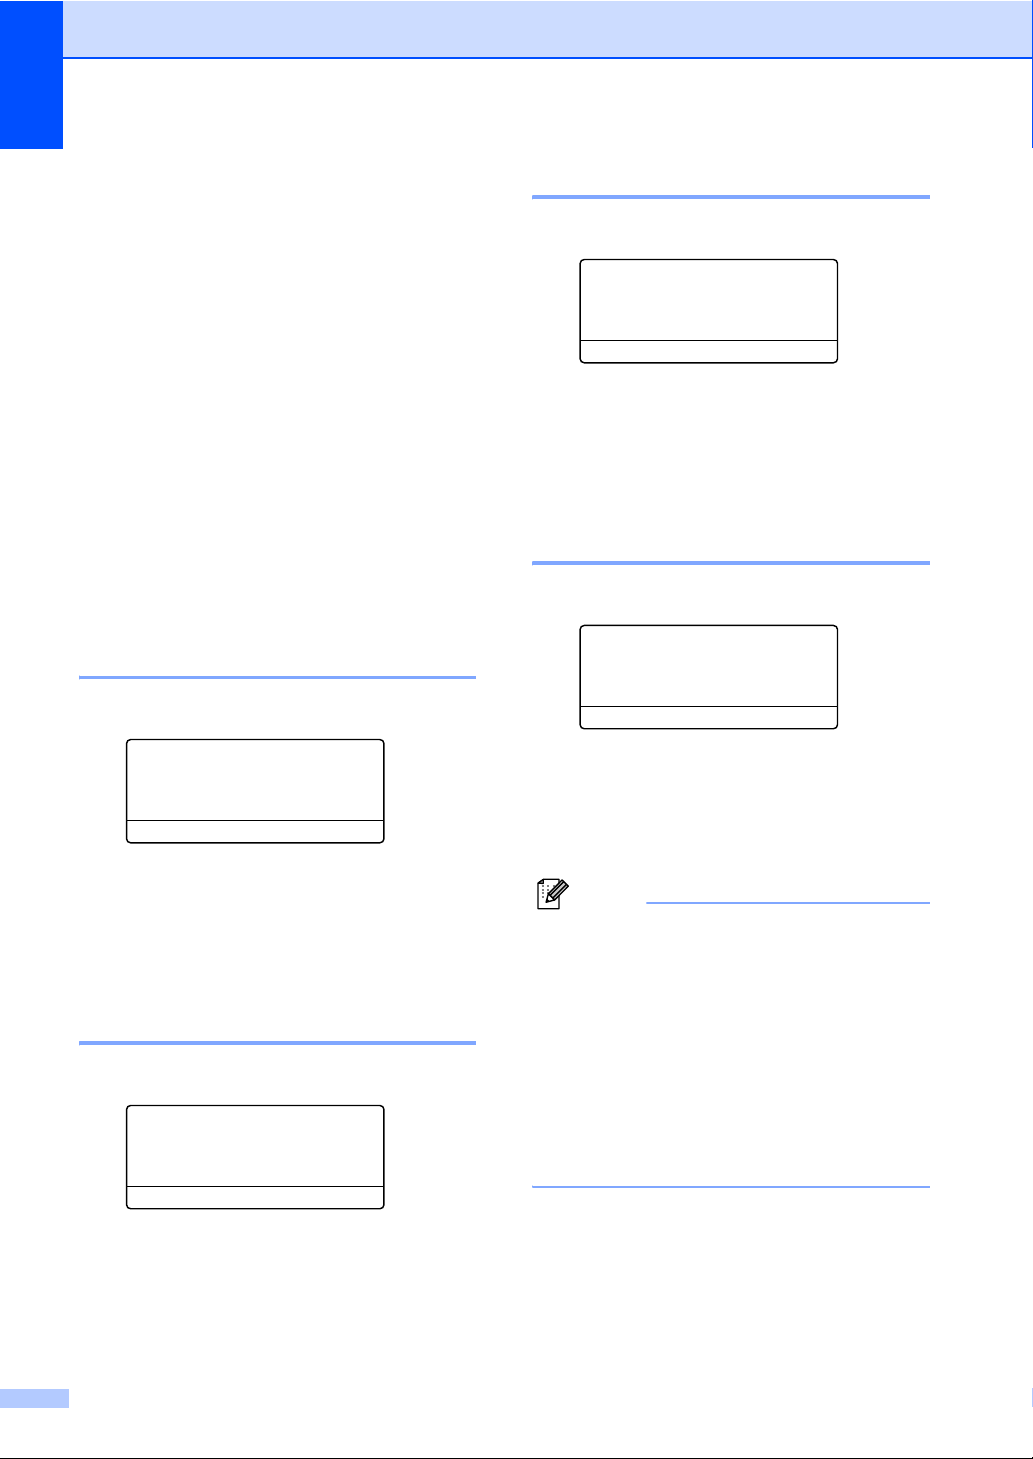
Chapter 4
Restricting dialing 4
This feature is to prevent users from sending
a fax or call to a wrong number by mistake.
You can set the machine to restrict dialing by
using the dial pad, One Touch, Speed Dial or
LDAP search.
If you choose Off, the machine does not
restrict any dialing method.
If you choose Enter # twice, the machine
will prompt you to re-enter the number, and
then if you re-enter the same number
correctly, the machine will start dialing. If you
re-enter the wrong number, the LCD will
show an error message.
If you choose On, the machine will restrict all
fax sending and outbound calls.
Dial pad restriction 4
a Press Menu, 2, 6, 1.
26.Dial Restrict.
1.Dial Pad
a Off
b Enter # twice
Select ab or OK
b Press a or b to choose Off,
Enter # twice or On.
Press OK.
c Press Stop/Exit.
One Touch restriction 4
a Press Menu, 2, 6, 2.
26.Dial Restrict.
2.One Touch
a Off
b Enter # twice
Select ab or OK
Speed Dial restriction 4
a Press Menu, 2, 6, 3.
26.Dial Restrict.
3.Speed Dial
a Off
b Enter # twice
Select ab or OK
b Press a or b to choose Off,
Enter # twice or On.
Press OK.
c Press Stop/Exit.
LDAP server restriction 4
a Press Menu, 2, 6, 4.
26.Dial Restrict.
4.LDAP Server
a Off
b Enter # twice
Select ab or OK
b Press a or b to choose Off,
Enter # twice or On.
Press OK.
c Press Stop/Exit.
Note
•The Enter # twice setting will not work
if you use an external phone or press
Hook before entering the number. You will
not be asked to re-enter the number.
• You can not restrict dialing when you use
Redial/Pause.
• If you chose On or Enter # twice, you
can not use the Broadcasting feature and
can not combine quick dial numbers when
dialing.
b Press a or b to choose Off,
Enter # twice or On.
Press OK.
c Press Stop/Exit.
38
Page 51

Section II
Fax II
Sending a fax 40
Receiving a fax 50
Telephone services and external devices 56
Dialing and storing numbers 65
Remote Fax Options 73
Polling 79
Printing reports 81
Page 52

5
Sending a fax 5
How to fax 5
Entering fax mode 5
To enter fax mode press the Fax key, and the
key will glow blue.
Sending a single-sided fax from the ADF 5
Using the ADF to send your faxes is the
easiest way. To cancel a fax in progress
press Stop/Exit.
a Make sure you are in Fax mode.
b Place your document face up in the
ADF.
c Dial the fax number. (See How to dial
on page 65.)
d Press Start.
The machine scans the pages into
memory and then sends the document.
Note
If the Out of Memory message appears
while scanning a document into memory,
press Stop/Exit to cancel or Start to send
the scanned pages.
Sending a 2-sided fax from the ADF 5
You can send a 2-sided document from the
ADF. To cancel a fax in progress press
Stop/Exit.
a Make sure you are in Fax mode.
b Place your document in the ADF.
c Press Duplex.
d Dial the fax number. (See How to dial
on page 65.)
e Press Start.
The machine will now scan and send your
document.
Note
• Legal size 2-sided documents cannot be
faxed from the ADF.
• When the machine is ready to scan a
2-sided document the LCD shows for
Duplex in the lower right corner.
40
Page 53
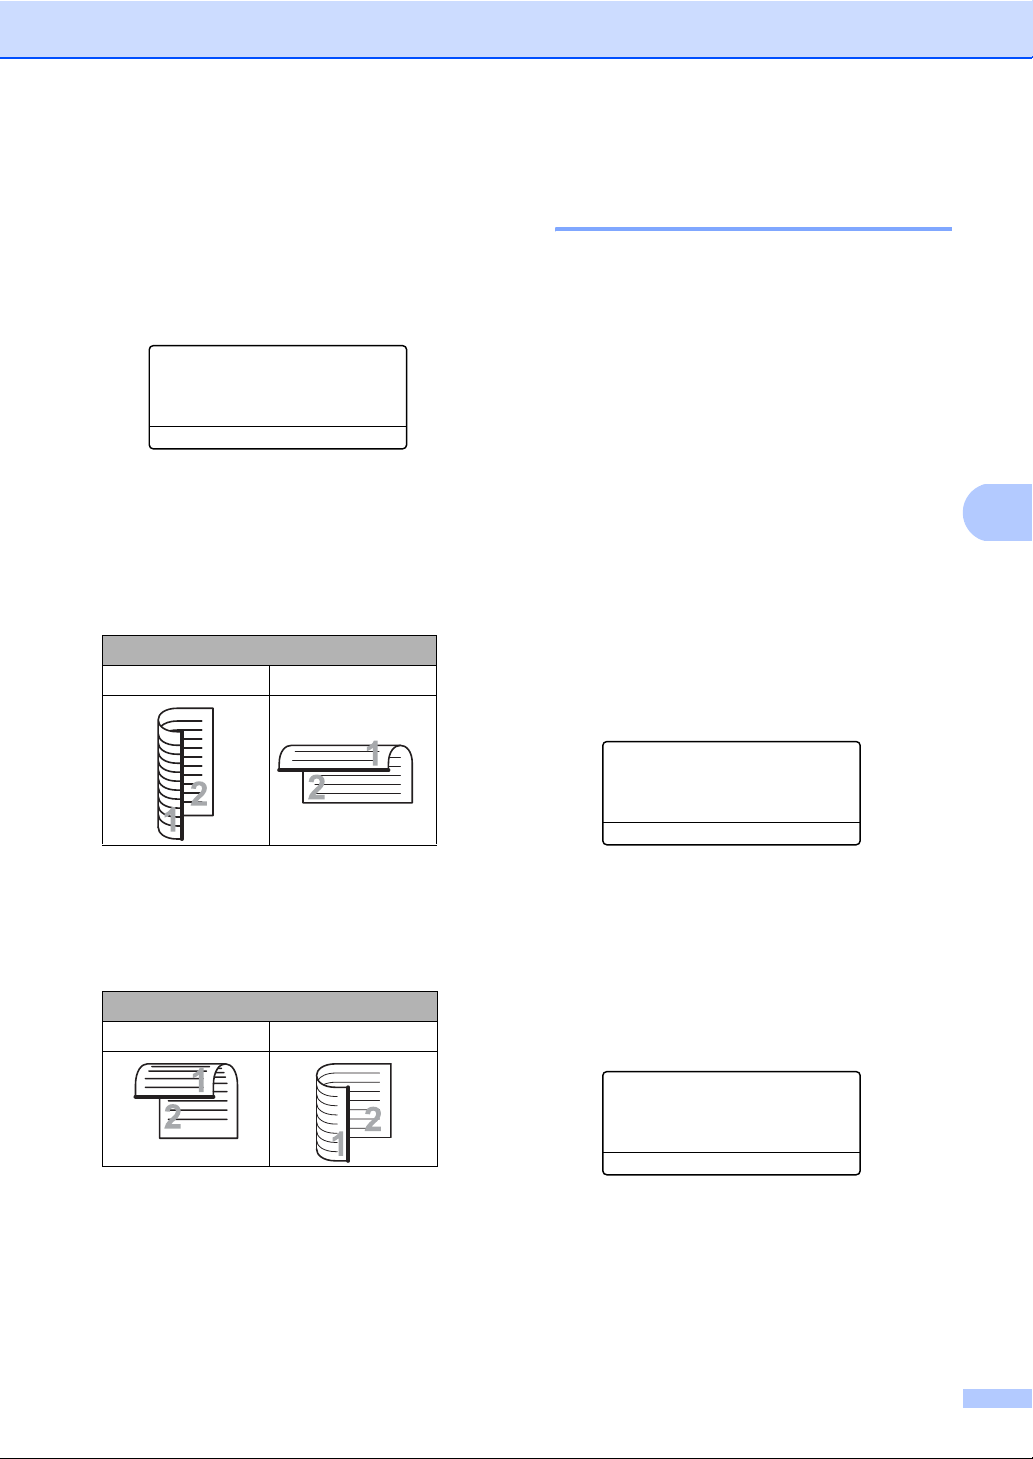
Sending a fax
Changing a 2-sided fax layout
You need to choose the duplex scanning
format before you send a fax. The format you
choose will depend on the layout of your
2-sided document.
a Press Menu, 1, 9, 3.
19.Document Scan
3.Duplex Scan
a Long edge
b Short edge
Select ab or OK
b Do one of the following:
If your document is flipped on the
Long edge, press a or b to choose
Long edge.
Press OK.
Long edge
Portrait Landscape
If your document is flipped on the
Short edge, press a or b to choose
Short edge.
Press OK.
Sending a fax from the scanner glass 5
You can use the scanner glass to fax the
pages of a book, or a single page at a time.
The documents can be up to Letter, A4, Legal
or Folio size. Press Stop/Exit to cancel a fax
in progress.
a Make sure you are in Fax mode.
b Place your document face down on the
scanner glass.
c Dial the fax number. (See How to dial
on page 65.)
d Press Start.
The machine starts scanning the first
page.
e After the machine scans the page, the
LCD will prompt you to choose one of
the options below:
Flatbed Fax:
Next Page?
a 1.Yes
b 2.No (Send)
Select ab or OK
Press 1 to send another page. Go to
step f.
Press 2 or Start to send the
document. Go to step g.
5
Short edge
Portrait Landscape
c Press Stop/Exit.
f Place the next page on the scanner
glass, press OK. Repeat steps e and f
for each additional page.
Flatbed Fax:
Set Next Page
Then Press OK
g Your machine will automatically send
the fax.
41
Page 54
Chapter 5
Note
When faxing multiple pages from the
scanner glass, real time transmission
should be set to Off. (See Real Time
Transmission on page 47.)
Faxing A4/Legal/Folio size documents from the scanner glass 5
When faxing A4/Legal/Folio size documents,
you need to set the scan glass size to A4or
Legal/Folio otherwise a portion of your
faxes will be missing.
a Make sure you are in Fax mode.
b Press Menu, 1, 9, 1.
19.Document Scan
1.Glass ScanSize
a Letter
b Legal/Folio
Select ab or OK
c Press a or b to choose A4 or
Legal/Folio.
Press OK.
d Press Stop/Exit.
Canceling a fax in progress 5
Press Stop/Exit to cancel the fax. If you
press Stop/Exit while the machine is dialing
or sending, the LCD will show as below:
Clear Fax?
a 1.Yes
b 2.No
Select ab or OK
Press 1 to cancel the fax.
42
Page 55
Sending a fax
Broadcasting 5
Broadcasting lets you send the same fax
message to more than one fax number. You
can include Groups, One Touch, Speed Dial
numbers and up to 50 manually dialed
numbers in the same broadcast.
You can broadcast up to 390 different
numbers. This will depend on how many
groups, access codes or credit card numbers
you have stored, and on how many delayed
or stored faxes in memory.
Note
Use Search/Speed Dial to help you
choose numbers easily.
a Make sure you are in Fax mode.
b Load your document.
c Enter a number.
Press OK.
You can use either a One Touch, Speed
Dial, a Group number, or a number
manually entered using the dial pad.
(See How to dial on page 65.)
d Repeat step c until you have entered
all the fax numbers you want to
broadcast to.
e Press Start.
After the broadcast is finished the machine
will print a broadcast report to let you know
the results.
Note
• The scan profile of the One Touch,
Speed Dial or Group number you chose
first will be applied to the broadcast.
• If the Fax Resolution setting of the fax
number you chose first is EX-Fine and
you enter a stored I-Fax number,
Select Std/Fine will appear on the
LCD. Press Stop/Exit. Press Resolution
and choose Standard, Fine or Photo
then re-enter the I-Fax number. If you
want to enter another number, go back to
step c.
Canceling a Broadcast in progress 5
While broadcasting you can cancel the fax
currently being sent or the whole broadcast
job.
a Press Menu, 2, 7.
The LCD will display the Broadcast job
number followed by the fax number
being dialed (for example,
#001 0123456789) and the broadcast
job number (for example,
Broadcast#001).
27.View/Del. Jobs
a #001 0123456789
b Broadcast#001
Select ab or OK
b Press a or b to choose the job number
you want to cancel.
Press OK.
5
c Press 1 to clear the job number or 2 to
exit.
If you chose to only cancel the fax
currently being sent in step b, the
machine will ask you if you want to
cancel the broadcast. Press 1 to clear
the whole broadcast job or 2 to exit.
d Press Stop/Exit.
43
Page 56

Chapter 5
Additional sending operations 5
Sending faxes using multiple settings 5
Before you send a fax, you can change any
combination of these settings: contrast,
resolution, overseas mode, delayed send
timer, polling transmission, TX from ADF or
cover sheet settings.
a Make sure you are in Fax mode.
After each setting is accepted, the LCD
asks if you want to enter more settings:
22.TX Settings
Other Settings?
a 1.Yes
b 2.No
Select ab or OK
b Do one of the following:
To choose more settings, press 1.
The LCD returns to the
TX Settings menu so you can
choose another setting.
If you have finished choosing
settings, press 2 and go to the next
step for sending your fax.
Electronic cover page 5
This feature will not work unless you have
already programmed your Machine ID. (See
the Quick Setup Guide.)
You can automatically send a cover page
with every fax. Your cover page includes your
Machine ID, a comment, and the name (or
number) stored in the One Touch or Speed
Dial memory.
By choosing Next Fax:On you can also
display the number of pages on the cover
page.
You can choose one of the following preset
comments.
1.Comment Off
2.Please Call
3.Urgent
4.Confidential
Instead of using one of the preset comments,
you can enter two personal messages of your
own, up to 27 characters long. Use the chart
on page 186 for help entering characters.
(See Composing your own comments
on page 45.)
5.(User Defined)
6.(User Defined)
44
Page 57
Sending a fax
Composing your own comments 5
You can set up two comments of your own.
a Make sure you are in Fax mode.
b Press Menu, 2, 2, 8.
22.TX Settings
8.Cover Message
a 5.
b 6.
Select ab or OK
c Press a or b to choose 5. or 6. to store
your own comment.
Press OK.
d Enter your own comment using the dial
pad.
Press OK.
Use the chart on page 186 for help entering
characters.
Send a cover sheet for the next fax 5
If you want to send a cover sheet only for the
next fax, your machine will ask you to enter
the number of pages you are sending so it
can be printed on the cover sheet.
a Make sure you are in Fax mode.
b Load your document.
c Press Menu, 2, 2, 7.
22.TX Settings
7.Cover Sheet
a Next Fax:On
b Next Fax:Off
Select ab or OK
d Press a or b to choose Next Fax:On
(or Next Fax:Off).
Press OK.
e Press a or b to choose a comment.
Press OK.
f Enter two digits to show the number of
pages you are sending.
Press OK.
For example, enter 0, 2 for 2 pages or 0,
0 to leave the number of pages blank. If
you make a mistake, press d or
Clear/Back to back up and re-enter the
number of pages.
Send a cover sheet for all faxes 5
You can set the machine to send a cover
sheet whenever you send a fax.
a Make sure you are in Fax mode.
b Press Menu, 2, 2, 7.
22.TX Settings
7.Cover Sheet
a Next Fax:On
b Next Fax:Off
Select ab or OK
c Press a or b to choose On (or Off).
Press OK.
d Press a or b to choose a comment.
Press OK.
Using a printed cover sheet 5
If you want to use a printed cover sheet that
you can write on, you can print the sample
page and attach it to your fax.
a Make sure you are in Fax mode.
b Press Menu, 2, 2, 7.
22.TX Settings
7.Cover Sheet
a Next Fax:On
b Next Fax:Off
Select ab or OK
c Press a or b to choose Print Sample.
Press OK.
d Press Start.
5
e After the machine print a copy of your
cover sheet, press Stop/Exit.
45
Page 58
Chapter 5
Contrast 5
For most documents the default setting of
Auto will give the best results. It
automatically chooses the suitable contrast
for your document.
If your document is very light or dark,
changing the contrast may improve the
quality of the fax.
Use Dark to make the faxed document
lighter.
Use Light to make the faxed document
darker.
a Make sure you are in Fax mode.
b Load your document.
c Press Menu, 2, 2, 1.
22.TX Settings
1.Contrast
a Auto
b Light
Select ab or OK
d Press a or b to choose Auto, Light or
Dark.
Press OK.
Note
Even if you choose Light or Dark, the
machine will send the fax using the Auto
setting if you choose Photo as the Fax
Resolution.
Changing Fax Resolution 5
The quality of a fax can be improved by
changing the Fax Resolution. Resolution can
be changed for the next fax or for all faxes.
To change the Fax Resolution setting for the next fax
a Make sure you are in Fax mode.
b Load your document.
c Press Resolution, then a or b to choose
the resolution.
Press OK.
To change the default Fax Resolution setting
a Make sure you are in Fax mode.
b Press Menu, 2, 2, 2.
22.TX Settings
2.Resolution
a Standard
b Fine
Select ab or OK
c Press a or b to choose the resolution
you want.
Press OK.
Note
You can choose four different resolution
settings.
5
5
46
Standard Suitable for most typed
documents.
Fine Good for small print and transmits a
little slower than Standard resolution.
EX-Fine Good for small print or artwork
and transmits slower than Fine resolution.
Photo Use when the document has
varying shades of gray or is a photograph.
This has the slowest transmission time.
Page 59
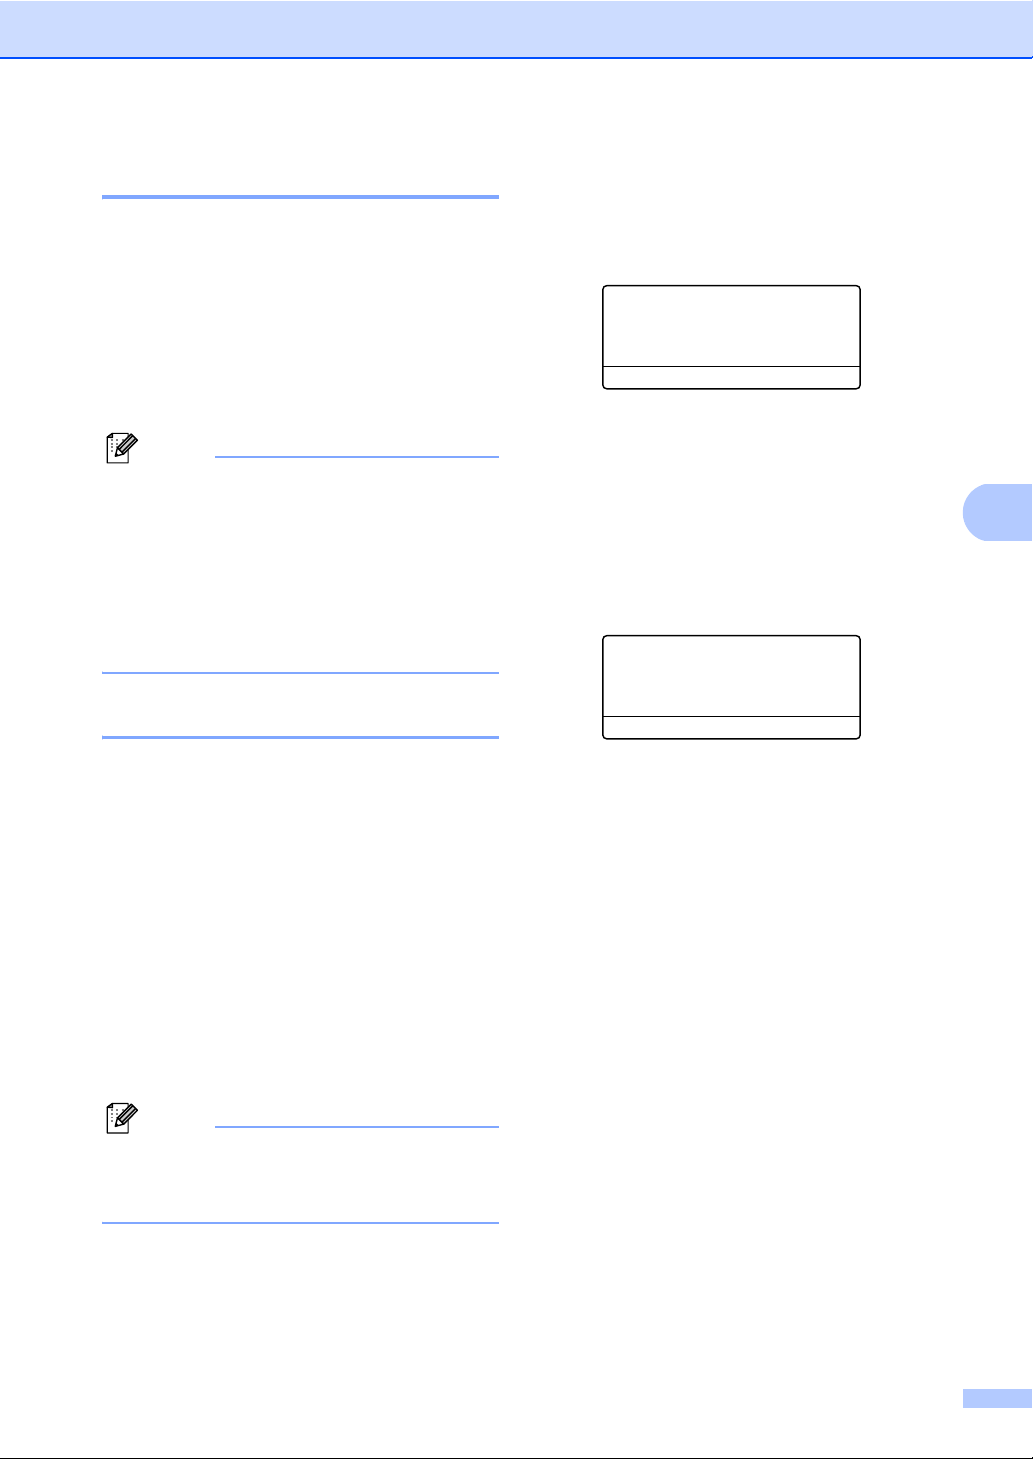
Sending a fax
Dual access 5
You can dial a number, and start scanning the
fax into memory-even when the machine is
sending from memory, receiving faxes or
printing PC data. The LCD will show the new
job number.
The number of pages you can scan into the
memory will vary depending on the data that
is printed on them.
Note
If you get an Out of Memory message
while scanning the first page of a fax,
press Stop/Exit to cancel scanning. If you
get an Out of Memory message while
scanning a subsequent page, you can
press Start to send the pages scanned so
far, or press Stop/Exit to cancel the
operation.
Real Time Transmission 5
Sending in real time for all faxes 5
a Make sure you are in Fax mode.
b Press Menu, 2, 2, 5.
22.TX Settings
5.TX from ADF
a On
b Off
Select ab or OK
c Press a or b to choose On.
Press OK.
Sending in real time for the next fax only
a Make sure you are in Fax mode.
b Press Menu, 2, 2, 5.
22.TX Settings
5.TX from ADF
a On
b Off
Select ab or OK
5
5
When you are sending a fax, the machine will
scan the documents into the memory before
sending. Then, as soon as the telephone line
is free, the machine will start dialing and
sending.
If the memory is full, the machine will send the
document in real time (even if TX from ADF
is set to Off).
Sometimes, you may want to send an
important document immediately, without
waiting for memory transmission. You can set
TX from ADF to On for all documents or
Next Fax:On for the next fax only.
Note
In Real Time Transmission, the automatic
redial feature does not work when using
the scanner glass.
c Press a or b to choose Next Fax:On.
Press OK.
47
Page 60
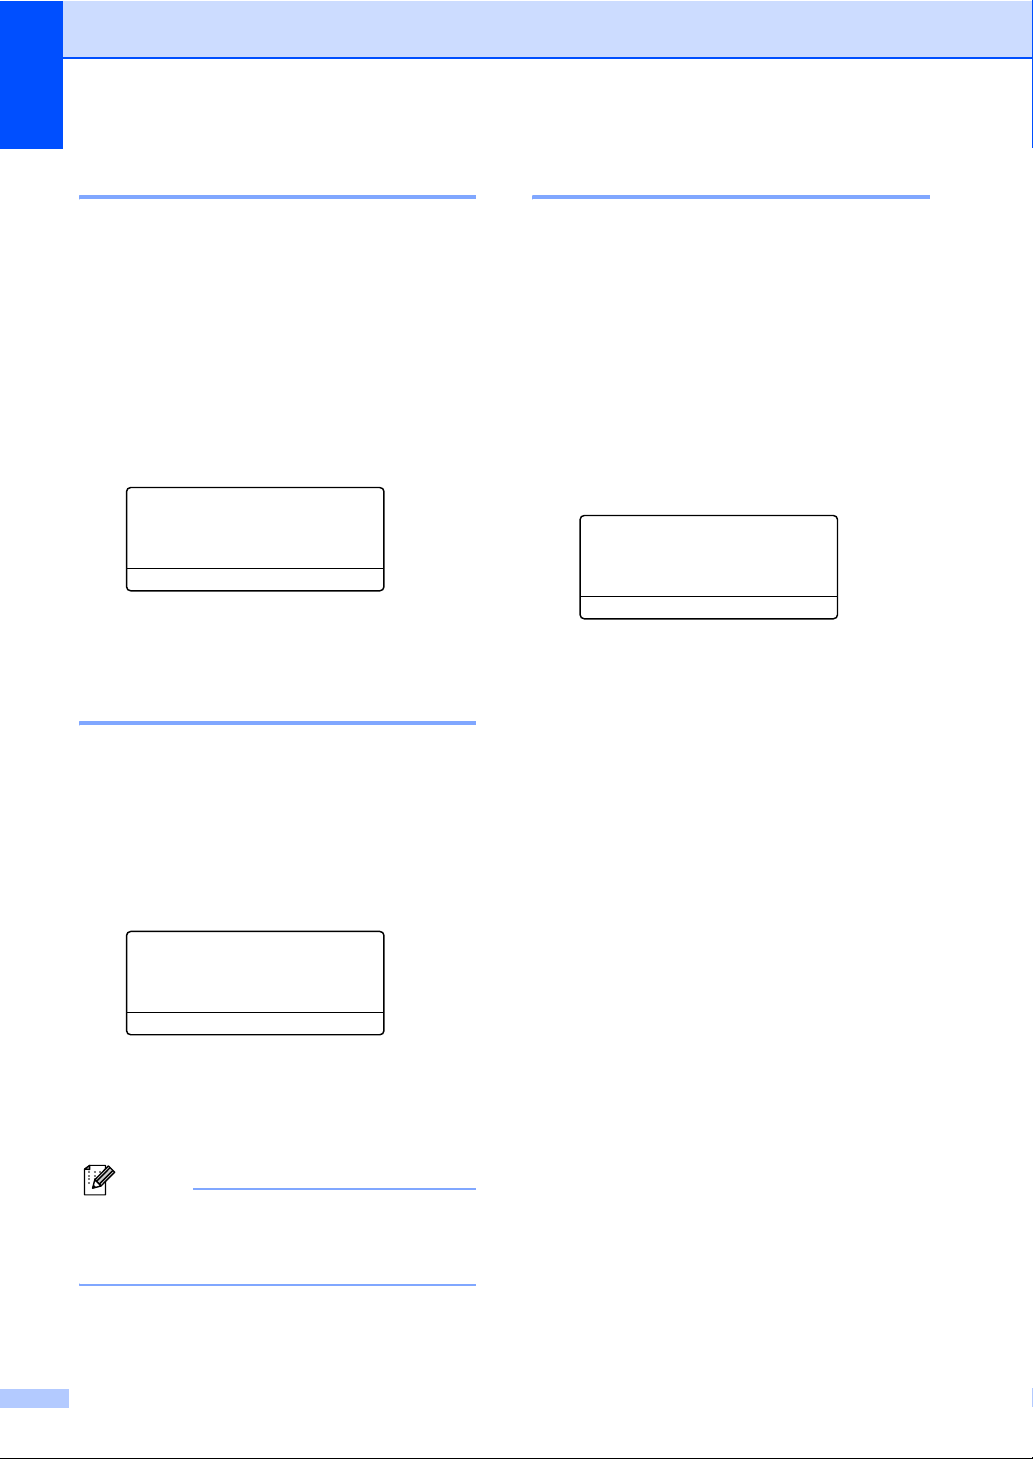
Chapter 5
Overseas Mode 5
If you are having difficulty sending a fax
overseas due to a bad connection, then
turning on Overseas Mode may help.
This is a temporary setting, and will only be
active for your next fax.
a Make sure you are in Fax mode.
b Load your document.
c Press Menu, 2, 2, 9.
22.TX Settings
9.Overseas Mode
a On
b Off
Select ab or OK
d Press a or b to choose On or Off.
Press OK.
Delayed Send 5
You can store up to 50 faxes in the memory
to be sent within a twenty four hour period.
Delayed batch transmission 5
Before sending the delayed faxes, your
machine will help you economize by sorting
all the faxes in the memory by destination and
scheduled time.
All delayed faxes that are scheduled to be
sent at the same time to the same fax number
will be sent as one fax to save transmission
time.
a Make sure you are in Fax mode.
b Press Menu, 2, 2, 4.
22.TX Settings
4.Batch TX
a On
b Off
Select ab or OK
c Press a or b to choose On or Off.
Press OK.
d Press Stop/Exit.
a Make sure you are in Fax mode.
b Load your document.
c Press Menu, 2, 2, 3.
22.TX Settings
3.Delayed Send
Set Time=00:00
Enter & OK Key
d Enter the time you want the fax to be
sent (in 24-hour format).
(For example, enter 19:45 for 7:45 PM)
Press OK.
Note
The number of pages you can scan into
the memory depends on the amount of
data printed on each page.
48
Page 61

Sending a fax
Checking and canceling waiting jobs 5
Check which jobs are still waiting in the
memory to be sent. If there are no jobs, the
LCD will show No Jobs Waiting. You can
cancel a fax job that is stored and waiting in
the memory.
a Press Menu, 2, 7.
The number of jobs still to be sent will be
displayed.
b Do one of the following:
Press a or b to scroll though the
waiting jobs, press OK to choose a
job, and then press 1 to cancel it.
Press 2 to exit without canceling.
c When you have finished, press
Stop/Exit.
Sending a fax manually 5
Manual transmission 5
Manual transmission lets you hear the
dialing, ringing and fax-receiving tones while
sending a fax.
a Make sure you are in Fax mode.
b Load your document.
c Press Hook and listen for a dial tone.
Or pick up the handset of the external
telephone and listen for a dial tone.
d Dial the fax number you want to call.
e When you hear the fax tone, press
Start.
Sending a fax at the end of a conversation 5
At the end of a conversation you can send a
fax to the other party before you both hang
up.
a Ask the other party to wait for fax tones
(beeps) and then to press the Start or
Send key before hanging up.
b Make sure you are in Fax mode.
c Load your document.
5
d Press Start.
If you are using the scanner glass,
press 1 to send a fax.
e Replace the handset of an external
telephone.
Out of memory message 5
If you get an Out of Memory message
while scanning the first page of a fax, press
Stop/Exit to cancel the fax.
If you get an Out of Memory message
while scanning a subsequent page, you will
have the option to press Start to send the
pages scanned so far, or to press Stop/Exit
to cancel the operation.
Note
If you get an Out of Memory message
while faxing and you do not want to delete
your stored faxes to clear the memory,
you can send the fax in real time. (See
Real Time Transmission on page 47.)
If you are using the scanner glass,
press 1 to send a fax.
f If you picked up the handset of an
external telephone, replace it.
49
Page 62
Receiving a fax 6
6
Choose the correct Answer Mode 6
The correct Answer mode is determined by the external devices and telephone subscriber
services (Voice Mail, Unique Ring, etc.) you have (or will be using) on the same line as the Océ
machine.
Will you be using a Unique Ring number for receiving faxes?
Océ uses the term "Unique Ring" but different telephone companies may have other names for this service
such as Custom Ringing, RingMaster, Personalized Ring, Teen Ring, Ident-A-Ring, Ident-A-Call,
Date Ident-A-Call, Smart Ring and SimpleBiz Fax & Alternate Number Ringing. (See Unique Ring
on page 56 for instructions on setting up your machine using this feature.)
Will you be using Voice Mail on the same telephone line as your Océ machine?
If you have Voice Mail on the same telephone line as your Océ machine, there is a strong possibility that
Voice Mail and the Océ machine will conflict with each other when receiving incoming calls. (See Voice
Mail on page 56 for instructions on setting up your machine using this service.)
Will you be using a Telephone Answering Machine on the same telephone line as your Océ
machine?
Your external telephone answering machine (TAM) will automatically answer every call. Voice messages
are stored on the external TAM and fax messages are printed. Choose External TAM as your answer
mode. (See Connecting an external TAM (telephone answering machine) on page 59.)
Will you be using your Océ machine on a dedicated fax line?
Your machine automatically answers every call as a fax. Choose Fax Only as your answer mode. (See
Fax Only on page 51.)
Will you be using your Océ machine on the same line as your telephone?
Do you want to receive voice calls and faxes automatically?
The Fax/Tel answer mode is used when sharing the Océ machine and your telephone on the
same line. Choose Fax/Tel as your answer mode. (See Fax/Tel on page 51.)
Important Note: You can not receive voice messages on either Voice Mail or an answering
machine when choosing the Fax/Tel mode.
Do you expect to receive very few faxes?
Choose Manual as your answer mode. You control the telephone line and must answer every call
yourself. (See Manual on page 51.)
To set the answer mode follow the instructions below:
a Press Menu, 0, 1.
b Press a or b to choose the answer mode.
Press OK.
01.Answer Mode
a Fax Only
Fax/Tel
b External TAM
Select ab or OK
c Press Stop/Exit.
The LCD will display the current answer mode.
50
Page 63

Receiving a fax
Using answer modes 6
Some answer modes answer automatically
(Fax Only and Fax/Tel). You may want to
change the Ring Count before using these
modes. (See Ring Count on page 52.)
Fax Only 6
Fax Only mode will automatically answer every call as a fax.
Fax/Tel 6
Fax/Tel mode helps you automatically manage incoming calls, by recognizing whether they are fax or voice calls and handling them in one of the following ways:
Faxes will be automatically received.
Voice calls will start the F/T ring to tell you
to pick up the line. The F/T ring is a fast
double ring made by your machine.
(Also see F/T Ring Time (Fax/Tel mode only)
on page 52 and Ring Count on page 52.)
Manual 6
Manual mode turns off all automatic answering functions unless you are using the Unique Ring Receive feature.
To receive a fax in Manual mode lift the
handset of the external telephone or press
Hook. When you hear fax tones (short
repeating beeps), press Start, and then press
2 to receive a fax. You can also use the EXT.
Tel. RX feature to receive faxes by lifting a
handset on the same line as the machine.
(Also see EXT. Tel. RX on page 53.)
External TAM 6
External TAM mode lets an external answering machine manage your incoming calls. Incoming calls will be handled in the following ways:
Faxes will be automatically received.
Voice callers can record a message on the
external TAM.
(For more information see Connecting an
external TAM (telephone answering
machine) on page 59.)
6
51
Page 64
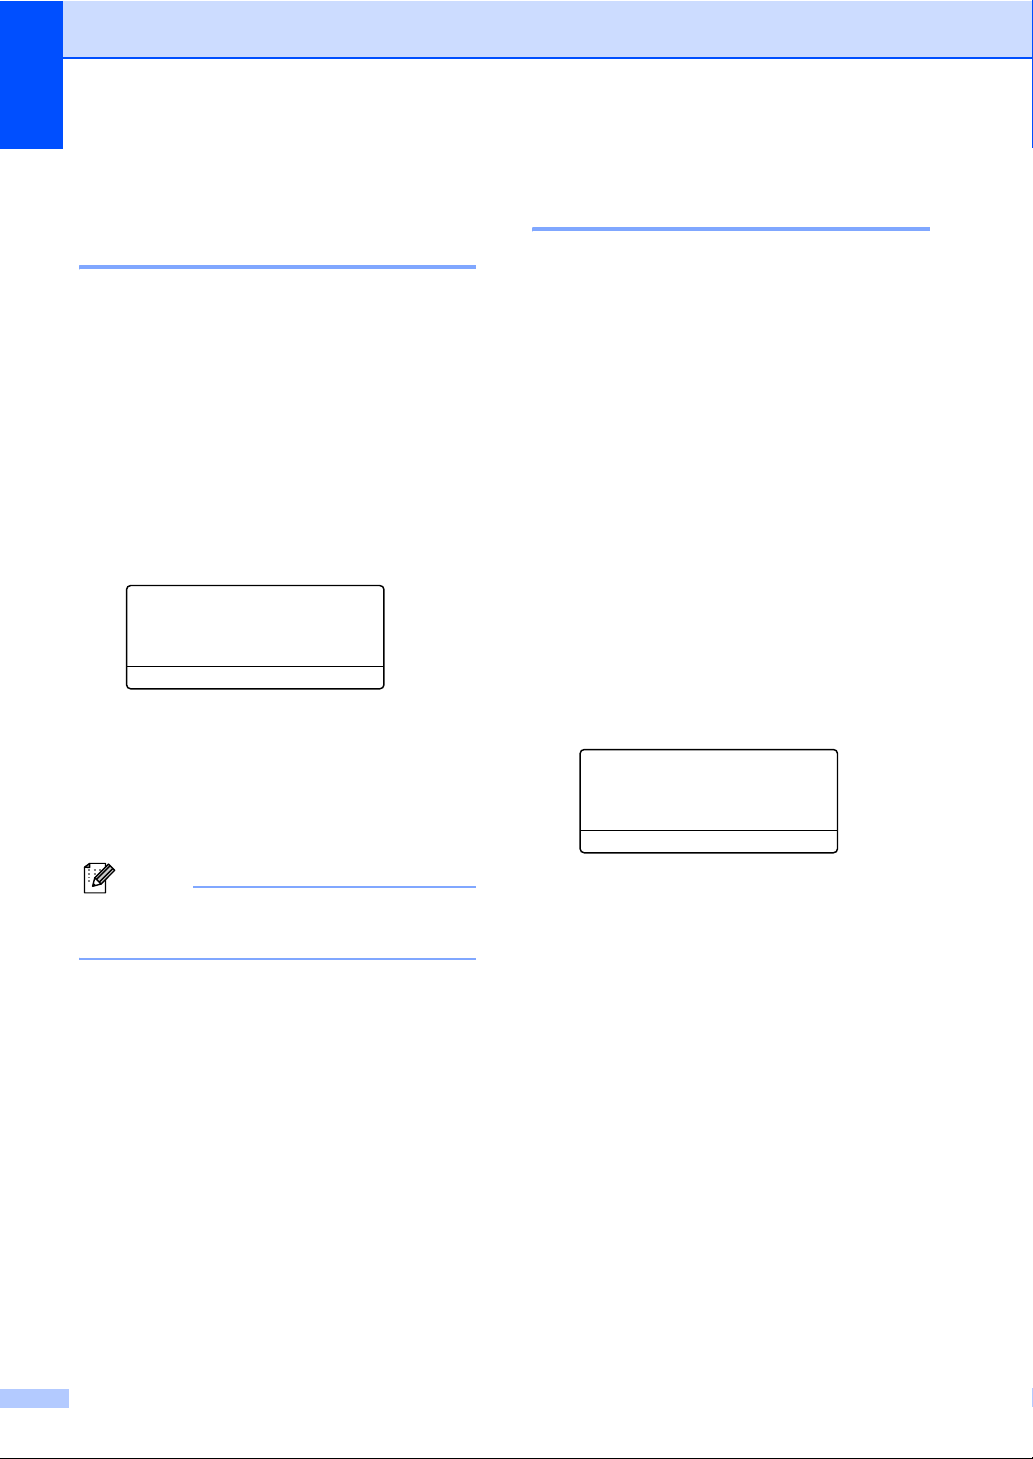
Chapter 6
Answer Mode settings 6
Ring Count 6
The Ring Count setting sets the number of
times the machine rings before it answers in
Fax Only and Fax/Tel modes.
If you have external or extension telephones
on the same line as the machine, keep the
Ring Count setting of 4. (See Using external
and extension telephones on page 62 and
EXT. Tel. RX on page 53.)
a Make sure you are in Fax mode.
b Press Menu, 2, 1, 1.
21.RX Settings
1.Ring Count
a 01
b 02
Select ab or OK
c Press a or b to choose 00, 01, 02, 03 or
04 for how many times the line rings
before the machine answers.
Press OK.
d Press Stop/Exit.
F/T Ring Time (Fax/Tel mode only) 6
When somebody calls your machine, you and
your caller will hear the normal telephone ring
sound. The number of rings is set by the Ring
Count setting.
If the call is a fax, then your machine will
receive it; however, if it is a voice call the
machine will sound the F/T ring (a fast
double-ring) for the time you have set in the
F/T Ring Time setting. If you hear the F/T ring
it means that you have a voice caller on the
line.
Because the F/T ring is made by the machine,
extension and external telephones will not
ring; however, you can still answer the call on
any telephone. (For more information see
Using Remote Codes on page 63.)
a Make sure you are in Fax mode.
b Press Menu, 2, 1, 2.
21.RX Settings
2.F/T Ring Time
a 20 Secs
b 30 Secs
Select ab or OK
Note
Choose 00 in step c to have the machine
answer immediately.
52
c Press a or b to choose how long the
machine will ring to alert you that you
have a voice call (20, 30, 40 or 70
seconds).
Press OK.
d Press Stop/Exit.
Page 65
Receiving a fax
EXT. Tel. RX 6
If EXT. Tel. RX is On: 6
The machine can receive a fax automatically,
even if you answer the call. When you see
Receiving on the LCD or hear a click on the
phone line through the handset you are
using, just replace the handset. Your
machine will do the rest.
If EXT. Tel. RX is Off: 6
If you are at the machine and answer a fax
call first by lifting an external handset, then
press Start, and then press 2 to receive.
If you answered at an extension telephone
press l51. (See Using external and
extension telephones on page 62.)
Note
• If this feature is set to On, but your
machine does not connect a fax call when
you lift an extension telephone handset,
press the fax receive code l51.
Setting the Print Density 6
You can adjust the Print Density setting to
make your printed pages darker or lighter.
a Make sure you are in Fax mode.
b Press Menu, 2, 1, 6.
21.RX Settings
6.Print Density
-nnonn+
Select dc&OK
c Press c to make the print darker.
Or, press d to make the print lighter.
Press OK.
d Press Stop/Exit.
6
• If you send faxes from a computer on the
same telephone line and the machine
intercepts them, set EXT. Tel. RX to Off.
a Make sure you are in Fax mode.
b Press Menu, 2, 1, 3.
21.RX Settings
3.Ext. Tel. RX
a On
b Off
Select ab or OK
c Press a or b to choose On or Off.
Press OK.
d Press Stop/Exit.
53
Page 66

Chapter 6
Additional receiving operations 6
Printing a reduced incoming fax 6
If you choose On, the machine automatically
reduces each page of an incoming fax to fit on
one page of A4, Letter, Legal or Folio size
paper.
The machine calculates the reduction ratio by
using the page size of the fax and your Paper
Size setting (Menu, 1, 2, 2).
a Make sure you are in Fax mode.
b Press Menu, 2, 1, 5.
21.RX Settings
5.Auto Reduction
a On
b Off
Select ab or OK
c Press a or b to choose On or Off.
Press OK.
d Press Stop/Exit.
Duplex (2-sided) printing for Fax mode 6
Your machine can automatically print
received faxes onto both sides of the paper
when Duplex is set to On.
You can use Letter, Legal, A4 or
Folio (8.5"×13") size paper for this function
(16 to 28 lb/60 to 105 g/m
2
).
a Make sure you are in Fax mode.
b Press Menu, 2, 1, 9.
21.RX Settings
9.Duplex
a On
b Off
Select ab or OK
c Press a or b to choose On (or Off).
Press OK.
d Press Stop/Exit.
Note
When you turn on Duplex the Auto
Reduction feature is also turned on.
54
Page 67
Receiving a fax
Setting Receive TTI 6
You can set the machine to print the received
date and time in the top center of each
received fax page.
a Make sure you are in Fax mode.
b Press Menu, 2, 1, 8.
21.RX Settings
8.Receive TTI
a On
b Off
Select ab or OK
c Press a or b to choose On or Off.
Press OK.
d Press Stop/Exit.
Note
• The received time and date will not appear
when using Internet Fax.
• Make sure you have set the current date
and time in the machine.
Receiving a fax at the end of a conversation 6
At the end of a conversation you can ask the
other party to send you a fax before you both
hang up.
a Ask the other party to place the
document in their machine and to press
the Start or Send key.
b When you hear the CNG tones (slowly
repeating beeps), press Start.
c Press 2 to receive a fax.
d Replace the external handset.
6
Printing a fax from the memory 6
If you are using the Remote Retrieval or Fax
Forward feature (Menu, 2, 5, 1), you can still
print a fax from the memory when you are at
your machine.
Setting the Substitute RX 6
When the paper tray is empty, toner is used
up or any other error occurs so that the
machine cannot print, if you choose On,
incoming faxes will be stored into memory. If
you choose Off, incoming fax calls will not be
automatically answered until the problem
resolves.
a Make sure you are in Fax mode.
b Press Menu, 2, 1, 0.
21.RX Settings
0.Substitute RX
a On
b Off
Select ab or OK
c Press a or b to choose On (or Off).
Press OK.
d Press Stop/Exit.
a Press Menu, 2, 5, 2.
25.Remote Fax Opt
2.Print Fax
Press Start
b Press Start.
c Press Stop/Exit.
55
Page 68

Telephone services and external
7
devices
Telephone line services 7
Voice Mail 7
If you have Voice Mail on the same telephone
line as your Océ machine, Voice Mail and the
Océ machine will conflict with each other
when receiving incoming calls.
For example, if your Voice Mail is set to
answer after 4 rings and your Océ machine is
set to answer after 2 rings, then your Océ
machine will answer first. This will prevent
callers from being able to leave a message in
your Voice Mail.
Similarly, if your Océ machine is set to
answer after 4 rings and your Voice Mail is set
to answer after 2 rings, then your Voice Mail
will answer first. This will prevent your Océ
machine from being able to receive an
incoming fax, since Voice Mail cannot
transfer the incoming fax back to the Océ
machine.
To avoid conflicts between your Océ machine
and your Voice Mail service, do one of the
following:
Get the Unique Ring service from your
telephone company. Unique Ring is a feature
of your Océ machine that allows a person
with one line to receive fax and voice calls
through two different telephone numbers on
that one line. Océ uses the term "Unique
Ring", but telephone companies market the
service under a variety of names, such as
Custom Ringing, Personalized Ring, Smart
Ring, RingMaster, Ident-A-Ring, Ident-A-Call,
Data Ident-A-Call, Teen Ring, and SimpleBiz
Fax & Alternate Number Ringing. This
service establishes a second telephone
number on the same line as your existing
telephone number, and each number has its
own ring pattern.
7
Typically, the original number rings with the standard ring pattern and is used for receiving voice calls, and the second number rings with a different ring pattern and is used for receiving faxes. (See Unique Ring on page 56.)
OR
Set your Océ machine’s Answer Mode to
"Manual". Manual Mode requires that you
answer every incoming call if you want to be
able to receive a fax. If the incoming call is a
telephone call, then complete the call as you
normally would. If you hear fax sending tones
you must transfer the call to the Océ machine.
(See Using external and extension
telephones on page 62.) Unanswered fax
and voice calls will go to your Voice Mail. (To
set the machine in MANUAL Mode, see
Choose the correct Answer Mode
on page 50.)
Unique Ring 7
Unique Ring is a function of your Océ
machine that allows a person with one line to
receive fax and voice calls through two
different phone numbers on that one line.
Océ uses the term "Unique Ring", but
telephone companies market the service
under a variety of names, such as Smart
Ring, Ring Master or Ident-a-Ring. This
service establishes a second telephone
number on the same line as your existing
telephone number, and each number has its
own ring pattern. Typically, the original
number rings with the standard ring pattern
and is used for receiving voice calls, and the
second number rings with a different ring
pattern and is used for receiving faxes.
56
Page 69

Telephone services and external devices
Note
• You must pay for your telephone
company's Unique Ring service before
you program the machine to work with it.
• Please call your telephone company for
availability and rates.
What does your telephone company’s ‘Unique Ring’ do?
Your telephone company’s Unique Ring
service allows you to have more than one
number on the same telephone line. If you
need more than one telephone number, it
is cheaper than paying for an extra line.
Each telephone number has its own unique
ring pattern, so you will know which
telephone number is ringing. This is one way
you can have a separate telephone number
for your machine.
Note
Please call your telephone company for
availability and rates.
What does Océ’s ‘Unique ring’ do? 7
The Océ machine has a Unique Ring feature
that allows you to use your machine to take
full advantage of the telephone company’s
Unique Ring service. The new telephone
number on your line can just receive faxes.
Note
You must pay for your telephone
7
company’s Unique Ring service before
you program the machine to work with it.
Do you have Voice Mail? 7
If you have Voice Mail on the telephone line
that you will install your new machine on,
there is a strong possibility that Voice Mail
and the machine will conflict with each other
while receiving incoming calls. However, the
Unique Ring feature allows you to use
more than one number on your line, so
both Voice Mail and the machine can work
together without any problems. If each one
has a separate telephone number, neither will
interfere with the other’s operations.
If you decide to get the Unique Ring service
from the telephone company, you will need to
follow the directions below to ‘register’ the
new Unique Ring pattern they give you. This
is so your machine can recognize its
incoming calls.
7
Note
You can change or cancel the Unique
Ring pattern at any time. You can switch it
off temporarily, and turn it back on later.
When you get a new fax number, make
sure you reset this feature.
57
Page 70
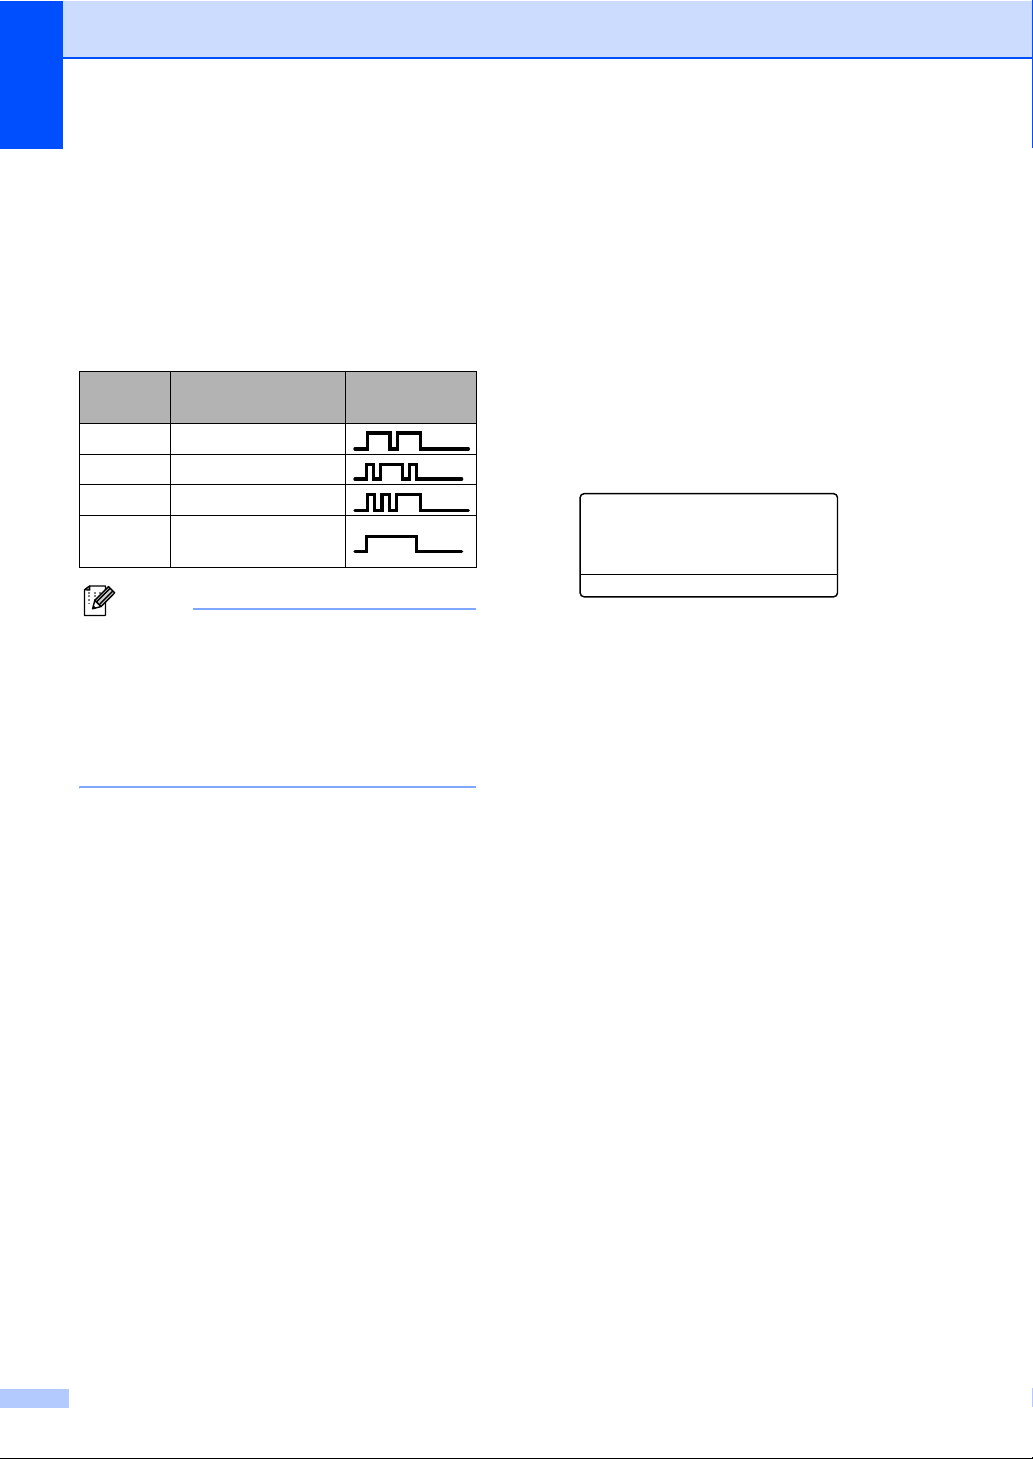
Chapter 7
Before you choose the ring pattern to register
You can only register one Unique Ring
pattern with the machine. Some ring patterns
cannot be registered. The ring patterns below
are supported by your Océ machine. Register
the one your telephone company gives you.
Ring
Pattern
1 long-long
2 short-long-short
3 short-short-long
4 very long
Rings
(normal pattern)
Note
• Ring Pattern #1 is often called Short-Short
and is the most commonly used.
• If the ring pattern you received is not on
this chart, please call your telephone
company and ask for one that is
shown.
The machine will only answer calls to its
registered number.
The first two rings are silent on the
machine. This is because the fax must
<<listen>> to the ring pattern (to compare
it to the pattern that was ‘registered’).
(Other telephones on the same line will
ring.)
If you program the machine properly, it will
recognize the registered ring pattern of the
‘fax number’ within 2 ring patterns and
then answer with a fax tone. When the
‘voice number’ is called, the machine will
not answer.
Registering the unique ring pattern
7
Very important!
After you have set the Unique Ring feature to
On, your Unique Ring number will receive
faxes automatically. The answer mode is
automatically set to Manual and you cannot
change it to another answer mode while
Unique Ring is set to On. This ensures the
Océ machine will only answer the Unique
Ring number and not interfere when your
main telephone number is called.
a Press Menu, 2, 0, 2.
20.Miscellaneous
2.Unique Ring
a Off
b Set
Select ab or OK
b Press a or b to choose Set.
c Press OK.
d Press a or b to choose the prestored ring
pattern you want to use.
Press OK.
(You will hear each pattern as you scroll
through the four patterns. Make sure
you choose the pattern that the
telephone company gave you.)
e Press Stop/Exit.
Unique Ring is now set to On.
7
58
Page 71
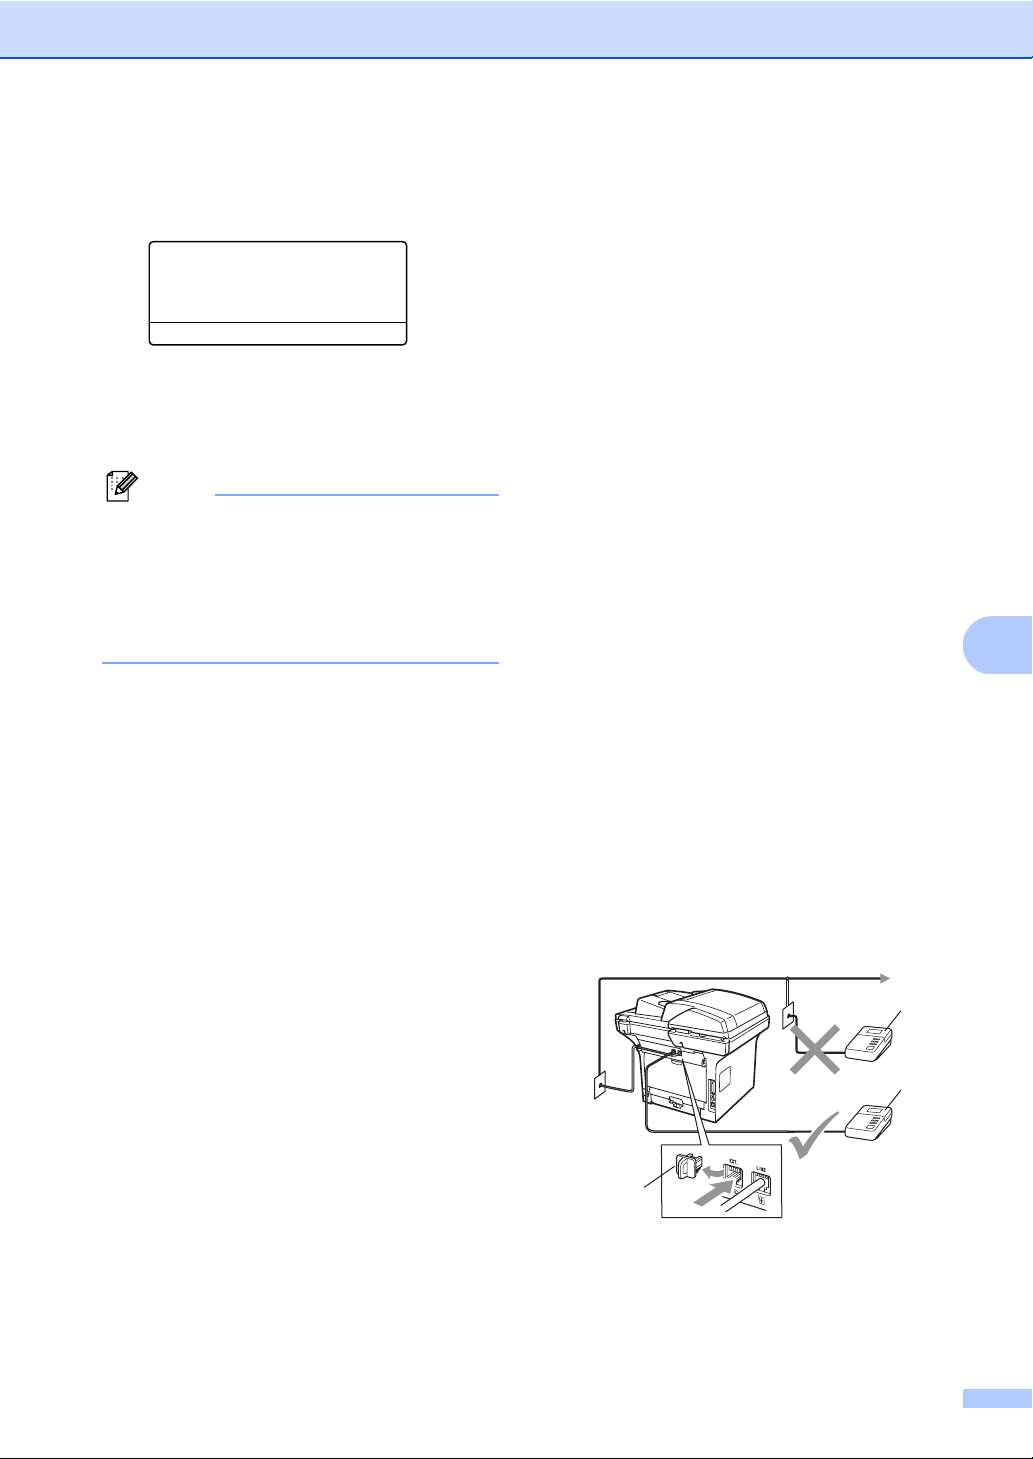
Telephone services and external devices
Turning off unique ring 7
a Press Menu, 2, 0, 2.
20.Miscellaneous
2.Unique Ring
a On
b Off
Select ab or OK
b Press a or b to choose Off.
Press OK.
c Press Stop/Exit.
Note
If you do not want to receive faxes on your
Unique Ring number, you can turn off
Unique Ring. The machine will stay in
Manual answer mode so you will need to
set the Answer Mode again. (See Choose
the correct Answer Mode on page 50.)
Connecting an external TAM (telephone answering machine)
You can connect an external Telephone
Answering Machine (TAM) to the same line
as your machine. When the TAM answers a
call, your machine will “listen” for the CNG
(fax calling) tones sent by a sending fax
machine. If it hears them it will take over the
call and receive the fax. If it does not hear
them, it will let your TAM take a voice
message and the display will show
Telephone.
The external TAM must answer within four
rings (we recommend you set it to two rings).
This is because your machine cannot hear
the CNG tones until the external TAM has
picked up the call. The sending machine will
send CNG tones for only eight to ten seconds
longer. We do not recommend using the toll
saver feature on your external TAM if it needs
more than four rings to activate it.
7
7
Unless you are using Unique Ring, the TAM
must be connected to the EXT. jack of the
machine.
Before you connect an external TAM
(telephone answering machine), remove the
protective cap (2) from the EXT. jack on the
machine.
1
1
2
1TAM
2 Protective Cap
59
Page 72

Chapter 7
Note
If you have problems receiving faxes,
reduce the ring count setting on your
external TAM.
Connections 7
The external TAM must be plugged into the
back of the machine, into the jack labeled
EXT. Your machine cannot work properly if
you plug the TAM into a wall jack (unless you
are using Unique Ring).
a Plug the telephone line cord from the
telephone wall jack into the back of the
machine, in the jack labeled LINE.
b Plug the telephone line cord from your
external TAM into the back of the
machine, in the jack labeled EXT. (Make
sure this cord is connected to the TAM
at the TAM’s telephone line jack, and not
its handset jack.)
c Set your external TAM to four rings or
less. (The machine’s Ring Count setting
does not apply.)
Recording an outgoing message (OGM) 7
a Record 5 seconds of silence at the
beginning of your message. This allows
your machine time to listen for fax tones.
b Limit your speaking to 20 seconds.
c End your 20-second message by giving
your Fax Receive Code for people
sending manual faxes. For example:
“After the beep, leave a message or
send a fax by pressing l51 and Start.”
Note
We recommend beginning your OGM with
an initial 5 second silence because the
machine cannot hear fax tones over a loud
voice. You may try leaving out this pause,
but if your machine has trouble receiving,
then you should re-record the OGM to
include it.
Special line considerations 7
d Record the outgoing message on your
external TAM.
e Set the TAM to answer calls.
f Set the Answer Mode to
External TAM. (See Choose the
correct Answer Mode on page 50.)
60
Roll over telephone lines 7
A roll over telephone system is a group of two
or more separate telephone lines that pass
incoming calls to each other if they are busy.
The calls are usually passed down or “rolled
over” to the next available telephone line in a
preset order.
Your machine can work in a roll over system
as long as it is the last number in the
sequence, so the call cannot roll away. Do not
put the machine on any of the other numbers;
when the other lines are busy and a second
fax call is received, the fax call would be
transferred to a line that does not have a fax
machine. Your machine will work best on a
dedicated line.
Page 73
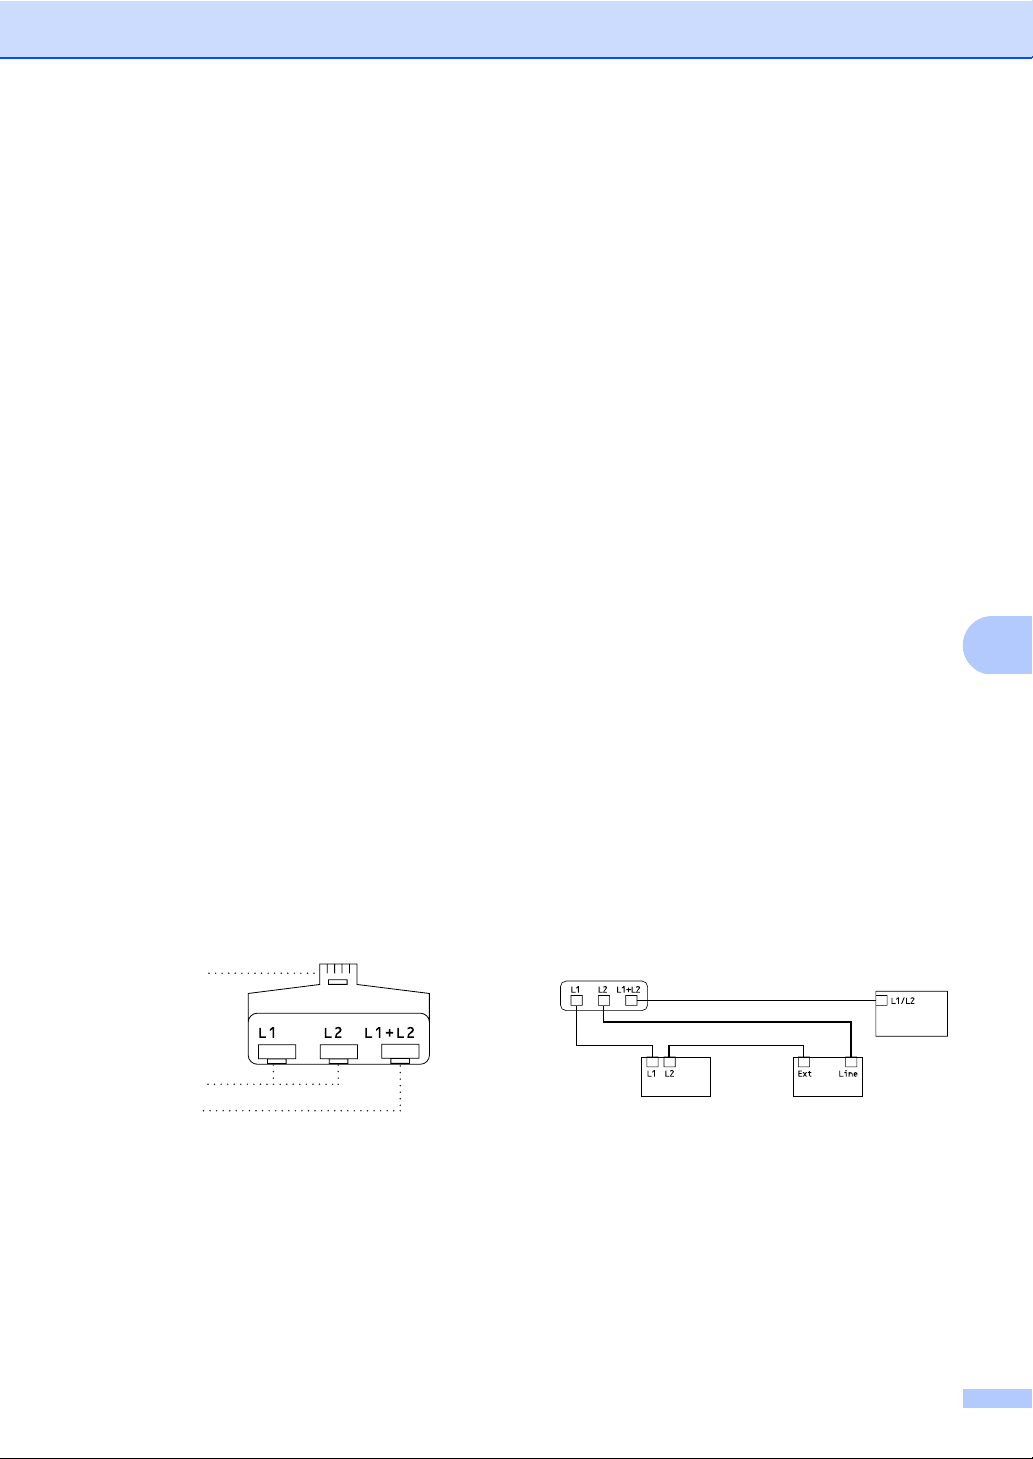
Telephone services and external devices
Two-line telephone system 7
A two-line telephone system is nothing more
than two separate telephone numbers on the
same wall outlet. The two telephone numbers
can be on separate jacks (RJ11) or combined
into one jack (RJ14). Your machine must be
plugged into an RJ11 jack. RJ11 and RJ14
jacks may be equal in size and appearance
and both may contain four wires (black, red,
green, yellow). To test the type of jack, plug in
a two-line telephone and see if it can access
both lines. If it can, you must separate the line
for your machine. (See EXT. Tel. RX
on page 53.)
Converting telephone wall outlets 7
There are three ways to convert to an RJ11
jack. The first two ways may require
assistance from the telephone company. You
can change the wall outlets from one RJ14
jack to two RJ11 jacks. Or, you can have an
RJ11 wall outlet installed and slave or jump
one of the telephone numbers to it.
The third way is the easiest: Buy a triplex
adapter. You can plug a triplex adapter into
an RJ14 outlet. It separates the wires into two
separate RJ11 jacks (Line 1, Line 2) and a
third RJ14 jack (Lines 1 and 2). If your
machine is on Line 1, plug the machine into
L1 of the triplex adapter. If your machine is on
Line 2, plug it into L2 of the triple adapter.
RJ14
Installing machine, external two-line TAM and two-line telephone
When you are installing an external two-line
telephone answering machine (TAM) and a
two-line telephone, your machine must be
isolated on one line at both the wall jack and
at the TAM. The most common connection is
to put the machine on Line 2, which is
explained in the following steps. The back of
the two-line TAM must have two telephone
jacks: one labeled L1 or L1/L2, and the other
labeled L2. You will need at least three
telephone line cords, the one that came with
your machine and two for your external twoline TAM. You will need a fourth line cord if
you add a two-line telephone.
Place the two-line TAM and the two-line
telephone next to your machine.
Plug one end of the telephone line cord for
your machine into the L2 jack of the triplex
adapter. Plug the other end into the LINE jack
on the back of the machine.
Plug one end of the first telephone line cord
for your TAM into the L1 jack of the triplex
adapter. Plug the other end into the L1 or
L1/L2 jack of the two-line TAM.
Plug one end of the second telephone line
cord for your TAM into the L2 jack of the twoline TAM. Plug the other end into the EXT.
jack on the left side of the machine.
1
2
7
7
RJ11
RJ14
3
1 Triplex Adapter
2 Two Line Telephone
3 External Two Line TAM
4 Machine
4
61
Page 74

Chapter 7
You can keep two-line telephones on other
wall outlets as always. There are two ways to
add a two-line telephone to the machine’s
wall outlet. You can plug the telephone line
cord from the two-line telephone into the
L1+L2 jack of the triplex adapter. Or, you can
plug the two-line telephone into the TEL jack
of the two-line TAM.
Multi-line connections (PBX) 7
We suggest you ask the company who
installed your PBX to connect your machine.
If you have a multi line system we suggest
you ask the installer to connect the unit to the
last line on the system. This prevents the
machine being activated each time the
system receives telephone calls. If all
incoming calls will be answered by a
switchboard operator we recommend that
you set the Answer Mode to Manual.
We cannot guarantee that your machine will
operate properly under all circumstances
when connected to a PBX. Any difficulties
with sending or receiving faxes should be
reported first to the company who handles
your PBX.
External and extension telephones 7
Using external and extension telephones 7
Using extension telephones 7
If you answer a fax call at an extension
telephone, you can make your machine
receive the fax by pressing the Fax Receive
Code l51.
If the machine answers a voice call and
pseudo/double-rings for you to take over, you
can take the call at an extension telephone by
pressing the Telephone Answer Code #51.
(See F/T Ring Time (Fax/Tel mode only)
on page 52.)
Using an external telephone (Connected to the EXT. jack of the machine)
If you answer a fax call at the external
telephone, you can make the machine
receive the fax by pressing Start.
If the machine answers a voice call and
pseudo/double-rings for you to take over, you
can take the call at the external telephone by
pressing Hook.
7
62
If you answer a call and no one is on the line:
You should assume that you’re receiving a
manual fax.
Press l51 and wait for the chirp or until the
LCD shows Receiving, and then hang up.
Note
You can also use the EXT. Tel. RX feature
to make your machine automatically take
the call. (See EXT. Tel. RX on page 53.)
7
Page 75
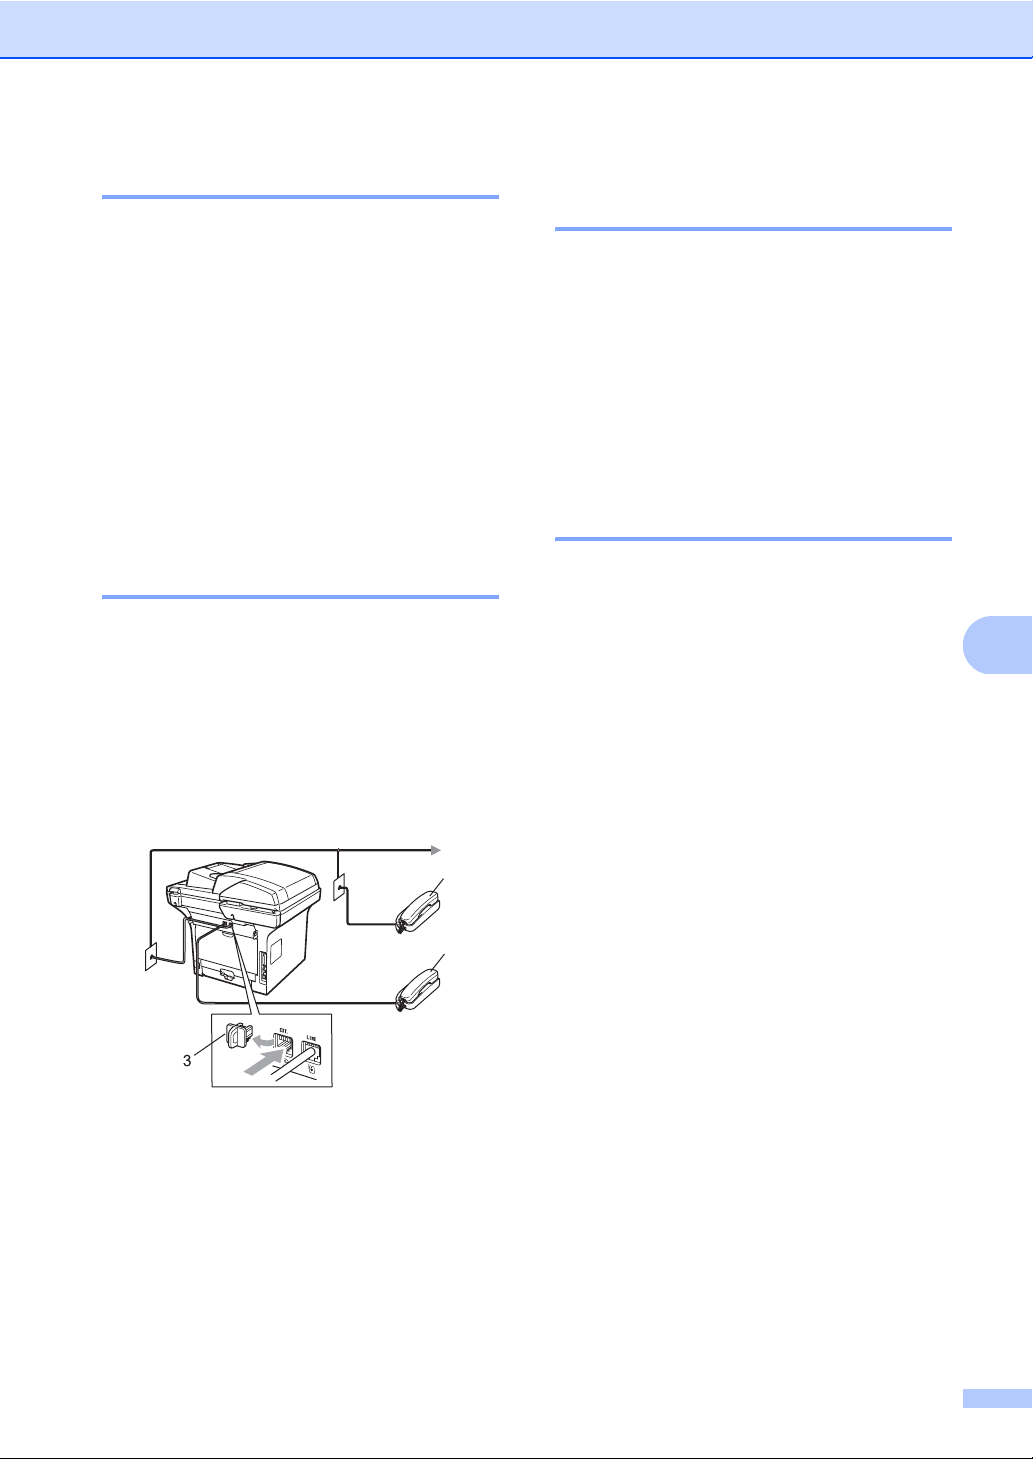
Telephone services and external devices
For Fax/Tel mode only 7
When the machine is in Fax/Tel mode, it will
use the F/T Ring Time (pseudo/doubleringing) to alert you to pick up a voice call.
Lift the external telephone’s handset, and
then press Hook to answer.
If you are at an extension telephone, you will
need to lift the handset during the F/T Ring
Time and then press #51 between the
pseudo/double rings. If no one is on the line,
or if someone wants to send you a fax, send
the call back to the machine by pressing l51.
Connecting an external or extension telephone 7
You can connect a separate telephone
directly to your machine as shown in the
diagram below.
Connect the telephone line cord to the jack
labeled EXT.
Before you connect the external telephone,
remove the protective cap (3) from the EXT.
jack on the machine.
1
Using a cordless external handset 7
If your cordless telephone is connected to the
EXT. jack of the machine (see page 63) and
you typically carry the cordless handset
elsewhere, it is easier to answer calls during
the Ring Count.
If you let the machine answer first, you will
have to go to the machine so you can press
Hook to transfer the call to the cordless
handset.
Using Remote Codes 7
Fax Receive Code 7
If you answer a fax call on an extension
telephone, you can tell your machine to
receive it by pressing the Fax Receive Code
l51. Wait for the chirping sounds then
replace the handset. (See EXT. Tel. RX
on page 53.)
If you answer a fax call at the external
telephone, you can make the machine
receive the fax by pressing Start and
choosing Receive.
Telephone Answer Code 7
7
2
1 Extension telephone
2 External telephone
3 Protective Cap
When you are using the external telephone,
the LCD shows Telephone.
If you receive a voice call and the machine is
in F/T mode, it will start to sound the F/T
(double-ring) after the initial ring count. If you
pick up the call on an extension telephone
you can turn the F/T ring off by pressing #51
(make sure you press this between the rings).
If the machine answers a voice call and
pseudo/double-rings for you to take over, you
can take the call at the external telephone
connected to the EXT. jack of the machine by
pressing Hook.
63
Page 76

Chapter 7
Changing the Remote Codes 7
The preset Fax Receive Code is l51. The
preset Telephone Answer Code is #51. If you
are always disconnected when accessing
your External TAM, try changing the threedigit remote codes, for example ### and 999.
a Make sure you are in Fax mode.
b Press Menu 2, 1, 4.
21.RX Settings
4.Remote Codes
a On
b Off
Select ab or OK
c Press a or b to choose On (or Off).
Press OK.
d If you chose On in step c, enter the new
Fax Receive Code.
Press OK.
e Enter the new Telephone Answer Code.
Press OK.
f Press Stop/Exit.
64
Page 77
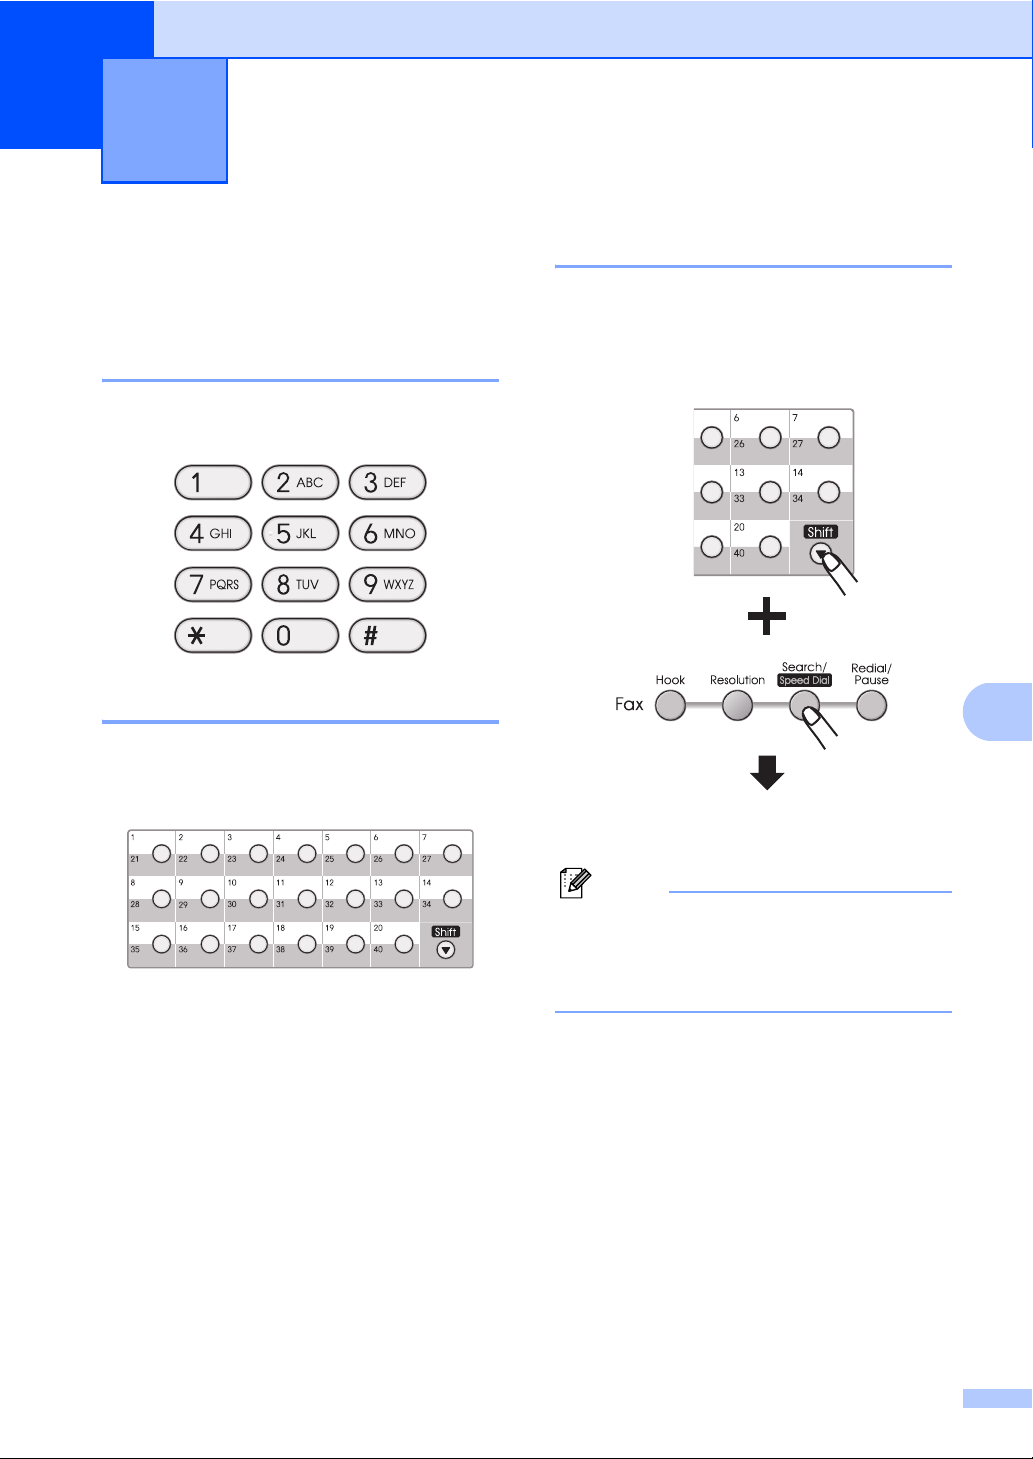
8
Dialing and storing numbers 8
How to dial 8
You can dial in any of the following ways.
Manual dialing 8
Use the dial pad to enter all the digits of the
telephone or fax number.
One Touch dialing 8
Press the One Touch key that stores the
number you want to call. (See Storing One
Touch dial numbers on page 67.)
Speed dialing 8
Press Search/Speed Dial and Shift
simultaneously and then the three digit
Speed Dial number. (See Storing Speed Dial
numbers on page 69.)
8
Three-digit number
To dial One Touch numbers 21 to 40, hold
down Shift as you press the One Touch key.
Note
If the LCD shows Register Now? when
you enter a One Touch or Speed Dial
number, it means that a number is not
stored there.
65
Page 78

Chapter 8
Search 8
You can search alphabetically for names you
have stored in the One Touch and Speed Dial
memories. (See Storing One Touch dial
numbers on page 67 and Storing Speed Dial
numbers on page 69.)
a Press Search/Speed Dial.
b Press the dial pad keys for the first few
letters of the name. (Use the chart on
Entering text on page 186 to help you
enter letters.)
Press OK.
c Press a or b to scroll until you find the
name you are looking for.
Press OK.
Note
• If you are using LDAP names that are
stored in the LDAP dialer setting, a c will
appear next to the names on the LCD.
• You can press Resolution to change the
fax resolution.
d Press Start.
LDAP search 8
If the machine is connected to your LDAP
server, you can search for information such
as fax numbers and E-mail addresses from
your server. (For details about how to set up
LDAP see the Network User’s Guide.)
Fax redial 8
If you are sending a fax manually and the line
is busy, press Redial/Pause, wait for the
other fax machine to answer, and then press
Start to try again. If you want to make a
second call to the last number dialed, you can
save time by pressing Redial/Pause and
Start.
Redial/Pause only works if you dialed from
the control panel.
If you are sending a fax automatically and the
line is busy, the machine will automatically
redial one time after five minutes.
Note
• If you do not enter a letter and press OK in
step b, all registered names will appear.
Press a or b to scroll until you find the
name you are looking for. If you are using
LDAP you must enter the letters of your
search in step b.
• If the LCD shows No Contact Found
when you enter the first few letters of the
name, it means that a name for the letter
is not stored.
66
Page 79
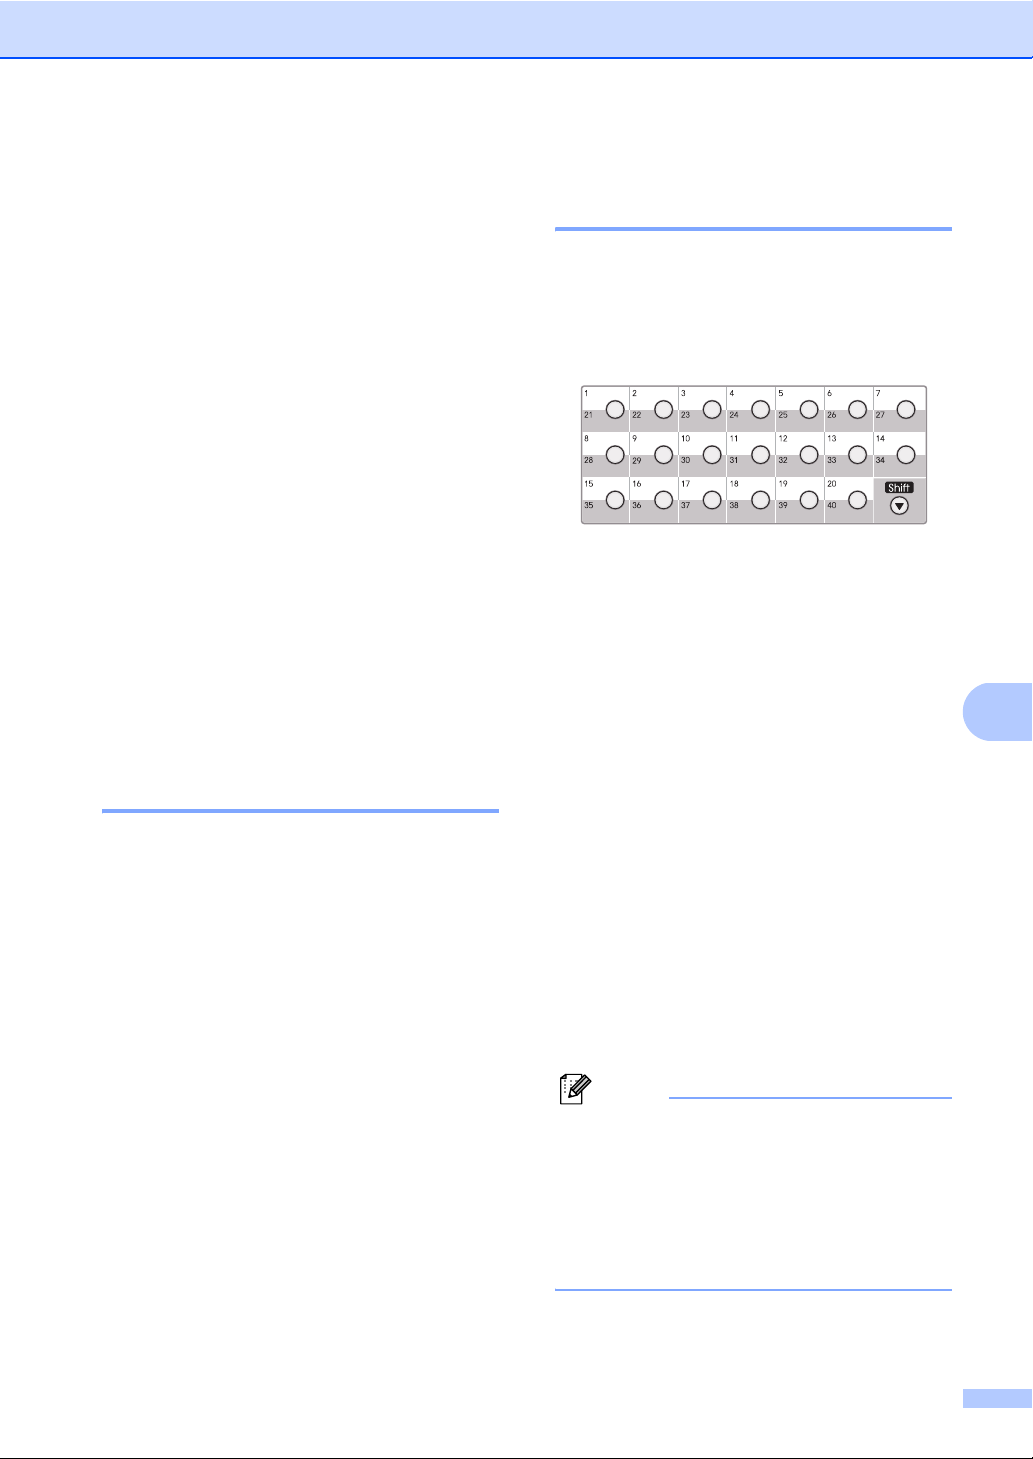
Dialing and storing numbers
Storing numbers 8
You can set up your machine to do the
following types of easy dialing: One Touch,
Speed Dial and Groups for Broadcasting
faxes. You can also specify the default
resolution for each One Touch and Speed
Dial number. When you dial a quick dial
number, the LCD shows the name, if you
stored it, or the number. A scan profile can
also be stored along with the fax number.
If you lose electrical power, the quick dial
numbers stored in the memory will not be lost.
A scan profile is the resolution and other scan
settings that you choose when you store a
number. For example, you will be asked to
select Standard, Fine, EX-Fine or Photo if
you have selected the Fax/Tel option. Or, you
will be asked to select B&W 200 dpi,
B&W 200x100 dpi, Gray 100dpi,
Gray 200dpi, Gray 300 dpi, Color 100 dpi,
Color 200 dpi, Color 300 dpi or Color 600 dpi
if you selected the E-Mail option.
Storing One Touch dial numbers 8
Your machine has 20 One Touch keys where
you can store 40 fax or telephone numbers
for automatic dialing. To access numbers 21
to 40, hold down Shift as you press the One
Touch key.
a Press the One Touch key where you
want to store the number.
If a number is not stored there, the LCD
shows Register Now?.
Press 1 to choose Yes.
b Press a or b to select Fax/Tel, E-Mail
or IFAX.
Press OK.
8
Storing a pause 8
Press Redial/Pause to insert a 3.5-second
pause between numbers. You can press
Redial/Pause as many times as needed to
increase the length of the pause.
c Choose one of the options below:
Enter the number (up to 20
characters) if you selected Fax/Tel.
Press OK.
Enter the E-mail address (up to 60
characters) if you selected E-Mail
or IFAX. Use the chart on Entering
text on page 186 to help you enter
letters.
Press OK.
Note
If you selected E-Mail and save the
E-mail address, you can only use the
E-mail address when you are in Scan
mode. If you selected IFAX and save the
E-mail address, you can only use the
E-mail address when you are in Fax
mode.
67
Page 80

Chapter 8
d Choose one of the options below:
Enter the name using the dial pad
(up to 15 characters).
Press OK.
Press OK to store the number or
E-mail address without a name.
e If you want to save a fax/scan resolution
along with the number, choose one of
the options below:
If you selected Fax/Tel in step b,
press a or b to select Std, Fine,
EX-Fine or Photo.
Press OK.
If you selected E-Mail in step b,
press a or b to select Color100dpi,
Color200dpi, Color300dpi,
Color600dpi, Gray100dpi,
Gray200dpi, Gray300dpi,
B&W200dpi or B&W200x100.
Press OK and then go to step f.
Note
• When you do a broadcast and you have
saved a scan profile along with the
number or E-mail address, the scan profile
of the One Touch, Speed Dial or Group
number you chose first will be applied to
the broadcast.
• You can also store the number by
pressing Menu, 2, 3, 1.
If you selected IFAX in step b,
press a or b to select Std, Fine or
Photo.
Press OK.
Press OK if you don’t want to change
the default resolution.
f Choose one of the options below:
If you selected Black & White in step e,
select the file format (TIFF, PDF or
Secure PDF) that will be used to send to
your PC. If you selected Gray or Color in
step e, select the file format (PDF,
Secure PDF, JPEG, or XPS) that will be
used to send your PC.
Press OK.
68
Page 81

Dialing and storing numbers
Storing Speed Dial numbers 8
You can store your frequently used numbers
as Speed Dial numbers, so that when you dial
you will only have to press a few keys (Hold
down Shift as you press Search/Speed Dial,
the three-digit number and Start). The
machine can store 300 Speed Dial numbers
(001 - 300).
a Hold down Shift as you press
Search/Speed Dial and enter a three-
digit Speed Dial location number
(001-300).
If a number is not stored there, the LCD
shows Register Now?.
Press 1 to choose Yes.
b Press a or b to select Fax/Tel, E-Mail
or IFAX.
Press OK.
c Choose one of the options below:
Enter the number (up to 20
characters) when you select
Fax/Tel.
Press OK.
Enter the E-mail address (up to 60
characters) if you selected E-Mail
or IFAX. Use the chart on Entering
text on page 186 to help you enter
letters.
Press OK.
Press OK to store the number or
E-mail address without a name.
e If you want to save a fax/scan resolution
along with the number, choose one of
the options below:
If you selected Fax/Tel in step b,
press a or b to select Std, Fine,
EX-Fine or Photo.
Press OK.
If you selected E-Mail in step b,
press a or b to select Color100dpi,
Color200dpi, Color300dpi,
Color600dpi, Gray100dpi,
Gray200dpi, Gray300dpi,
B&W200dpi or B&W200x100.
Press OK and then go to step f.
If you selected IFAX in step b,
press a or b to select Std, Fine or
Photo.
Press OK.
Press OK if you don’t want to change
the default resolution.
f If you selected Black & White in step e,
select the file format (TIFF, PDF or
Secure PDF) that will be used to send to
your PC. If you selected Gray or Color in
step e, select the file format (PDF,
Secure PDF, JPEG or XPS) that will be
used to send your PC.
Press OK.
8
Note
If you selected E-Mail and save the
E-mail address, you can only use the
E-mail address when you are in Scan
mode. If you selected IFAX and save the
E-mail address, you can only use the
E-mail address when you are in Fax
mode.
d Choose one of the options below:
Enter the name using the dial pad
(up to 15 characters).
Press OK.
Note
• When you do a broadcast and you have
saved a scan profile along with the
number or E-mail address, the scan profile
of the One Touch, Speed Dial or Group
number you chose first will be applied to
the broadcast.
• You can also store the number by
pressing Menu, 2, 3, 2.
69
Page 82

Chapter 8
Changing One Touch and Speed Dial numbers 8
If you try to store a One Touch or Speed Dial
number over an existing number, the LCD will
show the name or number already stored
there. If your machine has a scheduled job or
you have set a fax forwarding number, the
LCD will ask you if you want to change the
number.
a Do one of the following:
To change a stored One Touch
number, press Menu, 2, 3, 1.
Choose the One Touch number you
want to change.
To change a stored Speed Dial
number, press Menu, 2, 3, 2.
Choose the Speed Dial number you
want to change, then press OK.
b Do one of the following:
To change the stored number, press
1.
To exit without making a change,
press 2.
23.Dialer Setting
#005:MIKE
a 1.Change
b 2.Exit
Select ab or OK
c Press a or b to select Fax/Tel, E-Mail
or IFAX.
Press OK.
d Enter a new number or character.
Press OK.
e Press d or c to position the cursor under
the character you want to change, and
then press Clear/Back to delete it.
Repeat for each character you want to
delete.
f Follow the directions beginning in
step d in Storing One Touch dial
numbers and Storing Speed Dial
numbers. (See Storing One Touch dial
numbers on page 67 and Storing Speed
Dial numbers on page 69.)
Setting up Groups for Broadcasting 8
If you often want to send the same fax
message to many fax numbers you can set
up a group.
Groups are stored on a One Touch key or a
Speed Dial number. Each group uses up a
One Touch key or a Speed Dial location. You
can then send the fax message to all the
numbers stored in a group just by pressing a
One Touch key or entering a Speed Dial
number, and then pressing Start.
Before you can add numbers to a group, you
need to store them as One Touch or Speed
Dial numbers. You can have up to 20 small
groups, or you can assign up to 339 numbers
to one large group.
a Press Menu, 2, 3, 3.
23.Dialer Setting
3.Setup Groups
Group Dial:
Press Speed Dial
b Choose an empty location where you
want to store the group in one of the
following ways:
Press a One Touch key.
Hold down Shift as you press
Search/Speed Dial and then enter
the three-digit Speed Dial location.
Press OK.
c Use the dial pad to enter a group
number (01 to 20).
Press OK.
70
Page 83

Dialing and storing numbers
d Press a or b to select Fax/IFAX or
E-Mail.
Press OK.
e To add One Touch or Speed Dial
numbers follow the instructions below:
For One Touch numbers, press the
One Touch keys one after the other.
For Speed Dial numbers, hold down
Shift as you press
Search/Speed Dial, and then enter
the three-digit Speed Dial location.
The LCD will display your chosen One
Touch numbers with a l and Speed Dial
numbers with a # (for example l006,
#009).
f Press OK when you have finished
adding numbers.
g Do one of the following:
Enter the name using the dial pad
(up to 15 characters). Use the chart
on Entering text on page 186 to help
you enter letters.
Press OK.
Press OK to store the group without
a name.
Note
If you have selected Fax/IFAX in step d
and added One Touch or Speed Dial
numbers that are stored as ‘I-Fax’, you
cannot select EX-Fine.
i If you selected Black & White in step h,
select the file format (TIFF, PDF or
Secure PDF) that will be used to send to
your PC. If you selected Gray or Color in
step h, select the file format (PDF,
Secure PDF, JPEG or XPS) that will be
used to send your PC.
Press OK.
8
h You can save a fax/scan resolution
along with the number. Do one of the
following:
If you selected Fax/IFAX in step d,
press a or b to select Std, Fine,
EX-Fine or Photo.
Press OK.
If you selected E-mail in step d,
press a or b to select Color100dpi,
Color200dpi, Color300dpi,
Color600dpi, Gray100dpi,
Gray200dpi, Gray300dpi,
B&W200dpi or B&W200x100.
Press OK.
Press OK if you don’t want to change
the default resolution.
71
Page 84

Chapter 8
Dialing access codes and credit card numbers 8
You can combine more than one Quick Dial
number when you dial. This feature may be
useful if you need to dial an access code for
a cheaper rate from another long distance
carrier.
For example, you might have stored ‘555’ on
Speed Dial #003 and ‘7000’ on Speed Dial
#002. You can use them both to dial
‘555-7000’ if you press the following keys:
Hold down Shift as you press
Search/Speed Dial, 003.
Hold down Shift as you press
Search/Speed Dial, 002 and Start.
Numbers can be added manually by entering
them on the dial pad:
Hold down Shift as you press
Search/Speed Dial, 003, 7001 (on the dial
pad), and Start.
This would dial ‘555-7001’. You can also add
a pause by pressing Redial/Pause.
Pause 8
Press Redial/Pause to insert a 3.5-second
pause between numbers. You can press
Redial/Pause as many times as needed to
increase the length of the pause.
Tone or Pulse 8
If you have a Pulse dialing service, but need
to send Tone signals (for example, for
telephone banking), follow the instructions
below. If you have Touch Tone service, you
will not need this feature to send tone signals.
a Press Hook.
b Press # on the machine’s control panel.
Any digits dialed after this will send tone
signals.
When you hang up, the machine will
return to the Pulse dialing service.
72
Page 85
9
Remote Fax Options 9
Remote Fax Options let you receive faxes
while you are away from the machine.
You can use only one Remote Fax Option at
a time.
Fax Forwarding 9
The Fax Forwarding feature lets you
automatically forward your received faxes to
another machine.
a Press Menu, 2, 5, 1.
25.Remote Fax Opt
1.RMT RTV/FX FWD
a Off
b Fax Forward
Select ab or OK
b Press a or b to choose Fax Forward.
Press OK.
The LCD will ask you to enter the fax
number you want your faxes to be
forwarded to.
d Press a or b to choose On or Off.
Press OK.
25.Remote Fax Opt
Local Print
a Off
b On
Select ab or OK
e Press Stop/Exit.
IMPORTANT
If you choose Local Print On, the machine
will also print the fax at your machine so
you will have a copy. This is a safety
feature in case if there is a power failure
before the fax is forwarded or a problem at
the receiving machine. The machine can
store faxes for approximately 60 hours if
there is a power failure.
9
c Enter the forwarding number using the
dial pad (up to 20 digits), using a
One Touch key or holding down Shift as
you press Search/Speed Dial and the
three-digit location.
Press OK.
Note
• If you store a group on a One Touch key
or a Speed Dial location, the faxes will be
forwarded to several fax numbers.
• You can also enter an E-mail address if
your machine has been configured for the
Internet Fax feature. (For details about
Internet Fax, see the Network User’s
Guide.)
73
Page 86
Chapter 9
PC Fax Receive 9
If you turn on the PC Fax Receive feature
your machine will store received faxes in
memory and send them to your PC
automatically. You can then use your PC to
view and store these faxes.
Even if you have turned off your PC (at night
or on the weekend, for example), your
machine will receive and store your faxes in
its memory. The LCD will show the number of
stored faxes received, for example:
PC Fax Msg:001
When you start your PC and the PC Fax
Receiving software runs, your machine
transfers your faxes to your PC automatically.
For PC Fax Receive to work you must have
the PC-FAX Receive software running on
your PC. (For details, see PC-FAX Receiving
in the Software User’s Guide.)
If you choose Local Print On, the machine will
also print the fax.
a Press Menu, 2, 5, 1.
25.Remote Fax Opt
1.RMT RTV/FX FWD
a Off
b Fax Forward
Select ab or OK
b Press a or b to choose
PC Fax Receive.
Press OK.
c Press a or b to choose (<USB> or
<Parallel>), or your computer name
if the machine is connected to a
network.
25.Remote Fax Opt
1.RMT RTV/FX FWD
a <USB>
b <Parallel>
Select ab or OK
d Press a or b to choose On or Off.
25.Remote Fax Opt
Local Print
a Off
b On
Select ab or OK
Press OK.
e Press Stop/Exit.
IMPORTANT
If you choose Local Print On, the machine
will also print the fax at your machine so
you will have a copy. This is a safety
feature in case if there is a power failure
before the fax is forwarded or a problem at
the receiving machine. The machine can
store faxes for approximately 60 hours if
there is a power failure.
Note
• Before you can set up PC Fax Receive
you must install the Multi-Function Suite
software on your PC. Make sure your PC
is connected and turned on. (For details
see PC-FAX Receiving in the Software
User’s Guide.)
• If your machine has a problem and is
unable to print faxes in memory, you can
use this setting to transfer your faxes to a
PC. (For details, see Error and
maintenance messages on page 133.)
• PC Fax Receive is not supported in Mac
OS. (See PC Fax receiving in the
Software User’s Guide.)
74
Press OK.
Page 87
Remote Fax Options
Changing Remote Fax Options 9
If received faxes are left in your machine’s
memory when you change to another
Remote Fax Option, the LCD will ask you the
following message:
25.Remote Fax Opt
Erase All Fax?
a 1.Yes
b 2.No
Select ab or OK
or
25.Remote Fax Opt
Print All Fax?
a 1.Yes
b 2.No
Select ab or OK
If you press 1, faxes in the memory will be
erased or printed before the setting
changes. If a backup copy has already
been printed it will not be printed again.
If you press 2, faxes in the memory will not
be erased or printed and the setting will be
unchanged.
If received faxes are left in the machine’s
memory when you change to
PC Fax Receive from another remote fax
option (Fax Forward or Remote RTRV),
the LCD will ask you the following message:
25.Remote Fax Opt
Send Fax to PC?
a 1.Yes
b 2.No
Select ab or OK
If you press 2, faxes in the memory will not
be erased or transferred to your PC and
the setting will be unchanged.
The LCD will ask you the following message:
25.Remote Fax Opt
Local Print
a Off
b On
Select ab or OK
Press a or b to choose On or Off.
Press OK.
Press Stop/Exit.
IMPORTANT
If you choose Local Print On, the machine
will also print the fax at your machine so
you will have a copy. This is a safety
feature in case if there is a power failure
before the fax is forwarded or a problem at
the receiving machine. The machine can
store faxes for approximately 60 hours if
there is a power failure.
Turning off Remote Fax Options 9
a Press Menu, 2, 5, 1.
25.Remote Fax Opt
1.RMT RTV/FX FWD
a Off
b Fax Forward
Select ab or OK
b Press a or b to choose Off.
Press OK.
9
If you press 1, faxes in the memory will be
sent to your PC before the setting
changes. Faxes in the memory will be sent
to your PC when the PC Fax Receive icon
is active on your PC. (See the Software
User’s Guide.)
Note
The LCD will give you options if there are
received faxes still in your machine’s
memory. (See Changing Remote Fax
Options on page 75.)
c Press Stop/Exit.
75
Page 88
Chapter 9
Remote retrieval 9
The remote retrieval feature lets you retrieve
your stored fax messages when you are not
at the machine. You can call your machine
from any touch tone telephone or fax
machine, then use the Remote Retrieval
Passcode to retrieve your messages.
Setting a R R Passcode 9
The R R Passcode feature lets you access
the remote retrieval features when you are
away from your machine. Before you use the
remote access and retrieval features, you
have to set up your own code. The default
code is an inactive code: – – –l.
a Press Menu, 2, 5, 1.
25.Remote Fax Opt
1.RMT RTV/FX FWD
a Off
b Fax Forward
Select ab or OK
Note
Do not use the same code used for your
Fax Receive Code (l51) or Telephone
Answer Code (#51). (See Changing the
Remote Codes on page 64.)
You can change your code at any time. If you
want to make your code inactive, press
Clear/Back and then OK in b to restore the
inactive setting – – –l.
b Press a or b to choose Remote RTRV.
Press OK.
25.Remote Fax Opt
1.RMT RTV/FX FWD
Passcode:---*
Enter & OK Key
c Enter a three-digit code using numbers
0 – 9, l or #.
Press OK.
d Press a or b to choose On (or Off).
Press OK.
25.Remote Fax Opt
Local Print
a Off
b On
Select ab or OK
e Press Stop/Exit.
76
Page 89

Remote Fax Options
Using your R R Passcode 9
a Dial your fax number from a telephone
or another fax machine using touch
tone.
b When your machine answers,
immediately enter your R R Passcode (3
digits followed by l).
c The machine signals if it has received
messages:
No beeps
No messages received.
1 long beep
Fax message received.
d The machine gives two short beeps to
tell you to enter a command. (See
Remote fax commands on page 78.)
The machine will hang up if you wait
longer than 30 seconds before entering
a command. If you enter an invalid
command the machine will beep three
times.
e Press 9 0 to reset the machine when you
have finished.
Retrieving fax messages 9
a Dial your fax number from a telephone
or another fax machine using touch
tone.
b When your machine answers,
immediately enter your R R Passcode (3
digits followed by l). If you hear one
long beep, you have messages.
c When you hear two short beeps, use the
dial pad to press 9 6 2.
d Wait for a long beep, and then use the
dial pad to enter the number of the
remote fax machine where you want
your fax messages sent, followed by ##
(up to 20 digits).
e Hang up after you hear your machine
beep. Your machine will call the other
machine, which will then print your fax
messages.
Note
You can insert a pause in a fax number by
using the # key.
9
f Hang up.
Note
If your machine is set to Manual mode,
you can still access the remote retrieval
features. Dial the fax number as normal
and let the machine ring. After 100
seconds you will hear a long beep to tell
you to enter the R R Passcode. You will
then have 30 seconds to enter the code.
77
Page 90
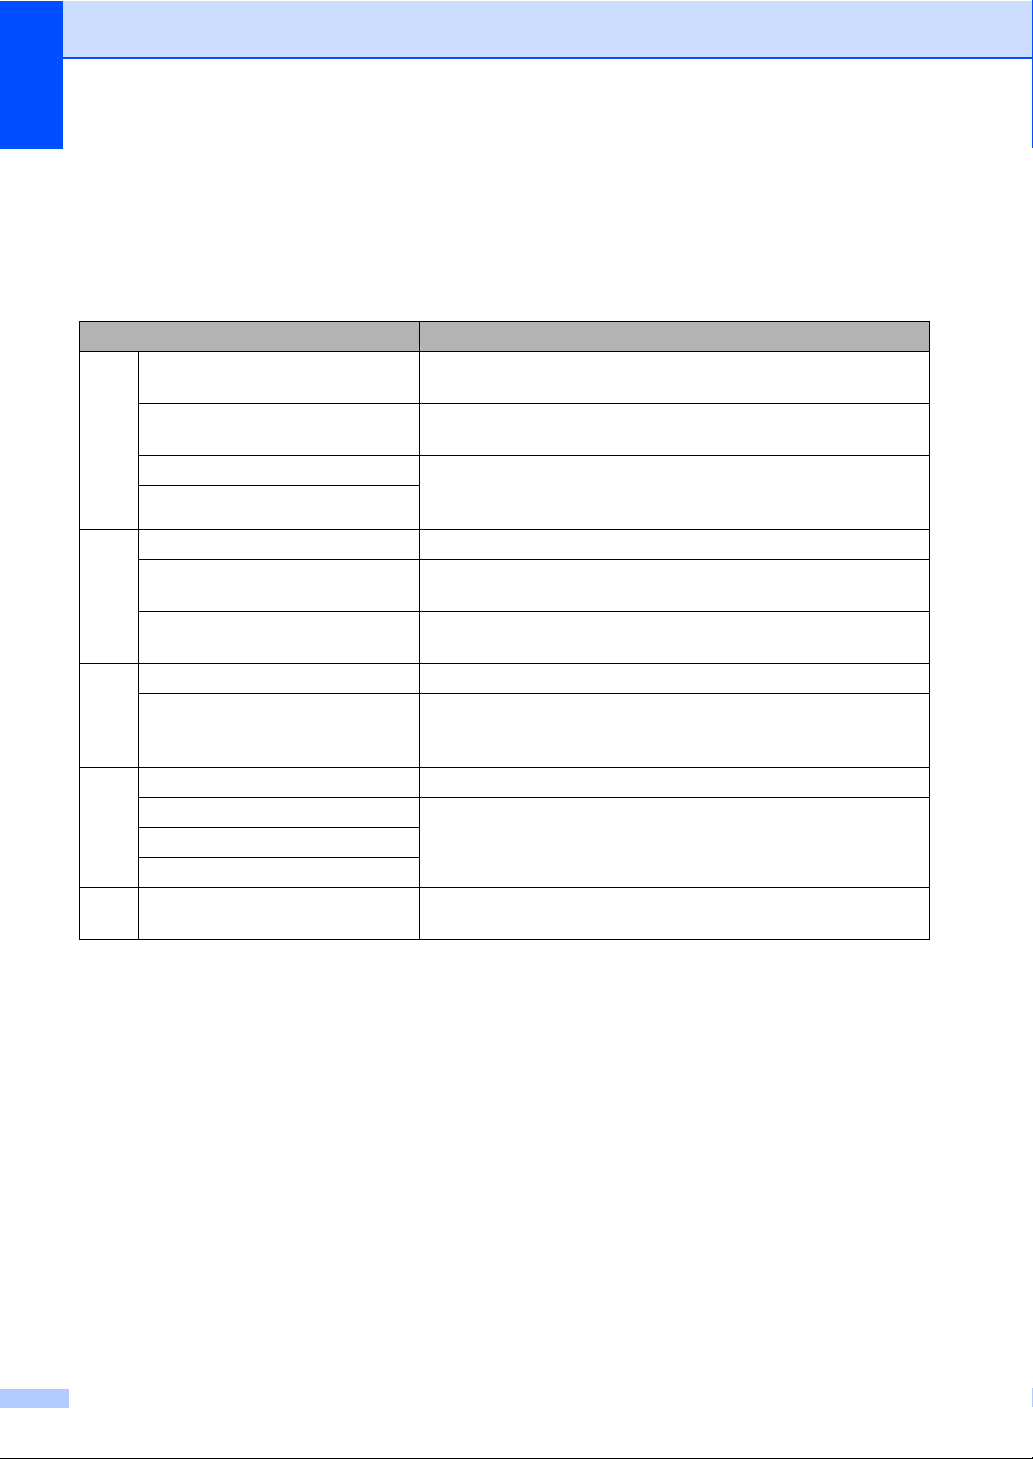
Chapter 9
Remote fax commands 9
Follow the commands below to access features when you are away from the machine. When you
call the machine and enter your R R Passcode (3 digits followed by l), the system will give two
short beeps and you must enter a remote command.
Remote commands Operation details
95 Change the fax forwarding or
remote retrieval settings
1 OFF You can choose Off after you have retrieved or erased all your
messages.
2 Fax Forwarding One long beep means the change is accepted. If you hear three
6 Fax storage
96 Retrieve a fax
2 Retrieve all faxes Enter the number of a remote fax machine to receive stored fax
3 Erase faxes from the memory If you hear one long beep, fax messages have been erased
97 Check the receiving status
1 Fax You can check whether your machine has received any faxes.
98 Change the Answer Mode
1 External TAM If you hear one long beep, your change has been accepted.
2 Fax/Tel
3 Fax Only
90 Exit Press 90 to exit remote retrieval. Wait for the long beep, then
short beeps, you cannot make the change because something
has not been set up.
messages. (See Retrieving fax messages on page 77.)
from the memory.
If yes, you will hear one long beep. If no, you will hear three
short beeps.
replace the handset.
78
Page 91

10
Polling 10
Polling lets you set up your machine so other
people can receive faxes from you, but they
pay for the call. It also lets you call somebody
else’s fax machine and receive a fax from it,
so you pay for the call. The polling feature
needs to be set up on both machines for this
to work. Not all fax machines support polling.
Polling receive 10
Polling receive lets you call another fax
machine to receive a fax.
a Make sure you are in Fax mode.
b Press Menu, 2, 1, 7.
Poll RX
Dial & Start
c Enter the fax number you are polling.
Press Start.
The LCD will show Dialing.
Sequential polling 10
Sequential polling lets you request
documents from several fax machines in one
operation. Afterwards, a Sequential Polling
Report will be printed.
a Make sure you are in Fax mode.
b Press Menu, 2, 1, 7.
Poll RX
Dial & Start
c Specify the fax machines you want to
poll by using One Touch, Speed Dial,
Search, a Group or the dial pad. You
must press OK between each location.
d Press Start.
The machine polls each number or
Group number in turn for a document.
Press Stop/Exit while the machine is dialing
to cancel the polling process.
10
To cancel all sequential polling receive jobs,
press Menu, 2, 7. (See Checking and
canceling waiting jobs on page 49.)
79
Page 92
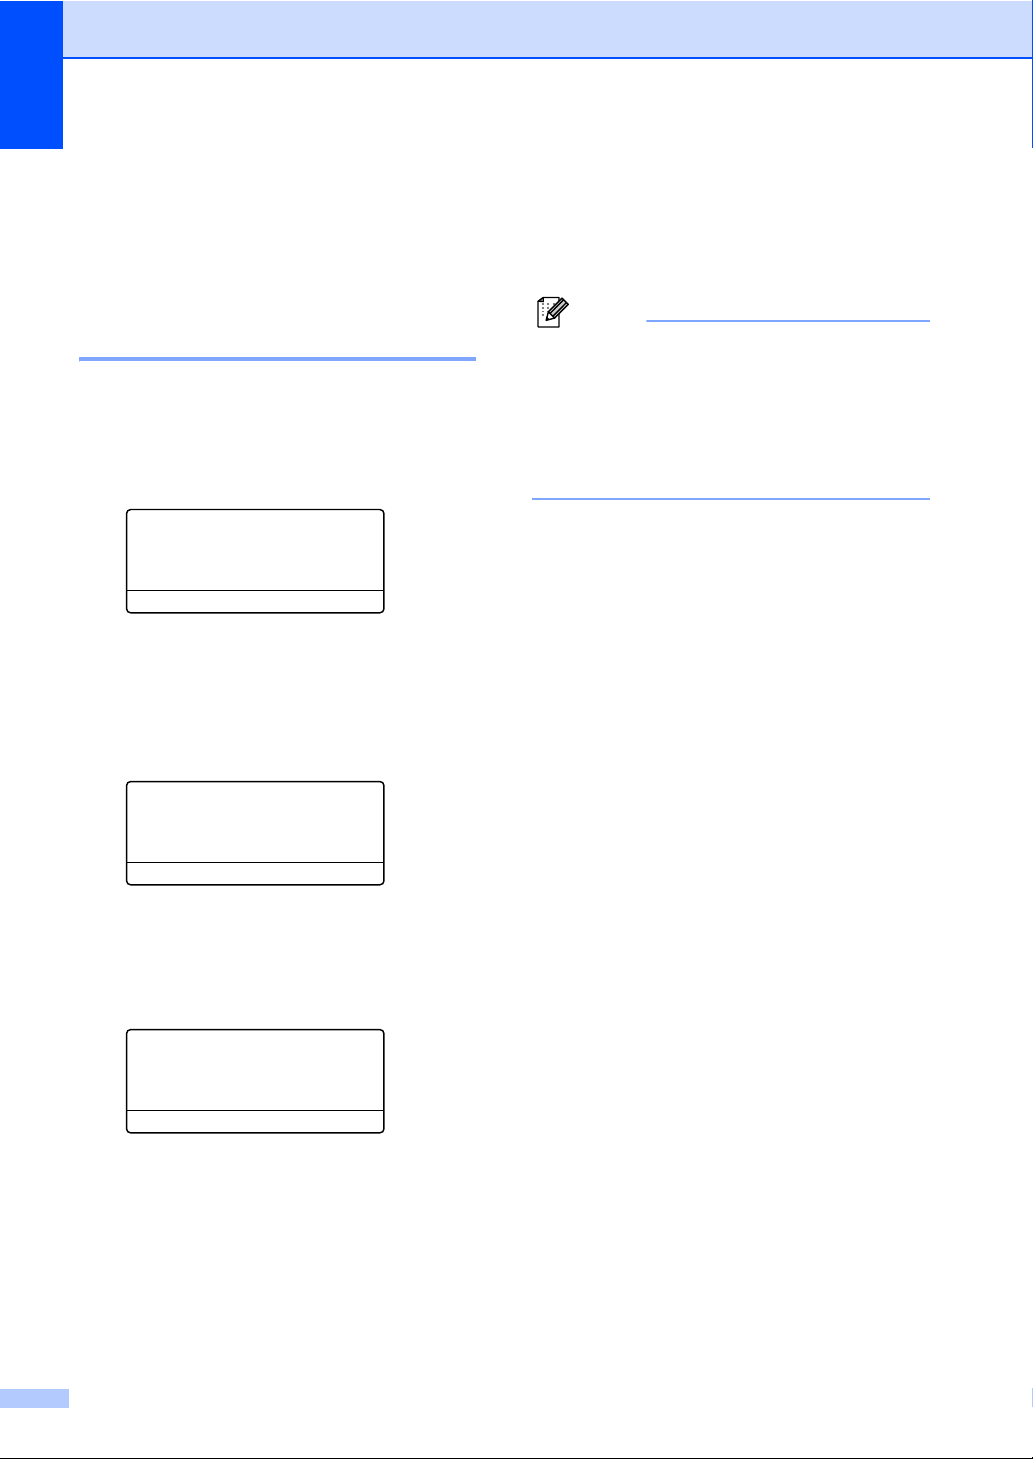
Chapter 10
Polled transmit 10
Polled transmit lets you set up your machine
to wait with a document so another fax
machine can call and retrieve it.
Setup for polled transmit 10
a Make sure you are in Fax mode.
b Load your document.
c Press Menu, 2, 2, 6.
22.TX Settings
6.Poll
a On
b Off
Select ab or OK
d Press a or b to choose On (or Off).
Press OK.
e Press 2 to choose 2.No if you do not
want to enter more settings when the
LCD asks you the following message:
22.TX Settings
Other Settings?
a 1.Yes
b 2.No
Select ab or OK
h Place the next page on the scanner
glass, press OK. Repeat steps g and
h for each additional page.
Your machine will automatically send
the fax.
Note
The document will be stored and can be
retrieved from any other fax machine until
you delete the fax from memory.
To delete the fax from memory, press
Menu, 2, 7. (See Checking and canceling
waiting jobs on page 49.)
f Press Start.
g If you are using the scanner glass, the
LCD will prompt you to choose one of
the options below:
Flatbed Fax:
Next Page?
a 1.Yes
b 2.No (Send)
Select ab or OK
Press 1 to send another page.
Go to step h.
Press 2 or Start to send the
document.
80
Page 93

11
Printing reports 11
Fax reports 11
Some fax reports (job status and fax journal)
can be printed automatically and manually.
Job status report 11
You can use the Job Status Report as proof
that you sent a fax.
This report lists the receiving party's name or
fax number, the time and date of
transmission, duration of transmission,
number of pages sent, and whether or not the
transmission was successful.
All: Prints a report after every fax you
send.
All+Image: Prints a report after every
fax you send. A portion of the fax’s first
page appears on the report.
Incomplete: Prints a report only if your
fax is unsuccessful due to a transmission
error. Incomplete is the default setting.
Inc+Image: Prints a report only if your
fax is unsuccessful due to a transmission
error. A portion of the fax’s first page
appears on the report.
Note
• If you choose All+Image or Inc+Image,
the image will only appear on the Job
Status Report if TX from ADF is set to
Off. (See Real Time Transmission
on page 47.)
• If your transmission is successful, OK will
appear next to RESULT on the Job Status
Report. If transmission is not successful,
NG will appear next to RESULT.
11
a Press Menu, 2, 4, 1.
24.Report Setting
1.Job Status Rpt
a Incomplete
b Inc+Image
Select ab or OK
b Press a or b to choose All,
All+Image, Incomplete or
Inc+Image.
Press OK.
c Press Stop/Exit.
81
Page 94

Chapter 11
Fax Journal 11
You can set the machine to print a fax journal
(activity report) at specific intervals (every 50
faxes, 6, 12 or 24 hours, 2 or 7 days). The
default setting is Every 50 Faxes, this
means that your machine will print the journal
when the machine has stored 50 jobs.
If you set the interval to Off, you can still print
the report by following the steps on the next
page.
a Press Menu, 2, 4, 2.
24.Report Setting
2.Journal
a Every 50 Faxes
b Every 6 Hours
Select ab or OK
b Press a or b to choose an interval.
Press OK.
If you choose 7 days, you will be asked
to choose a day when you want the 7
day countdown to begin.
c Enter the time to begin printing, in
24 hour format.
Press OK.
For example: enter 19:45 for 7:45 PM.
d Press Stop/Exit.
If you choose 6, 12, 24 hours, 2 or 7 days, the
machine will print the report at the selected
time and then erase all jobs from its memory.
If the machine’s memory becomes full with
200 jobs before the time you chose has
passed, the machine will print the journal
early and then erase all jobs from memory.
Reports 11
The following reports are available:
1 Job Status Rpt
Displays the Job Status Report for your
last outgoing 200 faxes and prints the last
report.
2 Help List
Prints a list of commonly used functions to
help you program your machine.
3 Dialer Dir
Prints a list of names and numbers stored
in the One Touch and Speed Dial memory
in numerical or alphabetical order.
4 Fax Journal
Prints a list of information about your last
200 incoming and outgoing faxes. (TX:
transmit.) (RX: receive.)
5 Mach. Settings
Print a list of your current settings.
6 Network Config
Lists your network settings.
7 Order Form
You can print an accessories order form to
fill out and send to your Océ sales office.
If you want an extra report before it is due to
print, you can print it manually without erasing
the jobs from memory.
82
Page 95

How to print a report 11
a Press Menu, 6.
6.Print Reports
1.Job Status Rpt
2.Help List
3.Dialer Dir
Select ab or OK
b Do one of the following:
Press a or b to choose the report you
want.
Press OK.
Enter the number of the report you
want to print. For example, press 2 to
print the Help List.
c Press Start.
d Press Stop/Exit.
Printing reports
83
11
Page 96

Chapter 11
84
Page 97

Section III
Copy III
Making copies 86
Page 98
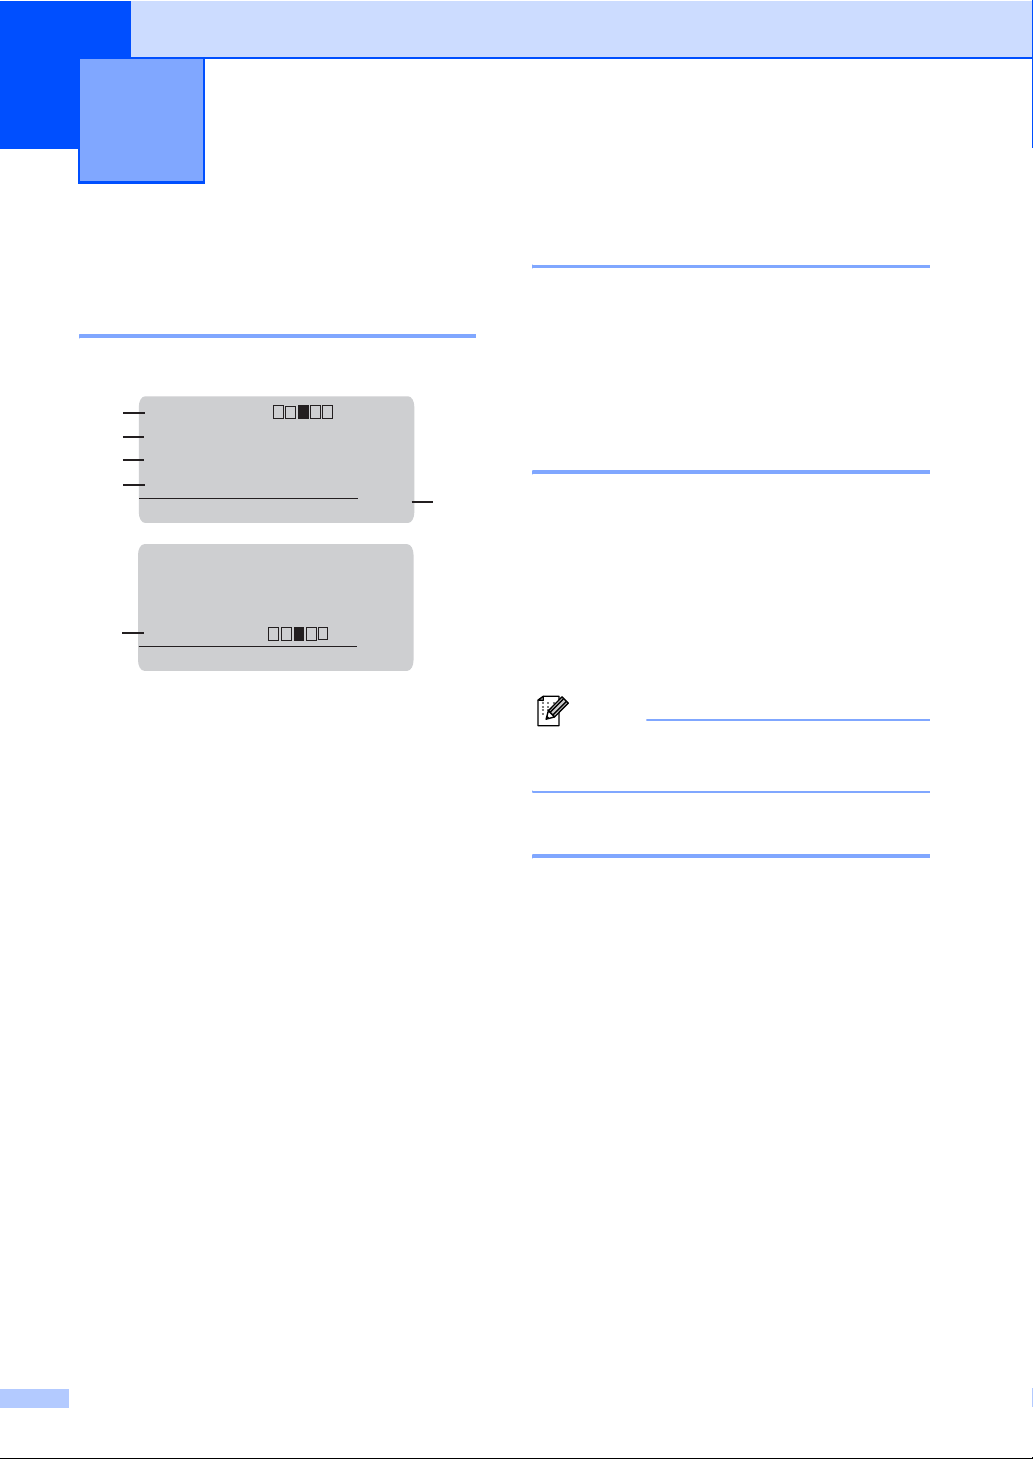
12
Making copies 12
How to copy 12
Entering copy mode 12
Press the Copy key to enter Copy mode.
Contrast:- +
1
2
Mode :Auto
3
Enlg/Red:100%
4
Tray :MP>T1
Press ab or Start
Mode :Auto
Enlg/Red:100%
Tray :MP>T1
6
Bright :- +
Select & OK
1 Contrast
2Copy mode
3Copy ratio
4 Tray selection
5 Number of copies
6 Brightness
a
a
01
01
5
Making a single copy 12
a Make sure you are in Copy mode.
b Load your document.
c Press Start.
Making multiple copies 12
a Make sure you are in Copy mode.
b Load your document.
c Use the dial pad to enter the number of
copies (up to 99).
d Press Start.
Note
To sort your copies, see Sorting copies
using the ADF on page 88.
Stop copying 12
86
To stop copying, press Stop/Exit.
Page 99
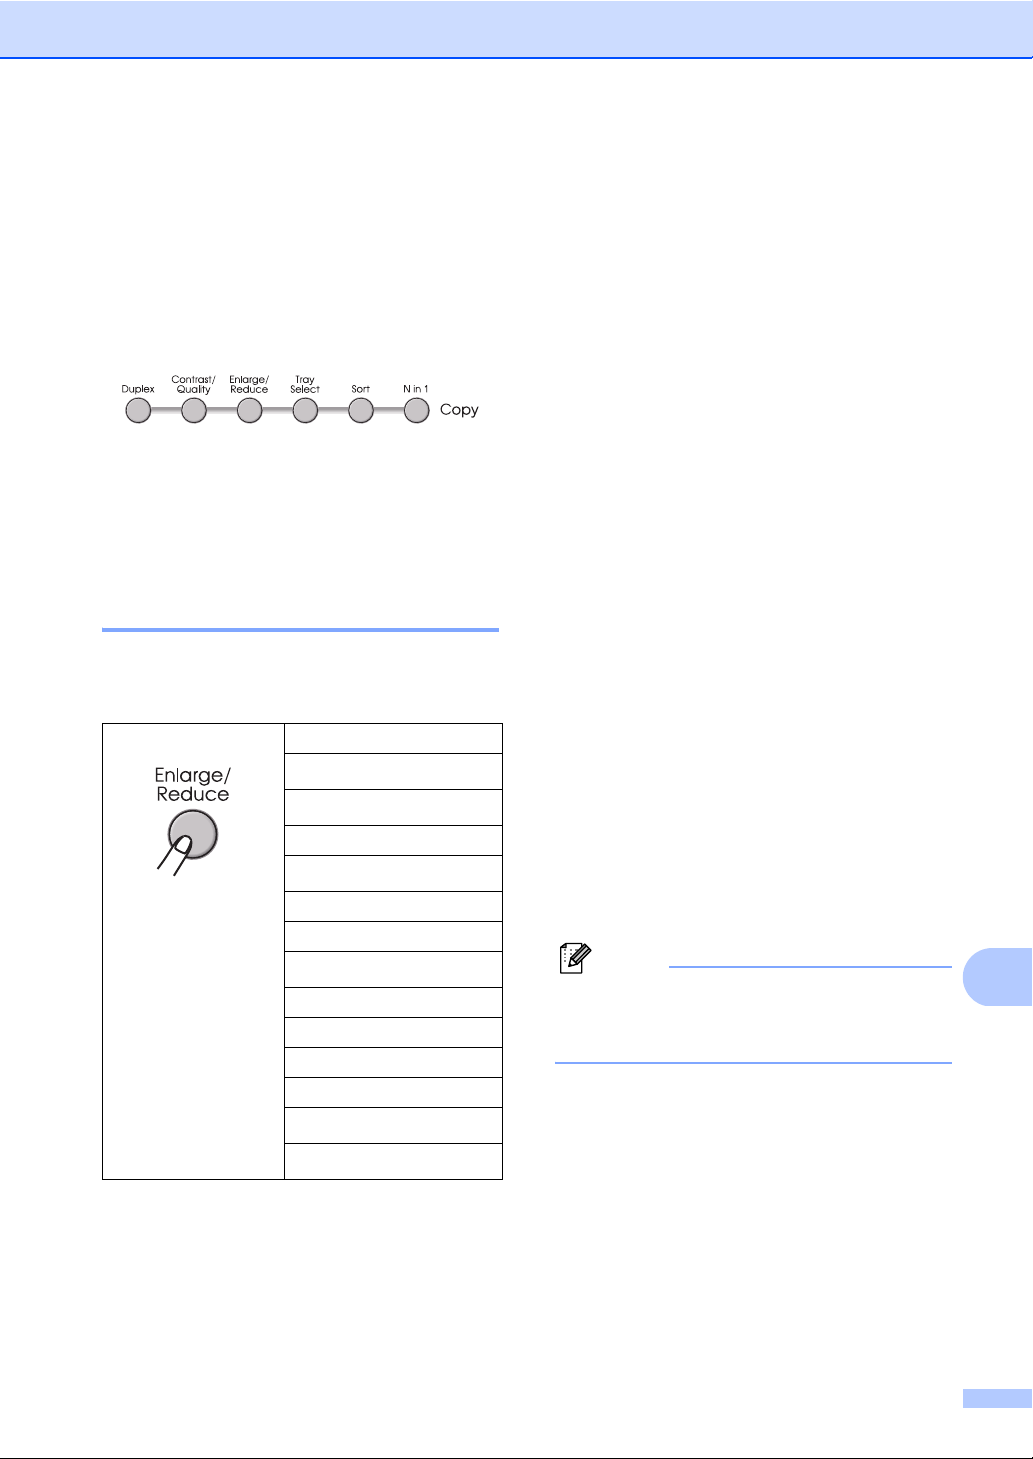
Making copies
Copy options (temporary settings) 12
When you want to quickly change the copy
settings temporarily for the next copy, use the
temporary Copy keys. You can use different
combinations.
The machine returns to its default settings
one minute after copying, unless you have
set the Mode Timer to 30 seconds or less.
(See Mode Timer on page 23.)
Enlarging or reducing the image copied 12
You can choose the following enlargement or
reduction ratios:
Press
100%*
97% LTRiA4
94% A4iLTR
91% Full Page
85% LTRiEXE
83% LGLiA4
78% LGLiLTR
70% A4iA5
50%
Custom(25-400%)
Auto
200%
141% A5iA4
Custom(25-400%) allows you to enter a
ratio from 25% to 400%.
To enlarge or reduce the next copy follow the
instructions below:
a Make sure you are in Copy mode.
b Load your document.
c Use the dial pad to enter the number of
copies (up to 99).
d Press Enlarge/Reduce.
Press c.
e Do one of the following:
Press a or b to choose the
enlargement or reduction ratio you
want.
Press OK.
Press a or b to choose
Custom(25-400%).
Press OK.
Use the dial pad to enter an
enlargement or reduction ratio from
25% to 400%. (For example, press 5
3 to enter 53%.)
Press OK.
f Press Start.
Note
Page Layout Options 2 in 1(P), 2 in 1(L), 4
in 1(P) or 4 in 1(L) are not available with
Enlarge/Reduce.
12
104% EXEiLTR
* The factory setting is shown in Bold with an
asterisk.
Auto sets the machine to calculate the
reduction ratio that best fits the size of paper.
Auto is only available when using the ADF.
87
Page 100

Chapter 12
Improving copy quality 12
You can choose from a range of quality
settings. The default setting is Auto.
Auto
Auto is the recommended mode for
ordinary printouts. Suitable for documents
that contain both text and photographs.
Text
Suitable for documents containing only
text.
Photo
Suitable for copying photographs.
To temporarily change the quality setting,
follow the steps below:
a Make sure you are in Copy mode.
b Load your document.
c Use the dial pad to enter the number of
copies (up to 99).
d Press Contrast/Quality. Press a or b to
choose Mode.
Press OK.
e Press d or c to choose Auto, Text or
Photo.
Press OK.
f Press Start.
To change the default setting, follow the
steps below:
a Press Menu, 3, 1.
31.Copy Mode
a Text
Photo
b Auto
Select ab or OK
Sorting copies using the ADF12
You can sort multiple copies. Pages will be
stacked in the order 1 2 3, 1 2 3, 1 2 3, and so
on.
a Make sure you are in Copy mode.
b Load your document in the ADF.
c Use the dial pad to enter the number of
copies (up to 99).
d Press Sort.
e Press Start.
Changing text copy resolution 12
You can change the text copy resolution to
1200x600dpi if you are using the scanner
glass and have selected Text as the
Contrast/Quality and an enlargement or
reduction ratio of 100%. The default setting is
600dpi.
a Make sure you are in Copy mode.
b Place your document on the scanner
glass.
c Press Menu, 3, 2.
32.FB Txt Quality
a 1200x600dpi
b 600dpi
Select ab or OK
d Press a or b to choose the text copy
resolution.
Press OK.
e Press Stop/Exit.
b Press a or b to choose the copy quality.
Press OK.
c Press Stop/Exit.
88
 Loading...