

Page 1
Administration guide
PlotWave - ColorWave Systems
Security information
Page 2

Copyright
© 2014, Océ
All rights reserved. No part of this work may be reproduced, copied, adapted, or transmitted in
any form or by any means without written permission from Océ.
Océ makes no representation or warranties with respect to the contents hereof and specifically
disclaims any implied warranties of merchantability or fitness for any particular purpose.
Further, Océ reserves the right to revise this publication and to make changes from time to time
in the content hereof without obligation to notify any person of such revision or changes.
Edition 2014-06
GB
Page 3

Trademarks
Océ, and its wide-format printing systems are registered trademarks of Océ.
Microsoft®, Windows®, Windows XP®, Windows XP® embedded, Windows Server® 2003,
Windows® Vista™, Windows Server® 2008, Windows ® 7, Windows 8, Windows Server 2012,
Windows Embedded Standard® 2009 are either registered trademarks or trademarks of
Microsoft® Corporation in the United States and/or other countries.
Linux® is a registered trademark of Linus Torvalds.
McAfee is a registered trademark or trademark of McAfee, Inc. or its subsidiaries in the United
States and other countries.
Symantec and Norton are trademarks or registered trademarks of Symantec Corporation or its
affiliates in the U.S. and other countries. Other names may be trademarks of their respective
owners.
Products in this publication are referred to by their general trade names. In most, if not all cases,
these designations are claimed as trademarks or registered trademarks of their respective
companies.
Page 4

Page 5

Contents
Contents
Chapter 1
Océ Security policy............................................................................................................. 9
The Océ Security policy ................................................................................................................................ 10
Downloads and support for your product....................................................................................................12
Overview of the security features available per Océ System .................................................................... 13
Chapter 2
Security on Océ PlotWave 300/350, PlotWave 750, PlotWave 900 and ColorWave 300
............................................................................................................................................ 17
Security on Océ PlotWave 300/350, PlotWave 900 R1.x and ColorWave 300........................................... 18
Overview...................................................................................................................................................18
Security overview for the Océ PlotWave 300, the Océ PlotWave 350, the Océ PlotWave 900
R1.x and the Océ ColorWave 300 systems .....................................................................................18
System and Network security................................................................................................................. 19
Ports - Protocols.................................................................................................................................19
Security Patches................................................................................................................................ 24
Security levels....................................................................................................................................26
Prevent any outgoing connection to the Internet .......................................................................... 29
Security of the USB connection (Océ PlotWave 300/350, Océ ColorWave 300)...........................30
Antivirus ............................................................................................................................................ 31
Roles and Passwords........................................................................................................................ 32
Data Security ........................................................................................................................................... 35
E-Shredding....................................................................................................................................... 35
IPsec (on Océ PlotWave 300/350, Océ PlotWave 900 1.2 and higher 1.x, Océ ColorWave 300)....
38
Prevent USB Direct Print and Scan to USB (Océ PlotWave 300/350, Océ ColorWave 300).........54
HTTPS with Océ PlotWave 900 R1.x................................................................................................ 56
Smart Inbox management................................................................................................................60
Security on Océ PlotWave 750 and Océ PlotWave 900 R2.x ......................................................................61
Overview...................................................................................................................................................61
Security overview for the Océ PlotWave 750 and the Océ PlotWave 900 R2.x systems............. 61
System and Network security................................................................................................................. 62
Ports - Protocols.................................................................................................................................62
Security Patches................................................................................................................................ 67
Security levels....................................................................................................................................70
Prevent any outgoing connection to the Internet .......................................................................... 72
Antivirus ............................................................................................................................................ 73
Roles and Passwords........................................................................................................................ 74
Audit log.............................................................................................................................................76
Data Security ........................................................................................................................................... 77
E-Shredding....................................................................................................................................... 77
IPsec ...................................................................................................................................................80
HTTPS (on Océ PlotWave 750 and PlotWave 900 R2.x)................................................................. 86
Smart Inbox management and job management...........................................................................93
Chapter 3
Security on Océ PlotWave 500 and PlotWave 340/360................................................. 95
Overview......................................................................................................................................................... 96
Security overview for the Océ PlotWave 500 and PlotWave 340/360 systems...................................96
5
Page 6

Contents
System and Network security....................................................................................................................... 97
Ports - Protocols....................................................................................................................................... 97
Applications, protocols and ports used in the Océ PlotWave 500 and PlotWave 340/360
systems...............................................................................................................................................97
Security Patches.....................................................................................................................................101
Install the Océ Remote patch..........................................................................................................101
Protocol protection................................................................................................................................ 103
Network protocols protection ........................................................................................................103
Prevent any outgoing connection to the Internet ...............................................................................105
Security of the USB connection ...........................................................................................................106
The USB connection on the printer user interface ...................................................................... 106
Antivirus .................................................................................................................................................107
Roles and Passwords.............................................................................................................................108
Roles and profiles............................................................................................................................108
Passwords policy and behaviour in the Océ PlotWave 500 and PlotWave 340/360 systems... 109
Access control........................................................................................................................................ 111
Audit log................................................................................................................................................. 112
Data security................................................................................................................................................. 113
E-Shredding in Océ PlotWave 500 and PlotWave 340/360 systems.................................................. 113
E-shredding presentation................................................................................................................113
Enable the e-shredding in Océ Express WebTools.......................................................................114
E-shredding process and system behaviour................................................................................. 116
IPsec ....................................................................................................................................................... 117
IPsec presentation .......................................................................................................................... 117
Configure the IPsec settings in the Océ controller .......................................................................119
Configure the IPsec settings on a workstation or a print server..................................................121
Troubleshooting: Disable 'Access control' and IPsec (Océ PlotWave 500 and PlotWave 340/360
systems)........................................................................................................................................... 130
HTTPS (for Océ PlotWave 500 and PlotWave 340/360).......................................................................132
Encrypt print data and manage the system configuration using HTTPS....................................132
Request and import a CA-signed certificate..................................................................................137
Prevent 'Print from USB' and/or 'Scan to USB' on Océ PlotWave 500 and PlotWave 340/360....... 143
How to prevent 'Print from USB' and/or 'Scan to USB'............................................................... 143
Smart Inbox management and job management............................................................................... 144
Chapter 4
Security on Océ ColorWave 550/600/650 (and Poster Printer).................................. 145
Security on Océ ColorWave 550, ColorWave 600 (Poster Printer), ColorWave 650 R2.x (Poster Printer)
....................................................................................................................................................................... 146
Overview.................................................................................................................................................146
Security overview for the Océ ColorWave 600/650 (Poster Printer) and the Océ ColorWave 550
systems.............................................................................................................................................146
System and Network security............................................................................................................... 148
Ports - Protocols...............................................................................................................................148
Security Patches.............................................................................................................................. 151
Protocol protection..........................................................................................................................153
Prevent any outgoing connection to the Internet ........................................................................ 154
Security of the USB connection .................................................................................................... 155
Operating System and software protection.................................................................................. 156
Roles and Passwords...................................................................................................................... 157
Access control..................................................................................................................................159
Data Security.......................................................................................................................................... 160
E-Shredding on Océ ColorWave 600 and Océ ColorWave 650 (PP) and Océ ColorWave 550.. 160
IPsec on Océ ColorWave 550 v2.3.1 and higher and Océ ColorWave 650 (PP) v2.3.1 and higher
...........................................................................................................................................................163
How to prevent 'Print from USB' on Océ ColorWave 550/650 (and PP) .....................................176
Smart Inbox management and job management.........................................................................177
Security on Océ ColorWave 650 R3.x......................................................................................................... 178
Overview.................................................................................................................................................178
6
Page 7

Contents
Security overview for the Océ ColorWave 650 R3.x system........................................................178
System and Network security............................................................................................................... 179
Ports - Protocols...............................................................................................................................179
Security Patches.............................................................................................................................. 182
Protocol protection..........................................................................................................................184
Prevent any outgoing connection to the Internet ........................................................................ 186
Security of the USB connection .................................................................................................... 187
Antivirus .......................................................................................................................................... 188
Roles and Passwords...................................................................................................................... 189
Access control..................................................................................................................................191
Audit log...........................................................................................................................................192
Data security...........................................................................................................................................193
E-Shredding..................................................................................................................................... 193
IPsec .................................................................................................................................................194
HTTPS (on Océ ColoWave 650 R3.x)..............................................................................................199
How to prevent 'Print from USB' on Océ ColorWave 550/650 (and PP) .....................................206
Smart Inbox management and job management.........................................................................207
Index.................................................................................................................................209
7
Page 8

Contents
8
Page 9

Chapter 1 Océ Security policy
Page 10

The Océ Security policy
The Océ Security policy
Definition
At Océ, security is an integral part of system development, and the company is taking a proactive
approach to the improvement of security-related issues. Océ is working to address security
requirements across all of its digital document systems.
For its printing systems connected to the network, Océ strives to ensure the:
- Security of the system on the network
- Security of the data sent to the printers, with a focus on protecting sensitive documents from
being captured by un-authorised persons
- Security of the configuration and data on the controller
NOTE
See the
available per Océ system.
Table of the security features
System security and security on the network
on page 13 to get an overview of the security features
Faced with system vulnerabilities, viruses, worms and in order to maximise the protection of the
Océ print systems from hackers and networking attacks, Océ has reinforced the security of the
Océ systems by:
•
Introducing the Océ Security levels to offer network security protection against virus / worm
attacks or system vulnerabilities (on Windows Operating Systems).
Once the Security Interface is activated, you can define the level of security according to your
system needs. Notice that the higher level of security you set, the fewer printing and scanning
functionalities you get.
•
Implementing network protocols protection features (by use of the Océ Security levels filtering
or by configuring each network protocol for firewall filtering)
•
Protecting the system roles and passwords. The main network and system settings are
protected against change. Only authorised users can configure or change these settings
•
Regularly checking the relevance of Microsoft flaws and delivering security patches whenever
it is necessary.
•
Providing OS and software protection mechanism. The internal system software is protected
against alteration
• Make the USB connection secure (on systems with USB slot)
• Restricting the access to the printer to allowed stations only
•
Allowing the installation of an Antivirus software on the Océ system controller
•
Being compliant with IPv6 and then benefiting from IPv6 secured assets
NOTE
The availability of the security features depends on the products. See the
security features available per Océ System
on page 13.
Overview of the
Data security on the network
To ensure the security of the print data sent on the network, Océ has implemented:
•
The HTTPS (HTTP over SSL) protocol to encrypt the configuration management data,
submitted print data and saved scan data:
Find all information about
page 56.
Chapter 1 - Océ Security policy
10
Use the Océ self-signed certificate with Internet Explorer
on
Page 11

The Océ Security policy
•
The e-shredding feature to overwrite any user data (print/copy/scan) when it is deleted from
the system.
This feature prevents the recovery of any deleted user data.
•
The IPsec configuration, that provides authentication, data confidentiality and integrity in the
network communication between devices.
A strong mechanism of encryption guarantees the confidentiality of the user print and scan
data on the network.
• The Smart Inbox and Job protection by:
- Limiting and restricting the access to the print and scan job data with the Smart Inbox
management capability
- Managing the visibility of jobs and their availability through job submission tools with the job
management settings
Chapter 1 - Océ Security policy
11
Page 12

Downloads and support for your product
Downloads and support for your product
Downloads
User guides, printer drivers and other resources can change without prior notice. To stay up-todate, you are advised to download the latest resources from:
"http://downloads.oce.com"
Before you use your product, you must always download the latest safety information for your
product: make sure that you read and understand all safety information in the manual entitled
'Safety Guide' .
Support
For support information please contact your Canon local representative.
Find your local contact for support from:
"http://www.canon.com/support/"
Chapter 1 - Océ Security policy
12
Page 13

Overview of the security features available per Océ System
Overview of the security features available per Océ
System
Security features in the Océ PlotWave and Océ ColorWave 300 systems
Operating System
Firewall
MS Security flaws /
Security patches
Network protocols
protection
OS and software in‐
tegrity mechanism
Antivirus
Océ PlotWave 300
Océ PlotWave 350
Océ PlotWave 900
R1.x
Océ ColorWave 300
Windows Embedded
Standard 2009
or
Windows XP embedded SP3
Security overview
See
on page 18
Yes Yes Yes
Yes Yes Yes
Océ Security levels - 3
levels
- - -
Compatible with 2 antivirus brands
Océ PlotWave 340
Océ PlotWave 360
Océ PlotWave 500
Windows Embedded
Standard 7 SP1
Yes. Protection configurable per protocol
Compatible with 2 antivirus brands
Océ PlotWave 750
Océ PlotWave 900
R2.x
Windows Embedded
Standard 7 SP1
Océ Security levels - 4
levels
Compatible with 2 antivirus brands
IPv6
SMB authentication
Feature to encrypt da‐
ta on the network
Password protection
Data overwrite
Access control
Yes (IPV6 and IPV4
combination)
NTLMV1
IPsec for:
Océ PlotWave 300
Océ PlotWave 350
Océ PlotWave 900 1.2
and higher
Océ ColorWave 300
HTTPS for:
Océ PlotWave 900
Yes for:
- User settings
- Administration settings
- Settings on the printer user panel
E-shredding E-shredding E-shredding
- IP filtering -
Yes (IPv6 only or IPv6
and IPv4 combination)
NTLMV2
- IPsec
- HTTPS
Yes for:
- User settings
- Administration settings
- Settings on the printer user panel
Yes (IPv6 only or IPv6
and IPv4 combination)
NTLMV2
- IPsec
- HTTPS
Yes for:
- User settings
- Administration settings
- Settings on the printer user panel
4
Chapter 1 - Océ Security policy
13
Page 14

Overview of the security features available per Océ System
Smart Inbox manage‐
ment
- Smart Inbox restriction
- Remote view restriction (except Océ Plot-
- Smart Inbox capability can be disabled
- Remote view restriction
Wave 900)
Océ Publisher Express
- Access restriction Access restriction
access
Actions on jobs
- Remote action restriction
Security features in the Océ ColorWave systems (except Océ ColorWave 300)
Operating System
Océ ColorWave 600 (PP)
Océ ColorWave 650 R2.x
Océ ColorWave 650 PP
Océ ColorWave 550
Linux and WES 2009 for:
- Océ ColorWave 650 (multifunctional)
- Océ ColorWave 550 (multifunctional)
Linux for:
- Océ ColorWave 650 (printer only)
- Océ ColorWave 550 (printer only)
- Océ ColorWave 600 (PP)
- Océ ColorWave 650 PP
Océ ColorWave 650 R3.x
Windows Embedded Standard 7
SP1
- Smart Inbox capability can be disabled
- Remote view restriction
Remote action restriction
Firewall
MS Security flaws /
Security patches
Network protocols
protection
OS and software in‐
tegrity mechanism
Antivirus
IPv6
SMB authentication
Yes Yes
Yes for Océ ColorWave 650 / 550
Yes
(multifunctional)
N/A for Océ ColorWave 600 (PP),
ColorWave 650 PP, Océ ColorWave 650 (printer only) and Océ
ColorWave 550 (printer only)
Yes. Protection configurable per
protocol
Yes. Protection configurable per
protocol
Yes -
- Compatible with 2 antivirus
brands
Yes (IPv6 only or IPv6 and IPv4
combination)
Yes (IPv6 only or IPv6 and IPv4
combination)
NTLMV1 NTLMV2 or NTLMV1 (can be set in
Océ Express WebTools)
4
Chapter 1 - Océ Security policy
14
Page 15

Overview of the security features available per Océ System
Feature to encrypt da‐
ta on the network
Password protection
Data overwrite
Access control
IPsec for:
Océ ColorWave 550 v2.3.1 and
higher
Océ ColorWave 650 v2.3.1 and
higher
Océ ColorWave 650 PP v2.3.1 and
higher
Yes for:
- User settings
- Administration settings
- Settings on the printer user panel
E-shredding for:
Océ ColorWave 650 2.0.1 and
higher
Océ ColorWave 650 PP 2.1 and
higher
Océ ColorWave 600 1.5 and higher
Océ ColorWave 600 PP 1.6.1 and
higher
Océ ColorWave 550 2.2 and higher
Access restriction to the printer
for:
Océ ColorWave 550 v2.3.1 and
higher
Océ ColorWave 650 v2.3.1 and
higher
Océ ColorWave 650 PP v2.3.1 and
higher
- IPsec
- HTTPS
Yes for:
- User settings
- Administration settings
- Settings on the printer user panel
E-shredding
IP filtering
Smart Inbox manage‐
ment
Océ Publisher Express
access
Actions on jobs
- - Smart Inbox capability can be
disabled
- Remote view restriction
- Access restriction
Remote action restriction Remote action restriction
Chapter 1 - Océ Security policy
15
Page 16

Overview of the security features available per Océ System
Chapter 1 - Océ Security policy
16
Page 17

Chapter 2 Security on Océ PlotWave 300/350, PlotWave 750, PlotWave 900 and ColorWave 300
Page 18

Security on Océ PlotWave 300/350, PlotWave 900 R1.x and ColorWave 300
Security on Océ PlotWave 300/350, PlotWave 900 R1.x
and ColorWave 300
Overview
Security overview for the Océ PlotWave 300, the Océ PlotWave 350, the Océ PlotWave 900 R1.x and the Océ ColorWave 300 systems
Introduction
The Océ PlotWave 300, the Océ PlotWave 350, the Océ PlotWave 900 R1.x and Océ ColorWave
300 are equipped with the following security features:
Security overview
Operating System
Firewall Yes
Network protocols protection 3 Océ Security Levels
MS Security patches Océ released patches
Antivirus Compatible with 2 Antivirus brands
IPV6 Yes
Data encryption on the network - IPsec for Océ PlotWave 300, Océ PlotWave
Data overwrite E-shredding
Password protection Yes for:
- Windows XP Service Pack 3 for all versions of
Océ PlotWave 300, Océ PlotWave 350, and Océ
ColorWave 300 prior to R1.5 and Océ PlotWave
900 R1.x
- Windows Embedded Standard 2009 for Océ
PlotWave 300 R1.5, Océ PlotWave 350 R1.5,
Océ ColorWave 300 R1.5 and higher versions
350, Océ PlotWave 900 from R1.2, and Océ ColorWave 300
- HTTPS for Océ PlotWave 900
- User settings
- Administration settings
- Settings on the printer user panel*
* Except on Océ PlotWave 900 R1.2.
Chapter 2 - Security on Océ PlotWave 300/350, PlotWave 750, PlotWave 900 and ColorWave 300
18
Page 19

System and Network security
System and Network security
Ports - Protocols
Applications, protocols and ports used in the Océ PlotWave 300, the Océ PlotWave 350, the Océ PlotWave 900 R1.x and Océ ColorWave 300 systems
Printing applications: security levels, ports and protocols used by the Océ systems
Application /Function‐
ality
Océ Wide-format
Printer Driver for Microsoft Windows
(WPD or WPD2)
Océ Adobe® PostScript® 3™ driver
Océ Publisher Express Océ PlotWave 300/
Océ Publisher Express
over SSL
System Supported security lev‐
Océ PlotWave 300/
PlotWave 350/ PlotWave 900 R1.x
Océ ColorWave 300
Océ PlotWave 300/
PlotWave 350/ PlotWave 900 R1.x
Océ ColorWave 300
PlotWave 350/ PlotWave 900 R1.x
Océ ColorWave 300
Océ PlotWave 900 x
els (x) and open port
N* M* H*
x
TCP 515
TCP
65200
TCP 80
UDP
515
x
TCP 515xTCP
x
TCP 80xTCP 80
TCP 443xTCP
(1)
x
TCP
515
TCP
65200
TCP 80
515
443
(2)
x
TCP
515
x
TCP
515
x
TCP
443
Port used on the
controller: protocol
TCP 515: LPR
TCP 65200: Océ
back-channel
TCP 80: HTTP (for
advanced accounting)
UDP 515: Océ protocol (for printer discovery)
TCP 515: LPR
TCP 80: HTTP
TCP 443: HTTPS
(**)
Océ Publisher Select Océ PlotWave 300/
PlotWave 350/ PlotWave 900 R1.x
Océ ColorWave 300
Chapter 2 - Security on Océ PlotWave 300/350, PlotWave 750, PlotWave 900 and ColorWave 300
x
TCP 515
TCP
65200
TCP 80
UDP
515
x
TCP
515
TCP
65200
TCP 80
TCP 80: HTTP
TCP 65200: Océ
back-channel
TCP 515: LPR
UDP 515: Océ protocol (for printer discovery)
(**)
4
19
Page 20

Applications, protocols and ports used in the Océ PlotWave 300, the Océ PlotWave 350, the Océ PlotWave 900 R1.x and Océ
ColorWave 300 systems
Application /Function‐
System Supported security lev‐
ality
Océ Publisher Mobile Océ PlotWave 300/
PlotWave 350/ PlotWave 900 R1.x
Océ ColorWave 300
Océ Mobile WebTools Océ PlotWave 350
Océ PlotWave 900
R1.2 and higher
Océ ReproDesk Studio Océ PlotWave 300/
PlotWave 350/ PlotWave 900 R1.x
Océ ColorWave 300
Novell NDPS printing Océ PlotWave 300/
PlotWave 350/ PlotWave 900 R1.x
Océ ColorWave 300
els (x) and open port
N* M* H*
x
TCP 515
TCP
4242
ICMP
UDP
515
TCP 21
(4)
x
TCP 80xTCP 80
x
TCP 515
TCP
65200
x
TCP
515
TCP
65200
x
TCP 515xTCP
515
x
TCP
515
Port used on the
controller: protocol
TCP 515: LPR
TCP 21: FTP
(3)
(4)
TCP 4242: FTP passive mode
(6)
ICMP: ping
UDP 515: Océ protocol (for printer discovery)
TCP 80: HTTP
TCP 515: LPR
TCP 65200: Océ
back-channel
(**)
TCP 515: LPR
LPR printing (command line)
Océ PlotWave 300/
PlotWave 350/ PlotWave 900 R1.x
x
TCP 515xTCP
515
x
TCP
515
TCP 515: LPR
Océ ColorWave 300
FTP printing Océ PlotWave 300/
PlotWave 350/ PlotWave 900R1.x
Océ ColorWave 300
x
TCP 21
TCP
4242
(5)
x
TCP 21
TCP 21: FTP
TCP 4242: FTP
Notes:
• * Levels: N: Normal - M: Medium - H: High
(**)
•
Océ back-channel is an Océ proprietary protocol used to retrieve information from the
printer (status, media loaded...) and to display it in the application or driver.
(1)
•
LPR printing with back-channel and advanced accounting
(2)
•
LPR printing. No back-channel. No advanced accounting
(3)
•
Océ Publisher Mobile v 2.2 and later for Android, and for Océ Publisher Mobile v 2.3 and
later for iOS
(4)
•
Only for Océ Publisher Mobile v 2.0 to v 2.2 for iOS
(5)
•
FTP active mode only
(6)
•
Data channel for FTP passive mode
(6)
Chapter 2 - Security on Océ PlotWave 300/350, PlotWave 750, PlotWave 900 and ColorWave 300
20
Page 21

Applications, protocols and ports used in the Océ PlotWave 300, the Océ PlotWave 350, the Océ PlotWave 900 R1.x and Océ
ColorWave 300 systems
Scanning / copying applications: security levels, ports and protocols used by the Océ systems
Application /Function‐
ality
Scan to File Remote
SMB
Scan to File Remote
FTP
Scan data retrieval by
FTP
Scan data retrieval
from Smart Inbox
(Scans)
System Supported security lev‐
els (x) and open port
N* M* H*
Océ PlotWave 300/
x PlotWave 350
Océ ColorWave 300
Océ PlotWave 900
x x x R1.x
Océ PlotWave 300/
x
(1)
x
(1)
x
PlotWave 350/ PlotWave 900 R1.x
Océ ColorWave 300
Océ PlotWave 300/
PlotWave 350/ PlotWave 900 R1.x
Océ ColorWave 300
Océ PlotWave 300/
PlotWave 350/ Plot-
x
TCP 21
TCP
4242
x
TCP 80xTCP 80
(2)
x
TCP 21
Wave 900 R1.x
Océ ColorWave 300
Port used on the
controller: protocol
-
TCP 21: FTP
TCP 4242: FTP
(3)
TCP 80: HTTP
Scan data retrieval
from Smart Inbox
(Scans) over SSL
Océ Matrix Logic Océ PlotWave 900
Océ PlotWave 900
R1.x
R1.x
x
TCP 443xTCP
443
x
TCP 80
TCP 443
x
TCP 80
TCP
x
TCP
443
x
TCP
443
TCP 443: HTTPS
TCP 80: HTTP
TCP 443: HTTPS
443
Notes:
• * Levels: N: Normal - M: Medium - H: High
(1)
•
FTP passive mode only: the FTP server on the remote workstation must support FTP passive
mode
(2)
•
FTP active mode only
(3)
•
Data channel for FTP passive mode
Control management: security levels, ports and protocols used by the Océ systems
Application /Function‐
ality
PING Océ PlotWave 300/
System Supported security lev‐
els (x) and open port
N* M* H*
x x x ICMP
PlotWave 350/ PlotWave 900 R1.x
Océ ColorWave 300
Port used on the
controller: protocol
4
Chapter 2 - Security on Océ PlotWave 300/350, PlotWave 750, PlotWave 900 and ColorWave 300
21
Page 22

Applications, protocols and ports used in the Océ PlotWave 300, the Océ PlotWave 350, the Océ PlotWave 900 R1.x and Océ
ColorWave 300 systems
Application /Function‐
ality
System Supported security lev‐
els (x) and open port
N* M* H*
SNMP based applications
Océ PlotWave 300/
PlotWave 350/ PlotWave 900 R1.x
UDP
161
Océ ColorWave 300
WSD Océ PlotWave 350 x
TCP 80
UDP
3702
Océ Express WebTools
Océ PlotWave 300/
PlotWave 350/ Plot-
TCP 80xTCP 80
Wave 900 R1.x
Océ ColorWave 300
Océ Express WebTools over SSL
Name resolution
(**)
Océ PlotWave 900
R1.x
Océ PlotWave 300/
TCP 443xTCP
PlotWave 350
Océ ColorWave 300
Océ PlotWave 900
R1.x
Port used on the
controller: protocol
x
x
TCP 80
TCP
UDP
3702
UDP
UDP 161: SNMP
x
TCP 80: HTTP
UDP 3702: WSD dis-
80
covery
3702
x
x
TCP 80: HTTP
x
TCP 443: HTTPS
TCP
443
443
x Outgoing connec-
tion:
- local port (on con-
x x x
troller): UDP(/TCP)
<dynamic value>
- remote port (on
DNS server): UDP(/
TCP) 53
DHCP Océ PlotWave 300/
PlotWave 350/ PlotWave 900 R1.x
Océ ColorWave 300
Océ Account Center
Advanced accounting
(WPD)
Océ PlotWave 300/
PlotWave 350/ PlotWave 900 R1.x
Océ ColorWave 300
Accounting information retrieval by FTP
Océ PlotWave 300/
PlotWave 350/ PlotWave 900 R1.x
Océ ColorWave 300
Browse Océ systems
on the network with
Windows network
neighbourhood
Océ PlotWave 300/
PlotWave 350/ PlotWave 900 R1.x
Océ ColorWave 300
x x x Outgoing connec-
tion:
- local port (on controller) : UDP 68
- remote port (on
DNS server): UDP 67
x
TCP 80: HTTP
TCP 80xTCP 80
x
TCP 21
(1)
x
TCP 21
TCP 21: FTP
TCP 4242: FTP
TCP
4242
x
UDP
UDP 137: NetBios
over TCP/IP
137
(2)
4
Chapter 2 - Security on Océ PlotWave 300/350, PlotWave 750, PlotWave 900 and ColorWave 300
22
Page 23

Applications, protocols and ports used in the Océ PlotWave 300, the Océ PlotWave 350, the Océ PlotWave 900 R1.x and Océ
ColorWave 300 systems
Application /Function‐
System Supported security lev‐
ality
Océ Service Logic Océ PlotWave 300/
PlotWave 350/ PlotWave 900 R1.x
Océ ColorWave 300
IPsec Océ PlotWave 300/
PlotWave 350
Océ ColorWave 300
Océ PlotWave 900
R1.2 and higher
Océ Remote Meter
Reading Manager
Océ PlotWave 300/
PlotWave 350/ PlotWave 900 R1.x
Océ ColorWave 300
Océ Remote Service Océ PlotWave 300
R1.5 and higher
PlotWave 350 R1.5
and higher
Océ PlotWave 900
R1.x
Océ ColorWave 300
R1.5 and higher
Port used on the
els (x) and open port
controller: protocol
N* M* H*
x
TCP 21
(1)
x
TCP 21
TCP 21: FTP
TCP 4242: FTP
TCP
4242
x
UDP
UDP 500
UDP 4500
500
UDP
4500
x
UDP 161: SNMP
UDP
161
x x x HTTPS outgoing
connection required:
TCP/IP port 443
(2)
(3)
Notes:
• * Levels: N: Normal - M: Medium - H: High
(**)
•
The name resolution is mainly used to determine the IP address of the scan destination
during Scan fo File operation
(1)
•
FTP active mode only
(2)
•
Data channel for FTP passive mode
(3)
•
TCP/IP port 443 must be opened and must allow response back on the IT infrastructure
firewall.
Chapter 2 - Security on Océ PlotWave 300/350, PlotWave 750, PlotWave 900 and ColorWave 300
23
Page 24
Security Patches
Security Patches
Install the Océ Remote patch (on Océ PlotWave 300/350, PlotWave 900 R1.x and Océ ColorWave 300)
Introduction
You can install the Océ Remote patches (Security patches) in the following versions of the
systems:
• Océ PlotWave 300 1.2.1 and higher
• Océ PlotWave 350 1.0 and higher
• Océ PlotWave 900 1.x
• Océ ColorWave 300 1.2.1 and higher
Before you begin
Find the Océ Security patch from the Océ Downloads website on
Open the product page and go to the Security tab to download the available security patches.
Install the Océ Remote patch
Procedure
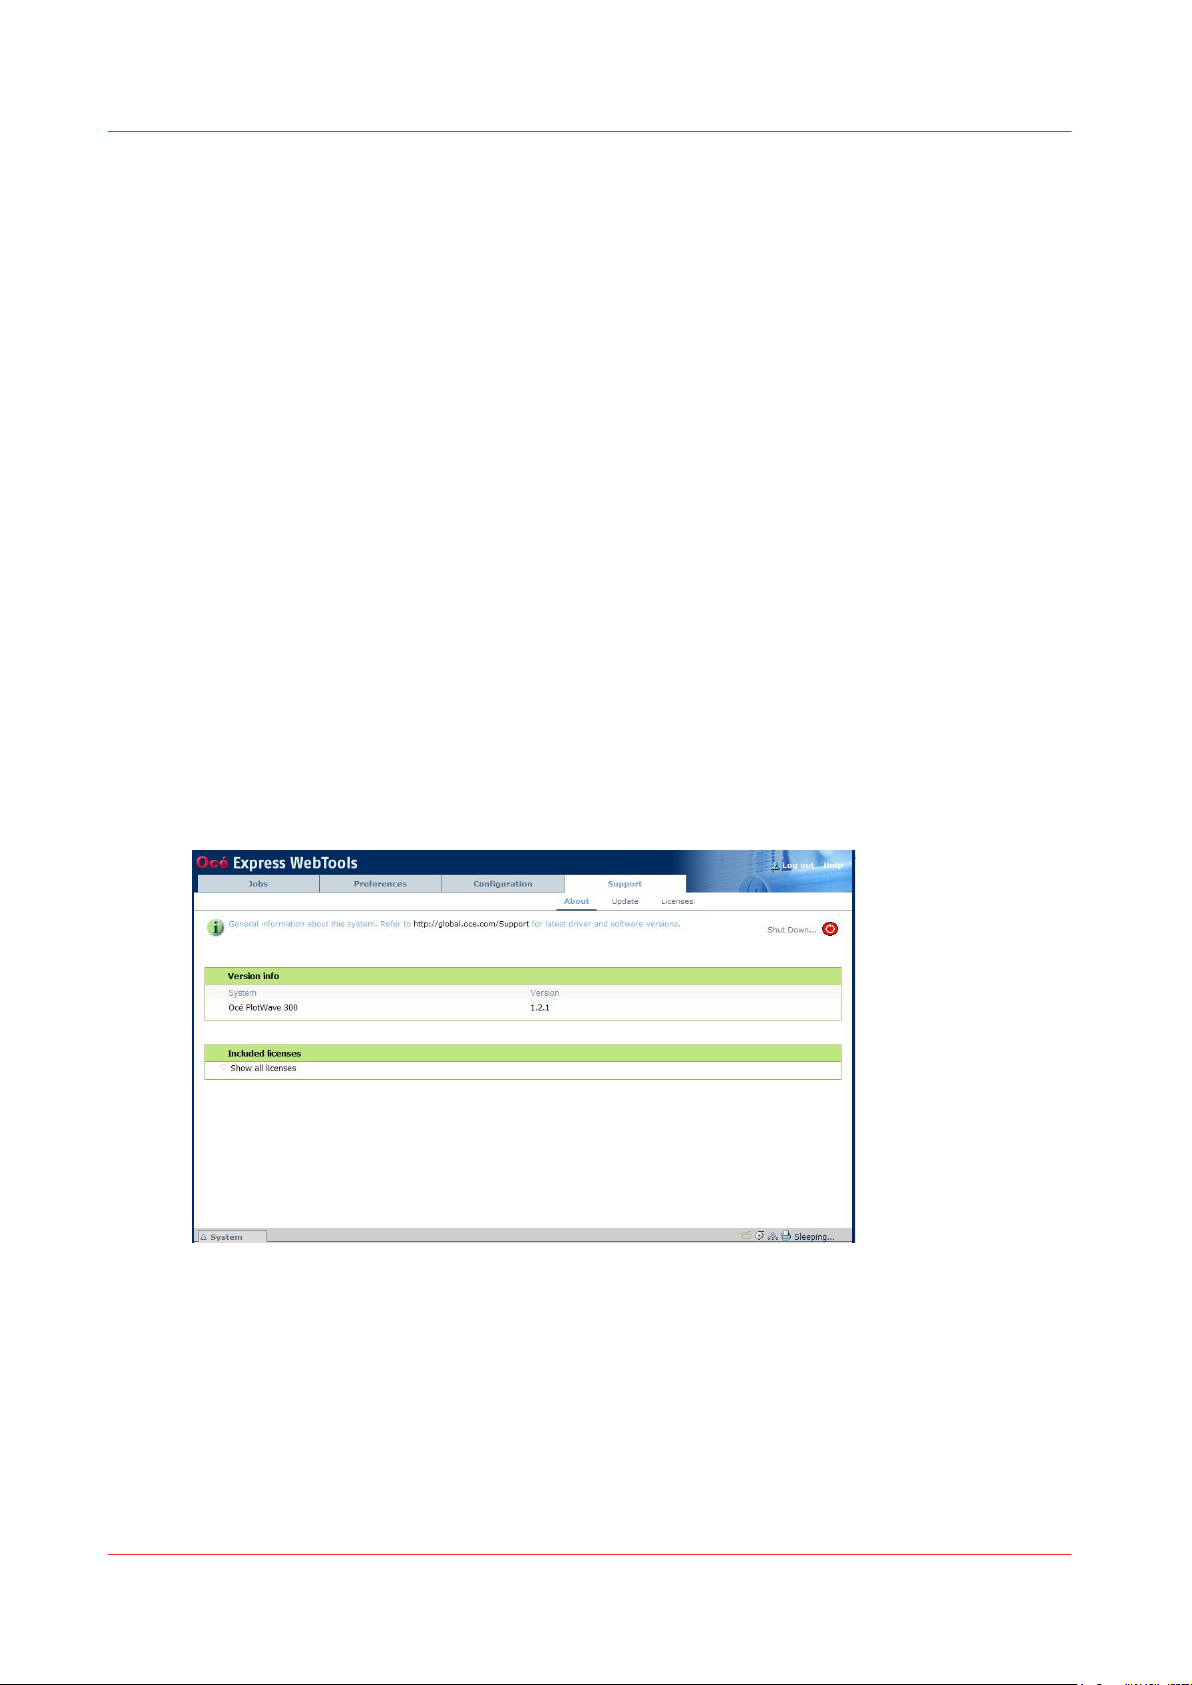
Open the Océ Express Webtools
1.
Open the 'Support' tab
2.
http://downloads.oce.com
:
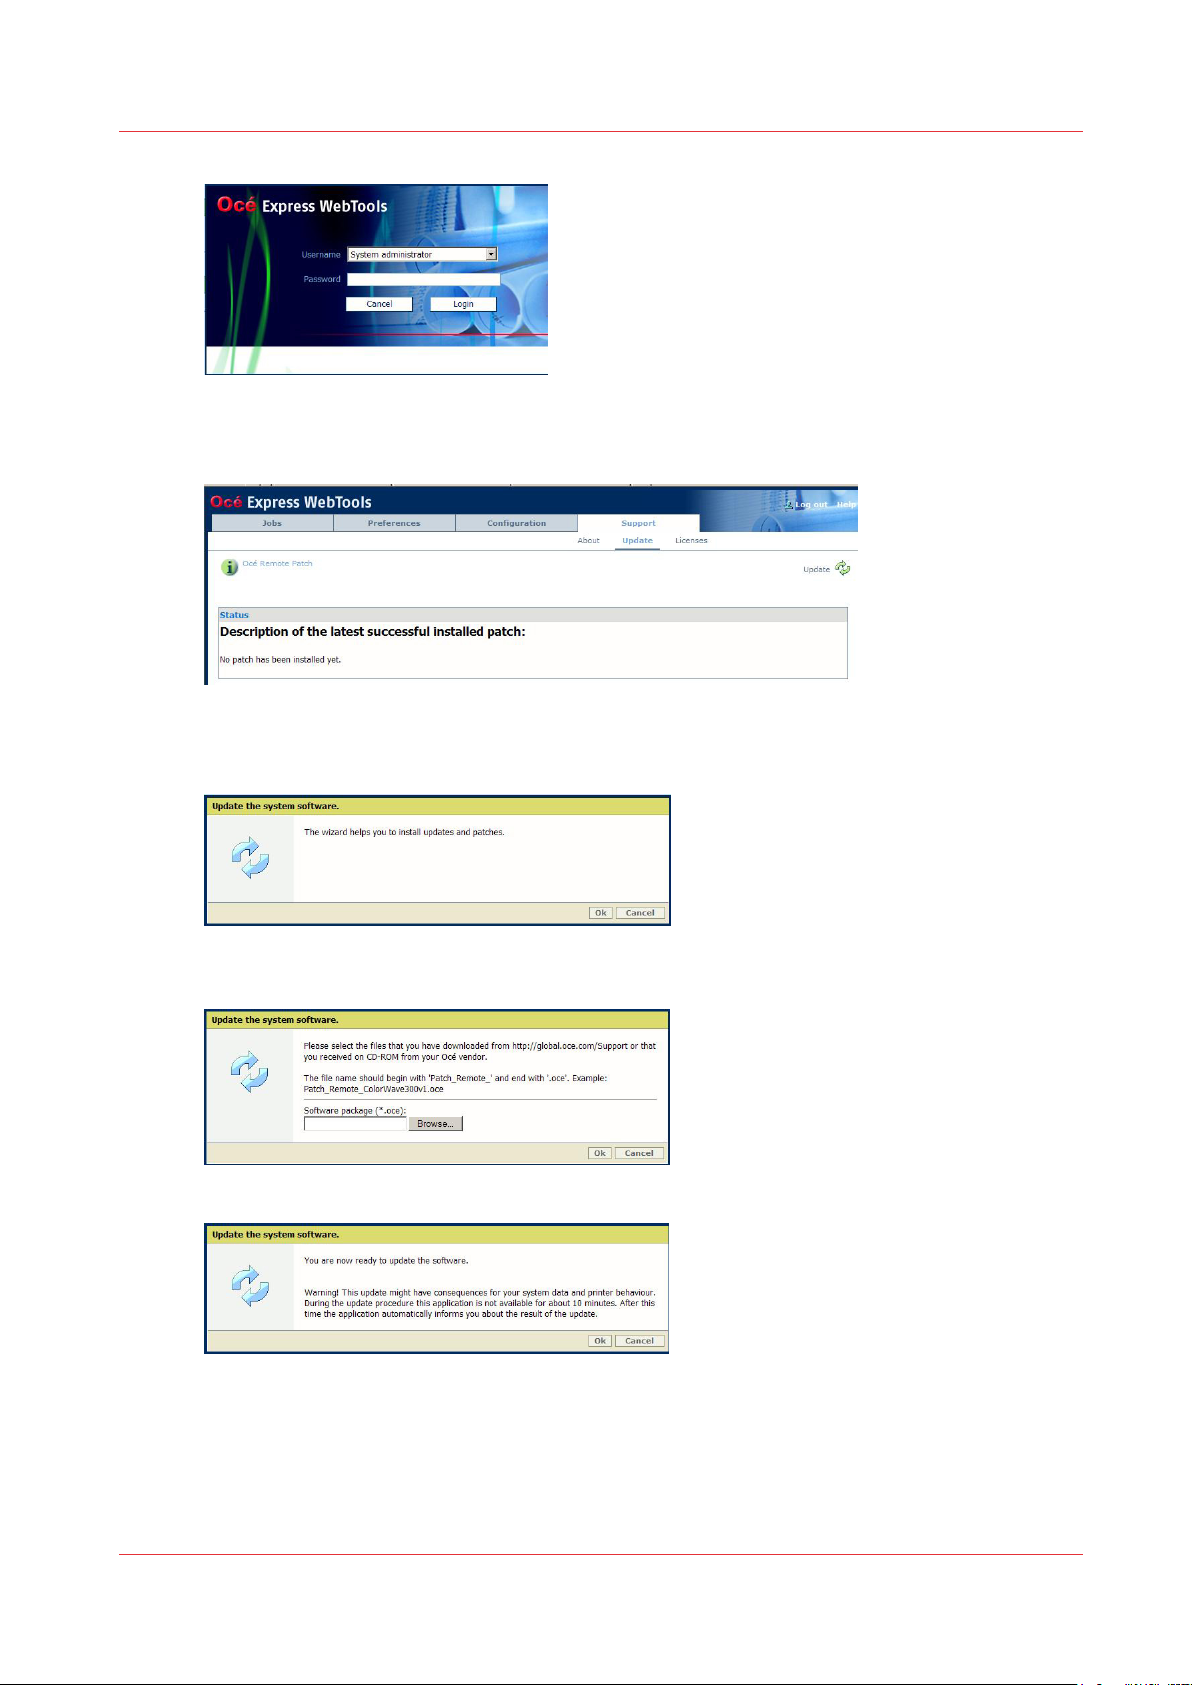
Select 'Update'
3.
The Authentication window opens.
Chapter 2 - Security on Océ PlotWave 300/350, PlotWave 750, PlotWave 900 and ColorWave 300
24
Page 25
Install the Océ Remote patch (on Océ PlotWave 300/350, PlotWave 900 R1.x and Océ ColorWave 300)
Log in as the System administrator or Power user
4.
All the patches successfully applied (when any) are displayed
Click on the 'Update' icon (top right corner) to open the wizard
5.
Click OK
6.
Browse to the Océ Remote patch and click OK to install it
7.
Click OK to confirm the update
8.
The system restarts to apply the patch.
Chapter 2 - Security on Océ PlotWave 300/350, PlotWave 750, PlotWave 900 and ColorWave 300
25
Page 26

Security levels
Security levels
Security levels presentation
Introduction
Océ defined 3 levels of security according to the customer needs. The presentation below can
help you to select the most suitable level.
High security level
The High level is the most secure mode for printing and scanning.
The compliant applications are based on:
• the LPR protocol for printing
• the HTTPS protocol (Océ PlotWave 900 only) for printing
• the FTP protocol for scanning.
Target:
• This level provides you the most secure mode while using the basic feature for printing and
scanning. Only some Océ applications are available. See the
application/functionality
• This security level may also be used when you want to be protected whenever a vulnerability
has been discovered and the corresponding patch cannot be yet installed. As soon as the patch
can be installed, you can go back to the original security level.
on page 19.
security levels supported per
Medium security level
The Medium level is compliant with all the Océ applications available for printing and scanning
which do not present a high risk (as reported by most popular network scanners).
Target:
This level is recommended if you need to be secured while you want to use the Océ applications
for printing and/or scanning (you can use the system including more functions than with the High
security level).
Normal security level
This mode offers all the functionalities.
Target:
• You can select this level if you want to use some features not covered by MEDIUM security
level.
• This level is more dedicated for small network infrastructure where security is less required
versus features.
Set the security level in Océ PlotWave 300, Océ PlotWave 350 and Océ ColorWave 300
Introduction
The [Security] wizard on the printer user panel gives the option to check or change the security
level of the system.
Chapter 2 - Security on Océ PlotWave 300/350, PlotWave 750, PlotWave 900 and ColorWave 300
26
Page 27
Before you begin
The System Administrator or a Power User can protect the security settings with a password.
When the protection is activated, you must type the password in the printer user panel before
you can change the security level.
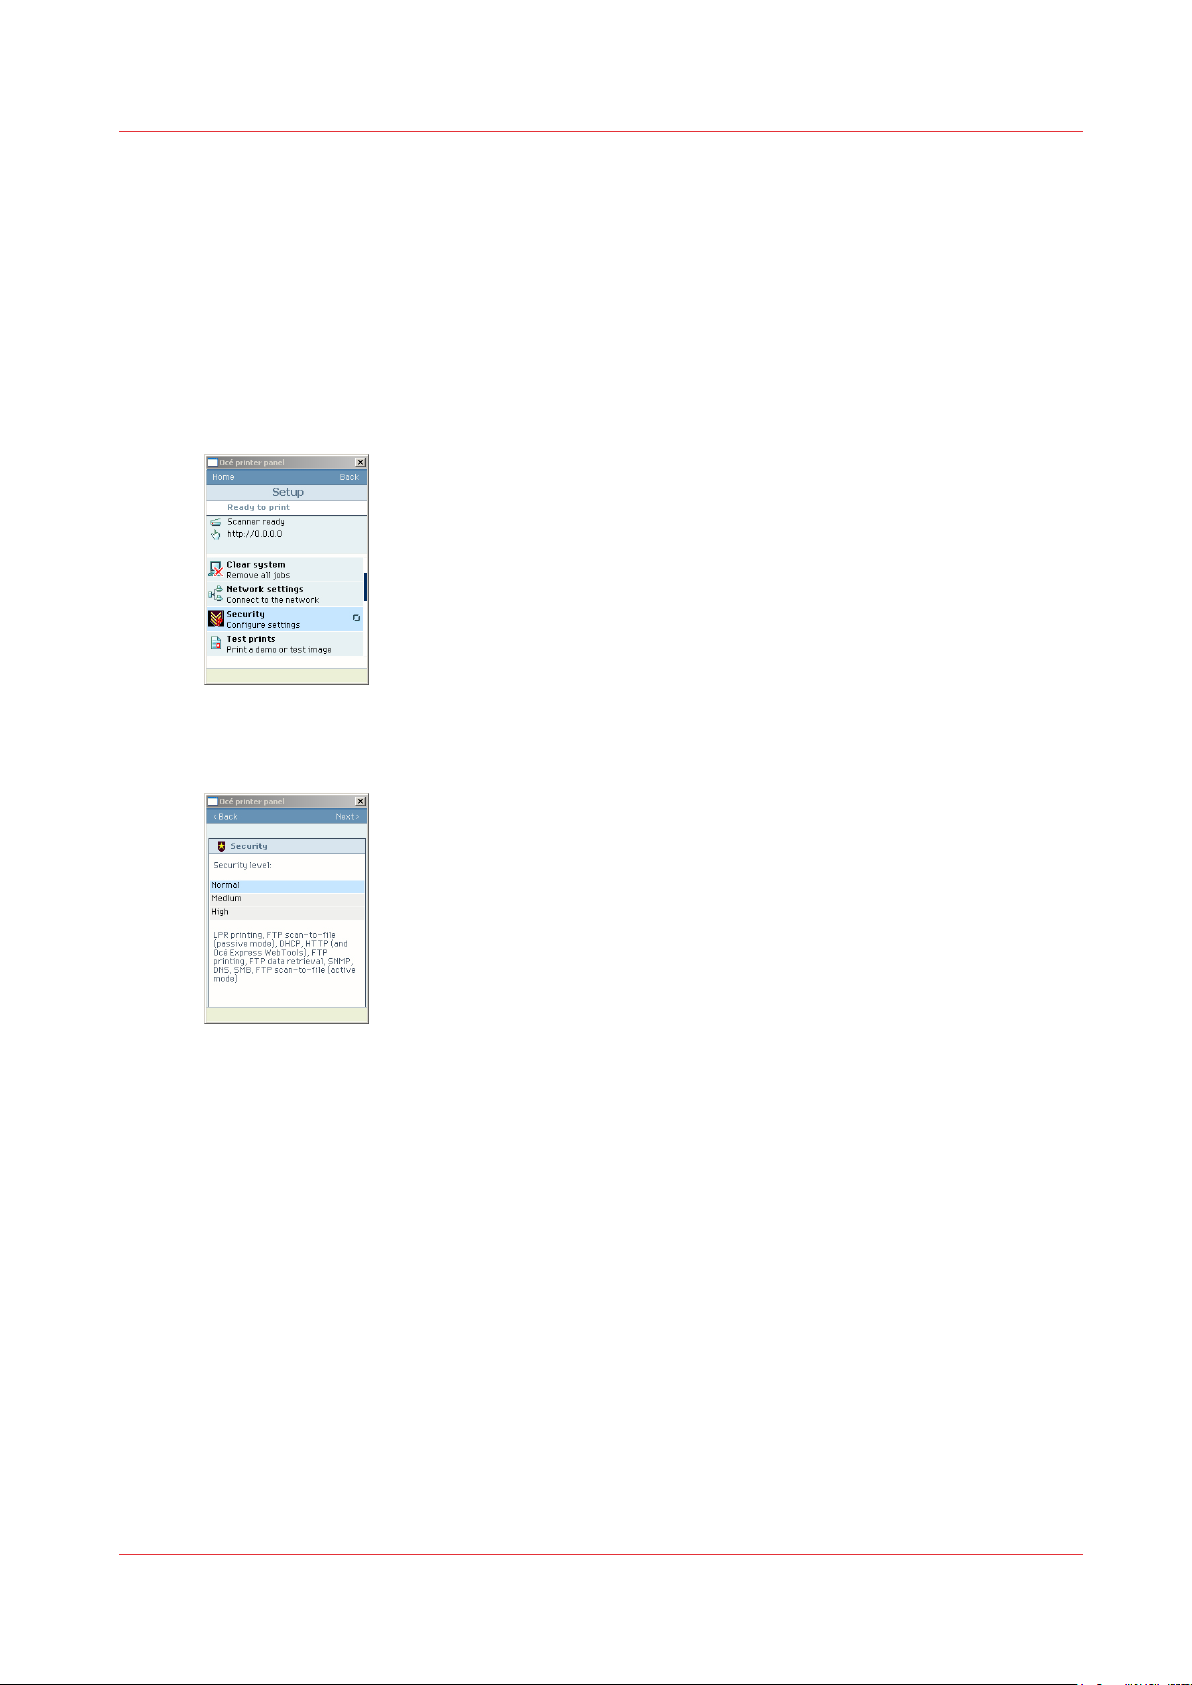
Procedure
From the [HOME] screen select the [System] tab.
1.
Select the [Setup] tab.
2.
Use the scroll wheel to go to the [Security]([Configure settings]) wizard.
3.
Protect the security level by a password
Open this section with the confirmation button.
4.
The screen displays the security level and the active network access options:
5.
Two options are possible:
6.
• Press the [Back] key in case you only want to check the security settings.
• Press the [Next >] key in case you want to adapt the security level.
Enter the password if requested and follow the wizard to adapt the security level.
Protect the security level by a password
Procedure
Open the Océ Express Webtools in a web browser (http://Printer IP address or hostname)
1.
In the 'Preferences' tab, select 'System settings'
2.
In the 'Printer Properties', goes to 'Password to change security level'
3.
Click on the value to edit it
4.
Log in as the System Administrator or as a Power User
5.
Select 'New'
6.
Type and re-type a numeric password
7.
Confirm to activate the password.
8.
Chapter 2 - Security on Océ PlotWave 300/350, PlotWave 750, PlotWave 900 and ColorWave 300
27
Page 28

Set the security level in Océ PlotWave 900 R1.1 and higher R1.x versions
Result
You must type the password in the printer user panel when you want change the security level.
Set the security level in Océ PlotWave 900 R1.1 and higher R1.x versions
Introduction
The security user interface is available through the Océ Express WebTools application.
NOTE
You need to be logged on as the System Administrator to access the security level interface and
change the security levels.
Procedure
Open the Océ Express Webtools in a web browser (http://Printer IP address or hostname)
1.
On the [Configuration] tab, select [Connectivity]
2.
Go to the Security section
3.
Click on 'Edit' or double click on the value to open the [Security level] window
4.
Set the security level and click 'OK'
5.
Restart the printer when prompted
6.
Result
After you set the Security level to 'High', you must open Océ Express Web Tools by means of the
HTTPS protocol: type https://Printer IP address or hostname in the web browser.
Chapter 2 - Security on Océ PlotWave 300/350, PlotWave 750, PlotWave 900 and ColorWave 300
28
Page 29

Prevent any outgoing connection to the Internet
Introduction
Some features of the following systems allow or request a connection over the Internet to work
properly:
• Océ PlotWave 300 R1.5 and higher
• Océ PlotWave 350 R1.5 and higher
• Océ ColorWave 300 R1.5 and higher
When the Security Policy in a company prevents any outgoing network traffic over the Internet,
perform all the following actions in Express WebTools:
Prevent any outgoing connection to the Internet
StepIn the Express WebT‐
ools section
1 Support - Remote Serv-
ice - Remote assistance
2 Preferences - System
Defaults - Service related information
3 Configuration - Scan
destination [X]
4 Support - About - Shut-
down - Restart
Action Detail
Stop the Remote assistance if is activated
Disable Online Services Set 'Océ Online Services
Delete any scan destination going to
the Internet:
FTP sites reachable through the Internet
Restart the system
Click 'Stop remote assistance' until it changes into
'Allow remote assistance' .
The two blinking arrows
on the right side disappear.
connection enabled' to
'Disabled'
Uncheck 'Scan destination
[X]: enabled'
Chapter 2 - Security on Océ PlotWave 300/350, PlotWave 750, PlotWave 900 and ColorWave 300
29
Page 30

Security of the USB connection (Océ PlotWave 300/350, Océ ColorWave 300)
Security of the USB connection (Océ PlotWave 300/350, Océ ColorWave 300)
The USB connection on the Local user interface
Introduction
A USB connection is available on the Océ PlotWave 300, Océ PlotWave 350 and Océ ColorWave
300 Local user interface.
This USB connection is used to:
• Install and upgrade the controller software
• Backup and restore the controller configuration
• Scan to the USB storage device
• Print from the USB storage device
Security on the USB port
General USB port protection:
• Booting from the USB device is not possible.
• Executing any programme present on the USB device is not possible
The Autorun is disabled and no operation on the controller can execute a programme on the
USB device.
• Propagating on network any infected file present on the USB device plugged on the USB port
is not possible
Read from / write to USB device protection
•
Protection of the USB READ operation:
- when restoring a controller configuration from the Local User Interface.
In that case, any file infected by a virus appears as an invalid backup file. The controller
software detects it and rejects the restore operation.
- when printing from the USB device.
Any print file infected by a virus will never compromise controller's software integrity.
•
Protection of the USB WRITE operation:
- during the backup of the controller configuration, from the Local User Interface.
The backup is performed by the internal controller software. It cannot contaminate the USB
device by any threat.
- when making a Scan To File to the USB device:
The Scan To File operation to USB device is performed by the internal controller software. It
cannot contaminate the USB device by any threat.
Disable the USB features
You can disable:
• The direct printing operation from USB. See
• The scanning operation to USB. See
How to prevent 'Print from USB'
1- Disable any 'USB stick' scan destination
on page 54
on page 54
Chapter 2 - Security on Océ PlotWave 300/350, PlotWave 750, PlotWave 900 and ColorWave 300
30
Page 31

Antivirus
Compatibility and recommendations
The following 2 antivirus programmes can be installed on your Océ systems:
• Symantec AntiVirus Endpoint Protection
• McAfee VirusScan Enterprise Edition / ePolicy Orchestrator for AntiVirus update
Contact your Canon representative to know which antivirus version to install on your Océ
systems and get the installation procedure.
NOTE
Canon/Océ shall not be liable for damages of any kind attributable to the use of an antivirus on
its controllers.
Antivirus
Chapter 2 - Security on Océ PlotWave 300/350, PlotWave 750, PlotWave 900 and ColorWave 300
31
Page 32

Roles and Passwords
Roles and Passwords
Roles and profiles in the Océ PlotWave 300/350, Océ Plotwave 900 R1.x and Océ ColorWave 300
Roles description
In the system, the main network and system settings are protected against change. Only
authorised users can configure/change these settings.
4 roles are available:
• Key operator:
The Key operator can manage the jobs and the device settings
• System administrator
The System administrator can manage the Configuration settings such as the Network settings,
scan destinations settings, security settings (e-shredding, IPsec), and the hardware/software
configuration settings...
• Power user
The Power user has both the rights of the Key operator and the System administrator
• Service
This role is used exclusively by the Canon Service technician
Passwords policy and behaviour in the Océ PlotWave 300/350 and Océ ColorWave 300
Introduction
There are 2 groups of passwords:
• The passwords used in Océ Express WebTools
• The passwords used in the printer user panel (also named Local User Interface)
Passwords used in Océ Express WebTools
In Océ Express WebTools the passwords protect:
• The roles
• The Scan to File remote user name
• The security settings (preshared key for IPsec)
Password modification table for Océ PlotWave 300/350 and Océ ColorWave 300
Password for Can be changed by
Key operator Key operator or Power user
System administrator System administrator or Power user
Power user Power user
Any ScanToFile remote user name System administrator or Power user
Any preshared key for IPsec System administrator or Power user
Mobile printing with Océ Mobile WebTools System administrator or Power user
Password policy
A password can be made of 256 characters maximum.
Chapter 2 - Security on Océ PlotWave 300/350, PlotWave 750, PlotWave 900 and ColorWave 300
32
Page 33

Passwords policy and behaviour in the Océ PlotWave 300/350 and Océ ColorWave 300
For Océ PlotWave 300 v1.2.1 and higher, Océ PlotWave 350 and Océ ColorWave 300 1.2.1 and
higher, all MS Windows characters are allowed in a password.
For previous versions of Océ PlotWave 300 and Océ ColorWave 300 the passwords can be made
of:
• Any number [0-9]
• Any letter lowercase/uppercase [a-z][A-Z]
• the following special characters:
_ - ~ ! @ # $ % ^ * ? { }
( ) = + , . ; : [ ] / | \
Passwords used on the Océ printer user panel (Océ Plotwave 300/350 and Océ ColorWave 300)
Important: These passwords can only be made of numbers.
NOTE
Keep these passwords. The loss of these passwords may require the intervention of Canon
Service.
Printer panel passwords modification table for Océ PlotWave 300/350 and Océ ColorWave 300
Printer user panel password for Can be changed by
Change of the Network Settings
Change of the security level
Clear of the system
System administrator or Power user
Print of demo and test prints
Change of the hardware/software configuration
Start of the scanner calibration
Password backup/restore policy with the 'Save Set'/'Open Set' features
Some passwords are stored into the backup set made with the 'Save Set' feature of Océ Express
WebTools (the passwords for the printer panel)
Password backup table for Océ PlotWave 300/350 and Océ ColorWave 300
Password / pincode for Backup with 'Save set'? Restore with 'Open set'?
Change of the Network Settings
Change of the security level
Clear of the system
Print of demo and test prints
Change of the hardware/software configuration
Start of the scanner calibration
Yes, encrypted
Yes, encrypted
Yes, encrypted
Yes, encrypted
Yes, encrypted
Yes, encrypted
(1)
(1)
(1)
(1)
(1)
(1)
Yes
Yes
Yes
Yes
Yes
Yes
(2)
(2)
(2)
(2)
(2)
(2)
Any preshared key for IPsec No -
Mobile printing with Océ Mobile WebTools No -
Any ScanToFile remote user name No -
Chapter 2 - Security on Océ PlotWave 300/350, PlotWave 750, PlotWave 900 and ColorWave 300
4
33
Page 34

Passwords policy and behaviour in the Océ PlotWave 900 R1.x
Password / pincode for Backup with 'Save set'? Restore with 'Open set'?
Key operator No -
System administrator No -
Power user No -
(1)
:
- When a password is configured as 'No password', the information 'Auto' (meaning 'No
password') is stored in the backup file. It is not encrypted
- The passwords are stored in the backup file whatever the login used when making the 'Save
Set' operation (System administrator, the Key operator, or the Power user)
(2)
- The passwords are restored only when the System administrator or the Power user makes the
'Open Set' operation
- When a password has been stored with 'Auto' value, it is restored with the 'No password' value
Passwords policy and behaviour in the Océ PlotWave 900 R1.x
Passwords used in Océ Express WebTools
In Océ Express WebTools the passwords protect:
• The roles
• The Scan to File remote user name
Password modification table for Océ PlotWave 900 R1.x
Password for Can be changed by
Key operator Key operator or Power user
System administrator System administrator or Power user
Power user Power user
Any ScanToFile remote user name System administrator or Power user
Any preshared key for IPsec System administrator or Power user
Mobile printing with Océ Mobile WebTools System administrator or Power user
Remote Service proxy setting System administrator or Power user
Password policy
• 256 characters maximum
• Any 'Microsoft Windows' characters
Password backup/restore policy with the 'Save Set'/'Open Set' features
None of the passwords for Power user, System administrator, Key operator, ScanToFile remote
user, Preshared key, Mobile printing or Remote Service proxy setting is stored in the back up file
with the 'Save Set' feature.
Chapter 2 - Security on Océ PlotWave 300/350, PlotWave 750, PlotWave 900 and ColorWave 300
34
Page 35

Data Security
E-Shredding
E-shredding presentation
Introduction
The e-shredding feature is a security feature which allows to overwrite any user data (print/copy/
scan) when it is deleted from the system.
This feature prevents the recovery of any deleted user data (files' content and attributes)
A deleted job is a job that cannot be retrieved from any user interface.
When is a job deleted?
A job is deleted either:
• When it is manually deleted from a Smart Inbox
• After it was successfully printed and was not saved in a Smart Inbox ('Save printed jobs in a
Smart Inbox' system setting is disabled in the Océ Express Webtools)
• After a 'ScanToFile to remote destination' has been successfully performed
• After a 'ScanToFile to USB stick' has been performed successfully or not (only on Océ
PlotWave 300/350 and Océ ColorWave 300)
• When it is automatically deleted after a timeout:
- When the end of the job lifetime in the Smart Inbox is reached ('Save printed jobs in a Smart
Inbox' system setting is enabled in the Océ Express Webtools and the 'Printed jobs in Smart
Inbox: job lifetime' is set)
- When the time for the cleanup of the 'Scans in Smart Inbox' is reached
• When a 'Clear system Remove all jobs' is performed on the printer local interface
Data Security
E-shredding algorithms
Select one of the three e-shredding behaviours:
•
DOD 5220.22-M: 3-pass overwriting algorithm (compliant with the US Department of Defense
directive):
•
Gutmann: 35-pass overwriting algorithm with random data
•
Custom: set the number of passes, from 1 to 35.
NOTE
The e-shredding feature has been designed to minimise impact of the global system
performance.
However the more passes selected, the more impact it has on general performance.
It is recommended to minimise the number of passes when document production is required.
Enable the e-shredding
Before you begin
You must be logged as a System Administrator or a Power user.
Chapter 2 - Security on Océ PlotWave 300/350, PlotWave 750, PlotWave 900 and ColorWave 300
35
Page 36

Enable the e-shredding
NOTE
When you enable the e-shredding, the system automatically disables the 'Save printed jobs in a
Smart Inbox' setting. The jobs previously printed and stored in the Smart Inbox are deleted.
They are not e-shredded.
Enable/disable the e-shredding (Océ Express WebTools)
Procedure
Open a web browser and enter the system URL: http://<hostname>, to open the Océ Express
1.
WebTools
Open the 'Configuration' - 'Connectivity' page and select the 'E-shredding' section
2.
Click Edit
3.
Check 'E-shredding' feature to enable it
4.
Result
Select the algorithm.
5.
When you select 'Custom', set the number of passes
When the E-shredding feature is enabled, an indication is displayed at 2 locations in the system:
• On the printer user panel (Océ PlotWave 300/350 and Océ ColorWave 300), an indication is
displayed in the System menu: 'E-shredding enabled'
• In the Océ Express WebTools window, a new icon is added to the list of icons (bottom right)
Each time data (file's content or attributes) is deleted from the system, the e-shredding process
occurs.
For a while, the E-shredding feedback returns as 'busy':
• On the printer user panel (Océ PlotWave 300/350 and Océ ColorWave 300), an indication is
displayed in the System menu: 'E-shredding busy'
• In the Océ Express WebTools window, roll the mouse over the e-shredding icon to display the
'E-shredding busy' status
Once the e-shredding data processed is complete, the status comes back to:
• 'E-shredding enabled' in the printer user panel (Océ PlotWave 300/350 and Océ ColorWave 300)
• 'E-shredding ready' in the Océ Express WebTools (roll over the icon)
Chapter 2 - Security on Océ PlotWave 300/350, PlotWave 750, PlotWave 900 and ColorWave 300
36
Page 37

NOTE
In case some scanned files have a 'Scan destination file name' composed of more than 256
characters, on the controller or on the remote destination, they will be deleted, but they will not
be e-shredded (too long name).
E-shredding process and system behaviour
When you enable the e-shredding
When you enable the e-shredding, the system starts the e-shredding process for all print/scan
jobs that will be deleted.
E-shredding process will occur as a background task.
All processed jobs will be e-shredded as soon as they are deleted:
- After a manual deletion from the Smart Inbox
- After an automatic deletion of the print and scan jobs by the system (timeout, disabled Smart
Inbox, cleanup)
When you disable the e-shredding
E-shredding process and system behaviour
When you disable the e-shredding, the system:
• Terminates the e-shredding process for files which are being e-shredded
• Will not e-shred the new deleted files
Make sure all the scan/copy/print jobs are completely e-shredded
Once a batch of scan/copy/print jobs has been processed, perform the following actions to make
sure all the files are e-shredded:
1- Unplug the system from the network
2- Check that 'Saved print jobs in Smart Inbox' is disabled
3- Delete any job from the 'Scans' Smart Inbox
4- Make a 'Clear System' on the Printer User interface
5- Wait until the e-shredder status comes back to 'Ready' (in Océ Express WebTools)
6- Restart the system
7- Wait until the e-shredder status displays 'Ready' (in Océ Express WebTools)
Chapter 2 - Security on Océ PlotWave 300/350, PlotWave 750, PlotWave 900 and ColorWave 300
37
Page 38

IPsec (on Océ PlotWave 300/350, Océ PlotWave 900 1.2 and higher 1.x, Océ ColorWave 300)
IPsec (on Océ PlotWave 300/350, Océ PlotWave 900 1.2 and higher 1.x, Océ
ColorWave 300)
IPsec presentation
Introduction
IPsec is a protocol that provides authentication, data confidentiality and integrity in the network
communication between devices.
A strong mechanism of encryption guarantees the confidentiality of the user print and scan data
on the network.
IPsec is particularly suitable in a configuration where you need to create a dedicated secure link
between the printer/copier system and a workstation which can be dedicated as a Print Server (or
a Scan Server).
You can connect up to 5 IPsec stations to the printer/copier system.
In this configuration below:
• The printer/copier system is physically connected to the network but communicates only with a
dedicated station (a Print Server or Scan Server for example)
• The Print Server receives the print request from the workstations via IP on the network
• The Print Server send the print requests to the printer/copier system via IPsec
• The workstations cannot communicate directly with the printer/copier system
NOTE
In this configuration, the back-channel communication between a workstation and the printer is
unavailable (the back-channel information is not displayed in the Océ WPD driver).
NOTE
IPsec is compatible with IPv4 only.
Make sure IPv6 is 'Disabled' before you configure IPsec on the controller.
Chapter 2 - Security on Océ PlotWave 300/350, PlotWave 750, PlotWave 900 and ColorWave 300
38
Page 39

Illustration
IPsec presentation
IPsec parameters in the Océ Express WebTools (EWT)
The following IPsec parameters are available in the Océ Express WebTools :
IPsec Generic section:
IPSec
Enabled/Disabled
Failsafe option
Enabled/Disabled
Default preshared key
Other settings You can display the other IPsec generic settings ('See all').
General setting to enable or disable IPsec.
Once enable, only the network traffic defined by the IPsec configuration
rules is authorised.
Keep this option enabled during the IPsec configuration, until the complete and successful IPsec communication between the printer/copier
system and the configured station.
- When the option is Enabled (with IPsec enabled), only the network
traffic defined by IPsec configuration rules is authorised.
All other network traffic is denied except the HTTP traffic* for Océ Express WebTools with any workstation: this allows to change some IPsec settings via Océ Express WebTools, from any workstation.
- When the option is Disabled (with IPsec enabled): only the network
traffic defined by the IPsec configuration rules is authorised. All other
network traffic is denied.
You can define a default preshared key that will be used for all the stations connected by IPsec to the printer/scanner system.
Keep them unchanged.
* and HTTPS traffic for Océ Plotwave 900.
IPsec stations section:
You can configure a maximum of 5 IPsec communications between the printer/copier system and
5 workstations.
Chapter 2 - Security on Océ PlotWave 300/350, PlotWave 750, PlotWave 900 and ColorWave 300
39
Page 40

Configure the IPsec settings on the Océ controller
Enable and configure the parameters for each required station.
The parameters can be different for each different workstation:
- the IP address
- the preshared key (keep the generic default one or set a custom one)
Configure the IPsec settings on the Océ controller
Before you begin
You must be logged as a System Administrator or a Power user.
Activate and configure IPsec on the printer/scanner controller
Procedure
Open a web browser and enter the system URL: http://<hostname>, to open the Océ Express
1.
WebTools
Open the 'Configuration' - 'Connectivity' page
2.
In 'IPsec generic' section, click 'Edit'
3.
Check 'IPsec'
4.
Keep 'Failsafe option' checked during the phase you configure the IPSec.
5.
In case of need, this allows to be able to connect to the Océ Express WebTools from any
workstation in order to be able to change parameters.
Keep the other parameters as they are.
6.
Chapter 2 - Security on Océ PlotWave 300/350, PlotWave 750, PlotWave 900 and ColorWave 300
40
Page 41

Configure the IPsec settings on the Océ controller
In the 'IPsec stations' section, click 'Edit'
7.
Select '"IPsec station 1: Enable'
8.
Enter the 'IPsec station 1: IP address' of the workstation
9.
Create and enter the 'IPsec station 1: Preshared key' using the following policy:
10.
• 256 characters maximum
• Any number [0-9]
• Any letter lowercase/upper-case [a-z][A-Z]
• the following special characters:
Result
_
- ~ ! @ # $ % ^ * ? { }
( ) = + , . ; : [ ] / | \
NOTE
Write it down, this preshared key will be required during the IPsec configuration on the
workstation.
NOTE
In the 'TCP/IP: IPv6' section, make sure TCP/IP (IPv6) is disabled.
The IPsec settings are configured on the controller for a connection to a workstation (which can
be a print server).
Chapter 2 - Security on Océ PlotWave 300/350, PlotWave 750, PlotWave 900 and ColorWave 300
41
Page 42

Configure the IPsec settings on a workstation or a print server
Configure the IPsec settings on a workstation or a print server
When to do
After the IPsec configuration on the controller.
Pre-requisites
Log on the workstation with the Administration rights.
Purpose
Complete the IPsec configuration for a secure connection between the printer/copier system and
a workstation.
On the workstation, perform the 6 following actions:
1-
Add the security snap-in
2-
Create the security policy
3-
Create the filter list
4-
Define the filter actions and security negotiation
on page 42
on page 43
on page 44
on page 46
5-
Define the security rule
6-
Assign the security policy
NOTE
The procedure below shows the configuration steps on Windows server 2008.
The procedure is similar on other Operating Systems (Windows Server 2003, Windows XP,
Windows Vista, Windows 7)
Add the security snap-in
Procedure
In the 'Start' - 'Run' window, enter 'mmc' to open the management console
1.
In the top menu select 'File' - 'Add/Remove Snap-in'
2.
Select 'IP Security Policy Management' and click 'Add' to add it to the root console
3.
on page 47
on page 49
Chapter 2 - Security on Océ PlotWave 300/350, PlotWave 750, PlotWave 900 and ColorWave 300
42
Page 43

Keep 'Local computer' checked and click 'Finish'
4.
The security snap-in is added, click 'OK'
Create the security policy
Create the security policy
Procedure
In the console, right click on 'IP Security Policies on local Computer' and select 'Create IP Security
1.
Policy'
Click 'Next' to open the wizard
2.
Enter the name for the policy and click 'Next'
3.
Chapter 2 - Security on Océ PlotWave 300/350, PlotWave 750, PlotWave 900 and ColorWave 300
43
Page 44
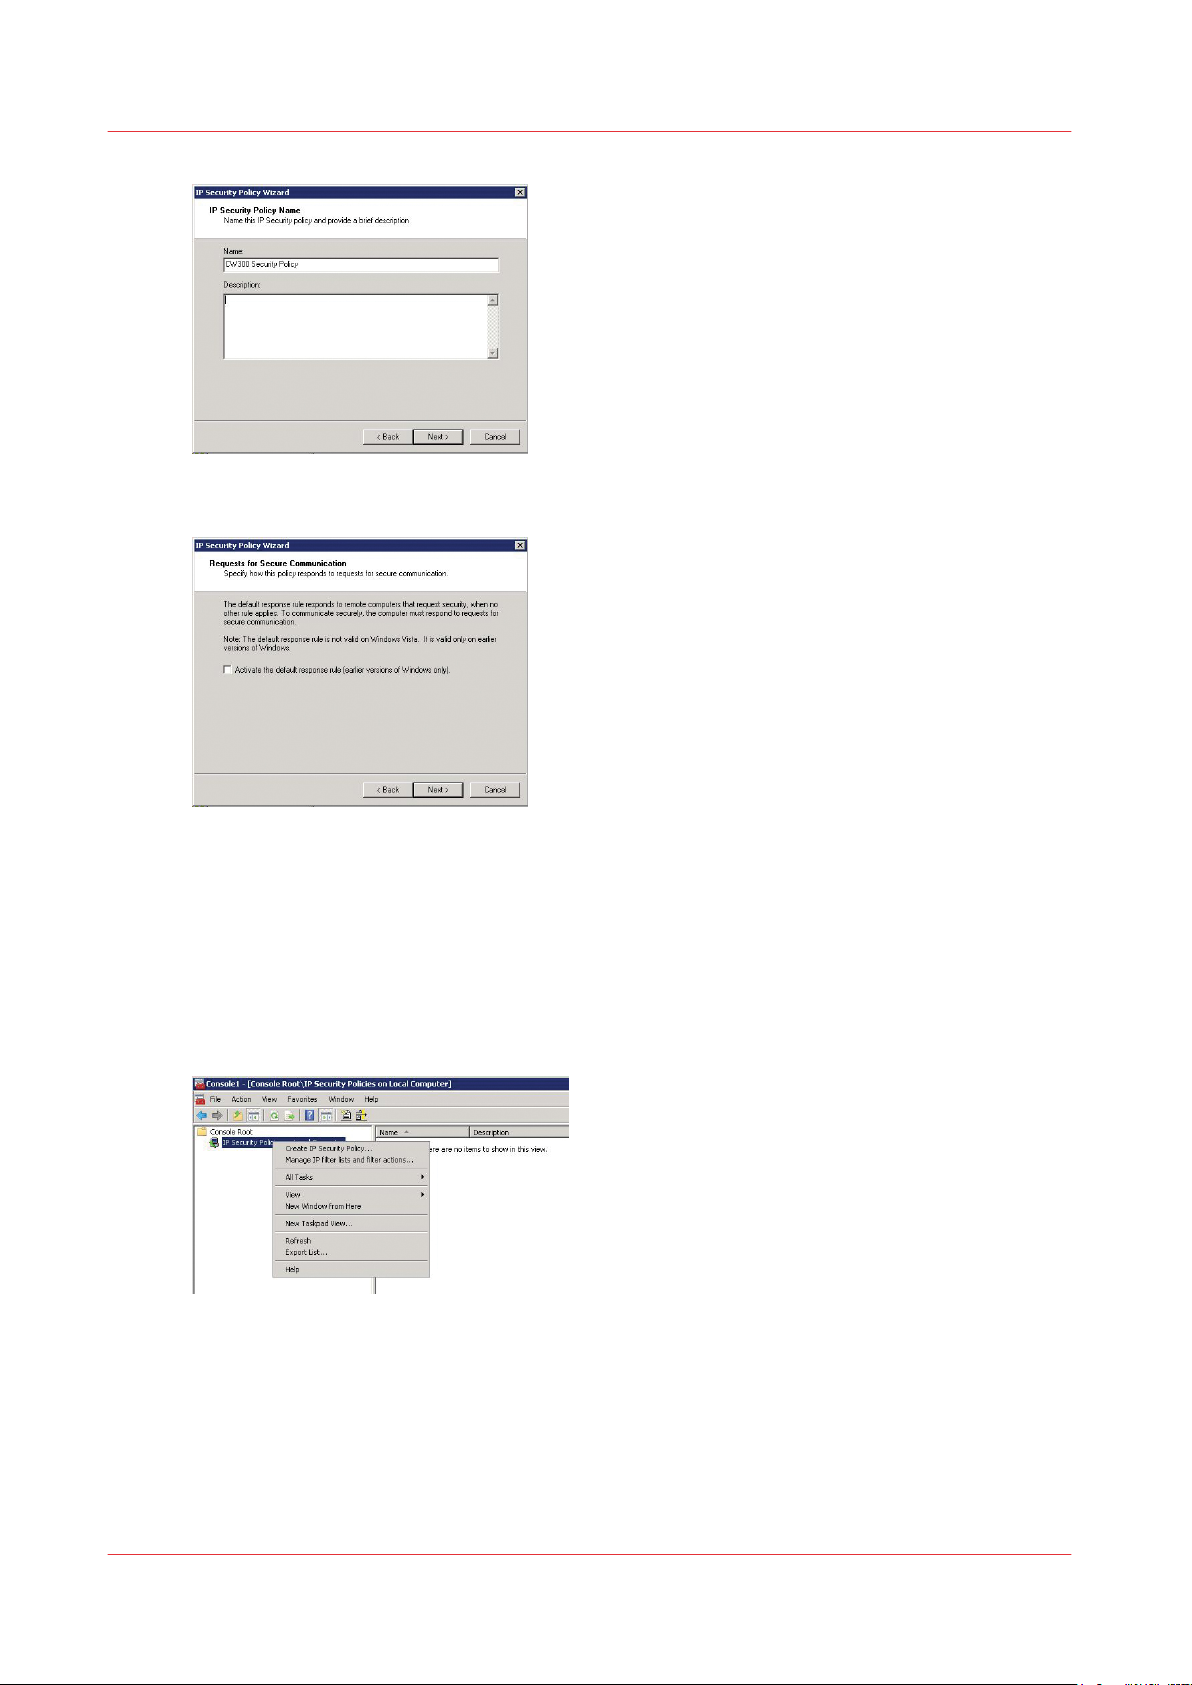
Create the filter list
Uncheck 'Activate the default response rule'
4.
Uncheck 'Edit properties' and click 'Finish'
5.
Create the filter list
Procedure
In the console, right click on 'IP Security Policies on local Computer' and select 'Manage IP filter
1.
lists and filter actions…'
In the 'Manage IP filter lists' tab click 'Add'
2.
Chapter 2 - Security on Océ PlotWave 300/350, PlotWave 750, PlotWave 900 and ColorWave 300
44
Page 45

Enter a filter name and a description and click 'Add'
3.
Create the filter list
Click 'Next' to open the wizard
4.
Check the 'Mirrored' checkbox and click 'Next'
5.
Select 'My IP address' as the 'Source address and click 'Next'
6.
Select 'A specific IP address or subnet' as 'Destination address' and enter the IP address of the
7.
controller
Select 'Any' as the 'IP Protocol Type' and click 'Next'
8.
Chapter 2 - Security on Océ PlotWave 300/350, PlotWave 750, PlotWave 900 and ColorWave 300
45
Page 46

Define the filter actions and security negotiation
Click 'Finish'
9.
In the 'IP filter list' window, click OK
10.
The filter list is set
Define the filter actions and security negotiation
Procedure
Open the 'Manage Filter Actions' tab and click 'Add' to open the wizard.
1.
Click 'Next'
2.
Give a name to the filter actions and click 'Next'
3.
Select 'Negotiate security' and click 'Next'
4.
Chapter 2 - Security on Océ PlotWave 300/350, PlotWave 750, PlotWave 900 and ColorWave 300
46
Page 47

Define the security rule
Select 'Allow unsecured communication if a secure connection cannot be established' or 'Fall
5.
back to unsecured communication' (depending on the Operating System) and click 'Next'
Select 'Custom' and click on the 'Settings...' button
6.
Configure the settings as below
7.
Click 'OK' and 'Next', then 'Finish'
8.
Define the security rule
Procedure
In the console, right click on the IP security policy just created and select 'Properties' to open the
1.
wizard
(On Windows 7, a new window opens: check that "Use Add Wizard" is checked, then click on
"Add")
Click 'Next'
2.
Select 'This rule does not specify a tunnel', and click 'Next'
3.
Chapter 2 - Security on Océ PlotWave 300/350, PlotWave 750, PlotWave 900 and ColorWave 300
47
Page 48

Define the security rule
As the Network type, select 'All network connections' and click 'Next'
4.
Select the filter previously created then click 'Next'
5.
Select the filter action previously created then click 'Next'
6.
In the 'Authentication method' window, check 'Use this string to protect the key exchange
7.
(preshared key)'
Chapter 2 - Security on Océ PlotWave 300/350, PlotWave 750, PlotWave 900 and ColorWave 300
48
Page 49

Assign the security policy
Enter the preshared key you set in Express WebTools (see
8.
controller
Click 'Finish'
9.
Click 'OK' to validate the Security rule
10.
on page 40), then click 'Next'
Assign the security policy
Procedure
Configure the IPsec settings on the Océ
In the console, right click on the security policy just created and select 'Assign'
1.
The configuration is activated on the IPsec station (workstation):
Chapter 2 - Security on Océ PlotWave 300/350, PlotWave 750, PlotWave 900 and ColorWave 300
49
Page 50

The impact of IPsec when you print using Océ WPD through a print server
To test the configuration, open a 'command' window and issue a 'ping' command from this IPsec
2.
station to the printer/scanner controller
When the test works properly it is recommended to disable the 'Failsafe mode' on the printer/
scanner controller. So, only the IPsec station is allowed to communicate with the printer/scanner
system.
NOTE
In case you use the WPD driver, see
a print server
on page 50.
The impact of IPsec when you print using Océ WPD through
The impact of IPsec when you print using Océ WPD through a print server
Introduction
When you use WPD on a print server, with advanced accounting activated, the use of IPsec has
an impact on the workflow.
When the following conditions are gathered:
• A print server is configured as an IPsec station. Océ WPD is installed on the print server.
• IPsec is activated and the 'Failsafe mode' is disabled on the printer controller.
• The client workstation is not configured as an IPsec station.
• The client workstation uses the Océ WPD shared driver installed on the print server (Point &
Print) to print jobs.
Pre-requisites
When advanced accounting is required, make sure you configured Account Center BEFORE
disabling the 'Failsafe mode' on the printer controller.
Consequences of the IPsec configuration on the client workstation:
The back-channel information (printer status, feed data) is not retrieved from the printer. It is not
displayed in the driver interface.
On the workstation, when the job is sent with Océ WPD:
• The required accounting information is not requested when submitting the job.
• The submitted job is stored in the Smart Inbox. It is not printed since accounting information is
missing.
Open the Inbox in Océ Express WebTools (on an IPsec station) to enter the required accounting
information and print the job.
NOTE
To be able to enter the accounting information and print directly from the workstation, enable
the 'Failsafe mode' on the controller.
Then, the accounting window will be displayed on the client workstation, and the accounting
information can be entered to print the job.
Troubleshooting: emergency procedure to disable IPsec
Introduction
In the following case:
• IPsec is enabled and activated on the printer/scanner controller
and
Chapter 2 - Security on Océ PlotWave 300/350, PlotWave 750, PlotWave 900 and ColorWave 300
50
Page 51

Troubleshooting: emergency procedure to disable IPsec
• The 'Failsafe mode' is disabled
and
• The communication between the controller and the IPsec stations fails
You cannot open remotely Océ Express WebTools to change the settings. The system is
unreachable.
Then you can use the emergency procedure to disable IPsec:
• Via the printer User panel on the printer/scanner system, for Océ PlotWave 300/350 and Océ
ColorWave 300
• Via Océ Express WebTools on the printer controller monitor for Océ PlotWave 900 R1.2 and
higher 1.x
Disable IPsec on the printer user panel (Océ PlotWave 300/350 and Océ ColorWave 300)
Procedure
On the printer printer user panel, click on 'System'
1.
Select 'Setup'
2.
Roll down to the Security item and open the Security menu
3.
The status is 'IPsec is enabled'
Click 'Next' several times to open the IPsec window
4.
NOTE
Enter the password if required (Password to change the security level - depends on the
configuration of the access to the Security menu).
Chapter 2 - Security on Océ PlotWave 300/350, PlotWave 750, PlotWave 900 and ColorWave 300
51
Page 52

Disable IPsec on the controller monitor (Océ PlotWave 900 R1.2 and higher 1.x)
Select 'Disabled' to deactivate IPsec
5.
Click 'Next' to the end of the procedure
6.
Restart the controller
7.
Result
IPsec is disabled.
After the restart, you will be able to open Océ Express WebTools remotely from a workstation
(HTTP).
Disable IPsec on the controller monitor (Océ PlotWave 900 R1.2 and higher
1.x)
When to do
When communication fails between the controller and the identified hosts, you can disable IPsec
in Océ Express WebTools only via the printer controller monitor.
Procedure
On the printer controller, open Océ Express WebTools and log in as System administrator.
1.
Open the Configuration - Connectivity tab.
2.
Go to the IPsec section
3.
Click on Edit, in the upper right hand corner of the section.
4.
Change the IPsec setting from 'Enabled' to 'Disabled':
5.
Chapter 2 - Security on Océ PlotWave 300/350, PlotWave 750, PlotWave 900 and ColorWave 300
52
Page 53

Result
Disable IPsec on the controller monitor (Océ PlotWave 900 R1.2 and higher 1.x)
IPsec is disabled.
You can open Océ Express WebTools remotely from a workstation (HTTP).
Chapter 2 - Security on Océ PlotWave 300/350, PlotWave 750, PlotWave 900 and ColorWave 300
53
Page 54

Prevent USB Direct Print and Scan to USB (Océ PlotWave 300/350, Océ ColorWave 300)
Prevent USB Direct Print and Scan to USB (Océ PlotWave 300/350, Océ
ColorWave 300)
How to prevent 'Print from USB'
Introduction
You can disable any access to the USB device by preventing printing from / scanning to the USB
device.
Illustration
[1] USB direct print: Disabled
How to disable the 'USB direct print' feature
Procedure
Open a web browser and enter the system URL: http://<hostname>, to open the Océ Express
1.
WebTools
Open the 'Preferences' - 'System settings' page and select the 'Printer properties' section
2.
Go to the 'USB direct print' setting
3.
Click on the value to open the 'USB direct print' window
4.
Log in
5.
Select 'Disabled' and 'Ok'
6.
How to prevent 'Scan to USB'
Introduction
You can neutralize the 'Scan to File to USB storage device' capability.
2-step procedure to prevent scanning to USB destination:
1. Disable any 'USB stick' scan destination
2. Remove the USB destination from all Scan templates
1- Disable any 'USB stick' scan destination
Introduction
You can neutralize the 'Scan to File to USB storage device' capability.
To prevent scanning to USB destination you must:
1. Disable any 'USB stick' scan destination
2. Remove the USB destination from all Scan templates
Chapter 2 - Security on Océ PlotWave 300/350, PlotWave 750, PlotWave 900 and ColorWave 300
54
Page 55

Purpose
Prevent any user from scanning to a USB device.
Illustration
[2] Disable the 'Scan to USB'
Procedure
Open a web browser and enter the system URL: http://<hostname>, to open the Océ Express
1.
WebTools
Open the 'Configuration' - 'Scan destinations' page
2.
Edit the 'Scan destination 2: Local to USB storage device'
3.
Uncheck the setting 'Scan destination 2 enabled' and click 'Ok'
4.
For each scan destination from 'Scan destination 3' to 'Scan destination 10', make sure that the
5.
scan destination type is NOT 'Local to USB storage device'
2- Remove the USB destination from all Scan templates
2- Remove the USB destination from all Scan templates
Procedure
In Océ Express WebTools open the 'Preferences' - 'Scan job defaults' page
1.
In each 'Scan template: File' section, check that the 'Destination' is not 'USB stick'
2.
When the destination is 'USB stick', edit the setting to change it
3.
Chapter 2 - Security on Océ PlotWave 300/350, PlotWave 750, PlotWave 900 and ColorWave 300
55
Page 56

HTTPS with Océ PlotWave 900 R1.x
HTTPS with Océ PlotWave 900 R1.x
Encrypt print data using HTTPS with the Océ self-signed certificate
Introduction
On Océ PlotWave 900 you can use the HTTPS protocol with the default Océ self-signed certificate:
- to send encrypted print data to the printer controller via Océ Publisher Express
- to securely manage the configuration of the system through Océ Express WebTools
The HTTPS protocol is available with all security levels.
All settings and options available through HTTP are also available through HTTPS.
NOTE
Only the Océ self-signed certificate is supported (this excludes the Certificate Authority signed
certificates).
Before you begin
The first time you use a self-signed certificate, your web browser will generate security error
messages.
In order to easily and securely use the self-signed certificate in your web browser, you must:
- View and check the self-signed certificate in your web browser
- Configure your web browser to trust the self-signed certificate
Use the Océ self-signed certificate with Internet Explorer
Procedure
On a workstation, type the URL address of your printer in Internet Explorer: https://[common
1.
Name or PrinterHostname or PrinterIPaddress]
A warning window opens. It displays 2 errors:
• The certificate is not issued by a trusted certificate authority.
• The Common Name in the certificate does not match the printer hostname (or IP Address) you
typed in the address bar.
In order to view and check the self-signed certificate, continue to the website
2.
Chapter 2 - Security on Océ PlotWave 300/350, PlotWave 750, PlotWave 900 and ColorWave 300
56
Page 57

Use the Océ self-signed certificate with Internet Explorer
Click on 'Certificate error':
3.
Click 'View certificates'
4.
The certificate is issued to 'OcéExpress WebTools' by 'Océ Express WebTools'
5.
Click 'Install Certificate...'
6.
Follow the Wizard's instructions to import the certificate into your web browser:
7.
1. Place the certificate in the 'Trusted Root Certification Authorities' folder
2. Accept the warning
3. Finish the installation
When the import is successful, the 'Océ Express WebTools' Certificate is recognised and its status
is OK.
Chapter 2 - Security on Océ PlotWave 300/350, PlotWave 750, PlotWave 900 and ColorWave 300
57
Page 58

Use the Océ self-signed certificate with Mozilla Firefox
Open the Tools menu\Internet options\Advanced tab. In the Security section, uncheck the option
8.
"Warn about certificate address mismatch"
Close ALL instances of Internet Explorer
9.
Restart the browser and type the URL of your printer in Internet Explorer (https://[common Name
10.
or PrinterHostname or PrinterIPaddress]).
Result
The padlock is displayed on the address bar, Océ self-signed certificate guarantees:
• The identity of the remote computer (controller)
• The encryption of the print data on the network
Use the Océ self-signed certificate with Mozilla Firefox
Procedure
On a workstation, type the URL address of your printer in Mozilla Firefox (https://[common Name
1.
or PrinterHostname or PrinterIPaddress]).
Chapter 2 - Security on Océ PlotWave 300/350, PlotWave 750, PlotWave 900 and ColorWave 300
58
Page 59

Use the Océ self-signed certificate with Mozilla Firefox
A warning window opens. It displays 2 errors:
• The certificate is not trusted because it is self-signed
In order to view and check the self-signed certificate, continue to add an exception.
2.
Click 'I Understand the Risks' and 'Add Exception...'
3.
In the 'Add Security Exception' window, click 'Get Certificate' to get the certificate from the
4.
controller web server.
The 'Wrong site' and 'Unknown Identity' errors are displayed.
Click 'View...' to see the content of the certificate.
5.
Check the following values:
Common Name (CN) = Océ Express WebTools
Organization (O) = Océ
Organization Unit (OU) = WFPS
Result
The certificate is issued to 'Océ Express WebTools' by 'Océ Express WebTools', so you can
6.
confirm the security exception (permanent or temporary exception).
A security warning window may pop-up. Click 'Yes' to continue.
7.
The Océ Express WebTools software opens.
You can check in the status bar (at the bottom of the window) that the padlock is displayed.
In the navigation bar, the Océ certificate is registered as an exception.
The identity of the remote controller and the encryption of the data on the network are secured.
Chapter 2 - Security on Océ PlotWave 300/350, PlotWave 750, PlotWave 900 and ColorWave 300
59
Page 60

Smart Inbox management
Smart Inbox management
Configure the Smart Inboxes to manage the access to job data
Use the Smart Inbox management features of your system to limit and restrict the access to the
print and scan job data.
Depending on your system capabilities, go to the 'Preferences'/'System settings' to disable or
restrict, for example:
• The remote view of the Smart Inboxes
• The printing from the Smart Inboxes
• The storage of the job data in the Smart Inboxes
Depending on your printer capabilities, you can also disable the printing from Océ Publisher
Express.
Chapter 2 - Security on Océ PlotWave 300/350, PlotWave 750, PlotWave 900 and ColorWave 300
60
Page 61

Security on Océ PlotWave 750 and Océ PlotWave 900 R2.x
Security on Océ PlotWave 750 and Océ PlotWave 900
R2.x
Overview
Security overview for the Océ PlotWave 750 and the Océ PlotWave 900 R2.x systems
Introduction
The Océ PlotWave 750 and the Océ PlotWave 900 R2.x are equipped with the following security
features:
Security overview
Operating System
Firewall Yes
Network protocols protection 4 Océ Security Levels
MS Security patches Océ released patches
Security logging Auditing of security related events
IPv6 Yes (IPV6 only or IPV6/IPV4 combination)
Antivirus Compatible with 2 Antivirus brands
SMB authentication NTLMV2
Data encryption on the network - IPsec
Data overwrite E-shredding
Password protection Yes for:
Smart Inbox management - Can be enabled/disabled
Windows Embedded Standard 7 SP1
- HTTPS for administration and for job submission through Publisher Express
- User settings
- Administration settings
- Settings on the printer user panel
- Remote view restriction
- Delete scan restriction
- Display on printer user panel restriction (for
Océ PlotWave 750)
Océ Publisher Express access Access restriction
Actions on Jobs Remote action restriction
Chapter 2 - Security on Océ PlotWave 300/350, PlotWave 750, PlotWave 900 and ColorWave 300
61
Page 62

System and Network security
System and Network security
Ports - Protocols
Applications, protocols and ports used on the Océ PlotWave 750 and the Océ PlotWave 900 R2.x systems
Printing applications: security levels, ports and protocols used by the Océ systems
Application /Function‐
ality
Océ Wide-format Printer Driver for Microsoft
Windows (WPD or
WPD2)
Océ Adobe® PostScript® 3™ driver
Océ Publisher Express Océ Plot-
System Supported security levels (x) and
Océ PlotWave 750 /
PlotWave
900 R2.x
Océ PlotWave 750 /
PlotWave
900 R2.x
Wave 750 /
PlotWave
900 R2.x
open port
N* M* M-H* H*
x
TCP 515
TCP
65200
TCP 80
UDP
515
x
TCP 515xTCP 515xTCP
x
TCP 80xTCP 80
(1)
x
TCP 515
TCP
65200
TCP 80
UDP
515
(2)
x
TCP
515
UDP
515
515
(2)
x
TCP
515
x
TCP
515
Port used on the
controller: proto‐
col
TCP 515: LPR
TCP 65200: Océ
back-channel
TCP 80: HTTP (for
advanced accounting)
UDP 515: Océ protocol (for printer
discovery)
TCP 515: LPR
TCP 80: HTTP
(**)
Océ Publisher Express
over SSL
Océ Publisher Select Océ Plot-
Chapter 2 - Security on Océ PlotWave 300/350, PlotWave 750, PlotWave 900 and ColorWave 300
62
Océ PlotWave 750 /
PlotWave
900 R2.x
Wave 750 /
PlotWave
900 R2.x
x
TCP 443xTCP 443xTCP
443
x
TCP 515
TCP
65200
TCP 80
UDP
515
x
TCP 515
TCP
65200
TCP 80
UDP
515
x
TCP
443
TCP 443: HTTPS
TCP 80: HTTP
TCP 65200: Océ
back-channel
TCP 515: LPR
UDP 515: Océ protocol (for printer
discovery)
(**)
4
Page 63

Applications, protocols and ports used on the Océ PlotWave 750 and the Océ PlotWave 900 R2.x systems
Application /Function‐
System Supported security levels (x) and
ality
Océ Publisher Mobile Océ Plot-
Wave 750 /
PlotWave
900 R2.x
Océ Mobile WebTools Océ Plot-
Wave 750 /
PlotWave
900 R2.x
Océ ReproDesk Studio Océ Plot-
Wave 750 /
PlotWave
900 R2.x
Novell NDPS printing Océ Plot-
Wave 750 /
PlotWave
900 R2.x
open port
N* M* M-H* H*
x
TCP 21
TCP
4242
ICMP
UDP
515
x
TCP 80xTCP 80
x
TCP 515
TCP
65200
x
TCP 515
TCP
65200
x
TCP 515xTCP 515xTCP
515
x
TCP
515
Port used on the
controller: proto‐
col
TCP 21: FTP
TCP 4242: FTP
passive mode
(6)
ICMP: ping
UDP 515: Océ protocol (for printer
discovery)
TCP 80: HTTP
TCP 515: LPR
TCP 65200: Océ
back-channel
(**)
TCP 515: LPR
LPR printing (command
line)
Océ PlotWave 750 /
PlotWave
x
TCP 515xTCP 515xTCP
515
x
TCP
515
TCP 515: LPR
900 R2.x
FTP printing Océ Plot-
Wave 750 /
PlotWave
900 R2.x
x
TCP 21
TCP
4242
(3)
x
TCP 21
TCP 21: FTP
TCP 4242: FTP
Notes:
• * Levels: N: Normal - M: Medium - M-H: Medium/High - H: High
(**)
•
Océ back-channel is an Océ proprietary protocol used to retrieve information from the
printer (status, media loaded...) and to display it in the application or driver.
(1)
•
LPR printing with back-channel and advanced accounting
(2)
•
LPR printing. No back-channel. No advanced accounting
(3)
•
FTP active mode only
(4)
•
Data channel for FTP passive mode
(4)
Chapter 2 - Security on Océ PlotWave 300/350, PlotWave 750, PlotWave 900 and ColorWave 300
63
Page 64

Applications, protocols and ports used on the Océ PlotWave 750 and the Océ PlotWave 900 R2.x systems
Scanning / copying applications: security levels, ports and protocols used by the Océ systems
Application /Function‐
ality
Scan to File Remote
SMB
Scan to File Remote
FTP
Scan data retrieval by
FTP
Scan data retrieval
from Smart Inbox
(Scans)
Scan data retrieval
from Smart Inbox
(Scans) over SSL
System Supported security levels (x) and
open port
N* M* M-H* H*
Océ PlotWave
x 750 /
PlotWave 900
R2.x
Océ PlotWave
x
(1)
x
(1)
x
(1)
x
750 /
PlotWave 900
R2.x
Océ PlotWave
750 /
PlotWave 900
R2.x
Océ PlotWave
750 /
x
TCP 21
TCP
4242
x
TCP 80xTCP 80
(2)
x
TCP 21
PlotWave 900
R2.x
Océ PlotWave
750 /
PlotWave 900
x
TCP 443xTCP 443xTCP
443
x
TCP
443
R2.x
Port used on the
controller: proto‐
col
-
TCP 21: FTP
TCP 4242: FTP
(3)
TCP 80: HTTP
TCP 443: HTTPS
Océ Matrix Logic Océ PlotWave
750 /
PlotWave 900
x
TCP 80
TCP 443
x
TCP 80
TCP 443
x
TCP
443
x
TCP
443
TCP 80: HTTP
TCP 443: HTTPS
R2.x
Notes:
• * Levels: N: Normal - M: Medium - M-H: Medium/High - H: High
(1)
•
FTP passive mode only: the FTP server on the remote workstation must support FTP passive
mode
(2)
•
FTP active mode only
(3)
•
Data channel for FTP passive mode
Control management: security levels, ports and protocols used by the Océ systems
Application /Func‐
tionality
PING Océ PlotWave 750 /
System Supported security levels (x)
and open port
N* M* M-H* H*
x x x x ICMP
PlotWave 900 R2.x
Port used on the
controller: pro‐
tocol
4
Chapter 2 - Security on Océ PlotWave 300/350, PlotWave 750, PlotWave 900 and ColorWave 300
64
Page 65

Applications, protocols and ports used on the Océ PlotWave 750 and the Océ PlotWave 900 R2.x systems
Application /Func‐
tionality
SNMP based applications
Océ Express WebTools
Océ Express WebTools over SSL
Name resolution
(**)
System Supported security levels (x)
and open port
N* M* M-H* H*
Océ PlotWave 750 /
PlotWave 900 R2.x
x
UDP
161
Océ PlotWave 750 /
PlotWave 900 R2.x
x
TCP 80xTCP
80
Océ PlotWave 750 /
PlotWave 900 R2.x
Océ PlotWave 750 /
x
TCP
443
x
TCP
443
x
TCP
443
TCP
443
x Outgoing con-
PlotWave 900 R2.x
Port used on the
controller: pro‐
tocol
UDP 161: SNMP
TCP 80: HTTP
x
TCP 443: HTTPS
nection:
- local port (on
controller):
UDP(/TCP) <dynamic value>
- remote port (on
DNS server):
UDP(/TCP) 53
DHCP Océ PlotWave 750 /
PlotWave 900 R2.x
Océ Account Center
Advanced accounting
Océ PlotWave 750 /
PlotWave 900 R2.x
(WPD)
Accounting information retrieval by FTP
Browse Océ systems
on the network with
Océ PlotWave 750 /
PlotWave 900 R2.x
Océ PlotWave 750 /
PlotWave 900 R2.x
Windows network
neighbourhood
Océ Service Logic Océ PlotWave 750 /
PlotWave 900 R2.x
x x x x Outgoing con-
nection:
- local port (on
controller) : UDP
68
- remote port (on
DNS server):
UDP 67
x
TCP 80: HTTP
TCP 80xTCP
80
x
TCP 21
TCP
(1)
x
TCP
21
TCP 21: FTP
TCP 4242: FTP
4242
x
UDP
UDP 137: NetBios over TCP/IP
137
x
TCP 21
TCP
(1)
x
TCP
21
TCP 21: FTP
TCP 4242: FTP
4242
(2)
(2)
4
Chapter 2 - Security on Océ PlotWave 300/350, PlotWave 750, PlotWave 900 and ColorWave 300
65
Page 66

Applications, protocols and ports used on the Océ PlotWave 750 and the Océ PlotWave 900 R2.x systems
Application /Func‐
tionality
System Supported security levels (x)
and open port
Port used on the
controller: pro‐
tocol
N* M* M-H* H*
IPsec Océ PlotWave 750 /
PlotWave 900 R2.x
x
UDP
UDP 500
UDP 4500
500
UDP
4500
Océ Remote Meter
Reading Manager
Océ PlotWave 750 /
PlotWave 900 R2.x
x
UDP
UDP 161: SNMP
161
Océ Remote Service Océ PlotWave 750 /
PlotWave 900 R2.x
x x x x HTTPS outgoing
connection required: TCP/IP
port 443
WSD print / WSD discovery
Océ PlotWave 750 x x x UDP 3702
TCP 5357
Notes:
• * Levels: N: Normal - M: Medium - M-H: Medium/High - H: High
(**)
•
The name resolution is mainly used to determine the IP address of the scan destination
during Scan to File operation
(1)
•
FTP active mode only
(2)
•
Data channel for FTP passive mode
(3)
•
TCP/IP port 443 must be opened and must allow response back on the IT infrastructure
firewall.
(3)
Chapter 2 - Security on Océ PlotWave 300/350, PlotWave 750, PlotWave 900 and ColorWave 300
66
Page 67

Security Patches
Security Patches
Install the Océ Remote patch on Océ PlotWave 750 and Océ PlotWave 900 R2.x
Introduction
You can install the Océ Remote patches (Security patches) in the following versions of the
systems:
• Océ PlotWave 750
• Océ PlotWave 900 R2.x
Before you begin
Find the Océ Security patch from the Océ Downloads website on
Open the product page and go to the Security tab to download the available security patches.
Install the Océ Remote patch
Procedure
Open the Océ Express Webtools
1.
Open the 'Support' tab
2.
http://downloads.oce.com
:
Select 'Update'
3.
The Authentication window opens.
Chapter 2 - Security on Océ PlotWave 300/350, PlotWave 750, PlotWave 900 and ColorWave 300
67
Page 68

Install the Océ Remote patch on Océ PlotWave 750 and Océ PlotWave 900 R2.x
Log in as the System administrator or Power user
4.
The latest patch successfully applied (when any) is displayed
Click on the 'Update' icon (top right corner) to open the wizard
5.
Click OK
6.
Browse to the Océ Remote patch and click OK to install it
7.
Chapter 2 - Security on Océ PlotWave 300/350, PlotWave 750, PlotWave 900 and ColorWave 300
68
Page 69

Click OK to confirm the update
8.
Install the Océ Remote patch on Océ PlotWave 750 and Océ PlotWave 900 R2.x
Chapter 2 - Security on Océ PlotWave 300/350, PlotWave 750, PlotWave 900 and ColorWave 300
69
Page 70

Security levels
Security levels
Security levels presentation
Introduction
On Océ PlotWave 750 and Océ PlotWave 900 R2.x Océ defined 4 levels of security according to
the customer needs. The presentation below can help you to select the most suitable level
High and Medium-High security levels
The High and Medium-High levels are the most secure mode for printing and scanning.
The compliant applications are based on:
• the LPR protocol or HTTPS protocol for printing
• the FTP protocol for scanning.
Differences between High and Medium-High
• The Océ Printer Discovery (Océ UDP 515) is available only in Medium-High level (not in HIGH)
• WSD Print/WSD Discovery are present only in Medium-High level (for Océ PlotWave 750 only)
Target:
• These levels provides you the most secure mode while using the basic feature for printing and
scanning. Only some Océ applications are available. See the
application/functionality
• These security levels may also be used when you want to be protected whenever a
vulnerability has been discovered and the corresponding patch cannot be yet installed. As
soon as the patch can be installed, you can go back to the original security level.
on page 62.
security levels supported per
NOTE
Attention when you set the Medium high or High security level through the HTTP protocol, the
communication immediately stops.
Open Océ Express Web Tools by means of the HTTPS protocol (type https://Printer IP address or
hostname in the web browser) and restart the system. Then use the HTTPS protocol.
Medium security level
The Medium level is compliant with all the Océ applications available for printing and scanning
which do not present a high risk (as reported by most popular network scanners).
Target:
This level is recommended if you need to be secured while you want to use the Océ applications
for printing and/or scanning (you can use the system including more functions than with the
HIGH and Medium-High security levels).
Normal security level
This mode offers all the functionalities.
Target:
• You can select this level if you want to use some features not covered by MEDIUM security
level.
• This level is more dedicated for small network infrastructure where security is less required
versus features.
Chapter 2 - Security on Océ PlotWave 300/350, PlotWave 750, PlotWave 900 and ColorWave 300
70
Page 71

Set the security level on Océ PlotWave 750 or océ PlotWave 900 R2.x
Security levels presentation
Refer to
Set the security level on Océ PlotWave 900 R1.1 and higher
on page 28.
Chapter 2 - Security on Océ PlotWave 300/350, PlotWave 750, PlotWave 900 and ColorWave 300
71
Page 72

Prevent any outgoing connection to the Internet
Prevent any outgoing connection to the Internet
Introduction
Some features of the following systems allow or request a connection over the Internet to work
properly:
• Océ PlotWave 750
• Océ PlotWave 900 R2.x
When the Security Policy in a company prevents any outgoing network traffic over the Internet,
perform all the following actions in Express WebTools:
StepIn the Express WebT‐
ools section
1 Support - Remote Serv-
ice - Remote assistance
2 Preferences - System
Defaults - Service related information
3 Configuration - Scan
destination [X]
4 Support - About - Shut-
down - Restart
Action Detail
Stop the Remote assistance if it is
activated
Disable Online Services Set 'Océ Online Services
Disable all scan destinations to FTP
sites reachable through the Internet
Restart the system
Click 'Stop remote assistance' until it changes into
'Allow remote assistance' .
The two blinking arrows
on the right side disappear.
connection enabled' to
'Disabled'
Uncheck 'Scan destination
[X]: enabled'
Chapter 2 - Security on Océ PlotWave 300/350, PlotWave 750, PlotWave 900 and ColorWave 300
72
Page 73

Antivirus
Compatibility and recommendations
The following 2 antivirus programmes can be installed on your Océ systems:
• Symantec AntiVirus Endpoint Protection
• McAfee VirusScan Enterprise Edition / ePolicy Orchestrator for AntiVirus update
Contact your Canon representative to know which antivirus version to install on your Océ
systems and get the installation procedure.
NOTE
Canon/Océ shall not be liable for damages of any kind attributable to the use of an antivirus on
its controllers.
Antivirus
Chapter 2 - Security on Océ PlotWave 300/350, PlotWave 750, PlotWave 900 and ColorWave 300
73
Page 74

Roles and Passwords
Roles and Passwords
Roles and profiles in the Océ PlotWave 750 and Océ Plotwave 900 R2.x
Roles description
In the system, the main network and system settings are protected against change. Only
authorised users can configure/change these settings.
4 roles are available:
• Key operator:
The Key operator can manage the jobs and the device settings
• System administrator
The System administrator can manage the Configuration settings such as the Network settings,
scan destinations settings, security settings (e-shredding, IPsec), and the hardware/software
configuration settings...
• Power user
The Power user has both the rights of the Key operator and the System administrator
• Service
This role is used exclusively by the Canon Service technician
Passwords policy and behaviour for Océ PlotWave 750 and Océ PlotWave 900 R2.x
Introduction
In Océ Express WebTools the passwords protect:
• The roles
• The Scan to File remote user name
• The security settings (preshared key for IPsec)
• The mobile printing password
On the printer panel, a password protects the administration settings.
Passwords in Océ Express WebTools
Password modification table for Océ PlotWave 750 and Océ PlotWave 900 R2.x
Password for Can be changed by Stored in the back up set*
Key operator Key operator or Power user No
System administrator System administrator or Power
user
Power user Power user No
Service System administrator or Power
user
No
No
Mobile printing password (for
Océ Mobile WebTools)
Any Scan To File remote user
name
Chapter 2 - Security on Océ PlotWave 300/350, PlotWave 750, PlotWave 900 and ColorWave 300
74
System administrator or Power
user
System administrator or Power
user
No
No
4
Page 75

Printer panel protection
Password for Can be changed by Stored in the back up set*
Any preshared key for IPsec System administrator or Power
Remote Service Proxy authentication user
* When you make a back up set of your system settings using the 'Save Set' feature in Océ
Express WebTools ('Preferences' tab).
The passwords are stored in the backup file whatever the role used when making the 'Save Set'
operation (as System administrator, Key operator, or Power user). However, the passwords are
restored only when the System administrator or the Power user performs the 'Open Set'
operation.
Password policy
• 256 characters maximum
• Any number [0-9]
• Any letter lowercase/uppercase [a-z][A-Z]
• the following special characters:
_
( ) = + , . ; : [ ] / | \
No
user
System administrator or Power
user
- ~ ! @ # $ % ^ * ? { }
Yes, stored encrypted.
Passwords storage on the controller
All passwords are stored encrypted on the controller. There is no open access to the system to
change them.
You can change them only through the standard user interface on the controller.
Password on the printer panel (for Océ PlotWave 750)
You can activate the password to restrict the access to the Administrator settings from the printer
panel. this password is fixed and cannot be changed (refer to the Océ PlotWave 750 Operation
Guide to know more about the password)
Printer panel protection
Introduction
From Océ Express WebTools, you can disable the access to some administration and network
settings from the printer panel.
When the 'System administration from Printer Panel' feature is disabled in the Configuration Connectivity settings in Océ Express WebTools, the 'Administrator only' menu is no more
displayed on the printer panel.
Therefore, the following settings are no more accessible from the printer panel:
• Network adaptor settings
• ‘Clear memory’ (job removal)
• Activate deactivate buzzer
• Activate deactivate password (on the printer panel)
Chapter 2 - Security on Océ PlotWave 300/350, PlotWave 750, PlotWave 900 and ColorWave 300
75
Page 76

Audit log
Audit log
Introduction
All changes related to security settings are logged in the Audit log. They can be downloaded
and/or cleared.
The operations stored in the Audit log
In Océ Express WebTools, open the Support - Audit log tab to download the Audit log that
contains information on any change made in settings.
Collected information on each setting is:
NOTE
In columns from left to right.
1. Username (if available)
2. IP address of the host or printer user interface from where the modification was done
3. Name of the host or printer user interface from where the modification was done
4. Type of event (create/modify/delete/start/stop/action)
5. Object concerned (setting/template name, service name, operation/action)
6. New value (if applicable, and not logged for password fields)
7. Timestamp in UTC (date&time in ISO-8601 format, yyyy-mm-ddThh:mm:ssZ)
User (Key operator, System administrator, Power user) and Service settings:
• IPv4/IPv6 network settings (IP address, Subnet mask, DNS, Gateway, DHCP, …)
• IPsec settings
• Network services (enable/disable/settings)
• Creation/modification/removal of scan destinations
• Changes of passwords used to protect security-related settings (Key operator, System
administrator, Power user, Service, User interface password/PIN for network settings, …)
• Timezone
• E-shredding settings
• Remote service online connection (enabled/disabled)
• 3rd-party software settings (remote desktop, admin account, firewall port)
• Smart Inbox (enable/disable)
• Allow Service Technician to reset passwords (on/off)
• Save retrieved job data for service (on/off)
• HTTPS settings (enable/disable, change of certificate)
• HTTP proxy settings (for remote service)
• Force entry of accounting data for scan/copy/print (on/off)
• Startup/ shutdown of the audit functionality
• Tracking info: when someone logs on to view or to change non-security settings
• Changing date and time
• Use of restore and 'open set'
Service settings only:
• Retrieval of job data by service
• Resetting of passwords by service
• Remote service (Allow remote login)
• Audit log export
• Accounting dialog upload (used to implement access control for scan/copy)
Chapter 2 - Security on Océ PlotWave 300/350, PlotWave 750, PlotWave 900 and ColorWave 300
76
Page 77

Data Security
E-Shredding
E-shredding presentation
Introduction
The e-shredding feature is a security feature which allows to overwrite any user data (print/copy/
scan) when it is deleted from the system.
This feature prevents the recovery of any deleted user data (files' content and attributes)
A deleted job is a job that cannot be retrieved from any user interface.
When is a job deleted?
A job is deleted either:
• When it is manually deleted from a Smart Inbox
• After it was successfully printed and was not saved in a Smart Inbox ('Save printed jobs in a
Smart Inbox' system setting is disabled in the Océ Express Webtools)
• After a 'ScanToFile to remote destination' has been successfully performed
• When it is automatically deleted after a timeout:
- When the end of the job lifetime in the Smart Inbox is reached ('Save printed jobs in a Smart
Inbox' system setting is enabled in the Océ Express Webtools and the 'Printed jobs in Smart
Inbox: job lifetime' is set)
- When the time for the cleanup of the 'Scans in Smart Inbox' is reached
• When a 'Clear system' or 'Clear memory' (job removal) is performed on the printer local
interface
Data Security
E-shredding algorithms
Select one of the three e-shredding behaviours:
•
DOD 5220.22-M: 3-pass overwriting algorithm (compliant with the US Department of Defense
directive):
•
Gutmann: 35-pass overwriting algorithm with random data
•
Custom: set the number of passes, from 1 to 35.
NOTE
The e-shredding feature has been designed to minimise impact of the global system
performance.
However the more passes selected, the more impact it has on general performance.
It is recommended to minimise the number of passes when document production is required.
Enable the e-shredding
Before you begin
You must be logged as a System Administrator or a Power user.
NOTE
When you enable the e-shredding, the system automatically disables the 'Save printed jobs in a
Smart Inbox' setting.
Chapter 2 - Security on Océ PlotWave 300/350, PlotWave 750, PlotWave 900 and ColorWave 300
77
Page 78

Enable the e-shredding
Enable/disable the e-shredding (Océ Express WebTools)
Procedure
Open a web browser and enter the system URL: http://<hostname>, to open the Océ Express
1.
WebTools
Open the 'Configuration' - 'Connectivity' page and select the 'E-shredding' section
2.
Click Edit
3.
Check 'E-shredding' feature to enable it
4.
Select the algorithm.
5.
When you select 'Custom', set the number of passes
Result
When the E-shredding feature is enabled, an indication is displayed at 2 locations in the system:
• On the printer user panel, an indication is displayed in the System menu: 'E-shredding
enabled'
• In the Océ Express WebTools window, a new icon is added to the list of icons (bottom right)
Each time data (file's content or attributes) is deleted from the system, the e-shredding process
occurs.
For a while, the E-shredding feedback returns as 'busy':
Once the e-shredding data processed is complete, the status comes back to 'E-shredding ready' in
the Océ Express WebTools (roll over the icon) on a workstation or on the controller monitor
NOTE
In case some scanned files have a 'Scan destination file name' composed of more than 256
characters, on the controller or on the remote destination, they will be deleted, but they will not
be e-shredded (too long name).
Chapter 2 - Security on Océ PlotWave 300/350, PlotWave 750, PlotWave 900 and ColorWave 300
78
Page 79

Example
E-shredding and 'Save received job data for Service' feature
On Océ PlotWave 750 and PlotWave 900 R2.x, enabling the e-shredding function doesn't impact
the feature 'Save received job data for Service'.
If 'Save received job data for Service' is activated it is recommended to clean-up the system and
delete all job data previously saved for Service:
1. Enable e-shredding
2. In Preferences - Systems settings, go to the Contact section
3. Set the 'Save received job data for Service' setting to 'Off and clear at next reboot'
4. Restart the controller
E-shredding process and system behaviour
When you enable the e-shredding
When you enable the e-shredding, the system starts the e-shredding process for all print/scan
jobs that will be deleted.
E-shredding process will occur as a background task.
E-shredding process and system behaviour
All processed jobs will be e-shredded as soon as they are deleted:
- After a manual deletion from the Smart Inbox
- After an automatic deletion of the print and scan jobs by the system (timeout, disabled Smart
Inbox, cleanup)
When you disable the e-shredding
When you disable the e-shredding, the system:
• Terminates the e-shredding process for files which are being e-shredded
• Will not e-shred the new deleted files
Make sure all the scan/copy/print jobs are completely e-shredded
Once a batch of scan/copy/print jobs has been processed, perform the following actions to make
sure all the files are e-shredded:
1. Unplug the system from the network
2. Check that 'Save received job data for Service' setting is set to 'Off and clear at next reboot'
3. Restart the system controller
4. Check that 'Saved print jobs in Smart Inbox' is disabled
5. Delete any job from the 'Scans' Smart Inbox
6. Make a 'Clear system' from Océ Express WebTools (Maintenance section in the Support tab)
7. Wait until the e-shredder status comes back to 'Ready' (in Océ Express WebTools or on the
printer panel)
8. Restart the system controller
9. Wait until the e-shredder status displays 'Ready' (in Océ Express WebTools)
Chapter 2 - Security on Océ PlotWave 300/350, PlotWave 750, PlotWave 900 and ColorWave 300
79
Page 80

IPsec
IPsec
IPsec presentation
Introduction
IPsec is a protocol that provides authentication, data confidentiality and integrity in the network
communication between devices.
A strong mechanism of encryption guarantees the confidentiality of the user print and scan data
on the network.
IPsec is particularly suitable in a configuration where you need to create a dedicated secure link
between the printer/copier system and a workstation which can be dedicated as a Print Server (or
a Scan Server).
You can connect up to 5 IPsec stations to the printer/copier system.
In this configuration below:
• The printer/copier system is physically connected to the network but communicates only with a
dedicated station (a Print Server or Scan Server for example)
• The Print Server receives the print request from the workstations via IP on the network
• The Print Server send the print requests to the printer/copier system via IPsec
• The workstations cannot communicate directly with the printer/copier system
NOTE
In this configuration, the back-channel communication between a workstation and the printer is
unavailable (the back-channel information is not displayed in the Océ WPD driver).
NOTE
IPsec can be used only with IPv4 (IP type set to 'IPv4 only' or 'IPV4 and IPv6 both enabled').
In the Connectivity - Network adapter section, the IPsec settings are not available when 'IPv6
only' is selected.
Chapter 2 - Security on Océ PlotWave 300/350, PlotWave 750, PlotWave 900 and ColorWave 300
80
Page 81

Illustration
IPsec presentation
IPsec parameters in the Océ Express WebTools (EWT)
The following IPsec parameters are available in the Océ Express WebTools :
IPsec Generic section:
IPSec
Enabled/Disabled
Failsafe option
Enabled/Disabled
Default preshared key
Other settings You can display the other IPsec generic settings ('See all').
General setting to enable or disable IPsec.
Once enable, only the network traffic defined by the IPsec configuration
rules is authorised.
Keep this option enabled during the IPsec configuration, until the complete and successful IPsec communication between the printer/copier
system and the configured station.
- When the option is Enabled (with IPsec enabled), only the network
traffic defined by IPsec configuration rules is authorised.
All other network traffic is denied except the HTTP traffic for Océ Express WebTools with any workstation: this allows to change some IPsec settings via Océ Express WebTools, from any workstation.
- When the option is Disabled (with IPsec enabled): only the network
traffic defined by the IPsec configuration rules is authorised. All other
network traffic is denied.
You can define a default preshared key that will be used for all the stations connected by IPsec to the printer/scanner system.
Keep them unchanged.
IPsec stations section:
You can configure a maximum of 5 IPsec communications between the printer/copier system and
5 workstations.
Enable and configure the parameters for each required station.
Chapter 2 - Security on Océ PlotWave 300/350, PlotWave 750, PlotWave 900 and ColorWave 300
81
Page 82

Configure the IPsec settings on the Océ controller
The parameters can be different for each different workstation:
- the IP address
- the preshared key (keep the generic default one or set a custom one)
Configure the IPsec settings on the Océ controller
Before you begin
You must be logged as a System Administrator or a Power user.
Activate and configure IPsec on the printer/scanner controller
Procedure
Open a web browser and enter the system URL: http://<hostname>, to open the Océ Express
1.
WebTools
Open the 'Configuration' - 'Connectivity' page
2.
In 'IPsec generic' section, click 'Edit'
3.
Check 'IPsec'
4.
Keep 'Failsafe option' checked during the phase you configure the IPSec.
5.
In case of need, this allows to be able to connect to the Océ Express WebTools from any
workstation in order to be able to change parameters.
Keep the other parameters as they are.
6.
Chapter 2 - Security on Océ PlotWave 300/350, PlotWave 750, PlotWave 900 and ColorWave 300
82
Page 83

Configure the IPsec settings on the Océ controller
In the 'IPsec stations' section, click 'Edit'
7.
Select '"IPsec station 1: Enable'
8.
Enter the 'IPsec station 1: IP address' of the workstation
9.
Create and enter the 'IPsec station 1: Preshared key' using the following policy:
10.
• 256 characters maximum
• Any number [0-9]
• Any letter lowercase/upper-case [a-z][A-Z]
• the following special characters:
_
- ~ ! @ # $ % ^ * ? { }
( ) = + , . ; : [ ] / | \
NOTE
Write it down, this preshared key will be required during the IPsec configuration on the
workstation.
NOTE
IPsec can be used only with IPv4 (IP type set to 'IPv4 only' or 'IPV4 and IPv6 both enabled').
In the Connectivity - Network adapter section, make sure 'IPv6 only' is NOT enabled before you
configure IPsec on the controller.
Result
The IPsec settings are configured on the controller for a connection to a workstation (which can
be a print server).
Chapter 2 - Security on Océ PlotWave 300/350, PlotWave 750, PlotWave 900 and ColorWave 300
83
Page 84

Configure the IPsec settings on a workstation or a print server
Configure the IPsec settings on a workstation or a print server
When to do
After the IPsec configuration on the controller.
Pre-requisites
Log on the workstation with the Administration rights.
Purpose
Complete the IPsec configuration for a secure connection between the printer/copier system and
a workstation.
On the workstation, perform the 6 following actions:
1-
Add the security snap-in
2-
Create the security policy
3-
Create the filter list
4-
Define the filter actions and security negotiation
on page 42
on page 43
on page 44
on page 46
5-
Define the security rule
6-
Assign the security policy
on page 47
on page 49
NOTE
The procedure below shows the configuration steps on Windows server 2008.
The procedure is similar on other Operating Systems (Windows Server 2003, Windows XP,
Windows Vista, Windows 7)
The impact of IPsec when you print using Océ WPD through a print server
Introduction
When you use WPD on a print server, with advanced accounting activated, the use of IPsec has
an impact on the workflow.
When the following conditions are gathered:
• A print server is configured as an IPsec station. Océ WPD is installed on the print server.
• IPsec is activated and the 'Failsafe mode' is disabled on the printer controller.
• The client workstation is not configured as an IPsec station.
• The client workstation uses the Océ WPD shared driver installed on the print server (Point &
Print) to print jobs.
Pre-requisites
When advanced accounting is required, make sure you configured Account Center BEFORE
disabling the 'Failsafe mode' on the printer controller.
Consequences of the IPsec configuration on the client workstation:
The back-channel information (printer status, feed data) is not retrieved from the printer. It is not
displayed in the driver interface.
Chapter 2 - Security on Océ PlotWave 300/350, PlotWave 750, PlotWave 900 and ColorWave 300
84
Page 85

Troubleshooting: emergency procedure to disable IPsec
On the workstation, when the job is sent with Océ WPD:
• The required accounting information is not requested when submitting the job.
• The submitted job is stored in the Smart Inbox. It is not printed since accounting information is
missing.
Open the Inbox in Océ Express WebTools (on an IPsec station) to enter the required accounting
information and print the job.
NOTE
To be able to enter the accounting information and print directly from the workstation, enable
the 'Failsafe mode' on the controller.
Then, the accounting window will be displayed on the client workstation, and the accounting
information can be entered to print the job.
Troubleshooting: emergency procedure to disable IPsec
Introduction
In the following case:
• IPsec is enabled and activated on the printer/scanner controller
and
• The 'Failsafe mode' is disabled
and
• The communication between the controller and the IPsec stations fails
You cannot open remotely Océ Express WebTools to change the settings. The system is
unreachable.
Solution to disable IPsec:
Connect to the printer system through the controller monitor (configuration where a keyboard
and monitor are plugged on the printer controller) to open Océ Express WebTools and disable
IPsec.
Chapter 2 - Security on Océ PlotWave 300/350, PlotWave 750, PlotWave 900 and ColorWave 300
85
Page 86

HTTPS (on Océ PlotWave 750 and PlotWave 900 R2.x)
HTTPS (on Océ PlotWave 750 and PlotWave 900 R2.x)
Encrypt print data and manage the system configuration using HTTPS
Introduction
On the Océ PlotWave 750 and Océ PlotWave 900 R2.x systems, you can use the HTTPS protocol
to:
- to send encrypted print data to the printer controller via Océ Publisher Express
- to save encrypted scan jobs from the printer controller (Scans Inbox)
- to securely manage the configuration of the system through Océ Express WebTools
Certificates are used to check the identity of the workstations and controller during the
communication.
The HTTPS protocol is always available.
All settings and options available through HTTP are also available through HTTPS.
The Océ self-signed certificate and the CA-signed certificate
2 types of certificates can be used:
• By default, Océ delivers an Océ self-signed certificate. This certificate provides encryption of
the print data (sent through Publisher Express) and of the configuration settings (accessed
through Océ Express WebTools) between the client and the controller. It can be easily used.
This self-signed certificate has not been signed by a Certification Authority, consequently the
web browser will display a 'Certificate Error' message the first time you use the HTTPS
protocol.
• The CA-signed certificate is delivered by a Certification Authority.
The administrator can request and import a CA-signed certificate when the security policy
recommends it.
Configure the HTTPS settings
Go to Configuration - Remote security and log on as the System administrator to manage the
certificates.
NOTE
On the controller monitor (screen/keyboard connected directly to the controller) only the 'Reset
Certificate' item is displayed on the Remote security page.
Chapter 2 - Security on Océ PlotWave 300/350, PlotWave 750, PlotWave 900 and ColorWave 300
86
Page 87

Use the Océ self-signed certificate with Internet Explorer
Before you begin
The first time you use a self-signed certificate, your web browser will generate security error
messages.
In order to easily and securely use the self-signed certificate in your web browser, you must:
- View and check the self-signed certificate in your web browser
- Configure your web browser to trust the self-signed certificate
Use the Océ self-signed certificate with Internet Explorer
Procedure
On a workstation, type the URL address of your printer in Internet Explorer: https://[common
1.
Name or PrinterHostname or PrinterIPaddress]
A warning window opens. It displays 2 errors:
• The certificate is not issued by a trusted certificate authority.
• The Common Name in the certificate does not match the printer hostname (or IP Address) you
typed in the address bar.
In order to view and check the self-signed certificate, continue to the website
2.
Click on 'Certificate error':
3.
Click 'View certificates'
4.
The certificate is issued to 'OcéExpress WebTools' by 'Océ Express WebTools'
5.
Click 'Install Certificate...'
6.
Follow the Wizard's instructions to import the certificate into your web browser:
7.
1. Place the certificate in the 'Trusted Root Certification Authorities' folder
Chapter 2 - Security on Océ PlotWave 300/350, PlotWave 750, PlotWave 900 and ColorWave 300
87
Page 88

Use the Océ self-signed certificate with Internet Explorer
2. Accept the warning
3. Finish the installation
When the import is successful, the 'Océ Express WebTools' Certificate is recognised and its status
is OK.
Open the Tools menu\Internet options\Advanced tab. In the Security section, uncheck the option
8.
"Warn about certificate address mismatch"
Chapter 2 - Security on Océ PlotWave 300/350, PlotWave 750, PlotWave 900 and ColorWave 300
88
Page 89

Use the Océ self-signed certificate with Mozilla Firefox
Close ALL instances of Internet Explorer
9.
Restart the browser and type the URL of your printer in Internet Explorer (https://[common Name
10.
or PrinterHostname or PrinterIPaddress]).
Result
The padlock is displayed on the address bar, Océ self-signed certificate guarantees:
• The identity of the remote computer (controller)
• The encryption of the print data on the network
Use the Océ self-signed certificate with Mozilla Firefox
Procedure
On a workstation, type the URL address of your printer in Mozilla Firefox (https://[common Name
1.
or PrinterHostname or PrinterIPaddress]).
A warning window opens. It displays 2 errors:
• The certificate is not trusted because it is self-signed
In order to view and check the self-signed certificate, continue to add an exception.
2.
Chapter 2 - Security on Océ PlotWave 300/350, PlotWave 750, PlotWave 900 and ColorWave 300
89
Page 90

Request and import a CA-signed certificate
Click 'I Understand the Risks' and 'Add Exception...'
3.
In the 'Add Security Exception' window, click 'Get Certificate' to get the certificate from the
4.
controller web server.
The 'Wrong site' and 'Unknown Identity' errors are displayed.
Click 'View...' to see the content of the certificate.
5.
Check the following values:
Common Name (CN) = Océ Express WebTools
Organization (O) = Océ
Organization Unit (OU) = WFPS
The certificate is issued to 'Océ Express WebTools' by 'Océ Express WebTools', so you can
6.
confirm the security exception (permanent or temporary exception).
A security warning window may pop-up. Click 'Yes' to continue.
7.
Result
The Océ Express WebTools software opens.
You can check in the status bar (at the bottom of the window) that the padlock is displayed.
In the navigation bar, the Océ certificate is registered as an exception.
The identity of the remote controller and the encryption of the data on the network are secured.
Request and import a CA-signed certificate
Description of the overall procedure to request and import a CA-signed certificate
Introduction
By default the first certificate delivered for the use of HTTPS is an Océ self-signed certificate.
To ensure a fully trusted authentication, you can request and import a certificate delivered by a
Certification Authority (CA-signed certificate).
Information about certificates
When you generate a CA-signed certificate request on a controller:
• A new private key is created: this key stays in the controller
• The certificate request containing the public key is created. Send it to the Certification
Authority.
Chapter 2 - Security on Océ PlotWave 300/350, PlotWave 750, PlotWave 900 and ColorWave 300
90
Page 91

Description of the overall procedure to request and import a CA-signed certificate
The CA-signed certificate you will receive also contains the public key. This public key is linked
to the private key already stored in the controller.
In the controller, the private key and the public key must match to enable a secure HTTPS
protocol.
To request and then import a CA-signed certificate while you are still using HTTPS, follow these 2
procedures, step by step:
Overall procedure to prepare and generate the CA-signed certificate request
Step Description
A1- Back up the current certificate
and private key
A2- Generate the certificate request Make this step when you want to request and install a
A3- Save the content of the certificate request
A4- Restart the controller
The current certificate can be:
• the original Océ self-signed certificate embedded
• a CA-signed certificate (delivered by a Certification
Authority) you previously installed
Back up a certificate and a private key
See
CA-signed certificate.
During the creation of the request, a new private key is
created.
Generate a CA-signed certificate request
See
page 139.
Send this content to the Certification Authority to request a (CA-signed) certificate
The Certification Authority will check the request and reply.
- If the request is valid, go to step A4
- if the request is not valid, make a new request (A2) ac-
cording to the remarks/corrections suggested by the CA
request feedback
on page 138.
on
Overall procedure to import the new CA-signed certificate
Step Description
B1- Save and store the new CA-signed certificate
B2- Import the new CA-signed certificate into the controller
Save the CA-signed certificate you received from the
Certification Authority.
Import the CA-signed certificate (Root and/or Intermediate and CA-signed certificates).
See
Import a CA-signed certificate (into the controller
and workstations)
B3- Restart the controller
Chapter 2 - Security on Océ PlotWave 300/350, PlotWave 750, PlotWave 900 and ColorWave 300
on page 140.
4
91
Page 92

Description of the overall procedure to request and import a CA-signed certificate
Step Description
B4- Import the Root certificate into
the web browsers of the workstations
B5- Back up the certificate and private key
Other procedures
Procedure When to do
Restore a certificate and a private key You can restore the certificate and the private key at any
The Root certificate identifies the Certification Authority.
By default, the web browsers contain a list of wellknown and trusted Root certificates.
In case the Root certificate of the Certification Authority
is not in this list, install the CA Root certificate in the
'Trusted Root certificates' list of the web browser, on
each workstation.
Check and import the Root certificate into the work-
See
stations browser
on page 141.
Back up and store the certificate and the private key.
Note: It is highly recommended to back up the CA-signed certificate and the private key since they are not
saved in any system backup.
Back up a certificate and a private key
See
on page 138.
moment, in case of need.
See
Restore a certificate and a private key
on page 141
Reset the current certificate You can reset the certificate after a certificate request or
at any moment when you want to restore a self-signed
certificate.
This procedure creates a new Océ self-signed certificate.
Reset the current certificate
See
on page 142
Chapter 2 - Security on Océ PlotWave 300/350, PlotWave 750, PlotWave 900 and ColorWave 300
92
Page 93

Smart Inbox management and job management
Smart Inbox management and job management
Configure the Smart Inboxes and the job management settings
You can use the Smart Inbox management features of your system to limit and restrict the access
to the print and scan job data.
Configure the job management settings to manage the visibility of jobs and their availability
through Océ Express WebTools
Smart Inbox and job management configuration:
Go to the 'Preferences'/'System properties' to disable or restrict:
The use of the Smart Inboxes
('Smart Inbox capability')
The remote view of the Smart Inboxes
('Remote Smart Inbox view')
The ability to print from Smart Inbox and
to make queue operations
('Printing from Smart Inbox and queue
operations')
The use of Publisher Express to create
jobs
('Create print job via Publisher Express')
When the 'Smart Inbox capability' is set to 'Disabled' the incoming jobs are temporary displayed
grey out in the Smart Inbox and sent to the print job
queue. The jobs are removed from the Smart Inbox
as soon as they are printed.
Recommendation
Before disabling the “Smart Inbox capability” it is
advised to cleanup the jobs:
• Clear the temporary store
• Clear the system
When set to 'Login needed', you restrict the view on
the Smart Inboxes to the Key operator or Power
user only (logging needed to view the Smart Inbox).
When set to 'Login needed', all remote actions on
jobs in the Smart Inboxes and queue are restricted
to the Key Operator or Power user only.
When set to 'no one', the job submission capability
(through Express WebTools) is completely deactivated.
When the login is needed, only the System administrator, the Power user or the Key operator can log
to use Publisher Express.
The ability to delete scans from the Smart
Inbox
('Delete scans from the Smart Inbox')
Chapter 2 - Security on Océ PlotWave 300/350, PlotWave 750, PlotWave 900 and ColorWave 300
When set to 'Login needed', only the Key Operator
or Power user can log to delete scans from an inbox.
93
Page 94

Smart Inbox management and job management
Chapter 2 - Security on Océ PlotWave 300/350, PlotWave 750, PlotWave 900 and ColorWave 300
94
Page 95

Chapter 3 Security on Océ PlotWave 500 and PlotWave 340/360
Page 96

Overview
Overview
Security overview for the Océ PlotWave 500 and PlotWave 340/360 systems
Introduction
The Océ PlotWave 500 and PlotWave 340/360 systems are equipped with the following security
features:
Security overview
Operating System
Firewall Yes
Network protocols protection Yes (per protocol, through firewall)
MS security patches Océ released patches
Security logging Auditing of security related events
Antivirus Yes
IPv6 Yes (IPV6 only or IPV6/IPV4 combination)
Data overwrite E-shredding
Data encryption on the network IPsec
Password protection Yes for:
Access control IP filtering
SMB authentication NTLMV2
Smart Inbox management - Smart Inbox capability can be disabled
Windows Embedded Standard 7 SP1
HTTPS for administration (Océ Express WebTools) and
for Job submission through Océ Publisher Express
- User settings
- Administration settings
- Settings on the printer user panel
- Remote view restriction
Océ Publisher Express access Access restriction
Actions on jobs Remote action restriction
Chapter 3 - Security on Océ PlotWave 500 and PlotWave 340/360
96
Page 97

System and Network security
System and Network security
Ports - Protocols
Applications, protocols and ports used in the Océ PlotWave 500 and PlotWave 340/360 systems
Printing applications with Océ PlotWave 500 and PlotWave 340/360: INBOUND and OUTBOUND
ports and protocols used by the system
Application /Functionality INBOUND ports on the con‐
troller: protocol
Océ Wide-format Printer Driver for Microsoft Windows
(WPD2)
Océ PostScript 3 driver TCP 515: LPR
Océ Publisher Express TCP 80: HTTP
Publisher Select TCP 80: HTTP
Océ Publisher Mobile
TCP 515: LPR
TCP 80: HTTP for back-channel* and Advanced accounting
UDP 515: Océ protocol for
Printer Discovery
TCP 443: HTTPS
UDP 515: Océ protocol for
Printer Discovery
TCP 515: LPR
TCP 4242: FTP passive mode
(for data channel in FTP passive mode)
ICMP: ping
UDP 515: Océ protocol for
Printer Discovery
TCP 21: FTP
(1)
(2)
OUTBOUND ports from the
controller: protocol
UDP 515: Océ protocol for
Printer Discovery
Océ Reprodesk Studio TCP 515: LPR
TCP 65200: Océ back-channel
(OCI)
Novell NDPS printing TCP 515: LPR
LPR printing TCP 515: LPR
FTP printing TCP 21: FTP
TCP 4242 (for data channel in
FTP passive mode)
Print from SMB TCP 139, 445
UDP 138, 445
Chapter 3 - Security on Océ PlotWave 500 and PlotWave 340/360
4
97
Page 98

Applications, protocols and ports used in the Océ PlotWave 500 and PlotWave 340/360 systems
Application /Functionality INBOUND ports on the con‐
troller: protocol
Print from FTP
OUTBOUND ports from the
controller: protocol
FTP command
(3)
:
- Local: TCP any
- Remote: TCP 21
FTP Data
(3)
:
- Local : TCP any
- Remote: TCP any
Print from Cloud: WebDAV TCP 80: HTTP
TCP 443: HTTPS
TCP web proxy port
(4)
TCP WebDAV port
Notes:
* Océ back-channel is an Océ proprietary protocol used to retrieve information from the printer
(status, media loaded...) and to display it in the application or driver.
(1)
For Océ Publisher Mobile v 2.2 and later for Android, and for Océ Publisher Mobile v 2.3 and
later for iOS
(2)
Only for Océ Publisher Mobile v 2.0 to v2.2 for iOS
(3)
FTP passive mode only (FTP active mode not supported).
(4)
When there is a proxy.
Scanning applications with Océ PlotWave 500 and PlotWave 340/360: INBOUND and
OUTBOUND ports and protocols used by the system
Application /Functionality INBOUND ports on the con‐
troller: protocol
Scan to File: SMB TCP 139, 445
Scan to File: FTP
Scan to File: Cloud (WebDAV) TCP 80: HTTP
Scan data retrieval from Smart
Inbox (Scans)
TCP 80: HTTP
TCP 443: HTTPS
Notes:
(1)
FTP passive mode only (FTP active mode not supported).
(2)
When there is a proxy.
OUTBOUND ports from the
controller: protocol
UDP 137, 138, 445
FTP command
(1)
- Local: TCP any
- Remote: TCP 21
FTP Data
(1)
:
- Local : TCP any
- Remote: TCP any
TCP 443: HTTPS
TCP web proxy port
TCP WebDAV port
:
(2)
Chapter 3 - Security on Océ PlotWave 500 and PlotWave 340/360
98
Page 99

Applications, protocols and ports used in the Océ PlotWave 500 and PlotWave 340/360 systems
Control management with Océ PlotWave 500 and PlotWave 340/360: INBOUND and
OUTBOUND ports and protocols used by the system
Application /Functionality INBOUND ports on the con‐
troller: protocol
PING IPv4 ICMPv4
PING IPv6 ICMPv6
nslookup UDP local port : any
UDP remote port : 53
SNMP based applications UDP 161: SNMP
Name resolution Outgoing connection:
Local port (on controller):
UDP(/TCP) <dynamic value>
Océ Express WebTools TCP 80: HTTP
TCP 443: HTTPS
Océ Account Center TCP 80: HTTP
Accounting information re-
TCP 80: HTTP
trieval
Océ Meter Manager UDP 161: SNMP
Océ back-channel TCP 65200 for OCI back-chan-
nel
OUTBOUND ports from the
controller: protocol
Remote port (on DNS server):
UDP(/TCP) 53
Océ Remote Service TCP 443: HTTPS
NetBios over TCP/IP UDP 137 TCP 139, 445
WSD TCP 80: HTTP
UDP 3702 for WSD discovery
TCP 5357 for WSD eventing
WAVE TCP 80: HTTP
OBIS TCP 80: HTTP for back-channel
(Océ Publisher Select)
IPsec UDP 500
UDP 4500
Notes:
(1)
When there is a proxy.
Additional built-in Windows 7 firewall rules
Inbound rules:
• Core Networking - Dynamic Host Configuration Protocol (DHCP-In)
• Core Networking - Dynamic Host Configuration Protocol for IPv6(DHCPV6-In)
TCP web proxy port
UDP 138
(1)
Outbound rules:
• Core Networking - DNS (UDP-Out)
• Core Networking - Dynamic Host Configuration Protocol (DHCP-Out)
• Core Networking - Dynamic Host Configuration Protocol for IPv6 (DHCPV6-Out)
Chapter 3 - Security on Océ PlotWave 500 and PlotWave 340/360
99
Page 100

Applications, protocols and ports used in the Océ PlotWave 500 and PlotWave 340/360 systems
• Core Networking - IPv6 (IPv6-Out)
Chapter 3 - Security on Océ PlotWave 500 and PlotWave 340/360
100
 Loading...