

Page 1
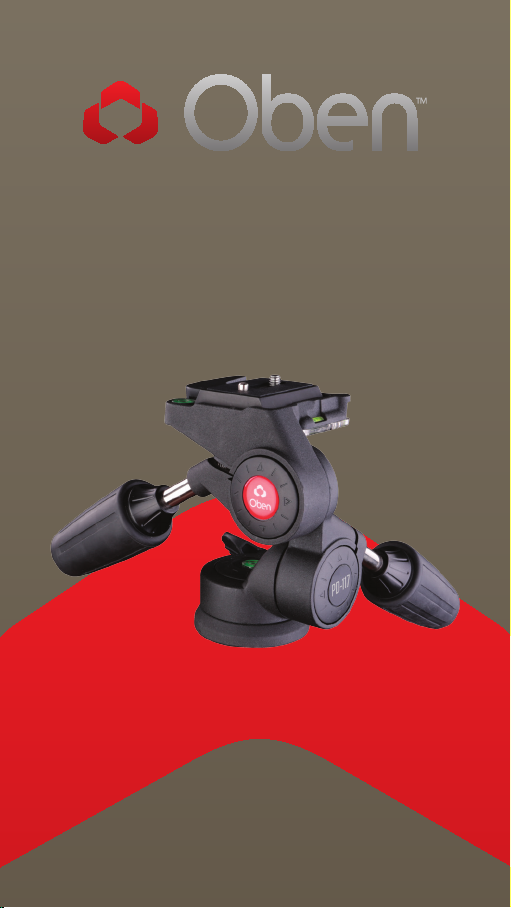
PD-117
3-Way Pan/Tilt Head
You’re on steady ground
1
™
Page 2

IntroductIon
Thank You for choosing Oben!
This st ur dy Oben PD -117 3-Wa y Pan and T ilt Head
oers precise, smooth operation, with independent
cont rol of eac h of the th ree axes.
The PD-117 has a dur able an d ha ndsome l owrefl ect ance powder-coat ed fin ish and ergonom ic
ru bber handl e gr ips for ti lt-and-pan operat ion.
Integr ated bub ble l eve ls along each of th e th ree a xes
ens ure accurate, p recise placement of the ca mer a.
Please read this entire manual before using the PD-117
3-Way Pan and Tilt Head.
Note: Images are for illustrative purposes only. Actual
product may vary.
tABLE oF contEntS
Key Features 4
Attach Handles to Head 5
Mount Head to Tripod 5
Dual Locking Quick-Release 5
Mount Quick-Release Plate 6
Mount Camera to Head 6
Operation 6
Pan Locking Knob 6
Vertical Tilt Handle 7
Pan and Tilt Handle 7
Warnings 7
2 3
Page 3
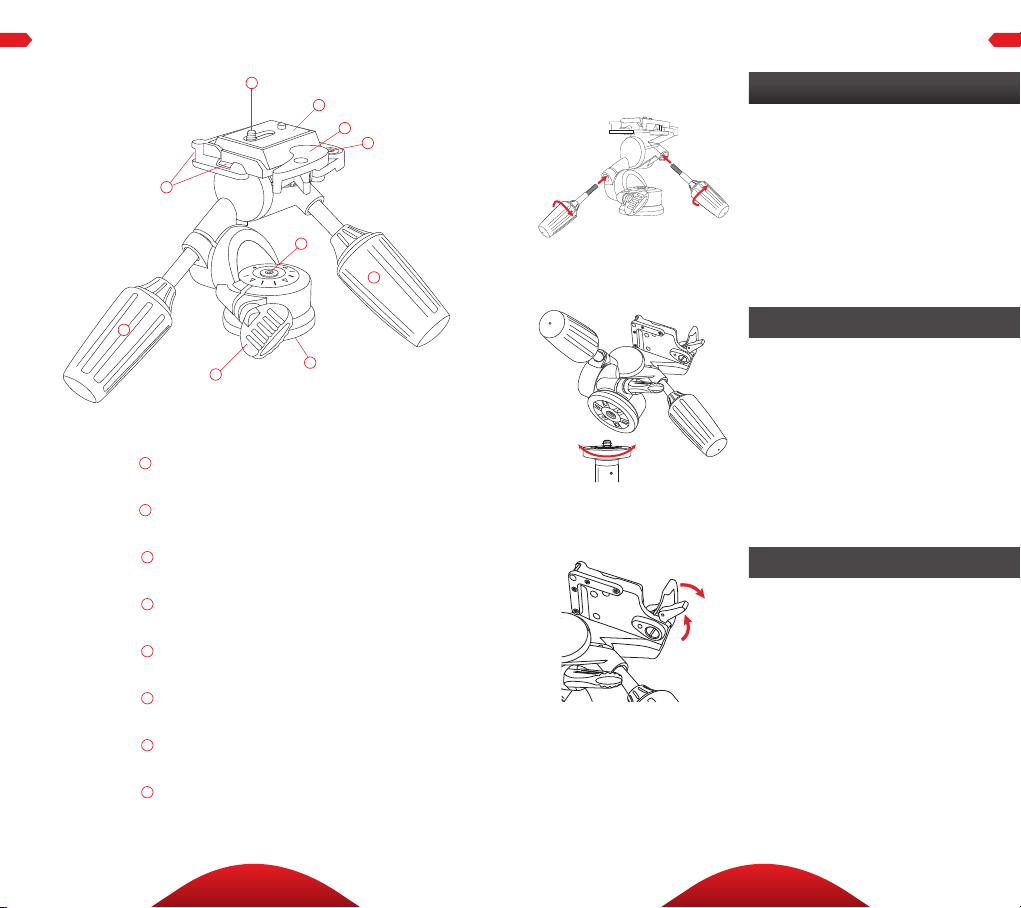
KEY FEAturES
oPErAtIon
H
F
D
E
A
Quick-Release Plate
B
Dual-Locking Quick Release
C
Vertical Tilt Handle
D
Pan and Tilt Handle
E
Pan Locking Knob
F
Bubble Levels
A
B
F
F
C
1. Attach Handles to Head
You mus t attach the c ont rol
handl es to t he head be for e usi ng
it. T here ar e two handl es, a s well
as a Pa n Locki ng K nob (which is
pre-insta lled). T he two ha ndles
to be inst al led a re identical and
either h andle c an be ins talle d in
either h andle p osit ion o n the head.
2. Mount Head to Tripod
G
To mo unt t he head on a tripod,
first tighten the p an lock ing kno b
on th e hea d. T hen, being carefu l to
properly align t he tripo d stud with
the h ead’s mount ing hole to avoid
damag ing the m, rotate the hea d
clockwise onto t he t ripod an d
hand-tighten .
3. Dual-Locking Quick-Release
The PD-117 is de sig ned w ith a
dua l-locking q uick-relea se latch
to keep th e camera secu rely in
pla ce on t he he ad. To un lock the
qu ick-r elease , press th e sma ll
latch while p ul li ng outwa rd on the
main la tch at the s ame time.
G
3/8”-16 Tripod Mounting Thread
H
1/4” Camera Mounting Screw
4 5
Page 4

oPErAtIon
oPErAtIon
4. Mount Quick-Release Plate
Mou nt the quic k-release plate to
the t hreaded hole on t he base o f
you r camera. T he plate uti lizes
a 1/4″-20 scr ew that w ill fit m ost
cam eras. A lign t he mounti ng
screw with the mo untin g socket
on your ca mera and ti ghten th e
screw sec urely. A fter ti ghteni ng
the s crew, fold th e thumbscr ew
flat a gainst th e bottom o f the
quick-release plate.
5. Mount Camera to Head
Af ter mou nting t he quick-re lease
plate to your c amera , ensure
that the handl es and knob on the
hea d are secure ly tightened . To
mou nt the ca mera to t he head ,
first in sert the side of the Qu ickRel ease Plate that i s opposit e the
qu ick-rele ase latch. T hen, press
dow n on the si de of the q uickrelease plate nearest th e quic krelease latch. The quick-release
latch wi ll automat icall y lock int o
pla ce when th e plate is pus hed
into the groove .
6. Operation
You shoul d only loo sen one
locking ha ndle at a t ime whe n
adjust ing you r camer a’s posit ion.
A. PAn LocKInG KnoB
The pan lock ing knob loc ks and
un locks the he ad, whi ch allows
you to rot ate the head 360°
horizontally.
Tu rn the k nob counter-clockw ise
to un lock and clock wise to lock it .
Af ter positioning the hea d, mak e
sure to securely t ighten t he knob.
c. VErtIcAL tILt HAndLE
The ver tical t ilt handle al lows
you to mov e the positio n of
the camera from horizontal to
vertical, or anywhere in-between.
Loosen the ha ndle by turning it
cou ntercl ockwise. Tigh ten it by
turning it clockwise.
c. PAn And tILt HAndLE
The pan a nd tilt h andl e allows
you to tilt the cam era up or
down, or rotate it horizontally.
Loosen the ha ndle by turning it
cou ntercl ockwise a nd tighten it by
turning it clockwise. To rotate th e
cam era hor izontally usi ng the pa n
and tilt handl e, first loos en the pa n
locking kn ob.
Warnings:
• Do not exceed the head’s maximum load
!
capacity of 17.6 lb (8 kg).
• Ensure that all appropriate locks are
engaged when necessary.
• Do not operate in saltwater. Dry head if it
becomes wet.
• Remove the camera from the head during
setup or transport.
• Avoid long-term exposure to sunlight.
• Keep out of reach of children .
Visit our website at ObenSupports.com
for more Oben products.
6 7
Page 5

© Copyright 2013 The Gradus Group
All other trademarks are the property of their respective owners
www.obensupports.com
8
 Loading...