

Page 1
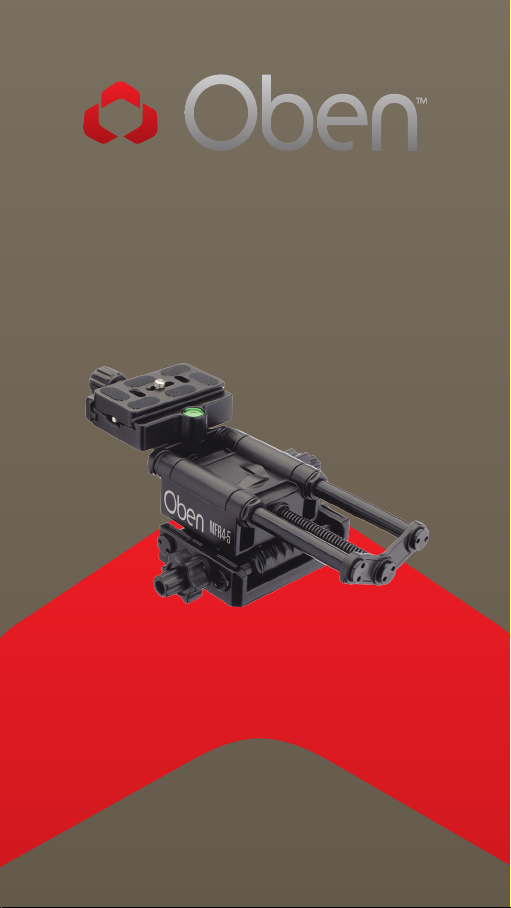
MFR4-5
Macro Focusing Rail 4-Way
You’re on steady ground
1
™
Page 2

INTRODUCTION
Thank You for choosing Oben!
The Oben MF R4-5 is a m ac ro focu sing ra il d esign ed
for precise camera-to-su bje ct focu sing id eal for
mac ro phot ography or exacti ng close-up w ork . The
two stages of the foc using r ai l provide fi ne contr ol
on tw o ax es: lef t-to-right and front-to-back.
This macr o foc us ing rail is comp atibl e with a ny
cam era that ha s a 1/4″-20 t hreaded sock et as wel l
as ca me ras wit h a 3/8″ t hr ead ed so cket when us ing
a 3/8 ″-1 /4″-20 bu sh in g. A n integ rat ed Arca-ty pe
qu ick-releas e plate pr ov ides an eas y an d sec ur e
att achment to mos t camer as . Th e lightweight M FR 45 mou nts onto most tr ipod s wi th eith er a 3/8″ o r
1/4″-20 t hrea ded s tu d. I f on ly front-to-back foc using
is needed, t he top an d botto m stages can b e easil y
separa ted w ith the included A llen ke y.
The MF R4-5 fe atures al l-aluminum constructi on
for dura bilit y an d tw o-l evel adjus tment k no bs fo r
precise foc using c ont rol. E xt ra se cu rity for your
cam era is pr ov ided by textu red r ubber pads on th e
qu ick releas e plate.
Key Features 3
Operation 4
Mount the Rail on a Tripod 4
Mount a camera onto the Rail 5
Operating the MFR4-5 6
Specifications 7
Warnings 7
2
Page 3

A
B
C
D
KEY FEATURES
E
F
H
A
Quick-release knob
B
Quick-release plate
C
Bubble Level
D
Quick-release plate platform
E
Front-back axis stage
F
Side-to-side axis stage
G
Front-back adjustment knob
K
I J
G
H
Side-to-side adjustment knob
I
Threaded mounting holes with
3/8″- 1/4″-20 bushing
J
Unthreaded hole
K
Allen key
L
Wrench
L
3
Page 4

OPERATION
1. Mount Rail to Tripod
1. If the tripod ha s a 1/4″-20
mou nting stud, proceed t o
step 2. If the tripod h as a
3/8″ mount in g st ud , use t he
included w rench t o remov e
the r edu cer bus hi ng f rom one
of th e soc kets on t he bott om of
the f ocusi ng rai l.
2. Alig n the mount in g soc ket
of th e foc us ing rail with t he
mou nting stud of t he t ripod.
Be ca refu l to hold it s tr aight
ove r the stud.
3. Screw t he focu si ng ra il
onto t he tripod by t ur ning it
clockwise onto th e st ud u ntil
it’s seat ed tight ly ag ai ns t th e
tripod plat form . Ma ke s ur e
the re a re no gaps bet ween th e
base and the tripod .
Important: If you r tr ipo d ha s set
screws o n th e platform, tight en
the m to se cu re t he focu sing ra il t o
the t ripod.
4
Page 5

OPERATION
2. Mount Camera onto Rail
The Arca-ty pe quick-release
plate ha s a 1/4″-20 mo untin g
screw that attach es to most
cameras.
Note: If your cam era has a 3/8 ″
mou nting s ocket, use a 3 /8″-1/4″-
20 reducer bu shing to sec urely
mou nt the ca mera to t he focu sing
rail.
1. Loose n the qu ick releas e knob
and rem ove the q uick rele ase
plate fr om the pl ate plat form.
2. Mo unt the cam era onto
the q uick-rele ase plat e by
tighten ing th e plate’s scr ew
to th e camer a by usin g the
wrenc h (included) , a coin, or the
attached D-ring.
3. Pl ace the c amera a nd qui ckrelease plate i nto the g rooves o f
the plate platform .
4. To e nsure proper balan ce,
mou nt the ca mera so t hat it’s
facing inw ard and the len s
extends over t he rails.
5. For clo ser plac ement to y our
subjec t, the ca mera ca n be
mou nted fac ing out , away from
the rails.
6. Securely tighten the rel ease
plate lock. Ma ke sure t he qui ckrelease plate is seated properly
in the pl ate plat form and the
qu ick-rele ase kno b is secu rely
tightened
5
Page 6

OPERATION
3. Operating the MFR4-5
1. De pth adjust ment: F rom beh ind
the c amera , turni ng the knob on
one side w ill mo ve the ca mera from
fro nt to back a nd back t o front .
2. Si deways adjust ment: T urning
the k nob on the ot her side wi ll
mov e the camer a side to si de.
Removing the bottom stage of
the MFR4-5
If on ly dept h (back-to front a nd
fro nt-to-back) fo cusin g is neces sary,
the b ottom stag e of the focus ing rai l
can b e removed.
Caution: Remove your camera from
the f ocusi ng rail before perfor ming
this operation .
1. Un screw t he focusin g rail f rom the
tripod a nd tur n it upsid e down.
2. Usi ng the side -to-side adjus tment
knob, slide the st age to the sid e
where th e hexag onal socket is
visib le through the u nthr eaded
hole.
3. Insert t he All en key into
the s ocket a nd tur n it
counterclockwise.
4. W hen the bolt i s suci ently
loos ened, t he bottom st age wil l
detach. The front-to-back axis
stage is d esigned with t hread ed
mou nting h oles.
5. Screw t he focu sing ra il back o nto
the t ripod using th e approp riate
threa ded hole d epend ing on th e
siz e of the tr ipod’s mo unting st ud.
6
Page 7

SPECIFICATIONS
Dimensions (H × W × D) 3″ × 4.75″ × 9″ (8 × 12 × 23 cm)
Weight 1.3 lb. (0.59 kg)
Base Width 4.75″ (12 cm)
Front-back range 2.75″ (7 cm)
Side-side range 1.25″ (3.2 cm)
Warni ngs:
!
• Please read and follow these instructions,
and keep this manual in a safe place.
• Do not attempt to attach the focusing rail to
a tripod with the camera attached.
• Remove the camera and lens from the
focusing rail during setup or transport.
Visit our website at ObenSupports.com
for more Oben products.
7
Page 8

© Copyright 2016 The Gradus Group
All other trademarks are the property of their respective owners.
www.obensupports.com
8
GG2
 Loading...