

Page 1
QUICKSTART GUIDE
ENGLISH ( 1 – 4 )
INICIO RÁPIDO
ESPAÑOL ( 5 – 8 )
UTILISATION SIMPLIFIÉ
FRANÇAIS ( 9 – 12 )
KURZANLEITUNG
DEUTSCH ( 13 – 16 )
GUIDA RAPIDA
ITALIANO ( 17 – 20 )
Page 2

Page 3
1
This Quickstart Guide explains how to quickly setup and begin using the Numark DMC2
Controller. Please take a few minutes to go through this Quickstart and get familiar with the
setup procedure and basic controls.
We have designed the DMC2 as an essential tool for software-based DJs. DMC2 is a HIDcompliant device and can be used with any software which supports the DMC2 protocol. We
have included the CUE LE software package for you to begin DJing immediately. We highly
recommend reading the CUE LE Reference Manual included on the installation disc, in order to
take full advantage of this product’s features. Happy DJing!
Please check that the following items were included in the box:
• DMC2
• USB cable
• DC power supply (7.5V 1A)
• CUE LE installation CD-ROM
Please read Safety & Warranty Information before using this product!
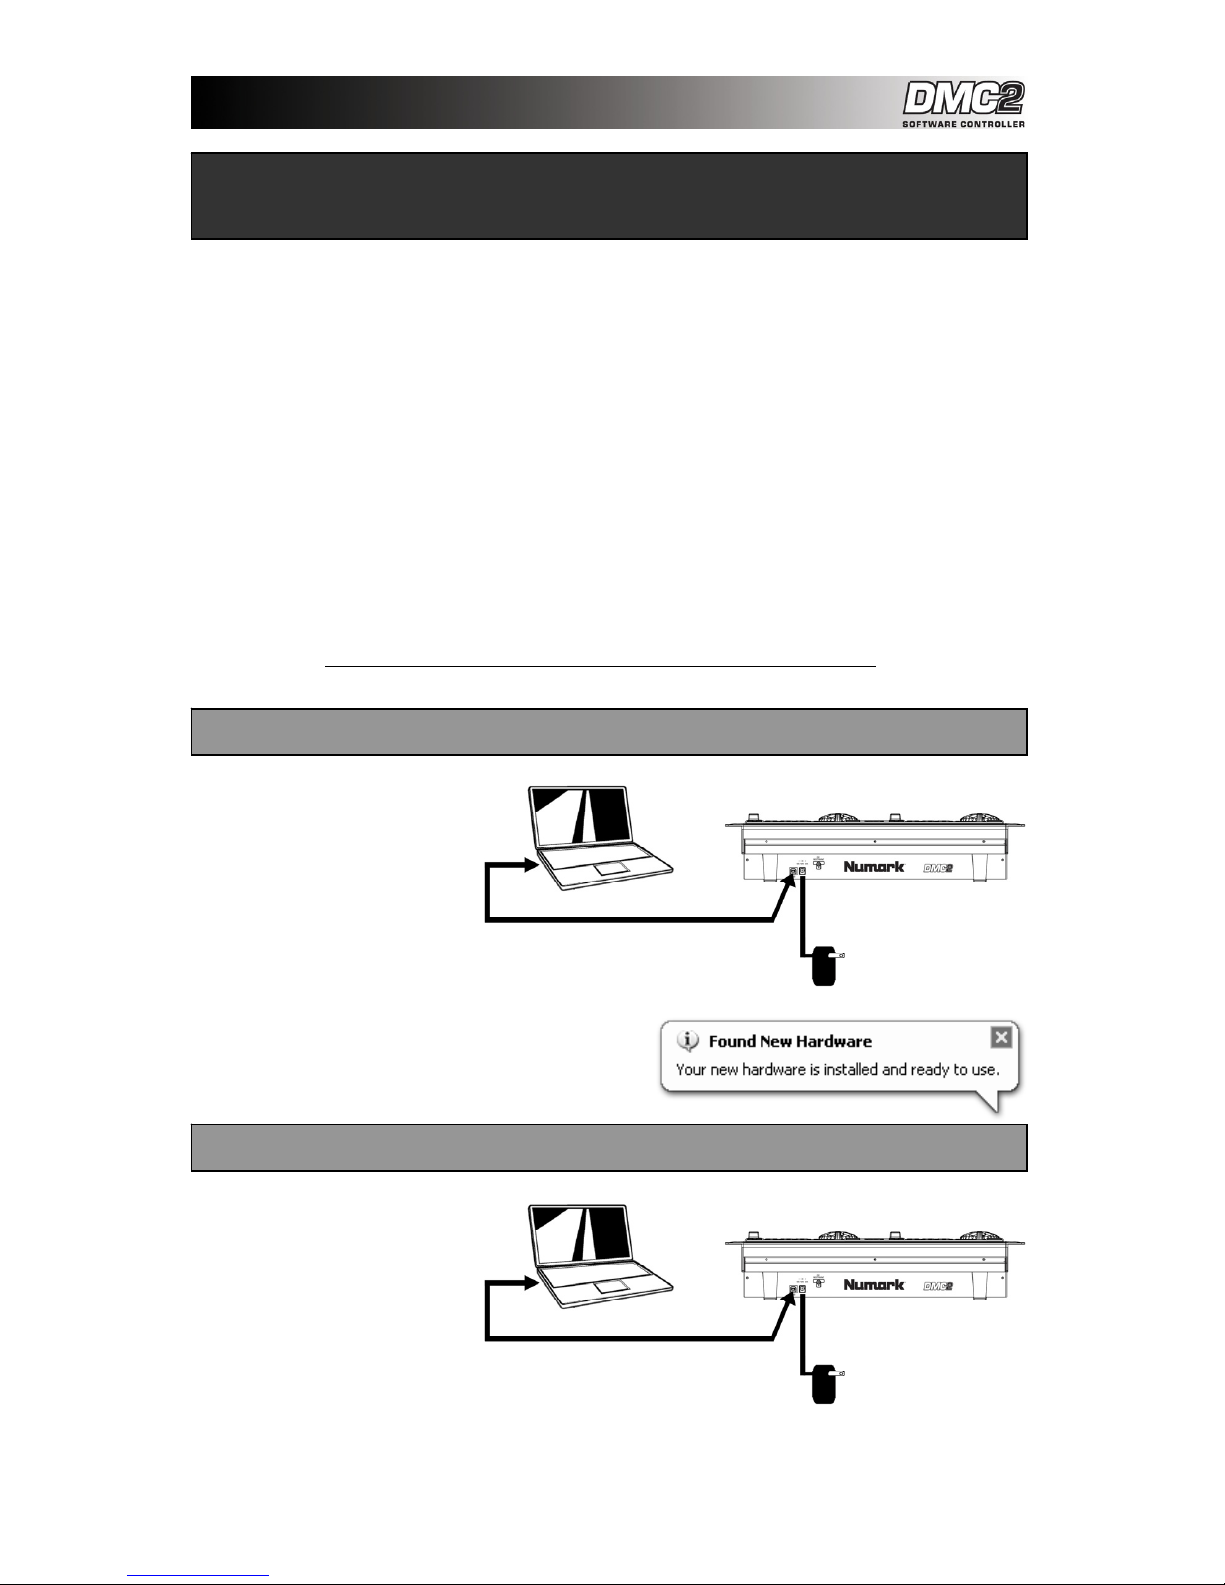
DMC2 is a plug-and-play device,
which means that the first time you
connect the controller to your
computer all necessary drivers will
be installed automatically.
Please first power the DMC2 with
the included power supply. Then,
use the included USB cable to
connect the DMC2 controller to an
available USB port on your PC.
Please allow the DMC2 to automatically initialize all the
necessary drivers. When the installation is complete, you will
see “Your new hardware is installed and ready to use”
message, shown on the right. The installation is now complete
and the controller is ready to use.
Under Mac OS, DMC2 is a plug-andplay device and will be ready to use
as soon as it is connected.
Please first power the DMC2 with
the included power supply. Please
use the included USB cable to
connect the DMC2 controller to an
available USB port on your Mac.
::: DMC2 Quickstart Guide :::
CONTROLLER SETUP - MAC
CONTROLLER SETUP - PC
Page 4

2
If you do not own an audio interface with
multiple audio outputs, please study the
connection diagram on the right.
Connect the DMC2 to your computer
with the included USB cable.
Connect your computer’s audio
output to a powered speaker system,
amplifier or headphones.
Hint: Most built-in computer
soundcards feature a 1/8” stereo
plug. Depending on your speaker
system, you may need to purchase
the appropriate cable connectors.
In this scenario, you are using an external
audio I/O interface with multiple audio
outputs, such as the Numark DJ|IO, via
USB or Firewire. Multiple output audio
interfaces enable you to send your master
mix and your CUE mix on separate audio
outputs, allowing you to take full advantage
of CUEing while you play.
If you own a multiple output audio interface,
please study the setup diagram on the
right.
Connect the DMC2 to your computer
with the included USB cable.
Connect your computer to your
audio interface with the proper cable.
(Please see your audio interface
documentation for correct
connection).
Connect one pair of outputs on your
audio interface to a powered
speaker system or amplifier.
Connect your headphones to an
alternate audio output on your audio
interface.
Note: You will have to setup your
software and hardware so your mix
output is being sent to one stereo
output, while the CUE mix is being
routed to another. Please consult
the software and hardware
documentation for more information
on routing your audio outputs.
HOOKUP SCENARIO 1 – WITHOUT MULTICHANNEL AUDIO INTERFACE
HOOKUP SCENARIO 2 – WITH MULTICHANNEL AUDIO INTERFACE
Page 5

3
In this section, we have provided information on using the
DMC2 Software Controller with the Numark CUE LE DJ
Software, included with the DMC2. Once you have plugged in
the DMC2 controller into your computer and installed the CUE
LE software, start up CUE LE. If the controller is not
automatically initialized, you will need to enable it in CUE’s
Configuration menu.
1. Click on the CONFIG button at the top right portion of the
CUE window.
2. Click on the Remote Control tab to access the list of
compatible remote control devices.
3. Enable the Numark DMC2 controller by checking the
Enable box. A green dot will appear next to DMC2 to let
you know that the controller is ready to be used.
4. Click OK. Now the DMC2 controller is ready to control
CUE.
Please refer to the following controller mappings for information on how DMC2’s controls are mapped to CUE LE. Please
note that the controls on the left deck are identical to the controls on the right deck. Therefore, we will focus only on the
left deck controls. For additional information on the CUE LE software, please refer to the CUE LE Reference Manual
included on the CD.
1. PUSH SELECT – You can use this knob to scroll
through the different folders and tracks in CUE’s
browser. When browsing folders in CUE’s browser
windown on the left, press down on the knob to expand
a selected folder. If browsing music inside a folder,
press down on the knob to load the selected track to
the corresponding deck.
2. FOLDER – Allows the PUSH SELECT knob to scroll
through the folders on your hard drive, which will
appear in CUE’s browser window on the left. While
using the PUSH SELECT knob to browse your music in
the folder structure, you can press the button to enter
the folder and browse the files inside.
3. FILE –Allows the PUSH SELECT knob to be used to
scroll and select tracks in the selected folder.
4. DISPLAY – Shows track name, time, playing
status, BPM and pitch of the song loaded on the
corresponding deck.
5. TIME – Changes display to show elapsed or
remaining time.
6. SAMPLER/EFFECT MODE – Changes the function
of the PUSH SELECT knob into an effect and
sample playback function. Results will show in the
display and can be activated via pressing the
PUSH SELECT knob. When in FX mode, turn the
PUSH SELECT knob to scroll through the different
effects. You can engage and disengage the
selected effect by pushing down on the knob,
When in SAMPLER mode, turn the PUSH SELECT
knob to scroll through the available samples. You
can engage and disengage playback of the
selected sample by pushing down on the knob.
CUE LE DMC2 CONTROL MAPPING
Page 6

4
7. MODE INDICATOR – Shows the current function of
the track/load control knob.
8. PLAY / STUTTER – Pressing PLAY starts playback on
the corresponding deck. If you press PLAY while the
song is already playing, it will restart the music from the
last position you pressed PLAY from, creating a
“stutter” effect.
9. PAUSE – Pressing PAUSE once will pause the music
at the current location. Pressing PAUSE a second time
will return to the last set cue point (if one has been set).
Pressing a third time will return to the beginning of the
track.
10. CUE - Returns and pauses the music at the Cue Point.
To set a CUE Point, pause the song, seek to the
desired position, and then press CUE. Once you’re on
the Cue Point, pressing and holding down CUE allows
for temporary play of this point. The track will play for
as long as the button is held down and will return to the
Cue point once it has been released.
11. JOG WHEEL - Each virtual deck features a JOG
WHEEL, which can be used for scratching, pitch
bending and changing playback and cue position on
the corresponding deck. The functionality of the jog
wheel is determined by the WHEEL MODE button.
12. WHEEL MODE – This button determines the
functionality of the JOG WHEEL. The different
functions will be displayed on the screen and are as
follows:
• In Nudge mode, the wheel can be used for
temporary adjustment of pitch, like a pitch bend.
• In Scratch mode, the jog wheel can be used for
scratching the music on the deck, much like a
conventional DJ scratches a record.
• In Move Loop mode, you can use the jog wheel to
move a loop forwards or backwards in time, if a
loop has already been set and engaged.
• In Shrink Loop mode, you can use the jog wheel to
resize the loop length, if a loop has already been
set and engaged.
• In Search mode (the display will show Pos=x%),
rotating the jog wheels will quickly scan through the
music loaded on the deck.
13. PITCH - Each virtual deck features a PITCH SLIDER,
which can be used to change the pitch or tempo of the
music playing on the corresponding deck.
14. + / - PITCH BEND – These two buttons are used for
temporary pitch bending and tempo adjustment for
beat alignment. The pitch or tempo will be affected for
as long as the button is held down and will return to
normal once the button has been released.
15. PITCH ADJUST – hold this button while moving the
pitch fader to change the relative position of the
pitch fader. For example, if you are using a pitch
range of +/- 8% (specified in the software) and then
select a pitch range of +/- 34% in the software,
moving the pitch slider will still give you only a +/- 8
pitch range. Youcan calibrate the pitch slider to
give you the full +/1 34% by using the PITCH
ADJUST feature. Hold the PITCH ADJUST button,
move the slider to the highest position, then move
the slider to the lowest position. When you release
the PITCH ADJUST button, the slider will give you
the full +/- 34 % range.
16. KEYLOCK – The KEYLOCK button engages the
Key Lock feature in CUE. When Key Lock is
engaged, the pitch of the music playing on the deck
will be locked to the current value. You can then
adjust the tempo of the music, independent of the
pitch.
17. HOT STARTS – Pressing these buttons will
instantly start playback from CUE points if
previously set. If no point is set, the first press will
assign the point, while the second press instantly
start playback from that point.
18. SYNC - When you press SYNC, CUE will sync the
tempo of the deck to the opposite deck’s tempo. If
you press SYNC while the song is paused, only the
pitch will be adjusted. If you press SYNC while the
song is playing, the beats will be smoothly aligned
too.
19. LOOP IN / OUT - A loop is any area of a track that
you choose to repeat seamlessly. Press LOOP IN
at the point where you wish the loop to start. Press
LOOP OUT when you reach the desired point to
mark the end point of the loop and the audio
between the two points will begin to loop
continuously. To release the loop and continue play
of the track press LOOP OUT again and the audio
will continue from the end point of the loop. If you
wish to set a new loop, just press LOOP IN again
while the loop is disengaged, and then press LOOP
OUT to begin the new loop.
20. SMART LOOP – When SMART LOOP is engaged,
all loops will be perfectly aligned with the beat of
the music playing.
21. LOOP 1/8 - 8 - Pressing any of these buttons will
allow you to instantly create loops of the
corresponding size (in fractions of 1 bar). If a loop
is already active, then pressing any button will
change the loop size. To release the loop press
loop out.
22. BACK BEAT – Instantly allows the user to double
beats.
23. VIDEO – These buttons control CUE’s internal
video mixer, when working with video content.
24. AUDIO – These buttons activate the internal
software faders to create transitions without an
Audio mixer
25. AUTOMIX – Actives the automatic mixing function
of CUE.
Page 7

MANUAL REVISION 1.0
Page 8

www.numark.com
 Loading...