

Page 1

Theexperiencespeaksfor itself
TM
Eval uation Guide
PDF Converter Enterprise 8
PDF Converter Professional 8
March 2013
Page 2

Nuance Eva luati on Guid e PDF Converter Enterp rise 8 and PD F Converter Professional 8
Welcome! ............................................................................................................................................... 5
Better PDF For Business ...............................................................................................................................5
Terms You May See In This Guide..................................................................................................................... .6
Popular Uses Of PDF.....................................................................................................................................6
Evaluating PDF Converter Enterprise 8 .............................................................................................................. .7
What Makes PDF Converter Enterprise 8 Different Than PDF Converter Professional 8 ................................... .7
PDF File Creation............................................................................................................................................... 8
Questions To Ask When Considering A PDF Solution: Creation............................................................................... 8
Creating PDF Files From Other Formats...................................................................................................................8
Print to PDF................................................................................................................................................................ 8
Creation By Opening A Document Within PDF Converter Enterprise 8 .................................................................... 9
Create PDF Document From Within PDF Converter Enterprise 8............................................................................. 9
One-Click PDFCreation IconsFrom Within MicrosoftWord, Excel,Powerpoint andOutlook ....................................... 9
One-Click PDFCreation IconsFrom Within Internet Explorer.......................................................................................10
Batch Create Using PDF Create Assistant................................................................................................................ 10
Batch Create Using PDF File Creation Profiles.........................................................................................................11
PDF Packages............................................................................................................................................................ 12
Questions To Ask When Considering A PDF Solution – Packages & Portfolios ....................................................... 12
PDF Package Creation............................................................................................................................................... 12
PDF Portfolios............................................................................................................................................................. 14
Creating A PDF Portfolio ...........................................................................................................................................14
PDF Conversion........................................................................................................................................................ 16
Converting PDF Files Into Other Formats.................................................................................................................. 16
Questions To Ask When Considering A PDF Solution - Conversion......................................................................... 16
PDF To Microsoft Word and PDF To Microsoft Excel................................................................................................. 16
PDF To Searchable PDF............................................................................................................................................ 17
Batch Convert PDF files using the PDF Converter Assistant..................................................................................... 17
The Auto-Detect Image-Only Feature – From Scanned To Editable PDF Files........................................................ 18
Convert An Area......................................................................................................................................................... 19
Document Assembly / Document Splitting............................................................................................................ 20
Document Assembly................................................................................................................................................... 20
Document Splitting...................................................................................................................................................... 21
Basic PDF Editing.............................................................................................................................................. 22
Document Editing – Touchup..................................................................................................................................... 22
Questions To Ask When Considering A PDF Solution - Editing ................................................................................ 22
Touchup Text.............................................................................................................................................................. 22
Touchup Objects - Resizing Objects.......................................................................................................................... 23
Touchup Objects - Moving And Rotating Objects ...................................................................................................... 24
Advanced PDF Editing....................................................................................................................................... 25
PDF View vs. Advanced Edit view ............................................................................................................................. 25
Steps to use Advanced Edit features ......................................................................................................................... 25
Comments And Annotations .................................................................................................................................. 27
Comment Features..................................................................................................................................................... 27
Sticky Notes................................................................................................................................................................ 27
Dragon Notes by Voice............................................................................................................................................... 28
Text Boxes And Callouts............................................................................................................................................ 30
Drawing Tools............................................................................................................................................................. 30
Active Markup Tool..................................................................................................................................................... 30
Comments .................................................................................................................................................................. 31
Printing Comments..................................................................................................................................................... 31
Page 3

Migrating Comments .................................................................................................................................................. 32
3
Managing Comments – Reply, Accept Or Reject.......................................................................................................32
Collaboration............................................................................................................................................................. 33
Launch And Setup Of Account...................................................................................................................................33
Gaaiho Collaboration Starting window, Chat Window and Toolbar ........................................................................... 34
Using PDF Collaboration............................................................................................................................................ 36
Gaaiho Collaboration Meetings.................................................................................................................................. 38
Document Comparison.............................................................................................................................................41
Document Comparison – PDF To PDF.......................................................................................................................41
Forms .........................................................................................................................................................................42
Turning Static/Scanned Forms Into Fillable Forms Using Formtyper..........................................................................42
Adding Form Fields / Form Controls............................................................................................................................42
Submit A Form .............................................................................................................................................................42
Combo Box ..................................................................................................................................................................43
Extract Data from Single or Multiple Forms.................................................................................................................43
Security......................................................................................................................................................................45
Questions To Ask When Considering A PDF Solution - Security................................................................................45
Redaction ....................................................................................................................................................................45
Digital Signatures.........................................................................................................................................................45
Document Inspection ...................................................................................................................................................45
PDF/A CREATION......................................................................................................................................................47
Create PDF/A Through The Save Menu......................................................................................................................47
Batch Create PDF/A Files Using the PDF Create Assistant........................................................................................48
PDF/A COMPLIANCE ................................................................................................................................................48
Compliance Checker....................................................................................................................................................48
PDF Search................................................................................................................................................................50
Using Looks Like SearchTM feature............................................................................................................................50
Using Looks Like SearchTM feature with Markup.......................................................................................................51
Using Looks Like SearchTM feature with Redaction...................................................................................................52
Network Scanning.....................................................................................................................................................53
Scan Inbox Preferences...............................................................................................................................................54
Notifications and Open Options ...................................................................................................................................55
Cloud Connections ...................................................................................................................................................56
Dropbox, Evernote and the Nuance Cloud Connector.................................................................................................56
Actions that can be performed from the Connections Menu........................................................................................57
What is the Nuance Cloud Connector? .......................................................................................................................58
Using and Configuring the Nuance Cloud Connector .................................................................................................58
Document Management Support.............................................................................................................................61
Supported Document Management Systems..............................................................................................................61
Sharepoint 2003, 2007, 2010, Windows Sharepoint Services (WSS) 3.0 and Microsoft Office 365...........................61
Hummingbird EnterpriseTM 5.3,6................................................................................................................................61
Interwoven® Worksite 8.3, 8.5, 9.................................................................................................................................61
Livelink® Ecm - Enterprise Server 9.7.0 and 10 From Opentext Corp. ......................................................................61
Xerox DocuShare 6 and 6.5.........................................................................................................................................61
EMC2®Documentum 6.5..............................................................................................................................................61
NetDocuments®............................................................................................................................................................61
Support Within PDF Converter Enterprise 8................................................................................................................61
Create and Send to DMS from Internet Explorer.........................................................................................................62
Support Within PDF Create Assistant..........................................................................................................................62
Page 4

Support Within PDF Converter Assistant.....................................................................................................................63
Integration Into The Document Management System .................................................................................................63
Integration Into Interwoven Worksite ...........................................................................................................................63
Integration Into Hummingbird Enterprise.....................................................................................................................63
Fax Via Email .............................................................................................................................................................64
Configure via e-mail settings........................................................................................................................................64
Fax via e-mail...............................................................................................................................................................65
Advanced File Storage .............................................................................................................................................66
To enable the File Storage option................................................................................................................................66
Opening and Saving files with File Storage Enabled...................................................................................................67
Automated Document Assembly.............................................................................................................................68
Configuring “Send To PDF Pro” ..................................................................................................................................68
Using “Send To PDF Pro” ...........................................................................................................................................69
Outlook Preview Pane ..............................................................................................................................................70
Stamp Creation..........................................................................................................................................................71
Multilingual User Interface.......................................................................................................................................71
Reduce File Size........................................................................................................................................................72
Send to PaperPort.....................................................................................................................................................72
Support for Digital Rights Management .................................................................................................................72
PDF Audio..................................................................................................................................................................73
Using Audio Features...................................................................................................................................................73
Read PDF Aloud ..........................................................................................................................................................74
Read-Back Controls.....................................................................................................................................................74
Read To File ................................................................................................................................................................74
PDF Autopilot - Batch Mode ....................................................................................................................................75
Page 5

WELCOME!
Welcome to your Nuance PDF Converter Enterprise 8 evaluation!
Thank you for taking the time to evaluate Nuance PDF Converter Enterprise and our commitment to “Better
PDF for Business.” PDFConverterEnterprise8,thelatestversionof Nuance’sflagshipenterprise-ready
desktopPDFsolution,is thesmartreplacementforAdobe®Acrobat®.Itenablesbusiness userstocreate,view,
edit, convert, andcollaboratewith100% industry-standardPDFfilestodeliver maximumvaluewithout
compromisingfunctionalityor easeof use.
AtNuance we’refocusedon helping you work faster,and enabling you todo thingswith PDFyou might notknow
were possible.To thatend;we’ve created toolsdesignedto save you time.Lots oftime. PDFConverter
Enterprise8 supportseffortlesscreationof 100%industry-standardPDFfilesandthemostaccurateconversion
ofPDFfilesto Microsoft®Word,Excel®, PowerPoint andCorel®WordPerfect®documents.It alsoprovides
uniquefeaturessuchaswordprocessor-likeediting,real-time interactivecollaboration, cloudconnectivity,PDF
security,andDragonNotesspeechrecognitionto dramaticallyincreasebusinessproductivityat a surprisingly
affordableprice.
With all the business features you need in an application that’s easier to use, easier to license, easier on your
schedule and easier on your budget, PDF Converter Enterprise 8 is a better PDF for business.
About this Guide
Thisguideservestwo purposes:First and foremostitprovidesawalkthrough of thePDF ConverterEnterprise
application,while asthe same time calling out some ofthekey questionsthat shouldbe addressed when
evaluating anyPDF solution.Whilenot encompassingeveryaspectof the PDFConverterEnterprise application,
this guidedoesdetailthemajorgroupings offunctionalitywhilecallingout someof themoreadvanced, and time
savingfeatures.
BETTER PDF FOR BUSINESS
At Nuance wetalk about deliveringBetterPDF forBusiness; that means a lotofdifferentthings:
It means delivering a PDF product designed specifically for business users, with business innovations designed to
save you time and increase your productivity.
It means better PDF pricing, pricing designed to get PDF on every desktop in your organization, eliminating the
difficult tasks of deciding who gets what functionality, and having to manage more than one PDF solution
to meet your organizational and budgetary needs.
It means easy-to-understand, 1-page licensing programs designed with you in mind, without seat counting
requirements or audits enabling you to predictably plan and budget for your PDF needs.
What we’ve built at Nuance, is a PDF application and a PDF licensing program that really works better for
business. So what Better PDF for Business means is a better company to do PDF business with.
Page 6

TERMS YOU MAY SEE IN THIS GUIDE
Creation -The processoftaking a documentin some format,and usingthat fileasthe sourceforcreatinga PDF
file.
Conversion – The process of taking a PDF file, and turning it back into a fully-formatted, editable document
in another format such as Word, Excel, PowerPoint, and WordPerfect.
OCR – OCR stands for Optical Character Recognition or the process of identifying and inserting text based
only on recognizing the characters from an image or picture.
ImageonlyPDF – Image-only PDFrefers toatypeof PDF file that was created eitherby a scanneror was
created usinga“Print asImage”settingintothe PDF format.Image-onlyPDF filesare literallyjust picturesofthe
pagesofthe document with notextual informationassociatedwiththem. Asaresult,image-onlyPDF filescannot
support text searchingor editingunless theyhavebeenconverted toaSearchablePDF.
Searchable PDF– Searchable PDFrefersto an Image-only PDFthat has been convertedusingOCR.In that
conversion process thetext from the image-only PDFis recognizedand inserted invisiblybehindthe image ofthe
page.The resultis a filethatlookslike animage-only orscanneddocument,but hassearchable text hidden within
thefile.
PDFNormal –PDFNormalrefers toa PDFfilethatwascreatedfrom a digitaldocument (suchas Word,Excel,
etc.)As a result,PDF normalfilescan besearchedand edited nativelywithinPDFsolutions,withouttheneedto run
a conversion.
Document Assembly – Document Assembly refers to the process of creating a single PDF file from multiple
source files. Document assembly can also refer to the ability to re-arrange pages within the document;
replace, extract or delete pages from the document; and taking any necessary steps, such as updating
headers/footers and page numbers, to provide a single unified document.
PDF Packages – PDFPackages areacollectionof files,both PDFand other filetypes, stored withinaPDF
“wrapper”similartotheWinzipprocess. Packages provideamechanismfororganizing your documents into a
single groupingrather thansharingmultiple individualfiles.PDF Packagesdifferfrom documentassembly in that
within a PDFPackage eachfile is discrete,not merged withthe other files. As a result,each document canhave
its ownsecuritysettings withinthe package.
PDFPortfolios– PDF Portfoliosare thenext generationof PDFPackages.WherePackagesallowyou to include
PDFandother filetypes, Portfoliosallowyou toinclude PDF, otherfiletypes, and even folders.Now you canbuild
entirefolderhierarchies withina single PDFfile witha muchmorepolishedpresentation layer thatcan include
videoorflashinstructions onhow toutilize thefiles withinthe Portfolio.
DMS – DMS stands for Document Management Systems, server based solutions that act as a repository for
an organizations documents. As related to PDF Converter Enterprise 7, the supported DMS include
SharePoint, Interwoven, Hummingbird, and Open Text.
POPULAR USES OF PDF
ThePortableDocumentFormat(PDF)wascreatedin1993 tohelpalleviatetheproblemsassociated with
electronic documentexchangeat thattime.PDF filesweredesigned asaway toencapsulate a complete
documentdescriptionthat includedtext,fonts,images, andvectorgraphics,in a compresseduniversally readable
format.
PDF has become the de facto standard for digital document collaboration in the workplace. As an approved
ISO standard, a standard that is implemented by over 1,800 hardware and softwarevendors, a PDF is a PDF
no matter what manufacturer’s software was used to create it.
Page 7

In additionto documentexchange,some of themore popular usesof the PDF formatinclude:
Applyingsecuritytodocuments
Documentassembly/ Documentsplitting
Documentsharing andcollaboration
Documentmarkupor annotatingdocuments
Onlineformfillingandformcreation
Archivingdocuments/Archivingmail
EVALUATING PDF CONVERTER ENTERPRISE 8
PDF Converter Enterprise 8 is the complete PDF solution designed specifically for the business user. With
more than 3,000,000 seats sold and supported, business professionals worldwide are making Nuance PDF
software their first choice. Create 100% industry-standard PDF files from any PC application. PDF Converter
Enterprise 8 accurately converts PDF files into fully-formatted Microsoft Word TM, Excel®, PowerPoint®,
XPS, and Corel® WordPerfect® documents that you can edit. Using the intuitive interface, your favorite
features will be right at your fingertips, making PDF Converter Enterprise 8 one of the easiest PDF
applications to use.
WHAT MAKES PDF CONVERTER ENTERPRISE DIFFERENT FROM PDF CONVERTER PROFESSIONAL?
PDF Converter Enterprise has been designed with a more robust feature set specifically designed for medium to
large organizations. Conversely PDF Converter Professional has been designed as the retail counterpart to the
Enterprise product.
PDF Converter Enterprise 8 offers all of the functionality within PDF Converter Professional 8, plus:
Redaction – the ability to permanently remove “sensitive” information such as social security numbers or
addresses from within PDF documents (commonly referred to as “blacking out” information).
Bates Stamping and advanced header and footer functionality – Create custom stamping profiles for
stamping information into headers and footers.
Document Management System support – Support and integration for selected Document Management
Systems (DMS).
Ability create and send PDFfiles to DMS from the Portfolio interface or Internet Explorer.
API layer for controlling functions within the application in order to create custom-coded workflows.
Network Deployment Configuration Tools – Support for WTS and Citrix deployments as well as a
“configurator” which allows the IT administrator to determine and customize which functionality within the
application and which application default settings are pushed to your users.
Support for network scanning and eCopy ShareScan with monitored Scan Inboxes.
Certified with Citrix® and Windows Terminal Services (Thin Client Deployment/Use).
PDF/A and 508 Compliance Checker – ability to fix files that do not comply with PDF/A or 508
Accessibility regulations.
Page 8
PDF FILE CREATION
Questionsto ask when consideringa PDF solution:Creation
AmI able tocreatea PDFfilefrom withinMS Office?
CanI createaPDFfromwithinInternetExplorer?
Cana PDFbe createdfromaWorddocumentwithoutrunningWord?
CanI combinemultiple documentsintoonePDF file?
CanI batchcreate(creatingmultiplefileswithonecommand)?
CanI createPDF fileseasily?
Creating PDF files from other formats
PDFConverterEnterprise8 offersavarietyofmethodsfor creating PDF files.Someof themethodsare describedbelow.
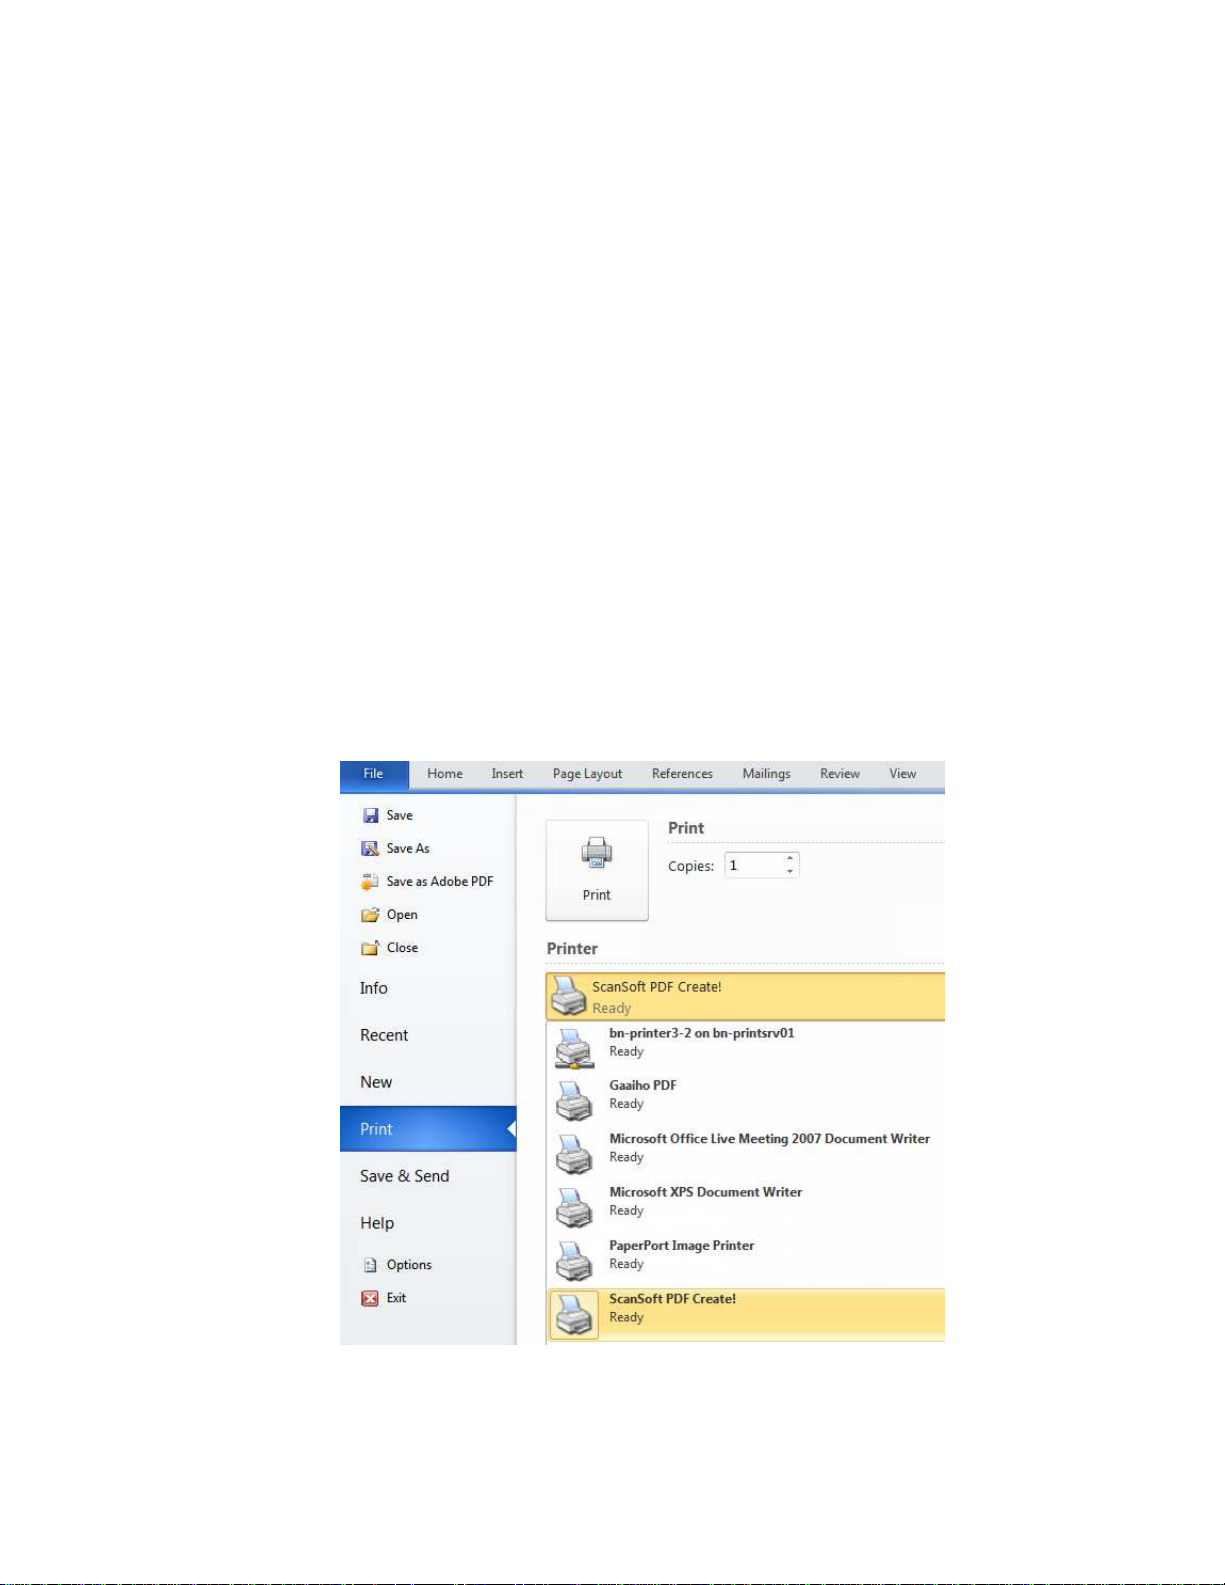
PRINT TO PDF
Printing to PDF using a “PDF Print Driver” is the most common method for creating PDFfiles. However, the limitationof
thismethodis that onlyone file at a timecan be processed.
1. OpenadocumentinMicrosoftWord.Choose File andthen ChoosePrint.
2. Select thePDF Create printerdriverfrom the listof available printers.Click OK.
3. Select a locationto savethe PDF.
Page 9
CREATIONBY OPENING ADOCUMENTWITHIN PDF CONVERTERENTERPRISE
7
WithinPDF ConverterEnterprise,creatinga PDF file isassimpleas openingafile.
1. WithinPDFConverterEnterprise,chooseFile,thenOpen.
2. Changethe “Filesof Type”field to“AllFiles (*.*)”.
3. Then simplyselectthe fileyou’dliketo turn into a PDFand click Open.
4. ThePDF filewillbe generated fromthe selecteddocument.
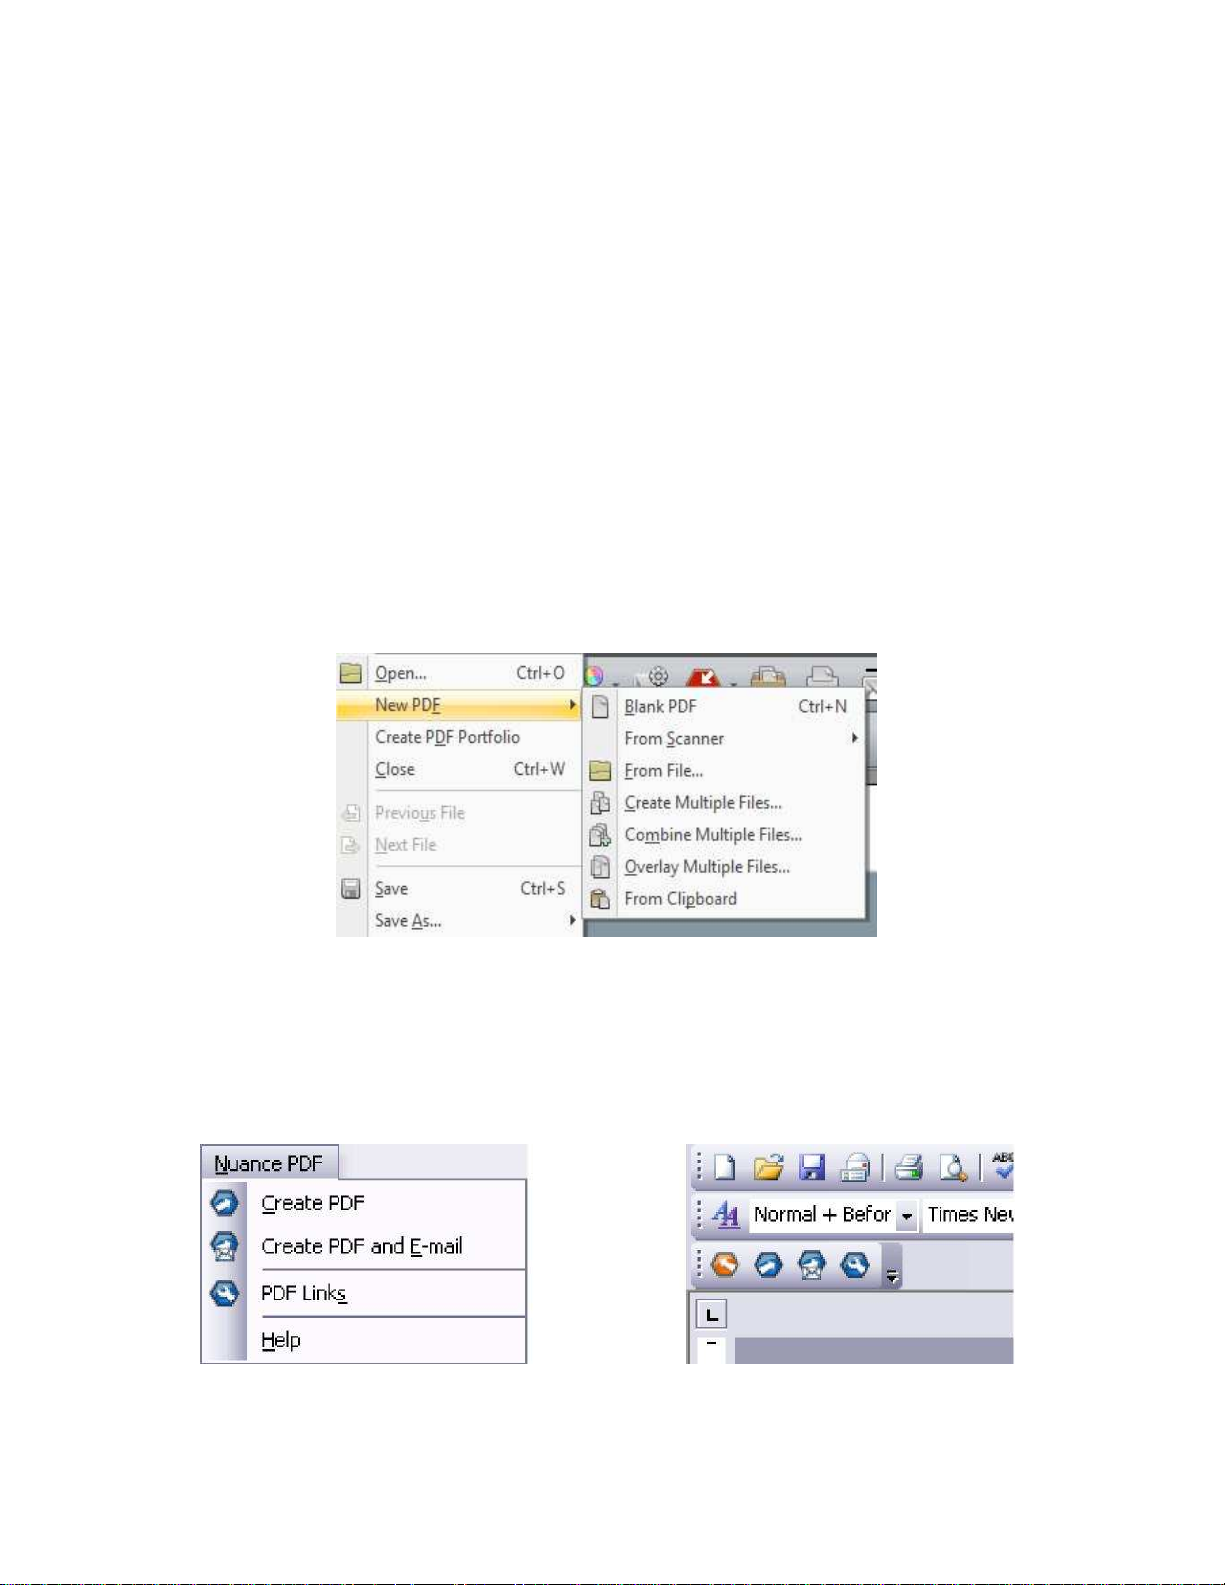
CREATE PDF DOCUMENT FROM WITHIN PDF CONVERTER ENTERPRISE 8
PDFConverterEnterprisealso offersa varietyof PDF creationmethods directlywithinthe application. Click the
‘NewPDF’icon anduse the drop-down listto selectwhat type of a PDFdocumentyou want to create:
1. Blank PDF - Providesa blank PDFpagewithwhich youcan startadding content.
2. Fromfile– Createsa singlePDFdocumentfrom aselectedfile.
3. Createmultiplefiles– Launchesthe PDFCreateAssistantto createmultiplePDFdocumentsfrommultiplesource
files.
4. Combinemultiple files–LaunchesthePDFCreateAssistant tocreate asinglePDFdocumentfrommultiplesource
files.
5. Overlaymultiplefiles–Launchesthe PDFCreateAssistantto createa singlePDF documentfrom the
overlaymentofmultiplesourcefiles.
6. From theclipboard– CreatesaPDF file from the content that iscurrently stored on the clipboard.
7. FromScanner–Creates aPDFfiledirectlyfromyourattachedscanner.
ONE-CLICK PDF CREATION ICONS FROM WITHIN MICROSOFT WORD, EXCEL, POWERPOINT AND
OUTLOOK
1. Withthe selecteddocumentopen,clickon theNuance CreatePDF icon.
2. Selecta locationto savethe resulting PDFfile.
Page 10
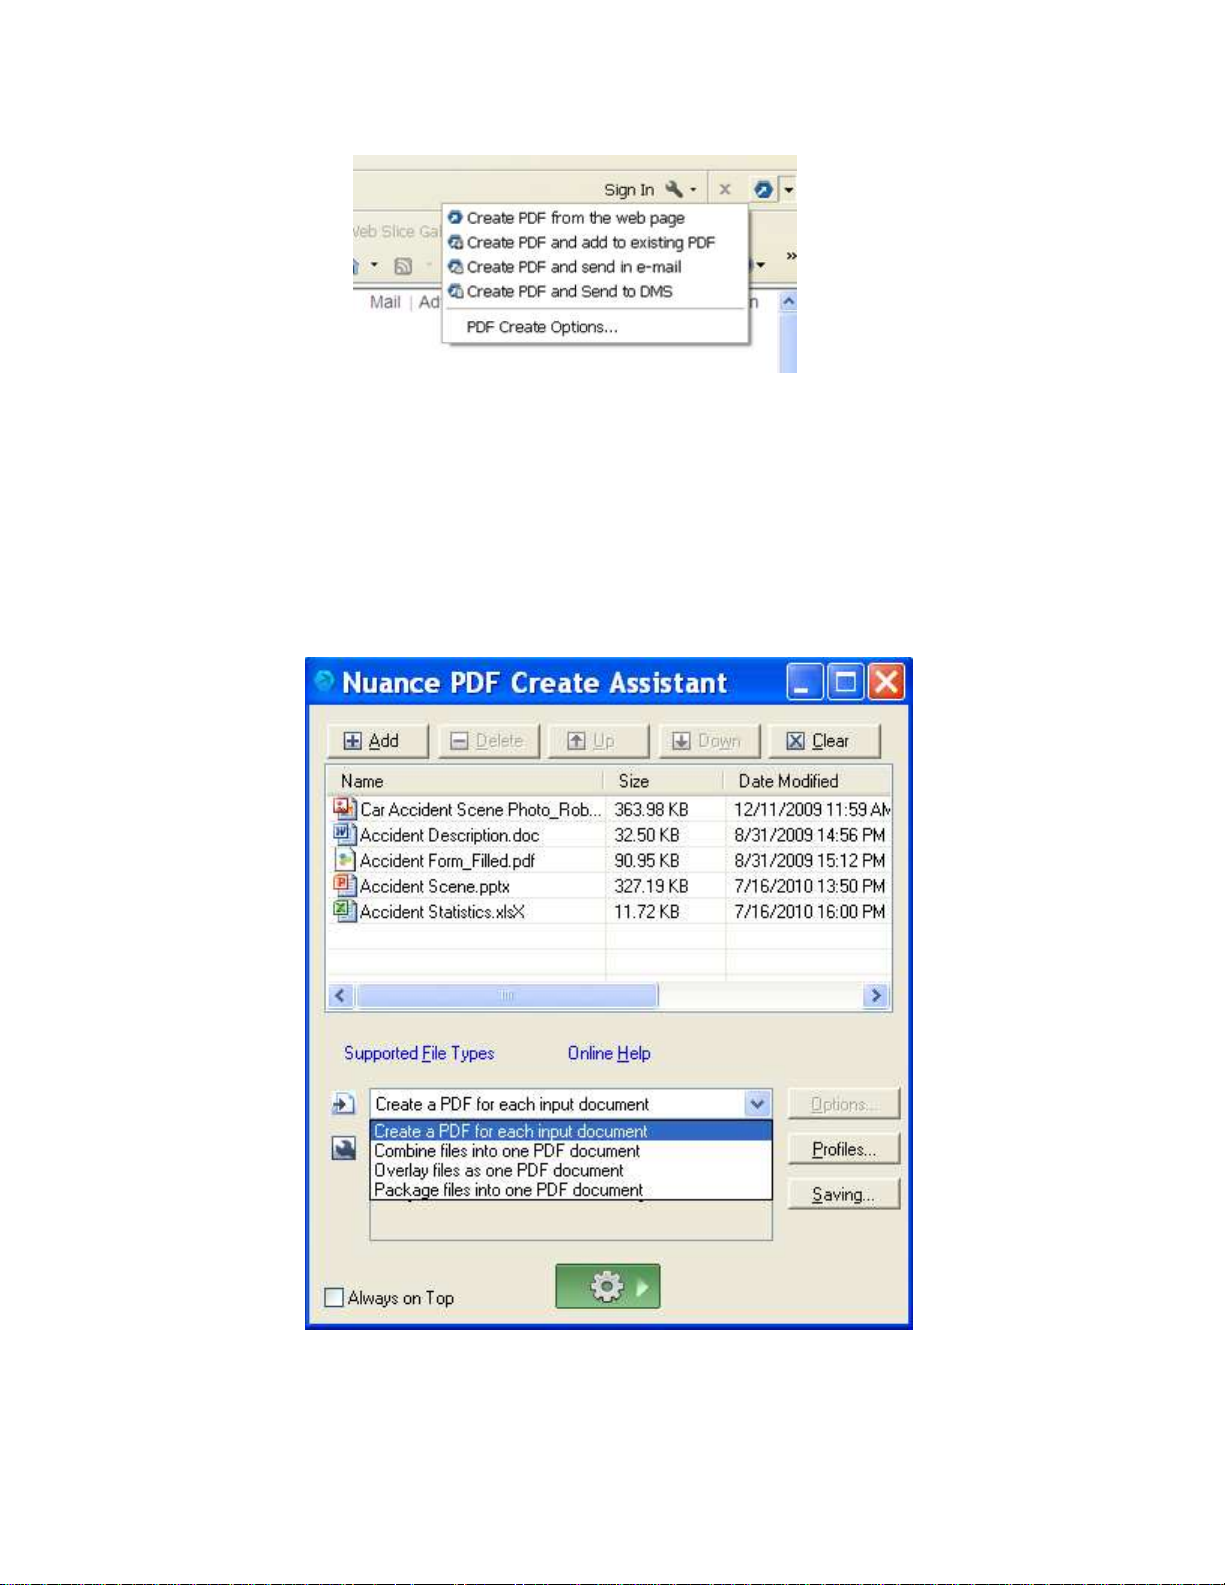
ONE-CLICK PDF CREATION FROM WITHIN INTERNET EXPLORER
Create,CreateandaddtoexistingPDF,Createandsendine-mailorCreateandSendtoDMSdirectlyfromyourIEtoolbar
BATCH CREATE PDF FILES USING THE PDFCREATE ASSISTANT
1. Launch PDF Create Assistant,or within PDF Converter Enterprise Click on “File” and Navigate to “New PDF”
and then select“Create Multiple Files.”
2. Click “Add”to begin selecting documents forPDF creation.
3. Browse andselectthe documents youwish towork with.
4. Makesurethedrop down menu for “Create aPDF foreach InputDocument” isselected.
5. Click “OK”to beginprocessing.
6. Your new PDF files are created in the order they were listed. Save each PDF file to continue processing the
next application file.
Note: Selecting “Combine Files into one PDF document” or “Overlay files as one PDF document” will result in the
creation of a single PDF file, either containing all of the pages from the selected documents, or the resulting
overlays that were created. “Package files in one PDF document” will be covered later in this guide.
USING PDF FILE CREATION PROFILES
Page 11
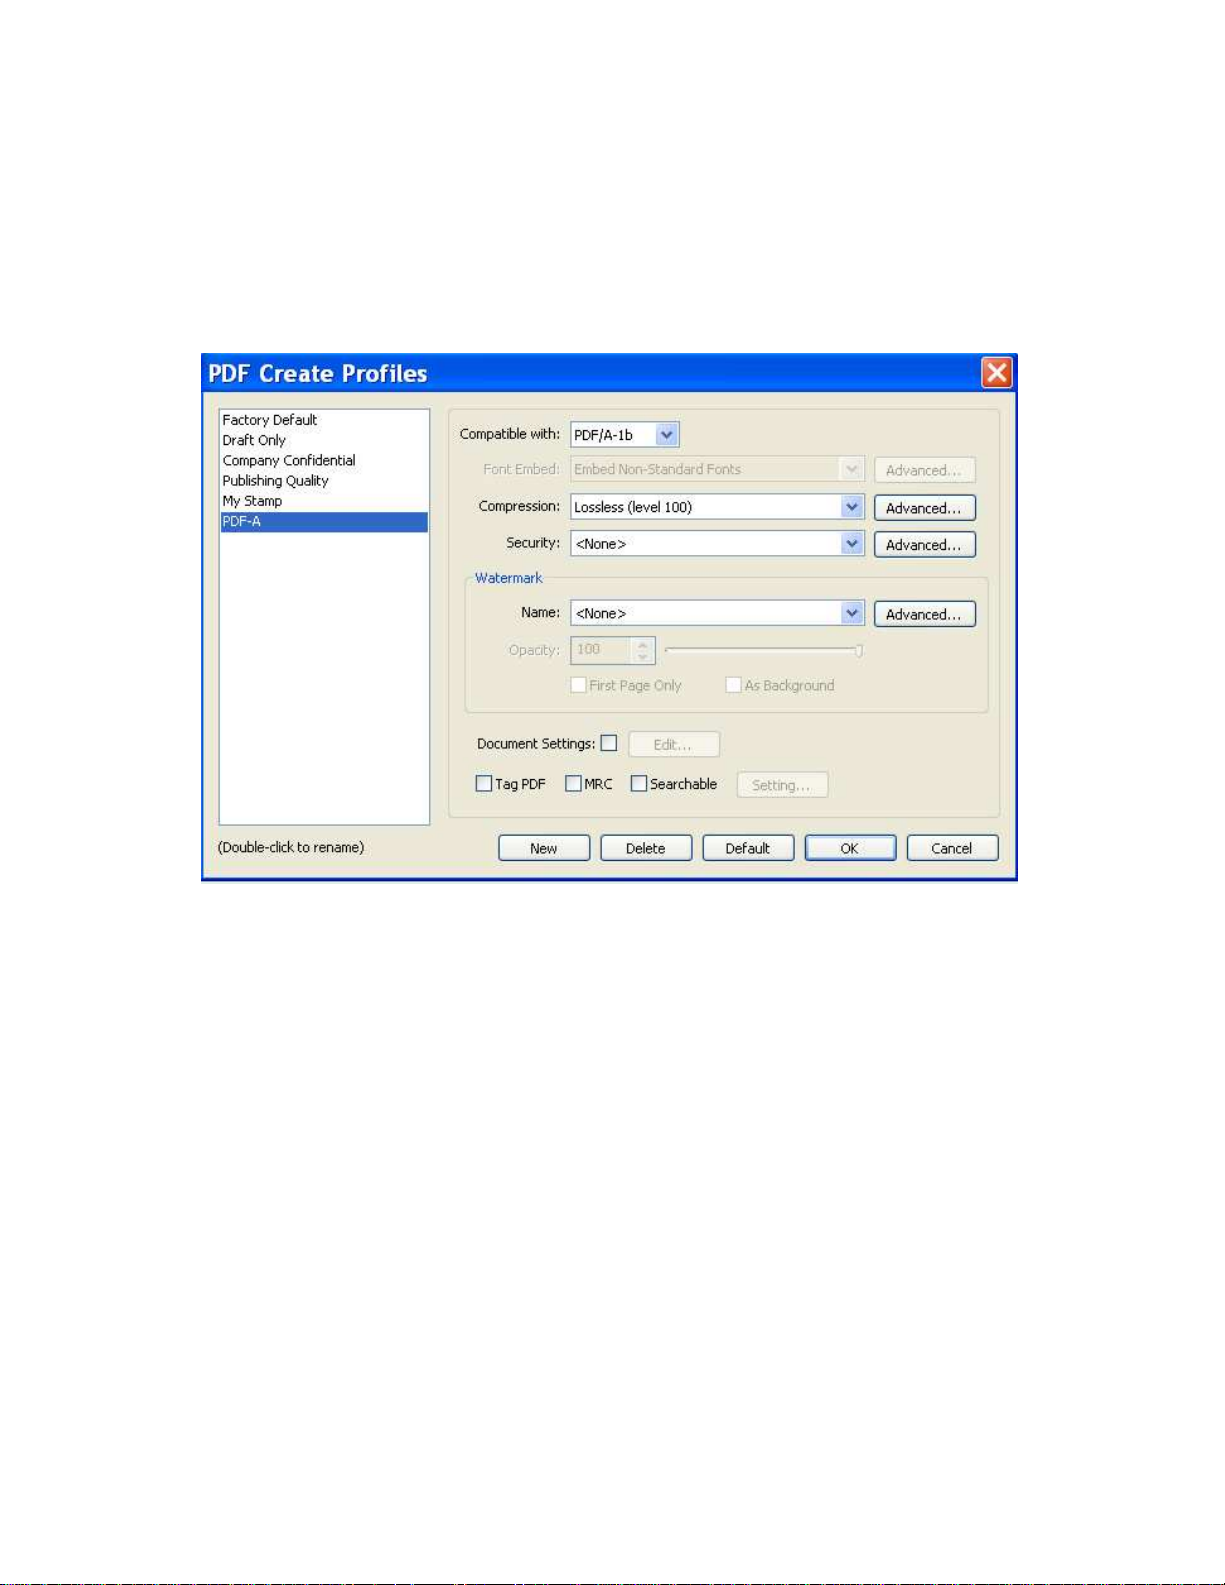
PDF file creation profiles allow the user to determine specific settings (compatibility, compression, security, etc.) to
be used when creating new PDF files.
1. Choose‘File’then‘New PDF’ and‘CreateMultipleFiles’which opensthe PDFCreate Assistant.
2. Click the topmost“Profile”button.
3. Click the “New”button tocreatea new Profile.
4. Type “PDF-A” asthenameofyourprofile toutilizethe formatdesignated forlong-term PDFpreservation.
5. At thetop of themenu change“compatible with” to “PDF/A-1b”.
6. Leaveall otheroptionsand click“OK”.
Page 12
PDF PACKAGES
CreatingaPDF packageissimilartothe Combining files processdescribedaboveinthe batch creationprocess.
However when packaging files, each selectedfile is placedwithin a PDFwrapperratherthan being appended to the
originaldocument.The resultingPDF package isa singlePDF filethat when opened contains multipledocuments,
eachretainingits ownuniqueidentityratherthan being fusedinto one large document. PDFPackagescan alsohouse
non-PDF files.PDF Packages aremost commonlyused for documentorganization and ease of distribution. AllPDF
content withinaPDF packagecan be searchedon from a single search,orprintedfrom a singleprint command.
Questionsto ask when consideringa PDF solution – Packages&Portfolios
1. Cantheprogramdoafull-contentsearch ona longdocument?
2. CanI packagemultiplePDFdocumentsintoonefile?
3. CanI include foldersora folderstructureto organizemyfilesas withPortfolios?
4. IfI receivea PDFPackage orPortfolio,willI beable toviewit andeffectivelywork withit?
PACKAGING MULTIPLE DOCUMENTS / DOCUMENT TYPES
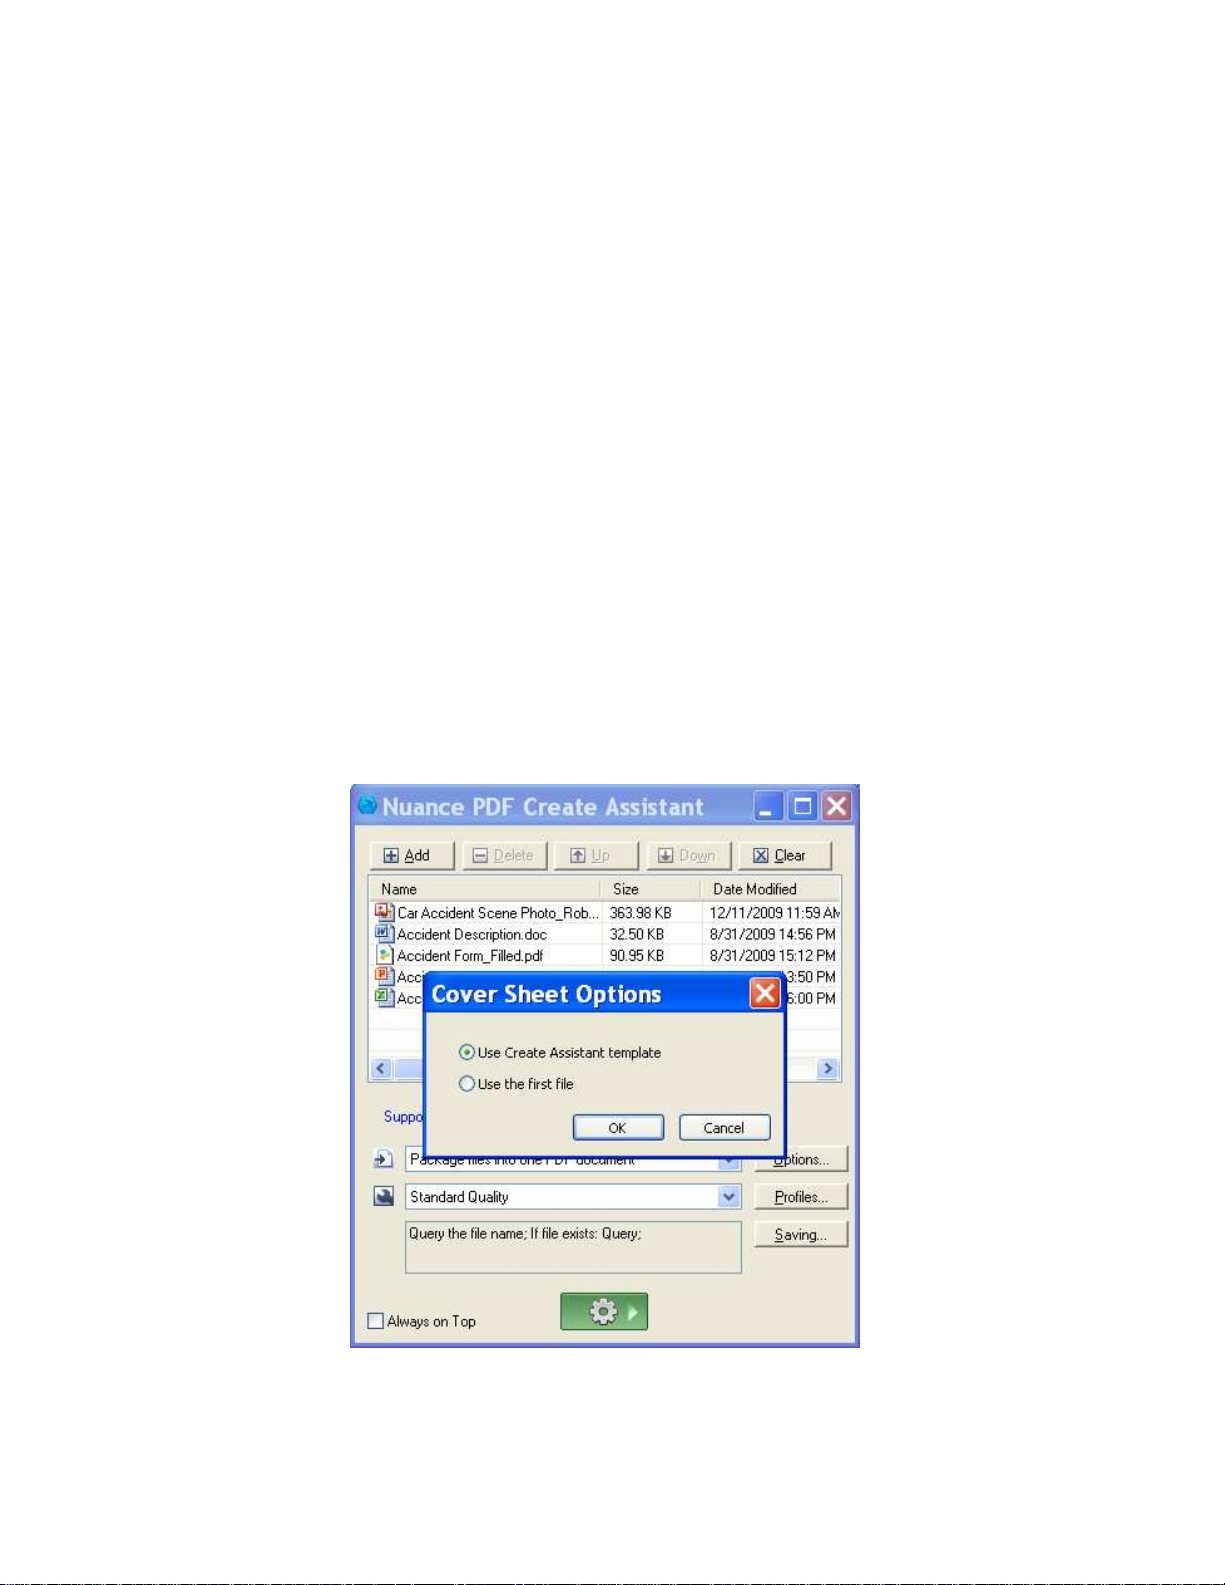
1. Launch PDF Create Assistant and select “Package files into one PDF document”, or within PDF Converter
Enterprise simply click on “New Package”.
2. Click “Add” to begin selecting documents for inclusion in the package.
3. Browse and select the documents you wish to work with. Note: All documents selected will be turned into PDF
documents for inclusion in the package. The inclusion of non-PDF documents within a PDF package will be
addressed later in this section.
4. Click “Option” and choose whether to use the default “Create Assistant Template” as the cover sheet to the
package or to use the first page of the first documentClick “OK”to beginprocessing.
5. YournewPDFPackagefileiscreated.
Page 13
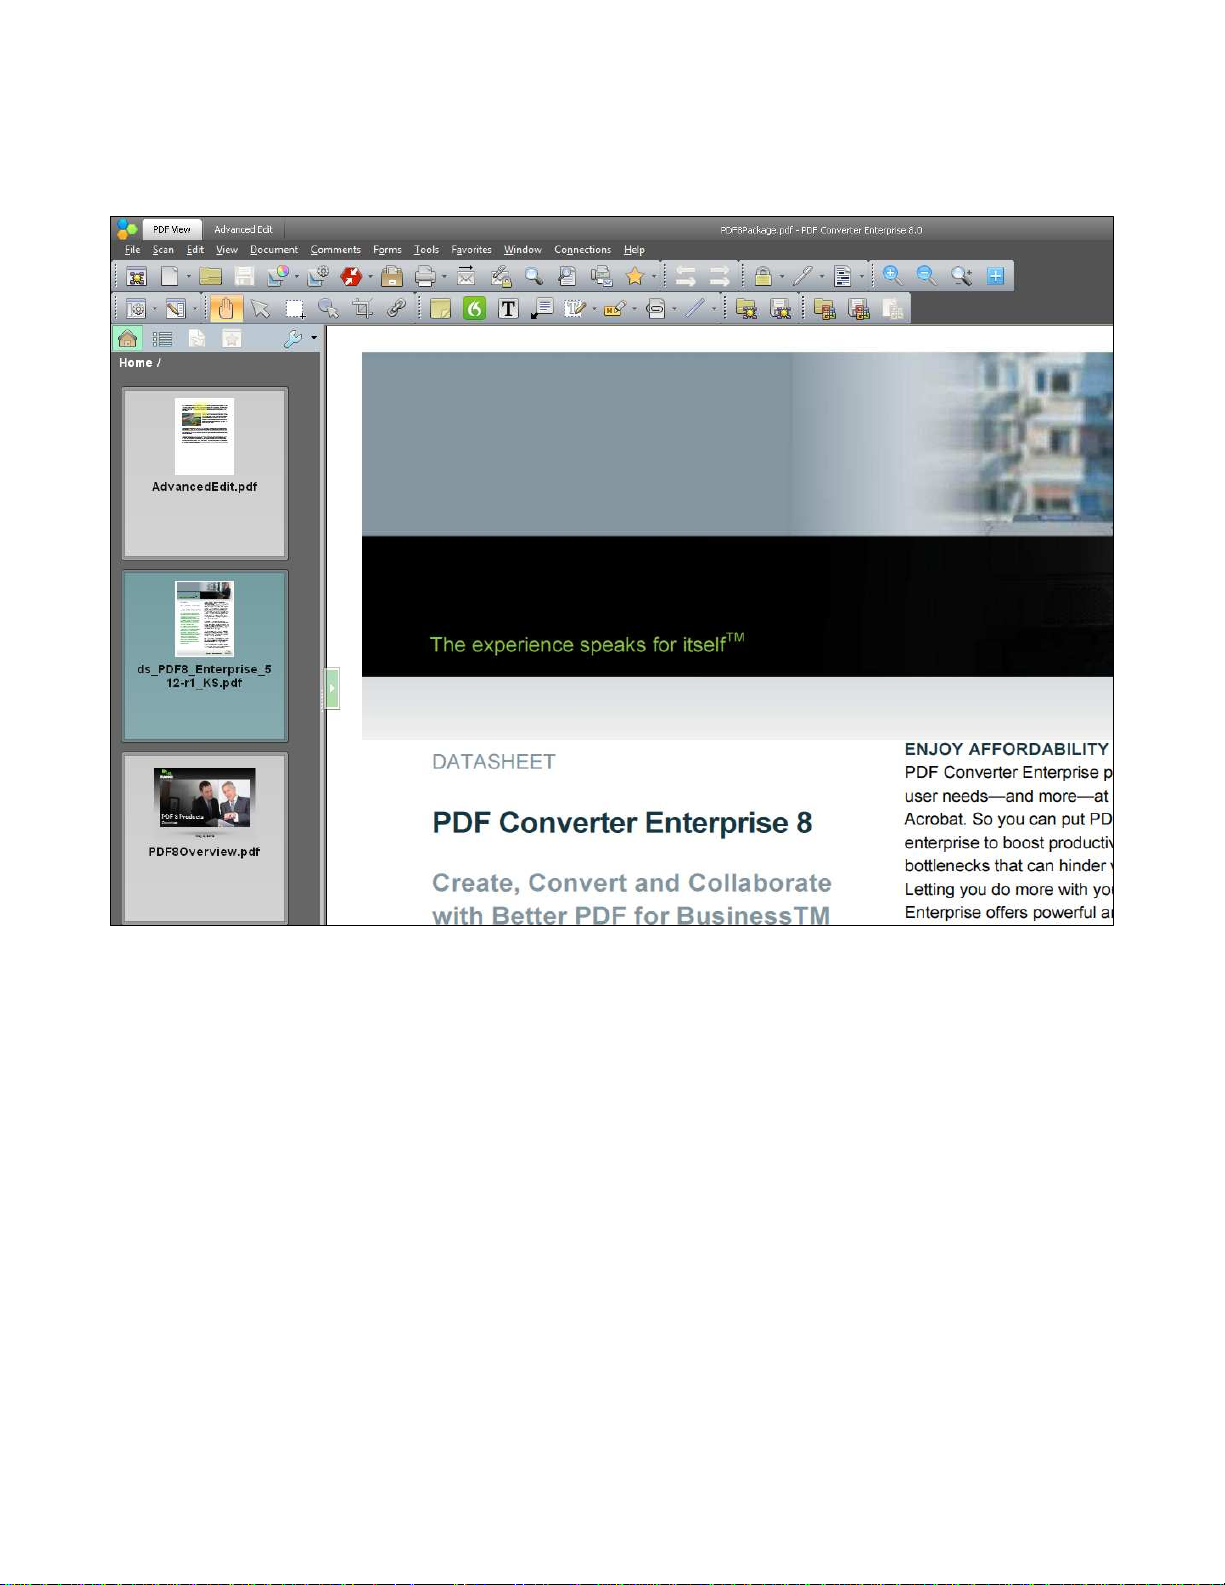
To addotherfile types, open thePDF packageand simply drag and drop other files intothe filelist.
Note: Non-PDF files will not be viewable and editable within PDF Converter Enterprise as they are not PDF files,
but they can be launched in their original application from within PDF Converter Enterprise.
Page 14
PDF PORTFOLIOS
Portfoliosarethe“nextgeneration”ofPDFPackages.In additiontofiles,Portfolioscaninclude foldersandevenfolder
hierarchiesforevenbetterpresentationand organizationof yourfiles.Portfoliosalsoofferadditionalpresentationtoolssuch
asan introductionpage,whichcaninclude Flashmovies,andinstructionson howtheincludedfiles shouldbe utilized.
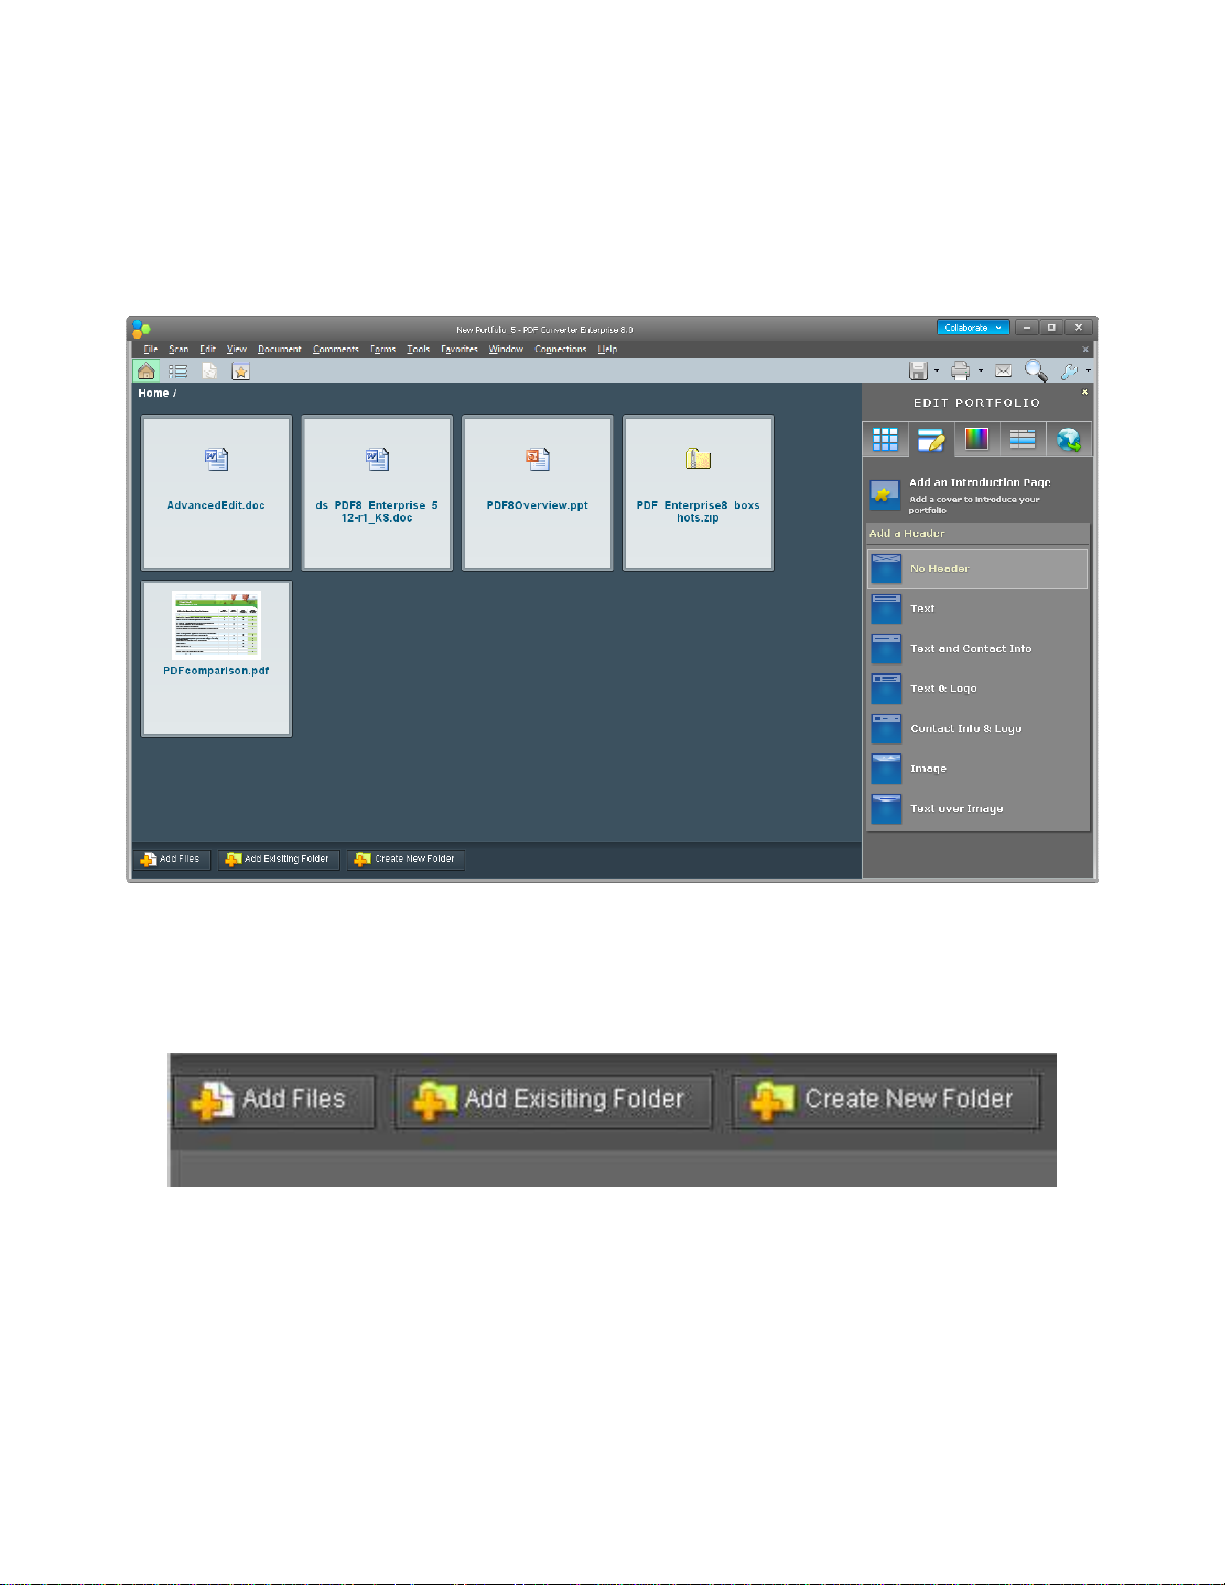
CREATINGA PDF PORTFOLIO
1. Launch PDF Converter Enterprise and select FILE.
2. Select CREATE PDF PORTFOLIO from the drop down list.
3. Drag and Drop any PDF Files or Folders you’d like to include in the Portfolio, or utilize the buttons at the
bottom to do the same.
Page 15
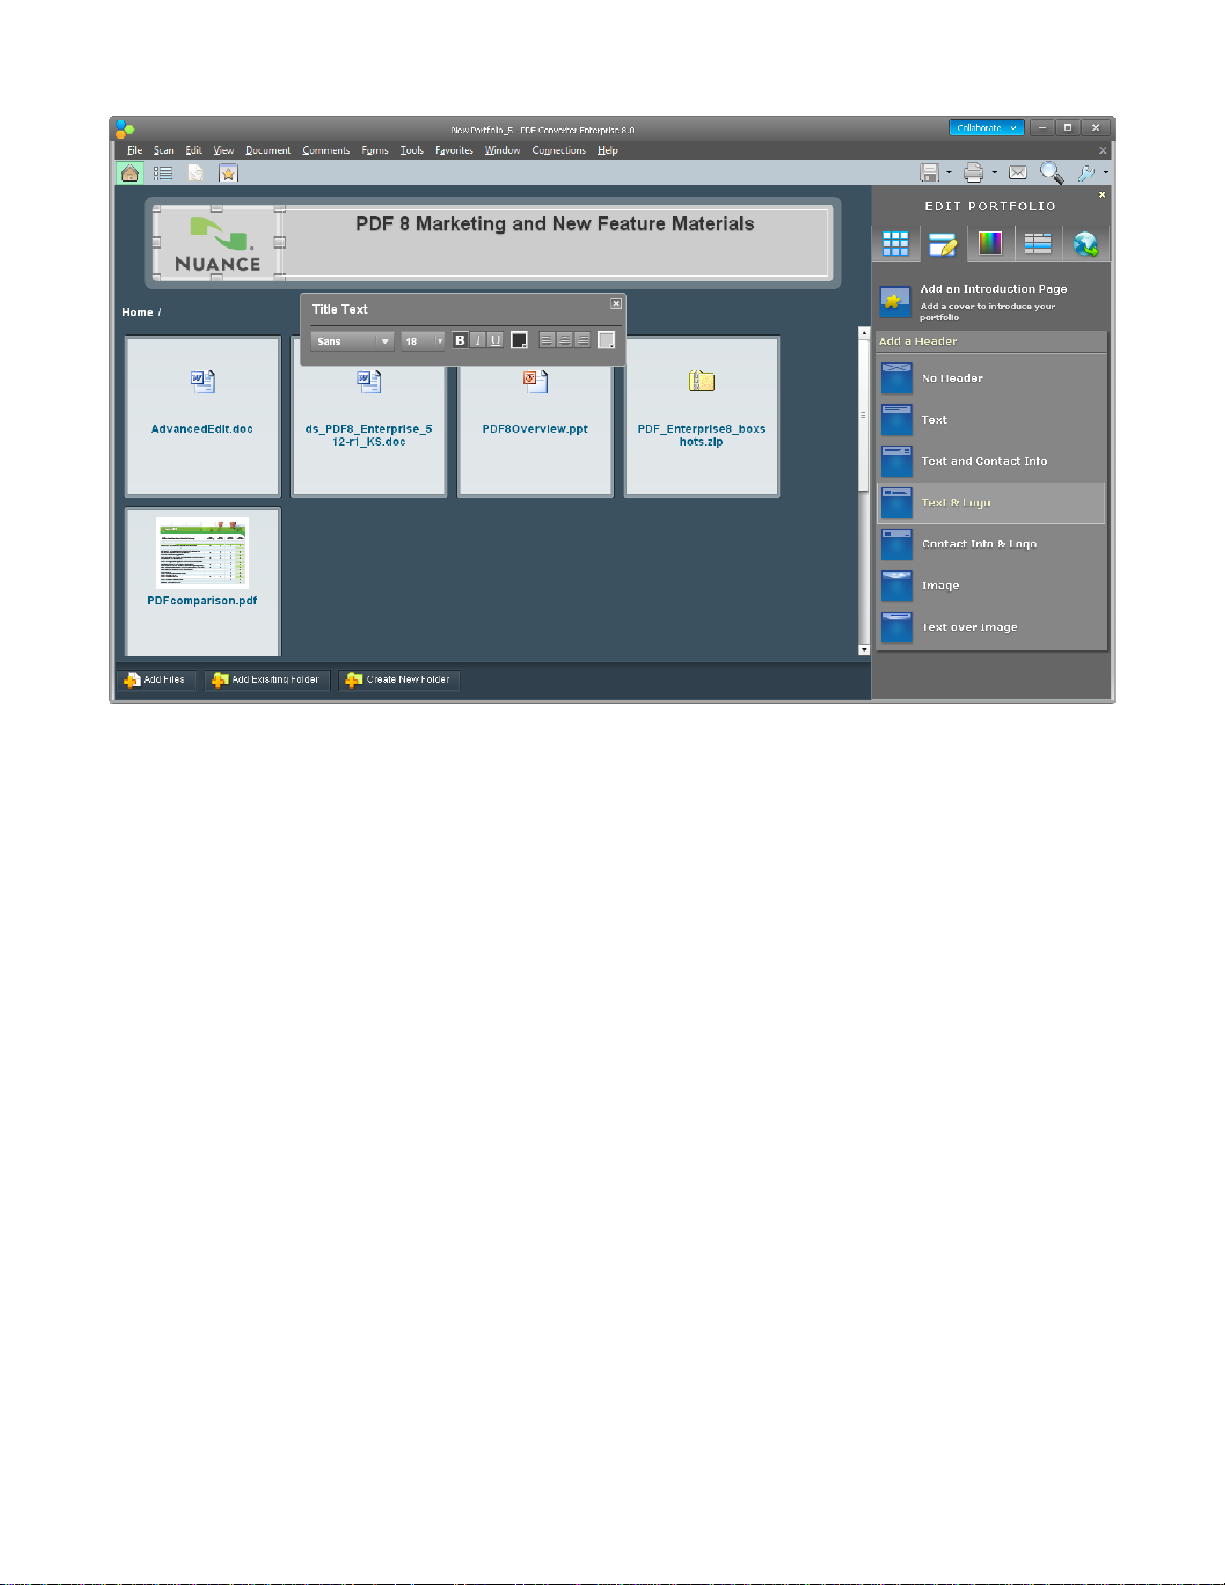
4. Select theAdd Header andIntroductionTab andchoosethe optionsthat best meetyour needs.
5. Next, simply select your color scheme.
6. Then add any additional file properties on the following tab.
7. Finally save your portfolio.
Page 16
PDF CONVERSION
Converting PDF Files into Other Formats
There are two main methods of Converting PDF documents into other formats. The first is from within PDF Converter
Enterprise, thesecondis through thePDF ConverterAssistant,both methodsare explained below.
Questionsto ask whenconsidering a PDFsolution - Conversion
CanI convertdocuments fromPDFtoWordformat?(Andif yes,howmuchclean-upisinvolvedpostconversion?)
Candocumentsbe converted fromPDFto Excelorother formats?
CansoftwareconvertfromPDF filetoOffice2007 or2010?
Can “static”or scanned imagesbe converted intosearchablePDF documents?
CONVERT PDF TO MICROSOFT WORD
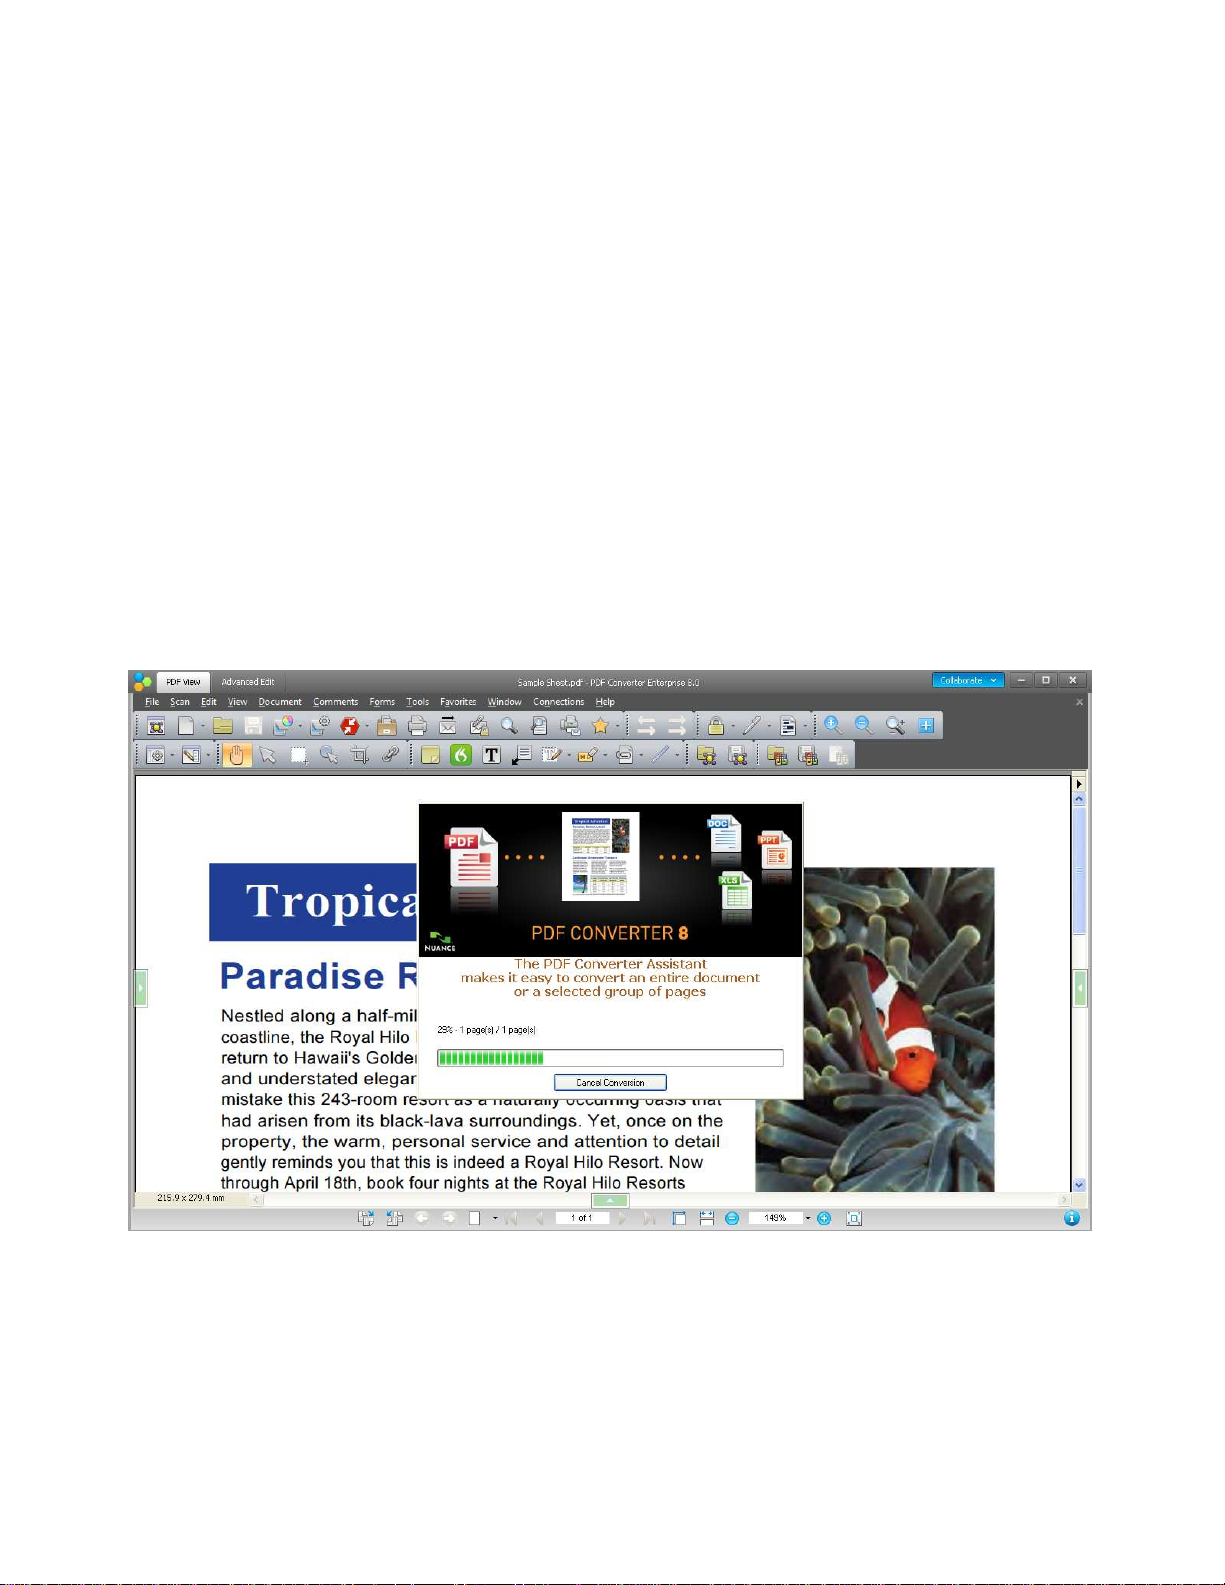
1. Openthe “SampleSheet”PDF document withinPDF Converter Enterprise andscroll throughit.
2. ClickontheConvert PDF icon andselect “WordDocument.”
3. Choose a place to save the converted document andclick OK.
4. The document will be opened in Microsoft Word, scroll through the document and see that the elements in the
Worddocument look exactlythe sameas the original PDFdocument.
Page 17
CONVERT PDF TO MICROSOFT EXCEL
1. Opena spreadsheetPDFdocument.
2. Click the Convert PDFicon and select‘Launch PDFConverter’ tostart the PDFConverterAssistant.
3. Click onOptionand SelectMicrosoft Excelor selectit fromthe toolbar.
4. SelectView and Outputto choose alocationto savethe documentand to generate Office 2007 output. (Note:If
selected,Office2007 outputwill bethe default,even withinthe PDFConverter Enterpriseapplication. Office2007 output
optionis enabledonlyifyou have Office2007 present onyourPC.)
5. Click Convert and choose “All Files” to begin converting your PDF into text.
CONVERT PDF TO SEARCHABLE PDF
1. Converting a PDF to Searchable PDF converts an image-only PDF file (typically a scanned picture of the
document) into a text searchable PDF file by recognizing the text in the picture (using OCR technology) and adding
that text behind the scenes. This allows the user to search and find content within the document.
2. Open the PDF Create Assistant.
3. Click on the Profiles... button.
4. Select the “Searchable” checkbox.
5. Click ‘OK’
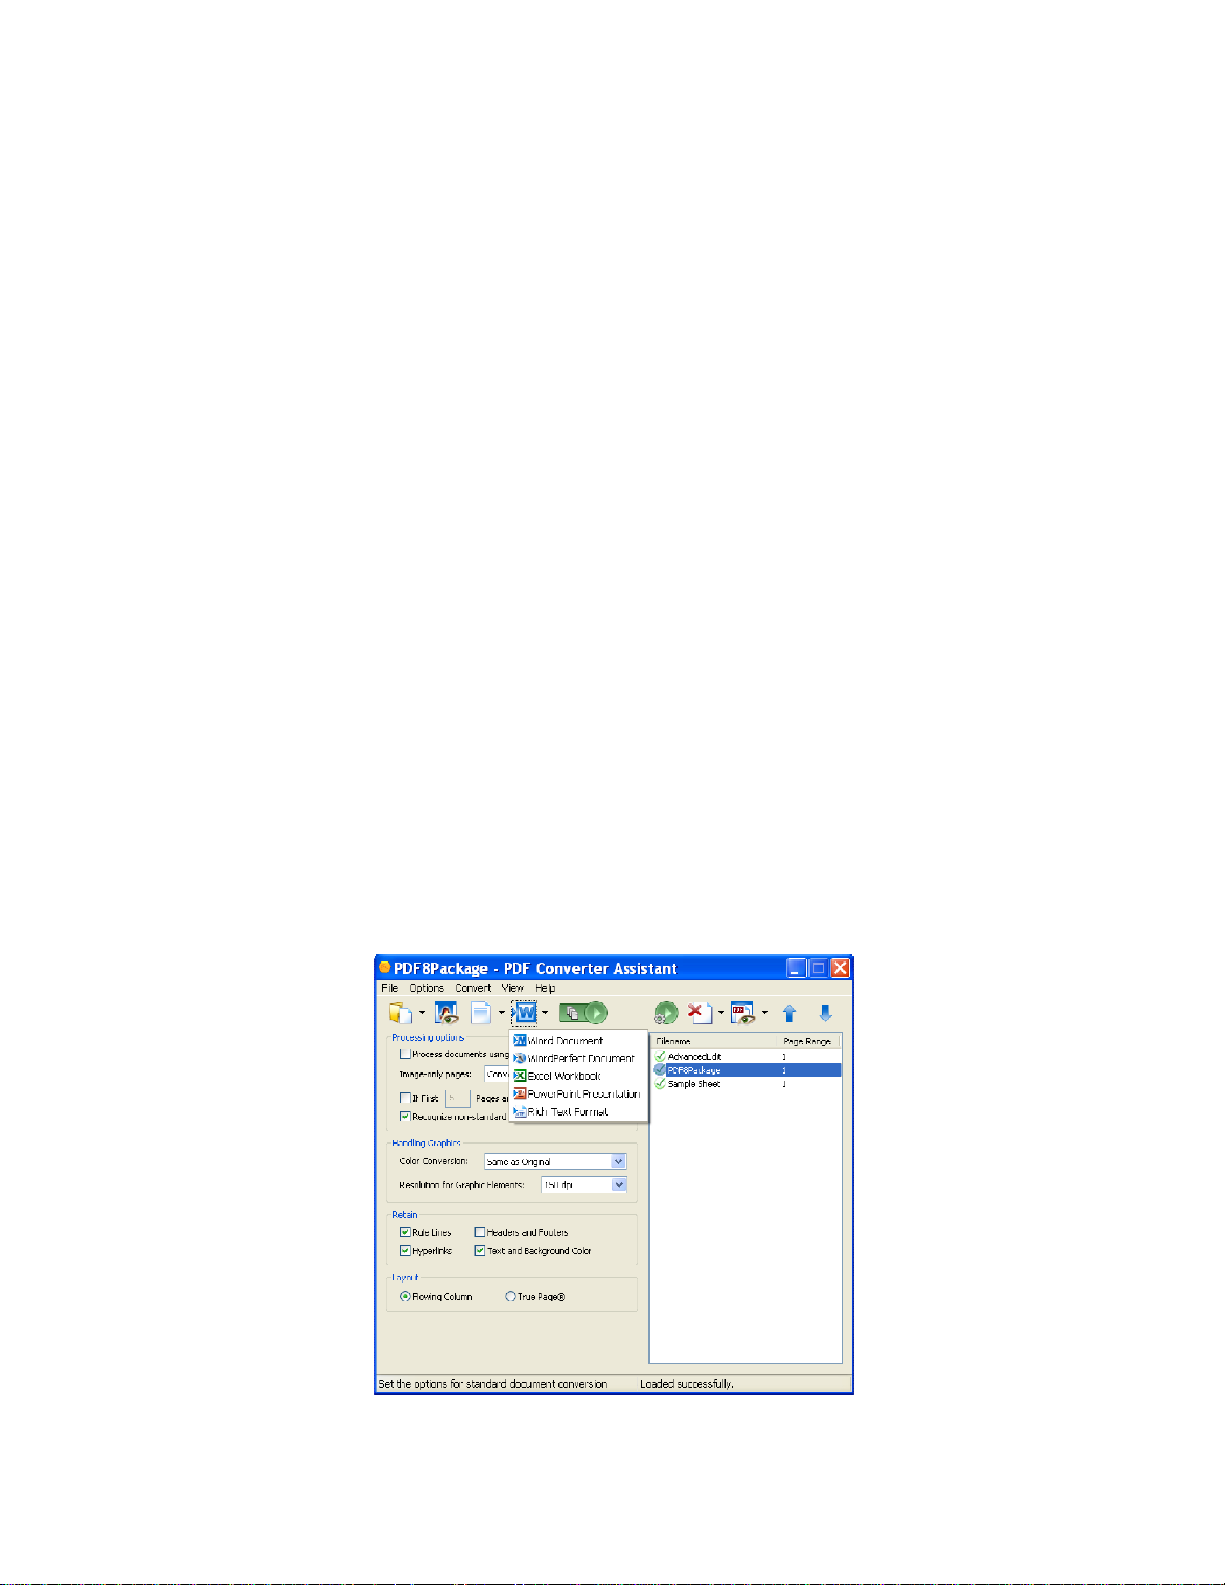
BATCH CONVERT PDFS TO ANOTHER DOCUMENT TYPE USING THE PDF CONVERTER ASSISTANT
To convert a lot of files at one time, utilize the PDF Converter Assistant utility. It lets you compile multiple PDF files
to be converted into another file type, so you can batch convert a lot of files at once.
1. To use this utility, you can either launch the PDF Converter Assistant from the Start Menu or you can access the
PDF Converter Assistant through the Converter menu from within the application.
2. Click “Add” to begin selecting documents for PDF conversion.
3. Once your PDF files are selected, you have the option to choose how you want the output to be handled under the
View > Output menu.
4. You can select for all to be combined into one file or converted into separate files and also the location and naming
for the files to be delivered.
5. Click the output document file type that you want all of the files to be converted into
6. Click “OK” to begin processing
Page 18
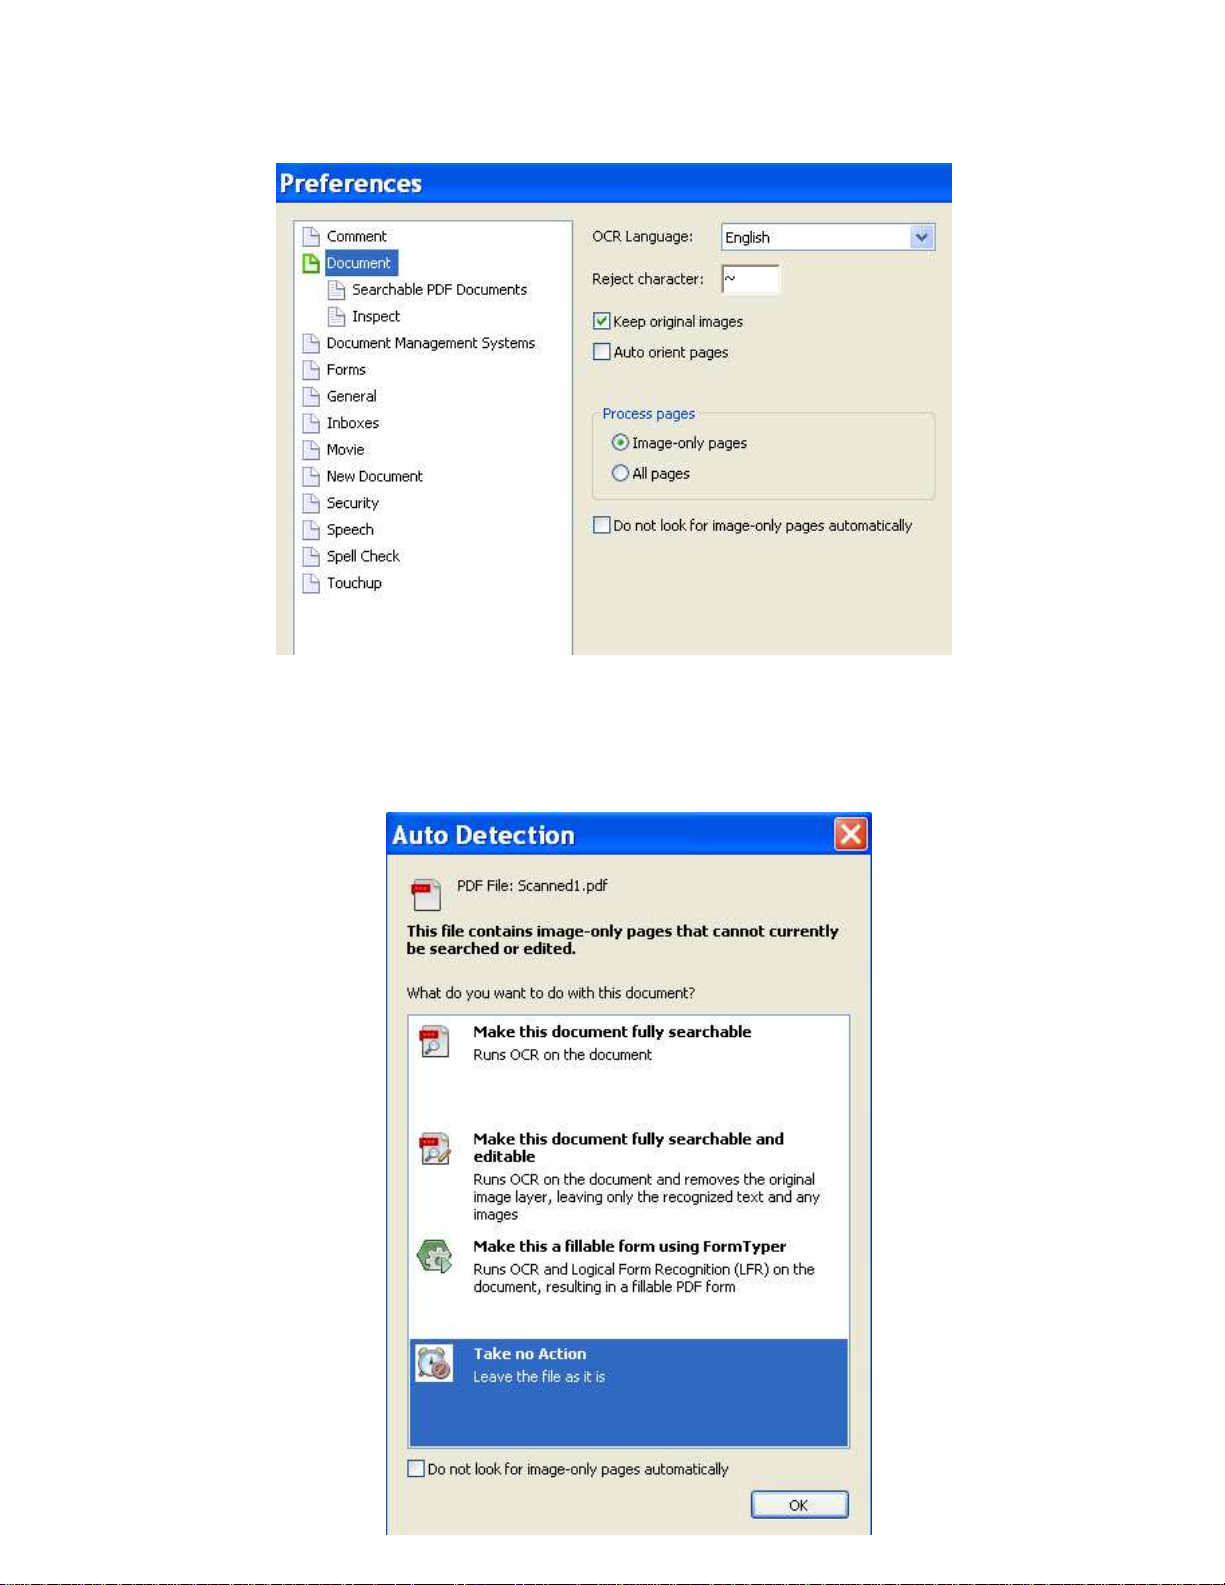
THE AUTO-DETECT IMAGE-ONLY FEATURE – FROM SCANNED TO EDITABLE PDF FILES
Ifyouopenascannedor image-onlyfile,PDFConverterEnterprisehasto abilityto auto-detectthatthefilecontainsimageonlypages.Thisfeatureneedsto beenabled undertheEdit> Preferences> Document
Bydefault,“Donotlookforimage-onlypagesautomatically”isselected,so toturn onthisnotificationyouwilluncheckthat
boxlikeyouseeabove.
1. Onceenabled when an Image-only fileis detected, a dialog box willpop-upgiving the user thefollowingoptions:
Page 19
2. Ifyouselect“Makethedocumentfullysearchable”,the applicationwillpreserve the pictureof thepageandaddan
18
invisiblelayer oftextunderit usingOCR,or OpticalCharacterRecognition technology.In thisway,you can searchfor
wordsin the document,but we'renot ableto editthetext.
3. Ifyouselect“Makethedocumentfullysearchableand editable”,the documentwillbe completelyconvertedintoa text
document,and theoriginalscanned fileisnotmaintained.The application willtryto faithfully reproducetheoriginal,but
youmaysee somechanges. Thebenefitof this processis thatallthetextcan beedited,as well assearched.
4. Thenextoptionis to “Make thisafillable formusingFormTyper”,you wouldonlyselectthisoptionif ourscannedfileis a
form thatwe wouldliketo makefillable.
5. Thelastoptionis to “take noaction”if we wouldliketo leaveitas anPDFImageonlyfile.You would choose thisoptionif
wedonotneedto searchor edit anyofthe datawithinthe file.
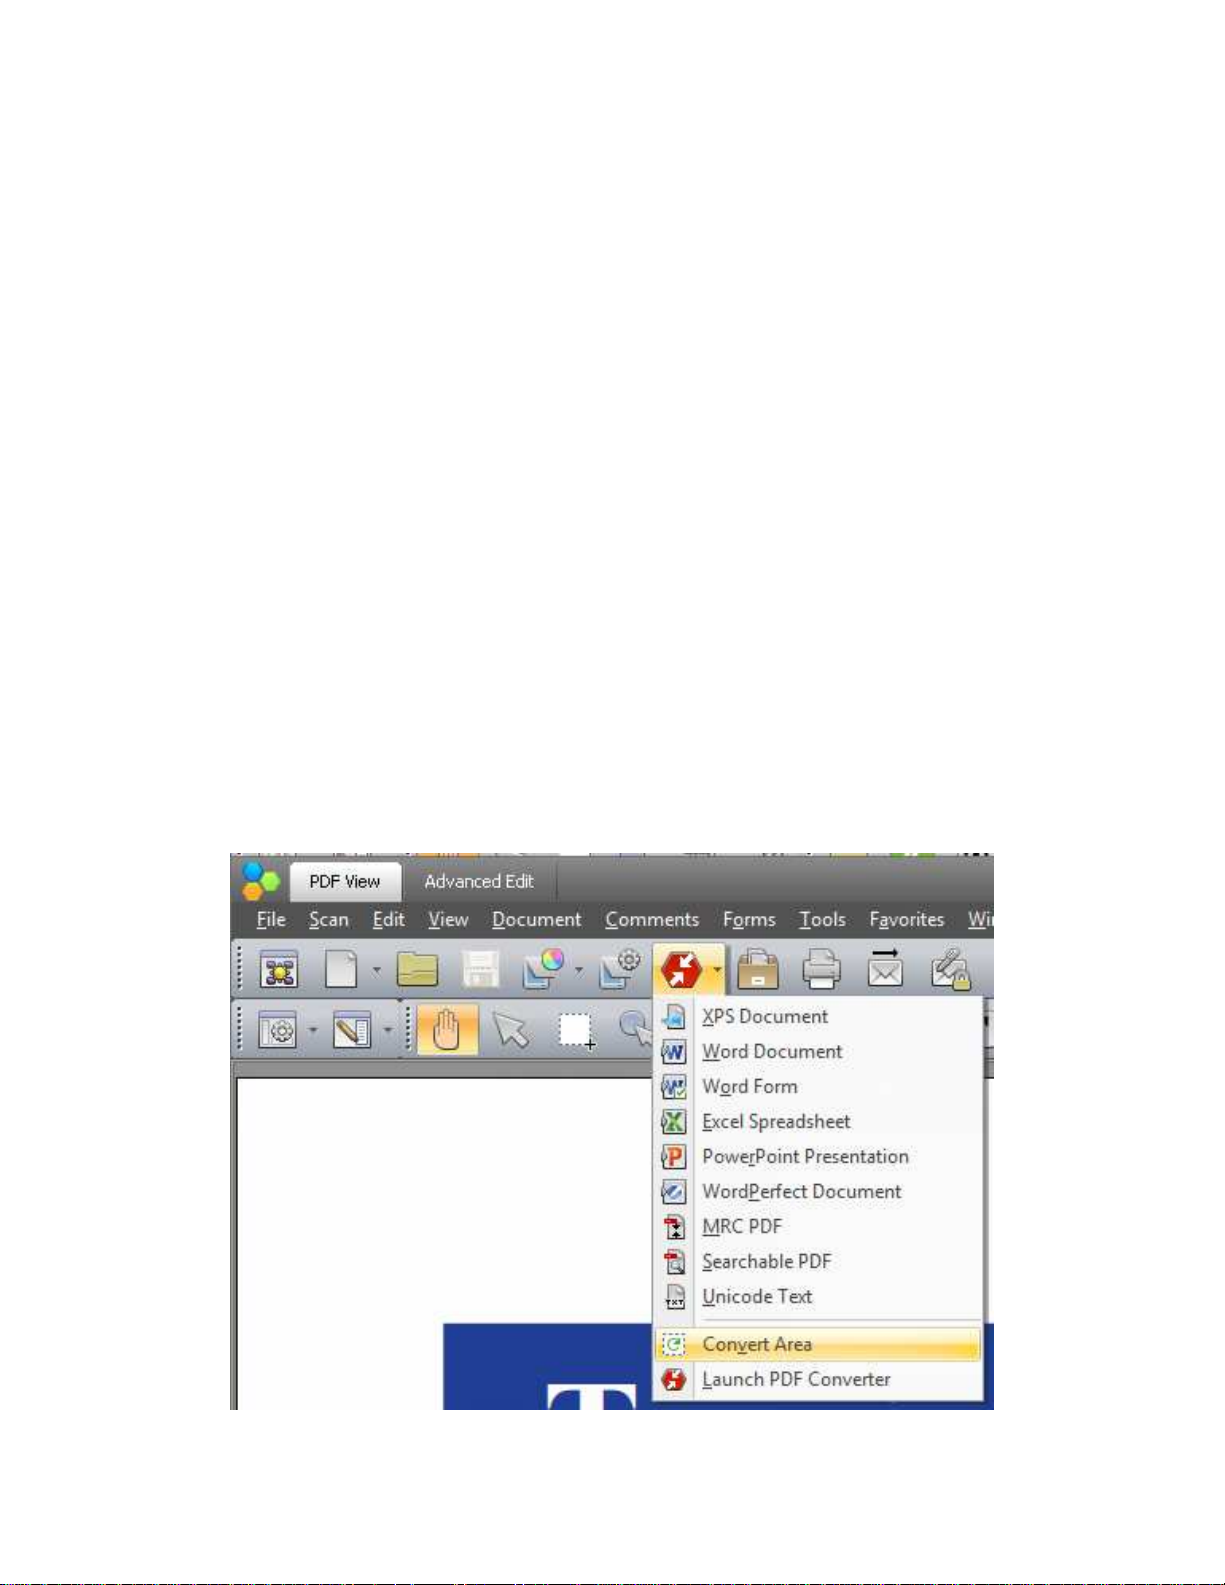
CONVERT AN AREA
PDF Converter Enterprise 7 offers the ability to convert just a selected area of a page into Word, Excel, PowerPoint
and WordPerfect. Converting an Area is a great way to extract tables out of documents, or to simply reuse a portion
of an existing document.
1. In PDF Converter Professional select the Convert Button.
2. Scroll to the bottom of the options and choose the Convert Area tool.
3. Next, the snapshot tool will be selected automatically in order for you to mark the area of the document
you’d like to convert.
4. When the SAVE AS menu opens, name your file and simply select the file type.
Page 20
DOCUMENT ASSEMBLY / DOCUMENT SPLITTING
Document Assembly
1. Open a multi-page document.
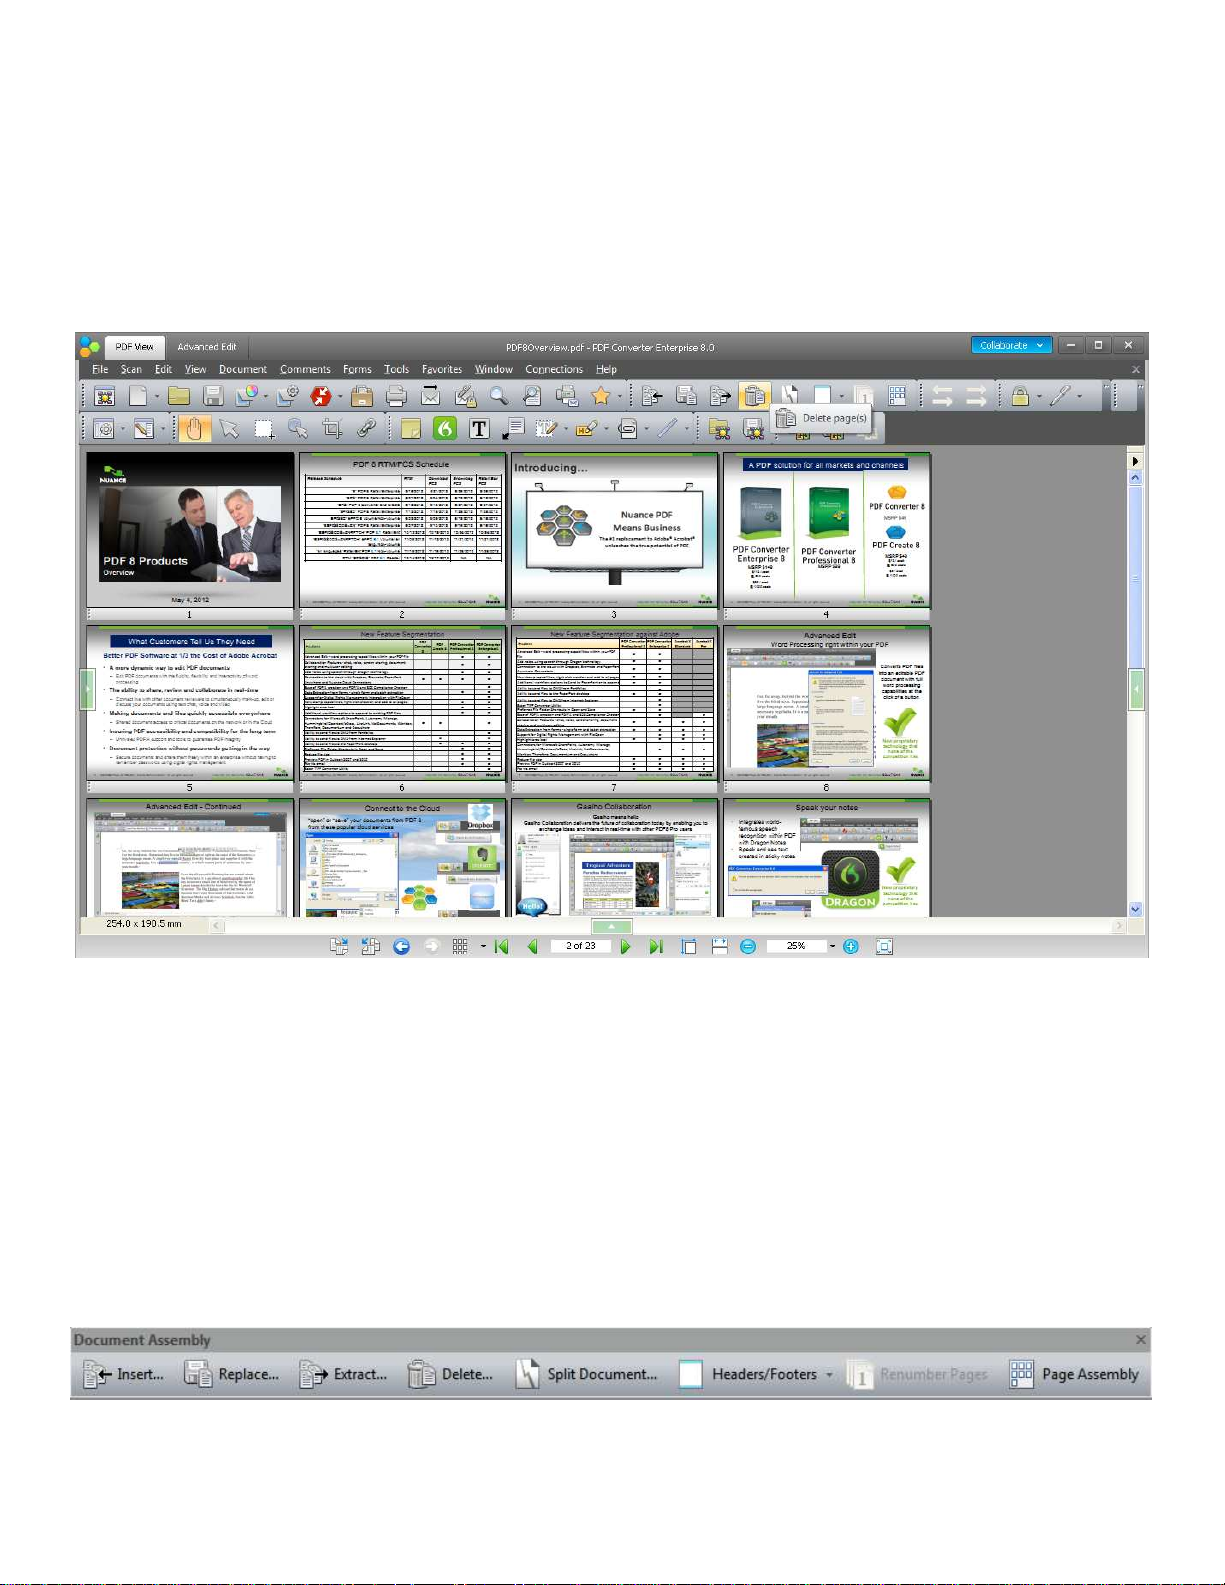
2. Select VIEW and then DocumentAssembly.
3. Pages can now be easily shuffled with simple Drag and Drop control
1. To add additional pages, select INSERT and choose additional files or pages to add, or simply drag and drop
files, even non-PDF files, into the view. Non-PDF files will be converted to PDF prior to being inserted into the
document.
2. Using the Document Assembly toolbar (only available in Document Assembly view) you can Insert, Replace,
Delete, and Extract pages.
3. Additionally, File Splitting functionality is available in this view. (See Document Splitting section below)
4. In order to create a polished assembled document, unify your headers and footers by either updating them, or
removing old headers and footers and replacing them with a new one.
5. Finally, click the RenumberPages button to correct the page numbers so that they correspond with your newly
re-ordered document.
Page 21
Document Splitting
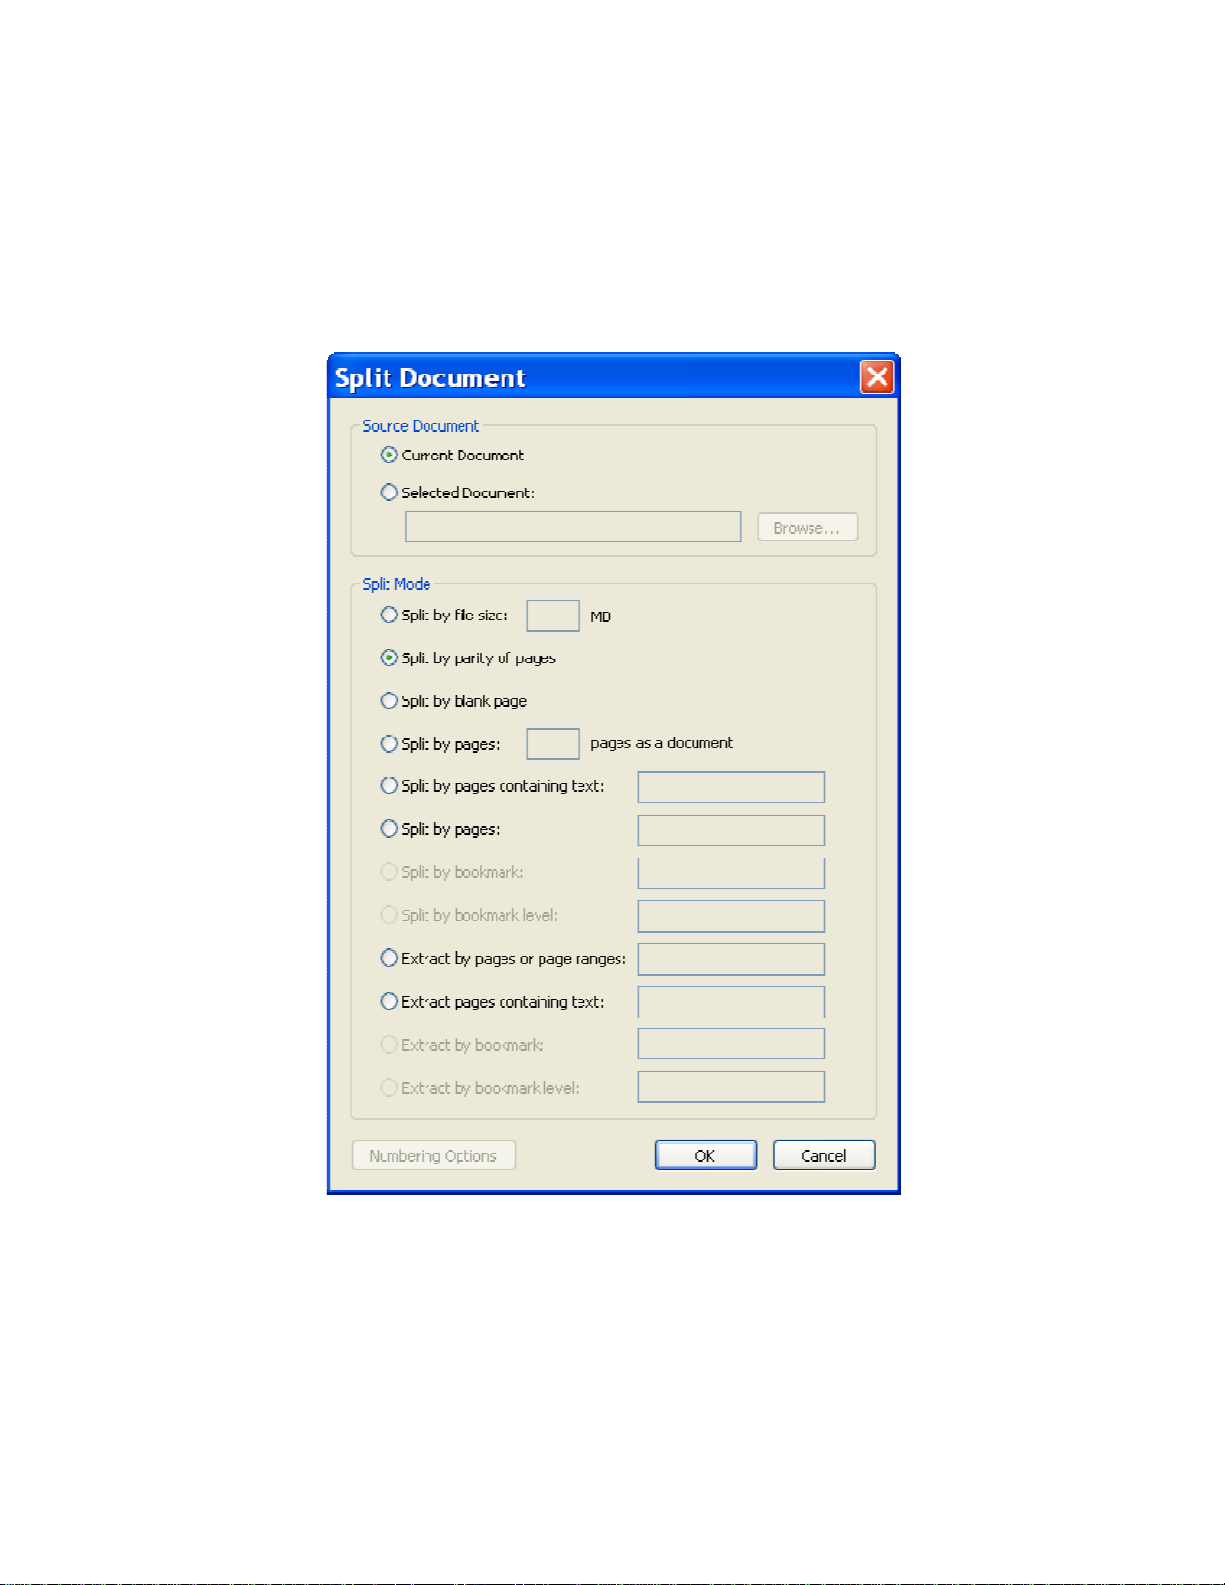
1. Open amulti-pagedocument.
2. Clickon “Document”andselect“Split Document...”.
3. Selectthe“Splitby Pages:___Pagesasa Document”option.
4. Enter“2”in thetextbox,indicatingthatthedocumentshouldbe splitintogroupsof 2 pageseachandclick “OK”.
5. Selecta folderin whichtosavethe newlygeneratedsplitfilesand click“OK”.
Note: With these settings, a four page document will be split into two 2-page documents. The naming convention
that is used for splitting documents is “Segment001of doc name”. Choose from 8 different splitting methods to split
your large document into smaller segments, including our newest addition Split By File Size.
Page 22
BASIC PDF EDITING
DOCUMENT EDITING – TOUCHUP
PDF Converter Enterprise provides you with a Touchup Tool for editing basic content within a PDF document; The
TouchupTool is designed to edittextualcontent andimages, graphs andother elementswithinthe document.
Questionsto ask whenconsidering a PDFsolution - Editing
Can theproductedit PDFdocumentcontent?
Canthe producteditor manipulategraphics and chartswithina PDFfile?
TOUCHUP TEXT
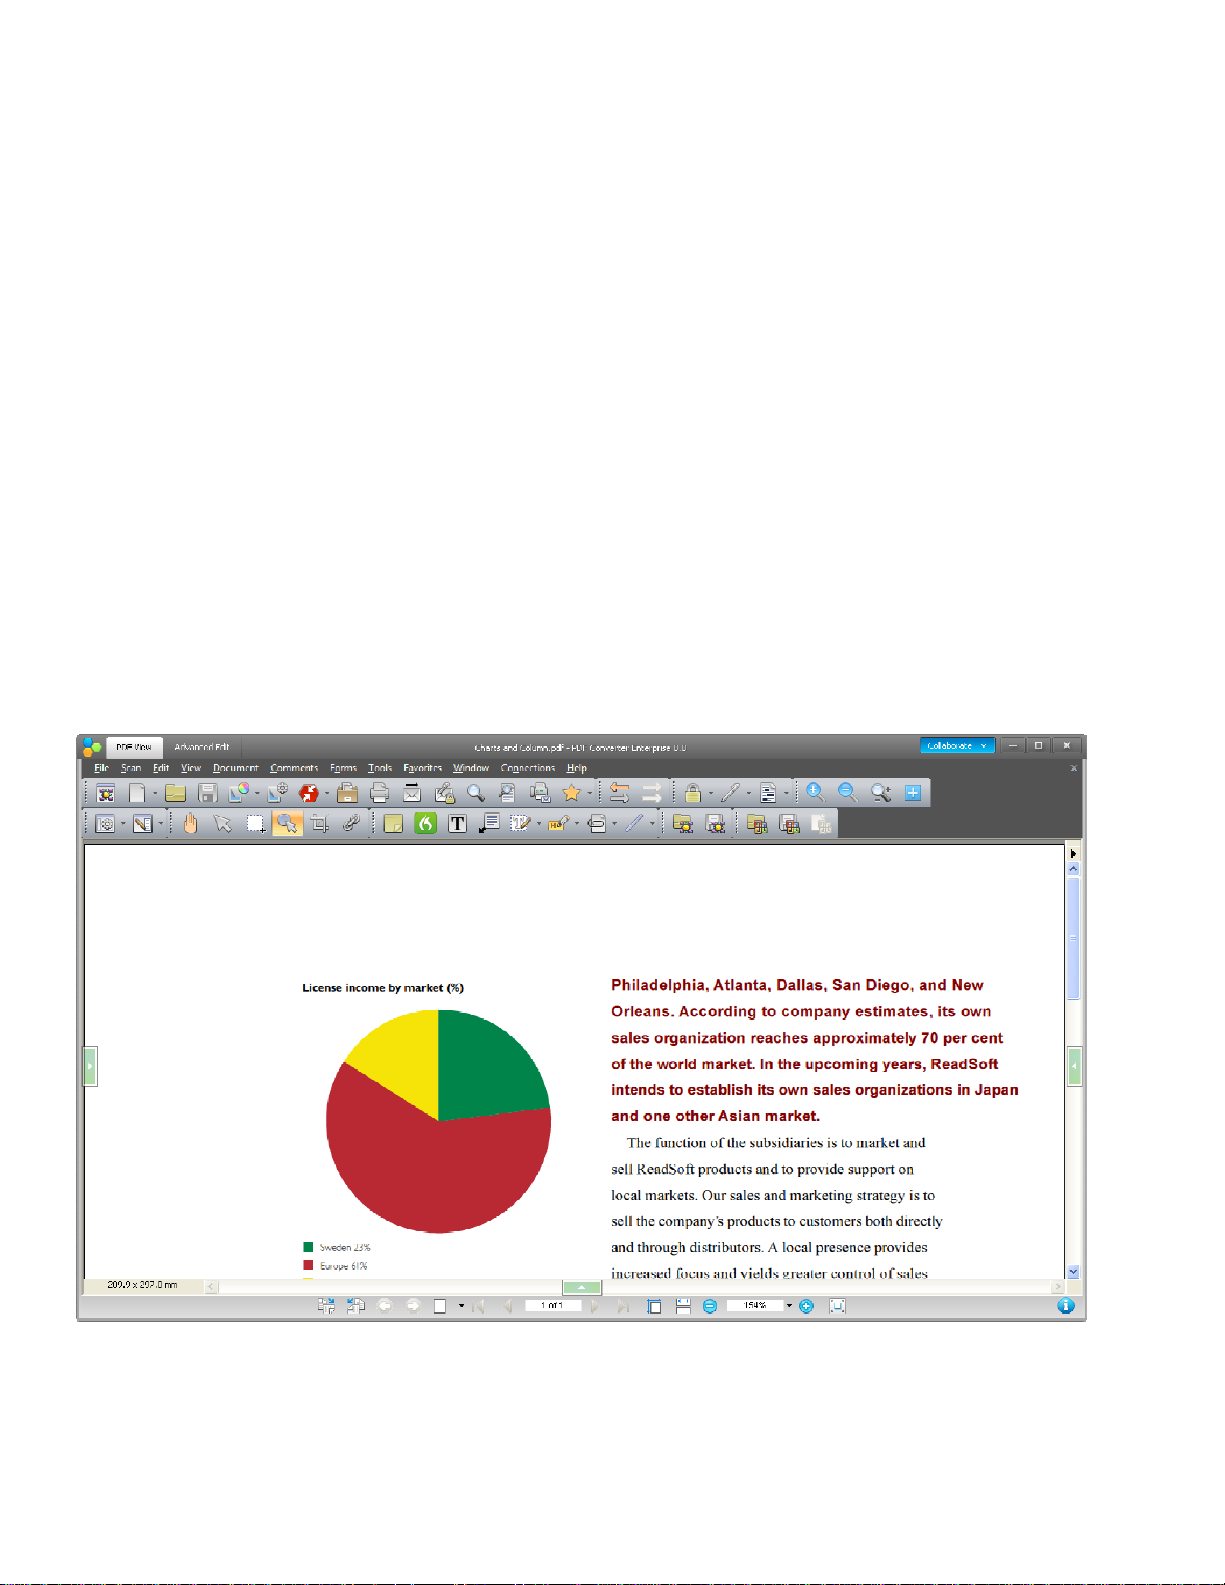
1. Closeand thenreopenthe“ChartsandColumn” PDFfile.
2. Clickon the“TouchupTool”icon.
3. Clickon thecolumnof textto selecttheblock,highlight thefirstparagraphoftext
4. Rightclick in thehighlighted textand select“Properties.”
5. Onthe “Text”tab changethe fontto ArialBold.
6. Changethefillcolortomaroon.
7. Changethefontsizeto 8 point.
8. Close the properties boxand view your text changes.
Page 23
Note:Typically,ifyou click onthe “Touch-UpText”tool andare unableto directlyedit text asyou doin MicrosoftWord,
that meansthe PDF document you areworking with has text properties (font,pointsize,etc.)thatarenotavailableon
your system. Inorderto editthe text you need tofollowsteps 1-8describedhere andsave the changed file.Onceyou
save the fileyou canreopen itand edittext exactly asyou doin MicrosoftWord.
9. Selectthefirstparagraphof text.
10. Right click and select “Cut.”
11. The firstparagraph of textis removed and theremainingtextismovedtofill in the space.
TOUCHUP OBJECTS - RESIZING OBJECTS
1. Openthe “Convert-Charts andColumn.pdf”PDF file.
2. Click onthe “Touchup Tool”icon.
3. Click on a sliceof the pie chart to selectit.
4. Resizethepieslice.
Page 24
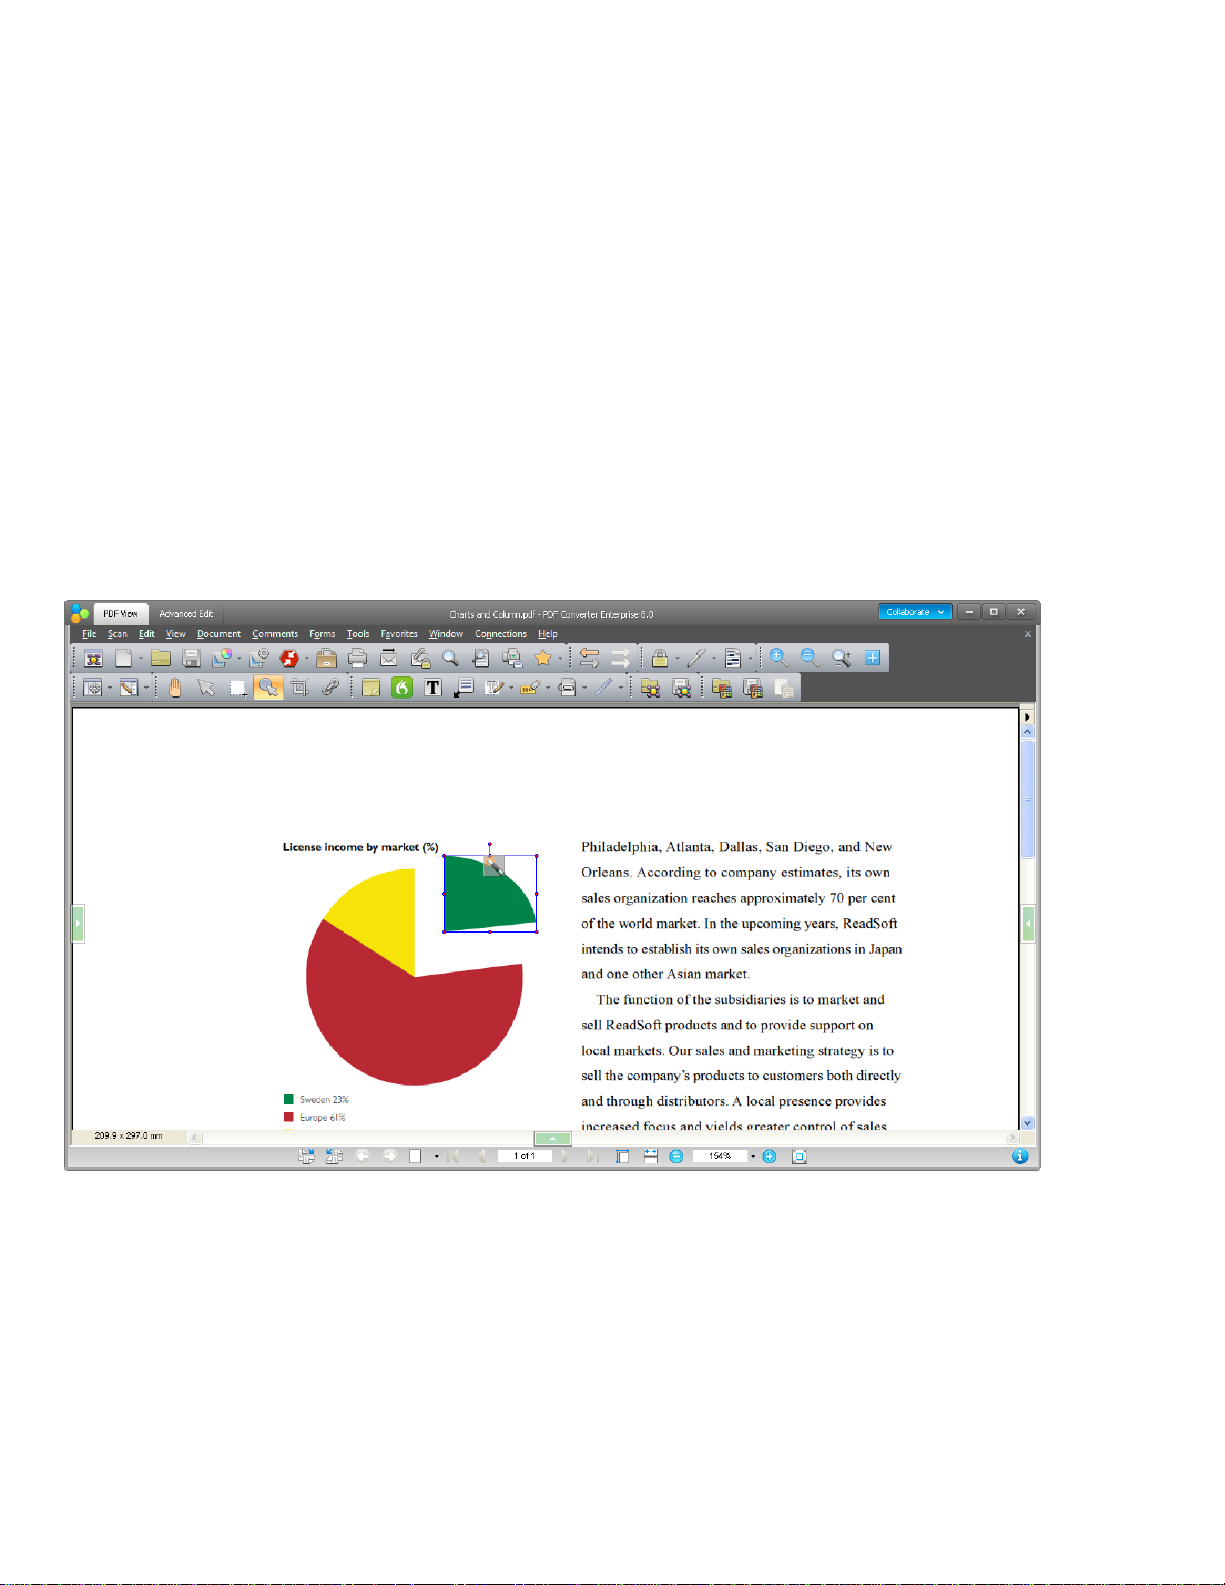
TOUCHUP OBJECTS - MOVING AND ROTATING OBJECTS
24
1. Open the“Convert-ChartsandColumn”PDF file.
2. Clickon the “TouchupTool”icon.
3. Click onthe green sliceof the piechart toselectit and moveitout of the way.
4. Click the yellowslice,move and rotateit intopositionwherethegreenslicewas.
5. Click the greenslice,moveandrotate ittowherethe yellowslicewas.
SAMPLE FILEBEFORE USING TOUCHUP OBJECT TOOL
BEFORE
Nuance Eva luati on Gui de PDF Converter Enterprise 7
SAMPLE FILEAFTER USING TOUCHUP OBJECT TOOL
AFTER
Page 25

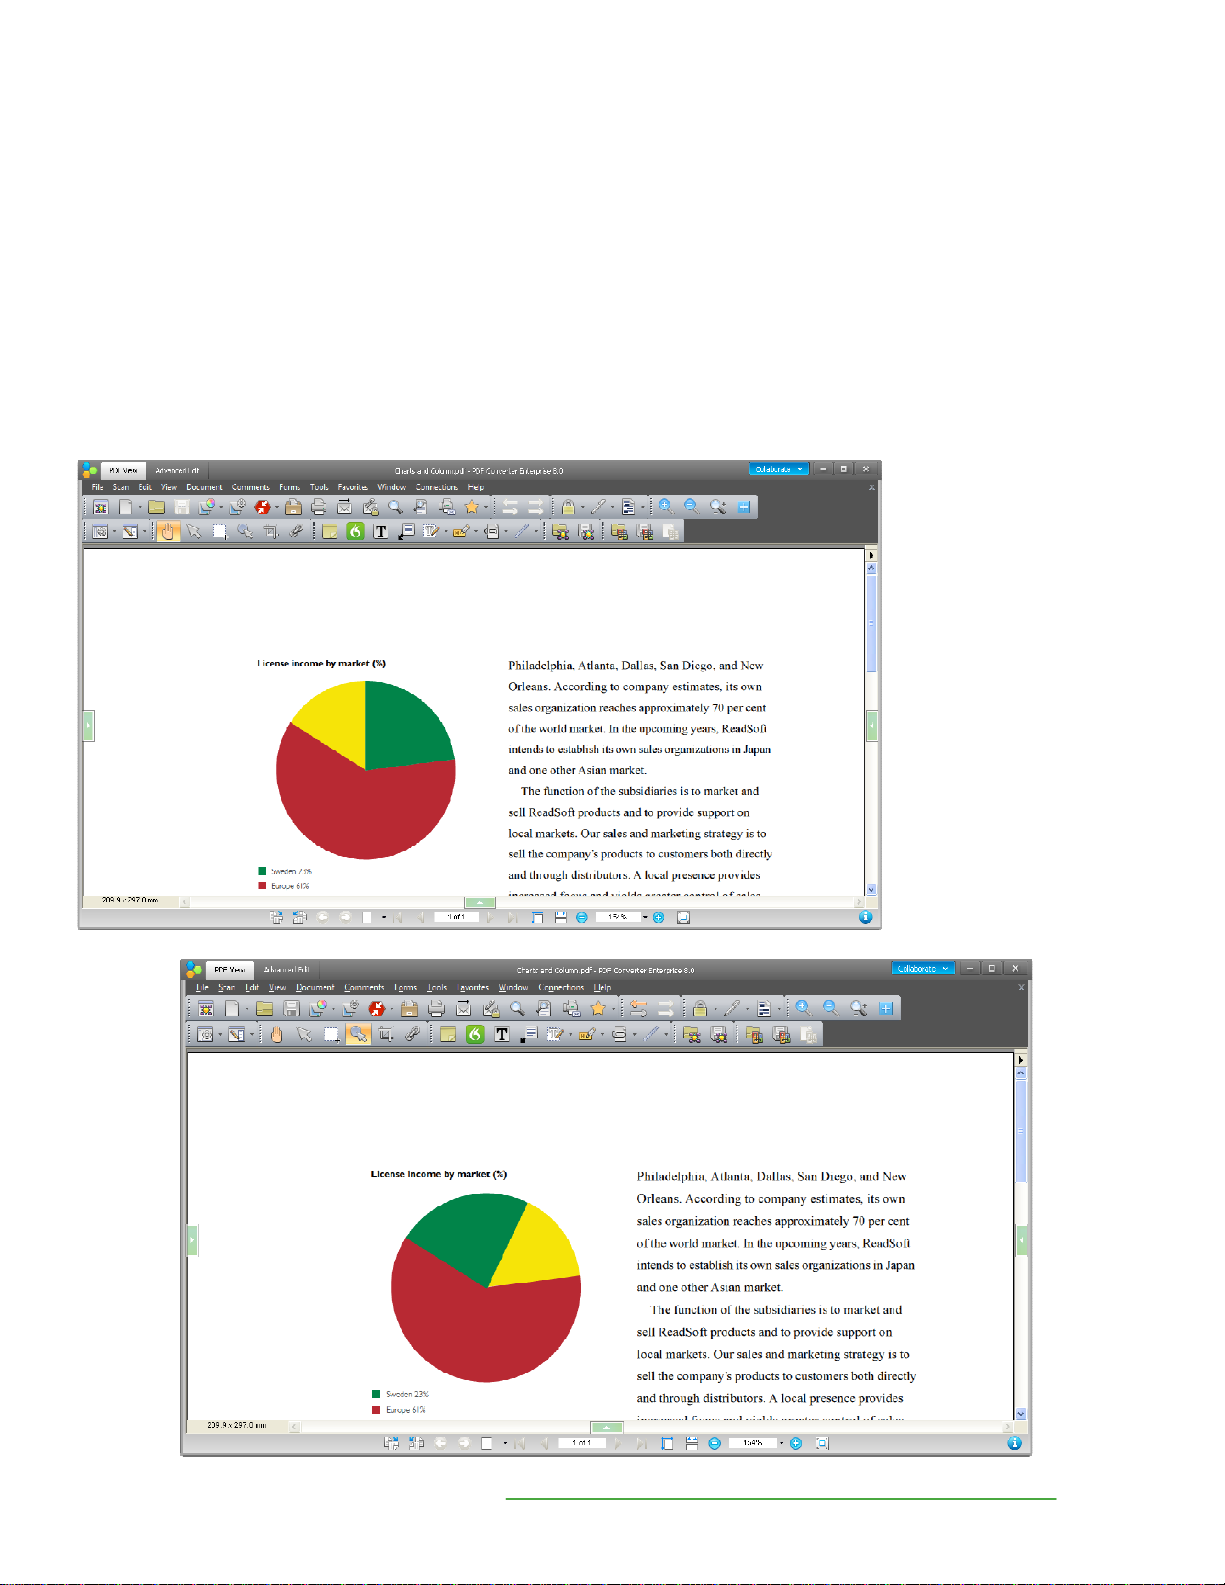
ADVANCED EDIT
PDF Converter Professional 8 now offers two different working modes inside of the application:
PDF View: The normal PDF Converter Professional interface that has been available in previous versions.
Advanced Edit: This new interface provides word processing functionalities right within your PDFfile!
Clicking the “Advanced Edit” tab will unlock the text objects in the PDF file and converts it into an editable PDF
document. This provides the user with editing capabilities similar to what would be found in an application like
Microsoft Word. The Advanced Edit feature is a new proprietary technology that is not available in any other PDF
application and makes it simpler and quicker than ever to make major edits to your PDF documents
Modify your PDF documents by editing existing text in the document or insert new text, lists or even tables.
These features turn PDF Converter Professional 8 into a fully functional word processor for PDF files!
Finalizing the Advanced Edit will solidify the changes within the PDF document and return to a Normal PDF
format that can be distributed in opened in other PDF viewing applications.
Important note: There is no OCR process run on the document when invoking the Advanced Edit mode.
Opening the file in Advanced Edit will not transform an image-only PDF or a searchable image-only PDF file
into a Normal PDF file with text objects. In some cases, it may be necessary to recreate the source PDF file to
a Normal PDF before the file is opened in Advanced Edit.
STEPS:
1. When you switch from PDF View to Advanced Edit, the PDF documentis analyzed and converted. You will be
presented with a dialog box when this process occurs to inform you that items such as tags and layers will be
removed.
2. Click the option to select the conversion method for a Document or a Form, and whether to automatically adjust
character spacing during the conversion.
3. We also suggest that you make a backup copy of the original PDF file. This is because the conversion process
may slightly alter the formatting, text flow and/or character spacing within the document
4. Click Convert for the conversion to editable PDF to be processed
Page 26

5. Once you are in the Advanced Edit mode, you will see that you now have access to word processing type options
for you to make more complex edits to your PDF file than ever before.
1. Convert for Advanced Edit: Only available after using the Finalize Advanced Edit button.
2. Finalize Advanced Edit: Makes the changes made in the Advanced Edit mode permanent and removes metadata
from the document.
3. Paragraph Style List: Adjusts the style of the selected text.
4. Font: Changes the font type of the selected text.
5. Font Size: Changes the font size of the selected text.
6. Highlight tool: Highlights the selected text. Select the drop-down arrow to change the highlight color.
7. Font color: Changes the font color of the selected text.
8. Bold: Bolds the selected text.
9. Italics: Italicizes the selected text.
Page 27

10. Underline: Underlines the selected text.
11. Bullets: Creates an unordered bullet list.
12. Numbering: Creates an ordered numbered list.
13. Decrease indent: Decrease the line indent.
14. Increase indent: Increase the line indent.
15. Left alignment: Align the selected text to the left margin.
16. Centered alignment: Align the selected text to the center of the document.
17. Right alignment: Align the selected text to the right margin.
18. Justified alignment: Extend the selected text to both margins.
19. Borders and Shading: Adjust the borders and shading properties of the document. The Borders and Shading dialog
allows the user to select the type of border along with the color and style of the line, or the shading color to be used,
and then apply those changes to specific areas of the document.
If the Advanced Edit mode has not achieved the ideal results, close the document without saving it. Re-
opening the document will return you to the previous PDF View state without making any changes to the
original file. If you just click the “PDF View” tab after making edits, any changes made in Advanced Edit
mode will be retained in the resulting PDF document.
After making changes from Advanced Edit mode, click the “Finalize Advanced Edit” button to convert
the changes back to a standard PDF format. The document is then returned to its state in PDF View
with the changes intact. Please note that saving the file directly from Advanced Edit mode is actually a
“save as” and not a “save”, because a new file will be created.
COMMENTS AND ANNOTATIONS
Comment Features
STICKY NOTES
1. Open your PDF file.
2. Click on the Note icon.
3. Place the note on the document, type in some text and close the note.
4. Hover over the note and see how it automatically appears.
5. Right click on the same note and select “Reply” to add comments.
6. A new blank note window opens.
7. Add a comment in the new note and close the window.
8. Click View and select Commentsfrom the Navigation Panels to view the list of all the comments. They are
displayedin a tree structure at the bottom of the page.
Page 28

DRAGON NOTES BY VOICE
Enter notes in PDF files by dictating text with the Dragon Notes speech recognition engine from inside of PDF
Converter Enterprise 8. The user dictates into their microphone and the speech is transmitted to the Nuance server
in the cloud for processing. After the speech has been processed and recognized, it will appear as transcribed text
in the Sticky Note. The speech processing is performed seamlessly, and no account, registration or training is
required.
Dragon Notes Requirements:
An active internet connection is required to use Dragon Notes, as the speech is not processed locally. The
speech the user dictates will be processed by the Dragon Notes server and the dictation results will be returned
to PDF Converter Enterprise.
Dragon Notes also requires the user to have a microphone that accepts speech input. The microphone should
be configured in the Windows Control Panel and set to the default recording device.
Page 29

If you have the inability to use their microphone to dictate a Dragon Note, test the microphone in Windows
Sound Recorder to confirm the microphone is configured properly.
To use Dragon Notes:
1. Click the Dragon Notes tool ( ) from the Comment Toolbar.
2. A dialog will appear that prompts you to select the location for the annotation and then start to dictate the note.
3. Click “OK” on this dialog (optionally, select the “Do not show this message again” option to disable this
reminder).
4. Select the area to insert the annotation and drag the mouse to manually size the Note, or just click the mouse
once to insert an auto-sized Note.
5. The “Dragon Notes Status” dialog appears in the top left corner to inform you that dictation is currently being
accepted:
Additional information on Dragon Notes:
Auto-detection works best when dictating in a quiet environment with little background noise.
The Author Name and Time Stamp will always be displayed in the Note when inserting a new Note in a PDF
file. By default, the Author Name will be the Windows User Name.
To edit a specificNote’s Author Name, right click on the Note and select “Properties”, and then adjust the
“Author” field on the “Author and Subject” tab.
Dragon Notes options can be found under “Edit > Preferences > Speech > Dragon Notes”.
Here is where you can specify the dictation language that should be used, to enable/disable the auto-detection
of dictation endings and also to Reset the Profile. If poor accuracy occurs while using Dragon Notes, try
resetting the profile and if accuracy improves.
Page 30

If no audio is detected when using the Dragon Notes feature, the following dialog will appear:
25
If this dialog appears, make sure that the microphone is configured in theWindowsControl Panel and set to the
default Recording device. Test the microphone in Windows Sound Recorder to confirm that the microphone is
working as expected. Also, verify that another application does not have control of the microphone.
TEXT BOXES AND CALLOUTS
1. Clickonthetext box icon or callouticon to draw a new textbox.
2. Typesome text intothe empty boxand click on theHand tool whenfinishedtyping.
3. The text is added to the box and the Comment panel is updated.
DRAWING TOOLS
1. SelecttheDrawingicon,and selectthedownarrow tothePencil Tool.
2. Youcan usethepencil tool tomakenoteson a PDFdocumentjust asyou would with apaperdocument.
3. Rightclick on thepencil mark to review propertiesoptions.
ACTIVE MARKUP TOOL
1. Click on theActiveMarkup toolicon.
2. Click OK on theActive Markuptool tipdialogue box.
3. Click on the text you’d liketo annotate,in order toplace the cursor in theproperlocation.
4. Toreplacetext:Highlighta word tobe removedbyholdingdownSHIFTand usingthe arrowkeys.
5. Tosuggestareplacementwordfor theselectedtext,simplystarttyping.Anote annotation will popup and your
suggestedreplacementtextwillbeenteredinthe note. Atthe same time,the selected word will begiven a
strikethrough andan insertion mark will appear after theword.
Page 31

6. TheCommentspaneis updatednoting replacementtext.
7. ToInsert text:Clickon the textareawhereyou’dliketoinserttext,and placethecursor intheproper location.
8. Simplystarttyping topop a noteannotationopen,your newtext will beentered in the note.
9. TheCommentspaneis updatednoting text insertion.
Comments
PRINTING COMMENTS
1. Toprint comments selecttheFilemenuand Printwithcomments.
2. Choose a layout based onifyou wantthe comments to print ‘linkedtothe texton the page’or on ‘separatepages’.
3. Printcommentssortedby author,date,pageor type.
Page 32

MIGRATING COMMENTS
PDF Converter Enterprise 7 offers the ability to migrate comments from reviewed versions of your document, in
order to have a complete set of revision statements within a single, “master” document.
1. Witha documentopen,opentheCommentspanelbyclicking onNavigation Panelsand selectingComments.
2. Clickon Optionsand selectMigrate Comments.
3. WithintheSource file drop-downselectOpenaFile toMigrate.
4. Select thefile from which you’dlike to pullcomments,and click OK.
5. Allcomments fromthesourcedocument willbe pulledintotheopendocument andmigratedintothe commentspanel.
6. If youmigrate commentsfrom multiplePDFs oneafter another,and would liketosee all the comments on the
“master”document,untickthe checkbox on the MigrateComments panel beforemigratingcommentsfrom a file.
MANAGING COMMENTS – REPLY, ACCEPT OR REJECT
Comments collected from reviews can be managed individually. The “owner” of the document can decide whether
or not she or he accepts, rejects or replies to the reviewers` comments.
1. WithintheCommentspanelclick ona comment.
2. Clickon SetStatusandselectReview fromthe menu.
3. ForthatselectedcommentyoucanchoosewhethertomarkthecommentasAccepted,Rejected,Cancelled,or
Completed.
4. Additionally by clicking on the Reply button within the Comments panel you can reply to individual comments.
All comments can be replied to, accepted, or rejected for collaboration purposes.
Page 33

COLLABORATION
Gaaiho Collaboration is a new cloud-based service that allows users to participate in multi-user editing
of PDF files. The collaboration options allow document sharing, screen sharing, chat, video and voice
conferencing, and more. Multiple users can actually view and edit the same file at the same time.
The sharing and collaboration is all done through a peer to peer connection, no personal information is stored on
the server. Documents and screen share sessions are never saved on the server, as that information could only be
saved locally by the participants of the meeting.
1. To launch this feature, click the “Collaborate” button in the top-right corner of PDF Converter Enterprise 8.
2. When Gaaiho Collaboration launches, the user is prompted to sign in. If the user does not already have an
account, click the “New ID” link to create a new account.
3. Create a new account by filling in the required fields on the “Gaaiho” dialog shown below. Once you provide a
User ID (whichmust be a valid email address), Password and optional Nickname, click the “Next” button to
create the account.
4. After the account has been created,click the “Sign In” button to sign into the Gaaiho Collaboration account.
5. If an account already exists, just enter the User ID and Password into the fields on the initial “Gaaiho
Collaboration” dialog and press the “Sign In” button.
6. The user can enable some or all of the following Sign In options for Gaaiho Collaboration:
Remember my ID: Stores the User Name in the Gaaiho Collaboration dialog.
Remember my password: Stores the Password for the User Name on the local computer.
Sign In automatically: Logs the saved User Account in when the application is launched.
7. If a proxy server is used, click the “Network Settings” link to specify the proxy server settings.
Page 34

Gaaiho Collaboration starting window:
1. Options Menu: Options include the ability to adjust the color of the interface and the language, to modify the
different startup and display options, to check for program updates and to view information about the application.
2. Account information: Displays the User Name and nickname of the account.
3. Friends button: Displays the Friends tab.
4. Friends tab: Displays all friends and blocked users.
5. Recent tab: Displays recently contacted friends.
6. Meetings button: Displays Meetingstab withallmeetings and its corresponding meeting status.
7. Options button: Allows items to be reordered, icon settings to be changed and to view the chat or meeting
history.
8. Add button: Add a contact or a new division (group). Use the Find box to search for a user name or nickname
from the Friends tab;or to search for a presider’s user name from the Meetings tab.
Note: If the Account Information is listed with a triangle with an exclamation mark next to it, it means that the account
email address has not yet been confirmed. Please open the confirmation email sent from onlinestore@gaaiho.com and
click the “Confirm Account” link. Click on this warning to re-send the confirmation message to the email account. Please
note that the account can be still used without confirming it.
Gaaiho Collaboration Chat window:
Double-clicking on a friend’s name from the Gaaiho Collaboration starting window will open the chat window shown
below. The Chat window is similar to Instant Messaging programs like AIM, but offers additional functionality not
typically found in Instant Messaging applications.
Page 35

1. Options Menu: Access a sub-menu for the Gaaiho Collaboration options.
2. Chat tab: Each active chat will havea separate tab for easy navigation.
3. New Chat: Create a new chat.
4. Chat tools: Display chat history, clear the current chat, and enable or disable the group sequential messages
and show timestamp options. There is also a Find button to search the contents of the chat text.
5. Chat information: Displays informationabout the chat and the participants.
6. Chat Textbox: Type a text message or insert objects with the Paint or Emoticons tools.
Additional chat tools include Font settings, Capture screen, Send File, Shake and Record.
7. Send button: Sends the message and/or objects written in the Chat Textbox.
8. Add button: Adds a participant to the chat.
9. Audio Chat: Starts the audio chat (headset and/or soundcard is required).
10. Video Chat: Starts the video chat (Webcam is required).
11. Screen Share: Start sharing your desktop, application, window or a specific screen area.
Collaboration Toolbar:
When viewing a PDF file via Collaboration, an additional Collaboration button will appear in the top right corner of
PDF Converter Professional 8. Click this button to display the Collaboration Toolbar:
1. Check connections: Checks the connections to the active participants.
2. Show user as: Display the user’s actions as “CurrentTool and ID”, “Laser Pointer and ID”, or “Do Not
Show”.
3. Follow another user: Switch between different users to view the edits being made.
Page 36

Using PDF Collaboration:
The typical way to use PDF Collaboration is to sharecontent with others. Sharing sessions can be used
to share the screen (the desktop or application), or to share a PDF document and allow it to be edited.
The workflow to start sharing content is:
1. Double-click on a Friends name from the Gaaiho Collaboration starting window to open the Chat window.
2. The Chat window will be displayed, but the Friend will not be contacted until a message is sent to them. Type
out a message (and/or use the different Chat Tools) and click the Send button to send the message to the
selected Friend.
3. After the message has been sent, the “Screen Share” or “Document Share” buttons can be used to start a
sharing session.
.
To share your screen with the invited Friend:
1. Click the “StartScreen Share” button ( ) to display the “Screen Share Settings” dialog.
2. Select the desired Screen Share Settings, and then click the “Start Sharing” to begin the sharing session.
Share my Desktop: Shares the entire Windows Desktop.
Share my Application: Shares the selected application(s) from the list of programs that are currently running.
Share my Window: Shares the selected window(s) from the list of currently open windows.
Share my Screen Area: Shares an area on the Windows Desktop that the user manually sizes.
3. After selecting the desired sharing options, click the “Start Sharing” button from the host computer to begin the
sharing session.
4. Once the invited Friend clicks the “Start Screen Share” button (which starts flashing Red when a share session
has begun) on their Chat window, they will be able to view the shared content from the host computer.
Page 37

An example of a “Share my Desktop session when viewed from a Friend’s computer:
To end the sharing session from the host machine, click the “Stop Sharing” button in the top-right corner:
To share a document with the invited Friend:
1. Click the “Document” button ( ) to display the “Add Files” area in the Chat window.
2. Click the “Add Files” button in the Chat window to display the “Open” dialog.
3. Select a PDF file to be shared with the participants of the chat and click the “Open” button.
4. Select the desired security option from the “Security Options” dialog box.
Normal: Allows other users to save their changes that will be contained in the final copy of the
document.
Secure: Allows other users to read/edit the document, but at the end of the session their changes will be
disregarded and will not be contained in the final copy of the file.
5. Click “OK” on the Security Options dialog box and the PDF File will open automatically on the Host computer.
Page 38

6. Once the invited Friend clicks the “Document” button (which starts flashing Red when a document has been
shared)ontheirChatwindow, they will see a “Download” link next to the filename being shared.
7. Click the “Download” link to start downloading the PDF file.
8. After the file has been downloaded, the shared PDF file will automatically open in PDF Converter Professional.
The Friend viewing the shared document on the host computer can view and make edits to file, and see
changes being made from the host computer or by other Friends.
An example of a “Document” share session when viewed from a Friend’s computer:
Gaaiho Collaboration Meetings:
A Chat allows communication and sharing between two people. A meeting allows communication and sharing
between two or more people. The steps above were specific to a Chat window, but the same workflows apply to
the Meeting window as well.
There are multiple ways to start a Meeting:
1. From the Gaaiho Collaboration starting window, right-click a Friends name and select the “Start a Free Meeting”
option to open the “Meeting Setting” window.
2. From the Gaaiho Collaboration starting window, click the “Meetings”button and click the “Plus”sign at the
bottom of the dialog to open the “Meeting Setting” window.
3. From an existing Chat window, type a Subject in the blue “Enter meeting subject” line and press Enter to
automatically start a new Meeting with the Friend you were chatting with.
Page 39

4. After opening the “Meeting Setting” window, type a Subject line and select the Friends to invite. Note:
Gaaiho Collaboration allows a maximum of 5 usersto join the same Meeting at the same time including the
host). It is not possible to have more than 5 total participants in a single meeting.
5. Optionally,click the “Permissions” button to change a participant’s permission level. The default permissions
levels are “Full Permission” and “Limited Permission”, but custom permission schemes can be created by
clicking the green Plus button and enabling or disabling each of the following permissions options:
6. Click “OK” to start the new meeting.
Note: When closing the meeting tab, the host can select to “End Meeting” or “Pause Meeting” and a participant can
select to “Step Out of Meeting” or “Quit Meeting”. Meetings that were paused or stepped away from can easily be
rejoined later from the Meetings tab.
Document Sharing:
When sharing a Document in a Gaaiho Meeting, the participants will all be viewing the same PDF documentin PDF
Converter Enterprise 8. Each user can view and edit the document independently or as a group. If the security
option was set to Normal, those edits by the participants will be retained in the final saved copy of the shared
document, and each user can save a local copy of the file.
To follow along with another participant’s view of the PDF file during a Document Sharing session, hover over the
"Collaboration" button and then select the "Follow another user" option. Pick the user to follow and the display will
shift to what that selected user is currently viewing.
When Following is enabled, working with the different tools such as annotations, notes, markups, etc will all be
displayed in real time.
Notes:
Page 40

The user may not always see the text being typed in real time. It may be necessary to click off theactive tool
(i.e. click off the Note) to make the text visible to the participants following along.
Accessing the different menus and toolbars on the PDF Converter Professional user interface are not shown
during collaboration.
To change the view of the participant that you are following, click the “Show user as” button from the
Collaboration toolbar to change the display of the user’s actions. The different choices include:
o Current Tool and ID: Displays the current tool icon (such as cursor) and the user’s ID (name).
o Laser Pointer and ID: Displays a green dot and the user’s ID (name).
o Do Not Show: Only displays the action being performed. There is no indication of the current tool being
used or the user name making those edits.
General Notes:
Right-clicking on a Friend’s name in the Gaaiho Collaboration starting window will allow the user to quickly access
common tasks. Using this method to initiate typical actions such as starting a meeting or sharing a document can
be a much more efficient workflow to quickly begin the meeting or sharing session.
The only information besides the email address and username that could possibly be stored on the server is any
chat messages that were sent to a Friend that was not currently signed on. The pending message will be encrypted
and stored on the server until that user logs into Gaaiho Collaboration again. At that point, the pending message will
be delivered to the user and it is no longer stored on the server.
Page 41

DOCUMENT COMPARISON
Document comparison tools provide a fast and easy mechanism for identifying differences between two versions of
a document. Options can include side-by-side comparisons or combined views as well as PDF to PDF and PDF to
Word comparisons.
DOCUMENT COMPARISON – PDF TO PDF
1. Open a PDFfile within PDFConverterEnterprise.
2. Edit some text and move some objects within the document as described in the Document Editing section of
this document and save it as a new file name.
3. Click on theDocument menu andselectCompareDocuments.
4. Use the browse buttons to selectthe older andnewer versions of the document for comparison.
5. Ensure View Visual and Textual differences is selected (in order to detect image changes as well as textual)
and that Side by side comparison is selected.
6. Then click OK.
7. After a summarypage a side-by-side comparison report is generated identifying the differences between the
two documents.
8. Side-by-sidedocumentcomparisonsavestime andaccuratelydetectsdifferencesbetween revisions.
Page 42

FORMS
29
PDFConverterEnterpriseprovidesa varietyofFormFieldsandFormControlsthatcanbe addedto PDFdocumentsin
ordertocreatecustomizedForms.
Additionally,PDFConverterEnterpriseoffersFormTyperfunctionalitywhich willconvertstaticor scannedformsintofillable,
editablePDFformsthatcanbe savedandemailed.You can easily create the form fields automatically by running
FormTyper from the Forms menu. FormTyper will detect and create the corresponding form fields from the PDF
image file.
TURNING STATIC/SCANNED FORMS INTO FILLABLE FORMS USING FORMTYPER
1. Opena static imagePDFform.
2. Clickon Forms and choose“FormTyper”.
3. TheFormTyperutilityis launched andthe staticPDF form isconvertedinto a fillablePDF form.
The PDF file shown on the left side is an image-only PDF file with no text or form fields. The PDF file shown on the
right has been run through FormTyper and is displaying all of the detected form fields.
Adding Form Fields/Controls
PDF Converter Enterprise has extensive form controls which can be used to add fields to an existing form or
creating a form from scratch.
SUBMIT A FORM
1. InPDFConverterEnterprise choose“NewPDF”then“BlankPDF”.
2. Clickthe“Forms”drop-down menu and select the “Button” tool.
3. Drawabuttonand the ‘buttonproperties’dialog appears.
4. Click onthe ‘Actions’tab.
5. Fromthe “SelectAction” drop-down menuchoose ‘submitaform’.
42
Page 43

6. Click “Add”and typeMailTo:[Youre-mailaddress]toset yourselfasthe recipientofa filledout form.
7. Select the‘HTML’ radiobutton in the“Exportformat” field.
8. Click ‘OK andclick‘Close’.
COMBO BOX
1. Clickthe“Forms”drop-down menu and select the “Combo Box” tool.
2. Drawabox andthe ‘buttonproperties’ dialog appears.
3. Selectthe“Options” tab.
4. Type“Cat”into the‘Item:’ field then click the >>button.
5. Type“Dog”into the‘Item:’ field thenclick the >>button.
6. Type“Turkey” into the‘Item:’ fieldthen clickthe >> button.
7. Click the ‘Close’ button.
Extract data from single and multiple forms:
PDF Converter Enterprise 8 allows the user to export populated form field data from multiple PDF forms and output
that form field data to CSV or XML files.
When batch exporting form data from multiple PDF form files, each form will be represented by a row and each
form field by a column. The labels of each form field will become the header row for each column at the top of the
spreadsheet. The CSV files can be opened in Excel or a similar spreadsheet program to view each individual form
field.
The “Export Data from Multiple Forms” feature is similar to but different from the “Import Data to Form” and “Export
Data from Form” tools. The Import/Export tools allow the user to import/export data from populated form fields from
a single file to/from XFDF, FDF, XML and TXT file formats.
TO EXPORT DATA FROM MULTIPLE FORMS
1. Create some PDF forms that have data populated in the existing forms fields.
2. Launch PDF Converter Enterprise 8 and click “Forms > Export Data from Multiple Forms”. Note: It is not
required to have a PDF file open to access this menu item.
3. Click the “Add Files” button and select the necessary filled PDF forms. Note: Select multiple files at the same
time by holding down the CTRL button and selecting each file, or hold the SHIFT button and selecting the first and
last file and the files in between will all be selected.
4. Optionally, select the “Includemost recent list of files to export data from” to include the forms
from the last exporting section.
5. Click the “Export”button.
6. Specify the following information:File Name, Output Folder and File Type (either CSV or XML)
7. Click the “Save”button.
8. Click the “View File Now” to view the resulting CSV or XML file, or click the “Close Dialog” to
return to PDF Converter Professional.
43
Page 44

Notes on exporting data from multiple forms:
For efficient export, all forms should have the same set of field names.
Multi-page forms can be processed.
One PDF file per form is recommended, but a single PDF containing a set of assembled forms is also
acceptable, providing the form field sets are identical.
If there are field differences between forms, all non-identical field names generate columns in the output table.
All fields in the resulting table have a generic cell type that accepts any input – use your spreadsheet program
to set other cell types (e.g. date, currency, numbers only)
Field Names:
When a form is exported, the field names will be the headings displayed in the output file. If the field names are not
defined in the PDF file, the user may need to modify these names in the Excel file.
To avoid renaming the headings in the output file, specify the correct field names in the PDF file after creating a fillable form.
To edit field names:
1. Open a PDF file that has form fields detected.
2. Display the Form Control panel.
3. Select the form field to edit by double-clicking a form control from the left panel, or by right-clicking the actual
form field and selecting “Properties”.
4. In the Text Field Properties dialog, adjust the “’Field Name” to the proper description of the form field.
5. Click “Close” to apply the name change.
6. Now when extracting form data, the form fields will show the correct field names as the headings.
44
Page 45

SECURITY
PDF Converter Enterprise provides a variety of methods for securing your PDF documents. PDF Converter
Enterprise includes Password Security, Certificate Security,Encryption, Digital Signatures, Redaction (Enterprise
Edition only) and Metadata Removal, we will go through some of these methods below.
Questionsto ask whenconsidering a PDFsolution - Security
Whatkindof securitysettingscanbe applied?
CansecuritysettingsbesetduringconversiontoPDF?
CanI digitallysignPDFdocuments?
Istheproductabletohidesensitivetext(redaction)?
Cantheproductfindanddeletehiddeninformation(e.g.metadata)?
REDACTION
1. Opena PDFfilewithinPDFConverterEnterprise.
2. Click onDocumentandselectRedaction andselectMark Redaction.
3. You are now using the redaction tool which will allow you to create text redactions (by highlighting words) or zone
redactions (by drawing boxes).
4. Click and drag the cursor to draw a box over a defined area. Hovering over this area will display a preview of how
the area will look when the redaction is applied.
5. Click onDocumentandselectRedaction andselectApplyRedaction.
6. Your items areredactedfromthe document.
DIGITAL SIGNATURES
1. Openthe“SampleDocument”PDFfile.
2. Clickon thedigital signature tool.
3. Draw aboxwhere youwantthedigitalsignaturetoappear.Close the DigitalSignaturePropertiesdialog.
4. Usethe Handtool toclick onthesignature boxand theSignDocumentdialogappears.
5. Selectyourdigital IDorfollowthe wizardto “Add a Digital ID”and click “OK.”
6. Click“Next,” thenclick“Save”.
7. Name the document“SampleDocument–Protected”and saveit on yourdesktop.
8. Thedigitalsignatureappearson thedocument.
9. Rightclickonthe signatureand select “CompareSignedVersionto CurrentDocument.”
10. An informationalmessageis displayed statingthatyouare viewingthesigned versionof thedocument.A varietyof
form toolsare availableincludingComboBoxes,Radiobuttons,listboxes, andmore
45
Page 46

DOCUMENT INSPECTION
1. Opena PDFfilewithinPDFConverterEnterprise.
2. Clickon Document and selectInspect Document.
3. A list ofitemsthat can be removedfromthedocumentis displayed.
4. Select the items that you would like to remove by checking the appropriate boxes next to the items (e.g.
metadata) to be removed.
5. ClicktheRemove button.Yourselecteddocumentitemshavebeenremoved.
46
Page 47

PDF/A CREATION
In PDF Converter Enterprise 8 you can create PDF/A files in a few different ways depending on your needs
CREATE PDF/A THROUGH THE SAVE AS MENU
1. Open PDF file
2. File > Save As > PDF/A
3. This will create a PDF/A file with the default of PDF/A-1b which is the most common PDF/A file type used
4. If you would like to select a different PDF/A level, you will select the Settings button and then you have the option to
select PDF/A-1a,PDF/A-1b, PDF/A-2a, PDF/A-2u or PDF/A-2b
47
Page 48

CREATE PDF/A THROUGH THE PRINTER DRIVER
Printing to PDF/A using a “PDF Print Driver” is the most common method for creating PDF files since it can be done
fromwithinthe PDF Converter Enterprise applicationor from within MS Officeapplications.
1. Openadocumentandchoose File and then ChoosePrint.
2. Select theScanSoft PDFCreate! printerdriverfrom thelist of availableprinters. ClickOK.
3. Select thePrinterPropertiesandthen Select PDFSettings tab
4. Select PDF/A-1bfrom the “Compatiblewith” dropdown menu
5. Select OK
6. Selecta locationtosave thePDF
BATCH CREATE PDF/A FILES USING THE PDF CREATE ASSISTANT
To create multiple PDF/A files at once you can do that through the PDF Create Assistant, please see the “Batch
Create PDF files using the PDF Create Assistant” chapter for these instructions and select PDF/A-1b from the
“Compatiblewith” dropdown menu.
PDF/A COMPLIANCE
If a PDF file is compliant with the PDF/A-1b standard, PDF Converter Enterprise 8 detects this upon opening the PDF
file and will notify you in the bottom system tray.
COMPLIANCE CHECKER
To check whether a PDF file is PDF/A or 508 compliant, use the Compliance feature within PDF Converter
Enterprise.
1. Open the PDF file that you want to verify compliance with
2. Navigate to the View > Navigation panel > Complianceto open the Compliance Panel
3. Select from the Compliance drop down menu which version of PDF/A you would like to run the compliance
against or select Accessibility to check for 508 compliance
48
Page 49

1. Then select to run the Compliance checker
2. The checker will generatea report and display the results
3. If Font or Other problems are found, you can then select the Fix button in order for them to be fixedautomatically.
4. If critical errors are found, you will have to correct them manually before saving the file to PDF/A.
5. To Generate a report of all issues found with file, select to Generate Report
49
Page 50

PDF SEARCHING
LOOKS LIKE SEARCH WITH A CUSTOM PATTERN
Using the Looks Like SearchTM feature
Use the intelligent “Looks Like” Search capability to quickly find content, like phone numbers, email addresses, and
Social Security numbers, via an alphanumeric pattern rather than exact text. Automatically redact, highlight, crossout, or underline search results for faster, easier PDF review and editing.
LOOKS LIKE SEARCH WITH PREDEFINED PATTERN
1. Opena PDFfile.
2. SelectEditand thenSearchfromtheMenubar.
3. SelectthePatternradiobutton.
4. Selecta predefinedpatternfromthedropdownmenu.
1. Opena PDFfile.
2. SelectEditand thenSearchfromtheMenubar.
3. SelecttheArbitrarymaskradiobutton.
4. Enter the alphanumeric pattern that you would
like to search for.
50
Page 51

USING LOOKS LIKE SEARCH AND MARKUP
1. OpenaPDFfile.
2. From the Menubar,selectComments,TextMarkupsand thenSearch and Markup.
3. Entertext,selecta predefined pattern orcreateyourown.
4. From the search results you can now choose to Select All or select individual words to highlight, cross-out or
underline.
51
Page 52

USING LOOKS LIKE SEARCH AND REDACTION
1. Opena PDFfile.
2. From the Menubar,selectDocument,Redactionand thenSearch andRedact.
3. Entertext,selecta predefined pattern orcreateyourown pattern.
4. From thesearchresults youcan nowchoosetoSelectAll orselectindividual wordsto Markfor Redaction.
5. Click onDocumentandselectRedaction andselectApplyRedaction.
6. Your items areredactedfromthe document.
52
Page 53

Network Scanning
Using the Scan to Inbox feature
Everyoneonthe networkcan scan from any network scanningdeviceto theScan Inbox.
PDFConverterEnterprisealsoconnects directlytothe eCopyShareScan Inbox.
53
Page 54

SETTING NETWORK SCANNING PREFERENCES
1. FromtheMenu bar,selectEditandPreferences.
2. From the PreferenceswindowselectInboxes
3. Basedon your currentequipmentand networkconnectivity select theappropriateSetting
SETTING DESCRIPTION
Automatic Inbox Agent (ShareScan only)
Thismethod uses the eCopyShareScan with the Scan to
DesktopConnector.Thisoption allows thesystemto
automaticallydetect thelocationofyour inbox.When afileis
scanned usingthe eCopyShareScanaScanIn-box notification
will appearon yourdesktop.
Home Directory
Thismethod isusedwithmost networkedMFPs that support a
scan tofolder option tohome directory folders onaserver.When
a PDFfile appearsinthe selected foldera Scan In-boxnotification
will appearon yourdesktop.
Manual
This supports any folder in which I file can be scanned. When a
PDF file appears in the selected folder a Scan In-box notification
will appearon yourdesktop.
54
Page 55

4. From the Preferences window select
Notifications.
5. Choose Scan Inbox Notificationto
receive notifications in your tool tray.
Or
Choose Quick Connect Notification. (When
using Quick Connect you will need to define
a folder)
6.From the Preferences window select
Open Options.
7.Choose from Browse Inbox, Open Next
and Auto Delete Document.
Browse Inbox - Opens your inbox so you
can see the files currently available.
Open Next - Opens the most current
file available.
Auto Delete Document - Deletes the
document after it has been opened from
the Inbox.
55
Page 56

CLOUD CONNECTIONS
PDF Converter Enterprise 8 provides Cloud storage connectors to open or save files directly to or
from Dropbox, Evernote and the Nuance Cloud Connector from inside of PDF Converter Enterprise.
The Nuance Cloud Connector allows connections to a variety of different third party cloud storage
services (such as Box.net, Google Docs etc).
Each of the toolbar buttons can be shown or hidden per the user’s preference:
Opening and saving docume nt s dir ect ly t o Cloud service s al l ow users to synchronize their
documents when accessing them from multiple devices or locations. For example, a user opens an
existing file from their Google Docs account on their laptop. They modify the file in PDF Converter
Enterprise and then save the updated copy back to Google Docs. Now the user would have the
latest copy of the file saved to their Googl Docs account, so they can access that updated copy
from any of their additional devices, such as their desktop computer at home, their Android device
or their iPad/iPhone.
Individual cloud storage sites will each require the corresponding login information to be entered
each time they are accessed. After specifying the login credentials for the cloud service, it is
possible to open and save documents to/from that service without being prompted again. After PDF
Converter Enterprise is closed, it will be necessaryto log in again to access the cloud services in
another session.
The cloud sites can be accessed either from their own toolbar buttons (shown above), or from the
“Connections” menu:
Note: To disable the individualCloud services from the Connections menu, open the “Preferences”
dialog and navigate to the “Document Management Systems > General” tab.
56
Page 57

Actions that can be performed from the Connections menu:
Open file from cloud storage: Select an existing file from the cloud storage location to be opened
in PDF Converter Enterprise.
Save file to cloud storage: Save the currently opened PDF file as a new document to the cloud
storage location.
Insert pages from cloud storage: Select an existing file from the cloud storage location and insert
a specified page range (or the entire document) into the currently opened PDF file.
Extract pages to cloud storage: Extracts specified pages from the currently opened PDF file and
save it as a new document to the cloud storage location.
Attach a file from cloud storage: Select an existing file from the cloud storage location to attach
as a file attachment to the currently opened PDF file.
Cloud integration is also available from PDF Converter Assistant. Click the “File” menu to open a
file directly from a cloud storage service, or select a choice from the “DMS” drop-down box in the
“Output Format” options to save to a cloud storage service.
From PDF Create Assistant, click the “Add” button and select the “Open from DMS” option to
open a file directly from a cloud service. To save to a cloud service, first click the “Saving” button
and select the “Save to DMS” option from the “Target” drop-down box. Then once the file has
been converted to a PDF file, the “DMS Selection” dialog will appear, prompting the user to select
the specific DMS (such as Box.net) to save the resulting file to.
57
Page 58

To show or hide Cloud Connections
In the PDF Converter Enterprise Preferences dialog, navigate to the “Document Management
Systems” menu and enable or disable the desired integration checkboxes. Alternatively, right click
on the toolbar to display the “View > Toolbars” menu and enable or disable the individual toolbars.
What is the Nuance Cloud Connector?
The Nuance Cloud Connector provides direct access to cloud services such as Google Docs,
Microsoft Live Skydrive, Box.netandmore. In addition to the direct integration with PDF Converter
Enterprise 8, files from the cloud can also be accessed as if they were on a local disk or a mapped
network drive.
Note: The user is never required to provide login information for the Nuance Cloud Connector’s
cloud storage services if the Nuance Cloud Connector process is running in the Windows System
Tray.
Using the Nuance Cloud Connector:
The Nuance Cloud Connector offers the following functionality:
• Connect to multiple cloud storage services at once
• Add a “Cloud Drive” in Microsoft Windows that is always available
• Drag and drop files from any Windows folders to the cloud, or from one cloud service to another
• Supports the most popular cloud storage services
58
Page 59

• Connectors are updated via the web and new connectors will be made available
• The user is not required to log-in repeatedly to access the cloud services
Note: The user is required to have an existing account with one of the supported cloud storage
services. The Nuance Cloud Connector will not create the cloud storage account, it must exist
already.
Configuring the Nuance Cloud Connector:
After deciding the cloud storage service(s) to use with the Nuance Cloud Connector, follow the
steps below to make the connection.
1. Launch the Nuance Cloud Connector Management Console by clicking “Start> All Programs
Nuance Cloud Connector > Management Console”.
2. Make sure that “Cloud Drive” is selected in the drop-down box in the top left corner.
3. Click the “MountVirtual Directory” link (or the “Click here” link if no cloud storage accounts
have been added yet).
4. Select the desired cloud storage service from the “Storage Service” drop-down box.
5. Optionally, rename the “Virtual Directory (Account) Name” value instead of using the default
name.
6. Click the “Next” button and specify the User Name and Password for the selected cloud
storage service.
7. Click “Next” again to finalize the connection to the specified cloud storage service.
After the connection is completed, the connected cloud storage service(s) will be displayed in the
Nuance Cloud Connector Management Console and as a mapped drive in Windows xplorer:
59
Page 60

Using the Nuance Cloud Connector:
To open the cloud storage service directlyfrom the Nuance Cloud Connector Management Console, click the “Open
Drive” button to open a Windows Explorer window. This Windows Explorer window will be opened to the Nuance
Cloud Drive (by default it will be “Drive N”) and display sub-folders for each cloud storage service that has been
connected. This means that documents can be opened and saved from connected cloud storage services just like
accessing files from a mapped folder in Windows Explorer.
The Nuance Cloud Connector can be accessed from inside of PDF Converter Professional either by using the NCC
toolbar buttons or the “Connections > Nuance Cloud Connector”menu:
Note: The toolbar only offers the “Open from Nuance Cloud Connector” or “Save to Nuance Cloud Connector”
buttons. The “Connections” menu offers additional functionality:
60
Page 61

DOCUMENT MANAGEMENT SUPPORT
Supported Document Management Systems
Hummingbird Enterprise™ 5.3, 6
PDF Converter Professional supports Hummingbird Enterprise systems if a DM Extensions API is installed and
configured on the client machine. The product is also integrated into Windows Explorer DM Extension.
Interwoven®WorkSite 8.3, 8.5, 9
PDF Converter Professional supports Interwoven WorkSite systems if DeskSite 8.2 or FileSite 8.2 for WorkSite
8.3 or Desksite 8.5 or FileSite 8.5 for WorkSite 8.5 or Desksite 9 or FileSite 9 for WorkSite 9 is installed and
configured on the client machine. The product is also integrated into DeskSite and FileSite clients.
Worldox™GX2
Livelink®ECM - Enterprise Server 9.7.0 and 10. from OpenText Corp.
PDF Converter Professional supports LiveLinkECM if LiveLink Explorer Professional Windows Client is
installed and configured on the client machine.
Microsoft®SharePoint Server 2003, 2007, 2010,Windows SharePoint Services (WSS) 3.0 and Microsoft
Office 365
Xerox DocuShare 6 and 6.5
PDF Converter Professional supports Interwoven Xerox DocuShare if Xerox DocuShare Client is installed and
configured on the client machine.
®
EMC2®Documentum 6.5
PDF Converter Professional supports EMC Documentum if DFC Client 6.5 is installed and configured on the
client machine.
NetDocuments
®
PDF Converter Professional supports uploading PDF documents to NetDocuments®.
SUPPORT WITHIN PDF CONVERTER ENTERPRISE
Opena FiledirectlyfromwithinyourDMS
If you are connected to a Document management System, it will be detected and will be included in the “Open from
DMS” drop down menu as an option to open your documents from within the open dialogbox
61
Page 62

Savea FiledirectlytoyourDMS
If you are connected to a Document management System, it will be detected and will be included in the
“Save to DMS” drop down menu as an option to save your documents from within the Save As dialogbox
CreateandSavePDFfilesdirectlytoyourDMSfromInternetExplorer
CreateandSavePDFfilesdirectlyfromyourIEToolbar
SUPPORT WITHIN PDF CREATE ASSISTANT
1. WhenyouAddfiles,youhavetheoptiontoopenlocallyorto“OpenfromDMS”.If you are connected to a
Document management System, it will be detected and will be included in the“Open from DMS” drop
down menu as an option to open your documents from.
2. Once allyour filesare added,Clickthe “Saving”button.
3. Inthe ‘Target:’fieldchoose “Saveto DMS”and clickOK.
4. BegincreatingPDFs.
5. Whensaving begins, chooseyourDocumentManagement System from thedrop down menu.
62
6. Navigateto thelocationwithinyourDMSto beginuploadingthenew PDFs.
Page 63

SUPPORT WITHIN PDF CONVERTER ASSISTANT
1. Whenyouopenfiles,youhavetheoptiontoopenlocallyortoopenfromDMS.If you are connected to a
Document management System, it will be detected and will be included in the File Open drop down
menu as an option to open your documents from.
2. ChooseaFile.
3. Setup the processing and outputoptionsyou prefer.
4. ClicktheViewmenuto chooseOutput.
5. Under“Store inDMS”chooseyourDMS fromthe drop down menu.
6. Navigateto thelocationwithinyourDMSto beginuploadingthenew PDFs.
INTEGRATION INTO THE DOCUMENT MANAGEMENT SYSTEM
In PDF Converter Enterprise, you can create PDF files, and convert PDF or XPS files directly from
Hummingbird Enterprise and Interwoven WorkSite using their client application: Windows Explorer
DM Extension for HummingbirdEnterprise, and DeskSite for WorkSite.
Integration into InterwovenWorkSite
Usethe NuancePDF menufromthe Nuance PDFAdd-inin the DeskSiteclient application.
Create PDF: Use this to create a PDF from a source file (including XPS files). See a list of the
supported file types in the PDF Create Assistant topic.
Send PDF in Email: Use this to create a PDF from a source file and send it as an e-mail
attachment. Open with PDF Professional: Use this to open a PDF file.
Open with PDF Converter: Use this to convert a PDF or XPS file toeditable formats.
Integration into HummingbirdEnterprise
Use the Nuance PDF shortcut menu from theWindows Explorer DM Extension client application.
This appears whenever you click a file other than a PDF that is supported by PDF Create. See a
list of the supported file types in the PDF Create Assistant topic. The shortcut menu has the same
commands as described above.
Note: In LiveLink you cannot open source files directly from your Document Management System.
You have to get the source files from the DMS into your file system, to create PDF or convert PDF
or XPS file to editable format.
63
Page 64

FAX VIA EMAIL
Deliver PDF files directly to a fax machine by sending an email that uses predefined fax settings.
A user can now deliver the file currently opened in PDF Converter Enterprise to a specified fax
number via e- mail. The default format can be configured in PDF Converter Enterprise Preferences
window, and the user can select different recipients to send the fax to each time they initiate the
Fax via e-mail tool.
Notes:
A fax client and/or email client is required to use this feature. PDF Converter Enterprise simply
passes the email message with PDF attachment to the fax or email client for delivery.
Some fax machines may not accept emails containing file attachments. To confirm whether the
fax machine supports this workflow, check with the fax machine’s manufacturer.
To configure the Fax via e-mail settings:
1. Click “Edit > Preferences”.
2. Open the “Fax via e-mail” tab under the “General” category.
3. Specify one of the following file formats under the “Attachment Format” drop-down box:
PDF
TIFF B&W (G4)
TIFF B&W (G3)
4. Click the “Format”button to define the default fax format in the Format Address dialog.
5. Now you can specify the default fax format to be used when a user initiatesthe Fax via e-mail
function. The options on the right side of the dialog will be used during the fax process; the options
on the left side of the dialog are not used. Note: These options are dependent on the environment
that the fax is being sent to.
6. Move the necessary fields to the right-side of the Format Address dialog by selecting them and
clicking the “Add” button. Once the values are displayedon the right-side, select the desired option
and click the “Modify” button to edit the option’s value.
7. Optionally, enable to disable the “Remember Recipients” option. When this option is enabled,
previous recipient’s information will be saved and can be used again by selecting that name from
the drop-down list when sending a fax.
8. Click “OK” to apply the changes and close the Preferences dialog.
64
Page 65

To fax a file via e-mail:
1. After configuring the AttachmentFormat and Fax Format preferences, open a PDF file
2. Click “File > Fax via e-mail”.
3. Specify the First Name, Last Name and Fax Number to send the fax to.
4. Optionally, enable the “Attach cover page” option.
5. Click the “Send” button to generate the Fax via e-mail message.
65
Page 66

ADVANCED FILE STORAGE
By default, file saving and opening allows free browsing over the local computer and any network
file storage systems that are accessible. PDF Converter Enterprise 8 provides advanced file
storage options that allow a user to configure a more restricted environment.
The Advanced File Storage option allows a single folder structure to be specified for private
documents and another folder structure to be configured as the shared documents directory.
Configuring a preferred file folder structure can be useful in environments that have a very large
folder structure to select files from and the user would only need to access a subset of those
folders. Also, if there were files that are private and should never be opened in PDF Converter
Professional, those directories can be excluded and a different folder structure can be defined to
browse through.
To enable the File Storage option:
1. Launch PDF Converter Professional.
2. Click “Edit > Preferences”.
3. Navigate to the “File Storage” tab.
4. Enable the “Use File Storage as default file Open/Save dialogs (Requires restart)” option.
Note: A restart of PDF Converter Professional is necessary, not the computer.
5. Specify a folder to use for the Private Documents Directory and another for the Shared
Documents Directory.
6. Optionally, enable the “Browse to windows file system” option to allow the user to navigate to
folders outside of the specified private and shared documents directories.
7. Click “OK” to apply the changes.
8. Restart PDF Converter Professional for the changes to take effect.
When the File Storagefeature is enabled, the user can only browseto the two specified folders to
open or save files (including any sub folders in the specified top level folders).
66
Page 67

Opening and Saving files with File Storage enabled:
After the File Storage optionhasbeenenabled, the user will be presented with different Open and
Save dialogs in PDF Converter Professional:
The File Storage dialog provides the following features:
1. Change between the tabs at the top to access the following:
a. Look In: To browse the defined folder structure.
b. Search: To perform a search for files contained in the folder structure,
c. Recent: To view recently opened files.
2. Select a PDF file from the list to display a preview of the file on the right-side of the dialog.
3. Switch between the Private and Shared folder structures that were configured in the
Preferences after File Storage was enabled.
4. Click the “Browse”button to browse the entireWindows file structure (if the “Browse to
windows file system” option is enabled).
Note: The Save to DMS functionality is not available when using the Advanced File Storage
Option.
67
Page 68

AUTOMATED DOCUMENT ASSEMBLY
PDF Converter Enterprise 8 allows users to print to PDF Create from any application without
being required to save the new PDF file. Files that are printed to PDF Create when using the
“Send To PDF Pro” functionality can either be appended to an existing PDF file or created as a
new PDF file.
To configure the “Send To PDF Pro” option:
1. Click “Start > Control Panel”.
2. Open “Devices and Printers” (or “Printers and Faxes” on Windows XP).
3. Right-click on the “ScanSoft PDF Create!” print driver, then select “Printing preferences >
ScanSoft PDF Create!”.
Note: On Windows XP, the Gaaiho PDF driver will be listed as a separate printdriver. Just select
the “Printing preferences” option from the right-click menu of the ScanSoft PDF Create printer.
4. Select the “PDF Settings” tab from the ScanSoft PDF Create Printing Preferences dialog.
5. Expand the “Naming Method” drop-down box and select the “Send To PDF Pro” option.
6. Click “OK” to apply the changes.
Now whenever a file is printed to the ScanSoft PDF Create print driver, the user will be prompted
with a new “Printed Document” dialog instead of being prompted to save the PDF file with the
standard “Save As” dialog.
68
Page 69

To use the “Send to PDF Pro” option:
1. Open a document in any application you can print from.
2. Click the “File > Print” button or equivalent action.
3. Select the “ScanSoft PDF Create!” printer from the list. Note: If the steps above were not performed to
configure “Send to PDF Pro” as the Naming Method option, it can also be done at this point. Click the “Preferences”
button in the Print dialog to open the Printing Preferences dialog, then select “Send to PDF Pro” as the Naming
Method option on the PDF Settings tab.
4. Click the “Print” button to confirm the print job.
5. The Printed Document dialog will appear instead of the normal Save As dialog. Note: If a PDF file is not
currently opened in PDF Converter Professional, the application will launch and the print job willbe a new PDF file
that is unsaved. The Printed Document dialog will not appear and the workflow is finished at this time.
6. Select the PDF file to print to from the Current Document drop-down list of PDF files that are currently open.
Note: If only a single PDF File is currentlyopened in PDF Converter Professional, there will only be a single choice
in the Current Document drop-down list.
7. Select one of the four following destination choices:
Append at the end of the current document: Inserts the pages at the end of the PDF file currently
opened in PDF Converter Professional.
Insert at the beginning of the current document: Inserts the pages at the beginning of the PDF file
currently opened in PDF Converter Professional.
Insert after the current page in the current document: Inserts the pages after the beginning of the PDF
file currently opened in PDF Converter Professional.
Create a new document: Inserts the pages at the beginning of the PDF file currently opened in PDF
Converter Professional.
8. After selecting the destination option, the new pages will be inserted at the specified location in the PDF file.
Notes on using Send to PDF Pro:
Make sure the original PDF file you are appending to is saved locally.
If problem arise when the file that you are appending from is not a local file (opened from a network location or a
website), try saving that file locally and try again.
69
Page 70

OUTLOOK PREVIEW PANE
With PDF Converter Enterprise 8, you have the ability to preview PDF files through the Preview Pane in Microsoft
Outlook 2007 and 2010.
Note: In previous versionsof PDF Converter Professional, it was not possible to use the Outlook Preview Pane to
view PDF files unless Adobe was also installed on the system.
When an email message is displayed in the Outlook Preview Pane that has an email attachment, the user can
select the PDF file attachment and a “Preview file” button will appear. After clicking the “Preview file” button, the
PDF file will be displayed in the Outlook Preview Pane.
Note: Optionallyuncheck the “Always warn before previewing this type of file” checkbox to automatically view PDF
files and not be prompted to click the “Preview file” button first.
To manually enable or disable the PDF File Previewing in Outlook 2007/2010:
1. Click the “File” tab and select “Options”’.
2. Select the “’Trust Center” link.
3. Click the “Trust Center Settings” button.
4. Select the “Attachment Handling” menu.
5. Click on the “Attachment and Document Previewers” button.
6. Locate the application named “zeon PDF PreviewHandler”.
7. Check the checkbox to enable the PDF Converter Professional PDF Preview Pane option,or clear the
70
Page 71

STAMP CREATION
It is simple to apply stamps to all the pages of the documentin addition to a specific area on the pages. A user is
also able to control the alignment and location properties of a stamp by using the Select Tool and accessing the
stamp location properties menu.
After placing a stamp in the desired location on a page of a PDF file, right-click on the stamp and select the “Apply to
All Pages” option to make the selected stamp appear on every page of the PDF file.
It is also possible to automatically create a newstamp from a selected area of a PDF file. Use the Select tool to
select any area of a PDF file, then right-click on the area and select the “Create Stamp” option.
MULTILINGUAL USER INTERFACE
PDF ConverterEnterprise 8 handles PDF files with content in a very wide range of languages and alphabets
(provided that your system and keyboard will support them).
The user interface language can now be changed from inside PDF Converter Enterprise, after the program has been
installed.
To modify the applications language, click “Edit >Preferences” and navigate to the “General” tab. Adjust the
“Application language” drop-down box to the desired language and then click “OK”.
Please note that PDF Converter Enterprise and any applications that have integration (such as Microsoft Office
applications) will need to be restarted to reflect the language change. The PDF print driver will not be updated until
the next time the computer is restarted.
71
Page 72

REDUCE FILE SIZE
Click “Document > Reduce File” to reduce the file size of one or more PDF files.
Images are compressed and their resolution is adjusted to reduce the overall file size. Select the “Reduce Current
File” option to reduce the file size of the currently opened PDF file, or select the “Reduce Multiple Files” option to
reduce the file size of a batch of PDF files simultaneously.
After specifying the files to reduce, the user will select where to save the reduced files (either in the same folder as
the original files or in a specified folder), along with the naming convention to use for the reduced files (to keep the
original file names or to add a prefix and/or suffix to the original file names), and whether to overwrite existing files.
Note: If the file reduction process will not reduce the file size at all, the user will be prompted with a message that
states “The file size after reducing will not be smaller”.
SEND TO PAPERPORT
Print to PaperPort directly from the PDF Create printer or from the PDF CreateAssistant. The resulting PDF file will
automatically open in the last accessed folder in PaperPort. This print option will only be available if PaperPort is
installed on the system. PDF Converter Enterprise will provide this option if it detects the existence of PaperPort on
the system.
SUPPORT FOR DIGITAL RIGHTS MANAGEMENT
PDF Converter Enterprise 8 supports PDF files secured under digital rights management using FileOpen document
controls.
72
Page 73

PDF AUDIO
Using Audio Features
READ PDF ALOUD
1. Opena PDFFileinPDFConverterEnterprise.
2. Clickon the Toolsmenuand select“Read PDF”and “ReadCurrentPage”.
3. PDFConverterEnterprisewillreadthe textof yourPDF throughspeakersor aheadset.
73
Page 74

READ BACK CONTROLS
When reading back a PDF aloud the application launches Readback controls that allow the following options:
Play/Read
Pause Reading
Stop Reading
Go to Prev Paragraph
Go to Next Paragraph
Go to Prev Page
Go to Next Page
READ TO FILE
Opena PDFFileinPDF
ConverterEnterprise.
SelecttheToolsmenuandchoose “ReadPDF”then“Readto File”.
Choosea locationtoSavethe.WAVfile.
74
Page 75

PDF Autopilot - Batch Mode
The PDF Autopilot runs a series of commands, similar to a workflow, on a batch of PDF files with just a single click.
To setup a workflow follow the steps below:
1. Within PDF Converter Enterprise, select DOCUMENT, then ADVANCED PROCESSING, and finally BATCH
PROCESSING...
2. Click NEW SEQUENCEand enteranamefor the sequencethat you’dlike tocreate.Then clickOK.
3. Click the Select Commands button and then choose which commands you’d like to run.
75
Page 76

4. Click the EDIT button for each command added to specify the details required for each command. (Below is an
example of editing the INSPECT DOCUMENT command)
5. When complete, click OK twice to return to the BATCH SEQUENCE dialog.
6.Select RUN SEQUENCE, and then click OK to confirm the sequence.
7.Finally, Select the files to be processed, and let your sequence run to completion.
76
Page 77

For more information please visit: www.nuance.com
Forsalesinquiriespleasedial:
1-800-380-1234
77
 Loading...