

Page 1
-1-
SM-H0004_E Rev.1
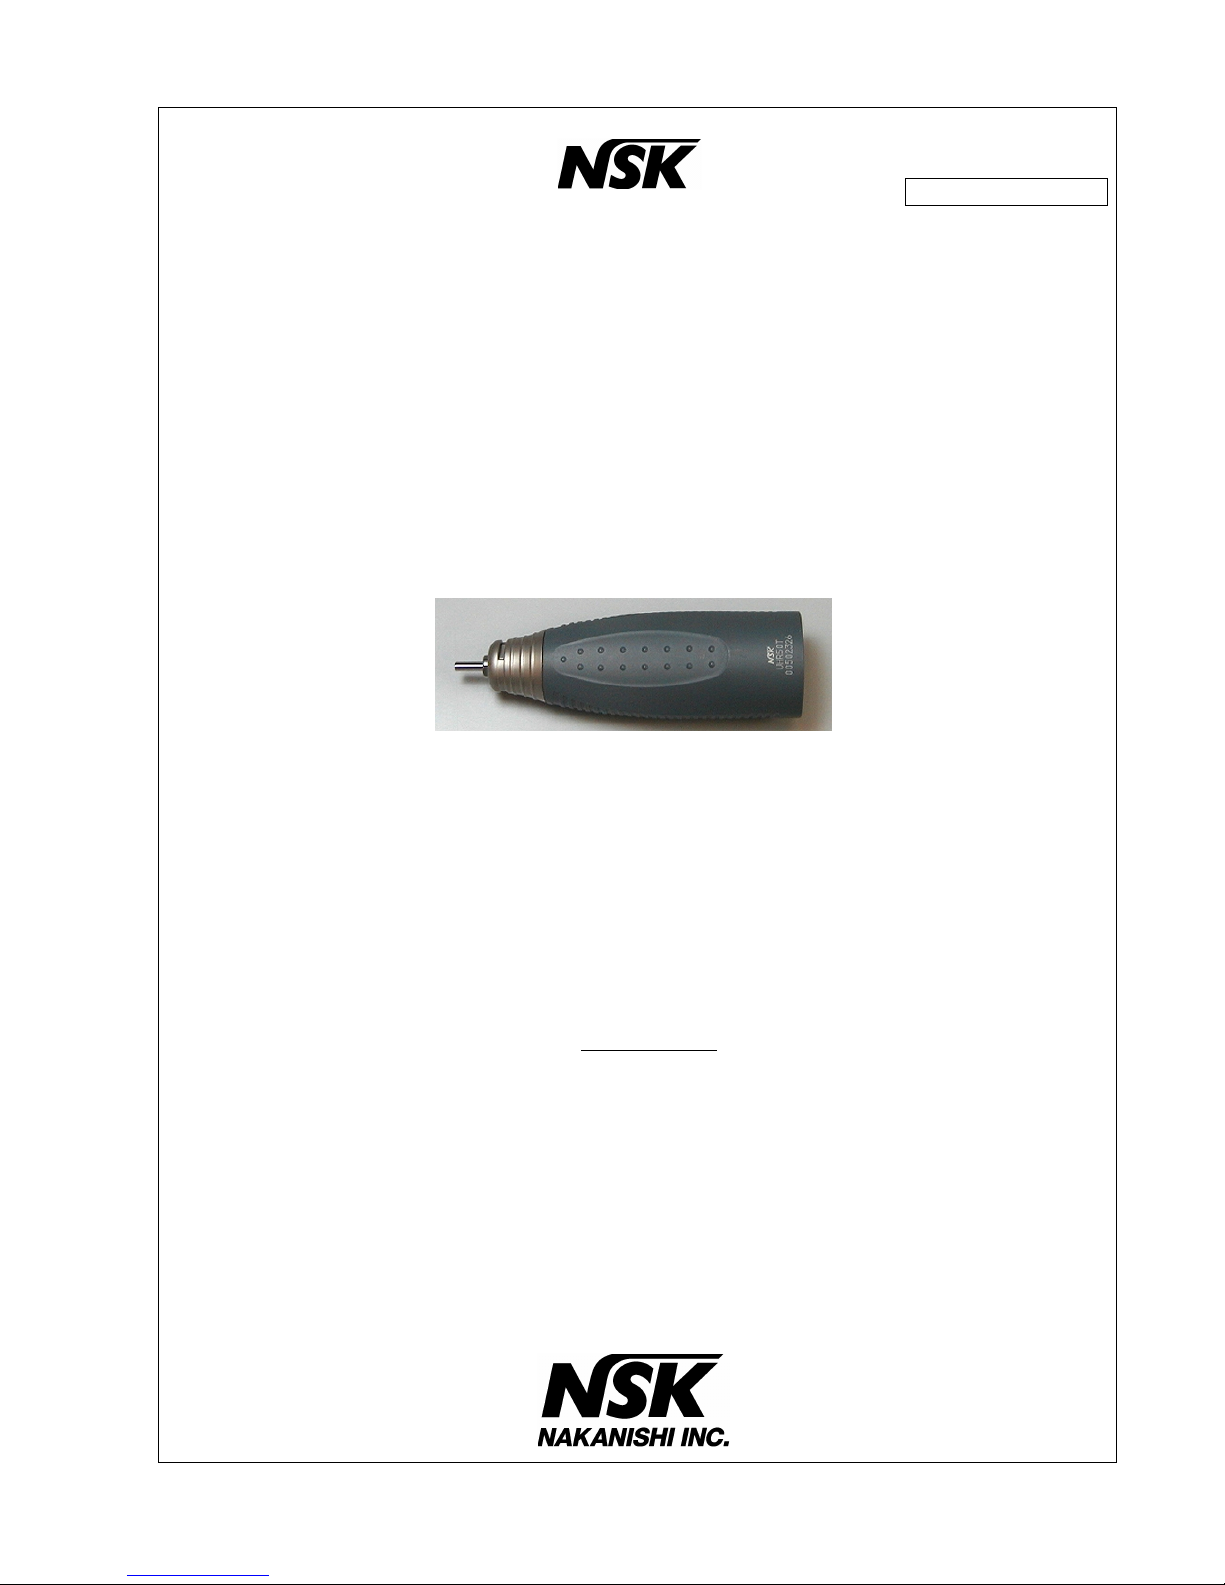
SERVICE MANUAL
For
UHR and VR series
Straight Handpiece
Parts List No.
UHR35: D-079
UHR50T: D-061
UHR50C: D-062
VR: D-036
VR-E: D-082
Page 2
-2-
Notice
This manual applies to both UHR series and VR series.
UHR series and VR series are identical in construction, with only exception of the outer design and
dimensions of the spindles; and same tools are used.
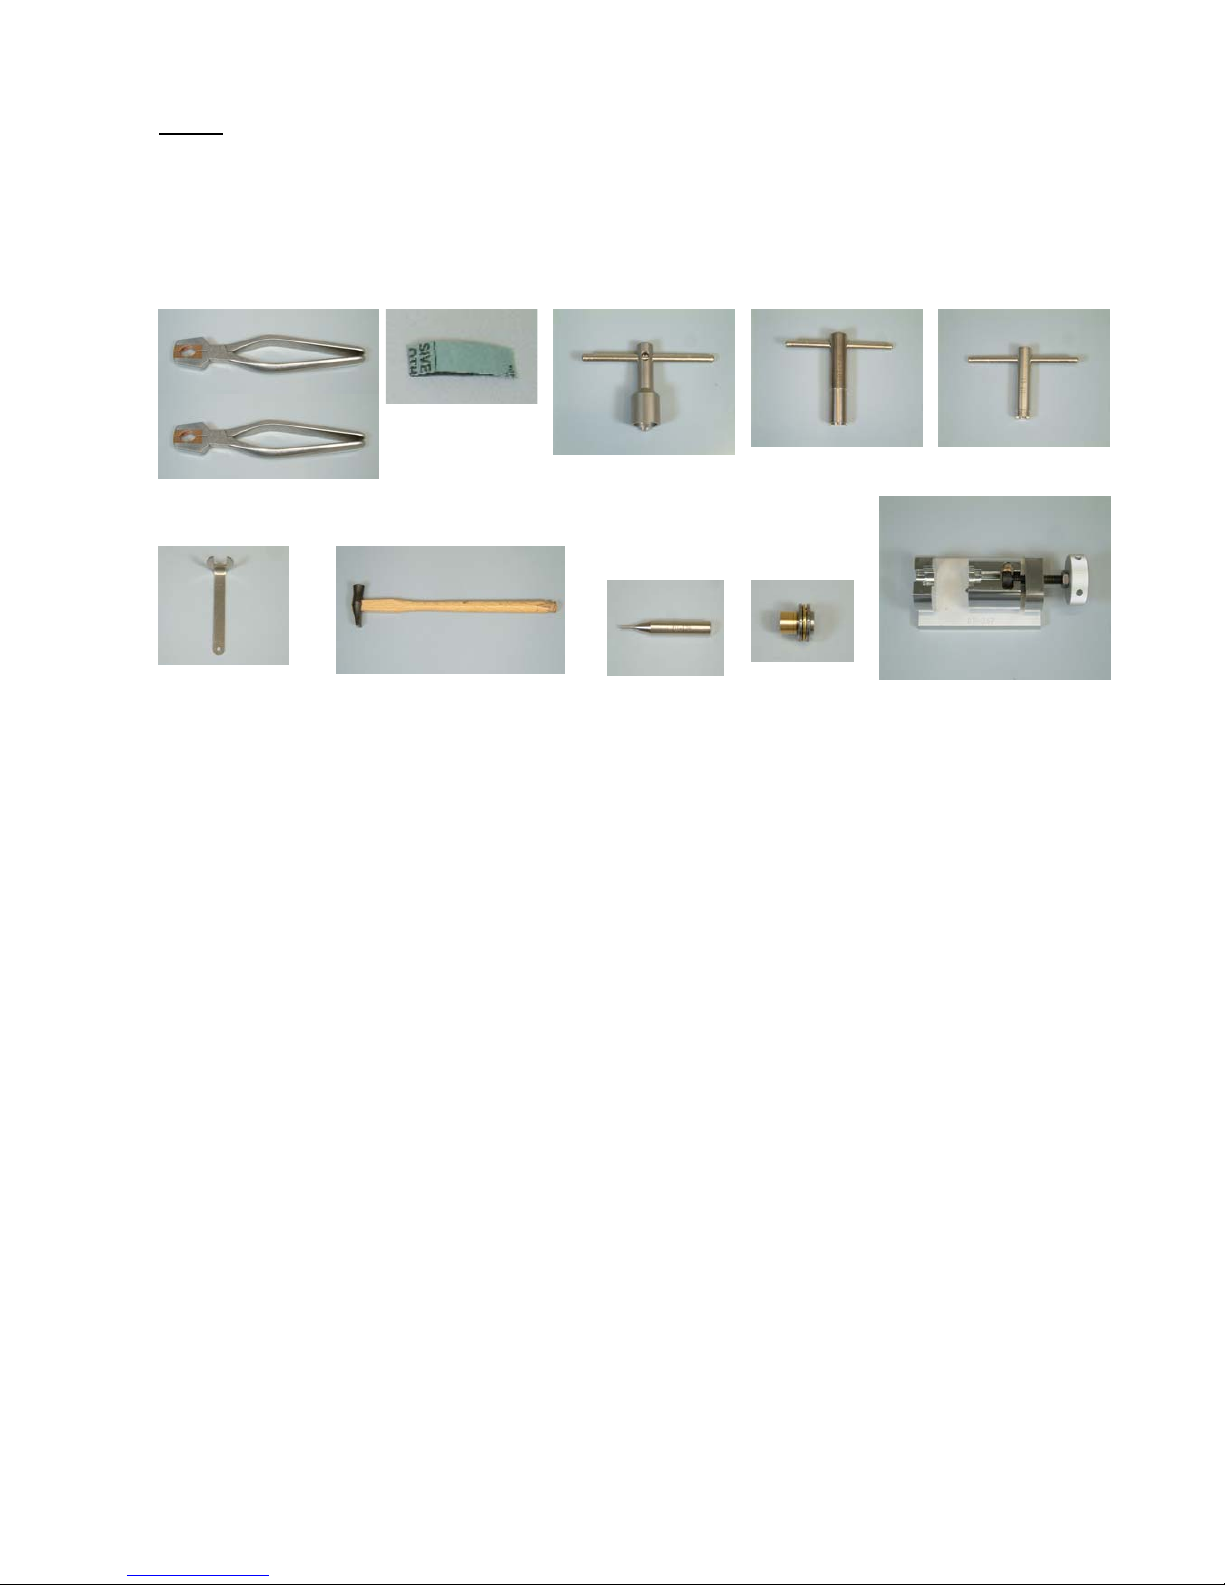
1. TOOLS REQUIRED
Dummy Bur and Tweezers are required.
T-2(Pliers)
Emery Cloth
T-35 (Hammer)
DT-41
DT-145 DT-203
DT-267 (Vise)
DT-179
DT-131
H124 751
(Angled Wrench (9mm))
Page 3
-3-
2. DISASSEMBLY PROCEDURE
Caution
Disassemble on a tray to prevent losing parts.
Replace the O-ring if any damages found during disassembling.
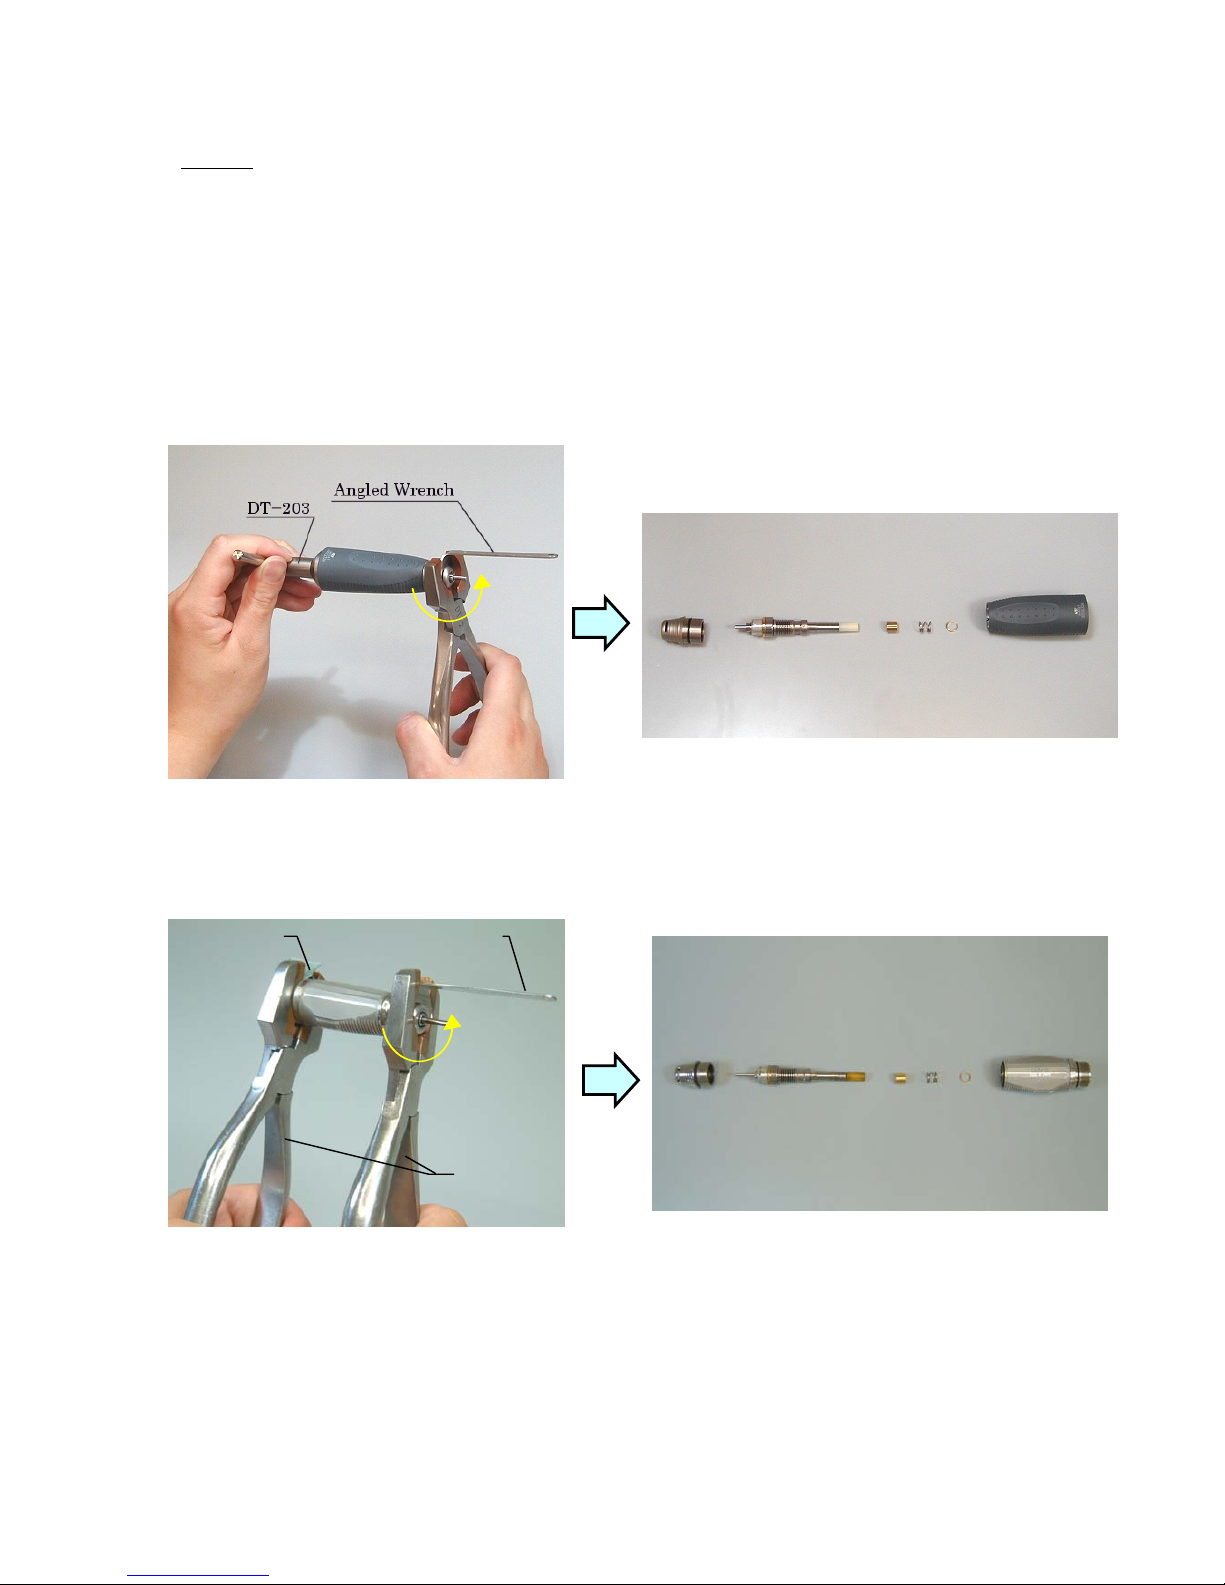
2-1 Remove the Nose Hood
Set DT-203 on the rear end of Bur Lock Ring. Align hollows of Spindle with slots of Nose Hood and slide H124-751
into the alignment. Hold H124-751 with T-2 and unscrew it to remove the Nose Hood from the Bur Lock Ring. By
removing the Nose Hood, a Spindle Assembly, a F. Preload Spring Washer, a Preload Spring, and a Preload Spring
Washer are drawn from the Bur Lock Ring.
(In case of VR series)
Hold the Sheath Ass’y with T-2 on emery cloth between. Align hollows of Spindle with slots of Nose Hood and slide
H124-751 into the alignment. Hold H124-751 with T-2 and unscrew it to remove the Nose Hood from the Sheath Ass’y.
Angled Wrench Emery Cloth
T-2
Page 4

-4-
Only in case of VR-E, before removal of the Nose Hood, remove the Insert Joint.
Protect the Sheath Ass’y and the Insert Joint with emery cloth and turn counterclockwise with T-2 to remove the Insert
Joint.
2-2 Remove the Rear Bearing
Insert DT-41 into the rear end of the Bur Lock Ring and unscrew R. Bearing Retainer Nut to remove Bearing. By
removing a R. Bearing Retainer Nut, a Return Spring, a Return Spring Washer, and a Bearing are drawn from the Bur
Lock Ring.
2-3 Remove the Slide Ring
Insert DT-145 into the Bur Lock Ring from front and unscrew Bur Lock Ring Retainer to remove Housing.
Slide out the Bur Lock Ring Retainer and the Housing. Remove two Balls and a Slide Ring from the Housing.
Insert Joint
DT-145 DT-203
Page 5

-5-
2-4 Disassemble the Spindle
Put DT-131 on the rear of the Spindle. Fix the Spindle with DT-267 (Vise) and compress it approximately 2mm.
Position the marked end on the Chuck Pin. Put DT-179 on it and tap the DT-179 with T-35 to push out the Chuck Pin
from the Spindle.
By removing the Chuck Pin, all components of the Spindle are disassembled.
Please refer to the part list for the more detailed disassembly.
DT-179
T-35
DT-267
DT-131
Cross Section
Page 6

-6-
3. CAUTIONS FOR ASSEMBLING
Reverse the procedure for disassembly with following cautions, when assembling.
3-1 Assemble the Spindle
Screw Chuck Shaft into the Chuck completely and then t urn the Shaft bac k by tw o threads.
Adjustment should be done after complete assembly of the Handpiece.
When drive the Chuck Pin into the Spindle, use new one.
Chuck
Chuck Shaft
New Chuck Pin
Direction of insertion
Page 7

-7-
3-2 Assemble the Slide Ring
Insert the Slide Ring into the Housing and align a groove on the Slide Ring with slots on the Housing.
Confirm the direction of the Slide Ring.
Grease the groove and slots, and place a ball on the slot on each side.
Look from the top of it and align the balls on the Housing with the hollows inside Bur Lock Ring. Insert the Housing
into the Bur Lock Ring slowly.
After the Slide Ring is set in the right position, mount the Bur Lock Ring Retainer securely, using the DT-145.
Then, assemble the remaining in the reverse order of disassembling.
Hollows
Grease
Slide Ring
DT-145 DT-203
 Loading...