

Page 1
Caution
Caution
Fig. 1 Fig. 2
Fig. 3
・When operating the handpiece always consider the safety of the patient.
・The handpiece is designed only for dental clinical use.
・
Check the vibration, noise and overheating outside the patient's oral cavity
before use. If any abnormalities are found, stop using and contact your dealer.
・If any abnormalities are found in use, stop using immediately and contact
your dealer.
・Do not allow any impact on the shank. Do not drop the handpiece.
・
Do not attempt to disassemble the handpiece nor tamper with the mechanism.
・Do not connect or disconnect the handpiece until the drive motor has
completely stopped.
・Do not exceed a speed of 200,000min
-1
(rpm) at the head.
・Do not use eccentric, worn or damaged burs.
・Use short shank bur for miniature head speed increasing handpiece. (Ti85L,
Ti85LA,Ti85) Using long burs could result in bur spin-out while using, or
premature bearing failure.
・Do not use a long surgical bur on speed increasing handpiece, which runs
to 200,000min
-1
(rpm). Such long bur as 25mm in length shall not be used. Its
shank may warp under load at a high speed and spin out of the handpiece
when the load is released.
・Before use always confirm that the bur is correctly seated and locked into
place.
・Depressing the push-button while handpiece bur is in rotation will result in
OVERHEATING of the handpiece head. Special caution must be exercised
during use to keep cheek tissue AWAY from the push-button of the handpiece. Contact with cheek tissue may cause the push-button to depress and
injury to the patient may occur.
・Always operate with spray. Without cooling spray, the handpiece may build
up heat.
・Supply PANA SPRAY after each use.
・Use only the genuine NSK-manufactured oil. (PANA SPRAY)
1. Specifications
3. Insertion and Removal of the bur
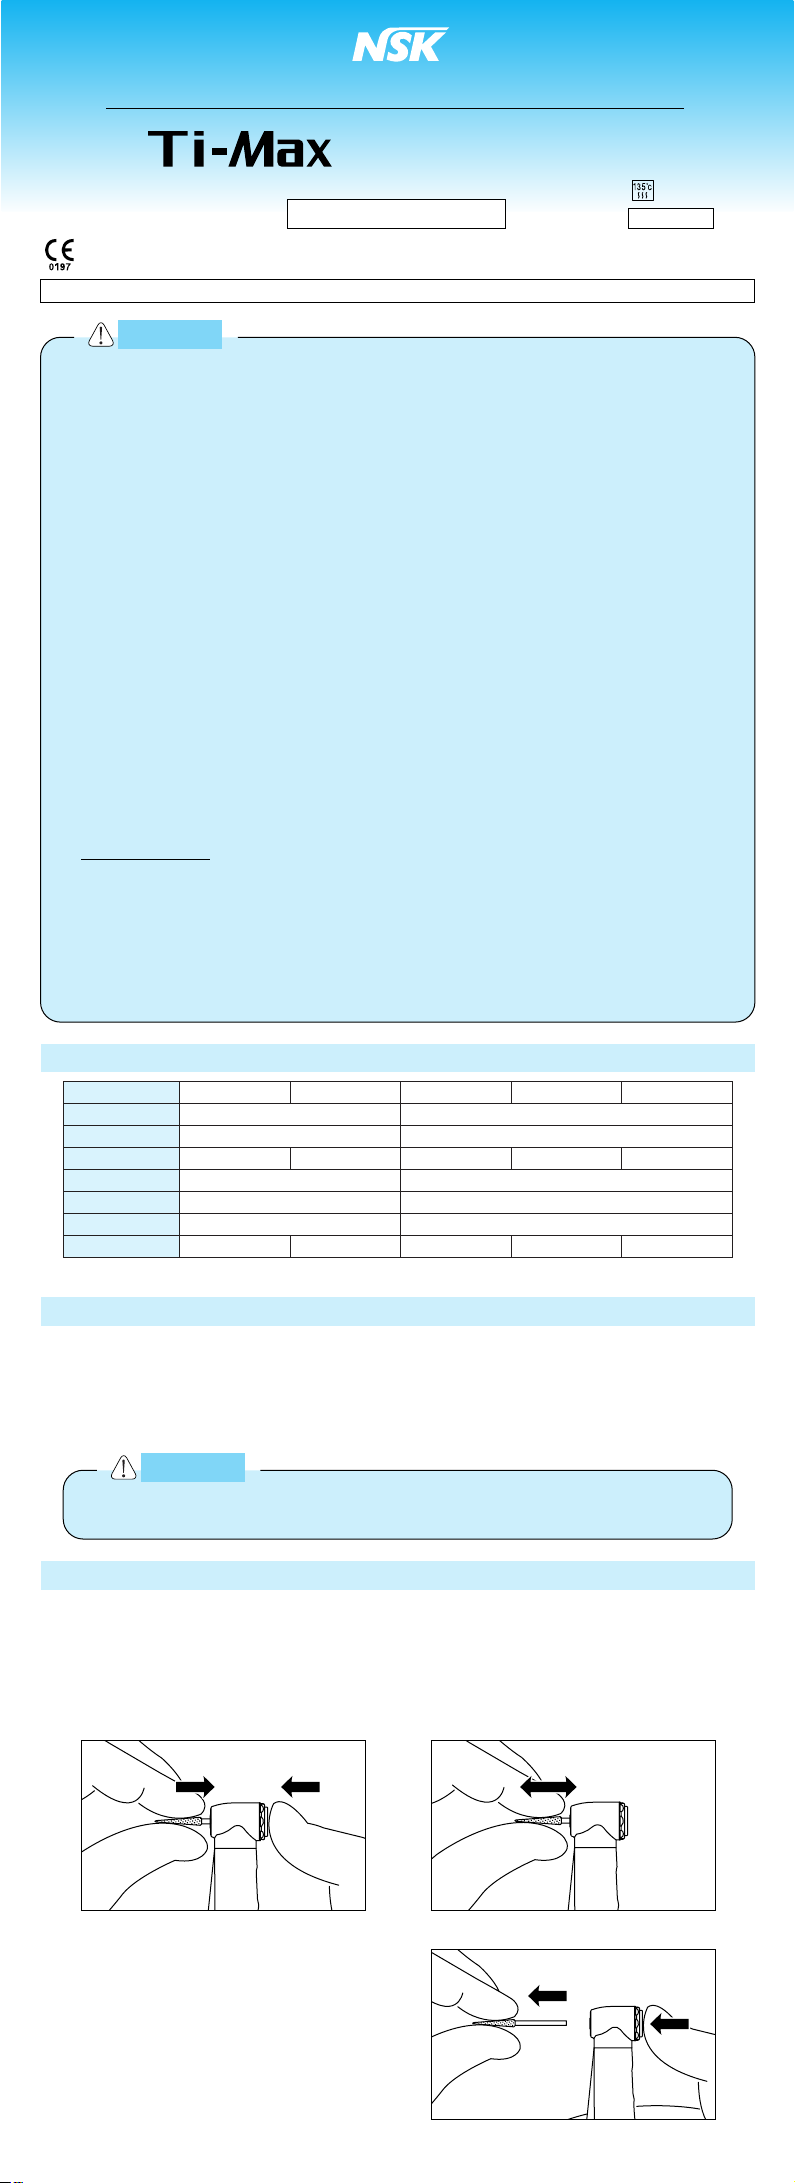
a Bur Insertion
Insert the bur into the chuck until it stops (4-6mm depth).
Depress the push-button and insert further into the chuck until the bur stops. (Fig. 1)
After the bur is inserted, push and pull the bur to make sure that it is held firmly in
place. (Fig. 2)
This action will further increase the bur retention force.
2. Connecting / Disconnecting the motor and the handpiece
To connect the motor and the handpiece, align the positioning marks on the motor
and the handpiece, and insert straight. This procedure will also align the light
receptacle and allow you to use illumination if your handpiece and motor are
equipped for illumination. (Ti85L, Ti85LA, Ti95L, Ti95LA) To disconnect, hold the
front part of the motor and the back part of the handpiece, and pull straight out.
# Only use burs capable of 200,000min-1(rpm).
s Bur Removal
Depress the push-button and Pull out
the bur. (Fig. 3)
Note : The push-button chuck has a
double action. The button stops
when it touches the rotor
Depress further and pull out the
bur.
The EU directive 93/42/EEC was applied in the design and production of this medical device.
Please read this Operation Manual carefully and file for future reference.
OPERATION MANUAL
Do not connect or disconnect the handpiece until the motor has
completely stopped.
1 : 5 Speed Increasing Contra Angle Handpiece FG bur
Ti85L / Ti85LA / Ti85
Ti95L
/
Ti95LA / Ti95 / Ti95EX
OM-C0179E Rev.B
Model
Gear Ratio
Allowable Max. Speed
Coolant Delivery
Spray Type
Chuck Type
Burs (#)
Optics
Ti95EX
External
−
Ti95
1 : 5 Increasing
40,000min
-1
(rpm)
Internal
Quadruple Spray
Ultra Push
ø1.59-1.60mm Standard Bur
−
Ti95L/Ti95LA
Internal
Glass Rod optic
Ti85
Internal
−
1 : 5 Increasing
40,000min
-1
(rpm)
Single Spray
Ultra Push
ø1.59-1.60mm Short Shank Bur
Ti85L/Ti85LA
Internal
Glass Rod optic
: AUTOCLAVABLE
Page 2
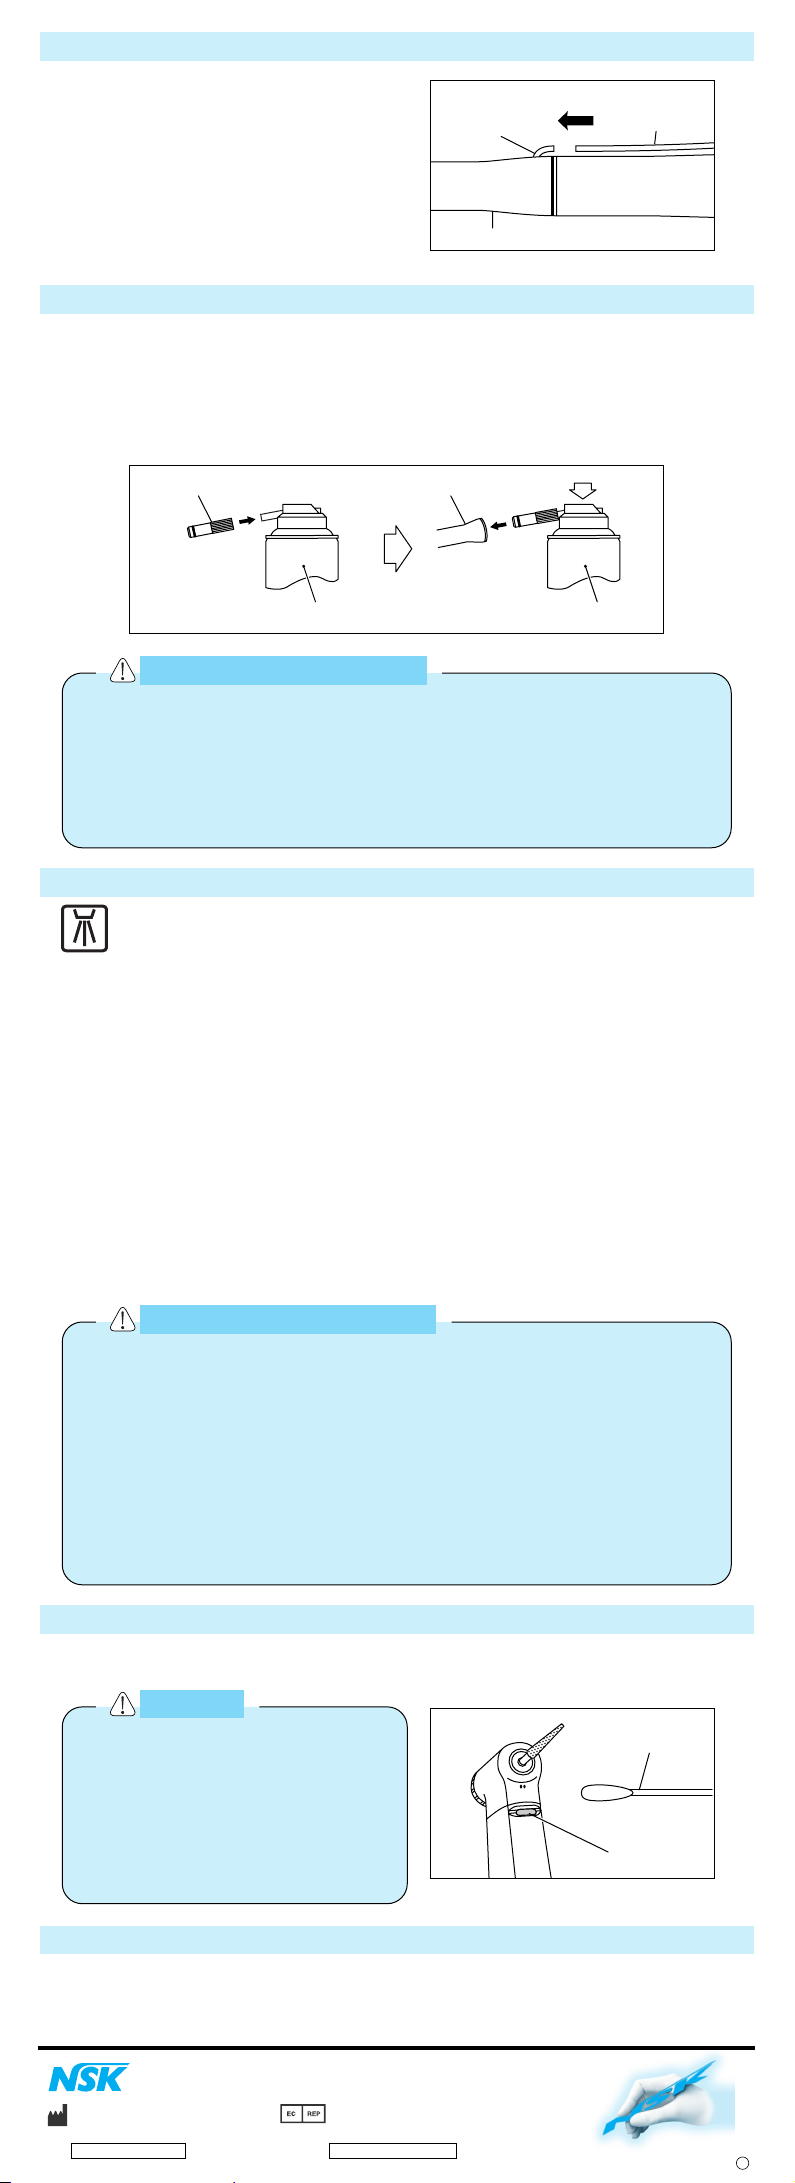
Fig. 5
PANA SPRAYPANA SPRAY
E-type Spray Nozzle
Handpiece
Cotton Swab
Glass Rod Optic End
Handpiece
Cautions on Lubrication
Cautions on Sterilization
Fig. 6
Fig. 4
Caution
4. Irrigation Nozzle (Ti95EX)
When irrigation is required please connect
the irrigation tube to the irrigation nozzle.
5. Lubrication
Supply PANA SPRAY after each use and/or before autoclaving.
q Push E-type spray nozzle attachment over the PANA SPRAY nozzle until it
firmly seats.
w Shake the can 3-4 times to well mix lubricant and propellant.
e Insert the E-type spray nozzle in the rear of the handpiece and spray for
approximately 2-3 seconds until the oil comes out of the handpiece head.
6. Cleaning and Sterilization
NSK recommends heat sterilization by autoclave.
Sterilization required after each patient as noted below.
Autoclave Procedure
q
Scrub dirt and debris from the handpiece, and wipe clean with alcohol-
immersed
cotton swab or cloth. Do not use a wire brush.
w Lubricate with PANA SPRAY. Refer to 5. Lubrication.
e Insert into an autoclave pouch. Seal the pouch.
r Autoclavable up to a max. 135˚C.
ex.) Autoclave for 20 min. at 121℃, or 15 min. at 132℃.
t Keep the handpiece in the autoclave pouch to keep it clean until you use it.
✻ Sterilization at 121˚C for more than 15 minutes is recommended by EN13060
or EN554.
✻ Performing sterilization according to our instruction has minimal effect on the
instruments. Life span is generally determined by wear and damage due to
use.
7. Cleaning Glass Rod Optic End (Ti85L, Ti85LA, Ti95L, Ti95LA)
In case the light had become dim, clean the glass rod optic end with an alcoholsoaked cotton swab. (Fig.6)
・Be sure to hold the handpiece firmly to prevent the handpiece from
slipping out by the spray pressure when lubricating.
・Supply lubricant until it comes out of the handpiece head (for approx.
2 seconds).
・Keep the PANA SPRAY can upright.
・Use of lubricants other than NSK’s PANA SPRAY can cause excessive
heat generation and possible handpiece damage.
・In case the sterilizer chamber temperature could exceed 135℃ during
the dry cycle. Skip the dry cycle.
・Always place the handpiece in the center or upper shelf of the
chamber, as the local temperature at the chamber bottom could rise
beyond the set value.
・Do not autoclave the handpiece, even when it is bagged, together with
other instruments, from which chemicals are not sufficiently cleaned.
This is to avoid discoloration and / or damage to the plating of the
handpiece.
・Do not heat or cool the handpiece quickly. Rapid change in tempera-
ture could break the glass rod give abnormal strain to other metals.
8. Repair Service
For genuine NSK service and parts always return the handpiece to your NSK dealer.
Irrigation Nozzle
Irrigation Tube
Do not use a pointed tool or sharp
edges to clean the glass rod optic
end. They may damage the mirror
finish and reduce the light transmission efficiency. If the glass rod
optic end has become damaged,
send the handpiece to the NSK
dealer for repair.
Powerful Partners
®
’07.06.02 M
※ Specifications may be changed without notice.
www.nsk-inc.com
NAKANISHI INC.
700 Shimohinata, Kanuma, Tochigi
322-8666, Japan
www.nsk-europe.de
NSK EUROPE GmbH
Westerbachstraße 58 60489 Frankfurt,
Germany
This handpiece can be washed via Thermo Disinfector.
 Loading...