

Page 1

OPERATING MANUAL
Model Number GBE104v2.2
10.4 inch Digital Photo Frame
Page 2
Quick Start Guide
GBEDIGITAL model number GBE104v2.2
This page gives you basic information for setting up your digital photo frame and showing
pictures. For more detailed instructions and safety instructions, see the Operating Manual
booklet included with your digital photo frame.
Set up your digital photo frame
• Remove the protective plastic sheeting from the digital frame’s LCD screen.
• Pull the plastic sheet from the remote battery terminal.
• Use the enclosed power cord (AC adaptor) to plug your digital frame into an electrical
outlet.
• Insert a media card into the appropriate slot on the side of the digital frame.
• Turn on the power switch.
• The Main menu will appear automatically.
• Using the remote control, press the PHOTO button to automatically start your slide
show. (Refer to the troubleshooting section on the Operating Manual if your slideshow
does not start up automatically.)
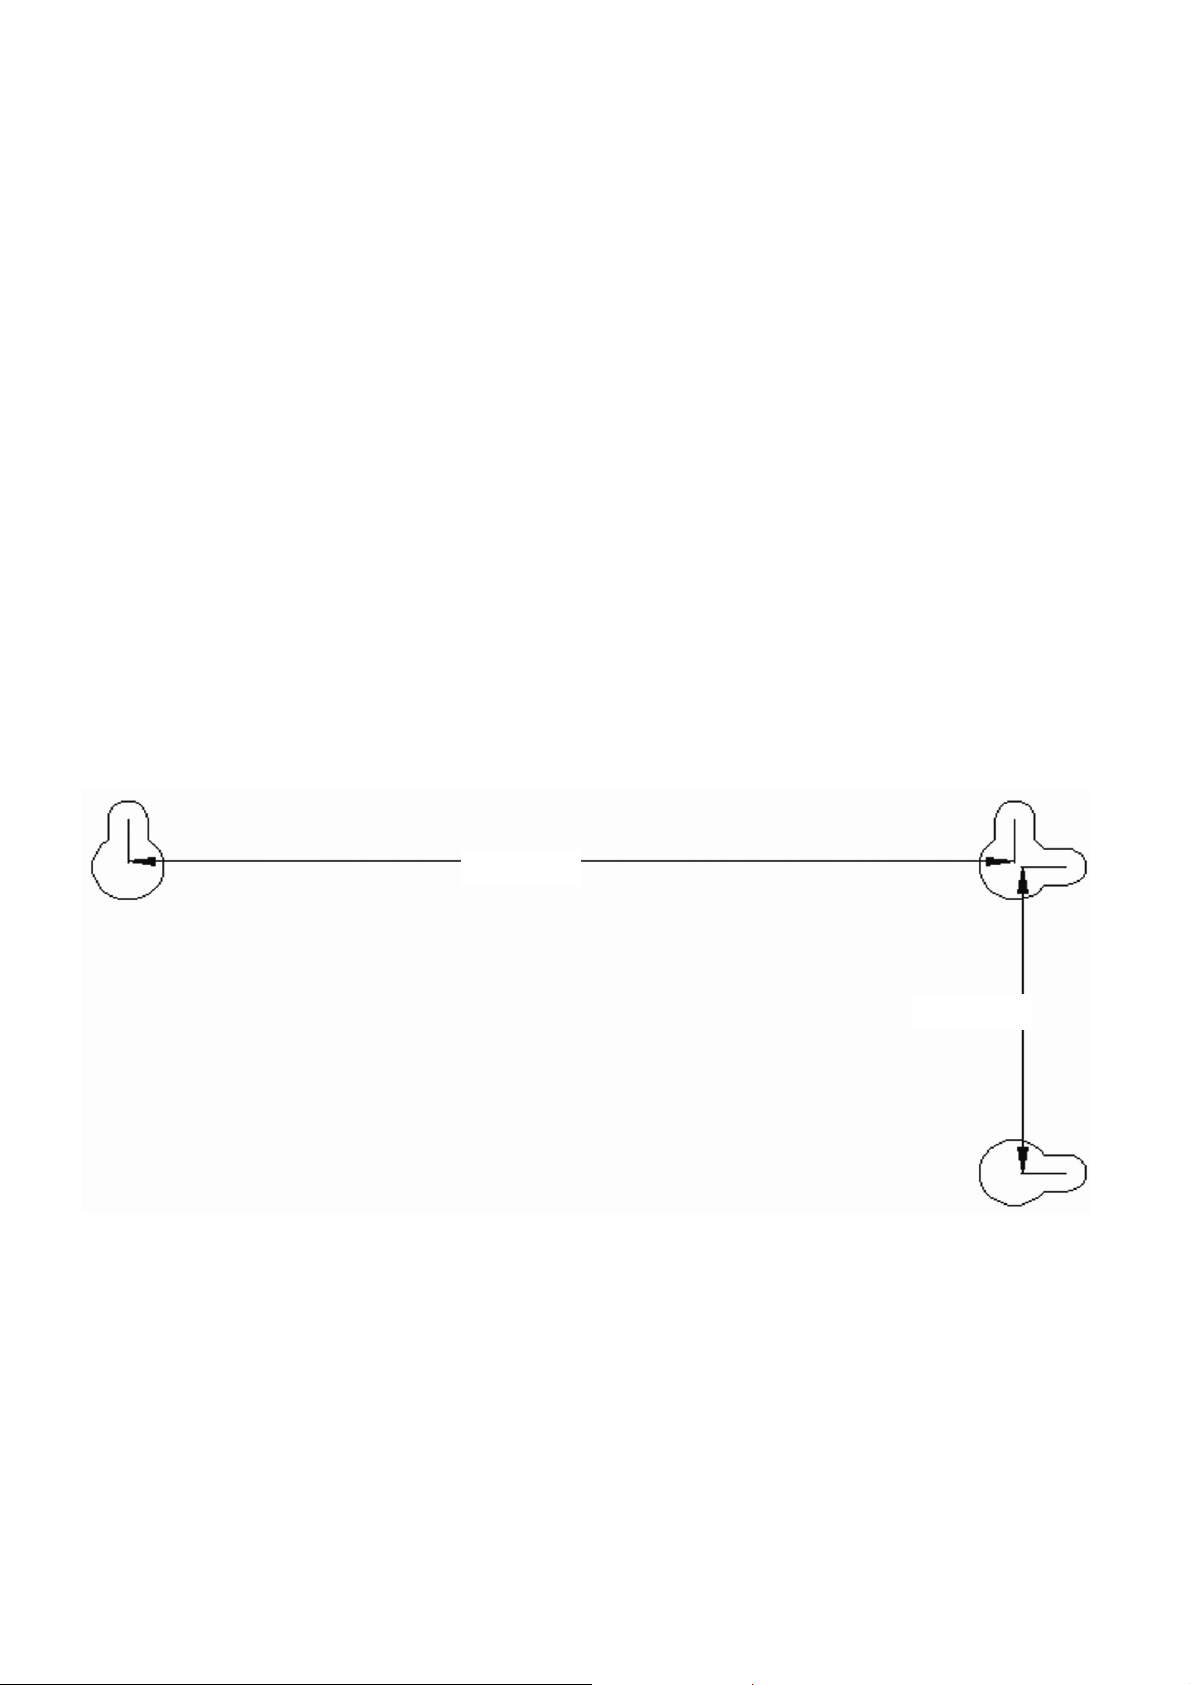
Wall Mount Drill Diagram
• To mount the frame to a wall, drill two pilot holes 6.1" apart to hang the frame
horizontally, or drill two pilot holes 2.20" apart to hang frame vertically.
•
Insert screws into the pilot holes.
•
Screw them in firmly, leaving approximately 1/2" of the screw head exposed.
• Position the wall-mount slots over the screws and slide the digital frame in place.
6.1”
2.20”
2
Page 3

Table of Contents
DISCLOSURES......................................................................................................................................................................4
IMPORTANT SAFETY INSTRUCTIONS..........................................................................................................................6
TECHNICAL SPECIFICATIONS.......................................................................................................................................7
BOX CONTENTS..................................................................................................................................................................7
THE DIGITAL PHOTO FRAME.........................................................................................................................................8
THE REMOTE.......................................................................................................................................................................9
GETTING STARTED..........................................................................................................................................................10
SETTING UP YOUR DIGITAL PHOTO FRAME.........................................................................................................................10
INSERTING AND REMOVING MEDIA CARDS........................................................................................................................10
INSTALLING OR CHANGING THE REMOTE’S BATTERY........................................................................................................11
BASIC OPERATIONS ........................................................................................................................................................11
PHOTO – (DISPLAYING IMAGES) ........................................................................................................................................11
MUSIC – (PLAYING MUSIC)................................................................................................................................................12
COMBO - (DISPLAYING IMAGES AND MUSIC SIMULTANEOUSLY).........................................................................................13
MOVIE – (PLAYING MOVIES)..............................................................................................................................................13
TEXT – (TXT FORMAT FILES ONLY)...................................................................................................................................13
EDIT – (COPY AND DELETE FILES)................................................................................................................................14
SETTINGS – (ADVANCED OPERATIONS) ............................................................................................................................14
Language Settings:.....................................................................................................................................................15
Slideshow Settings:.....................................................................................................................................................15
Clock Settings:.............................................................................................................................................................15
Alarm Settings:............................................................................................................................................................15
Color Settings:.............................................................................................................................................................16
Factory Reset:.............................................................................................................................................................16
Calendar / Clock – (Displaying date and time on your frame)..............................................................................16
Alarm – (Model 104v2.2 Only) ..................................................................................................................................16
ADVANCED OPERATIONS ..............................................................................................................................................16
VIEWING A THUMBNAIL DIGEST OF IMAGES.......................................................................................................................16
HOST MODE – (USING YOUR DIGITAL PHOTO FRAME WITH AN EXTERNAL USB CARD READER) ....................................17
SLAVE MODE – (ADDING MEDIA FILES TO THE DIGITAL PHOTO FRAME’S INTERNAL MEMORY)........................................17
AUDIO OUT / VIDEO OUT - MODE................................................................................................................................18
ADDITIONAL INSTRUCTIONS.........................................................................................................................................18
HOW TO CREATE A FOLDER IN THE INTERNAL MEMOR Y..................................................................................18
HOW TO COPY FILES FROM MEMORY CARD TO INTERNAL MEMORY USING REMOTE CONTROL.......19
HOW TO COPY MUSIC FILES FROM MEMORY CARD TO INTERNAL MEMORY USING REMOTE
CONTROL........................................................................................................................................................................19
HOW TO DELETE FILES FROM YOUR MEMORY CARD OR INTERNAL MEMORY..........................................20
HOW TO UPLOAD MUSIC FROM YOUR COMPUTER INTO INTERNAL MEMORY...........................................20
HOW TO ZOOM IN/OUT OF YOUR PICTURES?.......................................................................................................20
TROUBLESHOOTING ......................................................................................................................................................21
DIGITAL FRAME DOES NOT POWER ON...............................................................................................................................21
REMOTE DOES NOT WORK.................................................................................................................................................21
NO IMAGE IS DISPLAYED.....................................................................................................................................................21
PICTURE OR MOVIE DISPLAY SEEMS SLOW........................................................................................................................21
MOVIE OR PICTURES DISPLAY IN A SMALL AREA OF THE SCREEN......................................................................................21
I UPLOADED MY VIDEO FILE BUT IT DOES NOT START.........................................................................................................21
I CAN NOT ROTATE AN IMAGE THE WAY I WANT TO..............................................................................................................22
I UPLOADED MP3 FILES BUT ON COMBO OPTION I CAN NOT HEAR MY MUSIC................................................................22
I CAN NOT DISPLAY OR HEAR EXTERNAL VIDEO/AUDIO ......................................................................................................22
FAQS: ....................................................................................................................................................................................22
LIMITED WARRANTY (USA ONLY)..............................................................................................................................24
3
Page 4
Disclosures
Note
Please read the entire Operating Instructions document before using the digital frame.
GBEDIGITAL reserves the right to make changes and/or improvements to the products and
programs described in these Operating instructions at any time without notice.
GBEDIGITAL and its distributors or agents assume no responsibility for errors or omissions in
these Operating Instructions, and do not make any commitment to update the information
contained herein.
Trademarks
All names and products mentioned within this document are registered trademarks of their
respective owners.
Copyright
(c) 2007 GBEDIGITAL all rights reserved. All information and other content contained in this
operating manual are copyright protected. Use of information and content is forbidden
unless express permission has been given in writing by GBEDIGITAL.
FCC Notification
4
Page 5

This device complies with part 15 of the FCC rules. Operation is subject to the following two
conditions:
(1) this device may not cause harmful interference, and
(2) this device must accept any interference received, including interference that may cause
undesired operation.
NOTE: The manufacturer is not responsible for any radio or TV interference caused by
unauthorized modifications to this equipment. Such modifications could void the user’s
authority to operate the equipment.
NOTE: This equipment has been tested and found to comply with the limits for a Class B
digital device, pursuant to part 15 of the FCC Rules. These limits are designed to provide
reasonable protection against harmful interference in a residential installation. This
equipment generates uses and can radiate radio frequency energy and, if not installed and
used in accordance with the instructions, may cause harmful interference to radio
communications. However, there is no guarantee that interference will not occur in a
particular installation. If this equipment does cause harmful interference to radio or television
reception, which can be determined by turning the equipment off and on, the user is
encouraged to try to correct the interference by one or more of the following measures:
- Reorient or relocate the receiving antenna.
- Increase the separation between the equipment and receiver.
-Connect the equipment into an outlet on a circuit different from that to which the receiver is
connected.
-Consult the dealer or an experienced radio/TV technician for help
5
Page 6
Important Safety Instructions
Warning:
To reduce the risk of fire, electric
shock or product damage, do not
expose the digital frame to rain,
moisture, dripping or splashing of
liquids. Make sure no objects filled
with liquid, such as cups or vases are
placed on or near the digital frame.
Do not use the digital frame in
conditions which could allow
Warning:
To reduce risk of electric shock, do
not open the digital frame case and
do not remove screws from the frame
case. There are no user serviceable
parts inside the case.
Disassembly of the digital frame
will void your warranty.
condensation to occur.
Read these operating instructions carefully before using the unit and keep these
instructions handy for future reference. Heed all warnings and cautions.
• The digital frame is for indoor use only.
• Do not use the digital frame near water or while wet.
• Do not drop, bump, jar, shake or expose the unit to severe vibration.
• Keep the unit away from direct sunlight. Face the frame away from sunlight to reduce
glare.
• Do not use the digital frame near any heat source such as radiators, heat registers,
stoves or any other devices (including amplifiers) which produce heat.
• To prevent risk of heat buildup, place the frame in a well-ventilated area. Do not block
the ventilation holes on the back of the digital frame.
• Protect the power cord from being walked on or pinched, particularly at plugs,
electrical outlets, and point where the cords exit from the digital frame.
• Avoid touching the LCD screen surface. The screen can be scratched or broken, and
fingertips may leave an oily residue.
• Use only attachments/accessories specified by the manufacturer.
• Unplug the unit during lightning storms or when used for long periods of time. It is
recommended that you turn off and unplug the unit when it is not in use.
• If any fault occurs with the digital frame, first switch the power switch off, then unplug
the power cord from the wall outlet, then disconnect the power supply from the unit.
• Refer all servicing to qualified service personnel. Servicing is required when the
digital frame has been damaged in any way. For example, if the power cord has been
damaged, liquid has been spilled on or objects have fallen into the digital frame, the
digital frame has been dropped or expose to moisture, or is not operating normally.
• To clean the LCD screen: Gently wipe the LCD screen with a soft, non-abrasive, lint-
free cloth, such as a camera lens cloth. Do not use liquids of any kind on the LCD
screen.
6
Page 7

Technical Specifications
Model GBE104v2.2
Size 14.6" (H) x 12.5" (V) x 2.8" (D)
Display Area 8.3" (H) x 6.2" (V)
Diagonal Display Length 10.4"
Resolution 800 x 600 pixels
Colors 262,144
Brightness
350cd/㎡
Viewing Angle
Response Time Rise:20ms - Decay:40ms
Rating DC 12V / 1.5A
Working Temperature
Output System NTSC
File Format Supported JPEG, MP3, MPEG1, MPEG4 (DivX, XviD)
Internal Memory 128MB
Memory Cards CF, xD, MMC, SD, MS , MS Pro
Remote Battery Type Lithium 3V (CR2025)
Memory Card Type Minimum / Maximum Capacity
CF 8MB - 4GB
xD 8MB - 1GB
MMC 8MB - 1GB
SD 8MB - 1GB
MS 16MB - 2GB
Horizontal: 70° - Vertical: 70°
-10°C ~ +65°C
MS-Pro 16MB - 2GB
Box Contents
Description Quantity
GBE104v2.2 Digital Photo Frame 1
Back Stand 1
Operating Manual 1
Remote Control 1
Lithium Battery 3V - CR2025 (for remote) 1
AV Cable (Audio / Video Cable) 1
AC Power Adapter w/ Cable 1
USB Cable 1
7
Page 8
The Digital Photo Frame
es
d
Figure 1 – Front View
Receiver Sensor
Figure 3
Figure 4
1.
2.
3.
4.
5.
6.
7.
8.
9.
10.
1.
2.
3.
4
Figure 2 – Rear View
Wall Mount Hol
Back Stan
Figure 3 – Side View 1
1. SLAVE: (Mini USB 5-Pin port) –
connects to PC in order to send or
receive files from the digital photo
frame’s internal memory.
2. HOST: USB Host port – Can be
used to communicate with other
memory card readers.
3. xD, MMC, SD, MS , MS Pro –
Memory card port.
4. CF – Memory card port.
Figure 4 – Side View 2
1. POWER Light Indicator
2. Menu
3. RIGHT
4. LEFT
5. OSD
6. UP
7. DOWN
8. ENTER
9. ON/OFF Switch
10. AC Adapter Connection
(On-Screen Display)
8
Page 9

Figure 5
1 2
1. A/V OUT
2. EARPHONE
The Remote
The diagram below shows the digital photo frame’s remote, with control buttons. The battery type is Lithium 3V
(CR2025).
Remote Symbols
• LEFT, RIGHT, UP DOWN buttons,
respectively: , , ,
• Play/Pause button:
• Stop button:
• Reverse button:
• Forward button:
9
Page 10

Getting Started
Setting up your digital photo frame
1. Remove the contents from the box.
2. Review the Safety Instructions on page 5.
3. Remove the protective plastic sheeting from the LCD screen.
4. Install the Back Stand by placing it on the aperture and turning it clockwise. View
diagram below for more information.
5. Remove the protective film between the remote’s battery and the battery terminal.
6. Plug the AC adaptor into an electrical outlet and connect the power cord to the digital
photo frame.
7. Before switching the digital photo frame ON, insert your media card into the
appropriate slot.
8. Turn the power switch to the “on” position.
9. Your digital photo frame will automatically take you to the main Menu.
10. By default, PHOTO will be selected on the main menu. To view your digital pictures,
press the PHOTO button on your remote control. Choose your memory card using
LEFT or RIGHT arrow button until your memory card option is selected on your
screen and press ENTER. On the next screen you will see source of your memory
card and press ENTER to see them.
11. Your pictures will automatically start playing in slideshow mode.
12. To play music while viewing your digital pictures, press the COMBO button on your
remote.
NOTE: Your memory card must contain compatible music files in the same
folder with your pictures. Please review the file types supported by your digital
photo frame on page 6.
Inserting and Removing Media Cards
When inserting or removing media cards, keep the following in mind:
• Warning: To prevent damage to the unit or memory card, please make sure that
the unit is turned off when inserting or removing the memory card.
• The digital photo frame supports the Compact Flash™ (CF), xD-Picture Card™ (xD),
Multi Media™ (MMC), SD™ card (SD), Memory Stick™ (MS) and Memory Stick Pro™
(MS-Pro). Do not attempt to insert any other card or media into the digital
frame’s card slot.
10
Page 11

• Do not force cards into the slot. If the card does not slide eas ily into the slot, make
sure that you are inserting the card into the correct slot and make sure the card is
facing the correct direction.
• When applicable, make sure the card is in the unlock position before inserting.
Installing or Changing the Remote’s Battery
1. Turn the remote upside down, so that the buttons are facing away from you.
2. Pinch the edges of the battery tray toward the center to release the catch.
3. Gently slide the battery tray from the remote.
4. Place a CR2025 lithium battery on the tray, with the positive “+” end facing toward you.
5. Close the battery tray.
DIGITAL PHOTO FRAME MAIN MENU
Basic Operations
Photo – (Displaying Images)
1. Go to the main menu by pressing the MENU button on your remote until the main
menu appears.
2. Use the LEFT
your screen and press ENTER.
3. On the next screen, you will have an option between Internal Memory drive and your
memory card drive. Using the LEFT
select the drive you would like to use and press the ENTER button.
or RIGHT arrow button until the PHOTO option is selected on
or RIGHT arrow buttons from your remote,
11
Page 12

4. Select the file you would like to display by using the UP or DOWN arrow buttons
and press ENTER. (There may be several subfolders. You may have to press the
ENTER key more than once to get to your picture files).
5. The pictures will display in auto mode. To change from auto mode to manual mode,
press the OSD button. Then you will have eight options to choose manually.
(Play/Pause, Stop, Rotate, Zoom in, Rewind, Next, File Spec and Thumbnails) You
can use the LEFT or RIGHT arrow button to navigate through the eight options
and use the ENTER key to confirm your selection.
AUTO / MANUAL – Mode
Play stage / Play / Stop / Rotate / Zoom / Reverse / Next / File spec / Nine thumbnails
Optional: You can use the remote’s NEXT or REVERSE arrow buttons to scroll
through images while in manual mode.
NOTE: Depending on the size of the files you have on your memory card, the photo
might take as long as 12 seconds to display. For optimal performance, use the
recommended resolution of 800 x 600 pixels.
Music – (Playing Music)
1. If you are not already at the main menu, press the MENU button from the remote until
you arrive at the main menu.
2. Use the LEFT or RIGHT arrow button until the MUSIC option is selected on
your screen and press ENTER.
3. On the next screen, you will have an option between Internal Memory drive and your
memory card drive. Using the LEFT or RIGHT arrow buttons from your remote,
select the drive you would like to use and press the ENTER button.
4. Select the file you would like to display by using the UP or DOWN arrow buttons
and press ENTER. (There may be several subfolders. You may have to press the
ENTER key more than once to get to your picture files).
5. On the next screen, On Screen Display option will appear while playing your music file.
You can navigate the On Screen Display control panel using the LEFT or RIGHT
arrow buttons on your remote and the ENTER button to confirm. At the end of the
On Screen Display bar you will have 3 options to listen your music. Standard, Repeat
One and Dir Repeat (Repeat entire Directory music files) press the ENTER key to
change these options.
6. You can also use Play/Pause button: , PREVIOUS or NEXT buttons directly
from your remote control.
Optional: Use the remote’s MUTE, VOL- and VOL+ buttons to control music volume.
Hint: You can also press the MUSIC button on your remote to navigate your music
files.
*** Please note that only MP3 files will be played. If they are not MP3, you will need to
convert to MP3 files using your computer software.
12
Page 13

Combo - (Displaying images and music simultaneously)
1. Go to the main menu by pressing the MENU button on your remote until the main
menu appears.
2. Use the LEFT or RIGHT arrow button until the COMBO option is selected on
your screen and press ENTER.
3. On the next screen, you will have an option between (internal Memory and your
memory card drive. Use the LEFT or RIGHT arrow buttons on your remote to
select the drive you would like to use, and then press the ENTER.
4. A list of files will appear. Select the file you would like to display by using the UP or
DOWN arrows and press ENTER.
5. The pictures and music will automatically start. The pictures will display in slide show
mode.
6. Pressing the OSD button will display the Control Menu bar.
7. Use the remote’s MUTE, VOL- and VOL+ buttons to control the volume.
NOTE: Depending on the size of the files you have on your memory card, the photo
can take as long as 12 seconds to display. For optimal performance, use the
recommended resolution of 800 x 600 pixels.
Hint: You can also press the COMBO button on your remote to navigate.
Movie – (Playing Movies)
1. If you are not already at the main menu, press the MENU button on the remote until
you arrive at the main menu.
2. Use the LEFT or RIGHT arrow button until the MOVIE option is selected on
your screen and press ENTER.
3. On the next screen, you will have an option between Internal Memory drive and your
memory card drive. Using the LEFT or RIGHT arrow buttons from your remote,
select the drive you would like to use and press the ENTER button.
4. Select the movie file you would like to display by using the UP
or DOWN arrow
buttons and press ENTER. (There may be several subfolders. You may have to press
the ENTER key more than once to get to your picture files).
5. During playing your file pressing OSD button on your remote will display control Menu.
(Play/Pause, Stop, Previous, Rewind, Forward, Next, File Spec and ZOOM IN) you
can use the LEFT
or RIGHT arrow button to navigate and use ENTER key to
confirm.
Hint: You can also press the MOVIE button on your remote to navigate your movie
files.
NOTE: Your memory card must contain compatible movie format (.mjpeg or .avi)
Text – ( .TXT Format files only)
1. Go to the main menu by pressing the MENU button on your remote until the main
menu appears.
13
Page 14

2. Use the LEFT or RIGHT arrow button until the TEXT option is selected on your
screen and press ENTER.
3. On the next screen, you will have an option between internal Memory and your
memory card drive. Using the LEFT or RIGHT arrow buttons from your remote,
select the drive you would like to use and press the ENTER button.
4. A list of files will appear. Select the file you would like to display by using the UP or
DOWN arrow and press ENTER.
5. Your text file will appear on your screen.
6. To navigate the text file, use the arrow keys. The UP or DOWN arrow keys will
let you scroll through the file one line at a time. LEFT or RIGHT arrow keys will
let you scroll through the file one screen at a time.
Edit – (COPY and DELETE Files)
1. Go to the main menu by pressing the MENU button on your remote until the main
menu appears.
2. Use the LEFT or RIGHT arrow button until the EDIT has been selected and
then press the ENTER button on your remote.
3. On the next screen, you will have an option between internal Memory drive and your
memory card drive. Use the LEFT or RIGHT arrow to select the drive. Press
the ENTER key on your remote to see your file folder. Once you see your files, the
ENTER key will mark the file(s) you would like to copy or delete. Marked file(s) will be
ready to be copied or deleted.
4. Use the UP or DOWN arrow buttons to navigate your files. You may mark
additional files by pressing the ENTER button.
5. Press the OSD button on your remote to view the operation options (return, paste, and
delete).
6. RETURN OPERATION: press ENTER to cancel the operation.
7. PASTE OPERATION: Once you mark the files using ENTER key will let you copy your
files to another folder. Once you marked your files go back to directory menu using
LEFT arrow key. Find the folder that you will like to paste. Once you find the folder
then use RIGHT
choose the 2
nd
8. DELETE OPERATION: Press ENTER to mark file(s) you would like to delete then
press OSD button and choose the 3rd option from the menu and press ENTER.
Confirm that you would like to delete the file(s) using the ENTER key or any other key
to cancel the operation.
arrow key to go into the folder then press the OSD button and
option (Paste) from the menu to paste your copied files.
Settings – (Advanced Operations)
1. Go to the main menu by pressing the MENU button on your remote until the main
menu appears.
2. Press the LEFT or RIGHT arrow button until SETTINGS is selected and then
press the ENTER button on your remote.
3. On the next step you will have Settings Menu options (from top to bottom, 1.Language
Settings, 2.Slideshow Settings, 3.Clock Settings, 4.Alarm Settings, 5.Color Settings,
6.Factory Reset and 9. Model No). You can navigate your options using the UP or
DOWN arrows, and you may highlight your selection by pressing the ENTER key.
14
Page 15

Language Settings:
• Press ENTER to highlight then make your selection using the UP or DOWN
arrows then, confirm your selection by pressing ENTER. Press the LEFT to go
back to the menu.
Slideshow Settings:
• Press ENTER to highlight the section then make your selection using the UP or
DOWN arrows. Then press ENTER to see your options. Slide show Speed has 3
options which you may review by using the UP or DOWN arrows. Press ENTER
to make your selection. Press LEFT to go back the menu. Left arrow will always
take you to previous menu. Slideshow Mode has 5 options which you may review by
using the UP or DOWN arrows. Press ENTER to make your selection. Press
LEFT to go back the menu.
Clock Settings:
• Press ENTER to highlight the section. Use the UP or DOWN arrows to change
the year. Press the RIGHT arrow button to skip to the month and use the UP or
DOWN arrows to change the month. Press the RIGHT arrow button to skip to
the date and use the UP or DOWN arrow to change the date. Press the RIGHT
arrow button to skip to the hour and use the UP or DOWN arrow to change
the hour. Press the RIGHT arrow button to skip to the minute and use the UP or
DOWN arrow to change the minute. To change the time format from a 12 hour
(AM/PM) format to a 24 hour format, press the RIGHT arrow button followed by the
UP or DOWN arrow to make your selection. Confirm your selection by pressing
the ENTER key.
Alarm Settings:
• Press ENTER to highlight the section. Use the UP or DOWN arrows to change
the year. Press the RIGHT arrow button to skip to the month and use the UP or
DOWN arrows to change the month. Press the RIGHT arrow button to skip to
the date and use the UP or DOWN arrow to change the date. Press the RIGHT
arrow button to skip to the hour and use the UP or DOWN arrow to change
the hour. Press the RIGHT arrow button to skip to the minute and use the UP or
DOWN arrow to change the minute. Press the RIGHT arrow button to skip to
the ring type and use the UP
Press the RIGHT
arrow button to skip to the alarm option and use the UP or
or DOWN arrow to select ring type 1, 2 or 3.
DOWN arrow to select ON or OFF. Confirm your selection by pressing the ENTER
key.
15
Page 16

Color Settings:
Press ENTER to highlight the section then use the UP or DOWN arrow to
navigate the sections. Using LEFT or RIGHT arrow buttons will change your
settings on highlighted section.
Factory Reset:
• Press ENTER to highlight the section then press the ENTER key on your remote to
reset. When you have completed your changes, press the ENTER key to save and
press MENU button on your remote control to go back to Main Menu.
NOTE: At any time during settings menu using option 7 will reset your digital frame to
factory settings.
Calendar / Clock – (Displaying date and time on your frame)
1. Go to the main menu by pressing the MENU button on your remote until the main
menu appears.
2. Use the LEFT or RIGHT arrow button until the CALENDAR option is
selected on your screen and press ENTER.
Alarm – (Model 104v2.2 Only)
Advanced Operations
Viewing a Thumbnail Digest of Images
1. Press the remote’s PHOTO button.
2. On the next screen, you will have an option between internal Memory drive and/or
your memory card drive. Use the LEFT
Press the ENTER key on your remote to go into file folder. Once you see your files
press ENTER to play them.
3. Once the images are playing, press the remote’s OSD button.
4. A control panel will appear. Press ENTER and PAUSE your slideshow.
5. Using the LEFT or RIGHT arrow from your remote, select the thumbnail icon.
Press ENTER.
6. The thumbnail view will launch automatically.
7. You may navigate the thumbnail view using the UP , DOWN , LEFT or
RIGHT arrow from your remote. To play a specific image, press ENTER on the
remote once it is highlighted.
8. Optional: Use the REVERSE or NEXT buttons on your remote control to
navigate between thumbnail pages. This function will work if your memory card
contains more than nine pictures.
16
or RIGHT arrow to select the drive.
Page 17

NOTE: Depending on the image size and resolution, it may take up to 12 seconds
for each thumbnail to appear. For optimal performance, use the recommended
resolution of 800 x 600 pixels.
HOST Mode – (Using your digital photo frame with an external USB card reader)
1. With the digital frame switched on, connect your external USB card reader to the
port labeled HOST. (Refer to figure 3 on page 7.)
2. Switch your digital photo frame’s power ON.
3. Your digital photo frame will automatically detect your external drive and assign an
available drive.
4. You may use the photo frame as normal. To view the media stored in the HOST
drive, make sure you select the appropriate section when while using the PHOTO,
MOVIE, COMBO, and TEXT or EDIT functions.
SLAVE Mode – (Adding media files to the digital photo frame’s internal memory)
1. Find the USB cable and note that it has two different USB connection types. One
side is labeled PC USB, and the other is labeled Mini-USB.
2. While the digital frame power is turned ON, plug the Mini-USB cable onto the
digital photo frame’s slave slot. NOTE: It is labeled as SLAVE on the digital photo
frame.
3. Now plug the USB cable onto your computer’s USB port. Please review the
diagram below for further clarification.
PC USB Mini-USB
SLAVE port
4. Your computer will automatically recognize the Digital Photo frame and create
several drive letters for it. The names will appear as:” Removable Disk (X :)”and”
Removable Disk (Y :)”, where “X and Y” are the letters drive assigned by your
computer. Your digital frame will show “Connecting PC…”
5. Locate the drive that contains your pictures.
6. To add files, you can drag the desired files from your computer onto the Photo
Frame removable drive folder. Refer to your computer’s user manual for moving
and copying files in your computer.
7. To safely remove the cable from your digital photo frame, make sure the power is
turned off.
8. Wait until Disconnected with PC; please restart appears on your digital frame.
9. Restart your digital frames to update the files.
NOTE: While the digital photo frame is connected to your computer, no other
functions are accessible.
17
Page 18

AUDIO OUT / VIDEO OUT - Mode
You can connect your digital frame to an external device (i.e., TV) to display your
media from your digital photo frame.
1. With the digital frame switched off, use the AV cables included with your device. Plug
the cables into the A/V OUT jacks located on the bottom edge of the digital frame.
(Please review Figure 5 on page 8.)
NOTE: Use only the cables supplied with your digital photo frame. Be sure to use the
correct cables for each source. The cables are color coded for your convenience.
Refer to your external device’s operating manual to identify the appropriate connection
source of your external device.
2. Make sure your input device is set to the appropriate setting (i.e., AV channel). Switch
the digital photo frame ON. Lastly, press the ZOOM button on your remote control.
(While you connect your digital photo frame into TV your digital frame screen will be
blank.) Refer to Setting up your digital photo frame on page 9.
3. While in AUDIO OUT / VIDEO OUT mode, all operations will function as normal. Use
your digital photo frame’s remote to play the media of your choice.
ADDITIONAL INSTRUCTIONS
HOW TO CREATE A FOLDER IN THE INTERNAL MEMORY
IMPORTANT NOTE: PC Required
1. Find the USB cable and note that it has two different USB connection types. One
side is labeled PC USB, and the other is labeled Mini-USB.
2. While the digital frame power is turned ON, plug the Mini-USB cables onto the
digital photo frame’s slave slot. NOTE: It is labeled as SLAVE on the digital photo
frame.
3. Now plug the USB cable onto your computer’s USB port. Please review the
diagram below for further clarification
PC USB Mini-USB
SLAVE port
4. Your computer will automatically recognize the Digital Photo frame and create a
drive letter for it. The name will appear as,”Removable Disk (X :)”, where “X” is the
letter drive assigned by your computer.
5. You can also choose My Computer then double click on” (Removable Disk (X :)”,
where “X” is the letter drive assigned by your computer.
18
Page 19

6. Using your mouse- right click “New” then choose a “Folder”; while folder is
highlighted you might want to rename your newly created folder. “New Folder” to
“John’s Birthday”. You can create more than one folder at this time.
7. To add files, you can drag the desired picture files from your computer onto the
Photo Frame internal memory drive folder. Refer to your computer’s user manual
for moving and copying files in your computer.
8. To safely remove the cable from your digital photo frame, make sure the power is
turned off.
9. Restart your digital frames to update the files.
NOTE: While the digital photo frame is connected to your computer, no other functions
will be accessible.
HOW TO COPY FILES FROM MEMORY CARD TO INTERNAL MEMORY USING REMOTE
CONTROL
a. IMPORTANT NOTE: Make sure your memory card is in the proper drive and
Digital Frame Turned On
2. From Main Menu locate and choose EDIT
3. On the next page you will see your memory card drive and Digital Frame Internal
Memory shown as MEMORY.
4. Using LEFT arrow key to highlight your memory card.
5. Press ENTER to see all your files in your memory card.
6. Pressing ENTER key to mark the file(s) you want to copy; pressing twice to ENTER
key will unmark the file(s). If you like to copy or delete more than one file, use UP
or DOWN arrow key to select more files and mark it using ENTER key again.
7. Then using LEFT arrow key to go back and locate internal memory folder and
choose the OSD button. The OSD button will give you 3 options (Return, Paste and
Delete)
8. Choose the 2
nd
option from the menu using the DOWN arrow key. Pressing ENTER
will paste your pictures into internal memory or specific folder previously created.
IMPORTANT NOTE: Once you complete copying your files you must RESTART your
digital photo frame.
HOW TO COPY MUSIC FILES FROM MEMORY CARD TO INTERNAL MEMORY USING
REMOTE CONTROL
1. From Main Menu locate and choose EDIT.
2. On the next page you will see your memory card drive and Digital Frame Internal
Memory shown as MEMORY.
3. Using LEFT
button to highlight your memory card.
4. Press ENTER to see all your files in your memory card.
5. You can use the UP
or DOWN arrow buttons and each time pressing ENTER
key will let you mark more files.
6. Then using LEFT arrow key to go back and locate internal memory folder and
choose OSD button. The OSD button will give you 3 options (Return, Paste and
19
Page 20

Delete)
7. Choosing 2
nd
option from the menu using DOWN arrow key and using ENTER key
will paste your music file into internal memory or specific folder previously created.
IMPORTANT NOTE: Once you complete copying your files you must RESTART your
digital photo frame.
HOW TO DELETE FILES FROM YOUR MEMORY CARD OR INTERNAL MEMORY
1. From Main Menu locate and choose EDIT.
2. Find your memory card drive or Photo Frames Internal Memory.
3. Use the LEFT or RIGHT arrow keys to highlight the drive that you want to
delete files from.
4. Use the ENTER key to mark the file(s) you want to delete (pressing ENTER twice will
Unmark the file(s))
5. Pressing OSD button on your remote control will give you 3 options (Return, Paste
and Delete)
6. Choose 3
rd
option from the menu will delete your pictures; the following page will ask
you to confirm that you want to delete the files you selected.
IMPORTANT NOTE: Once you complete deleting your files you must RESTART your
digital photo frame.
HOW TO UPLOAD MUSIC FROM YOUR COMPUTER INTO INTERNAL MEMORY
IMPORTANT NOTE: You must use your PC
1. Plug your USB cable to your computer and Slave part to the Digital Frame.
2. You will see “CONNECTING PC…” on your digital Picture Frame screen.
3. Locate the folder inside of internal Memory of your digital frame using your computer.
HINT: The folder will be in MY Computer section in your PC.
4. You will see a several sub folders and/or your file folder previously created.
5. Locate your Music file from your computer or memory card drive and COPY (right click
on your mouse) then Paste into this folder or the folder previously created. You can
also drag the file from your computer and drop it in your digital frame’s internal
memory.
*** Please note that only MP3 files will be played. If the files are not MP3 files, you will
need to convert them to MP3 files with your computer software.
IMPORTANT NOTE: Make sure your memory card is in the proper drive and that the
Digital Frame is Turned On
HOW TO ZOOM IN/OUT OF YOUR PICTURES?
During your slideshow of your pictures, press the OSD button. In a few seconds, the
control panel will appear on your screen. Use the ENTER key to stop the slideshow.
Use the LEFT or RIGHT arrow on your remote control to locate the zoom icon
and press ENTER to zoom in. You can zoom into your pictures up to 5X.
20
Page 21

Troubleshooting
Digital frame does not power on
• Make sure the power is securely connected to the digital frame and to a working
electrical outlet.
• Check that the power switch on the side of your panel is switched ON.
Remote does not work
• Make sure the plastic protective film between the remote’s battery and battery terminal
has been removed, enabling the battery to work.
• Be sure to point the remote directly at the Receiver Sensor which is located as seen
on Figure 1 on page 7.
• Check the remote’s battery and replace it if needed. For more information, see
Installing or Changing the Remote’s Battery on page 9.
• The remote does not operate while in the SLAVE mode. Refer to SLAVE Mode on
page 14 for more information.
• While displaying audio/video from an external source (that is, when you have
connected the digital frame to an external device using the Audio In and Video In jacks
in the bottom of the frame) you will only have access to limited functions (volume and
setup).
No image is displayed
• Verify that there are image files on the card.
• Make sure the card is inserted properly.
• Make sure that the digital frame is turned on.
• Your card may contain images in a non-standard file format. The digital frame can
display images only in a JPG (JPEG) format. You can use image editing software to
convert non-standard image files to a standard JPG format and transfer them to your
media card with an appropriate adaptor.
Picture or movie display seems slow
• Higher-resolution images or movies take longer to load; if you are not satisfied with
the display speed, try using lower-resolution images.
• For movie files, be sure you are using a high-speed memory card.
Movie or pictures display in a small area of the screen
• Many digital cameras record movies or pictures at a 320 x 240 pixels (or lower)
resolution, which may result in movies being displayed in less than full-screen mode.
The digital frame optimal resolution is 800 x 600 pixels.
I uploaded my video file but it does not start
• Make sure your files are MJPEG or AVI. If the files other than MJPEG or AVI, you will
need to convert your files.
21
Page 22

I can not rotate an image the way I want to
• The remote’s ROTATE button alternates between rotating the images horizontally and
vertically. To return an image to its original position, you will have to click the ROTATE
button four times to cycle through to the original orientation.
• If you are trying to rotate an image during “auto mode” with a relatively short transition
time (such as a one- or three- second interval), the digital frame may not have time to
process all your rotate commands before it transitions to the next slide. Set the slide
show to “manual mode” and then press the ROTATE button.
• Movie files cannot be rotated.
I uploaded MP3 files but on COMBO option I can not hear my music
• Your MP3 files should be in the same folder with the pictures.
I can not display or hear external video/audio
• Make sure the audio and video cables are firmly connected to both the digital frame
and the external source of video/audio (DVD player, cable box, etc.)
• Make sure the audio and video cables are connected to the correct output jacks on
your external source.
FAQs:
Q: Is the LCD screen touch-enabled?
A: The LCD screen is not touch-enabled. Please use the keys on the side of the frame
to control Digital photo Frame.
Q: Can I use Digital photo frame to delete photos on memory card?
A: Yes, it does support operations to delete photos on external devices such as
memory cards.
Q: Can I print photos from Digital photo frame?
A: No, it does not support direct photo printing.
Q: What types of memory cards does GBE Digital support?
A: GBE Digital supports: SD™, Multimedia Card™, XD™, Memory Stick®, Memory
Stick Pro® and Compact Flash® (Type I).
Q: After copying photos, how can I check if the photos are already stored inside?
A: The photos are copied after the screen confirms with "photo copied" message. You
may then remove the card to view internal photos.
Q: Can I increase the memory size to store more pictures on my Digital Picture Frame?
A: No. The internal memory of Digital Picture Frame is fixed and cannot be expanded.
However, you could switch between different photos by using different memory cards
on Digital Picture Frame.
Q: Why Digital Photo Frame does not show some of my photos?
A: Digital cameras take photos and store them in JPEG format according to camera
22
Page 23

industry standards. Digital Photo Frame is designed to show following the same
industry standards. Some images, such as web images, scanned images, or photos in
RAW format from professional cameras, are not stored according to camera industry
standards and therefore cannot be correctly displayed on Digital Photo Frame. Please
use PC applications to convert such images into standard JPEG format for digital
Photo Frame.
Q: I'm trying to upload pictures from my PC directly to the Digital Picture Frame using
the USB connection, but I cannot get it working. What can I do?
A: Connect Photo Frame to PC and put photos directly under the Internal Memory
drive. Disconnect the USB cable. After a few seconds, all photos in the root directory
will be automatically added to Internal Memory. Please note that this operation does
not apply to photos in sub-directories.
Q: Why is the picture display slower with some pictures and faster with others?
A: Higher resolution pictures load slower. Try using lower resolution pictures.
Q: How do I transfer images to the digital photo frame?
A: There are three different ways to transfer images to your Digital photo frame.
1. Transfer files directly from your digital camera or storage device to the digital photo
frame via USB Cable.
2. Transfer files directly from your digital memory card by inserting them into the
picture frame and copying them to the internal memory.
3. Transfer files directly from your computer to the digital photo frame via USB cable.
Q: How do I contact for customer support center?
A: Send an email to: support@gbedigital.com
Need help? Call our customer support line at (877) 595-2040 or email us
cs@gbedigital.com. Operators are available between 9 a.m. and 5 p.m. CST,
Monday through Friday. Calls received after office hours will be returned the
following business day.
23
Page 24

Limited Warranty (USA only)
Limited Warranty Coverage
If the product does not work properly due to defect in materials or workmanship,
GBEDIGITAL (collectively refereed to as “the warrantor”) will, for the period of one year from
the date of purchase (“Limited Warranty Period”), at its option either (a) repair it, or (b)
replace it with a new or refurbished product. The decision to repair or replace will be made
by the warrantor.
During the Limited Warranty Period, there will be no charge for labor. You must mail in must
mail your product during the warranty period. If non-rechargeable batteries are included,
they are not warranted. This Limited Warranty is extended only to the original purchase, and
only covers products purchase as new. A purchase receipt or other proof of original
purchase date is required for Limited Warranty service.
Mail-In Service
To return your digital frame for Limited Warranty service, please follow these steps:
• Call GBEDIGITAL at (877) 595-2040 to obtain a return authorization number (RA).
• Carefully pack all contents (including cords, remote, documentation, etc.) in the
original packing.
• Enclose a letter detailing your complaint and referencing your return authorization
number. Include a daytime phone number and/or email address where you can be
reached. Attach your purchase receipt or other proof of original purchase.
• Send the package, prepaid and adequately insured, to:
GBEDIGITAL
c/o American Retail Distributors
8821 Knight RD
Houston, TX 77054
IF REPAIR IS NEEDED DURING THE LIMITED WARRANTY PERIOD, THE PURCHASER
WILL BE REQUIRED TO FURNISH A SALES RECEIPT/PROOF OR PURCHASE
INDICATING THE DATE OF PURCHASE, AMOUNT PAID, AND PLACE OF PURCHASE.
THE CUSTOMER WILL BE CHARGED FOR THE REPAIR OF ANY UNIT RECEIVED
WITHOUT SUCH PROOF OF PURCHASE.
Limited Warranty Limits and Exclusions
The limited Warranty COVERS ONLY failures due to defects in materials or workmanship
and DOES NOT COVER normal wear and tear or cosmetic damage. The Limited Warranty
ALSO DOES NOT COVER damages which occurred in shipment, or failures which are
caused by products not supplied by products not supplied by the warrantor, or failures which
result from accidents, misuse, abuse, neglect, mishandling, misapplication, alteration, faulty
installation, set-up adjustments, maladjustments of consumer controls, improper
maintenance, power line surge, lightning damage, modification, commercial use (such as
hotel, office, restaurant, or other business), rental use of the product or service by anyone
other than a factory service center or authorized service center, or damage that is attributable
to an act of God.
25
Page 25

THERE ARE NO EXPRESS WARRANTIES, EXPECT AS LIMITED UNDER “LIMITED
WARRANTY COVERAGE”. THE WARRANTOR IS NOT LIABLE FOR INCIDENTAL OR
CONSEQUENTIAL DAMAGES RESULTING FROM THE USE OF THIS PRODUCT, OR
ARISING OUT OF ANY BREACH OF THE WARRANTY. (As examples, this excludes
damages for lost time, cost of having someone remove or reinstall an installed unit if
applicable, travel to and from the service center, or loss of or damage to media, images, data,
or other recorded content. The items listed are not exclusive, but are for illustration only.)
ALL EXPRESS AND IMPLIED WARRANTIES, INCLUDING THE WARRANTY OF
MECHANTABILITY, ARE LIMITED TO THE PERIOD OF THE LIMITED WARRANTY.
Some states do not allow the exclusion or limitations of incidental or consequential damages,
or limitations on how long an implied Limited Warranty lasts, so the exclusion may not apply
to you.
This Limited Warranty gives you specific legal rights, and you may also have other rights
which vary from state to state. If a problem with this product develops during or after the
Limited Warranty period, you may contact your dealer or service center. If the problem is not
handled to your satisfaction, then write to the warrantor’s Consumer Affairs Department at
the address listed for the warrantor.
For more information:
WWW.GBEDIGITAL.COM
General Questions: info@gbedigital.com
Customer service: cs@gbedigital.com
Product Support: support@gbedigital.com
26
 Loading...