

NSI 6368 Instructions Manual
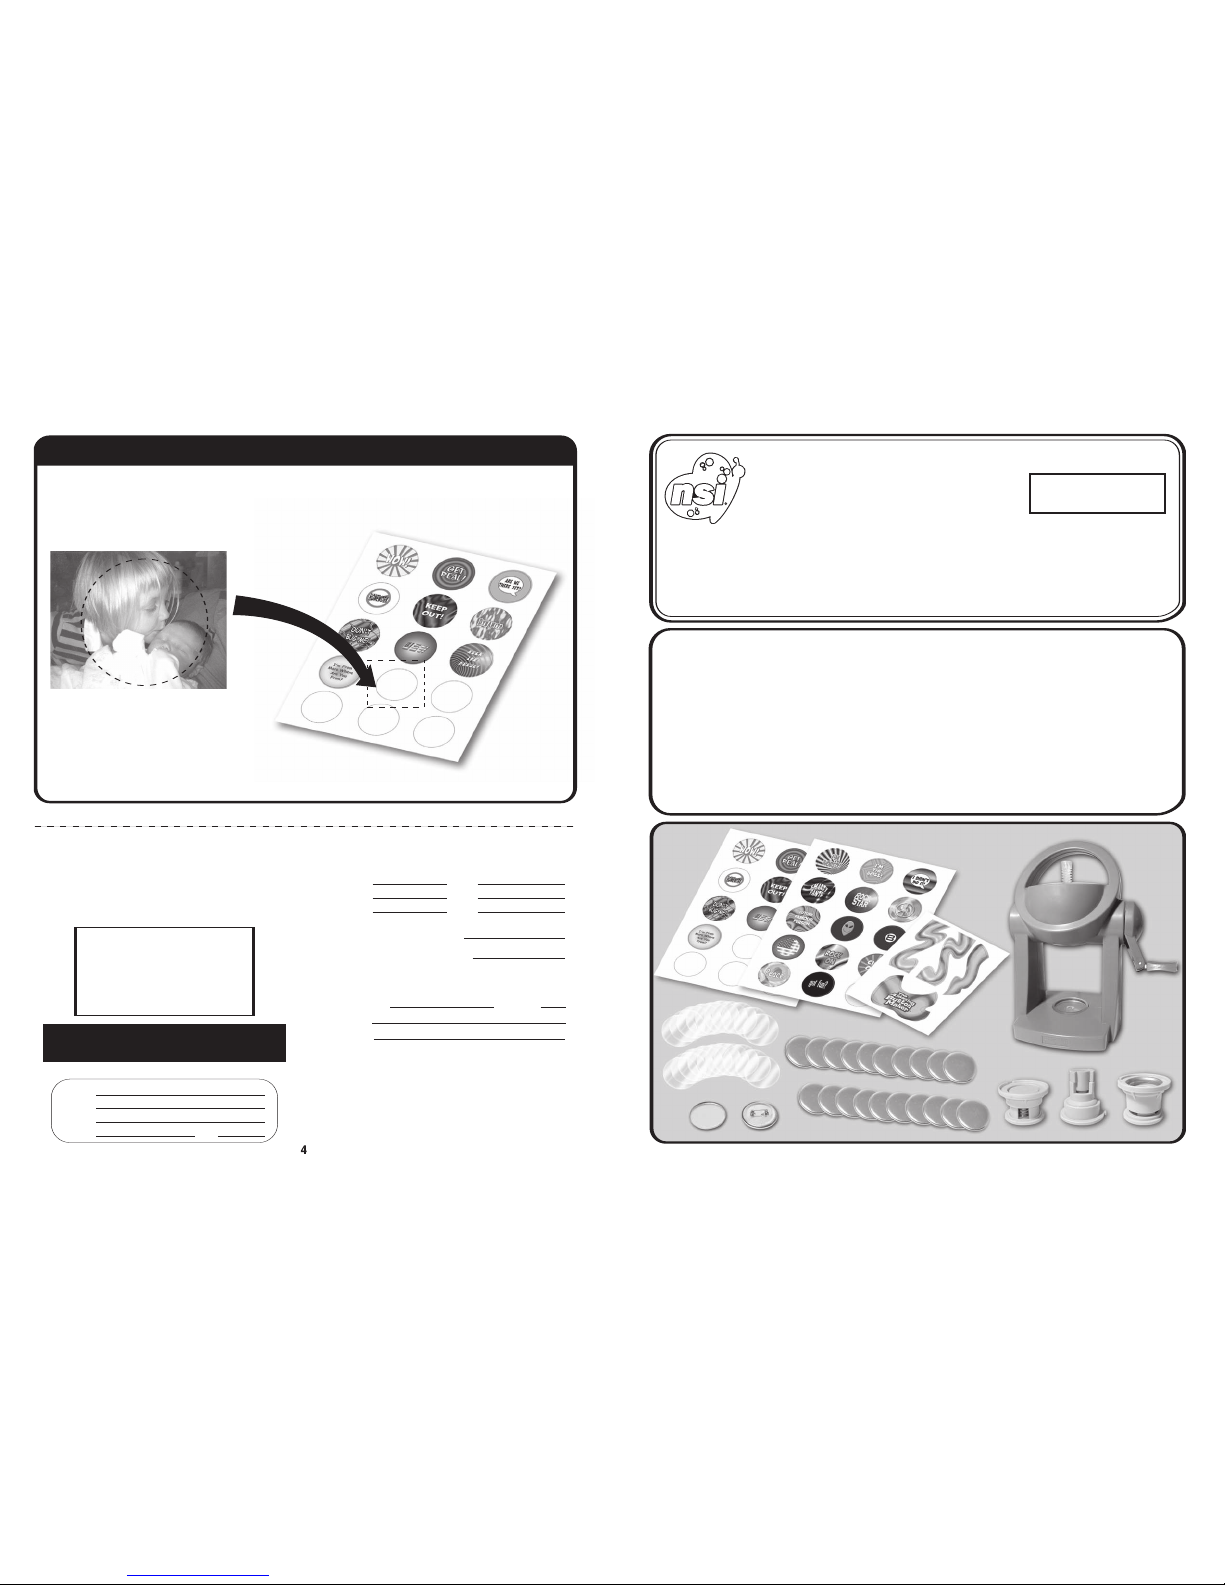
To Use Your Own Design or Photo
Simply use the blank design as a guide to cut out your design or photo.
Actual Size
Visit our website: www.nsi-int.com
Ages 8 and up
The Amazing
Button Maker
™
No. 6368
C
onforms to ASTM-D4236
Your set contains the following items:
2 Design Sheets
Machine
Labels
Button Machine
Base A
Front Back
20 Clear Sheets
20 Buttons
Base B Base C
©
MMII NSI INTERNATIONAL,INC., FARMINGDALE, N.Y. 11735-1318
PRINTED IN CHINA.
Dear Customer,
We hope you enjoy our The Amazing Button Maker
™
set. If you find that we have made an error or
if something is missing or damaged, let us know so that we can correct the problem for you.
Please include the following:
• Name of item
• Model number
• Date of Purchase
• Place of Purchase
• Purchase Price (please include sales slip)
• Brief description of the problem
Do not return the kit to the store where you purchased it, they will not have the replacement parts!
Send all correspondence to: NSI International, Inc.
105 Price Parkway,
Farmingdale, NY 11735-1318
Attn: Quality Control Department
REFILL PARTS FOR ITEM NO. 6368 The Amazing Button Maker
™
Button Backs & Fronts with Pin (20 each). . . . . . . . . . .
Design Sheets (2 each) . . . . . . . . . . . . . . . . . . . . .
Acetate Circles (20 each) . . . . . . . . . . . . . . . . . . .
$
$
$
$ 3.00
$ 1.00
$ 1.00
Amount of sets Total Price
Add shipping and handling:
Total amount enclosed: $
Name of card Exp. date
Card No.
Signature
Allow two extra weeks for check processing
Mailing label: Please print clearly
Name
Street
City
State Zip
Mail this form with check,
money order or credit card
information to:
NSI International, Inc.
105 Price Parkway
Farmingdale, NY 11735-1318
We also accept Visa or Mastercard
(Over $60.00 please call)
Order Total
$ -
$ 10.01
$ 15.01
$ 25.01
$ 35.01
$ 40.01
$ 50.01
$ 10.00
$ 15.00
$ 25.00
$ 35.00
$ 40.00
$ 50.00
$ 60.00
Shipping Cost
$ 5.00
$ 8.00
$ 11.00
$ 13.00
$ 16.00
$ 19.00
$ 23.00
P
ins contains functional
sharp points and edges. Adult
supervision recommended.
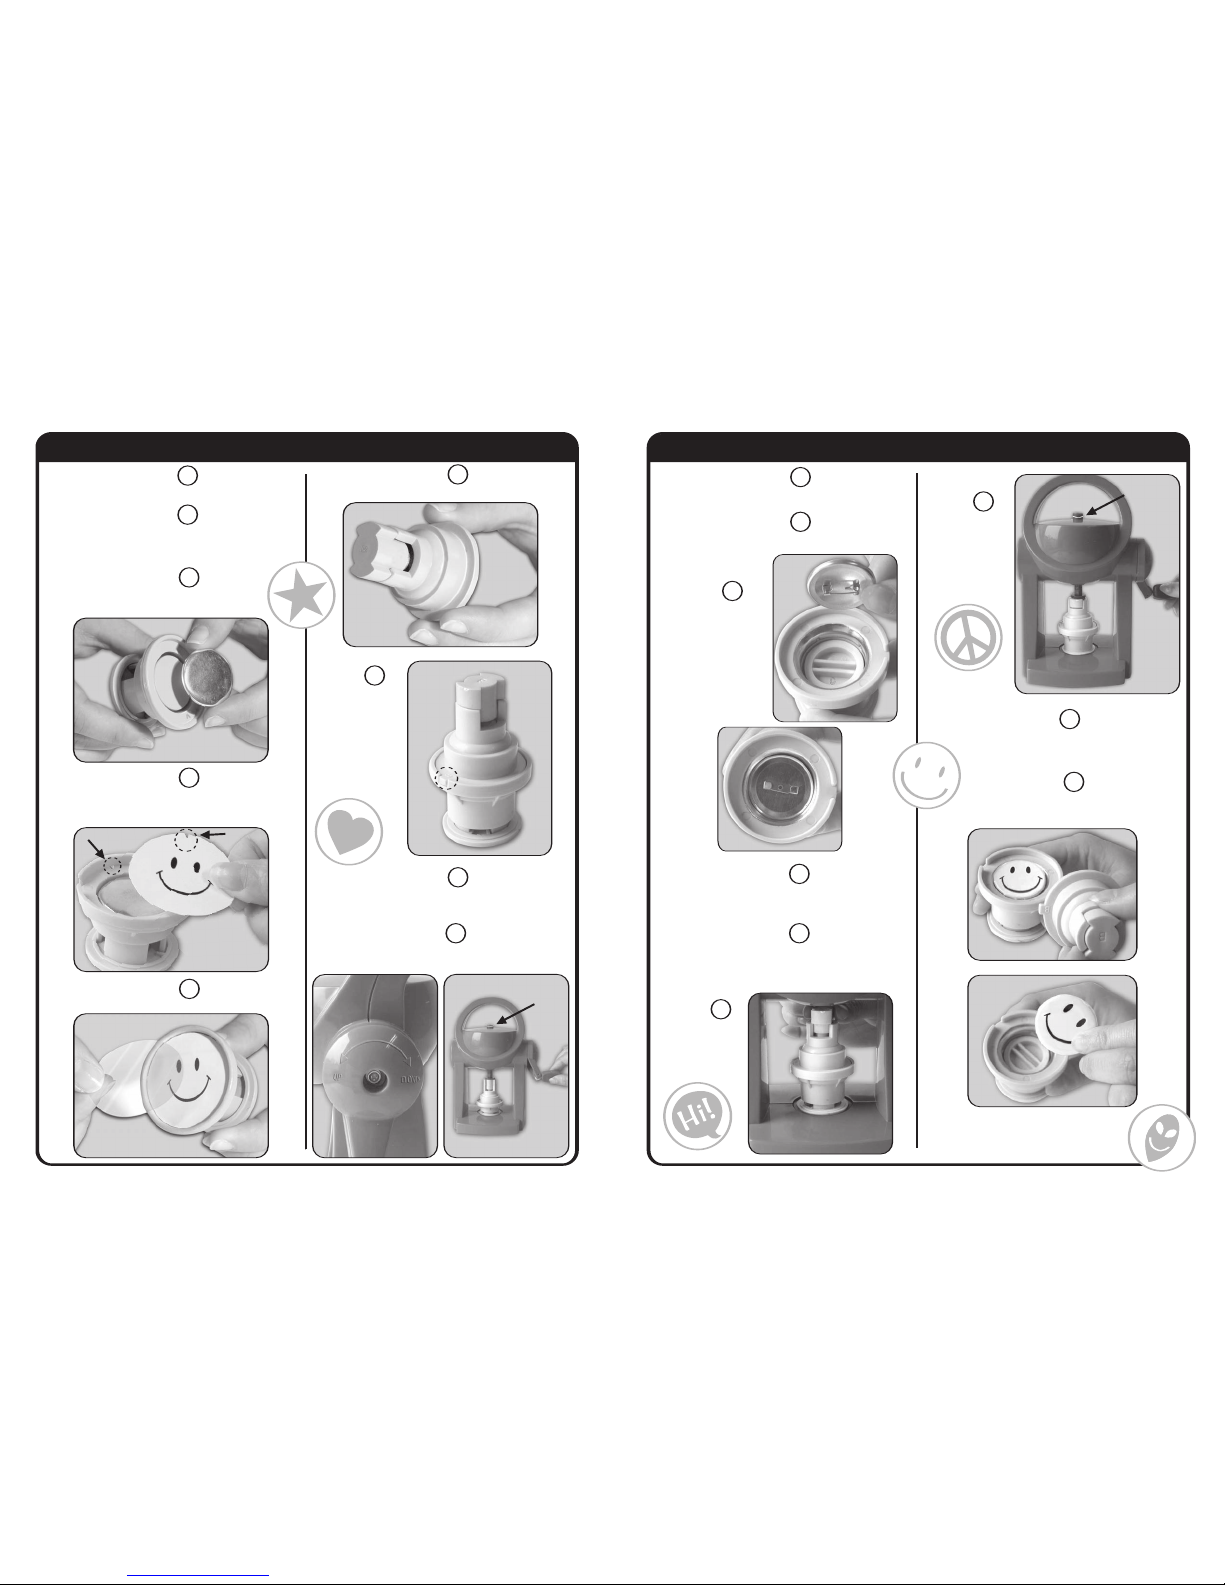
INSTRUCTIONS
2
3
Turn handle up all the way (counter-clockwise).
Take the base marked "B" and twist up (figure #4).
Figure #4
Place Base "B"
onto the top
of Base "A"
aligning the tag
on Base "B"
to the notch
on Base "A"
(figure #5).
Figure #10B
Turn handle down (clockwise) (Figure #6A)
until the rod reaches line #1 (Figure #6B).
Remove Bases "A" and "B".
Step 11
Figure #8
Take Base "B"
and twist 1/4
of the way
(figure #8).
Step 15
Step 9
Next, place onto base of Button Maker inside
round indented space, making sure it lays flat.
Step 8
Place button bottom
on Base "C"
with pin side down
(figure #7A).
Pin direction
should follow
groove on
Base "C"
(figure #7B).
Step 12
Next, place onto the base of the Button
Maker inside round indented space,
making sure it lays flat.
Step 14
Turn handle all the way up
(counter-clockwise).
Step 17
Remove your completed button!
Step 18
Look at the button designs and choose the one you
want to make. They are perforated, so gently
remove from the sheet.
Step 2
Add decorative labels to machine.
(See box for design placement)
Step 1
Step 4
Figure #1
Step 3
Place the button top (figure #1) onto
the Base marked "A", facing up.
Step 6
Step 7
Figure #3
Step 5
Place the round acetate sheet on top (figure #3).
Step 10
Place the design sheet on top, facing up,
match the notch on the design sheet
to the rib on Base "A" (figure #2).
Figure #5
Figure #2
Figure #6A Figure #6B
Figure #7A
Figure #7B
Turn handle down
(clockwise) until
the rod
reaches line #1
(figure #9).
Step 16
Figure #10A
Line #1
Rib
Notch
Figure #9
Place Base "B" on top of Base "C" aligning the tag
on Base "B" to the notch on Base "C".
Step 13
Line #1
 Loading...