

Page 1

Virtual Machine Management Guide
Novell®
PlateSpin Orchestrate
novdocx (en) 13 May 2009
AUTHORIZED DOCUMENTATION
2.0.2
November 17, 2009
www.novell.com
PlateSpin Orchestrate 2.0 Virtual Machine Management Guide
Page 2

Legal Notices
Novell, Inc., makes no representations or warranties with respect to the contents or use of this documentation, and
specifically disclaims any express or implied warranties of merchantability or fitness for any particular purpose.
Further, Novell, Inc., reserves the right to revise this publication and to make changes to its content, at any time,
without obligation to notify any person or entity of such revisions or changes.
Further, Novell, Inc., makes no representations or warranties with respect to any software, and specifically disclaims
any express or implied warranties of merchantability or fitness for any particular purpose. Further, Novell, Inc.,
reserves the right to make changes to any and all parts of Novell software, at any time, without any obligation to
notify any person or entity of such changes.
Any products or technical information provided under this Agreement may be subject to U.S. export controls and the
trade laws of other countries. You agree to comply with all export control regulations and to obtain any required
licenses or classification to export, re-export or import deliverables. You agree not to export or re-export to entities on
the current U.S. export exclusion lists or to any embargoed or terrorist countries as specified in the U.S. export laws.
You agree to not use deliverables for prohibited nuclear, missile, or chemical biological weaponry end uses. See the
Novell International Trade Services Web page (http://www.novell.com/info/exports/) for more information on
exporting Novell software. Novell assumes no responsibility for your failure to obtain any necessary export
approvals.
novdocx (en) 13 May 2009
Copyright © 2007-2009 Novell, Inc. All rights reserved. No part of this publication may be reproduced, photocopied,
stored on a retrieval system, or transmitted without the express written consent of the publisher.
Novell, Inc., has intellectual property rights relating to technology embodied in the product that is described in this
document. In particular, and without limitation, these intellectual property rights may include one or more of the U.S.
patents listed on the Novell Legal Patents Web page (http://www.novell.com/company/legal/patents/) and one or
more additional patents or pending patent applications in the U.S. and in other countries.
Novell, Inc.
404 Wyman Street, Suite 500
Waltham, MA 02451
U.S.A.
www.novell.com
Online Documentation: To access the latest online documentation for this and other Novell products, see
the Novell Documentation Web page (http://www.novell.com/documentation).
Page 3

Novell Trademarks
For Novell trademarks, see the Novell Trademark and Service Mark list (http://www.novell.com/company/legal/
trademarks/tmlist.html).
Third-Party Materials
All third-party trademarks are the property of their respective owners.
novdocx (en) 13 May 2009
Page 4

novdocx (en) 13 May 2009
4 PlateSpin Orchestrate 2.0 Virtual Machine Management Guide
Page 5

Contents
About This Guide 7
1 Managing Virtual Machine Hosts 9
1.1 Configuring Policies for VM Provisioning Adapters . . . . . . . . . . . . . . . . . . . . . . . . . . . . . . . . . . 9
1.1.1 Configuring Policies for Virtual Center. . . . . . . . . . . . . . . . . . . . . . . . . . . . . . . . . . . . . 9
1.1.2 Configuring Policies for Xen 3.0 . . . . . . . . . . . . . . . . . . . . . . . . . . . . . . . . . . . . . . . . 12
1.1.3 Configuring Policies for VMware Server . . . . . . . . . . . . . . . . . . . . . . . . . . . . . . . . . . 12
1.1.4 Configuring Policies for Hyper-V . . . . . . . . . . . . . . . . . . . . . . . . . . . . . . . . . . . . . . . . 13
1.1.5 Configuring Policies for ESX . . . . . . . . . . . . . . . . . . . . . . . . . . . . . . . . . . . . . . . . . . . 14
1.2 Discovering VM Hosts and Repositories . . . . . . . . . . . . . . . . . . . . . . . . . . . . . . . . . . . . . . . . . 15
1.3 Discovering VM Images . . . . . . . . . . . . . . . . . . . . . . . . . . . . . . . . . . . . . . . . . . . . . . . . . . . . . . 16
1.4 Resynchronizing the VM Host’s State . . . . . . . . . . . . . . . . . . . . . . . . . . . . . . . . . . . . . . . . . . . 16
1.5 Shutting Down VM Hosts . . . . . . . . . . . . . . . . . . . . . . . . . . . . . . . . . . . . . . . . . . . . . . . . . . . . . 17
1.6 Restarting VM Hosts . . . . . . . . . . . . . . . . . . . . . . . . . . . . . . . . . . . . . . . . . . . . . . . . . . . . . . . . 18
1.7 Understanding VM Host Failover . . . . . . . . . . . . . . . . . . . . . . . . . . . . . . . . . . . . . . . . . . . . . . . 18
novdocx (en) 13 May 2009
2 Managing Virtual Machines 21
2.1 Provisioning a Virtual Machine. . . . . . . . . . . . . . . . . . . . . . . . . . . . . . . . . . . . . . . . . . . . . . . . . 21
2.2 Managing a Virtual Machine in Runtime . . . . . . . . . . . . . . . . . . . . . . . . . . . . . . . . . . . . . . . . . 22
2.2.1 Using the Right-Click Menu for Provisioning Actions. . . . . . . . . . . . . . . . . . . . . . . . . 22
2.2.2 Prerequisites for Performing Provisioning Actions on ESX VMs . . . . . . . . . . . . . . . . 25
2.2.3 Releasing a Virtual Machine from Usage . . . . . . . . . . . . . . . . . . . . . . . . . . . . . . . . . 27
2.2.4 Managing Virtual Machine Templates . . . . . . . . . . . . . . . . . . . . . . . . . . . . . . . . . . . . 27
2.2.5 Managed Virtual Machine Actions . . . . . . . . . . . . . . . . . . . . . . . . . . . . . . . . . . . . . . . 28
2.2.6 Virtual Machine Technology-Specific Actions . . . . . . . . . . . . . . . . . . . . . . . . . . . . . . 28
2.3 Resynchronizing the State of All VMs . . . . . . . . . . . . . . . . . . . . . . . . . . . . . . . . . . . . . . . . . . . 29
2.4 Resynchronizing the State of All VMs of a Specific VM Host. . . . . . . . . . . . . . . . . . . . . . . . . . 29
2.5 Shutting Down Multiple VMs . . . . . . . . . . . . . . . . . . . . . . . . . . . . . . . . . . . . . . . . . . . . . . . . . . 29
2.6 Destroying and Deleting a Virtual Machine . . . . . . . . . . . . . . . . . . . . . . . . . . . . . . . . . . . . . . . 30
3 Managing VM Repositories 31
3.1 Deploying a VM to the Local Repository . . . . . . . . . . . . . . . . . . . . . . . . . . . . . . . . . . . . . . . . . 31
3.2 Deploying a VM to the Datagrid Repository . . . . . . . . . . . . . . . . . . . . . . . . . . . . . . . . . . . . . . . 32
3.3 Deploying a VM to the NAS Repository . . . . . . . . . . . . . . . . . . . . . . . . . . . . . . . . . . . . . . . . . . 32
3.4 Deploying a VM to the SAN Repository . . . . . . . . . . . . . . . . . . . . . . . . . . . . . . . . . . . . . . . . . . 32
3.5 Virtual Repository. . . . . . . . . . . . . . . . . . . . . . . . . . . . . . . . . . . . . . . . . . . . . . . . . . . . . . . . . . . 33
4 Troubleshooting Provisioning Actions 35
5 Understanding Autoprep 41
5.1 Setting Autoprep Facts in the Development Client . . . . . . . . . . . . . . . . . . . . . . . . . . . . . . . . . 41
5.1.1 Setting Linux Autoprep Config Facts . . . . . . . . . . . . . . . . . . . . . . . . . . . . . . . . . . . . . 42
5.1.2 Setting Autoprep Network Adapter Facts . . . . . . . . . . . . . . . . . . . . . . . . . . . . . . . . . 43
5.2 Applying Autoprep Facts . . . . . . . . . . . . . . . . . . . . . . . . . . . . . . . . . . . . . . . . . . . . . . . . . . . . . 44
5.2.1 Example Autoprep Scenarios . . . . . . . . . . . . . . . . . . . . . . . . . . . . . . . . . . . . . . . . . . 45
Contents 5
Page 6

5.2.2 How Autoprep Works. . . . . . . . . . . . . . . . . . . . . . . . . . . . . . . . . . . . . . . . . . . . . . . . . 45
5.3 Known Autoprep Limitations . . . . . . . . . . . . . . . . . . . . . . . . . . . . . . . . . . . . . . . . . . . . . . . . . . 46
A Virtual Machine Technologies and Actions 47
A.1 Virtual Machine Technologies . . . . . . . . . . . . . . . . . . . . . . . . . . . . . . . . . . . . . . . . . . . . . . . . . 47
A.2 Xen Hypervisor on SLES 10 SP2 or SLES 11 Host. . . . . . . . . . . . . . . . . . . . . . . . . . . . . . . . . 49
A.2.1 Additional Xen Provisioning Adapter Information . . . . . . . . . . . . . . . . . . . . . . . . . . . 50
A.3 VMware Virtual Center . . . . . . . . . . . . . . . . . . . . . . . . . . . . . . . . . . . . . . . . . . . . . . . . . . . . . . . 50
A.3.1 Additional VMware Virtual Center Provisioning Adapter Information. . . . . . . . . . . . . 51
A.4 Microsoft Hyper-V Hypervisor . . . . . . . . . . . . . . . . . . . . . . . . . . . . . . . . . . . . . . . . . . . . . . . . . 52
A.5 VMware ESX VM Hypervisor (Experimental). . . . . . . . . . . . . . . . . . . . . . . . . . . . . . . . . . . . . . 53
B Documentation Updates 55
B.1 November 17, 2009 . . . . . . . . . . . . . . . . . . . . . . . . . . . . . . . . . . . . . . . . . . . . . . . . . . . . . . . . . 55
B.2 July 9, 2009 . . . . . . . . . . . . . . . . . . . . . . . . . . . . . . . . . . . . . . . . . . . . . . . . . . . . . . . . . . . . . . . 55
B.3 June 17, 2009 (2.0.2 Release). . . . . . . . . . . . . . . . . . . . . . . . . . . . . . . . . . . . . . . . . . . . . . . . . 55
novdocx (en) 13 May 2009
6 PlateSpin Orchestrate 2.0 Virtual Machine Management Guide
Page 7

About This Guide
In addition to managing virtual machines (VMs) and host servers using the PlateSpin® Orchestrate
VM Client, you can do other management work using the PlateSpin Orchestrate Development
Client. This Virtual Machine Management Guide provides instructions on the management tasks
that you can do in the Development Client.
The guide is organized as follows:
Chapter 1, “Managing Virtual Machine Hosts,” on page 9
Chapter 2, “Managing Virtual Machines,” on page 21
Chapter 3, “Managing VM Repositories,” on page 31
Chapter 4, “Troubleshooting Provisioning Actions,” on page 35
Chapter 5, “Understanding Autoprep,” on page 41
Appendix A, “Virtual Machine Technologies and Actions,” on page 47
Appendix B, “Documentation Updates,” on page 55
novdocx (en) 13 May 2009
For documentation on using Orchestrate jobs to further manage VMs, host machines, and physical
machines, see “Virtual Machine Job Development” in the PlateSpin Orchestrate 2.0 Developer
Guide and Reference.
Audience
This book is for data center administrators. It assumes that users of the product have the following
background:
General understanding of network operating environments and systems architecture
Knowledge of basic Linux* shell commands, the Windows* command prompt, and text editors
Feedback
We want to hear your comments and suggestions about this manual and the other documentation
included with this product. Please use the User Comments feature at the bottom of each page of the
online documentation, or go to www.novell.com/documentation/feedback.html (http://
www.novell.com/documentation/feedback.html) and enter your comments there.
Additional Documentation
In addition to this Virtual Machines Management Guide, PlateSpin Orchestrate 2.0 includes the
following additional guides that contain valuable information about the product:
PlateSpin Orchestrate 2.0 Getting Started Reference
PlateSpin Orchestrate 2.0 Installation and Configuration Guide
PlateSpin Orchestrate 2.0 Upgrade Guide
PlateSpin Orchestrate 2.0 High Availability Configuration Guide
PlateSpin Orchestrate 2.0 Administrator Reference
PlateSpin Orchestrate 2.0 Command Line Reference
About This Guide 7
Page 8

PlateSpin Orchestrate 2.0 VM Client Guide and Reference
PlateSpin Orchestrate 2.0 Development Client Reference
PlateSpin Orchestrate 2.0 Developer Guide and Reference
PlateSpin Orchestrate 2.0 Server Portal Reference
Documentation Updates
For the most recent version of this guide, visit the PlateSpin Orchestrate 2.0 documentation Web site
(http://www.novell.com/documentation/ps_orchestrate20/).
Documentation Conventions
In Novell documentation, a greater-than symbol (>) is used to separate actions within a step and
items in a cross-reference path.
A trademark symbol (
®
, TM, etc.) denotes a Novell trademark. An asterisk (*) denotes a third-party
trademark.
When a single pathname can be written with a backslash for some platforms or a forward slash for
other platforms, the pathname is presented with a backslash. Users of platforms that require a
forward slash, such as Linux, should use forward slashes as required by your software.
novdocx (en) 13 May 2009
8 PlateSpin Orchestrate 2.0 Virtual Machine Management Guide
Page 9

1
Managing Virtual Machine Hosts
After installing the PlateSpin® Orchestrate Agent on the physical resource, you can discover for the
hypervisor technology residing on the resource by editing the appropriate policies and running the
Discover VM hosts job. Later on, you can discover and manage VMs residing on the VM hosts.
These launch the adapter job to connect to the appropriate hypervisor Web service.
Section 1.1, “Configuring Policies for VM Provisioning Adapters,” on page 9
Section 1.2, “Discovering VM Hosts and Repositories,” on page 15
Section 1.3, “Discovering VM Images,” on page 16
Section 1.4, “Resynchronizing the VM Host’s State,” on page 16
Section 1.5, “Shutting Down VM Hosts,” on page 17
Section 1.6, “Restarting VM Hosts,” on page 18
Section 1.7, “Understanding VM Host Failover,” on page 18
novdocx (en) 13 May 2009
1
1.1 Configuring Policies for VM Provisioning Adapters
This section contains information on the policies required to manage the Provisioning adapters.
Provisioning adapters are programs that provision (start, stop, snapshot, migrate, or pause) a VM.
They run just like regular jobs on the PlateSpin Orchestrate Server.
Section 1.1.1, “Configuring Policies for Virtual Center,” on page 9
Section 1.1.2, “Configuring Policies for Xen 3.0,” on page 12
Section 1.1.3, “Configuring Policies for VMware Server,” on page 12
Section 1.1.4, “Configuring Policies for Hyper-V,” on page 13
Section 1.1.5, “Configuring Policies for ESX,” on page 14
1.1.1 Configuring Policies for Virtual Center
Before provisioning and managing the Virtual Center provisioning adapter, you must configure
certain policies in the Development Client. However, before configuring the policies for the Virtual
Center, make sure that the following prerequisites are met:
Make sure that the Orchestrate Agent for Windows* is installed and started on the Windows
host running Virtual Center.
IMPORTANT: The PlateSpin Orchestrate Server supports only one VMware Virtual Center
server per grid.
Make sure that J2RE with version 1.4.2 for VCenter 1.x or version 1.5 for VCenter 2.x is
installed on the Windows system running Virtual Center.
Managing Virtual Machine Hosts
9
Page 10

NOTE: In the 2.0.2 release of PlateSpin Orchestrate, the VMware Virtual Center Provisioning
Adapter supports only VMware Virtual Center 2.x. Virtual Center 1.x is not supported in this
release.
The JREs that ship with Virtual Center and with the Orchestrate Agent are version 1.5. Version
1.4.2_15 can be downloaded from the Sun* Download Center (https://sdlc4a.sun.com/ECom/
EComActionServlet;jsessionid=88B0E4E7E868F2F6C671427ACC9C0D13).
Make sure that the keystore is created on the server where Virtual Center is installed.
If the keystore is not created, do the following on the server where Virtual Center is installed to
generate it
novdocx (en) 13 May 2009
1. Find the
rui.crt
On Windows, the default location is:
Users\Application Data\VMware\VMware VirtualCenter\SSL\rui.crt
2. Create a
C:\VCenter_Certs\
3. Copy
4. Run
VCenter_Certs
rui.crt
keytool
The default location is
2.0\jre\bin\keytool.exe
certificate.
directory at the top level by entering
.
to
C:\VCenter_Certs\
.
C:\Program Files\VMware\VMware VirtualCenter
.
C:\Documents and Settings\All
.
mkdir
.
5. Enter:
cd C:\VCenter_Certs
[path]keytool -import -keystore keystore -file rui.crt
6. Enter a password when prompted.
The following table provides detailed information about the policies associated with the Virtual
Center provisioning adapter that are used to manage the Virtual Center hosts and the VMs in the
grid. The policy settings are applied to all the Virtual Center VMs in the grid.
Table 1-1 Virtual Machine Management Policies for Virtual Center
Policy Name Explanation Additional Details
vcenter Contains the constraints used
to select the vCenter Server
resources.
10 PlateSpin Orchestrate 2.0 Virtual Machine Management Guide
Do not edit the policy.
Page 11

Policy Name Explanation Additional Details
novdocx (en) 13 May 2009
vcenter1x Contains the constraints used
to select the vCenter 1.x Server
resources.
vcenter2x Contains the constraints used
to select the vCenter 2.x Server
resources
You must configure the following facts in the
policy before running any job for the vCenter
1.x servers:
webservice_url
webservice_user
webservice_password
Additionally, you can configure the following
facts depending upon your requirements:
joblet.maxwaittime
timeout
debug
You must configure the following facts in the
policy before running any job for the vCenter
2.x servers:
webservice_url
webservice_user
webservice_password
Additionally, you can configure the following
facts depending upon your requirements:
vcenter_client1x Contains the settings used to
run only the vCenter job on the
associated vCenter resource.
vcenter_client2x Contains the settings used to
run only the vCenter job on the
associated vCenter resource.
vcenterDiscovery Contains the settings required
to discover the vCenter Server
host machines. It also contains
the default installation path of
the vCenter server.
joblet.maxwaittime
timeout
debug
You must configure the following facts in the
policy before running any job for the vCenter
1.x servers:
java1.4.2
vcenter.truststore
joblets.slots
You must configure the following facts in the
policy before running any job for the vCenter
1.x servers:
java1.5.0
vcenter.truststore
joblets.slots
Do not edit the policy.
Managing Virtual Machine Hosts 11
Page 12

NOTE: VM host discovery on the vcenter adapter can fail because VM host discovery with Virtual
Center requires JRE 1.4.2 for VCenter 1.x and JRE 1.5 for VCenter 2.x to be installed on the
Windows-based Virtual Center host. The JRE that ships with the Orchestrate Agent and with
VMware* Virtual Center is v1.5.
1.1.2 Configuring Policies for Xen 3.0
Before provisioning and managing the Xen* 3.0 Server provisioning adapter, you must configure
certain policies in the Development Client. The following table provides detailed information about
the policies associated with the Xen 3.0 Server provisioning adapter that are used to manage the Xen
3.0 Server hosts and VMs in the grid. The policy settings are applied to all the VMs in the grid.
Table 1-2 Virtual Machine Management Policies for Xen 3.0 Server
Policy Name Explanation Additional Details
novdocx (en) 13 May 2009
xen30 Contains the policy settings for the Xen 3.0
Server Provisioning Adapter.
xenDiscovery Contains the settings required to discover the
Xen 3.0 Server host machines. It also
contains the default installation path of the
Xen server.
xenPA Contains the constraints used to check
whether the Xen 3.0 Server host is registered
to the Orchestrate Server, and the host is up
and running.
By default, the optimal values are
configured for the job and joblets
in the policy.
If the Xen Server is not installed in
the default path, edit this policy to
provide the correct information.
Do not edit the policy.
1.1.3 Configuring Policies for VMware Server
Before provisioning and managing the VMware Server provisioning adapter, you must configure
certain policies in the Development Client. The following table provides detailed information about
the policies associated with the VMware Server provisioning adapter that are used to manage the
VMware Server hosts and VMs in the grid. The policy settings are applied to all the VMware Server
VMs in the grid.
Table 1-3 Virtual Machine Management Policies for VMware Server
Policy Name Explanation Additional Details
vmserver Contains the policy settings for the VMware
Server provisioning adapter.
vmserverPA Contains the constraints used to check
whether the VMware Server host is registered
to the Orchestrate Server, and whether the
host is up and running.
12 PlateSpin Orchestrate 2.0 Virtual Machine Management Guide
By default, the optimal values are
configured for the job and joblets
in the policy.
Do not edit the policy.
Page 13

Policy Name Explanation Additional Details
novdocx (en) 13 May 2009
vmserverDiscovery Contains settings required to discover the
VMware Server host machines. It also
contains the default installation path of the
VMware server.
Edit the policy only if the VMware
Server is not installed in the
default path.
1.1.4 Configuring Policies for Hyper-V
Before provisioning and managing the Hyper-V provisioning adapter, you must configure certain
policies in the Development Client. The following table provides detailed information about the
policies associated with the Hyper-V provisioning adapter that are used to manage the Hyper-V
hosts and VMs in the grid. The policy settings are applied to all the Hyper-V VMs in the grid.
Table 1-4 Virtual Machine Management Policies for Hyper-V
Policy Name Explanation Additional Details
hyperv Contains the policy settings for the Hyper-V
provisioning adapter
hypervDiscovery Contains the settings required to discover the
Hyper-V host.
By default, the optimal values are
configured for the job and joblets
in the policy.
Do not edit the policy.
Managing Virtual Machine Hosts 13
Page 14

1.1.5 Configuring Policies for ESX
Before provisioning and managing the ESX provisioning adapter, you must configure certain
policies in the Development Client. The following table provides detailed information about the
policies associated with the ESX provisioning adapter that are used to manage the ESX hosts and
VMs in the grid. The policy settings are applied to all the ESX VMs in the grid.
Table 1-5 Virtual Machine Management Policies for ESX
Policy Name Explanation Additional Details
novdocx (en) 13 May 2009
esx Contains the policy settings for the
ESX provisioning adapter.
esxPA Contains the constraints used to
check whether the ESX host is
registered to the Orchestrate Server,
and whether the host is up and
running.
esxServerDiscovery Contains the settings required to
discover the ESX host.
You must configure the following facts
in the policy before running any job for
the ESX VM hosts:
webservice_user
webservice_password
root_user
root_password
Additionally, you can configure the
following facts depending upon your
requirements:
joblet.maxwaittime
timeout
debug
Do not edit the policy.
Do not edit the policy.
esxvmPrep Contains the settings required to
perform the Install Agent action and
the Personalize Provisioning action.
esxVncServerConfig Contains the settings required to
perform the Launch Remote Desktop
Provisioning action.
You can customize the facts for a specific ESX VM. This overrides the policy settings configured in
the ESX policy of the ESX host on which the VM is hosted.
To customize the facts for an ESX VM, do the following in the Development Client:
1 Click Resources > Physical.
2 Click the ESX machine whose policy settings you want to edit.
The Constraints/Facts tab is displayed by default.
14 PlateSpin Orchestrate 2.0 Virtual Machine Management Guide
Do not edit the policy.
Do not edit the policy.
Page 15
3 To customize the Web service credentials, edit the resoruce.webservice_user.override and
resource.webservice_password.override facts. (To edit a fact, click the fact, click the Edit the
fact icon, make the necessary changes, then click OK.)
4 To customize the VM credentials for installing the Orchestrate agent, edit the
resource.root_user.override and the resource.root_password.override facts.
This overrides the default values configured in the ESX policy for all the ESX machines at the
grid level.
1.2 Discovering VM Hosts and Repositories
1 Ensure that the policies appropriate to the VM technology are configured.
For more information on the policies, see Section 1.1, “Configuring Policies for VM
Provisioning Adapters,” on page 9.
2 Ensure that you have set the correct number of joblet slots for the VM hosts in the policies
appropriate to the VM technology.
For more information on the policies, see Section 1.1, “Configuring Policies for VM
Provisioning Adapters,” on page 9.
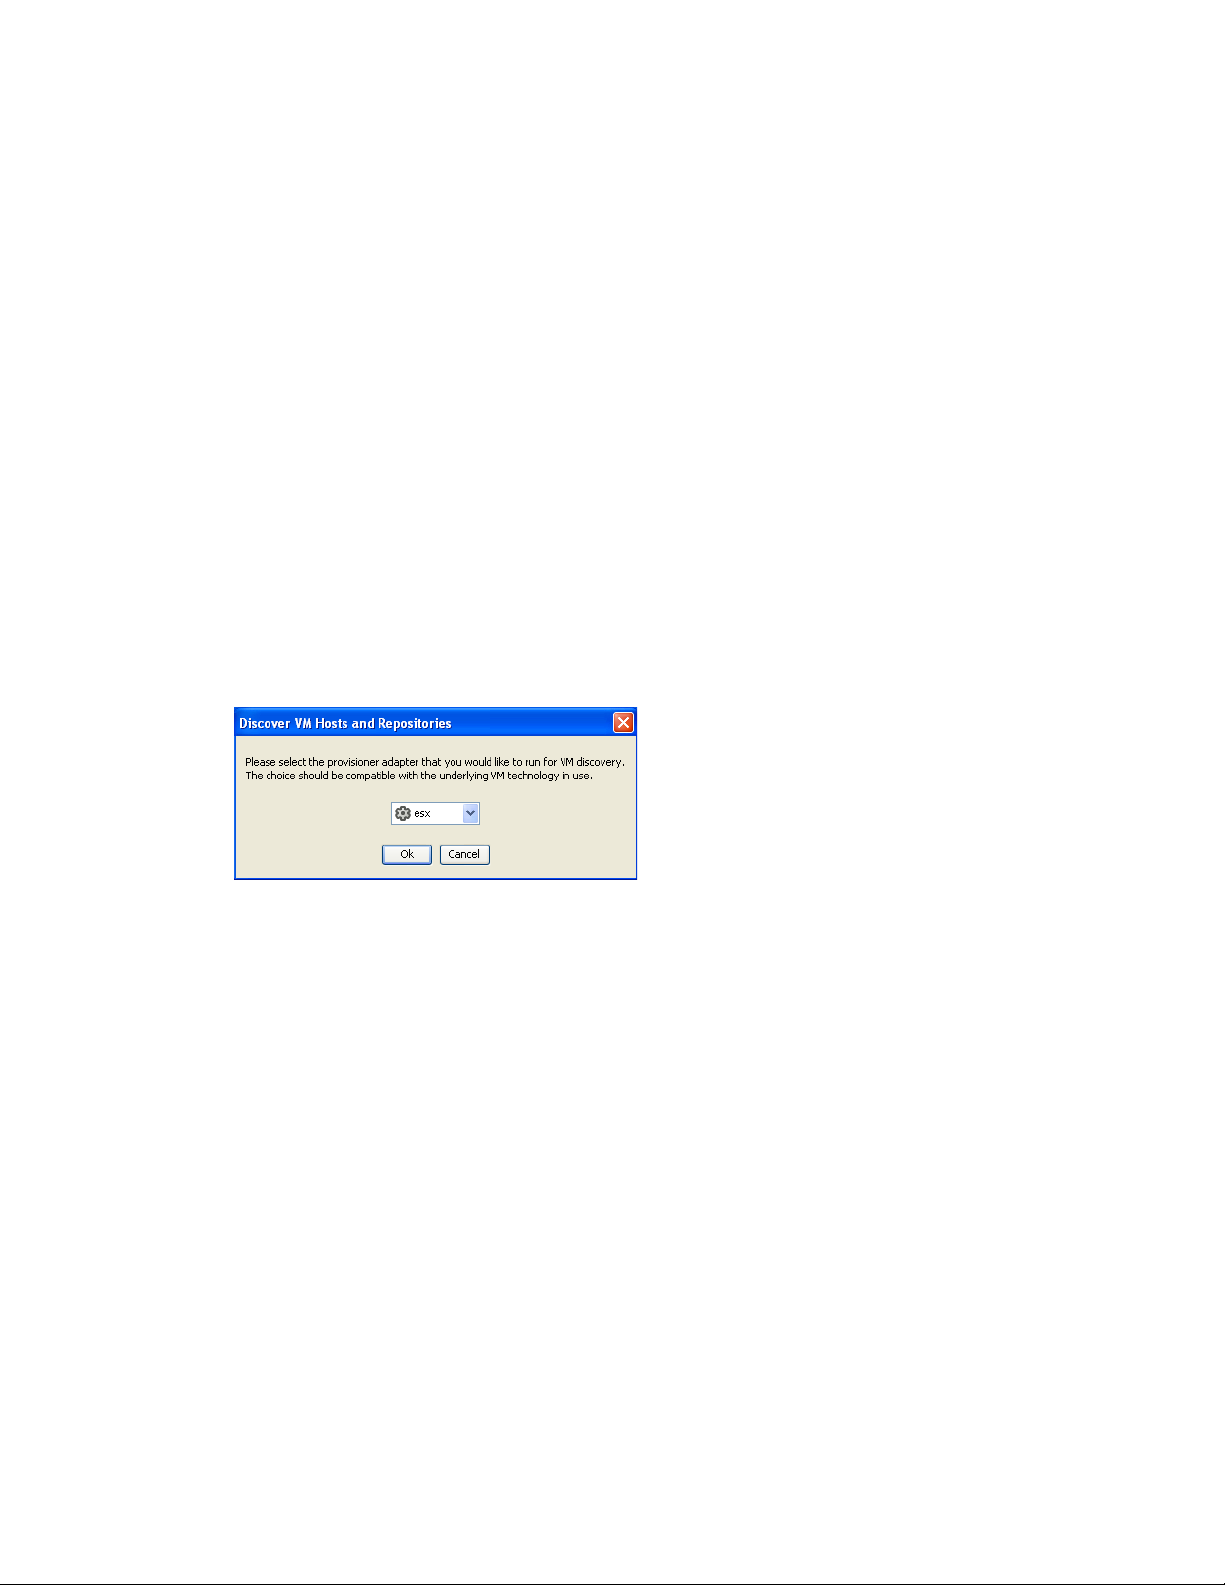
3 In the Development Client, click Provision > Discover VM Hosts and Repositories.
The Discover VM Hosts and Repositories dialog box is displayed.
novdocx (en) 13 May 2009
4 Select your provisioning adapter from the drop-down list.
5 Click OK.
6 Click Jobs to view the Jobs section in the Development Client and verify that the job has
started.
After your VM host machines are discovered, you can refresh your tree view or wait for the
automatic tree refresh to see the VM host machine listed under the provisioning adapter,
although no VMs are listed.
This also discovers:
Local repositories for all types of hypervisors.
SAN repositories for Xen and ESX.
To view the discovered repositories, click Repositories, then click xen30 or esx.
For a list of the VM technologies and supported host and guest operating systems, see
Section A.1, “Virtual Machine Technologies,” on page 47.
By default, the VM host is started when you initiate the Discover VM Hosts and Repositories
action.
Managing Virtual Machine Hosts 15
Page 16
1.3 Discovering VM Images
To discover the VM images on a specific repository:
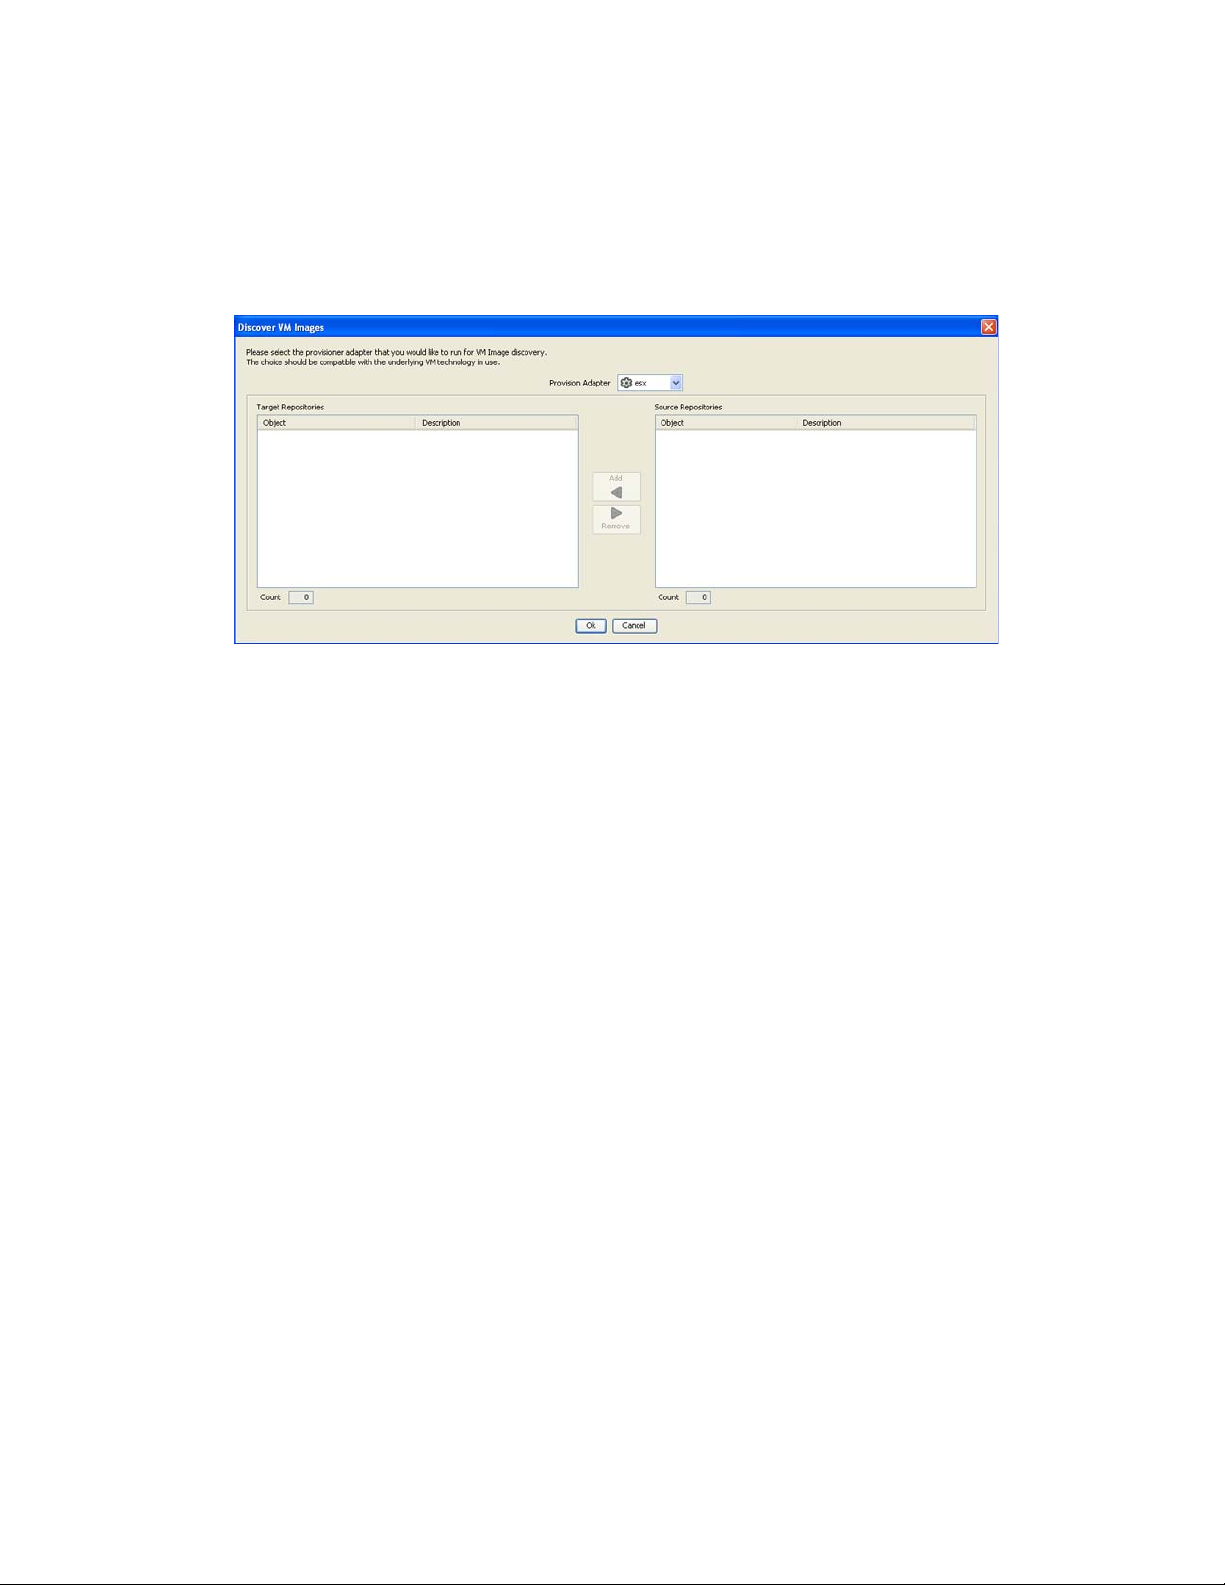
1 In the Development Client, click Provision > Discover VM Images.
The Discover VM Images dialog box is displayed.
novdocx (en) 13 May 2009
2 In the Provisioning Adapter drop-down list, select the provisioning adapter for which you want
to discover the VM images.
The source repositories for the selected provisioning adapter are displayed.
For information on provisioning adapters, see Section 2.1, “Provisioning a Virtual Machine,”
on page 21.
3 Select the source repositories, then click Add.
The selected repositories are added to the Target Repositories pane.
4 Click OK.
The VM images are displayed.
1.4 Resynchronizing the VM Host’s State
To manually verify and ensure that the state of a VM host displayed in the Development Client is
accurate:
1 In the Development Client, right-click the VM Host, then click Discover.
To manually verify and ensure that the state of multiple VM hosts displayed in the Development
Client is accurate:
1 In the Development Client, click Provision > Resync VM Host’s State.
The Resync VM Host’s State dialog box is displayed.
16 PlateSpin Orchestrate 2.0 Virtual Machine Management Guide
Page 17

2 In the Source VM Hosts pane, select the VM hosts to be resynchronized, then click Add.
The selected VM hosts are added to the Target VM Hosts pane.
3 Click OK.
1.5 Shutting Down VM Hosts
novdocx (en) 13 May 2009
To shut down a single VM host:
1 In the Development Client, right-click the VM host you want to shut down, then click
Shutdown.
To shut down multiple VM hosts:
1 In the Development Client, click Provision > Shutdown Hosts.
The Shut Down VM Hosts dialog box is displayed.
2 You can choose to shut down the VM hosts after the Orchestrate Agent becomes idle or to
immediately shut down the VM hosts. By default, the Wait for Agent to become Idle option is
selected.
3 In the Source VM Hosts pane, select the VM hosts you want to shut down, then click Add.
The selected VM hosts are added to the Target V M Hos t s pane.
4 Click OK.
The VMs running on the host are automatically shut down and the VM host is moved to the Shutting
Down state in which it will not accept any Provisioning actions.
Managing Virtual Machine Hosts 17
Page 18

1.6 Restarting VM Hosts
To restart a single VM host:
1 In the Development Client, right-click the VM host you want to start, then click Start.
To restart multiple VM hosts:
1 In the Development Client, click Provision > Start VM Hosts.
The Start VM Hosts dialog box is displayed.
novdocx (en) 13 May 2009
2 In the Source VM Hosts pane, select the VM hosts you want to restart, then click Add.
The selected VM hosts are added to the Target VM Hosts pane.
3 Click OK.
1.7 Understanding VM Host Failover
When the PlateSpin Orchestrate Server comes back online after being offline, it rediscovers the state
of all resources, including VM hosts and the VMs running on those hosts. This section provides
more information about how the Orchestrate Server behaves when the VM Host loses its agent
connection.
There are two possible scenarios that can occur in the case of a failure of VM Host running VMs.
The failover behavior depends on where the VM image is stored and whether the VM has the agent
installed.
The following table shows possible failover scenarios with the VM Host and the expected server
behavior when it occurs.
18 PlateSpin Orchestrate 2.0 Virtual Machine Management Guide
Page 19

Table 1-6 Orchestrate Server Behavior when the VM Host Loses Its Agent Connection
Scenario Failover Behavior
novdocx (en) 13 May 2009
Scenario 1: The VM image is:
The VMs that had been running on the failed VM host are
re-provisioned to other available VM hosts.
stored on a non-local repository (for
example, the zos repository)
accessible by other VM hosts
successfully provisioned
Situation: The VM host fails.
If the VM was provisioned from a template, there is
now another instance of the VM. For example, if the
template name is “sles10template,” the original VM
provisioned from the template is then named
"sles10template-1."
If the host running "sles10template-1" goes down, or
if it loses its agent connection, a new instance of the
template named "sles10template-2" is reprovisioned to an available host.
If the original VM was a standalone VM, it is re-
provisioned to an available host.
Scenario 2: The VM image is stored on a
local repository.
Situation: The VM host loses its agent
connection.
Because the VM image is stored locally, it cannot be
re-provisioned to another VM host.
When the VM host comes back online, it is re-
provisioned to the host where it is stored.
In either of these scenarios, if the Orchestrate Agent is installed on the VM and if the VM host loses
its agent connection but the VMs retain their agent connection (for example, if someone kills the
agent process on the VM host), no re-provisioning occurs.
If the VM host loses its agent connection, and if the Orchestrate Agent is not installed on the running
VMs, the VMs can continue running indefinitely. However, if the location of the VM image
warrants it, the VMs are re-provisioned to other available hosts. When there are two (or more) of the
same VM instance running on different VM hosts, the Orchestrate Server is aware only of the VMs
running on a VM host with an active agent connection, so the administrator must stop the VMs on
the host that has lost its agent connection.
NOTE: If you are interested in failover in a high availability environment, see the PlateSpin
Orchestrate 2.0 High Availability Configuration Guide.
Managing Virtual Machine Hosts 19
Page 20

novdocx (en) 13 May 2009
20 PlateSpin Orchestrate 2.0 Virtual Machine Management Guide
Page 21

2
Managing Virtual Machines
Review the following sections for information about the ongoing tasks in PlateSpin® Orchestrate
VM Management:
Section 2.1, “Provisioning a Virtual Machine,” on page 21
Section 2.2, “Managing a Virtual Machine in Runtime,” on page 22
Section 2.3, “Resynchronizing the State of All VMs,” on page 29
Section 2.4, “Resynchronizing the State of All VMs of a Specific VM Host,” on page 29
Section 2.5, “Shutting Down Multiple VMs,” on page 29
Section 2.6, “Destroying and Deleting a Virtual Machine,” on page 30
2.1 Provisioning a Virtual Machine
Provisioning is used to get a VM ready to start in a running state. The Orchestrate Server
automatically looks for the best VM host machine to run the VM on, unless you have specifically
designated another server to run the VM.
novdocx (en) 13 May 2009
2
By default, you can simultaneously provision eight VMs on a VM host. If you want to provision
additional VMs, you must proportionately increase the value of
in the Orchestrate Development Client.
Provisioning VMs that have only an NPIV disk is not supported. You can provision a VM that has a
hard disk and an NPIV disk (SAN repository). The OS image of the VM is stored on the local hard
disk and the data resides on the SAN repository.
Provisioning adapters on the Orchestrate Server abstract the VM. These adapters are special
provisioning jobs that perform operations for each integration with different VM technologies.
The Orchestrate Server uses provisioning adapters to perform life cycle functions for the VMs and
allow the Orchestrate Server to control them. Provisioning adapters are programs that provision
(start, stop, snapshot, migrate, or pause) a VM. They run just like regular jobs on the Orchestrate
Server.
The system can discover SAN repositories for Xen and ESX.
The system can detect a local store on each VM host and detect if a local disk might contain VM
images. The provisioner puts in a request for a VM host. However, before a VM is used, the system
pre-reserves that VM for exclusive use. That reservation prevents a VM from being “stolen” by any
other job waiting for a resource that might match this particular VM.
The constraints specified to find a suitable host evaluate machine architectures, CPU, bit width,
available virtual memory, or other administrator-configured constraints, such as the number of
virtual machine slots. This process provides heterogeneous virtual machine management.
Max Hosted VMs
for the VM host
For procedures and more information on provisioning VMs, see Section 2.2, “Managing a Virtual
Machine in Runtime,” on page 22.
Managing Virtual Machines
21
Page 22

2.2 Managing a Virtual Machine in Runtime
There are many ways you can control the VM after it has been deployed. All actions from
provisioning to shutting down the VM can be managed directly from the Orchestrate Development
Client and through the jobs written and executed by the Orchestrate Server.
Review the following sections for ways to manage VMs in runtime:
Section 2.2.1, “Using the Right-Click Menu for Provisioning Actions,” on page 22
Section 2.2.2, “Prerequisites for Performing Provisioning Actions on ESX VMs,” on page 25
Section 2.2.3, “Releasing a Virtual Machine from Usage,” on page 27
Section 2.2.4, “Managing Virtual Machine Templates,” on page 27
Section 2.2.5, “Managed Virtual Machine Actions,” on page 28
Section 2.2.6, “Virtual Machine Technology-Specific Actions,” on page 28
2.2.1 Using the Right-Click Menu for Provisioning Actions
You can perform provisioning actions by right-clicking a VM in the tree of the Orchestrate
Development Client. You start VMs by provisioning them under the VMs list according to the
appropriate provisioning adapter.
novdocx (en) 13 May 2009
For information on provisioning adapters, see Section 2.1, “Provisioning a Virtual Machine,” on
page 21.
The provisioning actions available from the right-click menu are as follows:
Table 2-1 Right-Click VM Commands
Action Description
Provision Starts a VM to a running state. The Orchestrate Server automatically
looks for the best VM host machine to run the VM on, unless you
have specifically designated another server to run the VM.
If a VM has snapshots, you cannot start the VM on a different host. If
a VM that has snapshots is on shared repository, you can register the
VM to a different host and start the VM if the host is also connected to
a shared repository.
Pause Prevents the VM from gaining access to the processor of the host
machine, although it is still resident in the memory of the host
machine.
Resume Allows a paused VM to access the processor of the host machine
again.
Suspend Pauses the VM and takes a snapshot of its disk and memory status.
In the suspended state, a VM can be moved or migrated to another
host machine.
Shutdown Stops a VM from running, just like shutting down a physical machine.
The operating system stops and acts as if it is shut down.
Restart Shuts down and restarts a running VM.
22 PlateSpin Orchestrate 2.0 Virtual Machine Management Guide
Page 23

Action Description
Migrate vCenter: Migrates the VM from one host machine to another only if
both the source and destination host machines have VMotion
enabled. VM migrations can be of the following types:
A “warm migrate” is the migration of a suspended VM to another
host and starting it there with brief resulting downtime
(measured in milliseconds). This function requires shared
storage.
A “hot migrate” (also called a “live migrate”) is the migration of a
running VM to another host and starting it there with minimal
resulting downtime (measured in milliseconds). This function
requires shared storage.
ESX: VM migrations can be of the following types:
A “warm migrate” is the migration of a suspended VM to another
host and starting it there with brief resulting downtime
(measured in milliseconds). This function requires shared
storage.
A “hot migrate” (also called a “live migrate”) is the migration of a
running VM to another host and starting it there with minimal
resulting downtime (measured in milliseconds). This function
requires shared storage.
novdocx (en) 13 May 2009
Ensure that the source and the destination machines have the same
architecture.
Hyper-V: VM Migration is not supported by PlateSpin Orchestrate.
XEN: VM migrations can be of the following types:
A “hot migrate” (also called a “live migrate”) is the migration of a
running VM to another host and starting it there with minimal
resulting downtime (measured in milliseconds). This function
requires shared storage.
NOTE: Migration of a Xen VM on Fibre Channel SAN disks is not
supported.
Resync State Ensures that the state of the VM displayed in the Orchestrate
Development Client is accurate.
Apply Config Updates the VM transient configuration. The VM must be running.
Create Template Makes a VM instance into a template from which other versions can
be cloned. This menu item is replaced by the Clone menu item when
you right-click a template VM.
Clone Launches a cloned instance of the template VM.
Delete/Destroy Resource Removes a VM from the Resources list in the Orchestrate
Development Client. If you want to delete the VM from the host
machine, select the Destroy VM Instance option.
Managing Virtual Machines 23
Page 24

Action Description
Move Disk Images A “move” is the relocation of VM disk images between two storage
devices when the VM is in a not running state (including VMs that are
suspended with a checkpoint file). This function does not require
shared storage; the move is between separate repositories. Select
the storage location from the drop-down menu.
You can also move a VM from one VM host machine to another. This
is a “cold” migration. VMware Server VMs must be migrated in this
manner.
If you want to move a VM of considerable size, appropriately increase
the timeout fact value in the VM policy. The default value is 2400. For
more information on editing the policy, see Section 1.1, “Configuring
Policies for VM Provisioning Adapters,” on page 9.
If a VM has snapshots, you cannot move the VM but you can register
it to a different host if the VM and the host are connected to a shared
repository.
Checkpoint Creates a named snapshot of a VM image. This image is stored on
the disk of the repository machine. Xen VMs cannot have a
checkpoint applied to them.
novdocx (en) 13 May 2009
All the snapshots of a VM are chronologically listed in the
resoruce.vm.snapshots fact, and the latest snapshot is listed in the
resource.vm.current_snapshot fact.
If the ESX VM or the Hyper-V VM already has snapshots taken
through other management consoles, the snapshots are
synchronized with the latest snapshot taken through the Orchestrate
Development Client, and are listed in the resoruce.vm.snapshots fact.
Restore Starts a Checkpoint VM (that is, resumes the operations of a VM
made into a stored checkpoint from the moment of storage).
If the ESX VM already has snapshots taken through other
management consoles, the snapshots are synchronized with the
latest snapshot taken through the Orchestrate Development Client,
and are listed in the resoruce.vm.snapshots fact.
Remove Template Dependency Changes a cloned instance of a VM into a VM instance.
Install Agent Launches a job that automatically installs the Orchestrate Agent on a
VM the next time you provision the VM.
IMPORTANT: If you stop or cancel a running Install Agent job, the VM
is locked and you cannot provision the VM. The VM is automatically
released after a period of time.
Before performing the Install Agent action, check the prerequisites
listed in “Automatically Installing the Orchestrate Agent or
Personalizing the VM” on page 25.
24 PlateSpin Orchestrate 2.0 Virtual Machine Management Guide
Page 25

Action Description
Personalize Allows you to customize the VM. This includes changing elements
like the DNS server. The changes are made to a VM that is shut
down.
IMPORTANT: If you stop or cancel a running Personalize job, the VM
is locked and you cannot provision the VM. The VM is automatically
released after a period of time.
Before performing the Personalize action, check the prerequisites
listed in “Automatically Installing the Orchestrate Agent or
Personalizing the VM” on page 25.
Shutdown Agent Shuts down the Orchestrate Agent and makes the VM unavailable as
a resource.
Cancel Action Stops an action that has been requested.
Check Host Assignment Opens a window so you can compare the VM hosts capable of
hosting the VM.
novdocx (en) 13 May 2009
Launch Remote Desktop Launches a VNC terminal in which you can view and control the VM.
Specify the credentials configured for the Web service in the
appropriate VM policy.
Before performing the Launch Remote Desktop action, check the
prerequisites listed in “Launching a VNC Terminal of the VM” on
page 26.
TIP: For information about using the PlateSpin Orchestrate VM Client to perform many of these
actions, see “Managing Virtual Machines” in the PlateSpin Orchestrate 2.0 VM Client Guide and
Reference.
2.2.2 Prerequisites for Performing Provisioning Actions on ESX VMs
You need to perform certain tasks before performing the Install Agent, Personalize, or the Launch
Remote Desktop actions.
“Automatically Installing the Orchestrate Agent or Personalizing the VM” on page 25
“Launching a VNC Terminal of the VM” on page 26
Automatically Installing the Orchestrate Agent or Personalizing the VM
Complete this procedure before performing the Install Agent or Personalize actions.
1 On any Windows or Linux resource, install the Virtual Disk Development Kit (Vmware-Vix-
Disklib) from the VMware Web site (http://www.vmware.com/download/sdk/
virtualdisk.html).
2 (Conditional) On Linux, ensure that the root partition is not on LVM.
3 In the Orchestrate Development Client, click Scheduler > vmDiskLibDiscovery > Run Now.
Managing Virtual Machines 25
Page 26

4 Click Jobs > vmDiskLibDiscovery to view the job execution details on all the resources within
the grid.
The job execution details are displayed in the Joblet tab.
5 Click the Resources tab to view the resources that have the Virtual Disk Development Kit.
For the ESX on Windows, the following facts are automatically configured:
resource.vmware.disklib with the value set to true.
novdocx (en) 13 May 2009
resource.vmware.vmmount_cmd with the value containing the location of
mount.exe
.
vmware-
For the ESX on Linux, the resource.vmware.disklib fact is automatically set to true.
If you want to configure a Linux resource, continue with Step 6; else skip to Step 7.
6 (Conditional) For the ESX on Linux, set the value of resource.vmware.disklibpath fact to the
location of lib32 or lib64, depending upon the processor.
7 (Optional) Install the Orchestrate Agent:
7a Shut down the VM on which you want to install the Orchestrate Agent.
7b Right-click the VM, then click Install Agent.
7c Provision the VM.
The resource is automatically registered as a VM in the Orchestrate Server if the
Orchestrate Server is registered to the DNS server.
8 (Optional) Personalize the VM:
8a Click Resources > VMs.
8b Click the VM you want to personalize.
The Info/Groups tab is displayed by default.
8c For a Linux VM, configure all the settings in the Linux Auotprep Config pane.
For a Windows VM, configure the computer name and the workgroup settings in the
Windows Sysprep Config pane
8d In the Autoprep Network Adapter pane, configure the following settings:
Mac Address
DHCP or Static IP address settings.
Launching a VNC Terminal of the VM
Before starting the Launch Remote Desktop action, perform the following tasks:
Ensure that the VM is powered on.
In the Orchestrate Development Client, click the Scheduler tab > esxVncServerConfig > Run
Job to enable the VNC Server service on the ESX host machine.
26 PlateSpin Orchestrate 2.0 Virtual Machine Management Guide
Page 27

2.2.3 Releasing a Virtual Machine from Usage
When the demand and load on your data center decreases, the Orchestrate Server analyzes the
remaining resources and releases the most appropriate resource. If a VM meets the requirements of
the remaining job demands better than a physical machine, the physical machine is released before
the VM is released. This dynamic analysis allows you to make sure that the needs of your data
center are met.
2.2.4 Managing Virtual Machine Templates
A VM template is a special kind of VM that is not deployed separately. When the Orchestrate Server
needs a VM of the template’s type to be used as a resource, it automatically clones a version of the
VM and uses that clone as the VM. You can change cloned VMs into instances of VMs instead of
clones.
Review the following tasks to manage VM templates:
“Making a Virtual Machine Instance into a Template” on page 27
“Changing a Virtual Machine Template Clone to an Instance” on page 27
novdocx (en) 13 May 2009
Making a Virtual Machine Instance into a Template
1 In the Orchestrate Development Client, right-click the VM.
2 Select Create Template.
3 Name the template.
4 Specify a repository.
5 Specify a visible VM host.
6 Select a recommended host for the VMs to be launched on, if any are present.
7 Click OK.
When the clone of the template VM is provisioned, it appears as a sub-branch of the template’s
location in the resources tree, as in the following Linux and Windows examples:
This clone functions as an instance of a VM and runs as though it were its own version with its own
MAC address and other unique identifiers. The UUID is the only new information that is
automatically generated for the clone. All the rest of the new information comes from autoprep,
including the MAC address if an asterisk (*) is placed in the Mac Address field in the Autoprep
Network Adapter section of the Info/Groups tab for the template (the default is a blank field,
meaning no MAC address is created), and if the Use Autoprep check box is enabled in the Create
VM from Template dialog box.
Changing a Virtual Machine Template Clone to an Instance
1 If you decide to keep a clone VM, go to the PlateSpin Orchestrate Development Client, right-
click it, and select Remove Template Dependency.
The Remove Template Dependency dialog box is displayed.
2 Click OK.
Managing Virtual Machines 27
Page 28

2.2.5 Managed Virtual Machine Actions
You can perform many actions on the VM through the Orchestrate Development Client and the
Orchestrate VM Client or you can write jobs to have actions performed on the VMs in your data
center. The following table lists the managed VM actions that you can perform or use in a written
job.
Table 2-2 Managed VM Actions
Action Description
Provision Starts a VM. This action clones and start a cloned VM template.
Clone Creates a new, unique instance of a VM template.
Cold Migrate Moves the storage location of the configuration and first disk files to another
physical storage host. This might allow the VM to start faster.
Shutdown Stops an active VM instance (including a started template VM).
Delete/Destroy Removes a VM from the Resources list in the Orchestrate Development
Client. If you want to delete the VM from the host machine, select the
Destroy VM Instance option.
novdocx (en) 13 May 2009
Suspend Takes a snapshot of an active VM and pauses it in order to move it to
another VM host.
Pause Prevents the VM from obtaining CPU cycles, but it stays resident.
Resume Allows a paused VM to access the CPU again.
Create Template Creates a VM template from a VM instance.
Hot Migrate Changes the association of the VM, which is residing in a shared storage
location, from one host machine to another.
Checkpoint Create a named snapshot of a moment that can later be accessed to restart
from the same point
Restore Resumes a VM at a previously stored checkpoint.
Install Orchestrator Agent Opens a VM image and installs the Orchestrate Agent.
Make Standalone Removes the association of a template and makes the active VM into its
own instance.
Check Status Checks the current state of the VM to verify if the VM is provisioned or shut
down.
Personalize Modifies the Orchestrate Agent properties and disk image that are currently
part of a clone.
Save Config Transfers changes made to a VM to its permanent image storage.
2.2.6 Virtual Machine Technology-Specific Actions
For a detailed breakdown of the actions you can perform on and with a VM, see the appropriate VM
technology and configuration section in Appendix A, “Virtual Machine Technologies and Actions,”
on page 47.
28 PlateSpin Orchestrate 2.0 Virtual Machine Management Guide
Page 29

2.3 Resynchronizing the State of All VMs
To manually verify and ensure that the state of the VMs of all VM hosts displayed in the Orchestrate
Development Client is accurate:
1 In the Orchestrate Development Client, click Provision > Resync VM’s State.
The Resync VM’s State dialog box is displayed.
novdocx (en) 13 May 2009
2 In the Source VMs pane, select the VMs to be resynchronized, then click Add.
The selected VMs are added to the Ta rge t VMs pane.
3 Click OK.
2.4 Resynchronizing the State of All VMs of a Specific VM Host
To manually verify and ensure that the state of the VMs of a specific VM host displayed in the
Orchestrate Development Client is accurate:
1 In the Orchestrate Development Client, click Provision > Reset State of All VMs.
The Reset State of All VM’s dialog box is displayed.
2 Select the VM host whose VMs you want to resynchronize.
3 Click OK.
2.5 Shutting Down Multiple VMs
1 In the Development Client, click Provision > Shutdown VMs.
The Shut Down VMs dialog box is displayed.
Managing Virtual Machines 29
Page 30

2 You can choose to shut down the VMs after the Orchestrate Agent becomes idle or to
immediately shut down the VMs. By default, the Wait for Agent to become Idle option is
selected.
3 In the Source VMs pane, select the VMs you want to shut down, then click Add.
The selected VMs are added to the Ta rge t VMs pane.
4 Click OK.
novdocx (en) 13 May 2009
2.6 Destroying and Deleting a Virtual Machine
1 In the PlateSpin Orchestrate Development Client, right-click the VM in the tree and select
Delete/Destroy Resource.
The Delete Resource dialog box is displayed.
2 (Optional) To delete a VM from the VM host, select the Destroy VM Instance option.
This completely deletes the VM and all its versions from your data center. You cannot restore
any version of the VM after you delete it.
If you do not choose this option, the VM is removed from the resource list. However, the actual
image of the VM is still stored in its directory.
3 Click OK.
If you choose only to delete a VM from your resource tree, you can rediscover the VM by running a
discovery job (click Provision > Discover VM Images).
30 PlateSpin Orchestrate 2.0 Virtual Machine Management Guide
Page 31

3
Managing VM Repositories
PlateSpin Orchestrate uses the Repository object to represent where VMs are stored. VMs can be
stored on local disks, the Orchestrate datagrid, a network attached storage (NAS), a storage area
network (SAN), or by using a separate VM technology.
Before VMs can be used by PlateSpin Orchestrate, you must create Repository objects and then
discover the VM Images within the Repository:
Section 3.1, “Deploying a VM to the Local Repository,” on page 31
Section 3.2, “Deploying a VM to the Datagrid Repository,” on page 32
Section 3.3, “Deploying a VM to the NAS Repository,” on page 32
Section 3.4, “Deploying a VM to the SAN Repository,” on page 32
Section 3.5, “Virtual Repository,” on page 33
novdocx (en) 13 May 2009
3
3.1 Deploying a VM to the Local Repository
By default, the Xen and VMware server adapters create a local Repository object for local VM
images when PlateSpin Orchestrate accomplishes the Discover VM Hosts action.
A local repository represents VMs residing in a VM Host's local storage where the VMs are only
visible to the VM Host. VMs are searched for in the default paths for each adapter.
IMPORTANT: Do not use local repositories for shared directories visible to more than one VM
Host. Instead, create a new NAS or SAN repository.
For information on NAS storage, see “Deploying a VM to the NAS Repository” on page 32. For
information on SAN storage, see “Deploying a VM to the SAN Repository” on page 32.
When discovering VM Images, the adapters use the
facts for searching. The
adapter creates a local repository with search paths of
var/lib/xen/images
When the Discover VM Images action is run, the provisioning adapter follows these steps:
Concatenates the
and searches for VMs in those directories.
Concatenates the
VMs in that directory.
repository.location
.
repository.location
repository.location
location, searchpath
is usually the root path, such as /. For Xen, the
/etc/xen/vm
and every element of
and
repository.preferredpath
and a preferred search path of
repository.searchpath
and
preferredpath
and searches for
/
These steps are also followed when searching in NAS and SAN repositories when representing automounted file systems, and when the location, search path, and preferred path are set.
For more information on facts, see “Defining Values for Grid Objects” in the PlateSpin Orchestrate
2.0 Developer Guide and Reference.
Managing VM Repositories
31
Page 32

3.2 Deploying a VM to the Datagrid Repository
novdocx (en) 13 May 2009
By default, a datagrid repository named
represents VMs residing in the PlateSpin Orchestrate datagrid, which is a storage area on the
Orchestrate Server.
zos
The
reserved for VM archival storage.
You can store VMs to the datagrid and deploy them to a VM host as necessary.
The datagrid repository storage is archival because VMs cannot be run from the datagrid repository.
You must move VMs out of the datagrid to a VM Host in order to run them.
datagrid repository has a location of
zos
is automatically created. The datagrid repository
grid:///vms
, which points to an area in the datagrid
3.3 Deploying a VM to the NAS Repository
The Network Attached Storage (NAS) repository represents VMs stored in a NAS. This is a storage
where VMs are visible to multiple VM Hosts, so they can be run by any one of the available hosts.
The following procedure shows an example of setting up a NAS repository. For the example,
/vms
assume you have a Xen setup where the
shared storage location for your VMs.
1 To create a new Repository object, go to the PlateSpin Orchestrate Development Client, then
click Actions > Create Repository.
2 Specify a new name and choose which adapter group this repository is used for.
The example is for Xen VMs, so choose the xen30 adapter.
3 Close the dialog box to display the Info/Groups tab for the new repository.
directory is auto-mounted on multiple VM hosts as the
4 Set the location path.
/
This is the root path for the repository. It is usually
5 Set the search path and preferred path.
In this example, the VMs are all in
preferredpath == "vms"
6 Select the VM Host objects that have visibility to the shared directory and add the new
repository to the VM hosts list of available repositories.
To find a VM host, either go to the VM Hosts view or open the Physical tree under Resources
and open the physical host representing the VM host.
7 Run Provision > Discover VM Images on the new repository.
/vms
, so leave
.
.
searchpath
empty and set the
3.4 Deploying a VM to the SAN Repository
The Storage Area Network (SAN) repository is a single storage server that can be accessed by
multiple machines. PlateSpin Orchestrate 2.x does not support booting a VM from a SAN
repository. SAN repositories can only be used as data disks for VMs.
32 PlateSpin Orchestrate 2.0 Virtual Machine Management Guide
Page 33

3.5 Virtual Repository
A Virtual Repository is where PlateSpin Orchestrate assumes the VM store is handled by the
underlying VM technology. For example, the Virtual Repository is used by the Virtual Center
adapter because Virtual Center is managing the VM storage.
novdocx (en) 13 May 2009
Managing VM Repositories 33
Page 34

novdocx (en) 13 May 2009
34 PlateSpin Orchestrate 2.0 Virtual Machine Management Guide
Page 35

4
Troubleshooting Provisioning
novdocx (en) 13 May 2009
Actions
The following sections provide solution to the problems you might encounter while performing
provisioning actions:
“The vCenter provisioning adapter for vCenter 1.x does not work properly if the
vcenter_client1x policy is not configured with the Java (JRE) 1.4.2 path” on page 35
“After installing the Orchestrate Agent on VM, the VM is not displayed as a resource in the
Orchestrate Development Client” on page 36
“Unable to launch a remote session on the ESX host through the VNC port configured in the
Orchestrate Development Client” on page 36
“The VM is suspended when you try to revert the snapshot of a powered-on VM running on a
Hyper-V host” on page 36
“Moving or migrating VMs between two ESX hosts that are registered to a vCenter server by
using the Orchestrate Development Client fails” on page 36
“Moving a VM from one ESX host local storage to another ESX host local storage might fail”
on page 37
“Unable to perform any provisioning adapter action after the Save Config action on the vCenter
VM” on page 37
“Provisioning of a Xen VM doesn’t work on the host server” on page 37
4
“Multiple instances of the same Xen VM running when located on shared storage” on page 38
The vCenter provisioning adapter for vCenter 1.x does not work properly if the
vcenter_client1x policy is not configured with the Java (JRE) 1.4.2 path
Source: The PlateSpin Orchestrate Development Client.
Explanation: The vCenter provisioning adapter for vCenter 1.x does not work properly if the
vcenter_client2x policy is not configured with the correct path of Java (JRE)
1.4.2. Even though the job log does not report any error, the following message
is logged into the
<date and time>: Broker,STATUS: assertion: workflowDone()
isProcessingComplete==true jobid=zosSystem.vcenter1x.8
Action: In the
with the vcenter host, set the JAVA (JRE) 1.4.2 path for the vCenter PA job in
the java1.4.2 fact tag:
<fact name="java1.4.2"
type="String"
value="location_of_the_JRE_1.4.2"
description="Location of Java VM 1.4.2"/>
server.log
vcenter_client1x
file:
policy, which has been automatically associated
Troubleshooting Provisioning Actions
35
Page 36

If JRE 1.5 is installed with the Orchestrate Agent, the default location of the
JRE on Windows is
c:\program files\novell\zos\agent\jre
.
After installing the Orchestrate Agent on VM, the VM is not displayed as a resource
in the Orchestrate Development Client
Source: The PlateSpin Orchestrate Development Client.
Action: Do the following:
Ensure that the Orchestrate Agent is running on the VM.
Ensure that no errors have been logged into the
agent.log
file.
The log file is located in the
Orchestrate_Agent_installation_directory\novell\zos\agent
\node.default
agent/node.default
Ensure that the Orchestrate Server is registered to the DNS server.
directory on Windows and in the
directory on Linux.
/opt/novell/zos/
Unable to launch a remote session on the ESX host through the VNC port configured
in the Orchestrate Development Client
novdocx (en) 13 May 2009
Source: The PlateSpin Orchestrate Development Client.
Possible Cause: The VMs are powered on when you run the discovery job.
Action: Shut down the VM and start the VM.
Action: In the Orchestrate Development Client, ensure that the
esxVncServerConfig
job has run.
This enables the VNC Server service on the ESX host machine
The VM is suspended when you try to revert the snapshot of a powered-on VM
running on a Hyper-V host
Source: The PlateSpin Orchestrate Development Client.
Explanation: If you try to revert the snapshot of a powered-on VM running on a Hyper-V
host, the VM is suspended. This is a known behavior of VMs runnings on a
Hyper-V host.
Action: Provision the suspended VM:
1 In the Orchestrate Development Client, right-click the suspended VM,
then click Provision.
The Provision VM dialog box is displayed.
2 In the Plan (Host/Repository) drop-down list, select the appropriate
Hyper-V host.
3 Click OK.
Moving or migrating VMs between two ESX hosts that are registered to a vCenter
server by using the Orchestrate Development Client fails
Source: The PlateSpin Orchestrate Development Client.
36 PlateSpin Orchestrate 2.0 Virtual Machine Management Guide
Page 37

Action: Do the following:
1 Disconnect and remove one of the ESX hosts from the vCenter server.
2 Move or migrate the VMs by using the Orchestrate Development Client.
Moving a VM from one ESX host local storage to another ESX host local storage
might fail
Source: The PlateSpin Orchestrate Development Client.
Explanation: When you try to use the VM Client to move a VM of considerable size from
one ESX host local storage to another ESX local storage, the move job might
fail with the following error message:
Job timeout, because Max elapsed time expired.
Action: In the policy associated with the VM, appropriately increase the timeout value.
For more information, see Section 1.1, “Configuring Policies for VM
Provisioning Adapters,” on page 9.
Unable to perform any provisioning adapter action after the Save Config action on
the vCenter VM
novdocx (en) 13 May 2009
Source: The PlateSpin Orchestrate Development Client.
Explanation: An explanation of the message.
Possible Cause: The VM UUID value of the vCenter VM is not a 128-bit hexadecimal value.
Even though the Save Config action is successful and the VM is provisioned,
the hypervisor automatically assigns a different UUID value. Subsequently,
any provisioning adapter action performed on the VM fails.
Action: Specify a 128-bit hexadecimal value for the VM UUID.
1 In the Orchestrate Development Client, click Resources > the vcenter
VM.
The Info/Groups tab is displayed by default.
2 In the Virtual Machine Configuration panel, set the value of VM UUID to
a 128-bit hexadecimal value.
3 Right-click the vCenter VM, then click Save Config.
Provisioning of a Xen VM doesn’t work on the host server
Source: The PlateSpin Orchestrate Development Client.
Explanation: When you try to provision a Xen 3.0 VM, the job might fail with the following
error message in the job log:
[c121] RuntimeError: vmprep: Autoprep of /var/lib/xen/images/
min-tmpl-1-2/disk0
failed with return code 1: vmprep: autoprep:
/var/adm/mount/vmprep.3f96f60206a2439386d1d80436262d5e:
Failed to mount vm
image "/var/lib/xen/images/min-tmpl-1-2/disk0": vmmount: No
root device found
Job 'zosSystem.vmprep.76' terminated because of failure.
Reason: Job failed
Troubleshooting Provisioning Actions 37
Page 38

A VM host cannot provision a VM that has a different file system than the VM
host. The currently supported file systems are ext2, ext3, reiserfs, jfs, xfs, vfat,
and ntfs.
Action: To work around the issue load the VM’s file system Linux module on the VM
host, or add this support to the Linux kernel if a custom kernel is being used.
Typically, last Linux kernels autoload the appropriate module to do the work.
You must manually load the proper kernel module on the VM host to support
the VM’s file system.
For example, if the VM host uses ext3 and the VM image uses reiserfs, load
the proper kernel module onto the VM host to support the VM image’s reiserfs
file system. Then, on the VM host, run:
modprobe reiserfs
Next, provision the VM.
Cloning with prep is limited to what the Virtual Center of VMware Server
supports.
novdocx (en) 13 May 2009
Multiple instances of the same Xen VM running when located on shared storage
Source: Shared storage for Xen VMs.
Explanation: The
xendConfig
job runs when a VM host is added to the PlateSpin
Orchestrate Server. This job automates some of the configurations possible on
a Xen VM host. When using the default Xen configuration, it is possible to
incorrectly start an already-running a VM a second time from storage that is
shared by and accessible to another Xen VM host.
Possible Cause: A running Xen VM can only be locked to a specific Xen VM host when the
xend
service is configured to share a VM domain lock file on a shared file
xend
system. By default, the
/var/lib/xend/domains
the
service will place these VM domain lock files in
directory, which is usually not located on
shared storage.
Action: You can configure Xen VM locks in PlateSpin Orchestrate by uncommenting
certain facts in the policy file (search for
Uncomment these facts in
xendConfig.policy
xend.xend-domain-lock
:
).
38 PlateSpin Orchestrate 2.0 Virtual Machine Management Guide
Page 39

To uncomment a section of code, remove the “<!--” (comment open) tag and
the “-->” (comment close) tag. Edit the
xend-domain-lock-path
fact to set
an alternate location on shared storage that is available to all VM hosts.
When you make the changes and save the file, the facts become active and the
VM locking parameters of each newly-joining VM host are adjusted
accordingly.
novdocx (en) 13 May 2009
You can also schedule an immediate run of the
xendConfig
job to adjust all
configuration files of the Xen VM hosts that are already connected to the
PlateSpin Orchestrate Server.
NOTE: Setting the lock path using PlateSpin Orchestrate only supports the
scenario where all VM hosts have the domain lock path connected to the same
shared repository. For more complex setups, you need to use alternative
methods to adjust the VM host lock configurations.
Troubleshooting Provisioning Actions 39
Page 40

novdocx (en) 13 May 2009
40 PlateSpin Orchestrate 2.0 Virtual Machine Management Guide
Page 41

5
Understanding Autoprep
In the PlateSpin® Orchestrate Development Client, “Autoprep” refers to the function of preparing
unique network settings for Linux VMs on VM hosts so that the VMs can be provisioned by the
provisioning adapter without creating network conflicts. As the administrator, you can set “facts” in
the PlateSpin Orchestrate Development Client that can later be automatically applied to a VM clone
during a Provision or a Clone action from a VM template. The Autoprep facts can also be manually
applied to an existing VM by using the Personalize action.
This section includes the following information:
Section 5.1, “Setting Autoprep Facts in the Development Client,” on page 41
Section 5.2, “Applying Autoprep Facts,” on page 44
Section 5.3, “Known Autoprep Limitations,” on page 46
5.1 Setting Autoprep Facts in the Development
novdocx (en) 13 May 2009
5
Client
You can use the Development Client to configure the facts for autoprep of a VM. This section
includes information about the Development Client interface where those facts are set.
When you select a VM object in the Explorer tree of the Development Client, click the Info/Groups
tab to open the Info Groups page, then scroll down to the Provisioning Information panel of this
page. Open the Linux Autoprep Config panel and at least one of the Autoprep Network Adapter
panels.
Understanding Autoprep
41
Page 42

Figure 5-1 The Autoprep Sections of the Info/Groups Page of a VM Template Object
novdocx (en) 13 May 2009
NOTE: Windows Sysprep Config is not supported in PlateSpin Orchestrate 2.0.2.
The fact settings for each of these panels are discussed below.
Section 5.1.1, “Setting Linux Autoprep Config Facts,” on page 42
Section 5.1.2, “Setting Autoprep Network Adapter Facts,” on page 43
5.1.1 Setting Linux Autoprep Config Facts
The settings located in the Linux Autoprep Config panel are global to a configuration of the a Linux
VM and are not specific to a particular network adapter. Click Define to enter string values for each
fact.
NOTE: It is not mandatory to define these facts. If tye are left undefined, they are not applied to the
“autoprepped” VM.
The field names and the accompanying fact value settings for this section include the following:
Linux Computer Name: The fact name for this setting is
resource.provisioner.autoprep.linuxglobal.ComputerName
The string value you enter here becomes the network host name of the new VM. If you enter an
asterisk ( * ), the current Grid object ID (
resource.id
) of the new VM will be used.
.
42 PlateSpin Orchestrate 2.0 Virtual Machine Management Guide
Page 43

Linux Domain: The fact name for this setting is
resource.provisioner.autoprep.linuxglobal.Domain
.
The string value you enter here becomes the network domain name where the new VM is a
member.
5.1.2 Setting Autoprep Network Adapter Facts
The PlateSpin Orchestrate Development Client supports creating network settings (facts) for two
network interfaces or “adapters” on a VM. The first adapter is identified as zero (0), and maps to
eth0
, and the second adapter is identified as one (1), and maps to
settings for one or both of these interfaces, but you should always configure Network Adapter 0 first.
Although you can define individual static settings to be applied to these adapters, Autoprep can be
useful to provision multiple clones with unique, autogenerated MAC addresses and DHCP defined
IP addresses (even though the VM clones are copies of the same VM template OS image), thus
avoiding network conflicts.
The field names and the accompanying fact value settings for this section of the VM Autoprep
adapter information are listed below. Click Define to enable selection or data entry in each field.
eth1
. It is possible to define
novdocx (en) 13 May 2009
MAC Address: The fact name for this setting is
resource.provisioner.autoprep.adapters[0].MACaddress
or
resource.provisioner.autoprep.adapters[1].MACaddress
.
This is the name for each NIC that represents the MAC Address for the interface. If you enter
an asterisk ( * ), PlateSpin Orchestrate automatically generates the MAC address. If you leave
this field undefined, the existing MAC address is re-used.
NOTE: When multiple clones are to be provisioned from a template, we recommend that you
regenerate the MAC Address for each clone to avoid possible ARP table conflicts.
Use DHCP: The fact name for this setting is
resource.provisioner.autoprep.adapters[0].UseDHCP
or
resource.provisioner.autoprep.adapters[1].UseDHCP
.
If you select this check box, the new VM retrieves its network settings from a DHCP server and
all other IP-specific adapter settings are ignored. If you do not select this check box, you must
define additional adapter settings (for example, IP address, Subnet Mask, and others).
IP Address: The fact name for this setting is
resource.provisioner.autoprep.adapters[0].IPAddress
or
resource.provisioner.autoprep.adapters[1].IPAddress
.
If you enter a legitimate string value here, it becomes the assigned static IP address for this
adapter. The setting is ignored if the Use DHCP check box is selected.
Subnet Mask: The fact name for this setting is
resource.provisioner.autoprep.adapters[0].subnetMask
or
Understanding Autoprep 43
Page 44

novdocx (en) 13 May 2009
resource.provisioner.autoprep.adapters[1].subnetMask
.
The string value you enter here becomes the network subnet mask for the specified adapter. The
setting is ignored if the Use DHCP check box is selected.
Gateway IP Address: The fact name for this setting is
resource.provisioner.autoprep.adapters[0].Gateways
or
resource.provisioner.autoprep.adapters[1].Gateways
.
This is a list of Internet gateways that are available to the network adapter. One or more
gateway addresses can be added to this list, but in the case of Autoprep for Linux VMs, only
the first Gateway address in the list is used.The setting is ignored if the Use DHCP check box is
selected.
DNS from DHCP: The fact name for this setting is
resource.provisioner.autoprep.adapters[0].DNSFromDHCP
or
resource.provisioner.autoprep.adapters[1].DNSFromDHCP
.
If you select this check box, the new VM retrieves its DNS server settings from a DHCP server.
If you do not select this check box, the DNS settings you define in the Development Client are
applied.
DNS Server IP Addresses: The fact name for this setting is
resource.provisioner.autoprep.adapters[0].DNSServers
or
resource.provisioner.autoprep.adapters[1].DNSServers
.
This is a list of DNS servers that are available to the VM. You can add one or more DNS server
IP addresses to this list if you want to. The setting is ignored if the DNS from DHCP check box
is selected.
DNS Domain: This fact is not currently supported.
Primary WINS Server: This fact is not currently supported.
Secondary WINS Server: This fact is not currently supported.
DNS Suffixes: This fact is not currently supported.
NetBIOS: This fact is not currently supported.
5.2 Applying Autoprep Facts
The PlateSpin Orchestrate Server applies the Autoprep facts by launching the
facts are defined. This job runs automatically and applies the appropriate facts to a VM in the
following situations:
When a Personalize action is run on any VM. (See Table 2-1 on page 22).
When a VM clone is created by initiating the Clone action on a VM template.
NOTE: The Use Autoprep Job check box in the VM Client or the Use Autoprep check box in
the Development Client must be selected if Autoprep facts are to be used when the Clone
action is initiated.
vmprep
job when the
When a VM clone is created by initiating a Provision action on a VM template.
44 PlateSpin Orchestrate 2.0 Virtual Machine Management Guide
Page 45

5.2.1 Example Autoprep Scenarios
Scenario 1: You want to create 25 dynamic VM instances to test job provisioning. You will never
use these instances again, so you will not personalize them.
You create a VM template by right-clicking a VM, then you select Create Template. When the VM
Template is created in the Explorer Tree, you define its Autoprep facts in the Info/Groups page by
entering an asterisk in the MAC Address field, and then you select the Use DHCP check box. This
lets the Development Client autogenerate the MAC address and retrieve network data from the
DHCP server.
When the Autoprep facts are defined, you provision this template. You right-click the template
object and select Provision, then in the Provision VM dialog box, you specify that you want to
provision (create) 25 new VM instances from this template. Provisioning automatically applies the
Autoprep facts from the template.
Scenario 2: You have created three VM clones in your grid and you want to provision those clones.
You want to ensure that the MAC address and other key network information for each clone is
unique, even though each clone is a copy of the same OS image. These clones are to be detached
later and used for such things as mail servers and Web servers. When the clones were first created,
Autoprep facts were applied, but now you have changed those facts by adding static IP addresses,
subnet masks, and gateway addresses for each. Each clone must be “personalized” because of this
change to basic network identifiers.
novdocx (en) 13 May 2009
To personalize, you select each Clone object, then define the adapter-specific settings on the Info/
Groups page by entering IP addresses, subnet masks, and gateway addresses for each adapter. When
you have defined the autoprep facts on each VM clone, you right-click each Clone object in turn and
select Personalize to apply the new network configuration.
For more information, see “Changing a Virtual Machine Template Clone to an Instance” on page 27
and “Personalize” on page 28.
5.2.2 How Autoprep Works
The
vmprep
first disk image of the VM with the defined Autoprep settings. On a Linux system, most of these
settings are stored in configuration files in the
vmprep
then mounts that partition and starts scanning the configuration files to make the necessary changes
to the VM configuration file settings.
Generally, the
If the
Autoprep assumes an asterisk, and autogenerates a MAC address for the template or clone.
If the
looks at
undefined, Autoprep assumes it can use DHCP. If the IP address is defined, Autoprep assumes
the address is static, and accepts the entered address.
job always runs when you clone or provision from a VM template. The job prepares the
/etc/hosts
or
/etc/sysconfig
directories. The
job identifies the first listed disk for the VM, attempts to find the root partition for that disk,
vmprep
resource.provisioner.autoprep.adapters.MACaddress
resource.provisioner.autoprep.adapters.UseDHCP
resource.provisioner.autoprep.adapters.IPAddress
job looks at each Autoprep fact independently, with the following exceptions:
fact is undefined,
fact is undefined, Autoprep
fact. If both are
If the first network adapter does not specify a gateway, but the second network adapter does
specify a gateway, the first network adapter is configured to use the gateway from the second
network adapter.
Understanding Autoprep 45
Page 46

5.3 Known Autoprep Limitations
There are some limitations that you need to be aware of when you use Autoprep:
Currently, the Gateway IP Address setting under the Autoprep Network Adapter 0 and the
Autoprep Network Adapter 1 sections of the Info/Groups tab for a VM object and VM template
object is available in a list box.
Because the Linux VM OS accepts only one default gateway, it accepts only the first setting in
the list as the actual gateway IP address. The other settings are ignored.
The hostname setting is required when you use the VCenter Provisioning Adapter to do any
autoprepping of Linux VMs. Use the following syntax to supply the hostname setting:
resource.provisioner.autoprep.linuxglobal.ComputerName
If you have a VM template with two network cards, only the first card is considered active and
therefore it is the only card configured with Autoprep.
To work around this issue, set the fact manually in the Facts/Constraints editor or associate a
new policy on the template with the following syntax:
<policy>
<resource>
<fact name="provisioner.autoprep.adapters[1].Active" value="true"
type="Boolean" />
</resource>
</policy>
The Personalize action is not supported for vCenter VMs, but it does work for VMs created
with the vSphere Provisioning Adapter Add-on for PlateSpin Orchestrate 2.0.2.
novdocx (en) 13 May 2009
46 PlateSpin Orchestrate 2.0 Virtual Machine Management Guide
Page 47

A
Virtual Machine Technologies and
novdocx (en) 13 May 2009
Actions
The tables in this section contain information about the different PlateSpin® Orchestrate VM
Management technologies, PlateSpin Orchestrate provisioning adapters, and actions you can
perform on and with a VM.
This section contains the following:
Section A.1, “Virtual Machine Technologies,” on page 47
Section A.2, “Xen Hypervisor on SLES 10 SP2 or SLES 11 Host,” on page 49
Section A.3, “VMware Virtual Center,” on page 50
Section A.4, “Microsoft Hyper-V Hypervisor,” on page 52
Section A.5, “VMware ESX VM Hypervisor (Experimental),” on page 53
A.1 Virtual Machine Technologies
The following table represents the available actions using VMs with PlateSpin Orchestrate:
Table A-1 VM Technologies with Host Operating System, Guest Operating System, and Provisioning Adapter
A
Hypervisor Host Operating System Guest Operating System
Xen 3.2 SUSE® Linux
Enterprise Server
(SLES) 10 SP2
SLES 9
SLES 10
RHEL 4
RHEL 5
Other Linux
Windows Server
2003
Windows Server
Windows XP
2008
1
1
1
PlateSpin
Orchestrate
Provisioning
Adapter
xen30
Virtual Machine Technologies and Actions
47
Page 48

Hypervisor Host Operating System Guest Operating System
novdocx (en) 13 May 2009
PlateSpin
Orchestrate
Provisioning
Adapter
Xen 3.3 SLES 11 SLES 9
SLES 10
SLES 11
RHEL 4
RHEL 5
Other Linux
Windows Server
2003
Windows XP
VMware Virtual Center 2.x 2Subject to the VMware
support matrix
Windows Server
SLES 8
SLES 9
2008
1
SLES 10
RHEL 4
RHEL 5
Other Linux
Windows Server
2003
Windows XP
VMware Server 1.x
3
Subject to the VMware
support matrix
SLES 9
SLES 10
RHEL 4
RHEL 5
Other Linux
Windows Server
2003
Windows XP
xen30
1
1
vcenter
vmserver
1
Windows VMs running on the Xen hypervisor require a VM host CPU with the Intel VT or AMD-
V technology available and enabled.
2 The vcenter provisioning adapter does not support VMware Virtual Center 1.x.
3
The vmserver provisioning adapter does not work with the VMware Server 2.x hypervisor. Novell
considers the PlateSpin Orchestrate provisioning technology used in conjunction with VMware
Server as “experimental” because it has not yet been fully tested.
48 PlateSpin Orchestrate 2.0 Virtual Machine Management Guide
Page 49

A.2 Xen Hypervisor on SLES 10 SP2 or SLES 11 Host
The Xen hypervisor runs on SLES 10 SP2 and SLES 11 host machines with the PlateSpin
Orchestrate Xen Provisioning Adapter (xen30). The following table represents the PlateSpin
Orchestrate VM actions and whether or not PlateSpin Orchestrate can perform that action on the
guest operating system.
Table A-2 VM Actions Supported for SLES 10 SP2 or SLES 11 Host Using the Xen Hypervisor
novdocx (en) 13 May 2009
PlateSpin Orchestrate
Managed VM Action
Provision X X X X X X
Clone X X X X X X
Shutdown X X X X X X
Destroy X X X X X X
Suspend X X X X X X
Pause X X X X X X
Resume X X X X X X
Create Template X X X X X X
Move Disk Image
Hot Migrate
Checkpoint X X X X X X
Restore X X X X X X
Install Orchestrate Agent X X X X X
Make Standalone X X X X X X
1
2
SLES 9
Guest
XXXXX X
XXXXX X
SLES 10
Guest
RHEL 4
Guest
RHEL 5
Guest
Other Linux
Guest
Windows
Guest
Check Status X X X X X X
Personalize X X X X
Save Config X X X X X X
Cancel Action X X X X X X
Check Host Assignment X X X X X X
Launch Remote Desktop X X X ? X X
1
A “move” is the relocation of VM disk images between two storage devices when the VM is in a
not running state (this includes VMs that are suspended with a checkpoint file).This function does
not require shared storage; the move is between separate repositories.
2
A “hot migrate” (also called a “live migrate”) is the migration of a running VM to another host and
starting it there with minimal resulting downtime (measured in milliseconds). This function requires
shared storage.
Virtual Machine Technologies and Actions 49
Page 50

A.2.1 Additional Xen Provisioning Adapter Information
The following characteristics were added to the Xen Provisioning Adapter, effective with the 2.0.2
release:
The VM Builder running on a SLES 11 VM host now supports three additional VM OS types:
openSUSE 11
SLED 11
SLES 11
These OS types are not available for build when you use the VM Builder running on a SLES 10
SP2 VM host. These OS types can only be built and provisioned to a SLES 11 VM host.
VMs that were supported on SLES 10 SP2 are supported on SLES11, that is, if the VM was
built on SLES 10 SP2, the provisioning adapter supported of that VM on SLES 10S P2 are also
possible when the VM runs on SLES11.
Although VM migration from a SLES 11 VM host to a SLES 10 SP2 VM host is not supported,
VM migration is supported in the following scenarios:
VM on a SLES 10 SP2 VM host migrating to a SLES 11 VM host
novdocx (en) 13 May 2009
VM on a SLES 10 SP2 VM host migrating to a SLES 10 SP2 VM host
VM on a SLES 11 VM host migrating to a SLES 11 VM host
Virtual machines built on SLES 10 SP2 can be provisioned on either SLES 10 SP2 or SLES 11
VM hosts.
Virtual machines (regardless of OS type) built on SLES 11 cannot be provisioned on a SLES 10
SP2 VM host.
A.3 VMware Virtual Center
The following tables represent the PlateSpin Orchestrate VM actions and whether or not PlateSpin
Orchestrate can perform that action on the guest operating system.
IMPORTANT: The PlateSpin Orchestrate Server supports only one VMware Virtual Center server
per grid.
Table A-3 PlateSpin Orchestrate VM Actions Supported Guest Operating Systems Using VMware Virtual Center
PlateSpin Orchestrate
Managed VM Action
Provision X X X X X X X
SLES 8 SLES 9 SLES 10 RHEL 4 RHEL 5 Other Linux Windows
Clone X X X X X X X
Shutdown X X X X X X X
Destroy X X X X X X X
Suspend X X X X X X X
Pause
50 PlateSpin Orchestrate 2.0 Virtual Machine Management Guide
Page 51

novdocx (en) 13 May 2009
PlateSpin Orchestrate
Managed VM Action
Resume
Create Template X X X X X X X
Move Disk Image
Hot Migrate
Warm Migrate
Checkpoint X X X X X X X
Restore X X X X X X X
Install Orchestrate Agent X X X X X X X
Make Standalone X X X X X X X
Check Status X X X X X X X
Save Config X X X X X X X
Cancel Action X X X X X X X
Check Host Assignment X X X X X X X
Launch Remote Desktop X X X X X X X
1
2
3
SLES 8 SLES 9 SLES 10 RHEL 4 RHEL 5 Other Linux Windows
XXXXXX X
XXXXXX X
XXXXXX X
NOTE: Host operating systems are dependent on the VMware Virtual Center support matrix.
In the 2.0.2 release of PlateSpin Orchestrate, the VMware Virtual Center Provisioning Adapter
supports only VMware Virtual Center 2.x. Virtual Center 1.x is not supported in this release.
1
A “move” is the relocation of VM disk images between two storage devices when the VM is in a
not running state (including VMs that are suspended with a checkpoint file). This function does not
require shared storage; the move is between separate repositories.
2
A “hot migrate” (also called a “live migrate”) is the migration of a running VM to another host and
starting it there with minimal resulting downtime (measured in milliseconds). This function requires
shared storage.
3
A “warm migrate” is the migration of a suspended VM to another host and starting it there with
brief resulting downtime (measured in seconds). This function requires shared storage.
A.3.1 Additional VMware Virtual Center Provisioning Adapter Information
The
vcenterDiscovery.policy
file includes fixed paths the to
vxpd.exe
file:
Virtual Machine Technologies and Actions 51
Page 52

If you have installed Vcenter in a location other than those listed as default in the policy file, you can
copy one of the three existing
location for the
vcenter.path.vpxd
vpxd.exe
process, and then append this new item to the end of the
list.
listelement
values, modify the path to point to their installation
novdocx (en) 13 May 2009
For example, if
VirtualCenter2.0\vpxd.exe
vxpd.exe
is installed at
D:\foo\bar\VMware\VMware
, you could modify the XML policy file as follows:
A.4 Microsoft Hyper-V Hypervisor
The following table represents the PlateSpin Orchestrate VM actions and whether or not PlateSpin
Orchestrate can perform that action on the guest operating system.
Table A-4 PlateSpin Orchestrate VM Actions Supported on Guest Operating Systems Managed by Hyper-V
PlateSpin Orchestrate Managed
VM Action
SLES 10 Windows 2000 Windows 2003 Windows 2008
Provision X X X X
Pause X X X X
Resume X X X X
Suspend X X X X
Shutdown X X X X
Shutdown Agent X X X X
Restart X X X X
Hot Migrate
1
52 PlateSpin Orchestrate 2.0 Virtual Machine Management Guide
Page 53

novdocx (en) 13 May 2009
PlateSpin Orchestrate Managed
VM Action
Warm Migrate
Move Disk Images
Resync State X X X X
Save Config X X X X
Apply Config
Create Template
Delete / Destroy Resource X X X X
Checkpoint X X X X
Restore X X X X
Remove Template Dependency
Install Agent
Personalize
Cancel Action X X X X
Check Host Assignment X X X X
2
3
SLES 10 Windows 2000 Windows 2003 Windows 2008
XX X X
Launch Remote Desktop
1
A “move” is the relocation of VM disk images between two storage devices when the VM is in a
not running state (including VMs that are suspended with a checkpoint file). This function does not
require shared storage; the move is between separate repositories.
2
A “hot migrate” (also called a “live migrate”) is the migration of a running VM to another host and
starting it there with minimal resulting downtime (measured in milliseconds). This function requires
shared storage.
3
A “warm migrate” is the migration of a suspended VM to another host and starting it there with
brief resulting downtime (measured in seconds). This function requires shared storage.
A.5 VMware ESX VM Hypervisor (Experimental)
The following table represents the PlateSpin Orchestrate VM actions and whether or not PlateSpin
Orchestrate can perform that action on the guest operating system.
NOTE: Novell considers the PlateSpin Orchestrate provisioning technology used in conjunction
with VMware ESX as “experimental” because it has not yet been fully tested.
Table A-5 PlateSpin Orchestrate VM Actions Supported Operating Systems Using ESX
PlateSpin Orchestrate Managed
VM Action
Provision XXXXX
SLES 9 SLES 10 RHEL 4 RHEL 5
Windows
2003
Virtual Machine Technologies and Actions 53
Page 54

novdocx (en) 13 May 2009
PlateSpin Orchestrate Managed
VM Action
Pause
Resume
Suspend XXXXX
Shutdown XXXXX
Shutdown Agent XXXXX
Restart XXXXX
Move Disk Image
Hot Migrate
Warm Migrate
Resync State XXXXX
Save Config XXXX
Apply Config
Create Template
Delete / Destroy ResourceXXXXX
1
2
3
SLES 9 SLES 10 RHEL 4 RHEL 5
XXXXX
XXXXX
XXXXX
Windows
2003
Checkpoint XXXXX
Restore XXXXX
Remove Template Dependency
Install Agent XXXXX
Personalize XXXXX
Cancel Action XXXXX
Check Host AssignmentXXXXX
Launch Remote DesktopXXXXX
1
A “move” is the relocation of VM disk images between two storage devices when the VM is in a
not running state (including VMs that are suspended with a checkpoint file). This function does not
require shared storage; the move is between separate repositories.
2
A “hot migrate” (also called a “live migrate”) is the migration of a running VM to another host and
starting it there with minimal resulting downtime (measured in milliseconds). This function requires
shared storage.
3
A “warm migrate” is the migration of a suspended VM to another host and starting it there with
brief resulting downtime (measured in seconds). This function requires shared storage.
54 PlateSpin Orchestrate 2.0 Virtual Machine Management Guide
Page 55

B
Documentation Updates
This section contains information about documentation content changes that were made in this
PlateSpin Orchestrate Virtual Machine Management Guide after the initial release of PlateSpin
Orchestrate 2.0. The changes are listed according to the date they were published.
The documentation for this product is provided on the Web in two formats: HTML and PDF. The
HTML and PDF documentation are both kept up-to-date with the changes listed in this section.
If you need to know whether a copy of the PDF documentation that you are using is the most recent,
the PDF document includes a publication date on the title page.
The documentation was updated on the following dates:
Section B.1, “November 17, 2009,” on page 55
Section B.2, “July 9, 2009,” on page 55
Section B.3, “June 17, 2009 (2.0.2 Release),” on page 55
novdocx (en) 13 May 2009
B
B.1 November 17, 2009
Updates were made to the following sections:
Location Update
Chapter 5, “Understanding Autoprep,” on
page 41
New content.
B.2 July 9, 2009
Updates were made to the following sections:
Location Update
Section A.1, “Virtual Machine
Technologies,” on page 47
Section A.5, “VMware ESX VM Hypervisor
(Experimental),” on page 53
Added information to the VMware Server footnote to
indicate that this is an “experimental” provisioning adapter.
Moved this section to the end of the appendix and added
an explanatory note to indicate that PlateSpin Orchestrate
uses an “experimental” provisioning technology to work
with the VMware ESX VM Hypervisor.
B.3 June 17, 2009 (2.0.2 Release)
Updates were made to the following sections:
Documentation Updates
55
Page 56

Location Update
novdocx (en) 13 May 2009
Section 1.1.1, “Configuring Policies for
Virtual Center,” on page 9
Chapter 4, “Troubleshooting Provisioning
Actions,” on page 35
Appendix A, “Virtual Machine Technologies
and Actions,” on page 47
Section A.2.1, “Additional Xen Provisioning
Adapter Information,” on page 50
Section A.3, “VMware Virtual Center,” on
page 50
Section A.3.1, “Additional VMware Virtual
Center Provisioning Adapter Information,”
on page 51
Added important note to alert users about limitation of one
Virtual Center Server installation per PlateSpin Orchestrate
grid.
Added a new section, “Multiple instances of the same Xen
VM running when located on shared storage” on page 38.
Added various changes to indicate support for SLES 11.
New content.
Added important note to alert users about limitation of one
Virtual Center Server installation per PlateSpin Orchestrate
grid.
New content.
56 PlateSpin Orchestrate 2.0 Virtual Machine Management Guide
 Loading...