

Page 1

OpenOffice.org 2.x
Setup Guide
[Setup Guide 2.0]
[Rev A_10]
First edition: [2005-02-24]
First English edition: [2005-02-24]
Page 2

Page 3

Contents
Contents
Contents.................................................................................................................................................i
Copyright and trademark information.................................................................................................iii
Feedback.........................................................................................................................................iii
Acknowledgments...............................................................................................................................iv
Modifications and updates..............................................................................................................iv
Overview...............................................................................................................................................1
General Installation Information...........................................................................................................3
RPM-based Installation........................................................................................................................5
Installation........................................................................................................................................5
Removal...........................................................................................................................................5
Debian-based Installation.....................................................................................................................7
Installing .debs.................................................................................................................................7
Removing .debs................................................................................................................................7
Installing from Linux RPMs............................................................................................................7
Solaris Installation................................................................................................................................9
Installation........................................................................................................................................9
Removal...........................................................................................................................................9
FreeBSD Installation...........................................................................................................................11
Quick method.................................................................................................................................11
Removal.........................................................................................................................................11
Gentoo installation..............................................................................................................................13
Removal.........................................................................................................................................14
Additional Information..................................................................................................................14
Slackware Installation.........................................................................................................................15
Removing ......................................................................................................................................15
Installation on Other UNIX systems..................................................................................................17
Mac OS X Installation........................................................................................................................19
Installing X11.................................................................................................................................19
Using Java 1.5................................................................................................................................21
OpenOffice.org 2.x Setup Guide i
Page 4

Contents
Removal.........................................................................................................................................22
Before OOo 2.0.2.................................................................................................................22
After OOo 2.0.2....................................................................................................................23
Windows® 98/ME/NT/2000/XP Installation.....................................................................................25
Single-User Installation.................................................................................................................25
Multiple User Environment under Windows® NT/2000/XP.......................................................30
User Configuration from a Multi-user install................................................................................33
Customizing an Installation................................................................................................................37
Auto installation.............................................................................................................................37
Installing individual modules from RPMs....................................................................................37
Installing multiple instances of OpenOffice.org with the same version number.........................38
Appendix 1 — MacOSX Extras.........................................................................................................41
Installing X11.................................................................................................................................41
How to install X11 with Mac OS X 10.3 or 10.4 ?.......................................................................41
Installing X11 on Panther(10.3)...........................................................................................41
Installing X11 on Tiger(10.4)...............................................................................................41
Launching X11.....................................................................................................................41
X11 claims to be already installed.......................................................................................42
Check and Select X11 settings :...........................................................................................42
1.6 How to get rid of the Xterm that starts without asking ?..............................................42
Public Documentation License, Version 1.0......................................................................................43
OpenOffice.org 2.x Setup Guide ii
Page 5

Copyright and trademark information
Copyright and trademark information
The contents of this Documentation are subject to the Public Documentation License, Version
1.0 (the "License"); you may only use this Documentation if you comply with the terms of this
License. A copy of the License is available at:
http://www.openoffice.org/licenses/PDL.rtf
The Original Documentation is Setup Guide 2.0. The Initial Writer(s) of the Original
Documentation is/are G. Roderick Singleton © 2005. All Rights Reserved. (Initial Writer
contact(s):G. Roderick Singleton.)
Contributor(s): Jacqueline McNally, Sophie Gautier_________________________________.
Portions created by G. Roderick Singleton are Copyright © 2005. All Rights Reserved.
(Contributor contact(s):G. Roderick Singleton.
Portions created by Marko Moëller are Copyright © 2005. All Rights Reserved.
(Contributor contact(s):Marko. Moeller.
All trademarks within this guide belong to legitimate owners.
[Note: a copy of the PDL is included in this template and is also available at:
http://www.openoffice.org/licenses/PDL.rtf.]
Feedback
Please direct any comments or suggestions about this document to:
grsingleton@openoffice.org
OpenOffice.org 2.x Setup Guide iii
Page 6

Acknowledgments
Acknowledgments
Derek Dreger for taking care of the 1.x.x Setup Guides.
mantas@openoffice.org for Debian install from rpm, Jaqueline for Windows®, Shaun
McDonald for the Mac section, maveric@openoffice.org and too many others to mention
individually.
Modifications and updates
Version Date Description of Change
[0.15a] [2005-08-18] [Markomlm/grs: Solaris Part added and minor edits for style]
[0.16] [2005-08-29] [grs: 16th -- added upgrade from 1.1.x warning]
[0.17] [2005-08-31] [grs: 17th – changed install script hyperlink]
[0.18] [2005-09-05] [grs: 18
[0.19] [2005-09-07] [grs: 19
[0.20] [2005-09-20] [grs: 20
[0.21] [2005-10-02] [grs: 22nd Updated with Slackware installation ]
[Rev A] [2005-10-12] [grs: Rev A – First non draft version ]
[Rev. A_01] [2005-10-13] [markomlm: – First non draft version linked pictures]
[Rev. A_02] [2005-10-18] [grs: – minor edits and spelling corrections]
[Rev. A_03] [2005-10-23] [grs: – create A4 version and spelling corrections]
[Rev. A_04] [2005-10-26] [grs: – installing modules added]
[Rev. A_05] [2005-12-31] [grs: – new customization added and pzisson Getnoo changes
[Rev. A_06] [2006-02-13] [grs: – multi-instance section added]
[Rev. A_08] [2006-06-10] [grs: – X11 install for MacOSX]
[Rev. A_09] [2006-06-13] [smsm1: – MacOSX corrections]
[Rev. A_10] [2006-06-13] [grs: – fix formatting]
th
th
th
integrated]
-- fixed typos, remove Ubuntu script note
-- Changed debian section to reflect new filenames
-- Updated to Uhv methods in RPM section
OpenOffice.org 2.x Setup Guide iv
Page 7

Acknowledgments
OpenOffice.org 2.x Setup Guide v
Page 8

Page 9

Overview
This document is designed to provide users with instructions on installing OpenOffice.org 2.x
and its successors on their systems.
Overview
OpenOffice.org 2.0 Setup Guide 1
Page 10

Overview
OpenOffice.org 2.0 Setup Guide 2
Page 11

General Installation Information
General Installation Information
Starting with OpenOffice.org 2.x, installation is done using the native installers available on
each system. This means that installation only requires that you unpack the download image
and then launch the local tool.
Using the native installers will provide better upgrades et cetera.
Language packs are mostly available from each Native Language Community and may also be
available from http://oootranslation.services.openoffice.org/pub/OpenOffice.org/ plus the
appropriate release. For example,
http://oootranslation.services.openoffice.org/pub/OpenOffice.org/2.0rc2/
Warning: Please keep in mind that upgrading from 1.1.x to any 2.x release is NOT
recommended, keep the installation of each separate.
OpenOffice.org 2.0 Setup Guide 3
Page 12

General Installation Information
OpenOffice.org 2.0 Setup Guide 4
Page 13

RPM-based Installation
Installation
1. Unpack the downloaded image into a directory. For example,Currently, the following
command would unpack into the current directory:
tar xvzf Ooo_2.0.xxx_LinuxIntel_install.tar.gz .
1. su to root, if necessary.
2. cd into the directory with the unpacked image. This could be RPMS.
3. Then execute rpm -Uvh *rpm for the standard installation in /opt. If you prefer to
install in another directory, try
rpm -Uvh --prefix /<where_ooo_should_go>/ *.rpm or something
similar. When relocating, only relocate the base rpms, in other words, do not include
any user interface RPMs as these must go in their default locations for proper system
integration.
Note: Upgrade the core first and then upgrade the user interface. Separating steps 3 and 4 ensures a good
upgrade.
RPM-based Installation
4. cd into the desktop-integration directory and execute
rpm -Uvh for the menu rpm that applies to your system. For example, on a RedHatbased system, you would use
rpm -Uvh openoffice.org-redhat-menus-<release>.noarch.rpm or
similar.
5. Download and install any language packs needed for OpenOffice.org. For example, if
you relocated Openoffice.org, you need
rpm -Uvh --prefix //<where_ooo_should_go>/ <name_of_pack>.rpm
Please read the man page for the rpm that comes with your distribution and select the options
that best apply to your situation. The examples above are only that, examples.
Installing individual components is the same as above but only requires the specific module be
installed. For example, install all core rpms and then install those for each module you wish,
such as, openoffice.org-impress-2.0.0-1.i586.rpm to install only Impress.
Other modules may also be necessary.
Note: You may substitute -ihv for -Uhv in any of the above commands to install without upgrading.
Removal
I found the following useful:
rpm -qa openoffice.org\* | xargs rpm --erase -–nodeps
Another method of removing an OpenOffice.org release is to use a file that lists the modules as
follows:
OpenOffice.org 2.0 Setup Guide 5
Page 14

RPM-based Installation
rpm -qa | grep openoffice > rmlist
which records what is installed in the file rmlist. The grep string will, of course, vary
according to the release. Edit rmlist for anything you do not want to remove. Then when it
is time to remove a release one simply has to enter:
rpm -e `cat rmlist`
Warning: Using rpm -e openoffice.org\* does not work. under FC3 or Suse 9.3 and possibly other
distributions.
Remember with the development and beta releases that it may be best to remove
<installdir>/openoffice* and any $HOME/.openoffice* files and directories
before installing a new version.
There may be better ways to do this but I find the above effective. Please check
http://installation.openoffice.org/source/browse/installation/setup_native/scripts/ for example
install and uninstall scripts or use them as a model for your own.
OpenOffice.org 2.0 Setup Guide 6
Page 15

Debian-based Installation
Debian-based Installation
Installing .debs
The simplest way to install the OpenOffice.org package you've downloaded is use the
command dpkg -i (short for dpkg –install).
1. First log on as root or from the GUI, open a root terminal.
2. Type:
dpkg -i -–force-overwrite openoffice.org*.deb \
desktop-integration/openoffice.org-debian-menus*.deb
and openoffice.org will be installed. If you already had an older version, dpkg will
upgrade it rather than installing both versions at once.
3. Install any language packs needed for OpenOffice.org.
Removing .debs
4. If you want to remove a package, you have two options. The first is most intuitive:
dpkg -r openoffice.org This will remove the openoffice.org package
(-r is short for --remove).
Note that you give only the 'openoffice.org' for --remove, while --install requires the entire .deb
filename.
Installing from Linux RPMs
1. Download Ooo_2.0.xxx_Linux<NeededCPUArchitecture>_install.tar.gz.
2. Unpack downloaded .tar.gz archive, for example with command 'tar xvzf'
3. cd into the RPMS subfolder, which will be created after unpacking the .tar.gz
4. Run su (or sudo -s, if your system uses sudo and you are allowed to run a shell as
root with sudo -s. For example, Debian-based Ubuntu Linux uses sudo as the
default utility that permits a user to become administrator (root)
5. Delete any openoffice.org*menus*.rpm files that do not apply to your system. For
example openoffice.org-suse-menus*.rpm and openoffice.org-redhat-menus*.rpm are
not for Debian.
6. Install the alien utility for converting RPM packages to native Debian packages
(.DEB) with command 'apt-get install alien' or by manually downloading
from http://packages.debian.org/alien/.
OpenOffice.org 2.0 Setup Guide 7
Page 16

Debian-based Installation
Note: alien versions 8.50 and earlier are known not to set the correct file permissions for
some files. Please refer to issue 54163 Solution: Use alien version 8.51 or newer or workaround the
problem by manually correcting the file-permissions
1. Run command 'alien -k *.rpm' to produce .deb packages
2. Install .deb packages with command
dpkg -i -–force-overwrite openoffice.org*.deb
Note: Using -–force-overwrite option can prevent errors where files belong to several packages.
3. Optionally install java runtime environment (j2re) from www.blackdown.org
4. Install any language packs needed for OpenOffice.org (also converted to .deb format
with alien utility)
5. Exit from administrator (root) shell with command 'exit'
6. Now you can run OpenOffice with the command
/opt/openoffice.org2.0/program/soffice.
Note: For those willing to accept development snapshots, there is another possibility, simply grab the debs from
ftp://ftp.linux.cz/pub/localization/OpenOffice.org/devel/ in the 680 directory. Pick your
release and let us know which works for you.
OpenOffice.org 2.0 Setup Guide 8
Page 17

Solaris Installation
Installation
1. Download Ooo_2.0.xxx_SOLARIS<NeededCPUArchitecture>_install.tar.gz.
2. Unpack the downloaded image into a directory. For example, the following command
will unpack into the current directory:
gunzip -c OOo_*_Solaris*_install.tar.gz | tar -xf -
This creates a new subdirectory which includes the installation-files.
Use the ls command to find the name of the new directory then use the cd command
to enter it.
3. cd into the packages subfolder. In this Directory you will find the needed packages
to install OpenOffice.org and a package for the desktop-integration in Gnome.
4. Run su to become the root user.
5. If Gnome is not installed on your system, delete the subdirectory gnome-desktop-
integration
Solaris Installation
6. To permanently avoid recurring queries at the installation, you should produce an
admin file with the following content:
action=nocheck
conflict=nocheck
idepend=nocheck.
You can do this with the following commands:
echo action=nocheck >admin
echo conflict=nocheck >>admin
echo idepend=nocheck >>admin
7. Install the packages with:
pkgadd -a admin -d . openoffice.org*
8. Install any language packs needed for OpenOffice.org.
Removal
No info. Probably pkgrm
OpenOffice.org 2.0 Setup Guide 9
Page 18

Solaris Installation
OpenOffice.org 2.0 Setup Guide 10
Page 19

FreeBSD Installation
FreeBSD Installation
This is a quick outline of installation on a FreeBSD system. For a detailed description, please
see
http://www.freebsd.org/doc/en_US.ISO8859-1/books/handbook/ports-overview.html.
Quick method
1. Download from
2. Unpack from its distribution format (typically a tarball compressed with
compress(1), gzip(1), or bzip2(1).
3. pkg_add
4. Install Java as needed.
5. Install any language packs needed for OpenOffice.org.
Removal
No info. Probably pkg_rm
OpenOffice.org 2.0 Setup Guide 11
Page 20

FreeBSD Installation
OpenOffice.org 2.0 Setup Guide 12
Page 21

Gentoo installation
Gentoo installation
OpenOffice.org 2.x is available in the Portage tree used to install applications under Gentoo
Linux.
Before starting it is a good idea to update the Portage tree if you have not done so recently:
emerge –-sync
Next, check to see which packages are currently available for your architecture:
emerge –-search openoffice
At the time of this writing there were two OpenOffice.org 2.x packages available for x86based systems: app-office/openoffice, a source-based package for compilation on your system;
and app-office/openoffice-bin, a pre-compiled binary package. Both packages were based on
version 2.0.0. By the time you read this these packages will probably be updated.
There are advantages and disadvantages to each of these options. Emerging appoffice/openoffice will compile OpenOffice.org directly on your computer, with all of the
optimizations you have designed into your system. You will also have the most control over
how OpenOffice.org 2.x is installed on your system. For example, by specifying a Java USE
flag Portage will insure that all Java packages needed by OpenOffice.org for full functionality
will be installed.
The disadvantage is that OpenOffice 2.x is a very large package, and installation will take
hours. Since the installation is automated by Portage you may choose to install this package
and walk away until the installation is complete.
The app-office/openoffice-bin package, if available for your architecture, is already compiled
into binaries. The compilation is based on a “generic” architecture and typically includes
everything OpenOffice.org offers. The advantage to using this package is that, once
downloaded, installation only takes a few minutes.
Note: Portage does not permit the installation of -bin and compile-locally packages of the same application on the
same system, even with different versions. If you wish to switch from a locally compiled version to a pre-compiled
binary, or vice versa, you must first remove the existing version of the application. See the removal instructions
below.
Once you have decided which package you want to install you can test the installation using
the “pretend” option:
emerge –-pretend openoffice or:
emerge –-pretend openoffice-bin
You will be presented with a list of all of the packages needed to successfully install
OpenOffice.org 2.x on your system. If you want to force installation of any Java packages that
OpenOffice.org 2.x can use you can specify a USE flag on the command line:
USE=”java” emerge –-pretend openoffice or:
USE=”java” emerge –-pretend openoffice-bin
OpenOffice.org 2.0 Setup Guide 13
Page 22

Gentoo installation
To prevent the installation of any Java dependencies, simply change the “java” flag above to
“-java”.
To perform the actual install, the command (Use flag omitted – enter it if necessary) is:
emerge openoffice or:
emerge openoffice-bin
Removal
To remove OpenOffice.org from your system the command is:
emerge –-unmerge openoffice or:
emerge –-unmerge openoffice-bin
Additional Information
More information about Gentoo Linux, Portage, and the emerge command can be found at
http://www.gentoo.org.
OpenOffice.org 2.0 Setup Guide 14
Page 23

Slackware Installation
Installing from Linux RPMs
1. Download Ooo_2.0.xxx_Linux<NeededCPUArchitecture>_install.tar.gz.
2. Unpack downloaded .tar.gz archive, for example with command 'tar xvzf'
3. cd into RPMS subfolder, which will be created after unpacking the .tar.gz
4. Run su (or sudo -s, if your system uses sudo and you are allowed to run a shell as
root with sudo -s.
5. Delete any openoffice.org*menus*.rpm files that do not apply to your system. For
example openoffice.org-debian-menus*.rpm is not for Slackware.
6. Install the rpm2tgz utility, if it is missing, for converting RPM packages to native
Slackware packages (.tgz).
7. Running rpm2tgz produces a .tgz file which can be installed using the
installpkg or pkgtool utility.
8. Install .tgz packages with either command installpkg or pkgtool. For example,
installpkg openoffice.org-base-2.0.0-1.i586.tgz. Repeat as
necessary to install all the packages.
Slackware Installation
9. Use rpm2tgz to convert the desktop integration package and install.
10. Optionally install java runtime environment (j2re).
11. Install any language packs needed for OpenOffice.org (also converted to .tgz format
with rpm2tgz utility)
12. Exit from administrator (root) shell with command 'exit'
13. Now you can run OpenOffice with the command
/opt/openoffice.org2.0/program/soffice.
Note: Please check paths, permissions and users when using rpm2tgz.
Removing
1. Use removepkg openoffice.org to remove the suite.
OpenOffice.org 2.0 Setup Guide 15
Page 24

Slackware Installation
OpenOffice.org 2.0 Setup Guide 16
Page 25

Installation on Other UNIX systems
Installation on Other UNIX systems
If you have a UNIX distribution that does not have an up-to-date rpm or you are unsure that you
system is current and rpm installation is failing, then try the following:
a) Use the --nodeps flag to install a rpm without having dependent packages in the
rpm database.
b) Get and use rpm2cpio to convert the rpm files to cpio archives and then employ
cpio to install the software. There is a perl version of rpm2cpio at
http://www.iagora.com/~espel/rpm2cpio that should be portable. However, if it fails,
try pre-compiled rpm-package (including rpm2cpio) from
ftp://ftp.rpm.org/pub/rpm/dist/rpm-4.1.x/rpm-4.1.i386.tar.gz or get the sources from
ftp://ftp.rpm.org/pub/rpm/dist/rpm-4.1.x/rpm-4.1.tar.gz
c) Install any language packs needed for OpenOffice.org.
OpenOffice.org 2.0 Setup Guide 17
Page 26

Installation on Other UNIX systems
OpenOffice.org 2.0 Setup Guide 18
Page 27
Mac OS X Installation
Mac OS X Installation
OpenOffice.org 2.x is only supported on Mac OS X 10.3 and 10.4.
Installing X11
You must have the application 'X11.app' installed in your utilities folder. To install X11 use
the optional installer on your install CD or DVD and select X11 for installation. For those
MacIntosh users that have trouble with this process, please see Appendix 1 — MacOS Extras
for a simple step-by-step procedure.
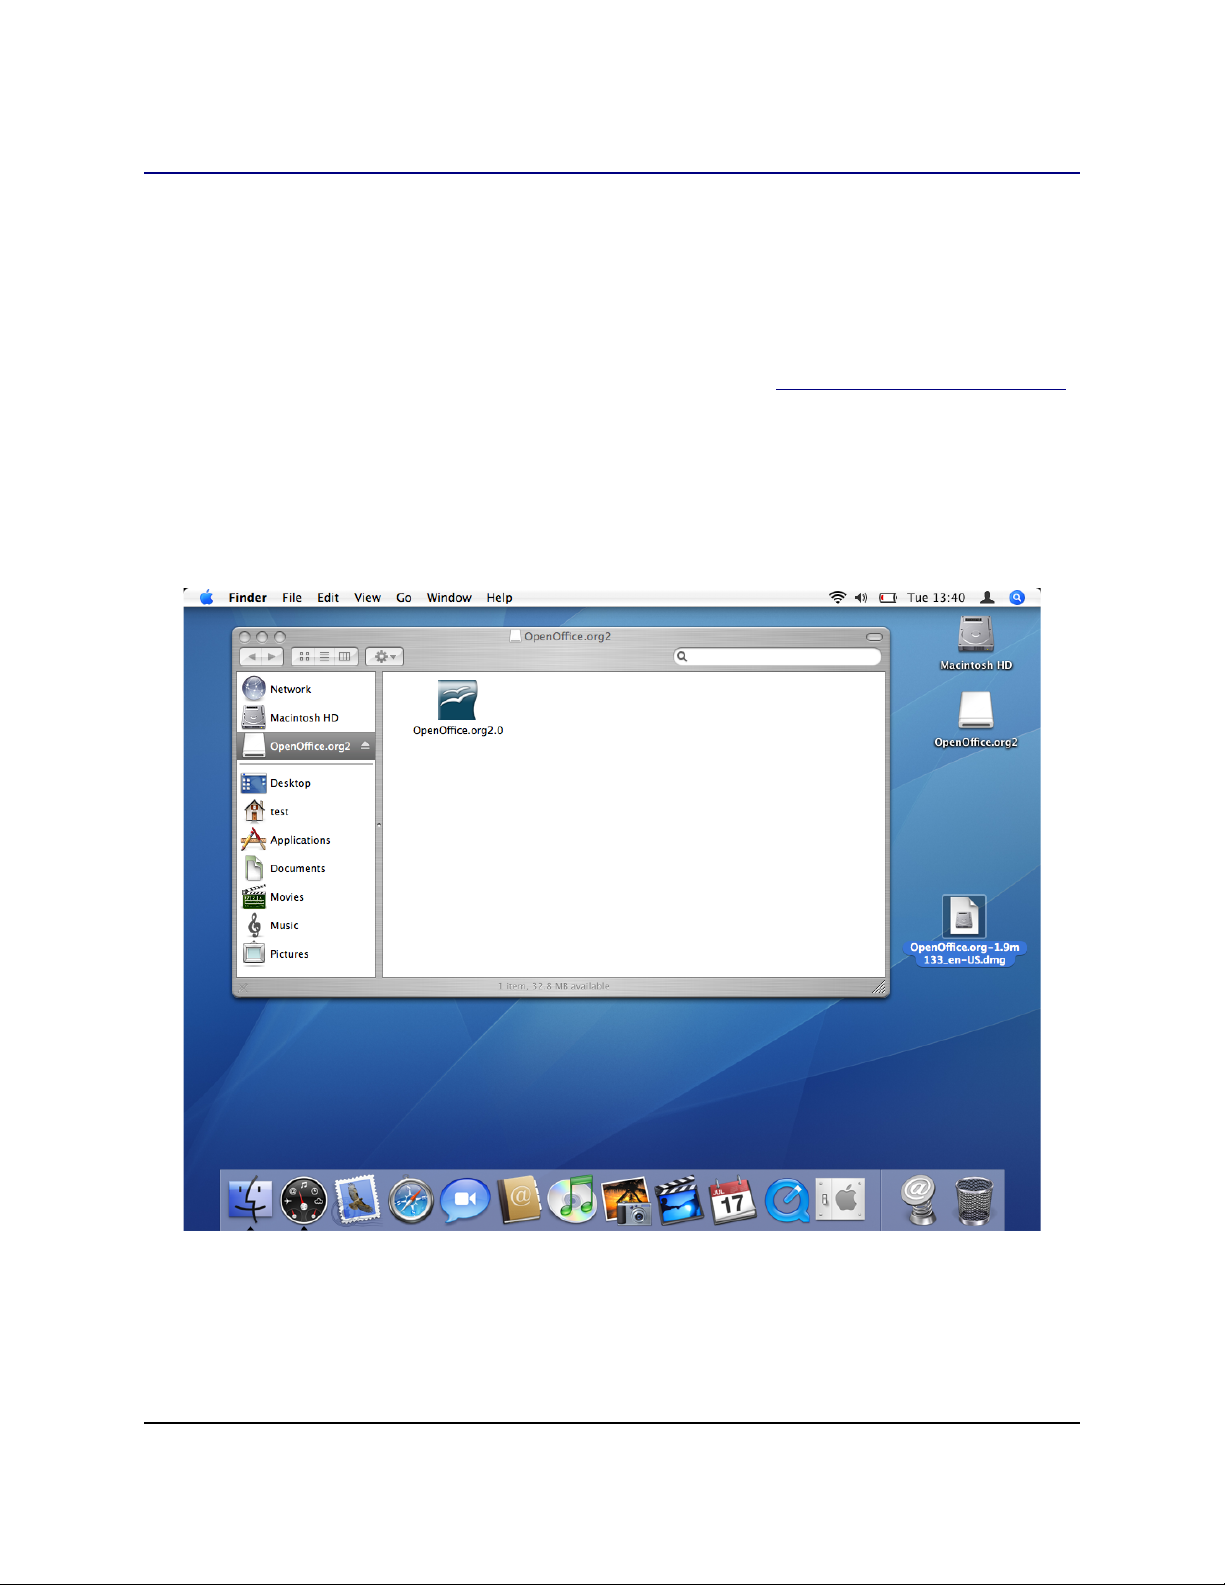
Install OpenOffice.org 2.x Instructions
1. Download the disk image for OpenOffice.org from the OpenOffice.org web site.
Locate your disk image and open it.
2. Drag and Drop the icon within the disk image to any place you like on your hard disk.
It is recommended to place it in your Applications folder.
OpenOffice.org 2.0 Setup Guide 19
Page 28

Mac OS X Installation
3. You may get a message similar to the one below if you have OpenOffice installed
already.
OpenOffice.org 2.0 Setup Guide 20
Page 29
Mac OS X Installation
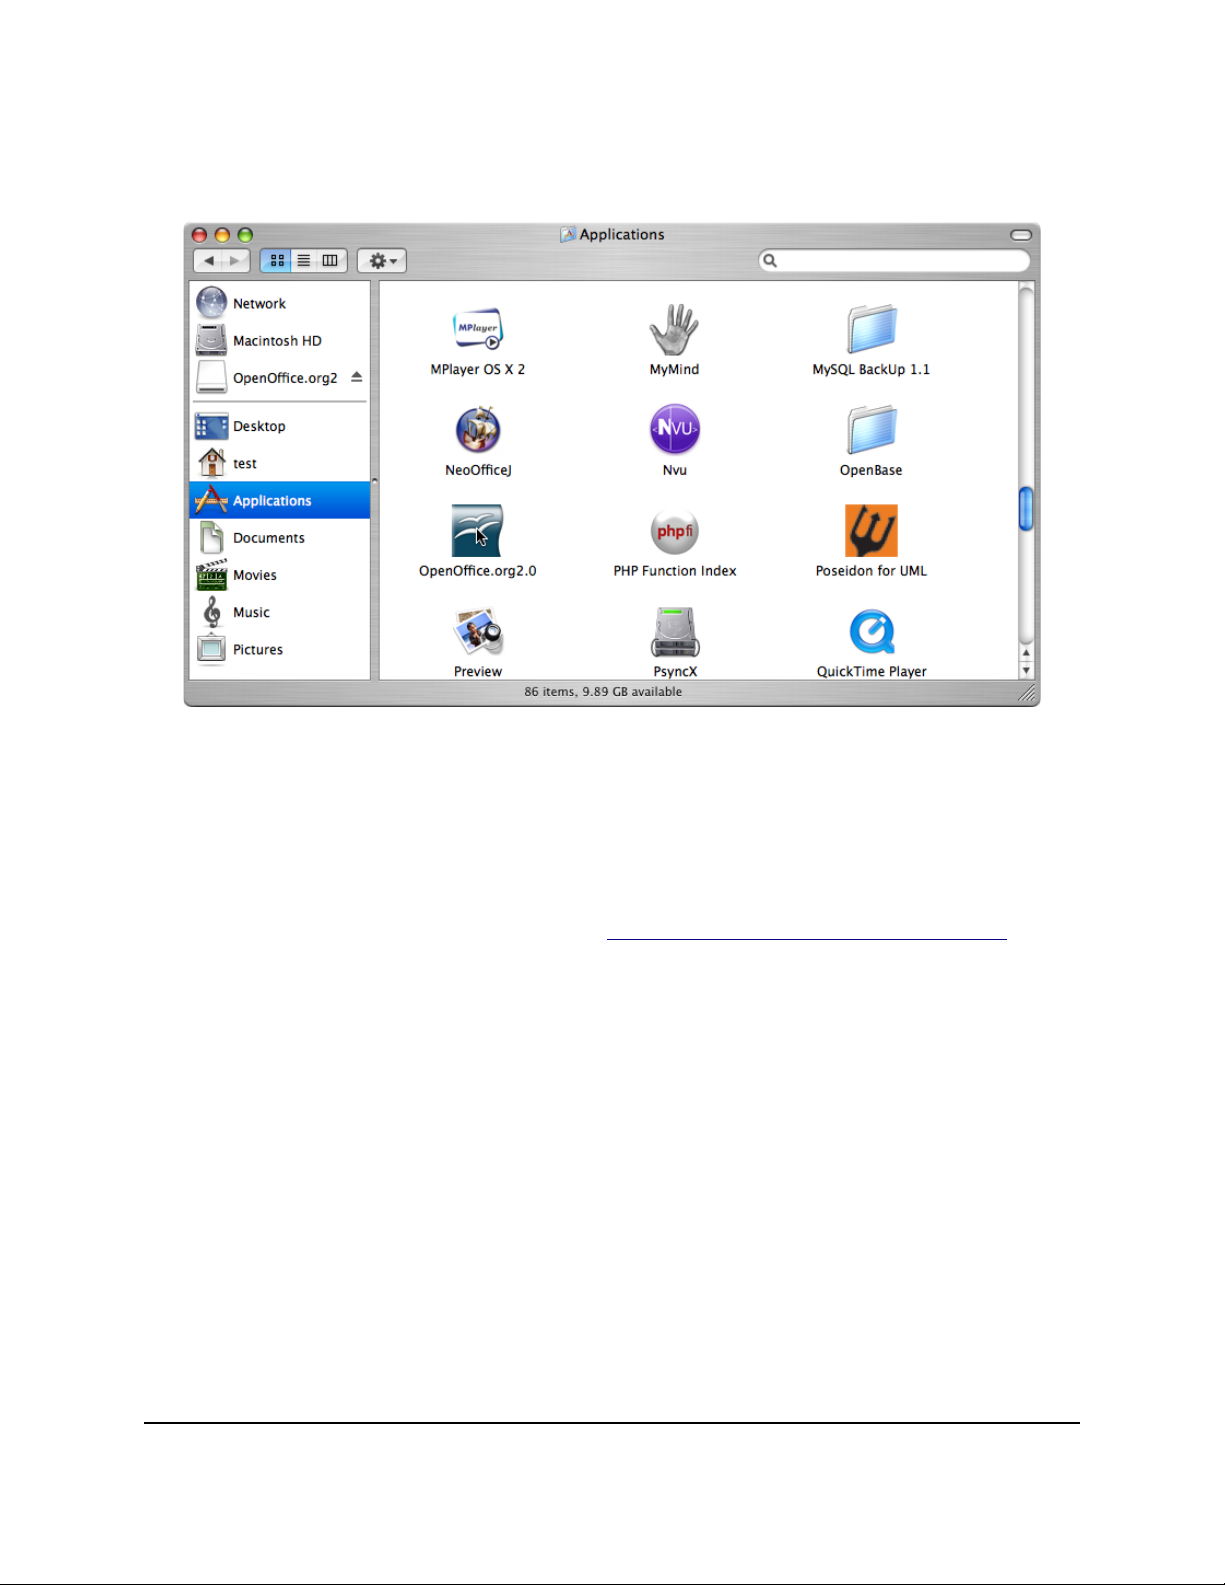
4. Go to the place that you placed the application in the previous step. You should see the
application icon showing. To start OpenOffice double click the icon.
Using Java 1.5
There are some modules available for OpenOffice that require Java 1.5 to work. On a Mac you
also require Mac OS X 10.4 (aka Tiger).
1. Make sure that you have Java 1.5 installed on your system. If you don't have it
download it from apple's support site http://www.apple.com/support/downloads/
2. Start OpenOffice.org 2.x.
3. Choose 'Tools' > 'Options...'.
4. In the dialog that appears select 'OpenOffice.org' in the left, then choose 'Java'.
OpenOffice.org 2.0 Setup Guide 21
Page 30

Mac OS X Installation
5. By default you will be using Java 1.4.2. Java 1.5 will not appear in the list, don't worry.
That is why I have put this section in here. It took me a while to figure it out.
6. Deselect 'Use a Java runtime environment' and click 'OK', you will be presented with a
warning, don't worry just click 'OK'.
7. Restart OpenOffice.org and repeat step 4.
8. Enable 'Use a Java runtime environment'. After a few moments the list will be
populated. Select the appropriate version.
9. Click 'OK'. After restarting OpenOffice.org the newly selected JRE will be used.
10. Install any language packs needed for OpenOffice.org.
Removal
To remove the Application
The normal Apple removal process is to drag the icon for the application to the trash.
To remove a User installation
Before OOo 2.0.2
1. Open a terminal : X11 menu ->Terminal
2. In the terminal window enter the following two commands:
a) cd ~username<enter> where username is the login name of the user. e.g.
joed
b) rm -rf .openoffice.org2<enter>
OpenOffice.org 2.0 Setup Guide 22
Page 31

Mac OS X Installation
After OOo 2.0.2
In OOo 2.0.2, the preferences and settings for OOo on the mac moved from ~/.openoffice.org2
to ~/Library/Application Support/OpenOffice.org 2.0.
1. In the Finder go to your home folder.
2. Enter the “Library” folder, then the “Application Support” folder.
3. In there you should find the folder named “OpenOffice.org 2.0” Move that to the trash
and then empty the trash.
OpenOffice.org 2.0 Setup Guide 23
Page 32

Mac OS X Installation
OpenOffice.org 2.0 Setup Guide 24
Page 33

Windows® 98/ME/NT/2000/XP Installation
Windows® 98/ME/NT/2000/XP Installation
This section assumes some basic knowledge of Windows® and is not intended to be a lesson in
Windows® administration as there are too many variations. The following step-by-step
instructions will allow you to install OpenOffice.org version 2.x and later releases on a
Windows®-based system from a downloaded image. If you are installing from a CD, you will
not have to unpack the image but, depending upon your Windows® release, you may have to
copy the installation files from the CD to disk.
The first thing you'll want to do is read through these instructions completely, and use the
OpenOffice.org site to answer any questions you might have. The site contains documentation
for users of all levels, beginner to advanced and is definitely the best place to get information.
All new Windows® users of OpenOffice.org and even more experienced users should start by e
browsing the FAQs.
Note: If you will be installing OpenOffice.org on a Windows® PC running NT/2000/XP that will be used by more
than one user, and all users are to be able to use OpenOffice.org (each user logs in separately), please see Multiple
User Environment under Windows® NT/2000/XP.
Note: Should you receive the error code "Internal error 2755. 110" while installing OOo 2.x on XP Pro, you may
use these steps to resolve:
1. Right-click the folder "OpenOfficeorg 2.x Installation Files," Click "Properties,"
2. Click "Advanced," Uncheck the box beside "Encrypt contents to secure data,"
3. Click "Ok." This should clear up the problem.
Checklist for all installations.
1. Read through these instructions and print them, if desired.
2. Decide whether to install for single users or multiple users.
3. Review the System Requirements for OpenOffice.org use.
4. Unpack the Downloaded OpenOffice.org 2.x file.
5. Turn off all virus protection and perhaps even disconnect from the Internet.
6. Install Java JRE if you need the features that are Java dependent, such as Base.
7. Execute the Installation Program.
8. Run OpenOffice.org 2.x.
Single-User Installation
Execute the NSIS-Installer for the downloaded OpenOffice.org 2.x files
Either using Windows® Explorer or Mozilla/Netscape's Download
Manager, navigate to the OpenOffice.org file you downloaded. It should be an executable
file like Ooo_2.0_Win32Intel_install_en.exe and double-click to launch the
NSIS-Installer. Follow the prompts, and the preparation process will be started.
OpenOffice.org 2.0 Setup Guide 25
Page 34

Windows® 98/ME/NT/2000/XP Installation
OpenOffice.org 2.0 Setup Guide 26
Page 35

Windows® 98/ME/NT/2000/XP Installation
Choose a folder where the installation files will be unpacked and saved an click 'Unpack'.
OpenOffice.org 2.0 Setup Guide 27
Page 36

Windows® 98/ME/NT/2000/XP Installation
Execute the installation program
Once the files are unpacked, the OpenOffice.org installation program will launch
automatically. Follow the prompts, and OpenOffice.org will be installed on your system, ready
for use.
Note: Depending on your install set you may be asked if you want OpenOffice.org to be your default Office suite.
If you answer "yes" and then change your mind, returning to the prior state is tedious. You need to re-associate all
Office files login as administrator and run the installation program.
OpenOffice.org 2.0 Setup Guide 28
Page 37

Note: You will need to use the scroll bar to view all of the license text
Windows® 98/ME/NT/2000/XP Installation
If you do not wish to accept the license, you will be prompted to confirm this before the
installation program closes.
Read the license, select “I accept the terms in the license agreement”,
and click Next.
The Customer Information window appears.
Install Java JRE if you need the features that are Java dependent.
Unpack the downloaded OpenOffice.org 2.x file.
OpenOffice.org 2.0 Setup Guide 29
Page 38

Windows® 98/ME/NT/2000/XP Installation
Multiple User Environment under Windows® NT/2000/XP
Login as Administrator.
1. The first steps are the same like the single user installation. If the dialog 'Customer
information' appears, choose the option 'Anyone who uses this computer...'
This action will install OpenOffice.org in multi-user configuration. Each user can then invoke
OpenOffice.org from the program menu which will allow the user to configure OpenOffice.org
as a workstation copy with no further effort on the part of the user.
You may leave this form blank, or enter your User Name and if applicable, Organization.
If you logged in as administrator you will be prompted to install for all users.
Complete Customer Information form and click Next.
The Setup Type window appears.
OpenOffice.org 2.0 Setup Guide 30
Page 39

Windows® 98/ME/NT/2000/XP Installation
1. Select a setup type (we recommend Complete) and click Next.
The File Type window is displayed.
Select the file types that you wish to open with the OpenOffice.org program and click Next...
Note: If you change your mind, returning to the prior state is tedious. You will need to re-associate all Office files
with the appropriate file type..
For example, in the above window, none of the file types are selected. This means that an
existing application or program will start when these file types are opened. To use
OpenOffice.org to view, edit and print these file types you will need to start the
OpenOffice.org program then open the file by choosing Open from the File menu.
To read more about file associations, please see the FAQ on the OpenOffice.org web site.
The Ready to Install the Program window is displayed.
OpenOffice.org 2.0 Setup Guide 31
Page 40

Windows® 98/ME/NT/2000/XP Installation
Click the Back button to return to previous Windows® to change your installation options.
1. Click Install to begin the installation process.
1. Click the Finish button when the Installation Wizard Finished window is displayed.
2. If you logged in as administrator, logout.
OpenOffice.org 2.0 Setup Guide 32
Page 41

Windows® 98/ME/NT/2000/XP Installation
User Configuration from a Multi-user install
Each user should then invoke OpenOffice.org from the program menu which will allow the
user to configure OpenOffice.org as a workstation copy with no further effort on the part of the
user.
Run OpenOffice.org to ensure that the installation was successful
When you first run OpenOffice.org after a successfully installing the program, you will be
prompted to accept the license, enter your user name and register your copy.
1. Login using your user account, and if you installed OpenOffice.org successfully it will
appear on the Programs sub-menu of the Start menu.
2. Click on one of the OpenOffice.org components (we recommend Writer). The Welcome
window is displayed.
Click Next to display the License Agreement window.
OpenOffice.org 2.0 Setup Guide 33
Page 42

Windows® 98/ME/NT/2000/XP Installation
3. Scroll to read the license and click Accept to continue.
4. The user information window is displayed.
You are prompted to enter your name. This is used in the document properties,
templates and when you record changes made to documents. This is useful if you are
working on a document with others, but you don't need to complete this information in
order to proceed. This information can also be entered later when using the program.
5. Complete the form and click Next to display the Registration window.
You will need to be connected to the Internet if you select “I want to register now” and
click Finish. Your browser will display a welcome message on the OpenOffice.org web
site and then redirect you to a user survey page.
If you are not connected to the Internet, you can choose to register later.
Registration of OpenOffice.org and completion of the user survey is optional and is not
required for you to ensure full use of OpenOffice.org.
OpenOffice.org 2.0 Setup Guide 34
Page 43

Windows® 98/ME/NT/2000/XP Installation
Note: Registration of the OpenOffice.org program is completely separate from subscribing to various
OpenOffice.org mailing lists and registering yourself with the www.openoffice.org site to submit bugs,
enhancement requests and contribute to projects.
You have successfully installed and run OpenOffice.org. You should now refer to the on-line
help (Help->OpenOffice.org Help) or connect to the Internet to obtain support from the
www.openoffice.org web site by clicking the Support tab available from any web page.
OpenOffice.org 2.0 Setup Guide 35
Page 44

Windows® 98/ME/NT/2000/XP Installation
OpenOffice.org 2.0 Setup Guide 36
Page 45

Customizing an Installation.
Customizing an Installation.
Auto installation
Windows
With OpenOffice.org 1.1.x, Response Files could be used to customize an installation. Now
with 2.x using native installers, this option is no longer available for most operating systems.
Nonetheless, Windows® installer does offer an alternative for customizing as follows:
1. If you only want to make a silent installation, you can use the /qn parameter from
msiexec.exe (the Windows® Installer service).
2. If you want to change some other default values in the installation wizard, you can use
the freely available Orca Tool to edit the Windows® Installer database and to create a
transformation. Then you can start the installation with a command line like:
msiexec.exe /i openoffice.msi /qn TRANSFORMS=myTransform.mst
Of course the creation of the transformation requires some knowledge of the
Windows® Installer database. But for many problems this is not so difficult.
UNIX® based Systems
At the time of preparing this document, all *NIX system installations are, what were called
network installs in 1.1.x, and so there is no specific auto-installation procedure beyond the
default.
Installing individual modules from RPMs
There are occasions where a user will only want to install one or two modules. Doing this is as
easy as a full install from the RPMs; however, doing so requires some knowledge of what to
install. This section addresses this need.
1. Install all core modules as in
rpm -Uhv *core*.rpm
2. Install desired module. For example,
rpm -Uhv openoffice.org-writer-<release>-*.rpm
OpenOffice.org 2.0 Setup Guide 37
Page 46

Customizing an Installation.
However one also needs to know which of the others to install as well to ensure that the
module needed is fully functional. The following list should provide sufficient information to
allow a good decision in this situation:
Module Functionality
openoffice.org-gnome-integration-*.rpm
openoffice.org-graphicfilter-*.rpm
openoffice.org-javafilter-*.rpm
openoffice.org-pyuno-*.rpm
openoffice.org-spellcheck-*.rpm
openoffice.org-testtool-*.rpm
openoffice.org-xsltfilter-*.rpm
Needed to get OOo to behave as a nice desktop
citizen on gnome (respect some system preferences,
etc). So installing this is still recommended unless
you never want to run gnome.
Some filters for additional graphics file formats
(e.g. flash & svg export) - optional (and probably
only relevant for draw or impress).
Writer, Calc, Math, Impress,Draw: Some
import/export filters for file formats - optional.
Required for Base.
Support for add-ons and scripts written in python optional.
Without this, your writer won't do spell-checking.
Recommended
Needed only if you want to do quality analysis (qa)
- optional
More filters for xml file formats (xhtml, docbook),
that showcase the xslt capabilities - optional
Installing multiple instances of OpenOffice.org with the same version number
There are occasions when having multiple copies of OpenOffice.org available is important; for
example, when one works in more than one language and using a language pack is insufficient.
The following procedure shows a way to successfully accomplish this task.
Windows
1. Open Windows START MENU > RUN ...
2. Enter the path and file to setup.exe OR browse to the location where this file
exists.
3. Add, at the end of the line (i.e. after setup.exe), a space and the characters forward
slash and a as follows: " /a"
4. Click OK
5. Start setup
6. Select the location in which to install OpenOffice.org
Note: When you install the OpenOffice.org with the option /a then you have NO system integration. In
other words, no start menu entries and no file associations are set.
OpenOffice.org 2.0 Setup Guide 38
Page 47

Customizing an Installation.
7. After installation has completed, change to the new directory and do the following:
Open the file bootstrap.ini in a editor such as Notepad and change the line
UserInstallation=$SYSUSERCONFIG/Openoffice.org2
to
UserInstallation=$SYSUSERCONFIG/Openoffice.org2_dutch
or any other directory you want.
8. Start this new installation of OpenOffice.org from the directory where it was installed.
Linux
1. Open a new shell or terminal.
2. Change to the directory where all the rpm packages are. (e.g..
/tmp/openoffice/rpm)
3. Choose the location where to install the extra version of Openoffice.org. For example
into the directory /home/user1/office
4. Install the new version in a manner similar to the following:
5. rpm -ivh --install --dbpath /home/user1/office/.rpm --nodeps --prefix /home/user1/office/ openoffice*.rpm
Note: When you install the office in this way you have no system integration (no start menu entries and no
file association)
6. After installation has completed, change to the new directory and do the following:
Open the file bootstrap.ini in a editor such as vi and change the line
UserInstallation=$SYSUSERCONFIG/.openoffice.org2
to
UserInstallation=$SYSUSERCONFIG/.openoffice.org2_dutch
or any other directory you want.
7. Once installation is complete, Start this new installation of OpenOffice.org from the
directory where it was installed. e.g.
/home/user1/office/program/soffice
OpenOffice.org 2.0 Setup Guide 39
Page 48

Customizing an Installation.
OpenOffice.org 2.0 Setup Guide 40
Page 49

Appendix 1 — MacOSX Extras
Appendix 1 — MacOSX Extras
Installing X11
Installing X11 is necessary for using OpenOffice.org 2.0.x under Mac OS X.
Where to find X11 ?
Apple provides a packaged version of X11(supporting 2D and 3D material acceleration). This
version is available either from:
1. On the Mac OS X 10.4 installation set.
or
2. By downloading from <http://www.apple.com/support/downloads/x11formacosx.html>
Note: administrator rights are needed to perform the X11 installation. Also be aware that X11 is not installed by
default when you update from Panther (Mac OS X 10.3) to Tiger (MacOS X 10.4), the previous version
must be updated otherwise it doesn't work. What follows is also applicable to the X11 Panther version included in
the installation set.
How to install X11 with Mac OS X 10.3 or 10.4 ?
Installing X11 on Panther(10.3)
Use either the version provided on the 3rd Panther CD (in the 'packages' file), or, the preferred
choice, download from http://www.apple.com/support/downloads/x11formacosx.html.
Once the version of X11 is selected and on the machine, double-click on X11User.pkg
which starts the X11 installation process. During installation, simply follow the instructions on
screen to completion.
Installing X11 on Tiger(10.4)
1. Insert the Tiger Installation DVD
2. Select X11User.pkg from System->Installation->Packages but not
X11SDK.pkg which is only for development.
3. Double-click on X11User.pkg launches the X11 installing process as above.
Launching X11
Open Applications -> Utilities
Double-click on the X11 icon. The following should appear in the resulting terminal window
depending on which OS release:
Panther: XFree Version 4.3.0 / X window System .
or :
Tiger: XFree Version 4.4.0 / X window System
OpenOffice.org 2.0 Setup Guide 41
Page 50

Appendix 1 — MacOSX Extras
Possible Problems
X11 claims to be already installed
To force the X11 re-installation, you need administrator's rights before you can do this:
1. Open the /Library/Receipts directory :
2. Drag the X11User.pkg file to Trash
3. Empty the trash.
4. Install X11 using the correct version.
Check and Select X11 settings :
When installed, X11 may be found in Applications/Utilities. Click to launch X11.
Now open the X11 preferences dialogue which may be found in the “Incoming” tab and
perform the following actions:
a) Enable the system's keyboard disposal ( allows to change the keyboard for Greek,
Russian, Arabic, ...et cetera, but not for Japanese
b) Add kinput2 to the list.
Next, deactivate the X11 keyboard shortcuts via the “outgoing” tab.
a) Set the display to millions of colors.
Note:This step is necessary for proper operation.
b) Disable the “activate full-screen mode” menu.
Note: This may be unnecessary when users know what they are doing)
1.6 How to get rid of the Xterm that starts without asking ?
1. In the starting Xterm, type the following command line :
sudo nano /etc/X11/xinit/xinitrc
2. Locate the line that reads “xterm &”, and comment it out by inserting a “#” at the
beginning.
3. Restart OpenOffice.org so that the Xterm does not reappear.
OpenOffice.org 2.0 Setup Guide 42
Page 51

Public Documentation License, Version 1.0
Public Documentation License, Version 1.0
1.0 DEFINITIONS.
1.1. "Commercial Use" means distribution or otherwise
making the Documentation available to a third party.
1.2. "Contributor" means a person or entity who creates or
contributes to the creation of Modifications.
1.3. "Documentation" means the Original Documentation or
Modifications or the combination of the Original
Documentation and Modifications, in each case including
portions thereof.
1.4. "Electronic Distribution Mechanism" means a mechanism
generally accepted for the electronic transfer of data.
1.5. "Initial Writer" means the individual or entity identified as
the Initial Writer in the notice required by the Appendix.
1.6. "Larger Work" means a work which combines
Documentation or portions thereof with documentation or
other writings not governed by the terms of this License.
1.7. "License" means this document.
1.8. "Modifications" means any addition to or deletion from
the substance or structure of either the Original
Documentation or any previous Modifications, such as a
translation, abridgment, condensation, or any other form in
which the Original Documentation or previous Modifications
may be recast, transformed or adapted. A work consisting of
editorial revisions, annotations, elaborations, and other
modifications which, as a whole represent an original work of
authorship, is a Modification. For example, when
Documentation is released as a series of documents, a
Modification is:
A. Any addition to or deletion from the contents of the
Original Documentation or previous Modifications.
B. Any new documentation that contains any part of the
Original Documentation or previous Modifications.
1.9. "Original Documentation" means documentation
described as Original Documentation in the notice required by
the Appendix, and which, at the time of its release under this
License is not already Documentation governed by this
License.
1.10. "Editable Form" means the preferred form of the
Documentation for making Modifications to it. The
Documentation can be in an electronic, compressed or archival
form, provided the appropriate decompression or de-archiving
software is widely available for no charge.
1.11. "You" (or "Your") means an individual or a legal entity
exercising rights under, and complying with all of the terms of
this License or a future version of this License issued under
Section 5.0 ("Versions of the License"). For legal entities,
"You" includes any entity which controls, is controlled by, or
is under common control with You. For purposes of this
definition, "control" means (a) the power, direct or indirect, to
cause the direction or management of such entity, whether by
contract or otherwise, or (b) ownership of more than fifty
percent (50%) of the outstanding shares or beneficial
ownership of such entity.
2.0 LICENSE GRANTS.
2.1 Initial Writer Grant.
The Initial Writer hereby grants You a world-wide, royalty-
free, non-exclusive license to use, reproduce, prepare
Modifications of, compile, publicly perform, publicly display,
demonstrate, market, disclose and distribute the
Documentation in any form, on any media or via any
Electronic Distribution Mechanism or other method now
known or later discovered, and to sublicense the foregoing
rights to third parties through multiple tiers of sublicensees in
accordance with the terms of this License.
The license rights granted in this Section 2.1 ("Initial Writer
Grant") are effective on the date Initial Writer first distributes
Original Documentation under the terms of this License.
2.2. Contributor Grant.
Each Contributor hereby grants You a world-wide, royalty-
free, non-exclusive license to use, reproduce, prepare
Modifications of, compile, publicly perform, publicly display,
demonstrate, market, disclose and distribute the
Documentation in any form, on any media or via any
Electronic Distribution Mechanism or other method now
known or later discovered, and to sublicense the foregoing
rights to third parties through multiple tiers of sublicensees in
accordance with the terms of this License.
The license rights granted in this Section 2.2 ("Contributor
Grant") are effective on the date Contributor first makes
Commercial Use of the Documentation.
3.0 DISTRIBUTION OBLIGATIONS.
3.1. Application of License.
The Modifications which You create or to which You
contribute are governed by the terms of this License, including
without limitation Section 2.2 ("Contributor Grant"). The
Documentation may be distributed only under the terms of this
License or a future version of this License released in
accordance with Section 5.0 ("Versions of the License"), and
You must include a copy of this License with every copy of
the Documentation You distribute. You may not offer or
impose any terms that alter or restrict the applicable version of
this License or the recipients' rights hereunder. However, You
may include an additional document offering the additional
rights described in Section 3.5 ("Required Notices").
3.2. Availability of Documentation.
Any Modification which You create or to which You
contribute must be made available publicly in Editable Form
under the terms of this License via a fixed medium or an
accepted Electronic Distribution Mechanism.
3.3. Description of Modifications.
All Documentation to which You contribute must identify the
OpenOffice.org 2.x Setup Guide 43
Page 52

Public Documentation License, Version 1.0
changes You made to create that Documentation and the date
of any change. You must include a prominent statement that
the Modification is derived, directly or indirectly, from
Original Documentation provided by the Initial Writer and
include the name of the Initial Writer in the Documentation or
via an electronic link that describes the origin or ownership of
the Documentation. The foregoing change documentation may
be created by using an electronic program that automatically
tracks changes to the Documentation, and such changes must
be available publicly for at least five years following release of
the changed Documentation.
3.4. Intellectual Property Matters.
Contributor represents that Contributor believes that
Contributor's Modifications are Contributor's original
creation(s) and/or Contributor has sufficient rights to grant the
rights conveyed by this License.
3.5. Required Notices.
You must duplicate the notice in the Appendix in each file of
the Documentation. If it is not possible to put such notice in a
particular Documentation file due to its structure, then You
must include such notice in a location (such as a relevant
directory) where a reader would be likely to look for such a
notice, for example, via a hyperlink in each file of the
Documentation that takes the reader to a page that describes
the origin and ownership of the Documentation. If You
created one or more Modification(s) You may add your name
as a Contributor to the notice described in the Appendix.
You must also duplicate this License in any Documentation
file (or with a hyperlink in each file of the Documentation)
where You describe recipients' rights or ownership rights.
You may choose to offer, and to charge a fee for, warranty,
support, indemnity or liability obligations to one or more
recipients of Documentation. However, You may do so only on
Your own behalf, and not on behalf of the Initial Writer or any
Contributor. You must make it absolutely clear than any such
warranty, support, indemnity or liability obligation is offered
by You alone, and You hereby agree to indemnify the Initial
Writer and every Contributor for any liability incurred by the
Initial Writer or such Contributor as a result of warranty,
support, indemnity or liability terms You offer.
3.6. Larger Works.
You may create a Larger Work by combining Documentation
with other documents not governed by the terms of this
License and distribute the Larger Work as a single product. In
such a case, You must make sure the requirements of this
License are fulfilled for the Documentation.
4.0 APPLICATION OF THIS LICENSE.
This License applies to Documentation to which the Initial
Writer has attached this License and the notice in the
Appendix.
5.0 VERSIONS OF THE LICENSE.
5.1. New Versions.
Initial Writer may publish revised and/or new versions of the
License from time to time. Each version will be given a
distinguishing version number.
5.2. Effect of New Versions.
Once Documentation has been published under a particular
version of the License, You may always continue to use it
under the terms of that version. You may also choose to use
such Documentation under the terms of any subsequent
version of the License published
by______________________ [Insert name of the foundation,
company, Initial Writer, or whoever may modify this License].
No one other than ________________________[Insert name
of the foundation, company, Initial Writer, or whoever may
modify this License] has the right to modify the terms of this
License. Filling in the name of the Initial Writer, Original
Documentation or Contributor in the notice described in the
Appendix shall not be deemed to be Modifications of this
License.
6.0 DISCLAIMER OF WARRANTY.
DOCUMENTATION IS PROVIDED UNDER THIS
LICENSE ON AN "AS IS'' BASIS, WITHOUT
WARRANTY OF ANY KIND, EITHER EXPRESSED OR
IMPLIED, INCLUDING, WITHOUT LIMITATION,
WARRANTIES THAT THE DOCUMENTATION IS FREE
OF DEFECTS, MERCHANTABLE, FIT FOR A
PARTICULAR PURPOSE OR NON-INFRINGING. THE
ENTIRE RISK AS TO THE QUALITY, ACCURACY, AND
PERFORMANCE OF THE DOCUMENTATION IS WITH
YOU. SHOULD ANY DOCUMENTATION PROVE
DEFECTIVE IN ANY RESPECT, YOU (NOT THE INITIAL
WRITER OR ANY OTHER CONTRIBUTOR) ASSUME
THE COST OF ANY NECESSARY SERVICING, REPAIR
OR CORRECTION. THIS DISCLAIMER OF WARRANTY
CONSTITUTES AN ESSENTIAL PART OF THIS
LICENSE. NO USE OF ANY DOCUMENTATION IS
AUTHORIZED HEREUNDER EXCEPT UNDER THIS
DISCLAIMER.
7.0 TERMINATION.
This License and the rights granted hereunder will terminate
automatically if You fail to comply with terms herein and fail
to cure such breach within 30 days of becoming aware of the
breach. All sublicenses to the Documentation which are
properly granted shall survive any termination of this License.
Provisions which, by their nature, must remain in effect
beyond the termination of this License shall survive.
8.0 LIMITATION OF LIABILITY.
UNDER NO CIRCUMSTANCES AND UNDER NO LEGAL
THEORY, WHETHER IN TORT (INCLUDING
NEGLIGENCE), CONTRACT, OR OTHERWISE, SHALL
THE INITIAL WRITER, ANY OTHER CONTRIBUTOR,
OR ANY DISTRIBUTOR OF DOCUMENTATION, OR
ANY SUPPLIER OF ANY OF SUCH PARTIES, BE
LIABLE TO ANY PERSON FOR ANY DIRECT,
INDIRECT, SPECIAL, INCIDENTAL, OR
CONSEQUENTIAL DAMAGES OF ANY CHARACTER
INCLUDING, WITHOUT LIMITATION, DAMAGES FOR
LOSS OF GOODWILL, WORK STOPPAGE, COMPUTER
FAILURE OR MALFUNCTION, OR ANY AND ALL
OTHER DAMAGES OR LOSSES ARISING OUT OF OR
RELATING TO THE USE OF THE DOCUMENTATION,
EVEN IF SUCH PARTY SHALL HAVE BEEN INFORMED
OF THE POSSIBILITY OF SUCH DAMAGES.
OpenOffice.org 2.x Setup Guide 44
Page 53

Public Documentation License, Version 1.0
9.0 U.S. GOVERNMENT END USERS.
If Documentation is being acquired by or on behalf of the U.S.
Government or by a U.S. Government prime contractor or
subcontractor (at any tier), then the Government's rights in
Documentation will be only as set forth in this Agreement; this
is in accordance with 48 CFR 227.7201 through 227.7202-4
(for Department of Defense (DOD) acquisitions) and with 48
CFR 2.101 and 12.212 (for non-DOD acquisitions).
10.0 MISCELLANEOUS.
This License represents the complete agreement concerning
the subject matter hereof. If any provision of this License is
held to be unenforceable, such provision shall be reformed
only to the extent necessary to make it enforceable. This
License shall be governed by California law, excluding its
conflict-of-law provisions. With respect to disputes or any
litigation relating to this License, the losing party is
responsible for costs, including without limitation, court costs
and reasonable attorneys' fees and expenses. The application of
the United Nations Convention on Contracts for the
International Sale of Goods is expressly excluded. Any law or
regulation which provides that the language of a contract shall
be construed against the drafter shall not apply to this License.
Appendix
Public Documentation License Notice
The contents of this Documentation are subject to the Public
Documentation License Version 1.0 (the "License"); you may
only use this Documentation if you comply with the terms of
this License. A copy of the License is available at
http://www.openoffice.org/licenses/PDL.rtf.
The Original Documentation is _________________. The
Initial Writer of the Original Documentation is
______________________ (C) ____. All Rights Reserved.
(Initial Writer contact(s):_______________[Insert
hyperlink/alias].)
Contributor(s):
______________________________________.
Portions created by ______ are Copyright
(C)_________[Insert year(s)]. All Rights Reserved.
(Contributor contact(s):________________[Insert
hyperlink/alias]).
Note: The text of this Appendix may differ slightly from the
text of the notices in the files of the Original Documentation.
You should use the text of this Appendix rather than the text
found in the Original Documentation for Your Modifications.
 Loading...