

Page 1

Novell®
www.novell.com
Cross-Platform User Guide
novdocx (en) 13 May 2009
AUTHORIZED DOCUMENTATION
iFolder
3.7
December 2008
®
OES 2 SP1: Novell iFolder 3.7 Cross-Platform User Guide
Page 2

Legal Notices
Novell, Inc., makes no representations or warranties with respect to the contents or use of this documentation, and
specifically disclaims any express or implied warranties of merchantability or fitness for any particular purpose.
Further, Novell, Inc., reserves the right to revise this publication and to make changes to its content, at any time,
without obligation to notify any person or entity of such revisions or changes.
Further, Novell, Inc., makes no representations or warranties with respect to any software, and specifically disclaims
any express or implied warranties of merchantability or fitness for any particular purpose. Further, Novell, Inc.,
reserves the right to make changes to any and all parts of Novell software, at any time, without any obligation to
notify any person or entity of such changes.
Any products or technical information provided under this Agreement may be subject to U.S. export controls and the
trade laws of other countries. You agree to comply with all export control regulations and to obtain any required
licenses or classification to export, re-export or import deliverables. You agree not to export or re-export to entities on
the current U.S. export exclusion lists or to any embargoed or terrorist countries as specified in the U.S. export laws.
You agree to not use deliverables for prohibited nuclear, missile, or chemical biological weaponry end uses. Please
refer to Novell International Trade Services Web Page (http://www.novell.com/info/exports/) for more information
on exporting Novell software. Novell assumes no responsibility for your failure to obtain any necessary export
approvals.
novdocx (en) 13 May 2009
Copyright © 2004-2008 Novell, Inc. All rights reserved. Permission is granted to copy, distribute, and/or modify this
document under the terms of the GNU Free Documentation License (GFDL), Version 1.2 or any later version,
published by the Free Software Foundation with no Invariant Sections, no Front-Cover Texts, and no Back-Cover
Texts. A copy of the GFDL can be found at GNU Free Documentation Licence (http://www.fsf.org/licenses/
fdl.html).
THIS DOCUMENT AND MODIFIED VERSIONS OF THIS DOCUMENT ARE PROVIDED UNDER THE
TERMS OF THE GNU FREE DOCUMENTATION LICENSE WITH THE FURTHER UNDERSTANDING THAT:
1. THE DOCUMENT IS PROVIDED ON AN "AS IS" BASIS, WITHOUT WARRANTY OF ANY KIND, EITHER
EXPRESSED OR IMPLIED, INCLUDING, WITHOUT LIMITATION, WARRANTIES THAT THE DOCUMENT
OR MODIFIED VERSION OF THE DOCUMENT IS FREE OF DEFECTS, MERCHANTABLE, FIT FOR A
PARTICULAR PURPOSE, OR NON-INFRINGING. THE ENTIRE RISK AS TO THE QUALITY, ACCURACY,
AND PERFORMANCE OF THE DOCUMENT OR MODIFIED VERSION OF THE DOCUMENT IS WITH
YOU. SHOULD ANY DOCUMENT OR MODIFIED VERSION PROVE DEFECTIVE IN ANY RESPECT, YOU
(NOT THE INITIAL WRITER, AUTHOR OR ANY CONTRIBUTOR) ASSUME THE COST OF ANY
NECESSARY SERVICING, REPAIR OR CORRECTION. THIS DISCLAIMER OF WARRANTY CONSTITUTES
AN ESSENTIAL PART OF THIS LICENSE. NO USE OF ANY DOCUMENT OR MODIFIED VERSION OF THE
DOCUMENT IS AUTHORIZED HEREUNDER EXCEPT UNDER THIS DISCLAIMER; AND
2. UNDER NO CIRCUMSTANCES AND UNDER NO LEGAL THEORY, WHETHER IN TORT (INCLUDING
NEGLIGENCE), CONTRACT, OR OTHERWISE, SHALL THE AUTHOR, INITIAL WRITER, ANY
CONTRIBUTOR, OR ANY DISTRIBUTOR OF THE DOCUMENT OR MODIFIED VERSION OF THE
DOCUMENT, OR ANY SUPPLIER OF ANY OF SUCH PARTIES, BE LIABLE TO ANY PERSON FOR ANY
DIRECT, INDIRECT, SPECIAL, INCIDENTAL, OR CONSEQUENTIAL DAMAGES OF ANY CHARACTER
INCLUDING, WITHOUT LIMITATION, DAMAGES FOR LOSS OF GOODWILL, WORK STOPPAGE,
COMPUTER FAILURE OR MALFUNCTION, OR ANY AND ALL OTHER DAMAGES OR LOSSES ARISING
OUT OF OR RELATING TO USE OF THE DOCUMENT AND MODIFIED VERSIONS OF THE DOCUMENT,
EVEN IF SUCH PARTY SHALL HAVE BEEN INFORMED OF THE POSSIBILITY OF SUCH DAMAGES.
Novell, Inc., has intellectual property rights relating to technology embodied in the product that is described in this
document. In particular, and without limitation, these intellectual property rights may include one or more of the U.S.
patents listed on Novell Legal Patents Web Page (http://www.novell.com/company/legal/patents/)
additional patents or pending patent applications in the U.S. and in other countries.
and one or more
Page 3

Novell, Inc.
404 Wyman Street, Suite 500
Waltham, MA 02451
U.S.A.
www.novell.com
Online Documentation: To access the online documentation for this and other Novell products, and to get
updates, see The Novell Documentation Web page (http://www.novell.com/documentation).
novdocx (en) 13 May 2009
Page 4

Novell Trademarks
For Novell trademarks, see The Novell Trademark and Service Mark list (http://www.novell.com/company/legal/
trademarks/tmlist.html)
Third-Party Materials
All third-party trademarks are the property of their respective owners.
novdocx (en) 13 May 2009
Page 5

Contents
About This Guide 11
1 Overview of iFolder 13
1.1 Benefits of iFolder . . . . . . . . . . . . . . . . . . . . . . . . . . . . . . . . . . . . . . . . . . . . . . . . . . . . . . . . . . 13
1.2 Component Overview. . . . . . . . . . . . . . . . . . . . . . . . . . . . . . . . . . . . . . . . . . . . . . . . . . . . . . . . 14
1.2.1 The iFolder Client . . . . . . . . . . . . . . . . . . . . . . . . . . . . . . . . . . . . . . . . . . . . . . . . . . . 14
1.2.2 iFolder Server . . . . . . . . . . . . . . . . . . . . . . . . . . . . . . . . . . . . . . . . . . . . . . . . . . . . . . 14
1.2.3 iFolder Web Access Console. . . . . . . . . . . . . . . . . . . . . . . . . . . . . . . . . . . . . . . . . . . 14
1.3 iFolder Accounts . . . . . . . . . . . . . . . . . . . . . . . . . . . . . . . . . . . . . . . . . . . . . . . . . . . . . . . . . . . 14
1.4 Key Features of iFolder . . . . . . . . . . . . . . . . . . . . . . . . . . . . . . . . . . . . . . . . . . . . . . . . . . . . . . 15
1.4.1 iFolder Sharing . . . . . . . . . . . . . . . . . . . . . . . . . . . . . . . . . . . . . . . . . . . . . . . . . . . . . 15
1.4.2 iFolder Access Rights . . . . . . . . . . . . . . . . . . . . . . . . . . . . . . . . . . . . . . . . . . . . . . . . 16
1.4.3 LDAPGroup Support . . . . . . . . . . . . . . . . . . . . . . . . . . . . . . . . . . . . . . . . . . . . . . . . . 16
1.4.4 SSL Support . . . . . . . . . . . . . . . . . . . . . . . . . . . . . . . . . . . . . . . . . . . . . . . . . . . . . . . 17
1.4.5 Merge. . . . . . . . . . . . . . . . . . . . . . . . . . . . . . . . . . . . . . . . . . . . . . . . . . . . . . . . . . . . . 17
1.4.6 File Synchronization . . . . . . . . . . . . . . . . . . . . . . . . . . . . . . . . . . . . . . . . . . . . . . . . . 17
1.4.7 Encryption . . . . . . . . . . . . . . . . . . . . . . . . . . . . . . . . . . . . . . . . . . . . . . . . . . . . . . . . . 17
1.4.8 Migration . . . . . . . . . . . . . . . . . . . . . . . . . . . . . . . . . . . . . . . . . . . . . . . . . . . . . . . . . . 18
1.4.9 Upgrade . . . . . . . . . . . . . . . . . . . . . . . . . . . . . . . . . . . . . . . . . . . . . . . . . . . . . . . . . . . 18
1.4.10 Default iFolder . . . . . . . . . . . . . . . . . . . . . . . . . . . . . . . . . . . . . . . . . . . . . . . . . . . . . . 18
1.4.11 Enhanced Web Access . . . . . . . . . . . . . . . . . . . . . . . . . . . . . . . . . . . . . . . . . . . . . . . 19
1.4.12 Synchronization Log . . . . . . . . . . . . . . . . . . . . . . . . . . . . . . . . . . . . . . . . . . . . . . . . . 19
1.5 What’s Next . . . . . . . . . . . . . . . . . . . . . . . . . . . . . . . . . . . . . . . . . . . . . . . . . . . . . . . . . . . . . . . 19
novdocx (en) 13 May 2009
2What’s New 21
2.1 What’s New for iFolder 3.7. . . . . . . . . . . . . . . . . . . . . . . . . . . . . . . . . . . . . . . . . . . . . . . . . . . . 21
2.2 What’s New for iFolder 3.6. . . . . . . . . . . . . . . . . . . . . . . . . . . . . . . . . . . . . . . . . . . . . . . . . . . . 21
2.3 What’s New for iFolder 3.4. . . . . . . . . . . . . . . . . . . . . . . . . . . . . . . . . . . . . . . . . . . . . . . . . . . . 22
2.4 What’s New for iFolder 3.2. . . . . . . . . . . . . . . . . . . . . . . . . . . . . . . . . . . . . . . . . . . . . . . . . . . . 22
2.5 What’s New for iFolder 3.1. . . . . . . . . . . . . . . . . . . . . . . . . . . . . . . . . . . . . . . . . . . . . . . . . . . . 22
2.6 What’s New for iFolder 3.0. . . . . . . . . . . . . . . . . . . . . . . . . . . . . . . . . . . . . . . . . . . . . . . . . . . . 22
2.7 What’s Next . . . . . . . . . . . . . . . . . . . . . . . . . . . . . . . . . . . . . . . . . . . . . . . . . . . . . . . . . . . . . . . 23
3 Using iFolder with Novell iFolder 3.7 25
3.1 Novell iFolder 3.7 . . . . . . . . . . . . . . . . . . . . . . . . . . . . . . . . . . . . . . . . . . . . . . . . . . . . . . . . . . . 25
3.2 Benefits of Using iFolder 3.7 Services . . . . . . . . . . . . . . . . . . . . . . . . . . . . . . . . . . . . . . . . . . . 25
3.3 Sharing iFolders Through an iFolder 3.7 Enterprise Server. . . . . . . . . . . . . . . . . . . . . . . . . . . 26
3.4 Key Features of iFolder 3.7 . . . . . . . . . . . . . . . . . . . . . . . . . . . . . . . . . . . . . . . . . . . . . . . . . . . 26
3.4.1 The iFolder Client . . . . . . . . . . . . . . . . . . . . . . . . . . . . . . . . . . . . . . . . . . . . . . . . . . . 27
3.4.2 iFolder Enterprise Server Account . . . . . . . . . . . . . . . . . . . . . . . . . . . . . . . . . . . . . . . 27
3.4.3 Shared iFolders . . . . . . . . . . . . . . . . . . . . . . . . . . . . . . . . . . . . . . . . . . . . . . . . . . . . . 28
3.4.4 iFolder Access Rights . . . . . . . . . . . . . . . . . . . . . . . . . . . . . . . . . . . . . . . . . . . . . . . . 28
3.4.5 Encryption Policy Settings . . . . . . . . . . . . . . . . . . . . . . . . . . . . . . . . . . . . . . . . . . . . . 28
3.4.6 Security Settings . . . . . . . . . . . . . . . . . . . . . . . . . . . . . . . . . . . . . . . . . . . . . . . . . . . . 28
3.4.7 Multi-Server Support . . . . . . . . . . . . . . . . . . . . . . . . . . . . . . . . . . . . . . . . . . . . . . . . . 29
3.4.8 Multi-Volume Support . . . . . . . . . . . . . . . . . . . . . . . . . . . . . . . . . . . . . . . . . . . . . . . . 29
3.4.9 Server Migration . . . . . . . . . . . . . . . . . . . . . . . . . . . . . . . . . . . . . . . . . . . . . . . . . . . . 29
Contents 5
Page 6

3.4.10 File Synchronization and Data Management. . . . . . . . . . . . . . . . . . . . . . . . . . . . . . . 29
3.5 What’s Next . . . . . . . . . . . . . . . . . . . . . . . . . . . . . . . . . . . . . . . . . . . . . . . . . . . . . . . . . . . . . . . 29
4 Comparing Novell iFolder 2.x and 3.7 31
4.1 Client Features and Capabilities . . . . . . . . . . . . . . . . . . . . . . . . . . . . . . . . . . . . . . . . . . . . . . . 31
4.2 Web Access Features and Capabilities . . . . . . . . . . . . . . . . . . . . . . . . . . . . . . . . . . . . . . . . . . 34
5 Getting Started 37
5.1 Prerequisites and Guidelines . . . . . . . . . . . . . . . . . . . . . . . . . . . . . . . . . . . . . . . . . . . . . . . . . . 37
5.1.1 Hardware . . . . . . . . . . . . . . . . . . . . . . . . . . . . . . . . . . . . . . . . . . . . . . . . . . . . . . . . . . 37
5.1.2 Client Computers . . . . . . . . . . . . . . . . . . . . . . . . . . . . . . . . . . . . . . . . . . . . . . . . . . . . 38
5.1.3 Mono . . . . . . . . . . . . . . . . . . . . . . . . . . . . . . . . . . . . . . . . . . . . . . . . . . . . . . . . . . . . . 38
5.1.4 Web Browser . . . . . . . . . . . . . . . . . . . . . . . . . . . . . . . . . . . . . . . . . . . . . . . . . . . . . . . 39
5.1.5 Network Connection . . . . . . . . . . . . . . . . . . . . . . . . . . . . . . . . . . . . . . . . . . . . . . . . . 39
5.1.6 Enterprise Server. . . . . . . . . . . . . . . . . . . . . . . . . . . . . . . . . . . . . . . . . . . . . . . . . . . . 39
5.1.7 Web Access Server . . . . . . . . . . . . . . . . . . . . . . . . . . . . . . . . . . . . . . . . . . . . . . . . . . 39
5.2 Downloading the iFolder Client Install Files . . . . . . . . . . . . . . . . . . . . . . . . . . . . . . . . . . . . . . . 39
5.3 Installing the iFolder Client . . . . . . . . . . . . . . . . . . . . . . . . . . . . . . . . . . . . . . . . . . . . . . . . . . . . 41
5.3.1 Installing iFolder for Linux . . . . . . . . . . . . . . . . . . . . . . . . . . . . . . . . . . . . . . . . . . . . . 42
5.3.2 Installing iFolder for Windows . . . . . . . . . . . . . . . . . . . . . . . . . . . . . . . . . . . . . . . . . . 42
5.3.3 Installing iFolder for Macintosh . . . . . . . . . . . . . . . . . . . . . . . . . . . . . . . . . . . . . . . . . 43
5.4 Updating iFolder. . . . . . . . . . . . . . . . . . . . . . . . . . . . . . . . . . . . . . . . . . . . . . . . . . . . . . . . . . . . 43
5.5 Updating Mono for Linux . . . . . . . . . . . . . . . . . . . . . . . . . . . . . . . . . . . . . . . . . . . . . . . . . . . . . 44
5.6 What’s Next . . . . . . . . . . . . . . . . . . . . . . . . . . . . . . . . . . . . . . . . . . . . . . . . . . . . . . . . . . . . . . . 44
novdocx (en) 13 May 2009
6 Novell iFolder Migration And Upgrade 45
6.1 Migrating from iFolder 2.x to iFolder 3.7 . . . . . . . . . . . . . . . . . . . . . . . . . . . . . . . . . . . . . . . . . 45
6.1.1 Understanding the Migration Process . . . . . . . . . . . . . . . . . . . . . . . . . . . . . . . . . . . . 45
6.1.2 Migration Procedure . . . . . . . . . . . . . . . . . . . . . . . . . . . . . . . . . . . . . . . . . . . . . . . . . 45
6.2 Upgrading iFolder 3.x Clients . . . . . . . . . . . . . . . . . . . . . . . . . . . . . . . . . . . . . . . . . . . . . . . . . . 49
6.2.1 Automatically Upgrading to iFolder 3.7 . . . . . . . . . . . . . . . . . . . . . . . . . . . . . . . . . . . 49
6.2.2 Manually Upgrading to iFolder 3.7. . . . . . . . . . . . . . . . . . . . . . . . . . . . . . . . . . . . . . . 50
6.3 Coexistence of Novell iFolder 2.x and iFolder Clients . . . . . . . . . . . . . . . . . . . . . . . . . . . . . . . 50
7 Managing iFolder Accounts and Preferences 51
7.1 Cross-Platform Considerations . . . . . . . . . . . . . . . . . . . . . . . . . . . . . . . . . . . . . . . . . . . . . . . . 51
7.2 Starting the iFolder Client. . . . . . . . . . . . . . . . . . . . . . . . . . . . . . . . . . . . . . . . . . . . . . . . . . . . . 52
7.2.1 Linux . . . . . . . . . . . . . . . . . . . . . . . . . . . . . . . . . . . . . . . . . . . . . . . . . . . . . . . . . . . . . 53
7.2.2 Windows . . . . . . . . . . . . . . . . . . . . . . . . . . . . . . . . . . . . . . . . . . . . . . . . . . . . . . . . . . 54
7.2.3 Macintosh . . . . . . . . . . . . . . . . . . . . . . . . . . . . . . . . . . . . . . . . . . . . . . . . . . . . . . . . . 54
7.3 Configuring an iFolder Account . . . . . . . . . . . . . . . . . . . . . . . . . . . . . . . . . . . . . . . . . . . . . . . . 55
7.4 Logging In to an iFolder Account . . . . . . . . . . . . . . . . . . . . . . . . . . . . . . . . . . . . . . . . . . . . . . . 63
7.5 Viewing and Modifying iFolder Account Settings . . . . . . . . . . . . . . . . . . . . . . . . . . . . . . . . . . . 64
7.6 Configuring iFolder Preferences for the Client . . . . . . . . . . . . . . . . . . . . . . . . . . . . . . . . . . . . . 68
7.7 Configuring Local Firewall Settings for iFolder Traffic . . . . . . . . . . . . . . . . . . . . . . . . . . . . . . . 71
7.7.1 Using a Local Dynamic Port . . . . . . . . . . . . . . . . . . . . . . . . . . . . . . . . . . . . . . . . . . . 71
7.7.2 Using a Local Static Port . . . . . . . . . . . . . . . . . . . . . . . . . . . . . . . . . . . . . . . . . . . . . . 71
7.8 Configuring Local Virus Scanner Settings for iFolder Traffic . . . . . . . . . . . . . . . . . . . . . . . . . . 72
7.9 Deleting an iFolder Account . . . . . . . . . . . . . . . . . . . . . . . . . . . . . . . . . . . . . . . . . . . . . . . . . . . 73
7.10 Logging Out of an iFolder Account. . . . . . . . . . . . . . . . . . . . . . . . . . . . . . . . . . . . . . . . . . . . . . 74
7.10.1 Linux . . . . . . . . . . . . . . . . . . . . . . . . . . . . . . . . . . . . . . . . . . . . . . . . . . . . . . . . . . . . . 74
6 OES 2 SP1: Novell iFolder 3.7 Cross-Platform User Guide
Page 7

7.10.2 Windows . . . . . . . . . . . . . . . . . . . . . . . . . . . . . . . . . . . . . . . . . . . . . . . . . . . . . . . . . . 74
7.10.3 Macintosh . . . . . . . . . . . . . . . . . . . . . . . . . . . . . . . . . . . . . . . . . . . . . . . . . . . . . . . . . 74
7.11 Exiting the iFolder Client . . . . . . . . . . . . . . . . . . . . . . . . . . . . . . . . . . . . . . . . . . . . . . . . . . . . . 74
7.12 What’s Next . . . . . . . . . . . . . . . . . . . . . . . . . . . . . . . . . . . . . . . . . . . . . . . . . . . . . . . . . . . . . . . 75
8 Managing Your iFolders 77
8.1 Guidelines for the Location and Use of iFolders . . . . . . . . . . . . . . . . . . . . . . . . . . . . . . . . . . . 77
8.2 Guidelines for File Types and Sizes to Not Synchronize . . . . . . . . . . . . . . . . . . . . . . . . . . . . . 79
8.2.1 Operating System Files . . . . . . . . . . . . . . . . . . . . . . . . . . . . . . . . . . . . . . . . . . . . . . . 79
8.2.2 Hidden Files. . . . . . . . . . . . . . . . . . . . . . . . . . . . . . . . . . . . . . . . . . . . . . . . . . . . . . . . 79
8.2.3 Database Files. . . . . . . . . . . . . . . . . . . . . . . . . . . . . . . . . . . . . . . . . . . . . . . . . . . . . . 79
8.3 Naming Conventions for an iFolder and Its Folders and Files . . . . . . . . . . . . . . . . . . . . . . . . . 79
8.4 Understanding iFolder Icons . . . . . . . . . . . . . . . . . . . . . . . . . . . . . . . . . . . . . . . . . . . . . . . . . . 80
8.5 Creating and Uploading an iFolder . . . . . . . . . . . . . . . . . . . . . . . . . . . . . . . . . . . . . . . . . . . . . 82
8.5.1 Linux . . . . . . . . . . . . . . . . . . . . . . . . . . . . . . . . . . . . . . . . . . . . . . . . . . . . . . . . . . . . . 82
8.5.2 Windows . . . . . . . . . . . . . . . . . . . . . . . . . . . . . . . . . . . . . . . . . . . . . . . . . . . . . . . . . . 85
8.5.3 Macintosh . . . . . . . . . . . . . . . . . . . . . . . . . . . . . . . . . . . . . . . . . . . . . . . . . . . . . . . . . 86
8.5.4 Creating iFolders on a FAT32 Mount Point (Linux) . . . . . . . . . . . . . . . . . . . . . . . . . . 87
8.6 Sharing an iFolder . . . . . . . . . . . . . . . . . . . . . . . . . . . . . . . . . . . . . . . . . . . . . . . . . . . . . . . . . . 88
8.6.1 Understanding User Access Rights . . . . . . . . . . . . . . . . . . . . . . . . . . . . . . . . . . . . . . 88
8.6.2 Accessing the Sharing Tab . . . . . . . . . . . . . . . . . . . . . . . . . . . . . . . . . . . . . . . . . . . . 89
8.6.3 Adding a User to an iFolder . . . . . . . . . . . . . . . . . . . . . . . . . . . . . . . . . . . . . . . . . . . . 90
8.6.4 Modifying User Access Rights . . . . . . . . . . . . . . . . . . . . . . . . . . . . . . . . . . . . . . . . . . 90
8.6.5 Removing a User from an iFolder . . . . . . . . . . . . . . . . . . . . . . . . . . . . . . . . . . . . . . . 91
8.6.6 Transferring Ownership to an iFolder User . . . . . . . . . . . . . . . . . . . . . . . . . . . . . . . . 91
8.7 Viewing and Hiding Available iFolders . . . . . . . . . . . . . . . . . . . . . . . . . . . . . . . . . . . . . . . . . . . 91
8.8 Merging iFolders . . . . . . . . . . . . . . . . . . . . . . . . . . . . . . . . . . . . . . . . . . . . . . . . . . . . . . . . . . . 92
8.8.1 iFolder-to-Folder Merge . . . . . . . . . . . . . . . . . . . . . . . . . . . . . . . . . . . . . . . . . . . . . . . 92
8.8.2 Moving Existing iFolders to Different Locations. . . . . . . . . . . . . . . . . . . . . . . . . . . . . 93
8.8.3 Merging a Migrated 2.x iFolder to iFolder 3.7 . . . . . . . . . . . . . . . . . . . . . . . . . . . . . . 93
8.9 Downloading an Available iFolder . . . . . . . . . . . . . . . . . . . . . . . . . . . . . . . . . . . . . . . . . . . . . . 94
8.10 Viewing and Configuring Properties of an iFolder . . . . . . . . . . . . . . . . . . . . . . . . . . . . . . . . . . 95
8.10.1 Understanding iFolder Properties . . . . . . . . . . . . . . . . . . . . . . . . . . . . . . . . . . . . . . . 95
8.10.2 Accessing iFolder Properties from a File Manager . . . . . . . . . . . . . . . . . . . . . . . . . . 96
8.10.3 Accessing iFolder Properties from the iFolder Browser. . . . . . . . . . . . . . . . . . . . . . . 96
8.11 Managing Passphrase for Encrypted iFolders . . . . . . . . . . . . . . . . . . . . . . . . . . . . . . . . . . . . . 96
8.11.1 Recovering an Encrypted iFolder . . . . . . . . . . . . . . . . . . . . . . . . . . . . . . . . . . . . . . . 97
8.11.2 Resetting the Passphrase . . . . . . . . . . . . . . . . . . . . . . . . . . . . . . . . . . . . . . . . . . . . . 98
8.12 Synchronizing Files . . . . . . . . . . . . . . . . . . . . . . . . . . . . . . . . . . . . . . . . . . . . . . . . . . . . . . . . . 98
8.12.1 Synchronizing Files on Demand . . . . . . . . . . . . . . . . . . . . . . . . . . . . . . . . . . . . . . . . 99
8.12.2 Configuring the Synchronization Interval . . . . . . . . . . . . . . . . . . . . . . . . . . . . . . . . . . 99
8.13 Resolving File Conflicts . . . . . . . . . . . . . . . . . . . . . . . . . . . . . . . . . . . . . . . . . . . . . . . . . . . . . . 99
8.13.1 Resolving File Version Conflicts . . . . . . . . . . . . . . . . . . . . . . . . . . . . . . . . . . . . . . . . 99
8.13.2 Resolving Filename Conflicts . . . . . . . . . . . . . . . . . . . . . . . . . . . . . . . . . . . . . . . . . 100
8.14 Moving an iFolder. . . . . . . . . . . . . . . . . . . . . . . . . . . . . . . . . . . . . . . . . . . . . . . . . . . . . . . . . . 101
8.15 Reverting an iFolder to a Normal Folder . . . . . . . . . . . . . . . . . . . . . . . . . . . . . . . . . . . . . . . . 102
8.16 Removing Membership From a Shared iFolder . . . . . . . . . . . . . . . . . . . . . . . . . . . . . . . . . . . 103
8.17 Deleting an iFolder . . . . . . . . . . . . . . . . . . . . . . . . . . . . . . . . . . . . . . . . . . . . . . . . . . . . . . . . . 103
8.18 What’s Next . . . . . . . . . . . . . . . . . . . . . . . . . . . . . . . . . . . . . . . . . . . . . . . . . . . . . . . . . . . . . . 104
novdocx (en) 13 May 2009
9 Using Novell iFolder 3.7 Web Access 105
9.1 Logging In . . . . . . . . . . . . . . . . . . . . . . . . . . . . . . . . . . . . . . . . . . . . . . . . . . . . . . . . . . . . . . . 105
9.2 Creating a New iFolder . . . . . . . . . . . . . . . . . . . . . . . . . . . . . . . . . . . . . . . . . . . . . . . . . . . . . 106
Contents 7
Page 8

9.3 Browsing and Managing iFolders. . . . . . . . . . . . . . . . . . . . . . . . . . . . . . . . . . . . . . . . . . . . . . 106
9.3.1 Viewing a List of Folders and Files . . . . . . . . . . . . . . . . . . . . . . . . . . . . . . . . . . . . . 107
9.3.2 Navigating Directories . . . . . . . . . . . . . . . . . . . . . . . . . . . . . . . . . . . . . . . . . . . . . . . 107
9.3.3 Downloading a File . . . . . . . . . . . . . . . . . . . . . . . . . . . . . . . . . . . . . . . . . . . . . . . . . 107
9.3.4 Creating a New Folder. . . . . . . . . . . . . . . . . . . . . . . . . . . . . . . . . . . . . . . . . . . . . . . 107
9.3.5 Deleting Folders or Files . . . . . . . . . . . . . . . . . . . . . . . . . . . . . . . . . . . . . . . . . . . . . 107
9.3.6 Uploading a File . . . . . . . . . . . . . . . . . . . . . . . . . . . . . . . . . . . . . . . . . . . . . . . . . . . . 108
9.3.7 Search Folders and Files in an iFolder . . . . . . . . . . . . . . . . . . . . . . . . . . . . . . . . . . 108
9.4 Searching iFolders . . . . . . . . . . . . . . . . . . . . . . . . . . . . . . . . . . . . . . . . . . . . . . . . . . . . . . . . . 108
9.5 Managing iFolder Shared Members . . . . . . . . . . . . . . . . . . . . . . . . . . . . . . . . . . . . . . . . . . . . 109
9.5.1 Adding New Shared Members. . . . . . . . . . . . . . . . . . . . . . . . . . . . . . . . . . . . . . . . . 109
9.5.2 Assigning Rights to the Members . . . . . . . . . . . . . . . . . . . . . . . . . . . . . . . . . . . . . . 109
9.6 Viewing History . . . . . . . . . . . . . . . . . . . . . . . . . . . . . . . . . . . . . . . . . . . . . . . . . . . . . . . . . . . 112
9.7 Viewing Details. . . . . . . . . . . . . . . . . . . . . . . . . . . . . . . . . . . . . . . . . . . . . . . . . . . . . . . . . . . . 112
9.8 Logging Out . . . . . . . . . . . . . . . . . . . . . . . . . . . . . . . . . . . . . . . . . . . . . . . . . . . . . . . . . . . . . . 113
A Uninstalling the iFolder Client 115
A.1 Before You Uninstall iFolder . . . . . . . . . . . . . . . . . . . . . . . . . . . . . . . . . . . . . . . . . . . . . . . . . 115
A.2 iFolder Client for Linux . . . . . . . . . . . . . . . . . . . . . . . . . . . . . . . . . . . . . . . . . . . . . . . . . . . . . . 115
A.3 iFolder Client for Windows . . . . . . . . . . . . . . . . . . . . . . . . . . . . . . . . . . . . . . . . . . . . . . . . . . . 116
A.4 iFolder Client for Macintosh . . . . . . . . . . . . . . . . . . . . . . . . . . . . . . . . . . . . . . . . . . . . . . . . . . 116
novdocx (en) 13 May 2009
B Troubleshooting 117
B.1 First Attempt at Connecting to The iFolder Server Fails . . . . . . . . . . . . . . . . . . . . . . . . . . . . 117
B.2 iFolder Linux Client Fails to Display All the iFolders on the Server . . . . . . . . . . . . . . . . . . . . 118
B.3 iFolder Client Fails to Start Up . . . . . . . . . . . . . . . . . . . . . . . . . . . . . . . . . . . . . . . . . . . . . . . . 118
B.3.1 Linux . . . . . . . . . . . . . . . . . . . . . . . . . . . . . . . . . . . . . . . . . . . . . . . . . . . . . . . . . . . . 118
B.3.2 Windows XP . . . . . . . . . . . . . . . . . . . . . . . . . . . . . . . . . . . . . . . . . . . . . . . . . . . . . . 118
B.3.3 Macintosh . . . . . . . . . . . . . . . . . . . . . . . . . . . . . . . . . . . . . . . . . . . . . . . . . . . . . . . . 118
B.4 Encrypted iFolders Take a Long Time to Synchronize. . . . . . . . . . . . . . . . . . . . . . . . . . . . . . 119
B.5 No Name Conflict When Filenames Differs Only By Case. . . . . . . . . . . . . . . . . . . . . . . . . . . 119
B.6 Resolving Name Conflict in Maintosh Client Throws Error. . . . . . . . . . . . . . . . . . . . . . . . . . . 119
B.7 iFolder File Fails to Synchronize . . . . . . . . . . . . . . . . . . . . . . . . . . . . . . . . . . . . . . . . . . . . . . 119
B.8 Client File Fails to Synchronize to the Server Even after Conflict Resolution . . . . . . . . . . . . 120
B.9 All iFolders in an Account Fail to Synchronize . . . . . . . . . . . . . . . . . . . . . . . . . . . . . . . . . . . . 120
B.10 Problem Synchronizing Some Files on a FAT32 File System on Linux . . . . . . . . . . . . . . . . . 121
B.11 Client Fails to Set Up a New iFolder Account . . . . . . . . . . . . . . . . . . . . . . . . . . . . . . . . . . . . 121
B.12 Repopulating Contents of a Read Only iFolder . . . . . . . . . . . . . . . . . . . . . . . . . . . . . . . . . . . 121
B.13 GroupWise Files Become Corrupted in an iFolder. . . . . . . . . . . . . . . . . . . . . . . . . . . . . . . . . 122
B.14 Possible Slowed Performance With ZoneAlarm 4.5 or Earlier . . . . . . . . . . . . . . . . . . . . . . . . 122
C Documentation Updates 123
C.1 December 2008 . . . . . . . . . . . . . . . . . . . . . . . . . . . . . . . . . . . . . . . . . . . . . . . . . . . . . . . . . . . 123
C.1.1 Starting the iFolder Client . . . . . . . . . . . . . . . . . . . . . . . . . . . . . . . . . . . . . . . . . . . . 124
C.1.2 Configuring an iFolder Account . . . . . . . . . . . . . . . . . . . . . . . . . . . . . . . . . . . . . . . . 124
C.1.3 Viewing and Modifying iFolder Account Settings . . . . . . . . . . . . . . . . . . . . . . . . . . . 124
C.1.4 Configuring iFolder Preferences for the Client. . . . . . . . . . . . . . . . . . . . . . . . . . . . . 124
C.1.5 Comparing Novell iFolder 2.x and 3.7 . . . . . . . . . . . . . . . . . . . . . . . . . . . . . . . . . . . 124
C.1.6 Using a Local Static Port . . . . . . . . . . . . . . . . . . . . . . . . . . . . . . . . . . . . . . . . . . . . . 125
C.1.7 Guidelines for the Location and Use of iFolders . . . . . . . . . . . . . . . . . . . . . . . . . . . 125
C.1.8 Understanding iFolder Icons . . . . . . . . . . . . . . . . . . . . . . . . . . . . . . . . . . . . . . . . . . 125
C.1.9 Creating and Uploading an iFolder . . . . . . . . . . . . . . . . . . . . . . . . . . . . . . . . . . . . . 125
8 OES 2 SP1: Novell iFolder 3.7 Cross-Platform User Guide
Page 9

C.1.10 Understanding iFolder Properties . . . . . . . . . . . . . . . . . . . . . . . . . . . . . . . . . . . . . . 126
C.1.11 Deleting an iFolder. . . . . . . . . . . . . . . . . . . . . . . . . . . . . . . . . . . . . . . . . . . . . . . . . . 126
C.1.12 Resolving File Conflicts . . . . . . . . . . . . . . . . . . . . . . . . . . . . . . . . . . . . . . . . . . . . . . 126
C.1.13 Uploading a File . . . . . . . . . . . . . . . . . . . . . . . . . . . . . . . . . . . . . . . . . . . . . . . . . . . . 126
C.1.14 Troubleshooting . . . . . . . . . . . . . . . . . . . . . . . . . . . . . . . . . . . . . . . . . . . . . . . . . . . . 126
C.2 March 2008 . . . . . . . . . . . . . . . . . . . . . . . . . . . . . . . . . . . . . . . . . . . . . . . . . . . . . . . . . . . . . . 127
C.2.1 Merge. . . . . . . . . . . . . . . . . . . . . . . . . . . . . . . . . . . . . . . . . . . . . . . . . . . . . . . . . . . . 127
C.2.2 Enhanced Conflict Resolution . . . . . . . . . . . . . . . . . . . . . . . . . . . . . . . . . . . . . . . . . 127
C.2.3 Support for Macintosh . . . . . . . . . . . . . . . . . . . . . . . . . . . . . . . . . . . . . . . . . . . . . . . 127
C.3 September 2007. . . . . . . . . . . . . . . . . . . . . . . . . . . . . . . . . . . . . . . . . . . . . . . . . . . . . . . . . . . 128
C.3.1 Benefits of iFolder . . . . . . . . . . . . . . . . . . . . . . . . . . . . . . . . . . . . . . . . . . . . . . . . . . 128
C.3.2 Key Features of iFolder . . . . . . . . . . . . . . . . . . . . . . . . . . . . . . . . . . . . . . . . . . . . . . 128
C.3.3 Using iFolder with Novell iFolder 3.6 . . . . . . . . . . . . . . . . . . . . . . . . . . . . . . . . . . . . 129
C.3.4 What’s New for iFolder 3.6 . . . . . . . . . . . . . . . . . . . . . . . . . . . . . . . . . . . . . . . . . . . 129
C.3.5 Novell iFolder Migration and Upgrade . . . . . . . . . . . . . . . . . . . . . . . . . . . . . . . . . . . 129
C.3.6 Downloading the iFolder Client Install Files . . . . . . . . . . . . . . . . . . . . . . . . . . . . . . . 129
C.3.7 Installing the iFolder Client . . . . . . . . . . . . . . . . . . . . . . . . . . . . . . . . . . . . . . . . . . . 130
C.3.8 Configuring an iFolder Account . . . . . . . . . . . . . . . . . . . . . . . . . . . . . . . . . . . . . . . . 130
C.3.9 Viewing and Modifying the iFolder Account Settings . . . . . . . . . . . . . . . . . . . . . . . . 130
C.3.10 Understanding iFolder Icons . . . . . . . . . . . . . . . . . . . . . . . . . . . . . . . . . . . . . . . . . . 130
C.3.11 Managing Passphrase for Encrypted iFolders. . . . . . . . . . . . . . . . . . . . . . . . . . . . . 131
C.3.12 Using Novell iFolder 3.6 Web Access . . . . . . . . . . . . . . . . . . . . . . . . . . . . . . . . . . . 131
C.4 August 15, 2006. . . . . . . . . . . . . . . . . . . . . . . . . . . . . . . . . . . . . . . . . . . . . . . . . . . . . . . . . . . 131
C.4.1 What’s New . . . . . . . . . . . . . . . . . . . . . . . . . . . . . . . . . . . . . . . . . . . . . . . . . . . . . . . 131
C.4.2 Getting Started. . . . . . . . . . . . . . . . . . . . . . . . . . . . . . . . . . . . . . . . . . . . . . . . . . . . . 131
C.4.3 Managing iFolder Accounts and Preferences . . . . . . . . . . . . . . . . . . . . . . . . . . . . . 132
C.4.4 Managing iFolders . . . . . . . . . . . . . . . . . . . . . . . . . . . . . . . . . . . . . . . . . . . . . . . . . . 132
C.5 December 23, 2005 (Novell iFolder 3.2 for OES SP2 Linux) . . . . . . . . . . . . . . . . . . . . . . . . . 132
C.5.1 What’s New . . . . . . . . . . . . . . . . . . . . . . . . . . . . . . . . . . . . . . . . . . . . . . . . . . . . . . . 133
C.5.2 Getting Started. . . . . . . . . . . . . . . . . . . . . . . . . . . . . . . . . . . . . . . . . . . . . . . . . . . . . 133
C.5.3 Managing iFolder Accounts and Preferences . . . . . . . . . . . . . . . . . . . . . . . . . . . . . 133
C.5.4 Managing iFolders . . . . . . . . . . . . . . . . . . . . . . . . . . . . . . . . . . . . . . . . . . . . . . . . . . 133
C.5.5 Troubleshooting . . . . . . . . . . . . . . . . . . . . . . . . . . . . . . . . . . . . . . . . . . . . . . . . . . . . 133
C.6 August 19, 2005 (Novell iFolder 3.1 for OES SP1 Linux) . . . . . . . . . . . . . . . . . . . . . . . . . . . 134
C.6.1 Overview of iFolder . . . . . . . . . . . . . . . . . . . . . . . . . . . . . . . . . . . . . . . . . . . . . . . . . 134
C.6.2 Using iFolder with Novell iFolder 3.x . . . . . . . . . . . . . . . . . . . . . . . . . . . . . . . . . . . . 134
C.6.3 What’s New . . . . . . . . . . . . . . . . . . . . . . . . . . . . . . . . . . . . . . . . . . . . . . . . . . . . . . . 134
C.6.4 Getting Started. . . . . . . . . . . . . . . . . . . . . . . . . . . . . . . . . . . . . . . . . . . . . . . . . . . . . 134
C.6.5 Managing iFolder Accounts and Preferences . . . . . . . . . . . . . . . . . . . . . . . . . . . . . 135
C.6.6 Managing iFolders . . . . . . . . . . . . . . . . . . . . . . . . . . . . . . . . . . . . . . . . . . . . . . . . . . 135
C.6.7 Troubleshooting . . . . . . . . . . . . . . . . . . . . . . . . . . . . . . . . . . . . . . . . . . . . . . . . . . . . 136
novdocx (en) 13 May 2009
Contents 9
Page 10

novdocx (en) 13 May 2009
10 OES 2 SP1: Novell iFolder 3.7 Cross-Platform User Guide
Page 11

About This Guide
novdocx (en) 13 May 2009
This cross-platform user guide describes how to install and use the iFolder® 3.7 client on Linux*,
®
Macintosh* and Windows* platforms in combination with a Novell
iFolder® 3.7 enterprise server
and how to access iFolders via the iFolder 3.7 Web Access server.
Chapter 1, “Overview of iFolder,” on page 13
Chapter 2, “What’s New,” on page 21
Chapter 3, “Using iFolder with Novell iFolder 3.7,” on page 25
Chapter 4, “Comparing Novell iFolder 2.x and 3.7,” on page 31
Chapter 5, “Getting Started,” on page 37
Chapter 6, “Novell iFolder Migration And Upgrade,” on page 45
Chapter 7, “Managing iFolder Accounts and Preferences,” on page 51
Chapter 8, “Managing Your iFolders,” on page 77
Chapter 9, “Using Novell iFolder 3.7 Web Access,” on page 105
Appendix A, “Uninstalling the iFolder Client,” on page 115
Appendix B, “Troubleshooting,” on page 117
Appendix C, “Documentation Updates,” on page 123
Audience
This guide is intended for users of the iFolder client and iFolder Web access for Novell iFolder 3.7.
Feedback
We want to hear your comments and suggestions about this manual and the other documentation
included with this product. Please use the User Comment feature at the bottom of each page of the
online documentation, or go to www.novell.com/documentation/feedback.html and enter your
comments there.
Documentation Updates
For the most recent version of iFolder 3.7 client documentation, see the following:
Novell iFolder Documentaion (http://www.novell.com/documentation/beta/ifolder3/)
Documentation Conventions
In Novell documentation, a greater-than symbol (>) is used to separate actions within a step and
items in a cross-reference path.
A trademark symbol (
®
, TM, etc.) denotes a Novell trademark. An asterisk (*) denotes a third-party
trademark.
About This Guide 11
Page 12

When a single pathname can be written with a backslash for some platforms or a forward slash for
other platforms, the pathname is presented with a backslash. Users of platforms that require a
forward slash, such as Linux* or UNIX*, should use forward slashes as required by your software.
novdocx (en) 13 May 2009
12 OES 2 SP1: Novell iFolder 3.7 Cross-Platform User Guide
Page 13

1
Overview of iFolder
iFolderTM is a file-sharing application for Linux, Windows, and Macintosh clients. You can share
files in multiple iFolders, each with different users or LDAPGroups. You control who can
participate in an iFolder and the access level for each member. You can also participate in iFolders
that others share with you.
iFolder 3.7 provides you a simple, hassle-free user interface for client-side migration from iFolder
2.x to iFolder 3.7, and for a client-side upgrade from iFolder 3.x to iFolder 3.7.
This section familiarizes you with the various benefits and features of iFolder:
Section 1.1, “Benefits of iFolder,” on page 13
Section 1.2, “Component Overview,” on page 14
Section 1.3, “iFolder Accounts,” on page 14
Section 1.4, “Key Features of iFolder,” on page 15
novdocx (en) 13 May 2009
1
Section 1.5, “What’s Next,” on page 19
1.1 Benefits of iFolder
iFolder provides the following benefits:
iFolder integrates with your native desktop environment, making it easy to create and manage
multiple iFolders.
iFolder is highly scalable and flexible, with no practical limit on the number of iFolders per
user or on the number of members per iFolder.
With encryption enabled, iFolder protects data as it travels across the wire and is stored on the
iFolder server.
With the enhanced Web Access console, you can access your files on the iFolder server from
any workstation without the iFolder client, and use a Web browser to perform all the operations
of iFolder client.
You can easily and selectively share personal and business files.
iFolder can migrate and upgrade your iFolder data to the latest version.
iFolder supports LDAPGroups.
You can control the access level of member users of the iFolders you own, or where you have
the necessary rights to control the access rights of members.
iFolder transparently updates your files to member iFolders on multiple workstations.
When iFolder is running, it tracks and logs changes made while you work offline, and
synchronizes those changes when you connect to the server.
iFolder provides secure authentication of members who access an iFolder to synchronize its
data.
iFolders offers an alternative to exchanging files via e-mail, which avoids the file-size limits on
e-mail attachments and reduces your e-mail storage requirements.
Overview of iFolder
13
Page 14

1.2 Component Overview
Section 1.2.1, “The iFolder Client,” on page 14
Section 1.2.2, “iFolder Server,” on page 14
Section 1.2.3, “iFolder Web Access Console,” on page 14
1.2.1 The iFolder Client
The iFolder client integrates with your operating system to provide iFolder services in your native
desktop environment. The iFolder client allows you to manage your own iFolders and to select
which shared iFolders to set up on each computer. iFolder supports the following operating systems:
SUSE
Windows Vista* SP1
Windows XP SP2
Macintosh OS X (Intel architecture) v10.4.11 and later (requires Mono 1.2.x ). PowerPc
®
Linux Enterprise Desktop 10 SP1
architecture is not supported.
novdocx (en) 13 May 2009
1.2.2 iFolder Server
The iFolder enterprise server is a central repository for storing iFolders and synchronizing files.
Before you start using iFolder, you need to connect to an iFolder server by using the IP address
given by the administrator. For more information on iFolder accounts, see Section 1.3, “iFolder
Accounts,” on page 14.
iFolder 3.7 supports multi-server configuration, in which multiple servers participate in a single
iFolder domain. A master-slave setup constitutes a multi-server configuration, where one or more
slave servers are connected to a master server. This helps to host a large amount of data on your
iFolder domain. For more information, see Chapter 3, “Using iFolder with Novell iFolder 3.7,” on
page 25.
1.2.3 iFolder Web Access Console
The iFolder 3.7 Web Access console provides you an interface for remote access to iFolders on the
iFolder enterprise server. For more information on the Web Access Console, see Chapter 9, “Using
Novell iFolder 3.7 Web Access,” on page 105.
1.3 iFolder Accounts
An iFolder account is created when an iFolder services administrator provisions you as an iFolder
user for an iFolder server. The administrator provides you with a username and password. For an
enterprise, this might be your username or e-mail address and the related password. You must
configure at least one iFolder account before you can create iFolders. For more information, see
Section 7.3, “Configuring an iFolder Account,” on page 55.
14 OES 2 SP1: Novell iFolder 3.7 Cross-Platform User Guide
Page 15

An iFolder session begins when you log in to an iFolder services account and ends when you log
out, or when you exit the iFolder client. Your iFolders synchronize files with other active iFolders
only when your session is active and you are working online. You can access data in your local
iFolders at any time, whether you are logged in to the account, or not. For information, see
Section 7.3, “Configuring an iFolder Account,” on page 55.
1.4 Key Features of iFolder
Before you begin to use iFolder, it is important to understand the following key features:
Section 1.4.1, “iFolder Sharing,” on page 15
Section 1.4.2, “iFolder Access Rights,” on page 16
Section 1.4.3, “LDAPGroup Support,” on page 16
Section 1.4.4, “SSL Support,” on page 17
Section 1.4.5, “Merge,” on page 17
Section 1.4.6, “File Synchronization,” on page 17
Section 1.4.7, “Encryption,” on page 17
Section 1.4.8, “Migration,” on page 18
novdocx (en) 13 May 2009
Section 1.4.9, “Upgrade,” on page 18
Section 1.4.10, “Default iFolder,” on page 18
Section 1.4.11, “Enhanced Web Access,” on page 19
Section 1.4.12, “Synchronization Log,” on page 19
1.4.1 iFolder Sharing
Typically, when you work in multiple locations or in collaboration with others, you must
conscientiously manage file versions. With iFolder, the most recent version of your files can follow
you to any computer where you have installed the iFolder client and created an iFolder for them.
iFolder also allows you to share multiple iFolders and their separate content with other authorized
users or LDAPGroups. For more information on shared iFolder, see “Shared iFolders” on page 16.
The iFolder client supports sharing by synchronizing files across multiple computers through a
central server. It allows you to do the following:
Share files across computers
Share files with others
Own multiple iFolders
Participate in multiple iFolders that other users share with you
Participate as the owner or a member of iFolders in multiple accounts
You work with iFolders directly in your file manager or in the iFolder browser that is part of the
client. Within the iFolder, you can set up any subdirectory structure that suits your personal or
corporate work habits. The subdirectory structure is constant across all member iFolders.
Overview of iFolder 15
Page 16

Shared iFolders
An iFolder is a local directory that selectively shares and synchronizes files via a central server with
user-specified users. The iFolder files are accessible to all iFolder members and can be changed by
those with the rights to do so. You can access your iFolders across multiple workstations and share
them with both individual users and LDAPGroups.
You decide who participates in each iFolder and the level of access for each member. Similarly, you
can participate in shared iFolders that are owned by others in your collaboration environment. When
you share an iFolder, member users with the Write permission can modify the directory structure,
and those changes apply to all copies of the iFolder. Each user can locate the shared iFolder
anywhere on his or her own computer if it satisfies the requirements in Section 8.1, “Guidelines for
the Location and Use of iFolders,” on page 77.
1.4.2 iFolder Access Rights
The iFolder client supports the owner and three levels of access for members of an iFolder:
IMPORTANT: Members of an LDAPGroup inherit the access rights set for that group.
novdocx (en) 13 May 2009
Owner: Only one user serves as the owner of an iFolder. This is typically the user who creates
the iFolder. The owner user can use the iFolder client to transfer ownership to another member
of the iFolder.
The owner of an iFolder has the Full Control right. This user has Read/Write access to the
iFolder, manages membership and access rights for member users, and can remove the Full
Control right for any member.
If an LDAPGroup owns an iFolders, all the member users of that group are given the full
control right.
Full Control: A member of the shared iFolder, with the Full Control access right. This member
has Read/Write access to the iFolder and manages membership and access rights for all users
except the owner.
Read/Write: A member of the shared iFolder, with the Read/Write access right to the
directories and files in the iFolder. This member can modify a file, but the local changes are
synchronized to other members’ copies of the iFolder.
Read Only: A member of the shared iFolder, with the Read Only access right to directories
and files in the iFolder. This member can modify a file, but the local changes are not
synchronized to other members’ copies of the iFolder.
Any iFolder user or LDAPGroup can own some iFolders and be a member of other iFolders. As an
owner user, you always have the Full Control right. As a member user, your level of access in each
shared iFolder can differ, depending on the access granted to you by any member with the Full
Control right.
1.4.3 LDAPGroup Support
iFolder supports LDAPGroups. You can share iFolders with LDAPGroups. Members of the
LDAPGroup can create, own and share iFolders with other individual users or other LDAPGroups.
16 OES 2 SP1: Novell iFolder 3.7 Cross-Platform User Guide
Page 17

1.4.4 SSL Support
Novell iFolder allows you use a secure channel to synchronize between iFolders on the server and
on the local machine. You can enable secure channel for both regular and encrypted iFolders.
1.4.5 Merge
With Merge, you can consolidate the iFolder data and minimize the data transfer between the iFolder
client and the server. Merge also allows you to move an existing folder to a different location on the
client machine. For more information, see Section 8.8, “Merging iFolders,” on page 92.
1.4.6 File Synchronization
When you are connected to the server, iFolder can synchronize iFolder membership and files in the
background as you work. When you set up an iFolder account, you can enable Remember My
Password so that iFolder can remember the password on that machine, and next time when you
launch iFolder, it automatically connects to the server and synchronize the data without prompting
for the password.
novdocx (en) 13 May 2009
You can configure the iFolder client to run automatically each time you log in to your computer’s
desktop environment. The session runs in the background as you work with files in your local
iFolders, tracking and logging any changes you make.
You can synchronize the files manually or at specified intervals.
iFolder also has delta synchronization capabilities. When you make any changes to an iFolder file,
only the deltas or changes are synchronized to the server. In other words, delta synchronization only
retrieves updates since the last synchronization between the iFolder client and the server. This
increases the efficiency,because it reduces the synchronization time.
1.4.7 Encryption
iFolder provides higher security for your confidential iFolder files, to protect them from intentional
or unintentional access by unauthorized people. In the past, data security was not ensured on the
server side, so the data was accessible to the administrator or to anyone who gained unauthorized
access to the server. In addition, when you access iFolder files via an ISP provider, there is a chance
that an unauthorized individual can inadvertently stumble across your confidential files. Now, you
can encrypt and save your files on the server, and retrieve them through a passphrase known only to
you. If you forget your passphrase, the Recovery agent you have selected during the creation of the
encrypted iFolder helps you recover your data. The figure given below gives you an idea of how
iFolder recover your lost data.
Overview of iFolder 17
Page 18
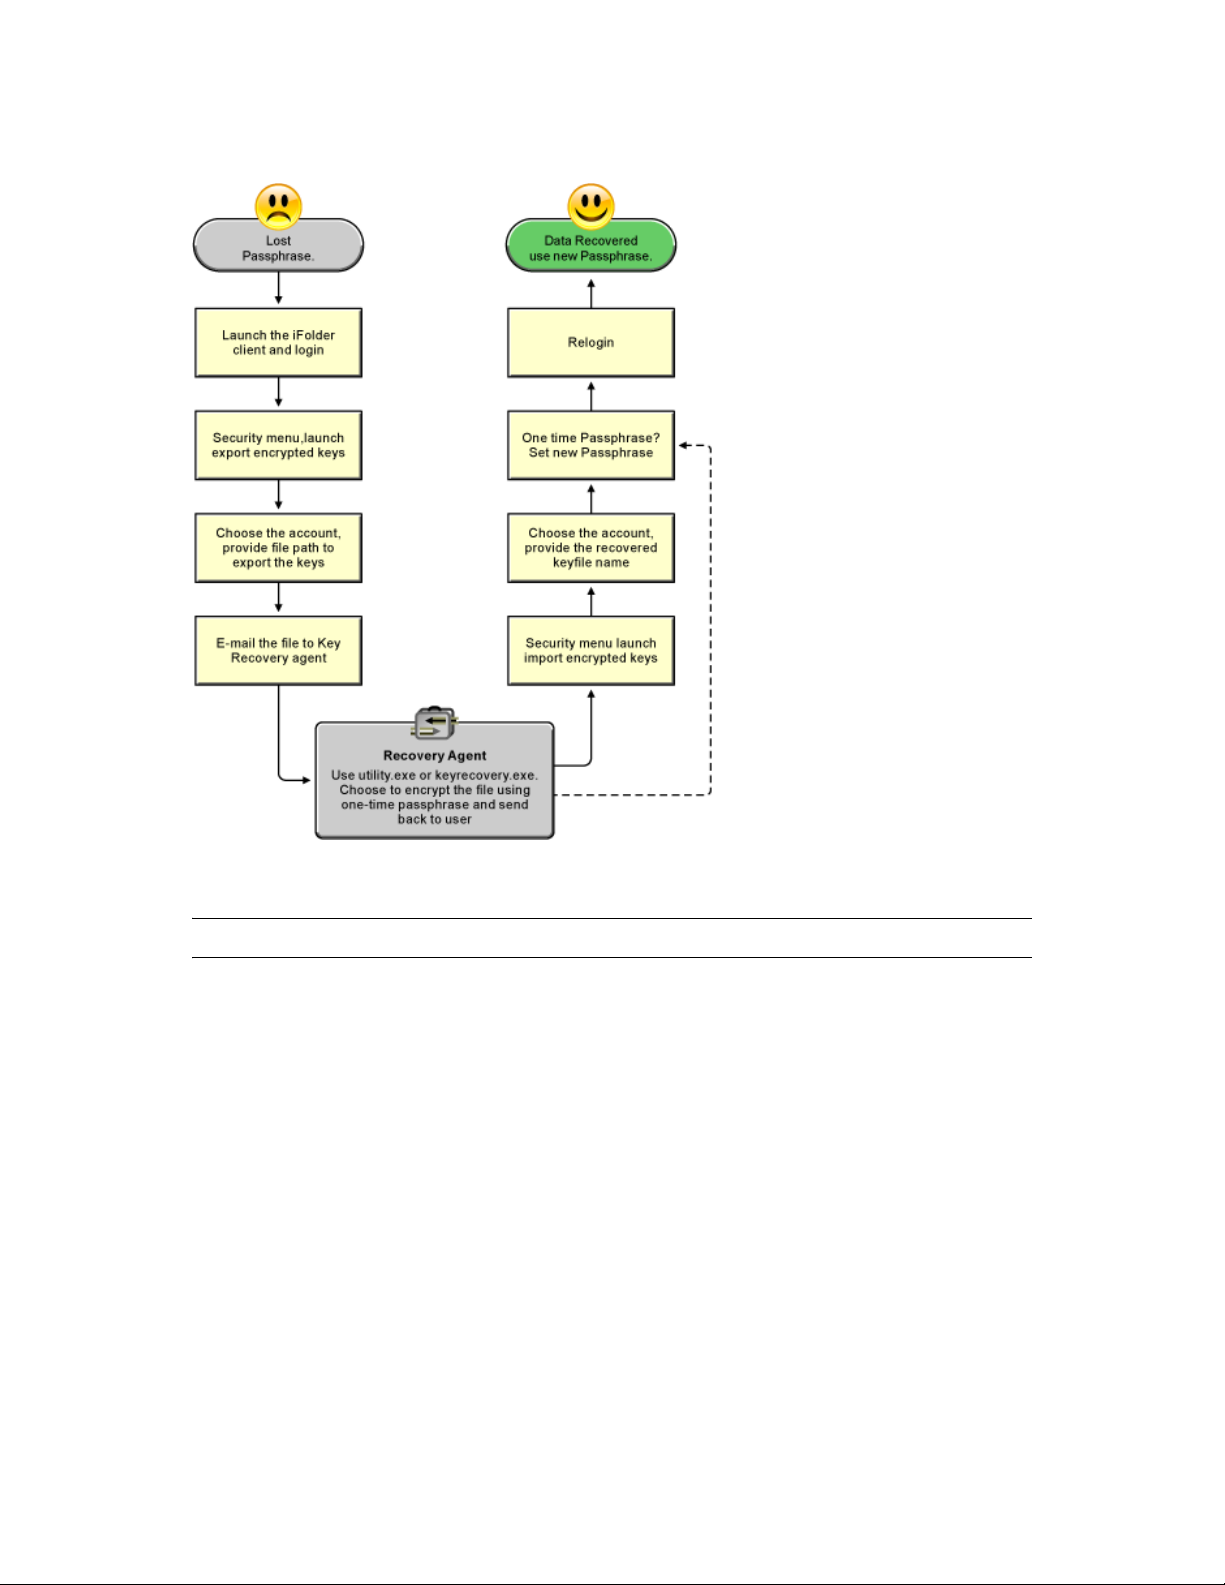
Figure 1-1 Passphrase Recovery
novdocx (en) 13 May 2009
For more information on encryption, see “Managing Passphrase for Encrypted iFolders” on page 96.
IMPORTANT: You cannot share an Encrypted iFolder.
1.4.8 Migration
Novell iFolder provides a simple, hassle-free migration from iFolder 2.x to the iFolder client for
Novell iFolder 3.7. The Migration Wizard provided in the iFolder client helps you migrate the
existing iFolder 2.x data to iFolder 3.7 and later quickly and easily. For more information, see
“Novell iFolder Migration And Upgrade” on page 45.
1.4.9 Upgrade
Novell iFolder 3.7 provides a simple upgrade from iFolder 3.x to the iFolder client for Novell
iFolder 3.7. For more information, see Section 6.2, “Upgrading iFolder 3.x Clients,” on page 49.
1.4.10 Default iFolder
iFolder allows you to set up a default iFolder when you configure a new account. Whenever you
configure a new iFolder account, iFolder automatically checks for the presence of the default
iFolder. If you have not created a default iFolder, iFolder prompts you to create one. If it already
18 OES 2 SP1: Novell iFolder 3.7 Cross-Platform User Guide
Page 19

exists, the iFolder client prompts you to download. You are also allowed to ignore both these
options. For more information, see Step 5 on page 60 in the Section 7.3, “Configuring an iFolder
Account,” on page 55.
1.4.11 Enhanced Web Access
iFolder provides an enhanced Web interface that allows you to access your iFolder files on remote
servers. With the Web Access console, you can use a Web browser to access your files on the iFolder
server from any workstation without the iFolder client. The Web Access interface enables you to
perform all the operations of the iFolder client.
When compared to the previous iFolder versions, iFolder 3.7 and later versions lets you create,
browse, share, upload and delete iFolders via the enhanced Web access console. Mobile users can
also make use of this facility through the Web.
1.4.12 Synchronization Log
The synchronization log displays a log of your iFolder background activity, such as uploading and
downloading files for different iFolders, policy violations, excluded files, and non-synchronized
files. Whenever a synchronization error occurs, a synchronization log window is displayed listing
all the error messages.To view the log of your background activity, you must open the
Synchronization Log from the Vie w menu.
novdocx (en) 13 May 2009
1.5 What’s Next
For information about configuring using the iFolder client, see the following:
Chapter 7, “Managing iFolder Accounts and Preferences,” on page 51
Chapter 8, “Managing Your iFolders,” on page 77
Overview of iFolder 19
Page 20

novdocx (en) 13 May 2009
20 OES 2 SP1: Novell iFolder 3.7 Cross-Platform User Guide
Page 21

2
What’s New
The iFolderTM client for Novell® iFolder® 3.x offers many new capabilities. This section identifies
the new features and compares client services, management, and functions to iFolder 2.x.
Section 2.1, “What’s New for iFolder 3.7,” on page 21
Section 2.2, “What’s New for iFolder 3.6,” on page 21
Section 2.3, “What’s New for iFolder 3.4,” on page 22
Section 2.4, “What’s New for iFolder 3.2,” on page 22
Section 2.5, “What’s New for iFolder 3.1,” on page 22
Section 2.6, “What’s New for iFolder 3.0,” on page 22
Section 2.7, “What’s Next,” on page 23
For additional information about key features of Novell iFolder 3.7, see the Novell iFolder 3.7
Administration Guide (http://www.novell.com/documentation/ifolder3).
novdocx (en) 13 May 2009
2
2.1 What’s New for iFolder 3.7
The following capabilities and features were added in the iFolder client for Novell iFolder 3.7:
Added support for LDAP Groups.
Added support for SSL communication.
Added support for Vista and Macintosh platforms.
Improved file conflict management.
Added support for server migration.
Added Merge functionality.
2.2 What’s New for iFolder 3.6
The following capabilities and features were added in the iFolder client for Novell iFolder 3.6:
Web Access features in parity with the iFolder 3.6 client operations.
Optional encryption support to protect data as it travels across the wire and while it is stored on
the iFolder server.
Flexibility in data transfer and security.
Improved iFolder sharing.
Consistency in user experience across different platforms.
User interface for client-side migration and upgrade.
What’s New
21
Page 22

2.3 What’s New for iFolder 3.4
The following capabilities and features were added in the iFolder client for Novell iFolder 3.4:
Support was added for SUSE Linux Enterprise Desktop 10.
The user interface was redesigned for improved usability.
2.4 What’s New for iFolder 3.2
The following features are new in the iFolder client for Novell iFolder 3.2 for OES SP2 Linux:
Updates were made to address known defects.
User help for the iFolder client was localized.
A option was added to allow the iFolder administrator to specify whether users log in with their
network user ID (LDAP common name) or their e-mail addresses. For information, see
Section 7.3, “Configuring an iFolder Account,” on page 55.
2.5 What’s New for iFolder 3.1
novdocx (en) 13 May 2009
Novell iFolder 3.1 includes the following enhancements:
Improved consistency in labels and messages across client platforms. For information on cross-
platform differences, see Section 7.1, “Cross-Platform Considerations,” on page 51.
The version of Mono
®
used for Linux and Macintosh clients in 3.1 is 1.1.7.7x
2.6 What’s New for iFolder 3.0
Novell iFolder 3.0 includes several important new features:
Multiple iFolders: You can create as many iFolders as desired and manage each one
separately. Each iFolder functions independently to synchronize its own set of files. You
specify the local path for each iFolder.
Shared iFolders: Each iFolder can be kept private or shared with a different group of users.
For a shared iFolder, if you own it or are a member with the Full Control right, you can control
who participates in the iFolder and control the level of access granted to each member, such as
Full Control, Read/Write, or Read Only.
Centralized iFolder Synchronization and Storage: iFolder data is automatically
synchronized by the iFolder client to the iFolder enterprise server over an IP network. The
enterprise server stores files for each iFolder, then synchronizes them to other member
computers. Your iFolder administrator controls whether data is transported securely with
HTTPS (SSL) connections during synchronization, or if data is transported with standard
HTTP connections.
Multiple iFolder Accounts: You can concurrently access iFolder accounts on multiple
servers.
Web Access to iFolders: You access your iFolder accounts from any computer with Internet
access. You can create subdirectories, upload files, and download files to any of your iFolders.
All iFolders for the account are available, whether you are the owner or a member.
22 OES 2 SP1: Novell iFolder 3.7 Cross-Platform User Guide
Page 23

2.7 What’s Next
For more information on iFolder, see the following:
Chapter 3, “Using iFolder with Novell iFolder 3.7,” on page 25
Chapter 4, “Comparing Novell iFolder 2.x and 3.7,” on page 31
Chapter 5, “Getting Started,” on page 37
Chapter 6, “Novell iFolder Migration And Upgrade,” on page 45
novdocx (en) 13 May 2009
What’s New 23
Page 24

novdocx (en) 13 May 2009
24 OES 2 SP1: Novell iFolder 3.7 Cross-Platform User Guide
Page 25

3
Using iFolder with Novell iFolder
novdocx (en) 13 May 2009
3.7
This section discusses how the iFolderTM client works with Novell® iFolder® 3.7.
Section 3.1, “Novell iFolder 3.7,” on page 25
Section 3.2, “Benefits of Using iFolder 3.7 Services,” on page 25
Section 3.3, “Sharing iFolders Through an iFolder 3.7 Enterprise Server,” on page 26
Section 3.4, “Key Features of iFolder 3.7,” on page 26
Section 3.5, “What’s Next,” on page 29
3.1 Novell iFolder 3.7
Novell iFolder 3.7 delivers all the benefits of earlier iFolder versions and adds new features for
greater productivity and flexibility for managing files securely in a collaborative environment.
NOTE: Your administrator must configure Novell iFolder 3.7 services. For more information, see
the Novell iFolder 3.7 Administration Guide (http://www.novell.com/documentation/beta/ifolder3)
on the Novell iFolder 3.x Documentation Web Site (http://www.novell.com/documentation/
ifolder3).
3
Enterprise Server
The iFolder 3.7 enterprise server provides central storage, synchronization, and backup of files in
your local iFolders. It allows local files to automatically follow you everywhere—online, offline, all
the time—across computers. You simply save your files locally, as you have always done. The client
automatically updates your iFolders’ local files to the iFolder 3.7 enterprise server, which delivers
them to other user computers that share the iFolders.
Web Access Server
For mobile users, the iFolder 3.7 Web Access server provides anywhere, anytime access to your
iFolder files on the iFolder 3.7 enterprise server. All you need is a Web browser and an Internet or
network connection.
3.2 Benefits of Using iFolder 3.7 Services
In addition to the benefits mentioned in Section 1.1, “Benefits of iFolder,” on page 13, using the
iFolder client with Novell iFolder 3.7 provides the following capabilities:
You can create iFolders and store files securely on a central enterprise server for anytime,
anywhere access through a passphrase known only to you. If you forget your passphrase, the
Recovery agent helps you recover your data. You can also reset your passphrase for future use.
You can synchronizes files at any time through a central server, with improved availability,
reliability, and performance over other sharing methods.
Using iFolder with Novell iFolder 3.7
25
Page 26
You can back up local files to a server.
You can back up iFolders to backup media.
You can restore files or entire iFolder contents from backup media.
You can centrally manage all iFolders in the enterprise server with policy-based administration
tools.
You can manage all iFolders on the server via an enhanced Web Access console.
3.3 Sharing iFolders Through an iFolder 3.7 Enterprise Server
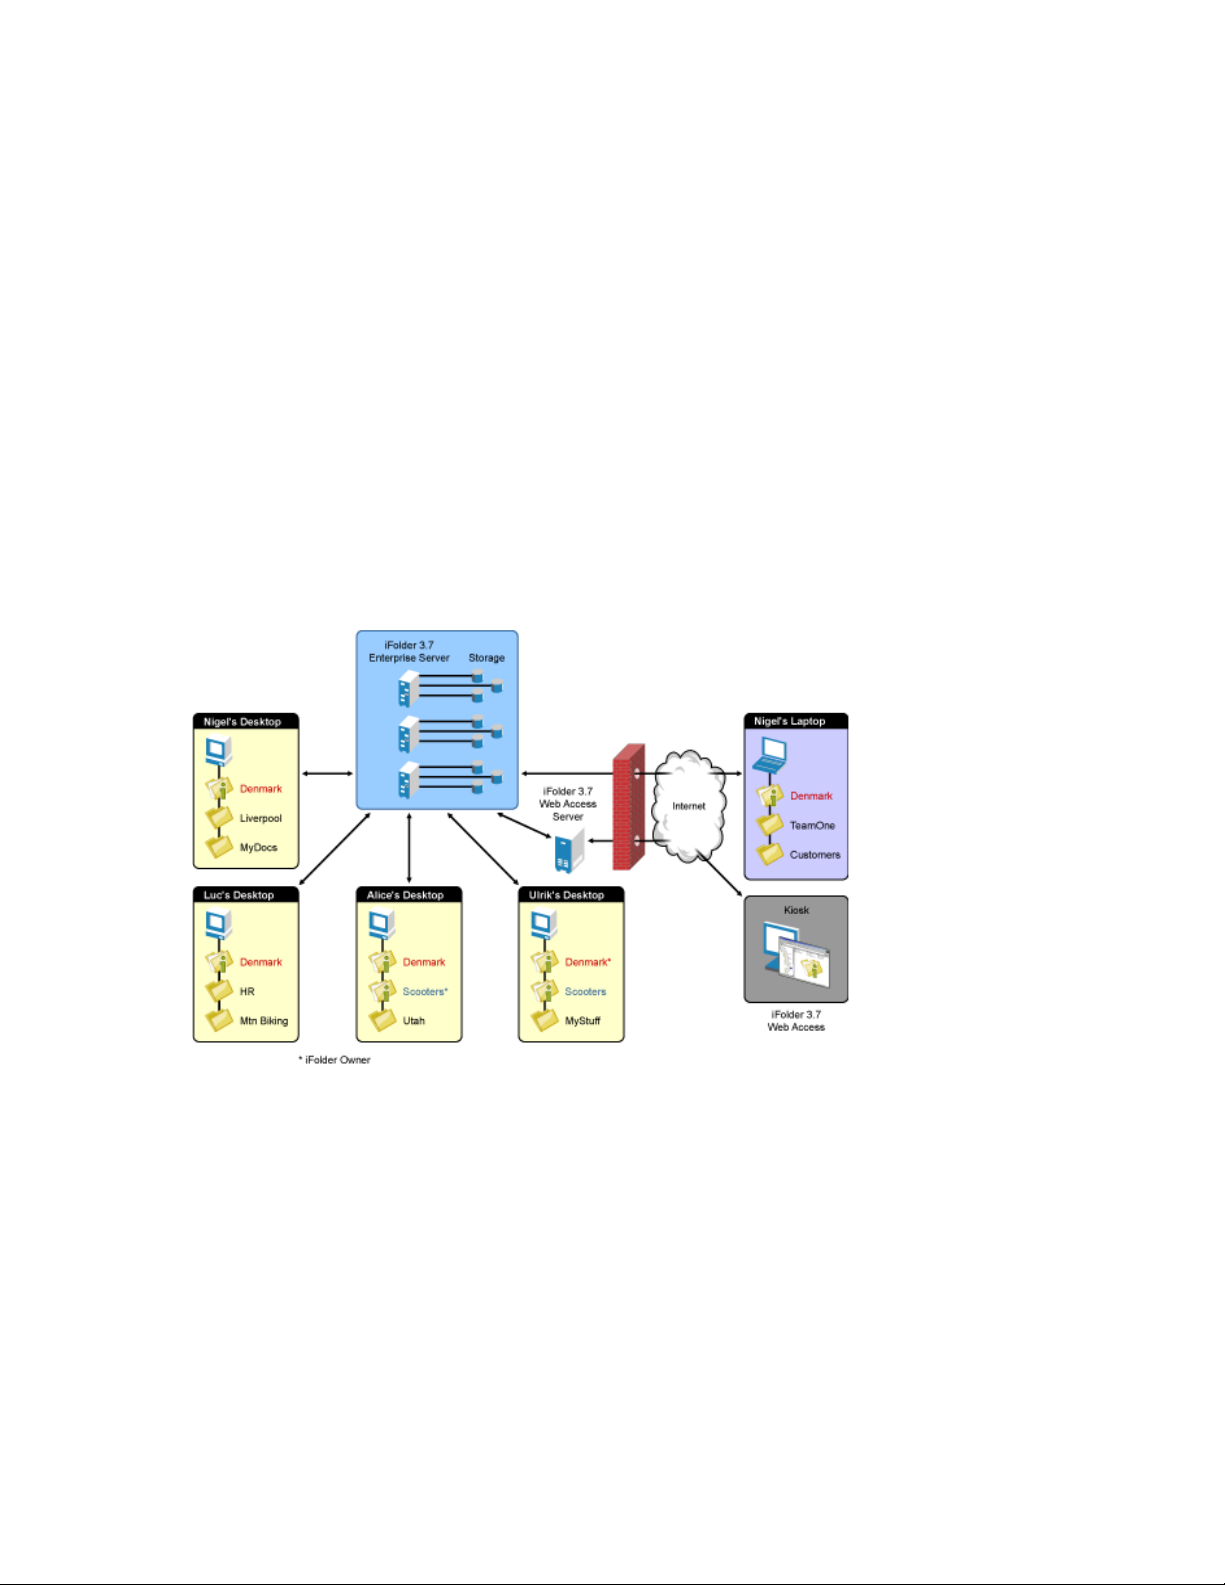
In the following example, Ulrik owns an iFolder named Denmark and shares it via his iFolder
enterprise account with Nigel, Luc, and Alice. Nigel travels frequently, so he also sets up the iFolder
on his laptop. iFolder members can upload and download files from the Denmark iFolder from
anywhere, using the iFolder Web Access server. In addition, Alice shares a non-work iFolder with
her friend Ulrik. In this example, an asterisk next to the folder name indicates the iFolder owner.
Figure 3-1 Collaboration and Sharing with iFolder
novdocx (en) 13 May 2009
The iFolder client synchronizes the most recent version of documents to all authorized users of your
shared iFolder. All that you and other iFolder members need is an active network connection and the
iFolder client. With an enterprise server, your iFolders are stored centrally where they are easily
accessed by all iFolder members in a multi-server environment.
3.4 Key Features of iFolder 3.7
In addition to the features described in “Key Features of iFolder” on page 15, using the iFolder
client with Novell iFolder 3.7 provides enhanced capabilities for the following features:
Section 3.4.1, “The iFolder Client,” on page 27
Section 3.4.2, “iFolder Enterprise Server Account,” on page 27
Section 3.4.3, “Shared iFolders,” on page 28
26 OES 2 SP1: Novell iFolder 3.7 Cross-Platform User Guide
Page 27

Section 3.4.4, “iFolder Access Rights,” on page 28
Section 3.4.5, “Encryption Policy Settings,” on page 28
Section 3.4.6, “Security Settings,” on page 28
Section 3.4.7, “Multi-Server Support,” on page 29
Section 3.4.8, “Multi-Volume Support,” on page 29
Section 3.4.9, “Server Migration,” on page 29
Section 3.4.10, “File Synchronization and Data Management,” on page 29
3.4.1 The iFolder Client
Use the version of the iFolder client that is approved by your system administrator. Typically,
compatible iFolder clients are downloadable from the enterprise server’s iFolder 3 Welcome page.
Contact your system administrator for this information.
For download instructions, see Section 5.2, “Downloading the iFolder Client Install Files,” on
page 39.
novdocx (en) 13 May 2009
For prerequisites and installation instructions, see “Getting Started” on page 37.
3.4.2 iFolder Enterprise Server Account
Your administrator provisions an account for you on at least one iFolder 3.7 enterprise server.
iFolder supports only one account for a given iFolder server domain under your current local login
identity. If you have multiple identities on the local computer, each identity can have its own account
on the same server. However, only one local user identity at a time can log in to the iFolder server
from that computer.
Each local identity on a computer must have its own copy of the iFolders related to its accounts. If
you share iFolders between users who share the same computer, multiple copies of those iFolders
must be stored locally where each user can modify the files within the user’s assigned workspace.
iFolder 3.7 introduces a new feature, auto-account creation, which helps the iFolder administrator to
create and configure an account for you. If your iFolder administrator has enabled auto-account
creation, you don’t need to configure an account for yourself. When you start an iFolder for the first
time, you are prompted to enter your password. Enter your password to complete configuring the
account.
If auto-account creation is not enabled, contact your system administrator for the IP address (such as
192.168.1.1
server where you have been assigned an account. Log in to the server with the username and
password for the account.
) or DNS name (such as
ifolder3svr1.example.com
) of each iFolder 3.7 enterprise
You must set up your enterprise server account before you can set up iFolders for it. The iFolder
client allows you to set up multiple accounts, where a single account represents a given enterprise
server. You specify the server address, username, and password to uniquely identify an account. On
your computer, log in as the local user identity you plan to use to access an account and its iFolders,
then set up the iFolder. Under your local login, you can set up multiple iFolder accounts, but each
account must belong to a different iFolder enterprise server.
For information, see Section 7.3, “Configuring an iFolder Account,” on page 55.
Using iFolder with Novell iFolder 3.7 27
Page 28

3.4.3 Shared iFolders
For your enterprise server account, you can share iFolders only with other users who also have an
account on the same enterprise server. Contact your system administrator if you need to share
iFolders with a user or group of users who are not yet provisioned for services on that server.
The server hosts every iFolder created for that account. When you create an iFolder, the enterprise
server makes it available to the specified list of users.
3.4.4 iFolder Access Rights
When you use the iFolder client with iFolder 3.7, the administrator can provide the following
support services:
Transfer ownership of an iFolder to any user on the iFolder server, even if the user is not
currently a member of the iFolder.
Modify the access right for a member.
Set a disk quota policy that restricts the amount of disk space that a user can consume for his or
her iFolders. The policy can apply system-wide for all users or can be set for an individual user.
novdocx (en) 13 May 2009
To view the disk quota setting for your account, see Section 7.5, “Viewing and Modifying
iFolder Account Settings,” on page 64 after you set up your enterprise server account.
If an owner user is deleted as a user for the iFolder enterprise server, the iFolders owned by the
user are orphaned. Orphaned iFolders are assigned temporarily to the iFolder administrator,
who serves as a temporary custodial owner. Membership and synchronization continues while
the iFolder administrator determines whether an orphaned iFolder should be deleted or
assigned to a new owner.
3.4.5 Encryption Policy Settings
iFolder 3.7 provide higher security for your sensitive files. With encryption policy set to On, all your
iFolder files are transferred and stored encrypted on the iFolder enterprise server. Your iFolder
admin determines the encryption policy for your iFolders. If encryption is enabled, You will have
the option to choose between encrypted and regular. If you choose the former, the data is encrypted
with your secret passphrase as it travels across the wire and stored on the iFolder server. For more
information, see Section 8.11, “Managing Passphrase for Encrypted iFolders,” on page 96.
3.4.6 Security Settings
Whenever iFolder connects to an enterprise server to synchronize files, it connects with HTTP
connections to the server, and the server authenticates the user against its LDAP directory service.
Your iFolder administrator determines whether iFolder traffic uses HTTP based iFolder settings. If
there are no policy settings to set, you can choose HTTP from the client policy settings.
You might need to configure the following settings on your local computer to accommodate this
traffic:
Section 7.7, “Configuring Local Firewall Settings for iFolder Traffic,” on page 71
Section 7.8, “Configuring Local Virus Scanner Settings for iFolder Traffic,” on page 72
28 OES 2 SP1: Novell iFolder 3.7 Cross-Platform User Guide
Page 29

3.4.7 Multi-Server Support
Handling large amount of data and provisioning multiple enterprise users in a corporate
environment is a major task for any administrator. iFolder 3.7 simplifies these tasks with multiserver configuration lets administrators provision many users and host large amount of data on your
iFolder domain. Your Admin can scale up the domain across servers to enterprise-level requirements
by adding multiple servers to a single domain. This allows you to leverage the under-utilized servers
in an iFolder domain.
3.4.8 Multi-Volume Support
One of the key features of iFolder is its storage scalability. With multi-volume support, Internet
service providers and enterprise data centers can manage large amounts of data above the file system
restrictions per volume. This facilitates moving data between the volumes, based on file size and
storage space availability.
3.4.9 Server Migration
iFolder 3.7 supports iFolder 2.x to iFolder 3.7 server migration. The server migration plug-in
bundled with iFolder 3.7 convert the iFolder 2.x data format to that of iFolder 3.7. Using OES 2 SP1
Migration tools, you can migrate the data from 2.x to iFolder 3.7 on OES 2 Linux SP1.
novdocx (en) 13 May 2009
3.4.10 File Synchronization and Data Management
Your iFolder files are synchronized through the iFolder 3.7 server, where the iFolder administrator
can optionally back up the iFolder files from the server to backup media. Contact your administrator
if you need to recover a backup copy of a deleted or modified file.
3.5 What’s Next
If you currently use Novell iFolder 2.x or 3.x in your environment, make sure to read the following:
To Understand This Functionality Read This
Comparing the capabilities of Novell iFolder 2.x
and Novell iFolder 3.7.
Coexistence and migration for iFolder client for
Novell iFolder 3.7 and the Novell iFolder 2.x
client.
How to upgrade the iFolder 3.4 client to iFolder
3.7
Chapter 4, “Comparing Novell iFolder 2.x and
3.7,” on page 31
Section 6.1, “Migrating from iFolder 2.x to iFolder
3.7,” on page 45
Section 6.3, “Coexistence of Novell iFolder 2.x
and iFolder Clients,” on page 50
Section 6.2, “Upgrading iFolder 3.x Clients,” on
page 49
Using iFolder with Novell iFolder 3.7 29
Page 30

novdocx (en) 13 May 2009
30 OES 2 SP1: Novell iFolder 3.7 Cross-Platform User Guide
Page 31

4
Comparing Novell iFolder 2.x and
novdocx (en) 13 May 2009
3.7
This section compares the features and capabilities of Novell® iFolder® 3.7 on OES 2 SP1 Linux to
Novell iFolder 2.x.
Section 4.1, “Client Features and Capabilities,” on page 31
Section 4.2, “Web Access Features and Capabilities,” on page 34
4.1 Client Features and Capabilities
The following table compares the features and capabilities of the iFolder 3.7 client to Novell iFolder
2.x.
Table 4-1 Comparison of Novell iFolder 2.x and 3.7
Feature or Capability Novell iFolder 2.x Client
Download location The iFolder download page is
http://serveraddress/
iFolder
Replace
the IP address or DNS name of
your iFolder server. For example,
192.168.1.1
nifsvr1.example.com
serveraddress
or
with
.
iFolder Client with a Novell iFolder
3.7 Enterprise Server
The administrator provides a
download site where users can
download the iFolder client, such
as the iFolder 3.7 Welcome page
on the iFolder enterprise server.
4
The path is case sensitive.
Default location of the iFolder
directory on a client
Connect to server Log in to one account at a time. Set up accounts for multiple
Authenticated access Yes, with username and
Windows:
Settings\username\My
Documents\iFolder\userna
me\Home
Linux:
ifolder/userid
password authentication via your
LDAP server.
C:\Documents and
/home/userid/
Anywhere you want to create an
iFolder on your Windows or Linux
computers.
iFolder domains and log in to one
or more as desired.
Yes, with username and
password authentication via your
LDAP server.
Comparing Novell iFolder 2.x and 3.7
31
Page 32

novdocx (en) 13 May 2009
Feature or Capability Novell iFolder 2.x Client
Encrypted data transfer Yes, with the encrypted iFolder
option.
The Blowfish algorithm is applied
with a user-specified passphrase.
iFolder data stored encrypted on
the server
iFolder data stored encrypted on
clients
Create an iFolder Yes, by logging in to the server for
Yes, with the encrypted iFolder
option
The user must specify a
passphrase when first creating
the iFolder account.
No
iFolder data is stored
unencrypted on the client. Use
third-party local encryption
options, if needed.
the first time after being
provisioned for iFolder services.
iFolder Client with a Novell iFolder
3.7 Enterprise Server
Yes, with encrypted iFolder
option.
The Blowfish algorithm is applied
with a user-specified passphrase.
Administrators control whether
connections use encryption or
HTTP.
Yes, with the encrypted iFolder
option
The user must specify a
passphrase when first creating
the iFolder account.
No
iFolder data is stored
unencrypted on the client. Use
third-party local encryption
options, if needed.
Yes, by selecting any local
directory and making it an iFolder.
You can create multiple iFolders
in each of your iFolder accounts.
Maximum iFolders per username One Multiple. You can own or
participate in an almost-unlimited
number of iFolders in one or
multiple accounts.
Share an iFolder across multiple
computers
Share an iFolder with other users Not as designed, but it is
Yes, by logging in to an iFolder
server from a computer with the
iFolder client, or by accessing the
iFolder via the Web with
NetStorage.
possible.
The administrator can create a
username for this purpose.
Membership in the iFolder is
determined by who has access to
the password for that username
and its iFolder account.
Yes, by logging in to an iFolder
account from another computer
with an iFolder client and setting
up the available iFolder.
You can select which of the
iFolders you own or participate in
to set up on each computer,
according to your needs at each
location.
Yes, as the owner user or a
member user with the Full Control
right.
For each iFolder, specify a
list of users.
For each member of an
iFolder, specify different
levels of access with the Full
Control, Read/Write, or
Read Only right.
32 OES 2 SP1: Novell iFolder 3.7 Cross-Platform User Guide
Page 33

novdocx (en) 13 May 2009
Feature or Capability Novell iFolder 2.x Client
Participate in a shared iFolder
owned by another user
Not as designed, but it is possible
if the iFolder’s owner shares his
or her username and password.
IMPORTANT: Sharing a
password is a security risk and is
never recommended.
Allows the owner of a shared
No Yes
iFolder to transfer ownership of a
shared iFolder to another user
Allows the iFolder owner to
No Yes
transfer ownership the iFolder to
another user
Maximum file size Software limits file size to 4 GB.
Below 4 GB, the maximum file
size depends on the server’s and
clients’ local file systems.
For example, on Windows clients,
FAT32 limits file sizes to 4 GB. On
Linux, EXT2 limits file sizes to 2
GB.
iFolder Client with a Novell iFolder
3.7 Enterprise Server
Yes, if the owner adds you as a
member.
After the owner makes you a
member of the iFolder, you can
view the shared iFolder listed on
your iFolders window. Use the
iFolder Setup function to activate
the iFolder on one or more
computers where you want to
participate.
There are no software
restrictions, but the administrator
can specify the maximum file size
that users can synchronize as a
system-wide policy.
Below the administrative
maximum, the practical maximum
file size depends on the server’s
and clients’ local file systems.
Restrict synchronization by
including or excluding files by file
type, such as
.mp3
No Yes, with policies set by the
administrator that can apply
system-wide, to individual user
accounts, or to individual
iFolders.
Maximum number of directories 32,765 No software restrictions; depends
on the server’s and clients’ local
file systems.
Disk quotas No An owner can specify a quota for
each iFolder, but the total
combined administrative quotas
for all owned iFolders cannot
exceed the user’s system-wide
quota.
An iFolder member can specify a
quota for the iFolder on each
computer where the iFolder is set
up.
Minimum synchronization interval You set a synchronization interval
for each workstation. The value
cannot be less than the system-
wide setting or individual user
You set a synchronization interval
for each computer that applies to
all iFolders in all accounts on that
computer.
setting.
Comparing Novell iFolder 2.x and 3.7 33
Page 34

novdocx (en) 13 May 2009
Feature or Capability Novell iFolder 2.x Client
Allows users to suspend
synchronization for a given client
computer
Yes, using any of the following
methods:
Log out of the iFolder server
Disable Automatic
Synchronization in the
iFolder Preferences tab. You
can remain logged in, and
then synchronize when you
want with the Synchronize
Now option.
Remote access to iFolder data on
the server
Backup of local files to a network
server
Backup support to restore deleted
files
Yes, using Novell NetStorage
Your administrator must configure
NetStorage for iFolder services.
Files in your local iFolders are
backed up on the iFolder server.
Administrators must back up and
restore the entire iFolder
contents.
iFolder Client with a Novell iFolder
3.7 Enterprise Server
Yes, using any of the following
methods:
Log out of the iFolder server
account
Disable Automatic
Synchronization
Disable the account in the
Account window (deselect
Enable Account)
Yes, using iFolder 3.7 Web
Access
Your administrator must configure
an iFolder 3.7 Web Access
server.
Files in your local iFolders are
backed up on the iFolder
enterprise server.
Administrators can back up the
entire iFolder account or
individual iFolders, directories,
and files in the account. They can
restore as individual files,
directories, iFolders, or accounts.
4.2 Web Access Features and Capabilities
The following table compares the features and capabilities of Novell iFolder 3.7 Web Access to
Novell iFolder 2.x.
Table 4-2 Comparison of Web Access for Novell iFolder 2.x and 3.7
Feature or Capability Novell iFolder 2.x Web Access Novell iFolder 3.6 Web Access
Web Access method For iFolder 2.1.4 and earlier, the
Java* applet or Novell NetStorage
(for NetWare
For iFolder 2.1.5 and later, Novell
NetStorage for Novell Open
Enterprise Server (both Linux and
NetWare servers)
®
servers only)
iFolder 3.7 Web Access server for
Novell Open Enterprise Server
2.0 Linux.
34 OES 2 SP1: Novell iFolder 3.7 Cross-Platform User Guide
Page 35

Feature or Capability Novell iFolder 2.x Web Access Novell iFolder 3.6 Web Access
novdocx (en) 13 May 2009
Web Access location
http://serveraddress/
iFolder
Replace
the IP address or DNS name of
your iFolder server. For example,
serveraddress
with
192.168.1.1 or
nifsvr1.example.com
The path is case sensitive.
Connect to server or domain The user has only one iFolder per
username. The user accesses
the iFolder server where his or
her files are located for that
username.
Authenticated access Yes, with username and
password authentication via your
LDAP server.
Encrypted data transfer Yes, with the encrypted iFolder
option.
http://serveraddress/
webalias
Replace
the IP address or DNS name of
your iFolder server. For example,
10.10.1.1
nifsvr1.example.com
Replace
administrator-specified path. The
default path is
path is case sensitive. For
example:
serveraddress
or
webalias
with the
/ifolder.
with
.
The
http://10.10.1.1/ifolder
You separately access the
different domain where you have
accounts. All iFolders for the
individual account are available.
Yes, with username and
password authentication via your
LDAP server.
Yes, with the encrypted iFolder
option.
The Blowfish algorithm is applied
with a user-specified passphrase.
The Blowfish algorithm is applied
with a user-specified passphrase.
Comparing Novell iFolder 2.x and 3.7 35
Page 36

novdocx (en) 13 May 2009
36 OES 2 SP1: Novell iFolder 3.7 Cross-Platform User Guide
Page 37

5
Getting Started
This section describes installation prerequisites and describes how to install the iFolderTM client for
®
Novell
iFolder® 3.7 enterprise server and Web Access server.
Section 5.1, “Prerequisites and Guidelines,” on page 37
Section 5.2, “Downloading the iFolder Client Install Files,” on page 39
Section 5.3, “Installing the iFolder Client,” on page 41
Section 5.4, “Updating iFolder,” on page 43
Section 5.5, “Updating Mono for Linux,” on page 44
Section 5.6, “What’s Next,” on page 44
5.1 Prerequisites and Guidelines
To use iFolder, your workstation must meet the prerequisites discussed in the following sections:
novdocx (en) 13 May 2009
5
Section 5.1.1, “Hardware,” on page 37
Section 5.1.2, “Client Computers,” on page 38
Section 5.1.3, “Mono,” on page 38
Section 5.1.4, “Web Browser,” on page 39
Section 5.1.5, “Network Connection,” on page 39
Section 5.1.6, “Enterprise Server,” on page 39
Section 5.1.7, “Web Access Server,” on page 39
5.1.1 Hardware
The iFolder client requires the following minimum hardware:
At least enough space on your hard drive to download and install the iFolder client for your
system (5-10 MB).
A network adapter.
A network connection must be active only when synchronizing files.
When working with a Novell iFolder 3.7 enterprise server, workstations can use static or
dynamic IP addresses.
Getting Started
37
Page 38

5.1.2 Client Computers
The iFolder client supports the following workstation operating systems:
SUSE
Windows Vista SP1/XP SP2 with the latest Microsoft* .NET 2.0 support patches.
Macintosh OS X (Intel architecture) v10.4.11 and later (requires Mono 1.2.x ). PowerPc
®
Linux Enterprise Desktop 10 SP2 (requires the Mono® framework).
The Mono modules you need for this release are included in the iFolder install file. For
information, see Section 5.1.3, “Mono,” on page 38.
IMPORTANT: The iFolder 3.4 client is not compatible with the iFolder 3.7 server
The Mono modules you need for this release are delivered with the operating system and
installed as part of the default install package for Novell Software.
Make sure you have installed the latest critical updates for your operating system and for .NET
2.0. See the “Windows Update Web site” (http://windowsupdate.microsoft.com).
architecture is not supported.
novdocx (en) 13 May 2009
5.1.3 Mono
For a Linux workstation, the iFolder client requires the Mono framework. Mono is a development
platform for running and developing modern applications. Based on the ECMA/ISO Standards,
Mono can run existing programs that target the .NET or Java frameworks. The Mono Project is an
open source effort led by Novell and is the foundation for many new applications. For information
about Mono, see the Mono Project Web site (http://www.mono-project.com).
If you ever need to upgrade Mono for other software, please check the latest Readme on the Novell
iFolder Documentation Web site (http://www.novell.com/documentation/ifolder3) to see if Novell
explicitly supports that Mono version and to learn any necessary steps to make the upgrade work
correctly.
If you have previously installed Mono, make sure the permissions on Mono directories are set
correctly:
1 On your Linux computer, open a terminal window.
root
2 At the prompt, log in as the
3 Navigate to the
cd /usr/lib
/usr/lib
user by entering su, then enter your
directory. At the prompt, enter
4 At the prompt, enter the following command to change the Mono permissions in the
directory:
chmod 755 -R mono
5 Navigate to the
cd /etc
/etc
directory. At the prompt, enter
6 At the prompt, enter the following command to change the Mono permissions in the
directory:
chmod 755 -R mono
root
password.
/usr/li
/etc
b
38 OES 2 SP1: Novell iFolder 3.7 Cross-Platform User Guide
Page 39

5.1.4 Web Browser
You need one of the following supported Web browsers on your client computers:
Mozilla* Firefox*
Microsoft Internet Explorer* 6.0/ 7.0
Safari* 3.0.4 and later
For secure connections, Novell iFolder 3.7 servers expect users to connect to the enterprise server
account and the Web Access server with SSL 3.0 connections. Both the client and browser
connections use the browser’s settings for SSL. If Microsoft Internet Explorer is installed on your
system, the iFolder client uses those settings over any other browser configuration for the client.
Make sure the IE browser settings and other browsers you use to connect to iFolder servers are
configured to use SSL 3.0.
5.1.5 Network Connection
An active network connection is necessary to synchronize files in your iFolders. Your computer
must be active and online for access to and synchronization with any enterprise servers where you
have iFolder accounts.
novdocx (en) 13 May 2009
5.1.6 Enterprise Server
Contact your iFolder administrator to get the server IP address or DNS name of the Novell iFolder
3.7 enterprise server for your iFolder account. For example,
ifolder3.example.com
.
192.168.1.1
or
5.1.7 Web Access Server
Contact your iFolder administrator to get the URL with the server IP address or DNS name of the
Novell iFolder 3.7 Web Access server for your iFolder account. For example, http://
ifolder
or http://
ifolder3.example.com/ifolder
.
192.168.1.1/
5.2 Downloading the iFolder Client Install Files
The iFolder client for Novell iFolder 3.7 is available for download on the OES 2 SP1 Welcome page
of your iFolder enterprise server.
1 Open a Web browser to the following location to open the server’s Welcome page:
http://ifolder3.example.com
Replace
192.168.1.1
your iFolder administrator for this information.
2 In the left navigator, click Client Software to open the download page.
ifolder3.example.com
) of the Novell iFolder 3.7 enterprise server where you have an account. Ask
with the DNS name or the IP address (such as
Getting Started 39
Page 40

3 In the iFolder Links, select one of the following client links to begin the download, then save
the file to a local directory:
novdocx (en) 13 May 2009
Link Name Operating System Filename
iFolder 3.7 Linux Client SUSE Linux Enterprise Desktop
10 SP1
iFolder 32-bit Windows Client Windows Vista/ XP SP2
iFolder 64-bit Windows Client Windows Vista SP1
iFolder 3.7 Macintosh Client Apple Macintosh 10.4.11 and
later
tar.gz
The
4 For the Linux clients, extract the
files include the necessary Mono
tar.gz
files to a local directory. At the command prompt,
.rpm
files for iFolder on your Linux computer.
ifolder3-linux.tar.gz
ifolder3-windows.exe
ifolder3-windowsx64.exe
ifolder-3.7.0-1.dmg
enter
tar -zxvf filename
Replace
filename
with the
tar.gz
filename for your operating system and extract i585 and
x86_64 versions of client RPMs.
Depending on your system, you should now have the following files on your system:
40 OES 2 SP1: Novell iFolder 3.7 Cross-Platform User Guide
Page 41

iFolder Client Install Files
novdocx (en) 13 May 2009
iFolder for Linux
Install script for iFolder
Linux Client
iFolder for Windows
iFolder for Windows (64
bit)
iFolder for Intel
Macintosh
../linux/ifolder3
ifolder3-3.7.1.xxxx-1-1.i586.rpm
nautilus-ifolder3-3.7.1.xxxx-1-1.i586.rpm
simias-1.8.0.xxxx-1-0.3.i586.rpm
novell-ifolder-client-plugins-3.7.1.xxxx.1-1.i586.rpm
ifolder3-3.7.1.xxxx-1-1.x86_64.rpm
nautilus-ifolder3-3.7.1.xxxx-1-1.x86_64.rpm
simias-1.7.1.xxxx-1-0.3.x86_64.rpm
novell-ifolder-client-plugins-3.7.1.xxxx.1-
1.x86_64.rpm
For example:
IMPORTANT: Ensure that you have installed xsp.1.1.8 or greater.
install-ifolder-script.sh
For more information, see “Install Script:” on page 42.
ifolder3-windows.exe
ifolder3-windows-x64.exe
ifolder-3.7.0-1.dmg
ifolder3-3.7.1.7235-1.i586.rpm
directory
Mono 1.2.5 Download
for Mac
MonoFramework-1.2.5_5.macos10.novell.universal.dmg
For information about the specific version of Mono included with the files you installed, see
Section 5.1.3, “Mono,” on page 38.
5.3 Installing the iFolder Client
Make sure your system satisfies the Section 5.1, “Prerequisites and Guidelines,” on page 37.
IMPORTANT: iFolder 3.7 client is not compatible with iFolder 3.2 servers.
Use the following methods to install iFolder on your client computers:
Section 5.3.1, “Installing iFolder for Linux,” on page 42
Section 5.3.2, “Installing iFolder for Windows,” on page 42
Section 5.3.3, “Installing iFolder for Macintosh,” on page 43
NOTE: iFolder 3.7 does not support a silent install (that is, a scriptable non-interactive install) on
.rpm
any platform. A silent install is possible for the Linux client using its
supported.
files, but it is not
Getting Started 41
Page 42

5.3.1 Installing iFolder for Linux
novdocx (en) 13 May 2009
You can install the iFolder client for Novell iFolder 3.7 and its dependent
.rpm
files on your Linux
computer by using command line instructions or by using YaST Software Installer. The installation
process require Mono 1.2.5 with XSP 1.2.5.
IMPORTANT: Do not install the client
.rpm
files on a server machine.
1 Specify the location of the files as an Installation Source in YaST:
1a Navigate to the directory where you extracted the
and
linux/ifolder3
../linux/mono
to the same directory.
files, then move the files from
../
.rpm
1b Open YaST, click Software > Installation Source, then click Add > Local Directory.
1c Browse to the directory where you placed the
.rpm
files, then click OK twice.
1d Click Finish.
2 To install iFolder, use one of the following methods:
Install Script: In the Client Software downloag page, click Intall script for iFolder Linux
Client and download
script.sh
Ya S T: In YaST, click Software > Software Management, select the files you want to
to automatically install the iFolder client.
install-ifolder-script.sh
. Run
install-ifolder-
install, then click Accept.
Command Line: Open a terminal console, log in as the root user by entering
.rpm
entering your password, go to the directory where you placed the
rpm -ivh *
files, then enter
su
and
If you get any dependency errors, install the softwares by using the SLED 10 SP2 media.
3 After the install is finished, log in with the local user identity you want to use when you create
and use iFolders.
4 Start iFolder.
For information, see Section 7.2, “Starting the iFolder Client,” on page 52.
5 Before you can use iFolder, you must configure at least one iFolder account. Continue with
Section 7.3, “Configuring an iFolder Account,” on page 55.
5.3.2 Installing iFolder for Windows
Use the install file for installing on Windows Vista/XP SP2/2000 Professional SP4.
1 Log on to the computer as an administrator user (or equivalent user).
2 Save the install file to a local directory.
3 Install iFolder by double-clicking the file, then follow the on-screen instructions.
IMPORTANT: iFolder for Windows requires the Microsoft .NET 2.0 framework. If .NET is
not detected, the install automatically installs .NET.
42 OES 2 SP1: Novell iFolder 3.7 Cross-Platform User Guide
Page 43

4 When prompted to reboot the computer, do one of the following:
Click Ye s and allow the reboot to continue, then continue with Step 5.
Click No, log off of the Administrator user (or equivalent user) identity, then continue
with Step 5.
5 To run iFolder, log on to the computer with the LDAP credentials when you create iFolders.
iFolder begins automatically whenever you log on to your computer and prompts you to create
an iFolder account. If it does not start, you can start it manually by selecting Start > Programs
> iFolder 3 > iFolder 3 Client.
6 If you are running personal firewall software on your computer, you might receive a message
asking whether you want to block Mono-XSP. Unblock (or do not block) Mono-XSP.
For information about why you need Mono-XSP, see Section 7.7, “Configuring Local Firewall
Settings for iFolder Traffic,” on page 71.
7 Before you can use iFolder on the computer, you must configure at least one iFolder account.
You can configure it now or later. For information, see Section 7.3, “Configuring an iFolder
Account,” on page 55.
novdocx (en) 13 May 2009
5.3.3 Installing iFolder for Macintosh
Use the
ifolder-3.7.0-1.dmg
1 Download
2 Install iFolder by double-clicking the file, then follow the on-screen instructions.
3 To run iFolder, do any of the following:
Double click iFolder in Applications directory window.
Enter iFolder in the the spot light and select the application.
ifolder-3.7.0-1.dmg
file for installing on Macintosh.
.
5.4 Updating iFolder
Update the iFolder client only with patches or upgrades distributed by your iFolder administrator.
The iFolder client checks for updates on the server whenever you log in, and prompts you to install
a new update if it exists.
Typical distribution methods on each platform are as follows:
Linux: Your administrator can deliver updates for the iFolder client for Linux with a customer-
hosted channel in an update manager, such as ZENworks
Manager.
Windows: The iFolder client for Windows automatically checks for updates on the server
whenever you log in, and prompts you to install a new update if it exists.
Macintosh: You cannot upgrade existing Mac client. You must perform a fresh install for
iFolder 3.7 client for Macintosh.
®
Linux Management Update
For information about Mono updates, see Section 5.5, “Updating Mono for Linux,” on page 44.
Getting Started 43
Page 44

5.5 Updating Mono for Linux
The iFolder client for Linux supports only the version of Mono included in the install software.
Whenever Novell iFolder 3.7 releases updates for the iFolder client, the update software also
includes any updates for Mono on Linux. You can update Mono concurrently with the iFolder
updates.
If you need to upgrade Mono for another reason, please check the online documentation to see if the
version is explicitly supported and to learn any necessary steps to make the upgrade work correctly.
For information, see the latest version of the online documentation on the Novell iFolder
Documentation Web site (http://www.novell.com/documentation/ifolder3).
5.6 What’s Next
You are ready to set up your enterprise server account and preferences. Continue with the next
section, “Managing iFolder Accounts and Preferences” on page 51.
novdocx (en) 13 May 2009
44 OES 2 SP1: Novell iFolder 3.7 Cross-Platform User Guide
Page 45

6
Novell iFolder Migration And
novdocx (en) 13 May 2009
Upgrade
This section discusses user-friendly migration to iFolder 3.7 client for Novell® iFolder® 3.7 from
the Novell iFolder 2.x client. It also discusses upgrading the client from iFolder 3.x to iFolder 3.7.
Before you migrate, see Chapter 4, “Comparing Novell iFolder 2.x and 3.7,” on page 31 to
understand the differences in the capabilities of Novell iFolder 2.x and 3.7.
Section 6.1, “Migrating from iFolder 2.x to iFolder 3.7,” on page 45
Section 6.2, “Upgrading iFolder 3.x Clients,” on page 49
Section 6.3, “Coexistence of Novell iFolder 2.x and iFolder Clients,” on page 50
6.1 Migrating from iFolder 2.x to iFolder 3.7
This section discusses the following:
Section 6.1.1, “Understanding the Migration Process,” on page 45
Section 6.1.2, “Migration Procedure,” on page 45
6.1.1 Understanding the Migration Process
6
Novell iFolder provides a simple migration from iFolder 2.x to the iFolder client for Novell iFolder
3.7. The Migration Assistant provided in the iFolder client helps you migrate the existing iFolder 2.x
data quickly and easily.
During the startup, the Migration Assistant detects the 2.x installation and prompts you to migrate
your data. During the data migration, it prompts you again to convert the existing folders or to make
a copy of the 2.x iFolder. For more information on this, refer Step 6 on page 46.
iFolder prompts you about the resynchronization of the files to 3.7 server, and asks whether you
need to retain the 2.x client until the 3.7 completes synchronization. During this process, only the
data get migrated, hence, the user has to set the preference in the new client.
6.1.2 Migration Procedure
1 Install the iFolder client for iFolder 3.7, then configure your account for the iFolder 3.7
enterprise server.
For information on installing the client and setting up the account, see “Managing iFolder
Accounts and Preferences” on page 51.
2 In the iFolder browser, create one or more iFolders on your local computer.
You can use any valid name for an iFolder. Do not create an iFolder in the same directory path
as your current iFolder 2.x directory. For information, see Section 8.5, “Creating and
Uploading an iFolder,” on page 82.
3 The iFolder displays a message about the existence of previous version data, and a request for a
migration.
Novell iFolder Migration And Upgrade
45
Page 46

Click OK to open a list of avilable 2.x iFolders.
4 Select the 2.x iFolder you want to migrate.
novdocx (en) 13 May 2009
Click Migrate to appear the Migration Assistant.
NOTE: You can also reach the Migration Assistant by iFolder > Migration > Migrate from
iFolder 2.x.
Migration Assistant takes you through the Migration process to complete your data migration.
5 Click Forward to display the Migration options.
6 Select one of the following:
46 OES 2 SP1: Novell iFolder 3.7 Cross-Platform User Guide
Page 47

novdocx (en) 13 May 2009
Migrate the iFolder and disconnect it from 2.x domain: Select this option to disconnect the
existing folder from the iFolder 2.x domain after migrating it to 3.7.
Create a copy of the iFolder and migrate: Select this option to create a copy of the iFolder 2.x
files and convert them to the iFolder 3.7. This does not remove the files from the ifolder 2.x
domain even after you migrate the files to the iFolder 3.7.
If you select this option, you can also select Copy the parent folder if you want to copy not only
the contents of the 2.x folder, but the parent folder as well. If you leave this option deselected,
only the contents of the selected folder will be migrated to 3.7.
Click Browse to find the location to save the migrated folder.
For example,
dir1
and
the parent directory, it create the
dir2
and
c:/Documents and Settings/<user name>/ifolder2dir
and
dir2
are the directories under
ifolder2dir
ifolder2dir
. When you select the option Copy
in the new location and the directories
is a 2.x iFolder
are copied to it. If the option remains deselected, only the directories
dir1
and
are moved to the specified location.
7 Click Forward to select the domain and Security options as follows:
7a Select the domain from the drop-down list.
dir1
dir2
Novell iFolder Migration And Upgrade 47
Page 48

novdocx (en) 13 May 2009
7b Select the desired security option:
Select Encrypted to encrypt the selected iFolder.
If you did not set your passphrase during login, iFolder prompts you to enter the
passphrase. You can skip this option and set the passphrase later.
If you are not currently connected to the iFolder domain, it prompts you to connect to
the domain.
Select Regular to share the iFolder with other members in the iFolder 3.7 domain.
You can migrate an encrypted 2.x iFolder to shared folder. When you attempt to
migrate an encrypted 2.x iFolder to a shared folder, it prompts you to verify the
action.
Click OK to confirm your action.
8 Click Forward to migrate the selected iFolder.
9 Verify that the information you have entered is correct, if necessary, click Back to return to
previous pages to make corrections.
48 OES 2 SP1: Novell iFolder 3.7 Cross-Platform User Guide
Page 49

novdocx (en) 13 May 2009
If the given information is correct, click Migrate to begin migration.
Click Back to go back and make any necessary changes.
10 Click Finish to complete the migration.
6.2 Upgrading iFolder 3.x Clients
This section discusses the following:
Section 6.2.1, “Automatically Upgrading to iFolder 3.7,” on page 49
Section 6.2.2, “Manually Upgrading to iFolder 3.7,” on page 50
IMPORTANT: Before upgrading your 3.4.1 client, you must back up your local Simias store. If
you don’t do the backup, you lose all configuration information from the computer because it deletes
the Simias store when the upgrade fails.
6.2.1 Automatically Upgrading to iFolder 3.7
The automatic upgrade is possible only if you have root access rights, because the process needs to
install the RPM packages. The root password is requested during the upgrade. If you do not have
root access rights, the package is not installed automatically. However, the client packages are
downloaded to a temporary location. The Linux client is downloaded to
ifolder3-linux.tar.gz
install scripts that you can run manually. Until you upgrade the client, you can not connect to the
iFolder 3.7 domain with an iFolder 3.x client.
. This enables you to upgrade it later because the location contains two
/tmp/<32chardir>/
1 From an iFolder 3.x client earlier than iFolder 3.7, try to connect to the iFolder server. You are
prompted about whether you want to upgrade.
2 Click Ye s to automatically upgrade your iFolder 3.x client.
For iFolder 3.4.1, if you click No and attempt to connect the iFolder 3.4.1 client to the iFolder 3.7
server, it displays an error message as shown below:
Novell iFolder Migration And Upgrade 49
Page 50

NOTE: An iFolder 3.x client (other than iFolder 3.4.1 clients) connects to iFolder 3.7 server even if
you choose not to upgrade. Although the 3.x client stays connected to the 3.7 server, you cannot
perform any of the iFolder operations with this client. When you attempt to convert an existing
folder to an iFolder, the server does not consider those changes, and displays an error message that
the server is unavailable. The only operation that you can perform is that download the new RPMs
from the server to install iFolder 3.7.
novdocx (en) 13 May 2009
6.2.2 Manually Upgrading to iFolder 3.7
1 Open a terminal. At the command prompt, run
2 Enter the root password when it is requested.
This closes the iFolder client if it is already running, then it updates the XSP Web server and
iFolder client along with the Nautilus-ifolder3 plug-in.
3 Start iFolder from the Application menu.
install-ifolder.sh
.
6.3 Coexistence of Novell iFolder 2.x and iFolder Clients
The iFolder client for Novell iFolder 3.7 and the Novell iFolder 2.x client can coexist on the same
computer, but they are not integrated and their software should not be installed in the same folder. If
you plan to use Novell iFolder 2.x on your computer, you must comply with the following
restrictions:
Any local directory where you store your Novell iFolder 2.x data should not be converted to an
iFolder.
Any directory that contains a local directory where you store your Novell iFolder 2.x data
should not be converted to an iFolder.
50 OES 2 SP1: Novell iFolder 3.7 Cross-Platform User Guide
Page 51

7
Managing iFolder Accounts and
novdocx (en) 13 May 2009
Preferences
This section discusses how to configure your iFolderTM accounts and how to manage preferences for
the iFolder client.
Section 7.1, “Cross-Platform Considerations,” on page 51
Section 7.2, “Starting the iFolder Client,” on page 52
Section 7.3, “Configuring an iFolder Account,” on page 55
Section 7.4, “Logging In to an iFolder Account,” on page 63
Section 7.5, “Viewing and Modifying iFolder Account Settings,” on page 64
Section 7.6, “Configuring iFolder Preferences for the Client,” on page 68
Section 7.7, “Configuring Local Firewall Settings for iFolder Traffic,” on page 71
Section 7.8, “Configuring Local Virus Scanner Settings for iFolder Traffic,” on page 72
Section 7.9, “Deleting an iFolder Account,” on page 73
Section 7.10, “Logging Out of an iFolder Account,” on page 74
Section 7.11, “Exiting the iFolder Client,” on page 74
Section 7.12, “What’s Next,” on page 75
7
7.1 Cross-Platform Considerations
The user interfaces for the Linux, Windows, and Macintosh versions of the iFolder client conform to
interface conventions of their individual platforms. The way you perform common tasks is parallel
in each platform, but you might observe slight differences in the buttons, the display area, function
labels, the location of the desktop notification area, the start iFolder preference, and so on as you
perform the tasks. Except where procedures differ explicitly, this guide provides instructions for
only one of the two platforms.
The following table lists some typical differences and similarities in the client interface:
Task Linux Windows Macintosh
iFolder menu / Rightclick option in the system
tray icon
iFolder Preferences >
Accounts dialog
iFolder Preference >
Accounts dialog
Quit Exit Quit
Add button Add button Plus (+) button
Remove button Remove button Minus (
-
) button
Managing iFolder Accounts and Preferences
51
Page 52

Task Linux Windows Macintosh
novdocx (en) 13 May 2009
Multiple locations Close button
Actions are committed
when you perform the
action
iFolder Preferences
dialog
Configuring an iFolder
Account
Notification area Notification area Status and Notification
Right-click notification
area
iFolders > iFolder menu Properties Properties Get Info
iFolder Wizards Forward button and
Add iFolder to the
desktop’s Startup
Programs
Remember my
password
Account Settings Accounts This feature is not
Back button
OK, Cancel, and Apply
buttons
Actions are committed
only when you click
Apply or OK
Select (enable) Start
iFolder when logging In
to the desktop
Remember password on
this computer
area
Next button and Back
button
OK and Cancel button
Actions are committed
when you perform the
action
This feature is not
available
Remember Password
Notification area
available
No buttons to move front
and back. You can
configure your
username, password
and server in a single
window.
Configuring an iFolder
Account
iFolder Server
Configuration Wizard
iFolder Identity
Configuration Wizard
iFolder Account
Assistant
iFolder Server Choose an iFolder
Identity iFolder Account
iFolder Account Creation
Wizard
Server
Information
Preferences > Account
Not available
Not available
7.2 Starting the iFolder Client
When iFolder is running, the iFolder Services icon appears in the notification area of the taskbar.
iFolder is integrated in the desktop environment. The iFolder emblem (a green “i”) appears on
iFolders when they are viewed in a file manager, on the desktop, or in the iFolder browser.The
encrypted iFolder is indicated by the emblem (locked folder).
IMPORTANT: The notification area of the taskbar must be enabled in order for the iFolder
Services icon to be displayed when iFolder is running.
You can work locally with files in your local iFolders at any time. Whenever the iFolder client is
running, it logs the changes you make to local iFolder data as you work. If you make changes to
local iFolder data when iFolder is not running, iFolder identifies and logs the differences the next
time you start iFolder.
When iFolder is not running, iFolders appear in the file manager or on the desktop. You can access
files in your local copy of an iFolder, but you cannot manage iFolders. In addition, you must log in
to an account to create an iFolder or synchronize its files.
52 OES 2 SP1: Novell iFolder 3.7 Cross-Platform User Guide
Page 53
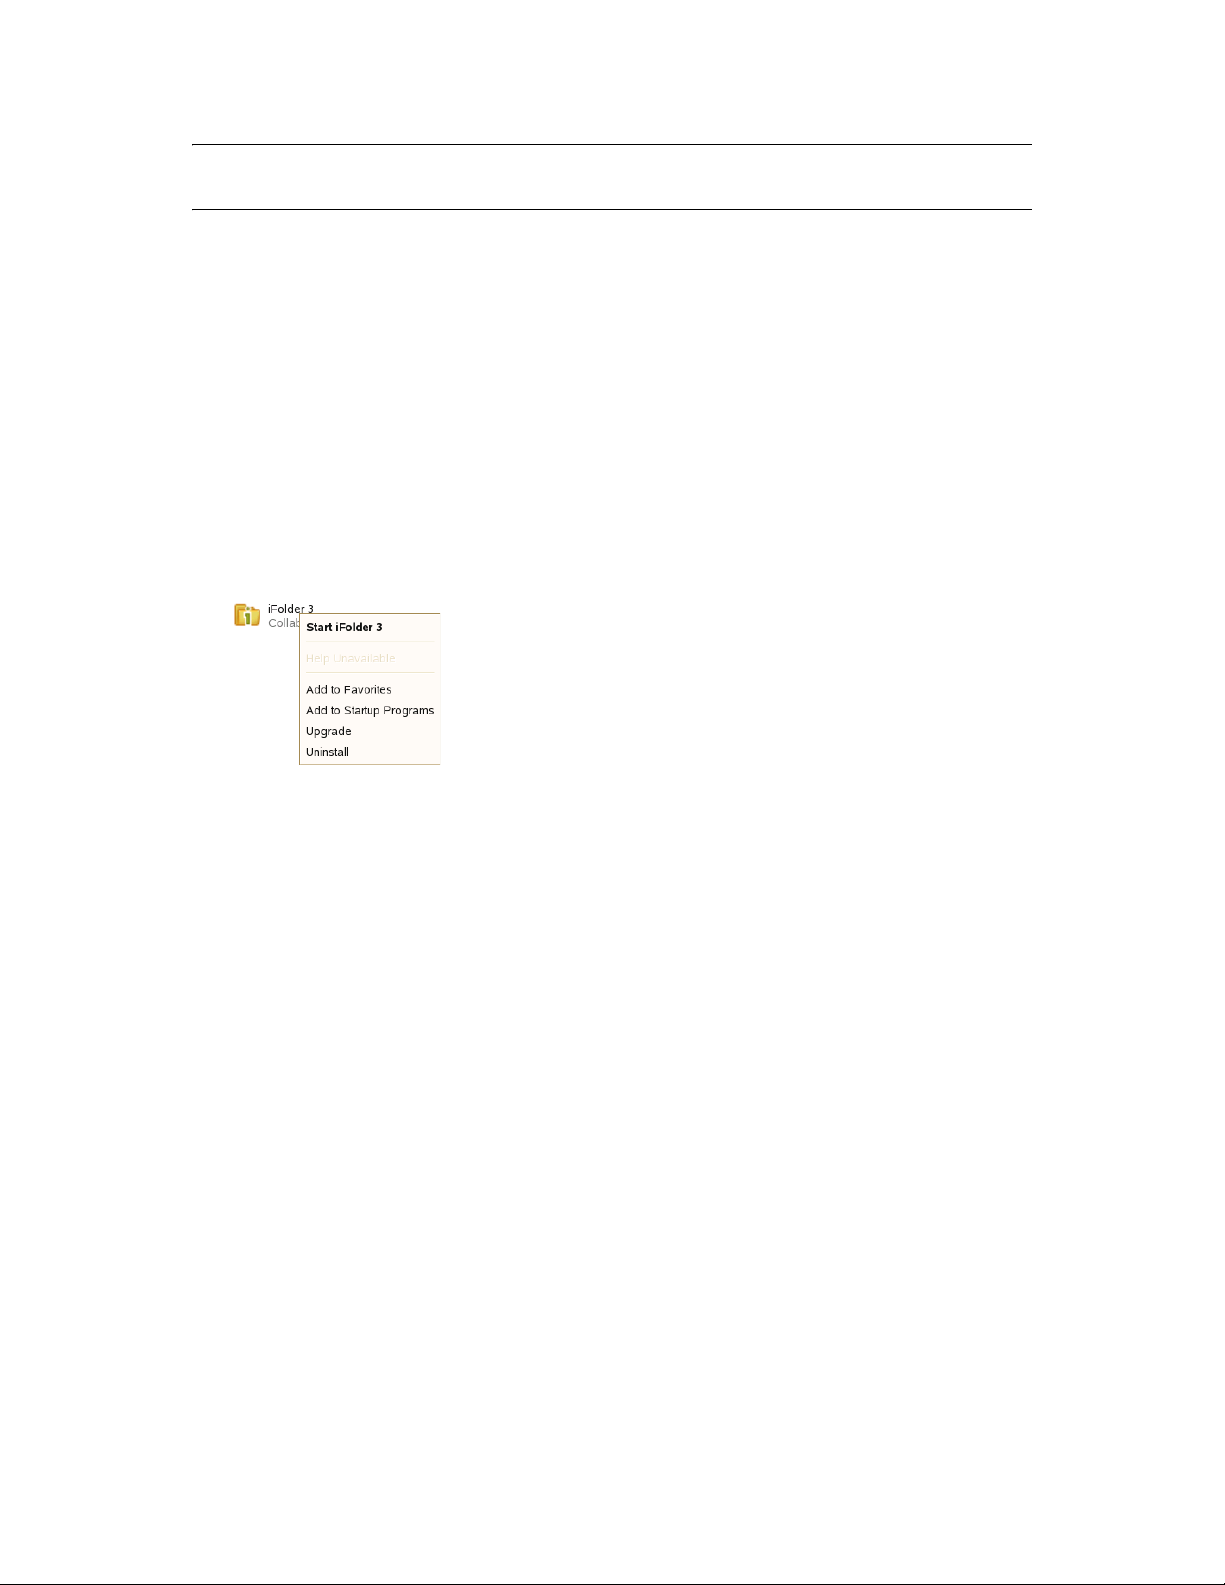
NOTE: During the account creation login happens through SSL. When you are prompted to accept
the server certificate, you must validate the certificate and accept it for a successful connection.
For information about stopping the iFolder client, see Section 7.11, “Exiting the iFolder Client,” on
page 74.
7.2.1 Linux
“Starting iFolder Automatically on Login” on page 53
“Starting iFolder Manually” on page 53
Starting iFolder Automatically on Login
To enable iFolder to start automatically when you log in to the desktop, do one of the following:
Open the applications menu, click More Applications, locate and right-click iFolder 3, then
select Add to Startup Programs from the menu.
novdocx (en) 13 May 2009
Make sure iFolder is running when you log out, then save the session setup. Select this session
option when you log in to the desktop.
Open a terminal window, log in as the
session-properties
to add iFolder as a program to start when you log in to your computer.
root
user, then run
/opt/gnome/bin/gnome-
To disable iFolder from starting automatically on login, do one of the following:
Open the applications menu, locate and right-click iFolder 3, then select Remove from Startup
Programs.
Make sure iFolder is not running when you log out, then save the session setup. Select this
session option when you log in to the desktop.
Starting iFolder Manually
1 Log in to your computer with the local Linux user identity you want to use when you create
iFolders.
2 Use one of the following methods to start iFolder:
In the taskbar, open the applications menu, click More Applications, locate iFolder 3 by
searching or scrolling through the available options, right-click iFolder 3, then select Start
iFolder 3.
Open a terminal shell, then enter
/opt/novell/ifolder3/bin/ifolder
Managing iFolder Accounts and Preferences 53
Page 54

7.2.2 Windows
“Starting iFolder Automatically on Login” on page 54
“Starting iFolder Manually” on page 54
Starting iFolder Automatically on Login
To start iFolder automatically when you log in to the desktop:
1 Right-click the iFolder Services icon, then select Preferences to open the iFolder
Preferences dialog box to the General tab.
2 Select Start iFolder When logging in to the Desktop, then click Apply.
3 Click OK to close the iFolders Preferences dialog box.
To disable iFolder from starting automatically when you log on to the desktop:
1 Right-click the iFolder Services icon, then select Preferences to open the iFolder Preferences
dialog box to the General tab.
2 Deselect Start iFolder When logging in to the Desktop, then click Apply.
3 Click OK to close the iFolders Preferences dialog box.
novdocx (en) 13 May 2009
Starting iFolder Manually
1 Log in to the computer with the local Windows user identity you want to use when you create
iFolders.
2 If iFolder does not start automatically on successful logon, start iFolder by clicking Start >
Programs > iFolder 3, then select the iFolder 3 Client application.
7.2.3 Macintosh
“Starting iFolder Automatically on Login” on page 54
“Starting iFolder Manually” on page 55
Starting iFolder Automatically on Login
To enable iFolder to start automatically when you log in to your Macintosh computer, add iFolder to
the Startup Items.
1 Start iFolder.
2 From the dock, right-click the iFolder icon and select the option Open at Login.
or
From the dock, press the Ctrl key, click the iFolder icon, then select Open at Login.
To disable iFolder from starting automatically, remove iFolder from the Startup Items.
1 From the dock, right-click the iFolder icon, and deselect Open at Login.
or
From the dock, right-click or Ctrl-click the iFolder icon, then deselect Open at Login.
54 OES 2 SP1: Novell iFolder 3.7 Cross-Platform User Guide
Page 55

Starting iFolder Manually
1 Log in to your computer with the local Macintosh user identity you want to use when you
create iFolders.
2 Use one of the following methods to start iFolder:
Open the Applications directory on
iFolder 3.
Type
Open a terminal shell, log in as the root user, then enter
iFolder
icon on top right) then click iFolder 3 under Applications.
/Applications/iFolder 3.app/Contents/MacOS/iFolder 3
in the spotlight (Apple button + Spacebar or click the magnifying glass
Macintosh HD
, select Applications, then double-click
7.3 Configuring an iFolder Account
Use the iFolder Account Assistant to add and configure a new account. You must configure at least
one iFolder account before you can create iFolders or share iFolders on your system. You can create
only one account for any given iFolder host service, but you can have multiple accounts. You can
log in separately to each account and be logged in concurrently to multiple accounts.
novdocx (en) 13 May 2009
Multiple users with different local login identities can have iFolders on the same computer. iFolder
prompts the active user to set up an account on the first time the iFolder client runs under that local
user identity.
IMPORTANT: iFolder 3.7 introduces a new feature, auto-account creation, which helps the iFolder
administrator to create and configure an account for you. If your iFolder administrator has enabled
auto-account creation, you don’t need to configure an account for yourself. When you start an
iFolder for the first time, you are prompted to enter your password. Enter your password to complete
configuring the account.
To configure a new account:
1 Access the iFolder Account Assistant, using one of the following methods:
Managing iFolder Accounts and Preferences 55
Page 56

The first time you start iFolder under your current local login identity, iFolder prompts
you to set up an iFolder account. Click Forward to go directly to the iFolder Account
Assistant.
Right-click the iFolder Services icon in the notification area, select Accounts to open
the iFolder Preferences dialog box to the Accounts tab, then click Add to open the iFolder
Account Assistant.
2 Follow the on-screen instructions to specify the following values:
novdocx (en) 13 May 2009
56 OES 2 SP1: Novell iFolder 3.7 Cross-Platform User Guide
Page 57

Parameter Description
Server Address The DNS name or IP address of the iFolder enterprise server where you have
an account. Get this information from your iFolder administrator.
novdocx (en) 13 May 2009
Make this my
default server
For example:
The server name is always displayed along with it’s IP address in the iFolder
user interface. For example: iFolder - 192.168.1.1
IMPORTANT: You cannot use an iFolder 3.7 client to connect to an iFolder 3.2
server.
When you have multiple servers, select Make this my default server to make
this server the one selected by default in the drop-down list of servers when
you create and upload iFolders.
svr21.example.com
or
192.168.1.1
Managing iFolder Accounts and Preferences 57
Page 58
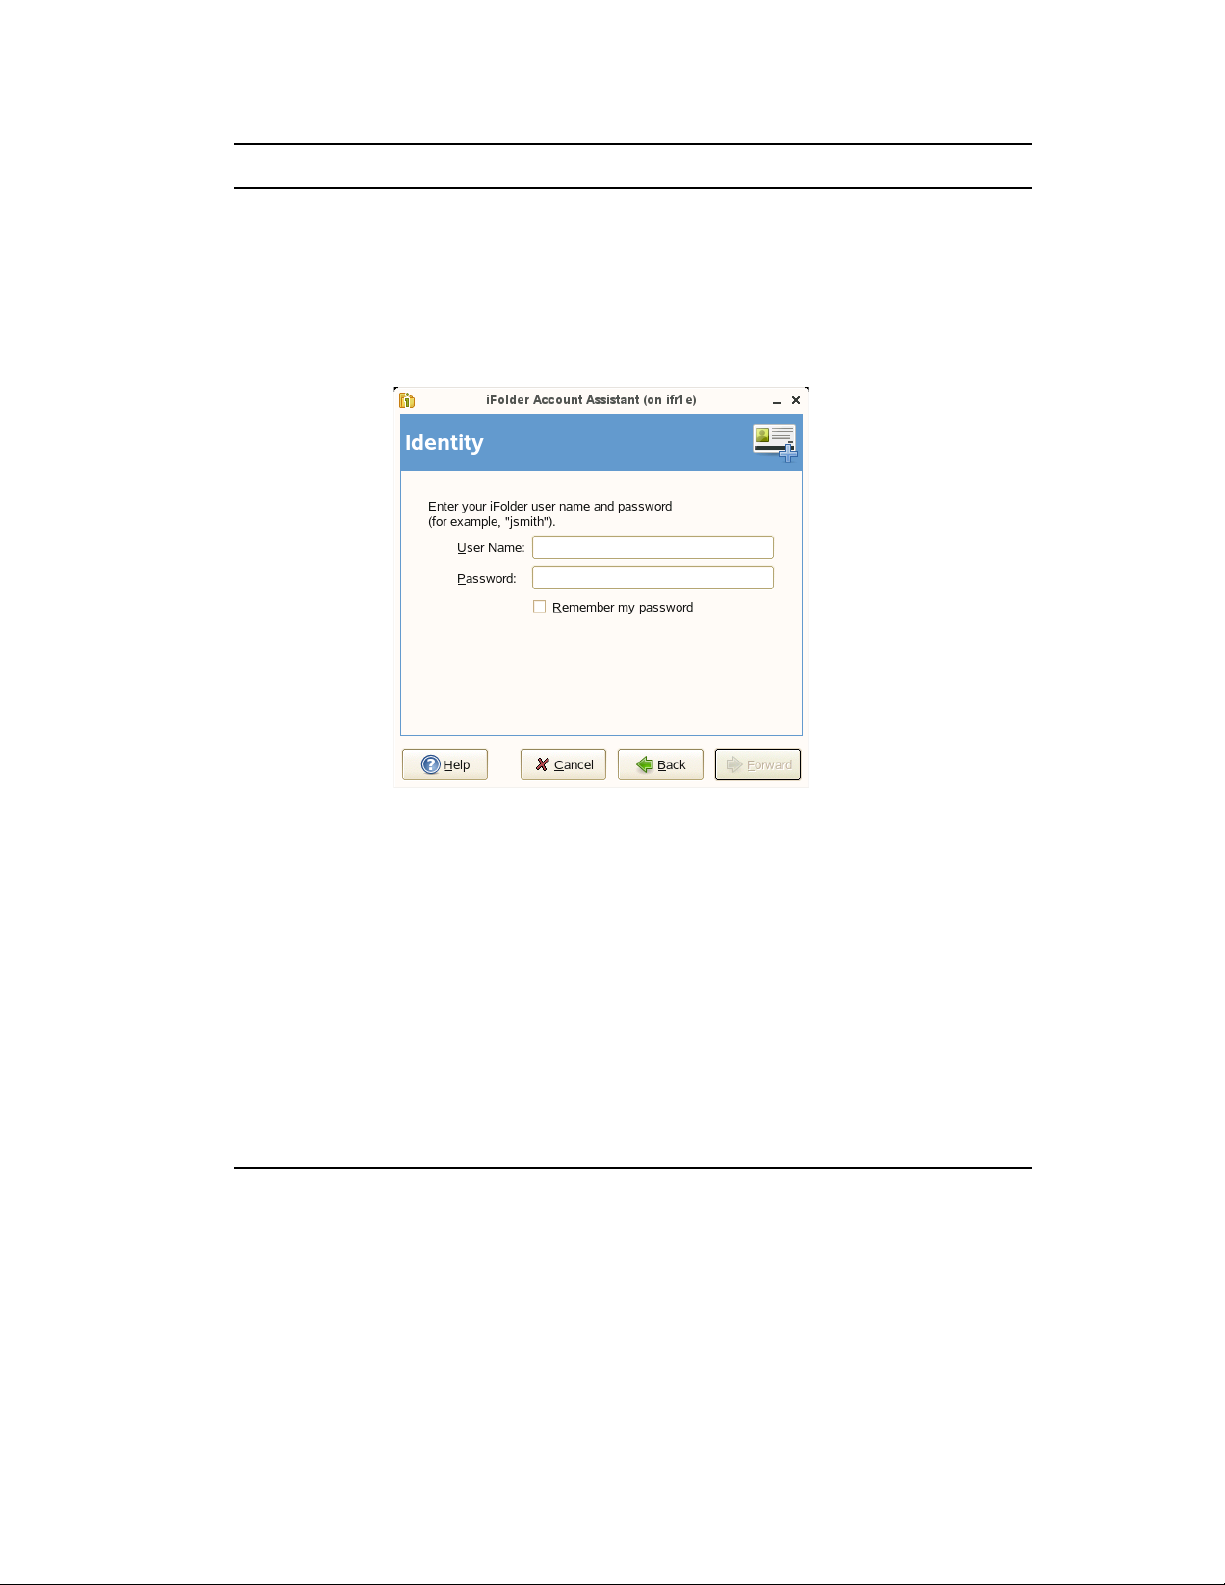
Parameter Description
User Name Specify your user identity for this account. Your iFolder administrator decides
whether the format you should use is your network user ID (LDAP common
name) or your e-mail address.
For example, if your name is John Smith with a user ID of jsmith and an e-mail
address of john.smith@example.com, your administrator configures a setting
for the server that determines which of the two formats to accept in the
Username field for authentication purposes.
novdocx (en) 13 May 2009
Password Specify the password for your username.
Authentication happens through a Secure channel (SSL). You are prompted to
validate and accept the SSL server certificate.
Remember My
Password
Select Remember My Password to log in automatically to this iFolder account
whenever you log in to your computer.
If your network password changes, automatic authentication fails gracefully the
next time iFolder attempts to log in to the iFolder account. iFolder prompts you
to log in with your new password and allows you to specify and save the new
password.
If your admin has set your encryption policy to
enter your passphrase and select the passphrase Recovery agent. For more
information on passphrase management, see Section 8.11, “Managing
Passphrase for Encrypted iFolders,” on page 96.
on, iFolder will prompts you to
58 OES 2 SP1: Novell iFolder 3.7 Cross-Platform User Guide
Page 59
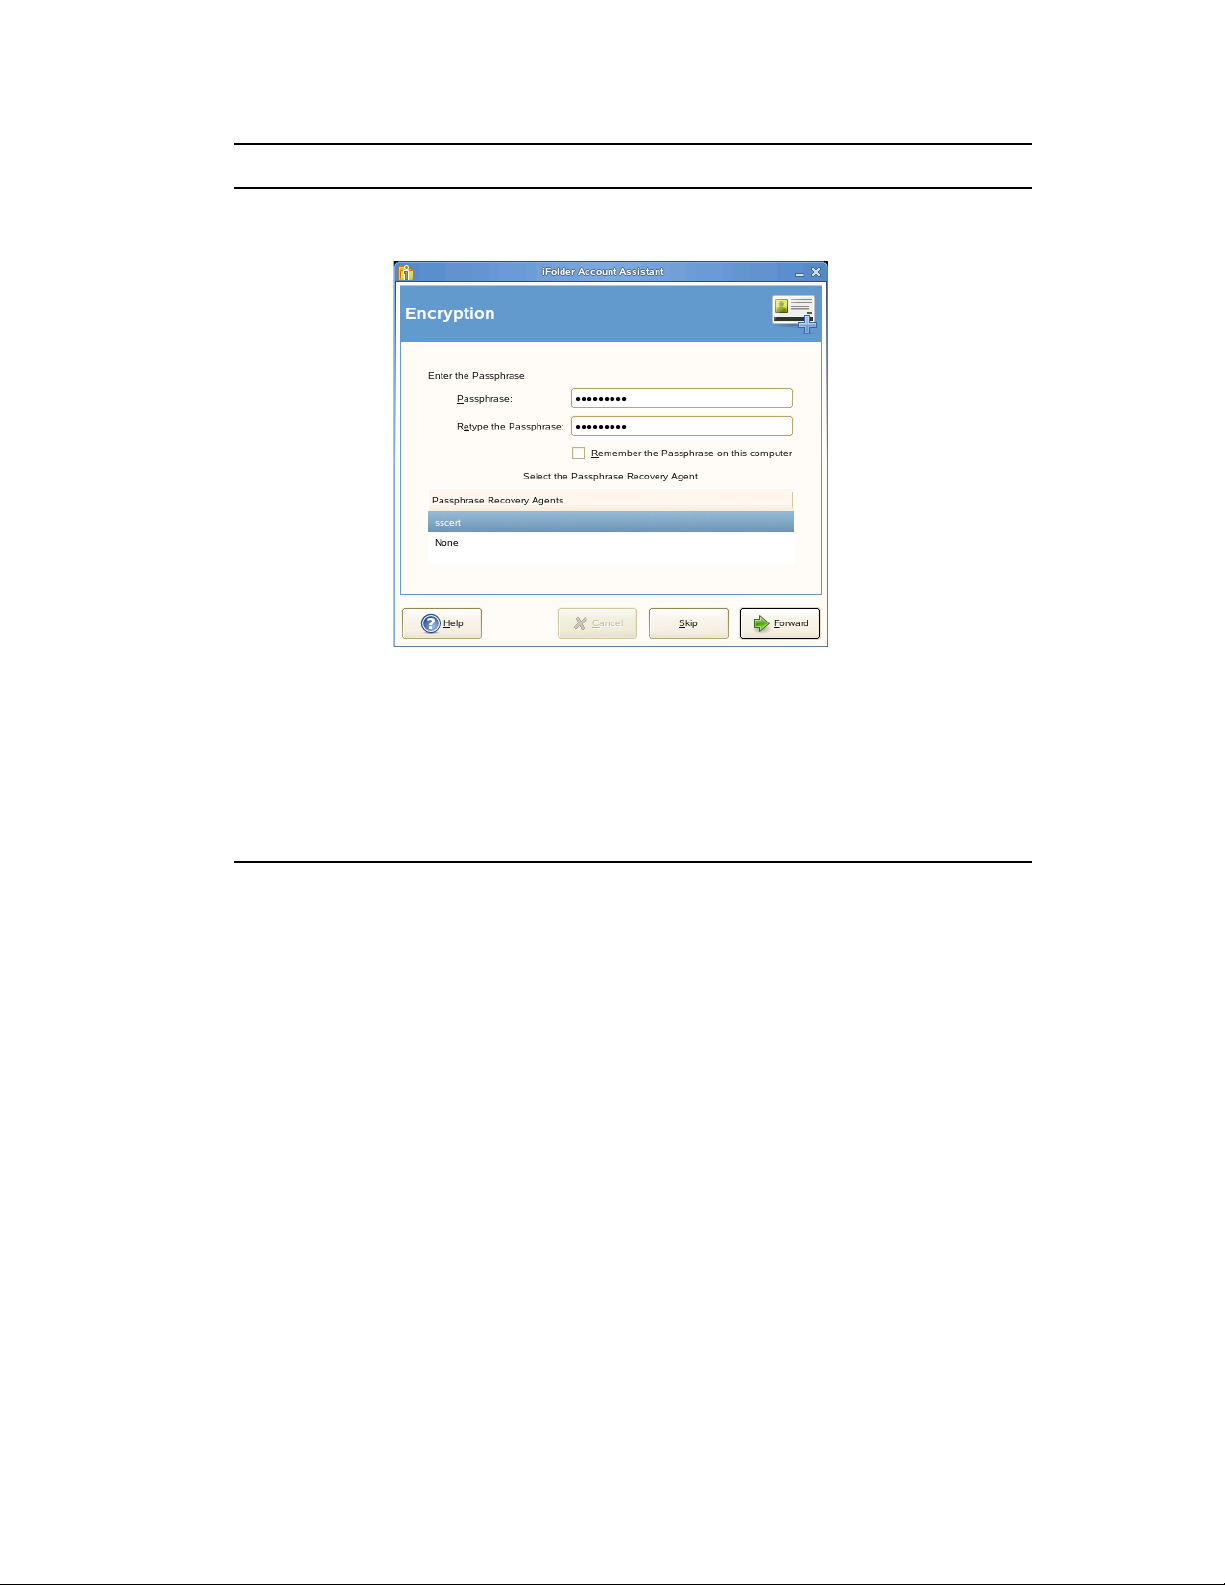
Parameter Description
novdocx (en) 13 May 2009
Enter the
Passphrase
Remember the
Passphrase on
this Computer
Passphrase
Recovery Agents
Enter your secret passphrase in the Passphrase field and re-enter it for
verification.
Select this option to automatically access the encrypted iFolder data during the
current session. If you choose this option, iFolder can remember your
passphrase. The next time you begin the login process, this passphrase
exchange is done automatically; no dialog box appears.
Select the desired Recovery agent from the list and click OK.
The Recovery agent is a trustworthy organizations that helps you recover the
encrypted data if you forget or lose your passphrase.
3 Verify that the information you have entered is correct, return to previous pages to make
corrections if necessary, then click Connect to validate the settings by logging in to the iFolder
server.
Managing iFolder Accounts and Preferences 59
Page 60
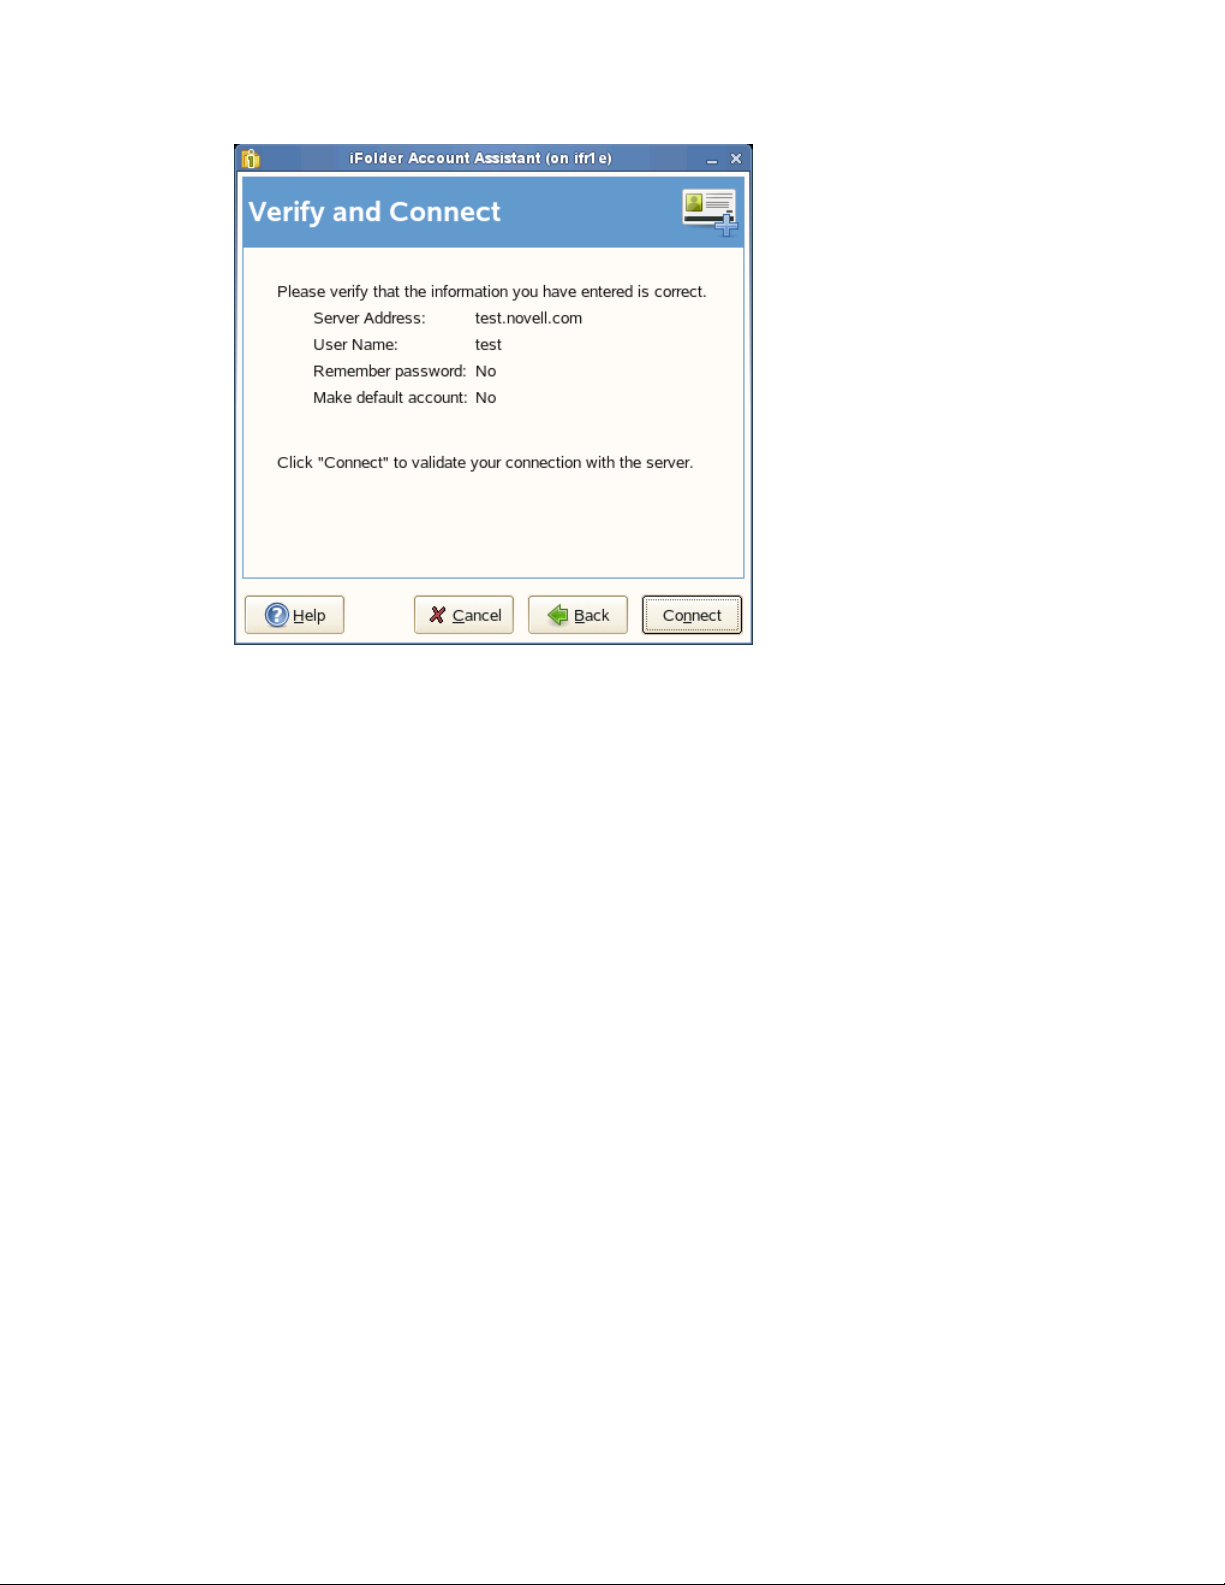
novdocx (en) 13 May 2009
4 If you are prompted to Accept the certificate of this server, click Details to review the
certificate information, then click OK to accept it.
If you do not accept the certificate, you cannot connect to the server.
On successful connection, you are asked to create a default iFolder, if you do not have one
currently.
5 Specify the location where you want to create the default iFolder.
The default iFolder name is Default_username, where username refers to your user identity for
test1
this account. For example: If your username for the current account is
default iFolder will be
Default_test1
.
, the name of the
60 OES 2 SP1: Novell iFolder 3.7 Cross-Platform User Guide
Page 61
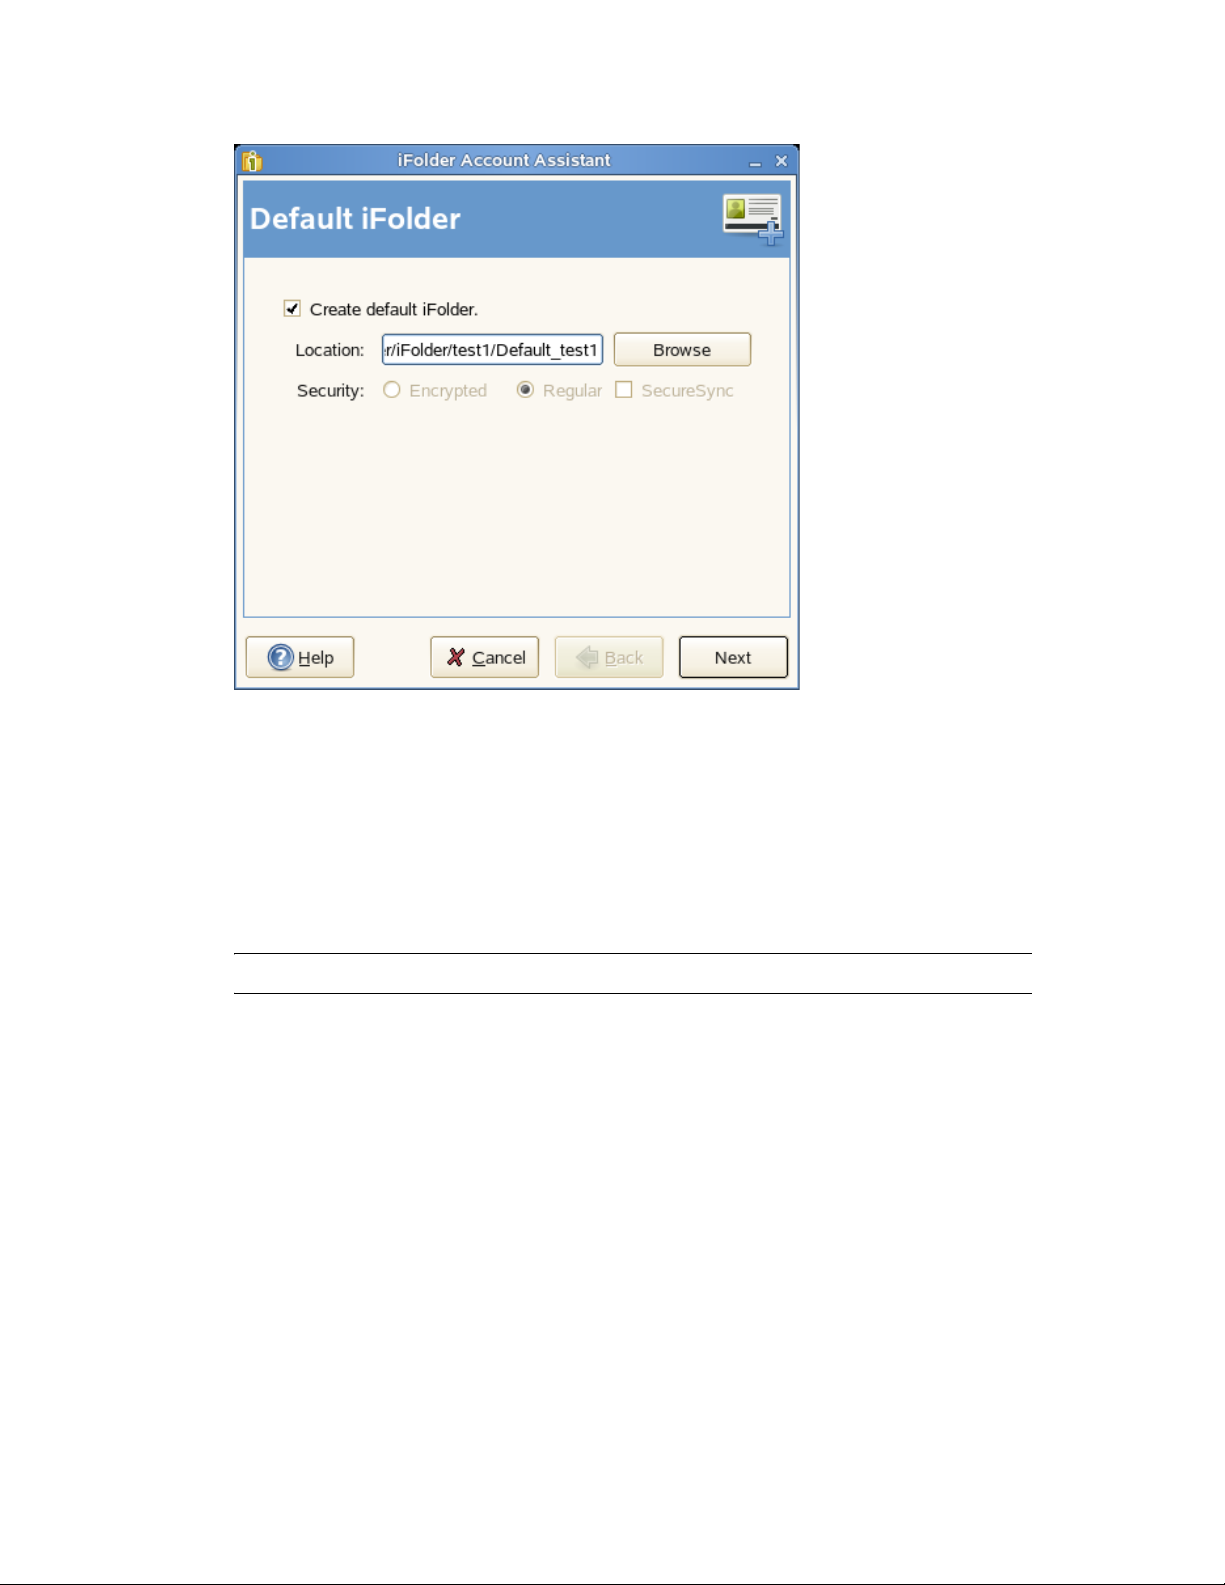
novdocx (en) 13 May 2009
By default, the default iFolder is stored at
server_name/user_name
. You are allowed to change this location.
<users home directory>/ifolder/
6 Select the type of the default iFolder that you want to create. If you choose Encrypted, it
prompts you to give the passphrase. For more information see “Enter the Passphrase” on
page 59 thru “Passphrase Recovery Agents” on page 59.
If your iFolder administrator has not enabled your encryption policy, you can create only
regular iFolders, and the Regular option is selected by default. In this case, both of the options
for Security are disabled.
IMPORTANT: You can share only the regular iFolders. Encrypted iFolders cannot be shared.
7 Select SecureSync to enable secure synchronization of files in the iFolder you are creating.
For more information on Secure Sync, see in the “Secure Sync” on page 96.
After a folder is made a default iFolder, you can change the type only by deleting it from the
server. If you remove the default iFolder on the server, the next time you configure the account
from any thick client, iFolder prompts you to create a default iFolder again.
8 If you have already set up a default iFolder, it asks you to download it to your local machine.
Download the default iFolder and click Next to go to complete account configuration.
Managing iFolder Accounts and Preferences 61
Page 62
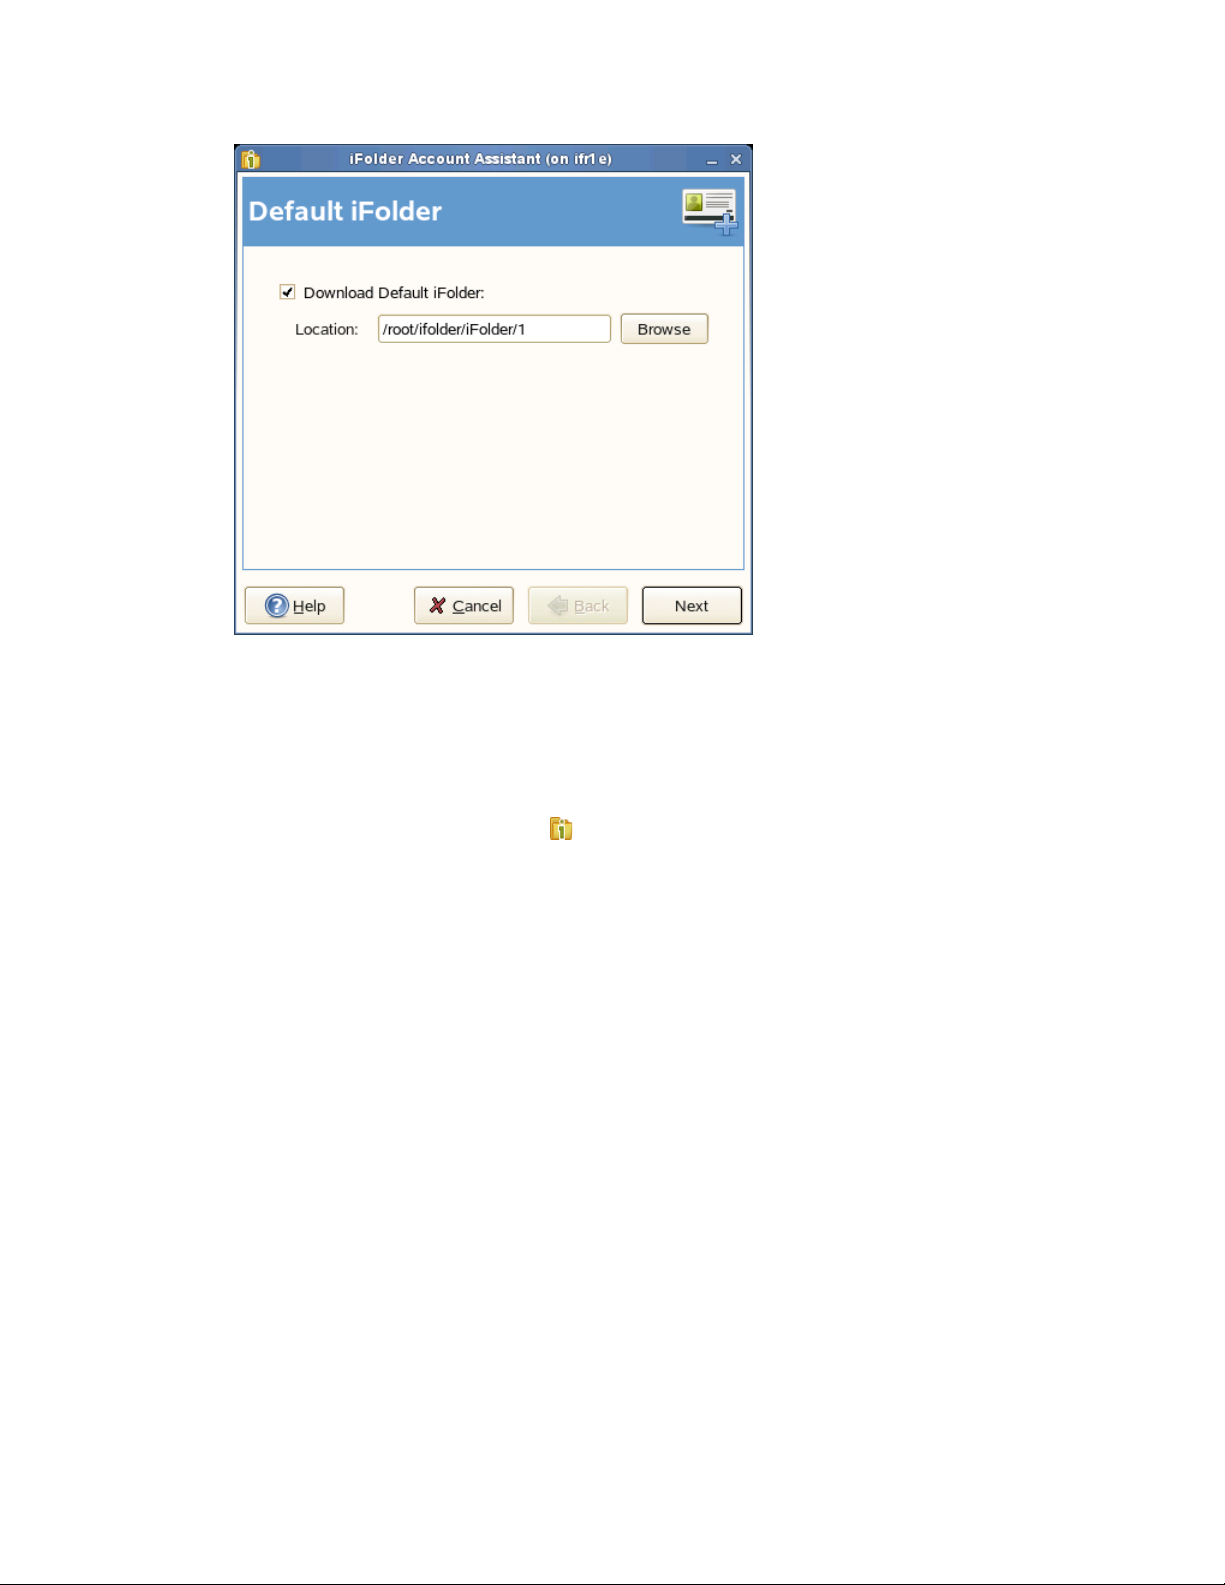
novdocx (en) 13 May 2009
9 On successful connection, click Finish to close the iFolder Account Assistant.
iFolder synchronizes the user list for the specified account and identifies iFolders that are
available for download. This initial download can take a few seconds to a few minutes,
depending on the size of the user list for the account.
10 Verify that the account you set up appears in the list of accounts.
10a Right-click the iFolder Services icon in the notification area, then select Preferences
from the menu to open the iFolder Preferences dialog box to the Accounts tab.
When you are connected to the iFolder server, the Online check box is selected.
62 OES 2 SP1: Novell iFolder 3.7 Cross-Platform User Guide
Page 63
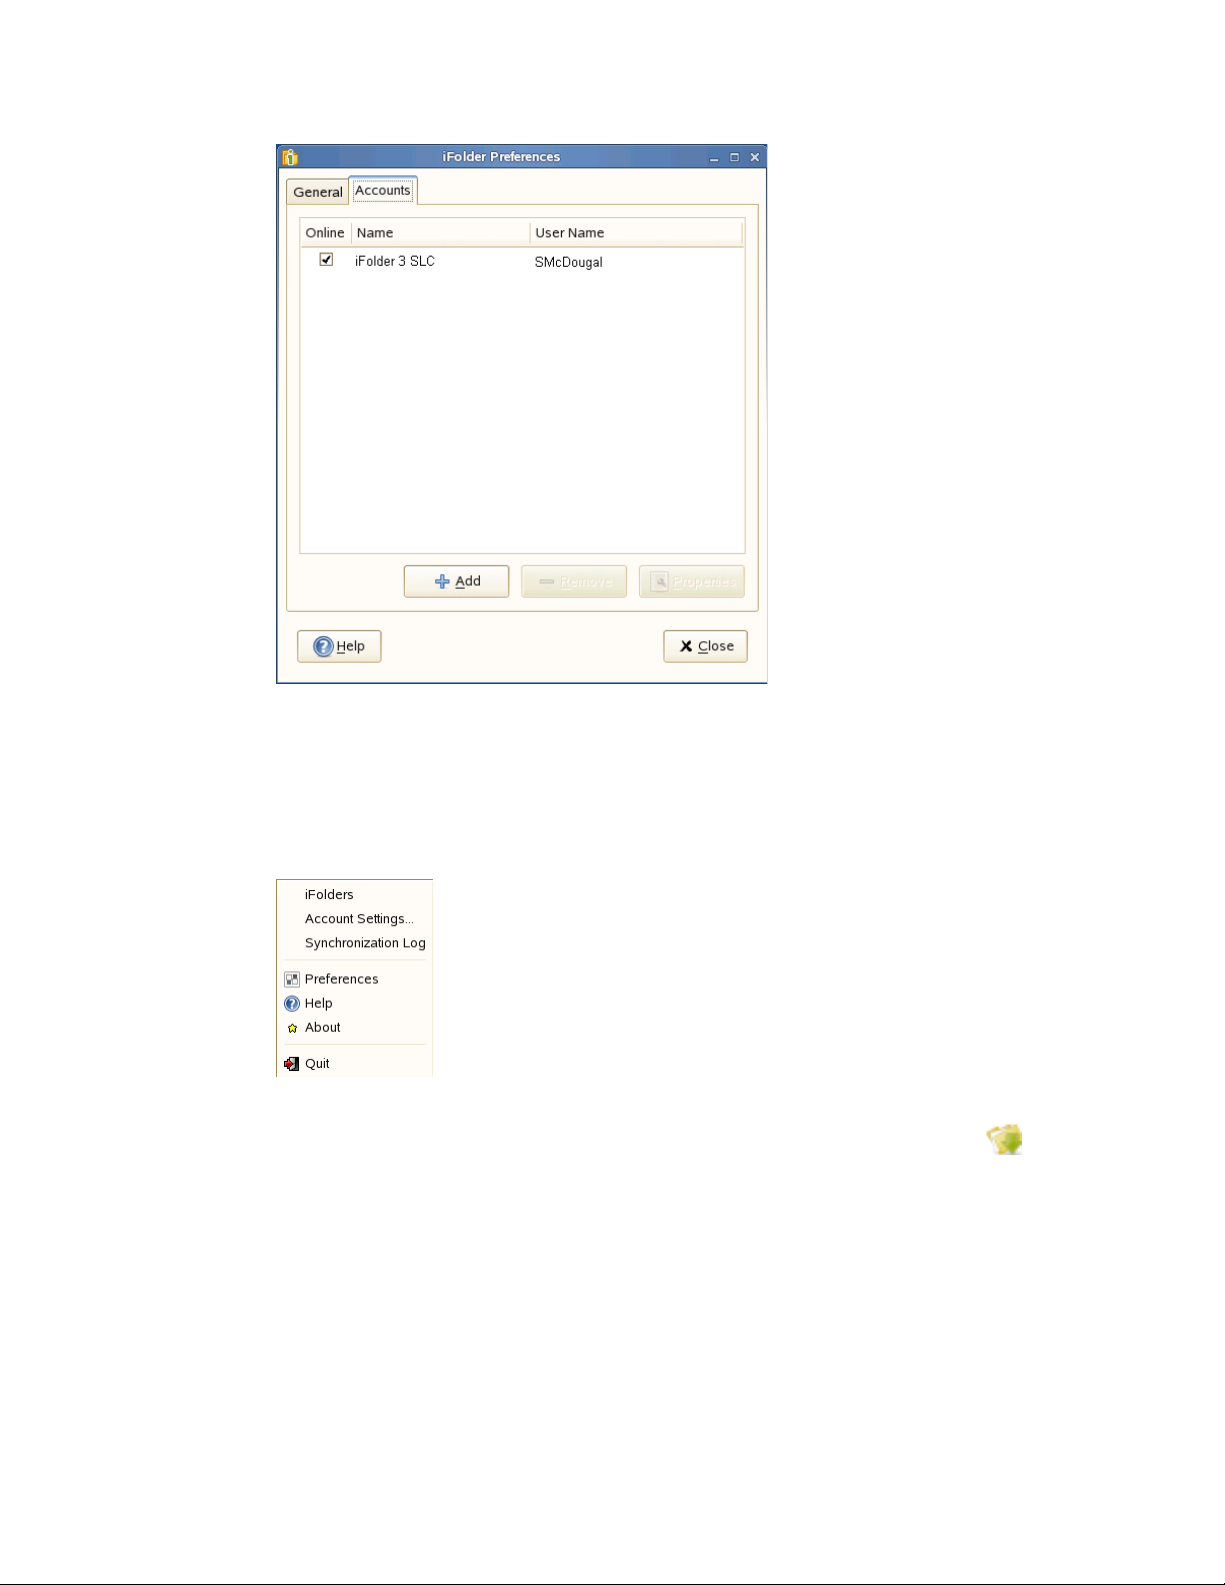
novdocx (en) 13 May 2009
10b Close the iFolder Preferences dialog box.
11 Set up iFolders for the account using either of these methods:
Right-click the iFolder Services icon in the notification area, then select iFolders to open
the iFolder browser. Continue with Section 8.5, “Creating and Uploading an iFolder,” on
page 82.
If iFolders for this account are available for download from the server, they are listed on
the iFolder window under iFolders on <iFolder_server_name>. The download icon
indicates that the iFolder is available for download. Continue with Section 8.9,
“Downloading an Available iFolder,” on page 94.
7.4 Logging In to an iFolder Account
You can work locally with files in the iFolder directories at any time. You must be logged in to an
iFolder account to synchronize the user list, synchronize iFolder data, upload new iFolders,
download shared iFolders, share iFolders, and manage iFolders. You can log in separately and be
logged in concurrently to multiple accounts.
Managing iFolder Accounts and Preferences 63
Page 64

Use one of the following login methods for each account:
Log In Automatically: Enable Remember My Password for your iFolder account if you want
to log in automatically whenever the iFolder client starts. You can enable Remember My
Password when you configure the account or by modifying the account settings later.
Whenever your password changes, automatic authentication fails gracefully the next time you
attempts to log in to the iFolder account. iFolder prompts you to log in, then you can enter the
new password. Enable Remember My Password again if desired.
Log In As Needed: Disable Remember My Password if you want to log in to an iFolder
account only as needed.
To enable or disable Remember My Password for an existing iFolder account:
1 Right-click the iFolder Services icon in the notification area, then select Accounts to open
the iFolder Preferences dialog box to the Accounts tab.
2 Select the iFolder account, then click Properties to view its setting in the Properties dialog box
3 Click the Identity tab
4 Select (enable) or deselect (disable) Remember My Password.
5 Click OK for successful completion.
novdocx (en) 13 May 2009
6 Click OK in the iFolder Properties dialog box to save your changes and log in to the server.
To log in to an iFolder account:
1 Right-click the iFolder Services icon in the notification area, then select Accounts.
2 Select the iFolder account, then select the Online check box next to it.
3 If prompted for a password, specify the password, then click Connect.
If Remember My Password is enabled for the account, you are not prompted to enter a
password unless your password has expired.
If login fails, an error message reports the cause, such as password failure.
4 On successful connection, close the iFolder Preferences dialog box.
7.5 Viewing and Modifying iFolder Account Settings
The following parameters can be viewed in the Account Settings and Account Properties dialog
boxes:
64 OES 2 SP1: Novell iFolder 3.7 Cross-Platform User Guide
Page 65

Table 7-1 Account Settings and Properties
novdocx (en) 13 May 2009
Parameter Description Location
Online Indicates whether you are currently connected to
the iFolder server for an account.
Select the Online check box next to the account to
iFolder
Preferences >
Accounts tab
connect to the iFolder server for this account.
Deselect the Online check box next to the account
to disconnect from the iFolder server.
Name Displays the descriptive name of the iFolder server
where your iFolders are stored for the account. This
name is supplied by the server and is controlled by
the iFolder administrator.
This setting cannot be modified by users.
iFolder
Preferences >
Accounts tab
Account
Properties >
Server tab
User Name Displays the user identity for this account, such as
your network user ID (LDAP common name) or
your e-mail address. This setting cannot be
modified.
The username is specified when you set up the
account in the iFolder Account Assistant. It cannot
iFolder
Preferences >
Accounts tab
Account
Properties >
Identity tab
be modified for an existing account.
Modifiable by
User (Yes/No)
Yes
No
No
To use a different username on the same server,
you must delete the existing account, then create a
different account for it.
Server Address Displays the DNS name or IP address of the
iFolder enterprise server where you have an
account. Get this information from your iFolder
administrator.
For example:
svr21.example.com
or
192.168.1.1
You can modify the address but you must be
disconnected from the iFolder server when you
make the change.
Password Allows you to specify the password for your
username.
Account
Properties >
Server tab
Account
Properties >
Identity tab
Yes
Yes
Managing iFolder Accounts and Preferences 65
Page 66

novdocx (en) 13 May 2009
Parameter Description Location
Remember
Password
Indicates whether iFolder automatically logs in for
you whenever iFolder starts. If the account’s
Automatically connect parameter is enabled
Account
Properties >
Identity tab
(default), then it attempts to connect with the saved
password.
Select Remember password to log in automatically
to this iFolder account whenever you log in to your
computer.
If your network password changes, automatic
authentication fails gracefully the next time iFolder
attempts to log in to the iFolder account. iFolder
prompts you to log in with your new password and
allows you to specify and save the new password.
Quota Reports the total amount of space allocated to your
iFolder account on the enterprise server. This value
might be the default quota set for all users, or a
Account
Properties >
Disk Space tab
user-specific quota. If no quota is set, the value is
N/A
empty or
(Not Applicable). You can also view
the space available in the iFolder main window for
each server you have currently connected to.
Used Reports the total amount of space currently in use
by all the iFolders you own for this account. It does
not include space used by iFolders that are shared
Account
Properties >
Disk Space tab
with you but owned by others.
Modifiable by
User (Yes/No)
Yes
No
No
Available Reports the total amount of space currently
available to you for iFolders on this iFolder account.
The value is equal to the quota minus the used
space.
Account
Properties >
Disk Space tab
No
66 OES 2 SP1: Novell iFolder 3.7 Cross-Platform User Guide
Page 67

novdocx (en) 13 May 2009
Parameter Description Location
Automatically
connect
If this value is selected (enabled), iFolder connects
to this account automatically when iFolder starts.
Deselect the setting to disable the account from
connecting.
This setting governs only client-side ability to
enable or disable the account.
When you use iFolder with a Novell
server, the iFolder system administrator can disable
your iFolder account (usually temporarily) on the
server side. You can expect the following behavior
when this occurs:
®
iFolder® 3.7
Account
Properties, on
all tabs
If you are logged in when the account is
disabled from the server side, you can
manage your iFolders and your iFolder data
continues to synchronize with the server until
you end your session by logging out or
disabling synchronization, or until the server
disconnects your session, whichever occurs
first.
If the account is disabled on the server side,
you receive a pop-up message informing you
that the account is disabled whenever you
attempt to log in. Contact your iFolder system
administrator for assistance.
Modifiable by
User (Yes/No)
Yes
Account is
default
Encryption
settings
When you have multiple accounts, select the check
box for Account is default to make this account the
one selected by default in the drop-down list of
accounts when you create and upload iFolders.
This value cannot be modified if you have only a
single account.
You can set and reset your encryption settings,
which are available under Security menu. For more
information on Encryption settings, see “Managing
Passphrase for Encrypted iFolders” on page 96
Account
Properties, on
all tabs
Security menu User can reset
Yes, if you have
multiple
accounts
only the
Passphrase
1 Right-click the iFolder Services icon in the notification area, then select Account Settings to
open iFolder Preferences to the Accounts tab.
In the Accounts report, you can manage the following parameters for each account:
Online (select to connect; deselect to disconnect)
Name (view only)
User Name (view only)
2 Select the iFolder account you want to manage, then click Properties to open the Account
Properties dialog box to the Server tab.
On the Server tab, you can manage the following parameters for the selected account:
Name (view only)
Managing iFolder Accounts and Preferences 67
Page 68

Address (view only if connected; modifiable if disconnected)
Server description (view only; scroll to view all information)
Automatically connect (select to enable; deselect to disable)
Account is default (select to enable; available only if multiple accounts exist)
3 Select the Identity tab to manage the following parameters for the selected account:
User Name (view only)
Password (specify the password)
Remember password (select to enable; deselect to enable
Automatically connect (select to enable; deselect to disable)
Account is default (select to enable; available only if multiple accounts exist)
4 Select the Disk Space tab to view the following parameters for the selected account:
Quota (view only)
Used (view only)
Available (view only)
Automatically connect (select to enable; deselect to disable)
novdocx (en) 13 May 2009
Account is default (select to enable; available only if multiple accounts exist)
5 When you are done, close the Account Properties dialog box, then close the iFolder
Preferences dialog box.
7.6 Configuring iFolder Preferences for the Client
1 Right-click the iFolder Services icon in the notification area, then select Preferences to open
the iFolder Preferences dialog box to the General tab.
68 OES 2 SP1: Novell iFolder 3.7 Cross-Platform User Guide
Page 69

novdocx (en) 13 May 2009
2 Specify your preferences for the following:
Parameter Description
Start iFolder
When Logging In
to the Desktop
(Available only in
Windows Client)
Show
Confirmation
Dialog When
Creating iFolders
Notify of Shared
iFolders
Select this option to launch iFolder whenever you log in with the local
username where you set up the iFolder account. For those accounts where you
have enabled Remember My Password, synchronization occurs in the
background at the specified synchronization interval.
Deselect this option to start iFolder manually.
Select this option to receive a confirmation message each time you create an
iFolder, in addition to the normal visual cues such as the iFolder appearing in
the list of iFolders.
Deselect this option to stop receiving the confirmation message.
Select this option to enable a pop-up message in the notification area
whenever you receive a new invitation to share an iFolder.
To view a list of iFolders that are available to download on your current
computer, select Show Available iFolders in the iFolder browser whenever
iFolder is running.
Managing iFolder Accounts and Preferences 69
Page 70

Parameter Description
novdocx (en) 13 May 2009
Hide iFolder Tray
Icon (Available
only in Windows
Client)
Notify of Conflicts Select this option to enable a pop-up message in the notification area
Notify When a
User Joins
Synchronization Automatically Synchronize iFolders: Select this check box to enable
Select this option to hide the iFolder tray icon in the notification area.
You can also hide the iFolder tray icon by using the right-click option in the
notification area. Right-click the iFolder Services icon in the notification
area, then select Hide.
Deselect this option to display the iFolder tray icon when iFolder is running.
whenever a conflict occurs when synchronizing files.
Deselect this option to disable the pop-up messages for synchronization
conflicts.
Whenever conflicts occur, the iFolder conflict icon is displayed on the
iFolder when iFolder is running.
Select this option to enable a pop-up message in the notification area
whenever a user accepts an invitation to share an iFolder. Acceptance is keyed
to when the user actually sets up the iFolder on his or her own computer.
Deselect this option to disable the pop-up messages for user share
confirmation.
You can view a complete list of iFolder users whenever iFolder is running by
selecting the iFolder, then clicking Share with to open the iFolder Properties
dialog box to the Sharing tab.
synchronization for all iFolders on this computer under your current local login
or logon identity. Deselect the check box to disable synchronization.
Synchronize iFolders Every: Specify the minimum interval to use for
synchronizing iFolders on this computer under your current local login or logon
identity. Specify the value and units. The default is 5 minutes, if this option is
enabled. The minimum interval can be lowered to 5 seconds.
NOTE: Change in the sync interval does not take effect in the current
synchronization cycle. The new sync interval is only effective in the next
synchronization cycle.
For example, if the current sync interval is 10 minutes and you change that to 5
minutes, the change takes effect only after 10 minutes.
If you use the iFolder client with Novell iFolder 3.7, the effective minimum
synchronization interval is always the largest value of the following settings:
The system policy default of zero (
user policy is set, the user policy overrides the system policy, whether the
user policy is larger or smaller in value.
The local machine policy, or the setting on the client machine
synchronizing with the server.
The iFolder (collection) policy.
3 When you are done, click Apply to apply your changes.
4 Click OK to close the iFolder Preferences dialog box.
0
), unless there is a user policy set. If a
70 OES 2 SP1: Novell iFolder 3.7 Cross-Platform User Guide
Page 71

7.7 Configuring Local Firewall Settings for iFolder Traffic
If you use a local firewall, you must set your firewall to allow iFolder to choose a local dynamic port
or configure a local static port for the iFolder client to communicate locally (the same computer)
with Mono
Novell iFolder enterprise servers where you have iFolder accounts. The iFolder administrator
configures iFolder services that determine whether communications use HTTP in your environment.
Your firewall does not block traffic between Mono XSP and the Novell iFolder enterprise server
because Mono XSP uses the standard HTTP ports for traffic. However, if you block the traffic
between the client and Mono XSP, the client has no way to communicate with the server. You cannot
log in to your iFolder account and synchronize iFolder data.
Initially, the iFolder configuration does not specify a particular port to use for client-to-Mono XSP
communications. When iFolder first runs, it opens an available local port to listen for requests from
Mono XSP and to send data to the server via Mono XSP. It writes the port number to a configuration
file and uses this port thereafter unless the port is not available whenever iFolder starts. If the port is
in use by another application, iFolder selects a different available port, reconfigures the port in the
configuration file, and uses the new port thereafter. For example, if iFolder is down and another
application takes the port, iFolder must select and configure a different port to use when you restart
iFolder.
®
XSP Server. iFolder uses Mono XSP Web services to communicate via HTTP with the
novdocx (en) 13 May 2009
Section 7.7.1, “Using a Local Dynamic Port,” on page 71
Section 7.7.2, “Using a Local Static Port,” on page 71
7.7.1 Using a Local Dynamic Port
If you use a local firewall on your computer, the firewall should detect the local traffic between the
iFolder and Mono XSP server whenever iFolder contacts the server to synchronize its list of users
and iFolder data. Select Allow to permit the iFolder traffic for this session. If you allow the traffic
permanently, your firewall should not remind you again, and you can avoid receiving the pop-up
alerts whenever iFolder starts.
If you block the iFolder-to-Mono XSP traffic, your firewall prevents you from connecting with the
iFolder server and you cannot synchronize your files. iFolder does not detect that traffic is blocked
by the firewall; it reports only that it cannot connect to your account on the iFolder server.
7.7.2 Using a Local Static Port
You can optionally add the Web Service Port parameter in the port section of the
to allow Mono XSP Server to use a static port for this local traffic. This port can then be opened in
the firewall to allow communications for Mono XSP.
You can find
xspport.cfg
in the following locations:
xspport.cfg
file
Operating System Location of the Simias.config File
Linux
Windows
/home/username/.local/share/simias/xspport.cfg
C:\Documents and Settings\username\Local Settings\Application
Data\simias\xspport.cfg
Managing iFolder Accounts and Preferences 71
Page 72

Operating System Location of the Simias.config File
novdocx (en) 13 May 2009
Macintosh
/Users/username/.local/share/simias/xspport.cfg
To configure your system to use a specific port:
1 Configure your firewall to allow traffic for the port you want to use for iFolder traffic.
See your firewall’s documentation for information on how to open a port in the firewall.
2 Stop the iFolder client by right-clicking the iFolder icon, then selecting Exit.
3 Modify the xspport.cfg file by adding the Web Service Port Range parameter to the Service
Manager section.
<XspPortConfiguration>
<Port>
<monoxsp_port>
</Port>
</XspPortConfiguration>
3a Replace monoxsp_port with a port number:
Specify a value of a single four-digit port number (such as 1234) to use a single static
port. For example:
<1234>
4 Start the iFolder client.
For more information, see Section 7.2, “Starting the iFolder Client,” on page 52.
7.8 Configuring Local Virus Scanner Settings for iFolder Traffic
If you use virus scanning software on your computer, exclude the
from the virus scan. For example, the location of the
c:\documents and settings\username\local settings\application
is
data\simias\WorkArea\.simias.wf.guid
The
..\simias\WorkArea\
directory is where iFolder stages files for download from the server. If
..\simias\WorkArea\
.
an iFolder file has a virus attached and your virus scanning software scans that virus while the file is
..\simias\WorkArea
in the
directory, the virus scanner pops up with a message indicating that a
virus has been found, moves the file to quarantine, then iFolder again tries to synchronize the file.
Not scanning the WorkArea allows the synchronization to finish. The infected file is successfully
downloaded and moved to the local iFolder. The virus scanner then detects the infected file in the
iFolder and moves it from that folder to quarantine, protecting the computer from infection. iFolder
detects the deletion of the file and when the next synchronization begins, iFolder removes the file
from the server and member computers.
However, if the iFolder where the file is downloaded is Read-Only, the local deletion is not enforced
to the server and other member computers. The virus must be detected elsewhere where permissions
allow changes to be synchronized. The user’s virus scanner probably alerts the user of the virus, so
the user should alert other iFolder members about the virus.
..\simias\WorkArea\
directory on Windows
directory
72 OES 2 SP1: Novell iFolder 3.7 Cross-Platform User Guide
Page 73

7.9 Deleting an iFolder Account
You can specify whether to remove an account only from the current computer, or whether to also
remove the iFolders you own from the server.
If you remove an iFolder account only from your computer:
The local iFolders for this account are reverted to normal folders. Use a file manager to locate
and delete the local copy of the data if it is not needed.
You can continue to access the iFolders from other computers with the iFolder client.
When the iFolder client is used with a Novell iFolder 3.7 enterprise server, you can also access
files from anywhere with Novell iFolder 3.7 Web Access.
If you remove your iFolder account from the server:
All of the iFolders you own are unshared.
The local copies of iFolders on member computers are reverted to normal folders. Use a file
manager to locate and delete the local copy of the data if it is not needed.
The iFolder and its contents are removed from the server.
novdocx (en) 13 May 2009
You are removed as a member of iFolders that others shared with you.
The account is removed from the local computer.
If you decide to use this account again on this or another computer, you must set up the account and
its iFolders just as you did when it was new.
To delete an iFolder account:
1 Right-click the iFolder Services icon in the notification area, then select Account Settings to
open the iFolder Preferences dialog box to the Accounts tab.
2 Select the iFolder account you want to delete, then click Remove.
3 A message prompts you to determine the extent of the remove action.
Do one of the following:
Remove the iFolder Account from Only the Current Computer: Make sure that
Remove My iFolder and Files from the Server is deselected, then click Yes .
Remove the iFolder Account and Your iFolders and Files from the Server: Select
Remove My iFolder and Files from the Server, then click Yes .
Cancel the Delete: Click No to back out of the delete action. Your account and its
iFolders remain untouched.
Managing iFolder Accounts and Preferences 73
Page 74

7.10 Logging Out of an iFolder Account
Log out of an iFolder account whenever you want to work offline.
Section 7.10.1, “Linux,” on page 74
Section 7.10.2, “Windows,” on page 74
Section 7.10.3, “Macintosh,” on page 74
7.10.1 Linux
1 Right-click the iFolder Services icon in the notification area, then select Accounts to open
the iFolder Preferences dialog to the Accounts tab.
2 Locate the account you want to manage, then deselect the Online check box beside it to
disconnect from the iFolder server.
3 Click Close to close the iFolders Preferences dialog box.
7.10.2 Windows
novdocx (en) 13 May 2009
1 Right-click the iFolder Services icon in the notification area, then select Accounts to open
the iFolder Preferences dialog to the Accounts tab.
2 Locate the account you want to manage, then deselect the Online check box beside it.
3 Click Apply to disconnect from the iFolder server, then click OK to close the iFolders
Preferences dialog box.
7.10.3 Macintosh
1 Click the iFolder Services icon in the dock, then select Accounts to open the iFolder
Preferences dialog.
2 Click the Accounts icon from the toolbar to view a list of accounts in the current iFolder
domain.
3 Locate the account you want to manage, then click Logout to disconnect from the iFolder
server.
7.11 Exiting the iFolder Client
To exit from the iFolder client follow any of the options given below:
Right-click the iFolder Services icon in the notification area, then select Quit.
74 OES 2 SP1: Novell iFolder 3.7 Cross-Platform User Guide
Page 75

Click iFolder > Quit
When you select Quit, iFolder displays a confirmation message. Click Ye s to confirm your
action.
Files are synchronized with your iFolder server account only when you are connected to the iFolder
server. You can stop synchronization by logging out of an account. iFolder continues to run in the
background in offline mode. For information, see Section 7.10, “Logging Out of an iFolder
Account,” on page 74.
You can have multiple accounts, each created on different host server (domain).
7.12 What’s Next
For information about using the iFolder client, see the following:
Chapter 8, “Managing Your iFolders,” on page 77
Chapter 6, “Novell iFolder Migration And Upgrade,” on page 45
novdocx (en) 13 May 2009
Managing iFolder Accounts and Preferences 75
Page 76

novdocx (en) 13 May 2009
76 OES 2 SP1: Novell iFolder 3.7 Cross-Platform User Guide
Page 77

8
Managing Your iFolders
novdocx (en) 13 May 2009
8
An iFolderTM is a local directory used to selectively share and synchronize files with user-specified
members. The iFolder files are accessible to all members via a host service, such as a Novell
iFolder
This section discusses the following tasks for iFolder:
®
3.7 server. iFolder files can be modified and read by those with privileges to do so.
Section 8.1, “Guidelines for the Location and Use of iFolders,” on page 77
Section 8.2, “Guidelines for File Types and Sizes to Not Synchronize,” on page 79
Section 8.3, “Naming Conventions for an iFolder and Its Folders and Files,” on page 79
Section 8.4, “Understanding iFolder Icons,” on page 80
Section 8.5, “Creating and Uploading an iFolder,” on page 82
Section 8.6, “Sharing an iFolder,” on page 88
Section 8.7, “Viewing and Hiding Available iFolders,” on page 91
Section 8.8, “Merging iFolders,” on page 92
Section 8.9, “Downloading an Available iFolder,” on page 94
Section 8.10, “Viewing and Configuring Properties of an iFolder,” on page 95
Section 8.11, “Managing Passphrase for Encrypted iFolders,” on page 96
Section 8.12, “Synchronizing Files,” on page 98
Section 8.13, “Resolving File Conflicts,” on page 99
Section 8.14, “Moving an iFolder,” on page 101
Section 8.15, “Reverting an iFolder to a Normal Folder,” on page 102
®
Section 8.16, “Removing Membership From a Shared iFolder,” on page 103
Section 8.17, “Deleting an iFolder,” on page 103
Section 8.18, “What’s Next,” on page 104
8.1 Guidelines for the Location and Use of iFolders
Generally, you can put iFolders anywhere on your local hard drive when you create an iFolder or set
up an iFolder that is shared with you. However, there are some practical and specific limitations.
Consider the following guidelines for placing and using iFolders on your computer:
An iFolder’s name must be a unique folder name in the directory where you put the iFolder.
An iFolder’s name cannot contain the following invalid characters:
\/:*?"<>|;
For other naming conventions, see Section 8.3, “Naming Conventions for an iFolder and Its
Folders and Files,” on page 79.
The iFolder must reside on a local hard drive; the location cannot be on a network drive or non-
physical drive.
Managing Your iFolders
77
Page 78

An iFolder cannot exist at the root of the hard drive.
An iFolder can be created only from a folder where you have the file system access rights to
read and write files. When you set up a shared iFolder on a computer, you must have file
system access rights to the folder where you are placing the iFolder.
An iFolder cannot contain or reside in an applications folder such as the Program Files folder.
The iFolder cannot contain or reside in the iFolder metadata folder. The default location of the
metadata folder is as follows:
Linux: In your home folder in the
<Home Directory>\.local\share\simias
subdirectory
novdocx (en) 13 May 2009
Windows: In the
Settings\Application Data\simias
Macintosh: In the
An iFolder cannot contain or reside in other iFolders, including your Novell iFolder 2.x iFolder.
C:\Documents and Settings\WindowsLogonUsername\Local
directory
$HOME/.local/share/simias
iFolder does not support network folders as iFolders. For example, iFolders cannot be the
users’ network-based /home directories that are mapped to the users’ workstations. iFolder also
does not support WebDAV access for users from their desktop to their iFolder collection on the
iFolder server’s user-data volume.
Although you can log in to more than one iFolder account at a time, an iFolder can be
associated with only one iFolder account. You cannot synchronize one iFolder against multiple
accounts. When you create an iFolder, the iFolder can be shared only with other users and
LDAPGroups that are provisioned in the same iFolder server or domain.
An iFolder is available to all the members of an LDAPGroup when it is shared with that
LDAPGroup.
When multiple users share a computer, the local copies of your iFolders are private to your
storage space on the disk if the file system supports privacy features, and if you configure your
system to use them.
On Windows, NTFS includes built-in security features such as file and folder permissions and
the Encrypting File System (EFS), which is the technology used to store encrypted files on
NTFS volumes. These security features are not supported on FAT32 file systems. Make sure
the local login identities for users (other than the Administrator identity, of course) do not have
the Administrator rights or equivalent. The Administrator user has access to all files and
directories on the computer. For shared computers where privacy and security are essential for
each user, the users can encrypt their local copy of iFolder data with EFS or a third-party file
system encryption.
Linux and Macintosh file systems are designed for multi-user environments. File permissions
allow you to control access for the user, groups, and others. A user’s personal files are typically
set with full permissions for the user and no access for the groups and others settings.
If you store iFolders locally on a FAT32 volume on Linux, it requires special handling because
FAT32 file systems are not POSIX* compliant. For information, see Section 8.5.4, “Creating
iFolders on a FAT32 Mount Point (Linux),” on page 87.
If users of the same computer share iFolders, multiple copies of the iFolder can exist on the
device, with a copy for each user who downloads it from the server. Different local login
identities cannot share a single location for the shared iFolders.
78 OES 2 SP1: Novell iFolder 3.7 Cross-Platform User Guide
Page 79

8.2 Guidelines for File Types and Sizes to Not Synchronize
When the iFolder client is used, your iFolder administrator might specify file type restrictions and
maximum file size restrictions at the system, user, LDAPGroup or iFolder level. Your account might
also be restricted in the amount of space you can use for the data in the iFolders you own. When you
participate in other iFolders, the space consumed on the server is counted against the owner of that
iFolder.
Some file types are not good candidates for synchronization, such as operating system files, hidden
files created by a file manager, or databases that are implemented as a collection of linked files. You
might include only key file types used for your business, or exclude files that are likely unrelated to
.mp3
business, such as
8.2.1 Operating System Files
You should not convert system directories to iFolders. Most system files change infrequently and it
is better to keep an image file of your basic system and key software than to attempt to synchronize
those files to the server.
files.
novdocx (en) 13 May 2009
8.2.2 Hidden Files
If your file system uses hidden files to track display preferences, your administrator might restrict
those file types to exclude them from being synchronized on your system. Usually, hidden files are
relevant only to the particular computer where they were created, and they change every time the file
or directory is accessed. You do not need to keep these files, and synchronizing them results in
repeated file conflict errors.
For example, iFolder automatically excludes two hidden file manager files called
.DS_Store
.
thumbs.db
and
8.2.3 Database Files
iFolder synchronizes individual files or the changed portions of individual files; it does not
synchronize files as a set. If you have a database file that is implemented as a collection of linked
files, do not try to synchronize them in an iFolder.
®
Do not try to synchronize your GroupWise
remote directories into iFolders. If you do this, the GroupWise data files become corrupted after
synchronizing the file a few times. GroupWise needs the files in the archive to be maintained as a set
of files.
data by making the GroupWise archive, cache, or
8.3 Naming Conventions for an iFolder and Its Folders and Files
The iFolder client imposes naming conventions that consider the collective restrictions of the Linux,
and Windows file systems. An iFolder, folder, or file must have a valid name that complies with the
naming conventions before it can be synchronized.
Managing Your iFolders 79
Page 80

Use the following naming conventions for your iFolders and the folders and files in them:
iFolder supports the Unicode* (http://www.unicode.org) character set with UTF-8 encoding.
Do not use the following invalid characters in the names of iFolders or in the names of folders
and files in them:
\/:*?"<>|;
iFolder creates a name conflict if you use the invalid characters in a file or folder name. The
conflict must be resolved before the file or folder can be synchronized.
The maximum name length for single path component depends upon the client file system. For
filenames, the maximum length includes the dot (.) and file extension.
When you attempt to download or synchronize an iFolder whose name length exceeds the
maximum limit supported by the file system, iFolder displays an error message.
Names of iFolders, folders, and files are case insensitive; however, case is preserved. If
filenames differ only by case, iFolder creates a name conflict. The conflict must be resolved
before the file or folder can be synchronized.
If you create iFolders on a FAT32 file system on Linux, avoid naming files in all uppercase
characters. The VFAT or FAT32 file handling on Linux automatically changes the filenames
that are all uppercase characters and meet the MS-DOS 8.3 file format from all uppercase
characters to all lowercase characters. This creates synchronization problems for those files if
the iFolder is set with the Read Only access right.
novdocx (en) 13 May 2009
8.4 Understanding iFolder Icons
The following table describes iFolder icons and related tasks.
Table 8-1 Description of iFolder Icons
iFolder Icon Description
The iFolder Services icon is displayed for the iFolder 3 Client in the desktop
Applications menu.
When iFolder is running, the iFolder Services icon also appears in the Notification area
of the desktop taskbar. Right-click it for a menu of possible tasks, including iFolder
browser, Account Settings, Synchronization Log, Preferences, and Help.
The iFolder Upload icon is displayed in the iFolder browser under iFolders on This
Computer if there are no iFolders are on the computer under your current local login
identity.
You can create a new iFolder or convert an existing folder to an iFolder. If you have
multiple accounts, you must specify which account to use; an iFolder can belong to
only one account. For information, see Section 8.5, “Creating and Uploading an
iFolder,” on page 82.
80 OES 2 SP1: Novell iFolder 3.7 Cross-Platform User Guide
Page 81

iFolder Icon Description
The iFolder Download icon is displayed in the iFolder browser under iFolders on This
Computer if no iFolders are on the computer under your current local login identity.
The iFolder Download icon is displayed under iFolders on Server Name when an
iFolder is available to you on the specified server, but you have not downloaded it to
this computer. Server Name is the administrator-specified descriptive name of the
server where you have an iFolder account.
You can download any combination of iFolders from different accounts to the local
computer. For information, see Section 8.9, “Downloading an Available iFolder,” on
page 94.
The encrypted iFolder icon (locked iFolder) indicates that the iFolder is encrypted and
is displayed in the iFolder browser under iFolders on This Computer.
The passphrase provided at the time of login retrieves you the files in the encrypted
iFolder. For more information on Encryption, see Section 8.11, “Managing Passphrase
for Encrypted iFolders,” on page 96.
The iFolder emblem (green “i”) appears on iFolders whenever the iFolder Services
application is running for iFolders viewed in a file manager, on the desktop, or in the
iFolder browser.
novdocx (en) 13 May 2009
When iFolder is not running, iFolders appear as normal folders when viewed in the
file manager or on the desktop. The iFolder browser is not available when iFolder is not
running.
It is a good practice to organize your local collection of iFolders in a separate directory
that contains only iFolders. This makes it easy to remember which folders are iFolders
even when iFolder is not running and providing icons to mark them as iFolders.
The iFolder Warning icon indicates that the server is unavailable. iFolder is running but
you are not connected to the iFolder server. Possible causes are:
You are not logged in to the iFolder account. For information, see Section 7.4,
“Logging In to an iFolder Account,” on page 63.
The account is disabled on the client side; that is, the Automatically connect
parameter is disabled. For information, see Automatically connect in Section 7.5,
“Viewing and Modifying iFolder Account Settings,” on page 64.
The server is down or your account is disabled on the server side. Contact your
iFolder administrator for assistance.
Your firewall is blocking iFolder traffic. For information to resolve this problem, see
Section 7.7, “Configuring Local Firewall Settings for iFolder Traffic,” on page 71.
Your network connection is down. Check your local network settings.
The iFolder Conflict icon indicates that there is a file conflict between local copy and the
server copy. Resolve the conflict by indicating which version of the file to keep. For
more information on file conflict, see Section 8.13, “Resolving File Conflicts,” on
page 99.
The iFolder Waiting to Synchronize icon indicates that the iFolder contains files to be
synchronized with the server, and the synchronization process has not yet begun.
iFolder synchronizes one iFolder at a time, and queues the synchronization tasks. To
make sure that files in this local iFolder are synchronized with the files on the server,
wait to shut down iFolder until the synchronization begins and completes successfully,
as indicated by the changes in the icon.
Managing Your iFolders 81
Page 82

iFolder Icon Description
The iFolder Synchronizing icon indicates that files in the iFolder are currently being
synchronized with the server.
The iFolder Error icon indicates that one or more files in the iFolder have not been
synchronized because there is a policy conflict occured due to policy settings like file
size limit or limit on number of iFolders.
In the Sharing dialog box, the iFolder Owner User icon indicates that the user owns the
shared iFolder.
In the Sharing dialog box, the iFolder Current User icon indicates that the user is
currently managing the iFolder. If the current user is the owner, the Owner User icon is
displayed instead.
8.5 Creating and Uploading an iFolder
You can create an iFolder by converting an existing folder that satisfies the following guidelines:
Section 8.1, “Guidelines for the Location and Use of iFolders,” on page 77
Section 8.3, “Naming Conventions for an iFolder and Its Folders and Files,” on page 79
novdocx (en) 13 May 2009
If the folder does not exist, you can browse to a location and create the new folder as part of the
process.
IMPORTANT: You can share only the regular iFolders. Encrypted iFolders cannot be shared.
Within the iFolder, you can set up any subdirectory structure that suits your personal or corporate
work habits. The subdirectory structure is constant across all member iFolders. Each workstation
can specify a different parent directory for the shared iFolder.
When you exceeds the limit for number of iFolders an individual user can create, iFolder displays an
error message. For example, if your administrator has set the policy for Number of iFolder per user
to 10 and you attempt to create the eleventh iFolder, iFolder 3.7 notifies you about the policy
violation.
Section 8.5.1, “Linux,” on page 82
Section 8.5.2, “Windows,” on page 85
Section 8.5.3, “Macintosh,” on page 86
Section 8.5.4, “Creating iFolders on a FAT32 Mount Point (Linux),” on page 87
8.5.1 Linux
You can create iFolders with a file manager or with the iFolder browser, which is available in the
client application. Use the following methods to create an iFolder:
“Creating iFolders in the iFolders Browser” on page 83
“Creating iFolders in a File Manager” on page 84
82 OES 2 SP1: Novell iFolder 3.7 Cross-Platform User Guide
Page 83

Creating iFolders in the iFolders Browser
1 In the notification area, use one of the following methods to open the iFolder browser:
Click the iFolder Services icon .
Right-click the iFolder Services icon , then click iFolders.
2 Click Upload a folder.
3 Under More Options, specify the iFolder Account you want to use for this iFolder.
If you have multiple iFolder accounts, the default account is listed first. Use the drop-down list
to select a different account.
4 In the browser, navigate to the directory where you want to create an iFolder.
5 Select the normal folder you want to make an iFolder, using one of these methods:
If the normal folder exists, select the folder, then click OK.
If the normal folder does not exist, click Create Folder to create it, select the newly
created folder, then click OK.
6 Select the iFolder Type from the given options. You can decide whether to create an encrypted
iFolders or it to be shared with other users.
novdocx (en) 13 May 2009
NOTE: You are permitted to create encrypted iFolders only if your iFolder administrator has
set your encryption policy to On. If not, you can create only regular iFolders, and this option is
selected by default. In this case, both the options for Typ e are disabled.
Select Passphrase Encryption to enable encryption for the selected iFolder.
Managing Your iFolders 83
Page 84

If you have not set the passphrase during the login session, and you select Passphrase
Encryption, it prompts you to enter the passphrase. Specify the passphrase in the
Passphrase dialog box.
Select Regular to enable sharing for the selected iFolder.
iFolder announces the availability of shared iFolders with a pop-up message in the
notification area. Shared users can click the message to set up the iFolder at that time, or
close the message and download the iFolder later.
7 Select Secure Sync to enable secure synchronization of files in the iFolder you are creating.
For more information on Secure Sync, see Secure Sync in the Table 8-4, “Synchronization
Parameters for iFolders Stored Locally,” on page 96.
NOTE: You can also enable secure sync for a selected iFolder on your machine by using the
right-click iFolder > Properties option in the iFolder main window. For that, right-click the
iFolder and select Properties. In the General tab of the iFolder properties window, select the
Secure Sync check box.
8 Click OK.
The iFolder appears in the iFolders on This Computer list.
9 If the iFolder Created message appears, do one of the following:
Click Close to dismiss the message.
novdocx (en) 13 May 2009
Select Do Not Show This Message Again to disable future notifications, then click Close
to dismiss the message.
If you later decide that you want to get confirmation messages, go to iFolder Preferences,
select Show Confirmation Dialog When Creating iFolders, then click OK.
Creating iFolders in a File Manager
1 Use the file manager to navigate to the folder you want to convert to an iFolder, then select the
folder.
2 Use one of the following methods:
Right-click the folder icon, then click Convert to an iFolder.
On the toolbar, click File > Convert to an iFolder.
The folder icon changes to a folder with an overlay of the iFolder emblem (green “i”).
3 If the iFolder Created message appears, do one of the following:
Click Close to dismiss the message.
Select Do not show this message again to disable future notifications, then click Close to
dismiss the message.
If you later decide that you want to get confirmation messages, go to iFolder Preferences,
select Show Confirmation Dialog When Creating iFolders, then click OK.
84 OES 2 SP1: Novell iFolder 3.7 Cross-Platform User Guide
Page 85

8.5.2 Windows
You can create iFolders with a file manager or with the iFolder browser, which is available in the
client application. Use the following methods to create an iFolder:
“Creating iFolders in the iFolders Browser” on page 85
“Creating iFolders in a File Manager” on page 86
Creating iFolders in the iFolders Browser
1 In the notification area, use one of the following methods to open the iFolder browser:
Click the iFolder Services icon.
Right-click the iFolder Services icon, then click iFolders.
2 Click Upload a folder.
3 From the drop-down list, select the iFolder account you want to use for this iFolder.
If you have multiple iFolder accounts, the default account is listed first. You can use the dropdown list to select a different account.
novdocx (en) 13 May 2009
4 In the browser, navigate to the directory where you want to create an iFolder.
5 Select the normal folder you want to make an iFolder, using one of these methods:
If the normal folder exists, select the folder, then click OK.
If the normal folder does not exist, click Make New Folder to create it, and select the
newly created folder.
6 Select the iFolder type from one of the following from the given options:
NOTE: You are permitted to create encrypted iFolders only if your iFolder Administrators has
set your encryption policy to On. If not, you can create only regular iFolders, and this option is
selected by default. In this case, both the options for Typ e are disabled.
Select Passphrase Encryption to enable encryption for the selected iFolder.
If you did not set the passphrase during the login session, and you select Encrypted, it
prompts you to enter the passphrase.
Select Regular to enable sharing for the selected iFolder.
When you share your iFolder with other iFolder members, iFolder announces the
availability of shared iFolders with a pop-up message in the notification area. Shared users
can click the message to set up the iFolder at that time, or close the message to download
the iFolder later.
7 Select Secure Sync to enable secure synchronization of files in the iFolder you are creating.
NOTE: You can also enable secure sync for a selected iFolder on your machine by using the
right-click iFolder > Properties option in the iFolder main window. For that, right-click the
iFolder and select Properties. In the General tab of the iFolder properties window, select the
Secure Sync check box.
For more information on Secure Sync, see Secure Sync in the Table 8-4, “Synchronization
Parameters for iFolders Stored Locally,” on page 96.
8 Click OK.
The iFolder appears in the iFolders on This Computer list.
Managing Your iFolders 85
Page 86

9 If the iFolder Created message appears, do one of the following:
Click Close to dismiss the message.
Select Do not show this message again to disable future notifications, then click Close to
dismiss the message.
If you later decide that you want to get confirmation messages, go to iFolder Preferences,
select Show Confirmation Dialog When Creating iFolders, then click OK.
Creating iFolders in a File Manager
novdocx (en) 13 May 2009
1 Use the file manager to navigate to the folder you want to convert to an iFolder, then select the
folder.
2 Use one of the following methods:
Right-click the folder icon, then click Convert to an iFolder.
On the toolbar, click File > Convert to an iFolder.
The folder icon changes to a folder with an overlay of the iFolder emblem (green “i”) .
3 If the iFolder Created message appears, do one of the following:
Click Close to dismiss the message.
Select Do Not Show This Message Again to disable future notifications, then click Close
to dismiss the message.
If you later decide that you want to get confirmation messages, go to iFolder Preferences,
select Show Confirmation Dialog When Creating iFolders, then click OK.
8.5.3 Macintosh
You can create iFolders with the iFolder browser, which is available in the client application.
1 Click the iFolder Services icon from the dock to open the iFolder browser.
2 Use one of the following methods to open the browser.
Click New in the toolbar
Click File > New in the menu bar
3 In the browser, navigate to the directory where you want to create an iFolder.
4 Select the normal folder you want to make into an iFolder, then click Open.
5 Select the iFolder type from one of the following from the given options:
86 OES 2 SP1: Novell iFolder 3.7 Cross-Platform User Guide
Page 87

NOTE: You are permitted to create encrypted iFolders only if your iFolder Administrators has
set your encryption policy to On. If not, you can create only regular iFolders, and this option is
selected by default. In this case, both the options for Typ e are disabled.
Select Passphrase Encryption to enable encryption for the selected iFolder.
If you did not set the passphrase during the login session, and you select Passphrase
Encryption, it prompts you to enter the passphrase.
Select Regular to enable sharing for the selected iFolder.
When you share your iFolder with other iFolder members, iFolder announces the
availability of shared iFolders with a pop-up message in the notification area. Shared users
can click the message to set up the iFolder at that time, or close the message to download
the iFolder later.
6 Select Secure Sync to enable secure synchronization of files in the iFolder you are creating.
For more information on Secure Sync, see Secure Sync in the Table 8-4, “Synchronization
Parameters for iFolders Stored Locally,” on page 96.
NOTE: You can also enable secure sync for a selected iFolder on your machine by using the
right-click iFolder > Properties option in the iFolder main window. For that, right-click the
iFolder and select Properties. In the General tab of the iFolder properties window, select the
Secure Sync check box.
novdocx (en) 13 May 2009
7 Click OK.
The iFolder appears in the iFolders on This Computer list.
8 Click OK.
The iFolder appears in the iFolder browser window.
8.5.4 Creating iFolders on a FAT32 Mount Point (Linux)
On Linux, iFolder supports creating and using iFolders on a mount point for a FAT32 file system.
Before you can create new iFolders or set up shared iFolders on a FAT32 volume on your Linux
computer, the iFolder user must own the FAT32 mount point where you want to store the iFolders,
and the
/etc/fstab
IMPORTANT: This is required because FAT32 does not support file permissions. Any other file
system that does not support permissions has the same issue.
For dual boot systems, you can access the data in iFolders as normal folders from the system where
the folder is not set up as an iFolder. If you set up the folder as an iFolder on both platforms, the data
set is stored in two different iFolders on the server, which consumes double your allocated server
disk resources.
Because the FAT32 file system does not support POSIX file system permissions, make sure the
iFolder user is the local owner of the mount point. Modify the
(UID) parameter of the user’s local login identity to the iFolder user who creates iFolders on that
mount point.
file must explicitly identify the iFolder user’s local user ID for the mount point.
/etc/fstab
file to set the user ID
root
1 Log in to your computer as the
user.
2 Create the directory where you want to mount the FAT32 file system. At a command prompt,
enter
Managing Your iFolders 87
Page 88

mkdir /home/username/fsmount
Replace
iFolders. Replace
example, if the username is
username
with the username of the user who plans to use the FAT32 drive for
fsmount
with the directory name you want to use as the mount point. For
jsmith
and the directory name is
fat32mntpt
for a FAT32 drive
or partition, enter
mkdir /home/jsmith/fat32mntpt
3 Mount the FAT32 drive at the desired mount point. At a command prompt, enter
mount -t vfat /dev/hda1 /home/username/fsmount
Replace
username
/dev/hda1
with the device or partition name of the non-Linux device. Replace
with the username of the iFolder user. Replace
fsmount
with the directory name you
want to use as the mount point.
Continuing the example, where the FAT32 file system (
), the username is
hda4
jsmith
, and the mount point directory is
vfat
) is on the
hda4
device (
/home/jsmith/fat32mntpt
enter
mount -t vfat /dev/hda4 /home/jsmith/fat32mntpt
4 Edit the
/etc/fstab
file by adding the
uid=username
parameter of the iFolder user on the
line that defines the FAT32 mount point.
/dev/hda1 /home/username/fsmount vfat uid=username
Continuing the example, modify
/dev/hda4 /home/jsmith/fat32mntpt vfat uid=jsmith
/etc/fstab
file by adding
uid=jsmith
to the mount point:
novdocx (en) 13 May 2009
/dev/
,
8.6 Sharing an iFolder
You can share an iFolder with multiple users. This section discusses the following tasks:
Section 8.6.1, “Understanding User Access Rights,” on page 88
Section 8.6.2, “Accessing the Sharing Tab,” on page 89
Section 8.6.3, “Adding a User to an iFolder,” on page 90
Section 8.6.4, “Modifying User Access Rights,” on page 90
Section 8.6.5, “Removing a User from an iFolder,” on page 91
Section 8.6.6, “Transferring Ownership to an iFolder User,” on page 91
8.6.1 Understanding User Access Rights
The following table describes the capabilities associated with each level of access for users or
LDAPGroup.
IMPORTANT: All the members of an LDAPGroup inherit the access rights set for that
LDAPGroup.
88 OES 2 SP1: Novell iFolder 3.7 Cross-Platform User Guide
Page 89

Table 8-2 Capabilities of iFolder Owners and Members Based on Their User Access Rights
novdocx (en) 13 May 2009
Capability Owner
With an enterprise server, the space
consumed by the iFolder on the server is
charged against the user’s quota
Transfer ownership to another member
whose state is iFolder User
Set a quota for the iFolder No No No No
Make the iFolder available to other users
(sharing)
Make the iFolder unavailable to other users
(stop sharing)
Assign iFolder access rights for other users Yes Yes, except
Read directories and files in the iFolder Yes Yes Yes Yes
Add, modify, or delete directories and files
in the iFolder
Rename directories and files in an iFolder Yes Yes Yes No
Rename the iFolder No No No No
No No No No
YesNoNoNo
Yes Yes No No
Yes Yes, except
Yes Ye s Ye s N o
Member with
Full Control
the owner
the owner
Member with
Read/Write
No No
No No
Member with
Read Only
Set up an iFolder on multiple computers Yes Yes Yes Yes
Revert an iFolder (do not participate on a
local computer)
Delete an available iFolder to decline
participating
Delete the iFolder and delete the iFolder
and its files from the server (make it a
normal folder again and no longer share it
with others)
Yes Ye s Ye s Ye s
Yes Ye s Ye s Ye s
YesNoNoNo
8.6.2 Accessing the Sharing Tab
You can manage membership for the iFolder from the Sharing tab in the iFolder Properties dialog
box.
IMPORTANT: You can share iFolders only if the iFolder administrator has enabled the sharing
policy for your account.
1 If iFolder is not running, start iFolder.
2 Do one of the following to open the iFolder Properties dialog box to the Sharing tab.
Managing Your iFolders 89
Page 90
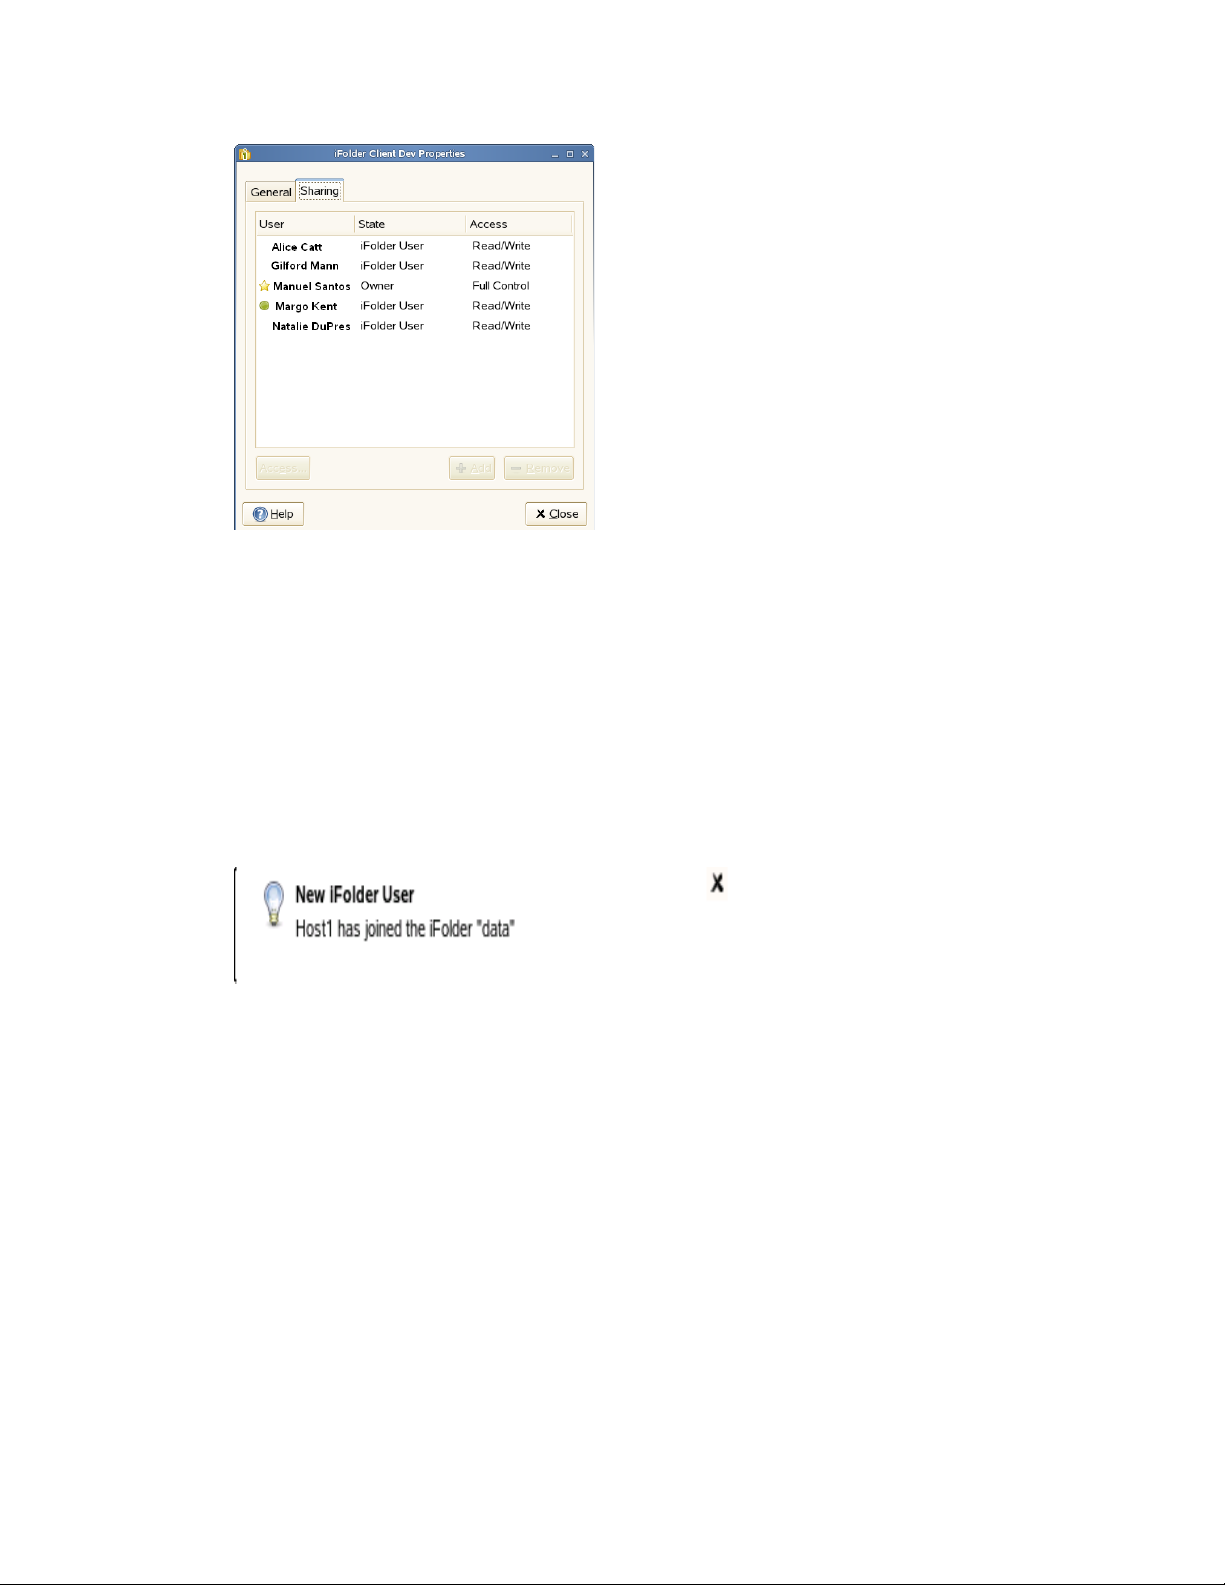
In a file manager, right-click the iFolder you want to share, then select Share with.
In the iFolder browser, select the iFolder, then select Share with.
novdocx (en) 13 May 2009
8.6.3 Adding a User to an iFolder
1 On the Sharing tab, click Add to open the Select User dialog box.
2 From the list of users, select one or more users or LDAPGroups by adding them to the Selected
Users list, then click OK.
It can take several seconds for the users to synchronize up to the server. Soon after the sync, a
notification appears at the bottom right of the page.
3 On the Sharing tab, select one or more users who you want to assign the same access right.
4 Click Access, select the Full Control, Read/Write, or Read Only access right, then click OK.
5 Repeat the previous steps until you have invited all the desired users or LDAPGroups to share
the iFolder and have set their access rights.
6 Click Apply, then click OK to close the iFolder Properties window.
8.6.4 Modifying User Access Rights
As the working relationships and status of members of an iFolder change, you might need to change
a user’s access right for the iFolder. For example, you might want to give a trusted user the Full
Control right for the iFolder.
1 On the Sharing tab, select one or more users who you want to have the same access right.
2 Select Access, then specify the Full Control, Read/Write, or Read Only right.
90 OES 2 SP1: Novell iFolder 3.7 Cross-Platform User Guide
Page 91

When you first invite a user or LDAPGroup to participate, the Make this user the owner of the
iFolder option is disabled (dimmed) in the Access dialog box. If you intend to make the new
user the owner, you must wait until the user’s state changes from Invited User to iFolder User,
then you can transfer ownership. When you transfer the ownership to an LDAPGroup, all the
members of that LDAPGroup get the ownership rights.
3 Click OK, then click OK to close the iFolder Properties window.
8.6.5 Removing a User from an iFolder
To unshare an iFolder, you must remove a user or an LDAPGroup as a member of an iFolder. The
iFolder on the user’s or LDAPGroup member’s workstation becomes a normal folder. A copy of the
data remains on the former member’s workstation, but the files are no longer synchronized with the
shared iFolder.
novdocx (en) 13 May 2009
1 On the Sharing tab, select one or more users from the list.
2 Click Remove, click Apply, then click OK.
8.6.6 Transferring Ownership to an iFolder User
The owner of an iFolder can transfer ownership of the iFolder to another individual member or
LDAPGroup whose state is iFolder User. After the transfer, the original owner becomes a member
with the Read/Write right, and the space consumed by the iFolder is charged against the new owner.
When an LDAPGroup becomes the owner of an iFolder, all the members of the group get the
ownership rights.
1 In a file manager or the iFolder browser, right-click the iFolder you want to transfer, then select
Share With to open the iFolder’s Properties dialog box to the Sharing tab.
2 From the list of users, select the iFolder User who is to be the new owner, then click Access.
3 Select Make this user the owner of this iFolder.
The Make this user the owner of the iFolder option is disabled (dimmed) in the Access dialog
box if the user’s state is Invited User. In this case, exit the dialog box, wait until the user’s state
changes from Invited User to iFolder User, then repeat the preceding steps to transfer
ownership.
4 Click OK, then click OK to close the iFolder Properties window.
8.7 Viewing and Hiding Available iFolders
You can decide which iFolders you want to download to each of your computers. If iFolders that you
have not downloaded are available to you on the server, they are listed in the iFolder browser under
the Server Name of the related account. The Server Name is the administrator-specified descriptive
name of the server where you have an iFolder account.
Managing Your iFolders 91
Page 92

To view the available iFolders in the iFolder browser, click View Available iFolders.
To hide the available iFolders in the iFolder browser, click Hide Available iFolders.
8.8 Merging iFolders
Merge helps you consolidate the iFolder data and minimize the data transfer between iFolder server
and client. You can merge the content in an iFolder on the server with the content on an existing
local machine folder content.
Section 8.8.1, “iFolder-to-Folder Merge,” on page 92
Section 8.8.2, “Moving Existing iFolders to Different Locations,” on page 93
Section 8.8.3, “Merging a Migrated 2.x iFolder to iFolder 3.7,” on page 93
8.8.1 iFolder-to-Folder Merge
You can merge an iFolder and a normal folder with the same name. For example, you can merge the
content of an iFolder named
corporate
with that of a normal folder named
corporate
.
novdocx (en) 13 May 2009
Assume that the
to download the content of
only the
the corporate
to
hr
the corporate
sub folders
If the data in the
and
corporate
finance
iFolder has three sub folders: hr,
corporate
iFolder to the folder named
finance
folders. In this case, you don’t need to download all the three folders to
folder and increase the transer rate. Instead, you can merge the
folder so that the Merge to folder feature intelligently avoids downloading the
hr
and
finance
corporate
, and downloads only
iFolder and
corporate
marketing
sub folder.
folder is different, a version conflict is
and
marketing
corporate,
. You want
which contains
corporate
iFolder
displayed. You can resolve the conflicts manually. Similarly, if a filename conflict is displayed, you
can resolve it manually.
To merge an iFolder on the server to an existing local machine folder content:
1 In the iFolder browser, right-click the desired iFolder from the list of iFolders on the selected
server, then select Merge to folder.
2 Browse and select the folder and click Merge.
92 OES 2 SP1: Novell iFolder 3.7 Cross-Platform User Guide
Page 93
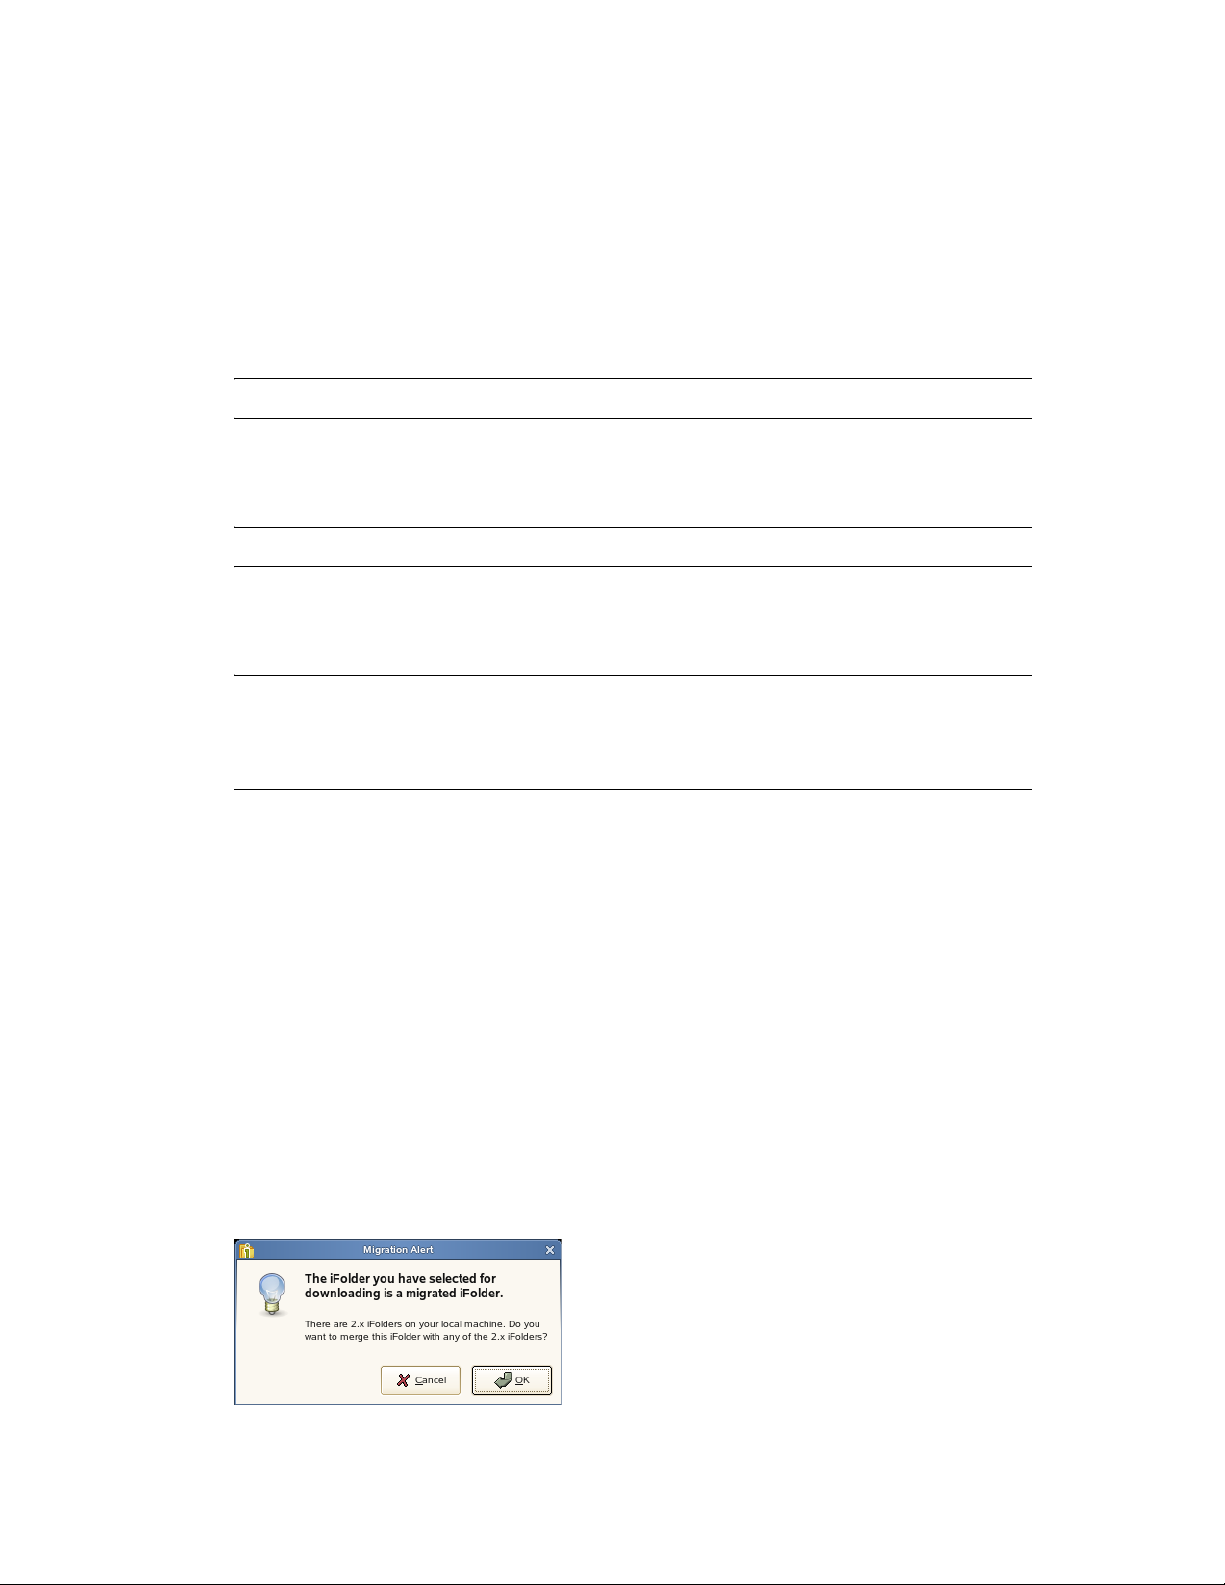
Now, the contents of these two folders are compared and the files that are not present in the folder is
downloaded from the iFolder. The files that are not present in the iFolder, but available in the folder
are uploaded.
8.8.2 Moving Existing iFolders to Different Locations
novdocx (en) 13 May 2009
To move an existing iFolder named
1 Convert the
IMPORTANT: You must not delete the iFolder on the server.
For more information, see Section 8.15, “Reverting an iFolder to a Normal Folder,” on
page 102.
2 Move the
IMPORTANT: You must not change the folder name while it is being moved.
3 In the iFolder browser window, select the
folder.
4 Select the
NOTE: If you use Sychronize Now (instead of Merge to folder), as described in Section 8.14,
“Moving an iFolder,” on page 101, it checks for all the data in the iFolder on the server, and
synchronizes all the data.Thus it increases data transfering time. In other hand, Merge to folder
minimize the data transfer as it only merges the contents of the iFolder and the normal folder.
For more information on merging, see Section 8.8.1, “iFolder-to-Folder Merge,” on page 92.
corporate
corporate
corporate
iFolder into a normal folder.
folder to a different location.
folder on the local machine, then click OK to merge the content.
corporate
to a different location on the client machine:
corporate
iFolder on the server, then click Merge to
8.8.3 Merging a Migrated 2.x iFolder to iFolder 3.7
You can merge a migrated 2.x iFolder and iFolder 3.7 iFolder. For more information on migration,
see Chapter 6, “Novell iFolder Migration And Upgrade,” on page 45.
After migration, the 2.x iFolders are moved to the iFolder 3.7 server. You can choose to download
the migrated iFolders on the 3.7 server to the client machine. However, those iFolders might already
exist on the client machine. When you try to download a migrated iFolder, it prompts you to
merge.In this case, use the merge functionality to avoid unnecessary data transfer from server to the
client
To merge a migrated 2.x iFolder to iFolder 3.7,
1 Select a migrated iFolder and click Merge to folder.
iFolder prompts you a message as follows:
Managing Your iFolders 93
Page 94
2 Click OK to open a list of 2.x iFolders on the machine.
Irrespective of the owner, you can select any of the iFolders on the machine to merge with the
migrated iFolder on the server.
3 Click Merge to continue.
If the name of the iFolders selected to merge are different, iFolder prompts you to rename the
iFolder on the server to the name of the iFolder on the machine.
novdocx (en) 13 May 2009
4 Click OK.
You can view the merged iFolder listed under iFolders on This Computer in the iFolder main
window.
8.9 Downloading an Available iFolder
When others share iFolders with you, the iFolders appear with the iFolder Download icon under
iFolders on iFolder Server Name in your iFolder browser, where the iFolder Server Name is the
name of the server for that account. To participate in the shared iFolder on your computer, you can
download the iFolder.
When a new user joins your shared iFolder list, iFolder announces the availability of new shared
user with a pop-up message in the notification area.
Figure 8-1 Example of Notification of a New SharedUser
94 OES 2 SP1: Novell iFolder 3.7 Cross-Platform User Guide
Page 95

The shared user also will get a balloon pop-up message in the notification area soon after he or she
finishes downloading the shared iFolder. The message reads that the <Username of the user who
shared the iFolder> has joined the <iFolder name>. Whenever a new user joins the shared members,
all the existing member users are notified of the new shared member.
1 Right-click the iFolder Services icon , then click iFolders to open the iFolder browser.
2 In the list of iFolders, select the available iFolder, then click Download an iFolder.
3 If you are not logged in to the account, log in with your username and password, then click
Connect.
4 Browse to the location where you want to create a local iFolder, then specify the name you
want to use locally for this iFolder.
The location and folder name must satisfy the following guidelines:
Section 8.1, “Guidelines for the Location and Use of iFolders,” on page 77
Section 8.3, “Naming Conventions for an iFolder and Its Folders and Files,” on page 79
5 Click OK twice.
novdocx (en) 13 May 2009
8.10 Viewing and Configuring Properties of an iFolder
Use the iFolders Properties page to view and configure the following information about a selected
iFolder.
Section 8.10.1, “Understanding iFolder Properties,” on page 95
Section 8.10.2, “Accessing iFolder Properties from a File Manager,” on page 96
Section 8.10.3, “Accessing iFolder Properties from the iFolder Browser,” on page 96
8.10.1 Understanding iFolder Properties
The following parameters report the disk space used on the server:
Table 8-3 Storage Parameters for iFolders Stored on the iFolder Server
Parameter Description
Available The total amount of server disk space currently available for files or
directories in the selected iFolder. The value is equal to the quota minus
the used space.
Used The total amount of server disk space currently consumed by all files and
directories in the selected iFolder.
Quota Tthe value reports the total amount of server disk space allocated to the
selected iFolder by the iFolder administrator. If no quota is set, the value is
N/A
empty or
(Not Applicable).
The following parameters report the synchronization status for the local copy of the iFolder:
Managing Your iFolders 95
Page 96

Table 8-4 Synchronization Parameters for iFolders Stored Locally
Parameter Description
novdocx (en) 13 May 2009
Last Successful
Synchronization
Files/Folders to Synchronize The total number of storage items (files and folders) in the iFolder that
Automatically Synchronizes
Every
Synchronize Now Click the button to initiate a synchronization on demand.
Secure Sync Secure Sync enables secure synchronization of files in the iFolder you are
The completion time of the most recent successful synchronization of your
local copy of the iFolder with the iFolder server.
mm/dd/yyyy hh:mm:ss
need to be synchronized.
The synchronization interval for the iFolder. Specify the value in minutes,
hours, or days.
When the iFolder client is used with a Novell iFolder 3.6 enterprise server,
the interval cannot override the minimum interval specified by the iFolder
administrator for the server or your account on the server, but it can
override the client-wide synchronization interval.
creating.You can enable secure channel for both regular and encrypted
iFolders. With this option selected, iFolder allows you use a secure
channel to synchronize between iFolder on the server and on the local
machine.
8.10.2 Accessing iFolder Properties from a File Manager
1 In the file manager, navigate to the iFolder, then select it.
2 Right-click the iFolder, then click iFolder > Properties.
8.10.3 Accessing iFolder Properties from the iFolder Browser
1 In the notification area, right-click the iFolder Services icon, then click iFolders to open the
iFolder browser.
2 In the list of iFolders, select the iFolder, then click Properties.
8.11 Managing Passphrase for Encrypted iFolders
Novell iFolder provides user-friendly interface to encrypt your iFolders to ensure data security at the
server side.
After you successfully log in to the iFolder, an optional iFolder passphrase dialog box opens where
you can enter your encryption passphrase if encryption is enabled by the Admin. iFolder uses the
passphrase to generate a unique encryption key for encrypting and decrypting your iFolder.If you
don’t provide a passphrase, the passphrase dialog box appears automatically while processing the
encrypted iFolders. If you cannot recall your passphrase, the recovery agent you selected during
login, helps you recover your encryption key. For more information, see “Enter the Passphrase” on
page 59.
96 OES 2 SP1: Novell iFolder 3.7 Cross-Platform User Guide
Page 97

Encryption occurs before the files leave your workstation to travel securely across an Internet
connection to be uploaded to, and stored on, the iFolder server. The iFolder data remain encrypted
on the iFolder Server and travel securely on the channel to and from the server. The iFolder client
decrypts the downloaded files as they arrive on your local workstation.
8.11.1 Recovering an Encrypted iFolder
Each iFolder has a unique data encryption key which is auto-generated during iFolder creation. You
use your passphrase to create the key that encrypts the unique data encryption key. If you forget the
secret passphrase, you cannot access either the iFolder data or the encrypted key used for recovering
it unless your passphrase is saved locally (enabling Remember passphrase). To avoid this problem,
you must export the keys using the Export encrypted Keys menu item and send it manually to the
recovery agent using e-mail address given in the dialog box. The recovery agent retrieves the keys
and sends back to you (through e-mail or any other communication channel). You can import the
keys and use them to reset the passphrase.
NOTE: The Recovery agent is generally an entity independent of entities owning the iFolder
server's infrastructure, or, independent of the IT department if deployed in a corporate environment.
novdocx (en) 13 May 2009
To export your data encryption key,
1 Select Security > Key Recovery > Export Encrypted Keys
2 Select the iFolder account from the drop down list.
3 Specify the location on your local machine where you want to store your exported file that
contains the encrypted keys.
4 Click OK
To import your recovered data encryption key,
1 Select Security> Key Recovery > Import Decryted Keys
Managing Your iFolders 97
Page 98

2 Specify the location of the imported file that contains the decrypted keys.
3 Specify the One Time Passphrase provided by the Recovery agent to decrypt and rarefy the
key.(optional)
The Recovery agent can choose to encrypt the recovered decrypted keys using the one time
passphrase. The one time passphrase and key file need to be send through different
communication channels (for security reason). If the Recover agent choose not to re-encrypt,
then the imported file contains decrypted keys.
novdocx (en) 13 May 2009
4 Specify the New Passphrase to re-encrypt the data encryption key.
5 In the Re-type Passphrase field, re-type the passphrase to verify and then, click OK
8.11.2 Resetting the Passphrase
For security reasons, you should reset the passphrase after you import the keys. You do this by using
the one-time passphrase sent by your Recover agent.
1 Select Security > Reset Passphrase.
2 In the Reset Passphrase window, select the iFolder account you want to reset the passphrase for
and specify the following details:
Enter Passphrase: Enter the one-time passphrase.
Enter New Passphrase: Enter the new passphrase you want to set for the current iFolder
account.
Retype Passphrase: Enter the new passphrase again for confirmation.
Recovery Agent: Select the Recovery agent you have set for the current iFolder account.
3 Click Reset.
8.12 Synchronizing Files
Section 8.12.1, “Synchronizing Files on Demand,” on page 99
Section 8.12.2, “Configuring the Synchronization Interval,” on page 99
98 OES 2 SP1: Novell iFolder 3.7 Cross-Platform User Guide
Page 99

8.12.1 Synchronizing Files on Demand
1 In the notification area, right-click the iFolder Services icon , then click iFolders to open the
iFolder browser.
2 In the list of iFolders, select the iFolder, then click Synchronize Now.
8.12.2 Configuring the Synchronization Interval
1 In the notification area, right-click the iFolder Services icon , then select Preferences to open
the iFolder Preferences dialog box to the General tab.
2 Do one of the following:
Select Synchronize to enable background synchronization.
Deselect Synchronize to disable synchronization.
3 If you enable synchronization, specify the interval for synchronizing files, such as every 1 hour
or every 2 days.
When the iFolder client is used with Novell iFolder, the minimum system Synchronization
Interval, typically every 5 minutes, is configured by the iFolder administrator. You cannot
override the system minimum. The absolute system minimum is 1 minute.
novdocx (en) 13 May 2009
8.13 Resolving File Conflicts
Conflicts can occur between file versions saved at the same time on different computers, or when a
filename differs by case only. When conflicts occur, the file is stored in the conflict area and the file
is flagged with a status of Name Conflict. The iFolder conflict icon is displayed on the iFolder. If
the Notify of conflicts option is enabled in your iFolder Preferences, an alert is also sent to the
notification area. You can control the pop-up behavior of notifications by setting your preference in
the iFolder Preferences > General tab.
To resolve file conflicts, see the following:
Section 8.13.1, “Resolving File Version Conflicts,” on page 99
Section 8.13.2, “Resolving Filename Conflicts,” on page 100
8.13.1 Resolving File Version Conflicts
To resolve file version conflicts, you must select the correct version in the Conflict Resolution
dialog box..
1 In the notification area, right-click the iFolder Services icon , then click iFolders to open the
iFolder browser.
2 Select the iFolder in conflict , then click Resolve to open the Resolve Conflicts dialog box.
Managing Your iFolders 99
Page 100

novdocx (en) 13 May 2009
You can view two versions of the same file:
Local Version: File saved on your local machine.
Server Version: File saved on the server.
You can view the details about the file on your local machine and the file on the server to
determine which version of the file you want to keep.
3 Select any of the following options for Save to iFolder based on your preference.
Local Version: Select this option if you want to save the local version to the iFolder.
Server Version: Select this option if you want to save the server version to the iFolder.
4 Select Enable to enable the Save to Conflict Bin option. When you enable this option, the file in
conflict is automatically selected to be saved in the Conflict bin. Your selection decides which
version to be saved in the Conflict bin locally for later use.
5 When you are done resolving the conflict, click Save.
8.13.2 Resolving Filename Conflicts
NOTE: Filename conflicts is not supported in the iFolder client for Macintosh. To resolve the
filename conflict, open a file manager and navigate to the local copy of the file in conflict. Copy the
file and save it with a unique name in the iFolder. iFolder synchronizes the file as a new file to the
server.
100 OES 2 SP1: Novell iFolder 3.7 Cross-Platform User Guide
 Loading...