

Page 1

Novell
GroupWise
6.5
WINDOWS* CLIENT USER GUIDE
September 19, 2005
®
www.novell.com
Page 2

Legal Notices
Novell, Inc. makes no representations or warranties with respect to the contents or use of this documentation, and specifically disclaims any express
or implied warranties of merchantability or fitness for any particular purpose. Further, Novell, Inc. reserves the right to revise this publication and to
make changes to its content, at any time, without obligation to notify any person or entity of such revisions or changes.
Further, Novell, Inc. makes no representations or warranties with respect to any software, and specifically disclaims any express or implied warranties
of merchantability or fitness for any particular purpose. Further, Novell, Inc. reserves the right to make changes to any and all parts of Novell software,
at any time, without any obligation to notify any person or entity of such changes.
Any products or technical information provided under this Agreement may be subject to U.S. export controls and the trade laws of other countries.
You agree to comply with all export control regulations and to obtain any required licenses or classification to export, re-export, or import deliverables.
You agree not to export or re-export to entities on the current U.S. export exclusion lists or to any embargoed or terrorist countries as specified in the
U.S. export laws. You agree to not use deliverables for prohibited nuclear, missile, or chemical biological weaponry end uses. Please refer to
www.novell.com/info/exports/ for more information on exporting Novell software. Novell assumes no responsibility for your failure to obtain any
necessary export approvals.
Copyright © 2003-2005 Novell, Inc. All rights reserved. No part of this publication may be reproduced, photocopied, stored on a retrieval system, or
transmitted without the express written consent of the publisher.
Novell, Inc. has intellectual property rights relating to technology embodied in the product that is described in this document. In particular, and without
limitation, these intellectual property rights may include one or more of the U.S. patents listed at http://www.novell.com/company/legal/patents/ and
one or more additional patents or pending patent applications in the U.S. and in other countries.
Novell, Inc.
404 Wyman Street, Suite 500
Waltham, MA 02451
U.S.A.
www.novell.com
GroupWise 6.5 Windows Client User Guide
September 19, 2005
Online Documentation: To access the online documentation for this and other Novell products, and to get updates, see
www.novell.com/documentation.
Page 3

Novell Trademarks
C3PO is a trademark of Novell, Inc.
eDirectory is a trademark of Novell, Inc.
GroupWise is a registered trademark of Novell, Inc. in the United States and other countries.
NDS is a registered trademark of Novell, Inc. in the United States and other countries.
NetMail is a trademark of Novell, Inc.
Novell is a registered trademark of Novell, Inc. in the United States and other countries.
Nterprise is a trademark of Novell, Inc.
ZENworks is a registered trademark of Novell, Inc. in the United States and other countries.
Third-Party Materials
All third-party trademarks are the property of their respective owners.
Page 4

Page 5

Contents
About This Guide 15
1 Getting Started 17
Starting the GroupWise Client . . . . . . . . . . . . . . . . . . . . . . . . . . . . . . . . . . . . . . . . . . . . . . 17
Running the Setup Program . . . . . . . . . . . . . . . . . . . . . . . . . . . . . . . . . . . . . . . . . . . . . 17
Starting GroupWise 6.5 . . . . . . . . . . . . . . . . . . . . . . . . . . . . . . . . . . . . . . . . . . . . . . . . 17
Using the Novell GroupWise 6.5 Collaboration Client for Novell Nterprise Linux Services 1.0 (v6.5 for NNLS 1.0) . . . 18
Setting Up an Account and Starting the Collaboration Client . . . . . . . . . . . . . . . . . . . . . . . . . . . . . 18
Using the Collaboration Client . . . . . . . . . . . . . . . . . . . . . . . . . . . . . . . . . . . . . . . . . . . . 19
Getting Acquainted with the Main GroupWise Window. . . . . . . . . . . . . . . . . . . . . . . . . . . . . . . . . . 20
Toolbar . . . . . . . . . . . . . . . . . . . . . . . . . . . . . . . . . . . . . . . . . . . . . . . . . . . . . . . . 21
Folder and Item List Header . . . . . . . . . . . . . . . . . . . . . . . . . . . . . . . . . . . . . . . . . . . . . 21
Folder List . . . . . . . . . . . . . . . . . . . . . . . . . . . . . . . . . . . . . . . . . . . . . . . . . . . . . . . 22
Item List . . . . . . . . . . . . . . . . . . . . . . . . . . . . . . . . . . . . . . . . . . . . . . . . . . . . . . . . 26
QuickViewer. . . . . . . . . . . . . . . . . . . . . . . . . . . . . . . . . . . . . . . . . . . . . . . . . . . . . . 26
Using Different GroupWise Modes (Online, Caching, and Remote) . . . . . . . . . . . . . . . . . . . . . . . . . . . 26
Online Mode . . . . . . . . . . . . . . . . . . . . . . . . . . . . . . . . . . . . . . . . . . . . . . . . . . . . . 26
Caching Mode. . . . . . . . . . . . . . . . . . . . . . . . . . . . . . . . . . . . . . . . . . . . . . . . . . . . . 27
Remote Mode . . . . . . . . . . . . . . . . . . . . . . . . . . . . . . . . . . . . . . . . . . . . . . . . . . . . . 27
Remote (Offline) Mode (v6.5 for NNLS 1.0). . . . . . . . . . . . . . . . . . . . . . . . . . . . . . . . . . . . . . 27
Understanding Your Mailbox . . . . . . . . . . . . . . . . . . . . . . . . . . . . . . . . . . . . . . . . . . . . . . . 27
Bolded Items in Your Mailbox . . . . . . . . . . . . . . . . . . . . . . . . . . . . . . . . . . . . . . . . . . . . . 28
Icons Appearing Next to Items in Your Mailbox and Calendar . . . . . . . . . . . . . . . . . . . . . . . . . . . . 28
Viewing Options in Your Mailbox . . . . . . . . . . . . . . . . . . . . . . . . . . . . . . . . . . . . . . . . . . . 30
Using the Toolbar. . . . . . . . . . . . . . . . . . . . . . . . . . . . . . . . . . . . . . . . . . . . . . . . . . . . . 32
Customizing the Toolbar Display . . . . . . . . . . . . . . . . . . . . . . . . . . . . . . . . . . . . . . . . . . . 32
Using Shortcut Keys . . . . . . . . . . . . . . . . . . . . . . . . . . . . . . . . . . . . . . . . . . . . . . . . . . . 34
Learning More . . . . . . . . . . . . . . . . . . . . . . . . . . . . . . . . . . . . . . . . . . . . . . . . . . . . . . 36
Online Help . . . . . . . . . . . . . . . . . . . . . . . . . . . . . . . . . . . . . . . . . . . . . . . . . . . . . . 36
GroupWise 6.5 Documentation Web Page . . . . . . . . . . . . . . . . . . . . . . . . . . . . . . . . . . . . . . 36
GroupWise Cool Solutions Web Community . . . . . . . . . . . . . . . . . . . . . . . . . . . . . . . . . . . . . 37
2 Logging In to GroupWise 39
Logging In to GroupWise . . . . . . . . . . . . . . . . . . . . . . . . . . . . . . . . . . . . . . . . . . . . . . . . . 39
Logging In to Your Mailbox . . . . . . . . . . . . . . . . . . . . . . . . . . . . . . . . . . . . . . . . . . . . . . 39
Logging In to Your Mailbox from Another User’s Workstation . . . . . . . . . . . . . . . . . . . . . . . . . . . . 40
Logging in to Your Mailbox from a Shared Workstation. . . . . . . . . . . . . . . . . . . . . . . . . . . . . . . . 40
Logging In to the Novell GroupWise 6.5 Collaboration Client for Novell Nterprise Linux Services 1.0 (v6.5 for NNLS 1.0)
41
Assigning Passwords to Your Mailbox . . . . . . . . . . . . . . . . . . . . . . . . . . . . . . . . . . . . . . . . . . 41
LDAP Authentication . . . . . . . . . . . . . . . . . . . . . . . . . . . . . . . . . . . . . . . . . . . . . . . . . 42
Adding, Changing, and Removing Your Password . . . . . . . . . . . . . . . . . . . . . . . . . . . . . . . . . . 42
Bypassing Your GroupWise or LDAP Password . . . . . . . . . . . . . . . . . . . . . . . . . . . . . . . . . . . 43
Proxies and Mailbox Passwords . . . . . . . . . . . . . . . . . . . . . . . . . . . . . . . . . . . . . . . . . . . 43
Mailbox Passwords and Remote Mode . . . . . . . . . . . . . . . . . . . . . . . . . . . . . . . . . . . . . . . . 44
Contents 5
Page 6

Mailbox Passwords and Caching Mode . . . . . . . . . . . . . . . . . . . . . . . . . . . . . . . . . . . . . . . . 44
3 Working with Items in Your Mailbox 45
Understanding GroupWise Item Types . . . . . . . . . . . . . . . . . . . . . . . . . . . . . . . . . . . . . . . . . . 45
Sending and Receiving Items . . . . . . . . . . . . . . . . . . . . . . . . . . . . . . . . . . . . . . . . . . . . . . . 46
Sending Mail Messages . . . . . . . . . . . . . . . . . . . . . . . . . . . . . . . . . . . . . . . . . . . . . . . . 46
Sending Phone Messages . . . . . . . . . . . . . . . . . . . . . . . . . . . . . . . . . . . . . . . . . . . . . . . 48
Changing the Font of Items You Send . . . . . . . . . . . . . . . . . . . . . . . . . . . . . . . . . . . . . . . . . 49
Formatting Bulleted and Numbered Lists . . . . . . . . . . . . . . . . . . . . . . . . . . . . . . . . . . . . . . . 50
Adding a Signature or vCard to Items You Send . . . . . . . . . . . . . . . . . . . . . . . . . . . . . . . . . . . 51
Spell-Checking Items You Send . . . . . . . . . . . . . . . . . . . . . . . . . . . . . . . . . . . . . . . . . . . . 52
Undoing the Last Text Action . . . . . . . . . . . . . . . . . . . . . . . . . . . . . . . . . . . . . . . . . . . . . 54
Delaying Delivery of an Item . . . . . . . . . . . . . . . . . . . . . . . . . . . . . . . . . . . . . . . . . . . . . . 55
Using Routing Slip. . . . . . . . . . . . . . . . . . . . . . . . . . . . . . . . . . . . . . . . . . . . . . . . . . . . . 55
Creating a Routed Item . . . . . . . . . . . . . . . . . . . . . . . . . . . . . . . . . . . . . . . . . . . . . . . . 55
Requiring a Password before Marking a Routed Item Completed . . . . . . . . . . . . . . . . . . . . . . . . . . . 56
Completing a Routed Item . . . . . . . . . . . . . . . . . . . . . . . . . . . . . . . . . . . . . . . . . . . . . . . 56
Addressing a Routed Item with an Address Book . . . . . . . . . . . . . . . . . . . . . . . . . . . . . . . . . . . 57
Notifying Recipients About an Item You have Sent . . . . . . . . . . . . . . . . . . . . . . . . . . . . . . . . . . . . 58
Downloading POP3 and IMAP4 Accounts to GroupWise . . . . . . . . . . . . . . . . . . . . . . . . . . . . . . . . . 58
Adding a POP3 or IMAP4 Account to GroupWise . . . . . . . . . . . . . . . . . . . . . . . . . . . . . . . . . . . 60
Modifying Properties of a POP3 or IMAP4 Account . . . . . . . . . . . . . . . . . . . . . . . . . . . . . . . . . . 61
Downloading Items from POP3 and IMAP4 Accounts . . . . . . . . . . . . . . . . . . . . . . . . . . . . . . . . . 61
Downloading New Items from POP3 and IMAP4 Accounts Automatically. . . . . . . . . . . . . . . . . . . . . . . 62
Downloading Only the Header (Subject) for IMAP4 Accounts . . . . . . . . . . . . . . . . . . . . . . . . . . . . . 62
Using GroupWise to Send POP3 and IMAP4 Mail. . . . . . . . . . . . . . . . . . . . . . . . . . . . . . . . . . . 63
Deleting an Item from a POP3 or IMAP4 Account . . . . . . . . . . . . . . . . . . . . . . . . . . . . . . . . . . . 63
Connecting to a POP3 or IMAP4 Server Using SSL. . . . . . . . . . . . . . . . . . . . . . . . . . . . . . . . . . 64
Importing POP3 and IMAP4 Accounts. . . . . . . . . . . . . . . . . . . . . . . . . . . . . . . . . . . . . . . . . 64
Storing Your POP3 Items on a Mail Server . . . . . . . . . . . . . . . . . . . . . . . . . . . . . . . . . . . . . . 65
Changing the Length of Time for POP3 and IMAP4 Server Timeouts. . . . . . . . . . . . . . . . . . . . . . . . . 66
Subscribing and Unsubscribing to IMAP4 Folders. . . . . . . . . . . . . . . . . . . . . . . . . . . . . . . . . . . 66
Alphabetizing the Folders in an IMAP4 Account . . . . . . . . . . . . . . . . . . . . . . . . . . . . . . . . . . . . 66
Downloading Voice Mail Attachments through an IMAP4 Account . . . . . . . . . . . . . . . . . . . . . . . . . . 66
Sharing an IMAP4 Folder (v6.5 for NNLS 1.0). . . . . . . . . . . . . . . . . . . . . . . . . . . . . . . . . . . . . 67
Seeing IMAP4 Folders That Are Shared with You (v6.5 for NNLS 1.0) . . . . . . . . . . . . . . . . . . . . . . . . 67
Attaching Files. . . . . . . . . . . . . . . . . . . . . . . . . . . . . . . . . . . . . . . . . . . . . . . . . . . . . . . 67
Attaching a File to an Item . . . . . . . . . . . . . . . . . . . . . . . . . . . . . . . . . . . . . . . . . . . . . . . 68
Attaching a Document Reference to an Item . . . . . . . . . . . . . . . . . . . . . . . . . . . . . . . . . . . . . 68
Embedding an OLE Object in an Item . . . . . . . . . . . . . . . . . . . . . . . . . . . . . . . . . . . . . . . . . 70
Viewing Attached Files. . . . . . . . . . . . . . . . . . . . . . . . . . . . . . . . . . . . . . . . . . . . . . . . . 71
Opening Attached Files . . . . . . . . . . . . . . . . . . . . . . . . . . . . . . . . . . . . . . . . . . . . . . . . 71
Managing Sent Items . . . . . . . . . . . . . . . . . . . . . . . . . . . . . . . . . . . . . . . . . . . . . . . . . . . 72
Confirming Delivery of Items You’ve Sent . . . . . . . . . . . . . . . . . . . . . . . . . . . . .
Displaying Sent Items . . . . . . . . . . . . . . . . . . . . . . . . . . . . . . . . . . . . . . . . . . . . . . . . . 72
Resending Items . . . . . . . . . . . . . . . . . . . . . . . . . . . . . . . . . . . . . . . . . . . . . . . . . . . . 73
Retracting Items You’ve Sent . . . . . . . . . . . . . . . . . . . . . . . . . . . . . . . . . . . . . . . . . . . . . 73
Checking the Status of Your Items . . . . . . . . . . . . . . . . . . . . . . . . . . . . . . . . . . . . . . . . . . 73
Receiving Notification About Items You Send . . . . . . . . . . . . . . . . . . . . . . . . . . . . . . . . . . . . . 74
Requesting a Reply for Items You Send. . . . . . . . . . . . . . . . . . . . . . . . . . . . . . . . . . . . . . . . 75
Changing the Subject of a Sent Item . . . . . . . . . . . . . . . . . . . . . . . . . . . . . . . . . . . . . . . . . 75
Managing Received Items. . . . . . . . . . . . . . . . . . . . . . . . . . . . . . . . . . . . . . . . . . . . . . . . . 76
Reading Items You Receive . . . . . . . . . . . . . . . . . . . . . . . . . . . . . . . . . . . . . . . . . . . . . . 77
Changing the Font of Items You Receive . . . . . . . . . . . . . . . . . . . . . . . . . . . . . . . . . . . . . . . 79
Replying to Items You Receive . . . . . . . . . . . . . . . . . . . . . . . . . . . . . . . . . . . . . . . . . . . . 79
. . . . . . . . . . 72
6 GroupWise 6.5 Windows Client User Guide
Page 7

Forwarding Items to Other Users . . . . . . . . . . . . . . . . . . . . . . . . . . . . . . . . . . . . . . . . . . . 81
Using Categories to Organize Items . . . . . . . . . . . . . . . . . . . . . . . . . . . . . . . . . . . . . . . . . 81
Changing the Subject of an Item You’ve Received . . . . . . . . . . . . . . . . . . . . . . . . . . . . . . . . . . 85
Creating a Checklist. . . . . . . . . . . . . . . . . . . . . . . . . . . . . . . . . . . . . . . . . . . . . . . . . . 86
Delegating Items . . . . . . . . . . . . . . . . . . . . . . . . . . . . . . . . . . . . . . . . . . . . . . . . . . . 91
Handling Unwanted Mail . . . . . . . . . . . . . . . . . . . . . . . . . . . . . . . . . . . . . . . . . . . . . . . 92
Changing Item Types . . . . . . . . . . . . . . . . . . . . . . . . . . . . . . . . . . . . . . . . . . . . . . . . . 98
Viewing and Composing Items in HTML . . . . . . . . . . . . . . . . . . . . . . . . . . . . . . . . . . . . . . 100
4 Using GroupWise Messenger from Within GroupWise 103
Using GroupWise Messenger from Within GroupWise . . . . . . . . . . . . . . . . . . . . . . . . . . . . . . . . . 103
Sending an Instant Message . . . . . . . . . . . . . . . . . . . . . . . . . . . . . . . . . . . . . . . . . . . . 104
Displaying the GroupWise Messenger Contact List. . . . . . . . . . . . . . . . . . . . . . . . . . . . . . . . . 104
Specifying Whether or Not to Start GroupWise Messenger When GroupWise Starts . . . . . . . . . . . . . . . 104
Displaying GroupWise Messenger Options . . . . . . . . . . . . . . . . . . . . . . . . . . . . . . . . . . . . . 104
5 Scheduling Group and Posted Items 105
Scheduling Appointments . . . . . . . . . . . . . . . . . . . . . . . . . . . . . . . . . . . . . . . . . . . . . . . 105
Scheduling an Appointment for Other Users . . . . . . . . . . . . . . . . . . . . . . . . . . . . . . . . . . . . 106
Rescheduling an Appointment . . . . . . . . . . . . . . . . . . . . . . . . . . . . . . . . . . . . . . . . . . . 107
Rescheduling Recurring Appointments . . . . . . . . . . . . . . . . . . . . . . . . . . . . . . . . . . . . . . . 107
Canceling an Appointment . . . . . . . . . . . . . . . . . . . . . . . . . . . . . . . . . . . . . . . . . . . . . 108
Scheduling an Appointment for Yourself . . . . . . . . . . . . . . . . . . . . . . . . . . . . . . . . . . . . . . 108
Checking When Everyone Is Available . . . . . . . . . . . . . . . . . . . . . . . . . . . . . . . . . . . . . . . 109
Formatting Your Appointments in ICAL . . . . . . . . . . . . . . . . . . . . . . . . . . . . . . . . . . . . . . . 111
Sending Tasks . . . . . . . . . . . . . . . . . . . . . . . . . . . . . . . . . . . . . . . . . . . . . . . . . . . . . 112
Assigning a Task to Other Users . . . . . . . . . . . . . . . . . . . . . . . . . . . . . . . . . . . . . . . . . . 112
Assigning a Task to Yourself . . . . . . . . . . . . . . . . . . . . . . . . . . . . . . . . . . . . . . . . . . . . 114
Marking Tasks Completed . . . . . . . . . . . . . . . . . . . . . . . . . . . . . . . . . . . . . . . . . . . . . 115
Sending Reminder Notes . . . . . . . . . . . . . . . . . . . . . . . . . . . . . . . . . . . . . . . . . . . . . . . . 115
Scheduling a Reminder Note for Yourself. . . . . . . . . . . . . . . . . . . . . . . . . . . . . . . . . . . . . . 115
Scheduling a Reminder Note for Other Users . . . . . . . . . . . . . . . . . . . . . . . . . . . . . . . . . . . 116
Accepting or Declining Scheduled Items . . . . . . . . . . . . . . . . . . . . . . . . . . . . . . . . . . . . . . . . 117
Accepting and Declining Resource Requests. . . . . . . . . . . . . . . . . . . . . . . . . . . . . . . . . . . . 117
Specifying a Time Zone for an Appointment . . . . . . . . . . . . . . . . . . . . . . . . . . . . . . . . . . . . . . 118
Scheduling Recurring Items . . . . . . . . . . . . . . . . . . . . . . . . . . . . . . . . . . . . . . . . . . . . . . 119
Scheduling a Recurring Item by Dates . . . . . . . . . . . . . . . . . . . . . . . . . . . . . . . . . . . . . . . 119
Scheduling a Recurring Item by Example. . . . . . . . . . . . . . . . . . . . . . . . . . . . . . . . . . . . . . 119
Scheduling a Recurring Item Based on Another Day of the Week . . . . . . . . . . . . . . . . . . . . . . . . . 120
Scheduling a Recurring Item Based on the Last Day of the Month . . . . . . . . . . . . . . . . . . . . . . . . . 120
Scheduling Auto-Dates by Formula . . . . . . . . . . . . . . . . . . . . . . . . . . . . . . . . . . . . . . . . . 121
Using Auto-Date Formula Functions and Operators . . . . . . . . . . . . . . . . . . . . . . . . . . . . . . . . 121
6 Using Your Calendar 127
Viewing Your Calendar . . . . . . . . . . . . . . . . . . . . . . . . . . . . . . . . . . . . . . . . . . . . . . . . . 128
Opening the Calendar Folder or a Calendar View . . . . . . . . . . . . . . . . . . . . . . . . . . . . . . . . . 128
Navigating in the Calendar . . . . . . . . . . . . . . . . . . . . . . . . . . . . . . . . . . . . . . . . . . . . . 129
Viewing As Calendar . . . . . . . . . . . . . . . . . . . . . . . . . . . . . . . . . . . . . . . . . . . . . . . . 130
Understanding the Icons Appearing Next to Items in Your Calendar . . . . . . . . . . . . . . . . . . . . . . . . 130
Reading an Item in Your Calendar . . . . . . . . . . . . . . . . . . . . . . . . . . . . . . . . . . . . . . . . . . . 130
Saving an Item in Your Calendar . . . . . . . . . . . . . . . . . . . . . . . . . . . . . . . . . . . . . . . . . . . 130
Viewing the Calendars of Multiple Users or Resources . . . . . . . . . . . . . . . . . . . . . . . . . . . . . . . . 131
Viewing the Calendars of Multiple Users or Resources. . . . . . . . . . . . . . . . . . . . . . . . . . . . . . . 131
Modifying a Multi-User List . . . . . . . . . . . . . . . . . . . . . . . . . . . . . . . . . . . . . . . . . . . . . 132
Creating a Multi-User Calendar View . . . . . . . . . . . . . . . . . . . . . . . . . . . . . . . . . . . . . . . . 132
Printing Calendar Items. . . . . . . . . . . . . . . . . . . . . . . . . . . . . . . . . . . . . . . . . . . . . . . . . 133
Printing Your Calendar, Task List, or Reminder Note List . . . . . . . . . . . . . . . . . . . . . . . . . . . . . 133
Contents 7
Page 8

Printing the Calendars of Multiple Users. . . . . . . . . . . . . . . . . . . . . . . . . . . . . . . . . . . . . . . 134
Changing the First Day of the Week in Your Calendar . . . . . . . . . . . . . . . . . . . . . . . . . . . . . . . . . 135
Viewing a Different Date in the Calendar . . . . . . . . . . . . . . . . . . . . . . . . . . . . . . . . . . . . . . . . 135
Setting Alarms for Calendar Items. . . . . . . . . . . . . . . . . . . . . . . . . . . . . . . . . . . . . . . . . . . . 135
Setting an Alarm . . . . . . . . . . . . . . . . . . . . . . . . . . . . . . . . . . . . . . . . . . . . . . . . . . . 136
Specifying How Long Before an Event the Alarm Sounds . . . . . . . . . . . . . . . . . . . . . . . . . . . . . . 136
Sending an Alarm to an Electronic Pager . . . . . . . . . . . . . . . . . . . . . . . . . . . . . . . . . . . . . . 137
7 Managing Your Mailbox 139
Using the Folder List . . . . . . . . . . . . . . . . . . . . . . . . . . . . . . . . . . . . . . . . . . . . . . . . . . 140
Renaming Folders . . . . . . . . . . . . . . . . . . . . . . . . . . . . . . . . . . . . . . . . . . . . . . . . . . 141
Deleting Folders . . . . . . . . . . . . . . . . . . . . . . . . . . . . . . . . . . . . . . . . . . . . . . . . . . . 141
Creating a Personal Folder . . . . . . . . . . . . . . . . . . . . . . . . . . . . . . . . . . . . . . . . . . . . . 141
Creating a Shared Folder . . . . . . . . . . . . . . . . . . . . . . . . . . . . . . . . . . . . . . . . . . . . . . 142
Moving or Linking an Item to Another Folder . . . . . . . . . . . . . . . . . . . . . . . . . . . . . . . . . . . . 142
Understanding Find Results Folders. . . . . . . . . . . . . . . . . . . . . . . . . . . . . . . . . . . . . . . . . 142
Changing or Deleting Folder Display Settings . . . . . . . . . . . . . . . . . . . . . . . . . . . . . . . . . . . . 144
Using Shared Folders . . . . . . . . . . . . . . . . . . . . . . . . . . . . . . . . . . . . . . . . . . . . . . . . . . 144
Sharing an Existing Folder with Other Users (v6.5 and v6.5 for NNLS 1.0) . . . . . . . . . . . . . . . . . . . . . 145
Posting a Message to a Shared Folder . . . . . . . . . . . . . . . . . . . . . . . . . . . . . . . . . . . . . . . 145
Viewing Discussion Threads in a Shared Folder . . . . . . . . . . . . . . . . . . . . . . . . . . . . . . . . . . 146
Managing Contacts Through Your Mailbox . . . . . . . . . . . . . . . . . . . . . . . . . . . . . . . . . . . . . . . 146
Managing Contacts . . . . . . . . . . . . . . . . . . . . . . . . . . . . . . . . . . . . . . . . . . . . . . . . . 147
Managing Groups . . . . . . . . . . . . . . . . . . . . . . . . . . . . . . . . . . . . . . . . . . . . . . . . . . 149
Managing Resources . . . . . . . . . . . . . . . . . . . . . . . . . . . . . . . . . . . . . . . . . . . . . . . . 150
Managing Organizations . . . . . . . . . . . . . . . . . . . . . . . . . . . . . . . . . . . . . . . . . . . . . . . 151
Changing the Address Book the Contacts Folder Displays . . . . . . . . . . . . . . . . . . . . . . . . . . . . . 151
Sending a Mail Message from a Contact . . . . . . . . . . . . . . . . . . . . . . . . . . . . . . . . . . . . . . 152
Changing the Display Name of a Contact . . . . . . . . . . . . . . . . . . . . . . . . . . . . . . . . . . . . . . 153
Viewing All Correspondence You Have Had with a Contact. . . . . . . . . . . . . . . . . . . . . . . . . . . . . 155
Using Mailbox Storage Size Information . . . . . . . . . . . . . . . . . . . . . . . . . . . . . . . . . . . . . . . . 155
Viewing Your Mailbox Size Information . . . . . . . . . . . . . . . . . . . . . . . . . . . . . . . . . . . . . . . 156
Deleting Items from Your Mailbox Using Mailbox Storage Size Information. . . . . . . . . . . . . . . . . . . . . 156
Archiving Items from Your Mailbox Using Mailbox Storage Size Information . . . . . . . . . . . . . . . . . . . . 157
Running Notify. . . . . . . . . . . . . . . . . . . . . . . . . . . . . . . . . . . . . . . . . . . . . . . . . . . . . . 157
Starting Notify . . . . . . . . . . . . . . . . . . . . . . . . . . . . . . . . . . . . . . . . . . . . . . . . . . . . 158
Reading an Item from Notify . . . . . . . . . . . . . . . . . . . . . . . . . . . . . . . . . . . . . . . . . . . . . 158
Sending an Alarm to an Electronic Pager . . . . . . . . . . . . . . . . . . . . . . . . . . . . . . . . . . . . . . 158
Displaying the Notify Dialog Box When You Receive Notification . . . . . . . . . . . . . . . . . . . . . . . . . . 158
Turning Off Notification . . . . . . . . . . . . . . . . . . . . . . . . . . . . . . . . . . . . . . . . . . . . . . . 159
Setting How Often Notify Checks for New Items. . . . . . . . . . . . . . . . . . . . . . . . . . . . . . . . . . . 159
Setting How to Be Notified . . . . . . . . . . . . . . . . . . . . . . . . . . . . . . . . . . . . . . . . . . . . . . 159
Setting the Alarm Options . . . . . . . . . . . . . . . . . . . . . . . . . . . . . . . . . . . . . . . . . . . . . . 159
Setting Notify Options for Return Status Messages . . . . . . . . . . . . . . . . . . . . . . . . . . . . . . . . . 160
Setting How to Be Notified When Outgoing Messages Change Status . . . . . . . . . . . . . . . . . . . . . . . 160
Setting How to Be Notified of Items in Your Mailbox. . . . . . . . . . . . . . . . . . . . . . . . . . . . . . . . . 160
Being Notified of Someone Else's Messages . . . . . . . . . . . . . . . . . . . . . . . . . . . . . . . . . . . . 161
Archiving the Items in Your Mailbox . . . . . . . . . . . . . . . . . . . . . . . . . . . . . . . . . . . . . . . . . . . 162
Archiving an Item in Your Mailbox . . . . . . . . . . . . . . . . . . . . . . . . . . . . . . . . . . . . . . . . . . 162
Viewing Archived Items . . . . . . . . . . . . . . . . . . . . . . . . . . . . . . . . . . . . . . . . . . . . . . . 162
Unarchiving Items . . . . . . . . . . . . . . . . . . . . . . . . . . . . . . . . . . . . . . . . . . . . . . . . . . 162
Archiving Items Automatically . . . . . . . . . . . . . . . . . . . . . . . . . . . . . . . . . . . . . . . . . . . . 163
Printing Items in Your Mailbox. . . . . . . . . . . . . . . . . . . . . . . . . . . . . . . . . . . . . . . . . . . . . . 163
Printing GroupWise Items . . . . . . . . . . . . . . . . . . . . . . . . . . . . . . . . . . . . . . . . . . . . . . 164
Printing Status Information about an Item . . . . . . . . . . . . . . . . . . . . . . . . . . . . . . . . . . . . . . 164
8 GroupWise 6.5 Windows Client User Guide
Page 9

Printing Calendars . . . . . . . . . . . . . . . . . . . . . . . . . . . . . . . . . . . . . . . . . . . . . . . . . 164
Creating Rules . . . . . . . . . . . . . . . . . . . . . . . . . . . . . . . . . . . . . . . . . . . . . . . . . . . . . 165
Actions a Rule Can Perform . . . . . . . . . . . . . . . . . . . . . . . . . . . . . . . . . . . . . . . . . . . . 165
Events That Trigger a Rule . . . . . . . . . . . . . . . . . . . . . . . . . . . . . . . . . . . . . . . . . . . . . 167
Creating a Rule . . . . . . . . . . . . . . . . . . . . . . . . . . . . . . . . . . . . . . . . . . . . . . . . . . . 167
Creating a Vacation Rule or Auto Reply . . . . . . . . . . . . . . . . . . . . . . . . . . . . . . . . . . . . . . 168
Creating a Rule to Forward All Mail to a Private Mail Account . . . . . . . . . . . . . . . . . . . . . . . . . . . 169
Copying a Rule to Make a New Rule . . . . . . . . . . . . . . . . . . . . . . . . . . . . . . . . . . . . . . . . 169
Editing a Rule . . . . . . . . . . . . . . . . . . . . . . . . . . . . . . . . . . . . . . . . . . . . . . . . . . . . 170
Deleting a Rule . . . . . . . . . . . . . . . . . . . . . . . . . . . . . . . . . . . . . . . . . . . . . . . . . . . 170
Limiting Items Affected by a Rule . . . . . . . . . . . . . . . . . . . . . . . . . . . . . . . . . . . . . . . . . . 170
Running a Rule Manually . . . . . . . . . . . . . . . . . . . . . . . . . . . . . . . . . . . . . . . . . . . . . . 170
Enabling or Disabling a Rule . . . . . . . . . . . . . . . . . . . . . . . . . . . . . . . . . . . . . . . . . . . . 171
Giving Other People Access to Your Mailbox . . . . . . . . . . . . . . . . . . . . . . . . . . . . . . . . . . . . . 171
Receiving Proxy Rights . . . . . . . . . . . . . . . . . . . . . . . . . . . . . . . . . . . . . . . . . . . . . . . 171
Assigning Proxy Rights to Another User . . . . . . . . . . . . . . . . . . . . . . . . . . . . . . . . . . . . . . 172
Adding and Removing Proxy Names and Rights in Your Access List . . . . . . . . . . . . . . . . . . . . . . . 172
Managing Someone Else's Mailbox or Calendar . . . . . . . . . . . . . . . . . . . . . . . . . . . . . . . . . . 173
Adding and Removing Users in Your Proxy List . . . . . . . . . . . . . . . . . . . . . . . . . . . . . . . . . . 174
Marking an Item Private. . . . . . . . . . . . . . . . . . . . . . . . . . . . . . . . . . . . . . . . . . . . . . . 174
Saving Items in Your Mailbox. . . . . . . . . . . . . . . . . . . . . . . . . . . . . . . . . . . . . . . . . . . . . . 174
Saving an Item to Disk or to a GroupWise Library . . . . . . . . . . . . . . . . . . . . . . . . . . . . . . . . . 175
Saving Status Information. . . . . . . . . . . . . . . . . . . . . . . . . . . . . . . . . . . . . . . . . . . . . . 175
Saving an Unfinished Item . . . . . . . . . . . . . . . . . . . . . . . . . . . . . . . . . . . . . . . . . . . . . 176
Owning Resources . . . . . . . . . . . . . . . . . . . . . . . . . . . . . . . . . . . . . . . . . . . . . . . . . . . 176
Accepting and Declining Resource Requests. . . . . . . . . . . . . . . . . . . . . . . . . . . . . . . . . . . . 176
Receiving Notification for Another User or Resource . . . . . . . . . . . . . . . . . . . . . . . . . . . . . . . . 177
Creating a Rule for a Resource . . . . . . . . . . . . . . . . . . . . . . . . . . . . . . . . . . . . . . . . . . . 177
Opening and Emptying the Trash . . . . . . . . . . . . . . . . . . . . . . . . . . . . . . . . . . . . . . . . . . . 178
Opening Your Trash . . . . . . . . . . . . . . . . . . . . . . . . . . . . . . . . . . . . . . . . . . . . . . . . 178
Undeleting an Item in the Trash. . . . . . . . . . . . . . . . . . . . . . . . . . . . . . . . . . . . . . . . . . . 178
Saving an Item That Is in Your Trash . . . . . . . . . . . . . . . . . . . . . . . . . . . . . . . . . . . . . . . . 178
Emptying the Trash . . . . . . . . . . . . . . . . . . . . . . . . . . . . . . . . . . . . . . . . . . . . . . . . . 178
Emptying Selected Items from the Trash . . . . . . . . . . . . . . . . . . . . . . . . . . . . . . . . . . . . . . 179
Emptying the Trash Automatically . . . . . . . . . . . . . . . . . . . . . . . . . . . . . . . . . . . . . . . . . 179
Deleting Items from Your Mailbox . . . . . . . . . . . . . . . . . . . . . . . . . . . . . . . . . . . . . . . . . . . 179
Deleting an Item from Your Mailbox. . . . . . . . . . . . . . . . . . . . . . . . . . . . . . . . . . . . . . . . . 180
Deleting and Emptying Items from Your Mailbox . . . . . . . . . . . . . . . . . . . . . . . . . . . . . . . . . . 180
Backing Up Your Mailbox. . . . . . . . . . . . . . . . . . . . . . . . . . . . . . . . . . . . . . . . . . . . . . . . 180
Backing Up Your Mailbox . . . . . . . . . . . . . . . . . . . . . . . . . . . . . . . . . . . . . . . . . . . . . . 180
Restoring Items from Backup . . . . . . . . . . . . . . . . . . . . . . . . . . . . . . . . . . . . . . . . . . . . 181
Finding Items . . . . . . . . . . . . . . . . . . . . . . . . . . . . . . . . . . . . . . . . . . . . . . . . . . . . . . 181
Finding an Item By Example . . . . . . . . . . . . . . . . . . . . . . . . . . . . . . . . . . . . . . . . . . . . 182
Finding an Item Using Search Criteria . . . . . . . . . . . . . . . . . . . . . . . . . . . . . . . . . . . . . . . 182
Saving the Results of a Find . . . . . . . . . . . . . . . . . . . . . . . . . . . . . . . . . . . . . . . . . . . . 184
Finding a Document and Creating a Reference to It in Your Mailbox. . . . . . . . . . . . . . . . . . . . . . . . 185
Finding an Item Using Advanced Find . . . . . . . . . . . . . . . . . . . . . . . . . . . . . . . . . . . . . . . 185
Narrowing an Advanced Find Using Filter Operators . . . . . . . . . . . . . . . . . . . . . . . . . . . . . . . . 186
Finding Text in Items . . . . . . . . . . . . . . . . . . . . . . . . . . . . . . . . . . . . . . . . . . . . . . . . . . 186
Filtering Items. . . . . . . . . . . . . . . . . . . . . . . . . . . . . . . . . . . . . . . . . . . . . . . . . . . . . . 187
Creating a New Filter . . . . . . . . . . . . . . . . . . . . . . . . . . . . . . . . . . . . . . . . . . . . . . . . 187
Creating a New Filter Using Advanced Filter . . . . . . . . . . . . . . . . . . . . . . . . . . . . . . . . . . . . 189
Selecting a Filter . . . . . . . . . . . . . . . . . . . . . . . . . . . . . . . . . . . . . . . . . . . . . . . . . . 190
Clearing a Filter . . . . . . . . . . . . . . . . . . . . . . . . . . . . . . . . . . . . . . . . . . . . . . . . . . . 190
Deleting a Filter . . . . . . . . . . . . . . . . . . . . . . . . . . . . . . . . . . . . . . . . . . . . . . . . . . . 190
Contents 9
Page 10

Narrowing Your Filter . . . . . . . . . . . . . . . . . . . . . . . . . . . . . . . . . . . . . . . . . . . . . . . . 190
Using Filter and Rule Wildcard Characters and Switches . . . . . . . . . . . . . . . . . . . . . . . . . . . . . . 191
Using Filter and Rule Operators . . . . . . . . . . . . . . . . . . . . . . . . . . . . . . . . . . . . . . . . . . . 192
Understanding Filter and Rule Fields . . . . . . . . . . . . . . . . . . . . . . . . . . . . . . . . . . . . . . . . 193
Using the Columns in Your Mailbox . . . . . . . . . . . . . . . . . . . . . . . . . . . . . . . . . . . . . . . . . . . 197
Changing Columns in Your Mailbox . . . . . . . . . . . . . . . . . . . . . . . . . . . . . . . . . . . . . . . . . 197
Sorting Items in Your Mailbox by Column . . . . . . . . . . . . . . . . . . . . . . . . . . . . . . . . . . . . . . 198
Repairing Your Mailbox . . . . . . . . . . . . . . . . . . . . . . . . . . . . . . . . . . . . . . . . . . . . . . . . . 198
About Your GroupWise Mailbox . . . . . . . . . . . . . . . . . . . . . . . . . . . . . . . . . . . . . . . . . . . 199
Analyze/Fix Databases . . . . . . . . . . . . . . . . . . . . . . . . . . . . . . . . . . . . . . . . . . . . . . . 199
Structural Rebuild . . . . . . . . . . . . . . . . . . . . . . . . . . . . . . . . . . . . . . . . . . . . . . . . . . 200
8 Using the Address Book 203
Understanding Address Books . . . . . . . . . . . . . . . . . . . . . . . . . . . . . . . . . . . . . . . . . . . . . 203
Using the Address Book, the Address Selector, and the Contacts Folder. . . . . . . . . . . . . . . . . . . . . . 204
System Address Book . . . . . . . . . . . . . . . . . . . . . . . . . . . . . . . . . . . . . . . . . . . . . . . . 206
Frequent Contacts Address Book . . . . . . . . . . . . . . . . . . . . . . . . . . . . . . . . . . . . . . . . . . 207
Personal Address Books. . . . . . . . . . . . . . . . . . . . . . . . . . . . . . . . . . . . . . . . . . . . . . . 207
LDAP Address Books . . . . . . . . . . . . . . . . . . . . . . . . . . . . . . . . . . . . . . . . . . . . . . . . 207
Shared Address Books . . . . . . . . . . . . . . . . . . . . . . . . . . . . . . . . . . . . . . . . . . . . . . . 208
Quick Info . . . . . . . . . . . . . . . . . . . . . . . . . . . . . . . . . . . . . . . . . . . . . . . . . . . . . . . . 208
Searching for Users and Resources. . . . . . . . . . . . . . . . . . . . . . . . . . . . . . . . . . . . . . . . . . . 209
Searching for User, Resource, Organization, and Group Addresses . . . . . . . . . . . . . . . . . . . . . . . . 210
Using Filters to Narrow an Address Search . . . . . . . . . . . . . . . . . . . . . . . . . . . . . . . . . . . . . 210
Defining Name Completion Search Order . . . . . . . . . . . . . . . . . . . . . . . . . . . . . . . . . . . . . . 211
Using LDAP in the Address Book . . . . . . . . . . . . . . . . . . . . . . . . . . . . . . . . . . . . . . . . . . . . 211
Adding a Directory Service to an Address Book . . . . . . . . . . . . . . . . . . . . . . . . . . . . . . . . . . . 212
Searching for a Person Through a Directory Service . . . . . . . . . . . . . . . . . . . . . . . . . . . . . . . . 212
Establishing a Secure Connection to a Directory Service . . . . . . . . . . . . . . . . . . . . . . . . . . . . . . 213
Modifying the Properties of a Directory Service . . . . . . . . . . . . . . . . . . . . . . . . . . . . . . . . . . . 213
Specifying the Search Criteria a Directory Service Uses . . . . . . . . . . . . . . . . . . . . . . . . . . . . . . 213
Changing the Length of Time a Directory Service Searches . . . . . . . . . . . . . . . . . . . . . . . . . . . . 214
Using Groups to Address Items . . . . . . . . . . . . . . . . . . . . . . . . . . . . . . . . . . . . . . . . . . . . . 214
Creating and Saving a Personal Group . . . . . . . . . . . . . . . . . . . . . . . . . . . . . . . . . . . . . . . 214
Addressing Items to a Group . . . . . . . . . . . . . . . . . . . . . . . . . . . . . . . . . . . . . . . . . . . . 216
Adding and Removing Contacts from a Personal Group . . . . . . . . . . . . . . . . . . . . . . . . . . . . . . 217
Viewing Group Information . . . . . . . . . . . . . . . . . . . . . . . . . . . . . . . . . . . . . . . . . . . . . 218
Importing and Exporting Addresses and Address Books . . . . . . . . . . . . . . . . . . . . . . . . . . . . . . . . 218
Importing Addresses into a Personal Address Book. . . . . . . . . . . . . . . . . . . . . . . . . . . . . . . . . 219
Exporting Addresses from the Address Book . . . . . . . . . . . . . . . . . . . . . . . . . . . . . . . . . . . . 219
Importing Third-Party Address Books . . . . . . . . . . . . . . . . . . . . . . . . . . . . . . . . . . . . . . . . 219
Changing How Information Displays in the Address Book . . . . . . . . . . . . . . . . . . . . . . . . . . . . . . . 221
Opening and Closing Address Books . . . . . . . . . . . . . . . . . . . . . . . . . . . . . . . . . . . . . . . . 222
Specifying the Columns to Display in an Address Book . . . . . . . . . . . . . . . . . . . . . . . . . . . . . . . 222
Sorting an Address Book . . . . . . . . . . . . . . . . . . . . . . . . . . . . . . . . . . . . . . . . . . . . . . 223
Viewing Links to the System Address Book . . . . . . . . . . . . . . . . . . . . . . . . . . . . . . . . . . . . . 223
Choosing the Display Format of Names . . . . . . . . . . . . . . . . . . . . . . . . . . . . . . . . . . . . . . . 223
Printing Labels and Lists from the Address Book . . . . . . . . . . . . . . . . . . . . . . . . . . . . . . . . . . . . 224
Printing Labels . . . . . . . . . . . . . . . . . . . . . . . . . . . . . . . . . . . . . . . . . . . . . . . . . . . . 224
Printing Lists . . . . . . . . . . . . . . . . . . . . . . . . . . . . . . . . . . . . . . . . . . . . . . . . . . . . . 225
Using the Address Selector and Address Book to Send Messages. . . . . . . . . . . . . . . . . . . . . . . . . . . 226
Using the Address Selector to Address an Item . . . . . . . . . . . . . . . . . . . . . . . . . . . . . . . . . . . 226
Sending Mail from the Address Book . . . . . . . . . . . . . . . . . . . . . . . . . . . . . . . . . . . . . . . . 227
Using Frequent Contacts . . . . . . . . . . . . . . . . . . . . . . . . . . . . . . . . . . . . . . . . . . . . . . . . 227
Using Frequent Contacts to Address Items . . . . . . . . . . . . . . . . . . . . . . . . . . . . .
Setting Frequent Contacts Options . . . . . . . . . . . . . . . . . . . . . . . . . . . . . . . . . . . . . . . . . 228
. . . . . . . . 228
10 GroupWise 6.5 Windows Client User Guide
Page 11

Using Predefined Filters for the Frequent Contacts Address Book . . . . . . . . . . . . . . . . . . . . . . . . . 229
Creating Personal Address Books . . . . . . . . . . . . . . . . . . . . . . . . . . . . . . . . . . . . . . . . . . . 229
Creating a Personal Address Book . . . . . . . . . . . . . . . . . . . . . . . . . . . . . . . . . . . . . . . . . 229
Deleting a Personal Address Book . . . . . . . . . . . . . . . . . . . . . . . . . . . . . . . . . . . . . . . . . 230
Editing a Personal Address Book . . . . . . . . . . . . . . . . . . . . . . . . . . . . . . . . . . . . . . . . . . 231
Synchronizing Address Book Entries . . . . . . . . . . . . . . . . . . . . . . . . . . . . . . . . . . . . . . . . 232
Setting Personal Address Book Properties . . . . . . . . . . . . . . . . . . . . . . . . . . . . . . . . . . . . . . . 233
Viewing an Address Book's Properties . . . . . . . . . . . . . . . . . . . . . . . . . . . . . . . . . . . . . . . 233
Sharing an Address Book with Another User . . . . . . . . . . . . . . . . . . . . . . . . . . . . . . . . . . . . 234
Viewing Groups, Organizations, or Resources in the Address Book . . . . . . . . . . . . . . . . . . . . . . . . . . 235
Advanced Address Book Options . . . . . . . . . . . . . . . . . . . . . . . . . . . . . . . . . . . . . . . . . . . 236
Defining Copy Options . . . . . . . . . . . . . . . . . . . . . . . . . . . . . . . . . . . . . . . . . . . . . . . 236
Changing Your MAPI Configuration. . . . . . . . . . . . . . . . . . . . . . . . . . . . . . . . . . . . . . . . . 237
9 Using Remote Mode 239
Remote Password . . . . . . . . . . . . . . . . . . . . . . . . . . . . . . . . . . . . . . . . . . . . . . . . . . . 240
Remote Requests . . . . . . . . . . . . . . . . . . . . . . . . . . . . . . . . . . . . . . . . . . . . . . . . . . . 240
Remote Connection Types . . . . . . . . . . . . . . . . . . . . . . . . . . . . . . . . . . . . . . . . . . . . . . . 240
If Your Remote Connection Is Expensive . . . . . . . . . . . . . . . . . . . . . . . . . . . . . . . . . . . . . . 240
Remote Features . . . . . . . . . . . . . . . . . . . . . . . . . . . . . . . . . . . . . . . . . . . . . . . . . . . . 240
Smart Docking . . . . . . . . . . . . . . . . . . . . . . . . . . . . . . . . . . . . . . . . . . . . . . . . . . . . . 240
Preparing to Use Remote. . . . . . . . . . . . . . . . . . . . . . . . . . . . . . . . . . . . . . . . . . . . . . . . 241
Setting Up Your Remote Mailbox . . . . . . . . . . . . . . . . . . . . . . . . . . . . . . . . . . . . . . . . . . 241
Setting Up Multiple Remote Mailboxes on a Shared Computer . . . . . . . . . . . . . . . . . . . . . . . . . . 242
Specifying Remote Properties . . . . . . . . . . . . . . . . . . . . . . . . . . . . . . . . . . . . . . . . . . . 243
Sending and Retrieving Items in Remote Mode . . . . . . . . . . . . . . . . . . . . . . . . . . . . . . . . . . . . 245
Downloading Items, Rules, Addresses, and Documents to Your Remote Mailbox . . . . . . . . . . . . . . . . . 245
Sending Items in Remote Mode . . . . . . . . . . . . . . . . . . . . . . . . . . . . . . . . . . . . . . . . . . 246
Viewing Pending Requests . . . . . . . . . . . . . . . . . . . . . . . . . . . . . . . . . . . . . . . . . . . . . 247
Retrieving Items That Were Not Completely Downloaded . . . . . . . . . . . . . . . . . . . . . . . . . . . . . 247
Using Busy Search in Remote Mode . . . . . . . . . . . . . . . . . . . . . . . . . . . . . . . . . . . . . . . . 248
Filtering the System Address Book for Your Remote Mailbox . . . . . . . . . . . . . . . . . . . . . . . . . . . 249
Deleting Items from Your Remote Mailbox . . . . . . . . . . . . . . . . . . . . . . . . . . . . . . . . . . . . . 250
Configuring Your Remote Connections. . . . . . . . . . . . . . . . . . . . . . . . . . . . . . . . . . . . . . . . . 250
Connections. . . . . . . . . . . . . . . . . . . . . . . . . . . . . . . . . . . . . . . . . . . . . . . . . . . . . 251
Creating a Modem Connection . . . . . . . . . . . . . . . . . . . . . . . . . . . . . . . . . . . . . . . . . . . 252
Creating a TCP/IP Connection . . . . . . . . . . . . . . . . . . . . . . . . . . . . . . . . . . . . . . . . . . . 253
Creating a Network Connection. . . . . . . . . . . . . . . . . . . . . . . . . . . . . . . . . . . . . . . . . . . 254
Copying a Remote Connection . . . . . . . . . . . . . . . . . . . . . . . . . . . . . . . . . . . . . . . . . . . 254
Editing a Remote Connection . . . . . . . . . . . . . . . . . . . . . . . . . . . . . . . . . . . . . . . . . . . . 254
Deleting a Remote Connection . . . . . . . . . . . . . . . . . . . . . . . . . . . . . . . . . . . . . . . . . . . 255
Specifying Your Remote Location . . . . . . . . . . . . . . . . . . . . . . . . . . . . . . . . . . . . . . . . . 255
Remote (Offline) Mode (v6.5 for NNLS 1.0) . . . . . . . . . . . . . . . . . . . . . . . . . . . . . . . . . . . . . . 255
Working Offline . . . . . . . . . . . . . . . . . . . . . . . . . . . . . . . . . . . . . . . . . . . . . . . . . . . 256
10 Using Caching Mode 257
Caching Features. . . . . . . . . . . . . . . . . . . . . . . . . . . . . . . . . . . . . . . . . . . . . . . . . . . . 258
Setting Up Your Caching Mailbox . . . . . . . . . . . . . . . . . . . . . . . . . . . . . . . . . . . . . . . . . . . 258
Synchronizing Your Caching Mailbox with Your Online Mailbox . . . . . . . . . . . . . . . . . . . . . . . . . . . . 258
Deleting Items in Your Caching Mailbox . . . . . . . . . . . . . . . . . . . . . . . . . . . . . . . . . . . . . . . . 259
Opening a Different Version of a Document in Your Caching Mailbox . . . . . . . . . . . . . . . . . . . . . . . . . 259
Viewing Pending Requests . . . . . . . . . . . . . . . . . . . . . . . . . . . . . . . . . . . . . . . . . . . . . . 260
Connection Status . . . . . . . . . . . . . . . . . . . . . . . . . . . . . . . . . . . . . . . . . . . . . . . . . . . 260
11 Using Newsgroups 261
Adding a News Account . . . . . . . . . . . . . . . . . . . . . . . . . . . . . . . . . . . . . . . . . . . . . . . . 261
Contents 11
Page 12

Deleting a News Account . . . . . . . . . . . . . . . . . . . . . . . . . . . . . . . . . . . . . . . . . . . . . . . . 262
Subscribing to a Newsgroup. . . . . . . . . . . . . . . . . . . . . . . . . . . . . . . . . . . . . . . . . . . . . . . 262
Posting a New Discussion to a Newsgroup . . . . . . . . . . . . . . . . . . . . . . . . . . . . . . . . . . . . . . . 263
Replying to a Message in a Newsgroup . . . . . . . . . . . . . . . . . . . . . . . . . . . . . . . . . . . . . . . . . 263
Adding a Signature to All Newsgroup Items You Send . . . . . . . . . . . . . . . . . . . . . . . . . . . . . . . . . 264
Changing the Display Name for Newsgroup Postings. . . . . . . . . . . . . . . . . . . . . . . . . . . . . . . . . . 264
Updating the Local Newsgroup Folder . . . . . . . . . . . . . . . . . . . . . . . . . . . . . . . . . . . . . . . . . 264
Deleting an Item in a Newsgroup from Your GroupWise Item List . . . . . . . . . . . . . . . . . . . . . . . . . . . 265
Collapsing or Expanding All Threads in a Newsgroup . . . . . . . . . . . . . . . . . . . . . . . . . . . . . . . . . 265
Performing a Search on a Newsgroup Server. . . . . . . . . . . . . . . . . . . . . . . . . . . . . . . . . . . . . . 265
Marking Items in a Newsgroup According to Your Interests. . . . . . . . . . . . . . . . . . . . . . . . . . . . . . . 265
Indenting Newsgroup Reply Text with a Specific Character. . . . . . . . . . . . . . . . . . . . . . . . . . . . . . . 265
Specifying Download Settings for Individual Newsgroups. . . . . . . . . . . . . . . . . . . . . . . . . . . . . . . . 266
12 Sending Secure Message (S/MIME) 267
Secure Message Concepts . . . . . . . . . . . . . . . . . . . . . . . . . . . . . . . . . . . . . . . . . . . . . . . 267
Digitally Signing or Encrypting an Item . . . . . . . . . . . . . . . . . . . . . . . . . . . . . . . . . . . . . . . . . 269
Digitally Signing or Encrypting All Items. . . . . . . . . . . . . . . . . . . . . . . . . . . . . . . . . . . . . . . . . 269
Obtaining a Security Certificate from a Certificate Authority . . . . . . . . . . . . . . . . . . . . . . . . . . . . . . 270
Selecting a Security Service Provider . . . . . . . . . . . . . . . . . . . . . . . . . . . . . . . . . . . . . . . . . . 271
Selecting a Security Certificate for Digitally Signing Items . . . . . . . . . . . . . . . . . . . . . . . . . . . . . . . 271
Searching for Recipient Encryption Certificates Using LDAP . . . . . . . . . . . . . . . . . . . . . . . . . . . . . . 271
Selecting the Method Used for Encrypting Items . . . . . . . . . . . . . . . . . . . . . . . . . . . . . . . . . . . . 272
Checking If the Digital Signature of an Item Was Verified. . . . . . . . . . . . . . . . . . . . . . . . . . . . . . . . 273
Viewing Security Certificates You Have Received and Changing the Trust. . . . . . . . . . . . . . . . . . . . . . . 273
Viewing Your Own Security Certificates. . . . . . . . . . . . . . . . . . . . . . . . . . . . . . . . . . . . . . . . . 273
Importing or Exporting Security Certificates . . . . . . . . . . . . . . . . . . . . . . . . . . . . . . . . . . . . . . . 274
13 Creating and Working with Documents 275
Managing Your Documents in GroupWise . . . . . . . . . . . . . . . . . . . . . . . . . . . . . . . . . . . . . . . 275
Storing Documents in Libraries . . . . . . . . . . . . . . . . . . . . . . . . . . . . . . . . . . . . . . . . . . . 276
Understanding Document References. . . . . . . . . . . . . . . . . . . . . . . . . . . . . . . . . . . . . . . . 277
Specifying Document Properties. . . . . . . . . . . . . . . . . . . . . . . . . . . . . . . . . . . . . . . . . . . 278
Creating Documents. . . . . . . . . . . . . . . . . . . . . . . . . . . . . . . . . . . . . . . . . . . . . . . . . . . 279
Creating a Document Using an Application's Template . . . . . . . . . . . . . . . . . . . . . . . . . . . . . . . 280
Creating a Document Using a GroupWise Template . . . . . . . . . . . . . . . . . . . . . . . . . . . . . . . . 280
Creating a Document Using a File as a Template . . . . . . . . . . . . . . . . . . . . . . . . . . . . . . . . . . 281
Making Any Document a Template . . . . . . . . . . . . . . . . . . . . . . . . . . . . . . . . . . . . . . . . . 282
Creating a Reference to a Document . . . . . . . . . . . . . . . . . . . . . . . . . . . . . . . . . . . . . . . . 282
Organizing Your Documents . . . . . . . . . . . . . . . . . . . . . . . . . . . . . . . . . . . . . . . . . . . . . . 282
Specifying When Document References Are Added to the Documents Folder . . . . . . . . . . . . . . . . . . . 283
Changing the Maximum Number of References in the Documents Folder . . . . . . . . . . . . . . . . . . . . . 284
Importing Documents into a GroupWise Library. . . . . . . . . . . . . . . . . . . . . . . . . . . . . . . . . . . . . 284
Specifying Files to Import . . . . . . . . . . . . . . . . . . . . . . . . . . . . . . . . . . . . . . . . . . . . . . 285
Choosing an Import Method . . . . . . . . . . . . . . . . . . . . . . . . . . . . . . . . . . . . . . . . . . . . . 285
Importing Documents Using Quick Import . . . . . . . . . . . . . . . . . . . . . . . . . . . . . . . . . . . . . . 285
Importing Documents Using Custom Import . . . . . . . . . . . . . . . . . . . . . . . . . . . . . . . . . . . . . 286
Sharing Documents . . . . . . . . . . . . . . . . . . . . . . . . . . . . . . . . . . . . . . . . . . . . . . . . . . . 289
Specifying Users Who Can Share the Document . . . . . . . . . . . . . . . . . . . . . . . . . . . . . . . . . . 289
Specifying Default Sharing Rights for Documents . . . . . . . . . . . . . . . . . . . . . . . . . . . . . . . . . . 290
Specifying Users' Rights to the Document. . . . . . . . . . . . . . . . . . . . . . . . . . . . . . . . . . . . . . 290
Giving a User Rights for All Document Versions. . . . . . . . . . . . . . . . . . . . . . . . . . . . . . . . . . . 290
Giving a User Rights to a Specific Document Version. . . . . . . . . . . . . . . . . . . . . . . . . . . . . . . . 291
Giving Users Rights to Modify the Sharing Settings for a Document . . . . . . . . . . . . . . . . . . . . . . . . 292
Preventing Other Users from Accessing Your Document . . . . . . . . . . . . . . . . . . . . . . . . . . . . . . 292
Publishing Documents to the Web with WebPublisher . . . . . . . . . . . . . . . . . . . . . . . . . . . . . . . . . 292
Publishing a Document to the Web . . . . . . . . . . . . . . . . . . . . . . . . . . . . . . . . . . . . . . . . . 294
12 GroupWise 6.5 Windows Client User Guide
Page 13

Unpublishing a Document from the Web . . . . . . . . . . . . . . . . . . . . . . . . . . . . . . . . . . . . . . 295
Viewing the History of a Document . . . . . . . . . . . . . . . . . . . . . . . . . . . . . . . . . . . . . . . . . . . 295
Viewing the Activity Log for Deleted Documents . . . . . . . . . . . . . . . . . . . . . . . . . . . . . . . . . . 295
Viewing the Activity of a Document . . . . . . . . . . . . . . . . . . . . . . . . . . . . . . . . . . . . . . . . . 295
Viewing Who Has a Document Open or Checked Out . . . . . . . . . . . . . . . . . . . . . . . . . . . . . . . 296
Checking Out Documents . . . . . . . . . . . . . . . . . . . . . . . . . . . . . . . . . . . . . . . . . . . . . . . 296
Checking Out a Document . . . . . . . . . . . . . . . . . . . . . . . . . . . . . . . . . . . . . . . . . . . . . 297
Checking Out Multiple Documents . . . . . . . . . . . . . . . . . . . . . . . . . . . . . . . . . . . . . . . . . 297
Viewing All the Documents You Have Checked Out . . . . . . . . . . . . . . . . . . . . . . . . . . . . . . . . 298
Updating a Checked-Out Document Without Checking It In . . . . . . . . . . . . . . . . . . . . . . . . . . . . 298
Checking In Documents . . . . . . . . . . . . . . . . . . . . . . . . . . . . . . . . . . . . . . . . . . . . . . . . 299
Checking in a Document and Leaving a Copy in the Check-Out Location . . . . . . . . . . . . . . . . . . . . . 300
Checking in an Unchanged Document . . . . . . . . . . . . . . . . . . . . . . . . . . . . . . . . . . . . . . . 301
Checking in a Document and Deleting It from the Check-Out Location. . . . . . . . . . . . . . . . . . . . . . . 301
Checking In a Document and Making It a New Version. . . . . . . . . . . . . . . . . . . . . . . . . . . . . . . 301
Deleting Documents . . . . . . . . . . . . . . . . . . . . . . . . . . . . . . . . . . . . . . . . . . . . . . . . . . 301
Deleting Groups of Documents . . . . . . . . . . . . . . . . . . . . . . . . . . . . . . . . . . . . . . . . . . . 302
Deleting a Document Reference from Your Mailbox . . . . . . . . . . . . . . . . . . . . . . . . . . . . . . . . 302
Deleting a Specific Version of a Document . . . . . . . . . . . . . . . . . . . . . . . . . . . . . . . . . . . . . 303
Deleting All Versions of a Document . . . . . . . . . . . . . . . . . . . . . . . . . . . . . . . . . . . . . . . . 303
Copying Documents . . . . . . . . . . . . . . . . . . . . . . . . . . . . . . . . . . . . . . . . . . . . . . . . . . 303
Copying a Document . . . . . . . . . . . . . . . . . . . . . . . . . . . . . . . . . . . . . . . . . . . . . . . . 304
Copying a Document to Another Library . . . . . . . . . . . . . . . . . . . . . . . . . . . . . . . . . . . . . . 304
Saving Documents . . . . . . . . . . . . . . . . . . . . . . . . . . . . . . . . . . . . . . . . . . . . . . . . . . . 304
Saving Items as Documents . . . . . . . . . . . . . . . . . . . . . . . . . . . . . . . . . . . . . . . . . . . . 304
Saving Changes to a Document's Contents . . . . . . . . . . . . . . . . . . . . . . . . . . . . . . . . . . . . 305
Saving Documents Outside of the GroupWise Library . . . . . . . . . . . . . . . . . . . . . . . . . . . . . . . 305
Opening Documents . . . . . . . . . . . . . . . . . . . . . . . . . . . . . . . . . . . . . . . . . . . . . . . . . . 306
Opening a Document . . . . . . . . . . . . . . . . . . . . . . . . . . . . . . . . . . . . . . . . . . . . . . . . 307
Opening Multiple Versions of a Document . . . . . . . . . . . . . . . . . . . . . . . . . . . . . . . . . . . . . 307
Storing Multiple Versions of a Document . . . . . . . . . . . . . . . . . . . . . . . . . . . . . . . . . . . . . . . . 307
Creating a New Version of a Document. . . . . . . . . . . . . . . . . . . . . . . . . . . . . . . . . . . . . . . 308
Viewing Version Information for a Document . . . . . . . . . . . . . . . . . . . . . . . . . . . . . . . . . . . . 308
Specifying the Official Version of a Document . . . . . . . . . . . . . . . . . . . . . . . . . . . . . . . . . . . 309
Managing Groups of Documents . . . . . . . . . . . . . . . . . . . . . . . . . . . . . . . . . . . . . . . . . . . . 309
Preparing for a Mass Operation. . . . . . . . . . . . . . . . . . . . . . . . . . . . . . . . . . . . . . . . . . . 310
Selecting Documents for the Mass Operation . . . . . . . . . . . . . . . . . . . . . . . . . . . . . . . . . . . 310
Acting as the Librarian . . . . . . . . . . . . . . . . . . . . . . . . . . . . . . . . . . . . . . . . . . . . . . . 311
Copying a Group of Documents . . . . . . . . . . . . . . . . . . . . . . . . . . . . . . . . . . . . . . . . . . 312
Moving a Group of Documents . . . . . . . . . . . . . . . . . . . . . . . . . . . . . . . . . . . . . . . . . . . 315
Changing the Properties of a Group of Documents . . . . . . . . . . . . . . . . . . . . . . . . . . .
Changing Sharing for a Group of Documents. . . . . . . . . . . . . . . . . . . . . . . . . . . . . . . . . . . . 322
Deleting a Group of Documents . . . . . . . . . . . . . . . . . . . . . . . . . . . . . . . . . . . . . . . . . . 326
Viewing Documents When Your Network or GroupWise Is Unavailable . . . . . . . . . . . . . . . . . . . . . . . . 328
Enabling Document Echoing . . . . . . . . . . . . . . . . . . . . . . . . . . . . . . . . . . . . . . . . . . . . 329
Deleting Unneeded Documents from Your Remote Library. . . . . . . . . . . . . . . . . . . . . . . . . . . . . 330
Integrating GroupWise with Your Applications . . . . . . . . . . . . . . . . . . . . . . . . . . . . . . . . . . . . . 330
Integrating Applications During Setup . . . . . . . . . . . . . . . . . . . . . . . . . . . . . . . . . . . . . . . 331
Integrating Applications After Setup . . . . . . . . . . . . . . . . . . . . . . . . . . . . . . . . . . . . . . . . 331
Turning Off Integrations . . . . . . . . . . . . . . . . . . . . . . . . . . . . . . . . . . . . . . . . . . . . . . . 331
Turning On Integrations . . . . . . . . . . . . . . . . . . . . . . . . . . . . . . . . . . . . . . . . . . . . . . . 332
Using Non-Integrated Applications . . . . . . . . . . . . . . . . . . . . . . . . . . . . . . . . . . . . . . . . . 333
Returning Documents to the Library . . . . . . . . . . . . . . . . . . . . . . . . . . . . . . . . . . . . . . . . . . 334
Using Reset Document Status . . . . . . . . . . . . . . . . . . . . . . . . . . . . . . . . . . . . . . . . . . . 335
Using Reset Document Status in Remote/Caching Mode . . . . . . . . . . . . . . . . . . . . . . . . . . . . . 335
. . . . . . 318
Contents 13
Page 14

Using the Unreturned Documents Dialog Box . . . . . . . . . . . . . . . . . . . . . . . . . . . . . . . . . . . . 336
Replacing a Document with a File from Backup. . . . . . . . . . . . . . . . . . . . . . . . . . . . . . . . . . . . . 336
14 Customizing GroupWise 339
Delaying Delivery of an Item. . . . . . . . . . . . . . . . . . . . . . . . . . . . . . . . . . . . . . . . . . . . . . . 339
Getting a Return Receipt for Items You Send . . . . . . . . . . . . . . . . . . . . . . . . . . . . . . . . . . . . . . 340
Requesting a Reply for All Items You Send . . . . . . . . . . . . . . . . . . . . . . . . . . . . . . . . . . . . . . . 341
Specifying Where Archived Items Are Stored . . . . . . . . . . . . . . . . . . . . . . . . . . . . . . . . . . . . . 341
Setting the File Attachment Behavior . . . . . . . . . . . . . . . . . . . . . . . . . . . . . . . . . . . . . . . . . . 342
Changing the Priority of Items You Send . . . . . . . . . . . . . . . . . . . . . . . . . . . . . . . . . . . . . . . . 342
Customizing Headers . . . . . . . . . . . . . . . . . . . . . . . . . . . . . . . . . . . . . . . . . . . . . . . . . . 342
Changing the GroupWise Interface Language . . . . . . . . . . . . . . . . . . . . . . . . . . . . . . . . . . . . . 343
Changing Your Default Views . . . . . . . . . . . . . . . . . . . . . . . . . . . . . . . . . . . . . . . . . . . . . . 343
Specifying How Long Before an Event an Alarm Sounds . . . . . . . . . . . . . . . . . . . . . . . . . . . . . . . . 344
Automatically Spell-Checking Every Message You Send . . . . . . . . . . . . . . . . . . . . . . . . . . . . . . . . 345
Customizing Your Toolbar. . . . . . . . . . . . . . . . . . . . . . . . . . . . . . . . . . . . . . . . . . . . . . . . 345
Customizing Your Library Settings . . . . . . . . . . . . . . . . . . . . . . . . . . . . . . . . . . . . . . . . . . . 346
Setting the Default Library . . . . . . . . . . . . . . . . . . . . . . . . . . . . . . . . . . . . . . . . . . . . . 347
Using Startup Options . . . . . . . . . . . . . . . . . . . . . . . . . . . . . . . . . . . . . . . . . . . . . . . . . . 347
Using a GroupWise Startup Option . . . . . . . . . . . . . . . . . . . . . . . . . . . . . . . . . . . . . . . . . 349
15 GroupWise Frequently Asked Questions 351
A Documentation Updates 353
September 19, 2005 (GroupWise 6.5 SP5) . . . . . . . . . . . . . . . . . . . . . . . . . . . . . . . . . . . . . . . 353
February 28, 2005 (GroupWise 6.5 SP4) . . . . . . . . . . . . . . . . . . . . . . . . . . . . . . . . . . . . . . . . 354
October 20, 2004 . . . . . . . . . . . . . . . . . . . . . . . . . . . . . . . . . . . . . . . . . . . . . . . . . . . . 354
October 8, 2004 . . . . . . . . . . . . . . . . . . . . . . . . . . . . . . . . . . . . . . . . . . . . . . . . . . . . . 355
December 18, 2003 (Novell Nterprise Linux Services 1.0) . . . . . . . . . . . . . . . . . . . . . . . . . . . . . . . 355
October 31, 2003 . . . . . . . . . . . . . . . . . . . . . . . . . . . . . . . . . . . . . . . . . . . . . . . . . . . . 356
July 16, 2003 (GroupWise 6.5 SP1). . . . . . . . . . . . . . . . . . . . . . . . . . . . . . . . . . . . . . . . . . . 357
14 GroupWise 6.5 Windows Client User Guide
Page 15

About This Guide
This Novell® GroupWise® 6.5 Windows Client User Guide explains how to use the GroupWise
Windows* client. The guide is divided into the following sections:
“Getting Started” on page 17
“Logging In to GroupWise” on page 39
“Working with Items in Your Mailbox” on page 45
“Using GroupWise Messenger from Within GroupWise” on page 103
“Scheduling Group and Posted Items” on page 105
“Using Your Calendar” on page 127
“Managing Your Mailbox” on page 139
“Using the Address Book” on page 203
“Using Remote Mode” on page 239
“Using Caching Mode” on page 257
“Using Newsgroups” on page 261
“Sending Secure Message (S/MIME)” on page 267
“Creating and Working with Documents” on page 275
“Customizing GroupWise” on page 339
“Documentation Updates” on page 353
Additional Documentation
For additional GroupWise documentation, see the following guides at the Novell GroupWise 6.5
documentation Web site (http://www.novell.com/documentation/lg/gw65):
Installation Guide
Administration Guide
Multi-System Administration Guide
Interoperability Guide
Troubleshooting Guides
GroupWise WebAccess Client User Guide
GroupWise Cross-Platform Client User Guide
Documentation Updates
For the most recent version of the GroupWise 6.5 Windows Client User Guide, visit the Novell
GroupWise 6.5 documentation Web site (http://www.novell.com/documentation/lg/gw65).
This User Guide has been updated with information about the Novell GroupWise 6.5
Collaboration Client for Novell Nterprise
release only is marked with (v6.5 for NNLS 1.0). For installation instructions, see the Novell
TM
Linux* Services 1.0. Information that applies to this
About This Guide 15
Page 16

Nterprise Linux Installation Guide (http://www.novell.com/documentation/lg/nnls/install/data/
front.html). For a list of known issues, see the Novell Nterprise Linux Services Release Notes
(http://www.novell.com/documentation/lg/nnls/readme/data/front.html).
Documentation Conventions
In Novell documentation, a greater-than symbol (>) is used to separate actions within a step and
items in a cross-reference path.
®
A trademark symbol (
, TM, etc.) denotes a Novell trademark. An asterisk (*) denotes a third-party
trademark.
User Comments
We want to hear your comments and suggestions about this manual and the other documentation
included with this product. Please use the User Comment feature at the bottom of each page of the
online documentation, or go to www.novell.com/documentation/feedback.html and enter your
comments there.
16 GroupWise 6.5 Windows Client User Guide
Page 17

1 Getting Started
GroupWise is a robust, dependable messaging and collaboration system that connects you to your
universal mailbox anytime and anywhere. This section gives you an introductory overview of the
GroupWise
“Starting the GroupWise Client” on page 17
“Using the Novell GroupWise 6.5 Collaboration Client for Novell Nterprise Linux Services
“Getting Acquainted with the Main GroupWise Window” on page 20
“Using Different GroupWise Modes (Online, Caching, and Remote)” on page 26
“Understanding Your Mailbox” on page 27
“Using the Toolbar” on page 32
“Using Shortcut Keys” on page 34
“Learning More” on page 36
Starting the GroupWise Client
®
client to help you start using the GroupWise client quickly and easily.
1.0 (v6.5 for NNLS 1.0)” on page 18
To begin using GroupWise, you or your system administrator must install GroupWise on your
computer. Your system administrator might prompt you to install GroupWise by using
ZENworks
This section contains the following topics:
“Running the Setup Program” on page 17
“Starting GroupWise 6.5” on page 17
®
.
Running the Setup Program
1 If you are not automatically prompted to install GroupWise, contact your system
administrator to find out the location of the GroupWise client Setup program, setup.exe.
2 Make sure you are logged in as yourself on your computer.
3 Click Start, click Run, browse to the file location, select setup.exe, then click OK.
4 Follow the instructions in the Setup Wizard.
Starting GroupWise 6.5
1 Double-click on your desktop to display the GroupWise Main Window.
Getting Started 17
Page 18

Using the Novell GroupWise 6.5 Collaboration Client for Novell Nterprise Linux Services 1.0 (v6.5 for NNLS 1.0)
The following is information about the Novell GroupWise 6.5 Collaboration Client for Novell
Nterprise Linux Services 1.0.
“Setting Up an Account and Starting the Collaboration Client” on page 18
“Using the Collaboration Client” on page 19
For installation instructions, see the Novell Nterprise Linux Installation Guide (http://
www.novell.com/documentation/lg/nnls/install/data/front.html).
Setting Up an Account and Starting the Collaboration Client
When you start the Novell GroupWise 6.5 Collaboration Client for Novell Nterprise Linux
TM
Services 1.0 for the first time, you need to set up an account to access your NetMail
3.5 account
on the NNLS server.
1 Double-click on your desktop.
2 If you are prompted to enter a GroupWise password without an option to select Remote
Mailbox Path, click Cancel.
3 Select Remote Mailbox Path, then click OK.
4 When prompted to create the folder for this path, click Yes.
5 When prompted to set up an account, click OK.
6 If the Location Information dialog box displays, specify the required information, then click
OK twice.
7 In the Create Account dialog box, type a name for the account, such as your NetMail
username.
8 In the Account Type drop-down list, select IMAP4.
9 Click Next.
10 In the Incoming Mail Server field, type the full DNS name of the NNLS server.
11 In the Login Name field, type the account name you typed in Step 7.
12 Click the next two fields to populate them with the correct information.
13 In the From Name field, type the name you want to display when sending items from this
account.
14 Click Next twice.
15 Using the Up and Down buttons, position the new folder in the Folder List.
16 Click Finish.
17 In the Folder List, click the account you just created.
18 Log in to the NNLS server by entering your username and password.
You might see a momentary delay while the database is populated on the local hard drive.
19 In the Folder List, click the Inbox folder to display messages and appointments in the Item
List.
18 GroupWise 6.5 Windows Client User Guide
Page 19

Now that this account is set up, when you want to log in to the GroupWise Collaboration Client,
double-click the desktop icon, make sure Remote Mailbox Path is selected (or add the /prpath_to_remote_mailbox startup switch to the Target field in your desktop shortcut), then click
OK. Click the account in the Folder List.
Using the Collaboration Client
Using this client, you can access your NetMail 3.5 account messages, as well as messages from
any POP3, IMAP4, or NNTP account. You can set up any accounts you want to connect to under
the Accounts menu. For information, see “Adding a POP3 or IMAP4 Account to GroupWise” on
page 60 and “Adding a News Account” on page 261.
Features
The following features are new in the Novell GroupWise 6.5 Collaboration Client for Novell
Nterprise Linux Services 1.0:
IMAP4 Shared Folders
You can share your IMAP4 account folders with other users in the same IMAP4 domain. For
example, you can share your NetMail folders with other users in the NetMail domain. The IMAP4
domain must support sharing folders.
For more information, see “Downloading POP3 and IMAP4 Accounts to GroupWise” on page 58,
“Adding a POP3 or IMAP4 Account to GroupWise” on page 60, “Sharing an IMAP4 Folder (v6.5
for NNLS 1.0)” on page 67, and “Seeing IMAP4 Folders That Are Shared with You (v6.5 for
NNLS 1.0)” on page 67.
Free Busy Search on a CAP Server
You can perform a free busy search on other users in your NetMail account domain or on users in
any other IMAP4 account domain that supports CAP (Calendar Access Protocol). Before you can
perform a free busy search, you need to add a CAP server account on the CAP tab in the Accounts
dialog box.
For more information, see “Scheduling an Appointment for Other Users” on page 106,
“Performing a Busy Search” on page 109, “Adding a CAP Account to GroupWise (v6.5 for NNLS
1.0)” on page 111, and “Modifying Properties of a CAP Account (v6.5 for NNLS 1.0)” on
page 111.
Remote (Offline) Mode
You can run this client in two different modes:
Remote, which automatically connects to your NetMail system and IMAP4/POP3/NNTP
accounts at periods you specify.
Remote (Offline), which never automatically connects. Working offline is beneficial when
you are working on a disconnected laptop and do not need to connect, and also when you want
to reduce charges for online time.
If you select to connect while in Remote (Offline) mode, your mode is changed to Remote mode
and a connection is made. After the connection has completed, you can return to Remote (Offline)
mode by clicking File, then clicking Work Offline.
For more information, see “Using Different GroupWise Modes (Online, Caching, and Remote)”
on page 26 and “Remote (Offline) Mode (v6.5 for NNLS 1.0)” on page 255.
Getting Started 19
Page 20

Unsupported Features
Because this client will generally be running against a NetMail back end and not a GroupWise
back end, some functionality in the user interface is not supported. Unless you run this client
against a GroupWise back end, the following GroupWise functionality is not supported:
For a list of known issues, see the Novell Nterprise Linux Services Release Notes (http://
www.novell.com/documentation/lg/nnls/readme/data/front.html).
Online and Caching Modes
Proxy
GroupWise Client Rules (although NetMail rules that are set up in NetMail are supported)
Document Management
Junk Mail Handling
Shared Address Books
Routing Slip
Status Tracking (seeing status information on the Properties tab of a sent item)
Notify
GroupWise Messenger
Getting Acquainted with the Main GroupWise Window
Your main work area in GroupWise is called the Main Window. From the Main Window of
GroupWise, you can read your messages, schedule appointments, view your Calendar, manage
contacts, change the mode of GroupWise you’re running in, open folders, open documents, and
much more.
20 GroupWise 6.5 Windows Client User Guide
Page 21
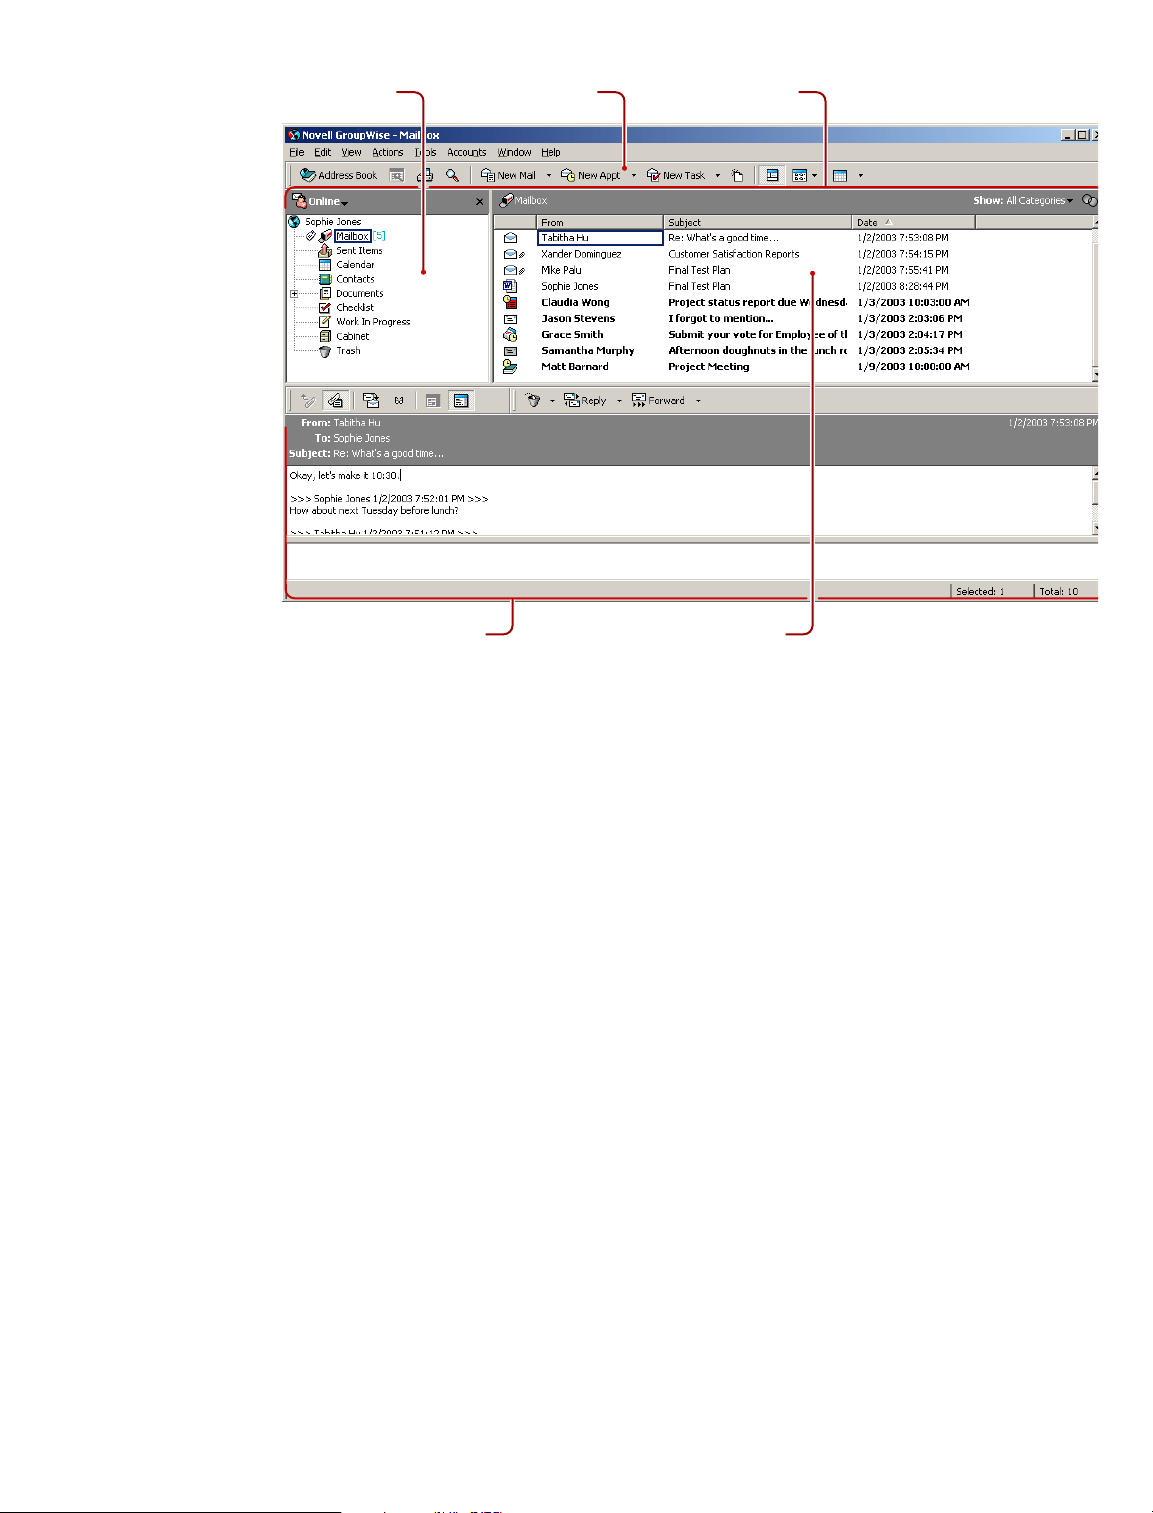
Folder List
Toolbar
Quick Viewer Item List
Folder and Item
List Header
You can open more than one Main Window in GroupWise by clicking Window, then clicking New
Main Window.This is useful if you proxy for another user. You can look at your own Main
Window and the Main Window belonging to the person you are proxying for. You might also want
to open a certain folder in one window and look at your Calendar in another. You can open as many
Main Windows as your computer’s memory will allow.
The basic components of the Main Window are explained below.
Toolbar
The toolbar lets you quickly accomplish common GroupWise tasks, such as opening the Address
Book, sending mail messages, and finding an item. The Display drop-down list on the toolbar lets
you change the display of your Item List. For information about the toolbar, see “Using the
Toolbar” on page 32 and “Customizing Your Toolbar” on page 345.
Folder and Item List Header
The Folder and Item List header provides a drop-down list where you can select the mode of
GroupWise you want to run (Online, Caching, Remote, or Remote (Offline) (v6.5 for NNLS 1.0)),
select to open your archived or backup mailbox, and select a proxy mailbox. For information about
these features, see “Using Different GroupWise Modes (Online, Caching, and Remote)” on
page 26, “Archiving the Items in Your Mailbox” on page 162, “Backing Up Your Mailbox” on
page 180, and “Giving Other People Access to Your Mailbox” on page 171.
This header also provides the Show drop-down list, from which you can select to see only items
of a specific category. For information about categories, see “Using Categories to Organize Items”
on page 81.
Getting Started 21
Page 22

Folder List
The new Filter icon ( ) is also on this header, giving you convenient access to predefined and
custom filters. For information about filtering, see “Filtering Items” on page 187.
To change how information displays in headers, right-click the header and choose options. For
more information, see “Customizing Headers” on page 342.
The Folder List at the left of the Main Window lets you organize your GroupWise items. You can
create new folders to store your items in. Next to any folder (except for shared folders), the number
of unread items is shown in square brackets. Next to the Sent Items folder, the number in square
brackets shows how many items are pending to be sent from Caching or Remote mode. For
information about the different GroupWise folders, see “Using the Folder List” on page 140.
If you want, you can close your folder list to leave more room for other views, such as the
Calendar, in the Main Window. Click View, then click Folders List to open or close the Folder List
display.
Here is what you’ll find in each of the default folders:
“User Folder” on page 22
“Mailbox Folder” on page 22
“Sent Items Folder” on page 23
“Calendar Folder” on page 23
User Folder
Mailbox Folder
“Contacts Folder” on page 23
“Checklist Folder” on page 23
“Cabinet” on page 24
“Documents Folder” on page 24
“Work in Progress Folder” on page 25
“Junk Mail Folder” on page 25
“Trash Folder” on page 25
“Shared Folders” on page 25
“IMAP4 Account Folder” on page 26
“NNTP Newsgroup Account Folder” on page 26
Your user folder (indicated by your name) represents your GroupWise database. All folders in
you Main Window are subfolders of your user folder.
The Mailbox displays all the items you have received, with the exception of scheduled items
(appointments, tasks, and reminder notes) you have accepted or declined. Accepted scheduled
items are moved to the Calendar.
22 GroupWise 6.5 Windows Client User Guide
Page 23

Sent Items Folder
The Sent Items folder displays all sent items from the Mailbox and Calendar. The Sent Items
folder in versions prior to GroupWise 6.5 was a query folder, which had some differences from
the current Sent Items folder.
The following is a comparison between the previous Sent Items query folder and the current Sent
Items folder.
Sent Items Folder (Current) Sent Items Query Folder (Previous)
A system folder that cannot be deleted. A Find Results folder that can be deleted and re-
created. (For more information about Find Results
folders, see “Understanding Find Results Folders”
on page 142.)
Calendar Folder
Contacts Folder
All sent items reside in this folder unless they are
moved to a folder other than the Mailbox or
Calendar. If a sent item is moved to another
folder, it no longer displays in the Sent Items
folder.
You can resend, reschedule, and retract sent
items from this folder.
No items actually reside in this folder. This folder is
a Find Results folder, which means a Find is
performed when you click the folder and the results
of the Find (all sent items) are displayed in the
folder. If you delete an item from this folder, the
original item remains in its original folder and
redisplays the next time you open this folder.
You can resend, reschedule, and retract sent items
from this folder.
The Calendar folder shows several calendar view options. If you hide your Folders list by
clicking View, then clicking Folders List, the Main Window shows a better view of your Calendar.
The Contacts folder , by default, represents the Frequent Contacts address book in the Address
Book. (You can change the folder properties so that it represents a different address book in the
Address Book. For information, see “Changing the Address Book the Contacts Folder Displays”
on page 151.) Any modification you make in the Contacts Folder will also be made in the Frequent
Contacts address book.
From this folder, you can view, create and modify contacts, resources, organizations and groups.
Checklist Folder
Your proxies will never see your Contacts folder.
Use the Checklist folder to create a task list. You can move any items (mail messages, phone
messages, reminder notes, tasks, or appointments) to this folder and arrange them in the order you
want. Each item is marked with a check box so that you can check items off as you complete them.
If you want another folder to work the way the Checklist folder does, click the folder, click the
Display drop-down list on the toolbar, then select Checklist. The folder will then have a Checklist
area at the top of the folder where you can drag items.
The following is a comparison between the Checklist folder and the Task List query folder (found
in previous versions of GroupWise).
Getting Started 23
Page 24

Checklist Folder Task List Folder
A system folder that cannot be deleted. A Find Results folder that can be deleted and re-
created. (For more information about Find Results
folders, see “Understanding Find Results Folders” on
page 142.)
This folder contains the following items:
Items you have moved to this folder
Items you have created in this folder
Items in other folders that you have marked
Show in Checklist
Items that are part of a checklist that you
have created in another folder
Any item type can reside in this folder. Only tasks show in this folder. Tasks are scheduled
To mark an item completed, click the check box
next to the item in the Item List.
To set a due date, open the item, click the
Checklist tab, then specify a date.
To set the priority of an item, drag the task to a
new position in the checklist.
Checklist items do not display in the Task List
of the Calendar.
If a checklist item is due today, the check box
in the Checklist is green. If a checklist item is
past due, the check box is red.
No items actually reside in this folder. This folder is a
Find Results folder, which means a Find is
performed when you click the folder and the results
of the Find (all scheduled tasks) are displayed in the
folder. If you delete an item from this folder, the
original item remains in its original folder and
redisplays the next time you open this folder.
items that are associated with a due date.
To mark an item completed, open the item, then click
Completed.
Due dates are set by the person who sent you the
task. If you post a task for yourself, you can set a due
date.
To set the priority of an item, open the item, then type
a priority in the Priority field.
Tasks display in the Task List of the Calendar and
can be marked Completed from the Calendar.
Tasks that are past due show as red in the Calendar.
Cabinet
The Cabinet contains all your personal folders. You can rearrange and nest folders by clicking
Edit, then clicking Folders. You can change how the folders are sorted by right-clicking the
Cabinet folder, clicking Properties, then selecting what you want to sort by.
Documents Folder
Your document references are organized in the Documents folder so you can locate them easily.
Any document references you create or open will be added to the Documents folder; if you specify,
any document references you view or import will also be added. You can also specify that none of
these actions adds a document reference to the Documents folder.
The Documents folder can contain only documents. If any other type of item is moved to this
folder by a GroupWise client older than version 5.5 (for example, from an older version of
GroupWise Remote), the item will be deleted.
The Documents folder contains, by default, your 20 most recent document references. You can
change this number from 0 to 5000 document references. After the maximum number is reached,
24 GroupWise 6.5 Windows Client User Guide
Page 25

the oldest document reference will be deleted. You can also manually delete document references
from the Documents folder.
The Documents folder has two Find Results folders. Authored contains document references for
all the documents which you are the author of. Default Library contains document references for
all the documents you have access to in the default library. You can change or delete the Author
and Default Library folders. You can create other document Find Results folders according to your
needs. For example, you can create a Find Results folder for a specific library, subject, author, or
document type.
Work in Progress Folder
The Work In Progress folder is a folder where you can save messages you have started but want
to finish later.
Junk Mail Folder
All e-mail items from addresses and Internet domains that are junked through Junk Mail Handling
are placed in the Junk Mail folder . This folder is not created in the folder list unless a Junk Mail
option is enabled.
While Junk Mail options are enabled, this folder cannot be deleted. However, the folder can be
renamed or moved to a different location in the folder list. If all Junk Mail options are disabled,
the folder can be deleted. The folder can also be deleted if the Junk Mail Handling feature is
disabled by the system administrator.
Trash Folder
Shared Folders
To delete items from the Junk Mail Folder, right-click the folder, click Empty Junk Mail Folder,
then click Yes.
For more information about Junk Mail Handling, see “Handling Unwanted Mail” on page 92.
All deleted mail and phone messages, appointments, tasks, documents, and reminder notes are
stored in the Trash folder . Items in the Trash can be viewed, opened, or returned to your Mailbox
before the Trash is emptied. (Emptying the Trash removes items in the Trash from the system.)
You can empty your entire Trash, or empty only selected items. Items in the Trash are
automatically emptied according to the days entered in the Cleanup tab in Environment Options,
or you can empty the Trash manually. The system administrator may specify that your Trash is
emptied automatically on a regular basis.
A shared folder is like any other folder in your Cabinet, except other people have access to it.
You can create shared folders or share existing personal folders in your Cabinet. You choose
whom to share the folder with, and what rights to grant each user. Then, users can post messages
to the shared folder, drag existing items into the folder, and create discussion threads. You can't
share system folders, which include the Cabinet, Trash, and Work In Progress folders.
If you place a document in a shared folder, people with rights to the shared folder don't
automatically have rights to edit the document. Before they can edit the document, you must give
them Edit rights on the Document Sharing tab.
Getting Started 25
Page 26

IMAP4 Account Folder
If you add a folder for an IMAP4 account, a icon displays in your Folder List.
NNTP Newsgroup Account Folder
If you add a folder for an NNTP newsgroup account, a icon displays in your Folder List.
Item List
The Item List on the right side of the Main Window displays your mail and phone messages,
appointments, reminder notes, tasks, and document references. You can sort the Item List by
clicking a column heading. To reverse the sort order, click the column heading a second time. For
information about the icons used with different items, see “Icons Appearing Next to Items in Your
Mailbox and Calendar” on page 28.
QuickViewer
The QuickViewer opens below the Folder and Item List. You can quickly scan items and their
attachments in the QuickViewer rather than open each item in another window. For information
about the QuickViewer, see “Reading Items in the QuickViewer” on page 77.
Using Different GroupWise Modes (Online, Caching, and Remote)
Online Mode
GroupWise provides four different ways to run the GroupWise client: Online mode, Caching
mode, Remote mode, and Remote (Offline) mode (v6.5 for NNLS 1.0).
You might be able to run GroupWise in any of the four modes, or your system administrator might
require that you use only a certain mode.
Most GroupWise features are available in all four GroupWise modes, with some exceptions.
Subscribing to other users’ notifications is not available in Caching mode. Subscribing to other
users’ notifications and Proxy are not available in Remote mode. Any feature that requires a
connection, for example to the GroupWise system or to an IMAP4 account, is not available in
Remote (Offline) mode.
If you are running GroupWise against a NetMail back end, only Remote mode and Remote
(Offline) modes are available. See “Using the Novell GroupWise 6.5 Collaboration Client for
Novell Nterprise Linux Services 1.0 (v6.5 for NNLS 1.0)” on page 18 for more information.
When you use Online mode, you are connected to your post office on the network. Your mailbox
displays the messages and information stored in your network mailbox (also called your Online
Mailbox). Online mode is connected to your network mailbox continuously. In Online mode, if
your Post Office Agent shuts down or you lose your network connection, you will temporarily lose
your connection to your mailbox.
You should use this mode if you do not have a lot of network traffic, or if you use several different
workstations and do not want to download a local mailbox to each one.
26 GroupWise 6.5 Windows Client User Guide
Page 27

Caching Mode
Remote Mode
Caching mode stores a copy of your network mailbox, including your messages and other
information, on your local drive. This allows you to use GroupWise whether or not your network
or Post Office Agent is available. Because you are not connected to the network all the time, this
mode cuts down on network traffic and has the best performance. A connection is made
automatically to retrieve and send new messages. All updates are performed in the background so
your work is not interrupted.
To use Caching mode, the client installation must be a standard installation, not a workstation
installation.
You should use this mode if you have enough disk space on your local drive to store your mailbox.
Several users can set up their Caching Mailboxes on a single shared computer.
If you run Caching Mode and Remote Mode on the same computer, the same local mailbox (also
called the Caching Mailbox or Remote Mailbox) can be used to minimize disk space usage.
If disk space is limited, you can restrict the items that are downloaded to your local mailbox. You
can specify to get the subject line only or specify a size limit.
For more information about setting up Caching Mode, see Chapter 10, “Using Caching Mode,” on
page 257.
Remote mode is familiar to GroupWise users on the road. Similar to Caching mode, a copy of your
network mailbox, or the portion of the mailbox you specify, is stored on your local drive. You can
retrieve and send messages on a periodic basis with the type of connection you specify (modem,
network, or TCP/IP). If you do not want a complete copy of your network mailbox, you can restrict
what is retrieved, such as only new messages or only message subject lines.
To use Remote mode, the client installation must be a standard installation, not a workstation
installation.
For more information about setting up Remote Mode, see Chapter 9, “Using Remote Mode,” on
page 239.
Remote (Offline) Mode (v6.5 for NNLS 1.0)
Remote (Offline) mode is the same as Remote mode except that connections are not made
automatically. Working offline is beneficial when you are working on a disconnected laptop and
do not need to connect, and also when you want to reduce charges for online time. If you want to
connect to your accounts, click Accounts, click Send/Retrieve, then click the account. A message
displays asking if you want to stop working offline. After you click Yes, your mode is changed to
Remote mode and a connection is made. After the connection has completed, you can return to
Remote (Offline) mode by clicking File, then clicking Work Offline.
Understanding Your Mailbox
All of your items, whether you send or receive them, are stored in your GroupWise Mailbox. You
can quickly display only received items, sent items, posted items, or draft items by clicking a
setting on the Display drop-down list. You can further restrict which items display in your Mailbox
by using filters. See Chapter 7, “Managing Your Mailbox,” on page 139 for more information.
Getting Started 27
Page 28
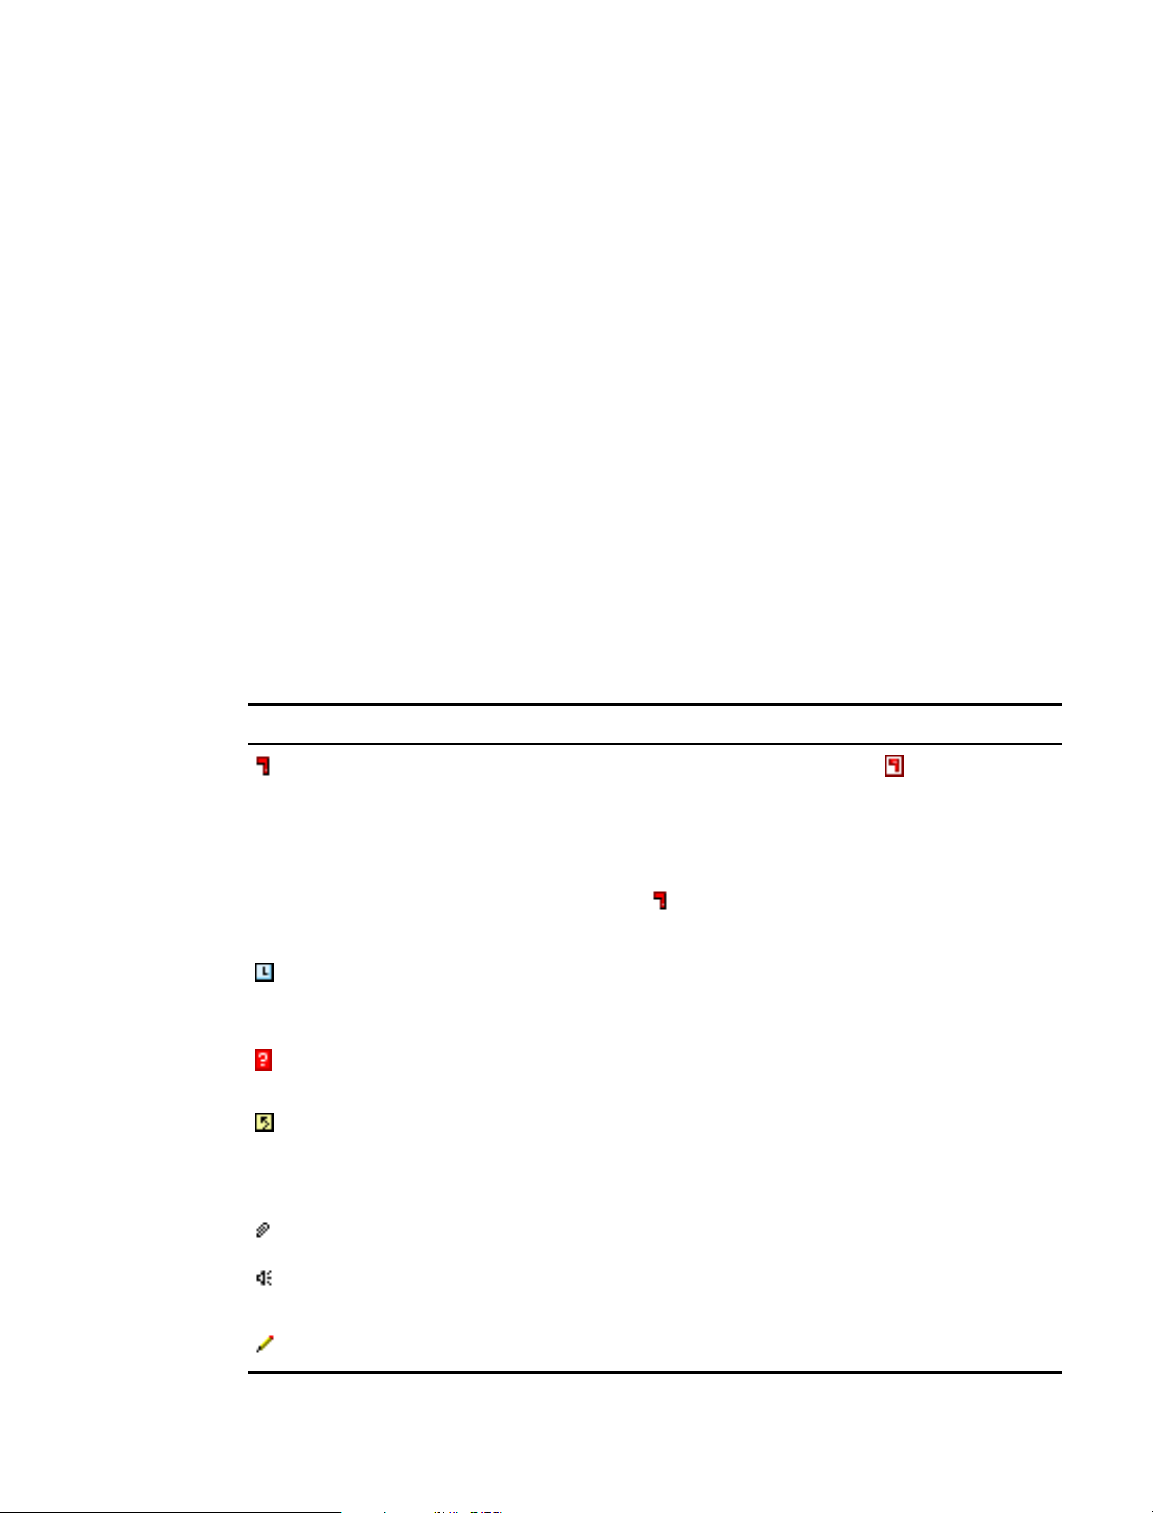
You can organize your messages by moving them into folders within your Cabinet, and you can
create new folders as necessary. See “Using the Folder List” on page 140 for more information.
You can also organize your messages by assigning them categories. Each category displays as a
different color in your Mailbox. You can filter on categories. See “Using Categories to Organize
Items” on page 81 for more information.
Bolded Items in Your Mailbox
All unopened items in your Mailbox are bolded to help you easily identify which items and
documents you have not yet read. The icon appearing next to an item also indicates if it is
unopened.
Collapsed discussion threads are marked with bold text to show that there are items in the thread
that are unread. This saves you the time of expanding each thread to check if there are newly posted
items.
Sent items are also bolded to show when they are queued but not uploaded, status information has
not been received about the item being delivered, or they have not yet been transferred to the
Internet.
Icons Appearing Next to Items in Your Mailbox and Calendar
The icons that appear next to items in your Mailbox and Calendar show information about the
items. The following table explains what each icon means.
Icon Description
Next to an item you have sent in Remote or Caching mode, the icon indicates that
the item has been queued, but the queue has not been uploaded. After the item has
been uploaded, this icon indicates that status information has not been received
about the item being delivered to the destination post office or transferred to the
Internet.
Next to the Sent Items folder, the icon indicates that there is at least one item that
has been queued but the queue has not been uploaded.
Appears next to an item you have sent. If the item has been opened by at least one
person, this icon will appear until all recipients have 1) opened the mail, phone
message, or reminder note; 2) accepted the appointment; or 3) completed the task.
Appears next to an item you have sent. The item couldn't be delivered to the
destination post office or it failed to transfer to the Internet.
Appears next to an item you have sent. Next to an appointment or task, this icon
indicates that at least one person has declined/deleted the item. Next to a mail
message, phone message, or reminder note, this icon indicates that at least one
person has deleted the item without opening it.
One or more attachments are included with the item.
One or more sound annotations are included with the item, or the item is a voice mail
message.
Draft item.
28 GroupWise 6.5 Windows Client User Guide
Page 29
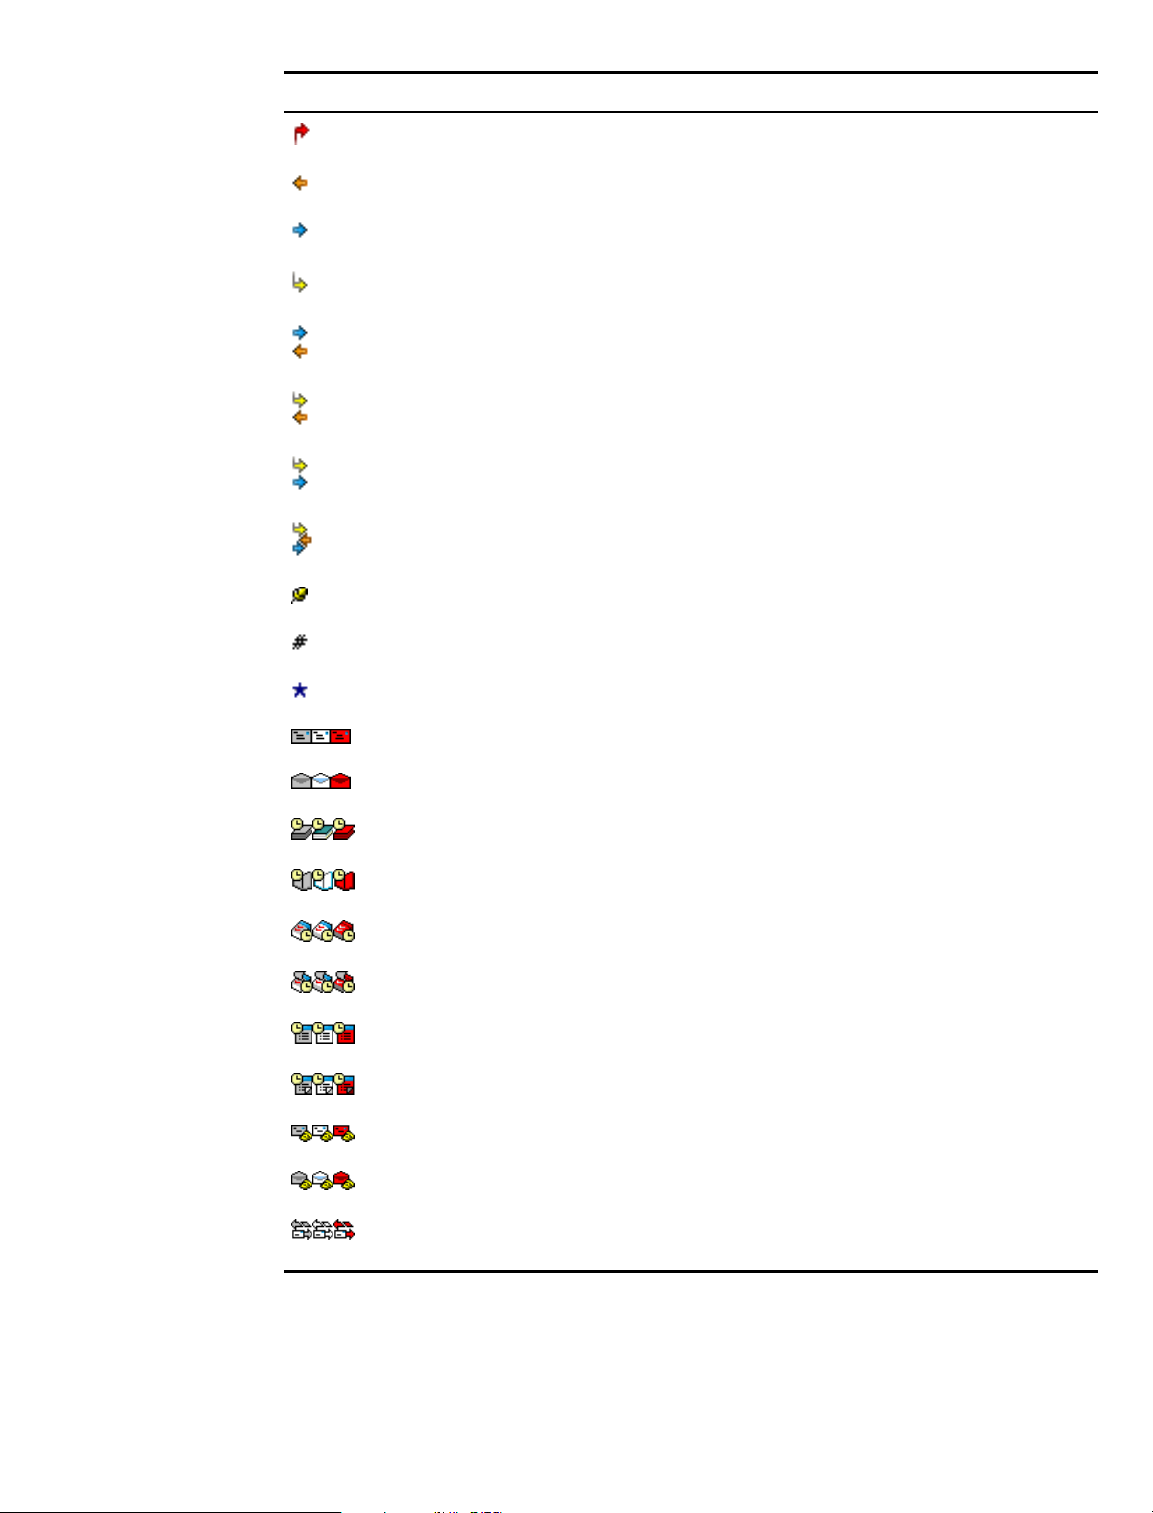
Icon Description
Appears next to an item you have sent.
Appears next to an item you have replied to.
Appears next to an item you have forwarded.
Appears next to an item you have delegated.
Appears next to an item you have replied to and forwarded
Appears next to an item you have replied to and delegated.
Appears next to an item you have forwarded and delegated.
Appears next to an item you have replied to, forwarded, and delegated
Posted item.
Specific version of a document.
Official version of a document.
Unopened mail message with a low, standard, or high priority.
Opened mail message with a low, standard, or high priority.
Unopened appointment with a low, standard, or high priority.
Opened appointment with a low, standard, or high priority.
Unopened task with a low, standard, or high priority.
Opened task with a low, standard, or high priority.
Unopened reminder note with a low, standard, or high priority.
Opened reminder note with a low, standard, or high priority.
Unopened phone message with a low, standard, or high priority.
Opened phone message with a low, standard, or high priority.
The sender has requested that you reply to this item. The item can be a low,
standard, or high priority.
Getting Started 29
Page 30
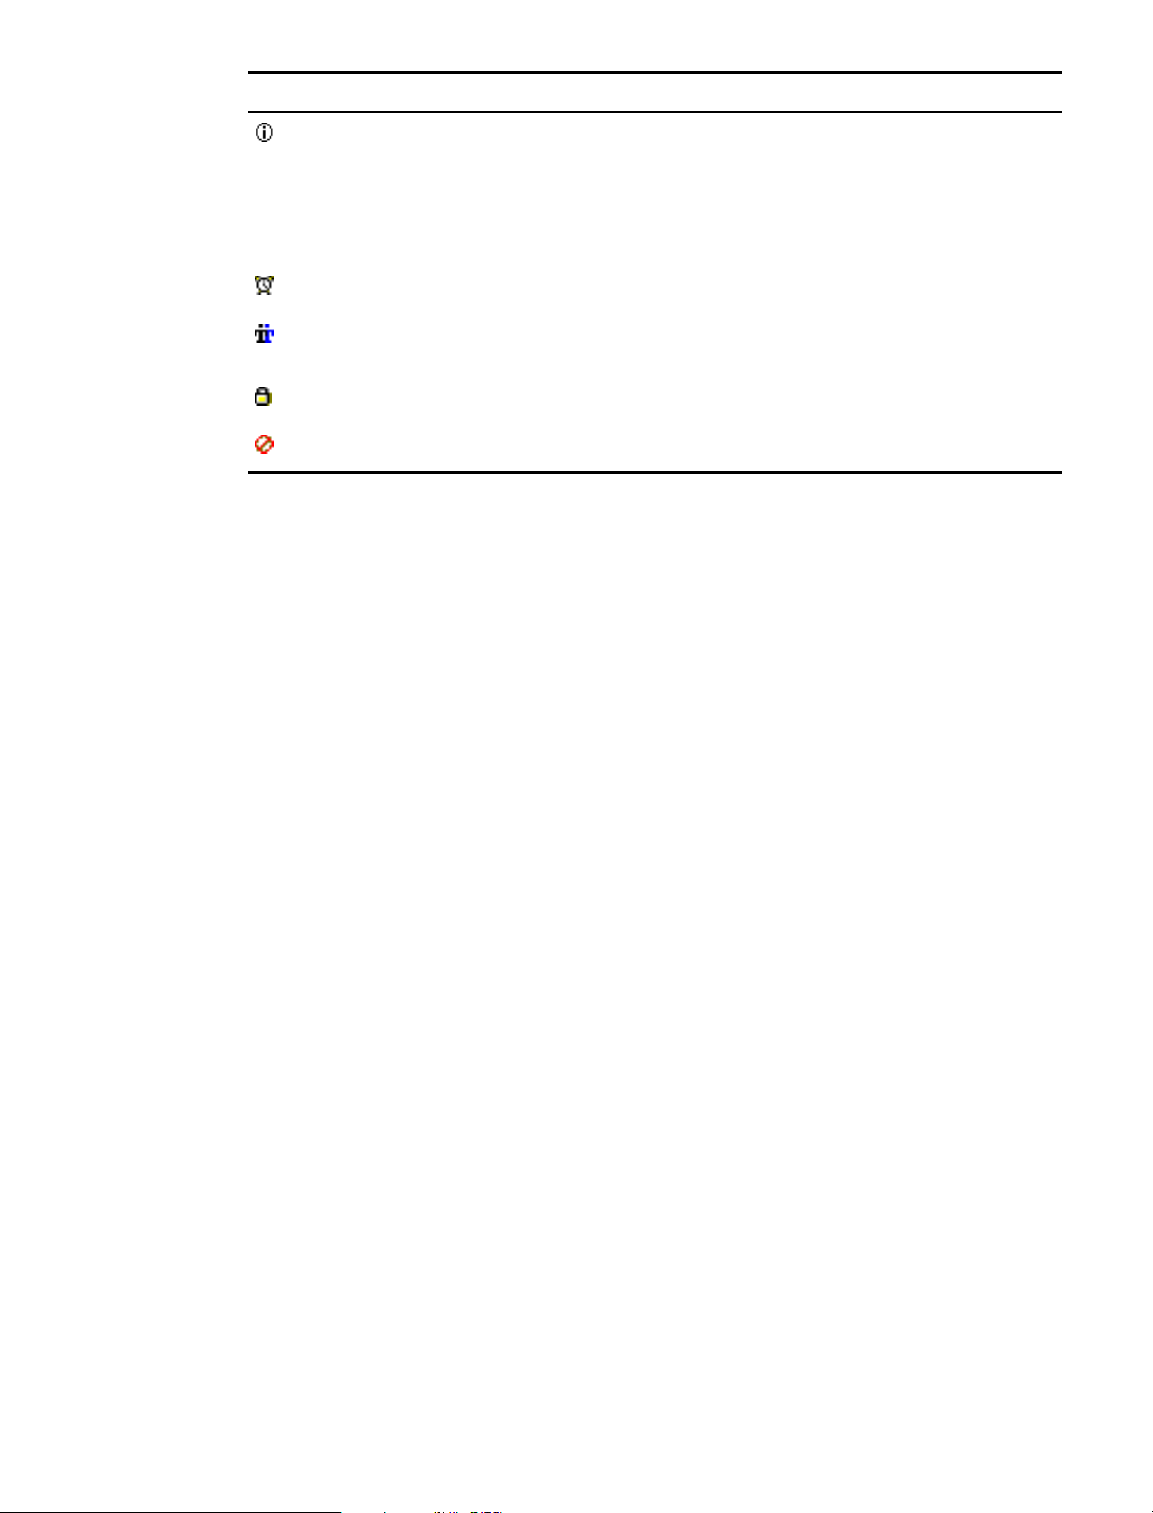
Icon Description
This icon appears in a Busy Search. If it appears to the left of a username or
resource, you can click a scheduled time across from the username or resource on
the Individual Schedules tab to display more information about the appointment in the
box below. However, the user or resource owner must give you appointment Read
rights in the Access List before this icon appears. See “Adding and Removing Proxy
Names and Rights in Your Access List” on page 172.
This icon appears on your Calendar. An alarm is set for the item.
This icon appears on your Calendar. The item is a group appointment, reminder note,
or task.
This icon appears on your Calendar. The item is marked private.
This icon appears on your Calendar. You declined the item but didn’t delete it.
Viewing Options in Your Mailbox
You can view the items in your Mailbox five different ways, depending on how you want the
information organized. Details, Discussion Threads, Panels, As Calendar, and As Checklist are all
found on the View menu.
You can choose to have the display settings be temporary or permanent depending how you set
them.
Details
To permanently set your display setting:
1 Right-click the folder you want to change the display settings for, then click Properties.
2 Click the Display tab, then click More Display Settings.
3 Select the display setting from the View By drop-down list.
4 Click OK twice.
To temporarily set your display settings:
1 Click View > Display Settings, then the display setting you want.
Details displays a list of your items and information about them in columns, including Subject,
Date, CC, Priority, Document Type, Due Date, Size, Version#, and many other categories. Details
is the default Mailbox view if you have not changed your Mailbox properties. For information
about adding or rearranging columns, see “Using the Columns in Your Mailbox” on page 197.
30 GroupWise 6.5 Windows Client User Guide
Page 31
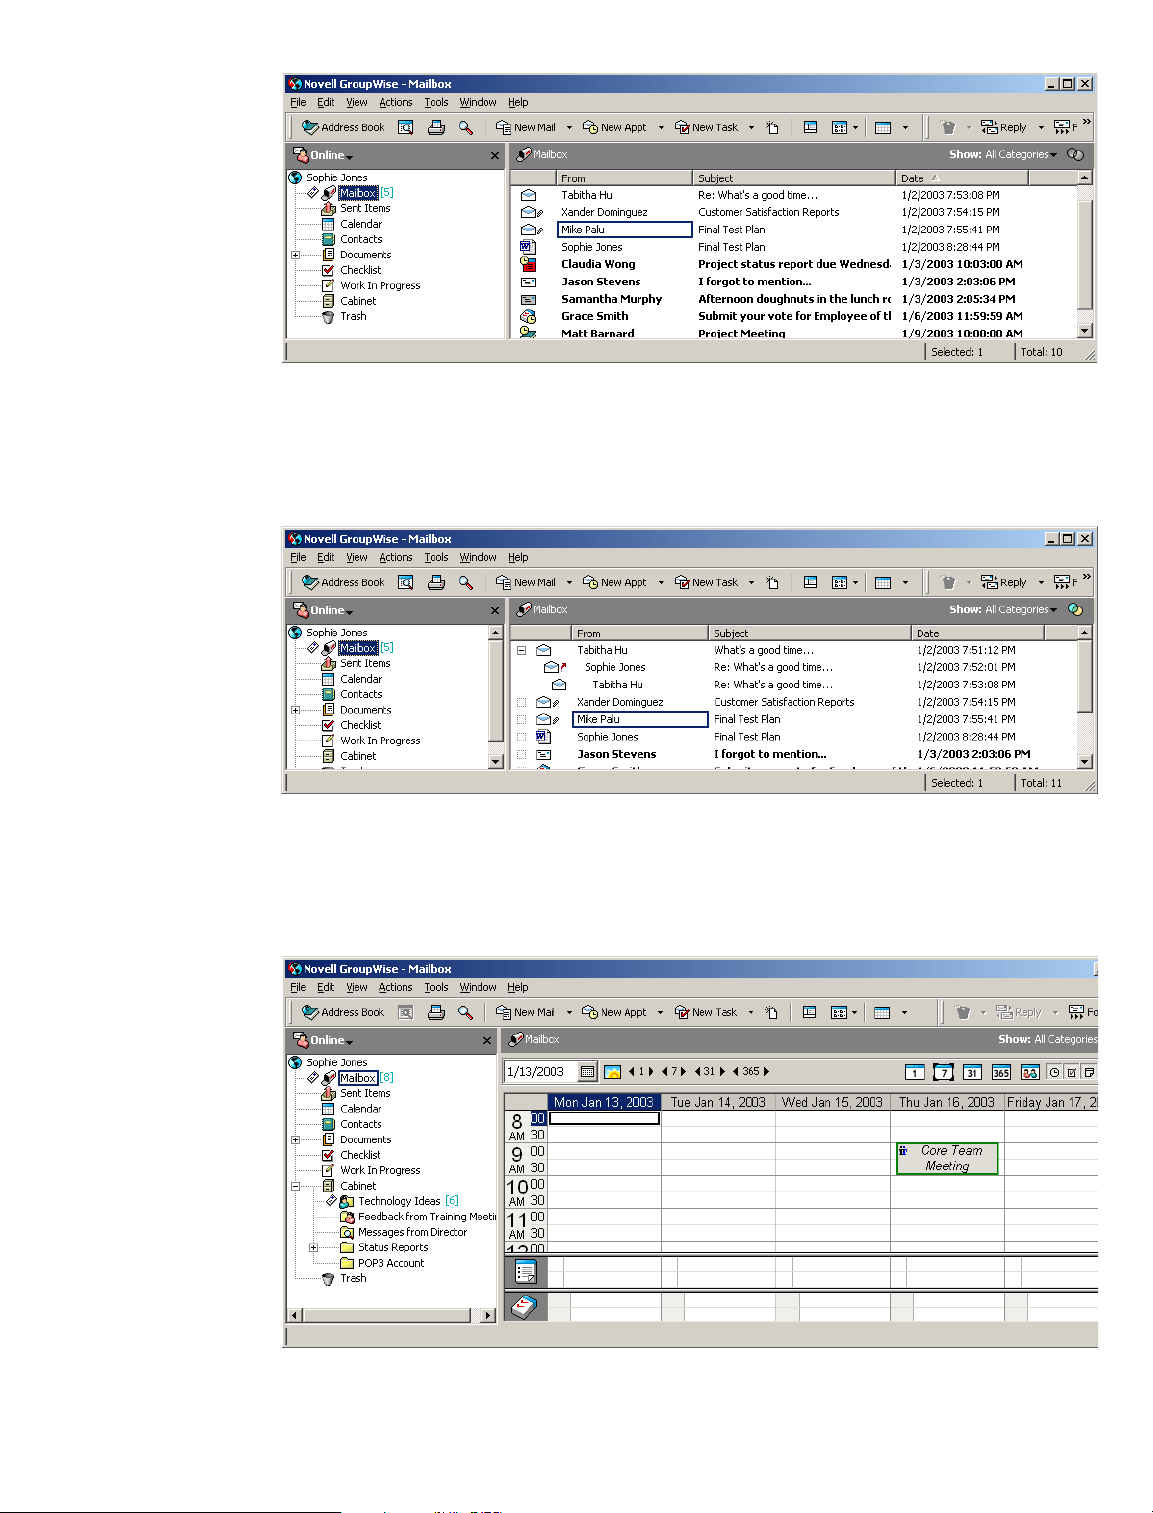
Discussion Threads
As Calendar
Discussion Threads shows the e-mail discussion of an original item and all its replies grouped in
hierarchical order.
As Calendar displays all scheduled items saved in a particular folder. This is useful if you organize
all your appointments and other items for a specific project in one folder.
Getting Started 31
Page 32
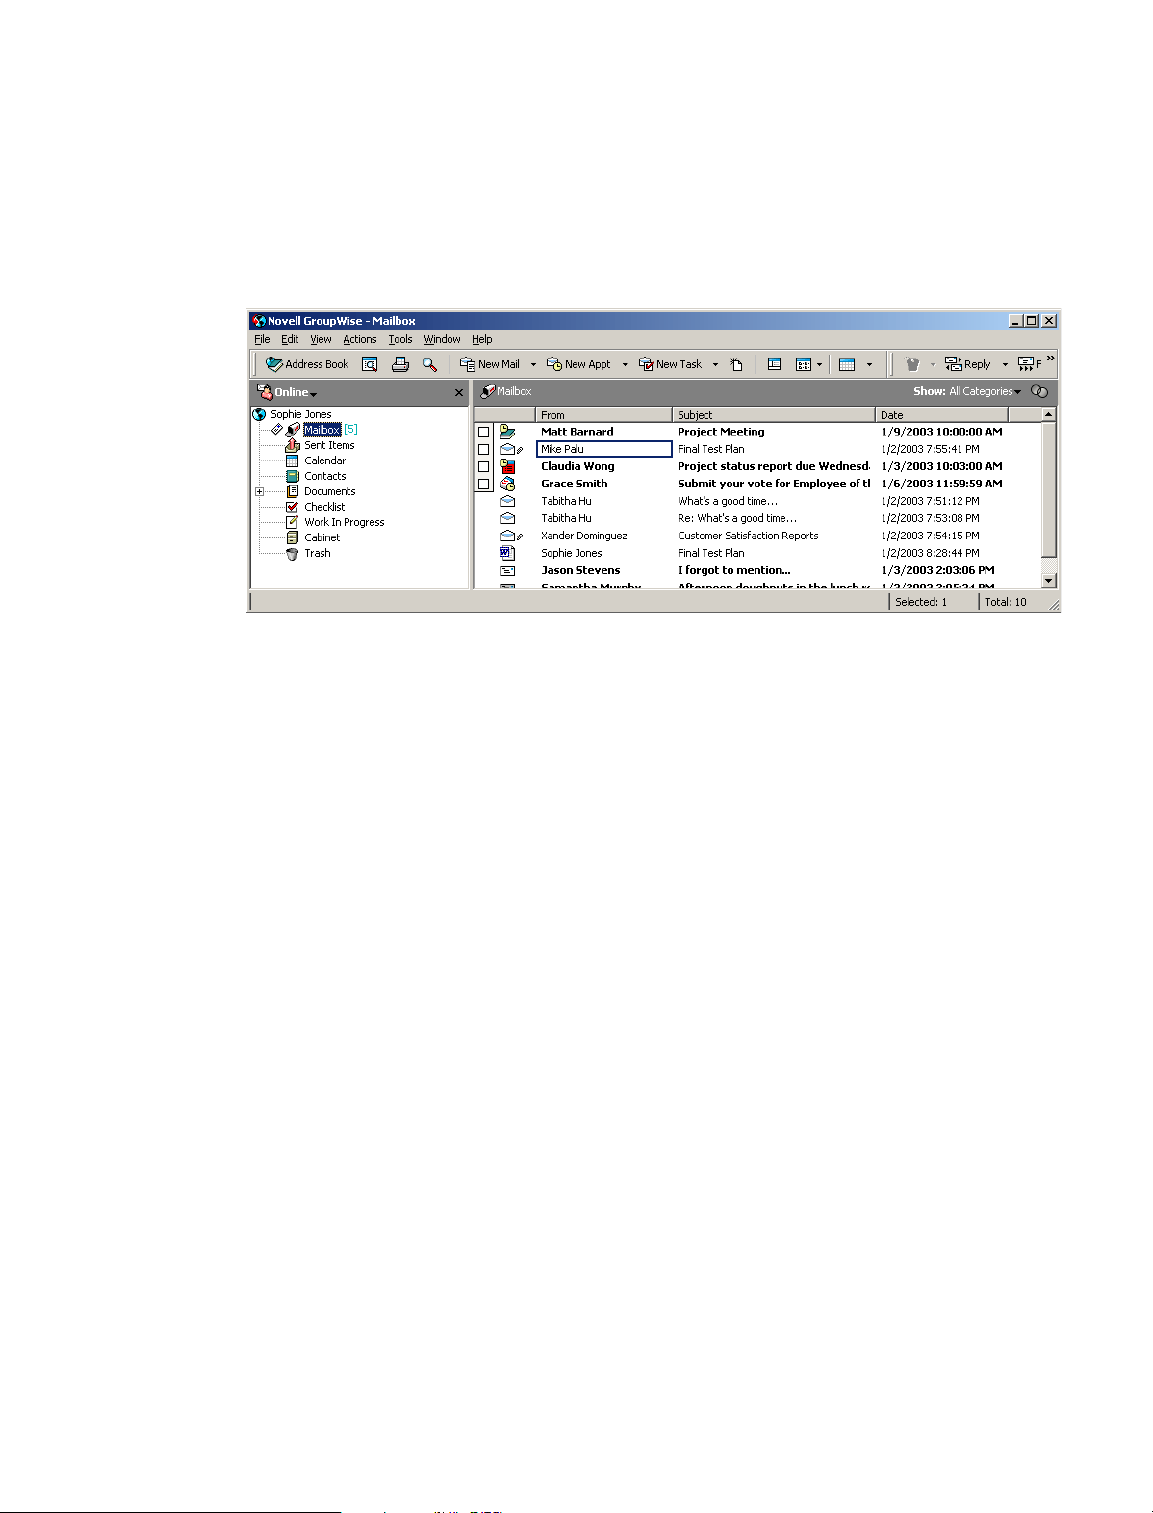
As Checklist
As Checklist displays a checklist area at the top of your Item List where you can create a checklist
using the items in your Item List. Each item that is dragged to the checklist area displays with a
check box so that you can mark it completed. You can assign due dates, priorities, and more to
checklist items. Any items you move to the checklist area will also display in the Checklist folder
in the Folder List.
For more information about creating a checklist, see “Creating a Checklist” on page 86.
Using the Toolbar
Use the toolbar to access many of the features and options found in GroupWise. The toolbar at the
top of a folder or item is context sensitive; it changes to provide the options you need most in that
location.
You can customize each toolbar by adding and deleting buttons, choosing button order, and
placing separators between buttons.
Customizing the Toolbar Display
1 If the toolbar is not displayed, click View, then click Toolbar.
2 Right-click the toolbar, then click Customize Toolbar.
3 Click the Show tab.
32 GroupWise 6.5 Windows Client User Guide
Page 33
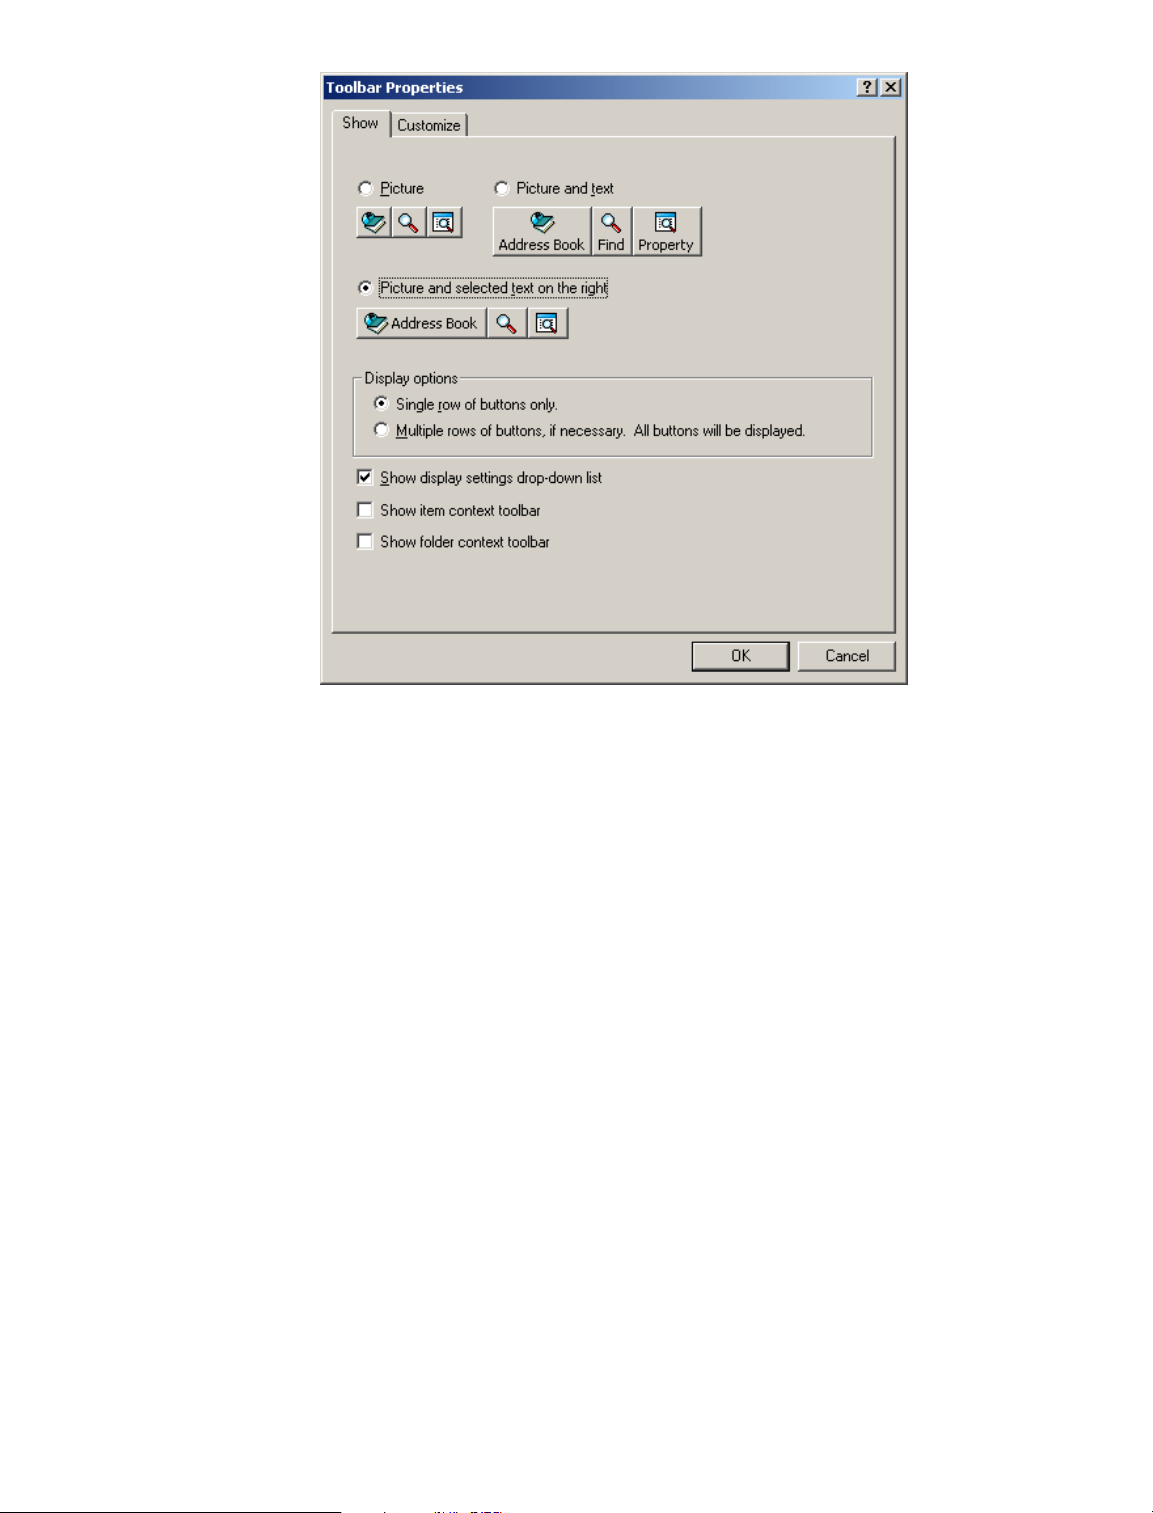
4
Click how you want the toolbar to display.
5 To remove or show the Display drop-down list, deselect or select the Show Display Settings
Drop-Down List check box.
6 To show the buttons that are most useful for the selected item, select Show Item Context
Toolbar.
7 To show the buttons that are most useful for the selected folder, select Show Folder Context
Toolbar.
8 Click the Customize tab.
9 To add a button, click a category in the Categories list box, click a button in the Controls box,
then click Add Button.
Categories are menu titles in the Main Window. The buttons in the Controls box correspond
to features found under the menu title. For example, the buttons for the File category are
actions under the File menu (opening views, printing, saving, and so on).
10 To remove a button, leave the Toolbar Properties dialog box open, then drag the button off the
toolbar in the Main Window.
11 To change the order of a button on a toolbar, leave the Toolbar Properties dialog box open,
then drag the button to a new location on the toolbar in the Main Window.
12 To add space between buttons, leave the Toolbar Properties dialog box open, then drag one
button away from the other button.
or
To remove space between buttons, leave the Toolbar Properties dialog box open, then drag
one button toward another button.
Getting Started 33
Page 34

13
Click OK.
Using Shortcut Keys
You can use a number of shortcut keys in GroupWise for accessibility or to save time when you
perform various operations. The table below lists some of these keystrokes, what they do, and the
context where they work.
Keystroke Action Where It Works
F1 Open online help Main Window, Calendar, item, dialog
F2 Search for text In an item
F4 Open the selected item Item List
F5 Refresh the view Main Window, Calendar
F8 Mark the selected item Private Item List
F9 Open the Font dialog box In an item
Ctrl+A Select all items; select all text Item List; text
Ctrl+B Bold text In text
box
Ctrl+C Copy selected text In text
Ctrl+D Open a new document
management document
Ctrl+F Open the Find dialog box Main Window, Calendar, item, dialog
Ctrl+G Go to today’s date Calendar
Ctrl+I Italicize text In text
Ctrl+L Attach a file to a message In a new item
Ctrl+M Open a new mail message Main Window, Calendar, item, dialog
Ctrl+N Normal text In text
Ctrl+O Open the selected message Item List
Ctrl+P Open the Print dialog box Main Window, item
Ctrl+Q Turn the QuickViewer on and off Main Window, Calendar
Ctrl+R Mark the selected item unread Item List
Ctrl+S Save a draft in the Work in
Progress folder
Main Window, Calendar, item, dialog
box
box
box
In an item
Ctrl+U Underline text In text
Ctrl+V Paste selected text In text
34 GroupWise 6.5 Windows Client User Guide
Page 35

Keystroke Action Where It Works
Ctrl+X Cut selected text In text
Ctrl+Z Undo the last action In text
Ctrl+Enter Open the selected item Item List
Ctrl+Del Delete an item In an item
Ctrl+F1 Open the Spell Checker In an item
Ctrl+Up-arrow
Open the previous or next item In an item
or
Ctrl+Down-arrow
Ctrl+Shift+Left-arrow
Select text one word at a time In text
or
Ctrl+Shift+Rightarrow
Ctrl+Shift+L Insert numbered or bulleted list In text
Ctrl+Shift+A Open a new appointment Main Window, Calendar, item, dialog
box
Ctrl+Shift+D Open a new document reference Main Window, Calendar, item, dialog
box
Ctrl+Shift+T Open a new task Main Window, Calendar, item, dialog
box
Ctrl+Shift+R Open a new reminder note Main Window, Calendar, item, dialog
box
Ctrl+Shift+P Open a new phone message Main Window, Calendar, item, dialog
box
Alt+F4 From the Main Window or
Calendar, exit GroupWise.
Main Window, Calendar, item, dialog
box
From an item, exit the item.
From a dialog box, exit the dialog
box.
Alt+F6 Toggle between the Main Window
Main Window, item
and the most recently opened item
Alt + [letter] Activate the menu bar (Use the
Main Window, Calendar, item
underlined letters in the menu
names)
Alt + D Send item In a new item
Alt+Enter Display the properties of the
Item List
selected item
Getting Started 35
Page 36

Keystroke Action Where It Works
Shift+Left-arrow
or
Shift+Right-arrow
Shift+End
or
Shift+Home
Shift + [letter] In the Folder List, Shift + the first
Tab Cycle through fields, buttons, and
Shift+Tab Reverse the order of cycling
Ctrl+Tab In text, indent the text.
Select text one character at a time In text
Select text to the end or beginning
of a line
letter of a subfolder name goes to
the subfolder.
areas
through fields, buttons, and areas
In a tabbed dialog box, open the
next tab.
In text
Folder list
Main Window, Calendar, dialog box,
item
Main Window, Calendar, dialog box,
item
In text, dialog box
Learning More
You can learn more about GroupWise from the following resources:
“Online Help” on page 36
“GroupWise 6.5 Documentation Web Page” on page 36
“GroupWise Cool Solutions Web Community” on page 37
Online Help
Complete user documentation is available in Help. In the Main Window, click Help, click Help
Topics, then use the Contents tab, Index tab, or Search tab to locate the help topics you want.
In order to use Help with the GroupWise client, you must have Internet Explorer 4.x or higher
installed.
GroupWise 6.5 Documentation Web Page
For this user guide and extensive GroupWise administration documentation, go to the GroupWise
6.5 area on the Novell Documentation (http://www.novell.com/documentation/lg/gw65/docui/
index.html) Web site.
This user guide is also available from the GroupWise client by clicking Help, then clicking User’s
Guide.
36 GroupWise 6.5 Windows Client User Guide
Page 37

GroupWise Cool Solutions Web Community
At GroupWise Cool Solutions, you’ll find tips, tricks, feature articles, and answers to frequent
questions. In the Main Window, click Help, then click Cool Solutions Web Community or go to
http://www.novell.com/coolsolutions/gwmag (http://www.novell.com/coolsolutions/gwmag).
Getting Started 37
Page 38

38 GroupWise 6.5 Windows Client User Guide
Page 39

2 Logging In to GroupWise
This section tells you about GroupWise® login options and GroupWise passwords.
“Logging In to GroupWise” on page 39
“Assigning Passwords to Your Mailbox” on page 41
Logging In to GroupWise
When you start GroupWise, you might be prompted to type information such as your password,
TCP/IP address of your post office agent, and so forth. This Startup dialog box changes, depending
on the information GroupWise needs to be able to open your Mailbox, and the GroupWise mode
that you log in to.
Your system administrator might restrict the GroupWise modes you can log in to.
You can use a startup option to force the Startup dialog box to be displayed when you start
GroupWise.
“Logging In to Your Mailbox” on page 39
“Logging In to Your Mailbox from Another User’s Workstation” on page 40
“Logging In to the Novell GroupWise 6.5 Collaboration Client for Novell Nterprise Linux
Services 1.0 (v6.5 for NNLS 1.0)” on page 41
Logging In to Your Mailbox
1 Start GroupWise.
If you have not specified a password for your Mailbox and GroupWise needs no additional
information, you will bypass the Startup dialog box and GroupWise will be displayed.
To force the GroupWise Startup dialog box to be displayed, right-click the GroupWise icon
on the desktop, click Properties, click the Shortcut tab, in the Target box, after the GroupWise
executable, type a space, type /@u-?, then click OK.
For information about other startup options, see “Using Startup Options” on page 347.
2 If you are prompted for a password, type the password in the Password box.
3 Click the mode of GroupWise you are logging in to and type additional information necessary,
such as the path to the post office, the TCP/IP address and port of the post office agent, the
path to your Caching or Remote mailbox.
If you do not know the required information, contact your system administrator.
4 Click OK.
Logging In to GroupWise 39
Page 40
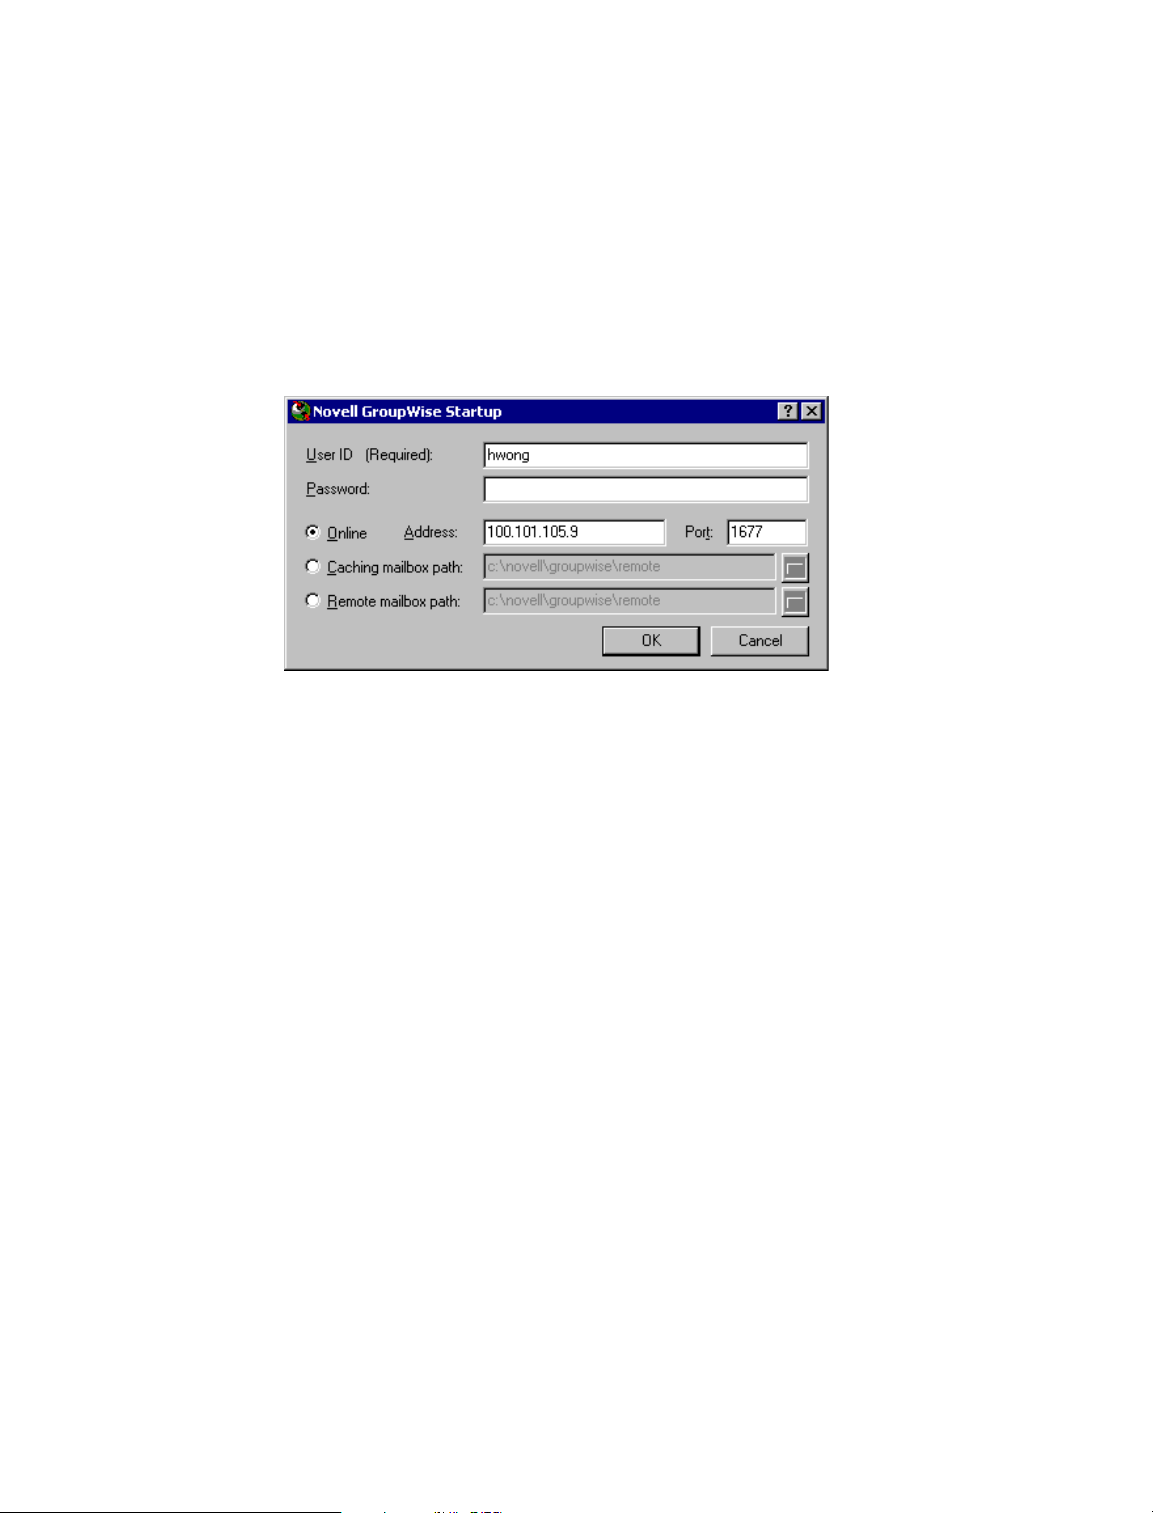
Logging In to Your Mailbox from Another User’s Workstation
You must be on the same post office as the other user to log into your own Mailbox from his or
her workstation.
1 Log in to the network with your own user ID.
or
To force the GroupWise Startup dialog box to be displayed, right-click the GroupWise icon
on the desktop, click Properties, click the Shortcut tab, in the Target box, after the GroupWise
executable, type a space, type /@u-?, then click OK.
2 Start GroupWise.
3 Type your user ID in the User ID box.
4 Click the Password box, type your password, then click OK.
Logging in to Your Mailbox from a Shared Workstation
If you use the same workstation for multiple people, it is highly recommended that each user have
a separate login for the workstation. When GroupWise saves the display settings for a user, the
settings are saved to the current user’s registry. This allows GroupWise to display the settings for
the user who is currently logged in to the workstation. This allows you to customize GroupWise
the way you want it to look without changing the look for other users.
When a user is finished using the workstation, that user should log out of the workstation
completely. This allows the next user to log on to the system with his or her own GroupWise
settings.
However, there are special circumstances when having a different logon for each user on the
workstation is not a viable option. In these cases there are some steps you should perform to log
in and set up GroupWise properly.
“Using the Login Screen Startup Switch” on page 40
“Using Notify On a Shared Workstation” on page 41
Using the Login Screen Startup Switch
For the login screen startup switch to work properly, you must be on the same post office as the
other user to log into your own Mailbox from his or her workstation.
1 Right-click the GroupWise icon on the desktop, click Properties, then click the Shortcut tab.
40 GroupWise 6.5 Windows Client User Guide
Page 41
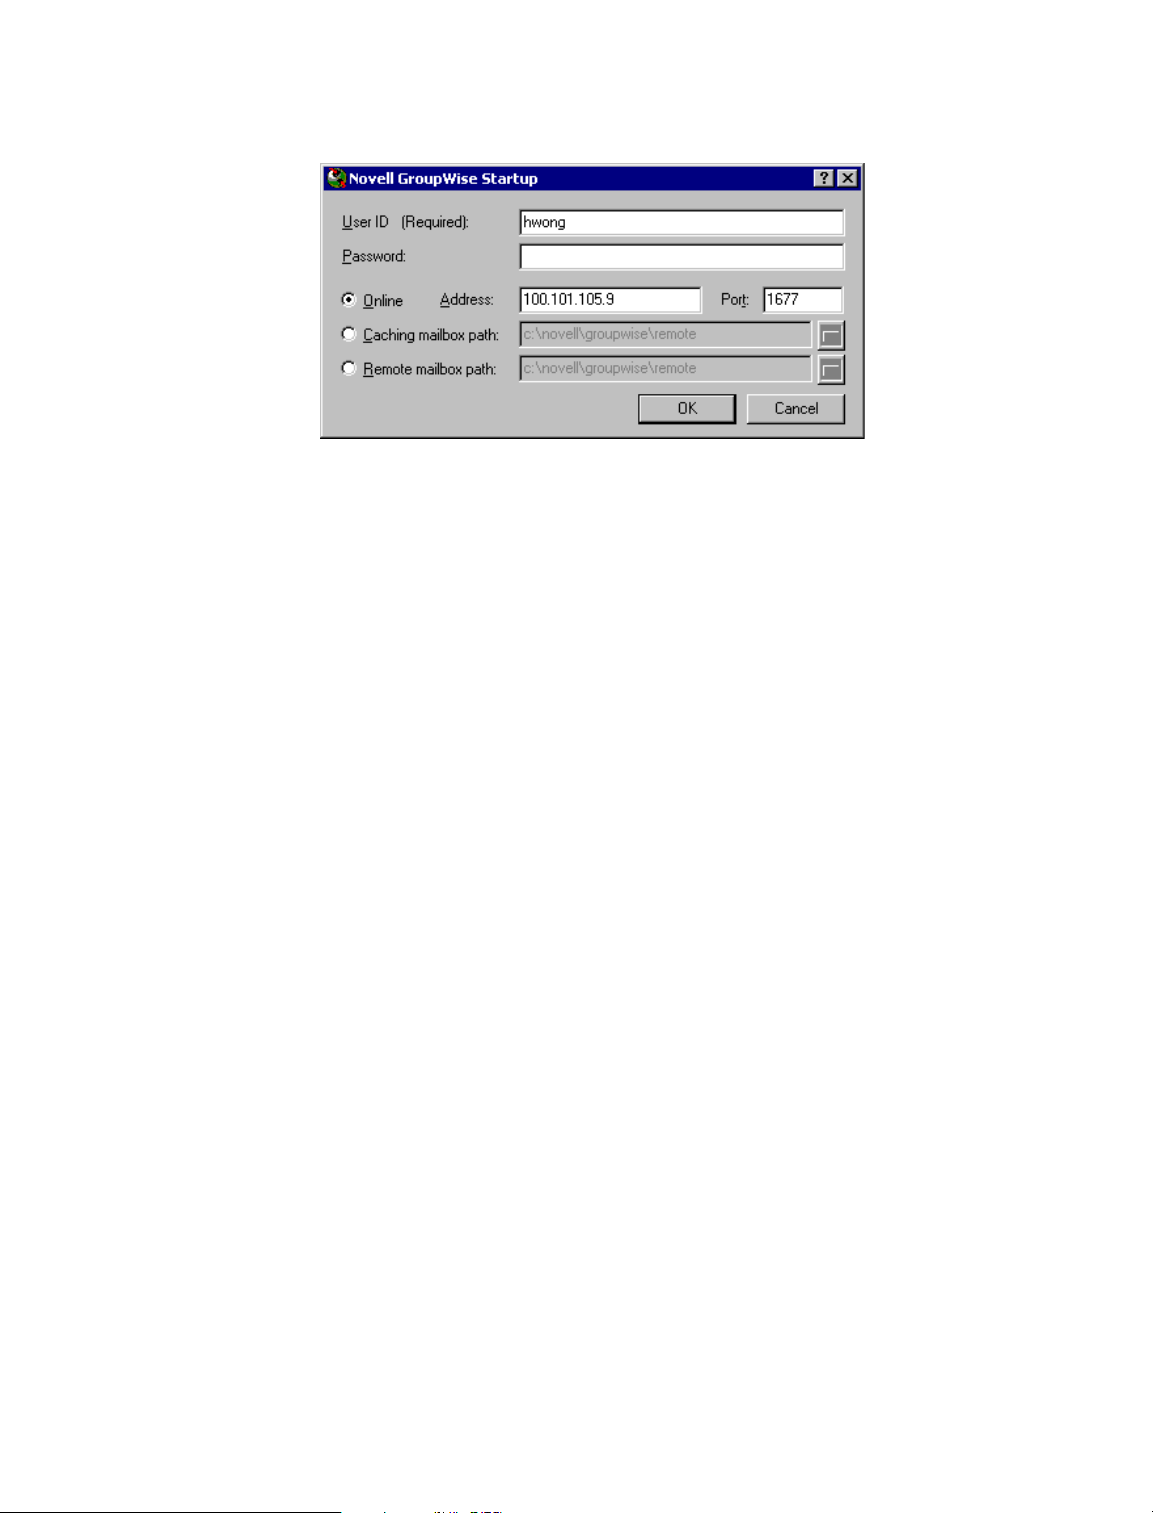
2
In the Target box, after the GroupWise executable, type a space, type /@u-?, then click OK.
3 Start GroupWise.
4 Type your user ID in the User ID box.
5 Click the Password box, type your password, then click OK.
Using Notify On a Shared Workstation
To use Notify on a shared workstation, you need make sure Notify is configured to start and close
when GroupWise is opened or closed.
1 In GroupWise, click Tools > Options, then double-click Environment.
2 On the General page, select Start Notify at Startup.
This starts Notify when GroupWise starts and closes Notify when GroupWise is closed.
3 Click OK, then click Close.
Logging In to the Novell GroupWise 6.5 Collaboration Client for Novell Nterprise Linux Services 1.0 (v6.5 for NNLS 1.0)
For information, see “Using the Novell GroupWise 6.5 Collaboration Client for Novell Nterprise
Linux Services 1.0 (v6.5 for NNLS 1.0)” on page 18.
Assigning Passwords to Your Mailbox
You can assign a password to your Mailbox. GroupWise passwords are case sensitive (for
example, Wednesday is not the same as WEDNESDAY). If you forget your password, you will
not have access to any of your items.
“LDAP Authentication” on page 42
“Adding, Changing, and Removing Your Password” on page 42
“Bypassing Your GroupWise or LDAP Password” on page 43
“Proxies and Mailbox Passwords” on page 43
“Mailbox Passwords and Remote Mode” on page 44
“Mailbox Passwords and Caching Mode” on page 44
Logging In to GroupWise 41
Page 42

LDAP Authentication
If your system administrator has turned on LDAP authentication, your LDAP password is used to
access your Mailbox rather than a GroupWise password. With LDAP authentication, you are
required to have a password and you cannot remove your password.
If your system administrator has disabled changing your LDAP password in GroupWise, you may
need to change your password using a different application. Contact your system administrator for
more information.
Adding, Changing, and Removing Your Password
“Adding a Password” on page 42
“Changing Your Password” on page 42
“Removing Your Password” on page 42
Adding a Password
If your system administrator has turned on LDAP authentication, your LDAP password is used to
access your Mailbox rather than a GroupWise password, and you cannot add a password using this
method.
1 In the Main Window, click Tools, then click Options.
2 Double-click Security, then click the Password tab.
3 In the New Password text box, type the password.
4 In the Confirm New Password text box, type the password, click OK, then click Close.
Changing Your Password
If your system administrator has turned on LDAP authentication and has disabled changing your
LDAP password in GroupWise, you might need to change your password using a different
application. Contact your system administrator for more information.
1 In the Main Window, click Tools, then click Options.
2 Double-click Security, then click the Password tab.
3 In the Old Password text box, type the password you want to change, then press the Tab key.
4 In the New Password text box, type the new password.
5 In the Confirm New Password text box, type the new password again, click OK, then Close.
Removing Your Password
If your system administrator has turned on LDAP authentication, you are required to have a
password and you cannot remove it.
1 Click Tools, then click Options.
2 Double-click Security, then click the Password tab.
3 Type your old password, then click OK.
4 Click Clear Password.
5 Click OK, then click Close.
42 GroupWise 6.5 Windows Client User Guide
Page 43

Bypassing Your GroupWise or LDAP Password
If you have a password but do not want to be prompted for it every time you start GroupWise, you
have several options. The availability of these options depends on the platform on which you run
GroupWise, the options your system administrator has set, and other products you have installed.
Remember My Password
When you run GroupWise on Windows* 95 or higher, are logged in to the network as yourself,
and have selected this option in Security Options or during login, you will not be prompted for
your password on the current workstation. Windows remembers the password.
No Password Required With eDirectory
When you are logged in to Novell® eDirectory™ or NDS® as yourself on any workstation and
have selected this option in Security Options, you will not be prompted for your password.
Because eDirectory has identified you, the password is not required.
Use Single Sign-On
When you are logged in to eDirectory as yourself on any workstation where Novell SecureLogin
is installed and you have selected this option in Security Options or during login, you will not be
prompted for your password. Single sign-on locates your stored password. If other users log in to
GroupWise on your workstation, they should deselect this option during login. This will not turn
the option off, but will make sure their password is not stored in place of yours.
Bypassing Your GroupWise Password
The availability of these options depends on the platform on which you run GroupWise, the
options your system administrator has set, and other products you have installed.
1 Click Tools, then click Options.
2 Double-click Security, then make sure the Password tab is selected.
3 Select No Password Required With eDirectory.
or
Type your password, type a new password, type the new password again, then select
Remember Password or Use Single Sign-On.
4 Click OK, then Close.
You can also select Remember My Password or Use Single Sign-On in the Startup dialog box at
login.
Proxies and Mailbox Passwords
Setting a password for your Mailbox does not affect a proxy's ability to access your Mailbox. A
proxy's ability to access your Mailbox is determined by the rights you assign him or her in your
Access List.
Logging In to GroupWise 43
Page 44

Mailbox Passwords and Remote Mode
To use Remote mode, you must assign a password to your Online Mailbox. If you assign a
password when you're running Remote, the password you create affects only your Remote
Mailbox. For example, if you are running Remote mode at home and you create a password in
Security Options, the password you create only affects your Remote Mailbox. The password does
not affect your Online Mailbox at the office.
Changing Your Online Mailbox Password from Remote Mode
If your system administrator has turned on LDAP authentication and has disabled changing your
LDAP password in GroupWise®, you might need to change your password using a different
application. Contact your system administrator for more information.
1 Click Accounts, click Account Options, then select your GroupWise account.
2 Click Properties, then click Server.
3 Change the password in the Online Mailbox Password field.
4 Click OK.
Mailbox Passwords and Caching Mode
To use GroupWise in Caching mode, you must assign a password to your Online Mailbox. If you
assign a password when you're in Caching mode, the password you create affects only your
Caching Mailbox. For example, if you are running in Caching mode and you create a password in
Security Options, the password you create only affects your Caching Mailbox. The password does
not affect your Online Mailbox.
Changing Your Online Mailbox Password from Caching Mode
If your system administrator has turned on LDAP authentication and has disabled changing your
LDAP password in GroupWise, you might need to change your password using a different
application. Contact your system administrator for more information.
1 Click Accounts, click Account Options, then select your GroupWise account.
2 Click Properties, then click Advanced.
3 Change the password in the Online Mailbox Password field.
4 Click OK.
44 GroupWise 6.5 Windows Client User Guide
Page 45

3 Working with Items in Your Mailbox
GroupWise® provides many options for sending and receiving different kinds of e-mail.
“Understanding GroupWise Item Types” on page 45
“Sending and Receiving Items” on page 46
“Using Routing Slip” on page 55
“Notifying Recipients About an Item You have Sent” on page 58
“Downloading POP3 and IMAP4 Accounts to GroupWise” on page 58
“Attaching Files” on page 67
“Managing Sent Items” on page 72
“Managing Received Items” on page 76
Understanding GroupWise Item Types
Every day you communicate in a variety of ways. To accommodate these needs, GroupWise
delivers your items using a variety of item types. Each item type is explained below.
Mail
A mail message is for basic correspondence, such as a memorandum or letter.
Appointment
An appointment lets you invite people to and schedule resources for meetings or events. You can
schedule the date, time, and location for the meeting. You can use posted appointments to schedule
personal events such as a doctor’s appointment, a reminder to make a phone call at a certain time,
and so forth. Appointments display on the Calendar. See “Scheduling Appointments” on page 105.
Task
A task lets you place a to-do item on your own or on another person’s Calendar. You can schedule
a due date for the task and include a priority (such as A1). Uncompleted tasks are carried forward
to the next day. See “Sending Tasks” on page 112.
TIP: You can also create a checklist that is not associated with your Calendar. In this type of checklist, any
item type (mail, appointment, task, reminder note, phone message) can be used. For information, see
“Creating a Checklist” on page 86.
Reminder Note
A reminder note is posted on a specific date on your own or another person’s Calendar. You can
use reminder notes to remind yourself or others of deadlines, holidays, days off, and so forth.
Working with Items in Your Mailbox 45
Page 46
Posted reminder notes are useful as reminders for birthdays, vacations, pay days, and so forth. See
“Sending Reminder Notes” on page 115.
Phone Message
A phone message helps you inform someone of a phone call or visitor. You can include such
information as caller, phone number, company, urgency of the call, and so forth. You cannot
answer your phone from a phone message. See “Sending Phone Messages” on page 48.
Sending and Receiving Items
This section contains the following topics:
“Sending Mail Messages” on page 46
“Sending Phone Messages” on page 48
“Changing the Font of Items You Send” on page 49
“Adding a Signature or vCard to Items You Send” on page 51
“Spell-Checking Items You Send” on page 52
“Undoing the Last Text Action” on page 54
Sending Mail Messages
A mail message has a primary recipient, subject line, date, and can be carbon copied and blind
copied to other users. You can also attach files, document references, sounds, movies, and OLE
objects to your mail messages.
CC (Carbon Copy)
Carbon copy recipients (CC) receive a copy of an item. CC recipients are users who would benefit
from the information in an item, but are not affected by or directly responsible for it. All recipients
can see that a carbon copy was sent. They can also see the names of the CC recipients.
BC (Blind Copy)
Blind copy recipients (BC) receive a copy of an item. Other recipients receive no information
about blind copies. Only the sender and the blind copy recipient know that a blind copy was sent.
If a recipient replies and chooses Reply to All, the blind copy recipient will not receive the reply.
1 Click on the toolbar.
You can select a different mail view by clicking the down arrow in .
46 GroupWise 6.5 Windows Client User Guide
Page 47
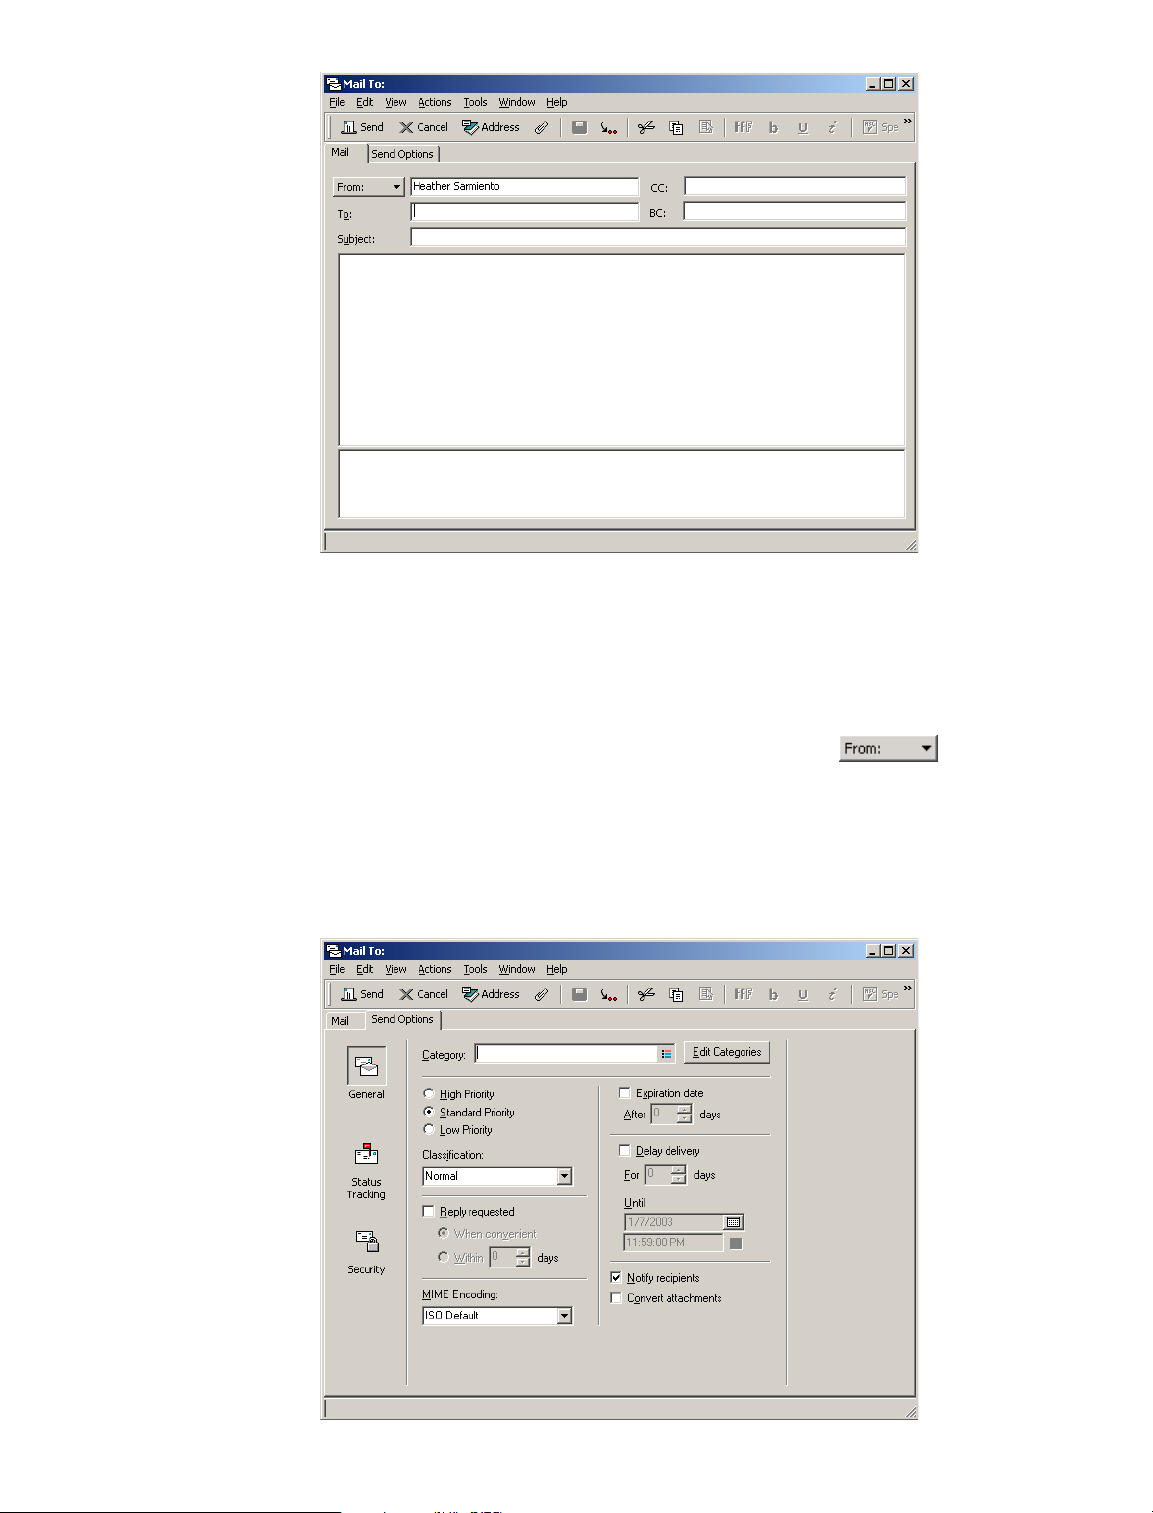
In the To box, type a username, then press Enter. Repeat for additional users. If necessary, type
2
usernames in the CC and BC boxes.
or
To select usernames from a list, click Address on the toolbar, double-click each user, then
click OK.
3 To change the From name (to another account or proxy), click , then click a name.
4 Type a subject.
5 Type a message.
You can specify many options, such as making this message a high priority, requesting a reply
from recipients, and more, by clicking the Send Options tab.
Working with Items in Your Mailbox 47
Page 48
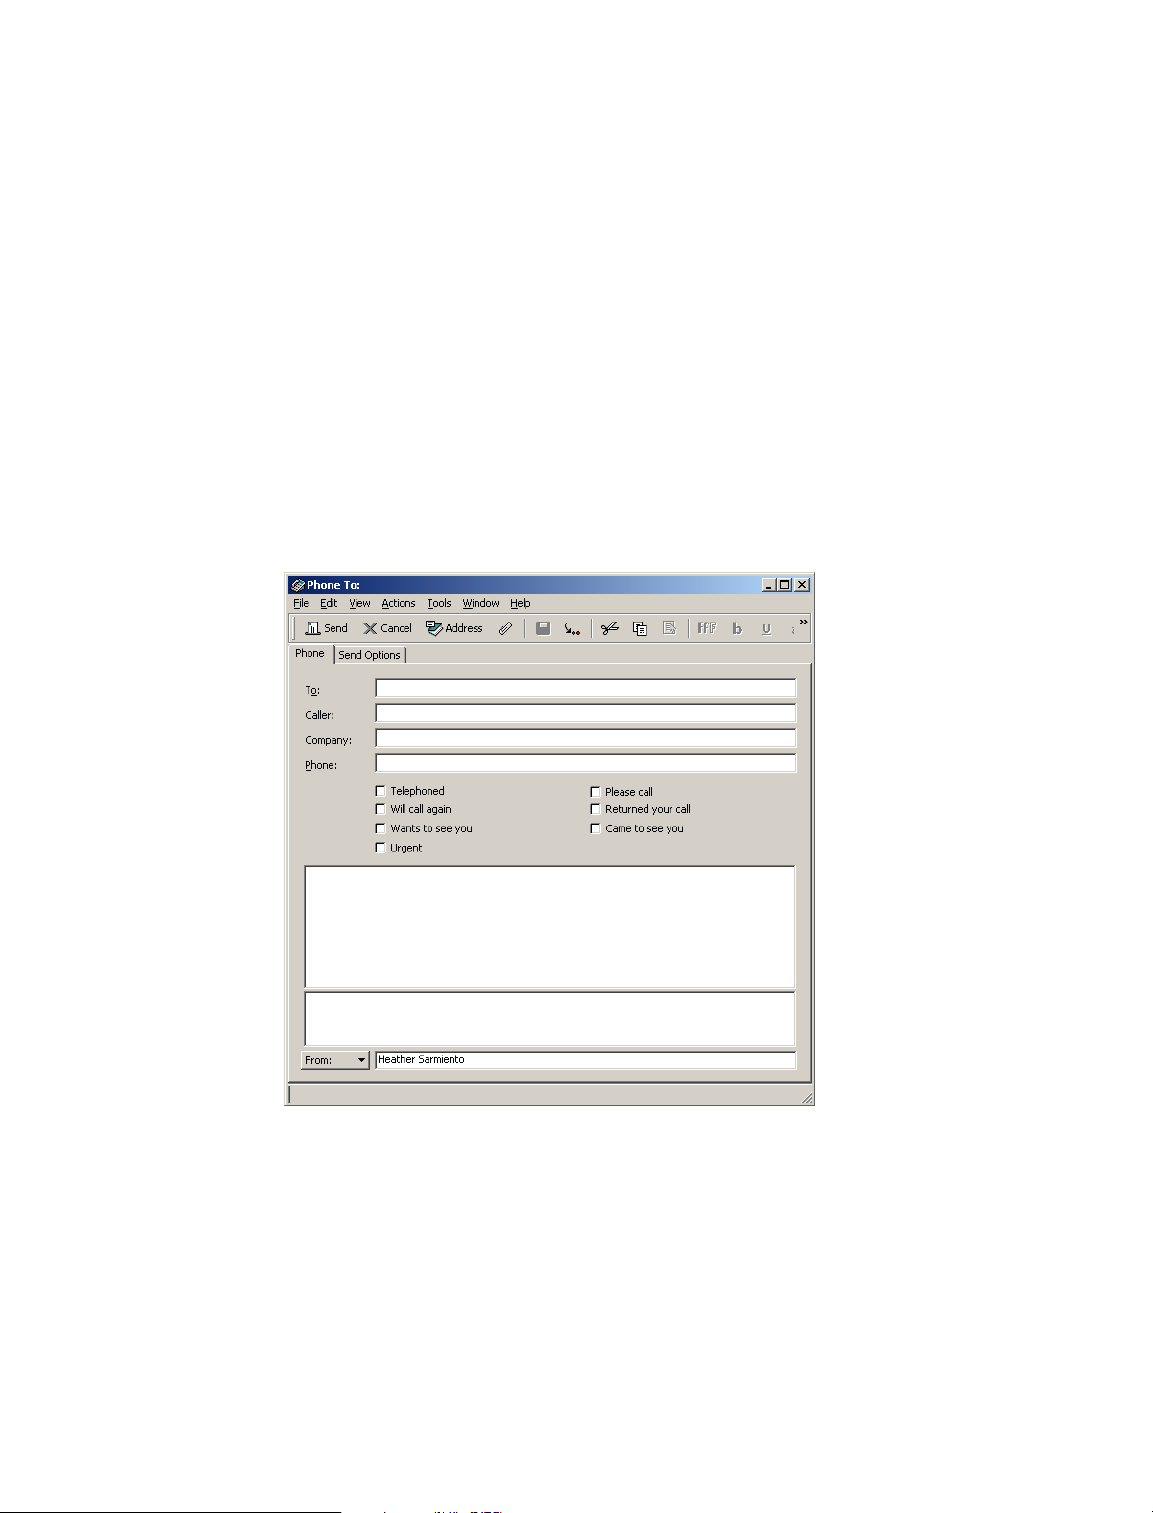
If you want, you can change the font of the message text. For information, see “Changing the
Font of Items You Send” on page 49.
6 Include any attachments by clicking Attach a File on the toolbar.
7 Click Send on the toolbar.
Sending Phone Messages
A phone message is a note you can send to notify other GroupWise users of calls they received
while they were out of the office or unavailable. Phone messages are stored in the recipient’s
Mailbox. You cannot answer your phone from a phone message.
You can change the phone messages you receive into tasks, reminder notes, or other posted item
views. This way, you can leave a record of the conversation on the date it was held (reminder note)
or create a to-do item to complete at a later date (task). See “Changing Item Types” on page 98.
1 Click File, click New, then click Phone Message.
You can place a New Phone Message button on the toolbar. See “Customizing the Toolbar
Display” on page 32.
2 In the To box, type a username, then press Enter. Repeat for additional users. If necessary, type
usernames in the CC and BC boxes.
or
To select usernames from a list, click Address on the toolbar, double-click each user, then
click OK.
3 Type the name, company, and phone number of the caller.
4 Click the check boxes that apply to this phone message.
5 Type the message in the Message box.
48 GroupWise 6.5 Windows Client User Guide
Page 49
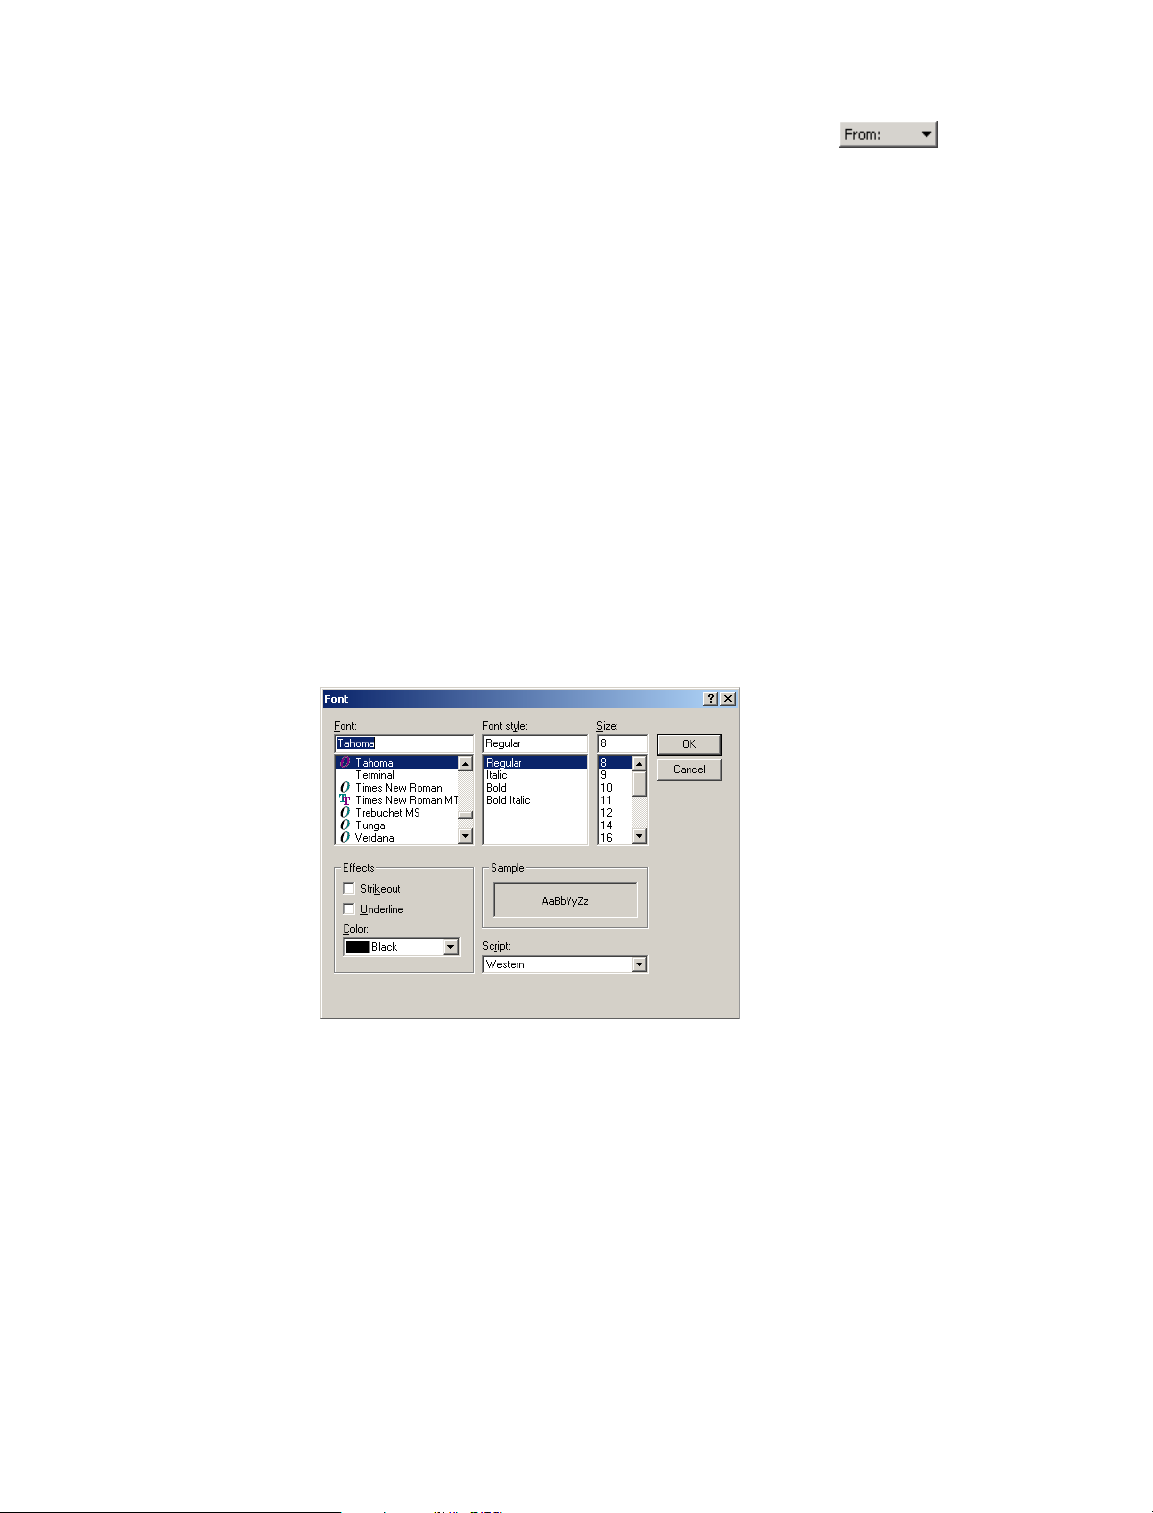
If you want, change the font of the message text. For information, see “Changing the Font of
Items You Send” on page 49.
6 To change the From name (to another account or proxy), click , then click a name.
7 Click Send on the toolbar.
Changing the Font of Items You Send
The recipient of an item will see the changes you make in Plain Text view if he or she views the
item in Plain Text view. The recipient of an item will see the changes you make in HTML view if
he or she views the item in HTML view. You might want to let the recipient know which view you
composed the item in.
This section contains the following topics:
“Changing the Font in Plain Text View” on page 49
“Changing the Font in the HTML View” on page 50
Changing the Font in Plain Text View
In an open item you are composing, click View, then click Plain Text.
1
2 Click the Message box.
3 Click Edit, click Font, then click Font again.
4 Click a font and a font style.
5 Click a size.
6 Click any other options you want to change, then click OK.
You can also bold, italicize, or underline portions of text using toolbar buttons.
Working with Items in Your Mailbox 49
Page 50
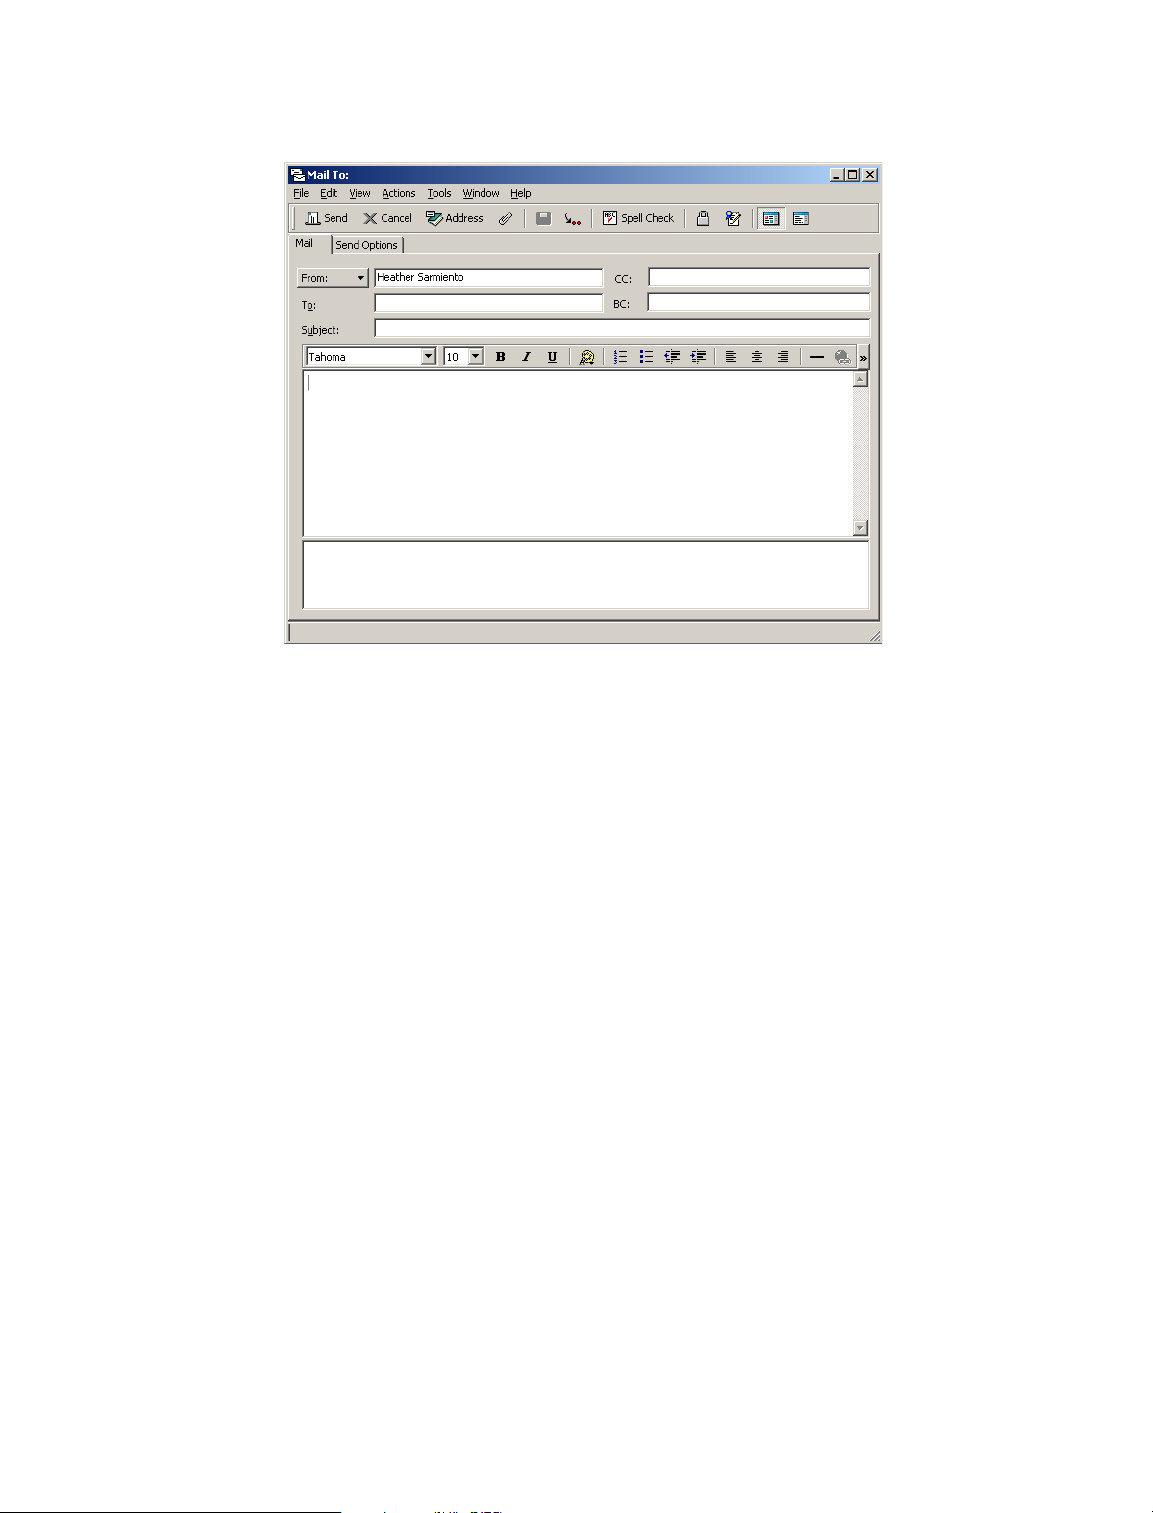
Changing the Font in the HTML View
1
In an open item you are composing, click View, then click HTML.
2 Use the HTML toolbar to change the font, add background colors, add images, and more.
You might need to re-size the item view horizontally to see all the buttons on the HTML toolbar.
You can set a default font for items you compose in HTML view. For information, see “Viewing
and Composing Items in HTML” on page 100.
Formatting Bulleted and Numbered Lists
You can easily include bulleted and numbered lists in messages.
“Formatting Lists in Plain Text View” on page 50
“Formatting Lists in HTML View” on page 50
Formatting Lists in Plain Text View
In an open item you are composing in Plain Text view:
1 Press Ctrl+Shift+L to insert a bulleted list.
2 Press Ctrl+Shift+L again to change it to a numbered list.
3 Continue to press Ctrl+Shift+L to select from the six list formats available.
4 Type the list item, then press Enter to create the next item in the list.
5 Press Enter twice after the last list item to turn off the list formatting.
Formatting Lists in HTML View
In an open item you are composing in HTML view:
1 Use the HTML toolbar to insert a bulleted or numbered list
50 GroupWise 6.5 Windows Client User Guide
Page 51

2
Type the list item, then press Enter to create the next item in the list.
3 Press Enter, then press Backspace after the last item to turn off the list formatting.
Adding a Signature or vCard to Items You Send
Use Signatures to insert a signature or tag-line at the end of items you send. For example, you can
have GroupWise automatically list your name, phone number, and e-mail address at the bottom of
every item you send. If you have a number of different accounts, including POP3, IMAP4, and
NNTP newsgroup accounts, you can create a different signature for each account.
You can also have GroupWise automatically add a vCard*, or virtual business card, to the end of
messages. GroupWise searches the Address Book for your user information and places it at the
end of any messages you send.
This section contains the following topics:
“Understanding .vCard Files” on page 51
“Adding a Signature or vCard to Items” on page 51
Understanding .vCard Files
vCards are electronic business cards formatted according to standards set by the Internet Mail
Consortium. A vCard file has a .vcf extension, and you can add the file to your outgoing e-mail
items. Third-party companies create software you can use to create vCards that include text,
graphics, and sound. When you use GroupWise to generate your vCard, it uses the information
from the fields in your Address Book listing.
To view a vCard that has been attached to an item, right-click it, then click View Attachment. For
information about importing vCard information into an address book, see “Importing Information
from a vCard” on page 221.
Adding a Signature or vCard to Items
To specify a general signature for all items, click Tools, click Options, then click double-click
1
Environment.
or
To specify a different signature for an individual POP3, IMAP4, or newsgroup (NNTP)
account, click Accounts, click Account Options, click the account on the Mail or News tab,
then click Properties.
2 Click the Signature tab.
3 Click Electronic Business Card (vCard) or Signature.
Working with Items in Your Mailbox 51
Page 52
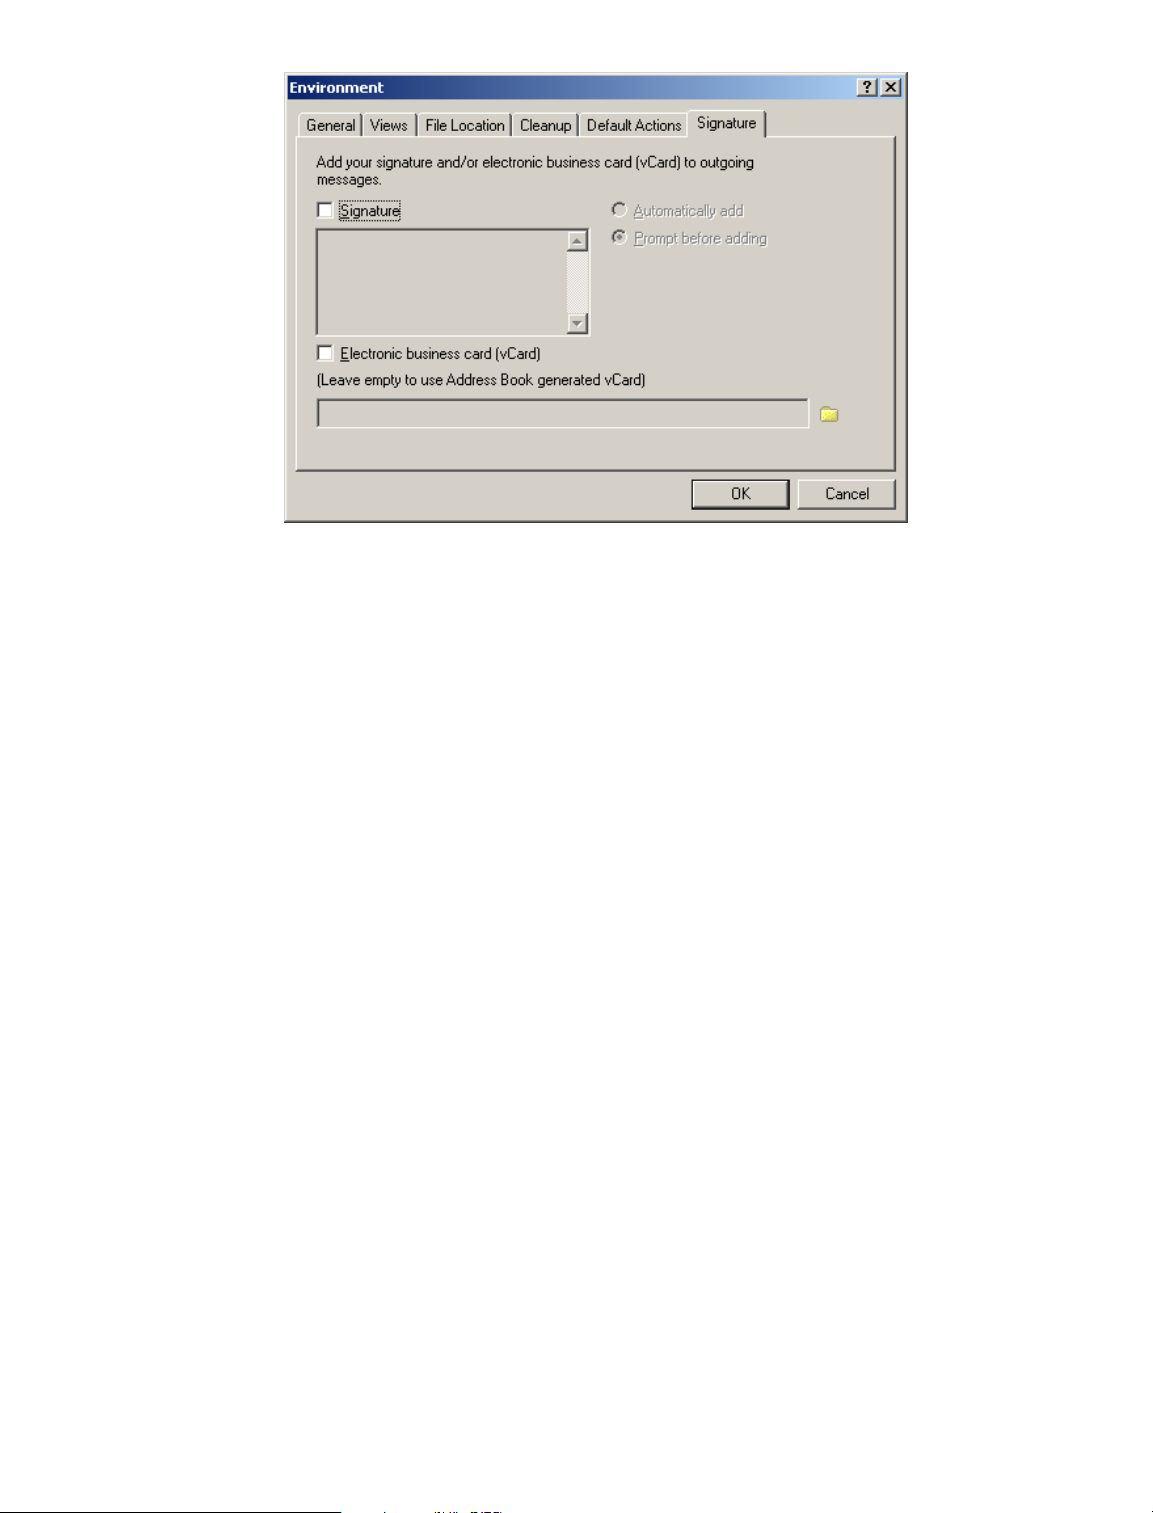
4
If you selected Signature, type the text you want as a signature in the Signature box.
or
If you selected vCard, either specify a .vcf file or leave the field empty to have the vCard use
information from your listing in the Address Book.
5 Click a signature option.
6 Click OK.
You can have both a signature and a vCard at the same time.
Spell-Checking Items You Send
Use Spell Checker to check for misspelled words, duplicate words, and irregular capitalization in
items you are creating.
When Spell Checker finds a misspelled word, you can replace it with a word Spell Checker
suggests, edit the word manually, or skip the word. You can also define an automatic replacement
for the word, or add the word to a user word list.
You can use Environment Options to set up Spell Checker to automatically spell check your
messages before you send them.
This section contains the following topics:
“Spell-Checking an Item” on page 52
“Spell-Checking Items Automatically” on page 53
“Editing Your User Word List” on page 53
Spell-Checking an Item
Click the Subject or Message box.
1
or
Select the text to spell-check.
52 GroupWise 6.5 Windows Client User Guide
Page 53
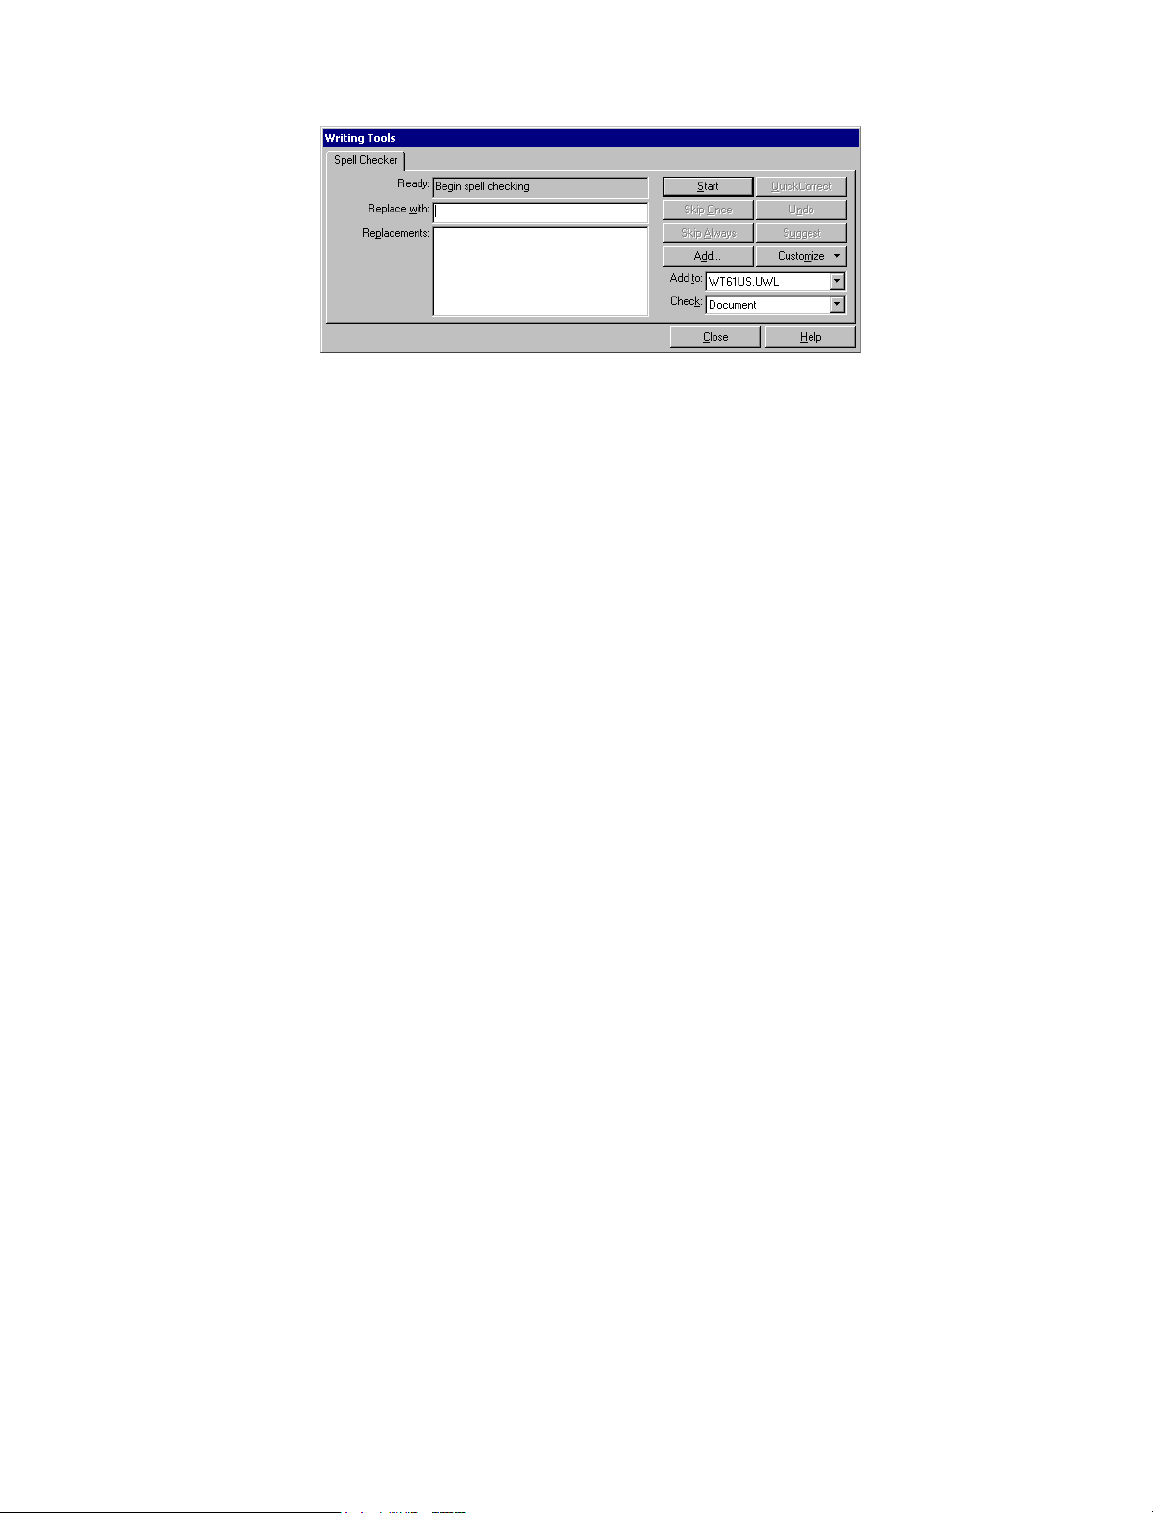
2
Click Tools, then click Spell Check.
3 To specify a user word list to add words to, click the Add To drop-down list and select an
option.
4 To specify a range of text to check, click the Check drop-down list and select an option.
5 When Spell Checker stops on a word, click any of the available options, or edit the word
manually.
You can choose from the following options:
Replace: Replaces a misspelled word with a word Spell Checker suggests. To replace a
misspelled word, double-click the word or click the word, then click Replace. To make your
own corrections, edit the word in the Replace With box, then click Replace.
Skip Once: Skips the word one time. Spell Checker will stop the next time it encounters the
word.
Skip Always: Skips every occurrence of the word throughout the document. Spell Checker
ignores the word until the next time you spell-check.
Add: Adds the word to the current user word list, which stores supplemental words so that
Spell Checker can recognize the word in future spell-checks.
QuickCorrect: Defines an automatic replacement for a word or phrase. When Spell Checker
stops on a word, click QuickCorrect to replace the word with the text in the Replace With box
and add the replacement to the user word list QuickCorrect* uses. Next time you type the
word, QuickCorrect automatically replaces it.
Suggest: Displays additional words or phrases in the Replacements list box.
6 Click Yes when spell-checking is complete.
Spell-Checking Items Automatically
You can spell-check items automatically every time you click Send.
1 Click Tools, click Options, then double-click Environment.
2 Click Check Spelling Before Send, then click OK.
Editing Your User Word List
Changes you make in a user word list are effective only if you have QuickCorrect turned on. In the
Message box of an item you are creating, click Tools, click QuickCorrect, then make sure the
Replace Words As You Type check box has a check mark.
Working with Items in Your Mailbox 53
Page 54
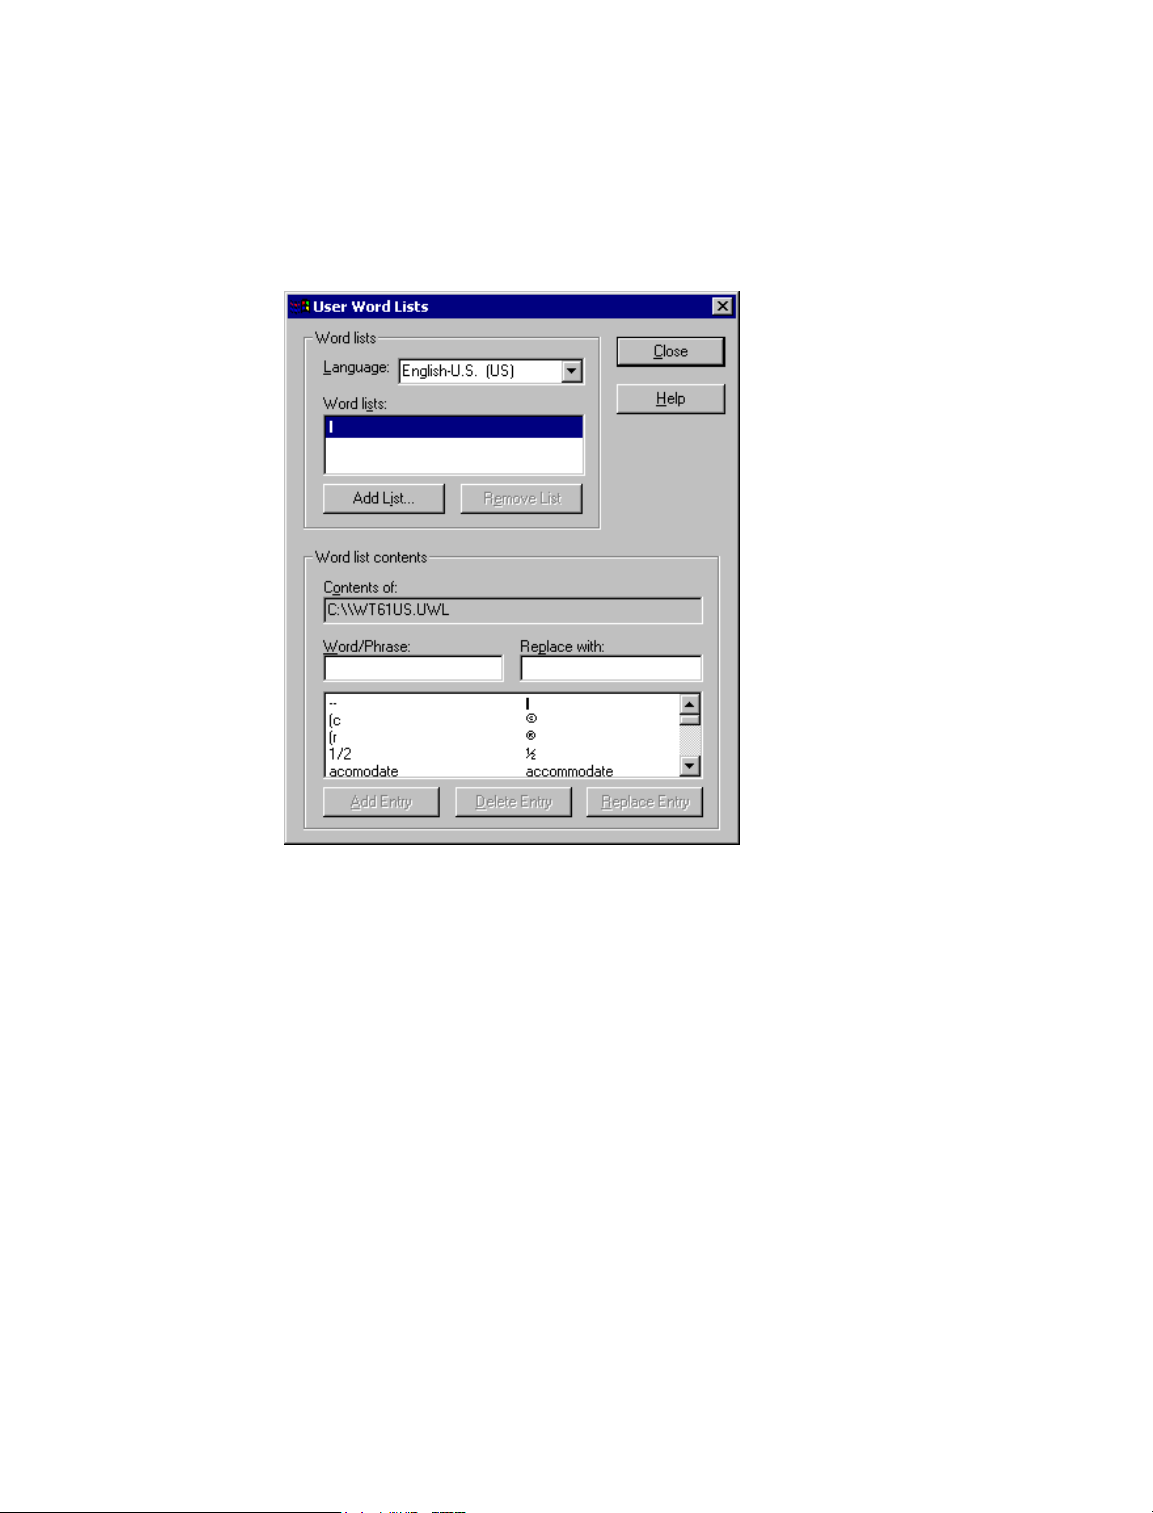
For more information about user word lists, click Tools, click Spell Check in an item you have
created. In the Writing Tools dialog box, click Customize, click User Word Lists, then click Help.
To make changes in your user word list:
1 In the Spell Checker, click Customize, click User Word Lists, then click the list you want to
modify.
If you haven’t added lists of your own, the default word list will be the only list available.
2 To add a new entry, type it in the Word/Phrase text box, then click Add Entry.
or
To delete an entry, select it, then click Delete Entry.
or
To change an entry, select it, make the changes, then click Add Entry.
3 Click Close when you have finished making changes.
Undoing the Last Text Action
You can undo the last text action in the Subject or Message field of a message you are composing.
1 Click Edit, then click Undo.
You can also undo an action by pressing Ctrl+Z. (For information about other shortcut keys, see
“Using Shortcut Keys” on page 34.)
54 GroupWise 6.5 Windows Client User Guide
Page 55

Delaying Delivery of an Item
Delay Delivery allows you to send an item at a different time than you composed the item.
1 From the new item window, click the Send Options tab.
2 Select Delay Delivery.
3 Specify the number of days to wait until delivery.
or
Specify the date and time to use for delivery.
4 Click Send.
Using Routing Slip
Use Routing Slip to send a mail message or task to several users consecutively. You determine the
order of the route. When a user marks the routed item Completed, it is sent to the next user on the
route.
If there are attachments to the routed item, each user on the route can view and add comments to
them. When comments are added to an attachment, all subsequent users on the route will see the
comments. The final user on the route will see all the comments that were added.
You can track the status of a routed item you have sent by checking the item's Properties. When
you send a routed item to an external address, the item is automatically marked Completed
(because the external recipient will not be able to mark it) and sent to the next user on the route.
If you want to prevent a proxy from marking routed items Completed, you can require a password
to complete a routed item.
This section contains the following topics:
“Creating a Routed Item” on page 55
“Requiring a Password before Marking a Routed Item Completed” on page 56
“Completing a Routed Item” on page 56
“Addressing a Routed Item with an Address Book” on page 57
Creating a Routed Item
1 Open a mail message or task.
2 Click Actions, then click Routing Slip.
Working with Items in Your Mailbox 55
Page 56
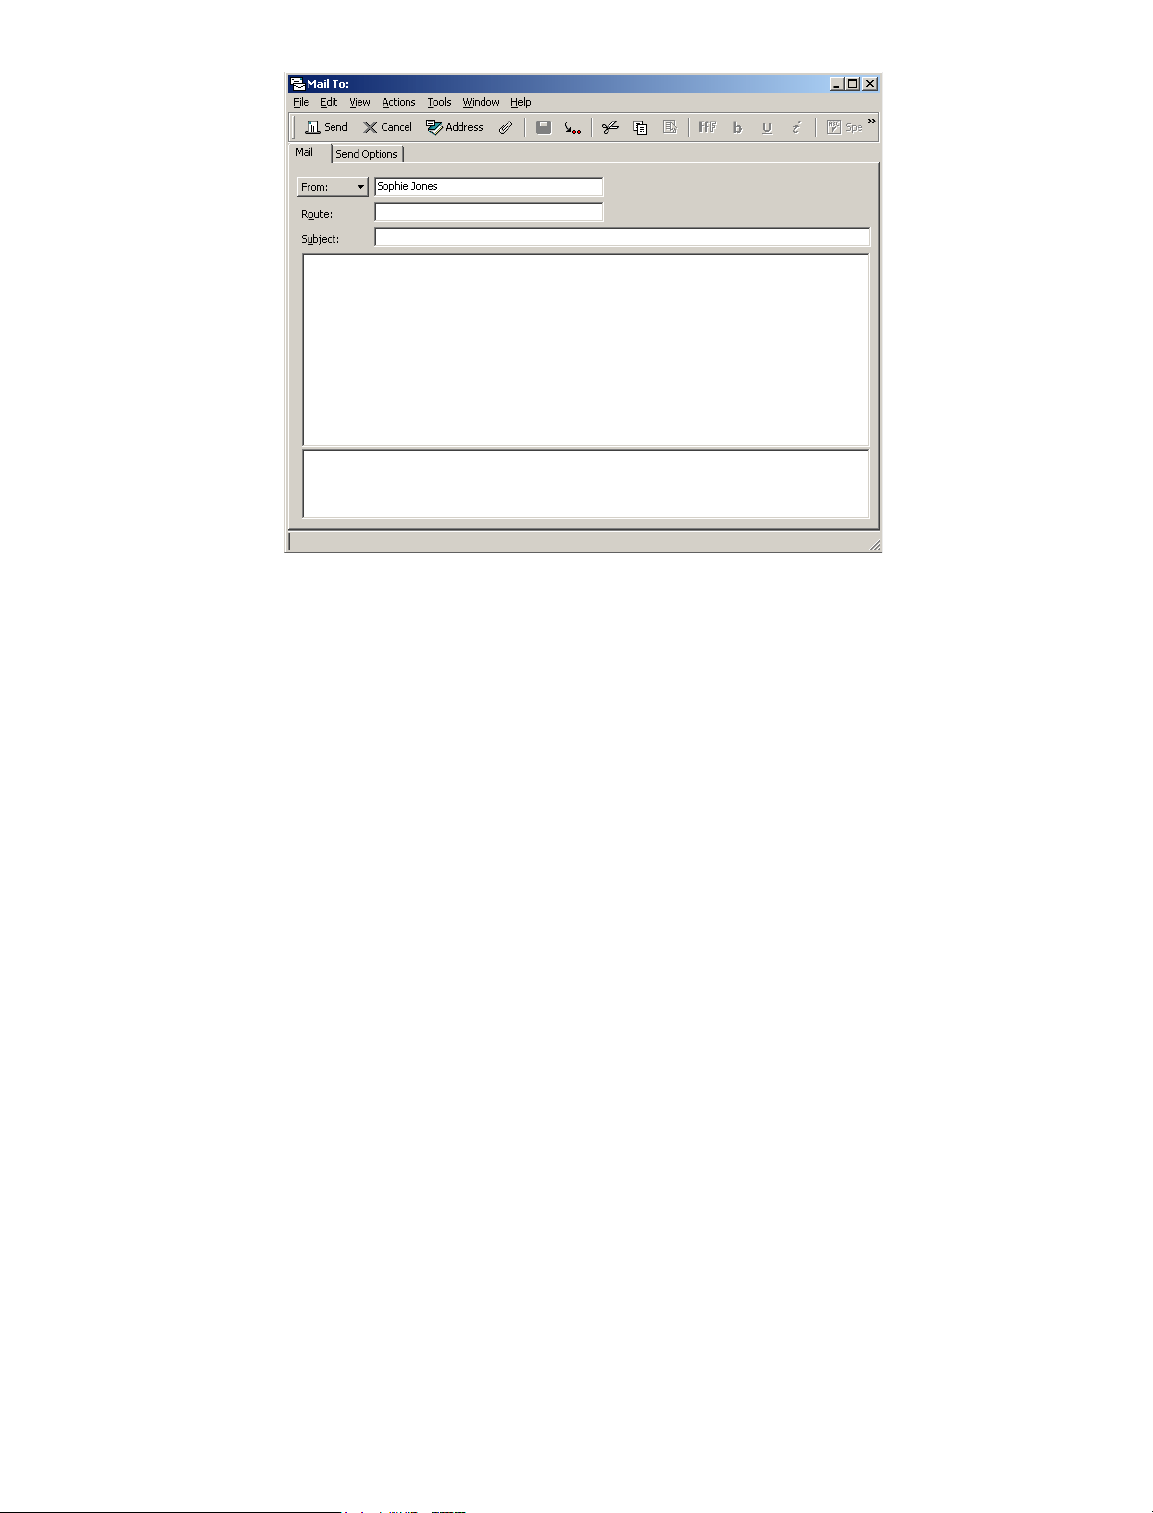
In the Route box, type a username, then press Enter. Repeat for each user included in the route.
3
or
Click Address on the toolbar to select usernames from the Address Selector dialog box.
You can also specify personal groups as recipients of a routed item. When you use the Address
Selector dialog box, the group is expanded into its members so that you can specify the order
of the users in the route.
4 Type a subject and message.
5 If you want to prevent a proxy from marking routed items Completed, you can require the
recipient's GroupWise password to mark the item Completed. Click the Send Options tab,
click Security, then select Require Password to Complete Routed Item.
6 Click Send on the toolbar.
Requiring a Password before Marking a Routed Item Completed
To require a password for all routed items you create,
1 Click Tools, then click Options.
2 Double-click Security, then click the Send Options tab.
3 Select Require Password to Complete Routed Item.
4 Click OK.
For information on GroupWise passwords, see “Assigning Passwords to Your Mailbox” on
page 41.
Completing a Routed Item
1 When you are finished with the assignment or instructions in the routed item, open the item.
2 If you need to view and edit an attachment to the routed item, open the attachment in its
associated application, make your changes, then save the file. The file is saved to your
56 GroupWise 6.5 Windows Client User Guide
Page 57
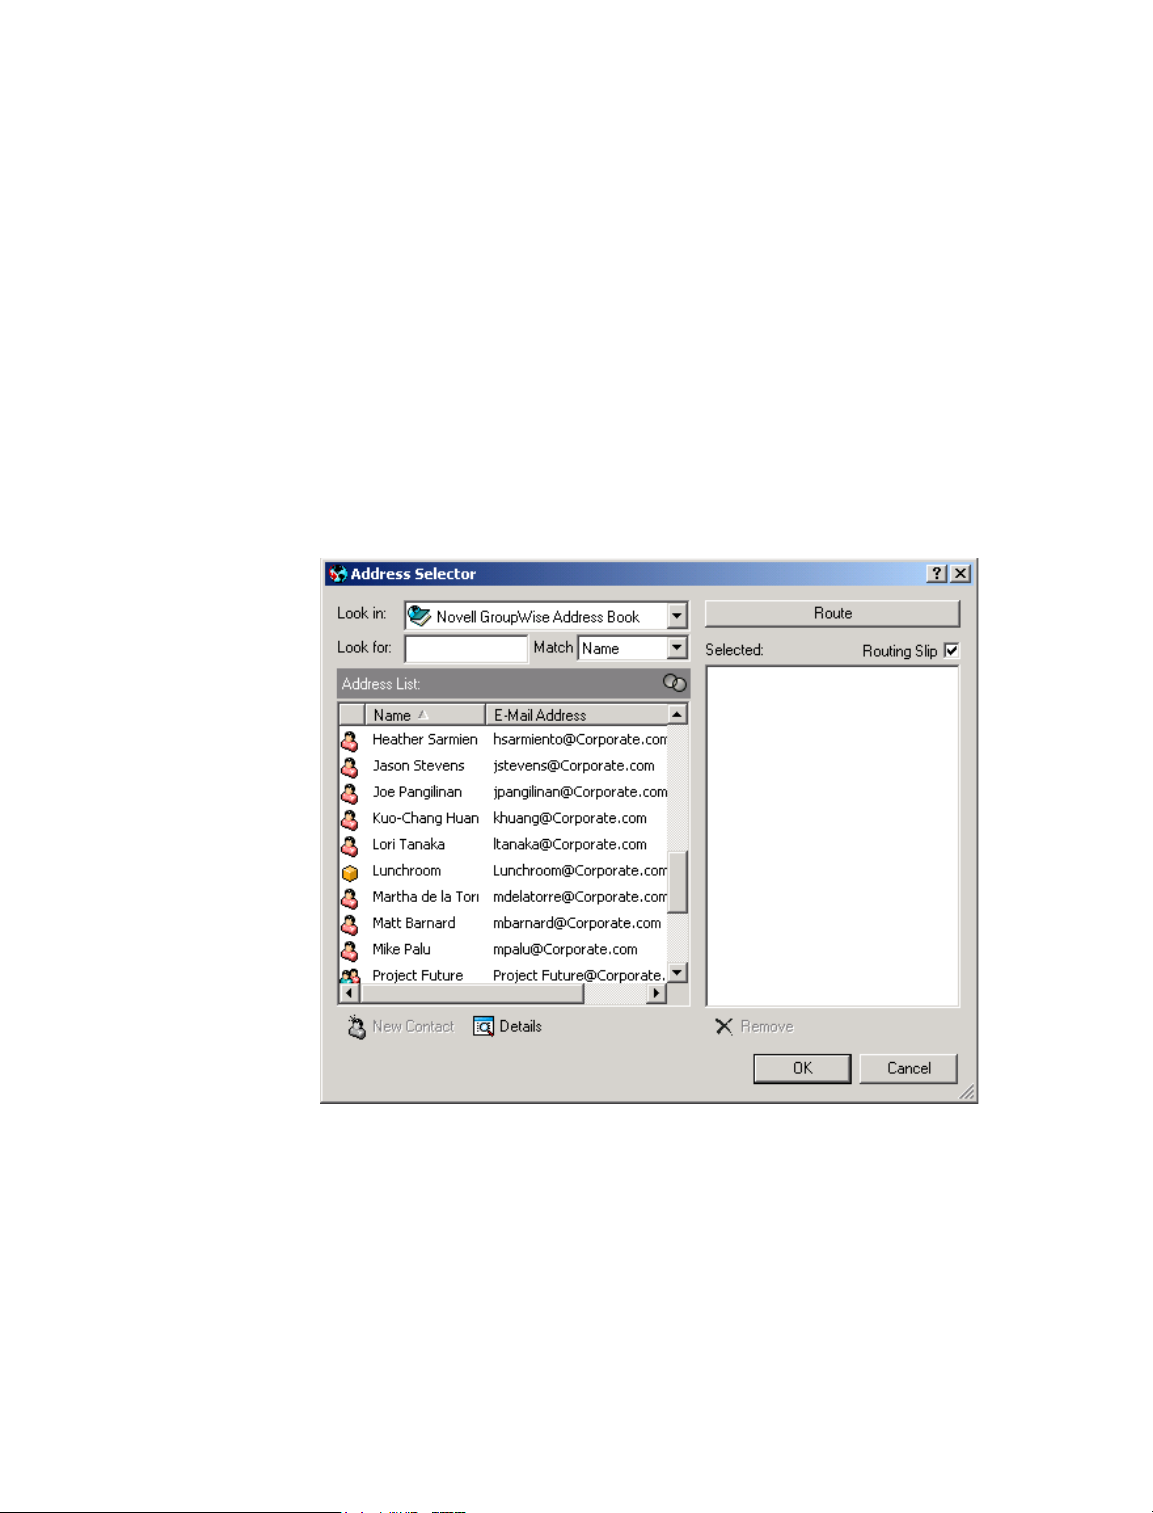
computer's temporary files directory. Do not change the path, or your changes will not be
included when the routed item is sent to the next recipient. Close the application.
IMPORTANT: To be able to edit attachments in a routed item, you must have the GroupWise 5.5
Enhancement Pack or higher installed.
3 In the item, select Actions, click Mark Completed, then click OK.
You can also select the Completed check box in the item header.
4 If the sender has required a password to complete the item, type your GroupWise password,
then click OK.
The item is sent to the next user on the route.
5 Click Close.
Addressing a Routed Item with an Address Book
1 In a mail message or task, click Address on the toolbar.
2 Select the Routing Slip check box.
3 Ctrl+click names in the order you want to route the item, then click Route.
or
Double-click names in the order you want to route the item.
Use drag and drop to change the order of names in the list of addresses.
4 Click OK.
Working with Items in Your Mailbox 57
Page 58
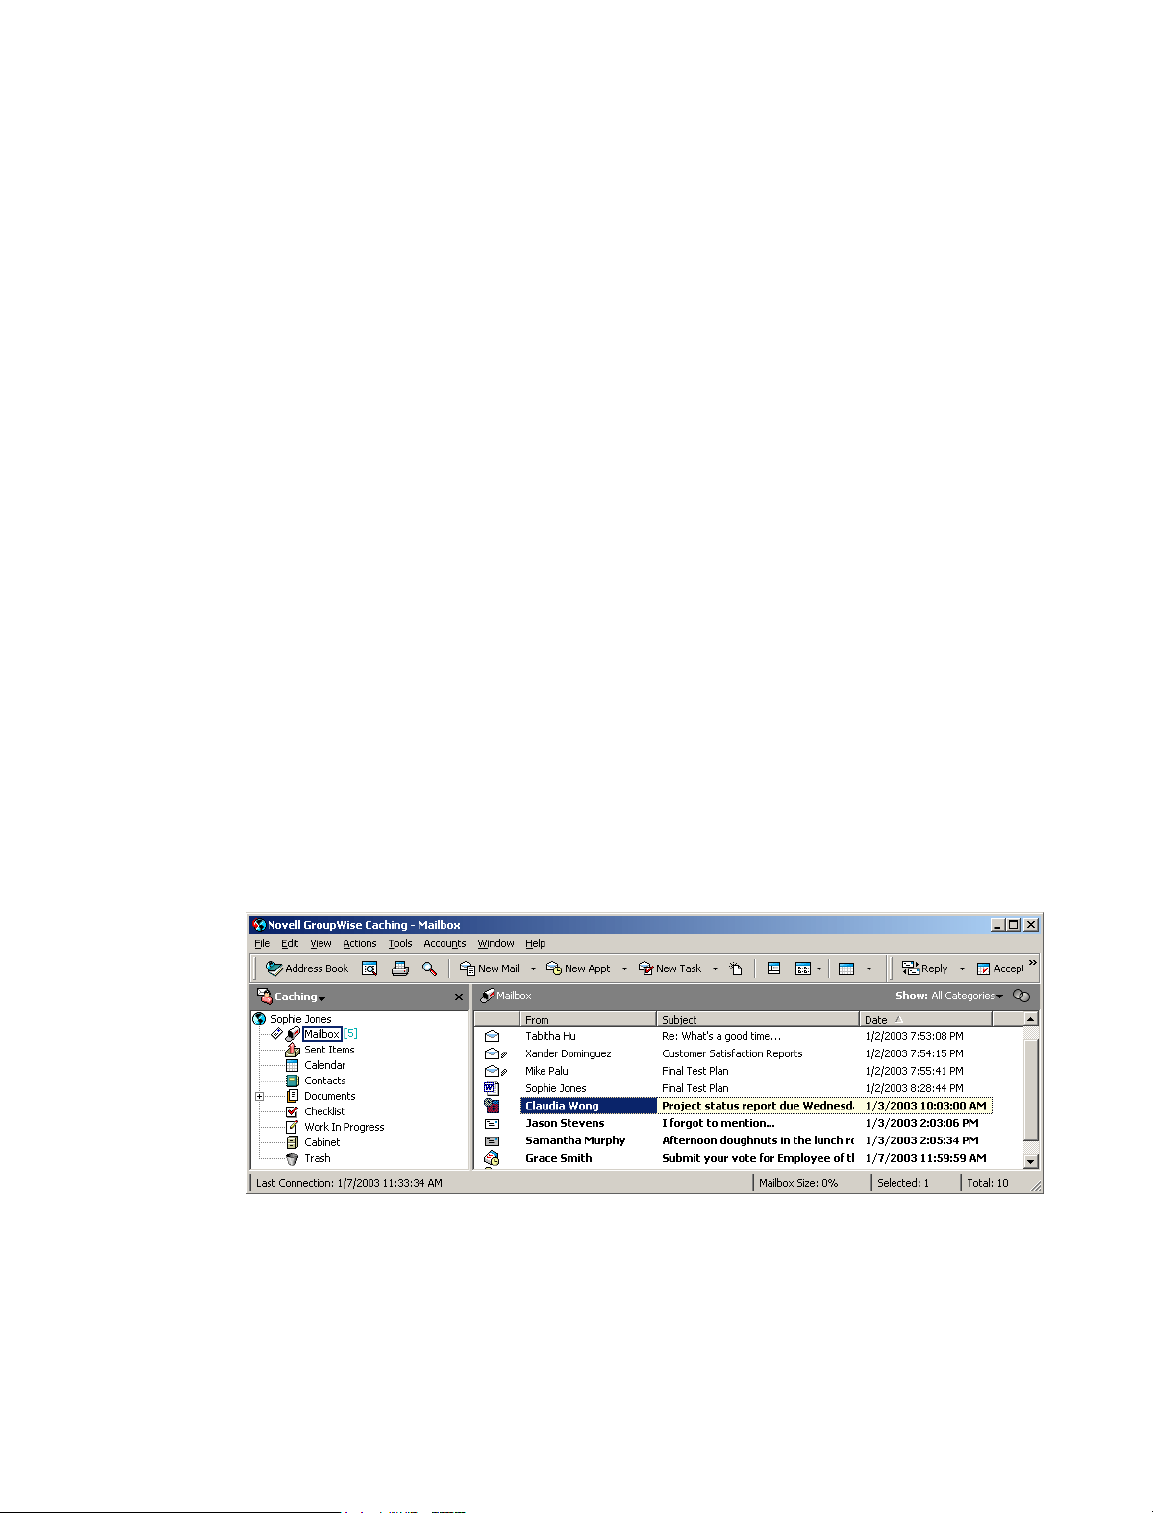
Notifying Recipients About an Item You have Sent
1 To notify the recipients of one item, open an item view > click the Send Options tab.
or
To notify the recipients of all items you send, click Tools > Options > double-click Send.
2 Click Notify Recipients.
Users are automatically subscribed to Notify in Options. If they have deselected to receive
alarms and notifications, they cannot be notified of messages you send. For more information,
see To receive notification for another user or resource.
3 Click OK.
Downloading POP3 and IMAP4 Accounts to GroupWise
If you have multiple e-mail accounts, you know that it's inconvenient to change locations to look
at each account. You can add your POP3 and IMAP4 Internet mail accounts to GroupWise so that
you can read and send messages for all your accounts from GroupWise.
Adding POP3 and IMAP4 Accounts to GroupWise
Before you add a POP3 or IMAP4 account to GroupWise, you need to know the type of mail server
being used (POP3 or IMAP4), your account name and password, and the name of the incoming
and outgoing mail servers. You can get this information from your Internet Service Provider or
LAN administrator. Microsoft* Secure Password Authentication is supported for accessing
Exchange servers and MSN accounts.
Configuring POP3 and IMAP4 Accounts
The Accounts menu in the GroupWise Main Window allows you to access account features, such
as adding an account, setting account properties, and sending and retrieving items from Internet
mail accounts.
Using POP3 and IMAP4 Accounts in Online Mode
If the Accounts menu is not available in your Online Mailbox, your system administrator has
specified that POP3 and IMAP4 accounts cannot be used in Online mode, or your post office is
not using a GroupWise 5.5 Enhancement Pack or higher Post Office Agent.
58 GroupWise 6.5 Windows Client User Guide
Page 59
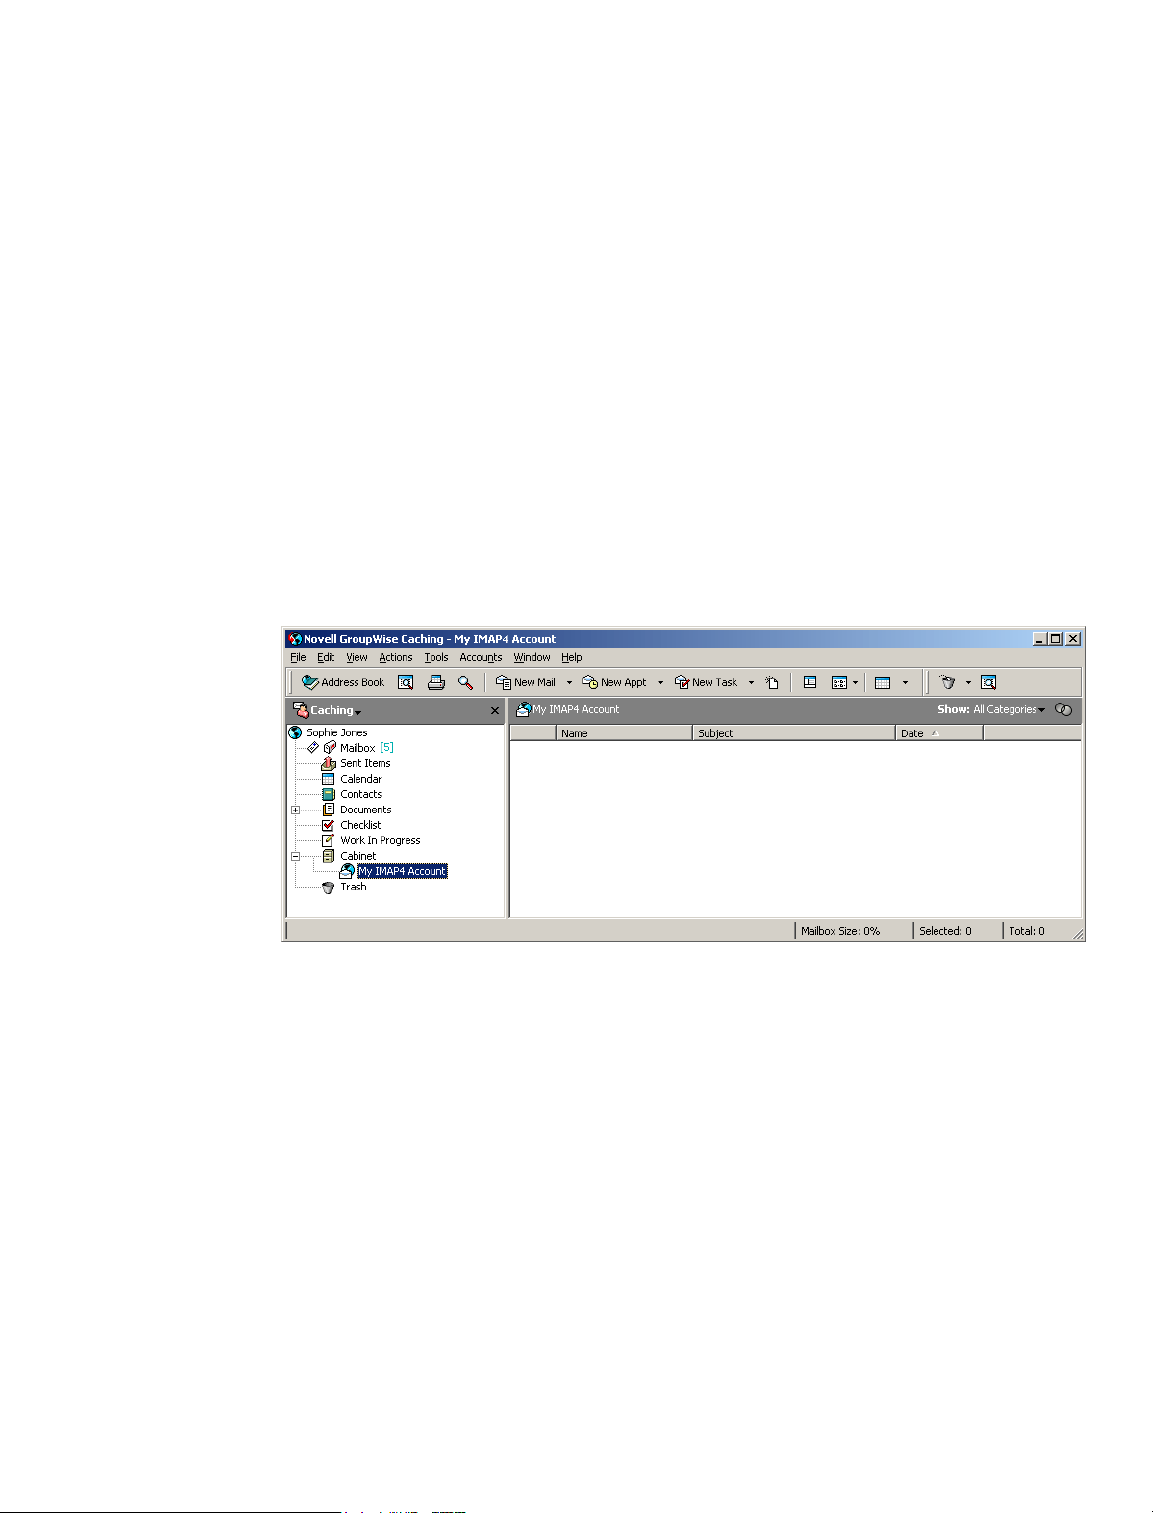
Using POP3 and IMAP4 Accounts in Remote and Caching Modes
While you are using Remote mode, you can check Internet mail accounts without connecting to
GroupWise.
The Accounts menu is always available in Remote mode.
If you are using GroupWise in either Remote mode or Caching mode, you have the option of not
uploading a POP3 or IMAP4 account to your Online Mailbox. To make sure you don't upload,
click Accounts, click Account Options, select an account, click Properties, then uncheck Upload
This Account to the GroupWise Online Mailbox.
Storing Items on the IMAP4 or POP3 Server
Your IMAP4 account items are always stored on the IMAP4 server. You can choose to have your
POP3 account items stored on the POP3 server. If you store items on the server, you can read those
items from more than one computer.
Understanding IMAP4 Accounts
When you add an IMAP4 account, the folder you see in GroupWise represents the folder on your
IMAP4 server. Any actions in the GroupWise folder, such as creating, sharing (v6.5 for NNLS
1.0), renaming, or deleting, are performed on the IMAP4 server as well.
If you are sharing an IMAP4 folder (v6.5 for NNLS 1.0), the IMAP4 server must support sharing
folders. You can only share IMAP4 folders with a user who is on the same IMAP4 server.
When you delete an item, it is marked for deletion on the IMAP4 server. To remove the item, you
need to purge it. You can download only the subject (header) of an item, or you can download the
entire item. You can move items from another folder into an IMAP4 folder, and the items will be
created on the IMAP4 server.
If you use your IMAP4 account while you are in Remote mode, any changes you make will be
synchronized with the GroupWise server the next time you connect to your Online Mailbox.
Querying in IMAP4 folders is not supported. Proxy for IMAP4 folders is not supported.
Using the GroupWise E-Mail Importer Utility
The GroupWise E-Mail Importer Utility lets you import information from supported POP3 and
IMAP4 clients into GroupWise. The Accounts > Account Options > Add option lets you create
Working with Items in Your Mailbox 59
Page 60

new accounts. For information about importing accounts from supported e-mail clients, see
“Importing POP3 and IMAP4 Accounts” on page 64.
This section contains the following topics:
“Adding a POP3 or IMAP4 Account to GroupWise” on page 60
“Modifying Properties of a POP3 or IMAP4 Account” on page 61
“Downloading Items from POP3 and IMAP4 Accounts” on page 61
“Downloading New Items from POP3 and IMAP4 Accounts Automatically” on page 62
“Downloading Only the Header (Subject) for IMAP4 Accounts” on page 62
“Using GroupWise to Send POP3 and IMAP4 Mail” on page 63
“Deleting an Item from a POP3 or IMAP4 Account” on page 63
“Connecting to a POP3 or IMAP4 Server Using SSL” on page 64
“Importing POP3 and IMAP4 Accounts” on page 64
“Storing Your POP3 Items on a Mail Server” on page 65
“Changing the Length of Time for POP3 and IMAP4 Server Timeouts” on page 66
“Subscribing and Unsubscribing to IMAP4 Folders” on page 66
“Alphabetizing the Folders in an IMAP4 Account” on page 66
“Downloading Voice Mail Attachments through an IMAP4 Account” on page 66
“Sharing an IMAP4 Folder (v6.5 for NNLS 1.0)” on page 67
“Seeing IMAP4 Folders That Are Shared with You (v6.5 for NNLS 1.0)” on page 67
Adding a POP3 or IMAP4 Account to GroupWise
Make sure you know the type of mail server being used (POP3 or IMAP4), your account login
name and password, and the name of the incoming and outgoing mail servers.
Contact your NetMail™ system administrator (if it's a NetMail IMAP4 account (v6.5 for NNLS
1.0)) or Internet Service Provider for this information.
1 Click Accounts, then click Account Options.
2 Click Add.
60 GroupWise 6.5 Windows Client User Guide
Page 61
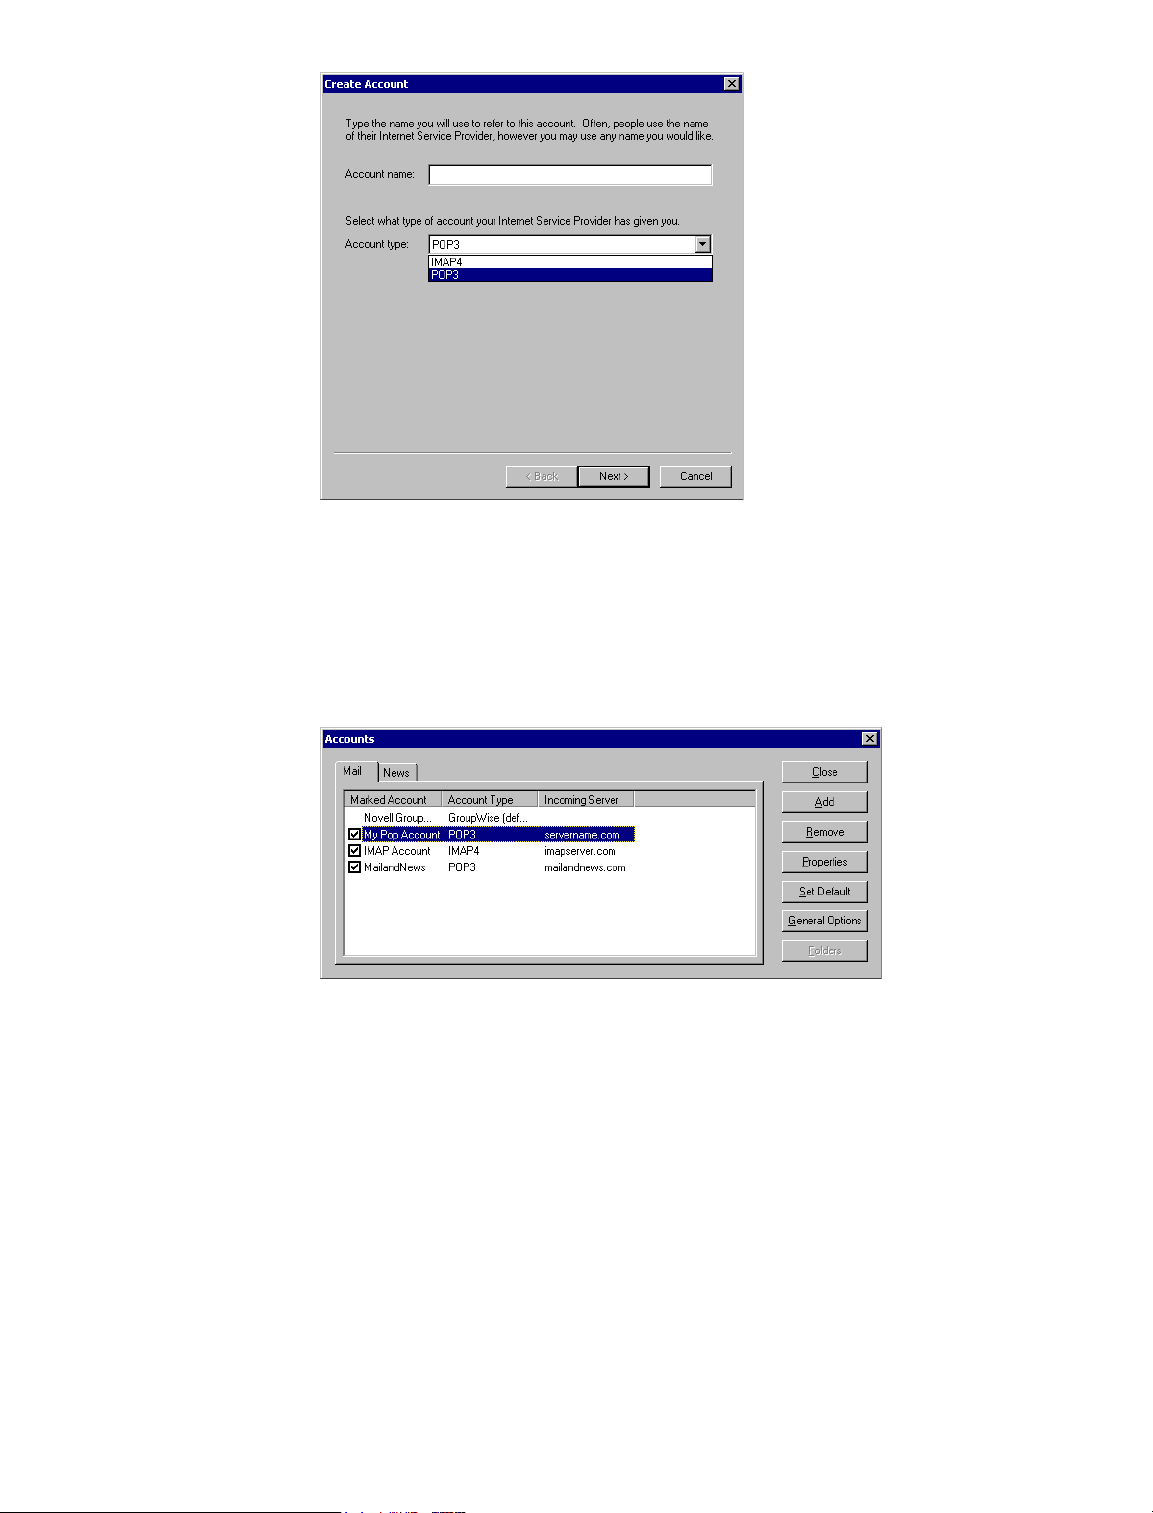
Follow the prompts.
3
Modifying Properties of a POP3 or IMAP4 Account
1 Click Accounts, then click Account Options.
2 Click the Account you want to modify.
3 Click Properties.
4 Click the tabs to find the properties you want to modify.
5 Modify the properties, then click OK.
For IMAP4 accounts, if you change the account name, the name of the IMAP4 folder is also
changed.
Downloading Items from POP3 and IMAP4 Accounts
1 To download items from one account, click Accounts, click Send/Retrieve, then click the
account name.
or
Working with Items in Your Mailbox 61
Page 62
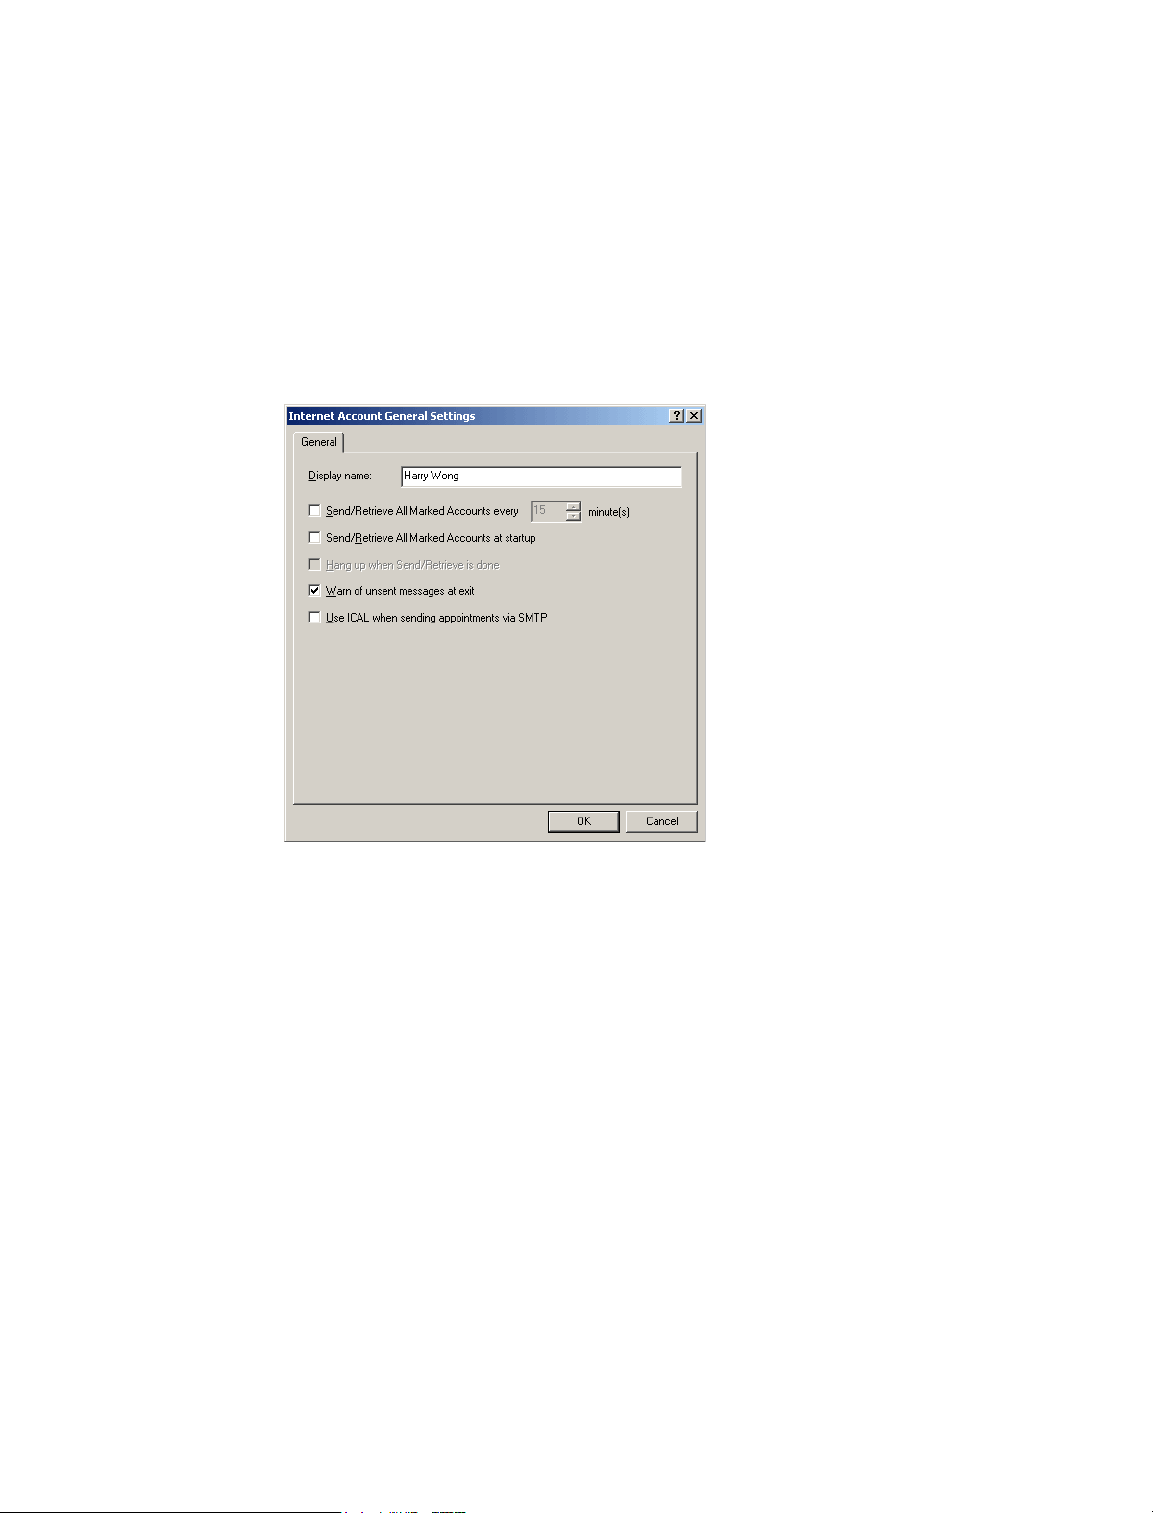
To download items from all accounts in which Include This Account When Doing Send/
Retrieve On All Marked Accounts is selected in the account properties, click Accounts, click
Send/Retrieve, then click All Marked Accounts.
In Remote mode, if Include This Account When Doing Send/Retrieve On All Marked
Accounts is selected in Remote Properties, you can download items from your Online
Mailbox at the same time as your Internet mail accounts.
Downloading New Items from POP3 and IMAP4 Accounts Automatically
1 Click Accounts, then click Account Options.
2 Click General Options.
3 To download items periodically, select Send/Retrieve All Marked Accounts Every _ Minutes.
Specify how often you want items to be sent and retrieved.
4 To download items every time you start GroupWise, select Send/Retrieve All Marked
Accounts at Startup.
The settings will affect all accounts that have Include This Account When Doing Send/Retrieve
On All Marked Accounts selected in the account’s properties.
If you have created new items for these accounts and have not yet sent them, they are sent at the
same time new items are downloaded.
To quickly turn this option on and off, click Accounts, then click Auto Send/Retrieve. It is active
when a check mark is displayed.
Downloading Only the Header (Subject) for IMAP4 Accounts
1 Click Accounts, then click Account Options.
2 Click the IMAP4 account, then click Properties.
3 Click the Advanced tab.
62 GroupWise 6.5 Windows Client User Guide
Page 63
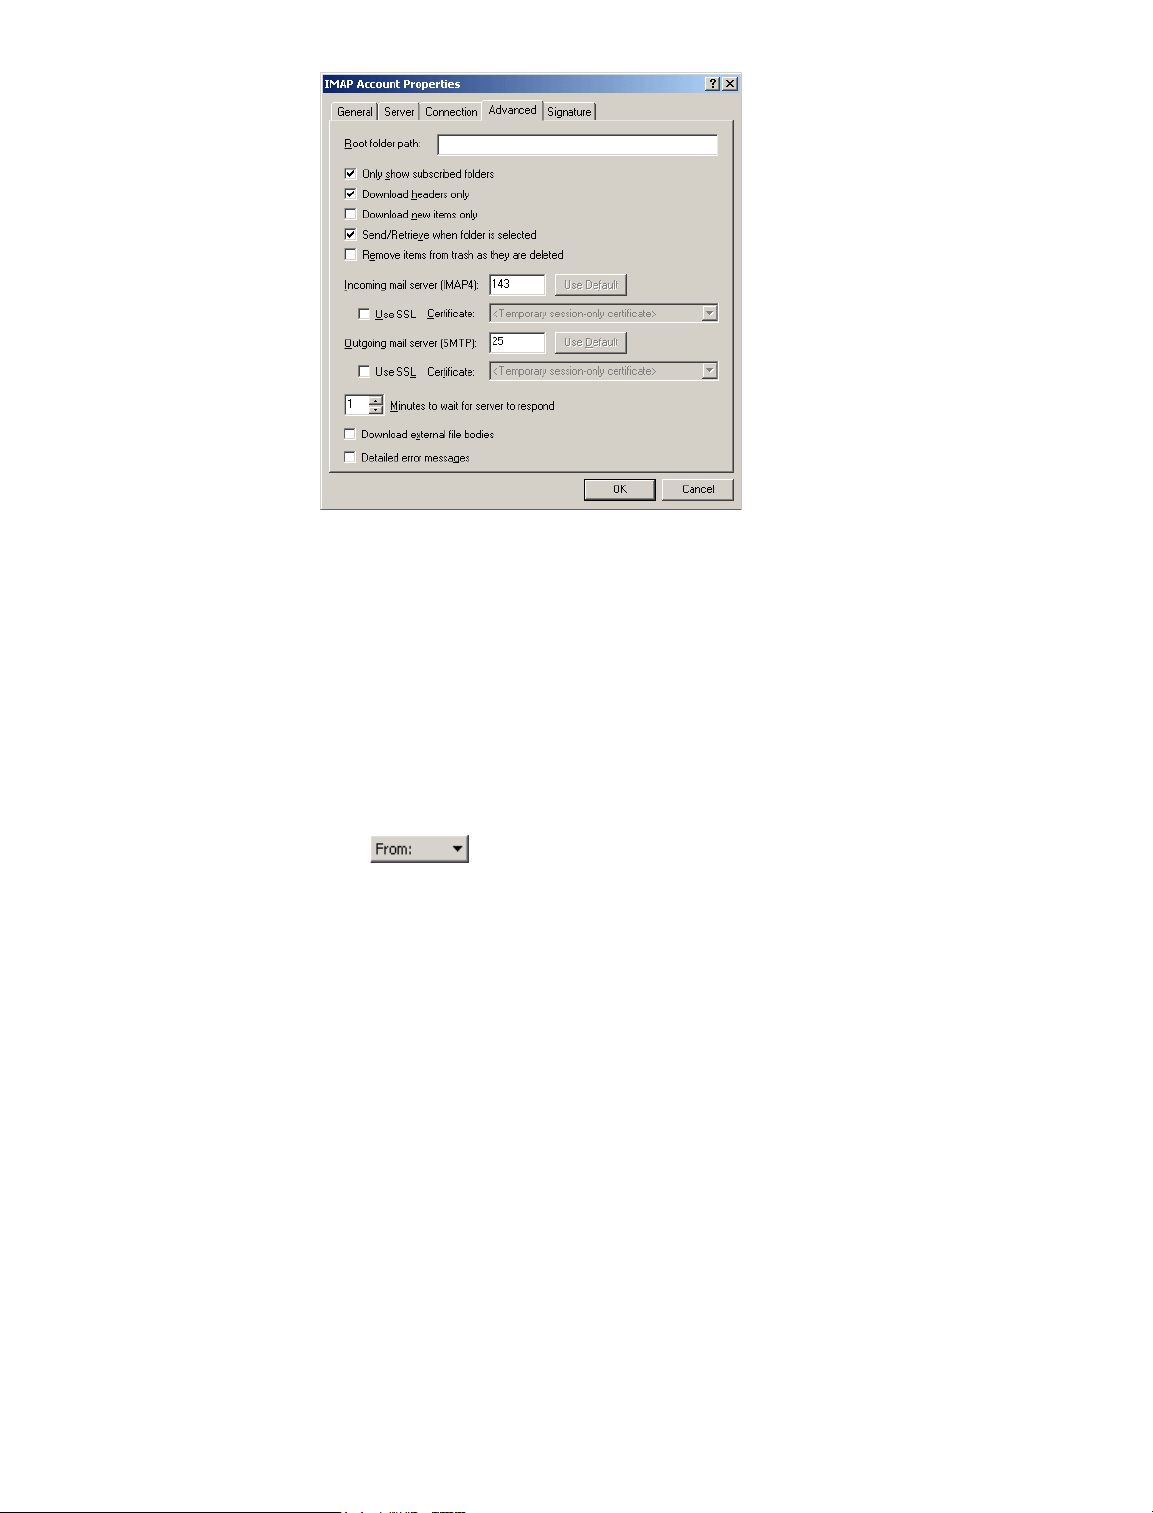
4
Select Download Headers Only.
5 Click OK, then click Close.
After downloading the headers (subjects) of items, you can download the complete item by
opening the item while you are connected to the Internet.
Using GroupWise to Send POP3 and IMAP4 Mail
1 In an item you want to send, click Actions, click Send Using, then click the account from
which you want to send.
or
Click , then click the account.
The From name associated with that account will be in the From box of this item.
To set the default account from which items will be sent, click Accounts, click Account Options,
click an account, then click Set Default.
Deleting an Item from a POP3 or IMAP4 Account
1 To delete an item from an IMAP4 or POP3 account, click the item, then press Delete.
or
To delete an IMAP4 item from the IMAP4 server, drag the item from the IMAP4 folder and
drop it in a regular GroupWise folder.
or
To delete POP3 items from the POP3 server as they are downloaded, click Accounts, click
Account Options, double-click the POP3 account, click the Advanced tab, make sure Leave
A Copy Of Messages On The Server is unchecked, then click OK.
If you select both Leave A Copy Of Messages On The Server and Remove From Server After __
Days, the POP3 items will be deleted from the POP3 server the specified number of days after the
item is downloaded.
Working with Items in Your Mailbox 63
Page 64
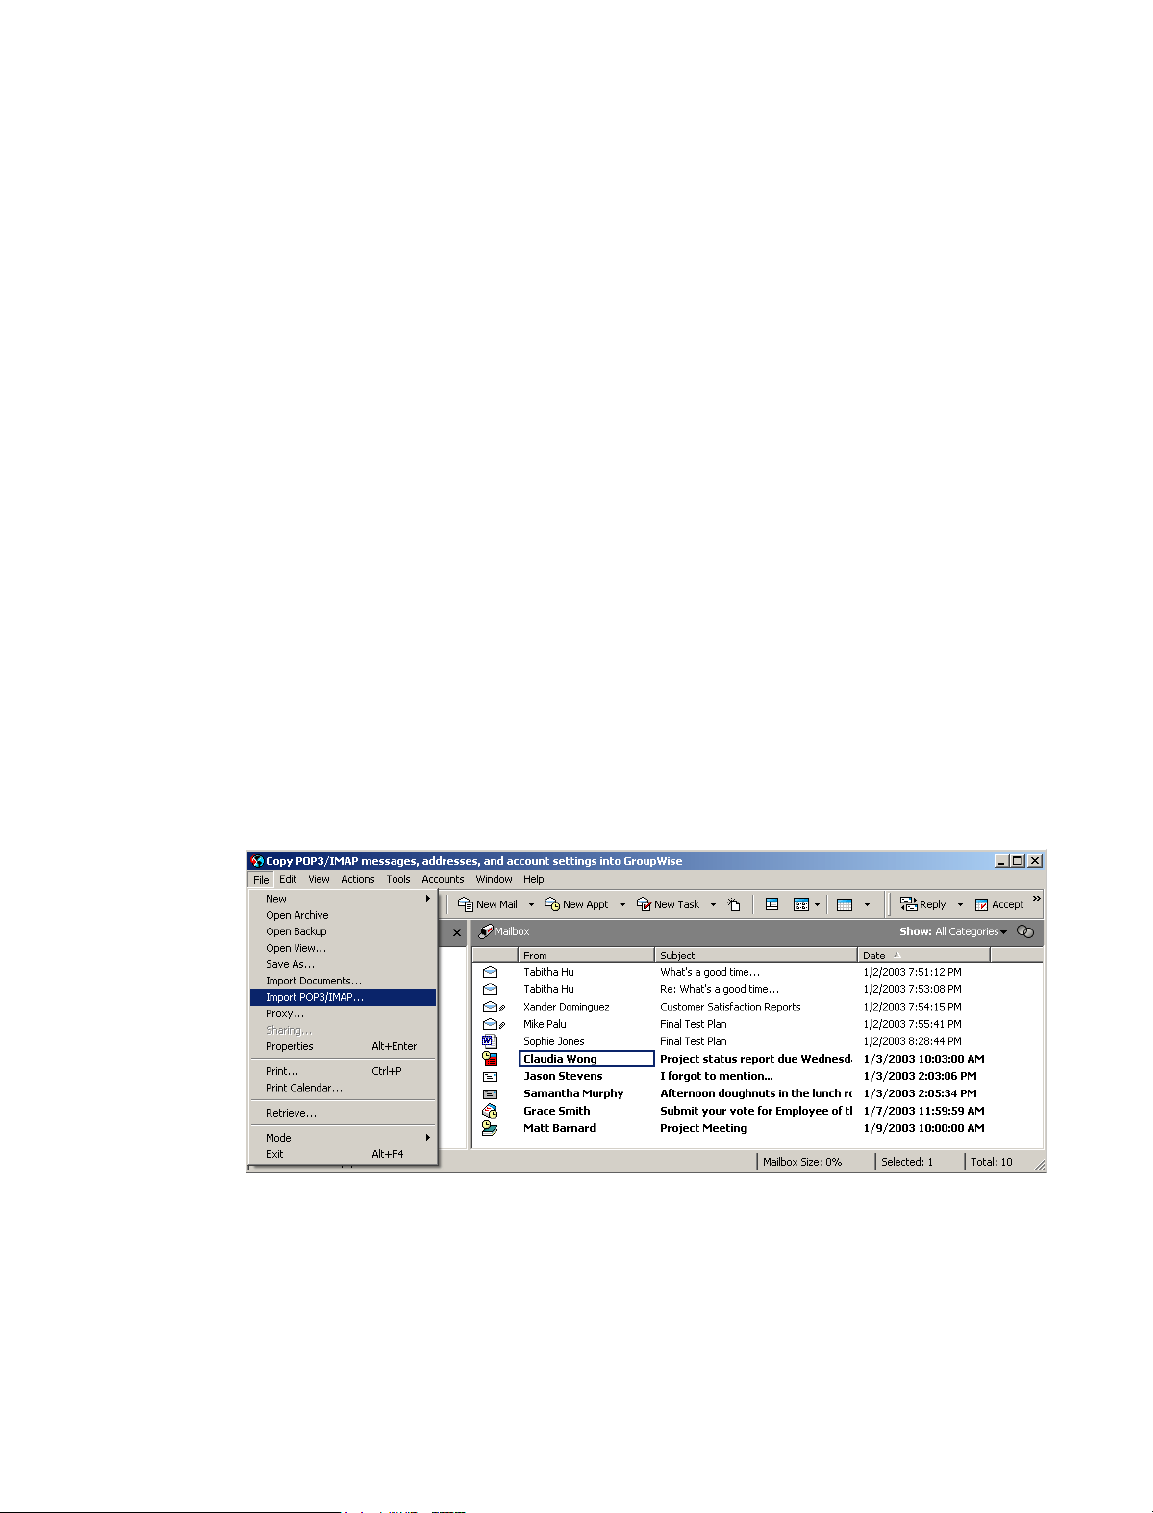
If you select both Leave A Copy Of Messages On The Server and Remove From Server After
Deleting From Trash, the POP3 items will be deleted from the POP3 server when you manually
empty them from the Trash. If GroupWise automatically empties your Trash, the items will not be
deleted from the POP3 server.
Connecting to a POP3 or IMAP4 Server Using SSL
You can connect to your POP3 or IMAP4 mail server using SSL, an Internet security protocol that
helps maintain the confidentiality of your messages. In order for you to use this option, your mail
server must support SSL.
1 Click Accounts, then click Account Options.
2 Click the account, then click Properties.
3 Click the Advanced tab.
4 Select Use SSL, then specify the digital certificate you want to use.
This certificate enables GroupWise to use SSL to authenticate to the mail server you have
chosen. (If no certificates are listed in the drop-down list, you need to use your Web browser
to obtain a certificate from an independent Certificate Authority. For more information, see
“Obtaining a Security Certificate from a Certificate Authority” on page 270.)
5 Click OK, then click Close.
Importing POP3 and IMAP4 Accounts
Use the GroupWise E-Mail Importer Utility to import existing POP3 and IMAP4 accounts into
GroupWise. In addition to importing messages from your existing POP3 and IMAP4 accounts,
you will save time by not having to retype address book entries into the GroupWise address book.
1 Click File, then click Import POP3/IMAP.
The Installed E-Mail Clients list box displays the e-mail accounts installed on your machine.
2 Select the e-mail account you want to import into GroupWise, then click Next.
3 Click the appropriate check boxes to import the account information into GroupWise.
You can choose e-mail messages, address books, account settings, or any combination of the
three.
4 Click Next.
64 GroupWise 6.5 Windows Client User Guide
Page 65
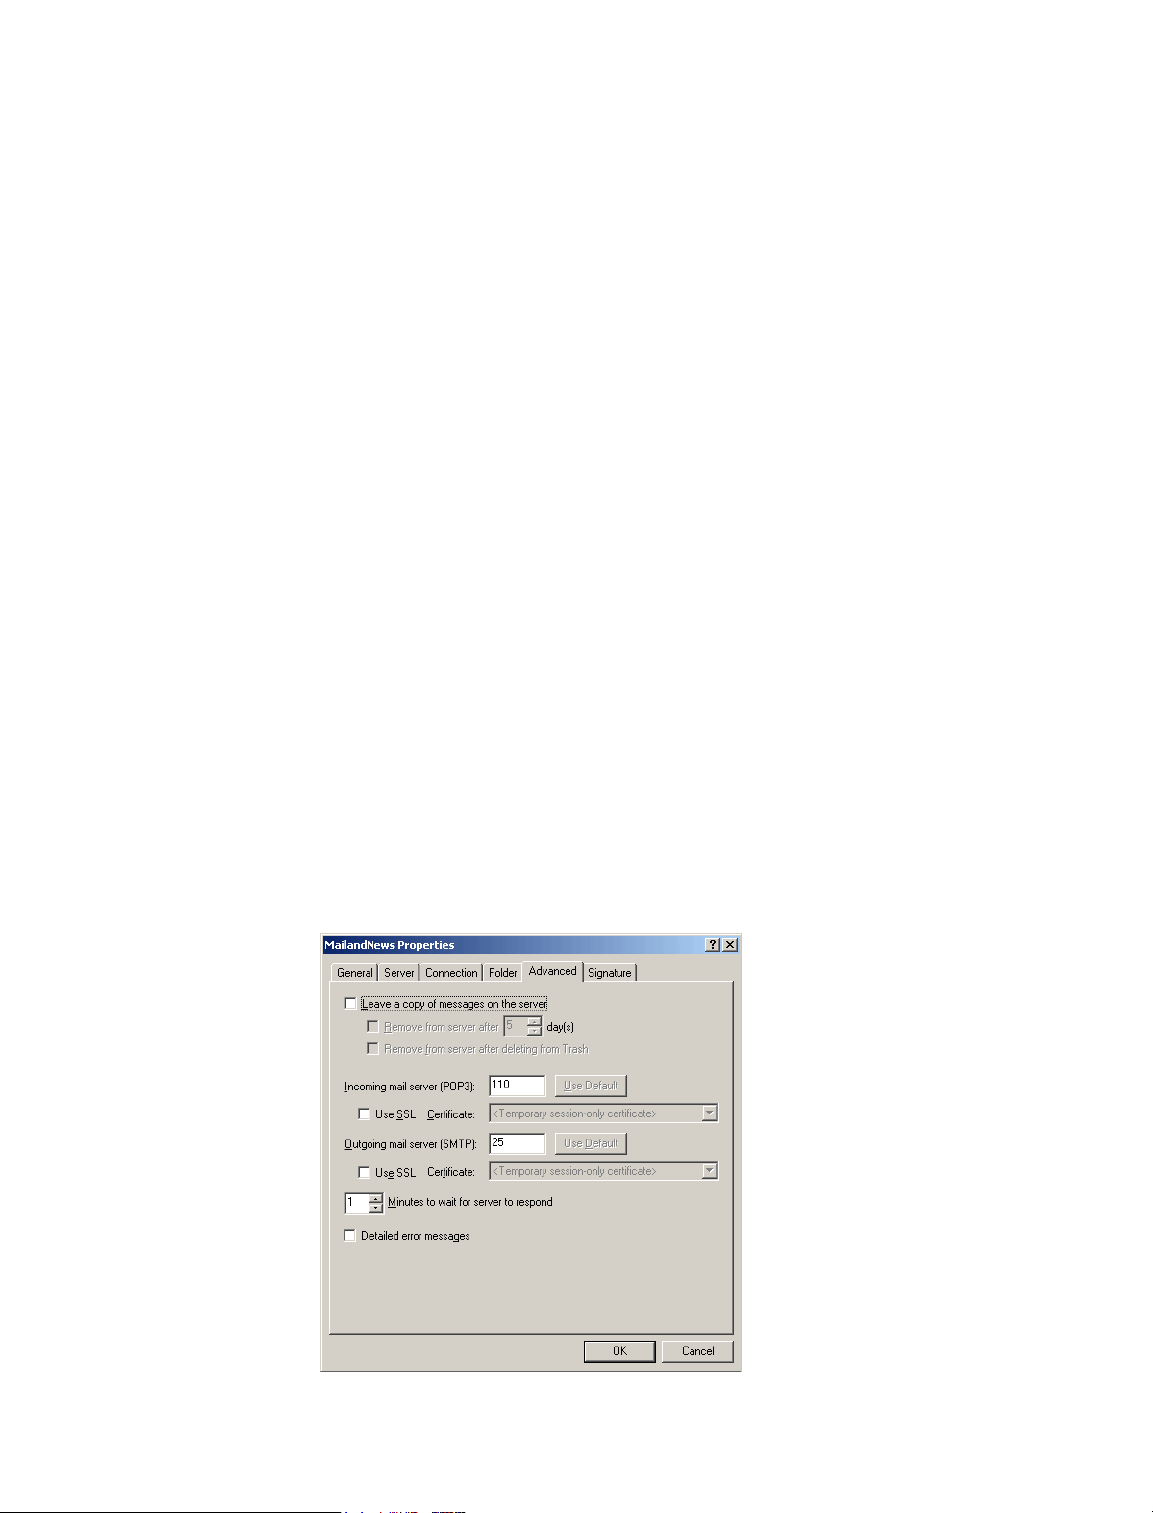
5
Click the folders that you want to import from your existing e-mail account into GroupWise.
When you import a folder, all messages and subdirectories in that folder will also be imported.
6 Click Next.
7 Type a name for the new GroupWise folder that will contain the imported messages and
folders, use the Up, Down, Right, and Left buttons to position the folder in the GroupWise
Cabinet, then click Next.
8 Type a name for the new GroupWise address book that will contain the imported addresses.
The name you type will display on a new tab in the GroupWise Address Book.
9 Click Next.
10 Click the accounts that you want to import into GroupWise, then click Next.
11 Accept the default name for the new account, then click Next.
or
Select the account folder in the list box, click Change Folder, type a new name, click OK, then
click Next.
12 Review the summary information to ensure that it is correct, then click Next.
or
Click Back to change your import options.
13 Ensure that the e-mail account was successfully imported, then click Done.
Storing Your POP3 Items on a Mail Server
1 Click Accounts, then click Account Options.
2 Click the POP3 account name.
3 Click Properties.
4 Click the Advanced tab.
Working with Items in Your Mailbox 65
Page 66

5
Click Leave A Copy Of Messages On The Server.
6 Click OK, then click Close.
Changing the Length of Time for POP3 and IMAP4 Server Timeouts
1 Click Accounts, then click Account Options.
2 Click the account name.
3 Click Properties.
4 Click the Advanced tab.
5 Type the number of minutes in the Minutes To Wait For Server To Respond box.
6 Click OK, then click Close.
Subscribing and Unsubscribing to IMAP4 Folders
This feature is available if your IMAP4 server supports subscribing and unsubscribing to folders.
When you unsubscribe to a folder, it no longer displays in your list of folders under the IMAP4
server, even though it is still in your IMAP4 account. This is especially useful if you are accessing
an NNTP account through an IMAP4 folder.
1 Click Accounts, then click Account Options.
2 Click the IMAP4 account, then click Folders.
3 Click the All tab to see all the folders in this account.
or
Click the Subscribed tab to see the folders you are currently subscribed to.
4 If you want to list folders containing specific text in the folder name (instead of listing all of
the folders), type the text in the Search for Folders Containing text box, then click Search.
5 Click the folder name, then click Subscribe.
or
To unsubscribe to a folder, click the folder name, then click Unsubscribe.
6 Click Close.
Alphabetizing the Folders in an IMAP4 Account
1 In the Folder List, right-click the IMAP4 account folder, then click Sort Folders.
This option is not available if the folders are already alphabetized.
Downloading Voice Mail Attachments through an IMAP4 Account
If you are accessing a telephony server through this IMAP4 account, GroupWise can download
the external file bodies for voice mail attachments.
1 Click Accounts, then click Account Options.
2 Click the IMAP4 account, then click Properties.
3 Click the Advanced tab.
66 GroupWise 6.5 Windows Client User Guide
Page 67

4
Select Download External File Bodies.
5 Click OK, then click Close.
Sharing an IMAP4 Folder (v6.5 for NNLS 1.0)
For information, see “Sharing an Existing Folder with Other Users (v6.5 and v6.5 for NNLS 1.0)”
on page 145.
Seeing IMAP4 Folders That Are Shared with You (v6.5 for NNLS 1.0)
When an IMAP4 folder is shared with you, you do not receive a message in GroupWise notifying
you of the shared folder. To see the IMAP4 folders that have been shared with you, as well as the
public folders in an IMAP4 account, follow these steps:
1 In the Folder List, right-click an IMAP4 account folder, then click Subscribe to Folders.
2 Click the Shared Folders tab.
The list shows all the folders that have been shared with you for this IMAP4 account. To see
them in your Folder List, you need to subscribe to them.
3 Click the folder name, then click Subscribe.
or
To unsubscribe to a folder, click the folder name, then click Unsubscribe.
4 Click Close.
Attaching Files
Use Attach File to send one or more files to other users. You can attach a file that exists on your
hard disk, diskette, or network drive. The recipients can open the attached file, save it, view it, or
print it. If you change the attached file after you have sent it, the recipients will not see the changes.
If you attach a file that is password-protected, the recipient cannot open or view the attachment
without entering the password.
For information about attaching documents that are in a GroupWise Library, see “Attaching a
Document Reference to an Item” on page 68.
This section contains the following topics:
“Attaching a File to an Item” on page 68
“Attaching a Document Reference to an Item” on page 68
“Embedding an OLE Object in an Item” on page 70
“Viewing Attached Files” on page 71
To see and subscribe to the public folders that are in this IMAP4 account, click the Public
Folders tab and follow the same steps.
“Opening Attached Files” on page 71
Working with Items in Your Mailbox 67
Page 68
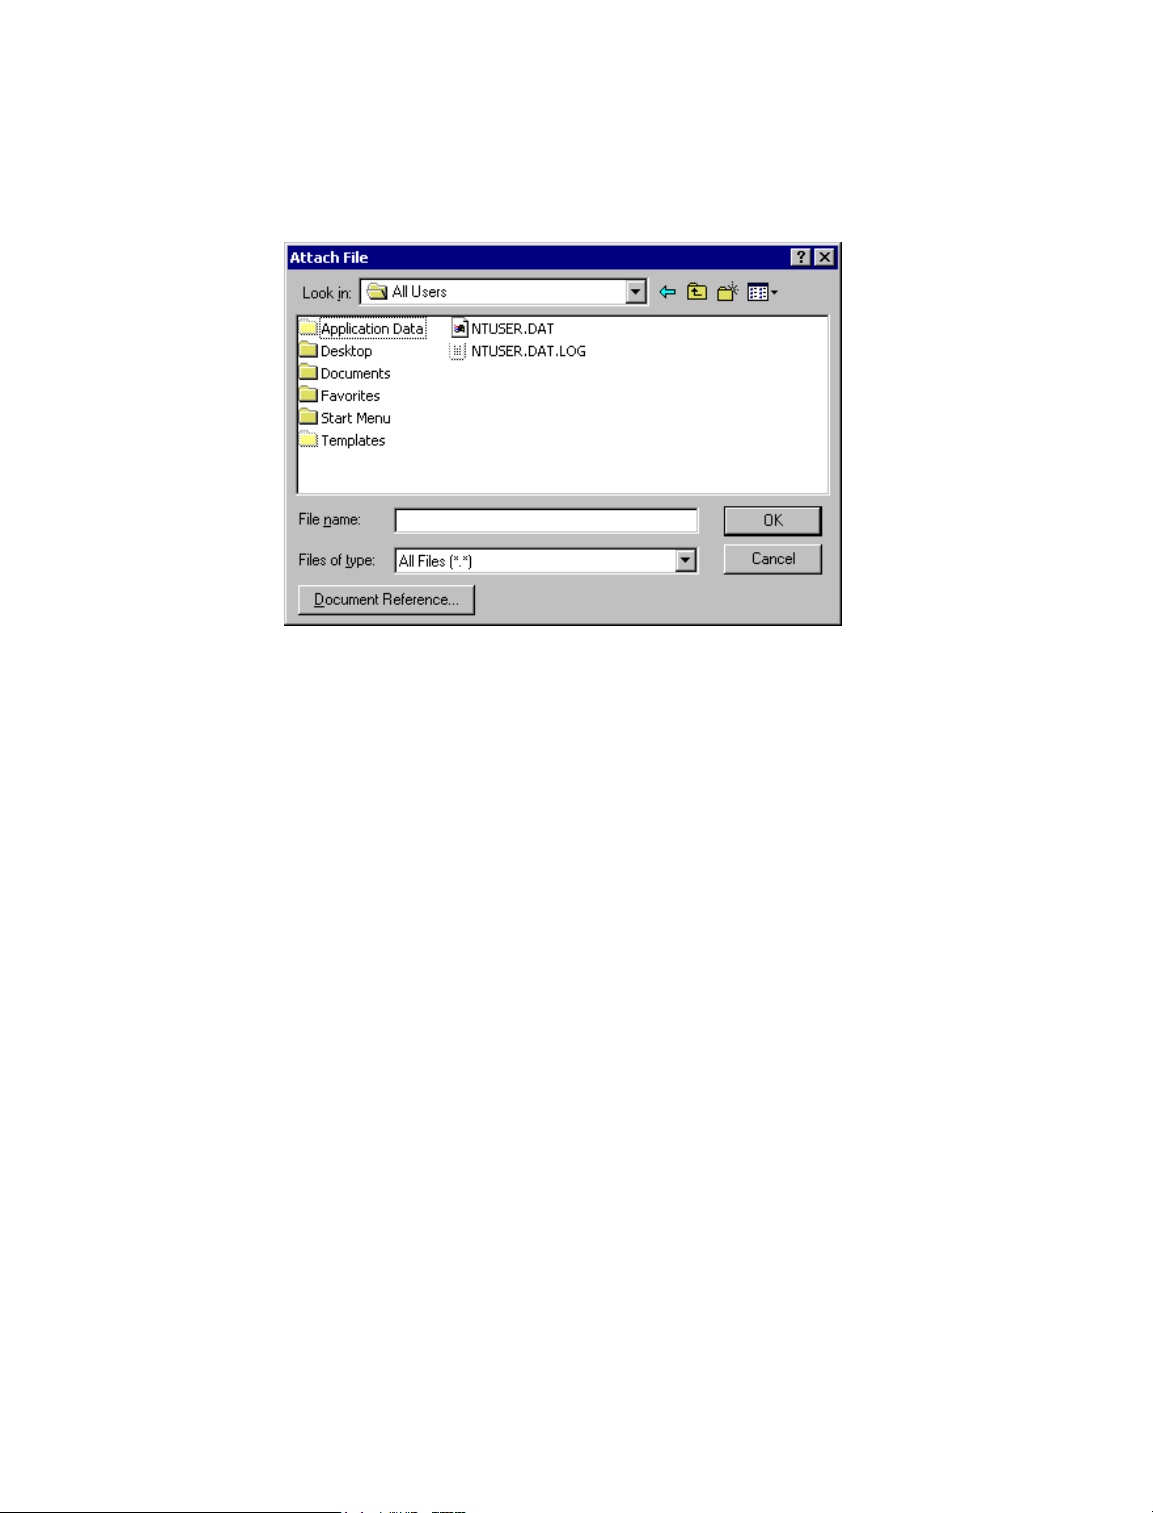
Attaching a File to an Item
1 Open a new item.
2 Fill in the To, Subject, and Message boxes.
3 Click Attach a File on the toolbar, then browse to and select the file or files you want to send.
To remove an attached file, right-click the attachment, then click Delete.
4 Click OK.
5 Click Send on the toolbar.
Moving or deleting a file on a disk or network drive does not affect a file you’ve attached to an
item and sent.
If you delete an attached file, it is not erased from disk or network drive; it is simply removed from
the attachment list.
In addition, you can right-click a file in Windows, then select Send To > GroupWise Recipient. A
new item is created with the attachment in the attachment window.
Attaching a Document Reference to an Item
If the file you want to attach is a document stored in GroupWise Library, you can attach a
document reference. When a recipient opens the attachment, the document in the library will open
if the recipient has rights to open or view the document and if the library is available.
If any recipients do not have sufficient document rights, or if they are not using an e-mail product
that supports GroupWise Library, or if the library is unavailable, only a copy of the document will
open. If the recipient edits the copy, the changes will not affect the actual document in the library.
For more information about document rights, see “Sharing Documents” on page 289.
Dragging and Dropping an Attachment from a Received Item
When you receive an item, you can drag any of its attachments into a folder or onto your desktop.
A document reference attachment that you drag and drop will become a shortcut to a document
reference or to a copy of the document, depending on your rights to the document and the
availability of the library.
68 GroupWise 6.5 Windows Client User Guide
Page 69
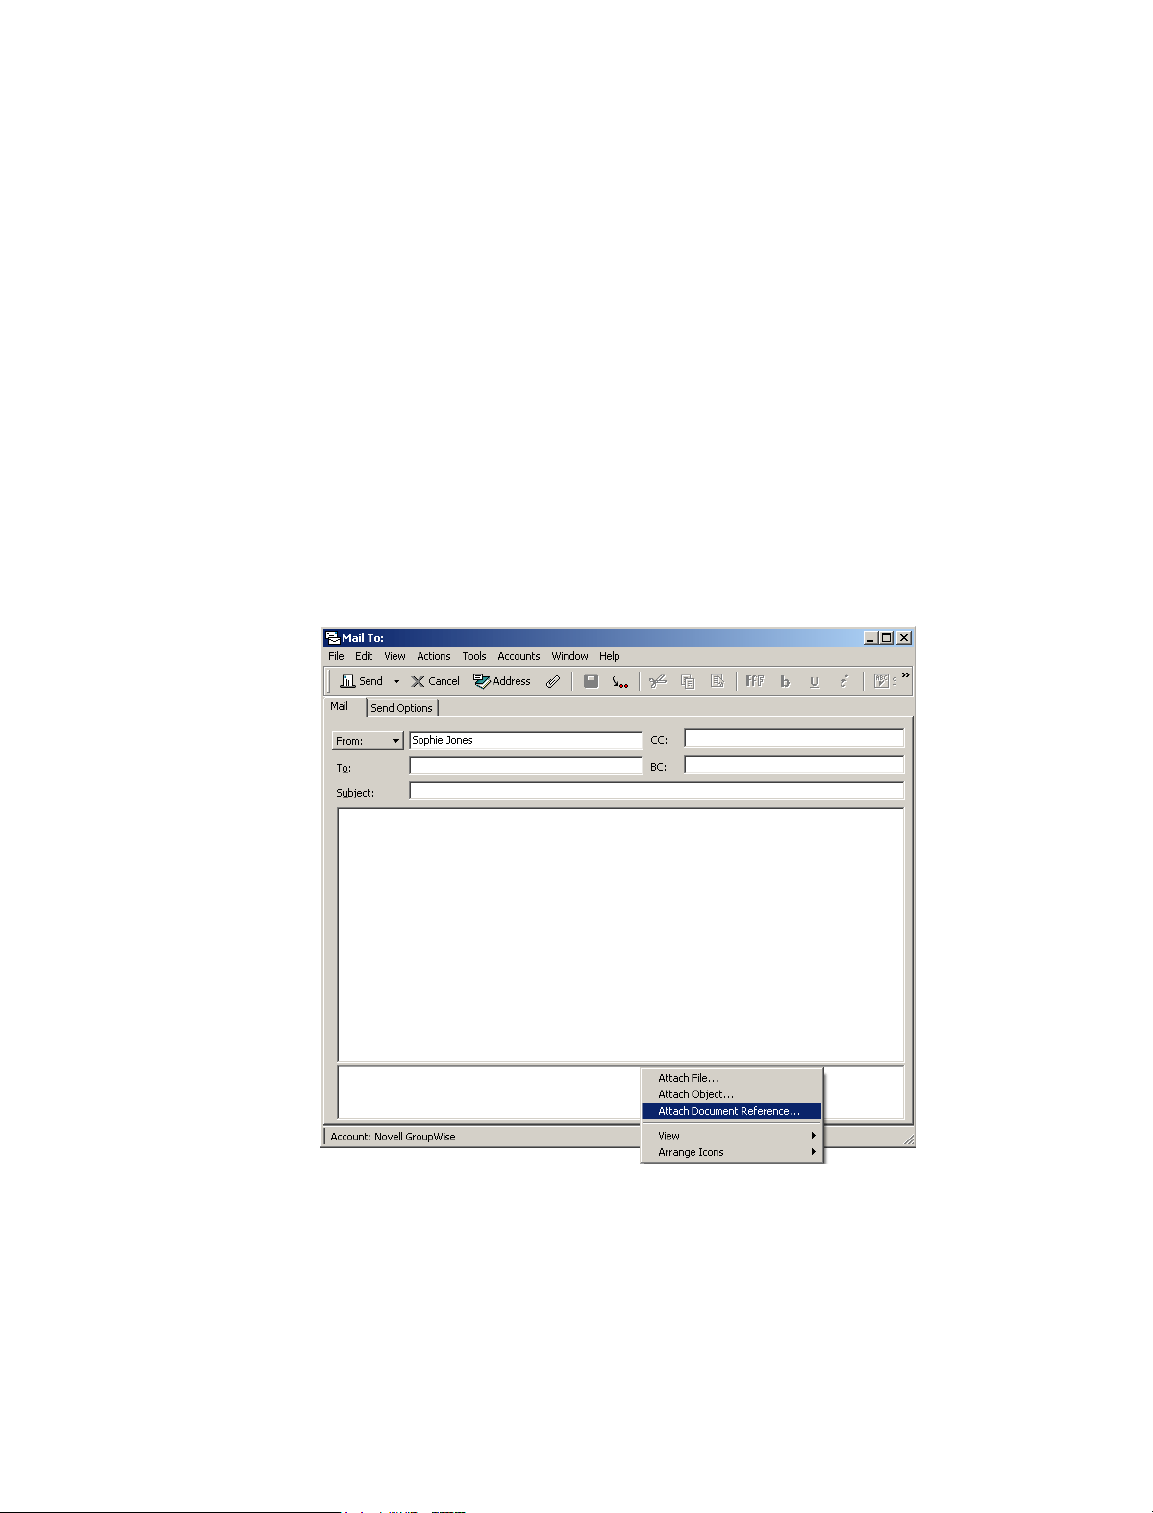
Document Reference Attachments and Remote Mode
You might receive an item with a document reference attachment when you are running Remote
mode. When you open the attachment, the document will open from your Remote Library, even if
the document in your Remote Library is an older version than the attachment. If the document does
not exist in your Remote Library, you will be prompted to connect now or later to your Online
Mailbox to retrieve the document.
You can also send items with document reference attachments from Remote mode. However, if
the document does not exist in your Remote Library, any recipients who do not have sufficient
rights to the document in the Master Library or who are not using an e-mail product that supports
GroupWise Library will not receive a copy of the document.
In addition, if the Master Library is unavailable, recipients will not receive a copy of the document.
If any of these conditions exist, you will need to attach an actual copy of the document in addition
to the document reference.
To attach a document reference to an item,
1 Open a new item.
2 Fill in the To, Subject, and Message boxes.
3 Right-click in the Attachments box, then click Attach Document Reference.
4 The Select Document dialog box displays.
Working with Items in Your Mailbox 69
Page 70
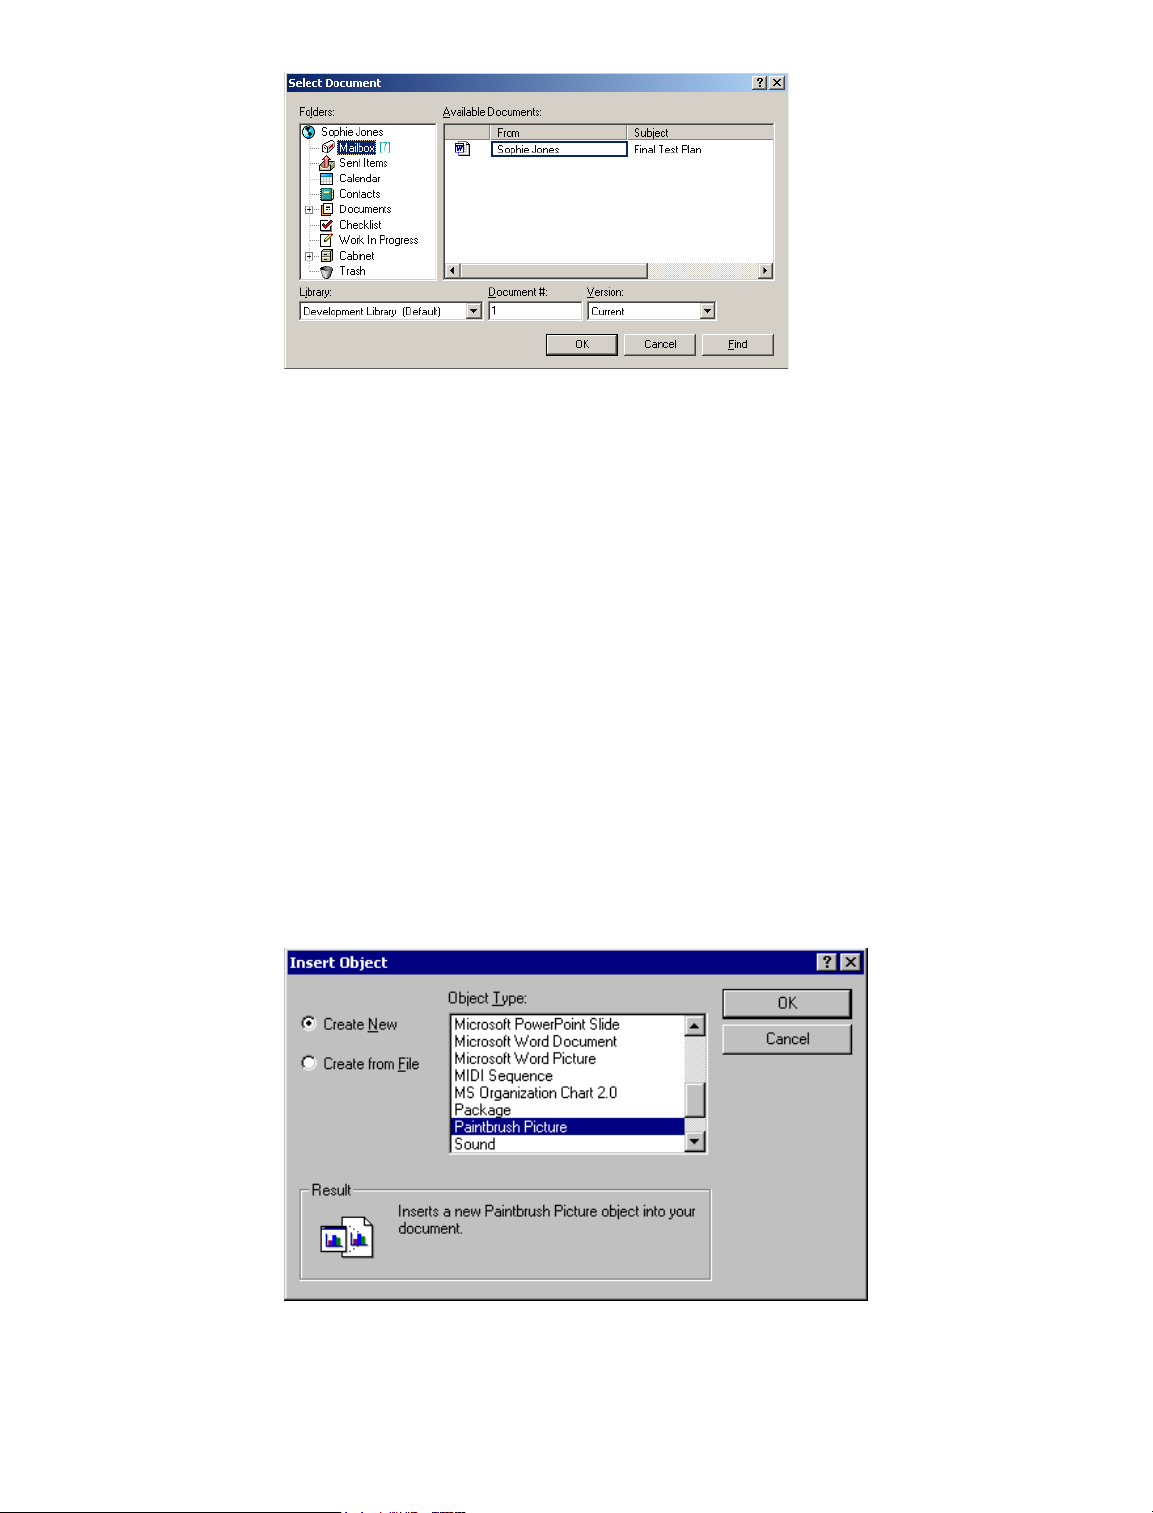
In the Library drop-down list, click the library that contains the document you want to attach.
5
6 In the Document # box, type the document number.
If you don’t know the number of the document, click Find to locate the document in the
library. To attach a document displayed in the Find Results dialog box, click the document,
then click OK.
7 In the Version drop-down list, click which version you want to attach. If you select Specific
Version, type the version number in the Version # box.
8 Click OK.
9 Click Send on the toolbar.
Embedding an OLE Object in an Item
In order for a recipient of an item to view or edit embedded OLE objects, the recipient must be
using GroupWise for Windows. For example, a GroupWise for Macintosh* recipient cannot view
embedded OLE objects.
1 Open and address an item.
2 Click File, click Attachments, then click Attach Object.
3 To embed an existing object, click Create from File, type the path and filename, then click OK.
Skip to Step 8.
70 GroupWise 6.5 Windows Client User Guide
Page 71

or
To create a new object and embed it, follow Steps 4-8
4 Click Create New, then select a type of object.
5 Click OK to open the application.
6 Create the object you want to embed.
7 Click the application’s File menu, then click Exit.
This step may differ depending on the application.
8 Complete the item if necessary, then click Send on the toolbar.
If the recipients open the object and edit it, they must save it under a new filename. Otherwise,
when they try to close the mail message, they’ll receive an error.
If you have copied an OLE object to the Clipboard, you can embed it in an open item by using
Paste Special on the Edit menu.
Viewing Attached Files
When you click an attached file, the attachment is displayed in the message pane with a viewer.
This is usually faster than opening the attachment; however, the attachment might not be formatted
properly. If the attachment type is not supported, you will receive an error.
1 Open the item containing the attachment.
2 Click the attachment.
or
Right-click the attachment, then click View Attachment or View in New Window.
or
If you cannot see an icon representing the attachment in your view, click File, click
Attachments, then click View.
Opening Attached Files
When you open an attached file by double-clicking it, GroupWise determines the correct
application to open the file in. You can accept the suggested application, or you can type the path
and filename to another application.
1 Open the item containing the attachment.
2 Double-click the attachment.
or
Right-click the attachment, then click Open or Open With.
or
If you cannot see an icon representing the attachment in your view, click File, click
Attachments, then click Open.
By default, GroupWise warns you if an attachment is larger than 1000 KB (1 MB). To eliminate
the warning message, click Tools > Options > Environment > Default Actions, then deselect Warn
If Larger Than. You can also adjust the attachment size at which the warning message is displayed.
Working with Items in Your Mailbox 71
Page 72

Managing Sent Items
This section contains the following topics:
“Confirming Delivery of Items You’ve Sent” on page 72
“Displaying Sent Items” on page 72
“Resending Items” on page 73
“Retracting Items You’ve Sent” on page 73
“Checking the Status of an Item” on page 74
“Receiving Notification About Items You Send” on page 74
“Requesting a Reply for Items You Send” on page 75
“Changing the Subject of a Sent Item” on page 75
Confirming Delivery of Items You’ve Sent
GroupWise provides several ways for you to confirm that your item was delivered.
Track an Item You Sent
You can check the status in the Properties window of any item you’ve sent. For information, see
“Checking the Status of Your Items” on page 73.
Receive Notification When the Item is Opened or Deleted
You can receive notification when the recipient opens or deletes a message, declines an
appointment, or completes a task. For information, see “Receiving Notification About Items You
Send” on page 74.
Request a Reply
You can inform the recipient of an item that you need a reply. GroupWise adds a sentence to the
item stating that a reply is requested and changes the icon in the recipient’s Mailbox to a double
arrow. For information, see “Requesting a Reply for Items You Send” on page 75.
Displaying Sent Items
You may want to display items you previously sent. For example, you can read a sent item, resend
it with or without corrections, and in some cases, retract it (if it has not already been opened by the
recipient).
1 Click the Sent Items folder in the Folder List.
All sent items reside in this folder unless they are moved to a folder other than the Mailbox or
Calendar. If a sent item is moved to another folder, it no longer displays in the Sent Items folder.
To display sent items that have been moved to other folders, open those folders.
72 GroupWise 6.5 Windows Client User Guide
Page 73

Resending Items
Use Resend to send an item a second time, perhaps with corrections.
1 Click the Sent Items folder in the Folder List.
2 Right-click the item you want to resend, then click Resend.
3 If the item was an auto-date item, click This Instance or All Instances.
4 Make any changes to the item, if necessary, then click Send on the toolbar.
5 Click Yes to retract the original item.
or
Click No to leave the original item.
You can check the Properties of the original item to see if GroupWise was able to retract it. Rightclick the item in the Mailbox, then click Properties. Mail and phone messages cannot be retracted
if they have already been opened.
Retracting Items You’ve Sent
Use Delete to retract a sent item from the recipient’s Mailbox. You can retract a mail or phone
message from those recipients who haven't yet opened the item. You can retract an appointment,
reminder note, or task at any time.
1 Click the Sent Items folder in the Folder List.
2 Right-click the item you want to retract, then click Delete.
3 Select the appropriate option.
4 If you have selected to retract this item from other recipients’ mailboxes, you can type a
comment to the recipients, explaining why the item was retracted.
5 Click OK.
To see which recipients have opened your message, right-click the item, then click Properties.
Checking the Status of Your Items
Properties lets you check the status of any item you’ve sent. For example, you can see when an
item was delivered and when the recipient opened or deleted the item. If a recipient accepted or
declined an appointment and included a comment, you’ll see the comment in the Properties
window. You’ll also see if a recipient marked a task Completed.
Properties also shows information about items you receive. You can see who else received the item
(except for blind copy recipients), the size and creation date of attached files, and more.
You can save and print status information for an item.
For information about a document, use the Activity Log in Properties. See “Viewing the History
of a Document” on page 295.
This section contains the following topics:
“Checking the Status of an Item” on page 74
“Saving the Status Information of an Item” on page 74
“Printing the Status Information of an Item” on page 74
Working with Items in Your Mailbox 73
Page 74
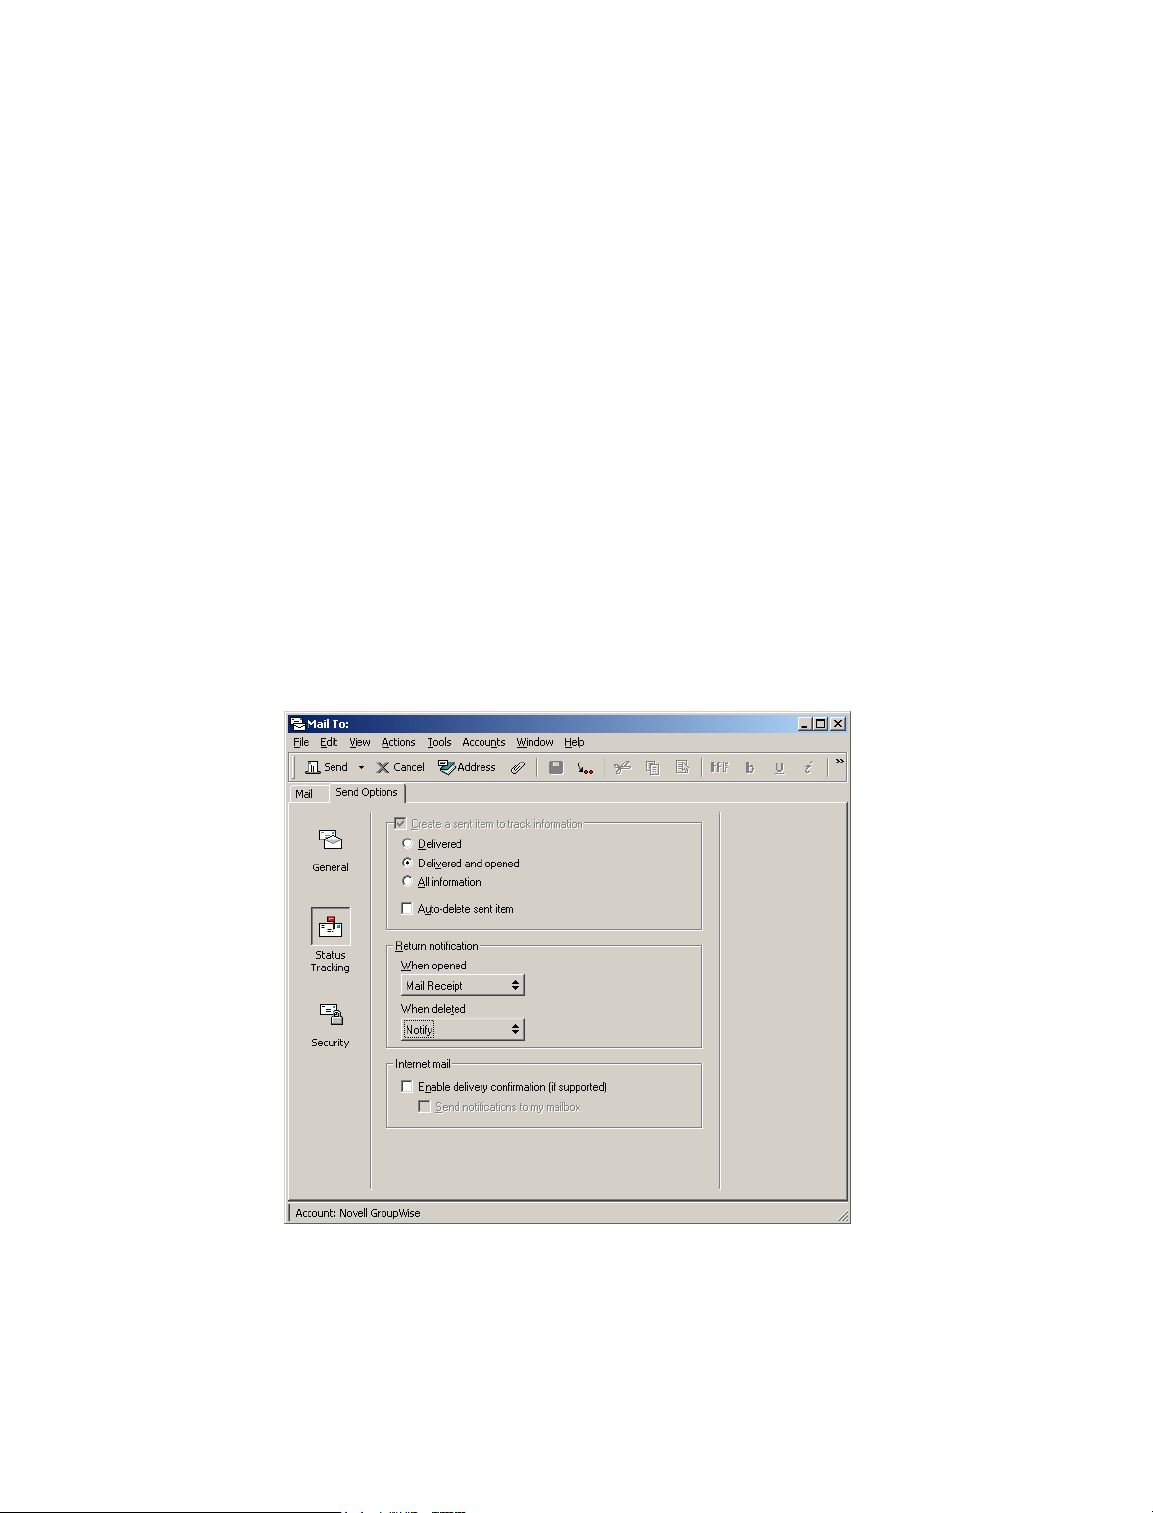
Checking the Status of an Item
1
Right-click an item in your Mailbox or Calendar, then click Properties.
The icons next to an item can give also you helpful status information. See “Icons Appearing Next
to Items in Your Mailbox and Calendar” on page 28.
Saving the Status Information of an Item
Right-click an item, then click Properties.
1
2 Click File, then click Save As.
GroupWise gives the item a temporary filename. You can change the filename and default
folder to save the file.
3 Click Save.
Printing the Status Information of an Item
Right-click an item, then click Properties.
1
2 Right-click in the Properties window, then click Print.
Receiving Notification About Items You Send
1 To receive notification for one item, open an item view, click the Send Options tab, then click
Status Tracking.
or
To always receive notification for items you send, click Tools, click Options, double-click
Send, then click the tab for the item type.
2 In the Return Notification group box, specify the type of return receipt you want.
74 GroupWise 6.5 Windows Client User Guide
Page 75
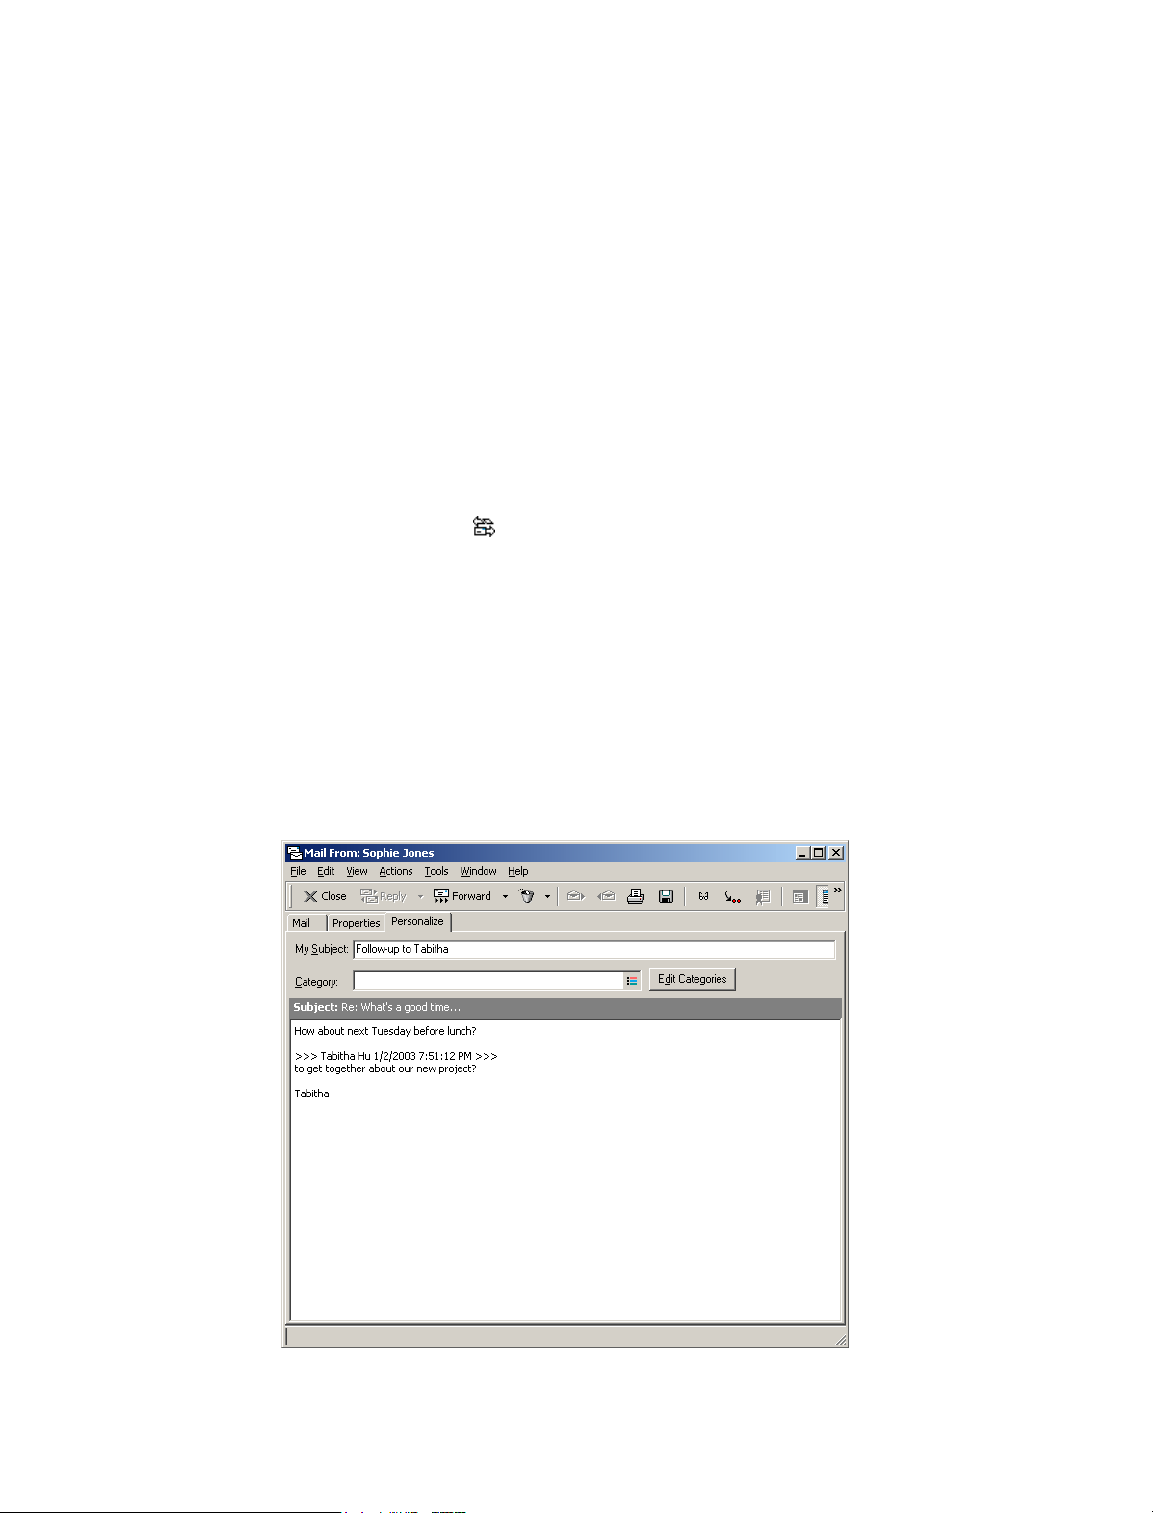
You are automatically subscribed to Notify in Options. If you have deselected to receive
alarms and notifications, you cannot receive notifications with Notify. For more information,
see “Running Notify” on page 157.
If you are sending an item to an Internet address, you can click Enable Delivery Confirmation.
If the receiver's Internet e-mail system enables status tracking, you can receive status about
the item you send.
3 Click OK.
Requesting a Reply for Items You Send
1 To request a reply for one item, open an item view, click the Send Options tab, then click
General.
or
To request a reply for all items you send, click Tools, click Options, then double-click Send.
2 Click Reply Requested, then specify when you want to receive the reply.
The recipient sees next to the message. If you select When Convenient, "Reply Requested:
When convenient" appears at the top of the message. If you select Within x Days, "Reply
Requested: By xx/xx/xx" appears at the top of the message.
3 Click OK.
Changing the Subject of a Sent Item
1 Open an item from your Mailbox or Calendar.
2 Click the Personalize tab.
3 Type a new subject in the My Subject text box.
Working with Items in Your Mailbox 75
Page 76
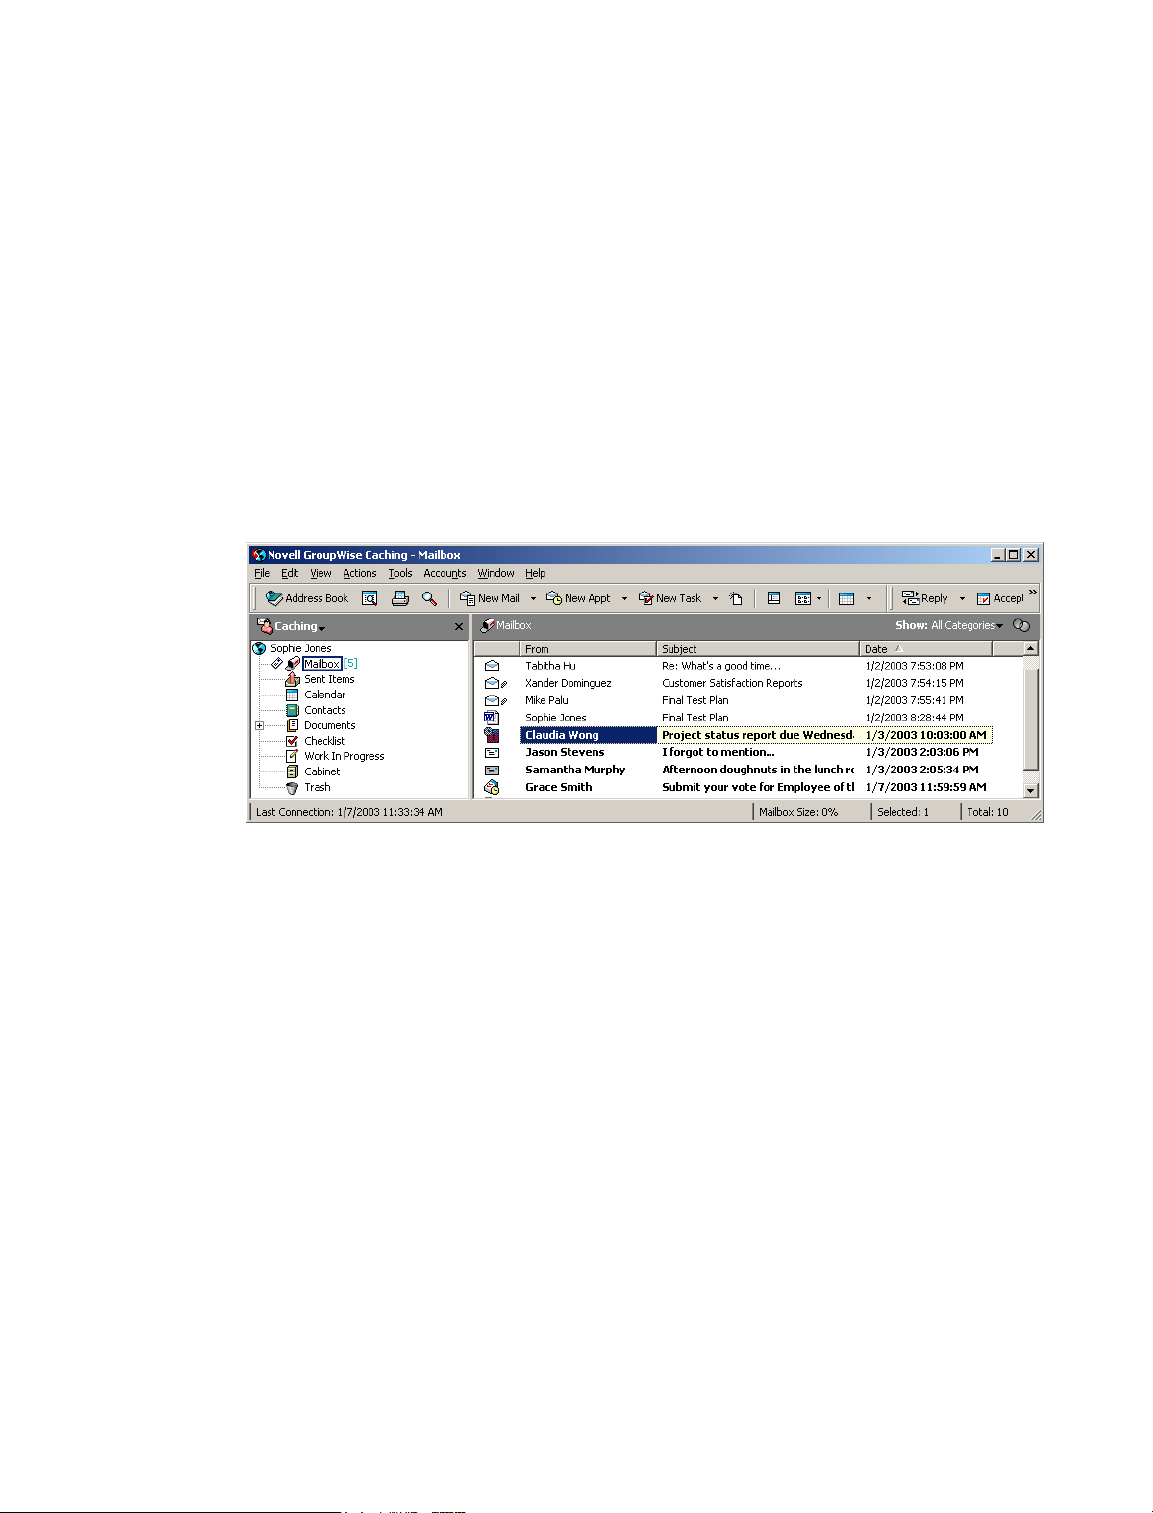
This personalized subject will display in your Mailbox and/or Calendar and in the Mailbox and/or
Calendar of anyone who proxies for you. If you change the subject of an item in a shared folder,
other users of the shared folder will see the original subject.
To see the original subject, open the item and look in the Subject field in the item header.
When you create a basic filter or perform a Find with a specific word in the Subject field, the filter/
Find results will show items whose original subject or personalized subject contains this word.
When you create an advanced filter or find, use the Subject field to search for the original subject,
and use the My Subject field to search for the personalized subject.
When you create a rule that looks for a specific word in the Subject field, the rule will only look
at the original subject.
Managing Received Items
GroupWise stores all the mail messages, appointments, and other items you receive in your
Mailbox.
From your Mailbox, you can read items, reply to items, and forward items you’ve received. You
can organize items by assigning them with categories or by creating a checklist. You can delegate
tasks and appointments to other users. You can handle unwanted Internet e-mail with Junk Mail
Handling. You can even change an item, such as a mail message, to another type of item, such as
an appointment.
This section contains the following topics:
“Reading Items You Receive” on page 77
“Changing the Font of Items You Receive” on page 79
“Replying to Items You Receive” on page 79
“Forwarding Items to Other Users” on page 81
“Using Categories to Organize Items” on page 81
“Changing the Subject of an Item You’ve Received” on page 85
“Creating a Checklist” on page 86
“Delegating Items” on page 91
“Handling Unwanted Mail” on page 92
“Changing Item Types” on page 98
“Viewing and Composing Items in HTML” on page 100
76 GroupWise 6.5 Windows Client User Guide
Page 77

Reading Items You Receive
You can read items you receive in your Mailbox or Calendar. Your Mailbox displays a list of all
of the items you have received from other users. Posted appointments, tasks, and reminder notes
appear in your Calendar, not in your Mailbox.
You can open and read all types of new items in your Mailbox. However, you might want to read,
tasks, and reminder notes in your Calendar so you can view new messages while looking at your
schedule.
Phone and mail messages stay in your Mailbox until you delete them. Appointments, reminder
notes, and tasks stay in your Mailbox until you accept, decline, or delete them. When you accept
an appointment, reminder note, or task, it is moved to your Calendar.
All Mailbox items are marked with an icon.The icons change depending on whether or not the item
has been opened. See “Icons Appearing Next to Items in Your Mailbox and Calendar” on page 28
for more information.
In addition, all unopened items in your Mailbox are bolded to help you easily identify which items
and documents you have not yet read. This is especially useful for collapsed discussion threads
because it saves you the time of expanding each thread to check if there are newly posted items.
This section contains the following topics:
“Reading Items in Your Mailbox” on page 77
“Reading HTML Items” on page 77
“Reading Items in the QuickViewer” on page 77
“Marking an Item Unread” on page 78
Reading Items in Your Mailbox
Double-click the item you want to read.
1
Reading HTML Items
For information about reading items that were composed in HTML, see “Viewing and Composing
Items in HTML” on page 100.
Reading Items in the QuickViewer
Use QuickViewer to scan the contents of your items. QuickViewer saves time because you don’t
need to open each item; you simply click an item or press the Down-arrow to read your items. If
you click a document reference, the document will display in the QuickViewer. You can display
an item’s attachment by clicking the attachment in the drop-down list on the QuickViewer toolbar.
OLE attachments, however, do not display in the QuickViewer.
When you read an item in the QuickViewer, the icon changes to the opened status. For example,
the closed envelope representing a mail message changes to an opened envelope.
You can specify that some folders show QuickViewer every time you open them, while others
never show QuickViewer.
1 Click on the toolbar.
Working with Items in Your Mailbox 77
Page 78
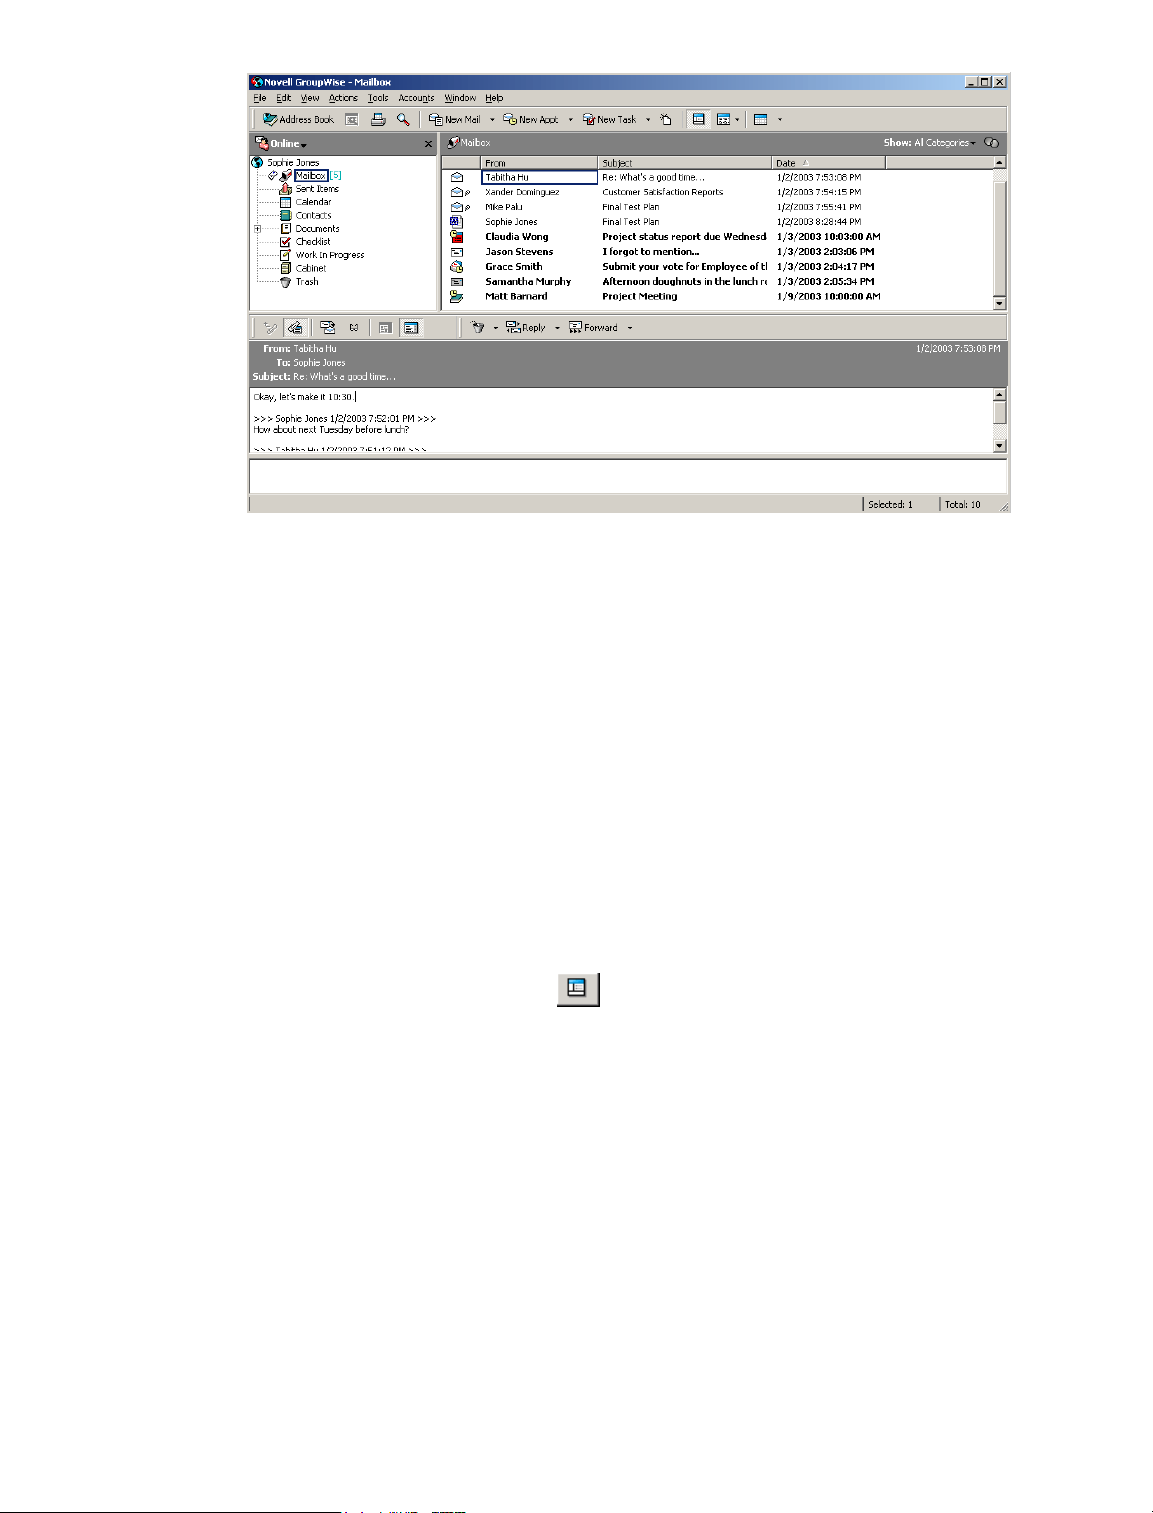
2
3 Size the QuickViewer by dragging a corner of the window or by dragging the horizontal
4 In the Mailbox, click each item that you want to read.
5 To change how information displays in the header, right-click the header and choose options.
6 To close the QuickViewer, click on the toolbar.
Marking an Item Unread
If you open an item to read it, and then decide you want to read the item later, you can mark the
item unread. Marking the item unread changes the item to bold and changes the item’s icon to
unopened so you will know you still need to read the item.
Select to turn the QuickViewer on in all folders or just the selected folder, then click OK.
(You can also set this option by clicking Tools, clicking Options, double-clicking
Environment, clicking Default Actions, then clicking an option under Show Or Hide
QuickViewer On.)
dividing line up or down.
If you size and close the QuickViewer, it will be the same size when you open it again. Size
it by dragging a corner of the window, not by clicking the maximize button.
To view an attachment, click the drop-down list on the QuickViewer header, then click the
attachment. You cannot open OLE attachments in the QuickViewer.
Right-click the QuickViewer window to choose other options.
For more information, see “Customizing Headers” on page 342.
1 In the Main Window, click the item in the Item List.
2 Click Actions, then click Read Later.
Marking an item you have opened unread does not change the status of the item in Properties. For
example, if you have opened an item, then marked the item unread, the sender of the item still sees
the item status as Opened in the Properties window.
78 GroupWise 6.5 Windows Client User Guide
Page 79
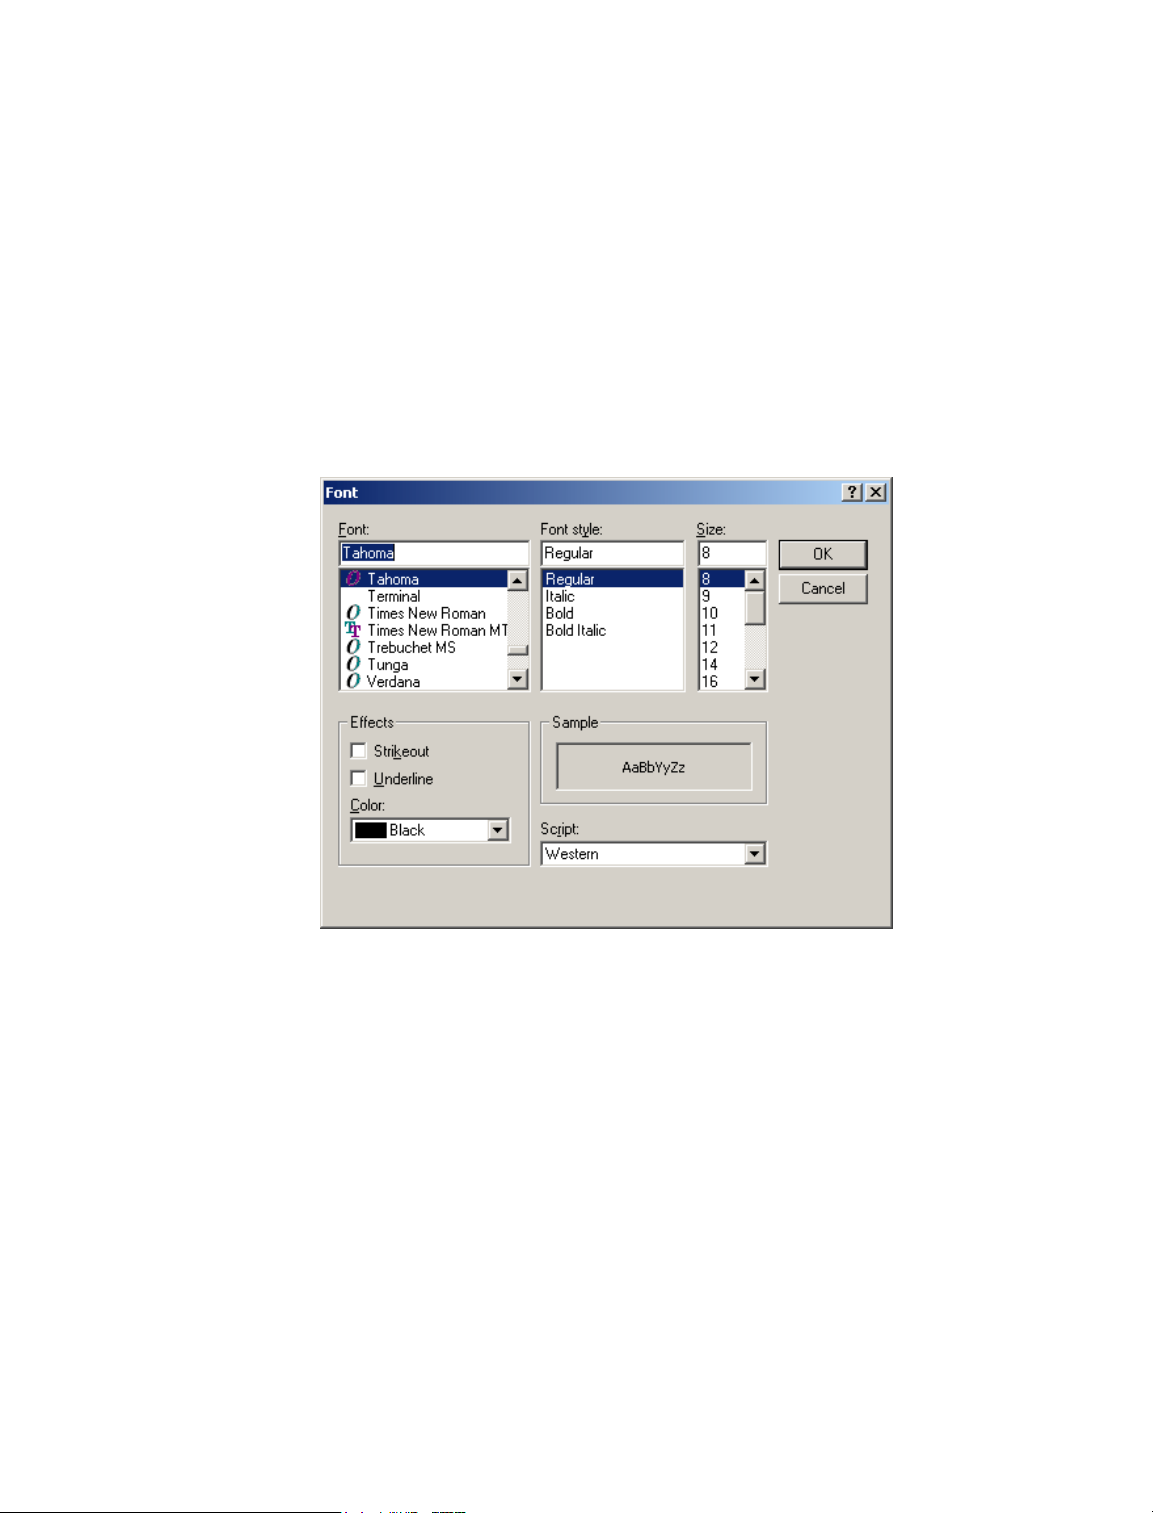
Changing the Font of Items You Receive
This information applies to reading an item in an item view or in the QuickViewer.
This font change is only in effect while you read the item. If you close the item and re-open it, the
font returns to the Windows system default font or the font that the sender composed the item in.
The Windows system default font affects every program on your desktop. To change the Windows
system default font, open the Control Panel and change Display Properties.
You cannot change the font in the QuickViewer if the item was composed in HTML view.
1 Select the text you want to change.
2 Click Edit, then click Font.
or
Right-click the window, click Font, then click Font.
3 Click a font and a font style.
4 Click a size.
5 Click any other options you want to change, then click OK.
Replying to Items You Receive
Use Reply to respond to an item. You can reply to everyone who received the original item or to
the sender only, without needing to create and address a new message. You can also include a copy
of the original message in your reply. Your reply will include Re: preceding the original subject
text. You can modify the subject text if you want.
This section contains the following topics:
“Replying to an Item” on page 80
“Replying to an Item in a Shared Folder” on page 80
Working with Items in Your Mailbox 79
Page 80
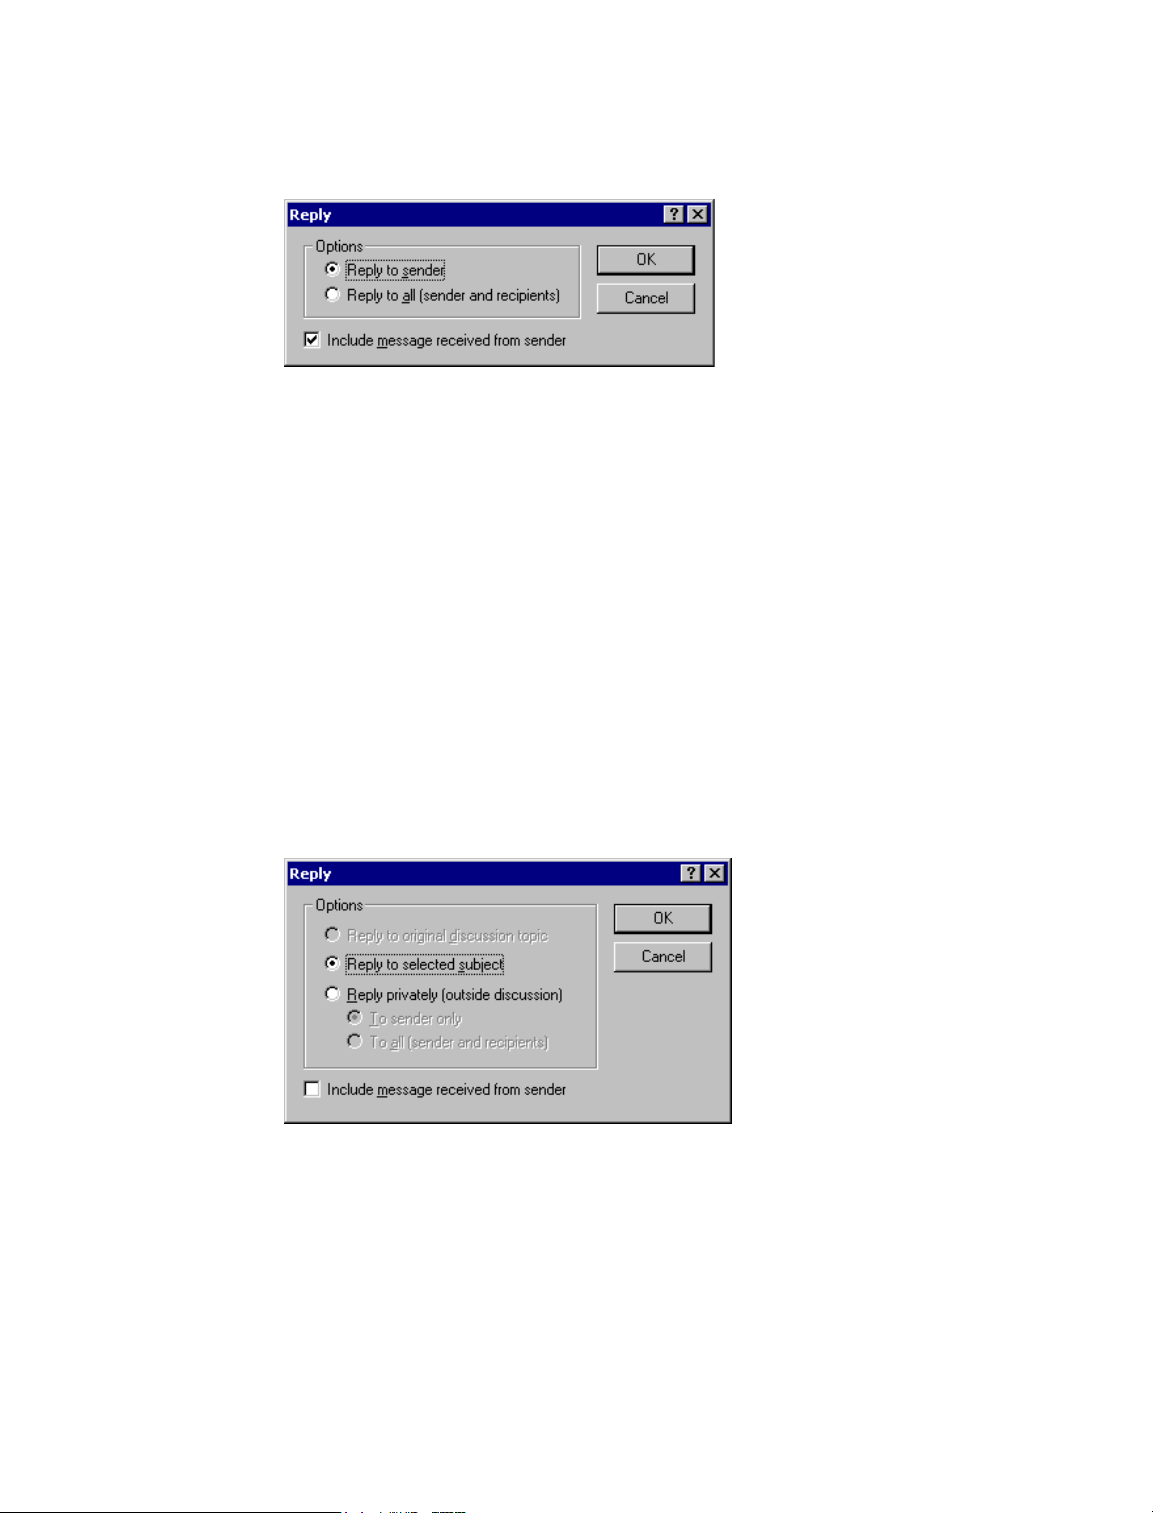
Replying to an Item
1
Open the item you want to reply to.
2 Click Reply on the toolbar.
3 Click Reply to Sender.
or
Click Reply to All.
To include the message text in your reply, make sure Include Message Received From Sender
is selected.
4 Click OK.
5 Type your message, then click Send on the toolbar.
If the original item included BC or CC recipients and you selected to reply to all, your reply will
be sent to the CC recipients but not to the BC recipients.
Replying to an Item in a Shared Folder
Open or select an item in the shared folder.
1
2 Click Reply on the toolbar.
3 Click a reply option.
You can reply to the original discussion topic, rather than to the item you are reading. Or, you
can reply to any item you are reading, whether it's an original discussion topic or someone
else's reply. In both cases, these replies are posted in the shared folder and not sent to
individuals.
If you reply privately to the individual who wrote the item, your reply is not posted to the
shared folder.
4 Click OK.
5 Type your reply, then click Post on the toolbar.
80 GroupWise 6.5 Windows Client User Guide
Page 81

Forwarding Items to Other Users
Use Forward to send items you receive and document references to other users. When you forward
an item, it is sent as an attachment to a mail message. The mail message includes your name and
any additional comments you have made.
This section contains the following topics:
“Forwarding an Item” on page 81
“Forwarding Multiple Items” on page 81
Forwarding an Item
1
Open the item you want to forward.
2 Click Actions, then click Forward.
or
Click Actions, then click Forward as Attachment.
3 Add the names of the users to whom you want to forward the item.
4 Type a message (optional).
5 Click Send on the toolbar.
If you can’t accept an appointment, task, or reminder note, you can delegate the item instead of
forwarding it. Delegating places a Delegated status in the item’s Properties window, letting the
sender know you have transferred responsibility for the item to another person.
Forwarding Multiple Items
Ctrl+click the items you want to forward in your Mailbox.
1
2 Click Actions, then click Forward as Attachment.
3 Add the names of the users to whom you want to forward the item.
4 Type a message (optional).
5 Click Send on the toolbar.
If you can’t accept an appointment, task, or reminder note, you can delegate the item instead of
forwarding it. Delegating places a delegated status in the item’s Properties window, letting the
sender know you have transferred responsibility for the item to another person.
Using Categories to Organize Items
Categories provide you with a way to organize your items. You can assign a category to any item,
including contacts. You create and add categories and can give each category an identifying color.
The colors display in the Item List and in the Calendar.
Working with Items in Your Mailbox 81
Page 82
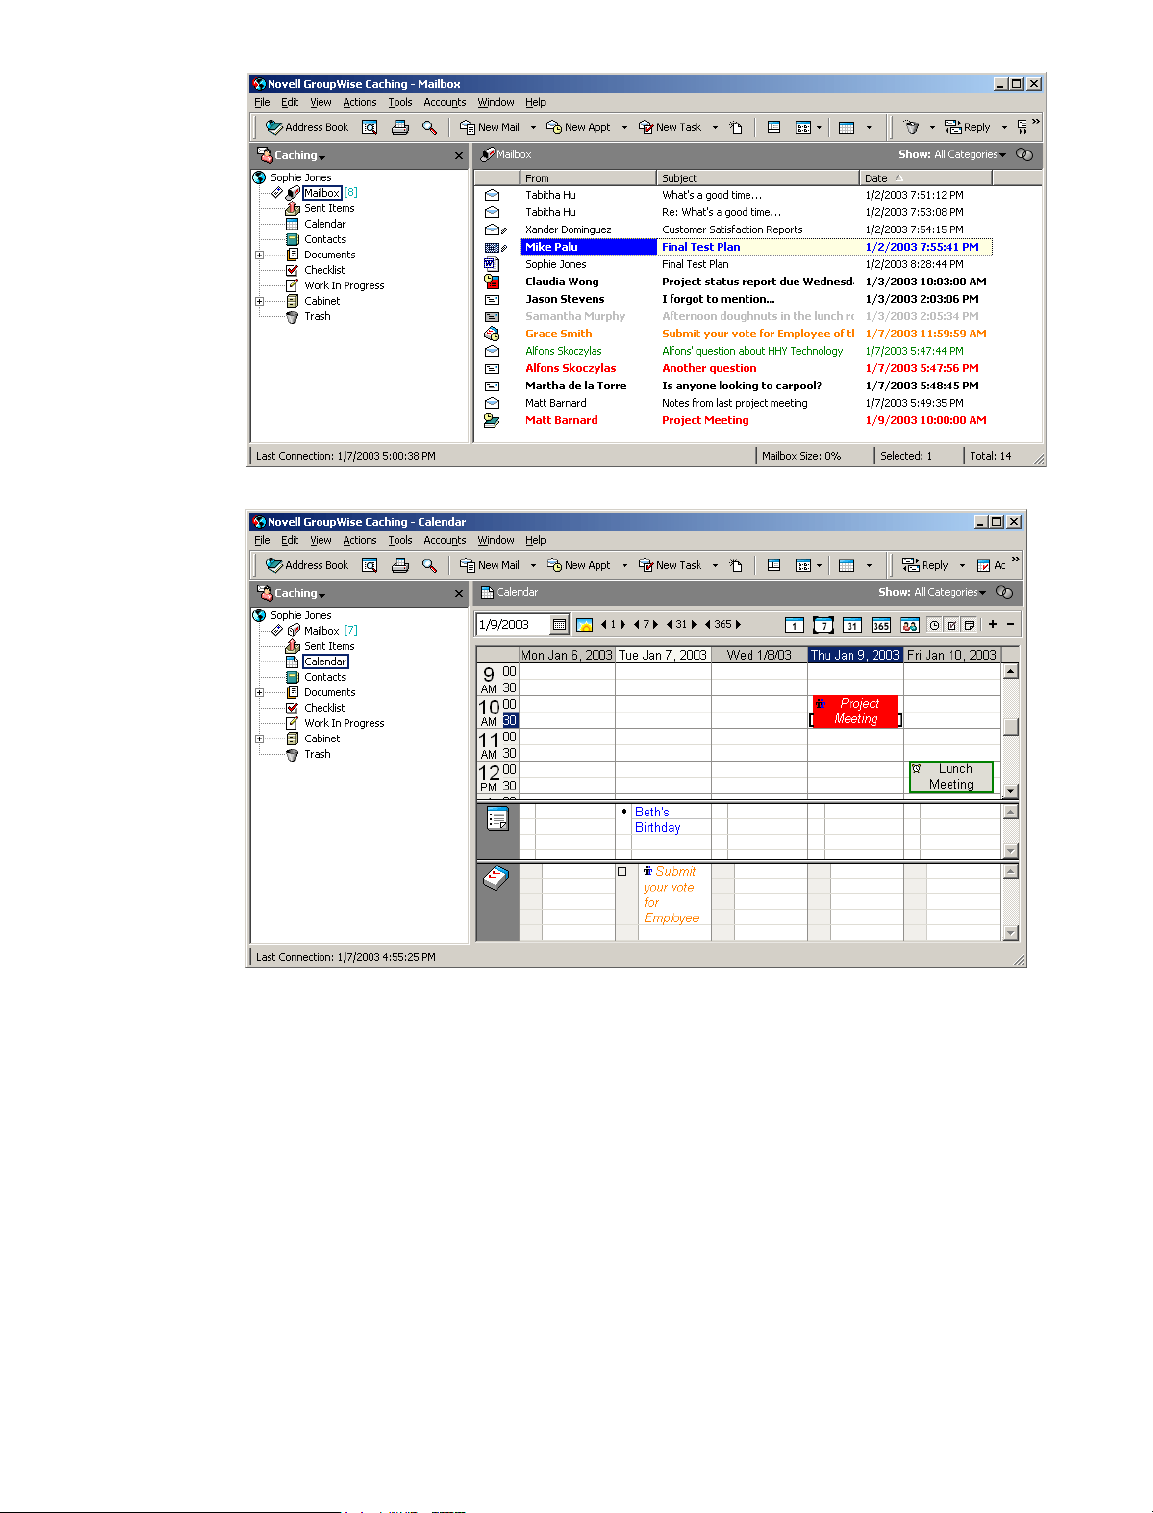
You can assign more than one category to an item, and specify which category is the primary one.
The color of the primary category will be used to identify the item.
When you reply to an item that has been assigned a category, the same category (or categories) is
assigned to the reply message.
Four default categories (Follow-Up, Low Priority, Personal, and Urgent) are available for you to
immediately assign to items. You can modify and delete them if you choose, as well as continue
to create new categories.
You can filter on categories by using the Show menu next to the Filter icon. You can add a
Category column heading and sort your Item List by category.
This section contains the following topics:
“Assigning a Category to an Item” on page 83
“Adding a Category” on page 84
82 GroupWise 6.5 Windows Client User Guide
Page 83
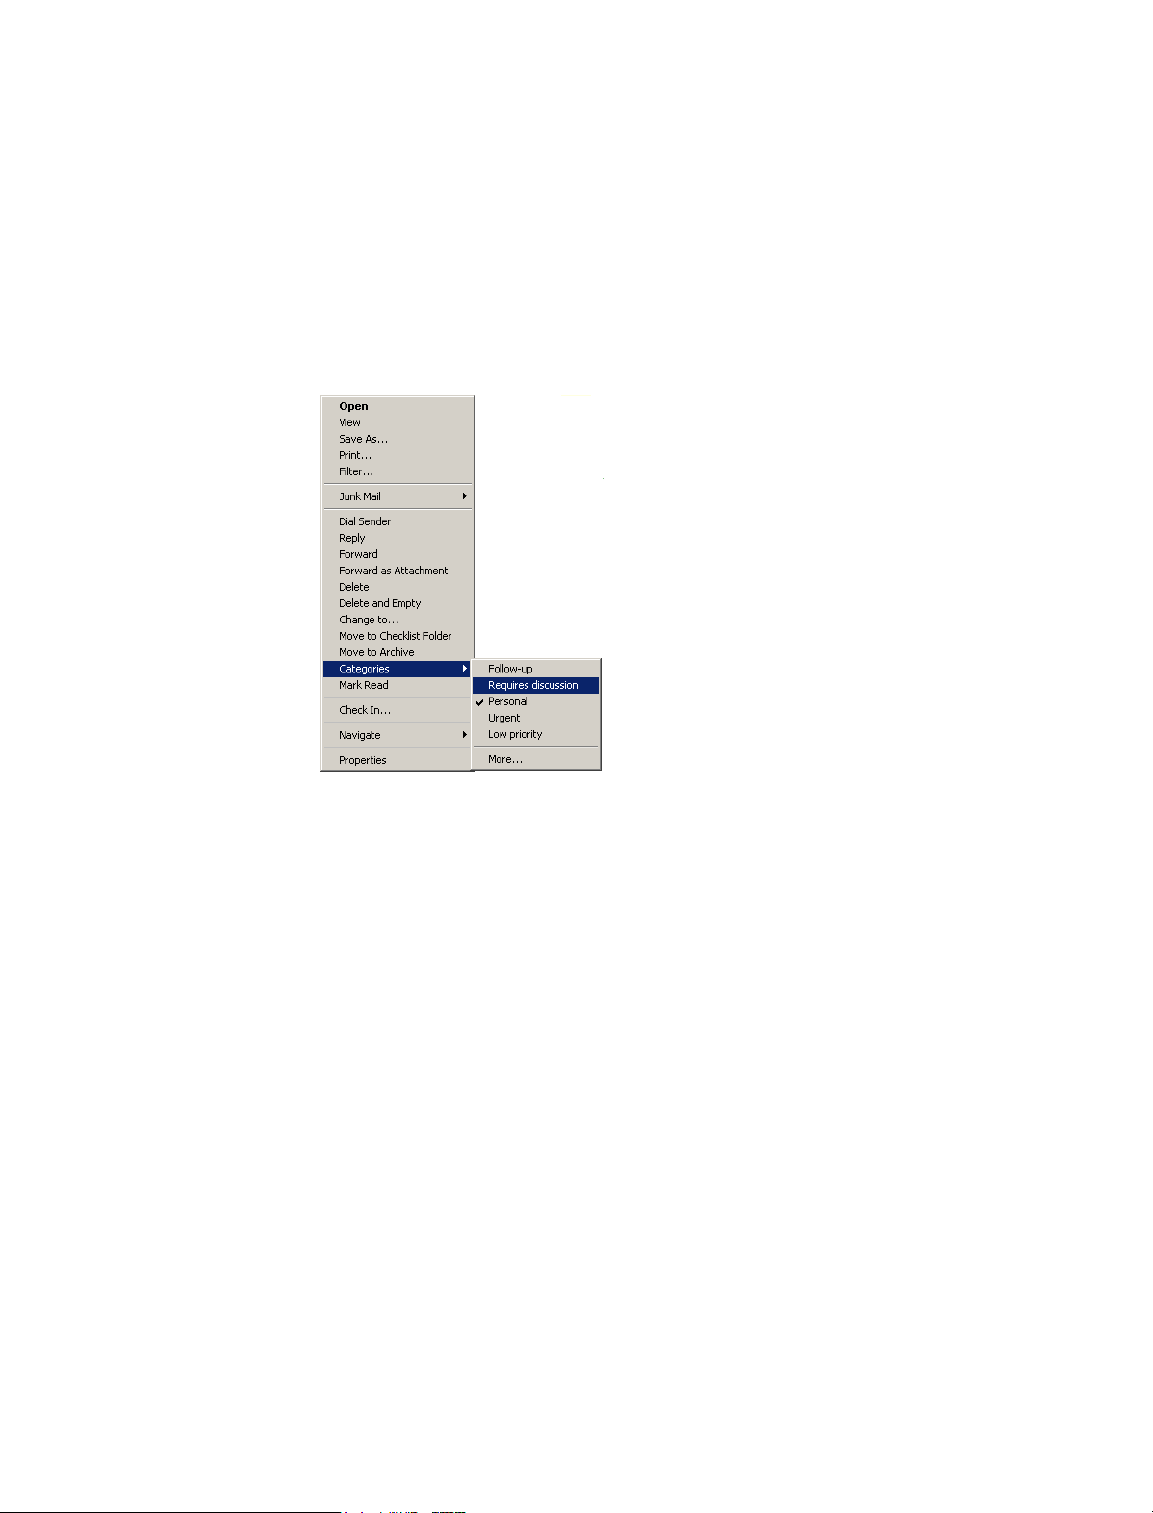
“Deleting a Category” on page 84
“Renaming a Category” on page 84
“Seeing All Items in a Certain Category” on page 84
Assigning a Category to an Item
To quickly assign a category to an item,
1 Right-click an item in your Mailbox or Calendar, then click the category.
The 10 most recently used categories are available from this right-click menu. (If you have
not yet used categories, they are displayed alphabetically.)
To assign multiple categories to an item, assign a category to a new item you are composing, or
assign a category that does not display on the right-click menu,
1 Right-click an item in your Mailbox or Calendar, click Categories, then click More.
or
Open an item in your Mailbox or Calendar, click the Personalize tab, then click Edit
Categories.
or
Open a new item to compose, click the Send Options tab, then click Edit Categories.
2 Select the check box of the category you want to assign.
or
Type a new category name in the text box next to Add, then click Add.
If you assign one of the default categories (Follow-Up, Low Priority, Personal, and Urgent)
to an item you are sending, the item arrives in the recipient’s Mailbox with that category
assigned. If you assign a category that you created to an item you are sending, the item arrives
in the recipient’s Mailbox with no category assigned.
3 To change the color of an existing category or assign a color to a new category, select the
category name, click Edit Color, click a color, then click OK.
4 To assign additional categories to this item, select the check boxes of those categories.
Working with Items in Your Mailbox 83
Page 84
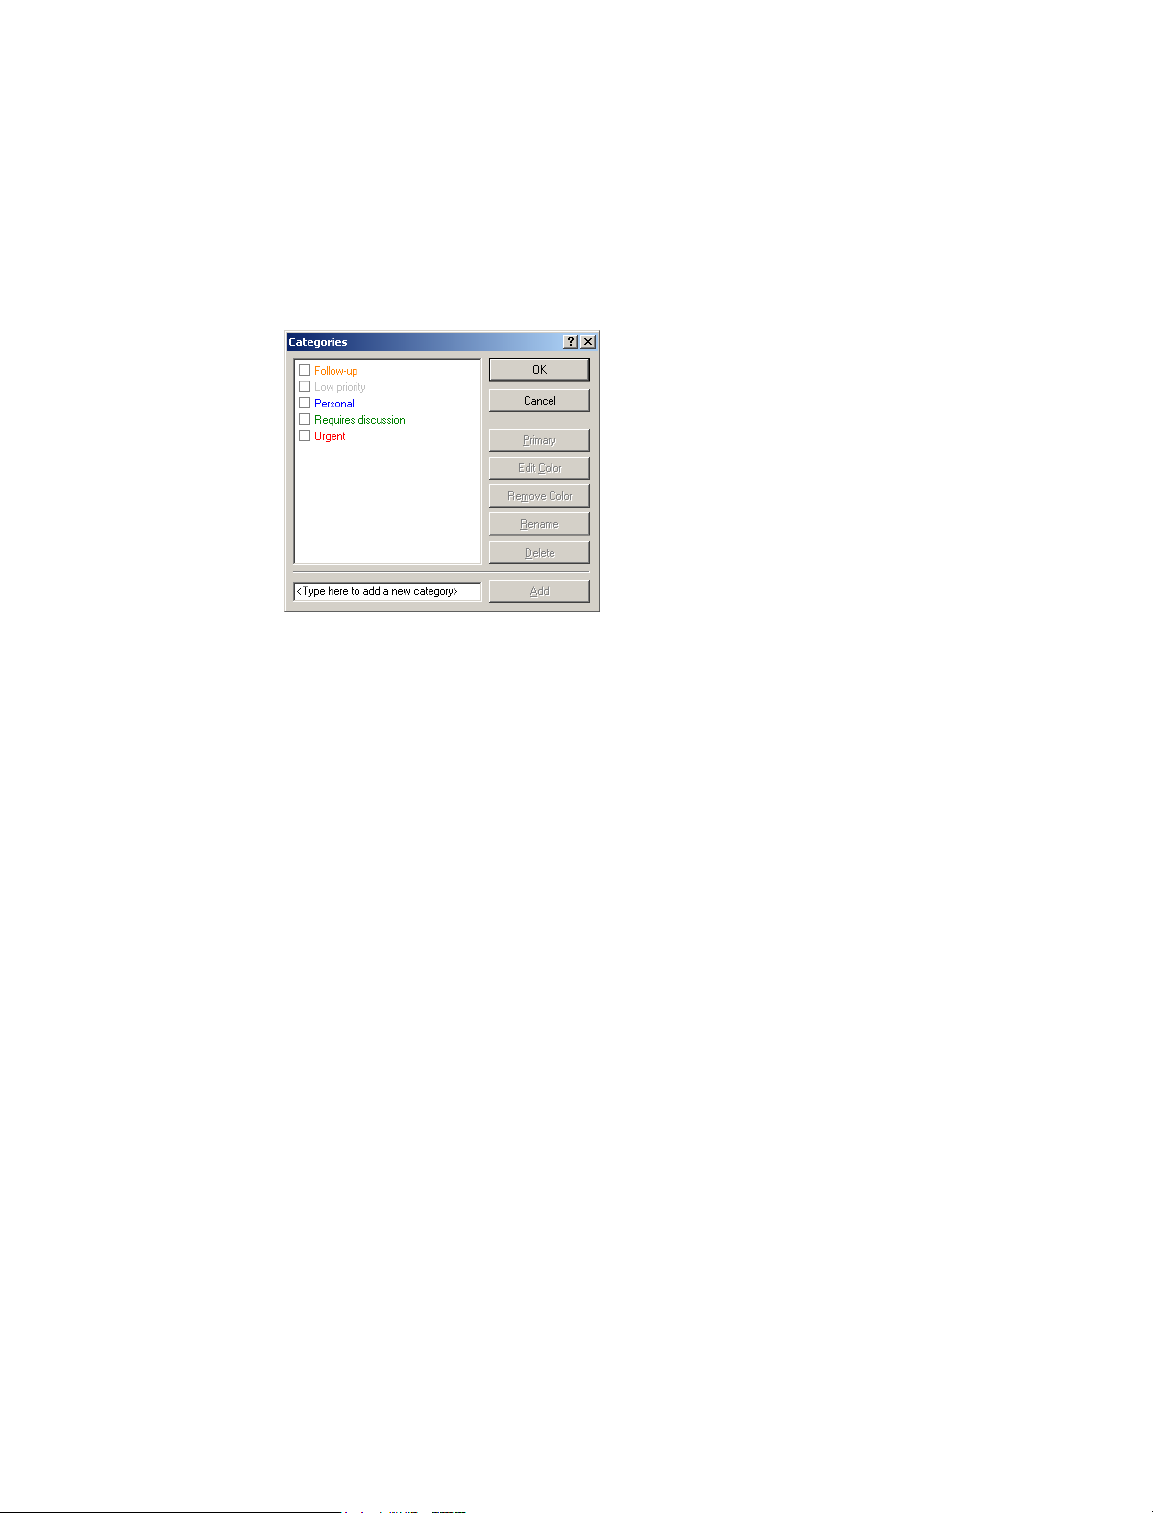
Adding a Category
When you assign multiple categories to an item, the color of the primary category is the color
that will show in the Item List. When you sort the Item List by category, items are sorted by
their primary category. By default, the first category you assign is the primary category. Or,
to set the primary category for this item, select a category, then click Primary.
5 Click OK.
Right-click an item, click Categories, then click More.
1
2 Type the category name in the field at the bottom of the Categories dialog box.
Deleting a Category
Renaming a Category
3 Click Add.
The Add button becomes active when you begin typing a category name.
4 To assign a color to a category, select the category name in the list, click Edit Color, click a
color, then click OK.
5 To assign this category to the selected item, select the check box to the left of the category
name, then click OK.
Right-click an item in your Mailbox or Calendar, click Categories, then click More.
1
2 Select the category name, then click Delete.
3 Click Yes, then click OK.
The category is removed from the list, and from all the items to which it was assigned.
Select the category name, then click Rename.
1
2 Type the new name, then click OK.
The category is renamed in the list, and for all the items to which it was assigned.
Seeing All Items in a Certain Category
In the upper-right corner of your Mailbox or Calendar view, click the Show menu, then click
1
the category name.
84 GroupWise 6.5 Windows Client User Guide
Page 85
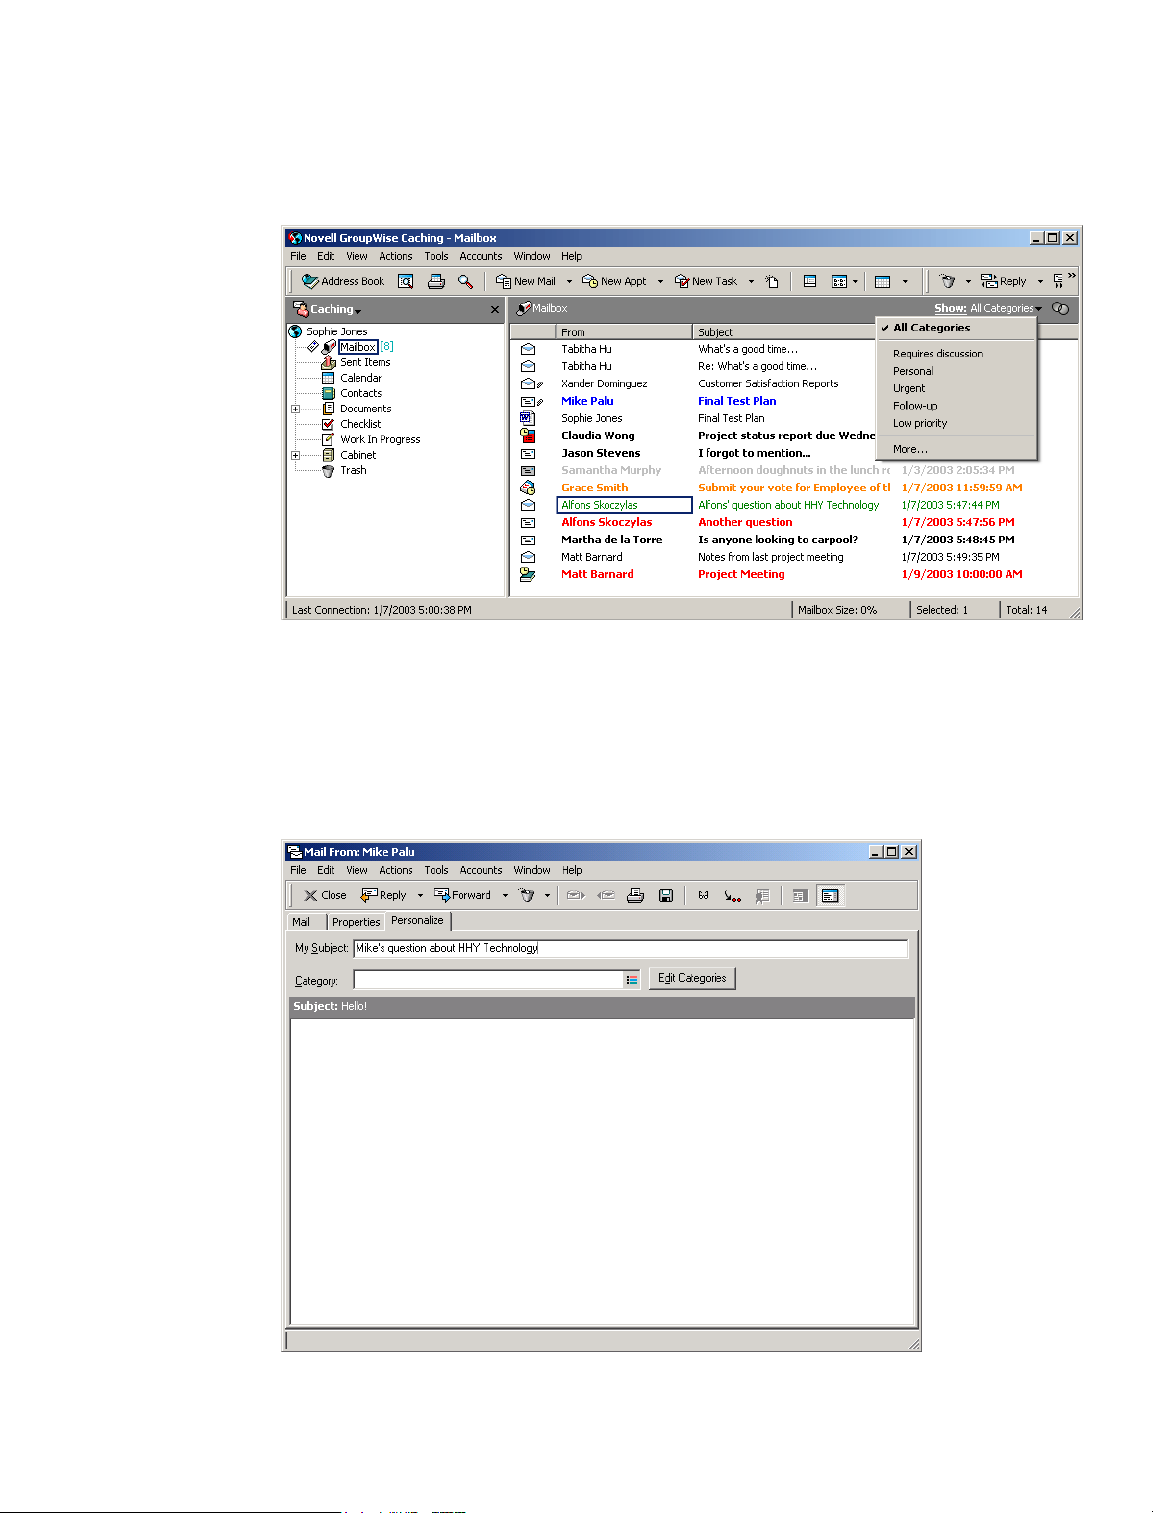
The 10 most recently used categories are available from the Show menu. (If you have not yet
used categories, they are displayed alphabetically.)
All items that have been assigned this category will display.
To clear this selection, click Show, then click All Categories.
Changing the Subject of an Item You’ve Received
1 Open an item from your Mailbox or Calendar.
2 Click the Personalize tab.
3 Type a new subject in the My Subject text box.
Working with Items in Your Mailbox 85
Page 86

This personalized subject will display in your Mailbox and/or Calendar and in the Mailbox and/or
Calendar of anyone who proxies for you. If you change the subject of an item in a shared folder,
other users of the shared folder will see the original subject.
To see the original subject, open the item and look in the Subject field in the item header.
When you create a basic filter or perform a Find with a specific word in the Subject field, the filter/
Find results will show items whose original subject or personalized subject contains this word.
When you create an advanced filter or find, use the Subject field to search for the original subject,
and use the My Subject field to search for the personalized subject.
When you create a rule that looks for a specific word in the Subject field, the rule will only look
at the original subject.
Creating a Checklist
Use the Checklist folder to create a task list. You can move any items (mail messages, phone
messages, reminder notes, tasks, or appointments) to this folder and arrange them in the order you
want. Each item is marked with a check box so that you can check off items as you complete them.
After you have moved an item to the Checklist folder, you can open it, click the Checklist tab, and
assign it a due date. You can also mark it Completed and set its position in the list from the
Checklist tab.
You can also make other folders work the way the Checklist folder does.
The Checklist folder is a system folder. It replaces the Task List folder. For a comparison of the
Checklist folder and the Task List folder, see Checklist Folder under “Folder List” on page 22.
IMPORTANT: If you or your system administrator has set up auto-archiving of items in your Mailbox, checklist
items will also be archived based on the original date you received the item, not based on the due date you
assign it.
This section contains the following topics:
“Creating a Master Checklist in the Checklist Folder” on page 86
“Creating a New Item in the Checklist Folder” on page 87
“Moving an Item to the Checklist Folder” on page 88
“Marking an Item to Display in the Checklist Folder” on page 88
“Creating a Checklist in a Folder Other Than the Checklist Folder” on page 89
“Assigning a Due Date to an Item in the Checklist Folder” on page 90
“Marking or Unmarking a Checklist Item Completed” on page 91
Creating a Master Checklist in the Checklist Folder
Drag items to the Checklist folder .
1
In the Checklist folder, the items display with a check box to the left of them. When you
complete an item in the checklist, you can mark it complete by selecting the check box.
You can move items to the Checklist folder from a shared folder only if you are the owner of
the shared folder.
86 GroupWise 6.5 Windows Client User Guide
Page 87
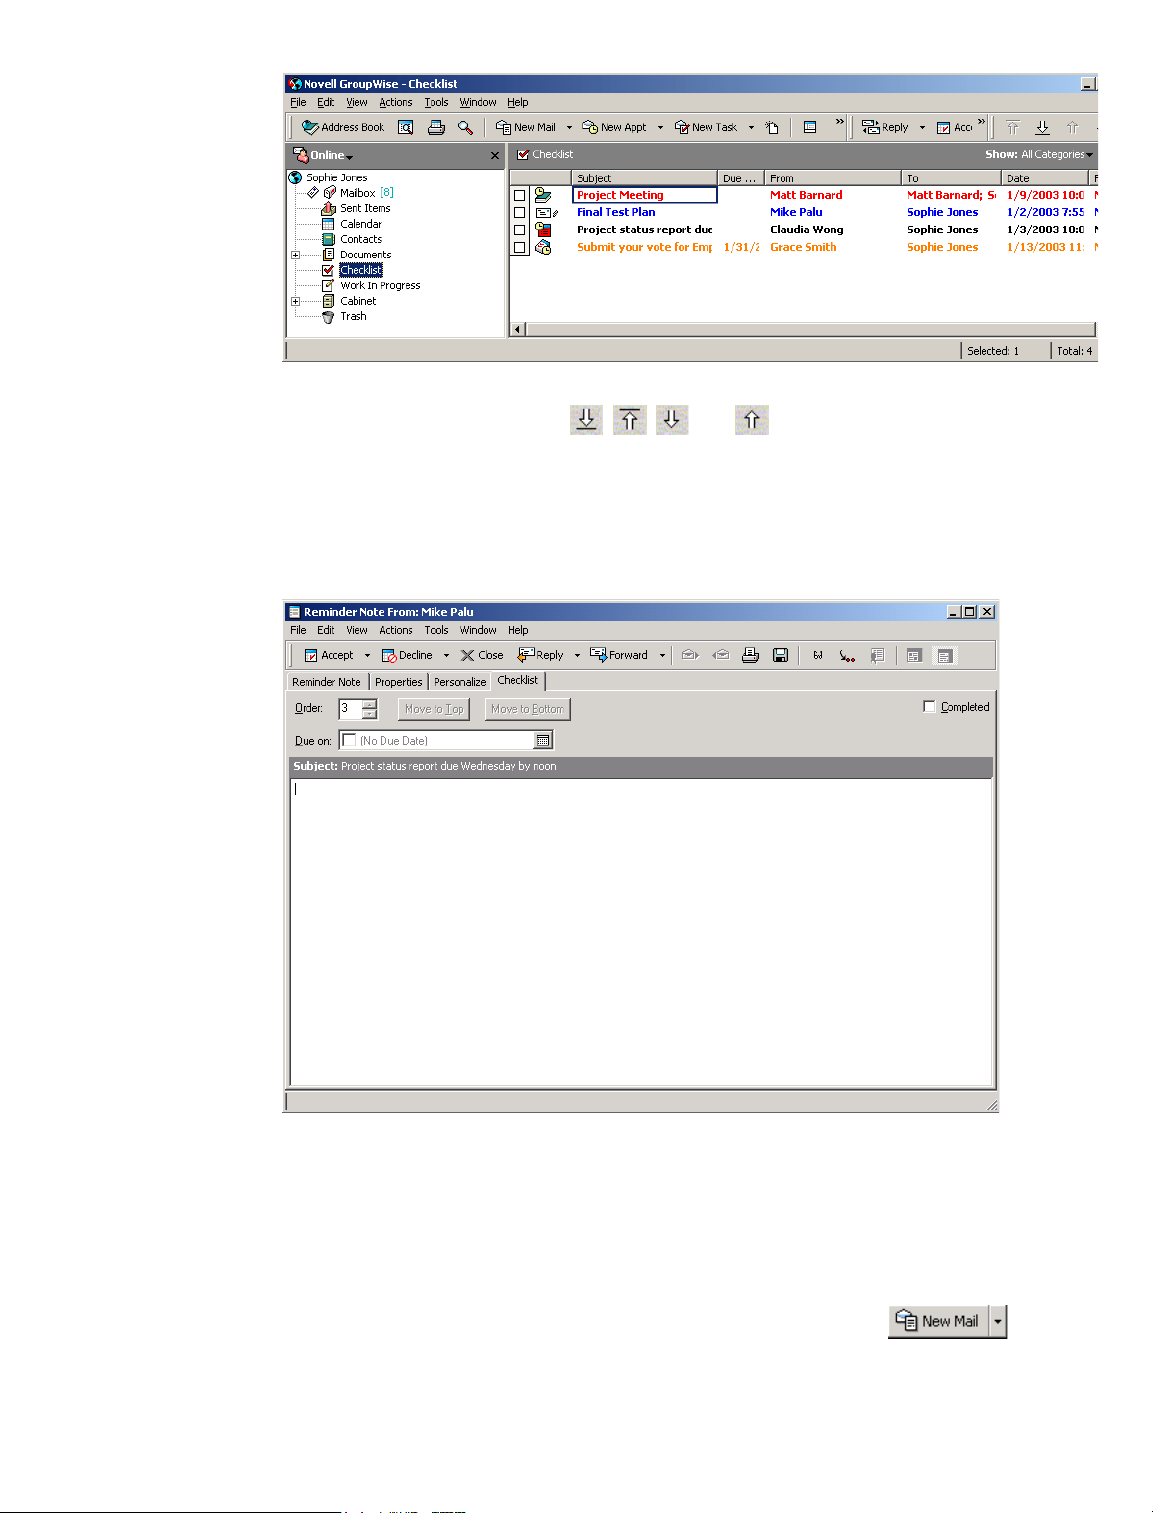
2
To arrange the items in the order you want, drag them to the position you want, or click them,
then click the toolbar buttons , , , and .
If these buttons do not display on the toolbar, right-click the toolbar, then click Folder
Context.
3 To assign a due date and a numerical position (order) in the Checklist to an item, open the item
and add this information on the Checklist tab.
You can also create a checklist area in another folder and drag items to the area. After items are in
a checklist area of any folder, they will also display in the master Checklist folder, even though
they are still located in the original folder.
Creating a New Item in the Checklist Folder
1
Click the Checklist folder.
2 If no items exist in the Checklist folder, click the down-arrow on the icon, then
click Posted Message.
Working with Items in Your Mailbox 87
Page 88
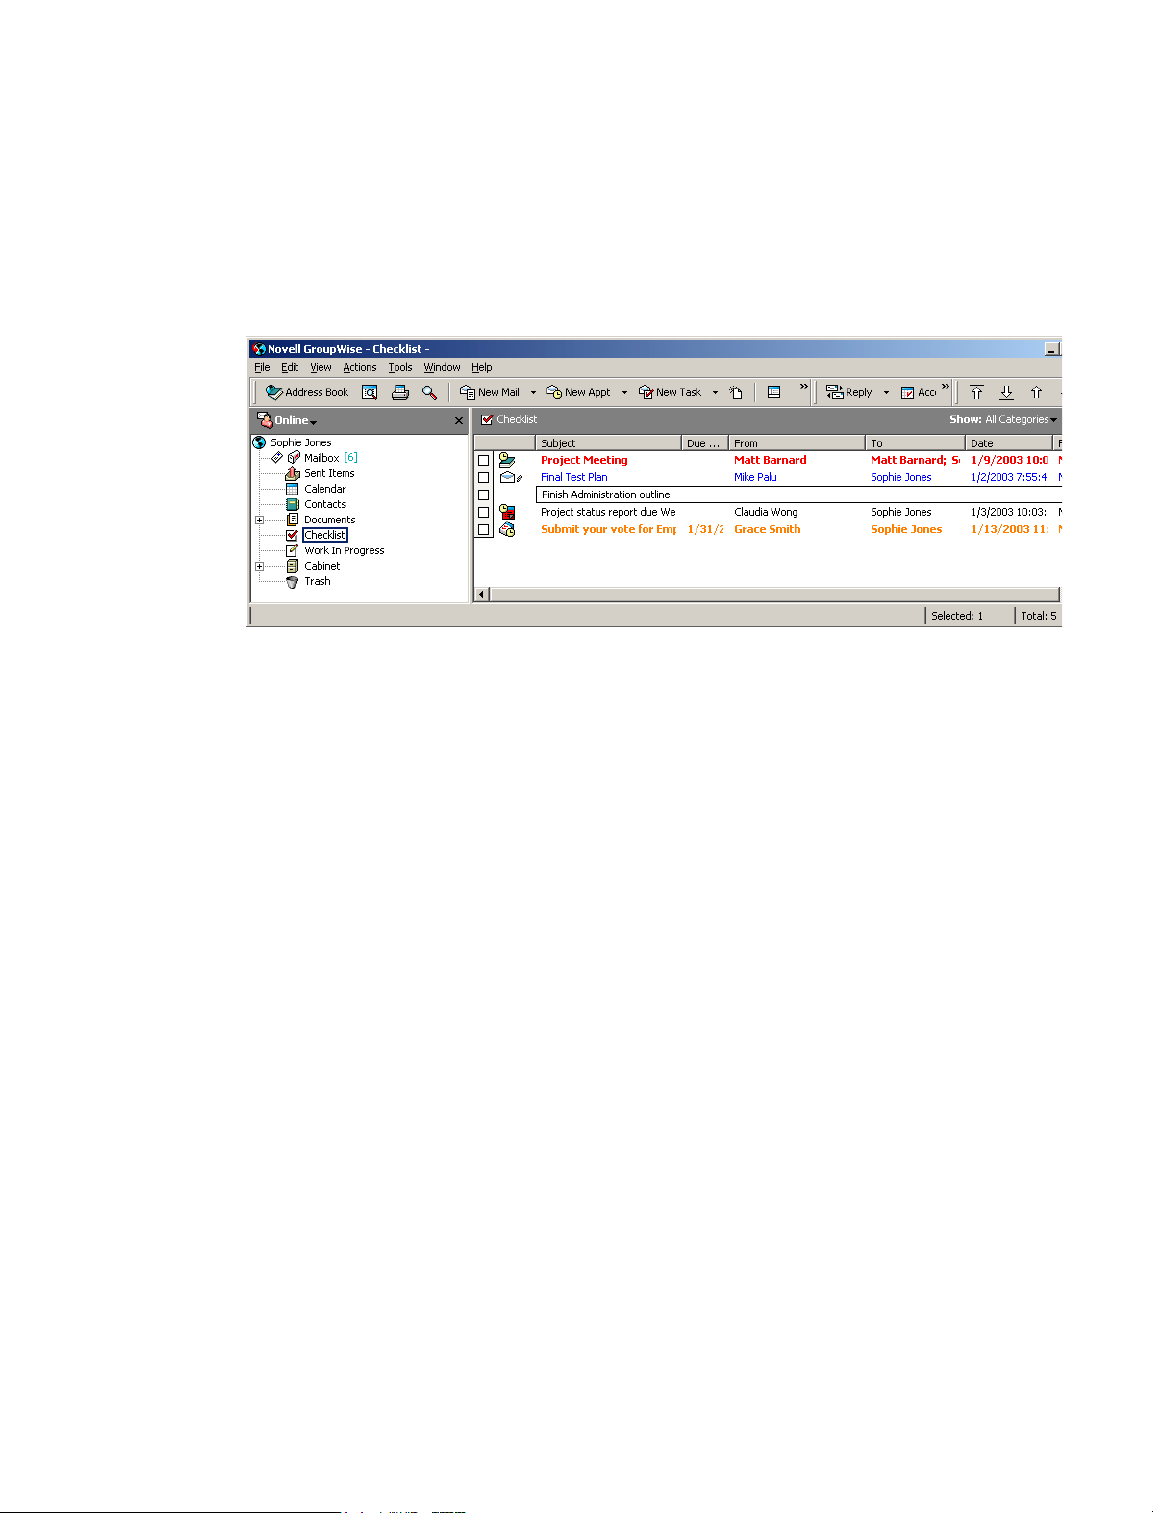
Type a subject and message, then click Post on the toolbar.
Skip to Step 6.
or
If items already exist in the Checklist folder, follow Steps 3-5 below.
3 Click the position in the checklist where you want to add a new item. For example, if you want
the item to be first in the checklist, click the first item.
4 Begin typing the subject text.
5 When you are finished typing the subject text, press Enter.
The item you have created displays as a posted mail item in the position you selected, and the
item that was originally in that position is moved down one position in the checklist.
6 To add additional information to this item, open it and type additional text on the Mail tab.
7 To assign a due date to the item, open it, click the Checklist tab, click Due On, then click a
date.
Moving an Item to the Checklist Folder
Right-click a selected item or items, then click Move to Checklist Folder.
1
You can also open an item, click Actions, then click Move to Checklist Folder.
The item or items are moved from this folder to the Checklist folder, where you can arrange them
in the order you want, assign due dates, mark them Completed, and so forth.
You can only move items to the Checklist folder from a shared folder if you are the owner of the
shared folder.
To return an item to its original folder, drag the item from the Checklist folder to the original
folder.
Marking an Item to Display in the Checklist Folder
Use this action to display an item in the Checklist folder without moving the item to the Checklist
folder.
1 Click an item or select multiple items.
2 Click Actions, then click Show in Checklist.
88 GroupWise 6.5 Windows Client User Guide
Page 89
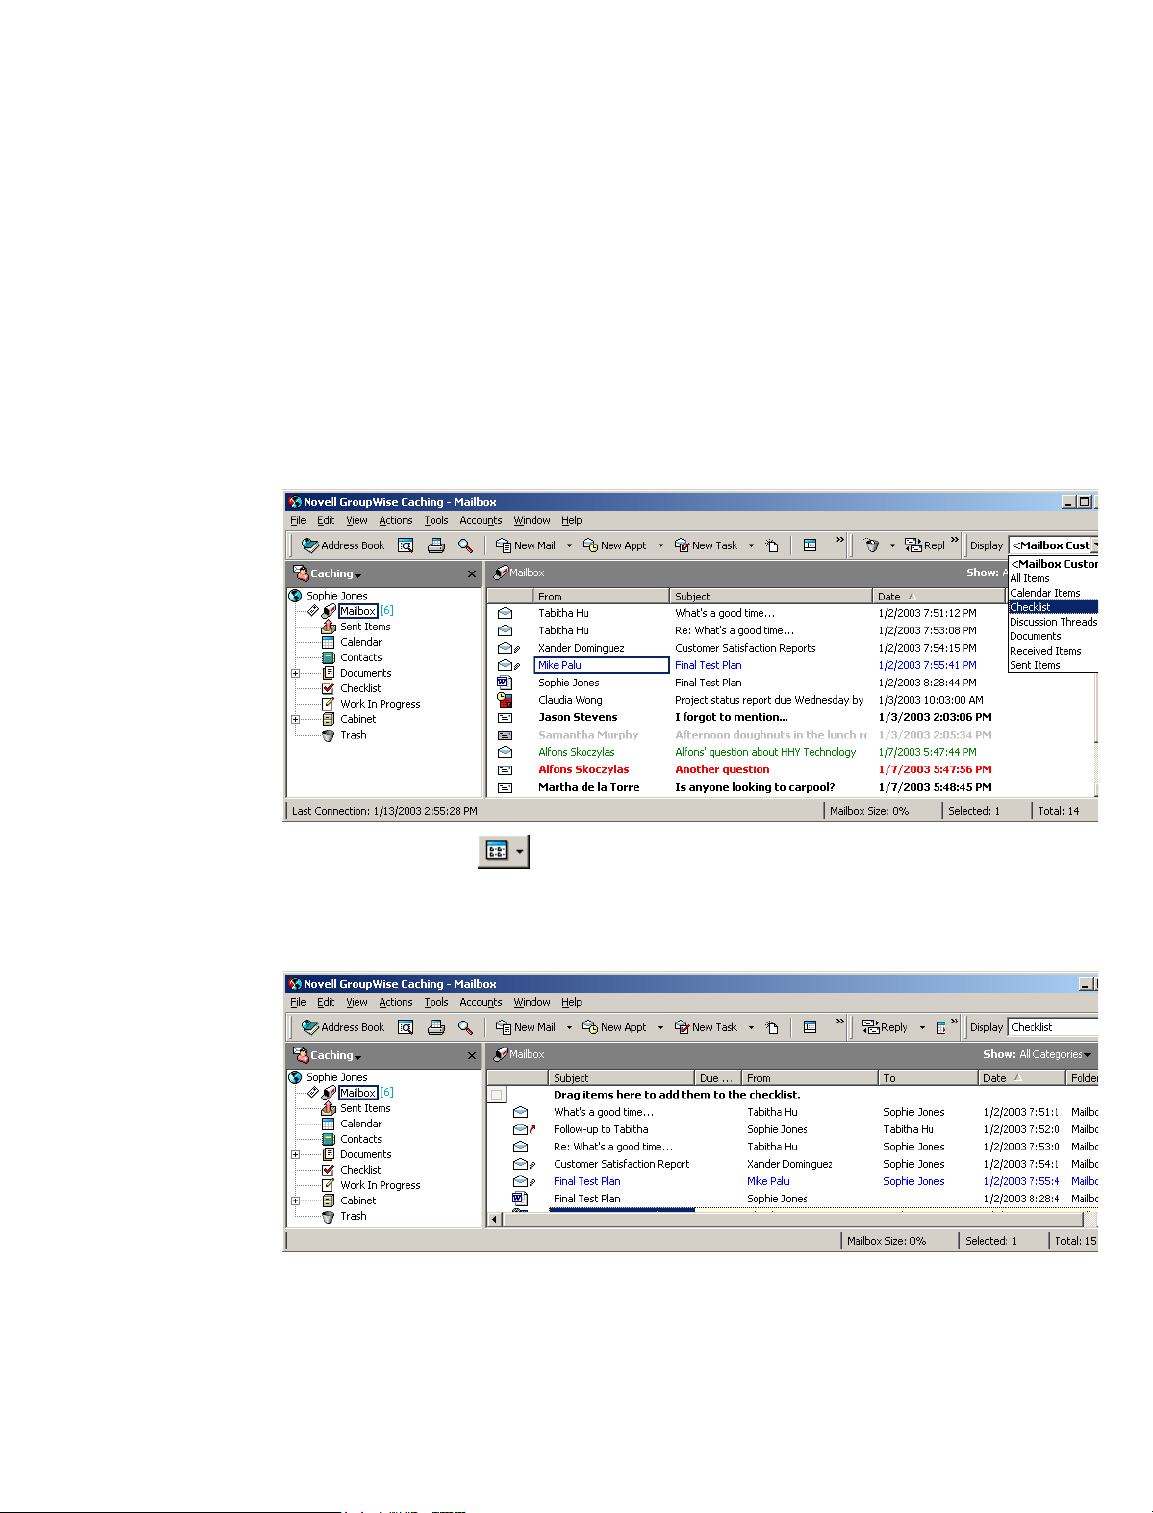
You can also open an item, click Actions, then click Show in Checklist.
The item or items will stay in the original folder, but will also display in the Checklist folder, where
you can arrange them in the order you want, assign due dates, mark them Completed, and so forth.
You can also open these items in their original folder to mark them Completed.
You can only mark items to display in the Checklist folder from a shared folder if you are the
owner of the shared folder.
Creating a Checklist in a Folder Other Than the Checklist Folder
Click a folder.
1
2 Click the Display drop-down list on the toolbar, then click Checklist.
If the Display drop-down list does not display on your toolbar, right-click the toolbar, then
click Display Settings.
You can also click , then click As Checklist.
The top of the item list for this folder now displays "Drag items here to add them to the
checklist."
3 Select one or more items and drag them to this area of the item list for this folder.
The items now display with a check box to the left of them.
Working with Items in Your Mailbox 89
Page 90
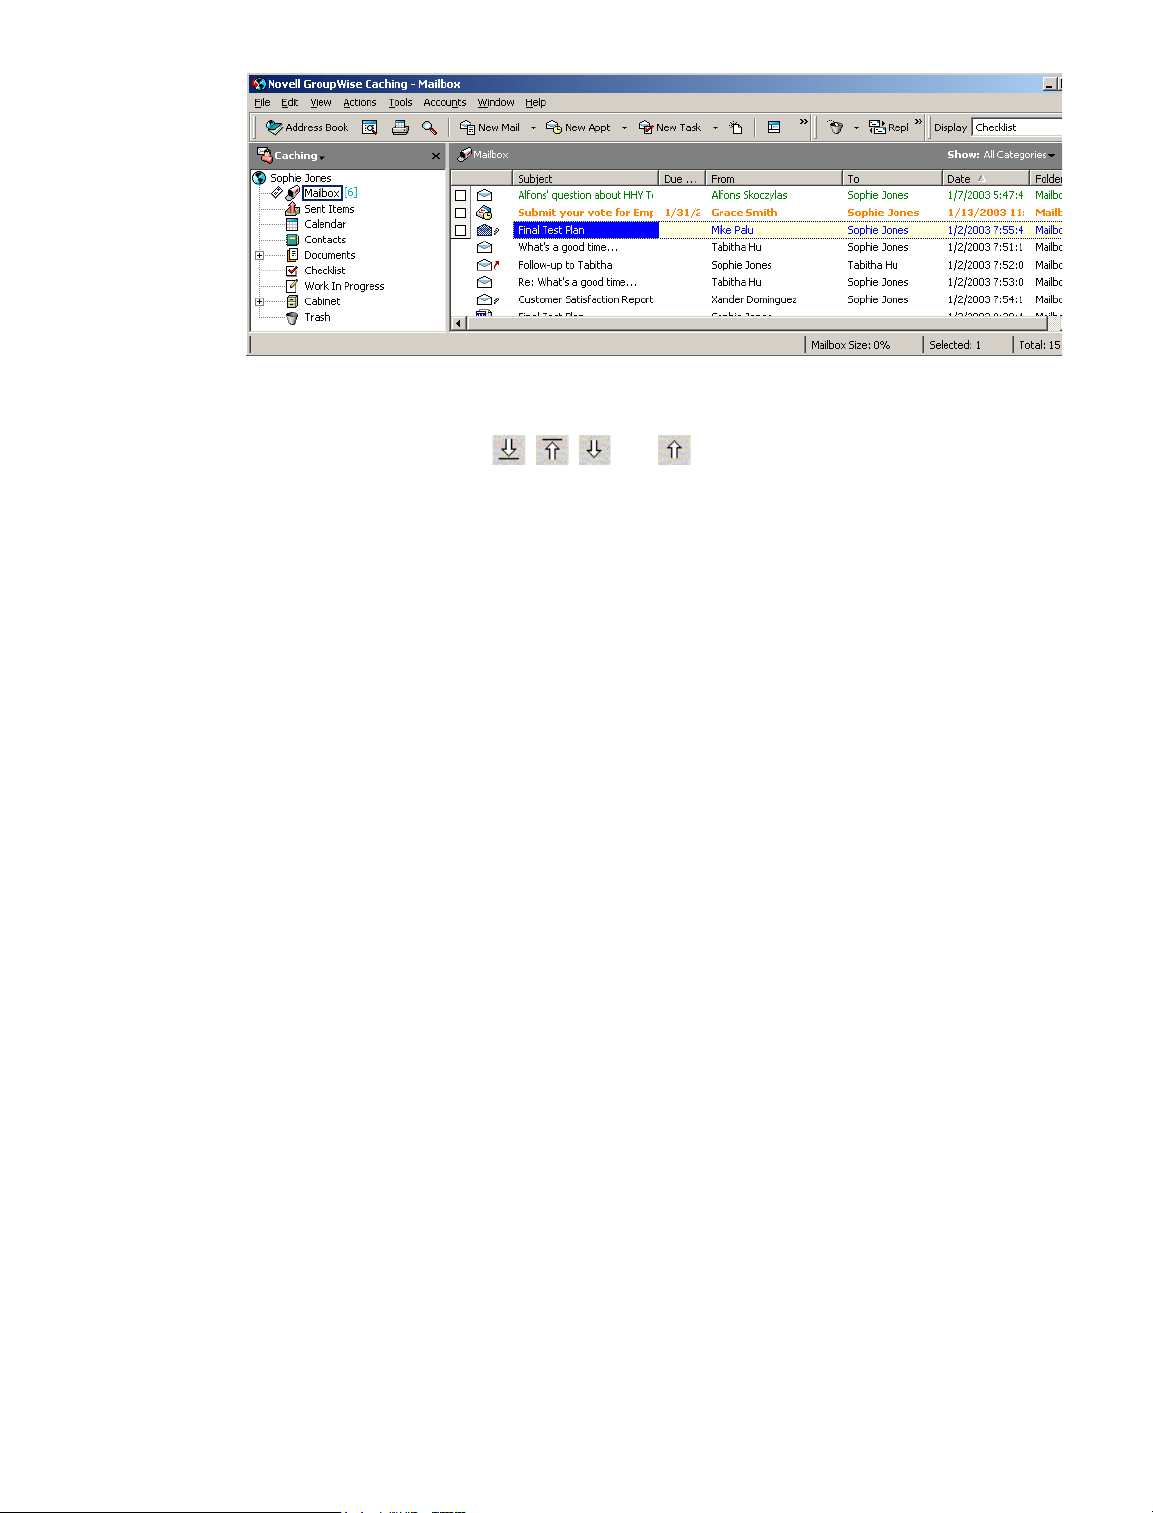
To arrange the items the order you want, drag them to the place you want, or click them, then
4
click the toolbar buttons , , , and .
If these arrow buttons are not on your toolbar, you can add them. Right-click the toolbar, click
Customize Toolbar, click Customize, then click Actions. Click each button, then click Add
Button.
5 To show only the items that are part of the checklist in this folder, click an item in the folder,
click Actions, click Checklist Actions, then click Hide Non-Checklist Items.
Perform this step again to show all items in the folder.
Any items you add to the checklist area of a folder will also display as part of the master checklist
in the Checklist folder.
If you click another folder and then click this folder again, the default Display setting shows in the
Display drop-down list, which is not Checklist unless you have changed it. You can select it again
from the Display drop-down list, or you can change the default Display setting by right-clicking
the folder, clicking Properties, clicking the Display tab, clicking Checklist on the Setting Name
drop-down list, then clicking OK.
If you perform a sort on this folder, only the non-checklist items are sorted.
Assigning a Due Date to an Item in the Checklist Folder
1
Open an item in the Checklist folder.
2 Click the Checklist tab.
3 Select Due On, then click a date.
90 GroupWise 6.5 Windows Client User Guide
Page 91
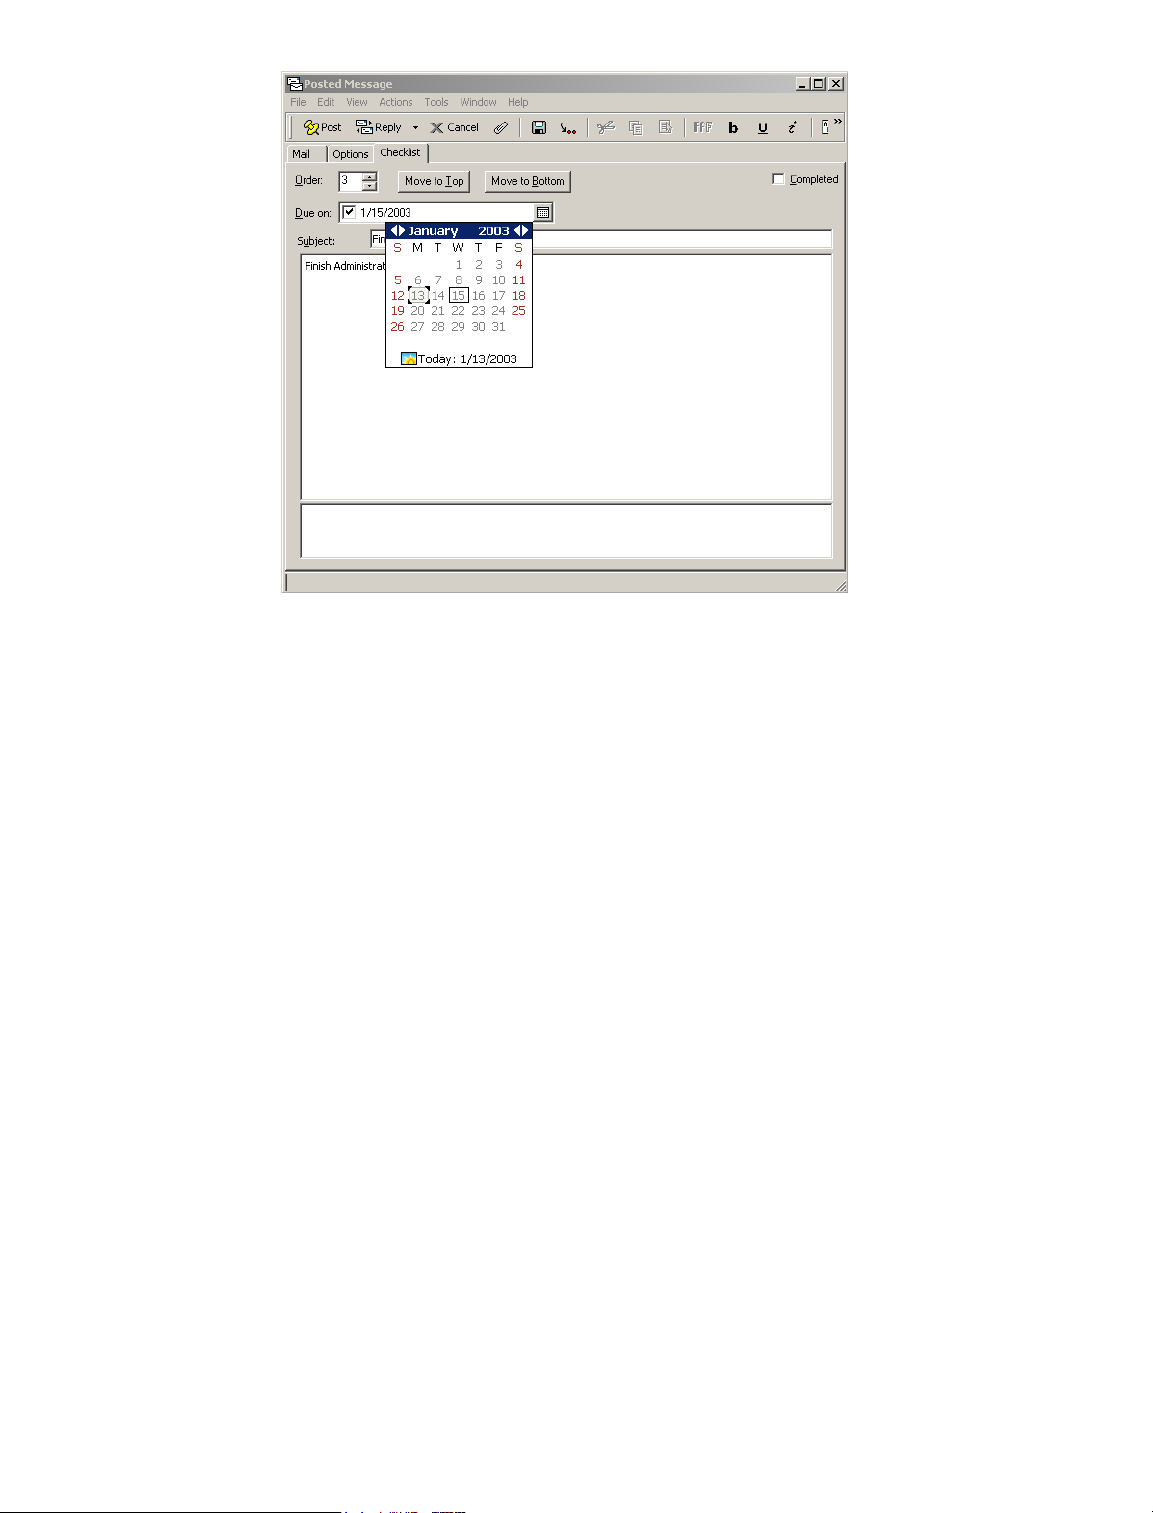
Marking or Unmarking a Checklist Item Completed
Click the box next to the checklist item.
1
Delegating Items
Use Delegate to reassign a scheduled item to someone else. The sender can determine who you
delegated the item to by looking at the item’s Properties.
This section contains the following topics:
“Delegating an Appointment, Task, or Reminder Note from the Main Window” on page 91
“Delegating an Appointment, Task, or Reminder Note from the Calendar View” on page 92
Delegating an Appointment, Task, or Reminder Note from the Main Window
In the Main Window, click a task, reminder note, or appointment.
1
2 Click Actions, then click Delegate.
3 In the To box, type a username, then press Enter.
or
To select a username from a list, click Address on the toolbar, double-click the user, then click
OK.
4 Type any additional comments to the recipient.
5 Click Send on the toolbar.
6 Click Yes if you want this item to remain in your Calendar.
or
Click No if you want this item deleted from your Calendar.
Working with Items in Your Mailbox 91
Page 92
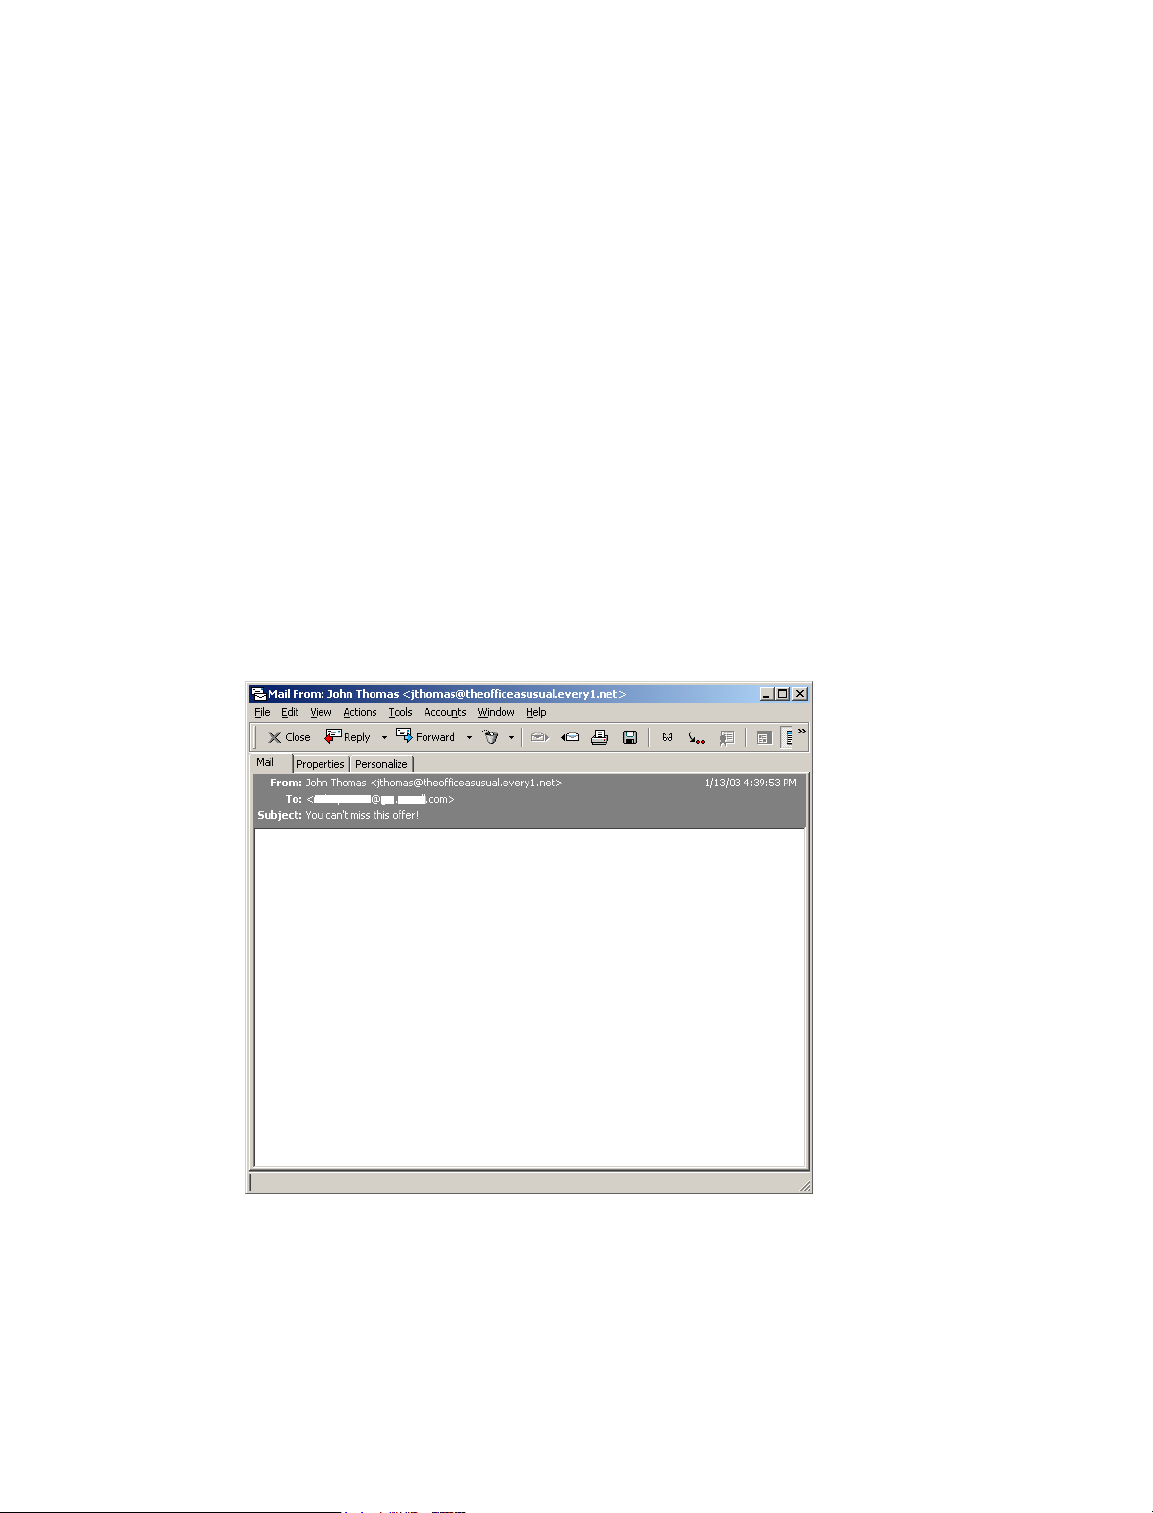
Delegating an Appointment, Task, or Reminder Note from the Calendar View
1
In a Calendar view, right-click a task, reminder note, or appointment, then click Delegate.
2 In the To box, type a username, then press Enter.
or
To select a username from a list, click Address on the toolbar, double-click the user, then click
OK.
3 Type any additional comments to the recipient.
4 Click Send on the toolbar.
5 Click Yes if you want the item to remain in your Calendar.
or
Click No if you want the item deleted from your Calendar.
Handling Unwanted Mail
Use Junk Mail Handling to decide what to do with unwanted Internet e-mail that is sent to your
GroupWise e-mail address. Internet e-mail includes all e-mail where the sender’s address is in the
form of [email protected], [email protected], and so forth.
This is an example of an e-mail message from the Internet:
Junk Mail Handling does not apply to internal e-mail. Internal e-mail is e-mail where the sender is
part of your GroupWise system and the From field shows only the name of the sender, not an
Internet address as explained above. If you want to block or junk internal e-mail, you can use
Rules. (For more information, see “Creating Rules” on page 165.)
This is an example of an internal e-mail message:
92 GroupWise 6.5 Windows Client User Guide
Page 93
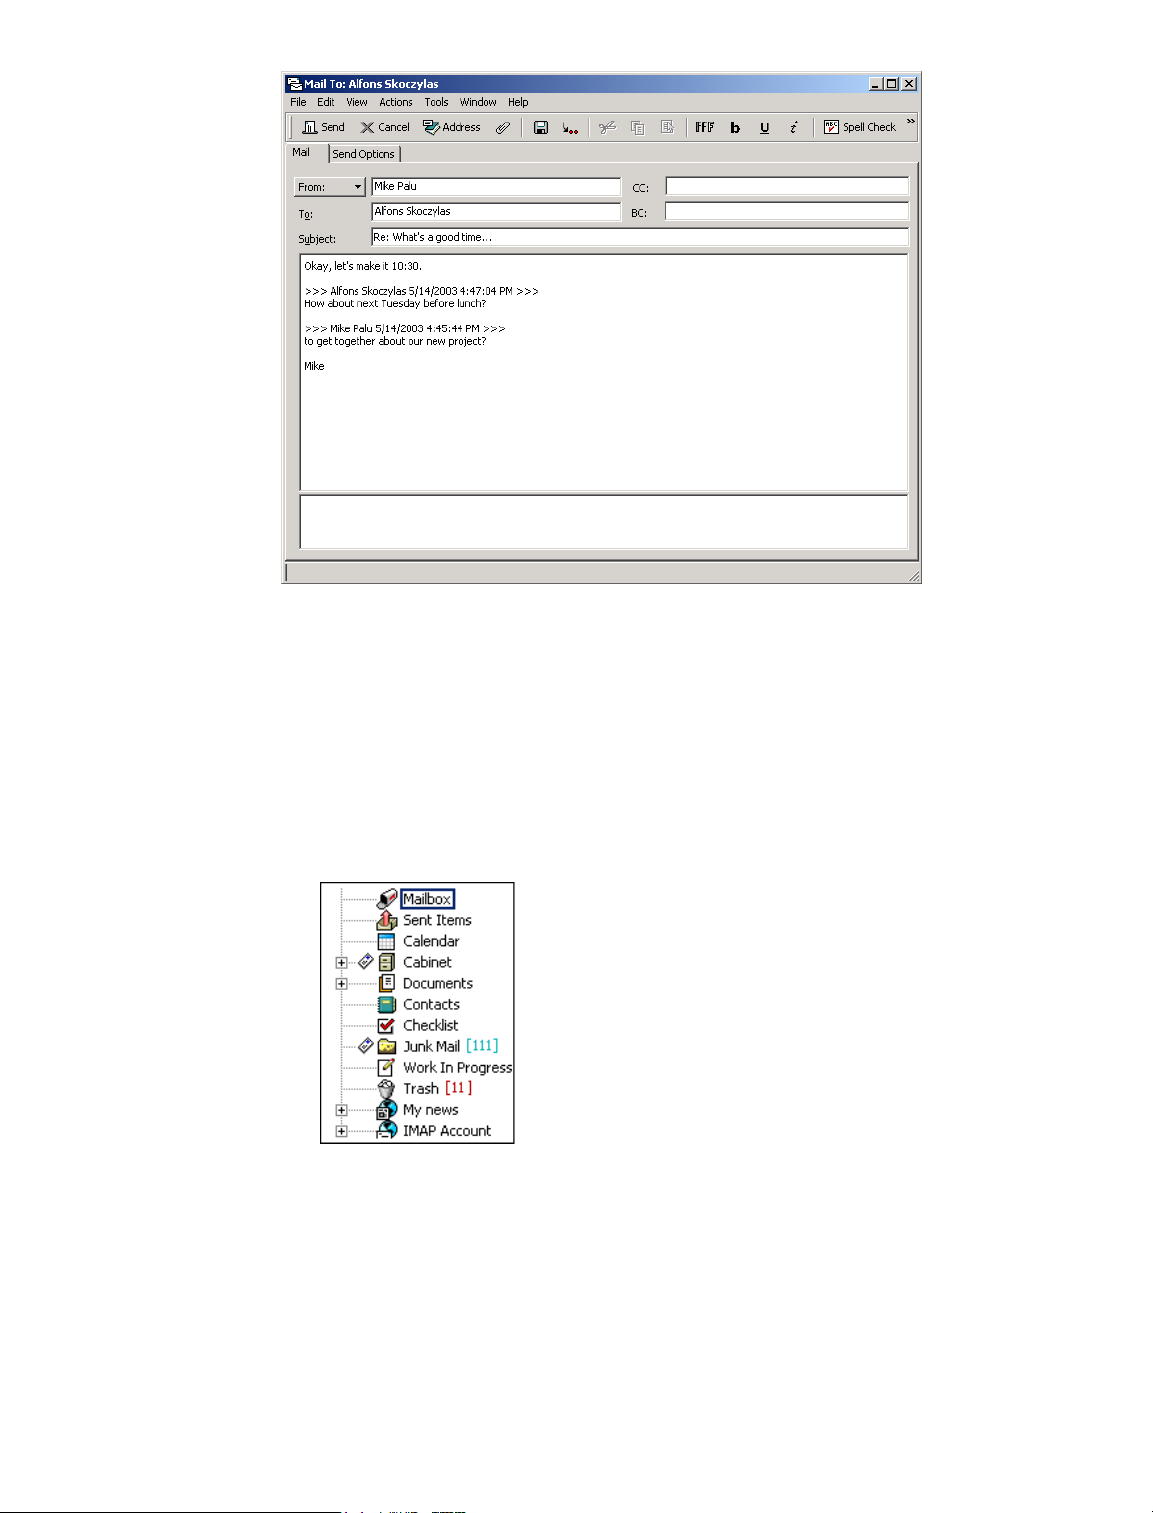
You have three options for blocking or junking Internet e-mail:
You can add individual e-mail addresses or entire Internet domains to a Block List. Items from
these addresses or Internet domains are blocked and never arrive in your Mailbox.
An Internet domain is the part of the e-mail address that comes after the @. For example, in
the address [email protected], the Internet domain is mymail.com.
You can add individual e-mail addresses or entire Internet domains to a Junk List. Items from
these addresses or Internet domains are delivered to the Junk Mail folder in your Mailbox.
You can specify that the items in this folder be automatically deleted after <n> days.
You can specify that any e-mail items from users whose addresses are not in your personal
address books (including your Frequent Contacts address book and any personal address
books you have created) are sent to the Junk Mail folder. This is sometimes called "white
listing."
For information about the Junk Mail folder, see Junk Mail Folder under “Folder List” on page 22.
In addition to the Block List and Junk List, there is a Trust List. Use this list to add e-mail addresses
or Internet domains that you do not want blocked or junked, no matter what is specified in the other
Working with Items in Your Mailbox 93
Page 94
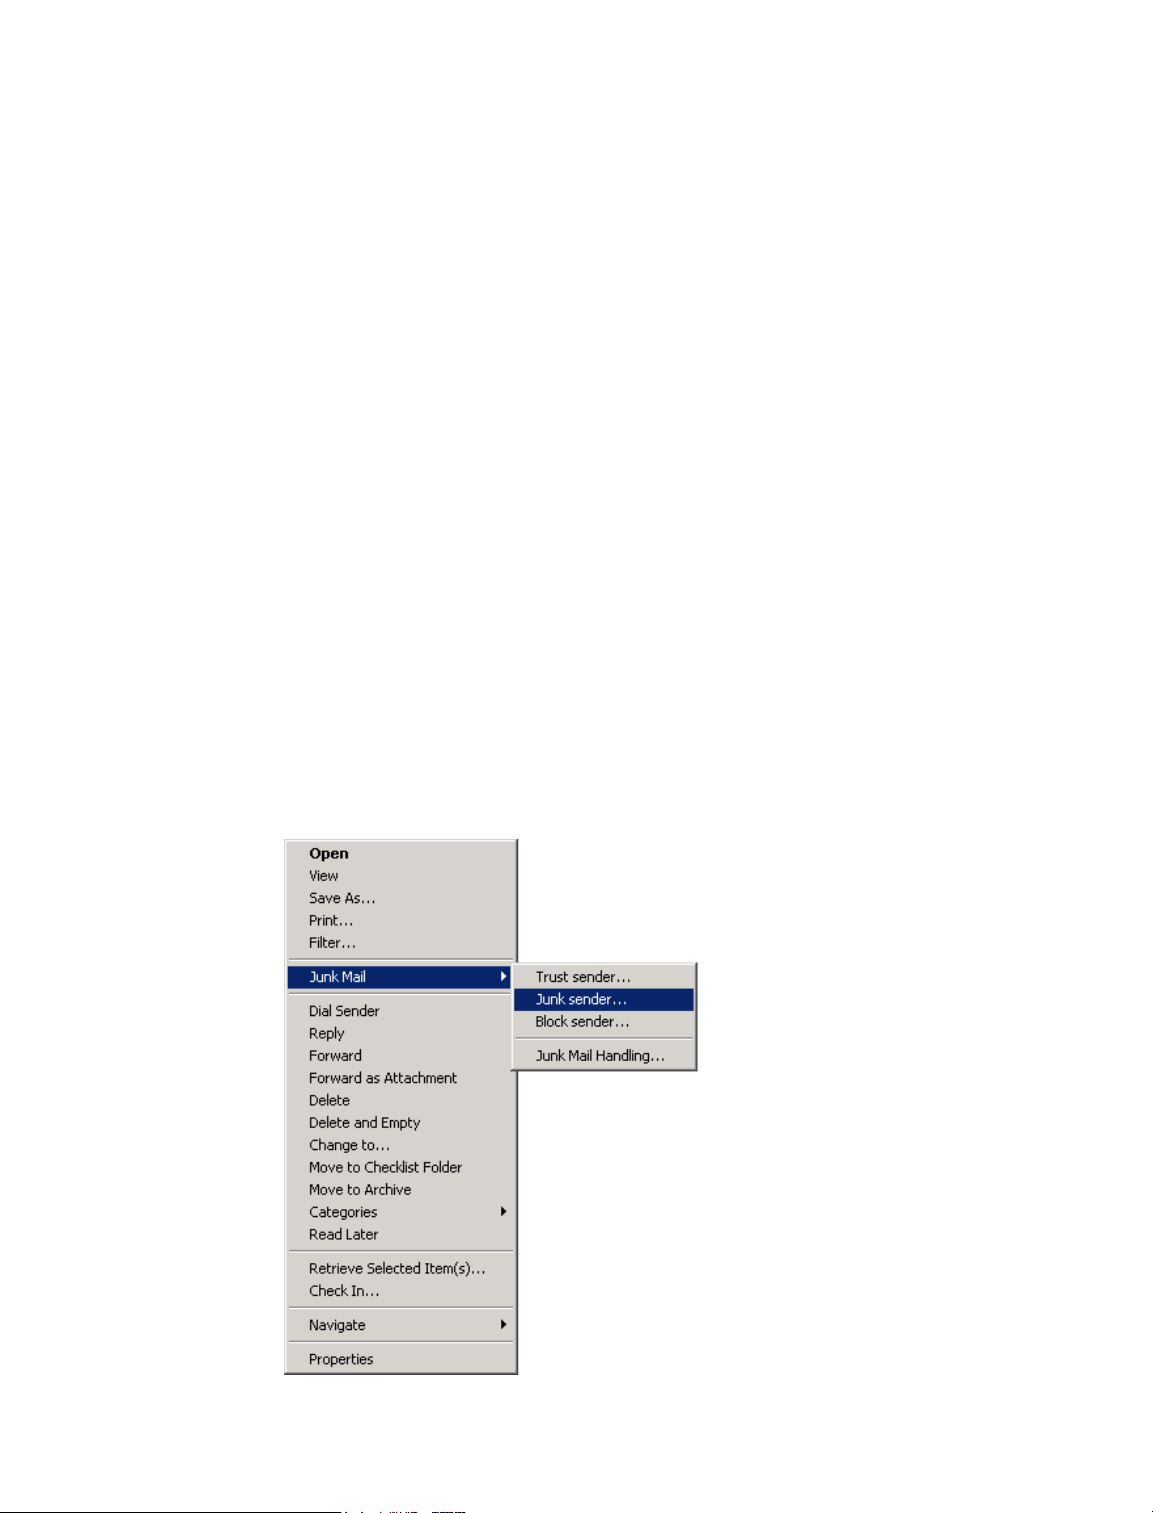
two lists. For example, you may have zcompany.com in your Block List, but you have one friend
whose address is [email protected]. Add this friend's e-mail address to the Trust List.
If you specify Junk Mail Handling options in Caching or Remote mode, make sure to synchronize
with your Online Mailbox in order to see the same options when you log in to GroupWise on
another computer.
However, e-mail from contacts in your Frequent Contact address book and your corporate address
book will not be blocked.
Your system administrator can turn off Junk Mail Handling so that it is not available.
This section contains the following topics:
“Blocking or Junking E-Mail From a User” on page 94
“Blocking or Junking E-Mail From an Internet Domain” on page 95
“Junking E-Mail From Users Not In a Personal Address Book” on page 96
“Deleting Items From the Junk Mail Handling Folder” on page 97
“Preventing E-Mail From a User or Internet Domain From Being Junked or Blocked” on
page 97
“Modifying Junk Mail Handling Lists and Settings” on page 98
Blocking or Junking E-Mail From a User
Right-click an item with an Internet address, then click Junk Mail.
1
2 Click Junk Sender.
or
Click Block Sender.
94 GroupWise 6.5 Windows Client User Guide
Page 95
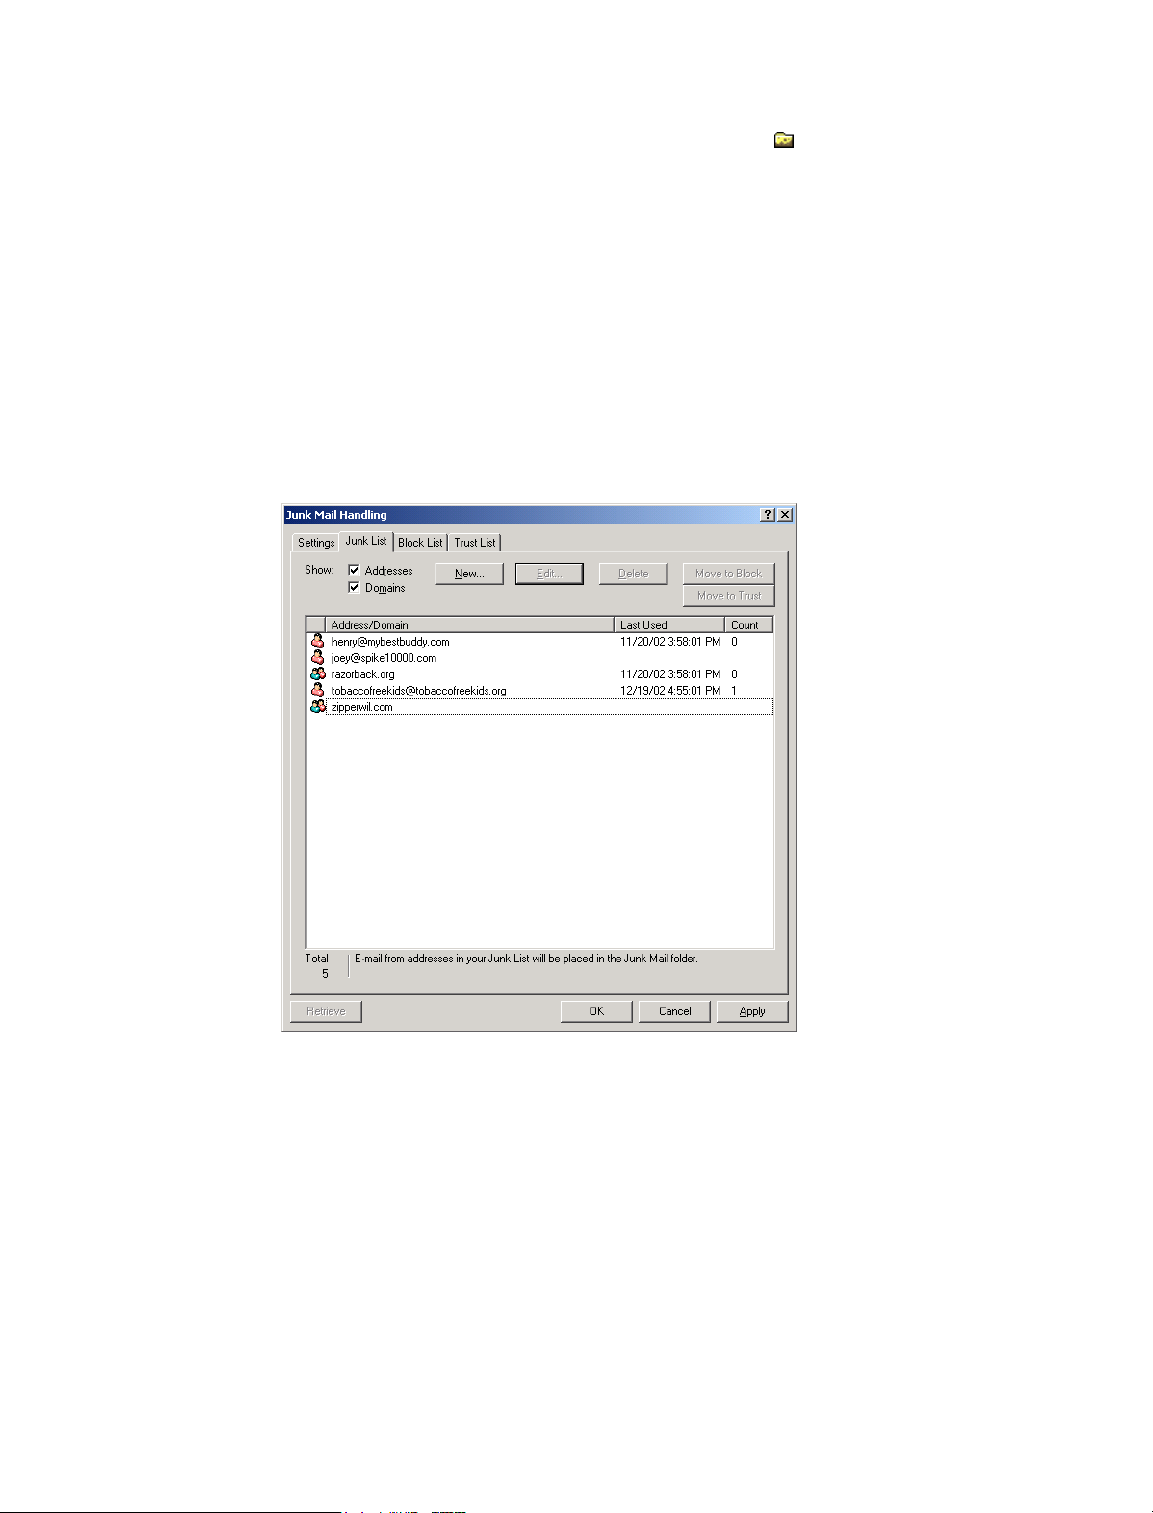
3
Select Junk E-Mail From This Address or Block E-Mail From This Address.
If you select Junk, the address is added to the Junk List. All future e-mail items from this email address will be delivered to the Junk Mail folder .
You can specify that the items in this folder be automatically deleted after <n> days. This
folder is not created in the folder list unless a Junk Mail option is enabled or an address or
Internet domain is added to the Junk List (which enables the Junk List option).
If you select Block, the address is added to the Block List. All future e-mail items from this
e-mail address will not be delivered to your Mailbox.
Your Junk List and Block List can each include up to 1000 entries. If more than 1000 entries
are added, the least-used entries are discarded.
4 If the Junk List or Block List is not enabled, select Enable Junk List or Enable Block List.
At any time, you can click Tools, click Junk Mail Handling, click Junk List or Block List, then
click New to add an e-mail address to the Junk List or Block List.
Blocking or Junking E-Mail From an Internet Domain
An Internet domain is the part of the e-mail address that comes after the @. For example, in the
address [email protected], the Internet domain is mymail.com.
1 Right-click an item, then click Junk Mail.
2 Click Junk Sender.
or
Click Block Sender.
3 Select Junk Any E-Mail From This Internet Domain or Block Any E-Mail From This Internet
Domain.
Working with Items in Your Mailbox 95
Page 96
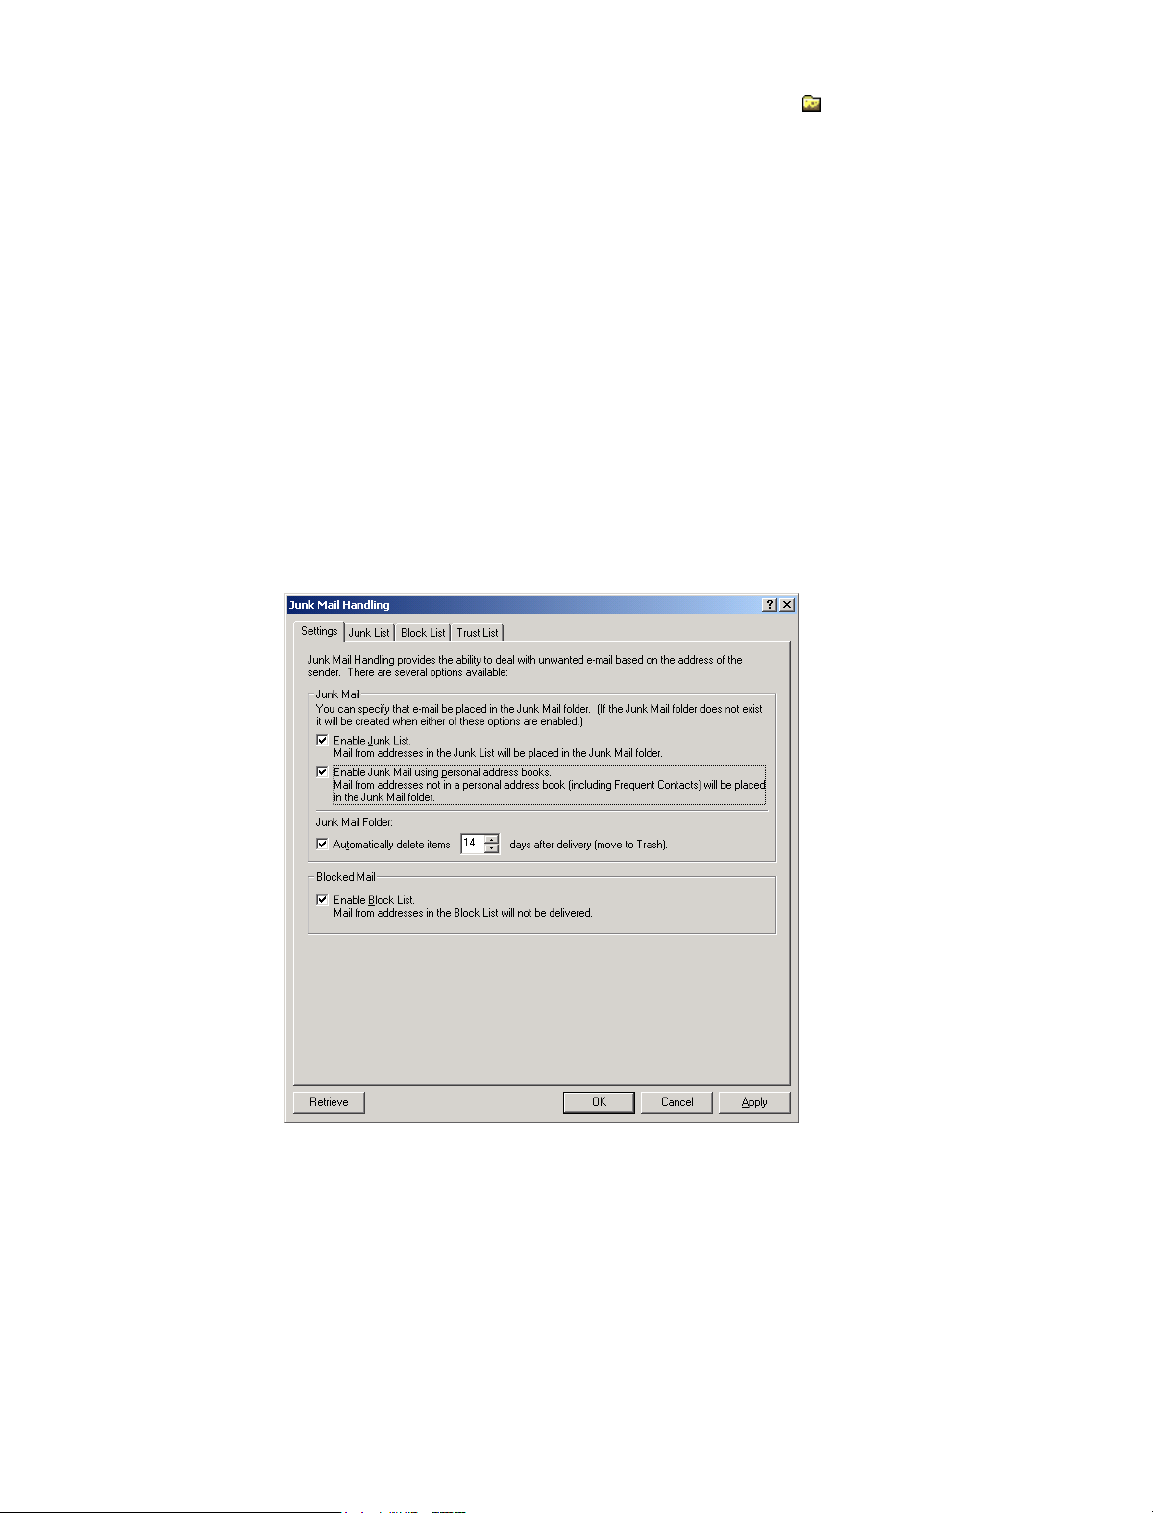
If you select Junk, the Internet domain is added to the Junk List. All future e-mail items from
this Internet domain will be delivered to the Junk Mail folder .
You can specify that the items in this folder be automatically deleted after <n> days. This
folder is not created in the folder list unless a Junk Mail option is enabled or an address or
Internet domain is added to the Junk List (which enables the Junk List option).
If you select Block, the Internet domain is added to the Block List. All future e-mail items
from this Internet domain will not be delivered to your Mailbox.
Your Junk List and Block List can each include up to 1000 entries. If more than 1000 entries
are added, the least-used entries are discarded.
4 If the Junk List or Block List is not enabled, select Enable Junk List or Enable Block List.
At any time, you can click Tools, click Junk Mail Handling, click Junk List or Block List, then
click New to add an Internet domain to the Junk List or Block List.
Junking E-Mail From Users Not In a Personal Address Book
Click Tools, then click Junk Mail Handling.
1
2 Select Enable Junk Mail Using Personal Address Books.
3 Click OK.
All future items from e-mail addresses not in your Frequent Contacts address book and other
personal address books will be delivered to the Junk Mail folder. You can specify that the items in
this folder be deleted after <n> days.
96 GroupWise 6.5 Windows Client User Guide
Page 97
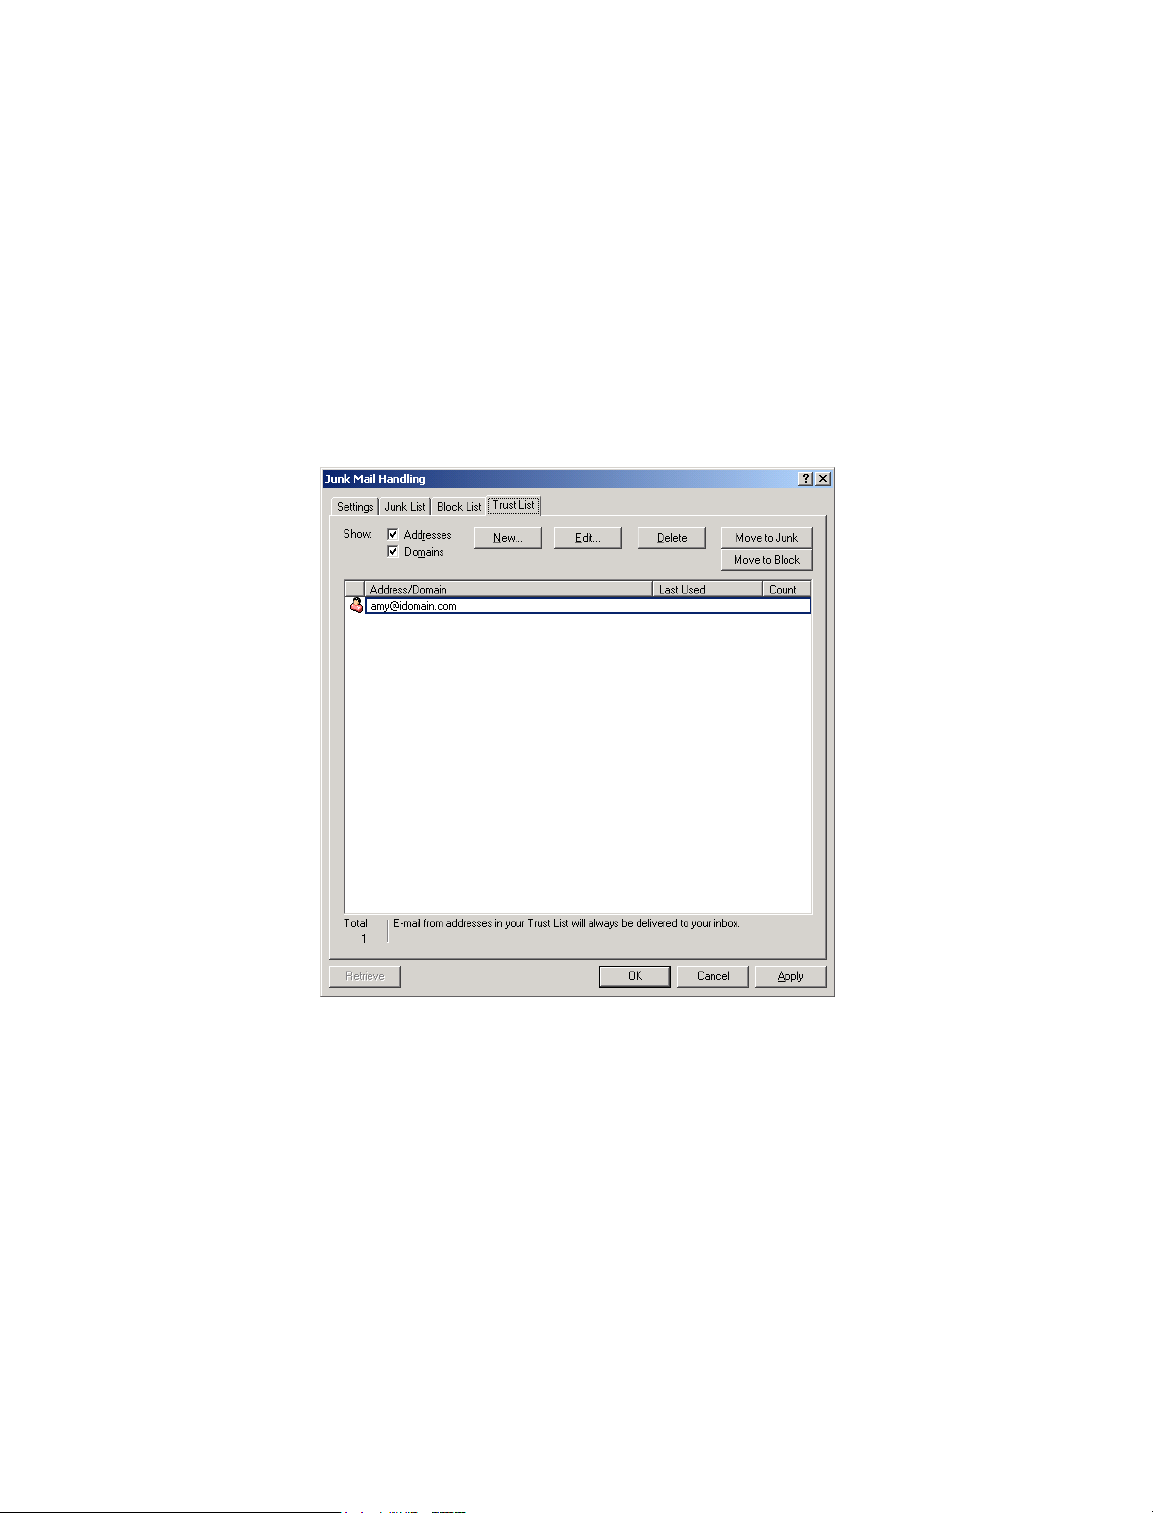
Deleting Items From the Junk Mail Handling Folder
1
Click Tools, then click Junk Mail Handling.
2 Click Automatically Delete Items __ Days After Delivery (Move to Trash).
Specify how long you want items retained in the Junk Mail folder.
3 Click OK.
To manually delete items from the Junk Mail folder, right-click the Junk Mail folder, click Empty
Junk Mail Folder, then click Yes.
Preventing E-Mail From a User or Internet Domain From Being Junked or Blocked
Click Tools, then click Junk Mail Handling.
1
2 Click the Trust List tab.
3 Click New, type an e-mail address or Internet domain, then click OK.
An address or Internet domain can be in upper, lower, or mixed case. For example,
[email protected] and [email protected] are both the same.
You cannot use wildcard characters such as * or ? in an Internet domain name. However, an
Internet domain, for example idomain.com, will affect all e-mail from idomain.com and any
subdomains which prefix this Internet domain, for example, offers.idomain.com or
members.idomain.com. A domain of abcidomain.com would not be affected.
4 Click OK.
All future items from this e-mail address or Internet domain will not be blocked or delivered to the
Junk Mail folder, no matter what is specified in the Block List and Junk List.
Working with Items in Your Mailbox 97
Page 98

Modifying Junk Mail Handling Lists and Settings
1
Click Tools, then click Junk Mail Handling.
2 On the Settings tab, modify any settings. Click , then click an option for information about
each option.
3 Click the tab of the list you want to modify.
4 To add an e-mail address or Internet domain to a list, click New, type the e-mail address or
Internet domain, then click OK.
An address or Internet domain can be in upper, lower, or mixed case. For example,
[email protected] and [email protected] are both the same.
You cannot use wildcard characters such as * or ? in an Internet domain name. However, an
Internet domain, for example idomain.com, will affect all e-mail from idomain.com and any
subdomains which prefix this Internet domain, for example, offers.idomain.com or
members.idomain.com. A domain of abcidomain.com would not be affected.
5 To change an e-mail address or Internet domain, click the address or Internet domain, click
Edit, make changes, then click OK.
6 To remove an e-mail address or Internet domain from a list, click the address or Internet
domain, then click Remove.
7 Click OK.
Changing Item Types
You can use Change To to convert an item in your Mailbox to another type of item. For example,
you can change a mail message in your Mailbox to an appointment in your Calendar. The new
appointment contains all the information from the mail message (such as To, CC, and BC lists,
subject, and message text) that is applicable in the appointment.
When you change a mail or phone message to another type of item (such as an appointment or
task), the original item is removed from your Mailbox and the new item is added in the appropriate
location, such as the Calendar.
When you change an item, GroupWise displays the default item view selected in Environment
Options.
This section contains the following topics:
“Changing an Item in Your Mailbox to Another Type of Item” on page 98
“Changing an Item in Your Calendar to Another Type of Item” on page 99
“Changing a Posted Item to a Group Item” on page 99
Changing an Item in Your Mailbox to Another Type of Item
1
In your Mailbox, click the item you want to change.
2 Click Edit, click Change To, then click an item type.
or
Click Edit, click Change To, click More, then click an item type. You can choose posted or
group items.
98 GroupWise 6.5 Windows Client User Guide
Page 99
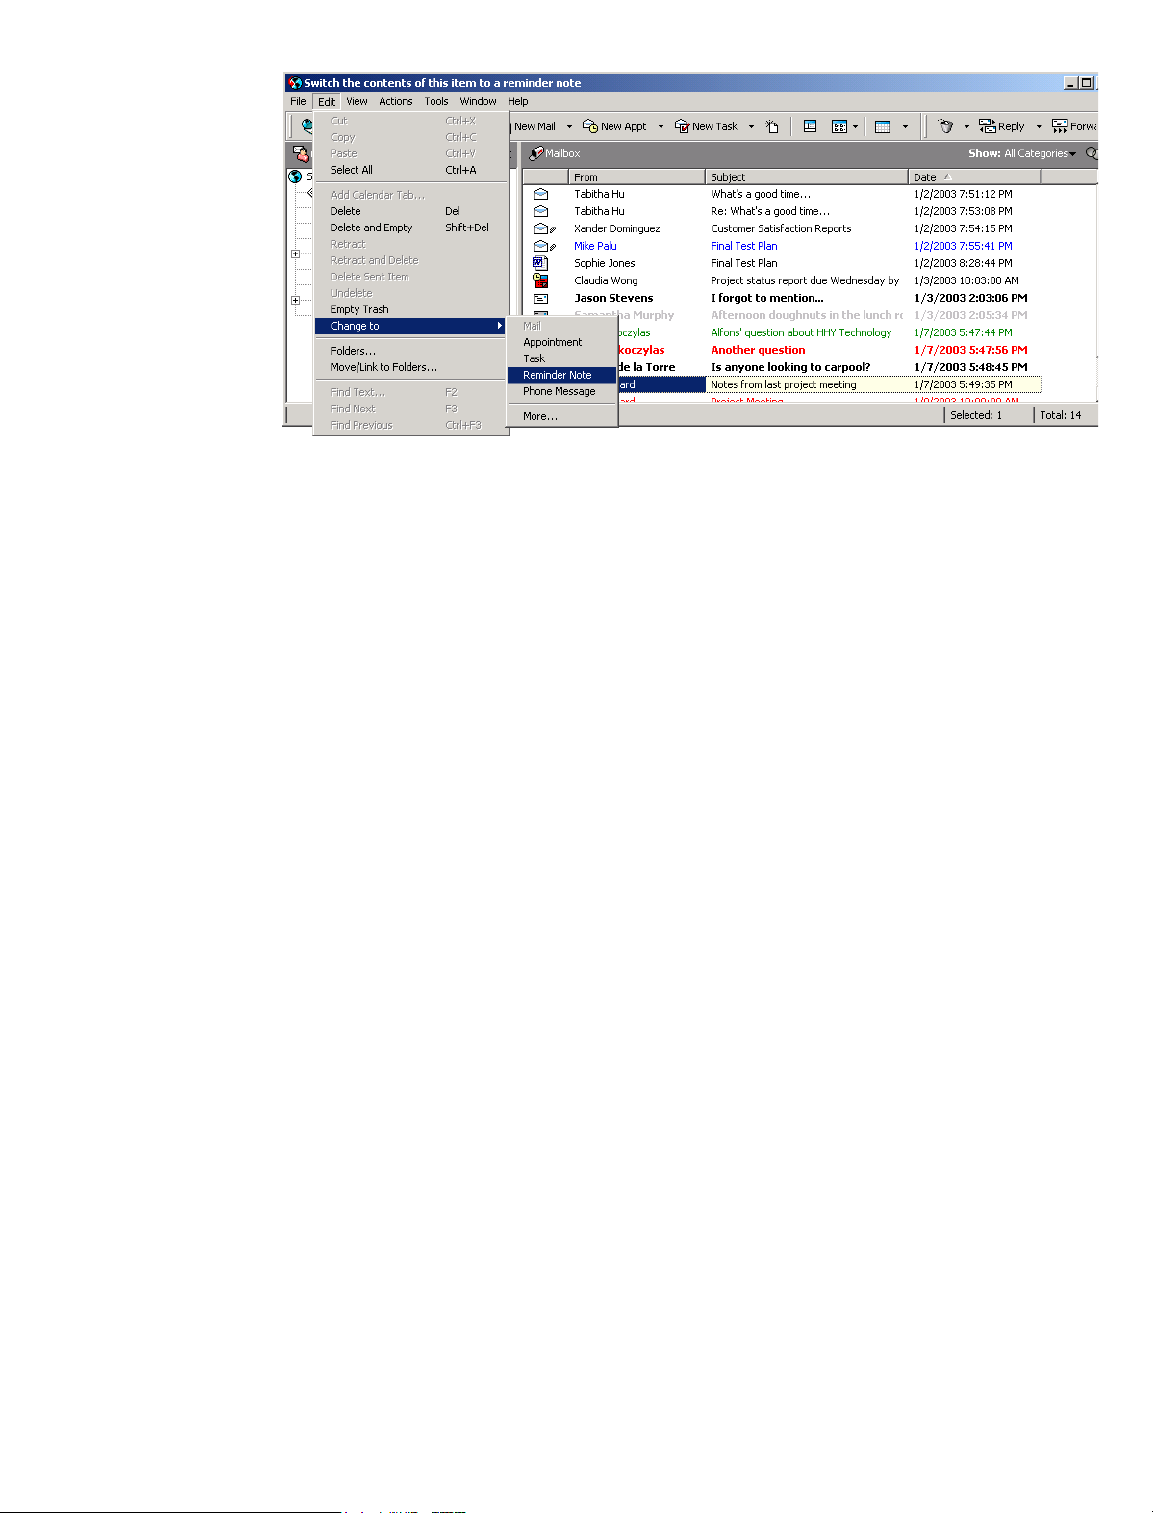
Posted items are sent directly to your Calendar. Group items are sent to the Mailboxes of
individuals and groups the message is sent to.
3 Type any necessary information.
4 Click Send or Post on the toolbar.
When you change a mail or phone message to another type of item (such as an appointment or
task), the original item is removed from your Mailbox and the new item is added in the appropriate
location, such as the Calendar.
Changing an Item in Your Calendar to Another Type of Item
1
Click Calendar in the Folder List.
2 Click the item you want to change in the Appointments, Tasks, or Reminder Notes List.
3 Drag the item to the list that corresponds to the type of item you want to change it to.
For example, drag a task to the Appointments List to change it to an appointment.
To copy an appointment, task, or reminder note, press Ctrl while you drag the item.
4 Type any necessary information.
5 Click Send or Post on the toolbar.
Changing a Posted Item to a Group Item
In your Calendar, click a posted item.
1
2 Click Edit, click Change To, then click More.
Working with Items in Your Mailbox 99
Page 100
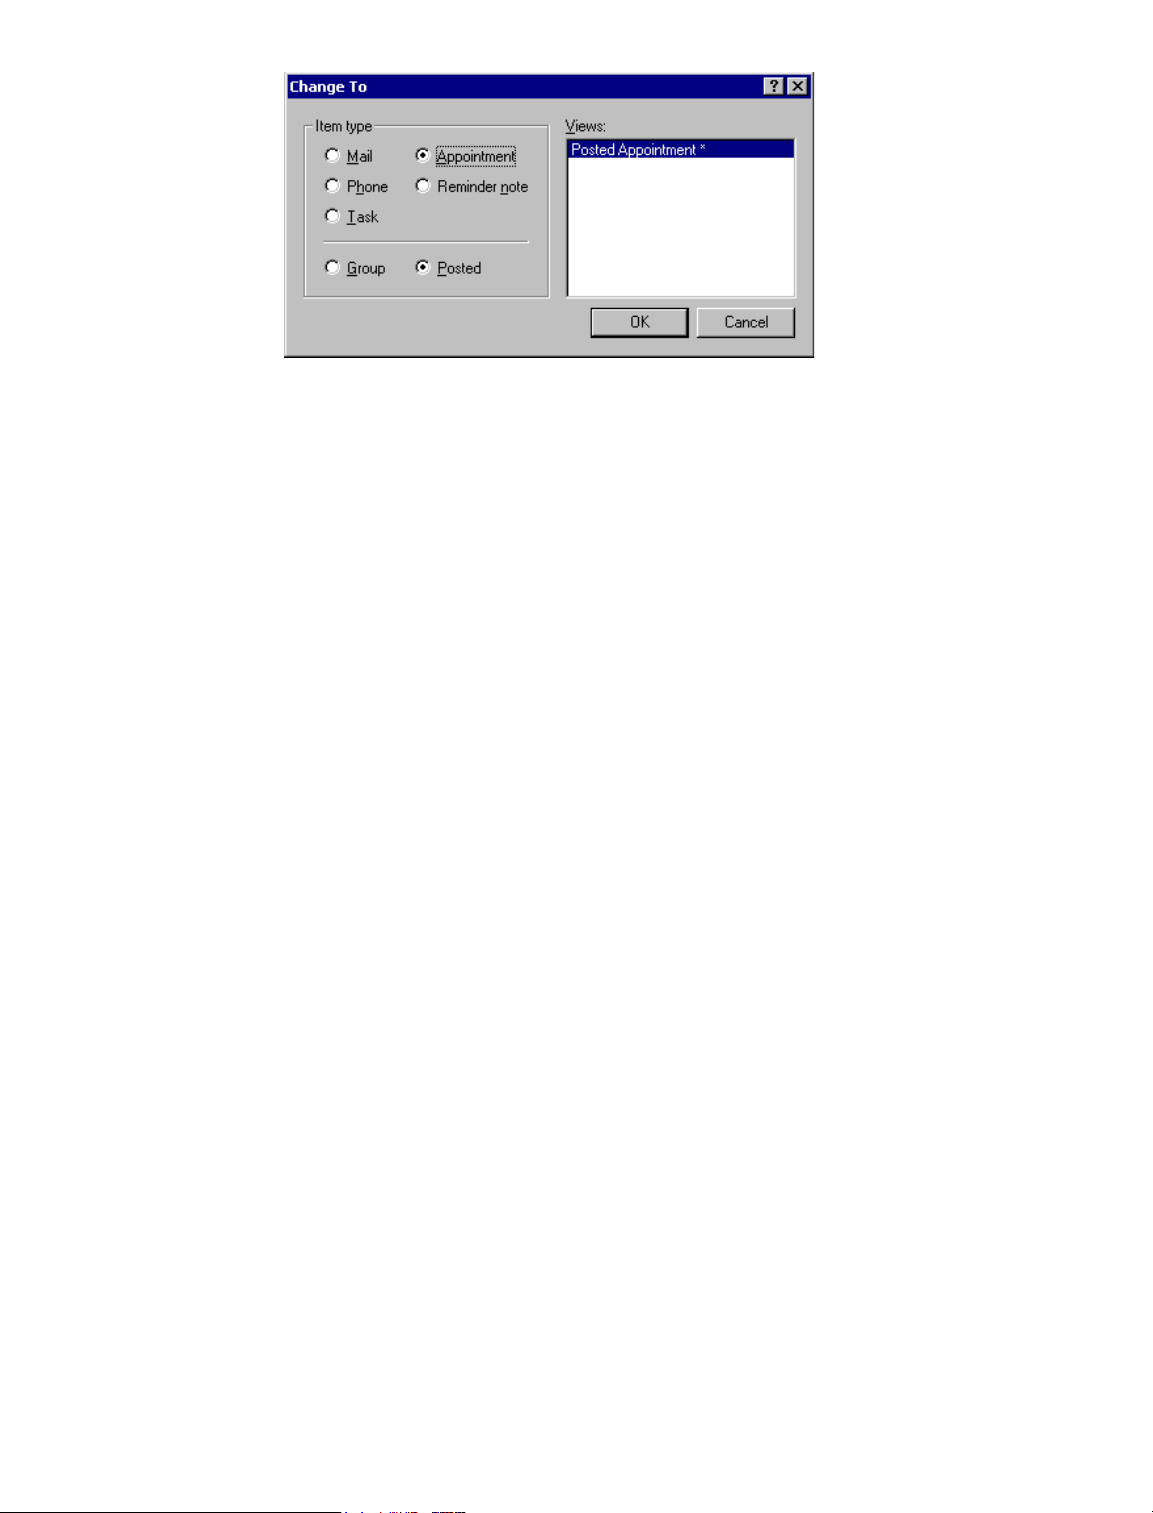
Click Group, then click OK.
3
4 Type any necessary information.
5 Click Send on the toolbar.
Viewing and Composing Items in HTML
You can view items in GroupWise that have been composed in HTML from other users or from
Web-based information services. You can click any links that are included in the item and jump to
the linked Web sites.
If you have Internet Explorer 4.x or higher installed on the same computer as GroupWise, you can
compose messages in HTML. An HTML toolbar above the Message box gives you HTML options
such as text formatting, text color, lists, inserting lines and pictures, inserting a background image,
and inserting links.
For information about changing the font of items you send and receive, see “Changing the Font of
Items You Send” on page 49 and “Changing the Font of Items You Receive” on page 79.
This section contains the following topics:
“Setting the Default View” on page 100
“Changing the Default Font in the HTML View” on page 101
Setting the Default View
If you do not like your default read or compose view (whether it is HTML or Plain Text), you can
change it. open an item, click View, then click Plain Text or HTML.
To change the view in one item,
1 Open an item.
2 Click View, then click Plain Text or HTML.
To set the default view,
1 Click Tools, then click Options.
2 Double-click Environment.
3 Click the Views tab.
4 Make selections in the Default Compose View and Default Read View group boxes.
100 GroupWise 6.5 Windows Client User Guide
 Loading...