

Page 1
Nortel Knowledge Network
Meridian Digital
Telephones
Meridian SL-100
M3905 Call Center
User Guide
Enterprise Voice Solutions Customer Documentation
Page 2

Page 3

Table of contents
Introduction to your M3905 Call Center Telephone 9
M3905 Call Center Telephone 9
M3905 Call Center Features 10
Available ACD Features on the M3905 Telephone 11
Terms you should know 13
Your telephone’s co ntro ls 15
Programmable Line/F ea ture Keys (self-labeled) 15
Context Sensitive Soft Keys (self-labele d) 16
Call Processing Keys 16
Fixed Keys 17
Application Keys 20
Primary Directory Numb er 21
Individual Directory Number 21
Messag e K ey 2 1
M3905 Call Center Meridian Digital Telephone 22
Your telephone display informat ion 22
M3905 Display 22
Options Li st 23
Select a language 24
Change a Feature Key la bel 24
Adjust Screen contras t 26
Adjust volume 26
Choose Ring type 27
Select Call Log options 27
Live dial pad 28
Preferred name match 28
Area code set up 28
Call timer 29
Date/time f or mat 29
Key click 29
3
Page 4

Table of contents
Headset type 30
Headset port on call 30
Headset port exte r n al alerter 31
Display diagnostics 31
Call Center headset interface 32
Freeing your hands while on the job 32
Switching be tween the handset and the heads et 32
Call Center agent/supervisor features 33
Agent Login 33
Agent Login Enhancement 33
Agent Logout 34
Agent features 35
Activity Code Fixe d Key to activate Line-of-Business code 35
Answer Ca ll Center Calls 35
Call Forcing 36
Multistage Queue Status Key/Lamp 36
Display Queue Threshold (MSQS enhancement for agents) 37
Emergency Key 39
Make Busy 39
Not Ready Key 40
Answer or Make Non-ACD Calls 41
Contact your supervisor 41
Walkaway and Return from Walkaway 42
Transfer to InCalls Key 43
Call Center supervisor features 44
Agent Keys 44
Answer Agent 44
Answer Emergency 45
Call Agent 45
Use Supervisor Observe and the Supervisor Headset Jack 45
Controlled Interflow 46
Night Service 46
4
Page 5

Observe Agent 47
Display Agent Status 48
Display Q ueu e S t at us 49
Your telephone non-ACD ca ll featur e s 50
Make a Call 50
Predial feature 51
Auto Dial 51
Redial Last Number Called 52
Activate Ring Again 52
Speed Call 53
System S p ee d Cal l (N et w o r k Sp ee d Cal l) 5 4
Intercom Call 55
Group Intercom All Ca ll 55
Intercom Call on a Predesignated Set 56
Individual Page from Group Intercom 57
Answer a Call 57
Table of contents
While you are away from your desk 58
Call Forward 58
Forward an Internal Call (Call Forward Busy/Don’t Answer Split) 59
Call Forward – Remote Activation 60
While on an active call 61
Place a call on Hold 61
Transfer a Call 61
Blind Transfer Re call 62
Call Park 63
Charge a Call or Charge a Forced Call 65
Inspect Key 65
Trace a Malicious Call 66
5
Page 6

Table of contents
Incoming calls 67
Answ er Call P ic kup 67
Call Waiting 68
Talk with more than one person 69
Set up a conference call 69
Call Join 70
Preset Conference 70
Call features 71
Use Privacy Release 71
Paging 71
Busy Override 72
Make an Announcement over the Call Page 72
Use Station Camp-on 73
Class features on IVD sets 74
Anonymous Caller Rejection (ACRJ) 74
Automati c Callback (A CB) 74
Automatic Recall (AR) 75
Custome r Ori gi n at ed Trace (CO T) 76
Calling Name/Number Delivery Blocking (CNNB) 77
Selective Call Forward (SCF) 78
Directory display and navigation 79
Access your Callers List, Redial List, or Personal Directory 79
Directory password protection 80
Call Log 83
Access and use the Callers List 83
Access and us e th e R ed i al List 84
6
Page 7

Use the Personal Directory 86
Access the Personal Directory 86
Add a Personal Directory entry 86
Add an incoming call 88
Add an ou tgoi n g call 89
Delete or edit a Personal Directory entry 89
Delete your Personal Directory 90
Use the Personal Directory to make a call 91
Use Card View 91
Searc h f o r an entry 92
Copy a number from the Redial List 93
Corporate Directory 94
Accessories for the M3905 97
Additional key caps 97
Accessory Connection Module (ACM) 97
Personal Directory PC Utility 97
Headset 97
Handset 97
Analog Terminal Adapter (ATA) 98
External Alerter and Recorder Int erfa ce 98
Key-based Access Expansion Module (KBA) 98
Display-based Access Expansion Module (DBA) 98
Table of contents
Feature Key chart 99
Meridian SL-100 Feature Access Codes (FAC) 103
7
Page 8

Table of contents
8
Page 9
Introduction to your M3905 Call Center Telephone
Introduction to your M3905 Call Center
Telephone
You r Call Center Meridian Digital Tele phone provides e as y access to a wide range of
business features. Your telephone system administrator assigns features to your
feature keys and provides you with passwords and other codes as required.
The Meridian SL-100 system automatically controls incoming call routing to
answering positions, and can provide music or recorded announcem ents to waiting
callers.
One of the codes provided by your system administrator is the Feature Access Code
(FAC ) which yo u need i n order t o use some feature s. F or othe r featu res, you m ay need
a feature key.
In this document, Call Center telephone and Automatic Call Distribution telephone
(ACD) are interchangeable terms for the M3905 Ca ll Center telephone.
Additional hardware options are available to expand the capabilities of the M3905
Call Center Tel ephone. See “Accessori es for the M3905” on page 97.
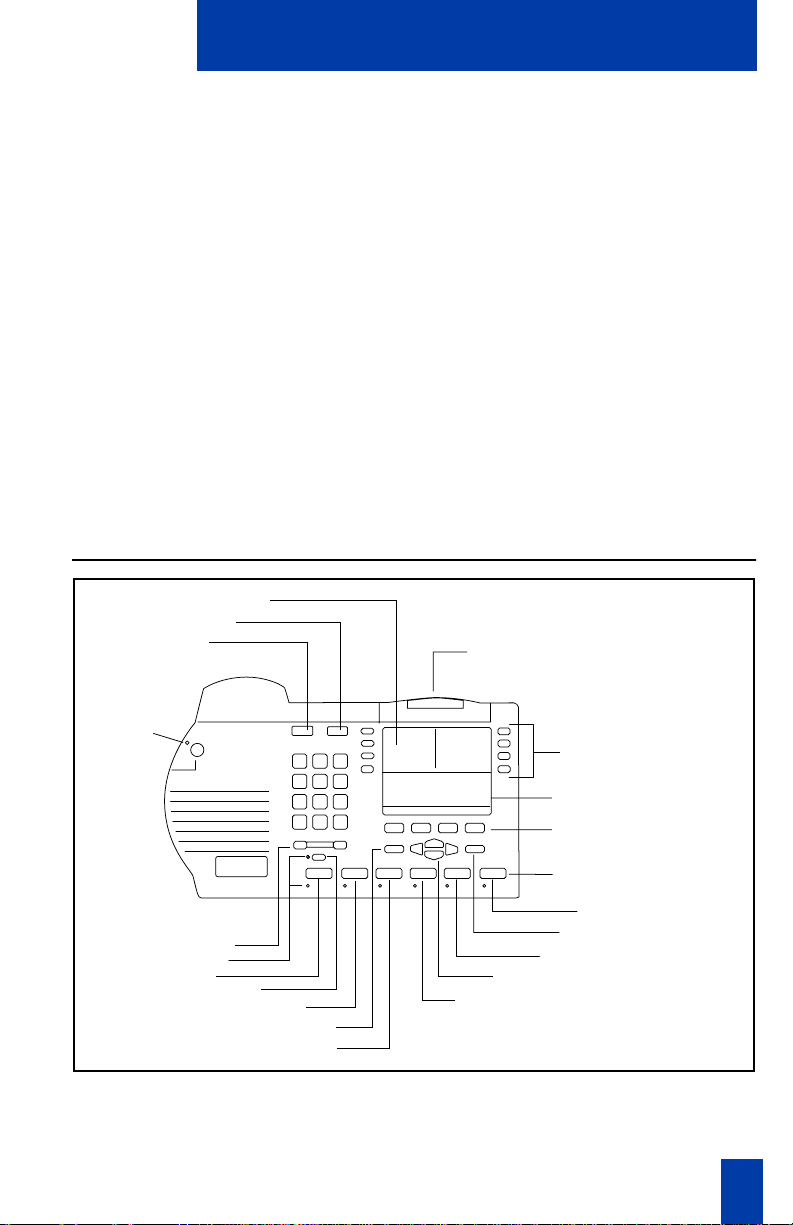
M3905 Call Center Telephone
LCD Display
Goodbye
Hold
Message Waiting Light/
Incoming Call Indicator
LED
Supervisor
Observe Key
Volume Control Bar
Headset
LED
Mute
Supervisor
Emergency
Quit
Navigation Keys
Not Ready
Programmable Line/
Feature Keys
(self-labeled)
Date/Time Display
Context Sensitive Soft Keys
(self-labeled)
Fixed Feature Keys
In-Calls
Copy
Make Busy
553-9043
9
Page 10

Introduction to your M3905 Call Center Telephone
M3905 Call Center Features
The M3905 Call Center features:
• eight Progra mmabl e Li ne/Feature K eys (self-la beled), giving the user
access to eight L ine/Feature K eys
• four Context Sensitive Soft Keys (self-labeled), giving the user access to a
maximum of 10 of the available features
• six Fixed Feature Keys (configured to fit the users business needs)
Fixed key caps:
— Headset (with LED indicator)*
—In-Calls*
— Supervisor*
— Emergency*
— Not Ready*
— Make Busy *
Note 1: The Headset and In-Calls Keys are required. Your system
administrator can reconfigure the remaining four keys to any of the features
listed above. Key caps need to be replaced to m atch the reconfigured feature.
Note 2: *The features with an asterisk are the default keys.
Optional accessories:
• Handset
• Headset
• Accessory Conne ction Module (ACM)
• Key-based Access Expansion Modu le (KBA)
• Display-based Access Expansion Module (DBA)
• External Alerter and Record er Interface (MEARI)
• Analog Terminal Adapter (ATA)
• Personal Directory PC Utility
Note: The M3905 does not support handsfree calling.
—Call Agent
— Observe Agent (Obv Agent)
— Answer Emergency (Ans
Emerg)
— Answer Agent
— Acti vity (for LOB codes)
— Displ ay Q u eu e ( D sp ly Q ue u e)
– for MSQS or Display Queue
status
Optional ke y ca p s:
10
Page 11

Introduction to your M3905 Call Center Telephone
Available ACD Featur es on the M3905 Te lephone
Common Agent/Sup ervisor Features
• Headset
• Non-ACD Call Keys
•Hold
• Personal Directory
•Call Log
•Redial List
•Options
• Call Park by ACD Agent
• ACD Call Transfer with Time
• Transfer to Incalls Key
• Agent Login Enhancement
Table 1 contains more Agent and Supervisor features for the M3905 ACD set.
Table 1 Agent and Supervisor fe atures
Agent features Supervisor features
Call Source Identification. Agent-Status Lamp.
Called Name/Number Display. Display Agents Summary Key.
Eme rgency Keys . Forced Agent Availability.
Emergency Keys Enhanced. Controlled Interflow.
Incalls Key. Agent Key.
Call-Supervis or Keys. Call-Agent Key.
Not-Ready Ke y. Night Treatment.
ACD Station Maintenance and
Configuration Enhancements.
ACD Multistage Queue St atus
Refresh.
Multistage Queue Status Key/Lamp. ACD Status -Lamp Enhancement.
ACD Walkaway/Clo s ed Key
Operation.
Line of Business Codes. ACD Observ e-Agent/Three-Way Calling.
Make Set Bus y. Extended Agent Observe.
Supervisor Control of Night Service.
ACD Observ e-Agent Enhanced.
ACD-Limited Enhanced Agent Features.
11
Page 12

Introduction to your M3905 Call Center Telephone
Table 1 Agent and Supervisor fe atures
Agent features Supervisor features
Call Forcing. Flexible Call Observing-Nodal.
Displ ay Q ueue and Threshold. Observe Agent from 250 0 se t.
Walkaway and Return from
Walkaway.
Agent Login and Login
Enhancements.
Observe-Agent Key.
Display Queue-Status Key.
Multistag e Q ue ue Statu s D is pl ay.
Answer Agent.
Answer Emergency.
Display Queue Threshold.
Make Set Busy.
12
Page 13

Terms you should know
Terms you should know
Agent Set – A telephone set con f igure d to ef f ic ientl y answer in comin g calls that ha v e
been directed to a group of ACD telephones vs. a single person or line.
Attendant – The attendant is a telephone operator in your organization.
Call party information – When your telephone rings, the display shows Caller Line
Ident i fica tion (CLID ) information. The system must have CLID enabled. The display
module shows the phone number and name of the inbound call.
Context Sensitive Soft Key – The four keys loca ted directly below t he display on the
M3905 are referred to Context Sensitive Soft Keys. The label and function of each
key changes, depending upon the available featur es or the active application assigned
to each key.
Date/time display feature – The Date/t ime displ ay feat ure sho ws the month and date
when the telephone is in an idle state.
Directory Number (DN) – The Directory Number is a number that consists of one to
seven digits for a telephone, also known as an extension number.
Feature display – The display area shows sta tus information about the fea ture in use.
It also displays the name and status of the active sess ion.
Feature Access Codes (F A C) – The Fe ature Ac cess Codes are code s you di al in orde r
to use a telephone feature instead of pressing a fixed feature or soft feature key. For
your convenience, the FACs for your system can be printed on a page located at the
back of this guide.
Fixed Feature Key – The Fixed Keys are keys on your telephone, that are labeled at
the factory.
Indicator status – The status indicator can be an LCD or LED that indicates the
status of a feature by the flash, wink, steady on, or off of the LCD or LED indicator.
Infor mation line – The Informati on line of the display relat es ca ll information or
application information.
Information display – The Information screen displays call activity, lists, prompts,
and status of calls.
Interrupted dial tone – Interrupted dial tone is a broken or pulsed dial tone, heard
when you access some of the features on your telephone.
Meridian SL-100 – The Meridian SL-100 system is your business communication
system.
Off-hook – Off-hoo k is a term used to indicate that the telephone is active and ready
to make a call. On the M3905 you can go off-hook when you press your Individual
DN Key only. The M3905 doe s not go off-hook when you pres s the In-Calls Key or
press your Primary DN (Call Center DN).
13
Page 14

Terms you should know
Paging tone – A Paging tone is two beeps followed by a dial tone. You hear the
special Paging tone when you are using the Ra dio Paging featur e.
Primary Directory Number (PDN) – The Primary Dire ctory Number is the main
extension number on your telephone. It is refe rred to by the Primary Directory
Number Key. On the M3905, the Primary Directory Number and your ACD
Directory Number are the same. The In-Calls Key connects directly to the Primary
DN Key. The Primary DN Key is th e key locate d at the lower right-hand s ide of the
upper portion of the display area.
Ringback/r ing tone – The Ringback/ring tone is the sound you hear when a call
you have made is ringing at its destination.
Shared Directory Numbers – A shared directory number is a DN (extension) that
is shared by two or more persons .
Special dial tone – The special dial t one refers to three consecutive tones follo wed
by dial tone that you hear when accessing some of your telephone features.
Supervisor Set – A telephone set configure d to manage a group of ACD agents,
and it can also be configured to answer incoming calls that are directed to a group
of ACD te lephones vs. a single person or line. You norm ally configu re a
Supervisor’s set with fea tures that display agent and group performance.
14
Page 15

Your telephone’s controls
Your telephone’s controls
This section describes the features on the M3905 ACD Meridian Digital telephone.
Programmable Line/F eatur e K e ys (self-labeled)
In addition to secondary extension number(s), you can have features assigned to the
Feature Ke ys on your telephone. An LCD indicator shows the status of the feature
assigned to each k ey. See “Agent features ” on pa ge 35. Also see “Call Center
supervisor features” on page 44.
Line Key
x2494
Auto Dial Key
Inspect Key
Options Key
Sales
Display
Options
A steady LCD indicator appea r ing beside a
Line (DN) K e y me an s th at th e f eat u re o r li ne
is acti ve. A flashing LCD indic ator means
the line is on hold or the fe ature is being
programmed.
An Auto Dial Key lets you dedicate a
Line/F ea tu r e Key to a sp ec ifi c nu m b er.
The Inspect Key allows you to displ ay
inform at ion ass oci at ed with the Li ne /Fea tur e
Ke ys . The display information on a second
calle r does not in terfere wi th the curren t call
in progress.
Note: If the Auto Display feature is enabled,
Calling Line Identification is displayed for a
secon d incom i ng call .
The Options Key is a dedicated
Programmable Line/Feature Ke y. T he
Options Ke y is located at the top-l eft side of
the upper display ar ea. Press the Options
Key to access the O pt i on s M en u .
Options
Press the Options Key to make adjustments
to your telephone’s volume and displ ay
contrast, as well as other feature settings.
15
Page 16
Your telephone’s controls
Applications Key
Apps
x2498
The Applications Key allows you to access
server applic ations, such as Corp o rate
Directory, if available on your system.
The Individual DN Key allows you to make
and receive non-AC D cal ls .
Context Sensitive Soft Keys (self-labeled)
The four keys located in the middle of the
telephone, be lo w the displ ay screen, are y our
Contex t S ens itive Soft Keys. These keys can
have the following assigned to them:
•Transfer
•Conference
•Call Forward
• Ring Again
•Call Park
•Call Pickup
•Speed Call
• Privacy Release
•Callers List
•Redial List
Call Processing Keys
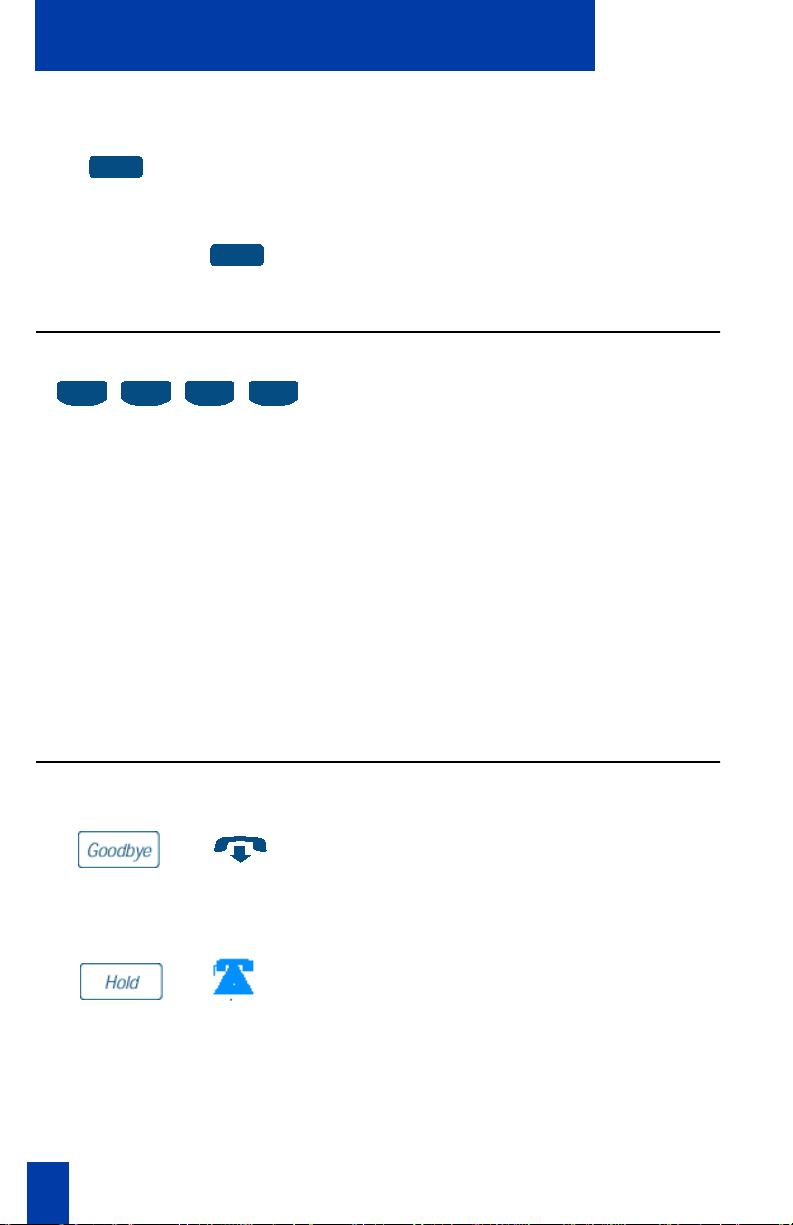
Goodbye Key
/
Hold Key
/
16
Press the Goodbye Key to terminate an
active call .
Place an active call on Hold by pressing the
Hold Key. Return to the caller by pressing
the extension key next to the flashing
indicator.
Page 17
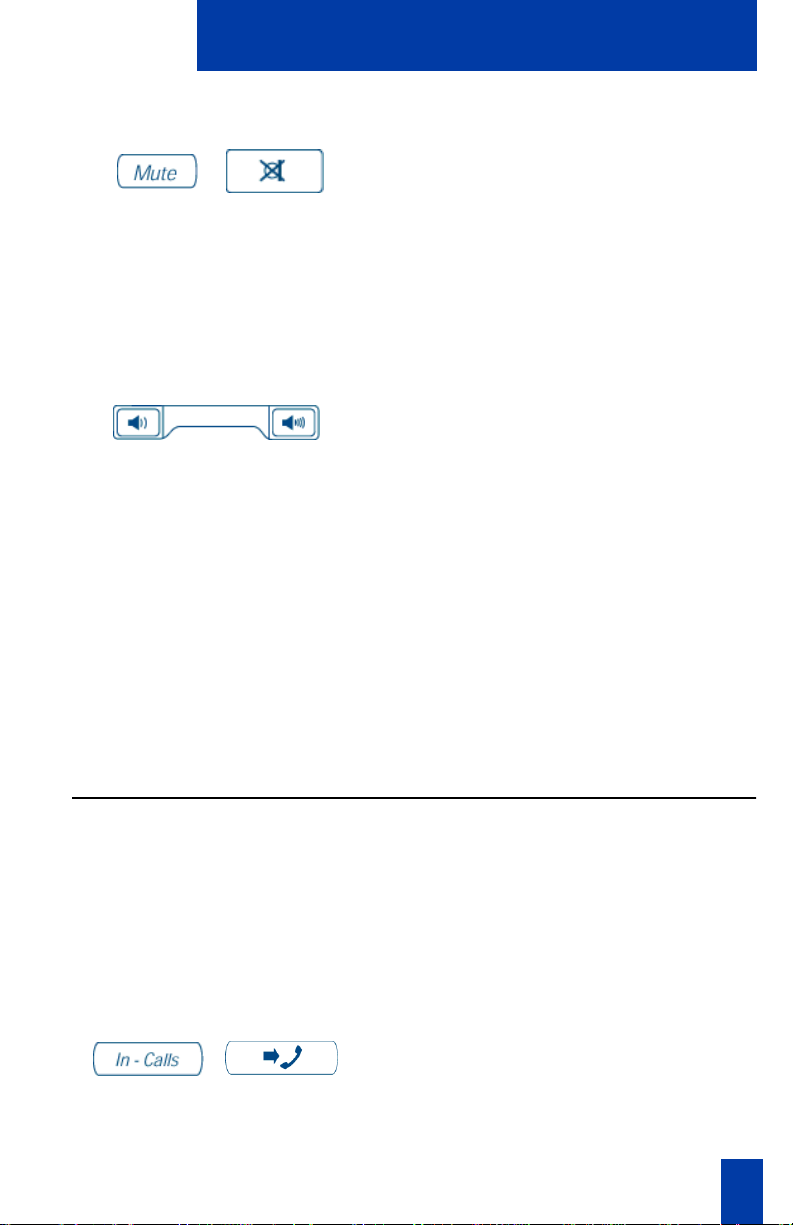
Mute Key
/
Volume Control Bar
Your telephone’s controls
When engaged in a call, you ca n press the
Mute Key. The party(ies) to whom you are
speaking canno t hear you. When you wis h to
return to the t wo- way c on v er sati on, y ou must
press the Mute Key again. On the M3905
ACD, th e Mute Key applies to handset and
headset microphones. The LED flashes
quickly when the Mute option is in use.
Use the Volume Control Bar to adjust the
volume of the handset, headset, sp ea ker,
ringer an d buzz er. Whil e o n a ca ll or whi le
the telephone is ringing, adjust the volume
on your set using the Volume Control Bar.
Raise the volume by pressing the ri ght side
or lowe r the volum e by press ing the lef t side .
You can a ls o adjust the volume of ringing,
headset or buzz by selecting Volume
adjustment in the Options Menu.
Message Waiting Lamp
The Message Waiti ng Lamp lights when you
have a message w aiting. See the M3905 Call
Center Telephone figure on page 9.
Fixed Keys
The Fixed Fea ture K eys on your M3905 ACD Meridian Digi tal Telephone are label ed
at the factory. The Fixed Feature Keys inc lude: Headset, Call Supervisor, Emergency,
Not Ready, Make Busy, a nd In-Calls. These keys can be reconfigured to Activ ity
Code, An swer Emerg ency, A n swer Agent, Observe Agent, Dis p lay Waiting Calls or
Call Agent to fit your busi nes s needs. The two ke ys that cannot be change d are
Headset and In-Calls.
In-Calls Key
Press the In-Calls Key to answer incoming
/
ACD calls. The In-Calls Key provid es ea sy
access to your Primary or ACD Directory
Number of the agent position.
17
Page 18
Your telephone’s controls
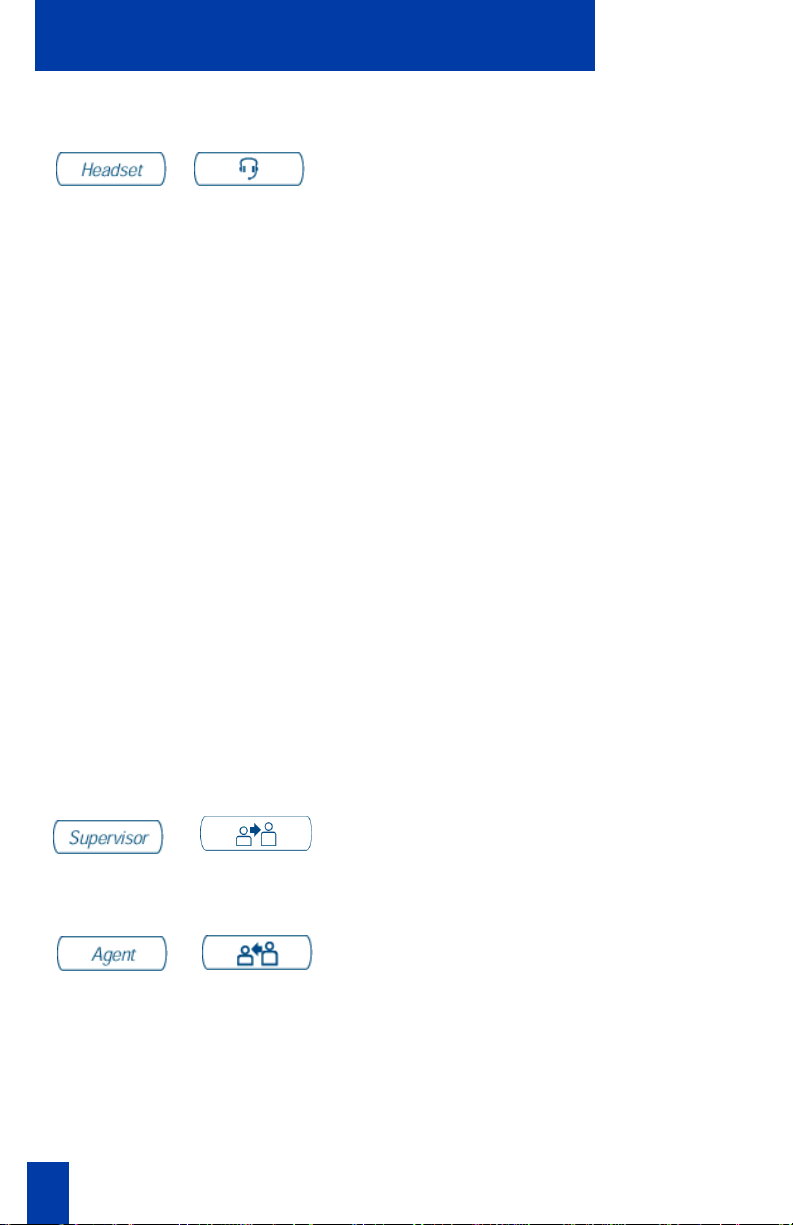
Headset Key
/
Press the Headset Key to toggle back and
forth between heads et and handset. It is
common to both the agent and the
super v isor. The headset indi cator is lit when
active.
Headsets vary in electrical, physical and
audio characteristics. Performance
perception is s ubjectiv e so it is
recommended that the headset user try using
the headset with ea ch of the thr ee setti ngs on
internal and external calls. This helps
determine which works best. As with all
Meridian Digital Telephones, amplified and
unamplified headsets are su pported.
Note 1: If you have the handset option
installed, press the Head se t Key to switch
between headset and handset . The handset is
an optional hardware item. If you order the
handset option kit, it is recommended tha t
your system administrator install the
equipment.
Supervisor Key
Call Agent Key
18
Note 2: Use the Amplified Hea dset setting if
you are using the amplified headset.
From an agent set, p ress the Supervisor Key
/
/
to access a super visor.
From a supervisor set, pres s the Call Agent
Key (optional key cap) and dial an agent’ s
secondary DN to communic ate directly with
the age n t. Al ternat ively, if you co n fig u r e an
Agent Programmable Feature Key (not one
of the Fixed F ea ture Keys) on the supervisor
set for each agent, press the Call Agent Key
followed by the associated Agent Key.
Page 19
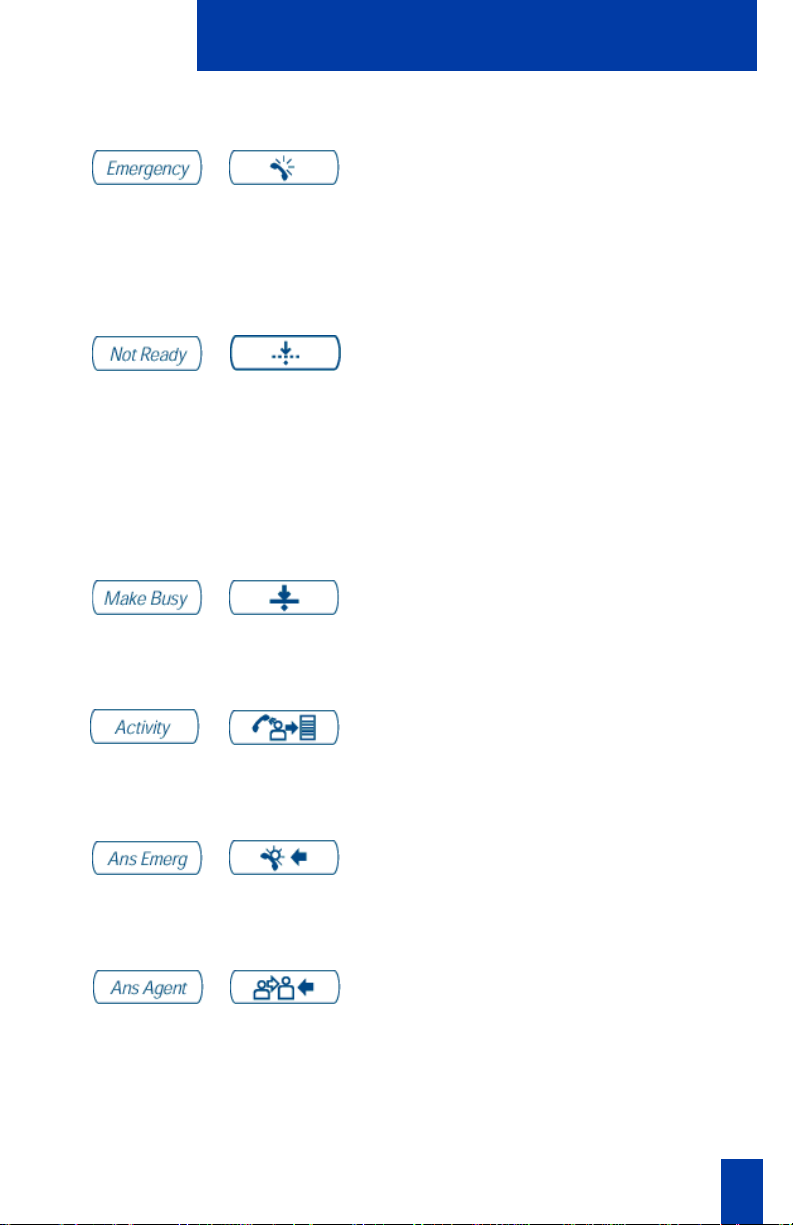
Emergenc y Key
Not Ready Key
Make Busy Key
Your telephone’s controls
Press the Emergency Key to join the
/
/
/
super v isor int o a call when judg ed to be an
emergency sit u ation. It can al s o be used to
add a recording device automatically .
The Emergen cy key is on the agent set.
Press the Not Ready Key to pu t the agent
position in a Not Re ady state . The Not Ready
state takes the agent out of the ACD queue
without loggi ng the agent out. The Not
Ready state allows the agent to perform and
record post call processing duties conn ected
to ACD calls. This key is com mon to both
agent and supervis or sets.
Press the Make Busy Key to log out of the
ACD queue and agent position . Thi s key is
common to both agent and su pervisor sets.
Activity Code Key
/
Answer Emergency Key
/
Answer Agent Key
/
Press the Activity Code Key and enter the
appropriate line of business (LOB) code to
record the activity the agent is performing.
Press the Answer Emergency Key on the
Supervisor ACD telephone to ans wer agent
emergency calls.
Press the Answer Agent Key on the
Supervisor ACD telephone to es tablish a
direct connection to the supervisor from an
agent position.
19
Page 20
Your telephone’s controls
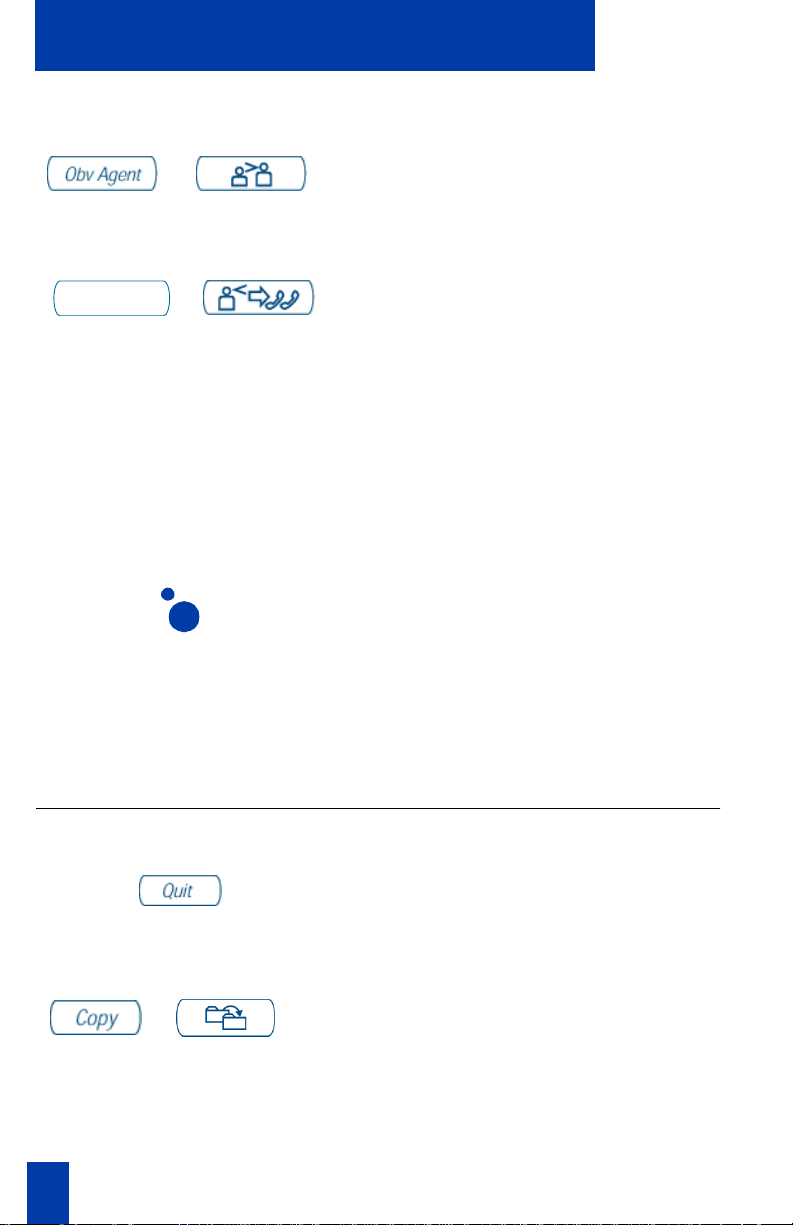
Observe Agent Key
/
Display Queue Key
Press the O b serve Agen t Key (on the
supervisor ACD telephone) to mo nitor the
activity on the agent’s telephone.
DsplyQueue
Supervi sor Observe Key
/
Application Keys
Quit Key
Press the Display Queue Calls Key on the
agent’s ACD telephone to display incoming
calls waiting info rmation .
The Display Queue Calls Key on the
supervisor’s ACD telephone disp lays to the
supervisor information on the number of
manned agent positions, the number of calls
waiting in the incoming call queue, number
of calls logically queued, and the waiting
time of the oldest call in the ACD queue.
Press the Supervisor Observe Key (LED) to
allow a walk-around supervisor to plug the
headset into the headset jack at the side of
the agent’s telephone and monitor or join the
conversation between the agent and the Call
Center caller.
Copy Key
20
Press the Quit Key to end an active
applicati on without affecting the state of any
call on the telephone.
Press the Copy Key to copy entries from the
/
corporate directory to the personal direc tory.
Page 21

Your telephone’s controls
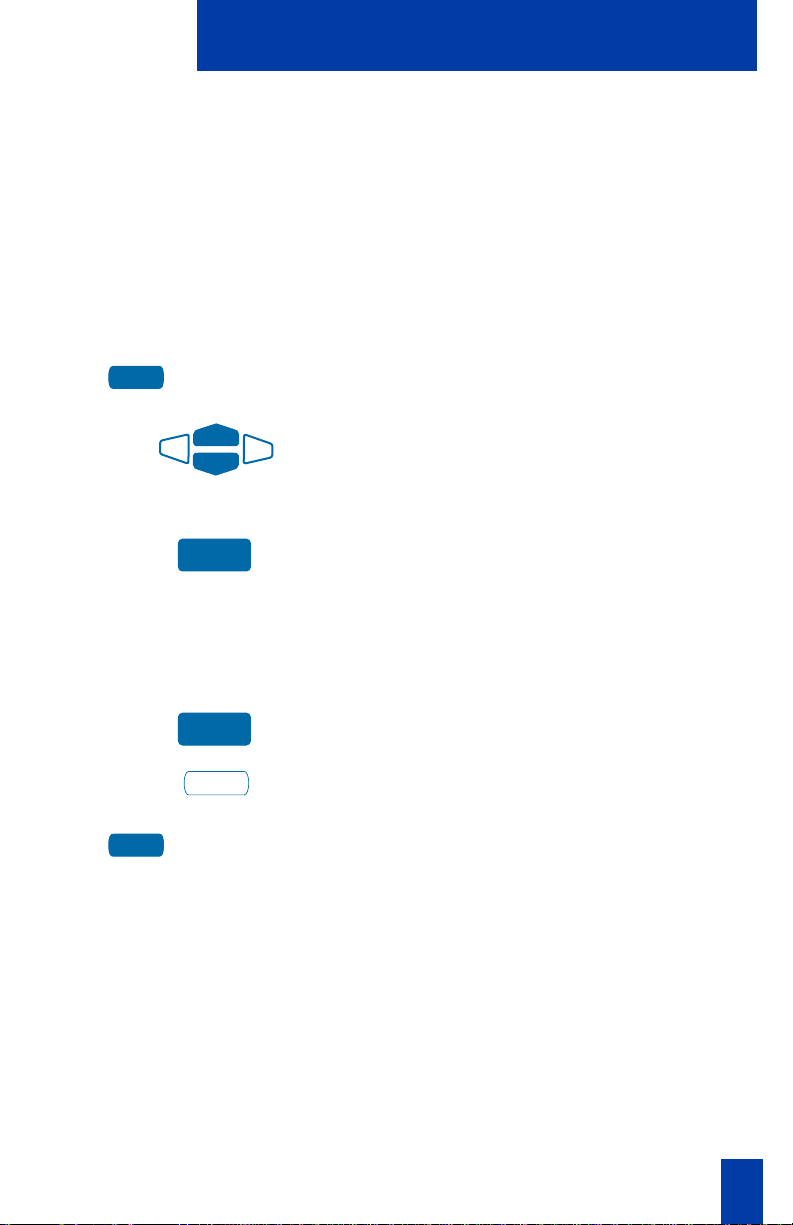
Navigation Keys
Press the Navigation Ke ys to move up,
down, right, and left through features ,
menus, and application functions on the
display.
Primary Directory Number
The lower -right key of your programmable keys is the ACD Primary Directory
Number (DN) K ey which is the same as the In-C al ls Key . On an ACD set there can be
a Primary A CD Directory Number, as wel l as an Individual Directory Number.
Individual Directory Number
The Indivi dual Directory Number is the second Directory Number for the telephone.
You can make outgoing calls on this number and receive incoming calls. The
Indivi dual line can be configured to have all the standard functions of a regular
telephone li ne.
Note: You have only one Primar y Directory Number assigned to your telepho ne. You
can have additional Directory Number (DN) Keys assi gned to your telephone.
Message Key
The Message Key can be c onfigured as Key 17 an d appears in the area of the Context
Sensitive Soft Keys. In this configurati on, you will only see it appear when you go off
hook. In addition, it will only dial your v oice mailbox when you hav e a message
waiting. As an alt ernativ e, a Message Key ma y be configured as a Programmable
Line/Feature Key (self-l abe led). This configuration allows you to dial your voice
mailbox whether or not you have a message waiting.
21
Page 22

M3905 Call Center Meridian Digital Telephone
M3905 Call Center Meridian Digital Telephone
You r Call Center Meridian Digital Tele phone provides e as y access to a wide range of
business features.
You r telephone system administrator assigns features to your feature keys and
provide s you with passwords and other codes as r equired.
Note: In this do cument Call Center telephone and the Automatic Call Distribution
(ACD) telephone are interchangeable terms for the M3905 Call Center Te lephone.
Your telephone display information
M3905 Display
The upper port ion of t he dis pl ay on th e M3905 gives c all s tatu s infor matio n; t he lo wer
display area is a two-line feature in formation display (see figure below).
Note: Refer to “Your Telephone’ s Controls” on page 15 for more information on the
display and specialized key information.
Line/Feature
Key Status
Date/time display
Call party info
Feature Status info
Options info
22
Options
Dir/Log
Apps
AutoDial
ConIntrFlw
NightSvc
Aug 20 5:48 P
NORTEL NETWORKS
5 New callers
Forward
Quit Copy
CallersRedial
2639
2637
553-9076C
Page 23
Options List
Options List
The Options List allows you to customize certa in characteristics of your phone.
Screen prompts take you step-by-step through procedures and keep you informed on
the status of the following settings: Language, Change feature key label, Screen
contrast, Volume adjustment, Ring type, Call log option s, Live dial pad , Pr eferred
name match, Area code set -up, Call ti mer enable , Date/ time form at, K ey cl ick ena ble,
Headset type, Headset port on call, Headset port external ale rter, an d Display
diagnostics.
To change any option’s setting:
1. Press the Options Key.
2. Use the Navigation Keys to scroll up or
down through the options list.
3. Press the Select Key when the desir ed
option is highlighted.
4. Change the option’s settings. Refer to
the following pages for details. The
display also provides you with
information to adjust your selection.
5. Press the Done Key to save your
changes.
6. Press the Quit Key or Options Key to
exit.
Select
Done
Options
Quit
or
Options
Note: If you press the Quit Key or Options Key before you press the Done Key, you
exit th e Options List without saving your changes.
23
Page 24
Options List
Select a language
The display is available in multiple languages. After you select
the Op tio ns List menu;
1. Use the Navigation Keys to highlight
the desired language (e.g., German).
Language. . .
from
Deutsch
Select
Press the Done Key to save changes. Press the Quit Key or Options Key to exit.
2. Press the Select Key.
Change a Featur e Key label
From the Options List you can change the name on the Program mable Line
(DN)/Feature Keys (self-labeled). These ke ys are located on both sides of the top
portion of the display area.
To change a Feature Key label:
1. Press the down Navigation Key onc e to
highlight
Change feature key label
Change feature key label
.
24
Select
Select
AutoDial
2. Press the Select Key.
This action takes you to t he Feature
Key menu and highlights
feature key label
3. Press the Select Key again.
The prompt asks you to select the
Feature Key you want to change.
4. Press the Programmable Line/Feature
Key whose label you want to change
AutoDial
(e.g.,
5. Press the Dial Pad Key that is printe d
with the f ir st letter in you r new label.
Press th e key u ntil the corr ect char ac ter
appears.
).
Change
.
Page 25
Options List
Note: Use the Case Key to change the case of the letter, as needed. Press the Up Nav-
igation Key to access speci al char acte rs you may want to in clude in the la bel . Use the
Navigation Keys to locate the character you want to include. Pr es s the Select Key to
choose the high lighted character . P r es s the Return Ke y to r eturn to label entry without selecting a special character.
6. Press the right Navigation Key once to
move the cursor (so you can enter the
next letter) when the desired letter
appears.
7. Repeat steps 5 and 6 until you have
changed the entire label .
Press the Done Key to save changes. Press the Quit Key or Options Key to exit.
Note: For a detailed example of using the dial pad to enter text into your M3905 Call
Center tele phone, see “Add a Personal Directory entry” on page 86.
To restore one key label to the
original:
1. From the Feature Key menu, use the
down Navigation K ey to highlight
Restore one key label.
Restore one key label
Select
Purchasing
Press the Done Key to return to the Options List menu. Press the Quit Key or
Options Key to exit.
Note: You cannot change the labe l on the primary DN. You can press the Shift Key, if
the label you want to change is on the second laye r of Programmable Line/Feature
Keys (self-labeled).
2. Press the Select Key.
3. Press the Programmable Line
(DN)/Feature Key (self-labeled ) that
you want to res tore to the original label
(e.g.,
Purchasing
).
25
Page 26

Options List
Adjust Screen contrast
The Screen co nt r ast option allows you to adjust the contrast of the display on your
telephone. After you select
Screen contrast
from the Options List menu;
Lower Higher
or
Press the Done Key to save changes. Press the Quit Key or Options Key to exit.
From the Contrast screen, press the
Lower Key to decrease the display
contrast level, or press th e Higher Key
to increase the display contrast level.
Adjust volume
Use the Volume adjustment option to select a comfortable sound level for the
various audio signals.
Note: Afte r you se lect
adjustable items for your telephone model appears. It is recommended that you adjust
these paramete rs while you are on a t elepho ne call so that you can jud ge the impac t of
the changes your are making.
To adjust the Ringer volume:
Ringer
Lower Higher
Volume ad jus tmen t . . .
or
Press the Done Key to save changes. Press the Quit Key or Options Key to exit.
Use the procedure above to adjust the volume on the following items:
from the Options List menu, a list of
1. Select Ringer from the Volume menu.
2. Press the Lower Key to decrease the
ringer volume, or press the Higher Key
to increase the ringer volume.
Buzzer
Speaker
Handset listen
26
Headset listen
Headset talk
Headset sidetone
Note: Headset sidetone is the sound of your
own voice that you hear in th e head s et
speaker.
Page 27
Options List
Choose Ring type
The Ring type option allows you to choose from among the various ringing sounds
ava ila ble for you r te lephone model. Afte r you se lect
List menu;
1. Use the Navigation Keys to scroll
through the lis t of ring types.
Ring type 3
Ring type. . .
from the Options
Press the Done Key to save changes. Press the Quit Key or Options Key to exit.
Play
Select
2. Press the Play Key to sample a ring
tone.
3. Press the Select Key to activate the
desired ring type.
Select Call Log options
The Call Log options setting provides a choice of logging all incom ing calls, logging
only the unanswer ed calls, or not logging any calls. The Call Log holds up to 100
diffe rent i ncomi ng entri es. After you sel ect
menu;
Log all calls
or
Log unanswered calls
Call log options
From the Log options menu, use the
Navigation Keys to highlight and select
either:
Log all calls
or
Log unanswered calls
from the Options List
Note:
New call indication
, if you want Call Log notification.
On
Press the Done Key to save the selection. Press the Quit Key or Options Key to exi t.
must be set to
27
Page 28

Options List
Live dial pad
The Live dial pad option allows you to pre ss an y dia l pad ke y to autom aticall y acce ss
a dial tone. After you sele ct
Live dial pad
from the Options Li st menu;
On
Off
or
Press the Done Key to save changes. Press the Quit Key or Options Key to exit.
From the Live dialpad screen, press the
On Key to turn on Liv e dial pad, or
press the Off Key to turn off Live dial
pad.
Prefe rred name match
The Preferred name match option displays the names of incoming and outgoing
callers as stor ed in your Personal Directory, i f the te lephone number matches th e one
stored in your directory. This option allows you to personalize the displayed names
for incoming and outgoing calls. After you select
Options List menu;
On
Off
or
Press the Done Key to save changes. Press the Quit Key or Options Key to exit.
Preferred name match
From the Name match screen, press the
On Key to turn on Preferred name
match, or press the Off Key to turn off
Preferred name match.
from the
Area code set up
Using the Area code set-up option causes the Callers List and Calling Line ID
(CLID) display to show the number/extension followed by the area code/prefix in
parenthesis . This makes it easier to identify local c alls and internal cal ls. You can
defin e up to three codes. After you se lect
menu
Area code set-up
from the Options List
1st Code: 408
2nd Code:
3rd Code:
Press the Done Key to save changes. Press the Quit Key or Options Key to exit.
28
Use the Navigation keys to pla ce your
cursor in the first line and enter an
area/country code of your choice.
Note: Y ou ca n enter up to three codes of your
choice.
Page 29
Options List
Call timer
The Call timer enable option measures how long you are on each call. After you
select
Call timer enable
from the Options List menu;
On
Off
or
Press the Done Key to save changes. Press the Quit Key or Options Key to exit.
From the Call timer screen, press the
On Key to turn on the Call ti me r, or
press the Off Key to turn off the Call
timer.
Date/time format
There ar e eight Date/time formats. Four formats are based on the 12-hour clock and
four are based on the 24-hour clock. After you select
the Op tio ns List menu;
Use the Navigation Keys to scroll
through the eight formats. The sample
formats appear on the upper-right side
of the display ar ea .
Format 3
Press the Done Key to select the highlighted format. Press the Quit Key or Options
Key to exit .
Date/time format. . .
from
Key click
The Key click option causes the handset or speake r to produc e a clicking s ound when
you press the tele phone keys. Afte r you select
List menu;
Key click enable
from the Options
On
Off
or
Press the Done Key to save changes. Press the Quit Key or Options Key to exit.
From the Key click scre en, p re s s t h e On
Key to turn on Key click, or press the
Off Key to tu r n o ff Ke y click.
29
Page 30

Options List
Headset type
The Headset type opti on allo ws you to s elect one of the three di f fer ent heads et types:
Type 1, Type 2, o r Amplified. Selec t the setting that w orks bes t for the headset that
you are using. For more information, see“Call Center headset interface” on page 32).
After you select
Headset type
from the Options Li st menu;
From the Headset type menu, use the
Navigation Keys to highlight and select
either:
Type 1
or
Type 2
or
Amplified
Press the Done Key to save selection. Press the Quit Key or Options Key to exit.
Type 1 headset
or
Type 2 headset
or
Amplified headset
Headset port on call
The Headset port on call option requires that a lamp-type acce ssory be connecte d to
the headset port . When the Heads et port on c all opti on is ac ti v a ted and th e user i s on a
call, the lamp lights prov iding an indication that a call is in progress. After you select
Headset port on call
On
or
Press the Done Key to save changes. Press the Quit Key or Options Key to exit.
Note: Additional equipment is requir ed to implement this option. For more informa-
tion please contac t your Nortel Networks distributor.
from the Option s List me nu;
Off
From the On call screen, press the On
Key to turn on Hea ds et port on call, or
press the Off Key to turn off Headset
port on call.
30
Page 31

Options List
Headset port external alerter
When the Headset port ex t erna l ale rt e r option is activat ed, it supports a visual or
audible alerter and/or recorder device. This device plugs into the Headset port, which
is located on the bottom of the telephone. After you select
alerter
from the Options List menu;
Headset port ext
On
Off
or
Press the Done Key to save changes. Press the Quit Key or Options Key to exit.
Note: Additional equipment is requir ed to implement this option. For more informa-
tion please contac t your Nortel Networks distributor.
From the External alerter screen, press
the On Key to turn on Headset port
external alerter, or press the Off Key to
turn off Headset port e xternal alerter.
Display diagnostics
The Display diagnostics option tests the functionality of your telephone’s display
screen and indic ator lights. This opti on also provides inform ation on the firmwa re
currently in use on your M3905 Call Center telephone. After you select
diagnost ics
Press the Done Key to return to the Options List menu. Press the Quit Key or
Options Key to exit.
from the Options List menu;
Use the up or down Navigation Key to
scroll through the list and view the
changing display screens.
Display
31
Page 32

Call Center headset interface
Call Center headset interface
The M3905 is compatible with most headsets.
Freeing your hands while on the job
The Headset Key controls a headset that is connected to the headset jack. The
Headset Key is a Fixed Feature Key on the lower left of the phone. The headset jack
is on the back of the M3905 telephone set. Both direct connect, or unamplified
headsets, and amplified head s ets can be used with the M3905 heads et jack.
Headset, Handset, and Supervisor Jacks.
are locate d on the back of the M3905 telephone set. The jack on the side of the
M3905 telephone set is the Supervisor jack that is used in conjunction with the
Supervisor Observe Key.
The headset and hands et jacks
Switching between the handset and the headset
If you use a head set, th e M3905 ha s a Headset Key to tu rn th e headse t on and of f. The
Headset Key is used to switch between the headset and the handset mode of
operation. The LED lights steady to indicate that you are in headset mode.
If you hav e the handset option in st alled, press the Headset Key to enter handset
mode. The Headset Key LED goes off, and all calls are presented to the handset. Lift
the handset and press a DN or In-Calls Key to receive calls. To make outgoing c alls
with your handset, lift the handset and pres s an Individual DN key to receive dial
tone. If you wish to return to headset mod e, press the Headset Key. The Headset Key
LED will go on, and all calls will be presented to the hea dset.
Headset Options Featur e.
connection . Use the Options feature to choose Type 1, Type 2, or Amplified to adjust
the gain that w orks best with the type of headse t that you are using. For a n amp lified
headset, choose the Amplified Headset setting in the Options list.
Volume Control with Amplified Headset.
volume co ntrol bar on the telephone and the switch on the amplified headset. Adju st
the telephone volume before adjusting the headset volume. To pro vide the best
communicati on with the leas t amou nt of dis tortion, the am plif ie r shoul d hav e a higher
setting tha n the telephone volume control.
There are three settings provided for the headset
To control the volume, use the
Volu me Control with Direct Connect, or Unamplified Headset.
control the volume, use the volume control bar on the telephone or adjust the volume
setting in the Options Menu.
Note: Refer to your distributor for the latest product bulletin from Nortel Networks
recommending heads et types for use with th e M3905 Call Center Telephone.
32
To
Page 33

Call Center agent/supervisor features
Call Center agent/supervisor features
This sectio n des cribes features and procedures for both the Call Center agent and the
supervisor.
Agent Login
1. Press the Make Busy Key until the indi-
/
cator turns on.
2. Press the In-Calls Key.
/
3. Dial your four-digit agent ID. You are
automatic ally in the Not Ready stat e and
in the cur r en t ACD que u e.
4. Press the Not Ready Key when you are
/
ready to acc ep t A C D calls. The LED for
the Not Re ad y Ke y goes off.
Note: You must press the Headset Key th e
first ti me you log i n, if usi ng a direct co nnect
headset.
Agent Login Enhancement
This feature provides two ne w options to ensure that only assigned agents are able to
log into an ACD group:
• Partitioning of agent login identification numbers between customer groups
• Agent login password option
Each time an agent enters an identification number, a check is made to determine if
the set being used is associ ated with t he same custo mer group as the identification
number.
If this check is successful and the password option has been assigned, the agent
receives a special dial tone. The agent must enter a four-digit password (a numbe r in
the range 0001 through 9999). When the password is accepted, the agent is logged
into the ACD group. If a checks is unsucc es s f ul, a reorder tone is given.
33
Page 34

Call Center agent/supervisor features
Agent Logout
/
If the password option is assigned:
After you enter your fou r-dig it a gent ID, you
receive a special dial tone. Enter you
four-digit password.
If your password is accepted, you are logged
in. If the system does not accept your
password, you will hear reorder (fast bus y)
tone.
Press the Make Bu sy Key and disconnect
the headset. The L ED in d icator lights
continuously.
Pressing the Make Busy Key onc e causes
the lamp to l ight solid “on, ” indicating that
Make Set Busy is ac tive for all directory
number appearances on the set.
34
Pressing the Make Busy Key a sec o nd time
causes the lamp t o fl ash, indi catin g Ma ke S et
Busy is active for th e ACD In Calls Key, but
deactivated for the secondary directory
number(s) on the set.
Note: If you press t he Ma k e Bu sy Key while
on an ACD call, you will be logged out automatically wh e n th e call is fin i sh ed.
Page 35

Agent features
Agent features
This section explains the features that are available to ACD agent positions.
Activity Code Fixed Key to activate Line- o f-B usiness code
The Line-of-Business (LOB) code feature allows the ACD user to enter a three-digit
code to record the type of activity the agent is performing.
The code is sent to a customer-premises do wnstream processor thro ugh the MIS
interf ace. The ACD super visor assigns the codes.
The Meridian SL-100 switch tracks item s such as the number of specific types of
calls, and the holding times for these calls. Use the Acti vity Code Fixed Key or the
LOB Code Programmable Feature Key to activate the LOB code.
1. While on an active ACD call, press the
/
or
LOBCode
Activity Key.
2. Dial the three-digit code whic h re f lects
the type of call you are ha ndling. The
digits are shown on the display as you
enter them. If you mak e a mistake , press
the Activity Key again and re -enter the
correct digits.
Repeat steps 1 and 2 if doing multiple
tasks . You can enter u p to th r ee activi ty
codes per call.
Answer Call Center Calls
The In-Calls Key is the lower right-hand key on the ACD termi nal set. The In-Calls
Key is the main ACD extension (Primary DN). The In-Calls Key allows the ACD
agent to answer the next queued call on the primary DN. This key presents only ACD
calls. To disconnect from an ACD call, the agent presses the Goodbye Key or the
In-Calls Key a second time.
To make outgoi ng calls and to accept non-ACD calls, the ACD user can have one or
more non-ACD DNs (Individual DNs).
35
Page 36

Agent features
Note 1: If you have ACD call forcing turned on, you hear a n audibl e tone and the c all
is automati cally s ent to your In-Calls Key. You do not p ickup the c all, it is sent to y our
line.
Note 2: If you have the handset option and you pickup the handset, you must also
press a DN key, otherwise the handset is not operable. You can terminate a call by
replacing the handset in the cradle.
Your ph one rings and the In-C alls
indicator flashes:
To answ er an ACD call, press the In-Calls
/
To end an ACD call:
Key. The caller is con n ected and the
indicator lights continuous ly.
Press the Goodbye Key.
/
or
Wait fo r the caller to terminate the call.
Call For cing
The Call Forcing option automa tically connects incoming ACD ca lls. An agent does
not have to press the In-Calls Key. When Call Forcing is on, the agent has a time
interval between e ac h incoming call that is defined by the system admini strator. After
the time interval is up, the agent hears a tone through the headset and Call Forcing
automatic ally connects the incoming call to the agent.
You hear a short t one. T he In-Calls indicator
/
lights continuously and the ACD call
automatically goes to the agent position.
Multistage Queue Status Key/Lamp
The ACD Multistage Queue Status (MSQS) Key/Lamp feature provides information
about the incoming call queue of any A CD group. Three thresholds, T1, T2 , and T3,
are created by you r supe rvisor. The t hresholds repre sent wait time in queue of the nex t
call to be answere d or nu mb er of calls in queue.
The MSQS Key/Lamp feature can be activated by any of the following actions:
• you log in
• an ACD call is presented to your position
36
Page 37

Agent features
• you activate the Not Ready feature
Once acti vated, the la mp status reflects the queue status as shown in Table 2.
Note: The MSQS feature can be assigned to a fixed key with the option al cap
Dsplay Queue, or it can be assigned to a programmable line/ feature key with
the labe l DisplayQue.
Table 2: MSQS lamp and queue stat us
Indicator Queue Status
Off Less than or equal to T1
On Greater than T1 and less than T2
Flash Greater than T2 and less than T3
Wink Greater than T3
Display Queue Threshold (MSQS enhancement for agents)
The Display Queue Threshold feature allows an agen t or super v isor to v iew the
number of calls wa iting in the queue, or how long the firs t call in the queue has been
waiting. The Display Queue Threshold feature can be assigned to a fixed ke y with the
optional key cap Dsply Queue, or it can be a ssigned to a programmable line/feature
key with th e label DispQTh.
To display the queue threshold for
your Meridian SL-100 ACD gro up:
Dsply Queue
Display Que
or
1. Press the Dsply Queue Key, or the
/
DispQTh program m a bl e li n e / f ea tu r e
key.
37
Page 38

Agent features
T1 T2 T3 CALLQ
3
Forward
Quit Copy
Callers Redial
2. Your disp lay s how s information si m ilar
to the examp l e ab ove .
The labels T1, T2, and T3, represent the
threshold wait time for the call at the
front of the queue or the number of calls
in the queue. The number below
CALLQ indicates the numbe r of calls in
the queue (in some systems CALLQ is
replaced by WAIT, which indicates the
actua l wa iting ti m e in seco n ds, for th e
first call in the que ue).
Number of
calls in
the queue
553-9094
38
5551234
T2 CALLQ 026
Forward
Quit Copy
Callers Redial
3. In some systems, a summary of the
queue threshold is shown on the display
each time a call is presented to your
Number of
calls in
the queue
553-9095
Page 39

Emergency Key
When you have an emergency
situation:
/
Agent features
position. The information includes the
threshold level, the threshold type
(CALLQ or WAIT), and the current
value of the threshold.
In some systems, this information is also
displayed when the Not Ready feat ure is
active. The information is updated
regularly and is visible until the Not
Ready fe at ure is tur n ed off.
Press the Emergency Key. The i nd ic at or
flashes while your supervisor is called.
When your supervisor pic ks up the call, the
LED indicator lights continuously and you
have a three-way conference with your
supervisor, or yo u can aut omat icall y connect
a tape recorder in the event of a threatening
or abusive call.
The Emergen cy lamp flashes on the Agent
set, and the Answer Emergency lamp flashes
on the Supervisor set .
Note: The display shows informati on about
the call. Write down this inform ation for
future reference, befo re you pre ss the
Emergency Key.
Make Busy
The Make Busy feature logs an agent out when going for brea ks, lunch, or end of day.
When th e Mak e Bu s y f ea tu r e is in use, the ACD age nt m u st lo g ba ck into the ACD
queue, if the agent has an agent log in.
39
Page 40

Agent features
To make the set busy:
/
To make your phone available for
incoming secondary directory
number calls:
/
To put your phone into Not Ready
state (after making it busy):
Press the Make Bu sy Key once. The
indicator lamp turns on steady and “Set Busy
Activated” is displayed.
Press the Make Bu sy Key again. The
indicator lamp is flashing and the dis play
goes away.
1. Press the Make Busy Key again.
/
/
2. Press the InCalls Key .
3. Dial your Agent Id. You are
automatic ally in the Not Ready stat e and
in the cur r en t ACD que u e.
4. Press the Not Ready Key when you are
ready to acc ep t ACD calls.
Note: If y ou are using an agent ID, you mu st
log in again to ta ke ACD calls.
Not Ready Key
The agent uses the Not Ready Key, when performing post-call work.
When you need time to catch up on
post-call processing work:
1. Press the Not Ready Key. This tak es
/
you out of the queue.
Note: The non -imme diate cutoff op tio n must
be enable d in the Merid ian SL-100 sys tem so
that an active call is not terminated when the
Not Ready Key is pressed.
40
Page 41

Agent features
When y ou are ready to take ACD
calls again:
2. Press the Not Ready Key again.
/
Answer or Make Non-ACD Calls
The individual DN allows the user (agent) to make outgoing calls and to receive
non-A CD incom ing ca lls. If the a gent doe s not h a ve a n active cal l when t he Indi vi dual
line flashes , the agent can press the individual DN line an d answ er the call.
To make a non-ACD call:
2498
To answer a non-ACD call, when the
telephone rings:
2498
Contact your supervisor
To ans wer y our sup ervi sor whe n your
phone rings and the Supervisor
indicator flashes:
/
If you are on a call and hear a buzz
and the Super visor indicator flashes:
1. Press an Individual DN Key.
2. Dial the number you wish to call .
Press the DN Key next to the flashing
indicator. You are connected to your
non-ACD caller.
Press the Supervisor Key.
1. Press the Hold Key.
/
41
Page 42

Agent features
/
To call your supervisor:
/
To return to t h e ACD cal l:
/
To Conference a call with your
Superv is or, during a ca ll in progres s:
/
2. Press the Supervisor Key.
Press the Supervisor Key. If you are on a
call, this automatically puts the cal l in
progress on Hold.
Press the In-Calls Key .
1. Press the Emergency Key. The Emergency indicator flashes while your
super v isor is ca lled.
2. When your supervisor answers, the
Emergency indicator goes on. You now
have a three-way con versation with the
superv isor and th e ca ll er.
Walkaway and Return from Walk away
Use this feature when you ne ed to leave your desk during an ACD call , during a
non-ACD call, or while in the Not Ready state.
To Walkaway w h ile in Not Ready
mode (Not Ready LED or LCD
indicator is on, and Not Ready is
shown on th e d i s pl a y):
1. Press the Not Ready Key.
/
42
2. Enter the three-digit unavailability code
provided by th e sy s t em admini s tr a to r.
The Not Ready indicator remains on
steady.
3. Disconnect the headset, if leav i n g th e
Agent position.
Page 43

To return from Walkaway:
/
Transfer to InCa l l s Key
Agent features
Note: The non -imme diate cutoff op tio n must
be enabled in the Meridian SL-100 system,
so that an active call is not terminated when
the Not Ready Key is pressed.
1. Connect the headset.
2. Press the Not Ready Key next to the
flashing indi ca tor.
Note 1: If a caller disconnects before you
retur n from Walkawa y , the Not Ready
indicator flashes. When you return from
Walkaway, y ou ar e in N o t Ready mode.
Note 2: On the Meridian SL-100 system, a
call on hold prevent s you from activa tin g the
Not Ready Key.
This f eatu re en abl es t he Cal l Cent er age nt to tra ns fer an inc omi ng C al l Ce nt er o r ACD
call directly to another agent’s InCall s Key in the same customer group. When the
second agent is idle at the time t he call is tr an sferre d , the call i s presented to that
agent’s InCalls Key; otherwise, the call is queued in a Call Transfer Queue (CTQ).
To tran sfer an incoming Call Center
or ACD call to an o t h e r a gent’s
InCall s Key :
1. Press the Transfer Key. The other pa rty
is on hold, and you receive dial tone.
The LCD indicator light flashes continuously.
2. Dial the second agent’s InCalls Key
directory number.
3. Press the Goodbye Key.
43
/
/
Page 44

Call Center supervisor features
Call Ce n ter supervi s or features
You can a ssign any feature listed in the “Agent features” section to the su pervisor’s
telephone (except Supervisor key), as well as the features described in this secti on.
Agent Keys
The Call Agent K eys feature allows you to connect to each agent position. Each
Agent Ke y is linked to a particular agent position. Press the Call Agent Key then th e
Agent Ke y for the particular ACD agent, or dial the secon dary or individua l agent
number, to be connected to a particular agent position.
Agent Ke ys also function as an Agent-Status La mp for each agent and allow you to
track the status of ea ch posit ion in the grou p. The foll ow ing sho ws th e meaning of the
LCD indicator associated with an Agent Key:
Indicator Agent Status
OFF Agent position unmann ed (Make Set Busy Activated)
ON Agent handling an ACD call
FLASH Agent waiting on an A CD call
WINK Agent bu sy on post-call work (Not Ready Activated)
Answer Agent
When your phone rings and the
Answer Age n t indicator f lashes:
/
To disconnect an agent call:
/
44
1. Press the Answer Agent Key.
2. Press the Goodbye Key.
Page 45

Answer Emergency
When your phone rings steadily for
30 seconds and the Answer
Emergency indicator flashes:
/
/
To disconnect from the emergency
call:
/
Call Agent
To call an agent:
Call Center supervisor features
1. Press the Hold Key if you intend to
return to the call in progress.
2. Press the Answer Emergency Key.
Press the Goodbye Key.
Call Agent
Agent1
To leave Call Ag en t st a te:
or
/
/
1. Press Call Agent Key.
2. Press the Agent Key assigned to the
agent or dial the agent’s position ID.
Press the Goodbye Key.
Use Supervisor Obse rve and the Supervisor Headset Ja ck
The Supervisor Observe Key is located in the upper left corner of the M3905 ACD
telephone. It has an associated LED.
A supervisor can listen in on an activ e call at an ACD terminal by connecting the
headset into the jack near the Supervi sor Observe Ke y on an agent’s telephone. The
45
Page 46

Call Center supervisor features
LED remains dark to denote that the supervisor ca n hea r the conv ersation while the
microphone for th e supervisor’s headset is muted.
To use the Supervisor Observe feature, the supervisor plugs t he headset into the agent
telephone.
To use the Su p ervisor Obser ve
feature for a two way conversation:
While the headset is plugged in, press the
Supervisor Observe Key. The LED lights
continuousl y and the supervisor can
parti cipate in the conversation .
To mute the Supervisor headset:
Press the Supervisor Observe Key a second
time and then put the supervisor headset on
mute. The LED turns off.
Controlled Interflow
When the call backlog or the waiting time in the queue exceeds a set threshold,
Controlled Interflow forwards calls to a predefined target queue.
The supervisor act ivates Controlled Interfl ow when the waiting time for the queue
exceeds its threshold.
To activate Controlled Interflow:
ConIntrFlw
To stop Co ntrolle d Interf low :
ConIntrFlw
Night Service
To enter Night Service:
NightSvc
46
Press the Controlled Interflow Key. The
indic ator flashes and excess calls are ro u ted
to the destination.
Press the Controlled Interflow Key again.
Press the Night Service Key.
The indic ator l ights conti nuousl y. All c alls in
the queue and new calls receive Night
Page 47

Exit Night Service:
Call Center supervisor features
Service, or ar e handl ed in a way desi gned for
your system.
NightSvc
Observe Agent
To observe an agent :
/
Agent1
To t alk to an agent you are obser ving,
and partic ipate in th e conversation:
Call Agent
/
or
Press the Night Service Key a sec o nd time.
The indicator goes off. New calls enter the
queue.
1. Press the O bserve Agent Key. The
Observe Agent indicator goes on.
2. Press the Agent Key or dial the agent’s
position InCalls number. You can listen
to the agent and caller’s conversation.
Repeat this st ep to observe another
agent.
1. While observing an agent. Press the
Call Agent Key. You now have a
conference with the agent and the caller.
To leave the Ob s erv e state :
/
2. Press the Goodbye Key.
Note: You cannot observe an agent if the
agent’s call is on hold or if no calls are in
progress.
47
Page 48

Call Center supervisor features
Display Agent Status
The Display Agent feature gives you a summary of the current status of all agent
positions for which you have Agent Keys information displayed.
DisplayAgt
Agent
positions not
logged in
Agent
positions
available to
receive calls
1. Press the Display Agent Key. The display shows a summary of the current
status of all agent positions in the ACD
group. If you supervise other ACD
groups, you need a Display Agent Key
for each group.
2. Press the Goodbye Key to clear the
/
display.
NMD IDL NR SDN ACD
1 2 1 0 8
Forward
Quit Copy
Callers Redial
Agent positions
on active ACD
calls
Agent positions
logged in but
currently on
non-ACD calls
Agent postions
logged in but
temporarily unable
to receive calls
553-9096B
48
3. Your disp lay s how s information si m ilar
to the examp l e ab ove .
Note: The information is displayed for 12
seconds, until you press another feature ke y,
or until a call is presented on your In-Calls
Key.
Page 49

Call Center supervisor features
Display Queue Status
The Display Queue Status fea ture allows you to a ccess the status of calls in a n ACD
Queue. Information displa yed includes: number of calls waiting in the queue, number
of agents’ positions occupied for that queue, and the call waiting time (s ec onds) for
the oldest call in the queue. To display information on your ACD queues:
Dsply Queue
Number of
calls waiting
in the ACD
call queue
Number of
calls logically
queued for
this group
DispQue
or
1. Press the Dsply Queue Key or Waiting
Calls Ke y for the ACD group you wish
/
to disp lay.
INC LOG AGT WAIT
1 0 6 14
Forward
Quit Copy
Callers Redial
2. Your disp lay s how s information si m ilar
to the examp l e ab ove .
Note 1: The Dsply Queue Key can be
configured on your M3905 ACD tel ephone
as a fixed key (using the Display Que key
cap) or as a Progra mmable Lin e/Feat ure Key
(self-labeled) that displays DisplayQue.
How long (in seconds)
the first call in the highest
priority queue has been
waiting for an agent
The number of agent
positions available to
answer calls
553-9096C
Note 2: The information is displayed for 12
seconds, until you press another feature ke y,
or until a call is presented on your In-Calls
Key.
49
Page 50

Your telephone non-ACD call features
Your telephone non-ACD call features
This section des cribes some non-A CD features commonly used for call
processing. Your telephone system administrator assigns features to your
programmable feature keys. Whene ver this guide desc ribes a procedure that
requires special codes, ask your teleph one system administrator to provide
these to yo u .
T o access a feature, press a Feature Key or enter a Feature Access Code (FA C).
The system administrator supplies you with Feature Access Codes.
Note: In order to use a feature de sc ribed in this section, your s ys tem software
must support the feature and the feature must be assigned to your telephone.
Check with your system administrator for more details.
Make a Ca ll
This sectio n des cribes features you can use when making a call. There are
several ways to make a call from your M3905 Call Center Digital Telephone.
Note: If your M3905 ACD telephone is equipped with a handset, you must lift
the handset and press a DN or ACD DN to get a response in the handset.
To make a call:
2498
50
1. Press the Individual DN Key
(non-A CD Key).
2. Dial the number.
Note: If you are not in Not Ready or Make
Busy mode while you are on a call on your
Indivi dual DN line, the call is put on hold
enabling you to answer the ACD In-Calls
line. Howe v er , if you a re on an A CD cal l and
a call comes in on your Indi vidual DN line,
you cannot put your ACD call on hold to
answer your Individual DN line call.
Page 51

Make a Call
Predial feature
The Predial feature allows you to enter and preview a number of up to 31 digits and
make corrections before you dial the number.
To use Predial:
1. Dial the number.
Note 1: If you are calling an external or long
distance number, be sure tha t the a ppropriat e
access co d es ar e inc l ud e d.
Note 2: Press the Pause Key to in s ert a
1.5-second pause in the dialing string.
2637
2. Press an Individual Line (DN) Key to
receive dial to n e.
The displayed pre dialed number is
automatically dialed.
Note: You cannot use the Predial feature if
the Liv e dial pad feature is acti ve.
Aut o Dia l
Auto Dial allows you to dedicate a feature key to a specific telephone number.
When the Auto Dial Key is pressed, the number is dialed automatically.
To program Auto Dial:
2498
Purchasing
To use the Auto Dial number:
AutoDial
To displ ay an Auto Dial num ber:
1. Select an Individual DN Line.
2. Press the associ ated Aut o Dial Key.
This automatically dials the number.
1. Press the configured Auto Dial Key.
The number appears on the dis play.
AutoDial
1. Press the appropriate Auto Dial Key.
2. Dial the telephone number (including
access code) you want to store on the
51
Page 52

Make a Call
Aut o Dial Key.
AutoDial
3. Press the Auto Dial Key a second
time. The numbe r is stored on the key
you selected.
Note: Use the Change fe ature key label
option (Option Key) to personalize the
Auto Dial label.
Redial Last Number Called
Last Number Redial allows you to automatically redial the last number you dialed.
Last Number Redial:
2498
1. Press a line key.
2. Press the Octothorpe (#) Key two
times. The last num ber dialed is
automatically redia led.
Note: Your system administrator must
configure this feature for your tele phone.
Activate Ring Again
The Ring Again feature allows you to automatically redial a number that is busy. If
you recei ve a b usy tone when you try to reach someone in your private network, press
Ring Again. The activated Ring Again features provides you with an audible tone
notification when that person is available or has used the telephone.
To use Ring Again:
RingAgn
To call a Ring Again party when you
receive not i fic at io n :
2498
52
1. Dial an individual DN and receive a
busy tone.
2. Press the Ring Again Key.
The screen displays RING AGAIN IS
ACTIVE.
When the number you want to reach is
available you hear the Ring Again tone.
1. Press the Individual DN Key, you
receive dial to n e.
Page 53

Make a Call
RngCall
To cancel Rin g Again befor e
notification
CanclRA
2. Press the Ring Call Key.
Press the Cancel Ring Again Key.
The screen displays RING AGAIN IS
CANCELLED.
Speed Call
Speed Call all ows you to automatically dial frequent ly ca lled telephone numbers by
entering a one- or two-digit code. Contact your system administ rator to determine the
capacity of your Speed Call list. A tele phone designated as a Spe ed Ca ll Controller
can program or edit the Speed Ca ll list. This feature must be en abled by your system
administrator.
To store or change a Speed Call
number:
SpcCtrl
1. Press the Speed Call Controller
Key . The screen displays ENTER
CODE, THEN NUMBER.
2. Dial a one- or two-digit code.
Use the Delete Ke y if y ou mak e a
mistake . U s e th e Cancel Key to
leave the scre en witho ut s to ring a
speed ca ll number.
Note: A dash is automatically inserted after
the required number of digits have bee n
entered.
3. Dial the associated tel ep h one
number. Use the Delete Key or
Cancel Key if you make a
mistake . U s e th e Done Key to
leave the scre en witho ut s to ring a
speed ca ll number.
53
Page 54

Make a Call
Note 1: Dial the access code (if required)
followed by the internal, external, or
long-distance telephone number.
Note 2: Pre ss the Pause key to insert a
1.5-second pause in the dialing string.
Done
To make a Spe ed Call:
1. Lift the handset.
SpcCtrl SpcUsr
or
4. Press the Done Key to save the
code and number.
2. Press the Speed Call Controller
Ke y or the Speed Call User Key.
The screen display s ENTER
CODE.
3. Dial th e Speed Call co de
assigned to the telephone
number. The number is
automatically dialed.
System Speed Call (Network Speed Call)
System Speed Call (Network Speed Call) allows you to dial Speed Ca ll codes and
override all restrictions while on the call. The System Speed Call feature is set up
by your system administrator on the system. It is a speed dial number that is
common to many users, therefore it is set up on the system, not your des ktop
telephone.
To make a Sys tem Speed Call:
2498
SSCuser SScCtlr
or
54
1. Press the Individual DN Key.
2. Press the System Speed Call User
Key or System Speed Controller
Key.
3. Dial the Spee d Call code as signed to
the number you want to dial.
The number is automatically dialed.
Page 55

Make a Call
Intercom Call
The Group Intercom feature connects a group of people through a Gpintercom
Ke y. You can use the Group Intercom feature to cal l a memb er of your intercom
group by pressing a one-, two-, three-, or four-digit code (depending on the size of
your group). Your telephone can be a member of several diffe rent Group Intercom
groups. Each group mu st have a diff erent Gpintercom Key. Yo ur system
administrator must se t up the intercom group(s).
To make an Intercom call:
Gpintercom
To answe r a G rou p In te rcom call
while on a line other than yo ur
Gpinte rc om line:
/
or
/
Gpintercom
1. Press the Gpintercom Key.
2. Dial the intercom code digit(s).
1. Press the Hold Key to put the
current call on hold.
or
Press the Goodbye Key to end
the call.
2. Press the Gpintercom Key and
begin to spe ak.
Group Intercom All Call
The Group Intercom All Call feature connects members of a Group Int ercom
group with a conference. You can si multaneously page up to 29 predefined
members of the same Group Intercom group. Group members hear the page
over their telephone set speaker and can respond to the originator, if required.
You r system administrator must set up thi s fe ature.
55
Page 56

Make a Call
To make a Group Intercom
All Call conference:
Gpintercom
Gpintercom
Gpintercom
1. Press the Gpintercom Key.
2. Press the Octothorpe (#) Key to
activate the Group Intercom All
Call feature . You hear ringing.
Note: Members can enter or leave the
conference, or you can page the m em bers.
3. To page members who have not
answer ed , p re s s th e Gpintercom
Key again to establish the
one-way paging link.
4. Make the page announcement,
which is heard by members over
their built-in speaker.
5. Press the Gpintercom Key again to
close or lock the conference.
Note: You can only page once. Members can
enter or leave the conference before it is
locked. When it is locked or closed, any
additional Gpintercom presses are ignored.
Intercom Call on a Predesignated Set
The Intercom feature allows you to directly, automatically terminate on a
Predesigna ted telephone set. Your system administrator must set up this feature.
To make an Intercom call to a
Predesignated Set:
Intercom
56
1. Press the Intercom Key. You hear ringing.
2. The other party hears ringing and their
Intercom Key lamp flashes.
3. The other party can answer the call by
pressing th e Intercom Key.
or
Page 57

Answer a Call
After a two-second delay, an automatic
connection is made, and the other party can
hear the message over the speaker.
Individual Page from Group Intercom
The Indivi dual Page from Group Intercom feature allows a Group Intercom member
to page another group member using the Handsfree speak er.
To make an Individual Page from
Group Int ercom:
Gpintercom
1. Press the Gpintercom Key.
2. Dial the appropriate Group Intercom
code digits.
3. After the first ring, press the
Gpintercom Key again. A
one-way connec tion is
establishe d, and you ca n talk ov er
the speaker.
Answer a Call
When you receive an incoming call on your Individual DN Key, your
telephone rin gs and the LCD indicator flashes .
To answer a call:
2498
Note: If you have the ha nds et option and you pickup the hands et, you must
also press a DN key, otherwise the handset is not opera ble. However, you can
terminate a call by replacing the handse t in the cradle.
Press the Individual DN Key to
answer a non-ACD call. The icon
beside the Individual DN Key
flashes.
57
Page 58

While you are away from your desk
While you are away from your desk
Call Forward
On an ACD set, Cal l Forward can only be used on your Individual DN. It
cannot be used in conjuncti on with your A C D DN. Call Forwa rd all ows you to
transfer your Individual DN calls to ring at another DN. If the telephone is in
the process of ringing, you cannot forward that call.
To forward your personal
directory number call s or
change the forward number:
Forward
Done
To view the num ber that your calls
are bei ng forwarded to:
CheckFw
1. Press the Forward Key.
The previously stored forward
number appears, if one exists,
and the screen displays ENTER
FORWARD NUMBER.
2. If desired, enter a new number.
The existing number is
automatically deleted. If you
make a mistake, use th e Delete
Key to dele te the prev ious
digit(s). Pr ess Cancel to leave
this screen without forwarding
your telephone.
3. Press the Done Key to activate Call
Forward.
1. Press the Check Forward Key.
58
Done
2. Press the Done Key to return to th e
previous sc ree n.
This action leaves Call Forward active.
Page 59

To cancel Call Forward:
While you are away from your desk
CheckFw
CanclFw
1. Press the Check Forward Key.
2. Press the Cancel Forward Key.
Forward an Internal Call (Call Forward Busy/Don’t Answer Split)
The Call Forward Busy/Don’ t Ans w er S plit feature allows you to:
• Forward an incoming call that originated internally from a DN in the same
customer group as you, to anot her DN in your customer group.
• Forward a n incomin g call th at orig ina ted from a DN out side of your c ustom er
group, to another DN outside of your customer group.
By activating the Cal l Forward Busy featu r e your calls are auto matically
redirecte d to another telephone if your DN is busy. By activating the Cal l
Forward Don’t Answer feature, your calls are automatically redirected to
another station if you cannot answer the calls within a predefined number of
rings. Contact your system administrator to set up this feature, and for the
feature access co d e (FAC).
To forward an internal call to
a predefined DN when your
individua l DN is bus y or whe n
you do not answer within a
prede fined number of rings:
To forward an internal call to
a DN that has not been
prede fined by your system
administrator:
Dial the appropria te F A C. You receive
a confirma tion tone if the Call
Forward Busy or Call Forward Don’t
Answer activation is successful.
1. Dial the appropriate FAC. Yo u
receive a confirmation tone i f the
Call Forward Busy or Call Forward Don’t Answer activation is
successful.
2. Dial the DN where you want to
forward your calls.
59
Page 60

While you are away from your desk
To cancel Call Forward
Busy/Don’t Answe r Split:
Dial t h e ap propriate FAC again. Yo u
receiv e a confirmat ion tone.
Call Forward – Remote Activation
On an ACD set, the Remote Call Forward feature works only with your
Individual DN. Remote Call Forwa r d allows you (from any telephone other
than your own) to activate, deactivate, or change call forwarding to a new
destination.
To activate Remote Call
Forward:
1. From a telephone ou tside the system, dial your remote access
directory number and wait for the
prompt.
2. Enter your individual system DN
plus PIN number follo wed by t he
number sign.
60
3. Enter the Call Forwarding
authorization code followed by
the number sign.
4. Follow the pro mpts to a ct iva te ,
deactivate, or change Call
Forwardi ng to a new destination.
Page 61

While on an active call
While on an active call
Place a call on Hold
Use the Hold feature when you are on the line with one party on your
secondary or Individual DN, and a second call comes in on a second line. You
can answer the second call and retain th e original non-A CD call by putting it
on Hold.
To place a call on Hold:
Press the Hold Key. The LCD
/
indicator flashes beside the line
on hold.
Note 1: If Automatic Hold is
enabled, the activ e call is
automatic ally put on Hold when you
answer the second call.
Note 2: On the Meridian SL-100
system, Aut omati c Hol d is the defa ul t
feature.
Note 3: The caller he ars music, if
music is configured on your system.
To retrieve a ca ll on hold:
2498
Press the DN Key beside the
flashing LCD indic ator.
Transfer a Call
Use the Trans fer feature to redire ct a call on yo ur Indi vidu al DN (non-A C D) to
a third p ar ty.
To use the Transfe r feature to
direct a call to a third party:
Trans
1. Press the Transfer Ke y. Th e
other party is on hold and you
receive d ial tone. T h e screen displays CALL ON HOLD, DIAL
NUMBER.
61
Page 62

While on an active call
2. Dial the DN number where you
are tran sferring the call.
Swap
or
Connect
To go back to the or iginal call,
if the tra nsf er is in com pl ete o r
the person you at tempt to
transfer to is unavailable:
/
2498
Blind Transfer Recall
3. Press the Swap Key to move
between talking with the or iginal
caller an d th e new c al le r.
or
Press the Connect Key to
complete the transfer.
The two callers are connected
and your telephone is ready to
make or receive new calls.
1. Press the Goodbye Key.
2. Press the Individual Line (DN)
Ke y next to the flashing LCD
indicator or ic on to rec onnect to
the original call.
Blind Transfer Recall gives you a reminder tone when a call you transferred is not
answered within a specifi c amount of time.
To use Bli nd Transfer Recall:
1. Press the Transfer Key. It puts the
call on hold and you hear dial tone.
2. Dial the number to which you w ant to
transfer the call.
62
Trans
Page 63

If the transferred call is n ot
answered, your telephone rings:
While on an active call
2498
Trans
1. Press a DN Key. You connect back to
the original caller.
2. Press the Transfer Key and repeat the
transfer (to a different DN), if desired.
Note: Check with your system administrator about the leng th of your recall timer.
Call Park
Call Park allows a call to be held temporarily, then retrieved from any other DN.
You can park an incoming call, then page the called party. When you use Call Park
you do not tie up a line. Your office may have a System Park DN wher e most calls
get automatically parked.
To Park a call on your own DN:
Park
/
1. While on an active call, press the
Park Key.
The scree n displays PARK on the first line.
On the next or bottom line, the screen
displays CA LL PARKED.
This call is automatically parked into the
system.
To Park a call on a DN other than
your ow n DN:
DirectPark
1. Press the DirectPark programmable
line/ f ea tu r e Key.
2. Dial the D N where you want the call
parked, or press the Octothorpe (#)
Ke y twice to park the call on the
System Pa r k extension .
63
Page 64

While on an active call
To Park a call using the FAC:
Trans
To retrieve a parked call
2498
DirectPark
or
1. Press the Transfer Key.
2. Dial the Call Park FAC
If you do not want the call par ked on
your own DN, dial a DN where you
want to park the call.
1. Press a DN Key.
2. Dial the Call Park FAC or press
the DirectPark Key.
3. Dial the DN where you parked
the call.
Note: If a parked call is not retrieve d
within a specified period of time, it
rings back to your telephone or to the
attendant . Che ck with your system
administrator to dete rmine your specified period of time.
64
Page 65

While on an active call
Charge a Call or Charge a Forced Call
Charge a Call or Charge a Forced Call allows you to enter a billing number for
charge-back purposes. The account code can be from 2 to 14 digits. You may
be prompted to enter an account code, or you may voluntarily enter an account
code wh en an in co mi n g ca ll is an s w e r ed . Ch e ck w it h yo ur s y st em
administrato r o r supervisor for ac co unt codes and the fea t u re access code
(FAC).
To enter an account code
when prompt ed by the
Meridian SL-100 system:
1. Dial the telephone numb er you
To enter an account code vol untarily
when an incoming call is ans w ered:
are calling.
2. When prompted by the telephone
system with a tone, dial the account
code digits.
1. Answer the incoming call and ask the
calling party to hold.
2. Flash the hookswitch.
3. Dial the FAC.
4. When you receive dial tone, dial the
account code digits.
5. Flash the hookswitch ag ain to return to
the call.
Inspect Key
The Inspect Key allows you to be on an active call and display a second
caller’s name without interfe r ing with the current call in progress.
Note: If Auto Di sp lay is enab led, the Ca lli ng Line Iden tificati on for the seco nd
call automatically displays.
65
Page 66

While on an active call
To view the nam e of a second
caller while on a call in
progress:
Inspect
2498
While on a call, you hear the call
waiting tone.
1. Press the Inspect Key.
2. Press the flashing DN Key. The
call waiting information appear s
on the display.
Note 1: The display information on the
incoming call does not interfere with the
current call in progre ss.
Note 2: You can use the Inspect Key with
other feature keys to display information
associated with t h e f eature keys.
Trace a Malicious Call
Malicious Call Hold provides a way for you to trace nuisance calls.
Note: If available on yo ur sy s te m, Customer Orig in ated Trace is an o t he r fea -
ture that provides a way for you to trace nui sa nce calls.
To trac e a call:
MALCSHold
2498
If you do no t have a
MALCSHold key:
Trans
66
1. Press the Malicious Call Hold
Key.
2. If you wish to return to the call,
press the DN beside the flashing
LED indicator of the call.
1. Press the Transfer or 3-way Call
key.
2. The calling party is placed on hold and
you receive a special dial tone.
3. Dial the M ALCShold FAC.
4. You are automatically
reconnected to the calling party.
Page 67

Incom in g ca l ls
Incomi n g calls
Answer Call Pickup
Call Pickup allows you to pick up a call from any telephone in the same Pickup
Group or another Pickup Group.
To answer a call in you r own Cal l
Pickup Group:
Pickup
To answer a call at a specific
extension within your Pickup
Group:
DNPickup
or
1. Press the DN key.
2. Press the Pickup Key.
1. Press the DN key.
2. Press the Pickup Key or dial the
Direct ed Pickup FAC.
You will hear a special dial tone.
3. Dial the extension numb er of the
ringing telephone.
67
Page 68

Incoming calls
Call Waiting
Call Waiting lets you put your current ca ll on Hold, whil e you answer the next call.
For ex am ple: The attendant routes an ou tside call to you when you are already on a
call. Call Waiting allows you to recognize an incoming call and respond to it.
To answe r an in co m ing call wh il e o n
another call:
1. Press the Hold Key when you
/
hear a tone and the call waiting
status icon appears.
Note: The Hold Key is optional. You
can just press the Call Wait Key as in
Step 2.
Call Wait
To return to your first
telephone call:
2498
/
or or
/
2. Press the Call Wait Key to
answer the call.
1. Press the Hold Key if you want
to put the second call on hold.
Press the Goodb ye Key to end
the second call.
2. Press the DN key associated with
the first call to continue that
conversation.
68
Page 69

Talk with more than one person
Talk with mo re than one person
Set up a conference call
You can set up a confer ence call for up to six people (this includes yourself).
Contact your sy st em administrator to find out the maximum number of peop le you
can join in a confer ence on your sys tem. On the M3905 Ca ll Cent er Tele phone, this
feature is available on your Individual DN Key.
To set up a conference call:
Conf
Swap
If the person you added to the
conference is unavailable:
2498
or
/
Connect
1. While on a call, press the Conference
Ke y. The other party is on hold and
you recei ve dial tone. The screen dis plays CALL ON HOLD, DIAL
NUMBER.
2. Dial the number of the person
you want to add to th e conferen ce
call.
3. Press the Swap Key to move
between talking with the or iginal
caller an d th e new c al le r.
or
4. Press the Connect Key to
complete the conference.
1. Press the Goodbye Key.
2. Press the Line (DN) Key with the
flashing icon to ret urn to your
origin a l call
.
69
Page 70

Talk with more than one person
Conf
Call Join
To conne ct a call on Hold (on
a different line) to your
current call:
1. Press the Conference Key .
2270
2. P r ess the key tha t ha s th e calle r
that yo u want to conn ect to your
current call.
Connect
3. Press the Connect Key.
The person on Hold joins your
conversation.
Preset Conference
The Preset Confere nce featur e allo ws you to estab lish a pre set conferen ce with
up to 25 conferees by di aling a specific directory number (DN). When the DN
is dialed, the Preset Conference feature simultaneously rings all of the
preselected conferees. Contact your system administrator to set up the
prede fined conferees an d obtain the Preset Conference DN.
To acti vate Preset Conference after
your sy stem admini strat or sets up the
predefined conferees:
1. Dial the Preset Con f erence DN digits.
2. When the first conferee answers, the
conference begins. Other conferees
are add ed to the co n ference as they
answer.
70
3. W h en al l co n f erees disc o nn e ct , th e
conference is term i n at ed .
Note: At leas t one member o f th e
conference must be a tele phone on the
Meridian SL-100 system. When all
members of the conference on the
Meridian SL-100 system disconnect, the
conference is term i n at ed .
Page 71

Call features
Call features
Call feature s are accessible on Fixed Keys, Programmable Line/Fea ture Keys
and Programmable Feature Keys.
Use Privacy Release
Priv ac y Rel ease allows one or more people who shar e your non -AC D DN to join your
call.
To use Privacy Release in an
established state:
PrivRls
To cance l Privacy Rel ease if
another pa rty did not join the call:
2498
1. Press the Private Release Key while
you are on a non-ACD call. One person can now join the call, if they press
the same non-A CD DN key on their
telephone.
2. Repeat Step 1 abov e to joi n addi ti onal
appearances of the DN.
Press the non-ACD DN key for which the
Privacy Release feature is active. If
another party did not join the call, the
Privacy Release feature will become
inactive.
Paging
If your system is equipped with a paging system, you can page a person. Check with
your system administrator to find out whet her your system has this capability and to
get the Feature Access Code.
To use Pagin g:
2498
1. Press your non-ACD DN key.
2. Dial the Paging Feature Access Code
(FAC ). A net w ork connection is
establishe d with the paging access trunk.
This provides access to lo u d speaker
paging equipment.
71
Page 72

Call features
Busy Override
The Busy Override feature allows you to gain access to a busy station by
pressing th e ExeBusyOvd Key.
To activate Busy Override
after receivin g a bu sy ton e:
ExeBusyOvd
ExeBusyOvd
/
or
1. Press the ExeBusyOvd Key .
Note 1: If Busy Override is valid for
the station being called, you hear
silence.
Note 2: If Busy Override is not valid
for the st ation be ing ca lled, yo u hear a
reorder tone.
2. The connected partie s hear a
Busy Override warning tone.
After this tone, a three-way call
connection is es tablished.
3. You can disconnect the third
party from the calle d party by
pressing th e ExeBusyOvd Key
again.
or
You can give a message to the
called party and then press the
Goodbye Key to release fr om the
call
.
Note: If the calle d party has Busy
Override with Call Waiting options,
your call is call waited when active
with Busy Override.
Make an Announcement over the Call Page
Call Page allo ws you to make an announc ement o v er the page s yste m. To ma ke
a page call , di al the pag e ac cess cod e.
Note: When attendant consoles use the Page Key, it overrides the telephones.
72
Page 73

The telephones disconnect and must re-acce ss the page access code.
Connect to Call Page feature:
Call features
2498
Disconne ct the Call Page f eature:
/
1. Press an Individual DN key.
2. Dial the p age access code.
The connection to the page system is
complete.
Press the Goodbye Key
.
Use Station Camp-on
This feature al lo ws you to exte nd an incom ing cal l to a bus y sta tion. When t he bus y
station becomes idle, it automatic ally rings and is connected to the waiting call . If
this featur e is act ivated for the telephone, whe n a ca ll is transferred to a busy line:
• You receive a visual indication that the line is busy.
• The calling party that is transferred hears ringing (or, if provided, music or an
announcement).
• The busy party hears a ca ll-waiting tone.
If the camped-on call is not ac cepted, it returns to you after a specifie d amount of
time. Contact your sy st em administrator for the specified amount of time.
To activate Station Camp-on after
answering an incoming telephone
call:
/
Connect
1. Press Transfer Key. The other party
is placed on ho ld, and you r eceive di al
tone. The screen displays CALL ON
HOLD, DIAL NUMBER.
2. Dial the destination DN digits.
3. Press the Connect Key to
complete the transfer.
73
Page 74

Class features on IVD sets
Class features on IVD sets
Anonymous Caller Rejection (ACRJ)
This feature allows you to reject incoming calls on your indi vidual DN for
which callin g nam e/number information has been intentional ly blocked. Only
calls in which the information is blocked are rejected. This feature is activated
using a f eature access code (FAC).
Note: Av ailability of this feature depends upon your Meridian SL-100 system
software and netw ork connections. Check with your system administrator for
availability of the feature and the FAC.
To activate or turn ON Anonymous
Caller Rejection:
2698
To deactivate or cancel
Anonymous Caller Rejection:
2698
1. Press your Individual DN Key.
2. Dial the FAC digits for feature
activation.
3. A recording or confirmation t one
tells you that Anonymous Caller
Rejection is activated.
1. Press your Individual DN Key.
2. Dial the FAC digits for feature
deactivation.
3. A recording or confirmation t one
tells you that Anonymous Caller
Rejection is cancelled.
Automatic Callba c k (AC B )
This featur e al lows you to enter a FAC that automatically sets up a call to the last
DN you dialed on your Individual DN, rega rdless if the call was answe r ed,
unansw ered, or busy.
Note: Av ailability of this feature depends upon your Meridian SL-100 system
software and netw ork connections. Check with your system administrator for
availability of the feature and the FAC.
74
Page 75

To activate or tu rn ON Auto ma tic
Callback after you have dialed a
telephone number:
/
Class features on IVD sets
1. Press the Goodbye Key to disconnect
.
the call
2698
/
To deactivate or cancel Automatic
Callback:
2698
2. Press your Individual DN Key.
3. Dial the FAC digits for feature
activation.
4. Follow the instructions provided by
the announcement.
5. Press the Goodbye Key again, or
replace the handset to disconnect.
6. When your line is idle, and the called
party line is idle, your tele phone rings.
7. Answer the call, and you hear normal
ringing.
1. Press your Individual DN Key.
2. Dial the FAC digits for feature
deactivation.
Automatic Re call (AR)
This featur e al lows you to enter a FAC that aut oma tically sets up a ca ll to the
DN of the last incoming cal l on your individua l DN.
Note: Av ailability of this feature depends upon your Meridian SL-100 system
software and netw ork connections. Check with your system administrator for
availability of the feature and the FAC.
75
Page 76

Class features on IVD sets
To activate or tu rn ON Auto matic
Recall:
2698
To deactivate or cancel
Automatic R ecall:
1. Press your Individual DN Key.
2. Dial the FAC digits for feature
activation.
3. An announcement may provide
additional instructions or
announce the number of the last
incoming call, and provide you
with a ch o i ce of wheth er to
continue the recall or abort it.
4. If you continue the recall , the
Automatic Recall feature calls
the last number th at called you;
or, if the number is busy, it
continues trying until the line is
idle.
5. When both lines are idle,
Automatic Recall rings your
telephone. Answe r the te lephone ,
and you hear normal ringi ng.
2698
1. Press your Individual DN Key.
2. Dial the FAC digits for feature
deactivation.
Customer Originated Trace (CO T)
This feature allows you to activate an im mediate trace of the last incoming call,
without requiring prior approval and manual intervention by your system
administrato r. Cust om er O ri g in a te d Trace ca n b e ac tivate d on a per-call basi s . Th i s
feature can be acti vated using a feature key or by entering a FAC. This feature c an
be used to initiate a trace of an ACD call terminating on your InCalls Key.
Note: Av ailability of this feature depends upon your Meridian SL-100 system soft-
76
Page 77

Class features on IVD sets
ware and netwo rk connections. Check with your system administrat or for availability of the feature and the FAC.
To activate or turn ON Customer
Originat ed Trace after receiving a
harassing or prank telephone call:
1. Press the Goodbye Key to disconnect
.
/
the call
2698
CustOrigTr
or
/
2. Press your Individual DN Key.
3. Press your CustOrigTr Key or dial
the FAC digits f o r f eature ac tiv ation.
4. An announcement tells you if the call
was successfully traced or not.
5. Press the Goodbye Key again to
disconnect. The feature deactivates.
6. Contact your system adminis trator fo r
follo w-up actions.
Calling Name/Number Delivery Blocking (CNNB)
This feature allows you to contr ol the display of your individual DN or your name
and DN for a terminating call on a per-call basis. Instead of your name and/or
telephone number being displayed, the word P RIVATE is displayed on the called
party’s telephone display. Calling Name/Number Del ivery Blocking is activated by
dialing a FAC.
Note: Av ailability of this feature depends upon your Meridian SL-100 system software and netwo rk connections. Check with your system administrat or for availability of the feature and the FAC.
To block your name and telephone
numbe r from the displa y on a
terminating call yo u want to make:
2698
1. Press your Individual DN Key.
77
Page 78

Class features on IVD sets
2. Dial the FAC digits for feature
activation.
3. Listen for the confirmation tone
or announcement, followed by
dial tone.
4. Place the telephone ca ll.
Selective Call Forward (SCF)
This feature allows you to selectively program a list of up to 31 DNs from
which calls on your Indi vi dual DN are to be rejec ted or bloc ked. The incoming
calls that are o n the list are routed to an announcement or other call tr eatment.
This feature is accessed by dialing a FAC.
Note: Av ailability of this feature depends upon your Meridian SL-100 system
software and netw ork connections. Check with your system administrator for
availability of the feature and the FAC.
To activate or turn ON Selective Call
Forward:
78
2698
1. Press your Individual DN Key.
2. Dial the FAC digits for feature
activation.
Listen to the announce ment for instructions
on how to activate , de ac tivat e, change, o r
review your Selective Call F orward list of
telephone numbe rs.
Page 79

Directory display and navigation
Directory display and navigation
Wit h the M3905’s dis play, you can vie w two lines of information. The figure below
shows the status once you log into the direc tory.
01 Directories
Personal Directory
Call Log (Callers List)
Select
Quit Copy
553-9092
Access your Callers List, Redial List, or Personal Directory
To acce ss the M3905 Dir/ Log:
Dir/Log
Personal Directory
Call Log (Callers List)
Call Log (Redial List)
Select
1. Press the Directory/Log Key.
Note: When you press the Directory/Log
Key, your Personal Directory is automatically selected. At this point, you can begin
searching the directory us ing the tel ephone’s
dial p ad . See “Sear ch for an entry” on
page 92.
2. Use the Navigation Keys to highlight
the Personal Directory or the Call Log
that you want to view.
3. Press the Select Key.
79
Page 80

Directory display and navigation
To access the M3905 Callers List or
Redial List using a Context Sensitive
Soft Key or a Programmable Feature
Key:
Callers
or
To exit the D ir/Log :
Quit
or
Redial
Press the Callers Key to access the
Callers List, or press the Redial Key to
access th e R ed i al Lis t .
Press the Quit Key or the
Directory/Log Key to exit.
Dir/Log
Directory password protection
You can password protect your Personal Directory , Callers Lis t, and Redial list on the
M3905. If password protection is activated , you will be asked to enter your password
each time you press the Dir/Log Key.
To enable password protection:
Dir/Log
Password Administration
1. Press the Directory/Log Key.
2. From the Directories menu, use the
Navigation K ey s to hi ghli ght
Administration
.
Pas s wor d
80
Selec t
Selec t
On
3. Press the Select Key. The Password
Administration menu appea rs with
Password enabled: OFF
4. Press the Select Key again to select
Password enabled: OFF
5. Press the On Key to enable password
protection.
6. Dial the password.
highlighte d.
.
Page 81

Directory display and navigation
Enter
Enter
Done
Quit
or
Dir/Log
To disable Perso n a l D irector y
password:
Dir/Log
7. Press the Enter Key.
8. Dial the password again to conf ir m your
password.
9. Press the Enter Key.
10. Press the Done Key to save changes.
11. Press the Quit Key or the
Directory/Log Key to exit.
1. Press the Directory/Log Key.
Enter
Password Administration
Selec t
2. Dial the password.
3. Press the Enter Key.
4. Use the Navigation Keys to highlight
Password A dministrat ion
5. Press the Select Key. The Password
Administration menu appea rs with
Password enabled: ON
.
high light ed .
81
Page 82

Directory display and navigation
Selec t
Off
Done
Quit
or
Dir/Log
6. Press the Select Key again to select
Password enabled: ON
7. Press the Off Key to disable password
protection.
8. Press the Done Key to save changes.
.
9. Press the Quit Key or the
Directory/Log Key to exit.
82
Page 83

Call Log
Call Log
The Call Log records the name and number of incoming and outgoing calls and can
be password protected. You can activate Call Log to record all calls, record only the
unanswered call s, or record no incoming calls.
The Callers Li st stores incoming cal ls, and the Redial List stores outgoing calls in
order of date and time re ce ived/made. The oldest call is stored at the top of the list.
The newest call is st or ed at the bottom of the list.
The M3905 Call Log list holds up to 100 entries for inco m ing and 20 entries for
outgoing calls. The M3905 can copy a number from the Cal lers List or Redial List
and store it in the Personal Directory.
Access and use the Callers List
To access the Callers List using the
Dir/Log Key:
Dir/Log
Call Log (Callers List)
Selec t
New
Old
or
To access the Callers List using a
Context Sensitive Soft Key or a
Programmable Feature Key:
Callers
1. Press the Directory/Log Key.
2. Use the Navigation Keys to highlight
Call Log (Callers List)
3. Press the Select Key.
4. Press the New Key to go to th e top of the
new cal ls li st, or pre ss the Old Ke y t o go
to the top of th e old ca ll s list.
Press the Callers Key. You are presented
with the f ir st call in the new calls list.
.
83
Page 84

Call Log
To make a call from the Ca llers List:
2498
1. Use the Navigation Keys to highlight
the number you want to call.
Note 1: If you are calling a n externa l or lo ng
distance number, you will need to edit the
number to add the access codes required by
your system to make an external or long
distance call .
Note 2: Press the Pause Key to insert a
1.5-second pause in the dialing string.
Dial
2. Press the Dial Key to call the number
selected and press your non-ACD line
key. You leave the Callers List when you
make th e call.
To exit the Callers List without
making a call:
Quit
or
Press the Quit Key or the
Directory/Log Key to exit.
Dir/Log
Access and use the Redial List
The Redial Li st reco rds your last 20 ou tgoing c al ls and ca n be pa ssw ord prote ct ed. On
the M3905, you can copy these numbers to your Persona l Directory.
To acce ss the Redial List using the
Dir/Log Key:
Dir/Log
1. Press the Directory/Log Key.
2. Use the Navigation Keys to highlight
Call Log (Redial List)
.
Call Log (Redial List)
Selec t
84
3. Press Select.
Page 85

To acce ss the Redial List using a
Context Sensitive Soft Key or a
Programmable Feature Key:
Call Log
Redial
To make a call from the Redial List:
2637
Dial
Press the Redial Key. You are presented
with the m o st rec en t ly di al ed n umber.
1. Use the Navigation Keys to highlight
the number you want to call.
Note: If you are calling an external or long
distance number, be sure that the appropriate
access co d es ar e inc l ud e d.
2. Press the Dial Key and press your
non-ACD line key. Your call is
automatically dialed and you exit the
Redial List.
85
Page 86

Use the Personal Directory
Use the Personal Directory
The Personal Directory provides a personalized directory of names and telephone
numbers. The Persona l Directory allows you to add, delete, search, and edit entries
and can be password protected. The Personal Directory holds up to 100 entr ies (an
entry is one name and one telephone number). You can add a directory entry by
copying the entry from your Callers List or Redial List. You can also add entri es with
the “AddNe w ” Key or by using the Personal Directory PC Utility application . Th e
Personal Directo r y PC Utility uses an accessory cartridge to connect your PC and
your M3905 telephone. You can create a directory on your Persona l Computer and
transfer it to your M3905 Call Center telephone.
Access the Personal Directory
Dir/Log
Select
Add a Personal Directory entry
After accessing yo ur Personal
Directory:
AddNew
1. Press the Directory/Log Key.
2. Press the Select Key in the Directories
menu to select
Note: When you press the Directory/Log
Key, your Personal Directory is automatically selected. At this point, you may be gin
searching the directory us ing the tel ephone’s
dial p ad . See “Sear ch for an entry” on
page 92.
1. Press the AddNew Key.
2. Dial the new name.
Personal Directory
.
86
Page 87

Example:
To enter the name an d telephone
number for Chris:
Use the Pers o na l Di re ct o ry
1. Dial the name using the key pad.
Note: Press the Up Navigation Key to
access sp ec ial chara cters you may want to
include in the name. Use the Navigation
Keys to loc a t e th e ch arac te r y o u want to
include. Press the Select Key to choose the
highlighted character. Press the Return Key
to return to name entry without selecting a
specia l ch aracte r.
ÛÛÛ
ÝÝ
ààà
ÝÝÝ
àààà
Next
2. Press the dial pad Key with the desired
letter repeatedly until that le tter appear s
on the display.
3. Press the right arrow Key to go to the
next letter.
Note: The cursor automatically advances to
the next position, if a dif ferent-from- last key
is pressed, or afte r a sh ort pause.
4. Press the Next Key.
5. Use the dial pad to enter the telephone
number associated with the name
entered ab ove.
Note 1: If you are adding a n externa l or long
distance numbe r, be sure to inc lude the access
codes required by your s ys tem to make an
external or long distance call.
Note 2: Press the Pause Key to insert a
1.5-second pause in the dialing string.
Done
6. When you have finished entering all of
the digits, pres s the Done Key to save
the ch an g es.
87
Page 88

Use the Personal Directory
Quit
or
Dir/Log
Add an inco ming c all
Copy
/
Dir/Log
Next
or
Clear
7. Press the Quit Key or the
Directory/Log Key to exit.
1. Press the Copy Key.
The displays shows the message
Copy to
2. Press the Directory/Log Key.
3. Press Next to copy the in coming call
without editing the name. Edit the
number , if required (see note for step 4)
and go to step 5.
or
Press Delete to make changes to the
name before savin g. Edit the name usin g
the dia l pad, Delete, and Case Keys as
needed.
.
88
Next
Done
4. Press the Next Ke y . Make changes to the
telephone number if required
Note 1: If you are copying an external or
long distance number, be sure to add the
access codes required by your system to
make an external or long distance call.
Note 2: Press the Pause Key to insert a
1.5-second pause in the dialing string.
5. Press the Done Key to save the entry in
your directory.
Page 89

Use the Pers o na l Di re ct o ry
Quit
or
Dir/Log
Add an outgoing call
Copy
/
Dir/Log
Next
Done
6. Press the Quit Key or the
Directory/Log Key to exit.
Note: You can edit the name or number
before or after you save to the directory.
1. After the person you called answers,
press the Copy Key.
The displays shows
2. Press the Directory/Log Key.
3. Add the name, using the dial pad,
Delete, and Case Keys as needed.
4. Press the Next Key.
5. Press the Done Key to save the changes .
Copy to
.
Quit
or
Dir/Log
6. Press the Quit Key or the
Directory/Log Key to exit.
Note: You can edit the name or number
before or after you sa ve to the Directory.
Delete or edit a Personal Directory entry
To delete a Personal Directory entry:
1. Use the Navigation Keys to highlight
the entry you want to edit or delete.
2. Press the Delete Key to de le te the
currently highlighted entry in your
Personal Directory.
Delete
89
Page 90

Use the Personal Directory
Yes
To edit a Personal Directory entry:
Edit
Next
Done
3. Press the Yes Key to confirm the
deletion.
1. Press the Edit Key to c hange the
telephone number or name.
2. Use the Navigation Keys to highlight
the character you want to change.
3. Use the dial pad to enter the desired
changes. Refer to“Add a Personal
Directory entry” on page 86 for an
example of how to use the dial pad to
enter names.
4. Press the Next Key. Edi t the number if
necessary.
5. Press the Done Key to save the changes .
Quit
or
Dir/Log
Delete your Personal Directory
To delete your Personal Directory:
DelList
90
Yes
or
No
6. Press the Quit Key or the
Directory/Log Key to exit.
1. Press the Delete List Key.
The display shows
entrie s?
2. Press the Yes Key if you want to delete
all the entries in your Personal
Directory, or press the No Key if you
want to return to the top of the Personal
.
Delete all
Page 91

Use the Pers o na l Di re ct o ry
Directory with no change s made.
Quit
or
3. Press the Quit Key or the
Directory/Log Key to exit.
Dir/Log
Use the Personal Directory to make a call
To use the Personal Directory to
make a call:
1. Use the Navigation Keys to highlight
the desired name or number.
Purchasing
Dial
Note: If you are dialing an external or long
distance number, be sure that your directory
entry i n cludes th e access co des required by
your system to make an e xternal or long distance call.
2. Press the Dial Key and press your
non-ACD line key.
Use Card View
The Card View feature provides additional information about the Personal Directory
entry.
To look at the Card View :
Purchasing
To dial from the Card View:
1. Use the Navigation Keys to highlight
the desired name.
2. Press the right Navigation Key.
1. Use the Navigation Keys to show the
name and number of the currently
selected entry in the Card View.
91
Page 92

Use the Personal Directory
Note: If you are dialing an external or long
distance number, be sure that your directory
entry i n cludes th e access co des required by
your system to make an e xternal or long distance call.
Dial
To exit the C ar d View :
2. Press the Dial Key and press your
non-ACD line key to place the call.
Press the left Navigation Key to leave
the Card View and return to the selected
name.
Search for an entry
You can search for a particular entry in your Personal Directory.
To search for an en tr y :
1. Use the Navigation Keys to highlight
Personal Directory
Select
Personal Directory
2. Press the Select Key or proceed directly
to step 3.
3. Use the dial pad to enter the fir st letter
of the name your are seeking. For
example, press the
the first en try tha t beg ins wi th th e le tt er
“B”.
.
key twice to go to
Û
92
Page 93

Use the Pers o na l Di re ct o ry
Copy a number from the Redi al Lis t
You can c opy a number from the Redial List to the Personal Directory.
To copy a number from the Redial
List:
1. Use the Navigation Keys to highlight
the name or number in your Redial List
that you want to copy to your Personal
2498
Directory.
Copy
Dir/Log
Next
Clear
Next
/
or
2. Press the Copy Key.
The displays shows
3. Press the Directory/Log Key.
4. Press Next to copy the in coming call
without editing the name. Edit the
number , if requi red (see note for ste p 5),
and go to step 6.
or
Press Clear to make changes to the
name before savin g. Edit the name usin g
the dia l pad, Delete, and Case Keys as
needed.
5. Press the Next Ke y . Make changes to the
telephone numbe r, if required.
Note: If you are copying an external or long
distance number, be sure that your directory
entry i n cludes th e access co des required by
your system to make an e xternal or long distance call.
Copy to
.
Done
6. Press the Done Key. The entry is saved
to your Personal Directory and you are
returned to the Redial List.
93
Page 94

Corporate Directory
Corporate Directory
The Corporate Dir ec tory application al lows you to search by ente ring the characters
in the name of the person you are calling, beginning with the last name. Onc e you
have located the name and number of the person, you may use the dial soft key to call
the number. You may copy an entry from the Corporate Directory and paste it into
your telephone’s Persona l Directory for quick access .
To use th e Corporate Dire ct o ry
application:
Apps
Corporate Directory
Select
1. Press the Applications Key.
Note: If, when you press the Applications
Ke y, Corporate Directory is highlighted, proceed to step 4.
2. From the Applications menu, use the
Navigation Keys to highlight
Corporate Directory
3. Press the Select Key or proceed to step
4.
The Corporate Directory Find screen
appears.
4. Use the dial pad to enter the name of the
person you want to cal l. Enter the last
name first. Separate the last name and
first name with a comma.
Note 1: Th e co mma is the fir st ch aracte r o n
Key on your dial pad.
Ú
the
Note 2: You do not need to enter the entire
name. When the Done Key is pressed, the
applicati on will highlight the f irst directory
entry th at matches the text that yo u en tered.
.
94
Done
5. Press the Done Key.
The applicati on hig hlights the f irs t entry
that matche s the text yo u en t e r e d in
step 4. If there is no match, the screen
displays
(the text tha t you entered).
No matches found for . . .
Page 95

Corporate Directory
6. Use the Navigation Keys to scroll
through the directory.
Note: The entire dire ctory is available. The
“find” process determines which directory
entry to select as your starting point.
7. If desired, use the Right Navigation
Key to move fr o m “list” view to “card”
view. In card v iew, the telep hone and
department numbers for the entry are
viewable. Use the Left Navigation Key
to return to list vie w.
Note: While you are in card view, you can
use the Up or Down Navigation Key to
scroll through directory entries.
Dial
To f ind anothe r directory listing or to
ref ine your current director y search:
NewFind Resume
or
To exit the Corporate Directory
application:
Quit
or
Apps
8. Press the Dial Key and press your
non-ACD line key to call the person
whose name is highlighted.
Note: The Dial Key will attempt to dial out
on your primary directory number. Since
your primary DN Key is your InCalls Key,
you cannot dial out on it. On the Meridian
SL-100, after you press the Dial Key, press a
secondary non-ACD line Key to dial the
number.
Press the NewFind Key to begin a new
search, or press th e Resume Key to
enter addi tional characters so that you
may narrow your search.
Press the Quit Key or the Applications
Key.
95
Page 96

Corporate Directory
To copy an entry from the Corporate
Directo ry to your telephone’s
Person a l D i re ctory:
Copy
Dirctry
/
1. With the entry selected in the Corporate
Directory, press the Copy Key.
2. In the Copy to screen, press the Dirctry
(Directory) Key to copy the name and
telephone number to your Personal
Directory
After you complete editing and entering
the name and te lephon e nu mber, you are
retur n ed to the Corp o r ate Directory.
3. Press the Next Ke y. Ma ke c hange s to t he
directory if needed.
4. Press the Done Key. The ent r y is copied
to your Personal Direct ory.
.
96
Page 97

Acces so r ie s for t he M 3 9 05
Accessories for the M3905
Optional items are available for use with your M3905 Meridian Digital telephone.
Please contact your s ystem administrato r for f urther details.
Additional key caps
There is a Key Cap Kit you can order that has additional labele d key caps. You can
confi gure four of the bottom six keys to fit your spec ialized busi ness needs. These
keys inc lude: Agent, Acti vity Key, Answe r Emergency, Observe Agent, and Dsply
Queue.
Accessory Connection Module (ACM)
The Accessory Connection Module provides the interface for adding the Analog
Terminal Adapter, External Alerter and Recorder Int erface, and Personnel Directory
PC Utility.
Personal Dire ctory PC Utility
The Personal Di recto ry PC Ut il ity pro vi des a f as ter, easier wa y to cre ate o r modif y the
Personal Directo ry on the M3905. You can enter names and numbers into a directory
file on your PC, and download the f ile directly from the PC to the M3905 through a
serial port conne ction. You can also upload the Personal Directory from the M3905 to
your PC so that you can modify th e directory. The PC and the M3905 are conne cted
using the Personal Directory PC Utility Cartridge.
Headset
The amplified or unamplified headsets are compatible with the M3905 Call Center
Telephone. Th e amplified heads et is an option for noisy environments .
Headsets vary in electrical, physical and audio characteristics. Performance
perception is s ubjective so it is recommended that the headset user try usin g their
headset with each of the three settings. Te st the headset settings on both internal and
external cal ls to determine which works best for you.
To adjust the headset volume, go to the Options menu, Headset types, and se lect one
of the headset type s from the sub-menu item: Headset 1, Headset 2, or Amplified.
Refer to your distributor for the latest product bulletin from Nortel Networks
recommending heads et types for use with th e M3905 Call Center Telephone.
Handset
The Handset does not accompa ny the M3905 Cal l Center Teleph one. The Handset kit
is a hardware option for the M3905 Call Center Telephone.
97
Page 98

Acces so r ie s for t he M 3 9 05
Analog Terminal Adapter (AT A)
The ATA allo ws you to c onne ct an analog dev ice suc h as a modem or FAX machine to
your telephone.
External Alerter and Recorder Interface
The External Aler ter Interface let s you connect a third-party device (remote rin ger,
indicator light, or recording device) to your telephone. The M3905 Call Center
Telephone uses the External Alerter and Recorder Interface accessory cartridge.
Key-based Access Expansion Module (KBA)
The Key-based Expansion Module provides additional DN or feature keys for the
M3905. You can add up to two 22-button Key-ba sed Expansion Modules to your
M3905 telephone.
Display-based Access Expans ion Modu le (DBA)
The Display-based Access Expansion Module provides additional line (DN) or
feature keys for the M3905 telephone. The DBA has eight keys on three layers for a
total of 24 additional DN or feature keys. The three layers are accessed through the
use of a Page key. The M3905 supports one DBA module.
98
Page 99

Feature Key chart
Feature Key chart
The follo wing chart indicates which type of feature key can be used for features, or
whether features can be accessed with a Feature Access Code (FAC).
Feature Name Context
Sensitive
Soft Key
Activity Code (LOB) NO YES NO YES
Age n t (A ssign ed to
Agent)
Agent (Call) NO YES NO YES
Anonymous Caller
Rejection ( ACRJ)
Answer Agent NO YES NO YES
Answer Emergency NO YES NO YES
Applications NO YES NO NO
Auto Dial NO YES NO NO
Auto m a tic Call b ac k
(ACB)
Automatic Recall (AR) NO NO YES NO
NO YES YES NO
NO NO YES NO
NO NO YES NO
Programmable
Key
Feature
Access
Code
Fixed
Key
Blind Transfer Recall YES NO NO NO
Busy Override NO YES YES NO
Call Forcing NO NO NO NO
Call For ward YES NO NO NO
Call For ward – Remote
Activated
Call Join YES NO NO NO
NO NO NO NO
99
Page 100

Feature Key chart
Feature Name Context
Sensitive
Soft Key
Programmable
Key
Feature
Access
Code
Fixed
Key
Call Page NO NO YES NO
Call Park YES NO NO NO
Call Pickup YES NO NO NO
Call Pickup, Directed NO NO YES NO
Call Transfer YES NO NO NO
Call Waiting NO YES NO NO
Callers YES YES NO NO
Calling Name/Number
NO NO YES NO
Delivery Blocking
(CNNB)
Charge a Call (Ac count
NO NO YES NO
Code)
Conference 6-party YES NO NO NO
Controlled Interflow NO YES NO NO
Cust o mer O r ig i na t ed
NO YES YES NO
Trace (COT)
Direct Call Park NO YES YES NO
Display Agent NO YES NO NO
Display Queue NO YES NO YES
Emergency NO YES NO YE S
Forced Agent NO YES NO NO
Forward an Internal Call NO NO YES NO
Group Intercom Call NO YES NO NO
Incalls NO NO NO YES
100
 Loading...