


 Loading...
Nortel Knowledge Network
Meridian Digital
Telephones
Meridian SL-100
M3905 Call Center
User Guide
Enterprise Voice Solutions Customer Documentation

Table of contents
Introduction to your M3905 Call Center Telephone 9
M3905 Call Center Telephone 9
M3905 Call Center Features 10
Available ACD Features on the M3905 Telephone 11
Terms you should know 13
Your telephone’s controls 15
Programmable Line/Feature Keys (self-labeled) 15
Context Sensitive Soft Keys (self-labeled) 16
Call Processing Keys 16
Fixed Keys 17
Application Keys 20
Primary Directory Number 21
Individual Directory Number 21
Message Key 21
M3905 Call Center Meridian Digital Telephone 22
Your telephone display information 22
M3905 Display 22
Options List 23
Select a language 24
Change a Feature Key label 24
Adjust Screen contrast 26
Adjust volume 26
Choose Ring type 27
Select Call Log options 27
Live dial pad 28
Preferred name match 28
Area code set up 28
Call timer 29
Date/time format 29
Key click 29
3

Table of contents
Headset type 30
Headset port on call 30
Headset port external alerter 31
Display diagnostics 31
Call Center headset interface 32
Freeing your hands while on the job 32
Switching between the handset and the headset 32
Call Center agent/supervisor features 33
Agent Login 33
Agent Login Enhancement 33
Agent Logout 34
Agent features 35
Activity Code Fixed Key to activate Line-of-Business code 35 Answer Call Center Calls 35
Call Forcing 36
Multistage Queue Status Key/Lamp 36
Display Queue Threshold (MSQS enhancement for agents) 37 Emergency Key 39
Make Busy 39
Not Ready Key 40
Answer or Make Non-ACD Calls 41
Contact your supervisor 41
Walkaway and Return from Walkaway 42
Transfer to InCalls Key 43
Call Center supervisor features 44
Agent Keys 44
Answer Agent 44
Answer Emergency 45
Call Agent 45
Use Supervisor Observe and the Supervisor Headset Jack 45 Controlled Interflow 46
Night Service 46
4

Table of contents
Observe Agent 47
Display Agent Status 48
Display Queue Status 49
Your telephone non-ACD call features 50
Make a Call 50
Predial feature 51
Auto Dial 51
Redial Last Number Called 52
Activate Ring Again 52
Speed Call 53
System Speed Call (Network Speed Call) 54
Intercom Call 55
Group Intercom All Call 55
Intercom Call on a Predesignated Set 56
Individual Page from Group Intercom 57
Answer a Call 57
While you are away from your desk 58
Call Forward 58
Forward an Internal Call (Call Forward Busy/Don’t Answer Split) 59 Call Forward – Remote Activation 60
While on an active call 61
Place a call on Hold 61
Transfer a Call 61
Blind Transfer Recall 62
Call Park 63
Charge a Call or Charge a Forced Call 65
Inspect Key 65
Trace a Malicious Call 66
5

Table of contents
Incoming calls 67
Answer Call Pickup 67
Call Waiting 68
Talk with more than one person 69
Set up a conference call 69
Call Join 70
Preset Conference 70
Call features 71
Use Privacy Release 71
Paging 71
Busy Override 72
Make an Announcement over the Call Page 72
Use Station Camp-on 73
Class features on IVD sets 74
Anonymous Caller Rejection (ACRJ) 74
Automatic Callback (ACB) 74
Automatic Recall (AR) 75
Customer Originated Trace (COT) 76
Calling Name/Number Delivery Blocking (CNNB) 77 Selective Call Forward (SCF) 78
Directory display and navigation 79
Access your Callers List, Redial List, or Personal Directory 79 Directory password protection 80
Call Log 83
Access and use the Callers List 83
Access and use the Redial List 84
6

Table of contents
Use the Personal Directory 86
Access the Personal Directory 86
Add a Personal Directory entry 86
Add an incoming call 88
Add an outgoing call 89
Delete or edit a Personal Directory entry 89
Delete your Personal Directory 90
Use the Personal Directory to make a call 91
Use Card View 91
Search for an entry 92
Copy a number from the Redial List 93
Corporate Directory 94
Accessories for the M3905 97
Additional key caps 97
Accessory Connection Module (ACM) 97
Personal Directory PC Utility 97
Headset 97
Handset 97
Analog Terminal Adapter (ATA) 98
External Alerter and Recorder Interface 98
Key-based Access Expansion Module (KBA) 98
Display-based Access Expansion Module (DBA) 98
Feature Key chart 99
Meridian SL-100 Feature Access Codes (FAC) 103
7

Table of contents
8

Introduction to your M3905 Call Center Telephone
Introduction to your M3905 Call Center Telephone
Your Call Center Meridian Digital Telephone provides easy access to a wide range of business features. Your telephone system administrator assigns features to your feature keys and provides you with passwords and other codes as required.
The Meridian SL-100 system automatically controls incoming call routing to answering positions, and can provide music or recorded announcements to waiting callers.
One of the codes provided by your system administrator is the Feature Access Code (FAC) which you need in order to use some features. For other features, you may need a feature key.
In this document, Call Center telephone and Automatic Call Distribution telephone
(ACD) are interchangeable terms for the M3905 Call Center telephone.
Additional hardware options are available to expand the capabilities of the M3905 Call Center Telephone. See “Accessories for the M3905” on page 97.
M3905 Call Center Telephone
LCD Display |
|
|
Goodbye |
|
|
Hold |
Message Waiting Light/ |
|
|
||
|
Incoming Call Indicator |
|
LED |
Programmable Line/ |
|
Supervisor |
||
Feature Keys |
||
Observe Key |
(self-labeled) |
|
|
Date/Time Display |
|
|
Context Sensitive Soft Keys |
|
|
(self-labeled) |
|
|
Fixed Feature Keys |
|
|
In-Calls |
|
Volume Control Bar |
Copy |
|
Make Busy |
||
LED |
||
Headset |
Navigation Keys |
|
Mute |
Not Ready |
|
Supervisor |
||
|
||
Quit |
|
|
Emergency |
553-9043 |
|
|
9

Introduction to your M3905 Call Center Telephone
M3905 Call Center Features
The M3905 Call Center features:
•eight Programmable Line/Feature Keys (self-labeled), giving the user access to eight Line/Feature Keys
•four Context Sensitive Soft Keys (self-labeled), giving the user access to a maximum of 10 of the available features
•six Fixed Feature Keys (configured to fit the users business needs)
|
Fixed key caps: |
|
Optional key caps: |
|
— |
Headset (with LED indicator)* |
— |
Call Agent |
|
— |
In-Calls* |
— |
Observe Agent (Obv Agent) |
|
— |
Supervisor* |
— |
Answer Emergency (Ans |
|
— |
Emergency* |
|
Emerg) |
|
— |
Answer Agent |
|||
— |
Not Ready* |
|||
— Activity (for LOB codes) |
||||
— |
Make Busy* |
|||
|
|
|||
— Display Queue (Dsply Queue)
– for MSQS or Display Queue status
Note 1: The Headset and In-Calls Keys are required. Your system administrator can reconfigure the remaining four keys to any of the features listed above. Key caps need to be replaced to match the reconfigured feature.
Note 2: *The features with an asterisk are the default keys.
Optional accessories:
•Handset
•Headset
•Accessory Connection Module (ACM)
•Key-based Access Expansion Module (KBA)
•Display-based Access Expansion Module (DBA)
•External Alerter and Recorder Interface (MEARI)
•Analog Terminal Adapter (ATA)
•Personal Directory PC Utility
Note: The M3905 does not support handsfree calling.
10
Introduction to your M3905 Call Center Telephone
Available ACD Features on the M3905 Telephone
Common Agent/Supervisor Features
•Headset
•Non-ACD Call Keys
•Hold
•Personal Directory
•Call Log
•Redial List
•Options
•Call Park by ACD Agent
•ACD Call Transfer with Time
•Transfer to Incalls Key
•Agent Login Enhancement
Table 1 contains more Agent and Supervisor features for the M3905 ACD set.
Table 1 Agent and Supervisor features
Agent features |
Supervisor features |
|
|
Call Source Identification. |
Agent-Status Lamp. |
|
|
Called Name/Number Display. |
Display Agents Summary Key. |
|
|
Emergency Keys. |
Forced Agent Availability. |
|
|
Emergency Keys Enhanced. |
Controlled Interflow. |
|
|
Incalls Key. |
Agent Key. |
|
|
Call-Supervisor Keys. |
Call-Agent Key. |
|
|
Not-Ready Key. |
Night Treatment. |
|
|
ACD Station Maintenance and |
Supervisor Control of Night Service. |
Configuration Enhancements. |
|
|
|
ACD Multistage Queue Status |
ACD Observe-Agent Enhanced. |
Refresh. |
|
|
|
Multistage Queue Status Key/Lamp. |
ACD Status-Lamp Enhancement. |
|
|
ACD Walkaway/Closed Key |
ACD-Limited Enhanced Agent Features. |
Operation. |
|
|
|
Line of Business Codes. |
ACD Observe-Agent/Three-Way Calling. |
|
|
Make Set Busy. |
Extended Agent Observe. |
|
|
11

Introduction to your M3905 Call Center Telephone
Table 1 Agent and Supervisor features
Agent features |
Supervisor features |
|
|
Call Forcing. |
Flexible Call Observing-Nodal. |
|
|
Display Queue and Threshold. |
Observe Agent from 2500 set. |
|
|
Walkaway and Return from |
Observe-Agent Key. |
Walkaway. |
|
|
|
Agent Login and Login |
Display Queue-Status Key. |
Enhancements. |
|
|
|
|
Multistage Queue Status Display. |
|
|
|
Answer Agent. |
|
|
|
Answer Emergency. |
|
|
|
Display Queue Threshold. |
|
|
|
Make Set Busy. |
|
|
12

Terms you should know
Terms you should know
Agent Set – A telephone set configured to efficiently answer incoming calls that have been directed to a group of ACD telephones vs. a single person or line.
Attendant – The attendant is a telephone operator in your organization.
Call party information – When your telephone rings, the display shows Caller Line Identification (CLID) information. The system must have CLID enabled. The display module shows the phone number and name of the inbound call.
Context Sensitive Soft Key – The four keys located directly below the display on the M3905 are referred to Context Sensitive Soft Keys. The label and function of each key changes, depending upon the available features or the active application assigned to each key.
Date/time display feature – The Date/time display feature shows the month and date when the telephone is in an idle state.
Directory Number (DN) – The Directory Number is a number that consists of one to seven digits for a telephone, also known as an extension number.
Feature display – The display area shows status information about the feature in use. It also displays the name and status of the active session.
Feature Access Codes (FAC) – The Feature Access Codes are codes you dial in order to use a telephone feature instead of pressing a fixed feature or soft feature key. For your convenience, the FACs for your system can be printed on a page located at the back of this guide.
Fixed Feature Key – The Fixed Keys are keys on your telephone, that are labeled at the factory.
Indicator status – The status indicator can be an LCD or LED that indicates the status of a feature by the flash, wink, steady on, or off of the LCD or LED indicator.
Information line – The Information line of the display relates call information or application information.
Information display – The Information screen displays call activity, lists, prompts, and status of calls.
Interrupted dial tone – Interrupted dial tone is a broken or pulsed dial tone, heard when you access some of the features on your telephone.
Meridian SL-100 – The Meridian SL-100 system is your business communication system.
Off-hook – Off-hook is a term used to indicate that the telephone is active and ready to make a call. On the M3905 you can go off-hook when you press your Individual DN Key only. The M3905 does not go off-hook when you press the In-Calls Key or press your Primary DN (Call Center DN).
13

Terms you should know
Paging tone – A Paging tone is two beeps followed by a dial tone. You hear the special Paging tone when you are using the Radio Paging feature.
Primary Directory Number (PDN) – The Primary Directory Number is the main extension number on your telephone. It is referred to by the Primary Directory Number Key. On the M3905, the Primary Directory Number and your ACD Directory Number are the same. The In-Calls Key connects directly to the Primary DN Key. The Primary DN Key is the key located at the lower right-hand side of the upper portion of the display area.
Ringback/ring tone – The Ringback/ring tone is the sound you hear when a call you have made is ringing at its destination.
Shared Directory Numbers – A shared directory number is a DN (extension) that is shared by two or more persons.
Special dial tone – The special dial tone refers to three consecutive tones followed by dial tone that you hear when accessing some of your telephone features.
Supervisor Set – A telephone set configured to manage a group of ACD agents, and it can also be configured to answer incoming calls that are directed to a group of ACD telephones vs. a single person or line. You normally configure a Supervisor’s set with features that display agent and group performance.
14

Your telephone’s controls
Your telephone’s controls
This section describes the features on the M3905 ACD Meridian Digital telephone.
Programmable Line/Feature Keys (self-labeled)
In addition to secondary extension number(s), you can have features assigned to the Feature Keys on your telephone. An LCD indicator shows the status of the feature assigned to each key. See “Agent features” on page 35. Also see “Call Center supervisor features” on page 44.
Line Key
x2494
Auto Dial Key
Sales
Inspect Key
Display
Options Key
Options
Options
A steady LCD indicator appearing beside a Line (DN) Key means that the feature or line is active. A flashing LCD indicator means the line is on hold or the feature is being programmed.
An Auto Dial Key lets you dedicate a Line/Feature Key to a specific number.
The Inspect Key allows you to display information associated with the Line/Feature Keys. The display information on a second caller does not interfere with the current call in progress.
Note: If the Auto Display feature is enabled, Calling Line Identification is displayed for a second incoming call.
The Options Key is a dedicated Programmable Line/Feature Key. The Options Key is located at the top-left side of the upper display area. Press the Options Key to access the Options Menu.
Press the Options Key to make adjustments to your telephone’s volume and display contrast, as well as other feature settings.
15
Your telephone’s controls
Applications Key
Apps
x2498
The Applications Key allows you to access server applications, such as Corporate Directory, if available on your system.
The Individual DN Key allows you to make and receive non-ACD calls.
Context Sensitive Soft Keys (self-labeled)
The four keys located in the middle of the telephone, below the display screen, are your Context Sensitive Soft Keys. These keys can have the following assigned to them:
• Transfer
• Conference
• Call Forward
• Ring Again
• Call Park
• Call Pickup
• Speed Call
• Privacy Release
• Callers List
• Redial List
Call Processing Keys
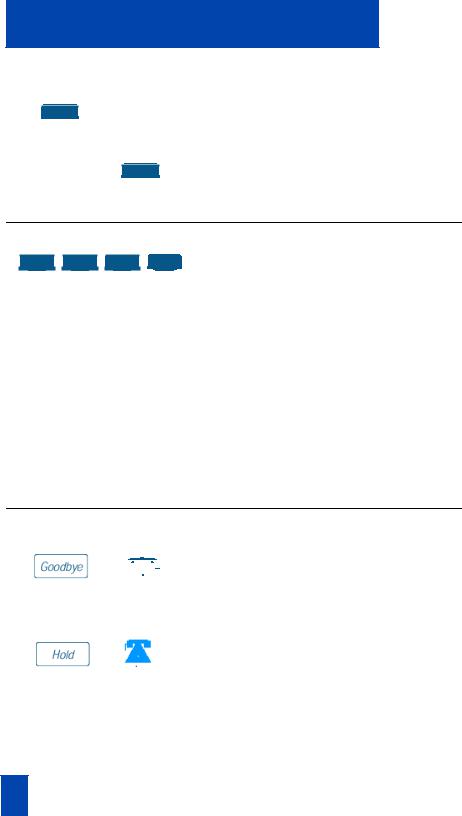
Goodbye Key
Press the Goodbye Key to terminate an
/ |
|
|
|
|
|
active call. |
Hold Key |
|
|
|
|
|
|
|
|
|
|
|
||
|
|
|
|
|
||
|
|
|
|
|
|
|
/ |
|
|
|
|
|
Place an active call on Hold by pressing the |
|
|
|
|
|
Hold Key. Return to the caller by pressing |
|
|
|
|
|
|
the extension key next to the flashing |
|
|
|
|
|
|
|
indicator. |
16

Your telephone’s controls
Mute Key
/
Volume Control Bar
Message Waiting Lamp
When engaged in a call, you can press the Mute Key. The party(ies) to whom you are speaking cannot hear you. When you wish to return to the two-way conversation, you must press the Mute Key again. On the M3905 ACD, the Mute Key applies to handset and headset microphones. The LED flashes quickly when the Mute option is in use.
Use the Volume Control Bar to adjust the volume of the handset, headset, speaker, ringer and buzzer. While on a call or while the telephone is ringing, adjust the volume on your set using the Volume Control Bar. Raise the volume by pressing the right side or lower the volume by pressing the left side. You can also adjust the volume of ringing, headset or buzz by selecting Volume adjustment in the Options Menu.
The Message Waiting Lamp lights when you have a message waiting. See the M3905 Call Center Telephone figure on page 9.
Fixed Keys
The Fixed Feature Keys on your M3905 ACD Meridian Digital Telephone are labeled at the factory. The Fixed Feature Keys include: Headset, Call Supervisor, Emergency, Not Ready, Make Busy, and In-Calls. These keys can be reconfigured to Activity Code, Answer Emergency, Answer Agent, Observe Agent, Display Waiting Calls or Call Agent to fit your business needs. The two keys that cannot be changed are Headset and In-Calls.
In-Calls Key
/
Press the In-Calls Key to answer incoming ACD calls. The In-Calls Key provides easy access to your Primary or ACD Directory Number of the agent position.
17

Your telephone’s controls
Headset Key
/ 
Supervisor Key
 /
/ 
Call Agent Key
 /
/ 
Press the Headset Key to toggle back and forth between headset and handset. It is common to both the agent and the supervisor. The headset indicator is lit when active.
Headsets vary in electrical, physical and audio characteristics. Performance perception is subjective so it is recommended that the headset user try using the headset with each of the three settings on internal and external calls. This helps determine which works best. As with all Meridian Digital Telephones, amplified and unamplified headsets are supported.
Note 1: If you have the handset option installed, press the Headset Key to switch between headset and handset. The handset is an optional hardware item. If you order the handset option kit, it is recommended that your system administrator install the equipment.
Note 2: Use the Amplified Headset setting if you are using the amplified headset.
From an agent set, press the Supervisor Key to access a supervisor.
From a supervisor set, press the Call Agent Key (optional key cap) and dial an agent’s secondary DN to communicate directly with the agent. Alternatively, if you configure an Agent Programmable Feature Key (not one of the Fixed Feature Keys) on the supervisor set for each agent, press the Call Agent Key followed by the associated Agent Key.
18

Your telephone’s controls
Emergency Key
 /
/ 
Not Ready Key
 /
/ 
Make Busy Key
 /
/ 
Activity Code Key
 /
/ 
Answer Emergency Key
 /
/ 
Answer Agent Key
 /
/ 
Press the Emergency Key to join the supervisor into a call when judged to be an emergency situation. It can also be used to add a recording device automatically.
The Emergency key is on the agent set.
Press the Not Ready Key to put the agent position in a Not Ready state. The Not Ready state takes the agent out of the ACD queue without logging the agent out. The Not Ready state allows the agent to perform and record post call processing duties connected to ACD calls. This key is common to both agent and supervisor sets.
Press the Make Busy Key to log out of the ACD queue and agent position. This key is common to both agent and supervisor sets.
Press the Activity Code Key and enter the appropriate line of business (LOB) code to record the activity the agent is performing.
Press the Answer Emergency Key on the Supervisor ACD telephone to answer agent emergency calls.
Press the Answer Agent Key on the Supervisor ACD telephone to establish a direct connection to the supervisor from an agent position.
19

Your telephone’s controls
Observe Agent Key
 /
/ 
Display Queue Key
DsplyQueue / 
Supervisor Observe Key
Press the Observe Agent Key (on the supervisor ACD telephone) to monitor the activity on the agent’s telephone.
Press the Display Queue Calls Key on the agent’s ACD telephone to display incoming calls waiting information.
The Display Queue Calls Key on the supervisor’s ACD telephone displays to the supervisor information on the number of manned agent positions, the number of calls waiting in the incoming call queue, number of calls logically queued, and the waiting time of the oldest call in the ACD queue.
Press the Supervisor Observe Key (LED) to allow a walk-around supervisor to plug the headset into the headset jack at the side of the agent’s telephone and monitor or join the conversation between the agent and the Call Center caller.
Application Keys
Quit Key
Copy Key
 /
/ 
Press the Quit Key to end an active application without affecting the state of any call on the telephone.
Press the Copy Key to copy entries from the corporate directory to the personal directory.
20
Your telephone’s controls
Navigation Keys
Press the Navigation Keys to move up, down, right, and left through features, menus, and application functions on the display.
Primary Directory Number
The lower-right key of your programmable keys is the ACD Primary Directory Number (DN) Key which is the same as the In-Calls Key. On an ACD set there can be a Primary ACD Directory Number, as well as an Individual Directory Number.
Individual Directory Number
The Individual Directory Number is the second Directory Number for the telephone. You can make outgoing calls on this number and receive incoming calls. The Individual line can be configured to have all the standard functions of a regular telephone line.
Note: You have only one Primary Directory Number assigned to your telephone. You can have additional Directory Number (DN) Keys assigned to your telephone.
Message Key
The Message Key can be configured as Key 17 and appears in the area of the Context Sensitive Soft Keys. In this configuration, you will only see it appear when you go off hook. In addition, it will only dial your voice mailbox when you have a message waiting. As an alternative, a Message Key may be configured as a Programmable Line/Feature Key (self-labeled). This configuration allows you to dial your voice mailbox whether or not you have a message waiting.
21

M3905 Call Center Meridian Digital Telephone
M3905 Call Center Meridian Digital Telephone
Your Call Center Meridian Digital Telephone provides easy access to a wide range of business features.
Your telephone system administrator assigns features to your feature keys and provides you with passwords and other codes as required.
Note: In this document Call Center telephone and the Automatic Call Distribution
(ACD) telephone are interchangeable terms for the M3905 Call Center Telephone.
Your telephone display information
M3905 Display
The upper portion of the display on the M3905 gives call status information; the lower display area is a two-line feature information display (see figure below).
Note: Refer to “Your Telephone’s Controls” on page 15 for more information on the display and specialized key information.
|
|
|
|
|
|
Options |
ConIntrFlw |
|
|
|
|
|
|
Dir/Log |
|
|
|
|
|
|
|
NightSvc |
|
Line/Feature |
Apps |
2639 |
|||||
Key Status |
|
|
|
|
|
AutoDial |
2637 |
|
|
|
|||||
|
|
|
|
|
|
|
|
|
|
|
|
|
|
|
|
|
|
|
|
|
|
|
Aug 20 5:48 P |
|
|
|
|
NORTEL NETWORKS |
|||
Date/time display |
|
|
|||||
Call party info |
|
|
|
|
|||
|
|
|
|
||||
Feature Status info |
|
|
|
5 New callers |
|||
Options info |
|
|
|
|
|
||
|
|
|
|
||||
Forward Callers Redial


Quit |
Copy |
553-9076C
22

Options List
Options List
The Options List allows you to customize certain characteristics of your phone. Screen prompts take you step-by-step through procedures and keep you informed on the status of the following settings: Language, Change feature key label, Screen contrast, Volume adjustment, Ring type, Call log options, Live dial pad, Preferred name match, Area code set-up, Call timer enable, Date/time format, Key click enable, Headset type, Headset port on call, Headset port external alerter, and Display diagnostics.
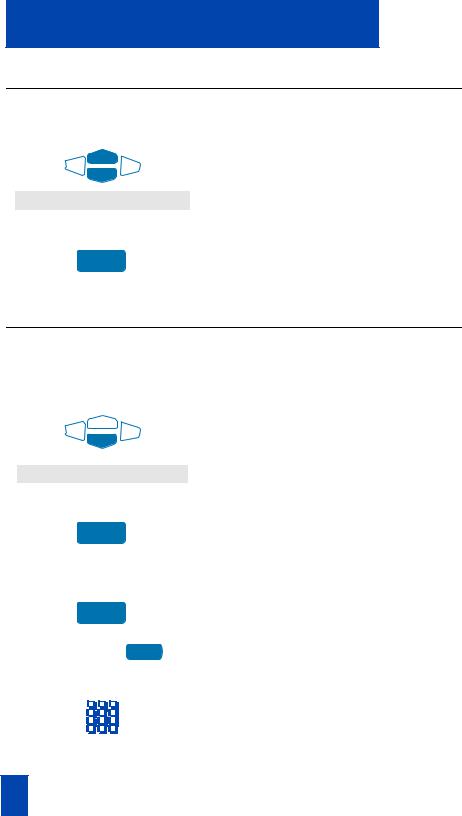
To change any option’s setting:
Options |
1. Press the Options Key. |
2.Use the Navigation Keys to scroll up or
|
down through the options list. |
Select |
3. Press the Select Key when the desired |
|
option is highlighted. |
4.Change the option’s settings. Refer to the following pages for details. The display also provides you with information to adjust your selection.
Done |
5. |
Press the Done Key to save your |
|
|
changes. |
|
6. |
Press the Quit Key or Options Key to |
Quit
exit.
or
Options
Note: If you press the Quit Key or Options Key before you press the Done Key, you exit the Options List without saving your changes.
23
Options List
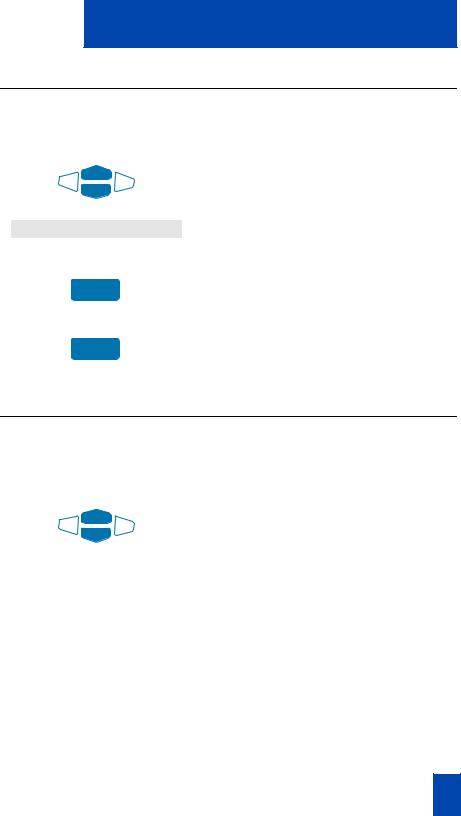
Select a language
The display is available in multiple languages. After you select Language. . . from the Options List menu;
1.Use the Navigation Keys to highlight
the desired language (e.g., German).
Deutsch
Select |
2. Press the Select Key. |
Press the Done Key to save changes. Press the Quit Key or Options Key to exit.
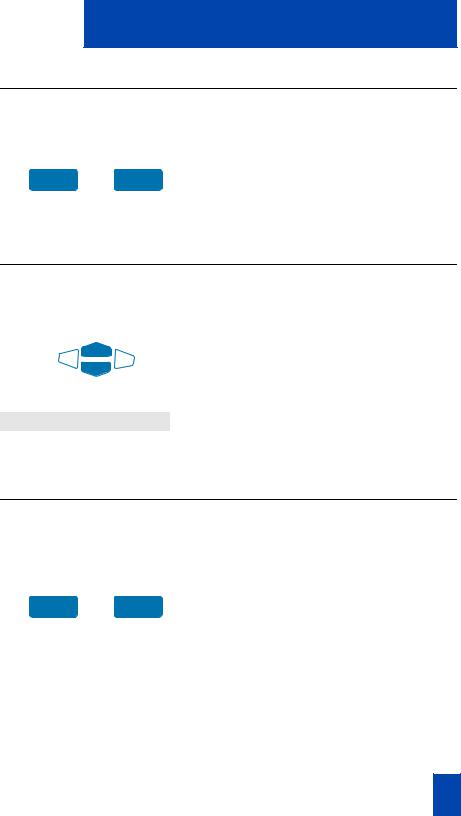
Change a Feature Key label
From the Options List you can change the name on the Programmable Line (DN)/Feature Keys (self-labeled). These keys are located on both sides of the top portion of the display area.
To change a Feature Key label:
1.Press the down Navigation Key once to
highlight Change feature key label.
Change feature key label
Select
Select
AutoDial
2.Press the Select Key.
This action takes you to the Feature Key menu and highlights Change feature key label.
3.Press the Select Key again.
The prompt asks you to select the Feature Key you want to change.
4.Press the Programmable Line/Feature
Key whose label you want to change (e.g., AutoDial).
5.Press the Dial Pad Key that is printed with the first letter in your new label. Press the key until the correct character appears.
24

Options List
Note: Use the Case Key to change the case of the letter, as needed. Press the Up Navigation Key to access special characters you may want to include in the label. Use the Navigation Keys to locate the character you want to include. Press the Select Key to choose the highlighted character. Press the Return Key to return to label entry without selecting a special character.
6.Press the right Navigation Key once to move the cursor (so you can enter the next letter) when the desired letter appears.
7.Repeat steps 5 and 6 until you have changed the entire label.
Press the Done Key to save changes. Press the Quit Key or Options Key to exit.
Note: For a detailed example of using the dial pad to enter text into your M3905 Call Center telephone, see “Add a Personal Directory entry” on page 86.
To restore one key label to the original:
1.From the Feature Key menu, use the down Navigation Key to highlight
Restore one key label.
Restore one key label
Select
Purchasing
2.Press the Select Key.
3.Press the Programmable Line (DN)/Feature Key (self-labeled) that you want to restore to the original label (e.g., Purchasing).
Press the Done Key to return to the Options List menu. Press the Quit Key or Options Key to exit.
Note: You cannot change the label on the primary DN. You can press the Shift Key, if the label you want to change is on the second layer of Programmable Line/Feature Keys (self-labeled).
25

Options List
Adjust Screen contrast
The Screen contrast option allows you to adjust the contrast of the display on your telephone. After you select Screen contrast from the Options List menu;
Lower Higher
or
From the Contrast screen, press the Lower Key to decrease the display contrast level, or press the Higher Key to increase the display contrast level.
Press the Done Key to save changes. Press the Quit Key or Options Key to exit.
Adjust volume
Use the Volume adjustment option to select a comfortable sound level for the various audio signals.
Note: After you select Volume adjustment. . . from the Options List menu, a list of adjustable items for your telephone model appears. It is recommended that you adjust these parameters while you are on a telephone call so that you can judge the impact of the changes your are making.
To adjust the Ringer volume:
Ringer |
|
1. |
Select Ringer from the Volume menu. |
Lower |
Higher |
2. |
Press the Lower Key to decrease the |
|
or |
|
ringer volume, or press the Higher Key |
|
|
|
to increase the ringer volume. |
Press the Done Key to save changes. Press the Quit Key or Options Key to exit.
Use the procedure above to adjust the volume on the following items:
Buzzer |
|
Headset listen |
|
|
|
|
|
|
Speaker |
|
Headset talk |
|
|
|
Handset listen |
|
Headset sidetone |
|
|
|
Note: Headset sidetone is the sound of your own voice that you hear in the headset speaker.
26
Options List
Choose Ring type
The Ring type option allows you to choose from among the various ringing sounds available for your telephone model. After you select Ring type. . . from the Options List menu;
1.Use the Navigation Keys to scroll
through the list of ring types.
Ring type 3
Play
Select
2.Press the Play Key to sample a ring tone.
3.Press the Select Key to activate the desired ring type.
Press the Done Key to save changes. Press the Quit Key or Options Key to exit.
Select Call Log options
The Call Log options setting provides a choice of logging all incoming calls, logging only the unanswered calls, or not logging any calls. The Call Log holds up to 100 different incoming entries. After you select Call log options from the Options List menu;
|
From the Log options menu, use the |
|
|
Navigation Keys to highlight and select |
|
|
either: |
|
|
Log all calls |
|
Log all calls |
||
or |
or |
|
|
Log unanswered calls |
|
Log unanswered calls |
||
|
||
|
Note: New call indication must be set to |
|
|
||
|
On, if you want Call Log notification. |
Press the Done Key to save the selection. Press the Quit Key or Options Key to exit.
27

Options List
Live dial pad
The Live dial pad option allows you to press any dial pad key to automatically access a dial tone. After you select Live dial pad from the Options List menu;
On |
Off |
From the Live dialpad screen, press the |
|
or |
On Key to turn on Live dial pad, or |
|
|
press the Off Key to turn off Live dial |
|
|
pad. |
Press the Done Key to save changes. Press the Quit Key or Options Key to exit.
Preferred name match
The Preferred name match option displays the names of incoming and outgoing callers as stored in your Personal Directory, if the telephone number matches the one stored in your directory. This option allows you to personalize the displayed names for incoming and outgoing calls. After you select Preferred name match from the
Options List menu;
On |
Off |
From the Name match screen, press the |
|
or |
On Key to turn on Preferred name |
|
|
match, or press the Off Key to turn off |
|
|
Preferred name match. |
Press the Done Key to save changes. Press the Quit Key or Options Key to exit.
Area code set up
Using the Area code set-up option causes the Callers List and Calling Line ID (CLID) display to show the number/extension followed by the area code/prefix in parenthesis. This makes it easier to identify local calls and internal calls. You can define up to three codes. After you select Area code set-up from the Options List menu
1st Code: 408 2nd Code: 3rd Code:
Use the Navigation keys to place your cursor in the first line and enter an area/country code of your choice.
Note: You can enter up to three codes of your choice.
Press the Done Key to save changes. Press the Quit Key or Options Key to exit.
28
Options List
Call timer
The Call timer enable option measures how long you are on each call. After you select Call timer enable from the Options List menu;
On |
Off |
From the Call timer screen, press the |
|
or |
On Key to turn on the Call timer, or |
|
|
press the Off Key to turn off the Call |
|
|
timer. |
Press the Done Key to save changes. Press the Quit Key or Options Key to exit.
Date/time format
There are eight Date/time formats. Four formats are based on the 12-hour clock and four are based on the 24-hour clock. After you select Date/time format. . . from the Options List menu;
Use the Navigation Keys to scroll through the eight formats. The sample formats appear on the upper-right side of the display area.
Format 3
Press the Done Key to select the highlighted format. Press the Quit Key or Options Key to exit.
Key click
The Key click option causes the handset or speaker to produce a clicking sound when you press the telephone keys. After you select Key click enable from the Options List menu;
On |
Off |
From the Key click screen, press the On |
|
or |
Key to turn on Key click, or press the |
|
|
Off Key to turn off Key click. |
Press the Done Key to save changes. Press the Quit Key or Options Key to exit.
29

Options List
Headset type
The Headset type option allows you to select one of the three different headset types: Type 1, Type 2, or Amplified. Select the setting that works best for the headset that you are using. For more information, see“Call Center headset interface” on page 32). After you select Headset type from the Options List menu;
|
From the Headset type menu, use the |
|
Navigation Keys to highlight and select |
|
either: |
|
Type 1 headset |
Type 1 |
|
or |
or |
|
Type 2 headset |
Type 2 |
|
or |
|
|
or |
Amplified |
|
|
Amplified headset |
|
Press the Done Key to save selection. Press the Quit Key or Options Key to exit.
Headset port on call
The Headset port on call option requires that a lamp-type accessory be connected to the headset port. When the Headset port on call option is activated and the user is on a call, the lamp lights providing an indication that a call is in progress. After you select
Headset port on call from the Options List menu;
On |
Off |
From the On call screen, press the On |
|
or |
Key to turn on Headset port on call, or |
|
|
press the Off Key to turn off Headset |
|
|
port on call. |
Press the Done Key to save changes. Press the Quit Key or Options Key to exit.
Note: Additional equipment is required to implement this option. For more information please contact your Nortel Networks distributor.
30
Loading...