

Page 1
User guide
Nortel Networks
M760
Digital set
Page 2

Page 3

Table of contents
Description 1
• Your M760 1
• Connections 2
• Accessories for the M760 2
• Recommendations and safety 3
• Presentation of the M760 4
• Interactive display 6
• Using the interactive keys 7
• Using the navigator 7
• Using the alphabetical keypad 8
Dialing methods 10
• Using the hands free mode 10
• Using the micro-headset mode 11
• Using the loudspeaker mode 12
• Using the intercom mode 12
• Using the prenumbering mode 13
• Adjusting listening volume 13
Dialing a correspondent 14
• Dialing the number 14
• Using the programmable keys 14
•
Using the LNR (Last Number Redial) feature
15
•
Calling the attendant (switchboard operator)
15
• Calling back a caller 15
• Calling an internal or external correspondent by name 16
• Calling a correspondent from the directories by name 16
• Using the automatic redial function 18
• Notifying the correspondent 18
• Using the callback later function 19
Receiving a call 19
• Adjusting ring volume 19
• Silencing ring tone 20
• Answering a call 20
• Diverting a call to another extension 20
• Intercepting a call intended for another extension 21
I
Page 4

Table of contents
II
During a call 22
• Using the mute feature 22
• Recording the conversation 22
• Placing a correspondent on hold and taking the call
on the same extension 22
• Placing a correspondent on hold and taking the call
on another extension 23
• Transferring a call 23
• Calling a second correspondent 23
• Answering a second call 24
• Switching from one correspondent to another 25
• Releasing one correspondent 25
• Setting-up a conference call 25
• Other features available during a call 26
• Ending a call 27
• Consulting the stored numbers 27
The LNR calls log 28
• Consulting the LNR (last number redial) calls log 28
• Calling a correspondent from the LNR calls log 29
• Storing the name and/or the number in the private directory 29
• Deleting a record from the LNR calls log 29
• Deleting the entire LNR calls log 30
The private directory 31
• Accessing the private directory 31
• Creating a record In the private directory 31
• Modifying or deleting a record from the private directory 32
• Customizing labels or private directory lists 33
• Searching by name within the private directory 34
• Searching in a list within the private directory 34
• Calling from the private directory 35
• Deleting all records from the private directory 35
The abbreviated numbers directories
36
• Programming a personal abbreviated number 36
• Editing or canceling a personal abbreviated number 37
• Calling a personal abbreviated number 37
• Calling a collective abbreviated number 37
Page 5

Table of contents
III
The incoming calls log 38
• Consulting the incoming calls log 38
• Calling a correspondent from the incoming calls log 40
• Storing the name and/or the number in the private directory
40
• Deleting a record from the incoming calls log 41
• Deleting all records from the incoming calls log 41
The information directory 42
• Consulting the information directory 42
• Filling in the information directory 42
The internal names list 44
• Consulting the internal names list 44
• Calling an internal correspondent 44
The external names list 45
• Consulting the external names list 45
• Calling an external correspondent 45
The programmable keys 46
• Programming a key 46
• Deleting, modifying and exiting programming 49
• Identifying programmed keys 50
The call forwarding function 51
• Forwarding your calls 51
• Canceling call forwarding 53
• Programming call forward on a programmable key 53
• Overriding the call forwarding function 54
The voice mailbox 55
• Configuring and customizing your voice mailbox 55
• Activating forwarding of calls to the voicemail system 55
• Consulting messages received 56
• Programming access codes on a programmable key 57
Page 6

The multikey function 58
• Programming the multikey function 58
• Communicating with the multikey function 59
The multiline function 60
• Programming the multiline function 61
• Communicating with the multiline function 63
The supervision function 64
• Programming the supervision function 64
• Communicating with the supervision function 65
The filtering function 66
• Programming the filtering function 66
• Communicating with the filtering function 67
The alarm function 69
• Programming the Alarm function 69
• Consulting for changing or canceling an appointment 70
The DND (Do Not Disturb) function 71
• Using the DND function 71
• Overriding the DND function 71
• Programming the DND function on a programmable key 72
Other functions 73
• Replace function 73
• Identity presentation function 73
• Notification function 74
• Out of the office function 74
• Data transmission line protection function 75
Table of contents
IV
Page 7

Table of contents
Locking the set 76
• Locking your set 76
• Calling an external correspondent from the locked set 76
• Calling an emergency number from the locked set 77
• Deactivating set locking 77
Settings
• Choosing and setting the set ring 78
• Setting the display contrast 79
• Adjusting the key beep volume 80
• Customizing the set password 80
• Associating a directory with direct keypad call 81
• Choosing the display language 81
• Programming a micro-headset connection 8 3
Miscellaneous 84
• Glossary (words to know) 84
• A problem? Check… 85
V
Page 8

Page 9

Description
1
Your M760
A new set has just been installed for you.
Your M760 digital set gives you access to all the services and features available within the
NORTEL NETWORKS M6500 IP PBX and SUCCESSION CSE 6500 ranges.
Your M760 digital set is full-featured and high-performing, yet simple and easy to use too,
thanks to:
- an alphabetical keypad (letting you dial by name),
- the presentation of the caller identification associated with a private directory
of 100 numbers,
- an incoming calls log,
- a message lamp,
- a set of 20 memory keys (used to program numbers or functions),
- a display unit associated with 5 interactive keys and a navigator.
Let yourself be led step-by-step
One of the prime advantages of your telephone set is its interactive display, which keeps
you informed of available telephone services at appropriate times.
Five interactive keys, each having a correspondence with messages shown on the display,
give you access to these services: simply press the desired key.
You no longer need to look for information in a directory, and no more complicated codes
to remember.
Efficient communications
Your new phone is a true "hands free" type that will help you further increase the efficiency of
your communications.
Without lifting your handset, you can make a call and be connected. You will be able to
consult documents or take notes during a conversation.
Similarly, you can answer a call by simply pressing the "hands free" key.
This User Guide will lead you step-by-step in how to use this new tool. You are recommended
to take a little time out to familiarize yourself with it.
As soon as you have mastered the basic functions, you will be ready to use your new phone.
You will find that there is nothing difficult or complicated to understand in using this
telephone: just read and follow the instructions. You will soon see how fast this telephone
is to use, and how much time it saves you, and you will soon be wondering how you managed
without it before.
So… just follow the guide!
Page 10
Description
2
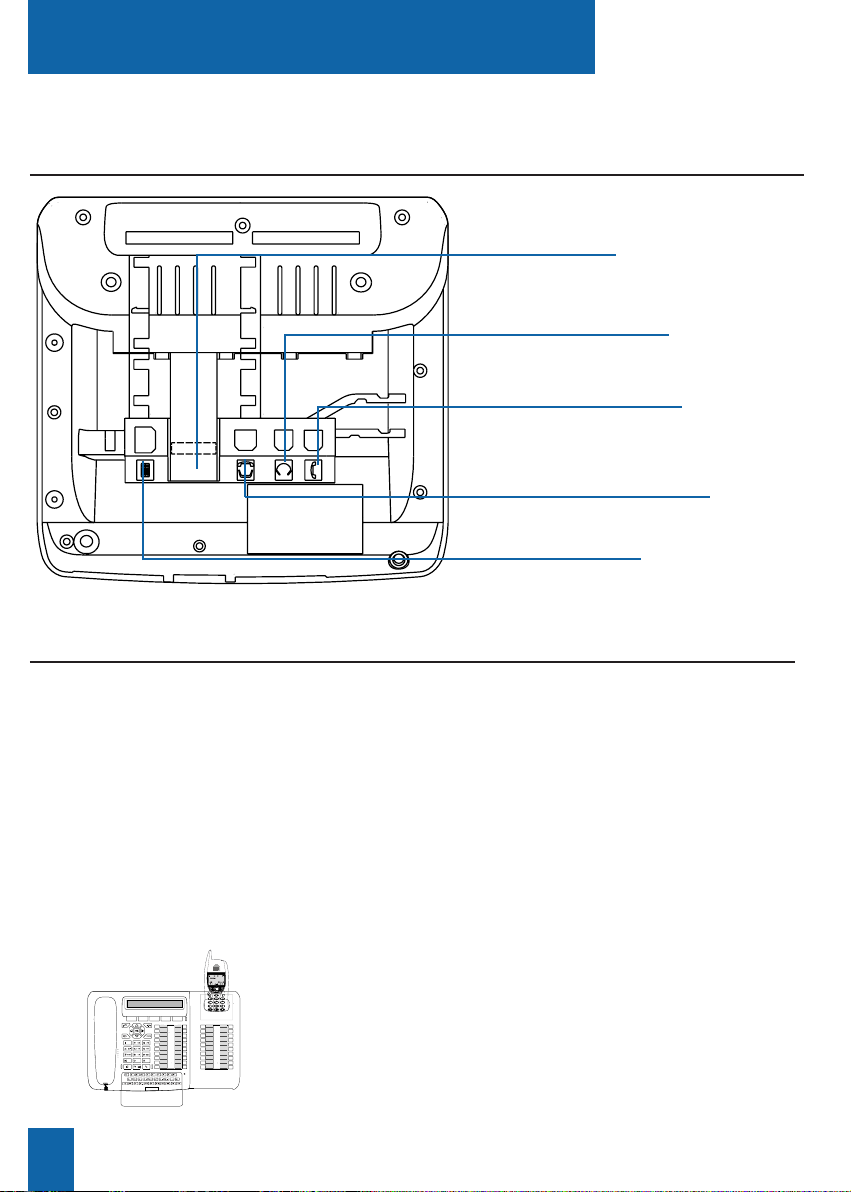
* Consult your system operator.
Handset cord
connector
Line cord
connector
Analog options board
connector*
(under the trap)
Connections
Extension module
connector*
Micro-headset
connector*
Accessories for the M760*
The analog options
board
The analog options board allows you to connect analog devices
(such as modem, recorder or remote ring)
The M760 is designed to accommodate a variety of options (*).
The micro-headset
The M760 lets you plug-in a micro-headset. After connection
and programming (see the section on Customizing your set),
the headset mode replaces the hands free mode.
The extension module lets you enhance your set by adding a
further 20 programmable keys. You can add up to two keypad
extensions, giving you a total of 60 programmable keys.
Two models are available as an option:
- the M700 simple extension module;
- or the M705 extension module equipped with a charger for
DECT mobile.
Forward
M.Martin
Filter
Assistante
Home
Banque
Taxi
Travel A
Line 1
Line 2
Superv.
Superv.
MEM
MESS
MENU
Jeudi 07 septembre 16:59
Comm Recup Service Langue
Renvoi
M.Martin
Filtrage
Assistante
Domicile
Banque
Taxi
A.Voyage
Libne 1
Libne 2
Superv.
Superv.
The extension
module
DESCRIPTION
Page 11
Description
3
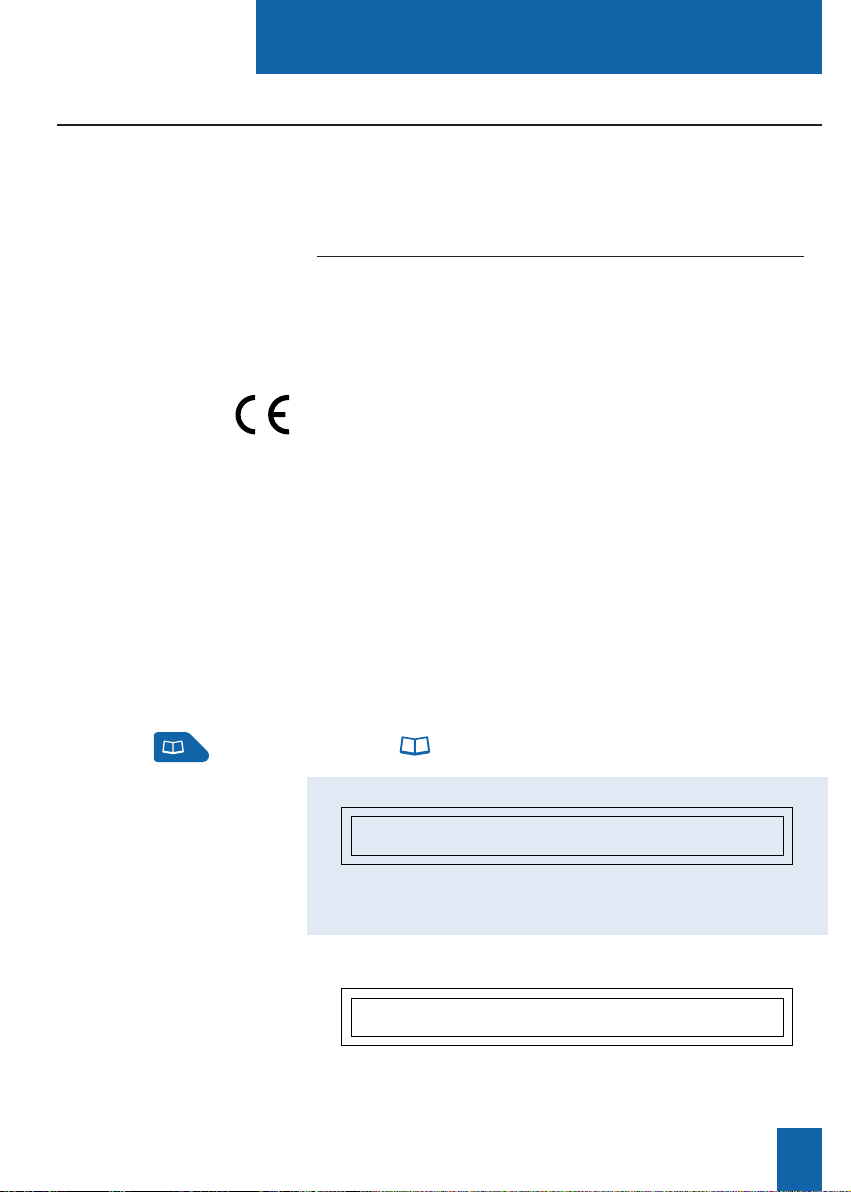
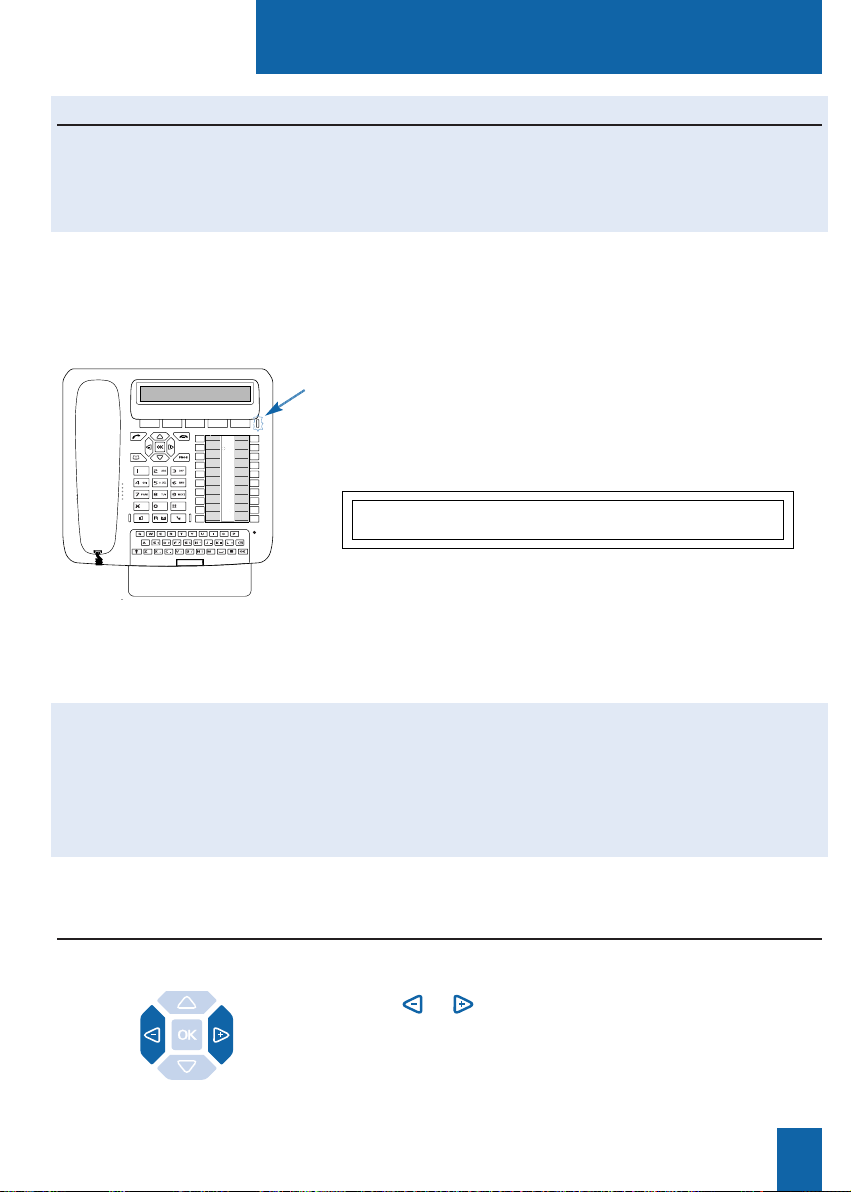
To find out
the system's
software version
The availability of certain functions described in this guide
may depend on the version or configuration of your system.
We would advise you to carry out the following test (after
connecting the set) to find out the version of the system
to which your set is connected.
- Press the key.
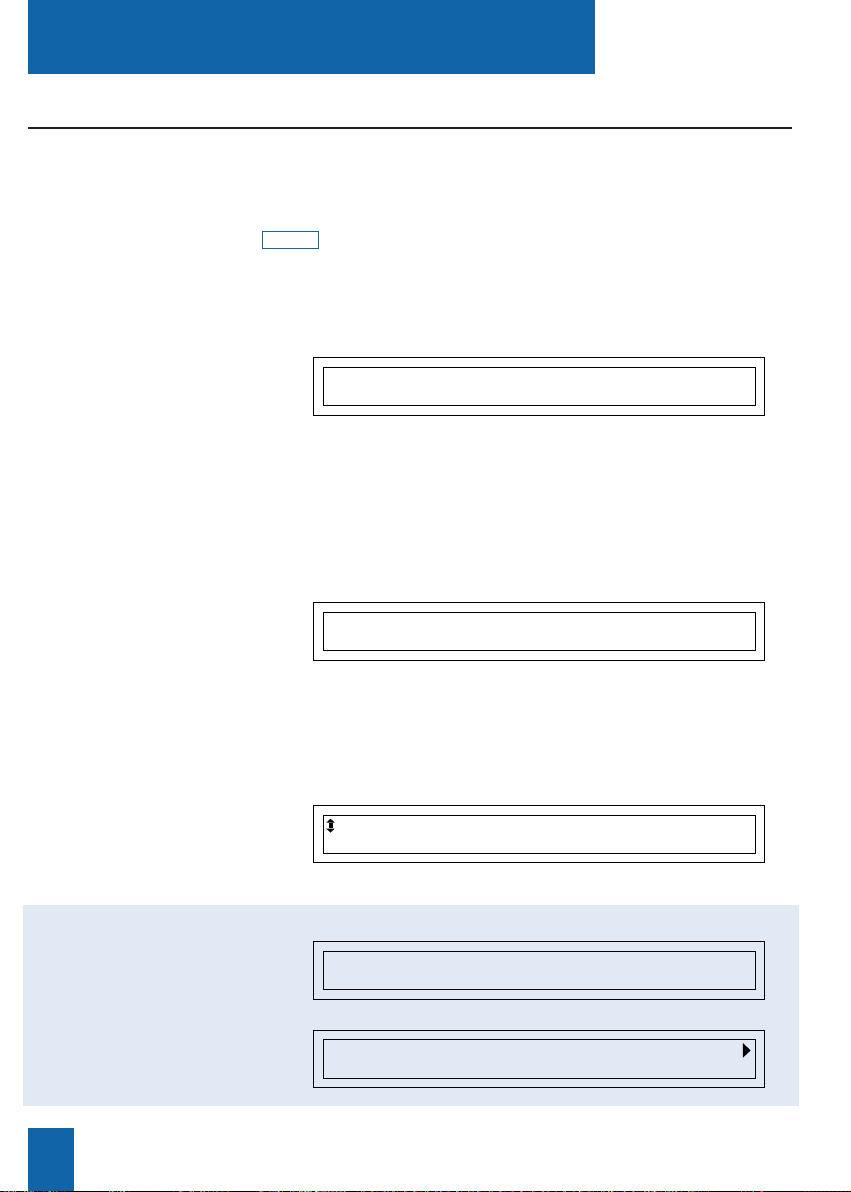
Either the display shows the following:
The indications and additional features which are highlighted
on a blue background are relevant to you in particular.
Otherwise:
The features highlighted on a blue background in this guide are
not available with your current system version.
If you are
in any doubt,
consult your
system operator.
WHICH DIRECTORY DO YOU WANT TO CONSULT?
Private Abbrev. Log Info -->
DIAL THE ABBREVIATED NUMBER: _
< -Start
Do not install the equipment in a damp room or near a water
outlet.
The equipment must be used at a temperature between 5 °C
and 45 °C.
This equipement can not be connected to the public network.
This equipment is designed to be installed with a private switching system of NORTEL NETWORKS M6500 IP PBX and
SUCCESSION CSE 6500 ranges.
The voltage on this network is classed TNV1 (Telephone Network Voltage) according to standard EN 60-950.
This certifies the conformity of the equipment with the
regulations which apply in accordance with the directive
R & TTE 1999/5/EC.
Use a cloth which has been dampened in slightly soapy water,
and then wipe with a dry cloth.
Your equipment will retain its new appearance if you do not
use any solvents or household cleaning products.
Recommendations and safety
Caution
Telephone
connection
CE marking
Maintenance
Page 12
Description
4
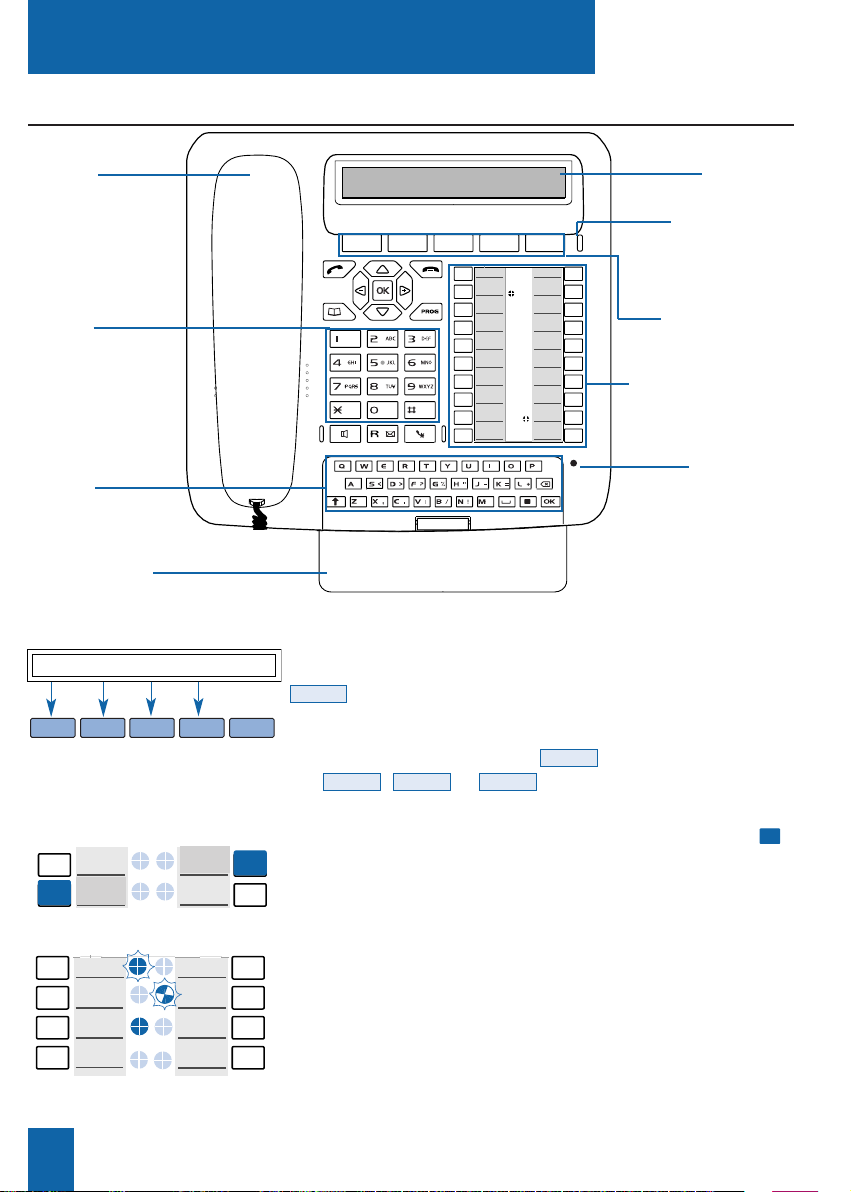
Description of the M760
Monday 16 October 09:26 AM
Comm Pick-up Funct. Lang.
Forward
M.Martin
Filter
Assistant
Home
Bank
Taxi
Travel A
Line 1
Line 2
Superv.
Superv.
Telephone
handset
Interactive
display unit
Message lamp
(incoming call indicator
and message notification)
Dialing
keypad
Alphabetic
keypad
Programmable keys
and icon display
Interactive display unit: made up of an information line and a
second line which contains the functions (symbolised in this guide by
) which may be accessed by interactive keys.
The display indicates the date and time when inactive.
If an event occurs (call reception, message deposit, etc.) the displays
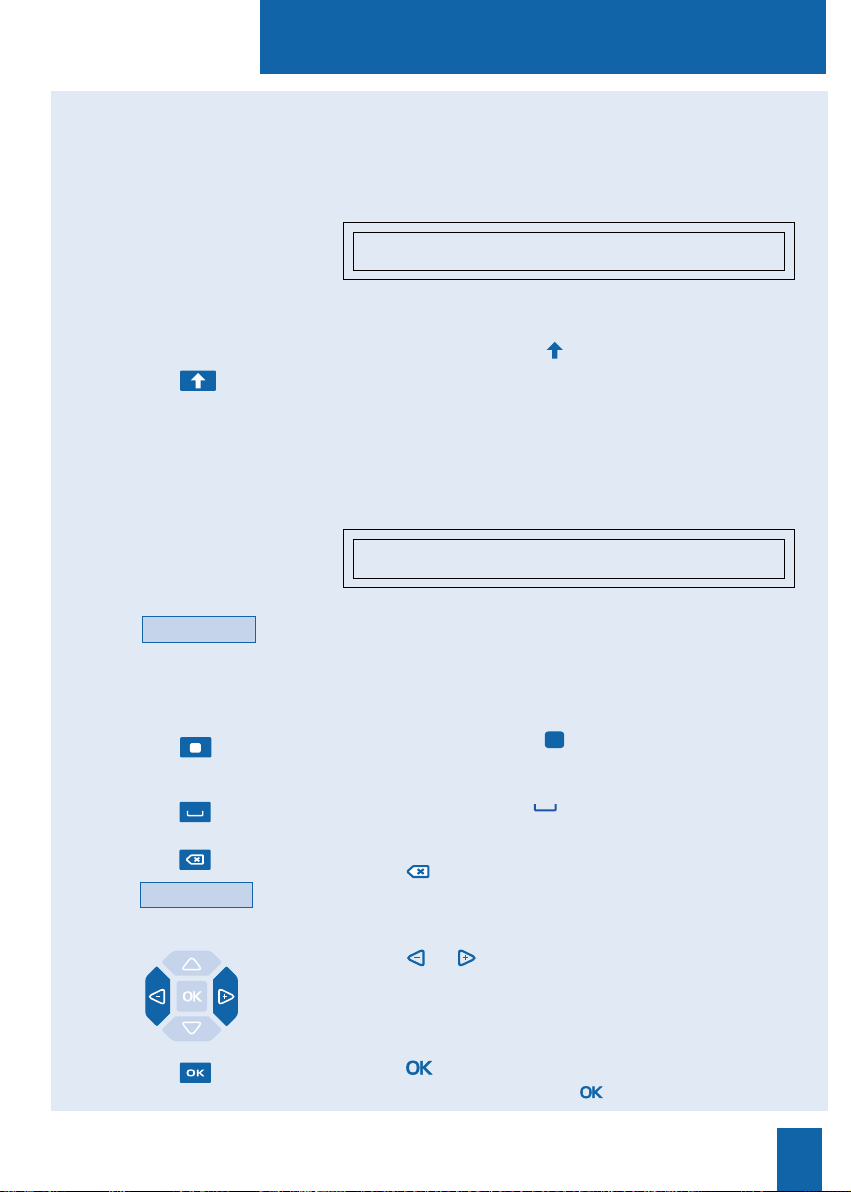
shows other information; press the key to delete this message.
The , or keys are used to access the next or
previous functions.
20-Key Programmable Keys (symbolised in this guide by ),
used to store:
- the numbers of your regular correspondents,
- the functions you use most frequently.
Icons associated with the programmable keys. These allow
you to view the status of the line or the programmed function:
- incoming call
,
- call waiting,
- connected or function activated,
- line free or function deactivated.
Alphabetic keypad: used to enter text and call a correspondent by
name. Remove the keypad cover to see the keypad.
<--More-->
Cancel
xxxx
Monday 16 October 10:40 AM
Comm Pick-up Funct. Lang.
Microphone
(hands free mode)
Keypad cover
Interactive keys
M.Martin
Call
forward
Call
Forward
Line 1
Call
Forward
M.Martin
M.Martin
Filtering
Page 13
Description
5
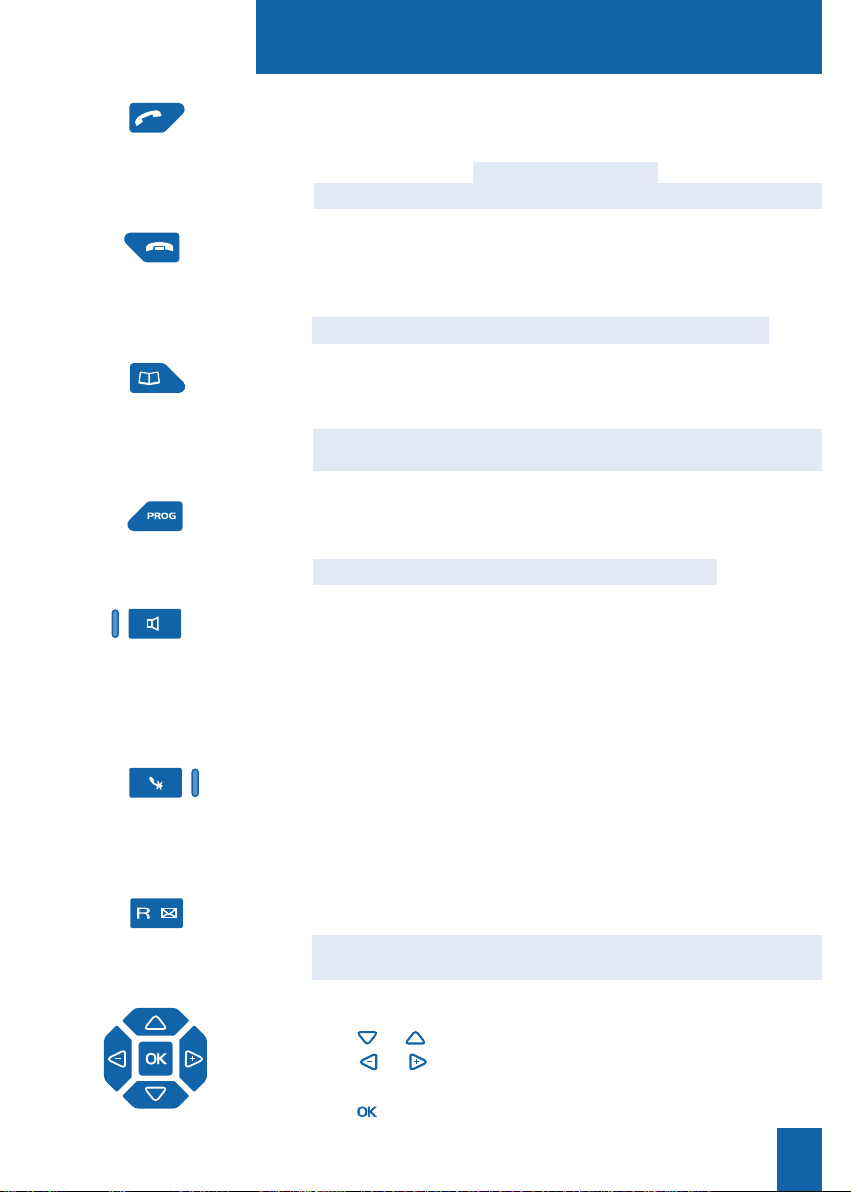
Green key: this is used
- to answer an incoming call in hands free mode,
- when the set is idle or in communication, to call back the last number
dialed (LNR function) or to access the LNR log,
- when consulting the directories and logs, to call the displayed number.
Red key: this is used
- to disconnect ringing during an incoming call,
- during a communication, to end the call,
- during programming, to cancel a setting or end a programming sequence,
- when the set is idle, to lock/unlock the set (hold down the key).
Directory key: used to activate the directory function when the set is
idle or in communication
- to call a personal abbreviated number,
- to consult and make calls from the directories and the incoming calls
log.
Programming key: this is used to access
- the programming (numbers and functions),
- the settings for the set (rings and contrast),
- the customization of the set (directories management).
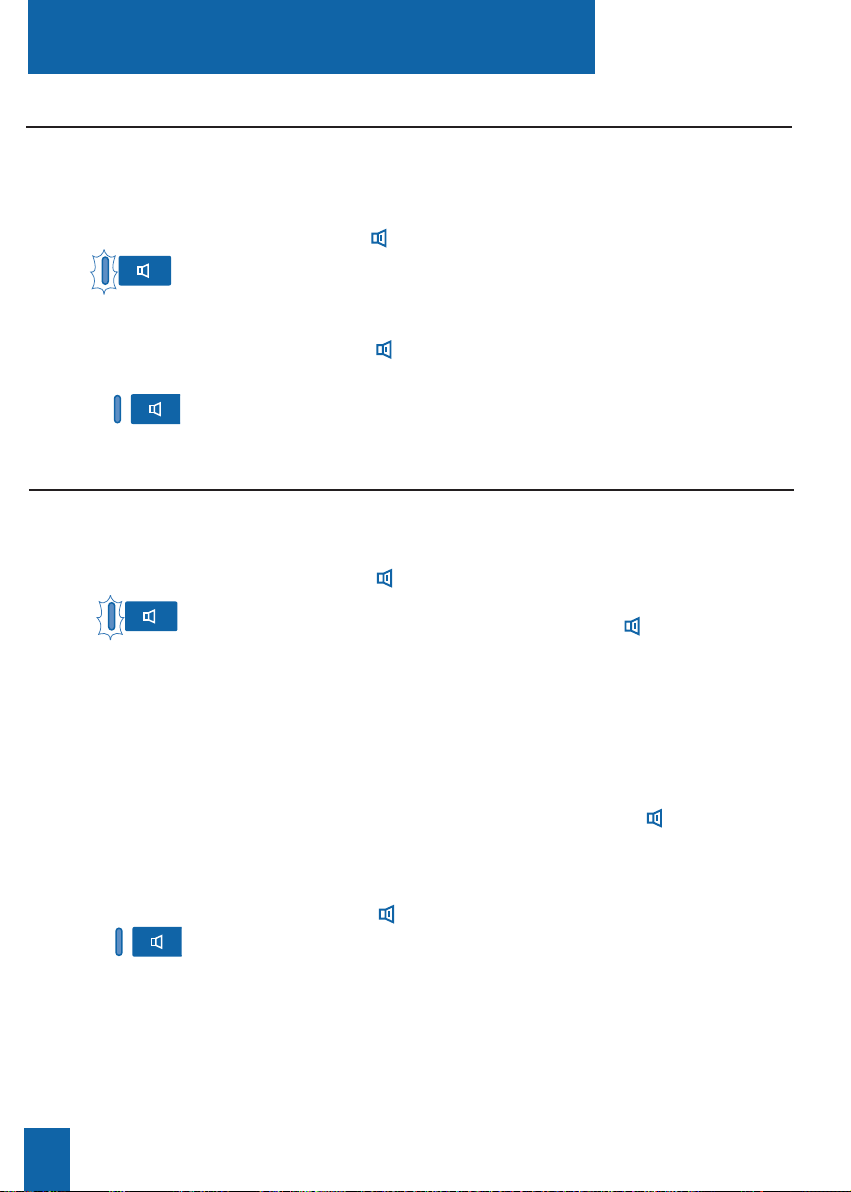
Loudspeaker key: this is used
- when the set is idle, to enable and to disable the intercom function,
- during an incoming call, to answer in hands free mode,
- during a call, to enable and to disable the loudspeaker and hands free
modes.
The associated lamp illuminates or blinks depending on the case.
Mute key: during a call, this key lets you to cut-off the microphone
(handset, hands free or micro-headset) and talk without your
correspondent being able to hear you.
The associated lamp illuminates to remind you that the feature has
been enabled.
R key (Flashing): during a call, this key is used to access dialing
(to call a second correspondent, for instance).
Voice mail direct access key: when the set is idle, this key is used
to call your voice mailbox.
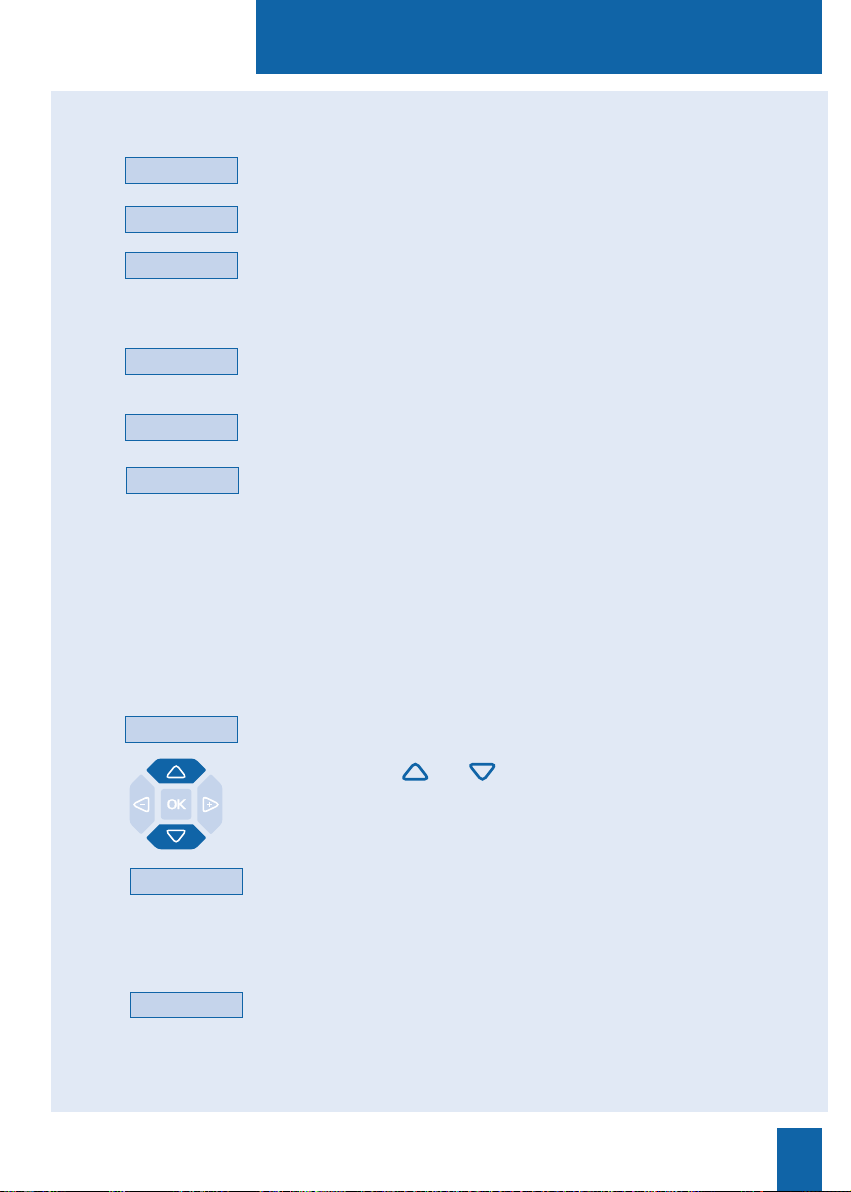
Navigator: is made up of four direction keys and one central key.
- The or keys are used to display a selection or a record.
- The or keys are used to display additional information about
the record or to carry out a setting.
- The key is used to confirm a choice, a setting or an entry.
Page 14
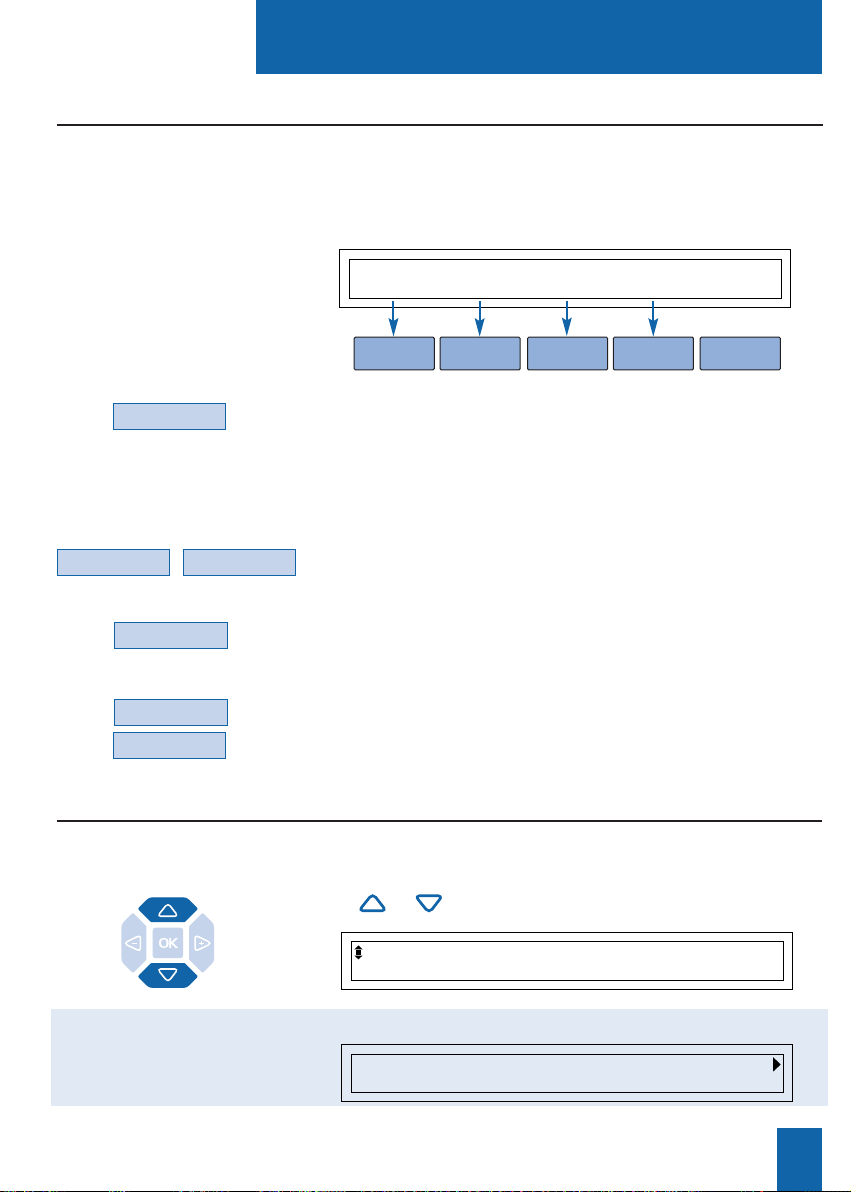
The M760 digital set incorporates a display associated with 5 interactive keys and a navigator.
You can adjust the contrast of the display (refer to the section on Settings).
The display consists of one information line and a second line which contains the functions
(symbolized in this guide by ) which may be accessed by pressing the interactive keys.
Note: the information on the display depends on how the set is programmed, and the features
available*.
xxxx
Description
6
When the set is idle, the display shows the time and date.
- If an event occurs (a call is received, a message is left, etc),
The display shows other information; pressing the Cancel interactive key will erase the message.
The first line of the display shows the identity of the other correspondent (or parties) during a call.
The second line shows functions that can be invoked during
a call, by pressing the interactive keys.
The display shows the selection:
The display shows the record information:
Interactive display
Thursday 25 May 10:40 AM
Comm Pick-up Funct. Lang.
C. CHARLES
Comm Prenum <- Start Park
When the set is
idle:
During a call:
During
programming:
* Depending on the features provided by your system operator.
PROGRAMMING
MARTIN 15/03 10:00 AM
Call Delete Create
C. CHARLES XXXXXXXXXX
Call Delete Modify Create Lists
While consulting the
directories
or the incoming calls log:
Page 15
Description
7
. To invoke a function, press the interactive key associated with
the desired function (Comm, for example).
In certain cases, the number of functions available can be
greater than 5.
. To invoke subsequent functions,
press the interactive key -->or More.
. To invoke preceding functions,
press the interactive key <--.
At any time,
. to return to previously display, press Previous,
. to return to idle display, press Content.
Using the interactive keys
-->
<--
Using the navigator
Thursday 25 May 10:40 AM
Comm Pick-up Funct. Lang.
Comm
More
The display shows a menu that can be invoked via the interactive keys. Each function shown on
the second line of the display is assigned to an interactive key.
Note: in some cases, some interactive keys may not be assigned to any function.
Previous
Content
The navigator lets you scroll through the different menus (or pages) and make a selection.
The icons of the display show the available choices.
. The or keys are used to display a selection:
or a record:
RING
MARTIN 15/03 10:00 AM
Call Delete Create
Page 16
Your M760 is equipped with a full 31-key keypad. To gain access to the keypad, lower the cover.
Description
8
Using the alphabetical keypad
Call by name:
This keypad lets you enter the first letters of a name for a search
in the directories, before calling the correspondent (refer to the
section on Calling a correspondent, Call by name).
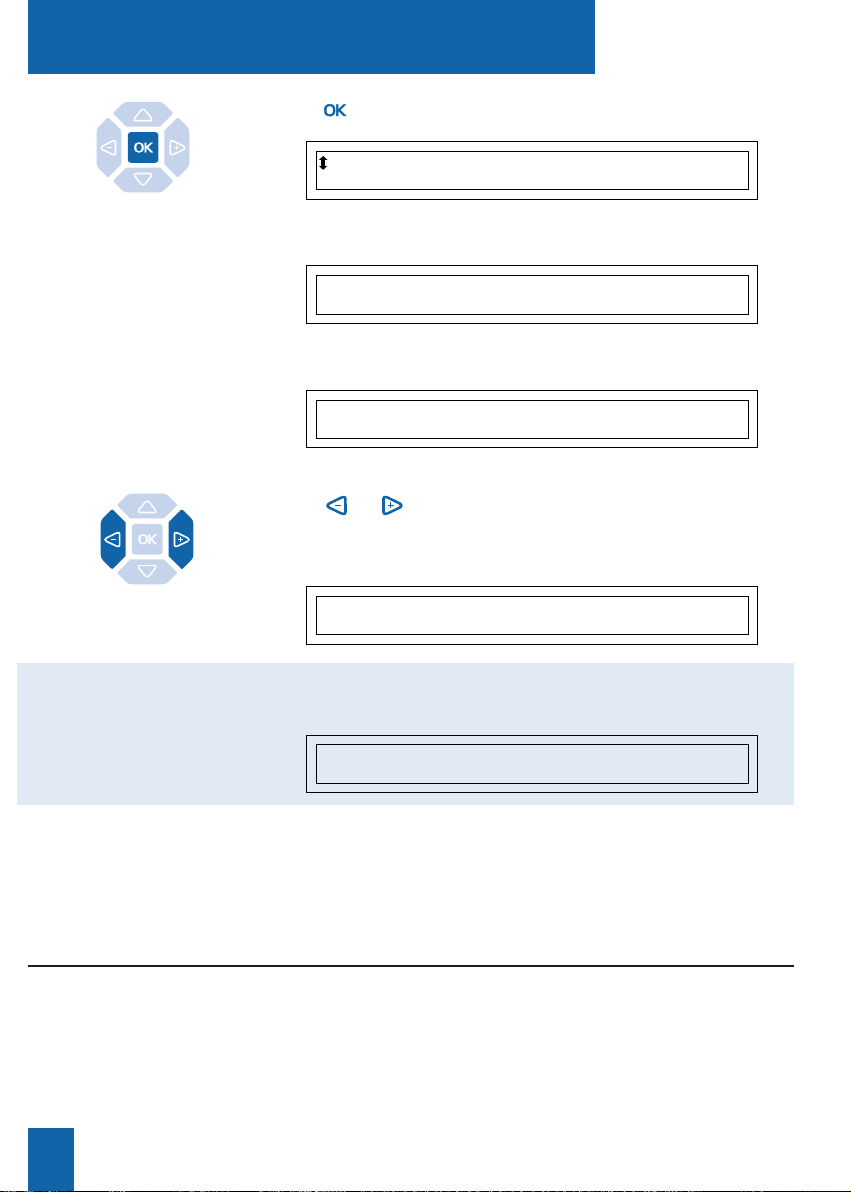
. The key is used to confirm a choice,
- a setting,
- an entry.
. The or keys are used to:
- carry out a setting in the displayed selection,
- display additional information about the record of the incoming calls log.
RING MELODY : 16
RING
RING MELODY: 5
ENTER NAME: DUPONT_
Erase
XXXXXXXXXX 2 CALLS
Call Delete Create
Page 17
Description
9
Erase
Using the keypad, you can enter information in the records of
your private directory and the information directory.
When a text entry is proffered:
- Press directly the key representing the letter to be entered.
The character displays in upper case.
1 - Press and hold down the key.
2 - Press the key representing the letter to be entered
The character displays in lower case.
- Press the key representing the desired accented character ("e"
for example).
The display shows the various possibilities for accentuation.
- Press the interactive key corresponding to the choice desired
(such as "é" for example).
The desired accented character displays.
These are characters marked in orange on the keypad.
1 - Press and hold down the key.
2 - Press the key representing the character to be entered.
To enter a space, press the key.
To delete your last entry:
- Press the key;
- or press the Erase interactive key.
To replace an entry:
- Press the or keys to select the character to be replaced
(the cursor will be positioned under the character);
- then enter the new character.
To accept an entry:
- Press the key on the keypad.
You can also use the navigator's key.
He_
é è ê ë Erase
ENTER NAME: DUPONT_
Erase
Entering lower case letters:
Entering special
characters:
Entering accented characters:
é
Enter text:
Page 18

Dialing methods
10
Dialing methods
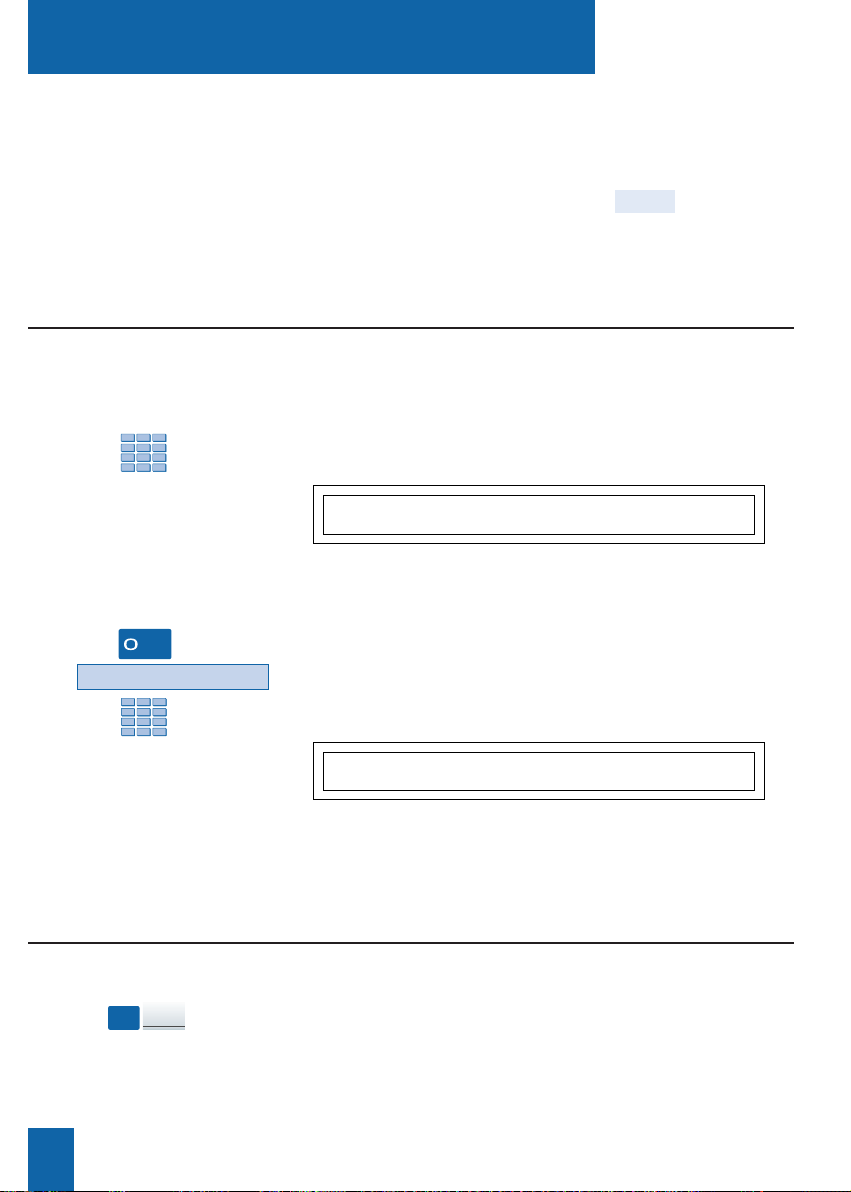
- Dial the desired number directly on the keypad.
The number is displayed progressively as you enter it.
Your set automatically enters hands free mode.
When the called correspondent picks up the receiver, you can
hold a conversation in hands free mode.
Using the hands free mode
Making a call:
The hands free feature lets you dial or answer a call without lifting the handset.
During a call, you can switch from hands free mode to handset mode, and vice versa.
Note: when a micro-headset is connected to the set, micro-headset mode replaces hands free
mode.
Switching from hands free
mode to handset mode:
If you are using the hands free mode.
- Simply pick up the handset.
The conversation is held in handset (or discreet) mode.
The lamp associated with the key goes out.
When the call is finished, you must hang-up the handset
to end the call.
Answering a call:
When your phone rings and the message lamp flashes in time
with the ring tone.
- Press the key (or the green key).
Without picking up the handset, you can hold a conversation
in hands free mode.
The lamp associated with the key illuminates.
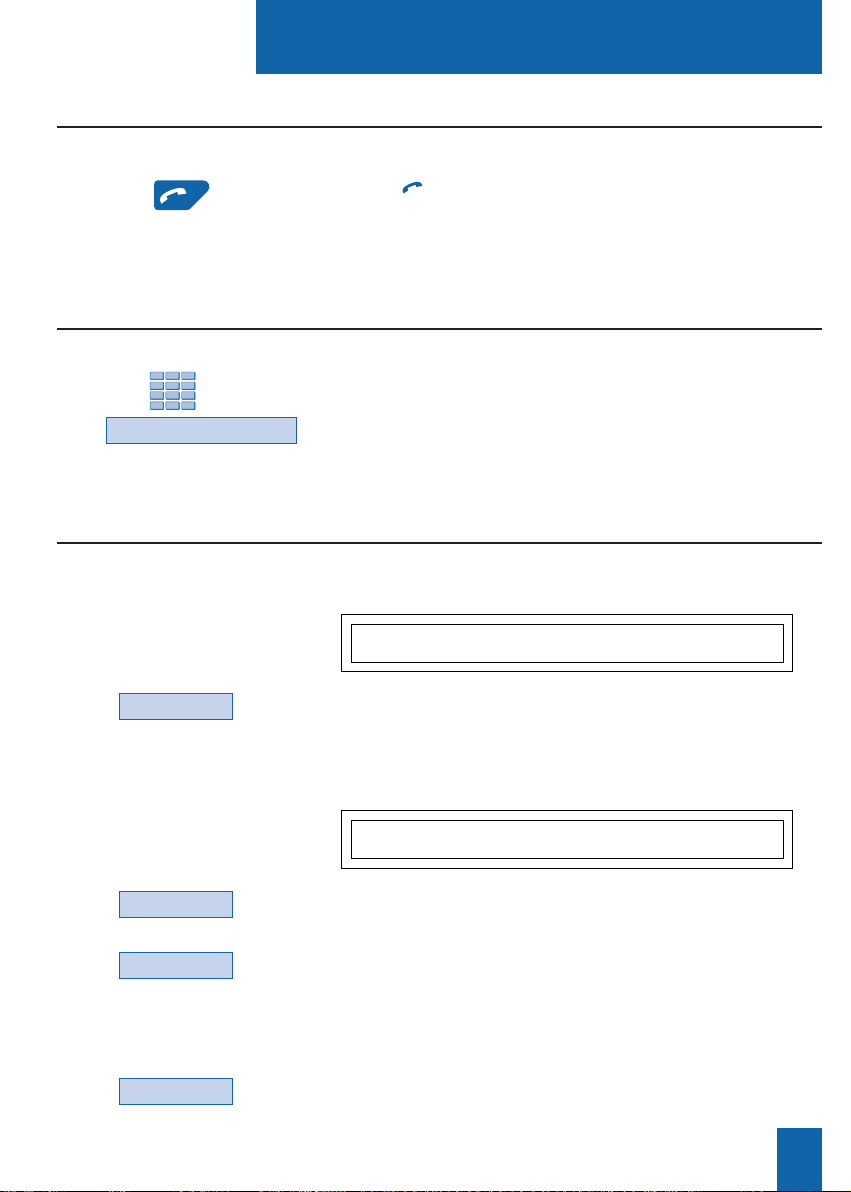
Ending a call:
- Press the red key.
The call is terminated and the lamp associated with the key
goes out.
Your M760 enables you to use a variety of dialing methods to fit in with your activities.
These features complement the conventional handset method (or discreet method):
off-hook the handset to answer or dial a call, and hang-up the handset to end the call.
Page 19

11
Dialing methods
Switching from handset
mode to hands free mode:
If you are using the handset mode:
- Press the key and then hang-up the handset within
6 seconds (while the lamp of the key blinks).
The conversation continues in hands free mode. The lamp of
the key blinks and will then be illuminated steadily.
When the call is finished, you must press the red key
to end the call.
Using the micro-headset mode
Your set is programmed in micro-headset mode.
Note: If your set is programmed in auto headset mode (refer to
the section on Settings - Programming a headset connection),
you can hold a conversation directly without taking any action.
When the phone rings,
- Press the key (or the green key).
You can converse in micro-headset mode.
The lamp of the key lights up.
- Dial the desired number directly on the keypad.
The number is displayed progressively as you enter it.
When the called correspondent picks up the receiver, you can
hold a conversation in micro-headset mode.
Making a call:
Switching from
micro-headset mode to
supervision mode:
While holding a conversation in micro-headset mode,
- Another person can lift the handset to supervise the
conversation. She can hang up at any time.
The conversation continues in micro-headset mode.
Ending a call:
- Press the red key.
The call is terminated and the lamp associated with the key
goes out.
Answering a call in
micro-headset mode:
When a micro-headset is connected to the M760, micro-headset mode replaces hands free mode.
(Refer to the section on Settings and consult your system operator to have more information
about facilities associated with the micro-headset).
While holding a conversation in micro-headset mode,
- Press the .
The conversation continues in handsfree mode.
Switching from
micro-headset mode to
handfree mode:
Page 20
12
Dialing methods
Using the loudspeaker mode
Loudspeaker mode lets you listen to a correspondent through the loudspeaker and thereby
allow other people to take part in the conversation.
While you are in discreet communication (handset off-hooked).
-Press the
key
.
The conversation will be broadcast over the loudspeaker.
The lamp associated with the key blinks and then illuminates
steadily.
Enabling loudspeaker
mode:
- Press the key again.
The conversation will continue in discreet mode. The lamp
associated with the key goes out.
Disabling loudspeaker
mode:
With the set idle.
- Press the key to enable intercom mode.
The display shows the message "YOUR SET IS IN INTERCOM
MODE", and the lamp associated with the key will blink.
. If an internal correspondent calls, you can hold a conversa-
tion directly without taking any action.
. To call an internal correspondent, dial the number directly
and speak when the called correspondent picks up the receiver.
When the called correspondent hangs up, the telephone will
return to intercom mode and the lamp of the key will flash
again.
With the set idle.
- Press the
key
.
You can also press the Cancel interactive key.
The lamp associated with the key goes out.
Using the intercom mode
The intercom mode lets you communicate with internal parties with no action required.
Enabling
intercom mode:
Disabling
intercom mode:
Page 21

Dialing methods
13
- Press the or keys successively to raise or lower
the volume.
The last setting is stored by the telephone set (except for the
micro-headset mode: return to middle level for the next call) .
Adjusting listening volume
Prenum
Erase
1 - Press the Comm interactive key.
2 - Then press the Prenum. interactive key.
3 - Dial the correspondent's number.
The number you dial displays progressively as you enter it.
. If you make a mistake, press the Erase interactive key
and then re-enter the digit.
4 - Press the Call interactive key to start dialing the call.
When the other correspondent picks up the receiver, you can
hold a conversation in hands free or headset mode, or pick up
the handset.
Using the prenumbering mode
The prenumbering mode enables you to enter and view a number so that you can edit
it if necessary before dialing it (this mode is advantageous for dialing long numbers,
such as international numbers).
Comm
Call
You can adjust the listening volume (8 levels), according to the mode used (handset, hands
free, micro-headset or loudspeaker mode).
Page 22
There are several ways of dialing a correspondent, depending on whether the number is being
keyed-in for the first time or whether it is already stored within the set.
The call procedures for correspondents' numbers stored in the directories or logs are explained
in the sections covering these particular features.
When the called correspondent answers, you can use any of the modes described above.
Dialing a correspondent
14
To call an internal correspondent.
- Dial the correspondent's extension number.
The called correspondent's name is displayed*.
To call an external correspondent.
1 - Dial the access code for obtaining an external line (0).
2 - Dial the correspondent's number.
The number dialed is shown on the display.
When the correspondent answers, you can hold a conversation.
Dialing a correspondent
Dialing the number
MARTIN FREE
<- Start Redial Notify Memory
Calling an internal
correspondent:
Calling an external
correspondent:
XXXXXXXXXX IN PROGRESS
Comm Prenum Duratn. <- Start -->
- Press the programmed key.
The correspondent's number is automatically dialed.
The display shows the number of the correspondent called.
When the called correspondent answers, you can hold a con-
versation.
Using the programmable keys
Your telephone set's programmable keys can be assigned to the phone numbers of correspondents that you call regularly (internal or external).
DUPONT
* Depending on the features provided by your system operator.
or
The keys of the numeric keypad are used to dial the number of the correspondent.
Page 23
Dialing a correspondent
15
- Dial 9 on the keypad.
Alternatively, you can press the Comm key, the --->key
and the Operator key in succession.
When the attendant answers, you can hold a conversation.
Calling the attendant (switchboard operator)*
- Press the green key.
The set automatically calls the last number dialed.
The display shows the number called.
When the correspondent answers, you can hold a conversation.
Using the LNR (Last Number Redial) feature
The LNR (last number redial) feature lets you automatically redial the last number called.
When an internal or external caller has tried to call you, the standby display informs you.
Calling back a caller
The display shows the number and time of the call.
- Press the Redial interactive key.
The correspondent's number will be called back automatically.
Calling back
an internal number:
Redial
The display informs you that an external call has been received
- Press the Consult interactive key.
The display shows the number that called and the time of the call.
- Press the Redial interactive key.
The correspondent's number will be called back automatically.
When the other correspondent answers, you can hold a conversation.
Note: to return to the standby display without calling
the number, press the Cancel interactive key.
Calling back
an external number:
Redial
Consult
MARTIN LAST CALL 10:00
Comm Pick-up Redial Cancel More
Cancel
YOU HAVE RECEIVED AN OUTSIDE CALL
Comm Pick-up Consult Cancel More
* Depending on the features provided by your system operator.
Suppose you want to talk to the person handling telephone reception.
or
Page 24

Dialing a correspondent
16
* According to features provided by the system operator.
Comm
Int. Name
Next
Call
1 - Press the Comm interactive key.
2 - Press the Int. Name interactive key (or press the --
>
interactive key and then press the Ext. Name interactive key).
3 - Enter the first letters of the correspondent's name via the
alphabetical keypad.
. If you need to correct what you enter, press the Erase
interactive key.
4 - Press the Consult interactive key.
. If you're not sure how the name is spelt, press the Phonetic*
interactive key.
The display suggests a name or shows the number of possibilities.
. Press the Next interactive key as many times as necessary
until the desired name is displayed.
. Press the Previous interactive key to return back.
. If necessary, press the Correct interactive key to resume
entering letters.
5 - Press the Call interactive key to dial the correspondent
displayed.
The telephone set automatically dials the number.
When the correspondent answers, you can hold a conversation.
If you don't know the number of an internal or external correspondent, you can retrieve the
number by entering the correspondent's name via the alphabetic keypad.
Calling an internal or external correspondent by name*
Depending on the settings chosen (refer to the section on Settings - Associating a directory
with direct keypad call), it may be possible to directly dial a correspondent via the alphabetical
keypad, from one of the three directories (the private directory, the internal names directory,
and the external names directory*). Names in these directories are in alphabetical order.
Calling a correspondent from the directories by name
- Key-in the first letters of the desired correspondent's name
via the alphabetical keypad.
The first keystroke on the alphabetical keypad shows
the entry display.
name xx
name xx
Consult
Phonetic
Erase
Correct
Previous
Page 25
Dialing a correspondent
17
Searching for a correspondent in the private
directory:
The display shows the letter(s) entered:
. if only one name corresponds to what you entered,
the said name is displayed with the associated number;
. if the cursor displays, this means that a variety of names
correspond to the letters entered;
. if necessary, enter further letters.
. If you make a mistake, press the Erase interactive key.
- Press the and interactive keys to scroll through the
names.
The display shows the names and associated numbers.
- If no name corresponds with the letters entered, press the
Correct interactive key to resume entering letters.
Correct
When the name of the correspondent you want to call displays:
- press the Call interactive key.
The set automatically calls the number.
When the correspondent answers, you can hold a conversation.
Next
Searching for a correspondent in the shared
directories:
Calling the number:
The display shows the letters entered.
. If you need to correct an entry keyed-in, press the Erase
interactive key.
- Press the Consult interactive key.
. If you are not sure of the spelling of the desired name,
press the Phonetic* interactive key.
The display suggests a name or, in case of several names,
shows the number of possibilities.
. Press the Next interactive key as many times as necessary
until the desired name is displayed.
. Press the Previous interactive key to return back.
. If necessary, press the Correct interactive key to resume
entering letters.
Consult
Previous
Erase
Call
Phonetic
Erase
Correct
* According to features provided by the system operator.
Page 26

Dialing a correspondent
18
Notify
Enter
More
The number is busy or does not answer,
- press the Redial interactive key (before hanging up).
When the correspondent is no longer busy (if he was busy) or
has re-activated the phone (if he was absent), your telephone
set will ring. When you pick up the handset, your correspon-
dent's telephone set will be redialed and ring.
Using the automatic redial function
1 - Press the Notify interactive key.
The display shows the first of the 6 pre-defined messages.
2 - Press the More interactive key successively to select
another pre-defined
message - if desired - or to select a blank message entry.
. Depending on the choice you make, you will either have to
complete the message shown, or enter a new message
via the alphabetic keypad.
Note: use the alphabetical keypad and its features.
. If you need to correct an entry, press the Erase interactive key.
3 - Press the Enter interactive key to send the message.
The display prompts you to get back the communication.
4 - Press the Yes or No (example) interactive keys, as desired.
Notes: the pre-defined messages are displayed directly on the
notified corresponden’s set. However, a new message is not
displayed directly: the other correspondent is informed of the
arrival of a writted message, and must choose to read it.
Notifying the correspondent
If the correspondent you are calling does not answer:
Redial
Erase
Suppose you are calling an internal number, and that the number concerned is busy or does not
answer. You can set the number to be called back automatically.
Suppose the correspondent you are calling does not answer. You can send a short message to
the display of his/her telephone set, provided that the said correspondent (internal or external)
is connected to a digital interface.
Desabling Redial
Function
If you want to disable the automatic redial function.
- Press Funct., Feature, -->, Memory, Call bk interactive
keys.
The display shows the memorised number.
- Press the Cancel interactive key to desable the redial function.
Enabling automatic
redial:
Cancel
No
Page 27
Receiving a call
19
- Press the or keys in succession to decrease or increase
the volume of ring tone (8 levels are available, including
silent).
The set stores the last setting chosen.
Adjusting ring volume
Receiving a call
When you receive an incoming call, the set rings and the
"Message" lamp flashes.
When the caller is stored in one of the shared directories
(internal or external), the display shows the name associated.
Notes:
- Otherwise, the number (or type of line) is shown on the
display.
- When the call is a forwarded call, the display informs you.
C. CHARLES IS CALLING
Divert
Receiving a call
from a correspondent in
the private directory
When the caller is in your private directory, the display shows
the name stored in this directory.
In addition, correspondents contained in list 4 of the private
directory are announced by the special ring tone (see the sec-
tions on The Private Directory and Settings).
If the correspondent you are calling does not answer, you can temporarily store the number and
then redial it with a single key (even if it is not the last number dialed).
Consult your system operator. He will program this function on one of your programmable
keys.
Using the callback later function
During the call phase, you can adjust the ring volume.
Monday 16 October 09:26 AM
Comm Pick-up Funct. Lang.
Assistant
M.Martin
Travel A
Taxi
Bank
Home
Line 1
Superv.
Line 2
Superv.
Filter
Forward
Page 28
Receiving a call
20
* Depending on the features provided by your system operator.
Answering a call
from a correspondent
in the private directory:
Divert
1 - Press the Divert interactive key.
2 - Then dial the extension number to which you want to
divert the call.
Note: you can also search an internal name or use the
pre-programmed keys.
The set will no longer ring and the "Message" lamp will
extinguish.
Diverting a call to another extension
- Pick up the handset.
The conversation with the caller will take place in discreet
mode.
Or
- Press the key or the green key.
You can hold a conversation directly in hands free mode,
without off-hooking the handset.
When you off-hook the handset or you press the key or the
green key, the display shows the number associated with
the correspondent name.
Notes:
. If your set is in intercom mode, you need not perform any
action in order to talk to the internal correspondent calling you.
. Any call not answered within a given time interval is
switched automatically to the attendant*.
Answering a call
- Press the
red key.
The set will no longer ring; however, the Message lamp will
continue to flash, to report that you have an incoming call.
The set will ring again the next time an incoming call is received.
Silencing ring tone
When your set is called, you can decide to silence the ring tone for this call only.
Suppose you want to divert a call to another extension without answering it.
Page 29
Receiving a call
21
* Depending on the features provided by your system operator.
Pick-up
Group
You can intercept a call ringing on another extension
when the person concerned is absent.
1 - Press the Pick-up interactive key.
2 - Press the Extens. interactive key.
3 - Dial the extension number.
You can hold a conversation with the caller.
Note: if this happens frequently with the same extensions,
ask your system operator to make you a member of the same
call group.
Suppose you are a member of a call interception group*,
i.e. all people in this group can quickly retrieve calls
from an extension that is ringing within the same group.
1 - Press the Pick-up interactive key.
2 - Press the Group interactive key.
You can hold a conversation with the caller.
Intercepting a call intended for another extension
Suppose the attendant is absent and you want to pick up a call
on general ring.
1 - Press the Pick-up interactive key.
2 - Press the G.Ring interactive key.
You can hold a conversation with the correspondent.
You can intercept calls dialed to another extension when the person concerned is absent.
Intercepting a call dialed
to an extension
in your group*:
Intercepting a call
dialed to any extension:
Intercepting a call
on general ring*:
Pick-up
Extens.
Pick-up
G.Ring
Page 30

During a call
22
* Depending on the features provided by your system operator.
During a call
1 - Press the key.
The microphone of the handset, the hands free system or the
micro-headset is silenced and the lamp associated with the key
illuminates steadily.
The correspondent will not be able to hear you speak.
2 - To resume talking with the other correspondent, press
the interactive key.
The lamp associated with the key goes out.
Using the mute feature
-->
Record
1 - Press the -->interactive key.
2 - Press the Record interactive key.
Warning! Recording a conversation against a person's will
may be an offence in the eyes of the law.
A recorded conversation will be consulted like a recorded mes-
sage (refer to the section The voice mailbox).
Recording the conversation*
Recover
1 - Press the key.
The other correspondent will be placed on hold, and will hear
holding music or tones.
2 - Press the Recover interactive key to resume talking with
the correspondent.
Note: The hold function can be programmed on a
programmable key. If you use this function regularly, ask your
system operator to program your set.
Placing a correspondent on hold and taking the call on the same extension
Suppose you are holding a telephone conversation and you want to say something without the
other correspondent hearing you.
Depending on the voicemail system installed, you may be able to record the conversation in
progress.
Suppose you have a call in progress with a correspondent and you want to place the correspondent on hold and then subsequently take the call on the same extension.
Page 31

During a call
23
Pick-up
- Press the Park key.
The telephone set returns to idle mode. Your call is on hold,
and the distant correspondent will hear holding music or tones.
On the second extension:
- Press the Pick-up interactive key;
- Then press the Park interactive key.
Note: if the set in question does not have interactive keys,
press the , and keys in succession.
- Dial the number of the first extension to pick up the call
on hold.
If the call on hold is not retrieved within a given time interval,
it will be automatically switched to the attendant.
Placing a correspondent on hold and taking the call on another extension
Park
Park
Comm
1 - Press the Comm interactive key.
You can also use the key.
2 - Dial the extension number.
Note: you may also conduct a search by name or use
the pre-programmed keys.
You may wait for the correspondent’s to answer or hang up
immediately (or press the red key if you are in hands free
mode or micro-headset mode).
Transferring a call
1 - Press the Comm interactive key.
The first correspondent will be placed on hold, and will hear a
tone.
Calling a second correspondent
Comm
Suppose you are holding a call with a distant correspondent and you want to continue the call
on an extension in another office.
Suppose you want to transfer a call to another extension.
Suppose you are talking to one correspondent and want to talk to a second correspondent,
whether inside or external to the organization.
Page 32

During a Call
24
* Depending on the features provided by your system operator.
2 - Dial the number of the second correspondent.
Note: you can also press the green key directly (to redial
the last number called), or a programmed key or the key
to call-up one of your abbreviated numbers; the first correspondent is automatically placed on hold.
. If the correspondent called does not answer, press the
keys to return to the correspondent on hold.
The display shows the number or the name of the two parties;
the identity of the correspondent on hold is shown on the righthand side of the display.
Dialing a number
while staying on-line with
the first correspondent:
Suppose you want to dial a number while staying on-line with
the first correspondent.
1 - Press the Prenum interactive key.
2 - Dial the extension number.
3 - Press the Call interactive key.
Your correspondent is only placed on hold at this moment, and
will hear a tone.
Prenum
Call
- Press the Wait interactive key.
The first correspondent is placed on hold.
You can hold a conversation with the second correspondent,
whose identity will be shown on the right-hand side of the dis-
play.
Note: if you have programmed the multi-key or multi-line
function (for more information, refer to the sections), pressing
the Wait interactive key displays the identity of the second
caller before you answer by pressing the Answer interactive
key (or decide not to answer).
Answering a second call*
Wait
You are in conversation with a caller and you hear a beep: this means that another caller is
attempting to call you; the Wait function flashes on the display. You can answer the second
caller without interrupting the call in progress.
Page 33

During A Call
25
Shuttle
Recover
Conf.
- Press the Shuttle interactive key.
You can converse alternatively with each of the
correspondents, but they cannot converse with each other.
The correspondent shown on the right-hand side of the display
is always the one on hold.
Switching from one correspondent to another
- Press the Recover interactive key.
You recover the correspondent who was on hold.
Releasing one correspondent
- Press the Conf. interactive key.
A three-way conference call is set-up between you and your
two parties.
If one of them hangs up, you remain on-line with the other.
Suppose you want to leave your two parties to talk to each
other during the conference call:
- Press the Transfer interactive key.
You can also simply hang-up the handset or press the
red
key.
The two parties remain on-line with each other.
Note: in the event of a failure, your telephone set rings again.
Setting-up a conference call
Terminating
the conference call:
Transfer
You want to switch from one correspondent to another.
You want to release one of the parties (the correspondent with whom you are talking).
You want to talk with each of the two parties at the same time (this feature is provided if you
have initiated one of the calls).
Page 34

During a call
26
* Depending on the features provided by your system operator.
To ascertain the call duration (for an external call only):
- Press the Duratn. interactive key.
The display shows information about the call duration and,
possibly, the call cost*.
To return to the previous display, press the Previous
interactive key (for dialing another number for example).
Other features available during a call
Duratn.
Previous
To protect the terminal against any call or intrusion during
a data transmission:
- Press the Protect. interactive key.
The display shows the message "Feature Accepted".
During the call, any call attempt is ignored.
You return to the previous display by pressing the Recover
interactive key.
Protect.
Ascertaining the call
duration:
Protecting the call:
To display the date and time instead of the distant correspondent's
name or number:
1 - Press the -->interactive key.
2 - Press the Time interactive key.
The display will now show the date and time.
Time
Displaying the time:
Suppose you want the number of the called or calling corre-
spondent (internal or external) to be registered in the log, to
identify a nuisance call, for example.
1 - Press the -->interactive key.
2 - Press the Trace interactive key.
The number will automatically be stored in the log, which can
be consulted by the system operator.
Trace
-->
Using the trace
function:
-->
Page 35

During a call
27
- Press the red key.
You can also simply hang-up the handset.
If the set is in hands free mode, the lamp associated with the
key goes out.
The correspondent will be released and the call ended.
Ending a call
You can save the distant correspondent's number to a programmable key, whether the call is incoming or outgoing.
1 - Press (sucessively) the -->interactive key.
2 - Press the Memory interactive key.
3 - Press a programmable key.
The number will automatically be stored, and can be dialed
by pressing the programmable key in question.
Write the correspondent's name on the label beside the programmable key.
Memory
-->
DUPONT
Saving the distant correspondent's number:
- Press Funct., Feature, -->, Memory interactive keys.
The display shows the memorised numbers.
. Press Store to dispay the number stored by storing-redialing
function.
. Press Redial to dispay the number stored by LNR function.
. Press Call bk to dispay the number stored by redial function.
The display shows the selected number.
- Press the Cancel interactive key to erase the stored number.
-->
Memory
Feature
Funct.
Cancel
Consulting the stored numbers
You want to consult the numbers stored by storing-redialing function, LNR or redial functions.
Page 36

The LNR calls log
28
1 - Press the green key.
The display shows the first part of the information pertaining
to the last number called: the name, the date and the time
of the call.
Notes:
. After the log has been totally eraseed, the display shows
the message "LNR CALLS LOG IS EMPTY".
. If the correspondent's name is not recognized, the display
shows the number instead of the name.
2 - Press the key to display the second part of the information:
the telephone number and the number of calls.
. Press the key to return to the name.
3 - Press the or keys in succession to view other
numbers stored.
Consulting the LNR (Last Number Redial) calls log
The LNR calls log can store the records of the last 10 numbers called (internal or external).
When consulting the log, you can automatically redial one of the numbers stored.
You can also delete one number or all saved records.
When the log is full, any further call overwrites the least recent. When a call has been
redialed several times, only the last call is stored with updating of the calls counter.
While consulting, you can erase one record or the entire LNR calls log.
The LNR calls log
MARTIN 15/03 10:00 AM
Call Delete Create
XXXXXXXXXX 2 CALLS
Call Delete Create
Page 37

The LNR calls log
29
- Press the Call interactive key.
You can also press the green key ot the key.
The set automatically calls the correspondent.
The display shows the number of the called correspondent.
When the correspondent answers, you can hold a conversation.
1 - Press the Delete interactive key.
The display prompts you to confirm that the record should be
deleted.
2 - Press the key to confirm deletion.
The list will be updated, and the display shows the next record.
Delete
Calling a correspondent from the LNR calls log
Deleting a record from the LNR calls log
Call
While consulting the log, when a record is displayed:
While consulting the log, when a record is displayed, you can access the deleting function.
- Press the Create interactive key.
The display prompts you to create the record within the directory.
2 - Press the key.
The name and number are automatically stored in the private
directory.
. If the correspondent’s name is not in the LNR calls log.
The display prompts you to enter a name.
- Enter the correspondent’s name.
Note: use the alphabetical key and its features (entry in upper
or lower case; entry of accented or special characters).
- Press the key.
. If a number is already saved under another name in the private
directory, the display shows the message “ALREADY REGISTERED”.
3 - Press the interactive key corresponding to the desired list
(such as List 1).
4 - Press the key to end.
The display returns to the LNR calls log record.
Storing the name and/or the number in the private directory
When consulting the log (name, date/time, number or number of calls), you want to store in
the private directory, the name / number of the displayed correspondent.
Create
List 1
Page 38

The LNR calls log
30
1 - Press the key.
The display shows « PROGRAMMING»
2 - Press the key
The display shows « CLEAR LOGS».
3 - Press the key.
The display shows «DELETE LNR CALLS LOG».
4 - Press the Delete interactive key.
The display prompts you to enter your password.
5 - Enter your password.
An audible signal confirms the deletion. The display will
confirm that the log has been erased entirely.
Note: You can use the red key to abort or terminate the
procedure.
Deleting the entire LNR calls log
You can delete all numbers stored in the LNR calls log.
Password
Delete
Page 39

The private directory
31
Create
1 - Press the key.
The display shows the directories available.
2 - Press the Private interactive key.
The display shows the name and number of the first record.
The records are stored in alphabetical order. When the directory
is empty, the display shows the message "PRIVATE DIRECTORY IS EMPTY".
3 - Press the or keys successively to view the other
records saved.
You can save the internal or external numbers you call most frequently, to your private directory (up
to 100 numbers).
When a correspondent in your private directory calls you, the display shows his/her name and number. The caller will also be stored by name in the incoming calls log.
You can classify records (containing a correspondent's name and number), and can compile a list of
parties (4 different lists) belonging to groups (board of management, workgroup, etc, depending on
your work).
You can customize the label of these lists. For parties filed in list 4, the privileged ring tone will
sound when they call.
Creating a record in the private directory
The private directory
MARTIN XXXXXXXXXX
Call Delete Modify Create Lists
Name
1 - Press the Create interactive key.
The display prompts you to enter the name.
. If the directory is already full, the display shows the message
«PRIV. DIR. FULL».
2 - Enter the correspondent's name, using the alphabetical
keypad (up to 14 characters).
Note: use the alphabetical key and its features (entry in upper
or lower case; entry of accented or special characters).
. If you make a mistake, press the Erase interactive key.
Private
Accessing the private directory
While the set is idle or is being used for a call, you can access the private directory.
While consulting the directory, you can create a record.
Page 40

The private directory
32
3 - Press the key to confirm the name.
The display prompts you to enter the associated number.
4 - Enter the telephone number, including the code for obtaining
external line if the number is an external number (up to 23 digits).
Note: when a name or number already exists in the directory,
the display shows the message "ALREADY REGISTERED".
. If you want to save an access sequence (e.g. secret code or
interrogation code), you must press before entering the
code. You must also press to insert a pause in this code, if
necessary.
. If you make a mistake, press the and keys to select the
character to be replaced (cursor under the character) then enter
the new character.
You can also press the Erase interactive key.
5 - Press the key to confirm the number.
The display prompts you to choose the list in which to save the
record (by default, the list 1 is suggested).
6 - Press eventually the interactive key corresponding to anoth-
er list (such as List 4).
7 - Press the key to terminate.
The display shows the record saved.
Note: use the red key to abort or terminate the process.
List 4
Modify
Name
Modifying or deleting a record from the private directory
Modifying a record:
Once a record has been created, you can subsequently modify it or delete it.
While consulting the list/record/directory and when the record
in question is displayed:
1 - Press the Modify interactive key.
The display prompts you to modify the name and/or number,
or to move the record to another list.
2 - Press the interactive key corresponding to the item
to be modified (such as the name, for example).
The display shows the name saved.
Page 41

The private directory
33
3 - Press the and keys to highlight the character to be
replaced (the cursor will be underneath the character), and then
enter the new character.
You can also press the Erase interactive key.
4 - Press the key to confirm the modification.
If necessary, modify the other items (Number and List).
Delete
While consulting the list/record/directory and when the record
in question is displayed:
1 - Press the Delete interactive key.
The display prompts you to confirm that the record displayed
should be deleted.
2 - Press the key to confirm deletion.
The display shows the next directory record.
Deleting a record:
Customizing labels of private directory lists
1 - Press the key.
The display shows « PROGRAMMING»
2 - Press twice the key.
The display shows « DIRECTORIES MANAGEMENT».
3 - Press the key.
The display shows the first choose of «DIRECTORIES MANAGEMENT» selection.
4 - Press the key.
The display displays the label of the four lists (by default: List
1 - List 2 - List 3 - List 4).
5 - Press the interactive key corresponding to the desired list
(such as List 1).
List 1
You can access customization of labels for the 4 private directory lists. By default labels are:
List 1 - List 2 - List 3 - List 4.
Page 42

The Private Directory
34
Lists
List 1
1 - Press the Lists interactive key.
The display shows the lists available.
2 - Press the interactive key corresponding to the desired list
(such as List 1).
The first record in the list displays.
3 - Use the or keys to select the desired record.
You can also enter the first letter of a name, in order to perfomr
a search by name.
Searching in a list within the private directory
1 - Enter the first character of the name of the correspondent to
search for, via the alphabetical keypad.
The display shows the name of the first correspondent match-
ing the character you entered.
2 - Press the or keys, to scroll through the other names.
The display shows the names and associated numbers.
Searching by name within the private directory
name xx
While consulting the directory, you can perform a search by name among all the records
contained in the private directory.
While consulting the directory, you can conduct a search among a list of records (stored in
alphabetical order).
- Enter the label from the alphabetical keyboard
(7 characters maximum).
. If you make a mistake or want to make a change, press the
or keys to select the character to be replaced (cursor under
the character), then enter the new character
You can also press the Erase interactive key.
Press the key to validate.
You will hear two beeps.
Repeat the operation for each label to be customized.
Label
Page 43

The Private Directory
35
Calling from the private directory
- Press the Call interactive key.
You can also press the green key or the key.
The set will automatically call the number registered within
the record.
Call
1 - Press the key.
The display shows « PROGRAMMING»
2 - Press twice the key
The display shows « DIRECTORIES MANAGEMENT».
3 - Press the key.
The display shows the first choose of «DIRECTORIES
MANAGEMENT» selection.
4 - Press twice the key.
The display prompts you to select one liste or all lists.
5 - Press the interactive key corresponding to the desired list
(such as List 1).
The display prompts you to enter your password.
6 - Enter your password.
You will hear two beeps. The display will confirm that the private directory log is erased partly or entirely.
Deleting all records from the private directory
Password
While consulting the directory, you can call the correspondent whose record is displayed.
You can delete one record or all records saved in the private directory.
List 1
Page 44

The abbreviated numbers directories
36
1 - Press the key.
The display shows « PROGRAMMING».
2 - Press the key.
The display shows the message "WHAT DO YOU WANT
TO PROGRAM?"
3 - Press the Abbrev# interactive key.
The display shows the current state of programming of number 0.
- Press the More interactive key successively to view the status
of other abbreviated numbers.
4 - Press the Activ. interactive key.
The display prompts you to enter the number to be programmed.
5 - Enter the correspondent's number (preceded by 0
in the case of an external correspondent).
. If you make a mistake, use the Erase interactive key.
6 - Press the Enter interactive key to finish.
The display shows the number stored.
To save another number:
- Press the More interactive key.
To display the first number:
- Press the Content interactive key.
Note: use the red key to abort or terminate the program-
ming process.
These are directories stored within the system.
- The personal directory (separate from the private directory of your set) lets you save the
numbers most frequently used (up to 10, numbered from 0 to 9).
- The collective directory can be accessed by all the telephone sets (even those with no access
to external lines).
The abbreviated numbers directories
Abbrev#
#:0 - NO NUMBER RECORDED
Content Activ. More
Activ.
Enter
More
Programming a personal abbreviated number
More
Content
Page 45

The abbreviated numbers directories
37
When the abbreviated number to be modified is displayed.
1 - Press the Modify interactive key.
2 - Enter the correspondent's new number (preceded
by 0 in the case of an external correspondent).
. If you make a mistake, press Erase interactive key.
3 - Press the Enter interactive key to finish.
The display shows the number stored.
Modifying or canceling a personal abbreviated number
Enter
Modifying an
abbreviated number:
1 - Press the key.
2 - Enter an abbreviated number from 0 to 9.
The set automatically calls the number.
When the called correspondent answers, you can hold a conversation.
Calling an abbreviated number
Modify
When an abbreviated number has been programmed, you may modify or cancel it.
When the abbreviated number to be canceled is displayed.
- Press Cancel interactive key.
The number is canceled and the display indicates
"NO NUMBER RECORDED "
Canceling an
abbreviated number:
Cancel
0 to 9
1 - Press the key.
The display shows the numbers available.
2 - Press the Abbrev. interactive key.
3 - Enter an abbreviated number from 0 to 9.
The set automatically calls the number.
When the called correspondent answers, you can hold a conversation.
Abbrev.
0 to 9
* Depending on the features provided by your system operator
1 - Press the key.
2 - Enter an abbreviated number (3xxx).
The set automatically calls the number.
When the correspondent answers, you can hold a conversation.
Calling a collective number*
You can save time by using collective abbreviated numbers; consult your system operator to
obtain the list. While the set is idle or being used, you can call a collective abbreviated number.
3xxx
or
_xxx
Page 46

The incoming calls log
38
The incoming calls log
The incoming calls log can store records (or information about a call) of the last 50 calls
received, whether or not they were answered. If the caller is stored in your private directory,
his/her name will be stored in priority, instead of the number.
When you consult the log, you can automatically call back the number saved; you can
also create a record in the directory. You can delete a stored record or set of stored records.
When the log is full, a new call will overwrite the least recent one. When a call is dialed
several times, only the last call is saved.
Consulting the incoming calls log
Log
Monday 16 October 09:26 AM
Comm Pick-up Funct. Lang.
Forward
M.Martin
Filter
Assistant
Home
Bank
Taxi
Travel A
Line 1
Line 2
Superv.
Superv.
Message
Lamp
When the set is idle or being used, you can consult the incoming calls log.
1 - Press the key.
The display shows the directories available.
2 - Press the Log interactive key.
The display shows the total number of calls received and the
number of calls not viewed.
3 - Press the key to display the last call.
. Pressing the key displays the oldest call.
The display shows the first part of the information pertaining
to the call: the name, the date and the time of the call.
The lamp to the right of the interactive keys informs you that a
new message has arrived.
- Lamp flashes slowly: there is a new call in the incoming calls
log;
- Lamp flashes quickly: there is a new call in the incoming
calls log and a message in your voice mailbox;
- Lamp extinguished: no new calls in the incoming calls log.
Notes:
- Lamp illuminated steadily: there is at least one message in
your voice mailbox.
. After the log has been totally erased, the display shows the
message “INCOMING CALLS LOG IS EMPTY”.
RECEIVED: 8 NOT READ: 3
MARTIN 09/06 11:00 AM
Call Delete Create
Page 47

The incoming calls log
39
Notes:
. If the caller’s identity is not revealed, the display shows a
series of asterisks instead of the name and number.
. If the caller identification is not available, the display shows
“UNKNOWN” instead of the name and number.
. When only the number is stored, the number will display
instead of the name.
. When a call has already been read, the icon is displayed in
front of the name.
4 - Press the
key to display the second part of the information:
the correspondent's telephone number, and the number of times
this correspondent has called.
. Press the or key to return to the name.
5 - Press the or keys successively to display the
information pertaining to the other saved calls.
MARTIN 09/06 11:00 AM
Call Delete Create
XXXXXXXXXX 2 CALLS
Call Delete Create
Page 48

The incoming calls log
40
Calling a correspondent from the incoming calls log
- Press the Call interactive key.
You can also press the green key or the key.
The set will automatically call the number and the display will
show the number called.
The record will remain saved in the log, but it will have the icon
in front of it to indicate that
the number has been called back.
Storing the name and/or the number in the private directory
Create
Call
While consulting the log, you can call the correspondent whose record is displayed.
Note: Only correspondents for whom a number is registered can be called.
While consulting the log, you can save the number (and possibly the name) of the correspondent
whose record is displayed, in your private directory.
1 - Press the Create interactive key.
The display prompts you to create the record within the directory.
2 - Press the key.
The name and number are automatically stored in the private
directory.
. If the correspondent’s name is not in the log.
The display prompts you to enter a name.
- Enter the correspondent’s name.
Note: use the alphabetical key and its features (entry in upper
or lower case; entry of accented or special characters).
- Press the key.
. If a number is already saved under another name in the private
directory, the display shows the message “ALREADY REGISTERED”.
3 - Press the interactive key corresponding to the desired list
(such as List 1).
4 - Press the key to end.
The display returns to the incoming calls log record.
List 1
MARTIN 09/06 11:00 AM
Call Delete Create
Page 49

The incoming calls log
41
Deleting a record from the incoming calls log
1 - Press the Delete interactive key.
The display prompts you to confirm that you want the record
deleted.
2 - Press the key to confirm the deletion.
The list will be updated, and the display shows the next record.
Delete
1 - Press the key.
The display shows « PROGRAMMING»
2 - Press the key
The display shows « CLEAR LOGS».
3 - Press the key.
The display shows the first selection.
4 - Press the key
The display shows «DELETE INCOMING CALLS LOG».
5 - Press the Delete interactive key.
The display will prompt you to enter your password.
6 - Enter your password.
You will hear two beeps. The display confirms that the entire
incoming calls log has been deleted.
Note: You can use the red key to abort or terminate the
procedure.
Deleting all records from the incoming calls log
Password
While consulting the log, you can delete the record displayed.
You can delete all numbers stored in the incoming calls log.
Delete
Page 50

The information directory
42
The information directory
The information directory enables you to view various shared numbers concerning the set and
the holder of the set in question.
Consulting the information directory
1 - Press the key.
The display shows the directories available.
2 - Press the Info interactive key.
The display shows the first information record, namely the
number of the set concerned.
3 - Press the or keys successively in order to consult
the other information records, namely:
- FAX NUMBER,
- GSM NUMBER,
- DECT NUMBER,
- FREE NUMBER,
- SET SERIAL NUMBER,
- SOFWARE RELEASE/SET.
Note: use the red key to abort or terminate the process.
Info
When the set is idle or being used, you can consult the information log.
SET NUMBER: XXXXX
In the information directory, you can customize four headings: FAX, GSM and DECT numbers
and one free number.
Filling in the information directory
1 - Press the key.
The display shows « PROGRAMMING»
2 - Press successively the key in order to display
«PRIVATE INFO».
PRIVATE INFO
Page 51

The information directory
43
When the display shows the FREE NUMBER heading:
1- Press the Name interactive key.
The display prompts you to enter the name.
2 - Use the alphabetical key and its features to enter the name
(10 characters maximum).
. If you make a mistake or want to make a change, press
the or keys to select the character to be replaced
(cursor under the character), then enter the new character.
You can also press the Erase interactive key.
3 - Press the key to validate.
You will hear two beeps.
4 - Press the Number interactive key.
The display prompts you to enter the number.
5 - Dial the number to be stored (23 digits maximum).
6 - Press the key to validate.
You will hear two beeps. The stored record is displayed.
3 - Press the key to access the first information heading.
4 - Press successively the or key to display the other
headings.
Filling in the FAX- GSM DECT numbers:
When the display shows one heading (FAX, GSM or DECT
number):
1 - Dial the number to be stored (23 digits maximum).
. If you make a mistake or want to make a change, press
the or keys to select the character to be replaced
(cursor under the character), then enter the new character.
You can also press the Erase interactive key.
2 - Press the key to validate.
You will hear two beeps.
Repeat the operation for each heading to be customized.
Filling in the free number:
Name
Name
Number
Page 52

The internal names list
44
The internal names list
This is the directory of internal correspondents shared by all subscribers. The programming
is performed by the system operator.
Consulting the internal names list
1 - Press the Comm interactive key.
or
- Press the
k
ey.
The display shows the directories available.
Press the -->interactive key.
2 - Press the Int. Name interactive key.
The display prompts you to enter the first letters of the name
you are looking for.
3 - Enter the first letters of the correspondent's name, using the
alphabetical keypad.
. If you have to correct an entry, use the Erase interactive key.
4 - Press the Consult interactive key.
The display suggests a name or, if there are several names,
states the number of proposals.
. If necessary, press the Next interactive key until the desired
name is displayed.
. Press the Previous interactive key to return back.
. If necessary, press the Correct interactive key to resume
entering letters.
-->
Int. Name
Next
name xx
Erase
Call
Calling an internal correspondent
- Press the Call interactive key.
When the correspondent answers, you can hold a conversation.
Comm
Consult
Correct
When the set is either idle or in use:
When the name of the correspondent to call is displayed:
Previous
Page 53

The external names list
45
The external names list*
This is the list of names of external correspondents, shared by all subscribers. Programming
is performed by the system operator.
Call
Calling an external correspondent
- Press the Call interactive key.
When the correspondent answers, you can hold a conversation.
Consulting the external names list
1 - Press the Comm interactive key and then the -->key,
or
- Press the key.
The display shows the directories available.
Press the -->interactive key.
2 - Press the Ext. Name interactive key.
The display prompts you to enter the first letters of the name
you are looking for.
3 - Enter the first letters of the correspondent's name, using the
alphabetical keypad.
. If you need to correct an entry, press the Erase interactive key.
4 - Press the Consult interactive key.
The display shows a name or, if there are several names,
shows the number of proposals.
. If necessary, press the Next interactive key until the desired
name is displayed.
. Press the Previous interactive key to return back.
. If necessary, press the Correct interactive key to resume
entering letters.
-->
Ext. Name
name xx
Erase
Comm
Consult
* Depending on the features provided by your system operator.
When the set is either idle or in use:
When the name of the correspondent to call is displayed:
Next
Correct
Previous
Page 54

Programmable keys
46
Programmable keys
1 - Press the key.
The display shows " PROGRAMMING".
2 - Press the
key
.
The display shows the prompt "WHAT DO YOU WANT
TO PROGRAM?"
3 - Press the Key interactive key.
The display prompts you to select the desired programmable key.
4 - Press a programmable key.
The icon associated with this key illuminates steadily, and the
display shows the programming status of the said key.
5 - Press the Modify interactive key.
During the programming procedure, the icon associated
with the key flashes.
You have access to various types of programming, which are
explained briefly below. You are recommended to refer to the
sections that cover these functions in depth, for more information
about the features available to you.
You may call certain correspondents or colleagues several times per day. Or maybe you make
frequent use of certain telephone features such as call forwarding, supervision, filtering and
interception.
The programmable keys of your set will allow you to store these numbers or functions
and have easy access to services available.
Note: if your set incorporates one or two extension modules*, you can program
and use these additional keys in the same manner.
Key
Modify
WHAT DO YOU WANT TO PROGRAM?
Number Feature Superv. Filter Tone
Programming a key
* Consult your system operator.
Whatever the type of programming used (number or function), the procedure for access is the
same.
Page 55

Programmable keys
47
Number
You can program the telephone number of an internal
or external correspondent.
1 - Press the Number interactive key.
The display prompts you to enter the number.
2 - Enter the correspondent's number, without forgetting to
enter the access code to an external line in the case of an external correspondent (0).
. If you make a mistake, using the Erase interactive key.
3 - Press the Enter interactive key to accept the programming.
The display shows the programming.
You can now call this correspondent simply by pressing
this key.
Enter
Suppose you want to program a feature: message, call
forwarding, alarm, lock, absent, filtering, DND, protect, etc.
1 - Press the Feature interactive key.
The display shows the prompt "SELECT A FEATURE".
2 - Press the interactive key corresponding to the desired
feature (Forward, for example)
The display prompts you to choose the type of call forwarding.
3 - Press the Immed. interactive key, for example.
The display prompts you to enter the number of the set
to which calls will be forwarded to immediately.
4 - Enter the extension number and then press the Enter
interactive key.
The display shows the programming.
This way, you will be able to invoke one of the features
(message, call forwarding, alarm, lock, etc) by simply
pressing the programmed key.
Programming
a number:
Programming
a feature:
Erase
Feature
Forward
Immed.
Enter
Page 56

Programmable keys
48
Superv.
Extens.
Yes
You can program the supervision feature for your
own extension or another extension.
1 - Press the Superv. interactive key.
The display shows "WHAT DO YOU WANT TO SUPERVISE?"
2 - Press the Extens. interactive key, for example.
The display prompts you to supervise your extension
or another extension.
3 - Press the Yes interactive key to supervise another
extension, for example.
The display prompts you to enter the number of the extension
that you want to supervise.
4 - Enter the extension number, and then press the Enter
interactive key.
The display prompts you to select the manner in which
the supervised extension will notify you.
5 - Press the Beep interactive key, for example.
The display shows the programming.
This way, the icon associated with the programmed key
will inform you about telephone usage by the co-worker
concerned, and you will be able to intervene by simply
pressing the key.
Programming
supervision:
Enter
Beep
Activ.
Filter
Suppose you want to program the feature of filtering
the telephone calls of a co-worker.
1 - Press the Filter interactive key.
The display prompts you to choose between the role of filtering
correspondent or filtered correspondent.
2 - Press the Activ. interactive key to assume the role
of filtering correspondent, for example.
The display prompts you to enter the number of the filtered
extension.
3 - Enter the number of the extension to filter.
. If you make a mistake, use the Erase interactive key.
Programming filtering:
Page 57

Programmable keys
49
4 - Press the Enter interactive key to accept the programming.
The display shows the programming.
This way, you can enable or disable the filtering function
by simply pressing this key, as a function of your work.
Tone
Programming
a series of codes:
This involves programming a series of codes that will be
interpreted by the set during the progress of a call.
You can, for example, program the sequence for access
to your voicemail service.
1 - Press the Tone interactive key.
The display prompts you to enter the code.
2 - Enter the sequence.
Example: enter the number of the voice mailbox followed by #,
then your personal voicemail code followed by #.
. If you make a mistake, use the Erase interactive key.
. To insert a pause between two series of codes, press the
Pause1 or Pause2 interactive keys.
3 - Press the Enter interactive key to accept the programming.
The display shows the programming.
This way, simply pressing this key when using the set
during a call will provide you with all expected information
and will give you fast access to the expected service.
Enter
Enter
Mailbox no. # pswd #
Deleting, modifying and exiting programming
Erase
After having programmed a key, The display shows
the programming status of this key, and will give you various
possibilities.
- Press the Erase interactive key to erase the programming
shown.
Page 58

Programmable keys
50
Start
- Press the Modify interactive key and resume programming
as explained above, in order to modify the programming
displayed.
- Press the Start interactive key to resume at the beginning,
in order to program another key.
- Press the End interactive key to exit programming mode.
Reminder: during programming,
- pressing the red key aborts the setting in progress;
- two keystrokes on the red key terminates
the programming sequence.
End
Identifying programmed keys
There are two paper labels to enable you to mark the names
of correspondents or functions programmed on each group of
10 keys.
1 - Remove the transparent cover over the label, by lifting
the bottom of the label.
2 - Write the name of the programmed correspondent or function on the label.
3 - Refit the transparent cover in position.
Monday 16 October 09:26 AM
Comm Pick-up Funct. Lang.
Forward
M.Martin
Filter
Assistant
Home
Bank
Taxi
Travel A
Line 1
Line 2
Superv.
Superv.
Labels
Modify
Page 59

The call forwarding function
51
Funct.
Feature
Forward
Delayed
Busy
Immed.
All
You can forward your calls to another extension, to an external number (a GSM number,
for example) or to a voice mailbox if you are away or already on the telephone*.
Forwarding your calls
Call forwarding function*
1 - Press the Funct. interactive key;
2 - Then press the Feature interactive key;
3 - And then press the Forward interactive key.
The display offers three types of call forwarding:
Note: the display may show the status of the forward feature
previously enabled, and in this case the Cancel interactive
key will be enabled.
SELECT TYPE OF FORWARDING
Content Delayed Busy Immed.
You have a choice between three types of call forwarding:
. For forwarding on no answer, press the Delayed
interactive key;
. For forwarding on busy, press the Busy interactive key;
. For immediate forwarding, press the Immed. interactive key.
The display offers to specify the origin of calls to be forwarded.
Choosing a type
of forwarding:
You will have to choose the origin of calls to be forwarded:
. To forward all calls, press the All interactive key.
Choosing the origin
of calls:
* Depending on the features provided by your system operator.
To gain access to the forward function:
Page 60

The Call Forwarding Function
52
Extern.
Intern.
Extens.
Enter
. To forward all calls from external lines, press the Extern.
interactive key;
. To forward calls from internal lines, press the Intern.
interactive key.
The display shows the forward status.
You will now have to choose the forward destination.
. To forward calls to an interior extension:
1 - Press the Extens. interactive key.
2 - Enter the extension number.
. If you make a mistake, use the Erase interactive key.
3 - Press the Enter interactive key.
. To forward calls to a voice mailbox:
- Press the V Mail interactive key.
. To forward calls to an external number:
1 - Press the Ext.L. interactive key.
2 - Enter the external number (with the dialing code
for obtaining an external line).
. If you make a mistake, use the Erase key.
3 - Press the Enter interactive key.
The display confirms forwarding of your calls.
Note: If you want to modify this programming,
press the Previous interactive key to restart the process.
Choosing the forward
destination:
V Mail
Ext.L.
Enter
Page 61

The call forwarding function
53
Cancel
More
Canceling call forwarding
When the set is idle, to consult the status of your call forwarding:
1 - Press the More interactive key.
The display shows the forwarding details.
2 - Press the Cancel interactive key.
A sound message and the display confirm cancellation of forwarding.
1 - Press the key.
The display shows " PROGRAMMING".
2 - Press the key.
The display shows "WHAT DO YOU WANT TO PROGRAM?"
3 - Press the Key interactive key.
The display prompts you to select the desired programmable key.
4 - Press a programmable key.
The icon associated with this key illuminates steadily, and the
display shows the programming status of the said key.
5 - Press the Modify interactive key.
The icon associated with this key illuminates flashes.
6 - Press the Feature and Forward keys in succession.
Then resume the sequence described in this section, namely:
- You must choose the type of forwarding, and then enter
the extension number to which to forward calls.
Nota: You can store only the sequence without the number. In
this case, while activating the function, you enter the desired
extension number.
Programming call forward on a programmable key
Key
Modify
Feature
Forward
When a type of forwarding is repetitive in nature, we recommend you to save the function to a
programmable key.
Page 62

The call forwarding function
54
Suppose you want to enable call forwarding:
- Press the programmed key.
Depending on the programming, the display hasks to enter the
extension number.
The forward function is enabled and the icon opposite the key
illuminates steadily, as a reminder.
Activating call
forwarding:
Suppose you want to disable call forwarding:
- Press the programmed key.
The forward function will be disabled and the icon
will extinguish.
A sound message and the display confirm cancellation of forwarding.
Disabling call
forwarding:
Overriding the call forwarding function*
1 - Press the and keys in succession.
2 - Then dial the number of the desired extension.
Note: this function is subject to a called correspondent and
calling correspondent right: consult the system operator.
Call fwd
Call fwd
or
* Depending on the features provided by your system operator.
Suppose you want to call a correspondent and calls to his/her extension have been forwarded.
You can override the forward function and make a call to the desired extension.
Page 63

The voice mailbox
55
The voicemail system* helps you manage your communications when you are absent
or when you simply don't want to be disturbed. For the voicemail system to be able
to record your messages, you must configure and customize your mailbox, and then
have your calls forwarded.
The voice mailbox*
- Dial the voicemail number .
You can also press the Comm interactive key and then the
(-->), V Mail keys.
Or press the key.
You will be guided by voice prompts instructing you about
the various commands, so that you can invoke the main menu.
We recommend you to immediately:
- personalize your password;
- record your name;
- record your greeting message.
If necessary, consult your system operator for additional
information on using the voicemail system.
Configuring and customizing your voice mailbox*
Funct.
Feature
Forward
Delayed
All
Activating forwarding of calls to the voicemail system
1 - Press the Funct., Feature and Forward interactive
keys in succession.
2 - Select the type of forwarding (delayed forwarding,
for example).
3 - Select the origin of calls to be forwarded (such as calls
from all origins).
* Depending on the features provided by your system operator.
You must call the voicemail system in order to gain access to the voice mailbox configuration
and customization menus.
If you want to forward your calls to the voicemail system:
Page 64

The voice mailbox
56
Consulting messages received
When you receive a new message, the display shows
the message "PLEASE CALL YOUR MAILBOX".
The lamp to the right of the interactive keys informs you that a
new message has been received:
- lamp illuminated steadily: at least one message is present in
your voice mailbox;
- lamp flashes quickly: there is a message in your voice mailbox
and a new call in the incoming calls log;
- lamp extinguished: no message in your voice mailbox.
To call your voice mailbox:
1 - Press the Redial interactive key.
Or press the key.
A voice prompt will guide you on the voicemail system, and will
instruct you about the various commands, so that you can gain
access to your voice mailbox. Simply follow the instructions.
2 - Dial the mailbox number, followed by # and/or password
followed by # (*).
Note: we recommend you to assign this sequence to a
programmable key.
A voice prompt will inform you of the number of messages received.
3 - Press the Listen interactive key (*),
or press the key on the dialing keypad.
The first message is played back, and a voice prompt informs
you of the commands available for managing messages
(next, previous, delete, archive, etc).
You can also use the interactive keys for gaining access
to the available commands.
The message lamp extinguishes after you have consulted your
messages.
Redial
Listen
4 - Press the V Mail interactive key.
The display confirms that calls will be forwarded to the voicemail
system.
Note: We recommend you to assign this function to a programmable key, so that you can easily enable and disable forwarding of your calls to the voicemail system (refer to the section
on The Call Forwarding Function).
Mailbox no. # pswd #
* Depending on the features provided by your system operator.
Monday 16 October 09:26 AM
Comm Pick-up Funct. Lang.
Forward
M.Martin
Filter
Assistant
Home
Bank
Taxi
Travel A
Line 1
Line 2
Superv.
Superv.
Message
lamp
V Mail
Page 65

The voice mailbox
57
1 - Press the key.
The display shows " PROGRAMMING".
2 - Press the key.
The display shows the message "WHAT DO YOU WANT
TO PROGRAM?"
3 - Press the Key interactive key.
The display prompts you to select the desired programmable key.
4 - Press a programmable key.
The icon associated with this key illuminates steadily, and the
display shows the programming status of the said key.
5 - Press the Modify interactive key.
6 - Press the Tone interactive key.
7 - Enter the key sequence (mailbox no. followed by # and/or
password, followed by #)*.
8 - Press the Enter interactive key to accept the programming.
This way, after you have called the voicemail system, when
the voice prompt asks you to enter the mailbox number and/or
your password,
- Simply press the programmed key.
You will gain direct access to the main menu of your mailbox.
Programming access codes on a programmable key
Key
Modify
Tone
Mailbox no. # pswd #
Enter
Using the programmed
key:
Mailbox
access
* Depending on the features provided by your system operator.
You can assign the codes for gaining access to your voice mailbox to a programmable key.
Page 66

The multikey function
58
A multikey-programmed set has one single directory number, but has customized keys
allowing it to handle several calls in parallel. This means you can answer incoming calls
as and when the calls arrive, and can view calls that have been placed on hold.
Note: you must program one customized key for each call you want to be able to accommodate
simultaneously. For example, to deal with three calls at the same time, program the multikey
function on three keys.
The multikey function
1 - Press the key.
The display shows " PROGRAMMING".
2 - Press the key.
The display shows "WHAT DO YOU WANT TO PROGRAM?"
3 - Press the Key interactive key.
The display prompts you to select the desired programmable key.
4 - Press a programmable key.
The icon associated with this key illuminates steadily, and the
display shows the programming status of the said key.
5 - Press the Modify interactive key.
The display shows the message "WHAT DO YOU WANT
TO PROGRAM?"
6 - Press the Superv. interactive key.
The display shows the message "WHAT DO YOU WANT
TO SUPERVISE?"
7 - Press the Extens. interactive key.
The display prompts you to supervise your extension
or another extension.
8 - Press the Yes interactive key to supervise your own extension.
The display shows the number of keys already programmed
for the purpose.
Programming the multikey function
Key
Modify
Superv.
Extens.
Yes
Page 67

The multikey function
59
Communicating with the multikey function
When a call arrives on your multikey-programmed telephone
set, the icon associated with the customizable key flashes.
- Press this programmed key to answer the caller.
The icon associated with this key switches to steady
illumination and the display shows the identity of the caller.
Answering a call:
If a second calling correspondent calls in, you will hear a beep
and a second key will flash.
1 - Press the Wait interactive key to view the caller's identity.
2 - Press the Answer interactive key.
You can also press the programmed key associated with the
blinking icon.
You are on-line with the second caller.
The indicator for this key switches to steady illumination and
the displays presents the on-line caller's identity.
The first correspondent is placed on hold.
The icon associated with his/her key flashes.
Answering
a second call:
You will have programmed the multikey function to at least two keys.
Wait
Key
1
Key
1
Key
2
9 - Press the Add interactive key to accept the new
programming.
10 - Press the <-Start interactive key, and then proceed
to program the multikey function to at least one other
customizable key.
When you have finished programming,
- pressing the red key twice restores the telephone set
to idle mode.
Add
<-Start
Divert
Answer
Key
2
If, after seeing the identity of the second caller, you do not
want to answer, you can divert the call.
- Press the Divert interactive key and then enter the extension
number to which you want to divert the call.
The icon associated with this call extinguishes.
Key
1
Page 68

The multikey function
60
When you are talking with one correspondent and another correspondent is on hold.
- Press the programmed key associated with the blinking icon.
The icon associated with the key of the correspondent in
conversation will be steadily illuminated and the display will
show his/her identity.
The icon associated with the key of the correspondent on hold
flashes.
Note: a multikey telephone set is perceived as free as long
as there is at least one position available, i.e. at least one
programmable key free.
Switching from
one correspondent to
another:
A telephone set used in multiline mode will have several directory numbers *. Each directory
number will be assigned to a programmable key.
This function is mainly used for programming the following on one telephone set:
- one so-called switchboard number, which you can make known to everyone;
- one so-called private number that you only make known to certain people;
it can also be an emergency number.
Examples:
For a manager: - unfiltered private number;
- number filtered by his/her assistant;
For an assistant: - private number for his/her own calls;
- number intended for taking filtered calls for the manager.
The multiline function*
Key
1
Key
2
* Depending on the features provided by your system operator.
Page 69

The multiline function
61
1 - Press the key.
The display shows " PROGRAMMING".
2 - Press the key.
The display shows "WHAT DO YOU WANT TO PROGRAM?".
3 - Press the Key interactive key.
The display prompts you to select the desired programmable key.
4 - Press a programmable key.
The icon associated with this key illuminates steadily, and the
display shows the programming status of the said key.
5 - Press the Modify interactive key.
6 - Press the Superv. interactive key.
The display shows the message "WHAT DO YOU WANT
TO SUPERVISE?"
7 - Press the Extens. interactive key.
The display prompts you to supervise your extension
or another extension.
8 - Press the Yes interactive key to supervise your own set.
The display shows the number of keys already programmed
with supervision mode for this directory number.
9 - Press the Add interactive key to accept the new
programming.
The display confirms the programming of the key.
10 - Press the <-Start interactive key (to repeat the procedure
for the second directory number).
11 - Press another programmable key.
The display shows the programming status of the said key.
12 - Press the Modify interactive key.
Programming the multiline function
Key
Modify
Superv.
Extens.
Yes
Add
<-Start
Modify
Below is an explanation of how to program the supervision function for each of the two tele-
Page 70

The multiline function
62
Attention!
Your set is now programmed in multiline mode.
You can use the features assigned to your telephone set by assigning them as you desire
to the directory numbers at your disposal. Each directory number can also be programmed
with multikey mode (management of inquiry/transfer or consultation hold).
A set of 10 personal abbreviated numbers is assigned to each directory number.
Example: for two directory numbers, you have altogether 20 personal abbreviated numbers.
You have a voice mailbox associated with each directory number. The programming of
forward calls is performed separately using access passwords that can be different.
Note that certain procedures described in this guide differ when your set is programmed
in multiline mode. An additional operation is required when programming certain features:
the selection of the line to forward, for example, by pressing one of the multiline-programmed
keys. Always follow the instructions shown on the display.
Superv.
Extens.
Yes
Add
More
13 - Press the Superv. interactive key.
14 - Press the Extens. interactive key.
15 - Press the Yes interactive key to supervise your set.
The display shows the number of keys already programmed
with supervision mode for the first directory number.
16 - Press the More interactive key.
The display shows the number of keys already programmed
with supervision mode for the second directory number.
17 - Press the Add interactive key to validate
the new programming.
The display confirms the programming of the key.
Note: use the red key to cancel a setting or to terminate
the process.
Page 71

The multiline function
63
If another correspondent initiates a call on the second line, you
will hear a beep and the icon of a second key will flash.
1 - Press the Wait interactive key to view the caller's identity.
If you don't want to answer:
- press the Divert interactive key;
- then dial the extension number to which you want
to divert the call.
2 - Press the Answer interactive key.
You can also press the programmed key associated
with the blinking icon.
You are on-line with the second caller.
The icon for this key switches to steady illumination and the
displays presents the on-line caller's identity.
The first caller is placed on hold.
The icon associated with his/her key flashes.
Answering
a second call:
Key
1
Key
2
Communicating with the multiline function
When a call arrives on your set programmed in multiline mode,
the icon associated with the customized key flashes.
- Press this programmed key to talk to the caller.
The icon associated with the key switches to steady
illumination. The display presents the caller's identity.
Answering a call:
The multiline function will have been assigned to at least two programmable keys of your set.
Key
1
Key
1
Key
2
Wait
Divert
Answer
When you are talking to one correspondent and another correspondent is on hold.
- Press the programmed key associated with the blinking icon.
The icon associated with the key of the correspondent in conversation will be illuminated steadily.
The icon associated with the key of the correspondent on hold
will flash.
Switching from one
correspondent to
another:
Key
1
Key
2
Page 72

The supervision function
64
Programming supervision of a range of extensions on your telephone allows you to:
- ascertain the status of the extension you are supervising (free, called or busy);
- quickly intercept calls to these extensions;
- directly call these extensions.
Note: you can also program supervision of an external line or a trunk line. In those particular
cases, we recommend you to consult your system operator.
The supervision function
1 - Press the key.
The display shows « PROGRAMMING»
2 - Press the key.
The display shows "WHAT DO YOU WANT TO PROGRAM?".
3 - Press the Key interactive key.
The display prompts you to select the desired programmable key.
4 - Press a programmable key.
The icon associated with this key illuminates steadily, and the
display shows the programming status of the said key.
5 - Press the Modify interactive key.
The display shows the message "WHAT DO YOU WANT
TO PROGRAM?"
6 - Press the Superv. interactive key.
The display shows the message "WHAT DO YOU WANT
TO SUPERVISE?"
7 - Press the Extens. interactive key.
The display prompts you to supervise your extension or another extension.
8 - Press the Yes interactive key to supervise another extension.
The display prompts you to enter the number of the extension
you want to supervise.
9 - Enter the extension number and then press the Enter
interactive key.
The display prompts you to select the manner in which
the supervised extension will notify you.
Programming the supervision function
Key
Modify
Superv.
Extens.
Yes
Enter
Page 73

The supervision function
65
Beep
Transfer
Communicating with the supervision function
. When the supervised extension is idle, the icon associated
with the key will be extinguished.
. When the line of the supervised extension is busy, the icon
associated with the key will be illuminated.
. When a call arrives on the supervised extension, the icon
associated with the programmed key will flash and, depending
on the programming, an audible signal will sound on your set.
Suppose the supervised extension receives a call and you want
to intercept the call.
- Press the programmed key.
You can hold a conversation with the call initiator.
The icon associated with the programmed key will extinguish.
Intercepting a call:
Superv.
Ext. 1
Superv.
Ext. 1
You have programmed the supervision function for one extension on a programmable key.
On your set, the status of the icon associated with the key programmed for supervision will
vary depending on the status of the extension supervised.
Superv.
Ext. 1
10 - Select the signaling mode (such as beep signaling,
for example).
You will have a choice between signaling by means of a repeated
beep (rep. beep), or ring tone, or no signaling (mute).
Note:
. A customizable key must be programmed for each post
supervised.
. A given extension may be supervised by several
other extensions.
Superv.
Ext. 1
Suppose you are in communication with a correspondent and
want to transfer the said correspondent to the supervised
extension.
- Press the programmed key and then press the Transfer
interactive key.
The icon associated with the programmed key will illuminate.
Transferring
the call received to the
supervisedextension:
Superv.
Ext. 1
Suppose you want to call the supervised extension.
- Press the programmed key.
The icon associated with the programmed key will illuminate.
Calling the supervised
extension:
Superv.
Ext. 1
Page 74

The filtering function
66
Enter
Filter
This feature makes it possible to filter calls for a third person (e.g. Assistant/Manager).
This requires the use of two programmable keys on the “Assistant” extension (filtering
extension) and on the “Manager” extension (filtered extension); one to activate or deactivate
the filtering function, the other to supervise the calls from the filtered extension.
The filtering function
1 - Press key.
The display shows " PROGRAMMING".
2 - Press key.
The display shows the message "WHAT DO YOU WANT
TO PROGRAM?"
3 - Press the Key interactive key
The display prompts you to select the desired programmable key.
4 - Press a programmable key.
The display shows the key status.
5 - Press the Modify interactive key.
The display shows the message "WHAT DO YOU WANT
TO PROGRAM?"
6 - Press the Filter interactive key.
The display prompts you to specify if you are filtering
or being filtered.
7 - Press the interactive Activ. key if you want to filter,
for example.
The display prompts you to key-in the number of the filtered
extension.
8 - Dial the number of the extension to be filtered.
. If you make a mistake, press the Erase interactive key.
9 - Press the Enter interactive key to confirm programming.
The display confirms the key program status.
You must now program supervision of the filtered extension.
10 - Press a second programmable key.
The display shows the key status.
Programming the filtering function*
Key
Modify
Activ.
* Depending on the features provided by your system operator.
Programming
the filtering function:
Programming
the supervising function:
Page 75

The filtering function
67
11 - Press the Modify interactive key.
12 - Press the filter interactive key.
The display shows the message in step 7.
13 - Press the superv. interactive key for the filtering set.
The display prompts you to key in the number of the extension
to be filtered.
14 - Key in the number of the extension then press the Enter
interactive key.
The display prompts you to select the manner in which
the supervised extension will notify you.
15 - Select the signaling mode (such as beep signaling, for
example).
You will have a choice between signaling by means of a repeated
beep (rep. beep), or ring tone, or no signaling (mute).
Reminder: press the red key to cancel a setting or to put
an end to the sequence.
You must repeat the operation on the filtered extension
however at:
7 - Press the Activ. interactive key for filtered;
13 - Press the Superv. interactive key for filtered.
Communicating with the filtering function
You have programmed the keys in order to use the filtering function*.
You can activate the filteringfunction either from the filtered
extension or from the filtering extension by using the key programmed with the filtering function.
- Press the key that has been programmed to filter.
A sound message and the display confirm the activating. The
icon associated with the programmed key will illuminate on the
filtered and filtering extension.
Activating
the filtering function:
Filtering
You want to call the person using the filtered set.
- Press the key that has been programmed to supervise.
The icon associated with the programmed key will illuminate.
Calling a filtered set:
Filtered
Superv.
You are filtering:
Modify
Filter
Beep
Superv.
Caution!
* Depending on the features provided by your system operator.
Enter
Page 76

The filtering function
68
You receive a call for the filtered extension.
The display informs you that the call is for the filtered extension.
- Pick up the handset
You can also press the green key.
Answering filtered calls:
Transfer
You are speaking to a caller and want to transfer the call
to the filtered extension.
- Press the key that has been programmed to supervise
then press the Transfer interactive key (or simply hang up
or press the red key).
The icon associated with the key programmed to supervise
will illuminate.
Transferring the call
received to the filtered
set:
Filter
Superv.
You can deactivate the filtering feature either from the filtered
extension or from the filtering extension by using the key
programmed to filter*.
- Press the key programmed to filter.
A sound message and the display confirm the deactivating.
The icon associated with the programmed key will extinguish
both on the filtered and filtering extensions.
Note: Deactivation or activation of the filtering function on
one of the extensions (e.g. filtered) is automatically registered
on the other extension (e.g. filtering).
Deactivating
the filtering function:
Filtering
You want to make a call to the filtering extension.
- Press the key programmed to supervise.
The icon associated with the programmed key will illuminate.
Calling the filtering
extension:
Your calls are being filtered:
You receive a call on the filtering extension.
On your extension, the icon associated with the key programmed
to supervise filtering will flash and depending on programming,
an audible signal is transmitted.
- Press the key programmed to supervise in order to speak
with the call initiator.
The icon associated with the programmed key will extinguish.
Intercepting
a call made to you:
Filtering
Superv.
* Depending on the facilities provided by your system operator.
Filtering
Superv.
Filtering
Superv.
Page 77

The alarm function
69
You can program one or several appointments on your extension using this function.
Your extension will remind you of the appointment at the specified time.
Note: Even if you have forwarded your calls, the appointment reminder will call you
on your extension.
The alarm function
You can record up to four appointments.
1 - Press the Funct. interactive key.
The display shows the message "SELECT A FUNCTION".
2 - Press the Feature interactive key.
The display shows the message "SELECT A FEATURE".
3 - Press the Alarm interactive key
When no other appointments have been recorded, the display
shows the message "APPOINTMENT REMINDER NOT ACTIVATED" and appointment no. 1 is offered.
. To choose another number (from 1 to 4), press the More
interactive key.
4. Press the Activ. interactive key
The display prompts you to key in the time of your appointment.
5. Key in the time of the appointment between 0000 and 2359
(e.g. 1830 corresponds to 6.30 p.m.)
. Press the Erase interactive key if you make a mistake.
6 - Press the Enter interactive key to confirm.
The display confirms the programming.
When you have finished press the red key twice to return
to idle mode.
At the time of your appointment the telephone will ring
and display “Appointment reminder”.
. Press the Mute interactive key to stop the reminder bell.
Programming the alarm function
Funct.
Feature
Alarm
Activ.
Enter
hhmm
More
Erase
Mute
Appointment reminder:
Page 78

The alarm function
70
Modify
Cancel
- Press the Funct., Feature, and Alarm interactive keys
in succession.
The display shows appointment no. 1 status.
- Press the More interactive key to view the other appointments.
Consulting for changing or canceling an appointment
Funct.
Feature
Alarm
When the appointment you want to change is displayed:
1 - Press the Modify interactive key.
The display will prompt you to key in the time of the appointment.
2 - Key in the new time.
3 - Press the Enter interactive key to confirm.
A sound message and the display confirm the changing.
Changing
an appointment:
When the appointment is displayed:
- Press the Cancel interactive key.
The display confirms the programming.
Reminder: use the red key to cancel or end cancelling.
Canceling
an appointment:
More
Enter
hhmm
You want to consult the memorized appointments.
Page 79

The DND (Do Not Disturb) function
71
Extension in idle mode:
1 - Press the Funct. interactive key.
The display prompts you to select a function.
2 - Press the Feature interactive key.
The display shows the message "SELECT A FEATURE".
3 - Press the - ->interactive key.
4 - Press the D.N.D interactive key.
The display shows "DO YOU WANT NOT TO BE DISTURBED?"
5 - Press the interactive Activ. key to finish.
The display shows “DO NOT DISTURB ACTIVATED”
for information.
You will not receive any calls.
Using the DND function
You do not want to be disturbed by the telephone for a certain length of time (DND function)
and therefore do not want to receive any calls.
The DND (Do Not Disturb) function*
-->
Funct.
Feature
D.N.D
Activating
the DND function:
When the extension is idle, the display shows the message
"DO NOT DISTURB ACTIVATED".
- Press the Cancel interactive key.
A sound message and the display confirm the deactivating.
You will now receive calls again.
Reminder: use the red key to return to idle mode.
Deactivating
the DND function:
Cancel
Overriding the DND function*
- Press the keys before dialing the extension
number.
* Depending on the facilities provided by your system operator.
Activ.
You want to speak to a correspondent who has programmed the DND function on his/her
extension. You can force this function and call the extension in question.
Page 80

DND (Do Not Disturb) function
72
Programming the DND function on a programmable key
If you use this function repeatedly, we recommend you to save the function to a programmable
key.
Feature
1 - Press key.
The display shows " PROGRAMMING".
2 - Press the key.
The display shows the message "WHAT DO YOU WANT
TO PROGRAM?"
3 - Press the Key interactive key
The display prompts you to select the programmable key
that you require.
4 - Press a programmable key.
The display shows the key status.
5 - Press the Modify interactive key.
The display shows the message "WHAT DO YOU WANT
TO PROGRAM?".
6 - Press the Feature interactive key.
7 - Press the - ->interactive key.
8 - Press the D.N.D. interactive key.
Key
Modify
-->
D.N.D.
- Press the programmed key.
The icon associated with the programmed key illuminates.
A sound message and the display confirm the activating.
You will not receive any calls.
Activating the function:
- Press the programmed key.
The icon associated with the programmed key will extinguish.
A sound message and the display confirm the deactivating.
You will now receive calls again.
Deactivating the function:
DND
Function
DND
Function
Page 81

Other functions
73
* Depending on the features provided by your system operator.
Other functions
By using this function, you can temporarily retrieve the features and settings from your own
personal extension on another extension.
Password
Funct.
Replace
On the temporarily used extension:
1 - Press the (-->) Funct. interactive key.
The display prompts you to SELECT A FUNCTION.
2 - Press the Replace interactive key.
The display prompts you to key in the number of the extension
that you want to retrieve features from.
3 - Key in the number of your extension.
The display prompts you to key in a password.
4 - Key in your extension’s password
You have access to the various features associated with your
extension number.
Examples:
- You can modify the call forwarding settings.
- You can access your personal abbreviated numbers.
- If you want to notify someone from this temporary extension,
the available messages are those customized by you.
Replace function
Identity presentation* function
You can select the identity shown to the other correspondent when you make a call. You can
choose between the company number, the extension number or no number.
After you have dialed the external access code,
1 - Press the Option interactive key.
Three types of identities are displayed:
Extens. - Company - None.
2 - Press the corresponding interactive key (e.g. Company).
The display confirms your choice.
You can now dial the other correspondent's number.
Note: The choice you have made only applies to the call that
follows. When no choice is defined, the identity shown is the
one programmed by the system operator.
Option
Company
Page 82

Other functions
74
You want to leave the office even though calls are forwarded to your extension.
You can temporarily reroute the forwarded calls back to the called parties to avoid penalizing
callers.
Out of the office function
Absent
Notification function
This function (also accessible when calling, refer to § Dialing a correspondent) makes it possible to send a short message to a correspondent provided that the correspondent is linked to a
digital interface.
Notify
Extension in idle mode,
1 - Press the Funct. interactive key and then the (-->) Notify
interactive key.
2 - Dial the number of the correspondent to notify and then
press the interactive Enter key.
The first of 6 pre-defined messages is displayed.
3 - Press the More interactive key if you want to choose another pre-defined message.
. Depending on your choice you must complete the message
shown or write a message of your own using the alphabetic
keyboard.
. Press the Erase interactive key if you make a mistake.
4 - Press the Enter interactive key to confirm that you want to
send your message.
Message sent confirmation is displayed.
Funct.
Enter
More
Erase
Extension in idle mode.
1 - Press the interactive Funct., Feature, - ->, - ->* keys
in succession.
2 - Press the Absent interactive key.
You are informed that your extension can receive calls
other than your own.
Funct.
Feature
-->
-->
Enter
* Depending on the features provided by your system operator.
Page 83

Other functions
3 - Press the Activ. interactive key.
You are informed that you will only receive your own calls.
When you get back,
. Press the Cancel interactive key.
Request confirmation is displayed.
You can now receive calls other than your own.
Activ.
Cancel
75
You want to transmit data via your telephone line (by using a Modem on the line, for example)
and therefore do not want to be disturbed during the call (i.e. non-presentation of calls waiting).
You can activate this function when required while you are calling (refer to section During a
call).
Consult your system operator if you require this function to be activated at all times.
Data transmission line protection function
Other specific functions that are not described in this guide can be adapted to
your specific needs. Please do not hesitate to contact your system operator who
will advise you and take care of the necessary programming.
Page 84

76
Locking the set
Funct.
Feature
Lock
Modify
1 - Press the Funct. interactive key.
The display shows "SELECT A FUNCTION".
2 - Press the Feature interactive key.
The display shows "SELECT A FEATURE".
3 - Press the interactive key - - >then Lock.
The display shows “EXTERNAL CALLS AUTHORIZED”.
4 - Press the Modify interactive key.
The display shows “SET LOCKED EXCEPT FOR EMERGENCY CALLS”.
Locking your set
Use this function during absences, for example, so you can block outgoing calls from your set
and prevent access to your logs (LNR calls log and incoming calls log) as also to your private
directory.
Note: accessing the directory of internal names is possible.
Important: before activating the locking of your set, you must first have customized your
password (refer to section on Settings - Customizing the set password).
Locking the set
1 - Hold the red key pressed down for 3 seconds.
The display waits for the locking confirmation.
2 - Press the key.
The display shows “SET LOCKED EXCEPT FOR EMERGENCY CALLS”.
Note: you can still call an internal correspondent with the set
locked.
1 - Dial the external access code (0).
The display will ask you to enter your password.
Calling an external correspondent from the locked set
-->
If you have locked your set but may at the time want to call an external correspondent without
unlocking your set.
Note: accessing the directory of external names is not possible.
or
Page 85

Locking the set
77
2 - Dial your password,
. If you make a mistake, you will have to repeat the operation.
As soon as the password is validated, you will be authorized
access to external calls.
You can dial your correspondent’s number. When the correspondent answers, you can hold a conversation.
Note: At the end of the conversation, the set will return to
locked status.
Password
1 - Press the interactive key Comm then the Emergcy
interactive key.
2 - Dial the emergency number (e.g., 18).
Note: at the end of the conversation, the set will return
to locked status.
Comm
Emergcy
Calling an emergency number from a locked set
1 - Press the Cancel interactive key.
The display will ask you to enter your password.
Deactivating set locking
Cancel
1 - Hold the red key pressed down for 3 seconds.
The display prompts you to enter your password.
Note: Having pressed a key ( green key, or ),
you will also be prompted to enter the password to deactivate
locking.
2 - Dial your password.
Note: if the code is wrong, you will have to repeat the operation.
As soon as the code is validated, the display will confirm
deactivation of locking.
You will then again have access to all the set facilities.
Password
You can make emergency calls from a locked set.
When in idle mode, the display will remind you that the set is locked. If you want to unlock
the set.
Page 86

Settings
78
Settings
You can choose the type of melody (16 different melodies) and adjust the volume (8 levels) of
the current ring.
A privilege ring is used to inform you when the correspondents stored in list No. 4 in the private directory call you. You can choose the melody and adjust the ring volume.
1 - Press the key.
The display shows " PROGRAMMING".
2 - Press the key until the display shows “ RING”.
3 - Press the key.
The display indicates the current ring melody.
4 - Consecutively press the or keys for access to different settings of the ring.
RING
Choosing and setting
the current ring:
When the display indicates «RING MELODY : XX».
- Consecutively press the or keys to choose the type of
current melody. Sixteen different melodies are available.
Note: By default, melody No. 8, is used to inform you when
the correspondents stored in list No. 4 in the private directory
call you. Therefore, we recommend that you choose another
melody as the current melody.
Each time the key is pressed, the corresponding melody is
broadcast and the display indicates its number.
- Press the key.
The display indicates «RING VOLUME : X».
- Consecutively press the or keys to to adjust the
current ring volume.
The volume can be set at 8 levels, including ringing cutoff.
Each time the key is pressed, ringing is broadcast at the new
level and the display indicates this level.
- Press the key to confirm the setting.
Choosing and setting the set ring
Page 87

Settings
79
Choosing and setting
the priviliged ring:
When the display indicates «PRIVILEGED RING MELODY:
XX».
- Consecutively press the or keys to choose the type of
privileged melody. Sixteen different melodies are available.
Each time the key is pressed, the corresponding melody is
broadcast and the display indicates its number.
Note: By default, melody No. 8, is used to inform you when
the correspondents stored in list No. 4 in the private directory
call you.
- Press the key.
The display indicates «PRIVILEGED RING VOLUME : X».
- Consecutively press the or keys to to adjust the
privileged ring volume.
The volume can be set at 8 levels, including ringing cutoff.
Each time the key is pressed, ringing is broadcast at the new
level and the display indicates this level.
- Press the key to confirm the setting.
Setting the display contrast
You can adjust the display contrast (8 levels).
1 - Press the key.
The display shows " PROGRAMMING".
2 - Press the key until the display shows “ DISPLAY”.
3 - Press the key.
The display indicates the contrast setting.
4 - Consecutively press keys or to adjust display
contrast.
Each time the key is pressed, the contrast changes and the display indicates the new level.
5 - Press the key to confirm the setting.
DISPLAY
Page 88

Settings
80
Funct.
Feature
Passwd
Enter
Enter
Modify
1 - Press the Funct. interactive key.
The display shows “SELECT A FUNCTION”.
2 - Press the Feature interactive key.
The display shows “SELECT A FEATURE”.
3 - Press the Passwd interactive key.
The display shows the code programming status.
4 - Press the Modify interactive key.
The display will ask you to dial the current code.
5 - Dial the current password.
Note: if not customized, the code will be 0000 by default.
. In the event of error, press the Erase interactive key.
6 - Press the Enter interactive key.
. In the event of error, press the Modify interactive key then
restart.
The display will ask you to dial your new password.
7 - Dial the new paswword (4 digits) then press the Enter
interactive key.
The display will ask you to confirm this password.
8 - Dial the new paswword a second time then press the Enter
interactive key.
Note: remember this code. You will need it to access certain
functions.
Customizing the set password
Password xxxx
New password xxxx
Enter
New password xxxx
To access certain facilities (unlocking the set, replace function, etc.) you will need a password.
This code (which is different to the mailbox access code) will be 0000 by default. You will
have to customize this password prior to any use (to unlock the set, for example).
With the set idle,
- Consecutively press keys or to decrease or increase the
key beep volume.
Each time pressed, the new setting is broadcast.
The last setting made remains stored by the set.
Adjusting the key beep volume
Each time a key is pressed, a beep is given. The volume of this beep can be adjusted to 8 levels. The lowest level corresponds to elimination of the beep.
Page 89

Settings
81
1 - Press the key.
The display shows " PROGRAMMING".
2 - Press twice the key.
The display indiactes “ DIRECTORIES MANAGEMENT”.
3 - Press the key.
The display shows the first selection of «BY DEFAULT SEARCH FROM DIR? Private».
4 - Press the interactive key corresponding to the desired list:
Private - Int.Name - Ext. Name (Int.Name: for example).
Depending on the choice made, the direct call on the keypad
is from the private directory or from the shared directory of
internal names or from the shared directory of external names.
Associating a directory with direct keypad call
You can choose the directory associated with the direct keypad call (refer to section on Dialing a correspondent from the directories by name).
This setting is used to choose the language in which internal
messages of the set are displayed.
1 - Press key.
The display indicates « PROGRAMMING».
Choosing the set
internal messages language:
Int.Name
Choosing the display language
Messages broadcast by the display are from two sources: messages from the set and messages
specific to the associated system.
If your set is installed with a recent version system, you have access to only one menu.
The language synchronization is supplied automatically by the system.
Otherwise, a specific menu will let you choose the language in which messages from the set
are displayed.
Page 90

Settings
82
2 - Press the key until the display shows “ LANGUAGE”.
3 - Press the key.
The display presents the first available languages.
. Press the -->interactive key to display the other languages, if
necessary.
4 - Press the interactive key corresponding to your choose (e.g.:
English).
Two beeps are emitted to confirm the language setting.
Depending on the choice, the display presents system
information in the selected language.
CHOOSE DISPLAY LANGUAGE
Français English Deutsch Nederl --->
English
--->
Language
To choose the language in which messages from the system are
displayed:
When the set is iddle,
1 - press the Language interactive key.
2 - Press the interactive key corresponding to the required language (for example, English).
The display shows the date and time in the selected language.
Choosing the system
message language:
English
You can choose the language in which all messages will be
shown on the display.
When the set is iddle,
1 - press the Lang. interactive key.
2 - Press the interactive key corresponding to the required language (for example, English).
All messages shown by the display are in the same language.
Choosing the set and
system messages
language :
Lang.
English
Page 91

Settings
83
Programming a micro-headset connection
Your set is designed for use with a micro-headset. Once the micro-headset is connected,
you have to program the micro-headset connection.
Consult your system operator. He will adjust your micro-headset setting to your specific
needs.
Note: your set must be programmed for multikeys (refer to section on Multikey function)
for access to headset programming (Connect interactive key).
Connect
Headset
Auto
1 - Press key .
The display indicates "7/Access features".
2 - Press key .
The display indicates "WHAT DO YOU WANT TO PROGRAM?"
3 - Press the Connect interactive key.
The display indicates the programmed mode (handset).
4 - Press the Headset interactive key.
The display proposes auto or manual headset mode.
. Handset headset mode: to answer a call, you have to press
key (or the green key).
. Auto headset mode: when called, you can speak to your
caller directly in the micro-headset without pressing any keys.
5 - Select the desired mode (for example, Auto).
The display confirms the choice.
At end of programming,
- pressing the red key returns to idle.
Page 92

Miscellaneous
84
Call between three parties, using a call between two parties.
A set with access to ISDN network services is called digital.
This is the shared directory of the names of external correspondents
recorded in the system by the system operator.
This is the shared directory of the names of internal correspondents
recorded in the system by the system operator.
This is the directory of collective abbreviated numbers recorded in the
system by the system operator.
This is the directory of personal abbreviated numbers recorded in the
system by the user of the set.
Used to forward calls intended for a set called "Manager" to a set
called "Assistant".
Ringing on a non-identified set.
Telephone mode in which calls can be made or answered without
picking up the handset.
List summarizing calls received by the set (up to 50 calls).
All sets associated within a given group and authorized to intercept
calls intended for this group.
Feature making it possible to receive internal calls without pressing
keys (hands free communication mode).
List summarizing the last ten calls made from the set.
Concerns a set with only one directory number but several
programmed keys to manage several simultaneous calls.
Concerns a set with several directory numbers.
This is the set directory: 100 records (names and numbers) stored.
Personal code, like any password. You have two passwords:
- set password: used to cancel set locking and access to certain
facilities (replace). The default code is 0000.
- mailbox access password: 2 or 4-digit code for access to your voice
mailbox.
Function used to recover the features granted on your normal set
on another set.
Conference call
Digital
Directory of external names
Directory of internal names
Directory of collective
abbreviated numbers
Directory of personal
abbreviated numbers
Filtering
General ring
Hands free
Incoming calls log
Intercept group
Intercom
LNR calls log
Multikey
Multiline
Private directory
Password
Replace
Glossary (words to know)
Miscellaneous
Page 93

85
Miscellaneous
Fault
No display
No tone
No sound
No dial out
Message displayed in
a foreign language
No voice messages
received
Probable causes
Check that the set is connected to the line
(line tone in the handset).
Check the connection cord to the line.
Check that the other sets in the system operate.
Check setting of display contrast.
Check that the set is connected to the line (plug).
Check the connection cord to the handset.
Check that the other sets in the system operate.
Check setting of handset volume, loudspeaker
or micro-headset volume.
Check setting of handset, loudspeaker or micro-headset volume.
Check that you have the right to call outwards.
Check that your set is not locked and that you have dialed
the right password.
Check the choice of display language.
Check your connection to a voice messaging system.
Check your welcome message or voice signature record.
Check activation of call forwarding to your voice mailbox.
A problem? Check…
Page 94

Copyright © 2000 - 2001 Matra Nortel Communications. All rights reserved.
Matra Nortel Communications reserves the right to change its products without notice.
Non-binding document.
Reference: MNPS9076BAAAA01
Date: March 2001
Published in France
 Loading...