

Page 1
Meridian Digital
Telephones
Nortel Knowledge Network
M3905 Call Center
Quick Reference Guide
Enterprise Voice Solutions Customer Documentation
Page 2

While you are away from your desk: Call Forward
38
Page 3

Contents
Introduction to the M3905 Call Center telephone 7
M3905 Call Center telephone ...............................................................7
M3905 Call Center telephone keys
Call Center Agent/Supervisor Features 9
Headset interface .................................................................................9
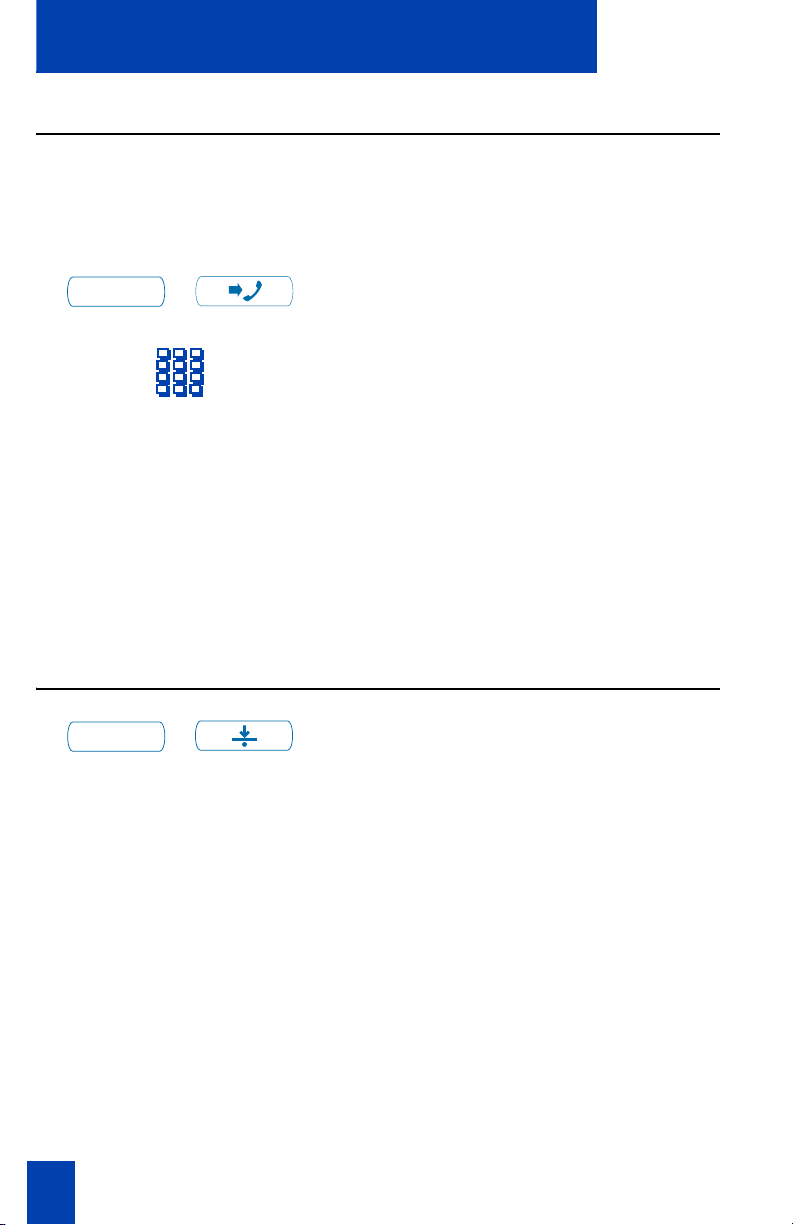
Agent login
Login with Agent ID and Multiple Queue Assignment (MQA)
Correct errors during the login procedure
Default login
Agent logout ....................................................................................12
.........................................................................................9
.....................................................................................12
Call Center Agent features 13
Use Activity Code ..............................................................................13
Answer Call Center calls
Call Forcing
Use the Emergency Key
Activate Make Set Busy
Use Not Ready ..................................................................................16
Answer or make non-ACD calls
Contact your supervisor
Use Walkaway and Return from Walkaway
.....................................................................................15
....................................................................14
......................................................................15
......................................................................15
.....................................................................17
.......................................................8
................10
............................................11
..........................................................16
........................................18
Call Center Supervisor features 20
Agent Keys .......................................................................................20
Answer Agent ...................................................................................20
Answer Emergency
Call Agent
Use the Supervisor Observe and Supervisor Headset Jack
Observe Agent
Interflow
Night Service
.........................................................................................21
............................................................................................22
............................................................................20
.....................21
..................................................................................22
....................................................................................23
Viewing queue status 24
The Meridian 1 ACD Calls Waiting status indicator .............................24
Display Queue on Meridian 1
............................................................24
3
Page 4

Contents
The Meridian SL-100 Multistage Queue Status indicator
Display Queue Threshold on Meridian SL-100
Display agent status on the Meridian 1
Display agent status on the Meridian SL-100
...................................................28
.........................................26
...........................................29
...........................25
Your telephone’s non-ACD call features 30
Make a call ..........................................................................................30
Use the Predial feature
Auto Dial
Ring Again
Redial last number called
Use Speed Call .....................................................................................33
Make a System Speed Call
Answer a call
Place a call on Hold
Transfer a call
Trace a Malicious call ...........................................................................37
Forward calls
Set up a Conference call
.............................................................................................31
..........................................................................................32
.......................................................................................35
......................................................................................36
........................................................................................38
..........................................................................30
......................................................................32
....................................................................34
..............................................................................35
........................................................................39
Options List 40
Select a language .................................................................................41
Change a Feature Key label
Adjust Screen contrast
Adjust volume
Choose Ring type
Select Call Log options ..........................................................................44
Use Live dial pad
Select Preferred name match
Set up area code
Enable Call timer
Select Date/time format
Enable Key click
Headset type selection
Use Headset port on call
Activate Headset port external alerter
Display diagnostics
......................................................................................43
.................................................................................44
..................................................................................45
..................................................................................45
..................................................................................46
...................................................................................46
...............................................................................48
..................................................................41
..........................................................................43
.................................................................45
.........................................................................46
...........................................................................47
........................................................................47
.....................................................48
4 Draft 0.01
Page 5

Contents
Directory display and navigation 49
Access your Callers List, Redial List, or Personal Directory .......................49
Directory password protection .............................................................50
Call Log 52
Access and use the Callers List .............................................................52
Access and use the Redial List
..............................................................54
Use the Personal Directory 55
Access the Personal Directory ...............................................................55
Add a Personal Directory entry
Add an incoming call
Add an outgoing call
Delete or edit a Personal Directory entry
Delete your Personal Directory
Use the Personal Directory to make a call
Use Card View ...................................................................................60
Search for an entry
Copy a number from the Redial List
..........................................................................57
..........................................................................58
.............................................................................61
............................................................55
...............................................58
.............................................................59
.............................................60
.....................................................62
Set-to-Set Messaging 63
Corporate Directory 66
5
Page 6

Contents
6 Draft 0.01
Page 7
Introduction to the M3905 Call Center telephone
Introduction to the M3905 Call Center telephone
Your M3905 Call Center telephone provides easy access to a wide range of
business features.
Your network administrator assigns features to your feature keys and provides you
with passwords and other codes as required.
Meridian 1 and Meridian SL-100 systems automatically control incoming call
routing to answering positions, and can provide music or recorded
announcements to waiting callers.
In this document, Call Center telephone and Automatic Call Distribution telephone
(ACD) are interchangeable terms for the M3905 Call Center telephone.
Optional accessories are available to expand the capabilities of the M3905 Call
Center Telephone.
M3905 Call Center telephone
LCD Display
Goodbye
Hold
Message Waiting Light
LED
Supervisor
Observe Key
Volume Control Bar
Headset
LED
Mute
Supervisor
Emergency
Quit
Navigation Keys
Not Ready
Programmable Line (DN)/
Feature Keys (self-labeled)
Context Sensitive
Soft Keys (self-labeled)
Fixed Feature Keys
In-Calls
Copy
Make Busy
553-9043C
7
Page 8

Introduction to the M3905 Call Center telephone
M3905 Call Center telephone keys
The M3905 Call Center telephone features:
• Eight Programmable Line (DN)/Feature Keys (self-labeled), giving you
access to eight different lines (DNs) or features.
• Four Context Sensitive Soft Keys (self-labeled)
• Six Fixed Feature keys which may be configured to fit your business
needs (see note):
— Headset (with LED indicator)*
— In-Calls*
— Call Supervisor*
— Emergency*
—Not Ready*
—Make Set Busy*
Note: The Headset and In-Calls Keys are required. Your network administrator can
reconfigure the remaining four keys to any of the features listed above. Default keys are
indicated by an asterisk. Order the optional Key Cap Kit to obtain key caps for the
non-default features.
— Call Agent
— Observe Agent
— Answer Emergency
— Answer Agent
—Activity Code
— Display Queue
8
Page 9

Call Center Agent/Supervisor Features
Call Center Agent/Supervisor Features
This section describes features and procedures common to both the Call Center
Agent and the Call Center Supervisor.
Headset interface
The Headset Key is used to switch between the headset and the handset mode of
operation. If you do not have the optional handset installed, all calls will be
connected to your headset. The LED lights steadily to indicate you are in headset
mode. The headset LED is dark (unlit) if you are in handset mode.
If you have the handset option installed, press the Headset Key to enter handset
mode. The headset LED will go dark, and all calls will be presented to the handset.
Lift the handset and press a DN or In-Calls key to receive calls. To make outgoing
calls using your handset, lift the handset and press an individual DN Key to
receive dial tone. If you want to return to headset mode press the Headset Key.
The headset LED will light steadily, and all calls will be presented to the headset.
Note: Refer to your distributor for recommended headset types for use with the
M3905 Call Center telephone.
Test your headset with the telephone before using the telephone to receive calls. In
a noisy environment, an amplified headset is an option. Select Headset type in the
Options list and choose Type 1, Type 2, or Amplified. When an amplified headset
is used, there are two methods of volume control: the Volume Control B ar on the
telephone and the volume control on the headset amplifier. You should adjust the
telephone volume before adjusting the headset volume. To provide the best
communication with the least amount of distortion, the headset volume control
should have a higher setting than the telephone volume control.
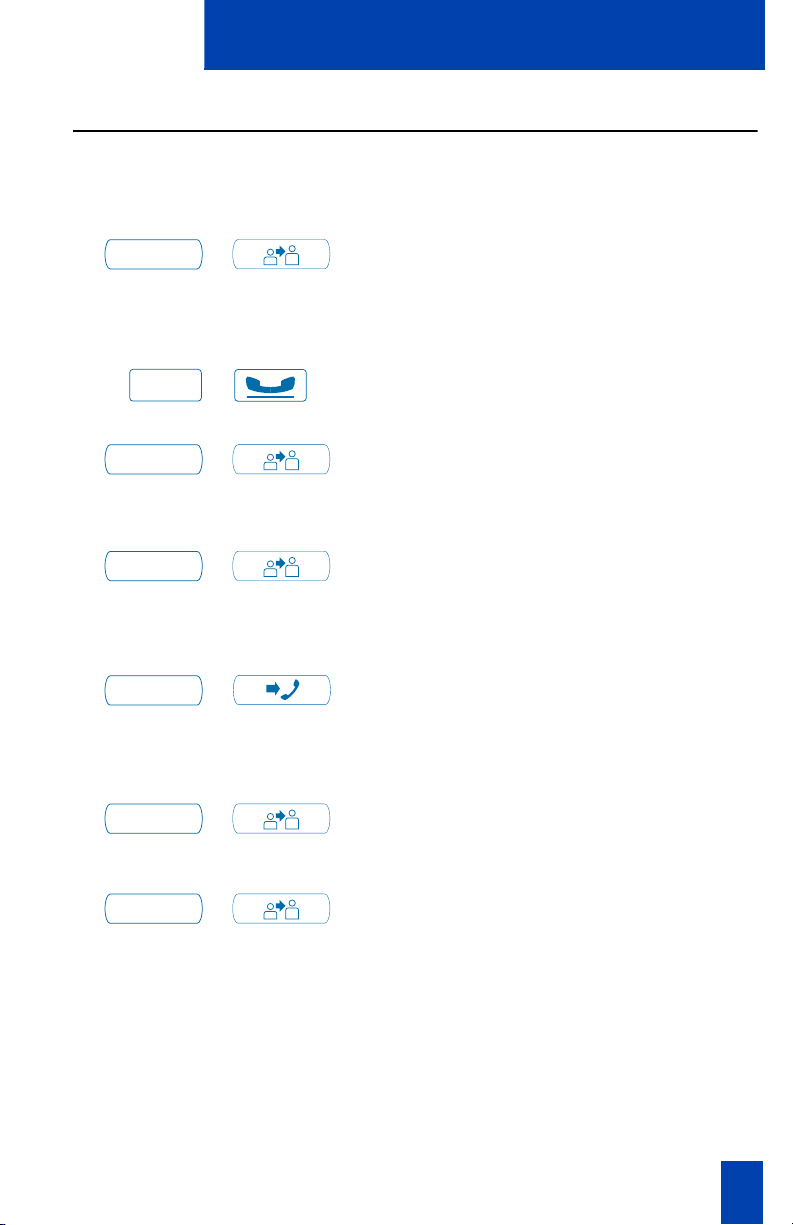
Agent login
In - Calls
In - Calls
Not Ready
/
/
or
/
1. Press the In-Calls Key.
Note: On the Meridian SL-100, press
Make Busy Key until the indicator turns on,
then press the In-Calls Key.
2. Dial your Agent ID (if required).
3. You are automatically placed into Not
Ready state. Press either the In-Calls
Key, or the Not Ready Key to enter the
ACD queue.
9
Page 10
Call Center Agent/Supervisor Features
Login with Agent ID and Multiple Queue Assignment (MQA)
The process of logging in using MQA consists of entering your four digit Agent ID
followed by a Supervisor ID (if your queue requires one) followed by up to five
ACD DNs and priority values (if priority values are being used) terminated by
££.
To choose the default Priority or Supervisor ID, enter £ instead of a Priority entry
or a Supervisor ID entry. The Priority or Supervisor configured for your set will be
used.
Note: A Supervisor who is logging in to accept ACD calls will not be able to
specify a Supervisor ID (even in the case where agents are required to enter
one).
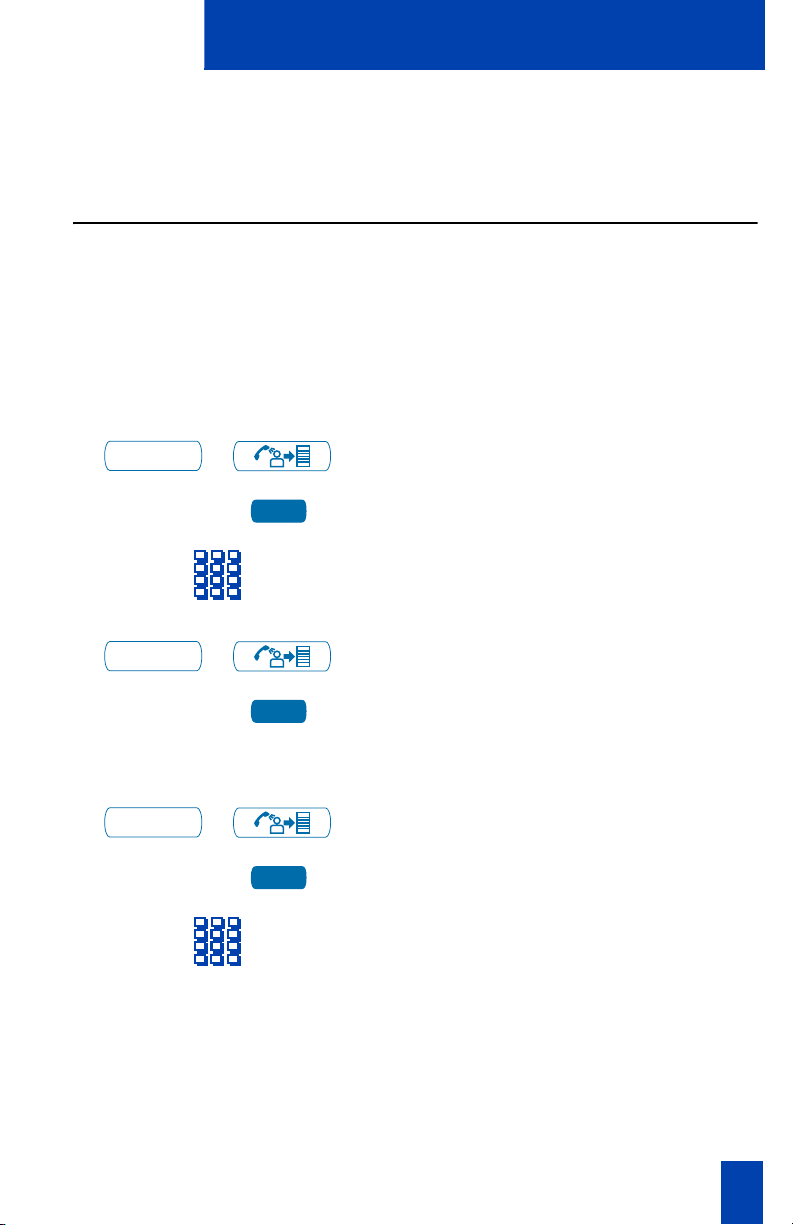
To lo g in :
In - Calls
To login without Supervisor ID and
without Priority:
To login with Supervisor ID and
without Priority:
To login without Supervisor ID and
with Priority:
/
1. Press the In-Calls Key.
2. Select one of the following four login
options:
Dial your Agent ID £ ACD DN 1 £
ACD DN 2 £ ACD DN 3 £
ACD DN 4 £ ACD DN 5 £ £.
Dial your Agent ID £
Supervisor ID £ ACD DN 1 £
ACD DN 2 £ ACD DN 3 £
ACD DN 4 £ ACD DN 5 £ £.
Dial your Agent ID £ ACD DN 1 £
Priority 1 £ ACD DN 2 £
Priority 2 £ ACD DN 3 £
Priority 3 £ ACD DN 4 £
Priority 4 £ ACD DN 5 £
Priority 5 £ £.
10
Page 11
To login with Supervisor ID and with
Priority:
Call Center Agent/Supervisor Features
Dial your Agent ID £
Supervisor ID £ ACD DN 1 £
Priority 1 £ ACD DN 2 £
Priority 2 £ ACD DN 3 £
Priority 3 £ ACD DN 4 £
Priority 4 £ ACD DN 5 £
Priority 5 £ £.
In - Calls
Not Ready
/
or
/
3. Press either the In-Calls Key, or the Not
Ready Key to enter the ACD queue.
Note: The MQA feature is not available on
the Meridian SL-100.
Correct errors during the login procedure
Dial ‚£ to correct the previous entry.
The Supervisor ID, ACD DNs, and
Priorities can be re-entered (see the
example below).
Example
To re-enter ACD DN 1 without using
Priority (press £ ‚ £ to correct
ACD DN 1):
Dial your Agent ID £ Supervisor ID £
ACD DN 1 £ ‚ £ ACD DN 1 £
ACD DN 2 £ ACD DN 3 £
ACD DN 4 £ ACD DN 5 £ £.
Note: This feature is not available on the
Meridian SL-100.
11
Page 12
Call Center Agent/Supervisor Features
Default login
If you normally use the same telephone, you need not repeat the entire login
process at the beginning of each shift. The default login places you in the same
ACD queues and the same supervisor that the set had in the previous login.
Default login:
In - Calls
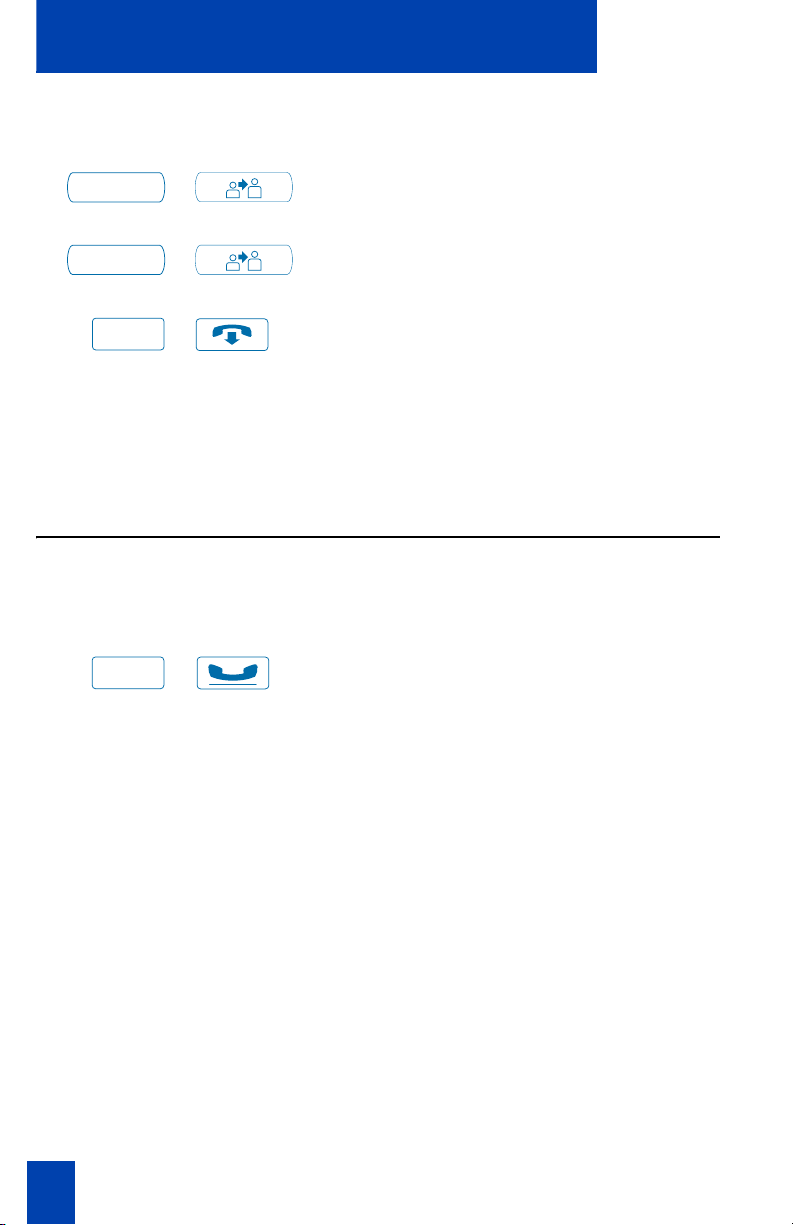
Agent logout
Make Busy
/
/
1. Press the In-Calls Key.
2. Dial your Agent ID £££ (if your
queue requires a Supervisor ID) or
Dial your Agent ID ££ (if a
Supervisor ID is not required).
Note 1: If queues are retained from a prior
login by an Agent ID, each queue is
displayed for two seconds. Press In-Calls,
Not Ready, or Make Busy to cancel display
of Multiple Queues.
Note 2: This feature is not available on the
Meridian SL-100.
Press the Make Busy Key and disconnect
the headset. The LED indicator lights
steadily.
Note 1: On the Meridian 1, if you press
the Make Busy Key again, the LED
indicator will turn off. At this point your
telephone can accept non-ACD calls, but
you are logged out of the queue.
12
Note 2: On the Meridian SL-100, if you
press the Make Busy Key again, the LED
indicator will flash. At this point your
telephone can accept non-ACD calls, but
you are logged out of the queue.
Note 3: If you press the Make Busy Key
while on an ACD call, you will be logged
out automatically when the call is finished.
Page 13
Call Center Agent features
Call Center Agent features
This section explains the features that are available to ACD agent positions.
Use Activity Code
This feature allows you to record the type of activity you are performing. Use the
Activity Key to record Activity Codes on the Meridian 1 and LOB (Line of
Business) Codes on the Meridian SL-100.
Both the Meridian 1 and the Meridian SL-100 track items such as the number of
specific types of calls and the holding times for these calls.
To capture activities on the
Meridian 1:
Activity
Activity
Activity
Activity
To capture the type of ACD call on
the Meridian SL-100:
Activity
Activity
/
/
/
1. Press the Activity Key.
2. Dial the Activity Code that
corresponds to the activity being
performed.
3. Press the Activity Key again.
If performing multiple tasks, repeat these
steps.
1. While on an active ACD call, press the
Activity Key.
2. Dial the LOB Code which reflects the
type of call you are handling. The
digits are shown on the display as you
enter them. If you make a mistake,
press the Activity Key again and
re-enter the correct digits.
Repeat steps one and two for other
applicable codes. You can enter up to three
LOB codes per call.
13
Page 14

Call Center Agent features
Answer Call Center calls
The In-Calls Key is the lower right-hand key on your M3905 Call Center
telephone. The In-Calls Key is your main ACD extension (Primary DN). The
In-Calls Key allows you to answer the next queued call on the primary DN. This
key presents only ACD calls. To disconnect from an ACD call, press the Goodbye
Key or press the In-Calls Key a second time.
To enable you to make outgoing calls and accept non-ACD calls, your network
administrator must configure one or more non-ACD DNs (Individual DNs) to your
M3905 telephone.
Note: If you have the handset option and you pickup the handset, you must also
press a DN key, otherwise the handset is not operable. You can terminate a
call by replacing the handset in the cradle.
Your phone rings and the In-Calls
indicator flashes:
In - Calls
To end an ACD call:
Goodbye
In - Calls
2637
Not Ready
/
/
/
/
or
or
or
or
Press the In-Calls Key. The caller is
connected and the indicator lights
continuously.
Press the Goodbye Key.
or
Press the In-Calls Key (Meridian 1 only).
or
Replace the Handset to terminate a call.
or
Press an Individual Line Key (non-ACD).
This will remove you from the queue.
or
Press the Not Ready Key. This will remove
you from the queue but keep you logged in
as an agent position.
or
14
Wait for the caller to terminate the call.
Page 15
Call Center Agent features
Call Forcing
The Call Forcing option automatically connects incoming ACD calls. You do not
need to press the In-Calls Key. When Call Forcing is on, you have a time interval
between each incoming call that is defined by your network administrator. After
the time interval is up, you hear a tone through the headset and Call Forcing
automatically connects you with the incoming caller.
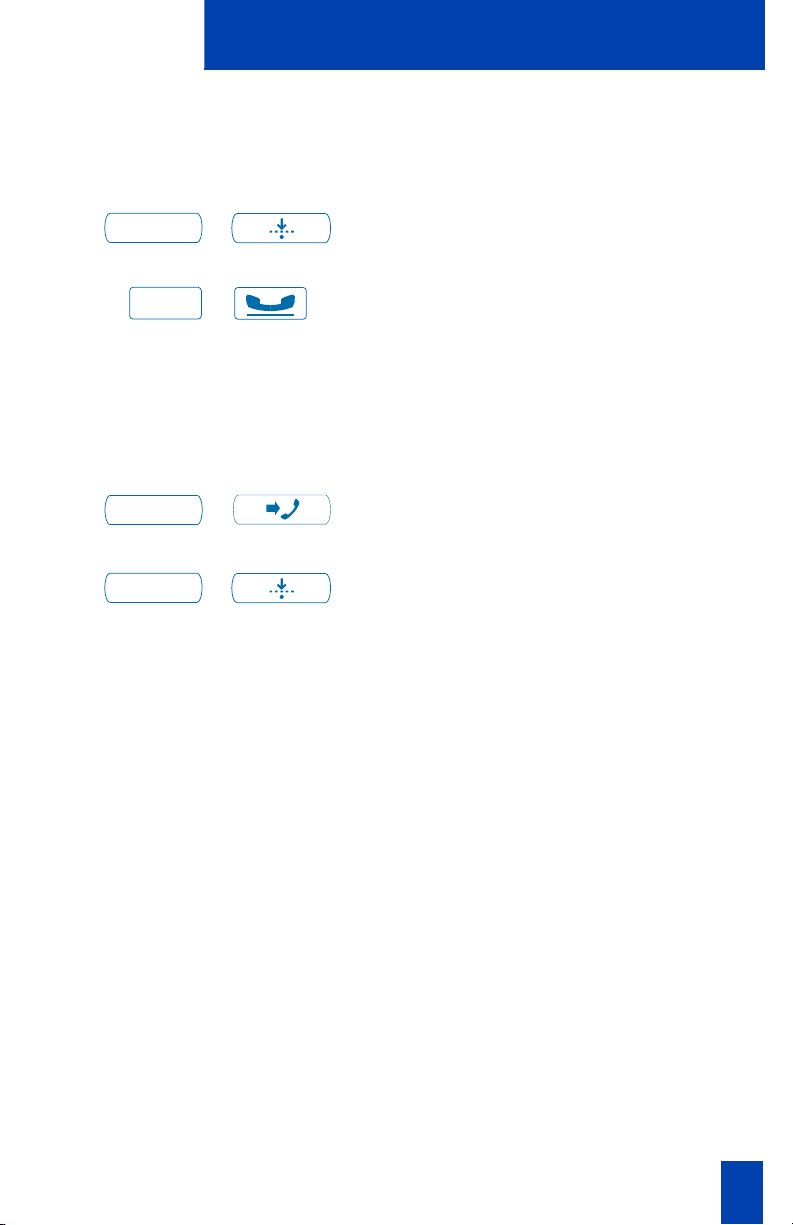
In - Calls
/
Use the Emergency Key
When you have an emergency
situation:
Emergency
/
Activate Make Set Busy
You hear a short tone. The In-Calls
indicator lights continuously and the ACD
call automatically goes to your agent
position.
Note: Pressing the In-Calls Key with Call
Forcing (Auto Answer) on, disconnects an
active ACD call.
Press the Emergency Key. The indicator
flashes while your supervisor is called.
When your supervisor picks up the call, the
LED indicator lights continuously and you
have a three-way conference.
Note: The display shows information about
the call. Before you press the Emergency
Key, write down this information for future
reference.
Make Set Busy allows you to make your telephone appear busy to all callers.
To activate Make Set Busy:
Make Busy
To deactivate Make Set Busy:
Make Busy
/
/
Press the Make Busy Key or lift the handset
and enter the Make Set Busy Activate FFC.
Press the Make Busy Key a second time, or
lift the handset and enter the Make Set
Busy Deactivate FFC.
15
Page 16
Call Center Agent features
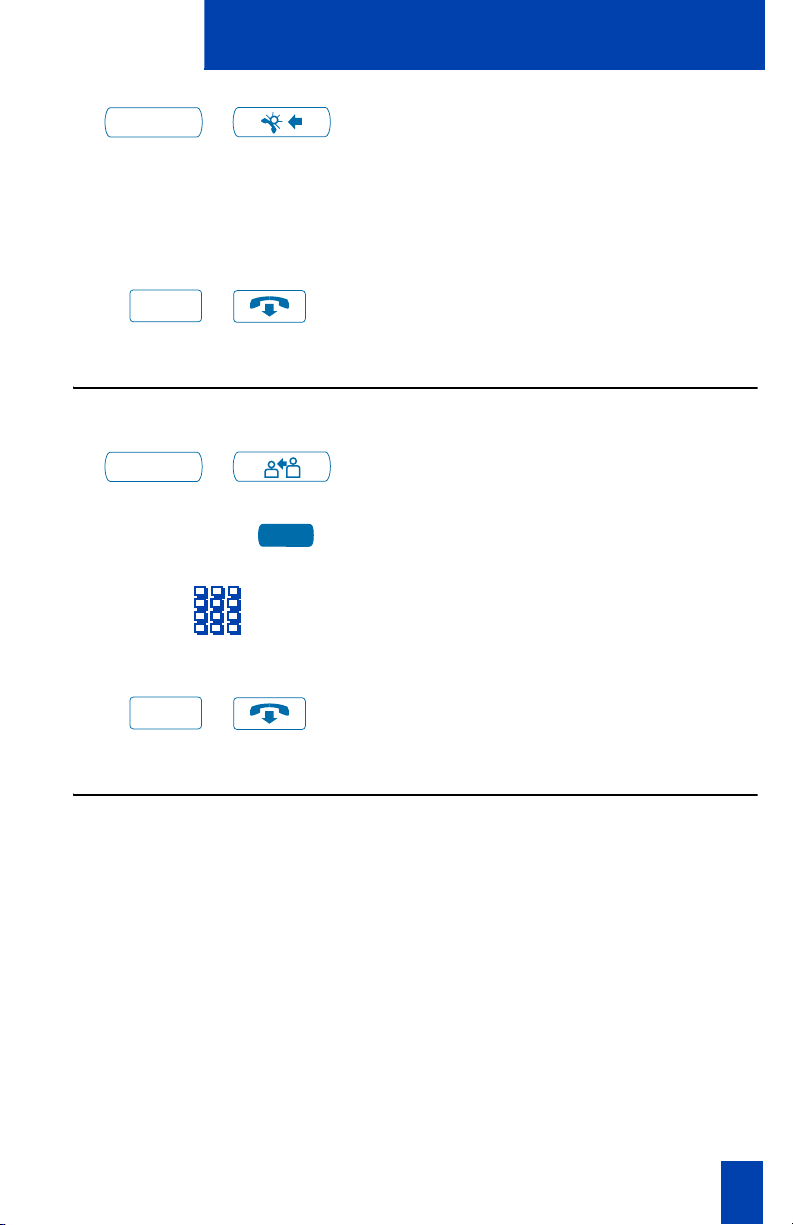
Use Not Ready
Use the Not Ready Key, when performing post-call work.
When you need time to catch up on
post-call processing work:
Not Ready
When you are ready to take ACD
calls again:
In - Calls
Not Ready
/
/
or
/
Press the Not Ready Key. This takes you
out of the queue.
Press either the In-Calls Key, or the Not
Ready Key to enter the ACD queue.
Note 1: On the Meridian SL-100, you must
press the Not Ready Key to begin receiving
ACD calls.
Note 2: If you Press the In-Calls Key
during an ACD call, the call is
disconnected.
Answer or make non-ACD calls
An Individual DN allows you to make outgoing calls and to receive non-ACD
incoming calls. If you do not have an active call when the LCD indicator flashes,
you can press the corresponding Individual DN Key and answer the call.
To make a non-ACD call:
2637
1. Press an Individual DN Key.
To answer a non-ACD call:
2637
16
2. Dial the number you wish to call.
Press the DN Key next to the flashing
indicator. You are connected to your
non-ACD caller.
Page 17
Contact your supervisor
To answer your supervisor when
your phone rings and the Supervisor
indicator flashes:
Call Center Agent features
Supervisor
If you are on a call and hear a buzz
and the Supervisor indicator flashes:
Supervisor
To call your supervisor:
Supervisor
To return to the ACD call:
In - Calls
To Conference your Supervisor
during a call in progress:
Supervisor
Hold
/
/
/
/
/
/
Press the Supervisor Key.
1. Press the Hold Key.
2. Press the Supervisor Key.
Press the Supervisor Key. If you are on a
call, this automatically puts the call in
progress on Hold.
Press the In-Calls Key.
1. Press the Supervisor Key. The caller is
on hold and you can talk privately
with your supervisor.
Supervisor
/
2. Press the Supervisor Key a second
time to have a three-way conversation
with the supervisor and the caller.
Note: On the Meridian SL-100, press the
Emergency Key to establish a three way
call.
17
Page 18
Call Center Agent features
To Transfer to a supervisor, during a
call in progress:
Supervisor
Supervisor
Goodbye
/
/
/
1. Press the Supervisor Key.
2. Press the Supervisor Key again when
the supervisor answers.
3. Press the Goodbye Key to disconnect
from the call. The caller remains
connected with your supervisor.
Note: On the Meridian SL-100, use the
Transfer Key to transfer the call to your
Supervisor’s DN. You cannot transfer a call
using the Supervisor Key.
Use Walkaway and Return from Walkaway
Use this feature when you need to leave your desk during an ACD call, during a
non-ACD call, or while in the Not Ready state.
To use the Walkaway feature:
Hold
/
1. Press the Hold Key. The LCD indicator
beside the In-Calls extension flashes.
2. Disconnect the headset before you
leave.
18
Note 1: Some headsets have a quick
disconnect feature. You can do a quick
disconnect instead of disconnecting the
headset.
Note 2: On the Meridian SL-100, you do
not need to disconnect the headset.
Page 19
To Walkaway while in Not Ready
mode (Not Ready LED or LCD
indicator is on, and Not Ready is
shown on the display):
Call Center Agent features
Not Ready
To return from Walkaway:
In - Calls
Not Ready
/
Hold
/
/
or
/
1. Press the Not Ready Key.
2. Press the Hold Key.
3. Disconnect the headset.
Note: On the Meridian SL-100, you need
to enter a walkaway code.
1. Connect the headset.
2. Press the key next to the flashing
indicator.
Note 1: If a caller disconnects before you
return from Walkaway, the Not Ready
indicator flashes. When you return from
Walkaway, you are in Not Ready mode.
Note 2: Even if you are using the optional
handset, you must disconnect the headset
to activate walkaway mode. There is not a
quick disconnect for the handset.
Note 3: On the Meridian SL-100, you are
not required to disconnect the headset for
walkaway.
Note 4: On the Meridian SL-100 a call on
hold prevents you from activating the Not
Ready Key. When you press the Not Ready
Key, an active call is terminated unless your
network administrator has enabled the
Non-immediate Cut-off feature for your
telephone.
19
Page 20

Call Center Supervisor features
Call Center Supervisor features
In addition to the features described in this section, your network administrator
can assign any feature listed in the “Agent features” section to a supervisor's
telephone (except Supervisor).
Agent Keys
Agent Keys allow you to connect, observe, or monitor the status of each Agent
position. Each Agent Key is linked to a particular agent position and can be used
along with the Call Agent or Observe Agent Keys. The following table shows the
meaning of the LCD indicator associated with an Agent Key.
Indicator Agent Status
Off No agent logged in at this position.
On Busy on an ACD call.
Slow Flashing Waiting for an ACD call.
Fast Flashing Busy on a non-ACD call.
Note: On the Meridian SL-100, instead of a Fast Flashing Indicator, you will
observe a Wink. This indicates that the Agent has entered Not Ready state.
Answer Agent
When your phone rings and the
Answer Agent indicator flashes:
Ans Agent
To disconnect an agent call:
Goodbye
/
/
Answer Emergency
When your phone buzzes and the
Answer Emergency indicator flashes:
Hold
/
20
Press the Answer Agent Key. Your position
goes into Not Ready state and you are
connected to the agent.
Press the Goodbye Key.
1. Press the Hold Key if you intend to
return to the call in progress.
Page 21
Call Center Supervisor features
Ans Emerg
To disconnect from the emergency
call:
Goodbye
/
/
Call Agent
To call an agent:
CallAgt
Agent1
To leave Call Agent state:
Goodbye
/
or
/
2. Press the Answer Emergency Key.
Your position goes into Not Ready
state and the Answer Emergency
indicator lights continuously. You are
connected to the call.
Press the Goodbye Key.
1. Press Call Agent Key, your position
goes into the Not Ready state.
2. Press the Agent Key assigned to the
agent or dial the agent's position ID.
Note: To talk to another agent repeat steps
one and two or press the Agent Key for the
next agent.
Press the Goodbye Key.
Use the Supervisor Observe and Supervisor Headset Jack
The Supervisor Observe Key is located in the upper left corner of the M3905 ACD
telephone. It has an associated LED.
A supervisor can listen in on an active call at an ACD terminal by connecting the
headset into the jack near the Supervisor Observe Key on an agent’s telephone.
The LED remains dark to denote that the supervisor can hear the conversation
while the microphone for the supervisor’s headset is muted.
To use the Supervisor Observe
feature:
Supervisor plugs the headset into the agent
telephone.
21
Page 22

Call Center Supervisor features
To use the Supervisor Observe
feature for a two way conversation:
To mute the Supervisor headset:
Observe Agent
To observe an agent:
Obv Agent
/
While the headset is plugged in, press the
Supervisor Observe Key, the LED lights
continuously and the supervisor can
participate in the conversation.
Press the Supervisor Observe Key a
second time and the to put the supervisor
headset on mute. The LED turns off.
1. Press the Observe Agent Key. Your
position goes into Not Ready state.
Agent1
or
To talk to an agent you are
observing:
CallAgt
To leave the Observe state:
Goodbye
/
/
2. Press the Agent Key or dial the agent's
position ID. You can listen to the agent
and caller's conversation.
Note: To observe another agent, repeat
step two.
1. While observing an agent. Press the
Call Agent Key. You now have a
conference with the agent and the
caller.
Press the Goodbye Key.
Note: You cannot observe an agent if the
agent's call is on hold or if no calls are in
progress.
Interflow
When the call backlog or the waiting time in the queue exceeds a set threshold,
Interflow forwards calls to a predefined target queue.
The supervisor activates Interflow when the waiting time for the queue exceeds its
threshold.
22
Page 23

To activate Interflow:
Call Center Supervisor features
Interflow
To stop Interflow:
Interflow
Night Service
To enter Night Service:
Night
To transition to Night Service:
Night
+
+
Press the Interflow Key. The indicator
flashes and excess calls are routed to the
destination.
Note: On the Meridian SL-100, this feature
is known as Controlled Interflow. Use the
ConIntrFlw Key to activate this feature.
Press the Interflow Key again.
Press the Night Key and dial fl
(6=N for Night).
The indicator lights continuously. All calls
in the queue and new calls receive Night
Service.
Note: On the Meridian SL-100, press the
Night Service Key. You do not dial six.
Press the Night Key and dial °
(8=T for Transition).
The indicator flashes. Calls in the queue
remain in the queue and new calls receive
Night Service.
Note: On the Meridian SL-100, press the
Night Service Key. You do not dial eight.
To exit Night Service:
Night
+
Press the Night Key and dial ‹
(3=D for Day).
The indicator flashes. New calls enter the
queue.
Note: On the Meridian SL-100, press the
Night Service Key. You do not dial three.
23
Page 24

Viewing queue status
Viewing queue status
The Meridian 1 ACD Calls Waiting status indicator
The LCD indicator beside the Calls Waiting key gives you a visual indication of the
number of calls in the ACD queue. The following table lists the four states of the
Calls Waiting LCD indicator.
Indicator Queue Status Meaning
Off Light There are few or no calls waiting.
On Normal An acceptable number of calls are
waiting.
Slow Flashing Busy Calls are backing up in the queue.
Calls overflowing to this queue will not
be accepted.
Fast Flashing Overloaded Too many calls are in the queue. New
calls are being overflowed to another
queue.
Note: If your telephone is configured for the Display Queue feature, the LED/LCD
indicator beside the feature key functions as a Calls Waiting status indicator.
Display Queue on Meridian 1
The Display Queue feature allows you to access the status of calls in an ACD
queue. The information displayed includes: number of calls waiting in the queue,
number of agent positions occupied for the queue, the length of time that the
oldest call has waited in the queue, and the number of calls that have been
overflowed into the queue.
To display information on your ACD
queue:
DisplayQue
Dsply Queue
24
/
/
Press the Display Queue Key.
Information on your current ACD
queue appears on the display.
Page 25

Viewing queue status
Calls
waiting
Number of
manned
positions
WAITING MAND LWAIT TOFQ
13 9 0:20 0
Forward
Quit Copy
Callers Redial
Calls time
overflowed
into this queue
Length of
time first call
has waited
553-9093
Note 1: In an MQA environment, the display will scroll through the different
queues at 2 second intervals. The queues are presented in the order in which they
were entered at login.
Note 2: The Display Queue Key may be configured on your M3905 Call Center
telephone as a Fixed Feature Key or as a Programmable Line (DN)/Feature Key.
The Meridian SL-100 Multistage Queue Status indicator
The ACD Multistage Queue Status (MSQS) Key/Lamp feature provides a visual
indicator of the number of calls in the ACD queue. Three thresholds, T1, T2, and
T3 are created by your supervisor. The thresholds represent the number of calls in
the queue or the wait time of the next call to be answered. You can activate the
MSQS Key/Lamp feature by any of the following actions: you log in, and ACD
call is presented to your position, or you activate the Not Ready feature. The
following table lists the four states of the LCD indicator.
Indicator Queue Status
Off Less than or equal to T1
On Greater than T1 and less than T2
Flash Greater than T2 and less than T3
Wink Greater than T3
25
Page 26

Viewing queue status
Display Queue Threshold on Meridian SL-100
On the Meridian SL-100, the Display Queue Threshold or Waiting Calls Key
allows an ACD Agent or Supervisor to view the number of calls waiting in the
queue, or how long the first call in the queue has been waiting.
To display the queue threshold for
your Meridian SL-100 ACD group:
DisplayQue
Dsply Queue
Note 1: The labels T1, T2, and T3 represent the threshold wait time for the call at
the front of the queue or the number of calls in the queue.
Note 2: The number below CALLQ indicates the number of calls in the queue. In
some systems CALLQ is replaced by WAIT. WAIT indicates the actual waiting time,
in seconds, for the first call in the queue.
/
/
T1 T2 T3 CALLQ
3
Forward
Quit Copy
Callers Redial
Press the Display Queue Key.
Information on your current ACD queue
appears on the display as shown on the
following page.
Number of
calls in
the queue
553-9094
In some systems, a summary of the queue threshold is shown on the display each
time a call is presented to your position:
26
Page 27

Viewing queue status
5551234
T2 CALLQ 026
Forward
Quit Copy
Callers Redial
Number of
calls in
the queue
553-9095
Note 1: The information includes the threshold level, the threshold type (CALLQ or
WAIT), and the current value of the threshold.
Note 2: In some systems, this information is also displayed when the Not Ready
feature is in use. The information is updated regularly and is visible until you exit
the Not Ready state.
27
Page 28

Viewing queue status
Display agent status on the Meridian 1
The Display Agent feature gives ACD Supervisors a summary of the current status
of all agent positions for which they have Agent Keys.
DisplayAgt
Positions
busy on
ACD calls
Positions
waiting for
ACD calls
Press the Display Agent Key.
The display shows summary of the
current status of all agent positions which
have a key assigned on the supervisor's
phone.
ACD WAIT DN LOGOUT
23 2 0 0
Forward
Quit Copy
Callers Redial
Note 1: Agent positions in the Not Ready
state will be counted as busy on either ACD
calls or non-ACD calls, as specified by your
system administrator.
Vacant
agent
positions
Positions
busy on
non-ACD
calls
553-9096
28
Note 2: The Display Agent Summary
Information is displayed for 12 seconds or
until another feature key is pressed.
Page 29

Viewing queue status
Display agent status on the Meridian SL-100
The Display Agent feature gives ACD Supervisors a summary of the current status
of all agent positions for which they have Agent Keys.
DisplayAgt
Agent
positions not
logged in
Agent
positions
available to
receive calls
Press the Display Agent Key.
The display shows summary of the
current status of all agent positions which
have a key assigned on the supervisor's
phone.
NMD IDL NR SDN ACD
1 2 1 0 8
Forward
Quit Copy
Callers Redial
Note: The Display Agent Summary
Information is displayed for 12 seconds or
until another feature key is pressed.
Agent positions
on active ACD
calls
Agent positions
logged in but
currently on
non-ACD calls
Agent postions
logged in but
temporarily unable
to receive calls
553-9096B
29
Page 30

Your telephone’s non-ACD call features
Your telephone’s non-ACD call features
This section describes non-ACD features commonly used for call processing. Your
network administrator assigns features to your programmable feature keys.
Whenever this guide describes a procedure that requires special codes ask your
network administrator to provide these to you.
To access a feature, you press a Feature Key, or enter a Flexible Feature Code
(FFC) for the Meridian 1 or a Feature Access Code (FAC) for the Meridian SL-100.
Your network administrator supplies you with the Flexible Feature Codes or
Feature Access Codes for your system.
Note: In order to use a feature described in this section, your system software must
support the feature and the feature must be assigned to your telephone. Check
with your network administrator for more details.
Make a call
This section describes features that you can use when you make a call. There are
several ways to make a call from your M3905 Call Center telephone. To make a
call from your telephone, use the features described in this chapter.
To make a call:
2637
1. Press an Individual Line (DN) Key.
2. Dial the number.
Note: If you are on a call on your Individual Line (DN) and your telephone is not
in Not Ready or Make Busy state, your call is automatically placed on hold when
an ACD call rings your telephone enabling you to answer the ACD In-Calls line.
However, if you are on an ACD call and a call comes in on your Individual Line
(DN), you cannot put your ACD call on hold to answer the call on your Individual
Line (DN).
Use the Predial feature
The Predial feature allows you to enter and preview a number of up to 31 digits
and make corrections before you dial the number.
To use Predial:
1. Dial the number.
Note 1: If you are calling an external or
long distance number, be sure that the
appropriate access codes are included.
30
Page 31

Your telephone’s non-ACD call features
Note 2: Press the Pause Key to insert a
1.5 second pause in the dialing string.
2637
2. Press an Individual Line (DN) Key to
receive dial tone.
The displayed predialed number is
automatically dialed.
Note: You cannot use the Predial feature if
the Live dial pad feature is active.
Auto Dial
Auto Dial lets you dedicate a feature key to a specific telephone number. When
the Auto Dial Key is pressed, the number is dialed automatically.
To us e Aut o Di a l:
2637
AutoDial
To display the Auto Dial number:
Display
1. Press an Individual Line (DN) Key.
2. Press the associated Auto Dial Key.
The number is dialed automatically.
1. Press the Display Key.
Note: On the Meridian SL-100, press the
Inspect Key to display the number.
AutoDial
To store an Auto Dial number:
AutoDial
AutoDial
Note: To change the key label “AutoDial”, select Change feature key label
from the Options List menu. Please see “Change a Feature Key label” on page 41
for detailed instructions.
2. Press the configured Auto Dial Key.
The number appears on the display.
1. Press the Auto Dial Key, without lifting
the handset.
2. Dial the number to be stored on the
Auto Dial Key.
3. Press the Auto Dial Key again. The
number is stored on the key.
31
Page 32

Your telephone’s non-ACD call features
Ring Again
Use the Ring Again feature when you dial a number and receive a busy tone or
no answer. The Ring Again feature lets you know when the person you dialed is
available or has used their telephone. The feature notifies you when to redial your
party. The Ring Again feature automatically redials the number.
To use Ring Again:
1. Dial a number and receive a busy tone
or no answer.
Note: On the Meridian SL-100, Ring
Again is available on busy tone only.
RingAgn
2. Press the Ring Again Key.
The screen displays Ring again is
active.
To call a Ring Again party when you
receive notification:
When the number you want to reach is
available, or the person has re-used their
set, you hear the Ring Again tone.
2637
1. Press an Individual Line (DN) Key.
RngCall
To cancel Ring Again before
notification:
CanclRA
2. Press the Ring Call Key.
Press the Cancel Ring Again Key.
The screen displays Ring Again is
cancelled.
Redial last number called
Last Number Redial allows you to automatically redial the last number you
dialed. This feature must be enabled by your network administrator.
To use Last Number Redial when
using the handset:
32
2637
1. Press an Individual Line (DN) Key.
Page 33

Your telephone’s non-ACD call features
2637
2. Press the Individual Line (DN) Key
again.
The last number you dialed is
automatically redialed.
Note: On Meridian SL-100, press the £
Key twice.
Use Speed Call
The Speed Call feature allows you to automatically dial frequently called numbers
by entering a one, two, or three digit code. Contact your network administrator to
determine the capacity of your Speed Call list.
A telephone designated as a Speed Call Controller can program or edit the Speed
Call list. This feature must be enabled by your network administrator.
To store or change a Speed Call
number:
SpcCtrl
1. Press the Speed Call Controller Key.
The screen displays Enter Code, then
number.
2. Dial a one, two, or three digit code.
Use the Delete Key if you make a
mistake. Use the Cancel Key to leave
the screen without storing a speed call
number.
Note: A dash is automatically inserted
after the required number of digits have
been entered.
3. Dial the associated telephone number.
Use the Delete Key if you make a
mistake. Use the Cancel Key to leave
the screen without storing a speed call
number.
Note 1: Dial the access code (if required)
followed by the internal, external, or
long-distance telephone number.
Note 2: Press the Pause Key to insert a 1.5
second pause in the dialing string.
33
Page 34

Your telephone’s non-ACD call features
Done
To make a Speed Call:
2637
4. Press the Done Key to save the code
and number.
1. Press an Individual Line (DN) Key.
SpcCtrl SpcUsr
or
2. Press the Speed Call Controller Key or
the Speed Call User Key.
The screen displays Enter code.
3. Dial the Speed Call code assigned to
the telephone number.
The number is automatically dialed.
Make a System Speed Call
System Speed Call allows you to make a call by dialing Speed Call codes which
may override your telephone’s class of service restrictions. The System Speed Call
feature is set up on the system by your network administrator. It is a speed dial
number that is common to many users, therefore it is set up on the system not on
your individual telephone.
To make a System Speed Call:
2637
SpcCtrl SpcUsr
or
34
1. Press an Individual Line (DN) Key.
2. Press the System Speed Call
Controller key or the System Speed
Call User Key, or enter the System
Speed Call User FFC.
3. Dial the Speed Call code assigned to
the telephone number.
The number is automatically dialed.
Page 35

Your telephone’s non-ACD call features
Answer a call
When you receive an incoming call on an Individual Line (DN), your telephone
rings and the LCD indicator flashes.
To answer a call:
2637
Note: If you have the handset option and you pick up the handset, you must also
press the Individual Line (DN) Key, otherwise the handset is not operable.
However, you may terminate a call by replacing the handset in the cradle.
Press the Individual Line (DN) Key
beside the flashing LCD indicator.
Place a call on Hold
Use the Hold feature when you are talking with one party and a second call
comes in on a second Individual Line (DN). You can answer the second call and
retain the original call by putting it on Hold.
To place a call on Hold:
Press the Hold Key. The LCD indicator
Hold
/
flashes beside the line on hold.
Note 1: If the Automatic Hold feature is
configured for your Meridian 1, the active
call is automatically put on Hold when you
answer the second call.
Note 2: On the Meridian SL-100
Automatic Hold is the default feature.
Note 3: The caller hears music while on
hold, if the Music on Hold feature is
configured for your system.
To retrieve a call on hold:
2637
Press the Individual Line (DN) Key
beside the flashing LCD indicator.
35
Page 36

Your telephone’s non-ACD call features
Transfer a call
Use the Transfer feature to redirect a call to a third party.
To use the Transfer feature:
Trans
Swap Connect
or
To go back to the original call if the
transfer is incomplete:
Goodbye
2637
/
1. Press the Transfer Key.
The other party is on hold and you
receive a dial tone. The screen
displays Call on hold, dial number.
2. Dial the number of the telephone
where the call is to be transferred.
3. Press the Swap Key to switch between
talking with the original caller and the
new caller. Press the Connect Key to
complete the transfer.
The two callers are connected and
your telephone is ready to make or
receive new calls.
1. Press the Goodbye Key.
2. Press the Individual Line (DN) Key with
the flashing icon to return to your
original call
.
36
Page 37

Your telephone’s non-ACD call features
Trace a Malicious call
Malicious Call Trace provides a way for you to trace nuisance calls. The feature is
available for both internal and external calls. When the key is pressed, your
Directory Number and the telephone number of the caller are recorded for access
by your network administrator.
To use Call Trace while you are on a
call:
CallTrace
To use Call Trace if you do not have a
Call Trace Key:
Trans Conf
or
p
2637
Press the Call Trace Key.
Note: On the Meridian SL-100, press the
MalcsHold (Malicious Call Hold) Key.
1. Press the Transfer Key or the
Conference Key.
Note: On the Meridian SL-100, press only
the Transfer Key.
2. Dial the Malicious Call Trace FFC
(Meridian 1) or the Malicious Call
Hold FAC (Meridian SL-100).
3. Press the Individual Line (DN) Key
beside the flashing LCD indicator to
return to the call.
Note: On the Meridian SL-100, after
dialing the Malicious Call Hold FAC, you
are automatically reconnected to the
calling party.
37
Page 38

Your telephone’s non-ACD call features
Forward calls
The Call Forward feature allows you to direct your calls to ring at another Line
(DN). You cannot forward calls while your telephone is ringing.
To forward your calls:
Forward
Done
To view the number that your calls
are being forwarded to:
CheckFw
Exit
1. Press the Forward Key.
The previously stored forward number
appears, if one exists, and the screen
displays Enter forward number.
2. If desired, enter a new number. The
existing number is automatically
deleted. If you make a mistake, use the
Delete Key to delete the previous
digit(s). Press Cancel to leave this
screen without forwarding your
telephone or changing the number.
3. Press the Done Key to activate Call
Forward.
1. Press the Check Forward Key.
2. Press the Exit Key to return to the
previous screen.
To cancel Call Forward:
CheckFw
CanclFw
38
This action will leave Call Forward
active.
1. Press the Check Forward Key.
2. Press the Cancel Forward Key.
Page 39

Your telephone’s non-ACD call features
Set up a Conference call
You can set up a Conference call for up to six people (including yourself). Contact
your network administrator to determine the maximum number of people your
system allows on a conference call.
To set up a conference call:
Conf
Swap Connect
or
If the person you attempt to add to
the conference is unavailable:
Goodbye
2637
/
1. Press the Conference Key while you
are on a call.
The other party is on hold and you
receive dial tone. The screen displays
Call on hold, dial number.
2. Dial the number of the person you
want to add to the conference.
3. Press the Swap Key to switch between
talking with the original caller and the
new caller. Press the Connect Key to
complete the conference. Everyone is
able to join the conversation.
1. Press the Goodbye Key.
2. Press the Individual Line (DN) Key
beside the flashing LCD indicator to
return to your original call
.
39
Page 40

Options List
Options List
The Options List allows you to customize certain characteristics of your phone.
Screen prompts take you step-by-step through procedures and keep you informed
on the status of the following settings: Language, Change feature key label,
Screen contrast, Volume adjustment, Ring type, Call log options, Preferred name
match, Area code set-up, Call timer enable, Date/time format, Key click enable,
Headset type, and Display diagnostics.
To change any option’s setting:
Options
Select
Done
Quit
or
Options
Note: If you press the Quit Key or Options Key before you press the Done Key,
you exit the Options List without saving your changes.
1. Press the Options Key.
2. Use the Navigation Keys to scroll up
or down through the options list.
3. Press the Select Key when the desired
option is highlighted.
4. Change the option’s settings. Refer to
the following pages for details. The
display also provides you with
information to adjust your selection.
5. Press the Done Key to save your
changes.
6. Press the Quit Key or Options Key to
exit.
40
Page 41

Options List
Select a language
The display is available in multiple languages. After you select Language. . . from
the Options List menu,
1. Use the Navigation Keys to highlight
the desired language (e.g., German).
Deutsch
Select
Press the Done Key to save changes. Press the Quit Key or Options Key to exit.
2. Press the Select Key.
Change a Feature Key label
You can change the name on the Programmable Line (DN)/Feature Keys
(self-labeled). These keys are located on both sides of the top portion of the
display area.
To change a Feature Key label:
1. Press the down Navigation Key once
to highlight Change feature key
label.
Change feature key label
Select
Select
2. Press the Select Key.
This action takes you to the Feature
Key menu and highlights Change
feature key label.
3. Press the Select Key again.
The prompt asks you to select the key
you want to change.
AutoDial
4. Press the Programmable Line/Feature
Key whose label you want to change,
(e.g., AutoDial).
5. Press the Dial Pad Key that is printed
with the first letter in your new label.
Press the key until the correct character
appears.
41
Page 42

Options List
Note: Use the Case Key to change the case of the letter, as needed.Press the Up
Navigation Key to access special characters you may want to include in the label.
Use the Navigation Keys to locate the character you want to include. Press the
Select Key to choose the highlighted character. Press the Return Key to return to
label entry without selecting a special character.
6. Press the right Navigation Key once to
move the cursor (so you can enter the
next letter) when the desired letter
appears.
7. Repeat steps 5 and 6 until you have
changed the entire label.
Press the Done Key to save changes. Press the Quit Key or Options Key to exit.
Note: For a detailed example of using the dial pad to enter text into your M3905
Call Center telephone, please see “Add a Personal Directory entry” on page 55.
To restore key label(s):
1. From the Feature Key menu, use the
down Navigation Key to highlight
Restore all key labels or Restore
one key label.
Restore all key labels
Restore one key label
Select
Purchasing
Press the Done Key to return to the Options List menu. Press the Quit Key or
Options Key to exit.
Note: The Primary DN key label, as well as other key labels, can be changed or
restored.
42
2. Press the Select Key.
3. If you are restoring one key label,
press the Programmable Line
(DN)/Feature Key (self-labeled) that
you want to restore to the original
label (e.g., Purchasing).
Page 43

Options List
Adjust Screen contrast
The Screen contrast option allows you to adjust the contrast of the display on your
telephone. After you select Screen contrast from the Options List menu;
Lower Higher
or
Press the Done Key to save changes. Press the Quit Key or Options Key to exit.
From the Contrast screen, press the
Lower Key to decrease the display
contrast level, or press the Higher Key
to increase the display contrast level.
Adjust volume
Use the Volume adjustment option to select a comfortable sound level for the
various audio signals.
Note: After you select Volume adjustment. . . from the Options List menu, a list
of adjustable items for your telephone model appears. It is recommended that you
adjust these parameters while you are on a telephone call so that you can judge
the impact of the changes your are making.
To adjust the Ringer volume:
Ringer
Lower Higher
or
Press the Done Key to save changes. Press the Quit Key or Options Key to exit.
Use the procedure above to adjust the volume on the following items:
1. Select Ringer from the Volume menu.
2. Press the Lower Key to decrease the
ringer volume, or press the Higher Key
to increase the ringer volume.
Buzzer
Speaker
Handset listen
Headset listen
Headset talk
Headset sidetone
Note: Headset sidetone is the sound of
your own voice that you hear in the
headset speaker.
43
Page 44

Options List
Choose Ring type
The Ring type option allows you to choose from among the various ringing
sounds available for your telephone model. After you select Ring type. . . from
the Options List menu;
1. Use the Navigation Keys to scroll
through the list of ring types.
Ring type 3
Play
Select
Press the Done Key to save changes. Press the Quit Key or Options Key to exit.
2. Press the Play Key to sample a ring
tone.
3. Press the Select Key to activate the
desired ring type.
Select Call Log options
The Call Log options setting provides a choice of logging all incoming calls,
logging only the unanswered calls, or not logging any calls. The Call Log holds up
to 100 different incoming entries. After you select Call log options from the
Options List menu;
From the Log options menu, use the
Navigation Keys to highlight and
select either:
Log all calls
or
Log unanswered calls
Log all calls
or
Log unanswered calls
Note: New call indication must be set
to On, if you want Call Log notification.
Press the Done Key to save selection. Press the Quit Key or Options Key to exit.
44
Page 45

Options List
Use Live dial pad
The Live dial pad option allows you to press any dial pad key to automatically
access a dial tone. After you select Live dial pad from the Options List menu;
On
Off
or
Press the Done Key to save changes. Press the Quit Key or Options Key to exit.
From the Live dialpad screen, press
the On Key to turn on Live dial pad, or
press the Off Key to turn off Live dial
pad.
Select Preferred name match
The Preferred name match option displays the names of incoming and outgoing
callers as stored in your Personal Directory, if the telephone number matches the
one stored in your directory. This option allows you to personalize the displayed
names for incoming and outgoing calls. After you select Preferred name match
from the Options List menu;
On
Off
or
Press the Done Key to save changes. Press the Quit Key or Options Key to exit.
Note: Preferred name match cannot support Dialed Number Identification (DNIS)
interworking unless the preferred name configured (within the set) is less than or
equal in length to the CPND/DNIS name configured on the Call Server.
From the Name match screen, press
the On Key to turn on Preferred name
match, or press the Off Key to turn off
Preferred name match.
Set up area code
Using the Area code set-up option causes the Callers List and Calling Line ID
(CLID) display show the number/extension followed by the area code/prefix in
parenthesis. This makes it easier to identify local calls and internal calls. You can
define up to three codes. After you select Area code set-up from the Options List
menu
1st Code: 408
2nd Code:
3rd Code:
Press the Done Key to save changes. Press the Quit Key or Options Key to exit.
Use the Navigation keys to place your
cursor in the first line and enter an
area/country code of your choice.
Note: You can enter up to three codes of
your choice.
45
Page 46

Options List
Enable Call timer
The Call timer enable option measures how long you are on each call. After you
select Call timer enable from the Options List menu;
On
Off
or
Press the Done Key to save changes. Press the Quit Key or Options Key to exit.
From the Call timer screen, press the
On Key to turn on the Call timer, or
press the Off Key to turn off the Call
timer.
Select Date/time format
There are eight Date/time formats. Four formats are based on the 12 hour clock
and four are based on the 24 hour clock. After you select Date/time format. . .
from the Options List menu;
Use the Navigation Keys to scroll
through the eight formats. The sample
formats appear on the upper right side
of the display area.
Format 3
Press the Done Key to select the highlighted format. Press the Quit Key or Options
Key to exit.
Enable Key click
The Key click option causes the handset or speaker to produce a clicking sound
when you press the telephone keys. After you select Key click enable from the
Options List menu;
On
Off
or
Press the Done Key to save changes. Press the Quit Key or Options Key to exit.
46
From the Key click screen, press the
On Key to turn on Key click, or press
the Off Key to turn off Key click.
Page 47

Options List
Headset type selection
The Headset type option allows you to select one of the three different headset
types: Type 1, Type 2, or Amplified. Select the setting that works best for the
headset that you are using. After you select Headset type from the Options List
menu;
From the Headset type menu, use the
Navigation Keys to highlight and
select either:
Type 1
or
Type 2
or
Amplified
Press the Done Key to save selection. Press the Quit Key or Options Key to exit.
Type 1 headset
or
Type 2 headset
or
Amplified headset
Use Headset port on call
The Headset port on call option requires that a lamp-type accessory be connected
to the headset port. When the Headset port on call option is activated and the
user is on a call, the lamp lights providing an indication that a call is in progress.
After you select Headset port on call from the Options List menu;
On
Off
or
Press the Done Key to save changes. Press the Quit Key or Options Key to exit.
Note: Additional equipment is required to implement this option. For more
information please contact your Nortel Networks distributor.
From the On call screen, press the On
Key to turn on Headset port on call, or
press the Off Key to turn off Headset
port on call.
47
Page 48

Options List
Activate Headset port external alerter
When the Headset port external alerter option is activated, it supports a visual or
audible alerter and/or recorder device. This device plugs into the Headset port,
which is located on the bottom of the telephone. After you select Headset port
ext alerter from the Options List menu;
On
Off
or
Press the Done Key to save changes. Press the Quit Key or Options Key to exit.
Note: Additional equipment is required to implement this option. For more
information please contact your Nortel Networks distributor.
From the External alerter screen, press
the On Key to turn on Headset port
external alerter, or press the Off Key to
turn off Headset port external alerter.
Display diagnostics
The Display diagnostics option tests the functionality of your telephone’s display
screen and indicator lights. This option also provides information on the firmware
currently in use on your M3905 Call Center telephone. After you select Display
diagnostics from the Options List menu;
Use the up or down Navigation Key to
Press the Done Key to return to the Options List menu. Press the Quit Key or
Options Key to exit.
scroll through the list and view the
changing display screens.
48
Page 49

Directory display and navigation
Directory display and navigation
With the M3905’s display, you can view two lines of information. The figure
below shows the status once you log into the directory.
01 Directories
Personal Directory
Call Log (Callers List)
Select
Quit Copy
553-9092
Access your Callers List, Redial List, or Personal Directory
To access the M3905 Directory/Log:
Dir/Log
Personal Directory
Call Log (Callers List)
Call Log (Redial List)
Select
1. Press the Directory/Log Key.
Note: When you press the Directory/Log
Key, your Personal Directory is
automatically selected. At this point, you
may begin searching the directory using
the telephone’s dial pad. See “Search for
an entry” on page 61.
2. Use the Navigation Keys to highlight
the Personal Directory or the Call Log
that you want to view.
3. Press the Select Key.
49
Page 50

Directory display and navigation
To access the M3905 Callers List or
Redial List using a Context Sensitive
Soft Key or a Programmable Feature
Key:
Callers
Redial
or
To exit the Directory/Log:
Quit
or
Dir/Log
Press the Callers Key to access the
Callers List, or press the Redial Key to
access the Redial List.
Press the Quit Key or the
Directory/Log Key to exit.
Directory password protection
You can password protect your Personal Directory, Callers List, and Redial list on
the M3905. If password protection is activated, you will be asked to enter your
password each time you press the Directory/Log Key.
To enable password protection:
Dir/Log
Password Administration
1. Press the Directory/Log Key.
2. From the Directories menu, use the
Navigation Keys to highlight
Password Administration.
50
Select
Select
On
3. Press the Select Key. The Password
Administration menu appears with
Password enabled: OFF highlighted.
4. Press the Select Key again to select
Password enabled: OFF.
5. Press the On Key to enable password
protection.
Page 51

Directory display and navigation
6. Dial the password.
Enter
Enter
Done
Quit
or
Dir/Log
To disable Personal Directory
password:
Dir/Log
7. Press the Enter Key.
8. Dial the password again to confirm
your password.
9. Press the Enter Key.
10. Press the Done Key to save changes.
11. Press the Quit Key or the
Directory/Log Key to exit.
1. Press the Directory/Log Key.
Enter
Password Administration
Select
2. Dial the password.
3. Press the Enter Key.
4. Use the Navigation Keys to highlight
Password Administration.
5. Press the Select Key. The Password
Administration menu appears with
Password enabled: ON highlighted.
51
Page 52

Call Log
Select
Off
Done
6. Press the Select Key again to select
Password enabled: ON.
7. Press the Off Key to disable password
protection.
8. Press the Done Key to save changes.
Quit
or
Dir/Log
9. Press the Quit Key or the
Directory/Log Key to exit.
Call Log
The Call Log records the name and number of incoming and outgoing calls and
can be password protected. You can activate Call Log to record all calls, record
only the unanswered calls, or record no incoming calls.
The Callers List stores incoming calls, and the Redial List stores outgoing calls in
order of date and time received/made. The oldest call is stored at the top of the
list. The newest call is stored at the bottom of the list.
The M3905 Call Log list holds up to 100 entries for incoming and 20 entries for
outgoing calls. The M3905 can copy a number from the Callers List or Redial List
and store it in the Personal Directory.
Access and use the Callers List
To access the Callers List using the
Directory/Log Key:
Dir/Log
Call Log (Callers List)
52
1. Press the Directory/Log Key.
2. Use the Navigation Keys to highlight
Call Log (Callers List).
Page 53

Call Log
Select
New
To access the Callers List using a
Context Sensitive Soft Key or a
Programmable Feature Key:
To make a call from the Callers List:
95551212
or
Callers
Old
3. Press the Select Key.
4. Press the New Key to go to the top of
the new calls list, or press the Old Key
to go to the top of the old calls list.
Press the Callers Key. You are
presented with the first call in the new
calls list.
1. Use the Navigation Keys to highlight
the number you want to call.
Note 1: If you are calling an external or
long distance number, you will need to edit
the number to add the access codes
required by your system to make an
external or long distance call.
Dial
2637
To exit the Callers List without
making a call:
Quit
or
Dir/Log
Note 2: Press the Pause Key to insert a
1.5 second pause in the dialing string.
2. Press the Dial Key to call the number
selected.
3. Press an Individual Line (DN) Key.
Your call is automatically dialed and
you exit the Callers List.
Note: Outgoing calls may not be placed
on your ACD DN using your In-calls Key.
Press the Quit Key or the
Directory/Log Key to exit.
53
Page 54

Call Log
Access and use the Redial List
The Redial List records your last 20 outgoing calls and can be password
protected. On the M3905, you can copy these numbers to your Personal
Directory.
To access the Redial List using the
Directory/Log Key:
Dir/Log
Call Log (Redial List)
Select
To access the Redial List using a
Context Sensitive Soft Key or a
Programmable Feature Key:
Redial
To make a call from the Redial List:
95551212
1. Press the Directory/Log Key.
2. Use the Navigation Keys to highlight
Call Log (Redial List).
3. Press Select.
Press the Redial Key. You are
presented with the most recently dialed
number.
1. Use the Navigation Keys to highlight
the number you want to call.
Note: If you are calling an external or
long distance number, be sure that the
appropriate access codes are included.
54
2637
Dial
2. Press the Dial Key.
3. Press an Individual Line (DN) Key.
Your call is automatically dialed and
you exit the Redial List.
Note: Outgoing calls may not be placed
on your ACD DN using your In-Calls Key.
Page 55

Use the Personal Directory
Use the Personal Directory
The Personal Directory provides a personalized directory of names and telephone
numbers. The Personal Directory allows you to add, delete, search, and edit
entries and can be password protected. The Personal Directory holds up to 100
entries (an entry is one name and one telephone number). You can add a
directory entry by copying the entry from your Callers List or Redial List. You can
also add entries with the “AddNew” Key or by using the Personal Directory PC
Utility application. The Personal Directory PC Utility uses an accessory cartridge to
connect your PC and your M3905 telephone. You can create a directory on your
Personal Computer and transfer it to your M3905 Call Center telephone.
Access the Personal Directory
Dir/Log
Select
Add a Personal Directory entry
After accessing your Personal
Directory:
AddNew
1. Press the Directory/Log Key.
2. Press the Select Key in the Directories
menu to select Personal Directory.
Note: When you press the Directory/Log
Key, your Personal Directory is
automatically selected. At this point, you
may begin searching the directory using
the telephone’s dial pad. See “Search for
an entry” on page 61.
1. Press the Add New Key.
2. Dial the new name.
55
Page 56

Use the Personal Directory
Example:
To enter the name and telephone
number for Chris:
1. Dial the name using the key pad.
Note: Press the Up Navigation Key to
access special characters you may want to
include in the name. Use the Navigation
Keys to locate the character you want to
include. Press the Select Key to choose the
highlighted character. Press the Return Key
to return to name entry without selecting a
special character.
¤¤¤
››
‡‡‡
›››
‡‡‡‡
Next
Done
Quit
or
Dir/Log
2. Press the dial pad key with the desired
letter repeatedly until that letter
appears on the display.
3. Press the right arrow key to go to the
next letter.
Note: The cursor automatically advances
to the next position, if a different-from-last
key is pressed, or after a short pause.
4. Press the Next Key.
5. Use the dial pad to enter the telephone
number associated with the name
entered above.
Note 1: If you are adding an external or
long distance number, be sure to include
the access codes required by your system to
make an external or long distance call.
Note 2: Press the Pause Key to insert a
1.5 second pause in the dialing string.
6. When you have finished entering all of
the digits, press the Done Key to save
the changes.
7. Press the Quit Key or the
Directory/Log Key to exit.
56
Page 57

Add an incoming call
Use the Personal Directory
Copy
Dirctry
Next
Clear
Next
/
or
1. Press the Copy Key.
The displays shows the message
Copy to.
2. Press the Directory Key.
3. Press Next to copy the incoming call
without editing the name. Edit the
number, if required (see note for
step 4) and go to step 5.
or
Press Clear to make changes to the
name before saving. Add the name
using the dial pad, Delete, and Case
Keys as needed.
4. Press the Next Key. Make changes to
the telephone number if required
Note 1: If you are copying an external or
long distance number, be sure to add the
access codes required by your system to
make an external or long distance call.
Done
Quit
or
Dir/Log
Note 2: Press the Pause Key to insert a
1.5 second pause in the dialing string.
5. Press the Done Key to save the entry in
your directory.
6. Press the Quit Key or the
Directory/Log Key to exit.
Note: You can edit the name or number
before or after you save to the directory.
57
Page 58

Use the Personal Directory
Add an outgoing call
Copy
Dirctry
Next
/
1. After the person you called answers,
press the Copy Key.
The displays shows Copy to.
2. Press the Directory Key.
3. Add the name, using the dial pad,
Delete, and Case Keys as needed.
4. Press the Next Key.
Done
Quit
or
Dir/Log
5. Press the Done Key to save the
changes.
6. Press the Quit Key or the
Directory/Log Key to exit.
Note: You can edit the name or number
before or after you save to the Directory.
Delete or edit a Personal Directory entry
To delete a Personal Directory entry:
58
Delete
Yes
1. Use the Navigation Keys to highlight
the entry you want to edit or delete.
2. Press the Delete Key to delete the
currently highlighted entry in your
Personal Directory.
3. Press the Yes Key to confirm the
deletion.
Page 59

To edit a Personal Directory entry:
Use the Personal Directory
Edit
Next
Done
Quit
or
Dir/Log
1. Press the Edit Key to change the
telephone number or name.
2. Use the Navigation Keys to highlight
the character you want to change.
3. Use the dial pad to enter the desired
changes. Refer to“Add a Personal
Directory entry” on page 55 for an
example of how to use the dial pad to
enter names.
4. Press the Next Key. Edit the number if
necessary.
5. Press the Done Key to save the
changes.
6. Press the Quit Key or the
Directory/Log Key to exit.
Delete your Personal Directory
To delete your Personal Directory:
DelList
Yes
or
No
1. Press the Delete List Key.
The display shows Delete all
entries?.
2. Press the Yes Key if you want to delete
all the entries in your Personal
Directory, or press the No Key if you
want to return to the top of the
Personal Directory with no changes
made.
59
Page 60

Use the Personal Directory
Quit
or
Dir/Log
3. Press the Quit Key or the
Directory/Log Key to exit.
Use the Personal Directory to make a call
To use the Personal Directory to
make a call:
1. Use the Navigation Keys to highlight
the desired name or number.
Purchasing
Dial
2637
Note: If you are dialing an external or
long distance number, be sure that your
directory entry includes the access codes
required by your system to make an
external or long distance call.
2. Press the Dial Key.
3. Press an Individual Line (DN) Key to
call the person whose name is
highighted.
Note: Outgoing calls may not be placed
on your ACD DN using your In-Calls Key.
Use Card View
The Card View feature provides additional information about the Personal
Directory entry.
To look at the Card View:
1. Use the Navigation Keys to highlight
the desired name.
Purchasing
2. Press the right Navigation Key.
60
Page 61

To dial from the Card View:
Use the Personal Directory
1. Use the Navigation Keys to show the
name and number of the currently
selected entry in the Card View.
Note: If you are dialing an external or
long distance number, be sure that your
directory entry includes the access codes
required by your system to make an
external or long distance call.
Dial
2637
To exit the Card View:
2. Press the Dial Key.
3. Press an Individual Line (DN) Key to
call the person whose name is
highighted.
Note: Outgoing calls may not be placed
on your ACD DN using your In-Calls Key.
Press the left Navigation Key to leave
the Card View and return to the
selected name.
Search for an entry
You can search for a particular entry in your Personal Directory.
To search for an entry:
1. Use the Navigation Keys to highlight
Personal Directory
Personal Directory.
Select
2. You may press the Select Key or
proceed directly to step 3.
3. Use the dial pad to enter the first letter
of the name your are seeking. For
example, press the ¤ key twice to go
to the first entry that begins with the
letter “B”.
61
Page 62

Use the Personal Directory
Copy a number from the Redial List
You can copy a number from the Redial List to the Personal Directory.
To copy a number from the Redial
List:
1. Use the Navigation Keys to highlight
the name or number in your Redial List
that you want to copy to your Personal
2498
Directory.
Copy
Dirctry
Next
Clear
Next
/
or
2. Press the Copy Key.
The displays shows Copy to.
3. Press the Directory Key.
4. Press Next to copy the incoming call
without editing the name. Edit the
number, if required (see note for
step 5), and go to step 6.
or
Press Clear to make changes to the
name before saving. Add the name
using the dial pad, Delete, and Case
Keys as needed.
5. Press the Next Key. Make changes to
the telephone number, if required.
Note: If you are copying an external or
long distance number, be sure that your
directory entry includes the access codes
required by your system to make an
external or long distance call.
62
Done
6. Press the Done Key. The entry is saved
to your Personal Directory and you are
returned to the Redial List.
Page 63

Set-to-Set Messaging
Set-to-Set Messaging
With the Set-to-Set Messaging application activated, an internal caller using an
M3903, M3904, or M3905 receives a quick visual message, which you have
selected, whenever they dial your telephone number. The length of your message
is limited to 24 characters. The message is entered through the dial pad keys
using a process similar to the one used for entering names in the Personal
Directory. Your network administrator may provide access to a list of up to ten
messages which you may customize and select as your current set-to-set message.
Only one message at a time may be customized and only one message can be
stored in your telephone’s memory.
You can check your Call Log to determine whether or not a caller was sent the
set-to-set message. A will appear beside the call log entry of the callers who
saw your message. Note: This feature is not available on the Meridian SL-100.
To access Set-to-Set Messaging:
App's
Set to Set Messaging
Select
To edit the currently stored message,
or to create a new message:
Edit
1. Press the Applications Key.
2. From the Applications menu, use the
Navigation Keys to highlight Set to
Set Messaging.
3. Press the Select Key.
The Set-Set Msg screen appears
indicating the status of the feature (on
or off) and whether or not a message
is stored (defined) in memory.
Note: If you have activated password
protection on your Directory/Log, you will
need to enter your password to continue.
1. Press the Edit Key.
63
Page 64

Set-to-Set Messaging
2. From the Edit Mode screen, use the
dial pad to enter a text message. Press
the Delete Key to delete a character.
Press the Case Key to toggle between
upper and lower case characters.
Press the Cancel Key to exit the screen
without saving changes.
Note 1: Please refer to “Add a Personal
Directory entry” on page 55 for detailed
instructions on using your telephone’s dial
pad to enter text.
Note 2: While in the Edit Mode screen,
Press the Up Navigation Key to access
special characters you may want to include
in the name. Use the Navigation Keys to
locate the character you want to include.
Press the Select Key to choose the
highlighted character. Press the Return Key
to return to name entry without selecting a
special character.
Done
To select a message provided by
your network administrator:
Select
To customize a message provided by
your network administrator:
Edit
64
3. Press the Done Key.
Your message is saved and you return
to the Set-to-Set Message Screen.
1. From the Set-to-Set Message screen,
use the Navigation Keys to scroll
through the list of available messages.
2. Press the Select Key to choose the
currently displayed message.
1. From the Set-to-Set Message screen,
use the Navigation Keys to scroll
through the list of available messages.
2. Press the Edit Key to choose the
currently displayed message.
Page 65

Set-to-Set Messaging
3. From the Edit Mode screen, use the
dial pad to customize the message.
Press the Delete Key to delete a
character. Press the Case Key to toggle
between upper and lower case
characters. Press the Cancel Key to
exit the screen without saving changes.
Note 1: Please refer to “Add a Personal
Directory entry” on page 55 for detailed
instructions on using your telephone’s dial
pad to enter text.
Note 2: While in the Edit Mode screen,
Press the Up Navigation Key to access
special characters you may want to include
in the name. Use the Navigation Keys to
locate the character you want to include.
Press the Select Key to choose the
highlighted character. Press the Return Key
to return to name entry without selecting a
special character.
Done
To activate or deactivate Set-to-Set
Messaging and exit the application:
On Off
/
4. Press the Done Key.
Your message is saved and you return
to the Set-Set Msg Screen.
Note: If you scroll to a different message in
the Set-Set Msg screen, and press the
Select Key, your changes are erased.
1. Press the On Key/Off Key to toggle
the Set-to-Set Messaging status
between On and Off.
Note 1: If messages have not been
provided by your network administrator
and a message has not been defined, the
On or Off Keys will not appear. Use the Edit
Key to enter a message before activating
Set-to-Set Messaging.
65
Page 66

Corporate Directory
Note 2: If messages have been provided
by your network administrator, up and
down arrows appear on the right side of
the display. The On and Off Keys appear
for the most recently selected message.
Quit
or
App's
2. Press the Quit Key or the Applications
Key to exit the Set-to-Set Messaging
application.
Note: If you press the Quit Key or the
Applications Key before you press the
Done Key, you exit the application without
saving your changes.
Corporate Directory
The Corporate Directory application allows you to search by entering the
characters in the name of the person you are calling, beginning with the last
name. Once you have located the name and number of the person, you may use
the dial soft key to call the number. You may copy an entry from the Corporate
Directory and paste it into your telephone’s Personal Directory for quick access.
To use the Corporate Directory
application:
App's
1. Press the Applications Key.
Note: If, when you press the Applications
Key, Corporate Directory is highlighted,
you may proceed directly to step 4.
2. From the Applications menu, use the
Navigation Keys to highlight
Corporate Directory.
Corporate Directory
Select
66
3. You may pess the Select Key or
proceed directly to step 4.
The Corporate Directory Find screen
appears.
4. Use the dial pad to enter the name of
the person you want to call. Enter the
last name first. Separate the last name
and first name with a comma.
Page 67

Corporate Directory
Note 1: The comma is the first character on
the ⁄
Key on your dial pad.
Note 2: You do not need to enter the
entire name. When the Done Key is
pressed, the application will highlight the
first directory entry that matches the text
that you entered.
Done
Dial
5. Press the Done Key.
The application highlights the first
entry that matches the text you entered
in step 4. If there is no match, the
screen displays No matches found
for . . . (the text that you entered).
6. Use the Navigation Keys to scroll
through the directory.
Note: The entire directory is available. The
“find” process determines which directory
entry to select as your starting point.
7. If desired, use the Right Navigation
Key to move from “list” view to “card”
view. In card view, the telephone and
department numbers for the entry are
viewable. Use the Left Navigation Key
to return to list view.
Note: While you are in card view, you
may use the Up or Down Navigation Key
to scroll through directory entries.
8. Press the Dial Key.
2637
9. Press an Individual Line (DN) Key to
call the person whose name is
highlighted.
Note: Outgoing calls may not be placed
on your ACD DN using your In-Calls Key.
67
Page 68

Corporate Directory
To find another directory listing or to
refine your current directory search:
NewFind
To exit the Corporate Directory
application:
To copy an entry from the Corporate
Directory to your telephone’s
Personal Directory:
Copy
Dirctry
Resume
or
Quit
or
App's
/
Press the NewFind Key to begin a new
search, or press the Resume Key to
enter additional characters so that you
may narrow your search.
Press the Quit Key or the Applications
Key.
1. With the entry selected in the
Corporate Directory, press the Copy
Key.
2. In the Copy to screen, press the
Directory Key to copy the name and
telephone number to your Personal
Directory
.
68
After you complete editing and
entering the name and telephone
number, you are returned to the
Corporate Directory.
Page 69

While you are away from your desk: Call Forward
38
Page 70

Copyright © 2006 Nortel Networks. All rights reserved.
The information in this document is subject to change without notice.
The statements, configurations, technical data, and recommendations
in this document are believed to be accurate and reliable, but are
presented without express or implied warranty. Users must take full
responsibility for their applications of any products specified in this
document. The information in this document is proprietary to Nortel
Networks.
Nortel, Nortel (Logo), the Globemark, SL-1, Meridian 1, and Succession
are trademarks of
Publication Number: NN
Document Release: Standard 3.00
Date: April 2006
Produced in Canada
www.nortel.com
Nortel Networks.
10300-117
 Loading...