

Page 1

Part No. P0919416 03
Return
to Menu
CallPilot 150
Telephone Administration
Guide
Page 2

2
CallPilot 150 Telephone
Administration Guide
Copyright © 2002 Nortel Networks
All rights reserved. 2002.
The information in this document is subject to change without notice. The statements, configurations, technical data, and
recommendations in this document are believed to be accurate and reliable, but are presented without express or implied
warranty. Users must take full responsibility for their applica tions of an y pr oduc ts specif ied in th is document. Th e informatio n in
this document is proprietary to Nortel Networks NA Inc.
The software described in this document is furnished under a license agreemen t and may be used only in accordance wit h t he
terms of that license. The software license agreement is included in this document.
Trademarks
NORTEL NETWORKS is a trademark of Nortel Networks.
All other trademarks and registered trademark s are t he property of their respective owners.
P0919416 03
Page 3

Contents
Chapter 1
Getting started with CallPilot . . . . . . . . . . . . . . . . . . . . . . . . . . . . . . . . . . . . . 7
About CallPilot . . . . . . . . . . . . . . . . . . . . . . . . . . . . . . . . . . . . . . . . . . . . . . . . . . . . . . . . 7
CallPilot features . . . . . . . . . . . . . . . . . . . . . . . . . . . . . . . . . . . . . . . . . . . . . . . . . . . . . . 7
Voicemail . . . . . . . . . . . . . . . . . . . . . . . . . . . . . . . . . . . . . . . . . . . . . . . . . . . . . . . . . 7
Automated Attendant . . . . . . . . . . . . . . . . . . . . . . . . . . . . . . . . . . . . . . . . . . . . . . . 7
Custom Call Routing (CCR) . . . . . . . . . . . . . . . . . . . . . . . . . . . . . . . . . . . . . . . . . . 7
CallPilot options . . . . . . . . . . . . . . . . . . . . . . . . . . . . . . . . . . . . . . . . . . . . . . . . . . . . . . . 8
Message Networking . . . . . . . . . . . . . . . . . . . . . . . . . . . . . . . . . . . . . . . . . . . . . . . . 8
Call Center . . . . . . . . . . . . . . . . . . . . . . . . . . . . . . . . . . . . . . . . . . . . . . . . . . . . . . . 8
How to get help . . . . . . . . . . . . . . . . . . . . . . . . . . . . . . . . . . . . . . . . . . . . . . . . . . . . . . . 9
Chapter 2
Using CallPilot . . . . . . . . . . . . . . . . . . . . . . . . . . . . . . . . . . . . . . . . . . . . . . . . 11
Who can use CallPilot . . . . . . . . . . . . . . . . . . . . . . . . . . . . . . . . . . . . . . . . . . . . . . . . . 11
System timeout . . . . . . . . . . . . . . . . . . . . . . . . . . . . . . . . . . . . . . . . . . . . . . . . . . . . . . 11
Using CallPilot with a two line display telephone . . . . . . . . . . . . . . . . . . . . . . . . . . . . . 11
Using the dialpad . . . . . . . . . . . . . . . . . . . . . . . . . . . . . . . . . . . . . . . . . . . . . . . . . . . . . 12
Symbols and conventions used in this guide . . . . . . . . . . . . . . . . . . . . . . . . . . . . . . . . 13
About telephone buttons . . . . . . . . . . . . . . . . . . . . . . . . . . . . . . . . . . . . . . . . . . . . . . . 13
Contents 3
Chapter 3
CallPilot mailboxes . . . . . . . . . . . . . . . . . . . . . . . . . . . . . . . . . . . . . . . . . . . . 15
About installing mailboxes . . . . . . . . . . . . . . . . . . . . . . . . . . . . . . . . . . . . . . . . . . . . . . 15
System Administrator Mailbox . . . . . . . . . . . . . . . . . . . . . . . . . . . . . . . . . . . . . . . . . . . 15
General Delivery Mailbox . . . . . . . . . . . . . . . . . . . . . . . . . . . . . . . . . . . . . . . . . . . . . . . 16
Subscriber mailboxes . . . . . . . . . . . . . . . . . . . . . . . . . . . . . . . . . . . . . . . . . . . . . . . . . 16
Guest mailboxes . . . . . . . . . . . . . . . . . . . . . . . . . . . . . . . . . . . . . . . . . . . . . . . . . . . . . 17
Information mailboxes . . . . . . . . . . . . . . . . . . . . . . . . . . . . . . . . . . . . . . . . . . . . . . . . . 18
Mailbox Class of Service . . . . . . . . . . . . . . . . . . . . . . . . . . . . . . . . . . . . . . . . . . . . . . . 19
Class of Service values . . . . . . . . . . . . . . . . . . . . . . . . . . . . . . . . . . . . . . . . . . . . . . . . 20
Mailbox properties . . . . . . . . . . . . . . . . . . . . . . . . . . . . . . . . . . . . . . . . . . . . . . . . . . . . 21
Restricting outdialing . . . . . . . . . . . . . . . . . . . . . . . . . . . . . . . . . . . . . . . . . . . . . . . . . . 23
Initializing a mailbox . . . . . . . . . . . . . . . . . . . . . . . . . . . . . . . . . . . . . . . . . . . . . . . . . . . 24
CallPilot 150 Telephone Administration Guide
Page 4

4
Contents
Chapter 4
W orking with mailboxes . . . . . . . . . . . . . . . . . . . . . . . . . . . . . . . . . . . . . . . . 25
Adding a Subscriber mailbox . . . . . . . . . . . . . . . . . . . . . . . . . . . . . . . . . . . . . . . . . . . . 25
Adding a Guest mailbox . . . . . . . . . . . . . . . . . . . . . . . . . . . . . . . . . . . . . . . . . . . . . . . . 27
Adding an Information mailbox . . . . . . . . . . . . . . . . . . . . . . . . . . . . . . . . . . . . . . . . . . 28
Adding many mailboxes . . . . . . . . . . . . . . . . . . . . . . . . . . . . . . . . . . . . . . . . . . . . . . . . 29
About mailbox passwords . . . . . . . . . . . . . . . . . . . . . . . . . . . . . . . . . . . . . . . . . . . . . . 31
Changing a mailbox . . . . . . . . . . . . . . . . . . . . . . . . . . . . . . . . . . . . . . . . . . . . . . . . . . . 32
Deleting a mailbox . . . . . . . . . . . . . . . . . . . . . . . . . . . . . . . . . . . . . . . . . . . . . . . . . . . . 35
About Group Lists . . . . . . . . . . . . . . . . . . . . . . . . . . . . . . . . . . . . . . . . . . . . . . . . . . . . 36
About Sending Group List messages . . . . . . . . . . . . . . . . . . . . . . . . . . . . . . . . . . 36
About Group List Numbers . . . . . . . . . . . . . . . . . . . . . . . . . . . . . . . . . . . . . . . . . . 36
Adding a Group List . . . . . . . . . . . . . . . . . . . . . . . . . . . . . . . . . . . . . . . . . . . . . . . . . . . 37
Changing a Group List . . . . . . . . . . . . . . . . . . . . . . . . . . . . . . . . . . . . . . . . . . . . . . . . . 38
Deleting a Group List . . . . . . . . . . . . . . . . . . . . . . . . . . . . . . . . . . . . . . . . . . . . . . . . . . 40
Chapter 5
Setting up the Automated Attendant . . . . . . . . . . . . . . . . . . . . . . . . . . . . . . 41
About the Automated Attendant . . . . . . . . . . . . . . . . . . . . . . . . . . . . . . . . . . . . . . . . . . 41
Greeting Tables . . . . . . . . . . . . . . . . . . . . . . . . . . . . . . . . . . . . . . . . . . . . . . . . . . . . . . 42
About Company Greetings . . . . . . . . . . . . . . . . . . . . . . . . . . . . . . . . . . . . . . . . . . . . . 43
Recording a Greeting . . . . . . . . . . . . . . . . . . . . . . . . . . . . . . . . . . . . . . . . . . . . . . . . . 44
Setting up a Greeting Table . . . . . . . . . . . . . . . . . . . . . . . . . . . . . . . . . . . . . . . . . . . . . 45
Configuring line answering . . . . . . . . . . . . . . . . . . . . . . . . . . . . . . . . . . . . . . . . . . . . . 49
Changing line configuration . . . . . . . . . . . . . . . . . . . . . . . . . . . . . . . . . . . . . . . . . . . . . 50
To change or view how a line is answered . . . . . . . . . . . . . . . . . . . . . . . . . . . . . . 50
Assigning the number of rings before CallPilot answers . . . . . . . . . . . . . . . . . . . . . . . 51
Setting up Touchtone Gate . . . . . . . . . . . . . . . . . . . . . . . . . . . . . . . . . . . . . . . . . . . . . 52
About the CLID Routing Table . . . . . . . . . . . . . . . . . . . . . . . . . . . . . . . . . . . . . . . . . . . 54
Chapter 6
Custom Call Routing . . . . . . . . . . . . . . . . . . . . . . . . . . . . . . . . . . . . . . . . . . . 57
About Custom Call Routing . . . . . . . . . . . . . . . . . . . . . . . . . . . . . . . . . . . . . . . . . . . . . 57
Planning and designing a CCR Tree . . . . . . . . . . . . . . . . . . . . . . . . . . . . . . . . . . . . . . 58
Components of a CCR Tree . . . . . . . . . . . . . . . . . . . . . . . . . . . . . . . . . . . . . . . . . . . . . 58
The Home node . . . . . . . . . . . . . . . . . . . . . . . . . . . . . . . . . . . . . . . . . . . . . . . . . . 58
Information Messages . . . . . . . . . . . . . . . . . . . . . . . . . . . . . . . . . . . . . . . . . . . . . . 59
Sub-menus . . . . . . . . . . . . . . . . . . . . . . . . . . . . . . . . . . . . . . . . . . . . . . . . . . . . . . 59
Mailbox nodes . . . . . . . . . . . . . . . . . . . . . . . . . . . . . . . . . . . . . . . . . . . . . . . . . . . . 60
Transfer nodes . . . . . . . . . . . . . . . . . . . . . . . . . . . . . . . . . . . . . . . . . . . . . . . . . . . . 60
Destination types . . . . . . . . . . . . . . . . . . . . . . . . . . . . . . . . . . . . . . . . . . . . . . . . . . 60
Paths . . . . . . . . . . . . . . . . . . . . . . . . . . . . . . . . . . . . . . . . . . . . . . . . . . . . . . . . . . . 60
An example of a CCR Tree . . . . . . . . . . . . . . . . . . . . . . . . . . . . . . . . . . . . . . . . . . . . . 61
P0919416 03
Page 5

Contents 5
Chapter 7
Working with CCR Trees . . . . . . . . . . . . . . . . . . . . . . . . . . . . . . . . . . . . . . . . 63
Building a CCR Tree . . . . . . . . . . . . . . . . . . . . . . . . . . . . . . . . . . . . . . . . . . . . . . . . . . 63
Creating a Home node . . . . . . . . . . . . . . . . . . . . . . . . . . . . . . . . . . . . . . . . . . . . . . . . 64
Adding nodes to the Home node . . . . . . . . . . . . . . . . . . . . . . . . . . . . . . . . . . . . . . . . . 65
Adding a Menu node . . . . . . . . . . . . . . . . . . . . . . . . . . . . . . . . . . . . . . . . . . . . . . . . . . 66
Adding an Information node . . . . . . . . . . . . . . . . . . . . . . . . . . . . . . . . . . . . . . . . . . . . 68
Adding a Mailbox node . . . . . . . . . . . . . . . . . . . . . . . . . . . . . . . . . . . . . . . . . . . . . . . . 70
Adding a Transfer node . . . . . . . . . . . . . . . . . . . . . . . . . . . . . . . . . . . . . . . . . . . . . . . . 72
About transfers to external numbers . . . . . . . . . . . . . . . . . . . . . . . . . . . . . . . . . . . 73
Adding special characters to an external transfer number . . . . . . . . . . . . . . . . . . . . . . 75
Assigning a CCR Tree to a Greeting Table . . . . . . . . . . . . . . . . . . . . . . . . . . . . . . . . . 76
Testing a CCR Tree . . . . . . . . . . . . . . . . . . . . . . . . . . . . . . . . . . . . . . . . . . . . . . . . . . . 77
Disabling a CCR Tree . . . . . . . . . . . . . . . . . . . . . . . . . . . . . . . . . . . . . . . . . . . . . . . . . 77
Deleting a CCR Tree . . . . . . . . . . . . . . . . . . . . . . . . . . . . . . . . . . . . . . . . . . . . . . . . . . 78
Changing a CCR Tree message . . . . . . . . . . . . . . . . . . . . . . . . . . . . . . . . . . . . . . . . . 79
Changing a Mailbox node . . . . . . . . . . . . . . . . . . . . . . . . . . . . . . . . . . . . . . . . . . . . . . 80
Changing a destination type . . . . . . . . . . . . . . . . . . . . . . . . . . . . . . . . . . . . . . . . . . . . 81
Changing a Transfer node . . . . . . . . . . . . . . . . . . . . . . . . . . . . . . . . . . . . . . . . . . . . . . 82
Deleting a Path . . . . . . . . . . . . . . . . . . . . . . . . . . . . . . . . . . . . . . . . . . . . . . . . . . . . . . 83
Chapter 8
Broadcast and Information messages. . . . . . . . . . . . . . . . . . . . . . . . . . . . . 85
About Broadcast messages . . . . . . . . . . . . . . . . . . . . . . . . . . . . . . . . . . . . . . . . . . . . . 85
Information mailbox messages . . . . . . . . . . . . . . . . . . . . . . . . . . . . . . . . . . . . . . . . . . 87
About recording an Information mailbox message . . . . . . . . . . . . . . . . . . . . . . . . 87
Recording an Information mailbox message . . . . . . . . . . . . . . . . . . . . . . . . . . . . . . . . 88
Chapter 9
CallPilot operations . . . . . . . . . . . . . . . . . . . . . . . . . . . . . . . . . . . . . . . . . . . . 89
About resetting CallPilot . . . . . . . . . . . . . . . . . . . . . . . . . . . . . . . . . . . . . . . . . . . . . . . 89
Initializing CallPilot . . . . . . . . . . . . . . . . . . . . . . . . . . . . . . . . . . . . . . . . . . . . . . . . . . . . 90
Resetting the System Administrator password . . . . . . . . . . . . . . . . . . . . . . . . . . . . . . 91
Operator settings . . . . . . . . . . . . . . . . . . . . . . . . . . . . . . . . . . . . . . . . . . . . . . . . . . . . . 92
Setting the Operator status . . . . . . . . . . . . . . . . . . . . . . . . . . . . . . . . . . . . . . . . . . 92
Changing the Operator password . . . . . . . . . . . . . . . . . . . . . . . . . . . . . . . . . . . . . 93
Resetting the Operator password . . . . . . . . . . . . . . . . . . . . . . . . . . . . . . . . . . . . . 93
Changing the Operator default extension . . . . . . . . . . . . . . . . . . . . . . . . . . . . . . . 94
Setting the Business Status . . . . . . . . . . . . . . . . . . . . . . . . . . . . . . . . . . . . . . . . . 94
Changing greetings or the Business Status from a remote telephone . . . . . . . . . 95
Setting up line answering . . . . . . . . . . . . . . . . . . . . . . . . . . . . . . . . . . . . . . . . . . . 95
Setting the Automated Attendant status . . . . . . . . . . . . . . . . . . . . . . . . . . . . . . . . 96
CallPilot 150 Telephone Administration Guide
Page 6

6
Contents
CallPilot default system options . . . . . . . . . . . . . . . . . . . . . . . . . . . . . . . . . . . . . . . . . . 97
Language availability . . . . . . . . . . . . . . . . . . . . . . . . . . . . . . . . . . . . . . . . . . . . . . . 97
Group List leading digit . . . . . . . . . . . . . . . . . . . . . . . . . . . . . . . . . . . . . . . . . . . . . . . . 98
Voicemail . . . . . . . . . . . . . . . . . . . . . . . . . . . . . . . . . . . . . . . . . . . . . . . . . . . . . . . . 99
Company Directory . . . . . . . . . . . . . . . . . . . . . . . . . . . . . . . . . . . . . . . . . . . . . . . 100
Outdialing . . . . . . . . . . . . . . . . . . . . . . . . . . . . . . . . . . . . . . . . . . . . . . . . . . . . . . . . . 101
General Delivery Mailbox . . . . . . . . . . . . . . . . . . . . . . . . . . . . . . . . . . . . . . . . . . 102
Enabling a software authorization code . . . . . . . . . . . . . . . . . . . . . . . . . . . . . . . . . . . 103
External Mailbox Initialization . . . . . . . . . . . . . . . . . . . . . . . . . . . . . . . . . . . . . . . . . . 104
Chapter 10
Dialing Translation. . . . . . . . . . . . . . . . . . . . . . . . . . . . . . . . . . . . . . . . . . . . 105
About Dialing Translation . . . . . . . . . . . . . . . . . . . . . . . . . . . . . . . . . . . . . . . . . . . . . . 105
How the Dialing Translation Table works . . . . . . . . . . . . . . . . . . . . . . . . . . . . . . . . . . 105
Examples of Dialing Translation Tables . . . . . . . . . . . . . . . . . . . . . . . . . . . . . . . . . . . 106
Setting Dialing Translation properties . . . . . . . . . . . . . . . . . . . . . . . . . . . . . . . . . . . . 108
Building a Dialing Translation Table . . . . . . . . . . . . . . . . . . . . . . . . . . . . . . . . . . . . . . 109
Reviewing entries in the Dialing Translation Table . . . . . . . . . . . . . . . . . . . . . . . . . . . 110
Changing a Dialing Translation Table entry . . . . . . . . . . . . . . . . . . . . . . . . . . . . . . . . 111
Deleting a Dialing Translation Table entry . . . . . . . . . . . . . . . . . . . . . . . . . . . . . . . . . 112
Chapter 11
Troubleshooting CallPilot . . . . . . . . . . . . . . . . . . . . . . . . . . . . . . . . . . . . . . 113
CallPilot error messages . . . . . . . . . . . . . . . . . . . . . . . . . . . . . . . . . . . . . . . . . . . 117
Chapter 12
CallPilot con figuration tip s . . . . . . . . . . . . . . . . . . . . . . . . . . . . . . . . . . . . . 121
Delayed answering by the Automated Attendant . . . . . . . . . . . . . . . . . . . . . . . . . . . . 121
Ringing lines and answer buttons . . . . . . . . . . . . . . . . . . . . . . . . . . . . . . . . . . . . . . . 121
Ringing Answer button . . . . . . . . . . . . . . . . . . . . . . . . . . . . . . . . . . . . . . . . . . . . 121
Using Call Forward All Calls (CFAC) and Call Forward No Answer (CFNA) . . . . . . . 122
How to set up CallPilot for different businesses . . . . . . . . . . . . . . . . . . . . . . . . . . . . . 123
CallPilot for a small business . . . . . . . . . . . . . . . . . . . . . . . . . . . . . . . . . . . . . . . 123
CallPilot for a medium business . . . . . . . . . . . . . . . . . . . . . . . . . . . . . . . . . . . . . 125
Feature Compatibility . . . . . . . . . . . . . . . . . . . . . . . . . . . . . . . . . . . . . . . . . . . . . . . . . 128
Chapter 13
Default conf iguration values. . . . . . . . . . . . . . . . . . . . . . . . . . . . . . . . . . . . 133
Glossary . . . . . . . . . . . . . . . . . . . . . . . . . . . . . . . . . . . . . . . . . . . . . . . . . . . . 137
Index . . . . . . . . . . . . . . . . . . . . . . . . . . . . . . . . . . . . . . . . . . . . . . . . . . . . . . . 145
P0919416 03
Page 7

Chapter 1
Getting started with CallPilot
About CallPilot
CallPilot is a versatile business communications tool that you can use to:
• answer incoming calls
• offer callers a selection of options to route their calls or access information
• provide advanced voicemail, Automated Attendant and call handling capabilities
This guide leads a System Administrator through setting up and operating CallPilot on a CallPilot
150 system. You can program CallPilot using any two-line display telephone on your Norstar
system. You can also use the web-based CallPilot Manager to set up and operate CallPilot.
CallPilot features
7
CallPilot includes:
Voicemail
Records messages and stores them in a mailbox for easy retrieval. Business telephones on your
system can have their own mailbox and greeting. Information can be distributed quickly to
departments and workgroups.
Automated Attendant
Answers your business calls promptly, 24 hours a day, with a Company Greeting. Callers can
direct their own calls by using the Company Directory.
Custom Call Routing (CCR)
Enhances the Automated Attendant menu with customized menus and information messages. With
CCR you can determine the menu options and record the voice prompts that guide callers along
call paths.
CallPilot 150 Telephone Administration Guide
Page 8

8 Chapter 1 Getting started with CallPilot
CallPilot options
CallPilot has two options to enhance your office communications. You need a software
authorization code to enable a CallPilot option. Contact your vendor if you want to trial or
purchase a software authorization code.
CallPilot options are:
Message Networking
Message Networking links the CallPilot system with other voicemail systems and allows the
exchange of v oi ce messa ges between u sers a t different sit es. Call Pilot suppor ts Digi tal ne tw orki ng
and Audio Messaging Interchange Specification (AMIS) networking. For information about
Message Networking refer to the CallPilot Message Networking Set Up and Operation Guide.
Call Center
CallPilot is an application that handles incoming calls as efficiently and economically as possible.
Call Center answers calls, then routes the calls to agents in a skillset that most closely matches the
needs of the caller. Calls can be routed based on the origi n of th e call , the de stina tion o f the c all, o r
the information entered by the caller. Callers can be given high or low priorities. Callers can
overflow to diff er ent g rou ps or skil ls et s of agents, transfer out of th e sys te m, leave a message, and
hear announcements or informative messages. For information about Call Center refer to the
Nortel Networks Call Center Set Up and Operation Guide.
For CallPilot 150, you have the option of choosing either CallPilot or Call Center as your primary
application.
Desktop Messaging
With Desktop Messaging subscribers can access their CallPilot mailbox from their personal
computer. Subscribers can manage all of their voice messages from one graphical interface.
P0919416 03
Page 9

How to get help
USA and Canada
Authorized Distributors - ITAS Technical Support
Telephone:
1-800-4NORTEL (1-800-466-7835)
If you already have a PIN Code, you can enter Express Routing Code (ERC) 196#.
If you do not yet have a PIN Code, or for general questions and first line support, you can enter
ERC 338#.
Website:
http://www.nortelnetworks.com/itas/
email:
naitas@nortelnetworks.com
Presales Support (CSAN)
Telephone:
1-800-4NORTEL (1-800-466-7835)
Use Express Routing Code (ERC) 1063#
Chapter 1 Getting started with CallPilot 9
EMEA (Europe, Middle East, Africa)
Technical Support - CTAS
Telephone:
00800 800 89009 or 33 4 9296 1341
Fax:
33 49296 1598
email:
emeahelp@nortelnetworks.com
CALA (Caribbean & Latin America)
Technical Support - CTAS
Telephone:
1-954-858-7777
email:
csrmgmt@nortelnetworks.com
APAC (Asia Pacific)
Technical Support - CTAS
Telephone:
+61 388664627
Fax:
+61 388664644
email:
asia_support@nortelnetworks.com
CallPilot 150 Telephone Administration Guide
Page 10

10 Chapter 1 Getting started with CallPilot
P0919416 03
Page 11

Chapter 2
Using CallPilot
Who can use CallPilot
CallPilot can be used by outside callers and mailbox owners (subscribers) in your company.
Subscribers at your office can use CallPilot from any display telephone that is connected to your
telephone system. Subscribers outside your office can use CallPilot from any tone dial telephone.
Incoming calls from a rotary dial telephone are transferred to your company receptionist or
designated operator. If an operator is not available, the call transfers to the General Delivery
Mailbox.
System timeout
If you pause longer tha n 2 min utes when you program CallPil ot, the syste m times out and end s the
session. This is a safety feature that p revents unauthori
11
zed use of the system.
For example, if the system times out before you enter all the settings for a mailbox, you must use
the procedures in “Changing a mailbox” on page 32 to finish setting up the mailbox.
Using CallPilot with a two line display telephone
You cannot use a single line display telephone to set up and administer CallPilot. You must use a
two line display telephone. Two line display phones sh ow CallPilot commands and options. A two
line display can show up to three display options at once. In some instances, an option does not
have a corresponding display button, and you must select the option by pressing buttons on the
diapad.
While you program CallPilot, at any time, you can press • to go back to the previous selections.
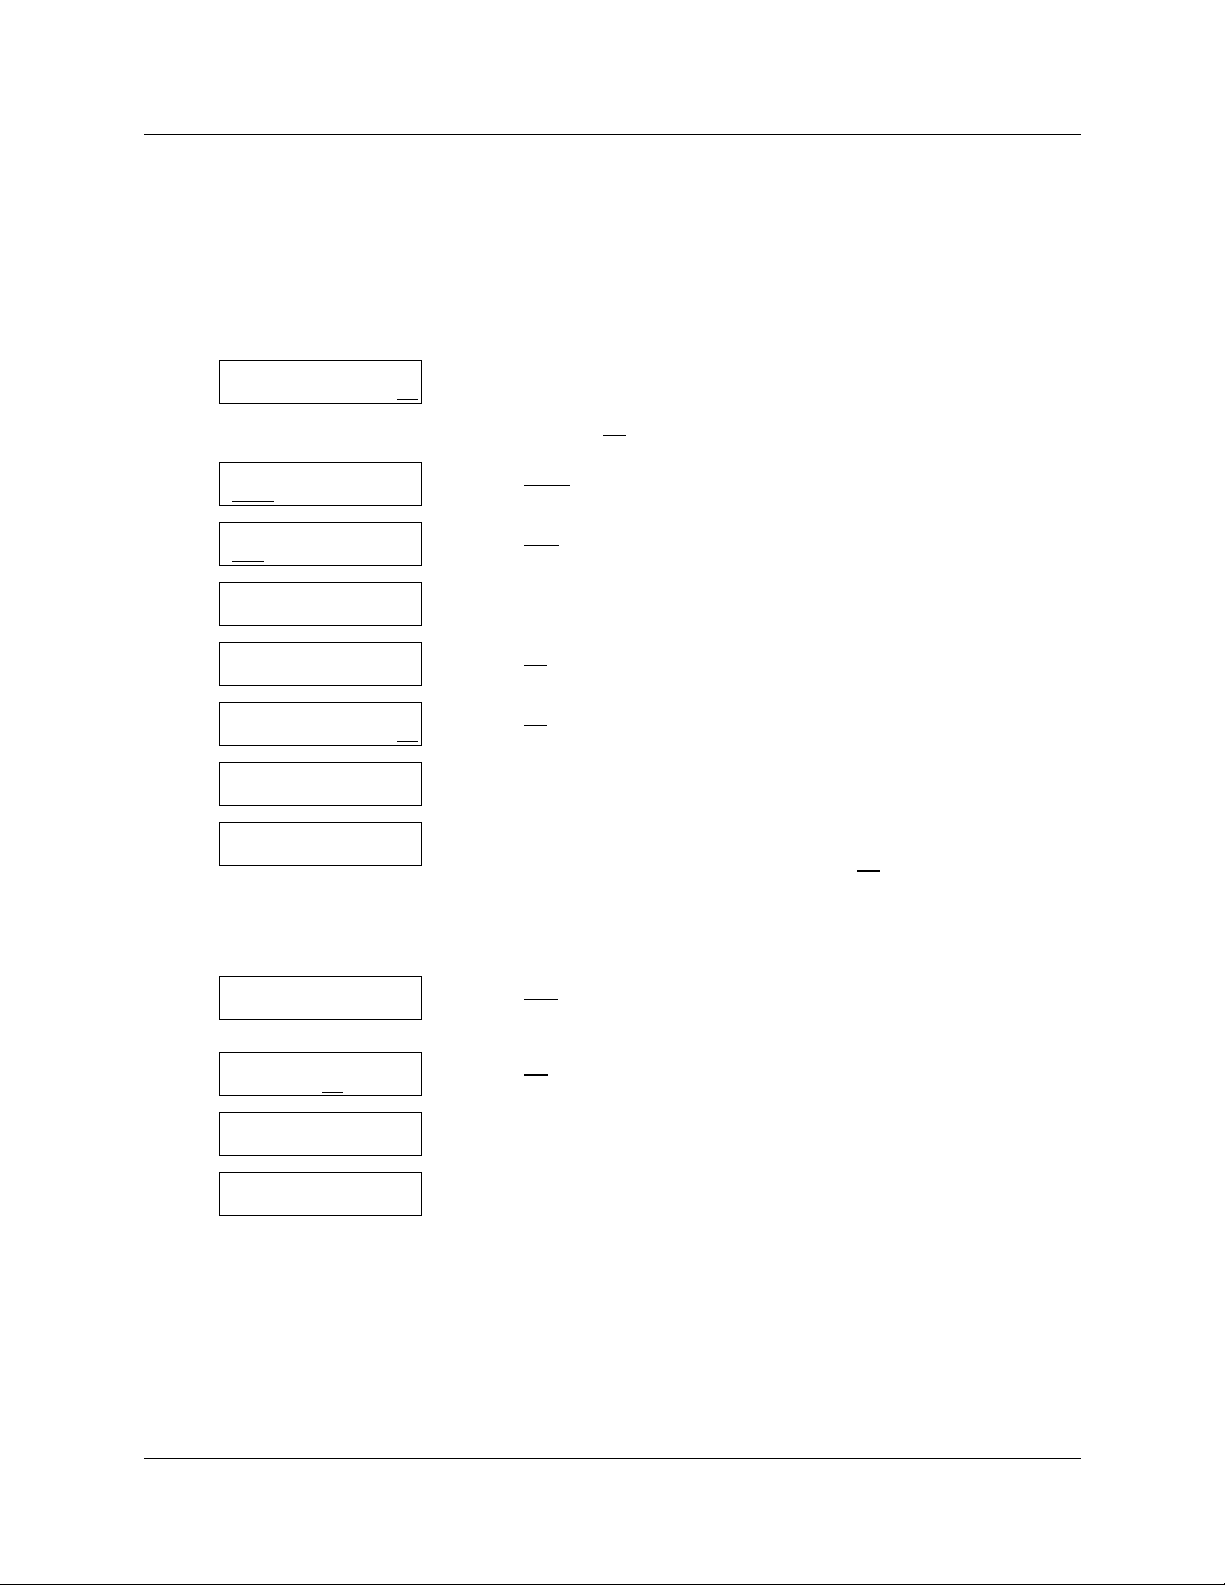
An example of a two line display
Display command line
Display button options
Display buttons
Pswd:
OTHR RETRY OK
CallPilot 150 Telephone Administration Guide
Page 12

12 Chapter 2 Using CallPilot
Using the dialpad
The buttons on your display telephone dialpad act as both numbers and letters. Each button
represents a number and letters of the alphabet.
To enter a character
To accept a character
To delete a character
Numbers and letters on the dialpad.
1 ’ -
⁄
G H I 4 g h i
›
P Q R S 7 p q r s
‡
Quit
•
press the dialpad button that represents the letter or number. Press the
button again to see the next letter or number.
press £ or press another button. When you press another button, the
cursor advances and the display shows the first character on the new
button.
press the
A B C 2 a b c
¤
J K L 5 j k l
fi
T U V 8 t u v
°
Q Z Zero q z
‚
display button.
BKSP
D E F 3 d e f
‹
M N O 6 m n o
fl
W X Y Z 9 w x y z
·
Accepts the displayed letter and,
£
(comma)
The display can show up to 16 characters. Whether the prompt remains on the display depends on
the type of prompt that is displayed.
Pswd:1111
OTHR RETRY OK
This is an example of a disp lay with fewer than 16 characters, where
the command line prompt remains on the display.
Name:
RETRY BKSP OK
P
RETRY BKSP OK
PARTRIDGE
RETRY BKSP OK
The prompt disappears for these command line prompt s:
•Name:
•Log:
•Dest ph:
P0919416 03
This display shows the Name: command line prompt.
When you begin to enter the last name, the Name: command line
prompt disappears. For example, if you enter the name Partridge, you
press the pad ‡ for P, and the display drops the Name: prompt.
Although the name is only nine characters long, the command line
prompt is not shown on the display after you enter the entire name.
Page 13

Chapter 2 Using CallPilot 13
Symbols and conventions used in this guide
These conventions and symbols are used to represent the Business Series Terminal display and
dialpad.
Convention Example Used for
Word is in a special font (in the top
line of the display)
Underlined word in capital letters
(on the bottom line of a two line
display telephone)
Dialpad buttons
About telephone buttons
This table shows the Nortel Networks Business Series Terminal buttons. Use the buttons that
pertain to the type of telephone you use.
Button name T7100, T7208, T7316
Feature
Handsfree Bottom right-hand
Hold
≤ ƒ
button
ú
≥
Pswd:
PLAY
£
Command line prompts on display telephones.
Display option. Available on two line display
telephones.
option on the display to proceed.
Buttons you press on the dialpad to select a
particular option.
M7100, M7208, M7310,
M7324
Press the button directly below the
M7100N, M7208N,
M7310N, M7324N
Ä
©
˙
©
ú
Volum e C o n tr o l
Release
√ √
® ®
You can enter ≤, ƒ or
Ä
and the code to use a feature. For example, press
Ã
¨
≤·°⁄ to access your mailbox.
The T7100 works differently from other telephones on your system because it does not have line
buttons. Where ot her tele phones requi re that you s elect a line b ut ton to answer a call, on the T7100
terminal you pick up t he handset . Where other t elephones require y ou to selec t a line b utt on to tak e
a call off hold, you press the
On T7100 terminals, you can answer a second call by pressing
ú
button on the T7100 terminal.
ú
. Your active call is put on
hold and you connect to the waiting call. You can have no more than two active calls at one time.
CallPilot 150 Telephone Administration Guide
Page 14

14 Chapter 2 Using CallPilot
P0919416 03
Page 15
Chapter 3
CallPilot mailboxes
About installing mailboxes
You install mailboxes by enabling a software authorization code. The software authorization code
enables the number of mailboxes that you can add to CallPilot. On CallPilot 150 you can have a
maximum of 200 subscriber mailb oxes. Re fer to “Enabling a software authorization code” on page
103 for information on how to enable software authorization codes.
System Administrator Mailbox
The System Administrator Mailbox:
• is reserved for the System Administrator
• is created automatically when the system is initialized for the first time
• is where you send Broadcast Messages from
15
Only the System Administrator can access the System Administrator Mailbox. Remember to
check this mailbox for messages.
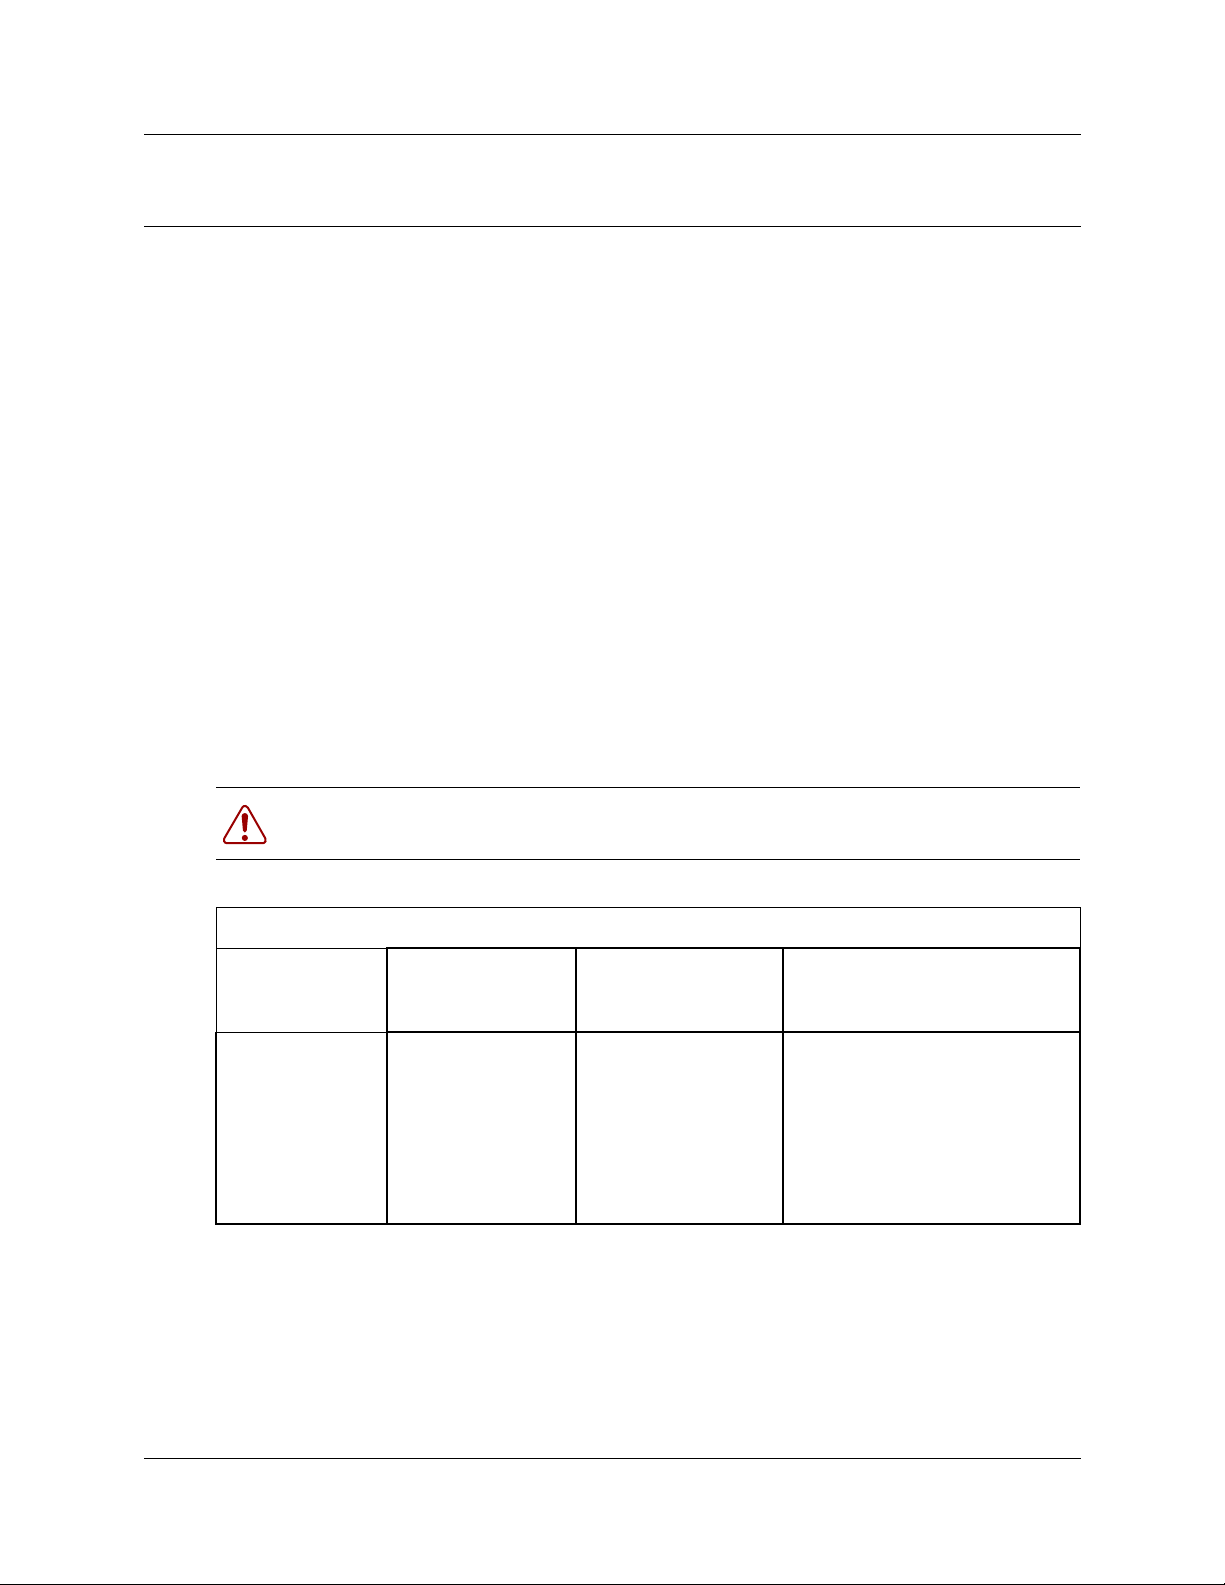
Warning: Change the System Administrator password as soon as possible to
minimize the risk of unauthorized activity.
Default System Administrator Mailbox number and password combinations
For a mailbox
number length
of...
2 12 0000 120000
3 102 0000 1020000
4 1002 0000 10020000
5 10002 0000 100020000
6 100002 0000 1000020000
7 1000002 0000 10000020000
the default System
Administrator
Mailbox number is...
and the default
System Administrator
Mailbox password is...
so the combined mailbo x number
and password is...
The default Class of Service for the System Administrator Mailbox is 7. You can change the Class
of Service any time. For information on cha nging the Cl ass of Service, refer to “Changing a
mailbox” on page 32.
CallPilot 150 Telephone Administration Guide
Page 16
16 Chapter 3 CallPilot mailboxes
General Delivery Mailbox
The General Delivery Mailbox is your company mailbox. It is created automatically when the
system is initialized for the first t ime. The General Delivery Mailbox stores me ssa ges fr om cal ler s
when the Operator is not available, from callers who use a rotary dial telephone, and when a
mailbox is full.
Usually the receptionist or designated Operator checks for messages in the General Delivery
Mailbox.
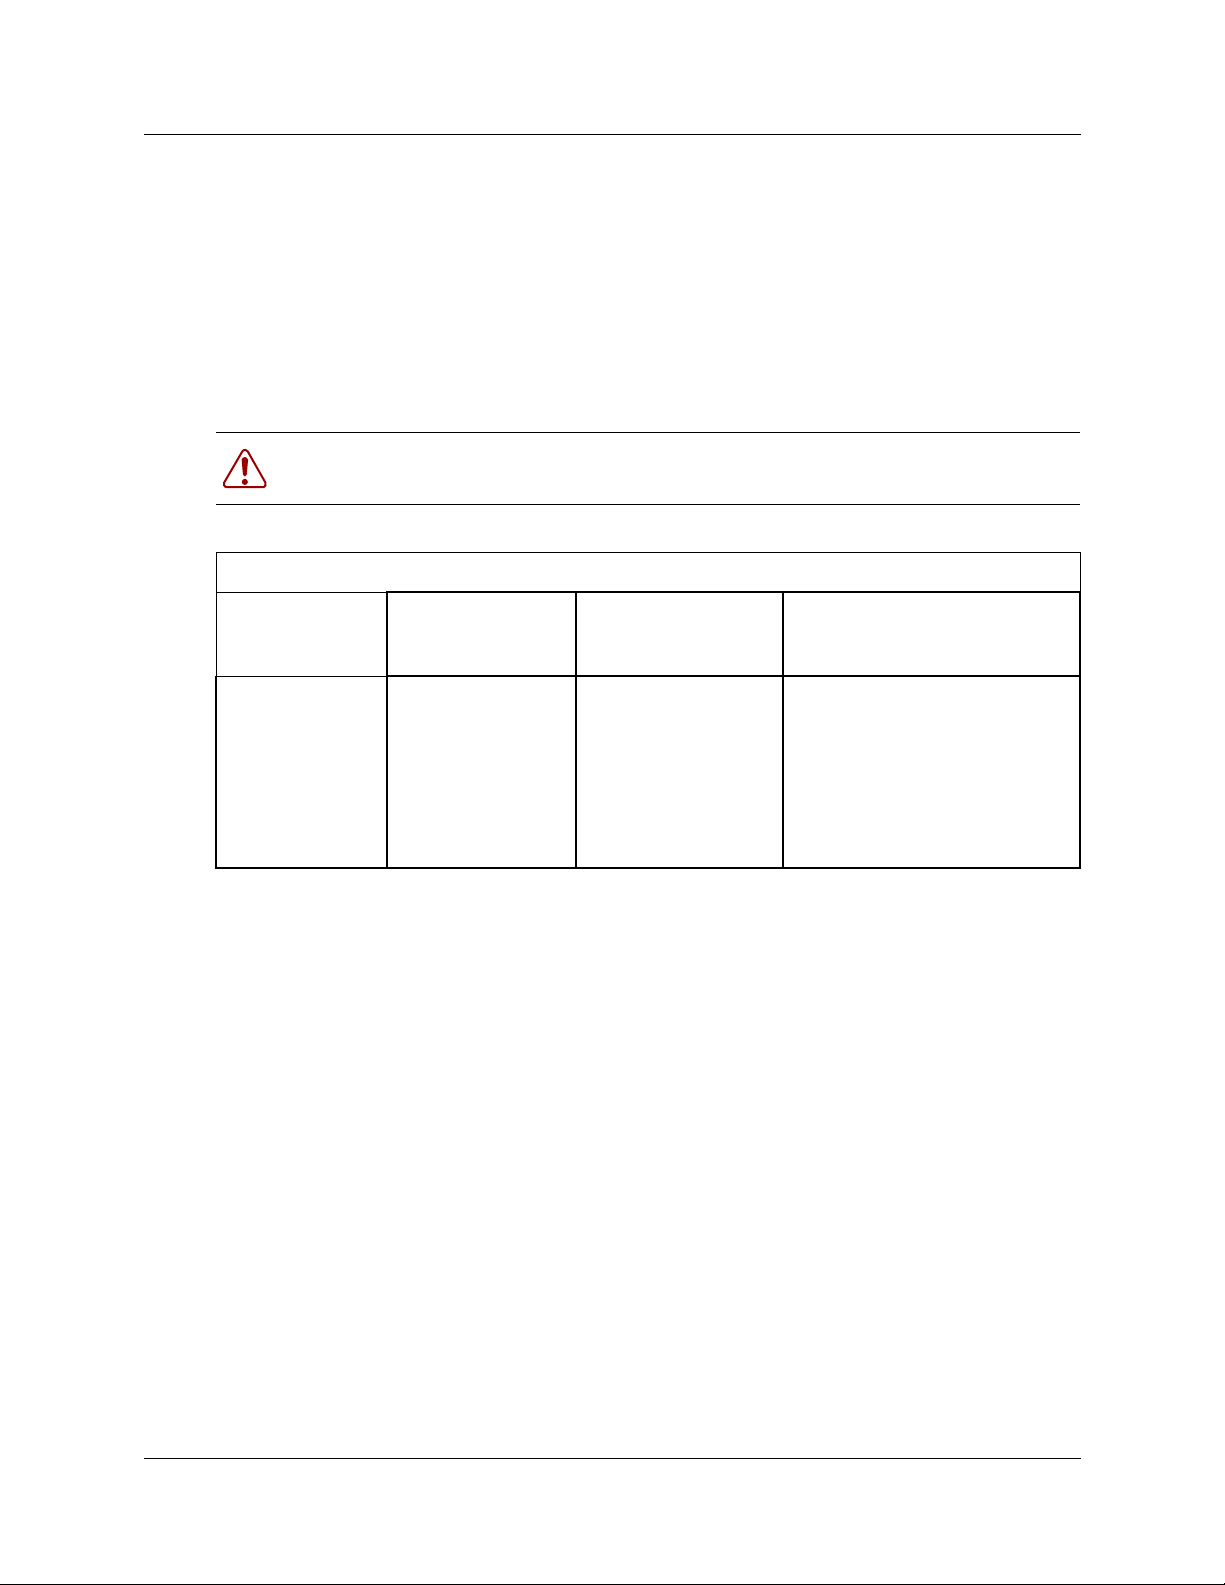
Warning: Change the General Delivery Mailbox password as soon as possible to
minimize the risk of unauthorized activity.
Default General Delivery Mailbox number and password combinations
For a mailbox
number length
of...
2 10 0000 100000
3 100 0000 1000000
4 1000 0000 10000000
5 10000 0000 100000000
6 100000 0000 1000000000
7 1000000 0000 10000000000
the default System
Administrator
Mailbox number is...
The default Class of Service for the General Delivery Mailbox is 1. You can change the Class of
Service any time. For information on changing the Class of Service, refer to “Changing a mailbox”
on page 32.
The General Delivery Mailbox can receive messages before it is initialized, but you must initialize
it before you can retrieve messages from it. For information about initializing mailboxes, refer to
“Initializing a mailbox” on page 24.
Subscriber mailboxes
and the default
System Administrator
Mailbox password is...
so the combined mailbo x number
and password is...
Create a Subscriber mailbox for each person in your organization who needs to be able to receive
messages.
A Subscribe r mailbox mus t be initialized by the mailbox owner before it can receive voice
messages. Until a ma il box is initialized, i t cannot recei ve voi ce messages, it does not a ppear in the
Company Dire ctory, and any calls that are directed to it are rerouted to the General Delivery
Mailbox. Tell subscribers to change their mailbox password as soon as they initialize their
mailbox.
P0919416 03
Page 17

Guest mailboxes
Create Guest mailboxes for people who do not have an operating extension but require a mailbox.
A Guest mai lbox must be initialized by the mailbox owner before it can receive messages.
When you create Guest mailboxes, assign mailbox numbers that begin with the same digit. This
identifies the mailbox type. Create Guest mailbox numbers that begin with a digit that is different
than the Subscriber mailbox numbers. For examp le , i f Subscriber mailbox numbe rs start with two,
Guest mailboxes can start with the number four.
When to use Guest mailboxes
Guest mailboxes can provide a temporary employee with CallPilot services, give clients access to
internal messaging and call routing, and let customers leave telephone orders.
You can use Guest mailboxes to:
• take personal catalog shopping orders
• list classes or seminars and let callers register by telephone
• give frequent cu stomers access to CallP i lot services
Chapter 3 CallPilot mailboxes 17
Using a Guest mailbox for telephone registration
This example shows how to set up a Guest mailbox with announcement and order-taking
capabilities. When you provide services that let a customer call into a mailbox, include the
mailbox number in the greeting. This lets a caller transfer directly to the mailbox.
To use a Guest mailbox to provide telephone registration, you must first determine a mailbox
number. Make sure that the Guest mailbox number is unique and is not assigned to any display
telephone extension. Next, record the mailbox greeting.
For example:
“This month we are pleased to provide the following courses: Jazz Dancing Made Easy,
Intermediate Jazz Dancing, Warming Up for that Big Performance, and Be gi nner Ba llet . If y ou are
interested in any of these courses, please leave your name and telephone number after the tone.
One of our instructors will contact you with more information.”
You can include the time and date the classes are being offered. This example is applicable to
Guest mailboxes that are used for taking orders.
After you record the announcement, record a Company Greeting that tells callers about the
mailbox is available. For example:
“Good Morning. This is On Your Toes Dance School. To reach the dance studio, press ›fl. To
register for our fall classes, press ¤°. To reach our receptionist, press ‚.”
Note: The number 46 in this example is an operating telephone extension and the
number 28 is the Guest mailbox.
CallPilot 150 Telephone Administration Guide
Page 18

18 Chapter 3 CallPilot mailboxes
Make sure the leading digit of Guest mailbox numbers is different from the leading digit of the
extensions. If you must use the same leading digit, ensure the Guest mailbox numbers are
“out-of-range” extension numbers. To test if an extension is out-of-range, dial it from another
extension. If the number is out-of-range, the display shows
not out-of-range but does not have a set plugged into the corresponding port, the display shows
Not in service
You must assign a Cl ass of Service to the Guest mailbox. When you assign a Cl ass of Service to a
Guest mailbox used as a n order mai lbox, c hoose a Class of Ser vice that h as the maximum mai lbox
greeting and message time available. Refer to “Mailbox Class of Service” on page 19.
.
Information mailboxes
Information mailboxes play an informative message to callers who access it. An Information
mailbox must be initialized before it can play an information message. Callers cannot leave
messages in Information mailboxes. Information mailboxes do not have operating extensions. For
more information about Information messages refer to “Information mailbox messages” on page
87.
Informati on mailboxes are maintaine d by the Syst em Administrator or a mail box owner.
Invalid number
. If the number is
You can use Information mailboxes to:
• announce sales
• provide product lists
• announce special events
A caller is disconnected automatically after listening to an Information mailbox. Information
mailbox Greetings can be recorded by you or by the person assigned the Information mailbox.
To let callers know about your company’s Information mailboxes:
• Advertise the Automated Attendant main number, and record a Company Greeting that
mentions the Information mail box ser vices.
• Provide a list of your company’s Information mailboxes in brochures and telephone directory
advertising.
• Mention the Information mailboxes in the Company Greeting if your company has a small
number of Information mailboxes, such as three or four. Use Custom Call Routing (CCR) if
you have a large number of Information mailboxes.
• Assign the Operator as the transfer point for all Information mailbox inquiries. Record a
statement in the Company Greeting that tells callers to press zero to reach company
information. F or e x ample, “Good Aft ernoon . This is On Your Toes Dance Studio. To reach our
studio, pr es s ›fl. To listen to one of our special announcements, press ‚ to reach the
Operator.”
When a caller presses zero, have the Operator provide a list of the Information mailboxes and
transfer the caller accordingly.
P0919416 03
Page 19

Mailbox Class of Service
Class of Service (COS) values reduce the amount of programming you do when you add a
mailbox. In stead of entering values for several fea tures, you ca n select the COS appropriate for a
mailbox. You enter the COS when you add the mailbox and the system uses the associated values.
The COS tables, shown in “Class of Service values” on page 20 have preset values. If you use the
web-based CallPilot Manager you can change individual COS values to meet the needs of your
company. For more information about using CallPilot Manager to edit Classes of Service, refer to
the CallPilot Manager Set Up and Operation Guide.
Class of Service features
Chapter 3 CallPilot mailboxes 19
Prompt language
Mailbox message
time
Message length
Message retention
period
Greeting length
Off-premise Message
Notification
Retry intervals
Number of attempts
Outbound Transfer
Incorrect password
attempts
If you select bilingual operation, Classes of Service 1, 3, 5, 7, 9, 11, 13, 15 use the
Primary Language, and Classes of Service 2, 4, 6, 8, 10, 12, 14, 16 use the
Alternate Language.
The total message time available to a mailbox. The maximum message time is 180
minutes. Mailboxes have a Never Full feature that lets a caller leave a message in a
“full” mailbox. The message is stored in the mailbox, but cannot be played, copied
or saved until a saved message is deleted.
The maximum length of an incoming message. Message length is from 1 to 30
minutes.
The number of days messages are saved in a mailbox. Message retention period is
from one to 365 days or 0 = indefinitely.
The maximum length of a mailbox greeting. Greeting length is from 1 to 30 minutes.
Redirects messages to another extension, telephone number or pager. Dialing
restrictions that apply to outdial lines apply to Off-premise Message Notification.
For Off-premise Message Notification, the minutes between attempts to notify the
recipient of a new or urgent message. The retry interval is from 1 to 120 minutes.
For Off-premise Message Notification, the number of attempts the system makes to
notify the recipient of a new or urgent message. The number of attempts is from 1
to 20.
Lets a caller who reaches a mailbox transfer to an external telephone number or an
extension.
The maximum number of incorrect password attempts before a mailbox owner is
locked out of their mailbox. The incorrect password attempts are from 4 to 20.
Password Expiry
Networking
Target Attendant
Call Record
User Interface
The maximum length of time a mailbox password is active. The password expiry is
from 1 to 365 days or 0 = never expire.
If the Message Networking option is installed, lets callers send messages to
mailboxes at various sites on a communication network.
Lets subscribers set up a Personal Target Attendant. Otherwise, callers are
directed to the Target Attendant specified in the Greeting Table.
Lets subscribers use the Call Record feature. With Call Record (≤
subscriber can record an active telephone call. The recorded message is placed in
the subscriber’s mailbox.
The user interface used for the mailbox. There are two mailbox UI choices: Norstar
Voice Mail (NVM) and CallPilot (CP).
·°·
) a
CallPilot 150 Telephone Administration Guide
Page 20

20 Chapter 3 CallPilot mailboxes
Class of Service values
Class of Service 12345678
Prompt language PAPAPAPA
Mailbox message time (in minutes) 15 15 15 15 5 5 20 20
Message length (in minutes) 33773322
Message retention period (in days) 30 30 0 0 7 7 15 15
Greeting length (in minutes) 1111111010
Off-premise Message NotificationYYYYNNYY
Retry intervals (in minutes) 5 5 10 10 15 15 30 30
Number of attempts 33557799
Outbound Transfer YYYYNNYY
Incorrect pswd attempts 99996644
Password expiry (in days) 9090909060603030
Networking* YYYYNNYY
Target Attendant YYYYNNYY
Call Record NNNNNNNN
Mailbox UI The interface selected from the Installation Wizard as the primary interface.
Class of Service 9 10 11 12 13 14 15 16
Prompt language PAPAPAPA
Mailbox message time (in minutes) 10 10 30 30 120 120 120 120
Message length (in minutes) 3377101022
Message retention period (in days) 365 365 60 60 90 90 45 45
Greeting length (in minutes) 11223355
Off-premise Message Notification Y Y N N Y Y Y Y
Retry intervals (in minutes) 5 5 10 10 15 15 30 30
Number of attempts 33557799
Outbound Transfer Y Y N N Y Y Y Y
Incorrect pswd attempts 99996644
Password expiry (in days) 9090909060603030
Networking* Y Y N N Y Y Y Y
Target Attendant Y Y N N Y Y Y Y
Call Record NNNNNNNN
Mailbox UI The interface selected from the Installation Wizard as the primary interface.
* If the Message Networking option is installed. 0 = indefinite; never expire, P = Primary Language, A = Alternate Language
P0919416 03
Page 21

Mailbox properties
Apart from mailbox Class of Service settings, you can change these mailbox properties:
• Company Directory
• Message Waiting Notification
• Outdial ro ute
• Alternate extensions
• Express Messaging Line
• Call Screening
Mailbox properties are not included in a Class of Service. When you add a mailbox, you can
change these options without changing the Class of Service.
Company Directory
The Company Directory is an internal list that contains the names of mailbox owners with
initialized mailboxes who are assigned to the directory.
When you add a mailbox, you determine whether the mailbox appears in the Company Directory.
Even if you do not include a mailbox in the Company Directory the mailbox owner must still
record their name when they initialize their mailbox.
Chapter 3 CallPilot mailboxes 21
Message Waiting Notification
Message Waiting Notification gives subscribers a visual indication on their telephone display that
they have new messages. Message Waiting Notification displays
subscriber’s display telephone when they have a message.
Message Waiting Notification is enabled by default. When you create Guest Mailboxes, do not
enable Message Waiting Notification. Guest Mailboxes do not have an operating extension.
Message for you
on a
Outdial route
The Outdial route determines which line or line pool the system uses when a subscriber uses:
• the Reply feature to reply to a message left by an external caller
• Off-premise M essage Noti fica tion
• Outbound Transfer
The default for Outdial route is None. The values available are None, Line, Pool or Route. Until
you assign a line or line pool as the Outdial route for a mailbox, the mailbox owner can use the
Reply feature to repl y to calls from int ernal e xtensi ons onl y, Off-premise Message Noti f icat ion fo r
internal extensions only and Outbound Transfer for internal extensions only.
When you assign an Outd ial r out e, t he dialing is done by the extension the sy st em is connected to,
not by the display telephone.
CallPilot 150 Telephone Administration Guide
Page 22

22 Chapter 3 CallPilot mailboxes
You can apply dialing restrictions to display telephones and the extensions connected to the
system. For more information on restricting outdialing refer to “Restricting outdialing” on page
23.
If you set the Outdial route to anything but None, there is a potential for unauthorized
long-distance dialing. You can prevent this by creating outdialing restrictions.
Alternate extensions
You can assign up to two alternat e exte nsions to e ach Subsc riber Mail box. If a cal ler dial s the main
extension (the mailbox that has alternate extensions assigned), the call rings at the main extension
only.
Note: The exception to this is if alternate extensions are assigned an Answer DN for the
main extension. Answer DNs are assigned to extensions in system programming.
For more information refer to your system documentation.
Only extensions that do not have a mailbox assigned can be used as an alternate extension. There
are no default alternate extensions for Subscriber mailboxes.
Alternate e xte nsions receive the same Me ss age Waiting Indication and Caller Display informati on
as the primary extension. Subscribers can use the Open Mailbox feature (≤·°⁄) from
alternate extensions to access messages from their primary extension.
Subscribers can use the Interrupt feature (≤·°‡) on an alternate extension the same way
the same way they use ≤·°‡ on a primary extensio n.
Express Messaging Line
When you create a Subscri ber mai lbox, you can assi gn an Express Messagi ng Lin e to it. Inst ead of
assigning an extension number to the Subscriber mailbox, assign an Express Messaging Line. If
you assign an Express Messaging Line, voice calls are left in the Subscriber Mailbox without
ringing at the set. Inform the subscriber that they should frequently check their mailbox for
messages because they do not receive Message Waiting Notification.
The line used for Express Messaging must be between 1 and 500. Give the corresponding seven
digit phone number associated with the line you assign as the Express Messaging Line to the
subscriber. For example, if line 20 is the Express Messaging Line and the corresponding phone
number is 555-2424, give this phone number to the subscriber. After you assign a line to a
mailbox, you cannot use the line for another function until you remove it from the mailbox.
The prime set for the Express Messaging Line must be set to the voicemail DN. For more
information refer to your system documentation. The Express Messaging default is none.
P0919416 03
Page 23

Call Screening
Call Screening lets sub scribers determine who is calling befo re they accept a ca ll. Call Screening
is useful if there is no Caller ID available. The system records the caller’s name, calls the
subscriber’s telephone, announces the name of the caller and offers options such as accepting the
call or taking a message.
Call Screening applies to external calls dialed by callers using the extension dialing facilities of the
Automated Attendant or Custom Call Routing (CCR). Call Screening does not apply to internal
calls, or e xt er nal calls routed usi ng a CCR Transfer node or place d t o a mailbox o wn er ’s dedicated
line. If a caller is calling from a line for which the mailbox owner has recorded a Personal Mailbox
Greeting, Call Screening is bypassed and the call transfers without delay.
If Call Screening is enabled, CallPilot calls a mailbox owner’s telephone that is call forwarded.
The default for Call Screening is No, which means that unless subscribers have Calling Line
Identification (CLID) they cannot determine who is calling before they answer the call.
Restricting outdialing
Chapter 3 CallPilot mailboxes 23
You can apply dialing restrictions to Nortel Networks Business Series Terminals and the
extensions connected to CallPilot 150.
To restrict outdialing
Do one of the following:
• In system programming, assign dialing restrictions to the extension numbers that CallPilot is
connected to. This restricts all outdialing calls including external transfers from CCR trees,
Off-premise Message Notification and Outbound Transfers. Outdialing is done by the
extension that CallPilot is connected to. For more information refer to your system
documentation.
• In system programming, assign dialing restrictions to the extension of the subscriber. For
additional information, refer to your system documentation.
• In system programming, assign dialing restrictions to the lines used for outdialing. For
additional information, refer to your system documentation.
CallPilot 150 Telephone Administration Guide
Page 24

24 Chapter 3 CallPilot mailboxes
Initializing a mailbox
Initializing a mailbox prepares the mailbox to receive messages. A mailbox cannot receive and
store messages and do es not appea r in the Company D irectory until it is initialized.
Initializing a mailbox involves:
• choosing a password from four to eight digits long that does not start with zero
• changing the default password to the new password
• recording the mailbox owner’s name in the Company Directory
To initialize a mailbox
Must change pswd
Pswd:
RETRY OK
Again:
RETRY OK
Record name:
RETRY OK
Accept name:
RETRY PLAY OK
1 Press
≤·°⁄.
2 Log on by following the voice prompts.
3 This display appears briefly to indicate that you must change your
password.
4 Enter a new password from four to eight digits long that does not
start with zero.
Press OK
5 Reenter your new mailbox password and press OK
or £.
or £.
6 At the tone, record your name in the Company Directory.
Include your mailbox number in the recording, For example, “Pat
Smith, mailbox 5813.”
Press OK
7 Press OK
or £ to end the recording.
or £ to accep t the recording
or
press PLAY
or ⁄ to listen to the recording
or
press RETRY
or ¤ to re-record your name.
P0919416 03
8 Press ® to end the session.
Page 25

Chapter 4
Working with mailboxes
Adding a Subscriber mailbox
Assign all Subscrib er mailbox es mailbox n umbers that b eg in with the same digit . This helps you to
identify the mail box type . If th e sy stem ti mes out b efore you e nter a ll the v alu es f or a mai lbox, us e
the procedures in “Changing a mailbox” on page 32 to finish setting up the mailbox.
To add a Subscriber mailbox
25
Log:
QUIT RETRY OK
Admin
AA OTHR
MBOX
Mailbox Admin
DEL CHNG
ADD
Mbox:
RETRY QUIT
Type:subscriber
NEXT OK
Ext:
RETRY OK
Service class:
RETRY OK
Name:
RETRY BKSP OK
1 Press ≤·°‹.
Enter the System Administrator Mailbox number and password,
and then press OK
2 Press MBOX
3 Press ADD
.
.
.
4 Enter the mailbox number.
5 Press OK
.
6 Enter the extension nu mb er.
7 Enter a Class of Service from 1 to 16.
8 Enter the mailbox o wner’s last name, press ££, enter the mailbox
owner’s first name or initial, and then press OK
.
The name can be a maximum of 16 characters.
For information on entering names using the telephone dialpad,
refer to “Using the dialpad” on page 12.
Directory?
YES NO
Msg waiting?
YES NO
Outdial: <none>
CHNG NEXT
9 Press YES
if you want the Subscriber’s name to be included in the
Company Directory.
10 Press YES
if you want the Subscriber to have Message Waiting
Notification.
11 Press NEXT
or
press CHNG
if you do not want to assign outdialing and go to step 15
.
CallPilot 150 Telephone Administration Guide
Page 26

26 Chapter 4 Working with mailboxes
Outdial: <line>
CHNG NEXT
xxxx:
RETRY OK
Accept: x
RETRY OK
Alt1 ext:(none)
CHNG NEXT
Alt1 ext:
RETRY OK
Alt1 ext: xx
CHNG NEXT
Alt2 ext: (none)
CHNG NEXT
12 Press NEXT
if you want to use a line
or
press CHNG
13 Enter the Line or Pool number and press OK
if you want to use a line within a line pool.
.
Line numbers must be between 1 and 500.
Although line pools are labelled by a letter such as A, B or C,
CallPilot accepts only numbers. If you enter a line pool use 1 for A,
2 for B, 3 for C, and so on.
14 Press OK
15 Press CHNG
.
if you want to assign an Alternate extension
or
press NEXT
if you do not want to assign an Alternate extension and
go to step 21.
16 Enter the Alternate extension and press OK
17 Press NEXT
18 Press CHNG
.
if you want to assign another Alternate extension
.
or
press NEXT
and go to step 21.
This display does not appear unless you assigned an Alternate
extension.
Alt2 ext:
RETRY OK
Alt2 ext:xx
CHNG NEXT
Msg line: (none)
CHNG NEXT
Msg line:
RETRY OK
Msg line: xx
CHNG NEXT
Xfers:blind
CHNG NEXT
Mailbox Admin
ADD DEL CHNG
P0919416 03
19 Enter the second Alternate extension and press OK
20 Press NEXT
21 Press CHNG
.
to assign an Express Messaging Line
.
or
press NEXT
and go to step 24.
22 Enter an Express Messaging Line number between 1 and 500
and press OK
23 Press NEXT
24 Press N
.
.
EXT
or
press CHNG
if you want to enable Call Screening.
25 Press ® to end the session.
Page 27
Adding a Guest mailbox
Assign all Guest mailboxes mailbox numbers that begin with the same digit. This helps you to
identify the mailbox type.
To add a Guest mailbox
Chapter 4 Working with mailboxes 27
Log:
QUIT RETR Y OK
Admin
MBOX AA OTHR
Mailbox Admin
ADD DEL CHNG
Mbox:
RETRY QUIT
Type:subscriber
NEXT OK
Ext:
RETRY OK
Service class:
RETRY OK
Name:
RETRY BKSP OK
1 Press
≤·°‹.
Enter the System Administrator mailbox number and password,
and then press OK
2 Press MBOX
3 Press ADD
.
.
.
4 Enter the Guest Mailbox number.
5 Press OK
6 Press OK
.
or £.
7 Enter a Class of Service from 1 to 16.
8 Enter the mailbox o wner’s last name, press ££, enter the mailbox
owner’s first name or initial, and then press OK
.
For information on entering names using the telephone dialpad,
refer to “Using the dialpad” on page 12.
Directory?
YES NO
Msg waiting?
YES NO
Outdial:<none>
CHNG NEXT
Mailbox Admin
ADD DEL CHNG
9 Press YES
if you want to include the mailbox owner’s name in the
Company Directory.
10 Press NO
.
11 Press •.
12 To add another Guest Mailbox, repeat steps 3 through 11
or
press ® to end the session.
CallPilot 150 Telephone Administration Guide
Page 28

28 Chapter 4 Working with mailboxes
Adding an Information mailbox
Assign all Information mailboxes mailbox numbers that begin with the same digit. This helps you
identify the mailbox type. Assign a Class of Service that ha s the maximum message length. To
accommodate an average Information Mailbox recorded message, assign a Class of Service of
either 7 or 8. These Classes of Service have a greeting length of 10 minutes.
To add an Information mailbox
Log:
QUIT RETR Y OK
Admin
MBOX AA OTHR
Mailbox Admin
ADD DEL CHNG
Mbox:
RETRY QUIT
Type: subscriber
NEXT OK
Type:information
NEXT OK
Service class:
RETRY OK
Name:
NEXT BKSP OK
Directory?
YES NO
1 Press
≤·°‹.
Enter the System Administrator mailbox number and password,
and then press OK
2 Press MBOX
3 Press ADD
.
.
.
4 Enter the In formation Mailbox number.
5 Press NEXT
6 Press OK
.
.
7 Enter a Class of Service from 1 to 16.
8 Enter the mailbox name and press OK
.
For information on entering names using the telephone dialpad,
refer to “Using the dialpad” on page 12.
9 Press YES
if you want to include the mailbox name in the Company
Directory.
Mailbox Admin
ADD DEL CHNG
P0919416 03
10 Repeat steps 4 through 10 to add another Information Mailbox
or
press ® to end the session.
Page 29

Adding many mailboxes
You can save time by crea ti ng mul ti pl e mai lbo xes when you set up CallP il ot 150 for the fir st ti me,
or when you need to add a large number of mailboxes to the CallPilot system. Adding many
mailboxes creates Subscriber mailboxes for the range of extensions that you define. You must use
extensions th at ar e not alr ea dy ass ign ed to mailboxes. You can add mailboxes only for the amount
of working telephone numbers that have specific extensions on your system.
To make the most effective use of adding multiple mailboxes, identify people who need a
non-standard Subscriber mailbox. Create these mailboxes individually. Use Add Many Mailboxes
to add the rem aining mailboxes.
The mailboxes you create using Add Many Mailboxes have these characteristics:
• the mailbox number is the same as the extension number
• Class of Service is the same for all mailboxes
• the Call Screening setting is the same for all mailboxes
• the mailbox name is taken from the extension names assigned on your system.
If extension names are not programmed, the mailbox number is used
• the Message Waiting Notification property is the same for all mailboxes
• the Outdial route is the same for all mailboxes
• the Display in Directory propert y is the same for all mailb oxes
Chapter 4 Working with mailboxes 29
The mailboxes created are uninitialized and ready for initialization by mailbox owners.
A mailbox is not created if:
• a mailbox w ith the same number already exists
• the extension is used by another mailbox
• the extension is a CallPilot voice port
To add multiple mailboxes
Log:
QUIT RETR Y OK
Admin
MBOX AA OTHR
Create mboxes
From ext:
RETRY QUIT
To ext:
RETRY QUIT
1 Press
2 Press flfl.
3 This display appears briefly.
4 Enter the extension number to start creating mailboxes from.
5 Enter the extension number to stop creating mailboxes at.
≤·°‹.
Enter the System Administrator mailbox number and password,
and then press OK
This option does not appear as a display button option.
.
CallPilot 150 Telephone Administration Guide
Page 30

30 Chapter 4 Working with mailboxes
Service class:
RETRY OK
Outdial: <none>
CHNG NEXT
Outdial: <line>
CHNG NEXT
xxxx:
RETRY OK
Accept: x
RETRY OK
Xfers:blind
CHNG NEXT
Proceed?
YES
QUIT
6 Enter a Class of Service from 1 to 16.
7 Press NEXT
if you do not want to assign outdialing and go to step 11
or
press CHNG
8 Press NEXT
.
if you want to use a line
or
press CHNG
9 Enter the Line or Pool number and press OK
if you want to use a line within a line pool.
.
Line numbers must be between 1 and 500.
Although line pools are labelled by a letter such as A, B or C,
CallPilot accepts only numbers. If you enter a line pool use 1 for A,
2 for B, 3 for C, and so on.
10 Press OK
.
11 Press NEXT
or
press CHNG
12 Press YES
to enable Call Screening for the mailboxes.
.
Checking xx
Created x mbox
OK
13 The display shows the numbers of the mailboxes that are being
created.
14 Press OK
to end the session.
P0919416 03
Page 31

About mailbox passwords
Each mailbox is protected by a password established by the mailbox owner. When you add a
mailbox to CallPilot Manager, the password 0000 is assigned. This is the default password.
To use a mailbox, a mailbo x owner must change the def ault password. The ne w pas sword must be
four to eight digits in length and cannot start with a zero.
If a mailbox owner cannot remember the password, you can reset the password to the default
password 0000. Refer to “To change a mailbox” on page 32.
Warning: Change the System Administrator password frequently to minimize the
risk of unauthorized activity.
Incorrect password lock-out
In its Class of Service each mailbox is assigned a maximum number of incorrect password
attempts. CallPilot records the number of inco rrect attempts from the l ast time the m ailbox was
accessed successful ly. If the number is exceed ed, the mailbox o w ner i s “ lo ck ed-out”. The mailbox
cannot be opened until the password is reset. Refer to “To change a mailbox” on page 32.
Chapter 4 Working with mailboxes 31
Password expiry
In its Class of Service ea ch mailbo x is assi gned the maximum number of days a pass word r emains
active. If the maximum number of days is exceeded, the mailbox password expires. The mailbox
owner can o pen t he mailbox, but c annot access messages or pe rf orm ot he r mailbox functions unt il
they change the password. Unless the telephone has a two-line display, this announcement plays
when the mailbox is opened after the password expires:
“Your current password has expired. You must change your password.
Please enter your new password and press £.”
After the new password is entered the mailbox returns to normal operation.
Warning: Set the Class of Ser vice for p asswo rd ex piry to a lo w value so that mai lbox
owners must changed their password frequently. A mailbox with a Class of Service
with a high or indef inite passw ord e xpiry interval setti ng is vulne rable t o unau thorized
access.
CallPilot 150 Telephone Administration Guide
Page 32

32 Chapter 4 Working with mailboxes
Changing a mailbox
After you add a mailbox, you can change the mailbox:
• password
•extension
• Class of Service
•display name
• appearance in the Company Directory
• Message Waiting Notification
• outdial route
• Alternate extension
• Express Messaging Line
• Call Scree ning
Note: Reset a password only if the mailbox owner forgets it or is “locked-out”. The
password for a rese t mailbox is 0000. Mail box ow ners cannot acces s their messages until
they change the default password. After you reset a mailbox password, tell the mailbox
owner to change the default password as soon as possible. While the mailbox has the
default password, the mailbox is vulnerable to unauthorized access.
To change a mailbox
Log:
QUIT RETR Y OK
Admin
MBOX AA OTHR
Mailbox Admin
ADD DEL CHNG
Mbox:
DIR QUIT
Password
RESET NEXT
Password reset
Password
RESET NEXT
1 Press
Enter the System Administrator mailbox number and password,
and then press OK
2 Press MBOX
3 Press CHNG
4 Enter the mailbox number or press DIR
Directory.
5 If you want to change the password press RESET
or
press NEXT
6 The password is reset.
7 Press NEXT
or
press ® to end the session.
≤·°‹.
.
.
.
to use the Company
to change other mailbox settings and go to step 8.
to change other mailbox settings
P0919416 03
Page 33

Chapter 4 Working with mailboxes 33
Ext: xx
CHNG NEXT
Ext: xx
RETRY QUIT
Service class:x
CHNG NEXT
Service class: x
RETRY OK
<mbox owner name>
CHNG NEXT
xxxxx, xx
RETRY BKSP OK
xxxxx, xx
CHNG NEXT
8 If you want to change the extension number, press CHNG
or
press NEXT
9 Enter the new extension number and press NEXT
and go to step 10.
.
10 If you want to change the Class of Service, press CHNG
or
press NEXT
11 Enter a Class of Service from 1 to 16 and press NEXT
and go to step 12.
.
12 If you want to change the mailbox owner’s display name press CHNG
or
press NEXT
and go to step 15.
13 Enter the mailbox owner’s last name, press ££, enter the
mailbox owner’s first name or initial, and then press OK
.
For information on entering names using the telephone dialpad,
refer to “Using the dialpad” on page 12.
14 Press NEXT
.
Directory:Y
CHNG NEXT
CHNG NEXT
Msg waiting:Y
CHNG NEXT
Outdial: <xxxx>
CHNG NEXT
Outdial: <xxxx>
CHNG NEXT
15 If you want to change whether the mailbox owner’s name is
included in the Company Directory, press CHNG
or
press NEXT
16 Press NEXT
and go to step 17.
.
17 If you want to change message waiting notification for the mailbox
press CHNG
or
press NEXT
18 Press CHNG
.
if you want to change the outdial meth od
or
press NEXT
19 Press NEXT
and go to step 27.
if you want to use the outdial method shown on the
display
or
press CHNG
if you want choose another outdial method.
CallPilot 150 Telephone Administration Guide
Page 34

34 Chapter 4 Working with mailboxes
xxxx:
RETRY OK
Accept: x
RETRY OK
Alt1 ext: xx
CHNG NEXT
Alt1 ext:
RETRY OK
Alt1 ext: xx
CHNG NEXT
Alt2 ext:xxx
RETRY OK
20 Enter the Line or Pool number and press OK
.
Line numbers must be bet w ee n 1 and 500. Although line pools have
a letter such as A, B or C, CallPilot accepts only numbers. If you
enter a line pool use 1 for A, 2 for B, 3 for C, and so on.
21 Press OK
.
Steps 22 through 26 appear only if the mailbox has Alternate
extensions. If not, go to step 27.
22 If you want to change or delete the first Alternate extension press
CHNG
or
if you want to change the sec ond Alternate e xtension press NEXT
and
go to step 25.
23 If you want to delete the first Alternate extension, press £
or
if you want to change the Alternate extension, enter the new
extension number and press OK
24 Press CHNG
to change the second Alternate extension.
.
25 If you want to delete the second Alternate extension, press £.
The display shows: Alt2 ext: (none)
or
if you want to change the second Alternate extension number enter
the new extension number and press OK
.
Alt2 ext appears only if Alternate extension 1 is assigned.
Alt2 ext:xxx
RETRY OK
Msg line:xxx
CHNG NEXT
Msg line:
RETRY OK
Msg line: xx
CHNG NEXT
Xfers:blind
CHNG
Xfers:screened
CHNG N EXT
Mailbox Admin
ADD DEL CHNG
P0919416 03
NEXT
26 Press NEXT
27 Press CHNG
.
to change or assign an Express Messaging Line
or
press NEXT
and go to step 29.
28 Enter an Express Messaging Line number between 1 and 500
and press OK
29 Press NEXT
30 Press CHNG
.
.
if you want to change the call screening status
or
press NEXT
31 Press NEXT
and go to step 30.
.
32 Press ® to end the session.
Page 35

Deleting a mailbox
Before you delete a mailbox, ensure the mailbox owner has listened to all their messages. When a
mailbox is deleted, all messages stored in that mailbox are deleted and the mailbox is deleted
automatically from the Company Directory and all Group Lists.
If you are deletin g a mailbox associat ed with a CCR T ree, mak e sure you remo v e the mail box from
the CCR Tree first. If you do not delete the mailbox, the message
display.
You cannot delete a mailbox if:
• it is curre ntly in use
• it is used in a CLID table or a CCR Tree
• it is the System Administrator or the General Delivery Mailbox
To delete a mailbox
Chapter 4 Working with mailboxes 35
Mbox in CCR
appears on your
Log:
QUIT RETRY OK
Admin
AA OTHR
MBOX
Mailbox Admin
ADD DEL
Mbox:
DIR QUIT
<Mbox ow ner name>
DEL QUIT
Mailbox deleted
Mailbox Admin
ADD DEL CHNG
CHNG
1 Press ≤·°‹.
Enter the System Administrator Mailbox number and password,
and then press OK
2 Press MBOX
3 Press DEL
.
.
.
4 Enter the number of the mailbox you want to delete
or
press DIR
5 Press DEL
to use the Company Directory.
.
6 This display appears briefly.
7 Press DEL
to delete additional mailboxes
or
press ® to end the session.
CallPilot 150 Telephone Administration Guide
Page 36

36 Chapter 4 Working with mailboxes
About Group Lists
You can create a maximum of 99 Group Lists on your system. Each Group List can contain a
maximum of 300 mailboxes. Before you add Group Lists, prepare a group mailbox member list.
This list must contain:
• the Group List name – maximum 16 characters long
• the mailbox numbers to include in the group
After you create a Group List, you can change the mailboxes included in the list, record a new list
name, view the Group List, or delete the Group List.
About Sending Group List messages
You can send a Group List message whenever you wan t t o not i fy a group of people about an event
or notice that pertains to them. When a subscriber sends a message to the Group List, the
subscriber does not receive the message.
For instructions on how to send a Group List message to a Voice Group List, refer to the CallPilot
Reference Guide.
About Group List Numbers
During system installation, a number from 0 to 9 (default 9) is assigned as the Group List leading
digit. For example, the default Group List numbers are 901 to 999. If the leading digit is 5, the
Group List numbers are 501 to 599. Group List numbers are three digits long.
You can change the Group List leading digit. For more information on changing the Group List
leading digit, refer to “Group List leading digit” on page 98.
The Group List number act s like a mailbox number when you lea v e a message f or the mail boxes i n
the Group List. The table below shows two sample Group Lists.
This table shows an example of a Group List
Group List number Name Mailbox number
901 Sales 224
223
233
902 Shipping 227
221
P0919416 03
Page 37

Adding a Group List
A mailbox must be initialized before you can add it to a Group List. For information on how to
initialize a mailbox, refer to “Initializing a mailbox” on page 24.
To add a Group List
Chapter 4 Working with mailboxes 37
Log:
QUIT RETRY OK
Admin
MBOX AA OTHR
Admin
GLIST CCR OTHR
Group List Admin
DEL CHNG
ADD
GList: xxx
OK
Record name:
RETRY OK
Accept name?
RETRY PLAY OK
1 Press ≤·°‹.
Enter the System Administrator Mailbox number and password,
and then press OK
2 Press OTHR
3 Press GLIST
4 Press ADD
5 Press OK
.
.
.
.
.
CallPilot assigns a Group List number automatically.
6 At the tone, record the Group List name and press OK
to end the
recording.
This Group List name is played to any caller who leaves a message
for the mailboxes in the gr oup.
7 To listen to your recording, press PLAY
or
to accept the recording, press OK
or
to record the name again, press RETRY
.
Name:
RETRY BSKP OK
Mbox:
DIR QUIT
xxxx, xx
RETRY ADD
Member added
Mbox:
DIR QUIT
8 Enter the Group List name (maximum 16 charac ters) and press OK
9 Enter the number of the first mailbox you want to include in the
Group List.
If you do not know the number of the mailbox, press DIR
to search
the Company Directory.
10 Press ADD
.
11 This display appears briefly.
12 To add additional mailboxes to the Group List, repeat steps 10
through 12
or
Press ® to end the session.
CallPilot 150 Telephone Administration Guide
.
Page 38

38 Chapter 4 Working with mailboxes
Changing a Group List
At any time you can:
• change a Group List display name
• add, delete or view Group List members
You cannot change a Group List number. To change a Group List number, you must delete the
Group List and add new member mailbox numbers as a new Group List. For more information,
refer to “Adding a Group List” on page 37.
To change a Group List
Log:
QUIT RETRY OK
Admin
MBOX AA OTHR
Admin
GLIST CCR
Group List Admin
ADD DEL CHNG
GList:
RETRY QUIT
xxxxxxx
CHNG NEXT
Name:
RETRY BKSP OK
xxxxxx
CHNG NEXT
Recorded name:
REC PLAY NEXT
1 Press ≤·°‹.
Enter the System Administrator Mailbox number and password,
and then press OK
2 Press OTHR
3 Press GLIST
4 Press CHNG
.
.
.
.
5 Enter the number of the Group List you want to change.
6 To change the Group List name, press CHNG
.
or
press NEXT
7 Enter the new Group List name and press OK
8 Press NEXT
and go to step 9.
.
.
9 To change the recorded Group List name, press REC
or
press NEXT
and go to step 12.
Record name:
RETRY OK
Accept name?
RETRY PLAY OK
P0919416 03
10 At the tone, record the new Group List name and press OK
11 To listen to your recording, press PLAY
or
to accept the recording, press OK
or
to re-record the name, press RETRY
.
.
Page 39

Chapter 4 Working with mailboxes 39
GList members
ADD DEL VIEW
Mbox:
DIR QUIT
GList members
ADD DEL VIEW
12 Press ADD
to add a mailbox number to the Group List
or
press DEL
to delete a mailbox number from the Group List
or
press VIEW
to view the members of the Group List.
13 Enter the number of the mailbox you want to add or delete.
14 After you make th e chan ges you w ant t o the make to t he Gro up List ,
press ® to end the session.
CallPilot 150 Telephone Administration Guide
Page 40

40 Chapter 4 Working with mailboxes
Deleting a Group List
You can delete a Group List at any time. When you delete a Group List, the Group List number is
re-assigned by Call Pil ot the next ti me you add a Group List. Dele ting a Group List does not delete
any mailboxes from the CallPilot system.
To delete a Group List
Log:
QUIT RETRY OK
Admin
MBOX AA OTHR
Admin
CCR OTHR
GLIST
Group List Admin
ADD DEL
GList:
RETRY QUIT
<Group List Name>
QUIT
DEL
GList deleted
Group List Admin
ADD DEL CHNG
CHNG
1 Press ≤·°‹.
Enter the System Administrator Mailbox number and password,
and then press OK
2 Press OTHR
3 Press GLIST
4 Press DEL
.
.
.
.
5 Enter the number of the Group List you want to delete.
6 Press DEL
.
7 This display appears briefly.
8 Press ® to end the session.
P0919416 03
Page 41

Chapter 5
Setting up the Automated Attendant
About the Automated Attendant
The Automated Attendant answers your company’s incoming phone lines with a prerecorded
greeting selected from the Greeting Table, according to the time of day.
You can record and assign different greetings to the Greeting Table. You can specify which
greetings play for particular lines. For example, you can program the system so that callers hear
one greeting when they call the sales line, and a different greeting when they call the customer
support line.
After the greeting, the Automated Attendant Menu offers a range of options that callers can select
using the dialpad of their phone. If you want to offer a greater range of options and services for
incoming calls, you can assign a Custom Call Routing (CCR) menu to play instead of the
Automated Attendant Menu. See “Planning and designing a CCR Tree” on page 58 for
information on creating a CCR menu.
41
Automated Attendant answering overview
Incoming call
Receptionist
answers
Custom Call Routing
Home Menu plays
Automated Attendant
answers
Company Greeting
plays
Automated Attendant
Menu plays
CallPilot 150 Telephone Administration Guide
Page 42

42 Chapter 5 Setting up the Automated Attendant
Greeting Tables
Greeting Tables store the recordings played by the Automated Attendant to incoming callers.
CallPilot has four Greeting Tables.
You can record a total of 40 Company Greetings, but only four greetings can be assigned to a
Greeting Table at any one time. You can assign the same four greetings to each table, or you can
assign unique greetings for each table.
This table shows an example of how you can assign Greetings.
Greeting Type Table 1 Table 2 Table 3 Table 4
Morning Greeting 1 Greeting 5 Greeting 9 Greeting 13
Afternoon Greeting 2 Greeting 6 Greeting 10 Greeting 14
Evening Greeting 3 Greeting 7 Greeting 11 Greeting 15
Non-business Greeting 4 Greeting 8 Greeting 12 Greeting 16
Morning Greeting 17 Greeting 21 Greeting 25 Greeting 29
Afternoon Greeting 18 Greeting 22 Greeting 26 Greeting 30
Evening Greeting 19 Greeting 23 Greeting 27 Greeting 31
Non-business Greeting 20 Greeting 24 Greeting 28 Greeting 32
We recommend using greetings 1 through 16 as your daily business greetings, and greetings 17
through 40 as special greetings.
Each Greeting Table is divided into four times of day.
This table shows the default times of day.
Greeting T yp e Default start times
Morning 12:00 am
Afternoon 12:00 pm
Evening 6:00 pm
Non-business 6:00 pm
If default hours are used, the Evening Greeting is not played.
The Non-business Greeting can be turned on and off using the Business Status
feature.
Greeting Tables using the alternate language
If you use primary and alternate languages, we recommend that you assign one Greeting Table to
the alternate langu age. Fo r exampl e, if your company has two i ncoming lin es and you w ant to ha v e
one line assigned to the alternate language, assign the line to the Greeting Table that has greetings
recorded in the al te rna te language. You can record greetings 5, 6, 7 and 8 in the alternate language
and assign the greetings to Greeting Table 2 for line 2.
P0919416 03
Page 43

About Company Greetings
Before you record your Company Gre eting s, decide what type of greet ings you wa nt to use for the
incoming phone lines, and what you want the greetings to say. There are four greeting times that
reflect the Morning, Afternoon, Evening and Non-business hours. You can prepare four greetings,
or you can use the same greeting for each time of day. As you record the greetings, number them
from 1 to 4. An example greetings for each time of day:
1 Morning Greeting: “Good morning. You have reached Touchstone Marketing.”
2 Afternoon Greeting: “Good afternoon. You have reached Touchstone Marketing.”
3 Evening Greeting: “Good evening. You have reached Touchstone Marketing.”
4 Non-business Greeting: “You have reached Touchstone Marketing. Our business hours are
Monday to Friday from 8:00 a.m. to 5:00 p.m. Please stay on the line and leave a message.
Thank you for calling.”
Greetings 1 through 4 are assigned by default to all Greeting Tables. This means that Greeting 1
plays as the Morning Greeting for Greeting Table 1, 2, 3 and 4.
If you use only one Greeting Table, the numbered greetings you record from 1 to 4 play
automatically. You do not have to assign Greetings 1 to 4 to the table, but you must select the
language preference.
Chapter 5 Setting up the Automated Attendant 43
If you use a Primary and Alternate Language, record the option · instruction in both languages.
For example, if you use English as your Primary Language and French as your Alternate
Language, your main greeting can be in English and the option · instruction can be in French.
For example:
“Good morning. This is Touchstone Marketing. To use our voice messaging service in French,
please press ·
Since the default Automated Attendant Menu prompt does not announce an Alternate Language
option, in your greeting you must tell callers to press · to use the Alternate Language.
Company Greetings can be 0 to 10 minutes in duration. If you need to change the greeting
duration, you must cha nge the Class of Ser vice ass igned to the Syste m Administra tor Mailb ox. For
information on how to change the setting, refer to “Changing a mailbox” on page 32.
After you decide what you wa nt your gre etings to s ay , practice r ecording th em. Remember to speak
slowly and clearly at a pace that is easy to understand.
”
.
CallPilot 150 Telephone Administration Guide
Page 44

44 Chapter 5 Setting up the Automated Attendant
Recording a Greeting
Do not use Handsfree to record your company Greetings.
Speak directly into the phone handset.
To record a company Greeting
Log:
QUIT RETRY OK
Admin
MBOX AA OTHR
Auto Atdt Admin
GRTG TABLE LINES
Greeting admin
GRTG AA
Greeting:
RETRY OK
Greeting <X>
RETRY PLAY REC
Record greeting:
RETRY OK
Accept greeting?
RETRY PLAY OK
1 Press ≤·°‹.
Enter the System Administrator Mailbox number and password,
and then press OK
2 Press AA
.
3 Press GRTG
4 Press GRTG
.
.
.
5 Enter the number of the Greeting you want to record (from 1 to 40)
and press OK
6 Press REC
.
. At the tone, record your greeting.
Do not hang up the handset when you are finished recording.
7 Press OK
to end your recording.
8 To listen to the greeting, press PLAY
or
to accept the recording, press OK
or
to re-record the greeting, press RETRY
.
P0919416 03
Repeat steps 5 through 9 if you want to record another greeting.
9 Press ® to end the session.
Page 45

Setting up a Greeting Table
To set up a Greeting Table you:
• can record a Custom prompt if you want to replace the Automated Attendant Menu
• assign Greetings for each time of day to the Greeting Tables
• assign a language preference if you use bilingual operation
• assign a Greeting Table Attendant
• assign a CCR Tree
• set your company’s Business Hours
Note: You must build a CCR Tree before you can assign it to a Greeting Table. For
information on building a CCR Tree, refer to “Building a CCR Tree” on page 63.
Chapter 5 Setting up the Automated Attendant 45
Custom prompts
Greeting For each Greeting Table you can assign what Greeting plays for each time
Language preference You can set the language preference for each Greeting Table. This setting
Greeting table attendant A Greeting Table Attendant overrides the designated Operator. If the
CCR Tree For each Greeting Table you can assign a CCR Tree for each time of day.
You can record a Custom prompt to replace the Automated Attendant
Menu prompt. We recommend that you record prompts that are at least
eight seconds long.
In the Custom prompt you can provide the caller with a list of options such
as choosing the alternate language, accessing the Company Directory and
reaching an operator. You can record a Primary and an Alternate Custom
prompt for each Greeting Table.
of day.
determines which language the Automated Attendant uses when
answering incoming calls. If the CallPilot bilingual option is not enabled,
you cannot set up a language preference.
Attendant does not answer, the call goes to the destination mailbox, or the
General Delivery Mailbox if not destination mailbox is assigned.
Assigning a CCR Tree to a Greeting Table is optional. You must build a
CCR Tree before you can assign it to a Greeting Table.
If you do not assign a CCR Tree to a Greeting Table the caller hears the
greeting you assign and then hears the Auto Attendant menu.
If you assign a CCR Tree to a Greeting Table the caller hears the greeting
you assign and then hears the CCR Tree menu.
Business hours Setting the Business Hours determines when each greeting is played for
each Greeting Table. Business Hours are divided into Morning, Afternoon,
Evening, and Non-business categories for each of the seven days of the
week for each Greeting Table.
To set up the days when your business is not open, set all the start times to
12:00 a.m. This ensures that the Non-business greeting plays throughout
the day.
The Non-business greeting can also be turned on and off using the
Business Status feature. When the Business Status is set to Off, the
Non-business greeting continues to play until you set the Business Status
to On.
CallPilot 150 Telephone Administration Guide
Page 46

46 Chapter 5 Setting up the Automated Attendant
To set up a Greeting Table
Log:
QUIT RETRY OK
Admin
MBOX AA OTHR
Auto Atdt Admin
GRTG TABLE
Grtg table:
RETRY OK
AA menu prompt: Y
CHNG OK
Prompt: pri
PLAY REC
Record prompt:
RETRY OK
Accept prompt?
RETRY PLAY OK
AA menu prompt:N
CHNG REC OK
LINES
QUIT
1 Press ≤·°‹.
Enter the System Administrator Mailbox number and password,
and then press OK
2 Press AA
.
3 Press TABLE
4 Enter a Greeting Table number from 1 to 4 and press OK
5 Press CHNG
6 Press REC
.
.
.
.
.
At the tone, record your primary Custom prompt. Speak slowly and
clearly, at a pace that is easy to understand.
7 Press OK
.
8 To accept the recording, press OK
or
to re-record the prompt press, RETRY
9 Press OK
.
.
Morning:1
CHNG PLAY NEXT
Greeting:
RETRY OK
Morning:<x>
CHNG PLAY NEXT
Afternoon:2
CHNG PLAY NEXT
Evening:3
CHNG PLAY NEXT
Non-business:4
CHNG PLAY NEXT
Lang pref: pri
CHNG NEXT
10 Press CHNG
to assign a new greeting number to this Greeting Table
or
press NEXT
11 Enter a greeting number from 1 to 40 and press OK
12 Press NEXT
to go to step 13, the afternoon greeting.
.
.
13 To continue assigning the Afternoon, Evening and Non-business
Greetings to the Greeting Table, repeat steps 10 through 12
or
if you are finish ed assigning Greetings, pr es s NEXT
until you see the
display in step 14 that you can assign a language preference from.
If you do not have the bilingual option enabled, the steps for setting
a language preference are not available and you go to step 16.
14 If you want to change the language preference for the Greeting
Table, press CHNG
or
if you do not want to change the language preference press NEXT
.
P0919416 03
Page 47

Chapter 5 Setting up the Automated Attendant 47
Lang pref: alt
CHNG NEXT
Atdt: (none)
CHNG NEXT
Ext:
RETRY QUIT
Atdt: <xx>
CHNG NEXT
Morn CCR tree:NO
CHNG NEXT
Aftn CCR tree:NO
CHNG NEXT
Eve CCR tree:NO
CHNG NEXT
NBus CCR tree:NO
CHNG NEXT
15 Press NEXT
16 Press CHNG
.
.
17 Enter the extension of the Greeting Table Attendant.
18 Press NEXT
To return the Greeting Table Attendant back to
extension has been entered, you must press CHNG
19 Press NEXT
.
after an
none
and then £.
.
You must build a CCR Tree before you can assign it to a Greeting
Table. For more information, refer to “Building a CCR Tree” on
page 63.
20 Press NEXT
21 Press NEXT
22 Press NEXT
.
.
.
Mo morn:12:00 am
CHNG DAY NEXT
Enter hhmm:
RETRY AM PM
Mo morn:<8:00>am
CHNG DAY NEXT
Mo aftn: 12:00 pm
CHNG DAY NEXT
Enter hhmm:<1201>
RETRY AM PM
Mon aft: 12:01 pm
CHNG DAY NEXT
Mo eve:<06:00>pm
CHNG
DAY NEXT
Enter hhmm:<0601>
RETRY AM PM
23 Press CHNG
or
press DAY
to change the display to the morning of the next day.
24 Enter the Monday Morning start time and
press AM
or PM.
This is a four-digit field. Any single-digit hour must be preceded by
a zero.
25 Press NEXT
26 Press CHNG
.
.
27 Enter the Monday Afternoon start time and
press AM
28 Press NEXT
29 Press CHNG
or PM.
.
.
30 Enter the Monday Evening start time and
press AM
or PM.
Mo eve: <0601>pm
CHNG DAY NEXT
31 Press NEXT
.
CallPilot 150 Telephone Administration Guide
Page 48

48 Chapter 5 Setting up the Automated Attendant
Mo nonb: <600> pm
CHNG DAY NEXT
Enter hhmm:<0901>
RETRY AM PM
Mo nonb: <09:01> pm
CHNG DAY
Tu morn:<12:00am
CHNG DAY NEXT
NEXT
32 Press CHNG
33 Enter the Non-business start time and press AM
34 Press DAY
.
or PM.
.
35 Repeat steps 23 through 34 for each day of the week.
36 Press • to return to the
Auto Atdt Admin
display and continue
setting up Greeting Tables
or
press ® to end the session.
P0919416 03
Page 49

Configuring line answering
CallPilot can answer all of your incoming lines, or just the lines you specify. Before CallPilot can
answer an in coming line , you must assign the line and set the An swer status to Yes. Each line you
add is answered by Greeting Table 1, unless you specify another table.
To configure how a line is answered
Chapter 5 Setting up the Automated Attendant 49
Log:
QUIT RETRY OK
Admin
MBOX AA
Auto Atdt Admin
GRTG TABLE LINES
Line number:
RETRY OK
Line:1 Ans:N
TABLE NEXT
CHNG
Line:1 Ans:AA
CHNG TABLE
Line:1 Table:1
RINGS NEXT
CHNG
Grtg table:
RETRY OK
Line:1 Table:1
CHNG RINGS NEXT
OTHR
NEXT
1 Press ≤·°‹.
Enter the System Administrator Mailbox number and password,
and then press OK
2 Press AA
.
3 Press LINES
.
.
4 Enter the number of the line you want to configure and press OK
5 Press CHNG
6 Press TABLE
7 Press CHNG
8 Enter a Greeting Table number from 1 to 4 and press OK
9 If you want to continue adding lines, press NEXT
to toggle the Answer status from N to AA.
.
.
.
and repeat steps 5
to 9
or
press ® to end the session.
.
CallPilot 150 Telephone Administration Guide
Page 50

50 Chapter 5 Setting up the Automated Attendant
Changing line configuration
You can view or change the answer status of any line that is added to CallPilot.
To change or view how a line is answered
Log:
QUIT RETRY OK
Admin
MBOX AA
Auto Atdt Admin
GRTG TABLE LINES
Line number:
RETRY OK
Line:1 Ans: N
CHNG TABLE NEXT
OTHR
1 Press ≤·°‹.
Enter the System Administrator Mailbox number and password,
and then press OK
2 Press AA
.
3 Press LINES
4 Enter the line number and press OK
5 Use the NEXT
.
.
.
and CHNG buttons to view the assigned lines or change
the answer status.
You can press • to return to step 4 and select a line number
without having to go through the entire list.
6 When you are finished viewing and changing lines
press ® to end the session.
P0919416 03
Page 51

Chapter 5 Setting up the Automated Attendant 51
Assigning the number of rings before CallPilot answers
You can assign the system to answer incoming calls after a specif i ed number of ri ngs. The number
of rings ranges from 0 to 12. If you leave the number of rings at zero, the system answers
immediately.
For lines equipped with Calling Line Identification (CLID), you must set the number of rings to
two or more if you use analog lines. CLID is not provided until just prior to the second ring, so
assigning the number of rings to 0 or 1 prevents CLID from being relayed. You do not have to set
the number of rings t o two or more for CLID i f you use BRI/PRI lin es. Fo r more inf ormation about
the type of lines you use contact your Norstar administrator.
Withou t CLID, personalized g ree ti ngs , CLI D Rout i ng Table and other featur es re lated to CLID do
not work.
To assign or change the number of rings
Log:
QUIT RETRY OK
Admin
MBOX AA OTHR
Auto Atdt Admin
GRTG TAB LE LIN ES
Line number:
RETRY OK
Line:1 Ans:Y
CHNG TABLE NEXT
Line:1 TABLE:1
CHNG RINGS NEXT
Line:1 Rings:0
CHNG ANS NEXT
No of rings:
RETRY OK
Line:1 Rings:X
CHNG ANS NEXT
1 Press ≤·°‹.
Enter the System Administrator Mailbox number and password,
and then press OK
2 Press AA
.
3 Press LINES
4 Enter the line number and press OK
5 Press TABLE
6 Press RINGS
7 Press CHNG
8 Enter a number of rings from 0 to 12 and press OK
.
.
.
.
.
.
.
Enter 2 rings or greater if your company subscribes to Caller ID.
9 You can use the NEXT
and CHNG buttons to vi e w the lines and change
the number of rings.
You can press • to return to step 4 and select a line number
without having to go through the entire list.
10 Press ® to end the session.
CallPilot 150 Telephone Administration Guide
Page 52

52 Chapter 5 Setting up the Automated Attendant
Setting up Touchtone Gate
With Touchtone Gate incoming calls can be routed more quickly.
With Touchtone Gate you can have the standard voice prompt play or you can record your own
custom prompt. If you choose th e standa rd pro mpt, the f ollo wing p rompt play s after your compa ny
greeting: “If you are calling from a tone dial telephone, please press ⁄ now. If you are a pulse
dialing caller or if you are calling from a rotary dial phone, please hold and you will be
transferred.”
Note: If you want to use a custom prompt, you must record it before you enable
Touchtone Gate. It is recommended that you use Greeting 40 as the custom Touchtone
Gate prompt. When Touchtone Gate is enabled, Greeting 40 is the default custom
prompt. For more information on recording Greetings, refer to “Recording a Greeting”
on page 44.
When the tone for 1 is recei ved, the call goes to the Auto mate d Atte ndan t or CCR Tree. If no tone
is received, the call is sent back to the receptionist or designated Operator specified by the
Greeting Table. If the attendant is not available, th e call is directed to the General Delivery
Mailbox. If the General Delivery Mailbox is not available, the call is disconnected.
The Touchtone Gate voice prompt is not presented to internal callers or callers who use Feature
981 or Feature 986.
If you disable Touchtone Gate, re-record the Compan y Greeti ng to inclu de “If you are calling f r om
a tone dial telephone, please dial the e xt ens ion number or press £ for the Company Directory. If
not, please hold and you will be transferred to the operator.”
To set up Touchtone Gate
Log:
QUIT RETRY OK
Admin
MBOX AA OTHR
Auto Atdt Admin
GRTG TABLE LINES
TT gate:none
CHNG OK
TT gate:std
CHNG OK
1 Press ≤·°‹.
Enter the System Administrator Mailbox number and password,
and then press OK
2 Press AA
.
.
3 Enter ⁄.
4 Touchtone Gate is not enabled by default.
Press CHNG
to change to enable Touchtone Gate or to choose a
custom voice prompt.
5 Press OK
to accept the standard voice prompt
or.
press CHNG
to choose the cus tom voice prompt o r d is abl e Touchtone
Gate.
P0919416 03
Page 53

Chapter 5 Setting up the Automated Attendant 53
TT gate:custom
CHNG NEXT
TT Greeting:40
CHNG OK
Greeting:
RETRY OK
TT Greeting: x
RETRY OK
6 Press NEXT
to choose the custom voice prompt
or
press CHNG
7 Press CHNG
to disable Touchtone Gate.
to change the custom voice prompt Greeting number
or
press OK to accept the custom voice prompt Greeting number and
go to step 11.
8 Enter the custom voice prompt Greeting number and press OK
9 Press OK
to accept the new Greeting number.
10 Press ® to end the session.
.
CallPilot 150 Telephone Administration Guide
Page 54

54 Chapter 5 Setting up the Automated Attendant
About the CLID Routing Table
Set up a CLID Table to control how calls ar e routed b ased on the Caller Id entif icat ion of calle rs. To
use a CLID Table, your incoming lines must be equipped with Caller Identification service.
If an incoming call has a CL ID value that matches one of the entries in the C LID Table, the call is
directed according to the CLID Routing Table rather than the Greeting Table. After the call is
directed, the call disconnects or retu rns to the routing according to the Auto A ttendant status. For
more information on the Au to Attendant status refer to “Setting the Automated Attendant status”
on page 96.
You can set up the CLID Routing Table to direct frequent callers to a specific extension or
mailbox, CCR Tree or Greeting Table.
A CLID Routing Table can have a maximum of 100 entries. Entries corr esp ond to a unique phone
number or a range of numbers. For example, if you enter 4165960196, the system routes an
incoming call from this number to a specific destination. However, if you make 416 a table entry,
all incoming calls with this prefix are ro uted to a specific destinatio n.
Entries in the CLID Routing Table are sorted in numerical order, from the longest number to the
shortest. An incoming call is routed by the longest CLID entry that matches the calling number.
For example:
Destination number Table entry Incoming call example
1 313 Incoming number 3148888 is compared to all of
the table entries, and does not match any
destination.
2 416598 Incoming number 4165981111 matches
destination 2.
3 416 Incoming number 4169998888 matches
4 5198853895 Incoming number 5198853895 matches
5 519 Incoming number 5198853896 matches
destination 3.
destination 4.
destination 5.
For the CLID Routing Table to work, your company must:
• subscribe to CLID services from your local telephone company
• have the appropriate hardware for your systems (a CI Trunk cartridge for example)
To set up a CLID Routing Table you:
• enter a phone number
• assign a destin ation. A dest inati on can be a Gree ting Table, mailbox, ext ension , CCR Tree or a
node on a Tree
P0919416 03
Page 55

To route a phone number
Chapter 5 Setting up the Automated Attendant 55
Log:
QUIT RETRY OK
Admin
MBOX AA OTHR
Call id table
ADD CHNG QUIT
Ph:
RETRY OK
Destination
TABLE EX T O THR
1 Press ≤·°‹.
Enter the System Administrator Mailbox number and password,
and then press OK
.
2 Enter ⁄⁄.
3 Press ADD
.
4 Enter the phone number or the leading digits of a phone number
(up to 13 digits) and press OK
.
Each phone number assigned to the CLID Routing Table must be
unique.
5 Choose a destination.
To route the phone number to a Greeting Table:
•Press TABLE
• Enter a Greeting Table number from 1 to 4
•Press OK
To route the phone number to an extension:
Call id table
ADD CHNG QUIT
•Press EXT
• Enter the extension number
•Press OK
To route the phone number to a mailbox:
•Press OTHR
•Press MBOX
• Enter the mailbox number
•Press OK
To route the phone number to a CCR Tree:
•Press OTHR
•Press CCR
• Enter the CCR Tree number from 1 to 8
•Press OK
6 Repeat steps 3 through 5 for each phone number you want to route.
7 Press ® to end the session.
CallPilot 150 Telephone Administration Guide
Page 56

56 Chapter 5 Setting up the Automated Attendant
To change or delete a phone number in the CLID Routing Table
Log:
QUIT RETR Y OK
Admin
MBOX AA OTHR
Call id table
ADD CHNG QUIT
Ph:
RETRY OK
Ph:XXXXXX
CHNG NEXT OTHR
Ph:XXXXXX
DEL
PH QUIT
1 Press ≤·°‹.
Enter the System Administrator Mailbox number and password,
and then press OK
.
2 Enter ⁄⁄.
3 Press CHNG
.
4 Enter the phone number you want to change or delete and press OK
5 Press CHNG
and follow the display prompts to change the phone
number.
Each phone number assigned to the CLID Routing Table must be
unique
or
press NEXT
to view the next phone number in the table.
or
press OTHR
6 Press DEL
to delete a phone number and go to step 6.
to delete the phone number from the table.
7 Press ® to end the session.
.
P0919416 03
Page 57

Chapter 6
Custom Call Routing
About Custom Call Routing
With Custom Call Routing (CCR) you can replace Automated Attendant menus with a CCR Tree
that offers callers additional choices. Callers who reach a CCR Tree hear the CCR Home node
immediately after the C ompany Greet ing.
CCR Trees con tain paths that caller s nav igate us ing their telephone d ialpad. By selec ting an opti on
from the prompts callers can:
• hear an Info rmation Message
• leave a message in a mailbox
• transfer to an extension or an external number
• go to a sub-menu
Custom Call Routing overview
57
Receptionist
answers
Incoming call
Automated Attendant
Company Greeting
Custom Call Routing
Home node options play
answers
plays
Automated Attendant
menu options play
T o b uild a CCR T ree you st art by creati ng the options pre sented in the Ho me node. You can include
up to eight options in the Home node. You record a prompt that informs callers of the Home node
options. You can build up to eight CCR Trees. After you build a CCR Tree you must assign it to a
Greeting Table.
CallPilot 150 Telephone Administration Guide
Page 58

58 Chapter 6 Custom Call Routing
Planning and designing a CCR Tree
To plan and design a CCR Tree you:
• determine the frequently-called departments and extensions that you can include in a CCR
Tree
• make a list of the goods and services you want to mention in Information messages
• create the mailboxes that you will add to a CCR Tree for callers to leave messages in
• determine destination types
• record the prompts and messages
By default, a caller can p ress · to hear prompts in an alternate language, or ‚ to reach an
operator. Tell callers about these options as part of the Home node prompt.
Components of a CCR Tree
The Home node
After the Company Greeting, a caller hears the Home node. The Home node is the “top” of the
CCR Tree. When a caller s elects a n option from t he Home node, t hey c an access a sub-menu, lea ve
a message, transfer to an extension or an external number, or play an Information Message. A
Home node can offer up to eight option s. By def ault , 0 is rese rv ed for reachi ng the Operat or, and 9
offers the menu i n the a lter nate l anguag e. A menu is a prompt that you rec or d that prese nts a c aller
with a list of up to eight options.
The Home node is on Level 0. As sub-menus are added to one another, the caller progresses
through the levels of the CCR Tree. You can create up to 11 levels (from 0 to 10).
An example of a Home node
Company Greeting
This is Ideal Off ice Mac hines. Our b usines s hours ar e f r om
9:00 a.m. to 5:00 p.m. Monday to Friday.
Home node
To place an order, press
To add your name to our mailing list, press ¤.
To reach our Sales Department, press ‹.
To speak with our Support Office, press ›.
To speak with our receptionist, press ‚
The call is forwarded to the destination the caller chooses.
For an example of Paths through a CCR Tree, refer to “An example of a CCR Tree” on page 61.
⁄.
.
P0919416 03
Page 59

Chapter 6 Custom Call Routing 59
Information Messages
An Information Message is a message you record to tell callers about information about goods or
services available from your company. You can tell callers about information such as sales,
specials, company events, business hours, price lists, and shipping times. For example:
We’ re pleased t o announce the arri val of t he ne w FaxEasy line of fax machines. FaxEasy is easy to
operate and produces top quality fax images at an affordable price.
You must create an Information mailbox before you can add it to a CCR Tree.
The Home node can be an Information Message
You can program the Home node to play an Information Message. For example:
Come celebrate with us! It’s time for Ideal Office Machines’ annual get-to-know-our-customers
picnic. The annual picnic is on the first Sunday of August from 1:00 to 5:00 p.m. in Thompson
Park. See you there.
If the Home node is an I nformat ion Mess age, th e call er dis connec ts at the end of t he messa ge. You
cannot specify another destination. For information on destination types refer to “Destination
types” on page 60.
Using an alternate language for the Home node prompt
If you record an alternate language Home node prompt, you must tell callers about the alternate
language option. In the primary language Home node prompt tell callers to press · if they want
to hear the message in the alternate language. For example:
To hear this message in [the alternate language], press ·
your name to our mailing list pr ess ¤. To reach our sal es de partm ent press ‹. To speak with the
receptionist press ‚.
. To place an order press
⁄. To add
Sub-menus
A sub-menu is any menu that callers hear after the Home node. Sub-menus can lead to other
sub-menus.
A sub-menu is a prompt that provides callers with another list of options. For example, from the
Home node a caller can press ‹to reach the Sales department and hear the sub-menu options:
To place an order press
Customer Service Representative press ‹. To speak with the receptionist press ‚.
⁄. To add your name to our mailing list, press ¤. To speak with a
CallPilot 150 Telephone Administration Guide
Page 60

60 Chapter 6 Custom Call Routing
Mailbox nodes
You can create Mailbox nodes to give callers a mailbox where they can leave a message.
For example:
You have reached the Ideal Office Mac hi nes Order Desk mai l box. Af t er t he t one, leave your name,
address, telephone number, and the number of the item you want to order. Thank you.
Transfer nodes
You can create Transfer nodes to transfer callers to an extension or an external number.
Destination types
The destination is where callers go after they listen to an Information Message or leave a message
in a mailbox. Each Information Message and Mailbox node must have a destination:
• Previous: returns the caller to the previous menu
• Home: retu rns the caller to the Home node
• Disconnect: disconnects the caller
You can assign destinations only to Information and Mailbox nodes. To see an example of how to
use destinations in a CCR Tree, refer to “An example of a CCR Tree” on page 61.
Paths
A Path can be a series of menus, Information Messages, Mailboxes or Transfers. A Path number is
the digit that callers press to go to the ne xt le v el in a CCR T ree. Fo r an e xample of ho w to use Pa ths
to route callers through a CCR Tree, refer to “An example of a CCR Tree” on page 61.
P0919416 03
Page 61

An example of a CCR Tree
To place an order press ⁄
Chapter 6 Custom Call Routing 61
Home node
Sub-menu
To place an order press ⁄
To speak to the order desk
press
¤
⁄›
To add your name to our mailing list press
To speak to our sales department press
To speak to our service department press
To speak to our receptionist press
‹
‚
¤
Mailbox
To be included on
our mailing list leave
your name and
address after the
tone.
Destination: PREV
Sub-menu
To leave an order
request press
T o speak to the s ales
manager pr ess
To hear about our
sales contest press
‹
¤
›
‹
⁄
¤
Transfer
Transfers the call to
the Service
department.
⁄
Information
message
Our weekly
specials are...
Destination:
PREV
¤
T ransfer
Transfers the call to
the order desk.
⁄
Mailbox
Leave your contact
information and a
sales person will
contact you.
Destination: DISC
CallPilot 150 Telephone Administration Guide
¤
Transfer
Transfers the call to
the order desk.
‹
Information
message
Ideal Office
Machines is having
a sales contest...
Page 62

62 Chapter 6 Custom Call Routing
P0919416 03
Page 63

Chapter 7
Working with CC R Trees
Building a CCR Tree
Note: To minimize the potential of service disruptions, avoid working on CCR
Trees during periods of peak activity. Callers can experience answering delays
while you are working on a CCR Tree.
To build a CCR Tree
1 Create the Home node. The Home node can be either a Menu node or an Information node.
If the Home node is an Information node:
• record an Information message
If the Home node is a Menu node:
63
• create the sub-nodes. The sub-nodes can be:
— Menu sub-nodes
— Information nodes
— Mailbox nodes
— Transfer nodes
2 Assign the CCR Tree to a Greeting Table.
You can assign a CCR Tree for each time of day.
3 Test the CCR Tree
CallPilot 150 Telephone Administration Guide
Page 64

64 Chapter 7 Working with CCR Trees
Creating a Home node
Begin to build a CCR Tree by creating a Home node. Create a Home menu node if you want to
give callers a list of options. Create an Information message Home node if you want callers to
disconnect after they hear the Information message.
To create a Hom e node
Log:
QUIT RETRY OK
Admin
MBOX AA OTHR
Admin
GLIST CCR
CCR Admin
ADMIN
CCR tree:
RETRY OK
New tree: x
QUIT
BUILD
0 Home/Menu
OTHR OK
REC
Rec pri prompt:
RETRY OK
Accept prompt?
RETRY PLAY OK
1 Press ≤·°‹.
Enter the System Administrator Mailbox number and password,
and then press OK
2 Press OTHR
3 Press CCR
.
4 Press ADMIN
5 Enter a Tree number from 1 to 8 and press OK
6 Press BUILD
7 Pick up the handset and press REC
.
.
.
.
.
.
8 At the tone, record your Home Menu or Information message and
press OK
to end the rec ording.
Do not replace the handset.
9 If you want to listen your recording, press PLAY
or
if you want to accept your recording, press OK
.
Path:
RETRY END OK
Tree: x
SAVE PRI NT QUIT
Save as tree x
YES
Tree saved
CCR Admin
ADMIN
P0919416 03
OTHR QUIT
10 Press END
11 Press SAVE
12 Press YES
.
.
.
13 This display appears briefly.
14 Press ® to end the session.
Page 65

Adding nodes to the Home node
If you create a CCR Tree with a Home menu node, and you have more choices than you can
conveniently fit in the Home menu, you can create sub-nodes. To create sub-node menus, add a
Menu node to your Home menu node.
If the Home node is an Information node, you cannot add a sub-node and the call disconnects
automatically after the Information message plays.
After you determine how many options to offer in a menu, you must determine where each option
directs the caller.
After you assign a Menu sub-node, create another set of nodes in the next level of the tree. The
nodes can be another Menu node, an Information node, a Transfer node or a Mailbox node. You
can assign up to eight nodes to each menu.
A Menu sub-node gives callers single-digit access to another list of options. For example, if your
Home node menu is:
To place an order press ⁄. To add your name to our mailing list press ¤. To reach our sales
department press ‹. To speak with our attendant press ‚.
Chapter 7 Working with CCR Trees 65
Callers can press ⁄ to hear more options, such as:
To hear our weekly specials press ⁄. To speak with the Order Desk press ¤.
CallPilot 150 Telephone Administration Guide
Page 66

66 Chapter 7 Working with CCR Trees
Adding a Menu node
Create a Menu node to org ani ze cho ic es for your callers, or when you ha ve more choices than can
fit on one menu. You can add a menu node to a CCR Tree at any time.
To add a Menu node
Log:
QUIT RETRY OK
Admin
MBOX AA OTHR
Admin
GLIST CCR
CCR Admin
ADMIN
CCR tree:
RETRY OK
Tree enabled
Tree: x
CHNG QUIT
Path:
RETRY END OK
1 Press ≤·°‹.
Enter the System Administrator Mailbox number and password,
and then press OK
2 Press OTHR
3 Press CCR
.
4 Press ADMIN
.
.
.
5 Enter the number of the CCR Tree you want to add a Menu node to
and press OK
.
6 If you have assigned the CCR Tree to a Greeting Table this display
appears briefly.
7 Press CHNG
8 Enter the Path number and press OK
,
.
For example, to create a Menu node on the second level of the CCR
Tree, enter ⁄⁄. The first 1 is the path of the first level Menu
node. The second digit is the path where you want to create the new
Menu node.
x
MENU INFO OTHR
Primary prompt
REC
Rec pri prompt:
RETRY OK
Accept prompt?
RETRY PLAY OK
Rec alt prompt?
YES NO
P0919416 03
9 Press MENU
10 Pick up the handset and press REC
.
.
At the tone, record the prompt.
11 Press OK
12 Press OK
to end the recording. Do not hang up the handset.
to accept the recording
or
if you want to re-record your message, press RETRY
13 Press NO
if you do not want to record an alternate prompt
or
press YES
to record an alternate pro mpt.
.
Page 67

Chapter 7 Working with CCR Trees 67
Path:
RETRY END OK
Tree: x
SAVE PRIN T QUIT
Save as tree x
YES OTHR QUIT
Tree saved
CCR Admin
ADMIN
14 Press END
15 Press SAVE
16 Press YES
.
.
.
17 This display appears briefly.
18 Press ® to end the session.
CallPilot 150 Telephone Administration Guide
Page 68

68 Chapter 7 Working with CCR Trees
Adding an Information node
An Information node is an Information mailbox that you add to a CCR Tree. You can use an
Information mailbox to give callers information such as specials, company events, business hours
or price lists. You can add an Information node to a CCR Tree at any time.
To add an Information node
Log:
QUIT RETRY OK
Admin
MBOX AA OTHR
Admin
GLIST CCR
CCR Admin
ADMIN
CCR tree:
RETRY OK
Tree: x
CHNG QUIT
Path:
RETRY END OK
x
MENU INFO OTHR
1 Press ≤·°‹.
Enter the System Administrator Mailbox number and password,
and then press OK
2 Press OTHR
3 Press CCR
.
4 Press ADMIN
.
.
.
5 Enter the number of the CCR Tree you want to add an Information
node to and press OK
6 Press CHNG
,
7 Enter the Path number and press OK
.
.
For example, to create an Information node on the second level of a
CCR Tree, enter ⁄⁄. The first 1 is the path of the first level
Menu node. The second digit is the path where you want to create
the Information node.
8 Press INFO
.
Primary message
REC
Rec pri message:
RETRY PLAY OK
Accept message?
RETRY PLAY OK
Rec alt prompt?
YES NO
P0919416 03
9 Pick up the handset and press REC
.
At the tone, record your Information mailbox message.
10 Press OK
to end your recording.
Do not replace the handset.
11 Press OK
to accept the recording
or
press RETRY
12 Press NO
to re-record the message.
if you do not want to record an alternate prompt
or
press YES
to record an alternate pro mpt.
Page 69

Chapter 7 Working with CCR Trees 69
Destination?
PREV HOME DISC
Path:
RETRY END OK
Tree: x
SAVE QUIT
Save as tree x
YES OTHR QUIT
Tree saved
CCR Admin
ADMIN
13 Select a destination:
press PREV
if you want to return the ca ller to the previous menu
or
press HOME
if you want to return the caller to the Home node
or
press DISC
if you want to disconnect the call.
For more informat ion on destin ations refe r to “Desti nation t ypes” on
page 60.
14 Press END
15 Press SAVE
16 Press YES
.
.
.
17 This display appears briefly.
18 Press ® to end the session.
CallPilot 150 Telephone Administration Guide
Page 70

70 Chapter 7 Working with CCR Trees
Adding a Mailbox node
Adding a mailbox node gives callers a mailbox where they can leave a message or listen to an
Information message, depending on the mailbox type. You create a Mailbox node by giving it a
Path number and assigning a mailbox number. You can add a Mailbox node to a CCR Tree at any
time.
A mailbox cannot recei v e messages unti l it is initi alized. Fo r informat ion on initializi ng mailbox es,
see “Initializing a mailbox” on page 24.
To add a Mailbox node
Log:
QUIT RETRY OK
Admin
MBOX AA OTHR
Admin
GLIST CCR
CCR Admin
ADMIN
CCR tree:
RETRY OK
Tree: x
CHNG
PRINT QUIT
Path:
RETRY END OK
x
MENU INFO OTHR
1 Press ≤·°‹.
Enter the System Administrator Mailbox number and password,
and then press OK
2 Press OTHR
3 Press CCR
.
4 Press ADMIN
.
.
.
5 Enter the number of the CCR Tree you want to add a Mailbox node
to and press OK
6 Press CHNG
7 Enter the Path number and press OK
.
,
.
For example, to cre ate a Mai lbox no de on th e secon d l e v el of a CCR
Tree, enter ⁄⁄. The first 1 is the path of the first level Menu
node. The second digit is the path where you want to create the
Mailbox node.
8 Press OTHR
.
x
XFER LVMSG
Mbox:
DIR QUIT
P0919416 03
OTHR
9 Press LVMSG
.
10 Enter the mailbox number
or
press DIR
to access the Company Directory.
Page 71

Chapter 7 Working with CCR Trees 71
Destination?
PREV HOME DISC
Path:
RETRY END OK
Tree: x
SAVE QUIT
Save as tree x
YES OTHR QUIT
Tree saved
CCR Admin
ADMIN
11 Select a destination:
press PREV
if you want to return the ca ller to the previous menu
or
press HOME
if you want to return the caller to the Home node
or
press DISC
if you want to disconnect the call.
For more informat ion on destin ations refe r to “Desti nation t ypes” on
page 60.
12 Press END
13 Press SAVE
14 Press YES
.
.
.
15 This display appears briefly.
16 Press ® to end the session.
CallPilot 150 Telephone Administration Guide
Page 72

72 Chapter 7 Working with CCR Trees
Adding a Transfer node
A Transfer node directs a caller to an internal or an external number. You can add a Transfer node
to a CCR Tree at any time.
To add a Transfer to an internal extension
Log:
QUIT RETRY OK
Admin
MBOX AA OTHR
Admin
GLIST CCR
CCR Admin
ADMIN
CCR tree:
RETRY OK
Tree: x
CHNG QUIT
Path:
RETRY END OK
x
MENU INFO OTHR
1 Press ≤·°‹.
Enter the System Administrator Mailbox number and password,
and then press OK
2 Press OTHR
3 Press CCR
.
4 Press ADMIN
.
.
.
5 Enter the number of the CCR Tree you want to add a Transfer node
to and press OK
6 Press CHNG
7 Enter the Path number and press OK
.
,
.
For example, to cre ate a Transfer node on the second l e v e l of a CCR
Tree, enter ⁄⁄. The first 1 is the path of the first level Menu
node. The second digit is the path where you want to create the
Transfer node.
8 Press OTHR
.
x
XFER LVMSG OTHR
Transfer
EXT INT
Ext:
RETRY OK
Path:
RETRY END OK
Tree: x
SAVE QUIT
Save as tree x
YES
Tree saved
P0919416 03
OTHR QUIT
9 Press XFER
10 Press INT
.
.
11 Enter the extension.
12 Press END
13 Press SAVE
14 Press YES
.
.
.
15 This display appears briefly.
Page 73

Chapter 7 Working with CCR Trees 73
CCR Admin
ADMIN
16 Press ® to end the session.
About transfers to external numbers
When CallPilot transfers a call using a CCR external transfer, it uses two lines . An incomin g line
connects the caller to the CCR Tree and an outgoing line transfers the caller to the external
telephone number. Both lines are used while the caller connects to the external telephone number.
To optimize the use of external lines, the incoming line can be used to make the external transfer.
This type of transfer is called a Link transfer.
Not all phone lines al low Link transfe rs . Ask yo ur t el ephone service pro v id er i f your lines support
Link transfers before you program CallPilot to use Link transfers.
To perform a Link transfer for a CCR external transfer you must press £ before the telephone
number. For example, for the telephone number:
£fififi⁄¤‹›
fififi⁄¤‹› is the telephone number dialed
For information on prev enting una uthorized call s using outdial, refe r to “Outdial route” on page 21.
To add a Transfer to an external number
Log:
QUIT RETRY OK
Admin
MBOX AA OTHR
Admin
GLIST CCR
CCR Admin
ADMIN
CCR tree:
RETRY OK
Tree: x
QUIT
CHNG
Path:
RETRY END OK
1 Press ≤·°‹.
Enter the System Administrator Mailbox number and password,
and then press OK
2 Press OTHR
3 Press CCR
.
4 Press ADMIN
.
.
.
5 Enter the number of the CCR Tree you want to add a Transfer node
to and press OK
6 Press CHNG
.
,
7 Enter the Path number and press OK
For example, to cre ate a Transfer node on the second l e v e l of a CCR
Tree, enter ⁄⁄. The first 1 is the path of the first level Menu
node. The second digit is the path where you want to create the
Transfer node.
.
CallPilot 150 Telephone Administration Guide
Page 74

74 Chapter 7 Working with CCR Trees
x
MENU INFO OTHR
x
XFER LVMSG OTHR
Transfer
EXT INT
Outdial: <line>
CHNG NEXT
xxxx:
RETRY OK
Accept: x
RETRY OK
Ph:
RETRY OK
xxxxxxx
ADD OK
8 Press OTHR
9 Press XFER
10 Press EXT
11 Press NEXT
.
.
.
if you want to use a line as the outdialing method
or
press CHNG
Press CHNG
12 Enter the line or pool number and press OK
if you want to select a line within a line pool.
again if you want to select a route.
.
Although line pools are labeled by a letter such as A, B, or C, the
system accepts only numbers such as 1, 2, or 3. When you enter a
line pool use 1 for A, 2 for B, 3 for C, and so on.
13 Press OK
to accept the line or pool number.
14 Enter a destination telephone number up to 30 digits and press OK
15 Press OK
to accept the destination phone number
or
press ADD
to add more digits.
Refer to “Adding special characters to an external transfer number”
on page 75 for more information.
.
Path:
RETRY END OK
Tree: x
SAVE PRIN T QUIT
Save as tree x
YES
Tree saved
CCR Admin
ADMIN
P0919416 03
OTHR QUIT
16 Press END
17 Press SAVE
18 Press YES
.
.
.
19 This display appears briefly.
20 Press ® to end the session.
Page 75

Chapter 7 Working with CCR Trees 75
Adding special characters to an external transfer number
Special characters are pauses or other dialing instructions that you can add if they are required to
access the network or a destination number.
Adding special characters to a destination number
Press Description
¤ or DI G S
‹or PAUS
›
or
fi
OTHR #
or
fl
OTHR *
then
OTHR
•
T
to resume adding digits to the destination phone number.
to enter a timed pause that appears as P on the display. Pauses are four seconds long.
You can press
to recognize dial tone (behind PBX). The Recognize Dial Tone special character
appears as
to enter a #.
to enter a *.
to recognize dial tone (behind PBX). The Recognize Dial Tone special character
ONE
appears as
to cancel and retry.
D
D
again to enter another four second pause.
PAUS
on the display.
on the display.
CallPilot 150 Telephone Administration Guide
Page 76

76 Chapter 7 Working with CCR Trees
Assigning a CCR Tree to a Greeting Table
Before incoming callers can access a CCR Tree, you must assign lines to a Greeting Table.
For informati on about assi gning l ines t o Greet ing Tables, refer to “Confi gurin g line a nsweri ng” on
page 49.
To assign a CCR Tree to a Greeting Table
Log:
QUIT RETRY OK
Admin
MBOX AA
Auto Atdt Admin
GRTG TABLE
Grtg table:
RETRY OK
AA menu prompt:Y
CHNG OK
Morn CCR tree: NO
CHNG OK
Morn CCR tree: NO
CHNG
Morn CCR tree:
DISABLE
OTHR
LINES
NEXT
1 Press ≤·°‹.
Enter the System Administrator Mailbox number and password,
and then press OK
2 Press AA
.
3 Press TABLE
4 Enter the Greeting Table number and press OK
5 Press OK
.
6 Press NEXT
7 Press CHNG
.
.
.
until you see this display.
if you want to assign a CCR Tree to the Greeting Table
for the morning
or
press NEXT
if you do not want to assign a CCR Tree and go to step
11.
8 Enter the number of the CCR Tree that you want to assign to the
Greeting Table for the morning.
Tree enabled
Morn CCR tree: x
CHNG NEXT
P0919416 03
9 This display appears briefly.
10 Press NEXT
if you want to assign afternoon, evening and
non-business CCR Trees to the Greeting Table
or
press ® to end the session.
Page 77

Testing a CCR Tree
After you a buil d a CCR Tree and assign it to a Greeti ng Table, test the CCR Tree . To test the CCR
Tree, call the company number and test each node.
Check that:
• the Home node routes the call as designated
• each transfer routes the caller to the intended destination
• each prompt has correct information
• messages are courteous and easy to understand
Disabling a CCR Tree
Before you make an y chang es to a CCR T r ee you must e nsure ser vice is not d isrupted by remo ving
any references to the CCR Tree from the Greeting Tables and the CLID Routing Table.
To disable a Tree
Chapter 7 Working with CCR Trees 77
Log:
QUIT RETRY OK
Admin
MBOX AA
Auto Atdt Admin
GRTG TABLE
Grtg table:
RETRY OK
Morning:1
CHNG PLAY NEXT
Morn CCR tree: x
CHNG NEXT
Morn CCR tree:
DISABLE
Tree disabl ed
OTHR
LINES
1 Press ≤·°‹.
Enter the System Administrator Mailbox number and password,
and then press OK
2 Press AA
.
3 Press TABLE
4 Enter the Greeting Table number and press OK
5 Press NEXT
6 Press CHNG
.
.
twice.
until the display shows:
if you want to disable the morning CCR Tree
or
press NEXT
7 Press DISABLE
until the CCR Tree you want to disable is displayed.
.
8 This display appears briefly.
9 Press ® to end the session.
CallPilot 150 Telephone Administration Guide
Page 78

78 Chapter 7 Working with CCR Trees
Deleting a CCR Tree
You must disable a CCR Tree b efo re you de lete it. For information about dis abl in g a Tree, refe r t o
“Disabling a CCR Tree” on page 77.
To delete a Tree
Log:
QUIT RETRY OK
Admin
MBOX AA OTHR
Admin
GLIST CCR OTHR
CCR Admin
ADMIN
CCR tree:
RETRY OK
Tree: x
CHNG QUIT
Delete tree x?
YES NO
Tree deleted
CCR Admin
ADMIN
1 Press ≤·°‹.
Enter the System Administrator Mailbox number and password,
and then press OK
2 Press OTHR
3 Press CCR
.
4 Press ADMIN
.
.
.
5 Enter the number of the CCR Tree you want to delete and press OK
6 Press °.
7 Press YES
.
8 This display appears briefly.
9 Press ® to end the session.
.
P0919416 03
Page 79

Changing a CCR Tree message
Use this procedure to change the recorded message for a Menu or an Information node.
Chapter 7 Working with CCR Trees 79
Log:
QUIT RETRY OK
Admin
MBOX AA OTHR
Admin
GLIST CCR
CCR Admin
ADMIN
CCR tree:
RETRY OK
Tree: x
CHNG
PRIN T QUI T
Path:
RETRY END OK
x xxxx
CHNG
ERASE OK
Primary rec?
REC
PLAY NEXT
1 Press ≤·°‹.
Enter the System Administrator Mailbox number and password,
and then press OK
2 Press OTHR
3 Press CCR
.
4 Press ADMIN
.
.
.
5 Enter the number of the CCR T ree that you wa nt to change and press
.
OK
6 Press CHNG
7 Enter the Path of the node you want to change and press OK
8 Press CHNG
9 Lift the handset and press REC
.
.
.
. Do not use handsfree.
At the tone, record the primary language menu.
Rec pri prompt:
RETRY OK
Accept prompt?
RETRY PLAY OK
Alternate rec?
YES NO
Path:
RETRY END
Tree: x
SAVE
PRIN T QUIT
Save as tree x
YES
OTHR QUIT
Tree saved
CCR Admin
ADMIN
OK
10 Press OK
11 Press OK
12 Press NO
to end your recording.
to accept your recording.
if you do not want to record an alternate message
or
press YES
13 Press END
14 Press SAVE
15 Press YES
to record an alternate message.
.
.
.
16 This display appears briefly.
17 Press ® to end the session.
CallPilot 150 Telephone Administration Guide
Page 80

80 Chapter 7 Working with CCR Trees
Changing a Mailbox node
To change a Mailbox node
Log:
QUIT RETRY OK
Admin
MBOX AA OTHR
Admin
GLIST CCR
CCR Admin
ADMIN
CCR tree:
RETRY OK
Tree: x
CHNG QUIT
Path:
RETRY END OK
x LvMsg
CHNG ERASE OK
Mbox: xx
CHNG NEXT
Mbox:
DIR QUIT
1 Press ≤·°‹.
Enter the System Administrator Mailbox number and password,
and then press OK
2 Press OTHR
3 Press CCR
.
4 Press ADMIN
.
.
.
5 Enter the number of the CCR T ree that you wa nt to change and press
.
OK
6 Press CHNG
7 Enter the Path of the node you want to change and press OK
8 Press CHNG
9 Press CHNG
.
.
.
.
10 Enter the new mailbox number.
Make sure the mailbox is initialized before you assign it to a CCR
Tree.
Dest: <xxxx>
CHNG OK
Path:
RETRY END OK
Tree: x
SAVE PRIN T QUIT
Save as tree x
YES
Tree saved
CCR Admin
ADMIN
P0919416 03
OTHR QUIT
11 Press OK
if you want to accept the assigned destination type
or
press CHNG
12 Press END
13 Press SAVE
14 Press YES
and assign a new destination type.
.
.
.
15 This display appears briefly.
16 Press ® to end the session.
Page 81

Changing a destination type
You can assign destination types only to Information and Mailbox nodes. For more information
about destination types, refer to “Destination types” on page 60.
To change a destination type
Chapter 7 Working with CCR Trees 81
Log:
QUIT RETRY OK
Admin
MBOX AA OTHR
Admin
GLIST CCR
CCR Admin
ADMIN
CCR tree:
RETRY OK
Tree: x
CHNG QUIT
Path:
RETRY END OK
x xxx
CHNG ERASE OK
Mbox: xx
CHNG NEXT
1 Press ≤·°‹.
Enter the System Administrator Mailbox number and password,
and then press OK
2 Press OTHR
3 Press CCR
.
4 Press ADMIN
.
.
.
5 Enter the number of the CCR Tree that you want to change and
press OK
6 Press CHNG
.
.
7 Enter the Path number of the node you want to change and press OK
8 Press CHNG
.
The display shows Info if you are changing an Information node.
9 Press NEXT
.
.
Dest: xxxx
CHNG OK
Destination?
PREV HOME DISC
Dest: xxxx
CHNG OK
Path:
RETRY END
Tree: x
QUIT
SAVE
Save as tree x
YES
OTHR QUIT
OK
10 Press CHNG
.
11 Change the destination type:
press PREV
return the caller to the previous menu
or
press HOME
to return the caller to the Home node
or
press DISC
12 Press OK
13 Press END
14 Press SAVE
15 Press YES
to disconnect the call.
.
.
.
.
CallPilot 150 Telephone Administration Guide
Page 82

82 Chapter 7 Working with CCR Trees
Tree saved
CCR Admin
ADMIN
16 This display appears briefly.
17 Press ® to end the session.
Changing a Transfer node
To change a Transfer node
Log:
QUIT RETRY OK
Admin
MBOX AA OTHR
Admin
GLIST CCR
CCR Admin
ADMIN
CCR tree:
RETRY OK
1 Press ≤·°‹.
Enter the System Administrator Mailbox number and password,
and then press OK
2 Press OTHR
3 Press CCR
4 Press ADMIN
5 Enter the number of the CCR Tree that you want to change and
press OK
.
.
.
.
.
Tree: x
CHNG QUIT
Path:
RETRY END OK
x Xfer
CHNG
ERASE OK
Ext: xx
CHNG
NEXT
Transfer
EXT INT
Ext:
CHNG NEXT
Path:
RETRY END OK
Tree: x
SAVE QUIT
Save as tree x
YES
OTHR QUIT
6 Press CHNG
.
7 Enter the Path number of the node you want to change and press OK
8 Press CHNG
9 Press CHNG
10 Press INT
.
.
if you are changing an internal extension
or
press EXT
if you are changing an external extension.
11 Enter the new extension number you want to transfer to and press
.
NEXT
12 Press END
13 Press SAVE
14 Press YES
.
.
.
.
P0919416 03
Page 83

Chapter 7 Working with CCR Trees 83
Tree saved
CCR Admin
ADMIN
Deleting a Path
If you delete a Path, all messages, prompts, and options on the Path are also erased. After you
delete a Path you cannot recover it.
To delete a Path
Log:
QUIT RETRY OK
Admin
MBOX AA OTHR
Admin
GLIST CCR
CCR Admin
ADMIN
15 This display appears briefly.
16 Press ® to end the session.
1 Press ≤·°‹.
Enter the System Administrator Mailbox number and password,
and then press OK
2 Press OTHR
3 Press CCR
.
4 Press ADMIN
.
.
.
CCR tree:
RETRY OK
Tree: x
CHNG
QUIT
Path:
RETRY END OK
x xxx
CHNG ERASE OK
Erase path?
YES NO
Path erased
Path:
RETRY END OK
Tree: x
QUIT
SAVE
Save as tree x
YES
OTHR QUIT
Tree saved
5 Enter the number of the CCR Tree that you want to change and
press OK
6 Press CHNG
7 Enter the Path number you want to delete and press OK
8 Press ERASE
9 Press YES
.
.
.
.
.
10 This display appears briefly.
11 Press END
12 Press SAVE
13 Press YES
.
.
.
14 This display appears briefly.
CallPilot 150 Telephone Administration Guide
Page 84

84 Chapter 7 Working with CCR Trees
CCR Admin
ADMIN
15 Press ® to end the session.
P0919416 03
Page 85

Chapter 8
Broadcast and Information messages
About Broadcast messages
You can send Broadcast messages if you need to send a message to every initialized mailbox on
your phone system. Broadcast messages play on all mailboxes initialized with CallPilot. You can
send a Broadcast message to anno unce meeti ngs, spec ial compa n y e v e nts, and re minders . Sendi ng
a Broadcast message eliminates recording and sending the same message several times. You can
change the Broadcast message address.
As the System Administrator, you are the only person who can send Broadcast messages.
In order to send a Broadcast message, you must know the Broadcast message address.
• If you use the CallPilot interface ·‚‚ is the default Broadcast message address
• If you use the Norstar Voice Mail interface · is the default Broadcast message address
Note: Broadcast messages are not sent to Information or General Delivery mailboxes.
85
To send a Broadcast message you must follow the procedures that apply to the interface you use.
For information about checking what interface you use refer to the CallPilot Reference Guide.
To record and send a Broadcast message
≤·°⁄.
If you are recording a Broadcast message from a set that has a
mailbox, press OTHR
· is the default Broadcast message address.
press OK
to end your recording.
.
Log:
QUIT RETR Y OK
0 new 0 saved
PLAY REC ADMIN
Record message:
RETRY PAUSE OK
1 Press
2 Enter the System Administrator Mailbox number and password.
3 Enter the Broadcast message address.
4 At the tone, record your Broadcast message and
- Norstar Voice Mail
CallPilot 150 Telephone Administration Guide
Page 86

86 Chapter 8 Broadcast and Information messages
Accept rec?
RETRY PLAY OK
5 Press PLAY
or
press OK
to listen to your Broadcast message before sending it
to accept your recording
or
to press RETRY
to re-record your Broadcast message.
Your message is delivered to all initialized mailboxes
or
press ® or • to cancel sending the Broadcast message.
6 Press ® to end the session.
To record and send a Broadcast message - CallPilot
≤·°⁄.
press OK
press OK
A mailbox summary is announced.
or £.
or £.
Mbox:
RETRY OK
Pswd:
RETRY OK
1 Press
2 Enter the System Administrator mailbox number and
3 Enter the System Administrator mailbox password and
To:
NAME SPEC DONE
EMPTY
REC
Recording...
REREC OK
Rec stopped
PLAY DEL SEND
4 Press COMP
or ‡fi to enter the Compose Message option.
5 Enter the Broadcast message address and press OK
·‚‚ is the default Broadcast message address.
The Broadcast message address changes if you change the
Group List leading digit.
6 Press REC
7 Press OK
or fi and record the Broadcast message at the tone.
or £ to end your recording
or
press REREC
8 Press PLAY
to erase and re-record the Broadcast message.
or ¤ to listen to your message
or
press SEND
or ‡· to send the Broadcast message
or
press DEL
or ‡fl to erase and re-record the Broadcast
message.
9 Press ® to end the session.
or £.
P0919416 03
Page 87

Information mailbox messages
Your business or departments within your business can use Information mailboxes to provide
callers with messages and announcements. You or another person responsible for the Information
mailbox can record and update the Information mailbox message.
You can use Information mailbox messages to:
• announce sales
• provide product lists
• announce special events
Make it easy for callers to access Information mailbox messages by mentioning the Information
mailbox in the Automated Attendant, or by asking the operator to route enquiries to the
Information mailbox.
Callers cannot leave messages in an Information mailbox. Callers automatically disconnect after
they listen to an Information mailbox message.
Chapter 8 Broadcast and Information messages 87
About recording an Information mailbox message
Before you record an Information mailbox message, you must determine what the message
includes. As you prepare the message, be sure to include important times and dates.
For example: “Paddy’s Dance Studio proudly presents an extravaganza of dance. The
entertainment begins at 8:00 pm on the fourth of July. Toddlers tap is in the White Room. Folk
dance is in the Green Room. Cl assic al bal let is i n the Pink Room. Conte mpor ar y jaz z is in th e Blue
Room. The studio and recital rooms are located at 222 Main Street.”
Write the message down and practice reading it aloud. When you are confident the message
includes everything you want it to, record the message. If you use a phone system with bilingual
capability, you must record the Information mailbox message in both languages.
An Information mailbox message can be either a Primary or an Alternate mailbox greeting.
Use the procedure “Recording an Information mailbox message” on page 88 to record an
Information mailbox message.
The messages you record must be longer than three seconds. The system times out after five
seconds of silence.
CallPilot 150 Telephone Administration Guide
Page 88

88 Chapter 8 Broadcast and Information messages
Recording an Information mailbox message
To record an Information mailbox message you must follow the procedures that apply to the
interface you use. For information about checking what interface you use refer to the CallPilot
Reference Guide.
To record an Information mailbox message
Greeting options
REC
CHOOSE CFWD
Greeting options
REC
CHOOSE CFWD
1 Press
≤·°⁄.
Follow the voice prompts or the display button options to open the
Information mailbox. Do not enter your mailbox number or
password. Enter the mailbox number and password of the
Information mailbox.
2 If you use t he CallPilot i nterface:
•Press °¤ to open the Greetings Options menu
• Go to step 3
If you use the Norstar Voice Mail interface:
•Press ADMIN
•Press GREET
or °
or ¤
• Go to step 3
3 Press REC
4 Press PRIME
or ⁄.
or ⁄ to record the Primary Information mailbox
message
or
press ALT
or ¤ to record the Alternate Information mailbox
message.
Record now?
YES
Record greeting:
RETRY OK
Accept greeting?
RETRY PLAY OK
P0919416 03
NO QUIT
5 Press YES
6 Press OK
7 Press OK
or ⁄ and record the message at the tone.
or £ to end the recording.
or £ to accep t the recording
or
press PLAY
or ⁄ to listen to the greeting
or
press RETRY
or ¤ to rerecord the greeting.
8 Press ® to end the session.
Page 89

Chapter 9
CallPilot operations
You must reset the CallPilot system if you:
• change the type of phone system you use
• change the extension number length
About resetting CallPilot
Warning:
Resetting CallPilot erases all Company Greetings, Greeting Tables and mailbox
information, including mailbox messages. After you reset CallPilot you must
immediately initialize CallPilot.
To res et Ca ll Pi lot
89
Log:
QUIT RETRY OK
Admin
MBOX AA OTHR
Pswd:
RETRY OK
Reset database?
YES NO
Resetting...
1 Press ≤·°‹.
Enter the System Administrator Mailbox number and password,
and then press OK
If you reset CallPilot bef ore you do the in itial setu p, enter the def ault
password 0000.
2 Press ⁄.
This option does not appear as a display button option.
3 Enter ‡‹›fl‡°¤fifi (Reinstall)
and press OK
To keep your system secure, keep this password secret.
4 Press YES
5 As CallPilot resets the display shows: Resetting …
6 After the system reboots, the displ ay shows the time and date.
The CallPilot system takes approximately three minutes to reboot.
.
.
.
CallPilot 150 Telephone Administration Guide
Page 90

90 Chapter 9 CallPilot operations
Initializing CallPilot
You must initialize CallPilot immediately after you reset the system.
To init ia li ze CallP il ot
1 Press ≤·°‹.
Log:
QUIT RETRY OK
App: Voicemail
CHNG NEXT
Bilingual?
YES NO
Primary lang?
ENG FRE
Group lists? Y
CHNG
NEXT
Group lists? Y
CHNG NEXT
Leading digit: 9
CHNG NEXT
Primary UI: xxx
CHNG NEXT
2 Enter ¤flfl‹›› (Config) and press OK
3 Press NEXT
4 Press YES
.
or NO.
.
If you do not choose bilingual operation, step 5 does not appear.
5 Select a primary language.
6 Press CHNG
to toggle between Y and N.
Select Y if you want to enable Group Lists.
7 Press NEXT
.
If you do not enable Group Li sts s tep 11 does not appea r and yo u go
to step 12.
8 The default Group List leading digit is 9.
Press CHNG
if you want to enter a new Group List leading digit
or
press NEXT
.
9 If you want to change the primary interface press CHNG
or
Press NEXT
.
Primary UI: CP
CHNG NEXT
Primary UI:NVM
CHNG NEXT
System config
RETRY OK
Configuring...
P0919416 03
10 Press NEXT
11 Press CHNG
.
to toggle the setting between Norstar Voice Mail and
CallPilot
and press NEXT
12 Press OK
13 The display shows
.
.
Configuring...
Initialization takes abo ut three secon ds.
Page 91

Chapter 9 CallPilot operations 91
System ready
14 When the sy stem is initialized, the d isplay shows:
System ready
Exit
and
Exit
and then shows the time and date.
Resetting the System Administrator password
You can reset the System Administrator password if you forget it. This is the password that you
use for administrative functions. The default password is 0000. After you reset the System
Administrator password, you must log on and change the password immediately to prevent a
security breach.
To reset the System Administrator password
1 Press ≤·°fi.
Set: xxxx
NEXT
Pswd:
RETRY OK
2 Press ·.
3 Press ‡‹‡‹°‡fl‡‡·‹ (Resetsmpswd)
and press OK
or £.
Reset Password:
YES
NO
4 Press YES
or £.
CallPilot 150 Telephone Administration Guide
Page 92

92 Chapter 9 CallPilot operations
Operator settings
With the Operator settings you can:
• set the Operator status to On or Off
• change the Operator password
• reset the Operator password
• set the Business Status
• assign CallPilot Line answering
• change Automated Attendant Status
Setting the Operator status
Set the Operator status to Yes when your recepti oni st or ope ra tor is available to respond to callers.
Set the Operator status to No when your receptionist or designated operator goes for a break,
lunch, or leaves in the afternoon.
When the Operator Status is set t o No, a call er who reque sts an Operator is informed the Oper at or
is not available, and is transferred to the Automated Attendant to dial another extension or leave a
message.
To set the Operator status
1 Press ≤·°¤.
Pswd:
RETRY OK
Atdt avail: N
CHNG NEXT
2 Enter the default operator password fl‡‹‡¤°fl‡
(Operator)
and press OK
To change the Operator password, see “Changing the Operator
password” on page 93.
3 Press CHNG
4 Press ® to end the session.
.
to select Y or N.
P0919416 03
Page 93

Chapter 9 CallPilot operations 93
Changing the Operator password
You can change the Operator password at any time. It must be between four and eight digits, and
cannot begin with a zero.
To change the Operator password
1 Press ≤·°¤.
Pswd:
RETRY OK
Atdt avail: N
CHNG NEXT
Pswd:
RETRY OK
Atdt avail: N
CHNG NEXT
2 Enter the Operator passwo rd, or the default Operator passw ord
fl‡‹‡¤°fl‡ (Operator) and press OK
.
3 Press ‡.
4 Enter a new Operator password between 4 and 8 digits
and press OK
.
5 Press ® to end the session.
Resetting the Operator password
You can reset the Operator password if it is forgotten. Resetting the Operator password
resets the Operator password to the default of fl‡‹‡¤°fl‡ (Operator).
1 Press ≤·°fi.
Set: xxxx
NEXT
Pswd:
RETRY OK
2 Press ‡.
3 Press ‡‹‡‹°fl‡‹‡‡‡·‹ (Resetoperpswd)
and press OK
or £.
Reset Password:
YES NO
4 Press YES
or £.
CallPilot 150 Telephone Administration Guide
Page 94

94 Chapter 9 CallPilot operations
Changing the Operator default extension
When callers request to speak to your company Receptionist or Operator, CallPilot transfers the
call to the Operator’s extension. You can change the receptionist or designa te d Opera to r extension
number. Callers can request to speak to your company receptionist or designated Operator if the
Automated Attendant voice prompt announces the option and the Operator Status is set to Yes.
To change the Operator default extension
1 Press ≤·°¤.
Pswd:
RETRY OK
Atdt avail: Y
CHNG NEXT
Atdt: xxx
CHNG OK
Ext:
RETRY QUIT
Atdt: xxx
CHNG NEXT
2 Enter the Operator password and press OK
3 Press NEXT
4 Press CHNG
until you see the display in step 4.
.
5 Enter the Operator extension.
6 Press ® to end the session.
.
Callers who request the Operator are transferred to the new extension. If the Operator does not
answer, the call is transferred to the General Delivery Mailbox.
Setting the Business Status
The Business Status setting overrides the Morning, Afternoon, and Evening Greeting Tables.
If you set the Business Status to Yes, greetings are played according to the time scheduled in the
Greeting Tables. For example, if Business Status is set to Yes, the Morning, Afternoon and
Evening Greetings play automatically according to the start times programmed in the Greeting
Tables.
When the receptionist sets the Business Status to No at the end of the business day or prior to the
weekend, the Non-business hours Greeting plays until the receptionist sets the Business Status to
Yes.
Have the receptionist or designated Operator change the Business Status to Yes in the morning
when your company opens. At the end of the business day, have the Receptionist or designated
Operator set the Busine ss Status to No.
P0919416 03
Page 95

To set the Business Stat u s
1 Press ≤·°¤.
Chapter 9 CallPilot operations 95
Pswd:
RETRY OK
Atdt avail: Y
CHNG NEXT
Business open: N
CHNG
NEXT
2 Enter the Operator password and press OK
3 Press NEXT
4 Press CHNG
.
to toggle between Y and N.
.
5 Press ® to end the session.
Changing greetings or the Business Status from a remote telephone
You can change a greeting or the Business Status from the dialpad of external tone dial telephone.
You must do remote administration through the System Administrator Mailbox. For information
about remote administration, refer to the CallPilot Reference Guide.
Setting up line answering
CallPilot can answer all your Central Office (CO) lines included in line configuration. You can
designate whether or not CallPilot answers your company lines. When Answer Lines is enabled,
CallPilot answers the incoming calls and presents each caller with the Company Greeting and the
Automated Attendant menu. When Answer Lines is disabl ed, CallPi lo t does not answe r inc oming
calls. Your receptionist must answer and route incoming calls.
For more information about line configuration, refer to “Configuring line answering” on page 49.
To assign Answer Lines
1 Press ≤·°¤.
Pswd:
RETRY OK
Atdt aval: N
CHNG NEXT
Business open: N
CHNG NEXT
Answer lines? N
CHNG NEXT
2 Enter the Operator password and press OK
3 Press NEXT
4 Press NEXT
5 Press CHNG
.
.
.
If you set Answer Lines to N the display shows:Disabling...
If you set Answer Lines is set to Y the displa y shows: Enabling...
6 Press ® to end the session.
CallPilot 150 Telephone Administration Guide
.
Page 96

96 Chapter 9 CallPilot operations
Setting the Automated Attendant status
The Automated Attendant plays after the Company Greeting and aft er a caller leaves a message in
a mailbox. The Automated Attendant gives callers a list of options such as entering a mailbox
number, accessing the Company Directory or reaching the Operator. You can turn the default
Automated Attendant of f at an y time and recor d a customized menu promp t. For more in format ion
about recording customized menu prompts, refer to “About Company Greetings” on page 43.
When the Return to Automated Attendant status is set to No, callers do not have any options after
they leaving a message. Callers hear the voice prompt “Message delivered. Exiting the system,
good-bye”, and the call ends.
You can set the Automated Attendant prompt to No to prevent callers from having lengthy
CallPilot sessions, or if you use CallPilot behind a private exchange system.
To change the Automated Attendant status
1 Press ≤·°‹.
Log:
QUIT RETRY OK
Admin
MBOX AA OTHR
Auto Atdt Admin
GRTG TA BLE LINES
Greeting admin
GRTG AA
Return to AA: Y
CHNG NEXT
2 Enter the System Administrator Mailbox number and password,
then press OK
3 Press AA
4 Press GRTG
5 Press AA
6 Press CHNG
.
.
.
.
.
If you select N callers ca nnot return to the Automate d Attendant
Menu prompt after they leave a message.
7 Press ® to end the session.
P0919416 03
Page 97

CallPilot default system options
You can change these default CallPilot system options:
• Language Availability
• Group List leading digit
•Voicemail
• Company Directory
• Outdialing
• General Delivery Mailbox
• Software Keycode Administration
• External Mailbox Initialization
Language availability
You can disable or enable the CallPilot bilingual option that is assigned during installation.
You can change the Primary Language on a bilingual CallPilot system.
If you disable bilingual operation or change the Primary Language choice on a bilingual system
the change affects:
Chapter 9 CallPilot operations 97
• the language designations for Greetings that are assigned to the Automated Attendant
• voice prompt selections for callers who use the Automated Attendant
• voice prompt selections for callers who transfer to mailbox greetings
To change the language availability and the Primary and
Alternate Languages
Log:
QUIT RETR Y OK
Admin
MBOX AA OTHR
Bilingual:Y
CHNG NEXT
Bilingual:Y
CHNG NEXT
Prim lang: NAEng
CHNG NEXT
1 Press
2 Press
3 Press CHNG
4 Press NEXT
5 Press CHNG
≤·°‹.
Enter the System Administrator mailbox number and password,
and then press OK
.
¤
This option does not appear as a display button option.
and N.
Steps 4 and 5 appear only if you have the bilingual option enabled.
In this example, North American English is the primary language.
.
if you want to toggle the bilingual option between Y
if you want to change the primary language.
to toggle the primary language choices.
Prim lang: NAEng
CHNG NEXT
6 Press NEXT
.
CallPilot 150 Telephone Administration Guide
Page 98

98 Chapter 9 CallPilot operations
Sec lang: NASpa
CHNG NEXT
7 Press CHNG to toggle the secondary language choices.
In this example, North American Spanish is the secondary
language.
8 Press ® to end the session .
Group List leading digit
When CallPilot is installed, a number from 0 to 9 is assigned as the Group List leading digit.
The default Group List leading digit is 9, and 901 to 999 is your range of Group Lists.
You can change the Group List leading digit. If you change the leading digit to 5, the Group List
numbers change to 501 to 599. The Group List numbers are always three digits long.
Note: You cannot change the Group List leading digit to a number that conflicts with
mailbox numbers. For example, if your company has mailboxes ranging from 500 to 720,
you cannot choose 5, 6 or 7 as the Group List leading digit.
To change the Group List leading digit
Log:
QUIT RETR Y OK
Admin
MBOX AA OTHR
Bilingual:Y
CHNG NEXT
Prim lang: xxx
CHNG NEXT
Sec lang: xxx
CHNG NEXT
Group lists:Y
CHNG NEXT
Leading digit: 9
CHNG NEXT
Leading digit:
RETRY OK
1 Press
≤·°‹.
Enter the System Administrator mailbox number and password,
and then press OK
.
2 Press ¤.
This option does not appear as a display button option.
3 Press NEXT
4 Press NEXT
5 Press NEXT
6 Press NEXT
7 Press CHNG
8 Enter the new leading digit and press OK
.
.
.
.
.
.
9 Press ® to end the session .
P0919416 03
Page 99

Chapter 9 CallPilot operations 99
Voicemail
Voicemail is enabled by default. You can disable or re-enable voicemail at any time. When
voicemail is enabled, callers who reach an extension th at is not answered or is busy transfer
to the extension’s mailbox.
If you disable voicemail:
• external callers cannot leave a message in a mailbox
• external callers who use the Automated Attendant can still access Information Mailboxes
or press ‚ to reach the Operator
• Subscribers can st ill record and s end mess ages from th ei r mailbo x to oth er CallPi lot mai lbo xe s
• CallPilot users still can leave a message in a mailbox using the Leave Message feature
(≤·°‚)
• CallPilot users st il l can tra nsf er internal calls to anot her mailb ox usi ng the Voicemail Transfer
feature (≤·°fl)
To enable or disable voicemail
Log:
QUIT RETR Y OK
Admin
MBOX AA OTHR
Voice Mail:Y
CHNG NEXT
1 Press
≤·°‹.
Enter the System Administrator mailbox number and password,
and then press OK
.
2 Press ›.
This option does not appear as a display button option.
3 Press CHNG
to toggle between Y and N.
4 Press ® to end the session.
CallPilot 150 Telephone Administration Guide
Page 100

100 Chapter 9 CallPilot operations
Company Directory
The Compa ny Directory is an internal voice and text list of the names of mailbox owners with
initialized mailboxes who are included in the directory. Callers can use the Company Directory to
search for mailboxes by a recorded or a text name. The Company Directory is enabled by default.
You can set whether callers can se arch t he Compan y Dire cto ry by first name, la st name or f i rst an d
last names. For e xample, i f a call er ent ers Ja mes, the name s Jesse James and Ja mes Bond appe ar if
the Company Directory option specifies both first and last names.
If you disable the Company Directory:
•the DIR
button option does not appear on two line display telephones when a subscriber sends
a message from their mailbox or uses the Leave Message feature (≤·°‚)
• the prompt “Press £ to use the Directory” does not play:
• to callers who use the Automated Attendant
• to subscribers who s end a message from thei r mailbox or use the Leave Message feature
(≤·°‚)
To enable or disable the Company Directory
Log:
QUIT RETRY OK
Admin
MBOX AA OTHR
Voice Mail:Y
CHNG NEXT
Dir avail:Y
CHNG NEXT
1 Press
2 Press ›.
3 Press NEXT
4 Press NEXT
≤·°‹.
Enter the System Administrator mailbox number and password,
and then press OK
This option does not appear as a display button option.
or
press CHNG
.
.
to choose a search mode
to toggle between Y and No.
Match: Firstname
CHNG OK
P0919416 03
5 Press OK
to search by firs t name
or
press CHNG
to select last name or first and last names.
6 Press ® to end the session.
 Loading...