

Nortel ICB, Integrated Conference Bridge Professional 4.5 Owner's Manual

Nortel Communication Server 1000
Integrated Conference Bridge
Professional
Administrator Guide
Title page


iii
Nortel Communication Server 1000
Nortel Integrated Conference Bridge
Professional
Administrator Guide
Revision history
June 2007
Standard 01.01. This document is issued to support Integrated
Conference Bridge Professional Release 4.5.
Nortel Integrated Conference Bridge Professional Administrator Guide


v
Contents
Revision history iii
Introduction 13
User levels 13
Integrated Conference Bridge Professional interfaces 14
Browser User Interface 14
Microsoft Outlook User Interface 14
Telephone User Interface 14
Browser User Interface 15
Overview 15
Accessing the Web Browser 17
General information 17
Preparing to use the Web Browser 17
Logging in to the Web Browser 17
Changing the administrator password 19
Integrated Conference Bridge Professional (ICB
Professional) Console
Title frame
Installing ICB Professional using the Install Wizard 22
Configuring Basic System Settings 22
Configuring Access Numbers 24
Defining the First User 25
E1/T1 ISDN Trunk Configuration 27
Configuring Time Settings parameters 28
Scheduling a test conference 30
Defining general attributes 30
Defining default conference attributes 33
Defining volume levels 35
Defining a confirmation e-mail 36
Customizing greetings 39
Greetings Settings window 39
Customizing the Brandline Greeting 41
Previewing a Brandline greeting 42
21
21
Nortel Integrated Conference Bridge Professional Administrator Guide

vi Contents
Deleting a Brandline greeting 42
Enabling a conference-specific greeting 42
Disallowing a conference-specific greeting 42
Customizing images 43
Users Administration 44
User Groups 45
Adding a new user group 45
Users list 47
Editing a user 48
Adding a user 49
Searching for a user 50
Configuring Always on conferences 52
Always on Conferences window 52
Scheduling or editing a Always on conference 53
System Upgrade 57
Software Upgrade 58
Configuring call-out groups 59
Call-Out Groups window 60
Viewing group details 61
Modifying group settings 63
Adding members to an existing group 63
Editing a member 64
Adding a new group 65
Generating reports 67
Display a Report 73
Backing up data 74
Configuring a scheduled backup 74
Configuring a Billing Scheduled Backup 75
Executing a manual backup 76
Viewing backup history log 77
Viewing last backup details 78
Restoring data 78
Executing a Manual Restore 78
Executing a Last Restore Details 79
Using the Command Line Interface (CLI) 79
Microsoft Outlook User Interface 81
Overview 81
ICB Professional form 82
Standard 01.01 June 2007
System requirements 81
Microsoft Outlook settings 81
ICB Professional files 82
Getting started 83
Publishing the ICB Professional files 83
Upgrading the ICB Professional form 86
Obtaining the upgraded ICB Professional files 86

Contents vii
Removing ICB Professional files from the Organizational
FormsLibrary
Clearing the Microsoft Outlook forms cache
87
87
ICB Professional form errors 88
Telephone User Interface 91
Overview 91
Configuring the TUI 91
Recording a brandline greeting 91
Recording a conference-specific greeting 92
Nortel Integrated Conference Bridge Professional Administrator Guide


ix
Table of Figures
Figure 1: Web Browser navigation flowchart - administration......................................16
Figure 2: ICB Professional Login window.....................................................................18
Figure 3: Network Password window ...........................................................................19
Figure 4: Change Password window............................................................................20
Figure 5: Administration ICB Professional Console window ........................................21
Figure 6: Administration ICB Professional Console title frame ....................................22
Figure 7: Install Wizard: Basic System Settings panel.................................................23
Figure 8: Install Wizard: Access Numbers panel..........................................................24
Figure 9: Install Wizard: Define First User panel..........................................................26
Figure 10: Install Wizard: E1/T1 ISDN panel................................................................27
Figure 11: Install Wizard: Time Settings panel.............................................................29
Figure 12: General Attributes window ..........................................................................31
Figure 13: Default Conference Attributes window........................................................34
Figure 14: Volume Level Attributes window.................................................................36
Figure 15: Confirmation E-Mail Attributes window .......................................................37
Figure 16: Greeting Settings window............................................................................40
Figure 17: File Requirements window..........................................................................41
Figure 18: Company Images window...........................................................................43
Figure 19: User Groups window...................................................................................45
Figure 20: User Groups - New User Group window.....................................................46
Figure 21: User List window.........................................................................................47
Figure 22: Users > Edit User Details window...............................................................49
Figure 23: Users > New User window..........................................................................50
Figure 24: Users > Search for a User window..............................................................51
Figure 25: Always on Conferences window .................................................................52
Figure 26: New/Edit Always on Conference window....................................................54
Figure 27: Conference Details window.........................................................................57
Figure 28: System Upgrade window.............................................................................58
Figure 29: Software Upgrade window ..........................................................................59
Figure 30: Call-Out Groups window .............................................................................60
Figure 31: Group Details window .................................................................................61
Figure 32: Modify Group Settings window....................................................................63
Nortel Integrated Conference Bridge Professional Administrator Guide

x Contents
Figure 33: Add Members window.................................................................................64
Figure 34: Edit Members window.................................................................................65
Figure 35: New Group Details window.........................................................................66
Figure 36: Report Viewer window.................................................................................67
Figure 37: Example - Error report.................................................................................68
Figure 38: Example - Overbooking report ....................................................................69
Figure 39: Example - Billing report...............................................................................70
Figure 40: Example - Short Connection report.............................................................72
Figure 41: Example - Short Connection report.............................................................73
Figure 42: Scheduled Backup window .........................................................................75
Figure 43: Billing Scheduled Backup window...............................................................76
Figure 44: Manual Backup window...............................................................................77
Figure 45: Manual Restore window..............................................................................79
Figure 46: Command Line Interface window................................................................80
Figure 47: ICB Professional form .................................................................................82
Figure 48: Publish Form As window.............................................................................85
Standard 01.01 June 2007

xi
List of Tables
Table 1: General Settings window fields ......................................................................31
Table 2: Default Conference Attributes window fields..................................................34
Table 3: Volume Level Attributes window fields...........................................................36
Table 4: Confirmation E-mail Settings..........................................................................38
Table 5: User List table columns..................................................................................47
Table 6: Components of Conferences window.............................................................52
Table 7: Call-Out Group List fields ...............................................................................60
Table 8: Group Members table columns ......................................................................61
Table 9: Group Settings Retry parameters...................................................................62
Nortel Integrated Conference Bridge Professional Administrator Guide


13
Introduction
Nortel Integrated Conference Bridge Professional allows users to
schedule and administer multiple, simultaneous conferences using a
web, telephone, or Microsoft® Outlook® user interface.
Note: For First Time Installation refer to Nortel ICB Professional
User levels
Installation guide.
Nortel Integrated Conference Bridge Professional (ICB Professional)
supports the following four user levels:
y Administrator - An administrator can set up the ICB Professional
system, add one or more users (including super users), delete one
or more users, and define an Always On Conference.
y Super user - A super user can view, create and change any
conference scheduled on the ICB Professional, (except the Always
On), for self and other users.
y Executive user - An executive user can create and modify their own
conferences. An executive user can also view any conference
scheduled on the ICB Professional.
y Regular user - A regular user can create and modify their own
conferences. A regular user cannot view or change the conferences
of other users.
This document describes ICB Professional operations for the
Administrator. Operations for the super user, executive user, and
regular user levels are described in Nortel Integrated Conference
Nortel Integrated Conference Bridge Professional Administrator Guide
Bridge Professional User Guide.

14 Introduction
Integrated Conference Bridge Professional interfaces
A conference on the Nortel Integrated Conference Bridge Professional
(ICB Professional) can be configured in three ways:
1 Use the Browser User Interface
2 Use the Microsoft Outlook User Interface.
3 Use the Telephone User Interface.
Browser User Interface
The ICB Professional Browser User Interface (Web Browser) offers one
set of configuration options for administrators and a second set for other
users.
y For information about Web Browser options for administrators, see
Browser User Interface (page 15).
y For information about Web Browser options for non-administrators,
refer to Nortel Integrated Conference Bridge Professional User
Guide.
Microsoft Outlook User Interface
The Microsoft Outlook User Interface enables users to schedule and
manage ICB Professional conferences. The interface includes a subset
of the options available in the Web Browser.
y For information about Microsoft Outlook User Interface options for
administrators, see Microsoft Outlook User Interface (page 81).
y For information about Microsoft Outlook User Interface options for
non-administrators, refer to Nortel Integrated Conference Bridge
Professional User Guide.
Telephone User Interface
The ICB Professional Telephone User Interface (TUI) lets
administrators and other users enter commands on a telephone keypad
to configure conferences.
y For information about TUI options for administrators, see Telephone
User Interface (page
y For information about TUI options for non-administrators, refer to
Nortel Integrated Conference Bridge Professional User Guide.
Standard 01.01 June 2007
91).

15
Browser User Interface
Overview
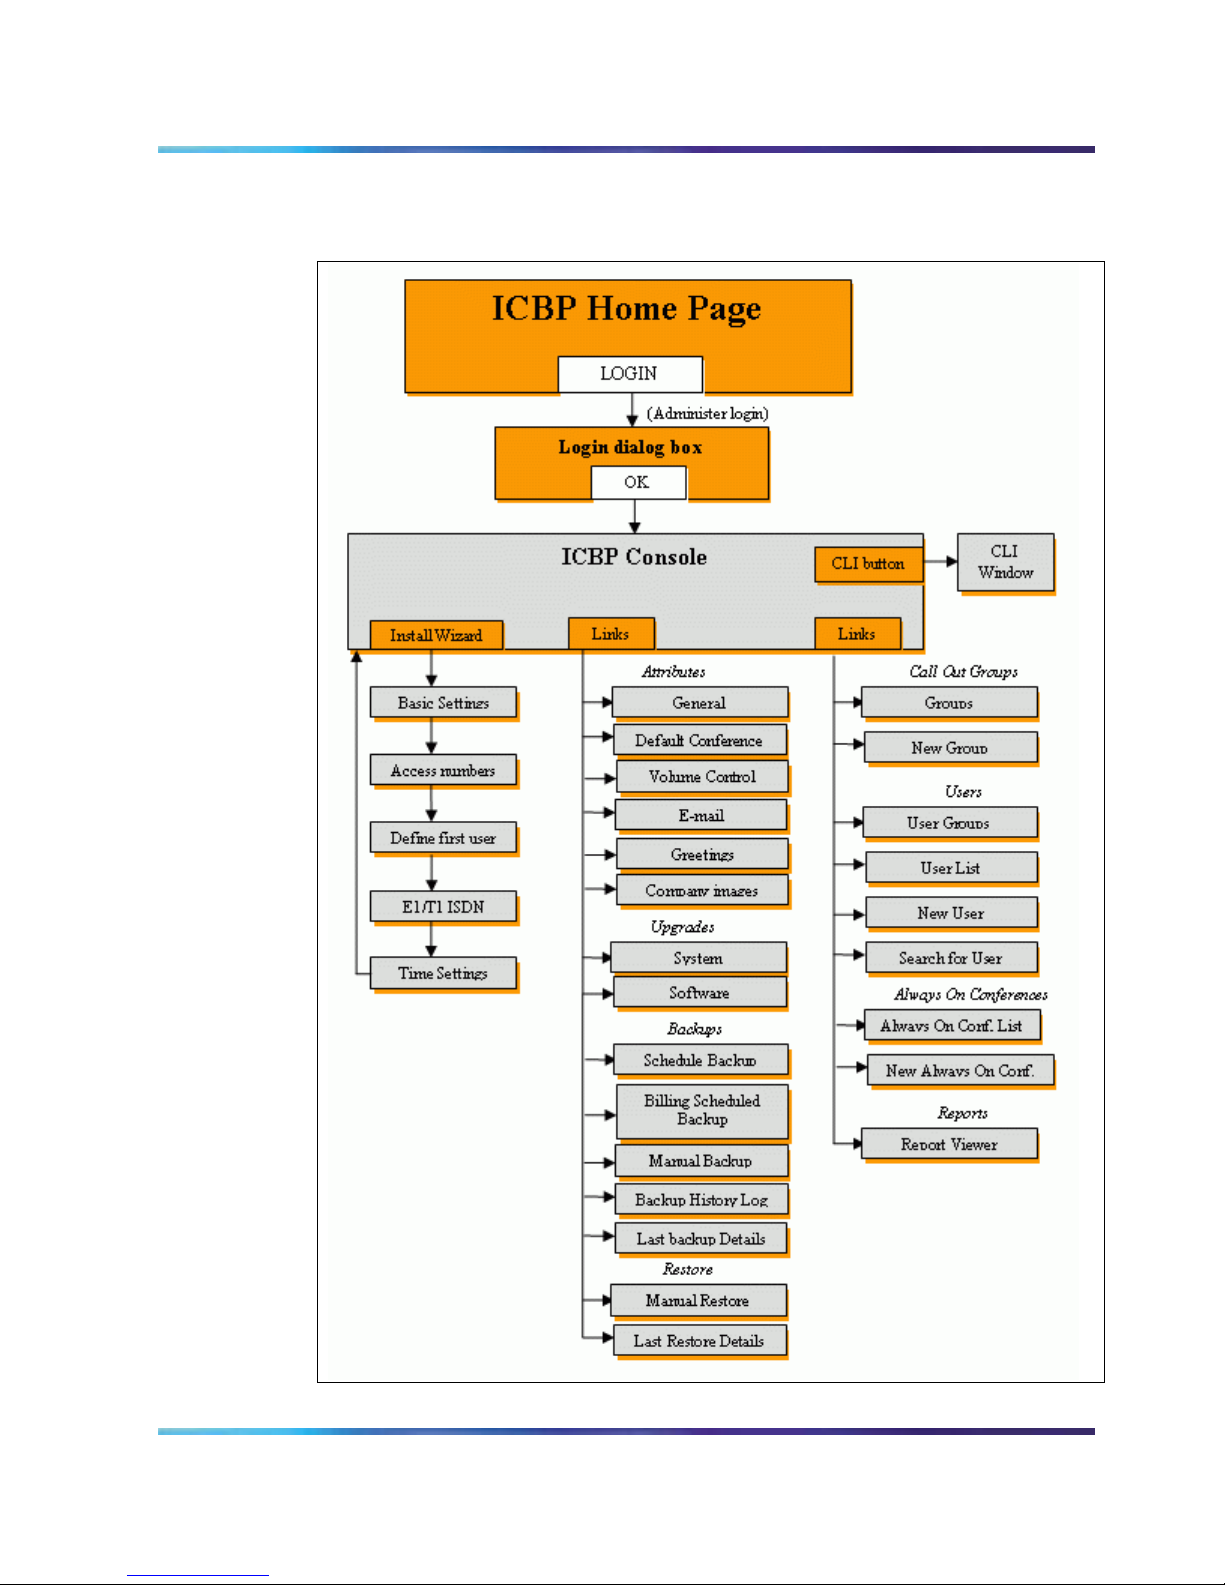
The following figure depicts the logical layout of the Nortel Integrated
Conference Bridge Professional Browser User Interface (Web Browser)
administration system.
Nortel Integrated Conference Bridge Professional Administrator Guide
16 Browser User Interface
Figure 1
Web Browser navigation flowchart - administration
Standard 01.01 June 2007

Browser User Interface 17
Accessing the Web Browser
This section contains instructions on accessing the Web Browser and
General information
Preparing to use the Web Browser
changing the administrator's password.
The ICB Professional Web Browser supports open access from
anywhere on the Internet, including gateways and firewalls. The ICB
Professional web server is accessed over an Ethernet connection. The
system does not support browsers running on Macintosh computers.
When using the Web Browser, do not disable the cookies function in the
browsers.
Follow the steps below before using the Web Browser.
1 Check the web browser version.
⎯ Netscape Communicator® users must run version 4 or later. To
check the version, choose Help > About Netscape.
⎯ Microsoft Internet Explorer® users must run version 5 or later
with Service Pack 1. To check the version, select Help > About
Internet Explorer.
To upgrade the web browser, ask your system administrator about
the upgrade procedure.
2 Obtain the following information:
⎯ your ICB Professional UserID name
⎯ your ICB Professional login password
⎯ the ICB Professional IP address (URL or DNS Name)
Logging in to the Web Browser
Follow the steps below to log in to the Web Browser.
1 Enter the ICB Professional IP address in the browser's Location or
Address field, and press Enter or Return.
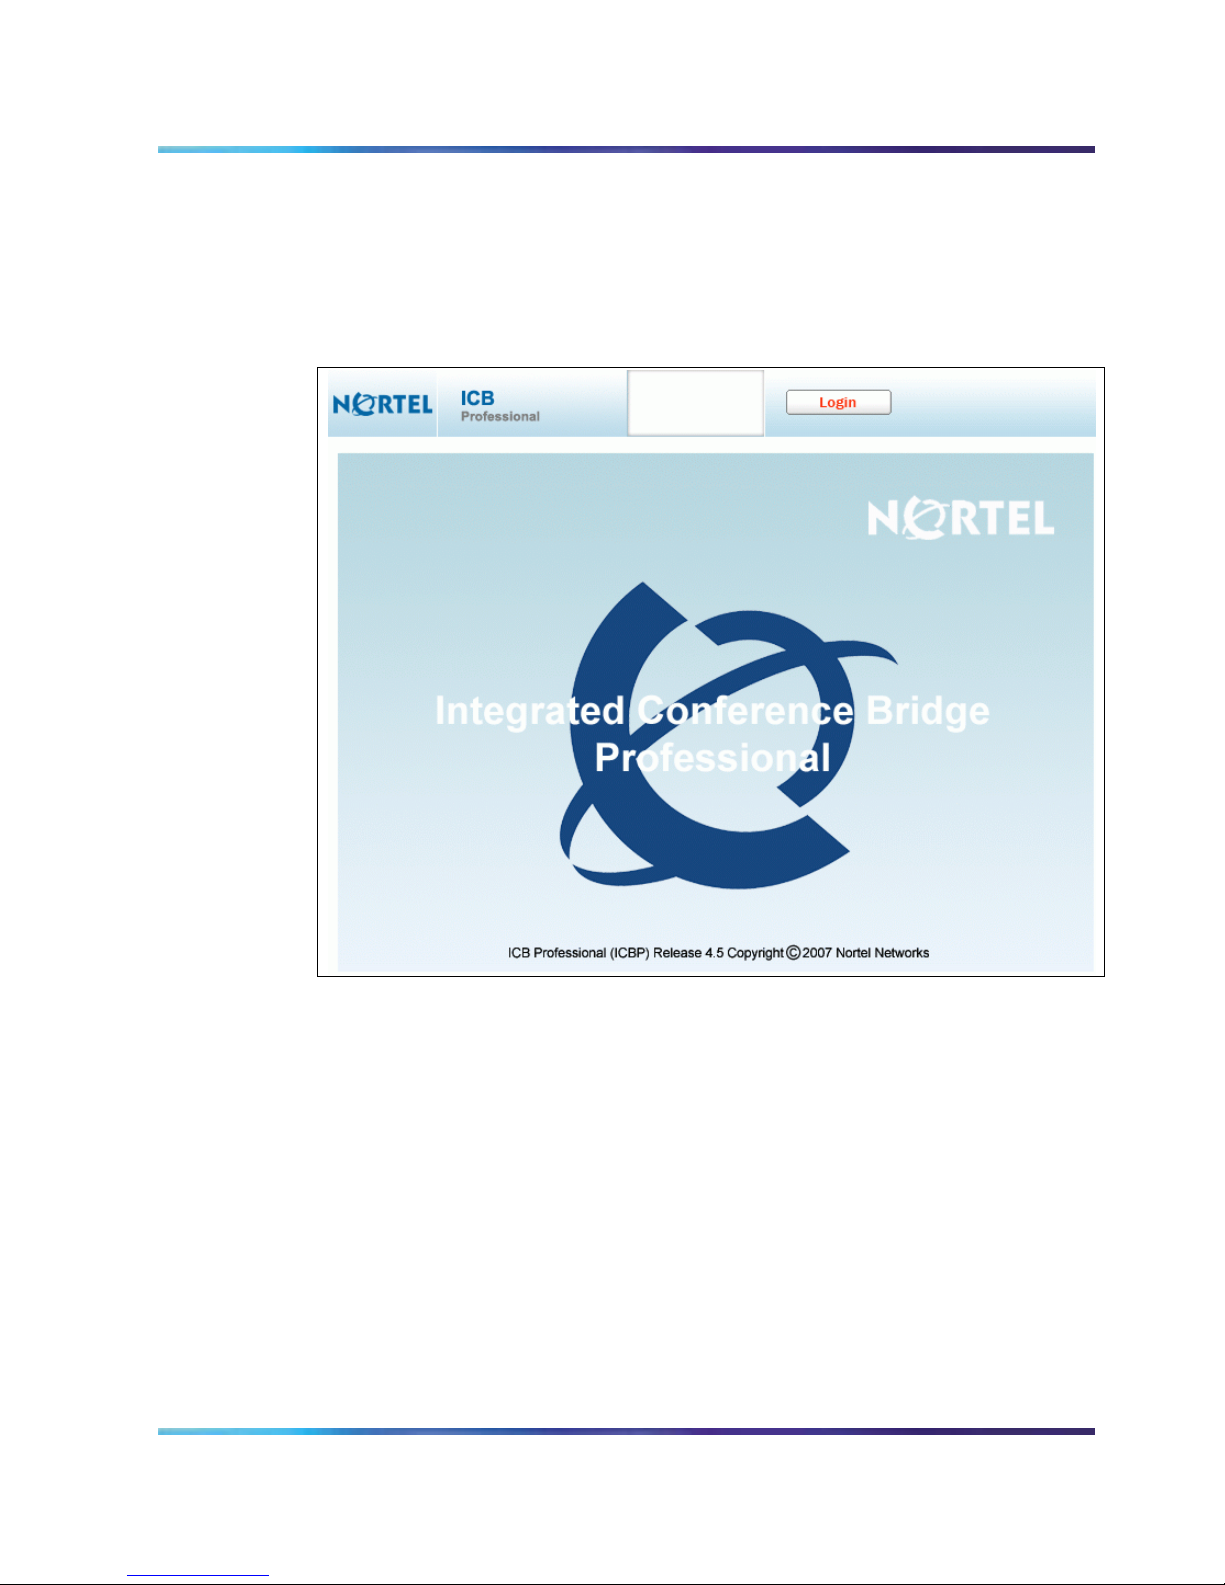
The ICB Professional Login window opens. See following figure.
Nortel Integrated Conference Bridge Professional Administrator Guide
18 Browser User Interface
Note: By default, the ICB Professional Login window has a
generic image. Administrators can replace this image with their
own. See Customizing images (page 43).
Figure 2
ICB Professional Login window
2 Bookmark this URL for future use.
3 Click LOGIN.
Standard 01.01 June 2007
Browser User Interface 19
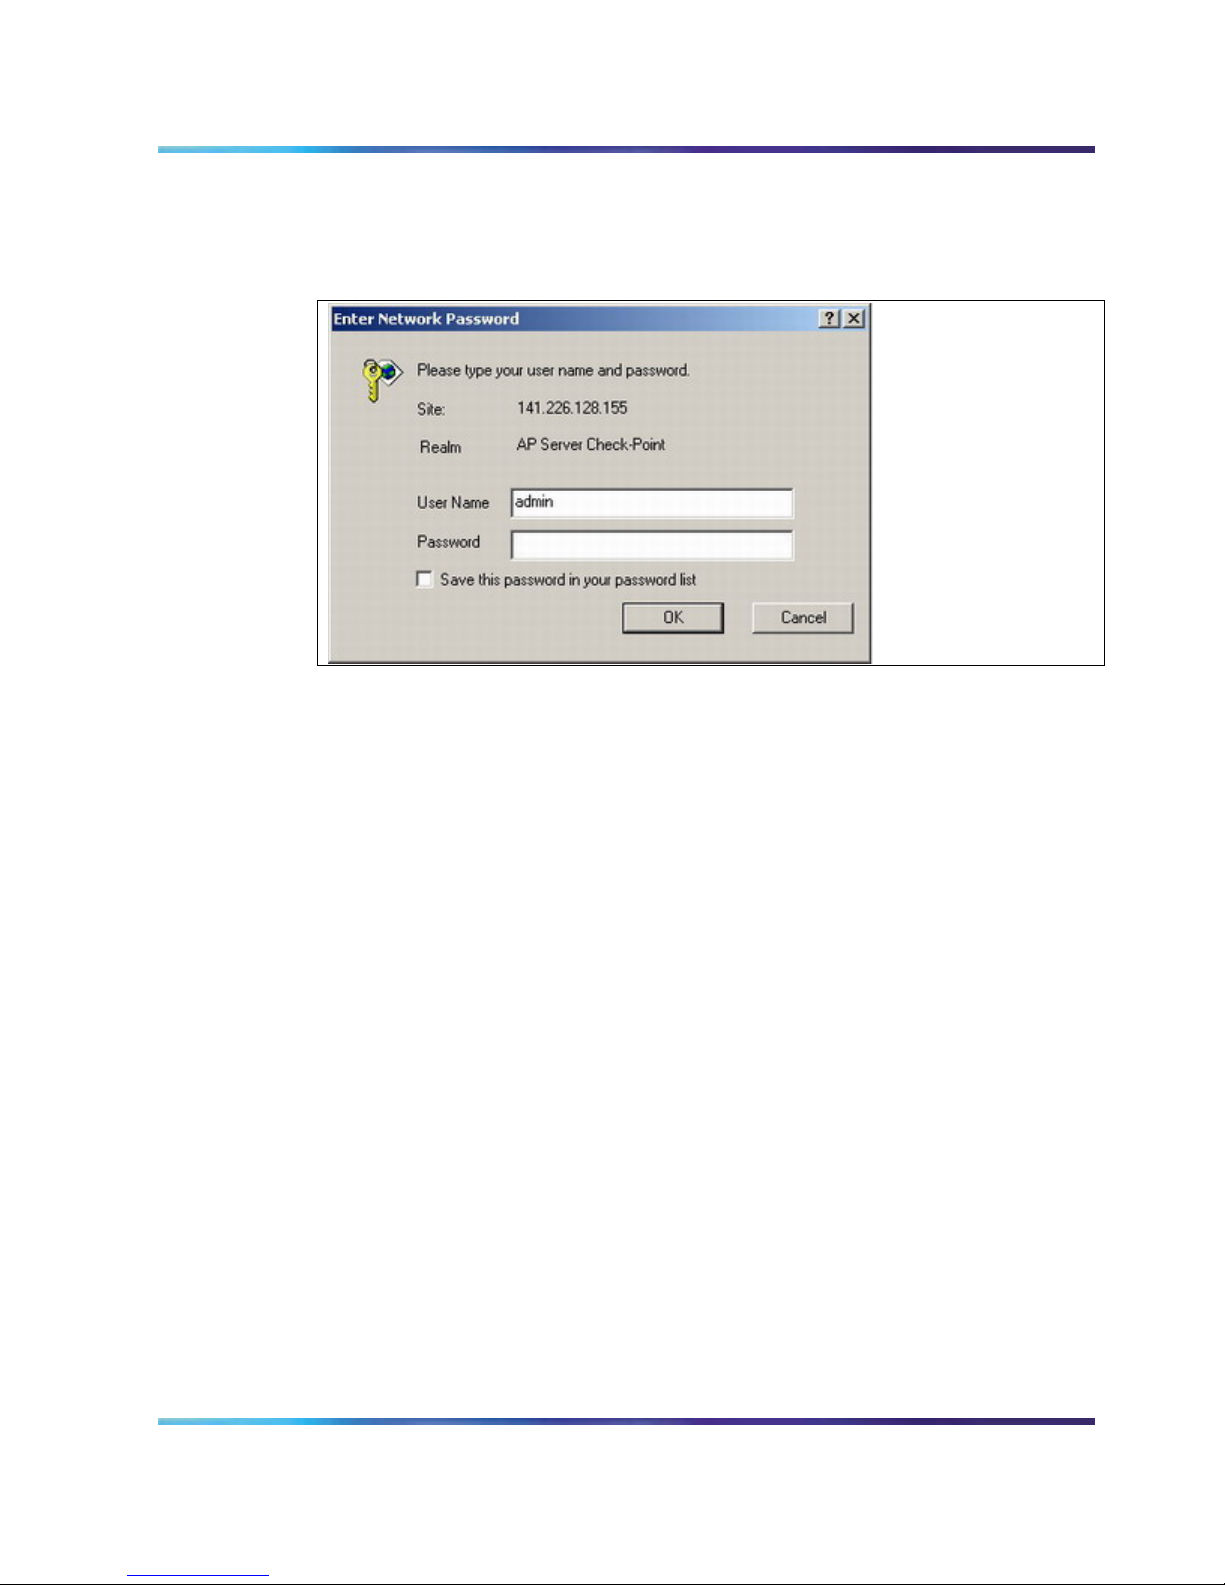
The Network Password window opens. See following figure.
Figure 3
Network Password window
4 Enter your administrator ID in the User Name field.
5 Enter your six-digit administrator password in the Password field.
6 Select Save this password in your password list (optional).
7 Click OK.
Changing the administrator password
Follow the steps below to change the administrator password.
1 Log in to the Web Browser. See Logging in to the Web Browser
(page 17).
2 Click Change Password in the Console.
Nortel Integrated Conference Bridge Professional Administrator Guide
20 Browser User Interface
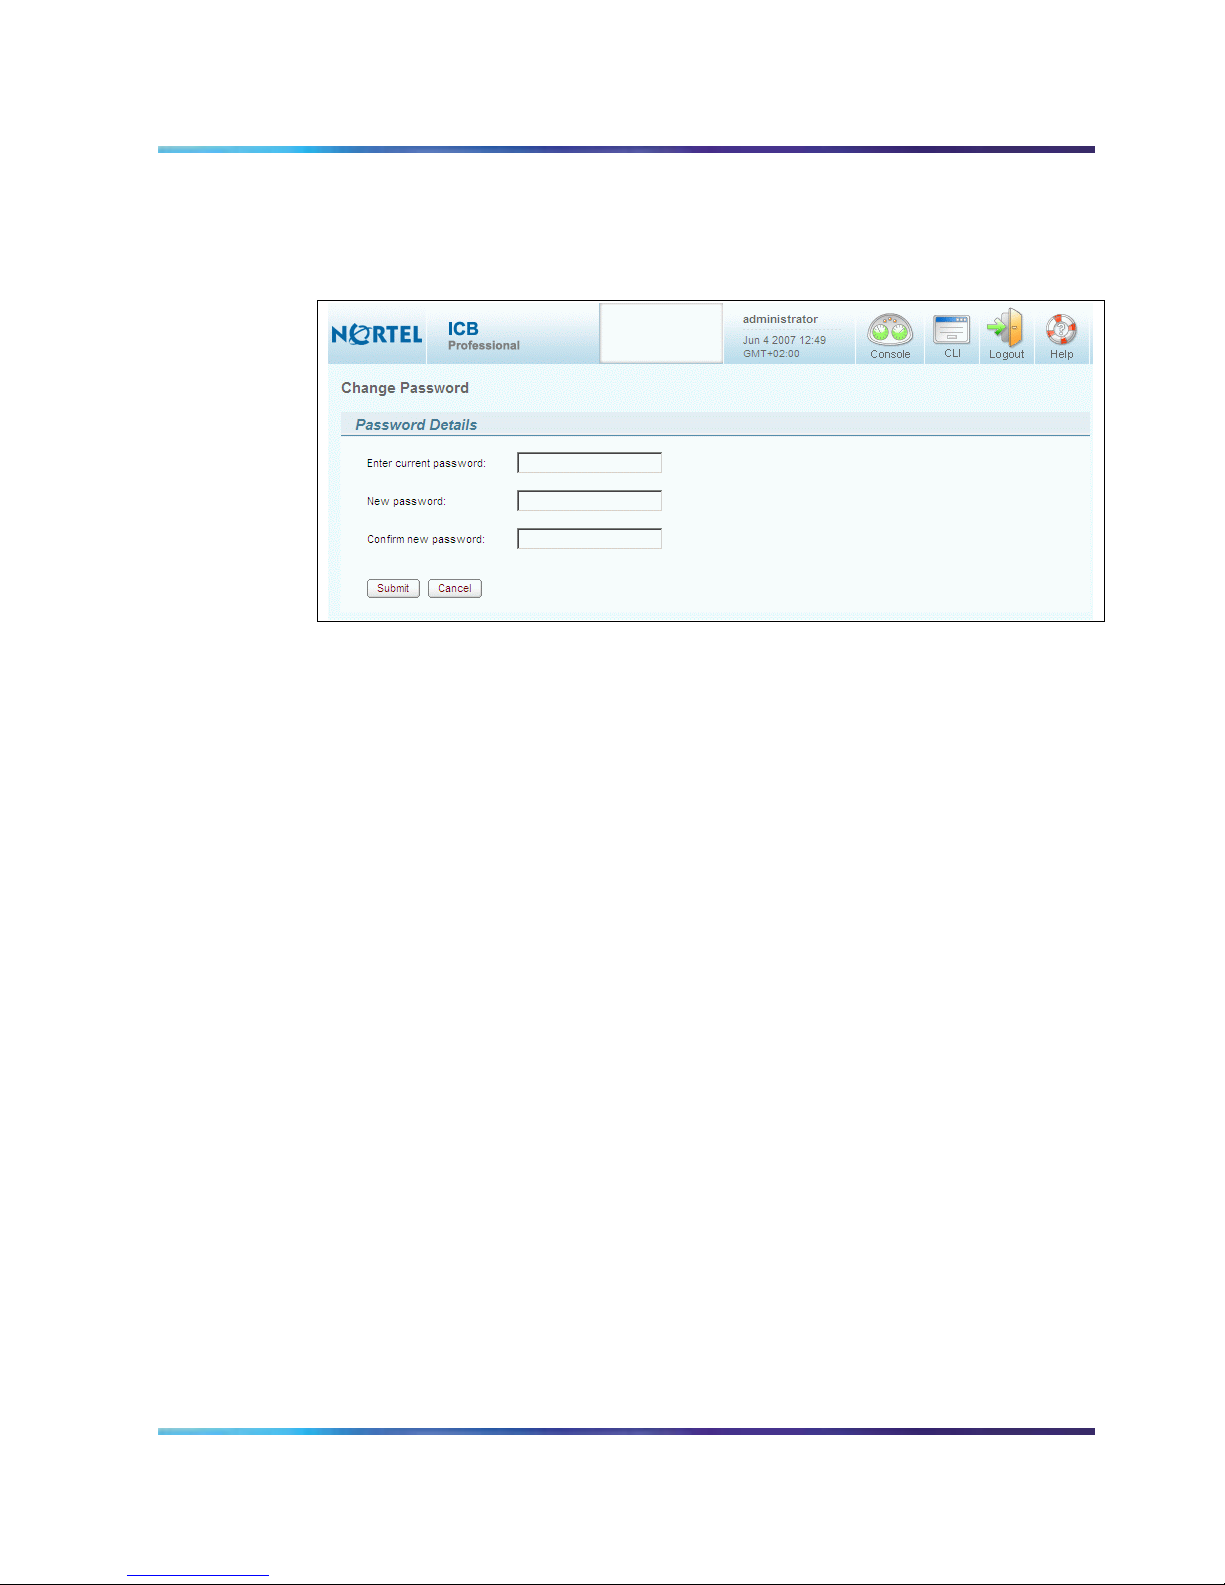
The Change Password window opens. See following figure.
Figure 4
Change Password window
3 Enter the current password in the Enter current password field.
4 Enter the new password in the New password field.
5 Reenter the new password in the Confirm new password field.
6 Click Submit.
Note: Save this password for future use.
Standard 01.01 June 2007
Browser User Interface 21
Integrated Conference Bridge Professional (ICB Professional)
Console
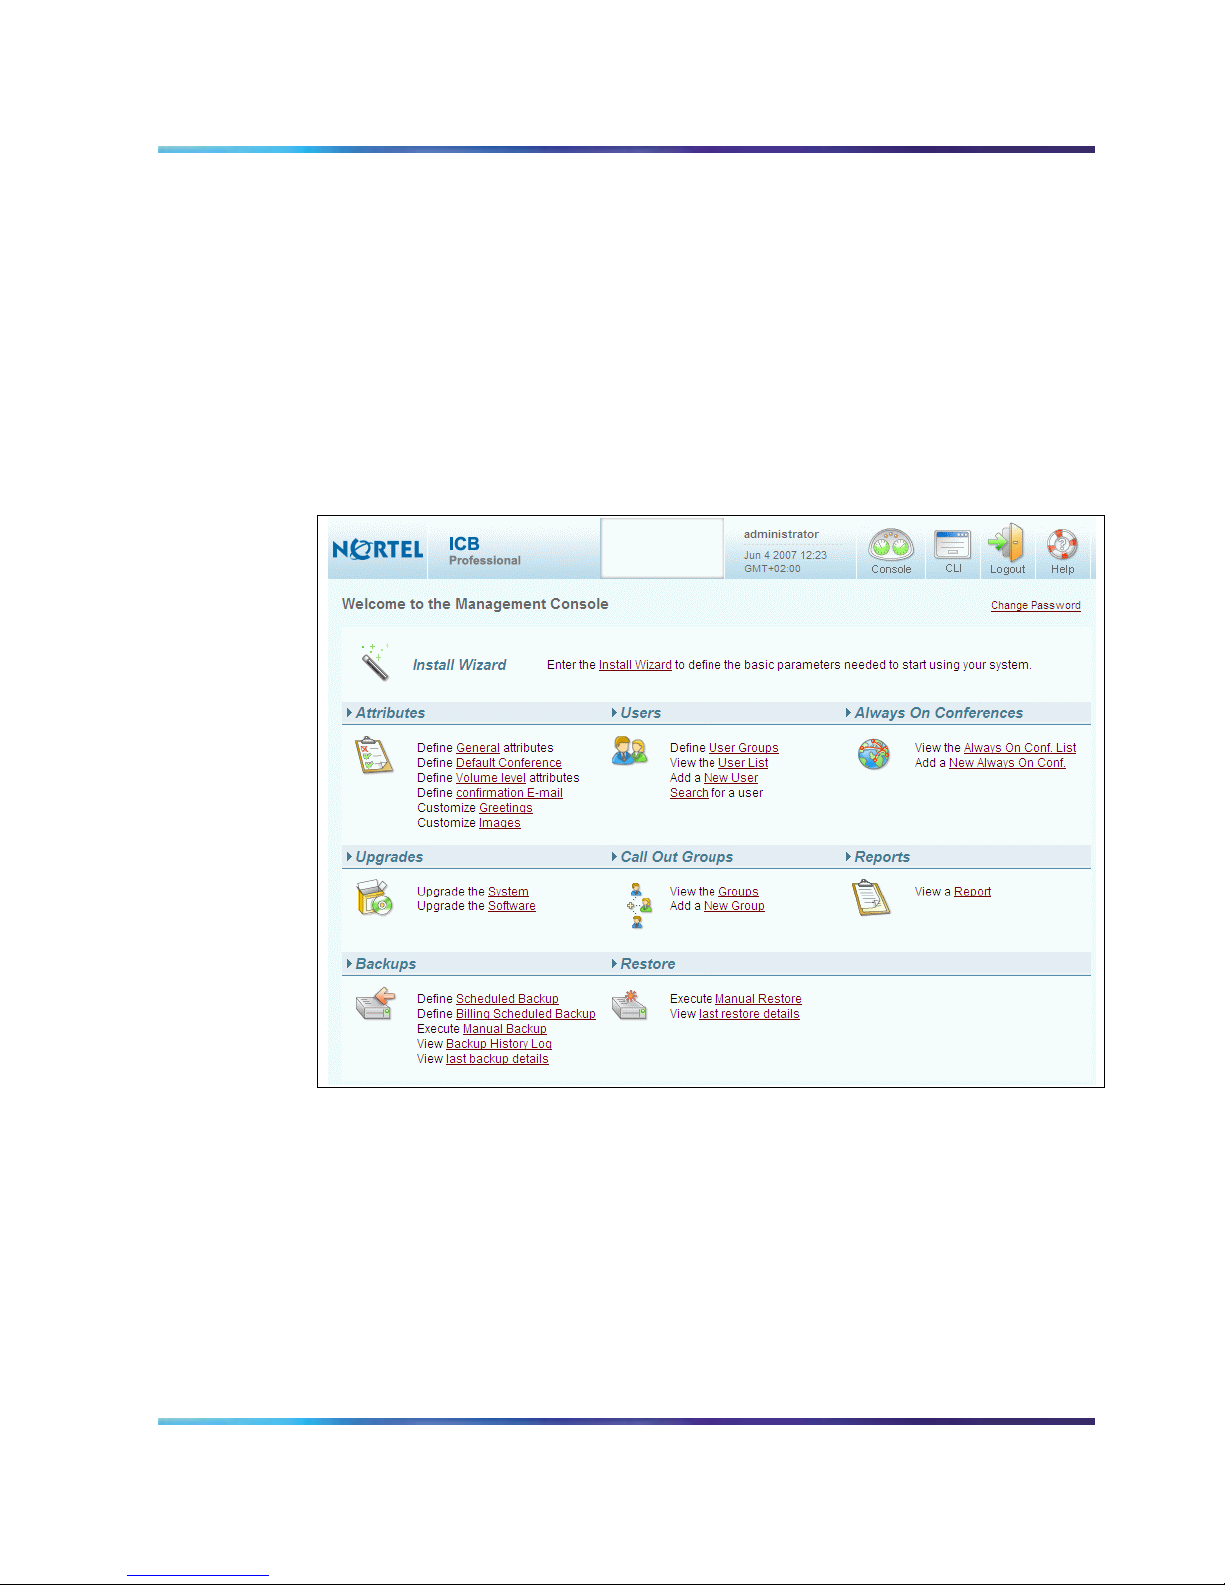
The following figure shows the ICB Professional Console, which is the
home screen for the ICB Professional administrative system. It opens
when an administrator logs in to the system. The Console, which is
organized as an Internet portal, contains links to the following key
configurable options: Settings, Users, Always on Conferences,
Upgrades, Call-Out Groups, Reports, Backup and Restore.
Figure 5
Administration ICB Professional Console window
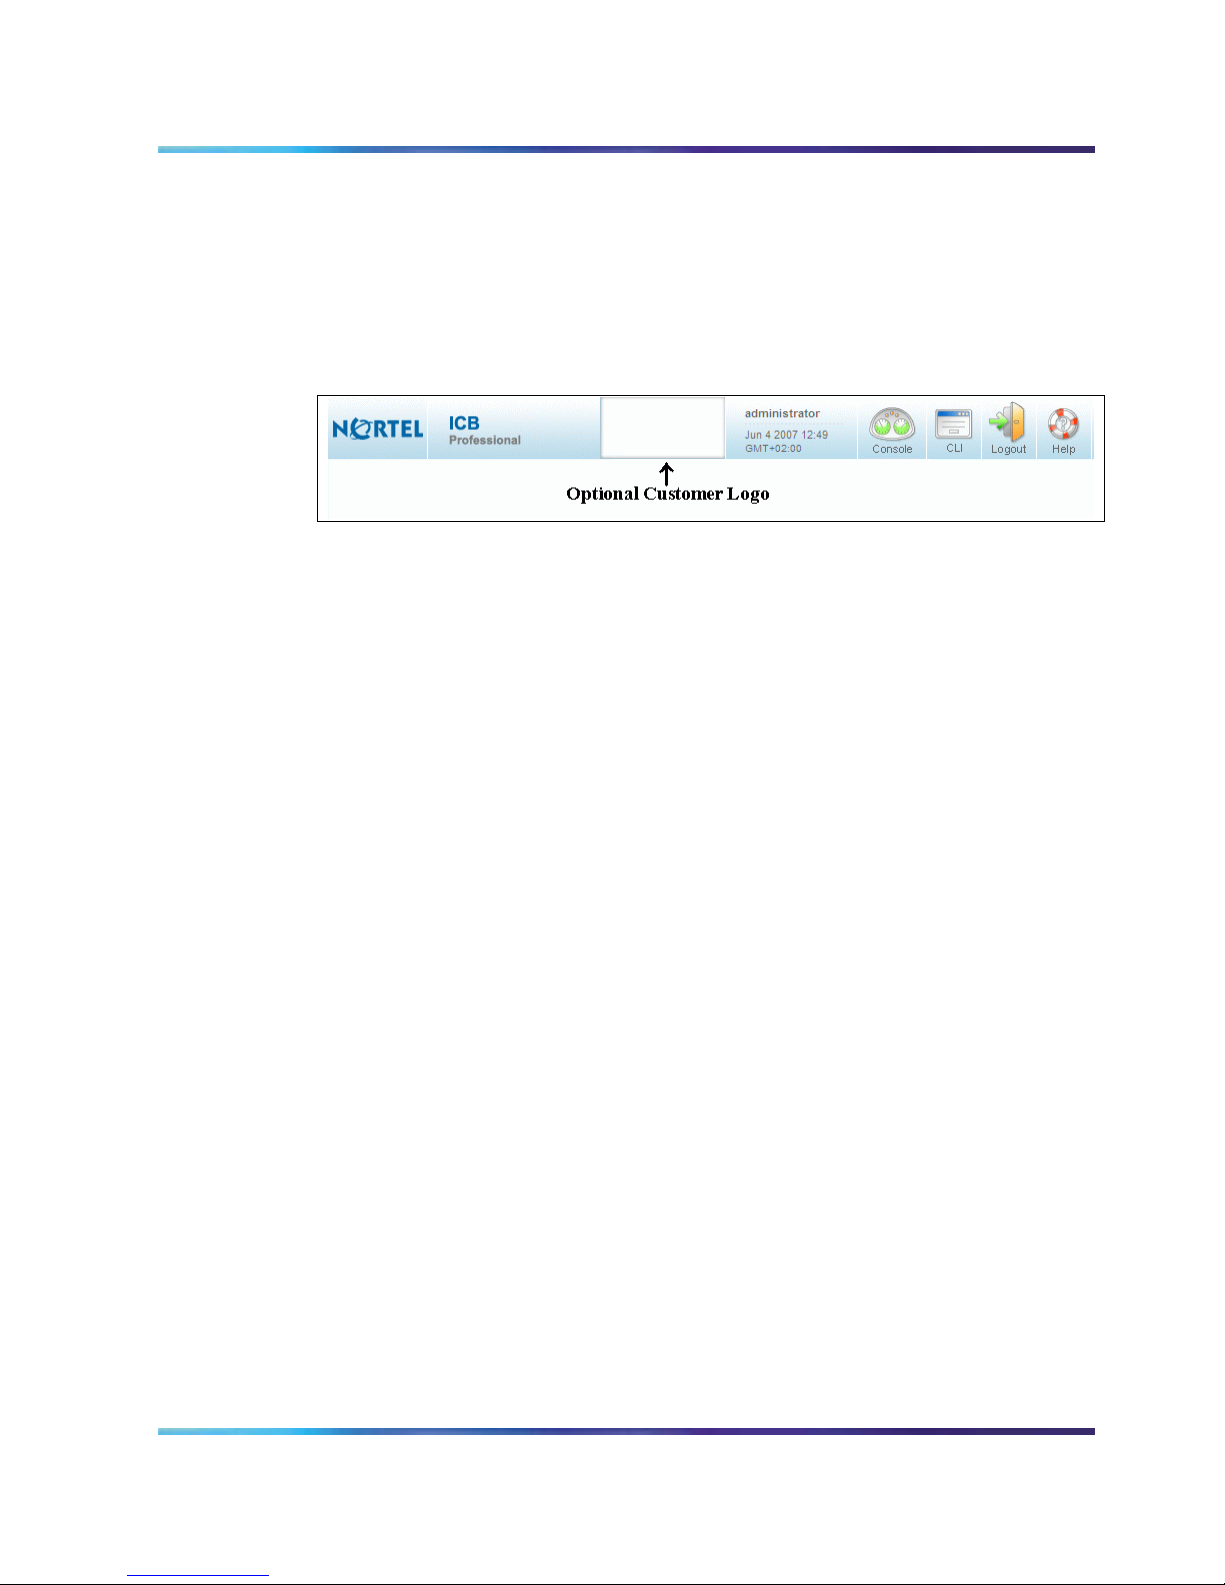
Title frame
The title frame sits at the top of the Console window and all
administration windows. See following figure. It contains the following
buttons:
y Console - Returns to the Console. New settings will not be saved.
y CLI - Opens an additional window for input and output of Command
Line Interface (CLI) commands. See Using the Command Line
Interface (CLI) (page 79).
Nortel Integrated Conference Bridge Professional Administrator Guide
22 Browser User Interface
y Logout - Terminates the session and returns the user to the home
page login window.
y Help - Displays help information relevant to the current window. The
information is displayed in a separate window.
Figure 6
Administration ICB Professional Console title frame
Installing ICB Professional using the Install Wizard
The ICB Professional Install Wizard provides an easy method for
configuring new systems. To access the Install Wizard, click Install
Wizard on the Console.
All Install Wizard windows list steps on the left side of the window.
During installation, the Submit & Continue buttons advance users
step-by-step. After installation is complete, users can reach a specific
step by clicking its name.
The Install Wizard has five main groups: Basic System Settings,
Access Numbers, Define First User, E1/T1 ISDN and Time Settings.
Follow the Wizard step-by-step - the panels for each step open
automatically. To modify one of more fields in installed systems, click a
Configuring Basic System Settings
specific step to open the window for that step.
1 Log in to the Web Browser. See Accessing the Web Browser
(page 17).
2 Click Install Wizard on the Console.
Standard 01.01 June 2007
Browser User Interface 23
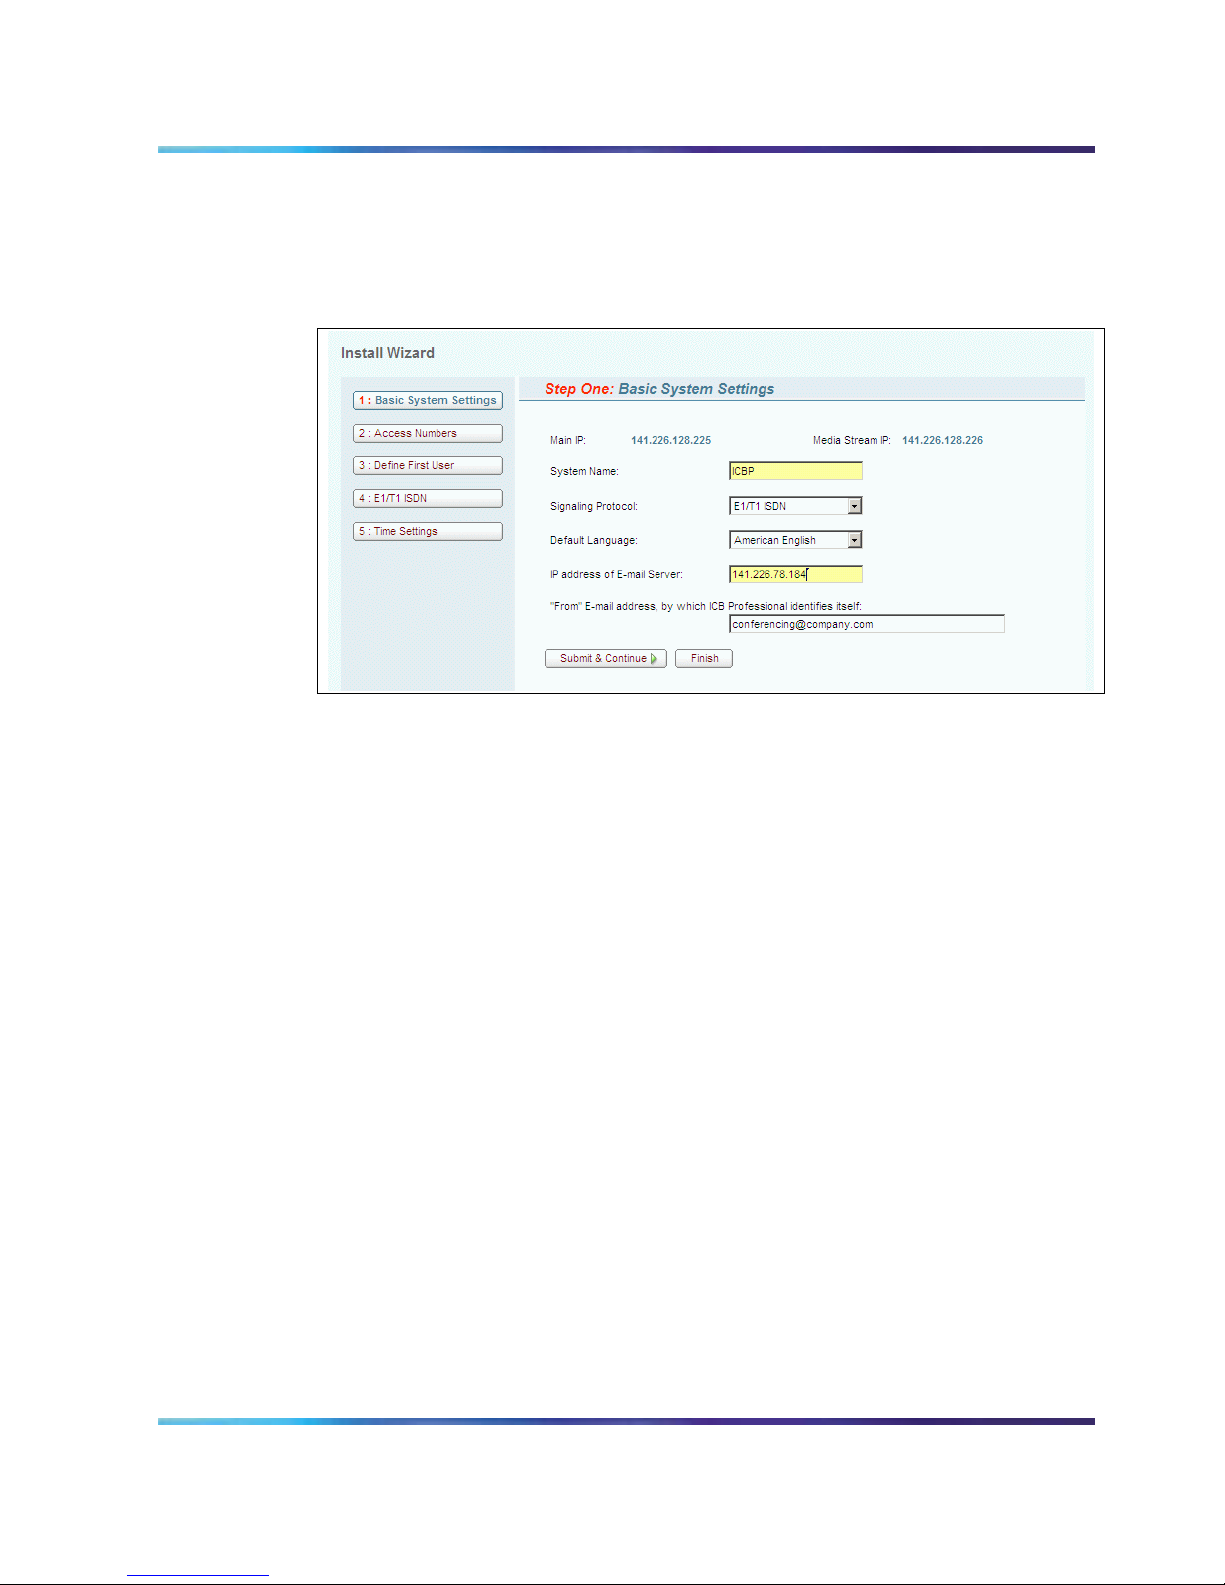
The ICB Professional Install Wizard window opens to the Basic
System Settings panel, as shown in following figure.
Figure 7: Install Wizard
Basic System Settings panel
3 In the System Name field, enter up to 15 characters of
alphanumeric text for the system's name.
The IP address field is a read-only field that shows the IP address
of the system. Users define the system address using the CLI.
4 In the Signalling Protocol field, is a read-only field specifying the
telephony connection by E1/T1 trunk.
5 In the Default Language field, select the default voice-prompt
language for conferences and the TUI. When scheduling a
conference, users can select a language from the available set.
However, if the user does not specify a language, this parameter
applies. The default is American English.
6 In the IP address of E-mail Server field, enter the IP address of the
server that the ICB Professional uses to send scheduling
confirmation and to administer e-mail messages. If this field is
empty, or specified incorrectly, the ICB Professional does not send
e-mail messages. However, the rest of the system operates
properly.
Note: The ICB Professional system uses SMTP. The e-mail server
must support this protocol.
Nortel Integrated Conference Bridge Professional Administrator Guide
24 Browser User Interface
7 In the From E-mail address field, enter the e-mail address which
the ICB Professional uses to identify itself. This e-mail address
appears in the From field of sent e-mail messages. Some e-mail
servers require this information. The initial factory default address is
conferencing@company.com (there is no such address).
8 Do one of the following:
a Click Submit & Continue to save the settings and continue to
the next step.
b Click Finish to save the changes and return to the Console. This
option is available only when editing the settings after installation,
not during a first installation.
c Click Console in the title frame to return to the Console without
saving the changes.
Configuring Access Numbers
1 Log in to the Web Browser. See Accessing the Web Browser
(page 17).
2 Click Install Wizard on the Console.
The ICB Professional Install Wizard window opens to the Basic
system Settings panel, see figure in Configuring Basic System
Settings (page 22).
3 Click Access Numbers on the left-hand side of the ICB
Professional Install Wizard window.
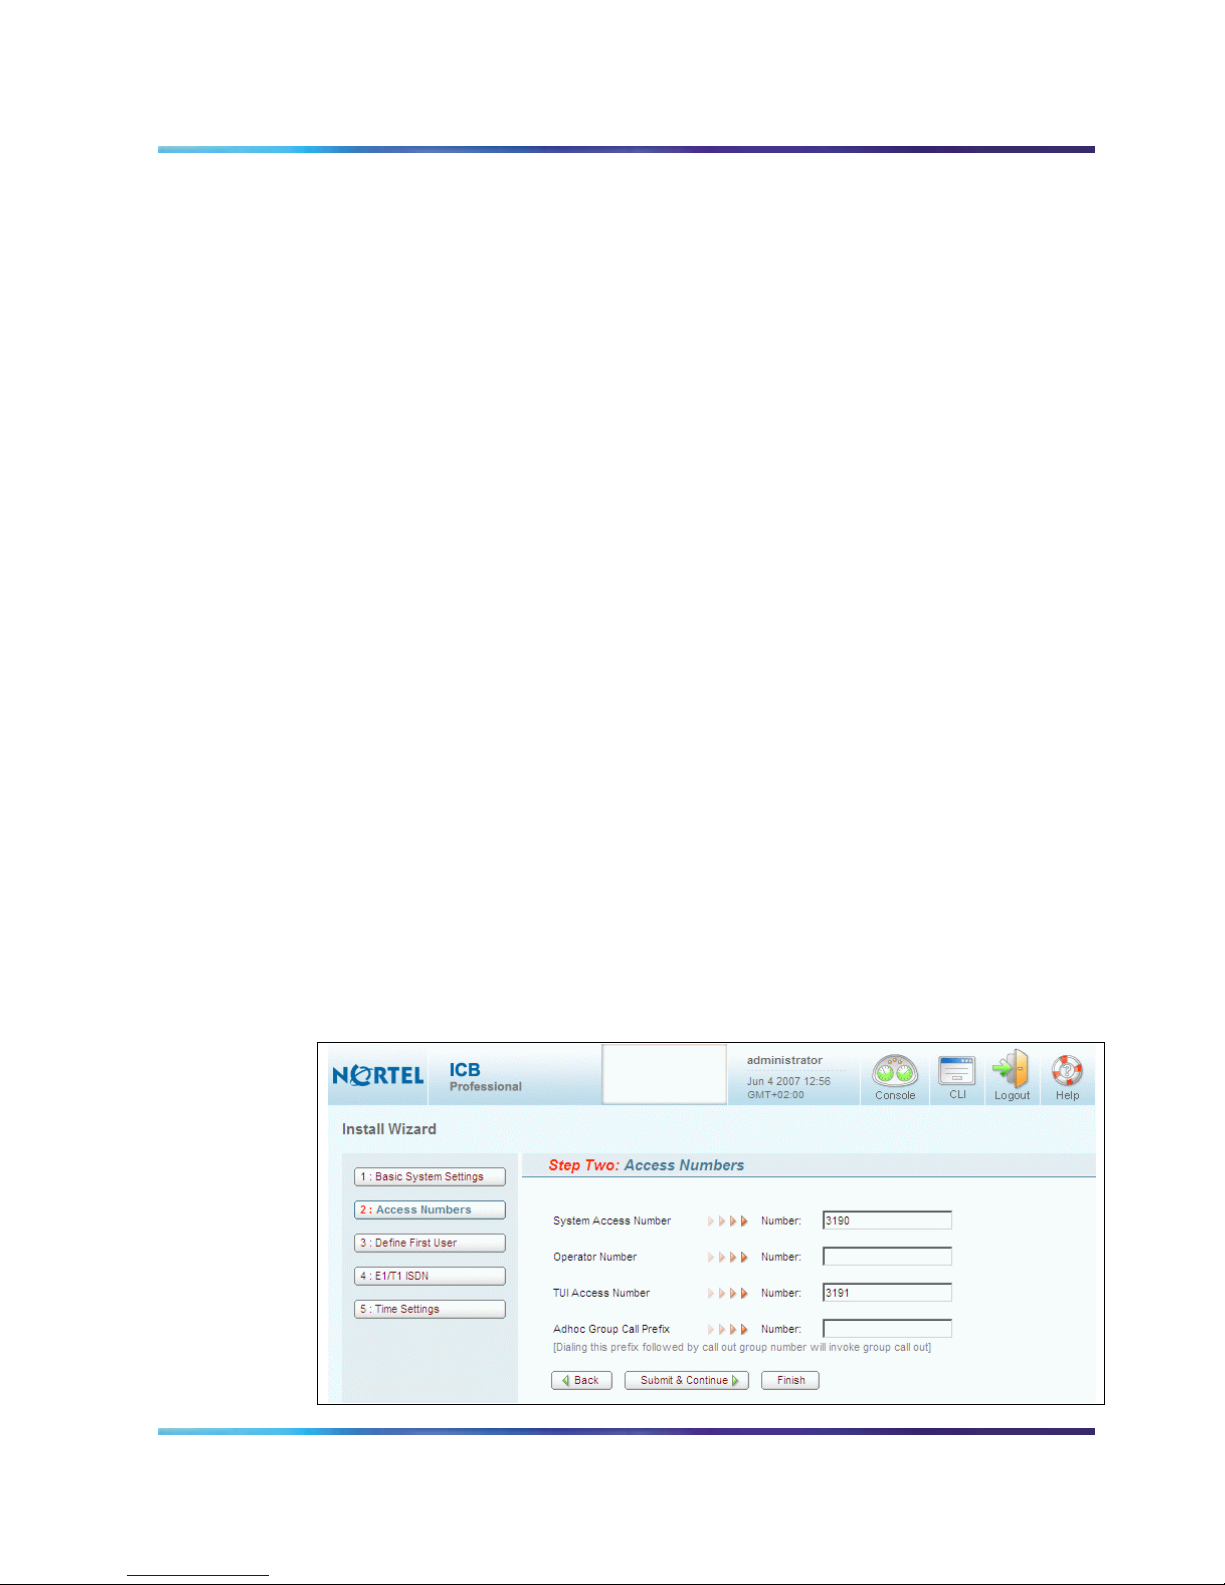
The Access Numbers panel opens, as shown in following figure.
Figure 8: Install Wizard
Access Numbers panel
Standard 01.01 June 2007

Browser User Interface 25
4 In the System Access Number field, (range up to 7 digits) enter the
number dialed to access the system from inside the organization. In
a E1/T1 connected system, its the DID number dialed by incoming
trunk calls, the PABX sends this number to ICB Professional.
5 In the Operator Number field, (range up to 31 digits) enter the
number of an operator or attendant. This number is called by ICB
Professional when the chairperson in an active conference invokes
“Call assistant” command.
6 In the TUI Access Number field, (range up to 7 digits) enter the DN
to access TUI services from inside the organization (scheduling from
a telephone, recording, etc.). The same rules as System Access
Number above.
7 In the Adhoc Group Call Prefix field, define a prefix for optional
feature “Ad-hoc Group Call dialling”. When this prefix is dialled by
phones in the network, followed by a group number of ICB
Professional, the call is routed to, an ad-hoc conference opened and
group call is invoked from conference, (for further details refer to ICB
Professional User Guide).
8 Do one of the following:
a Click Submit & Continue to save the settings and continue to
the next step.
b Click Back to return to the previous step without saving the
changes.
c Click Finish to save the changes and return to the Console. This
option is available only when editing the settings after installation,
not during a first installation.
d Click Console in the title frame to return to the Console without
saving the changes.
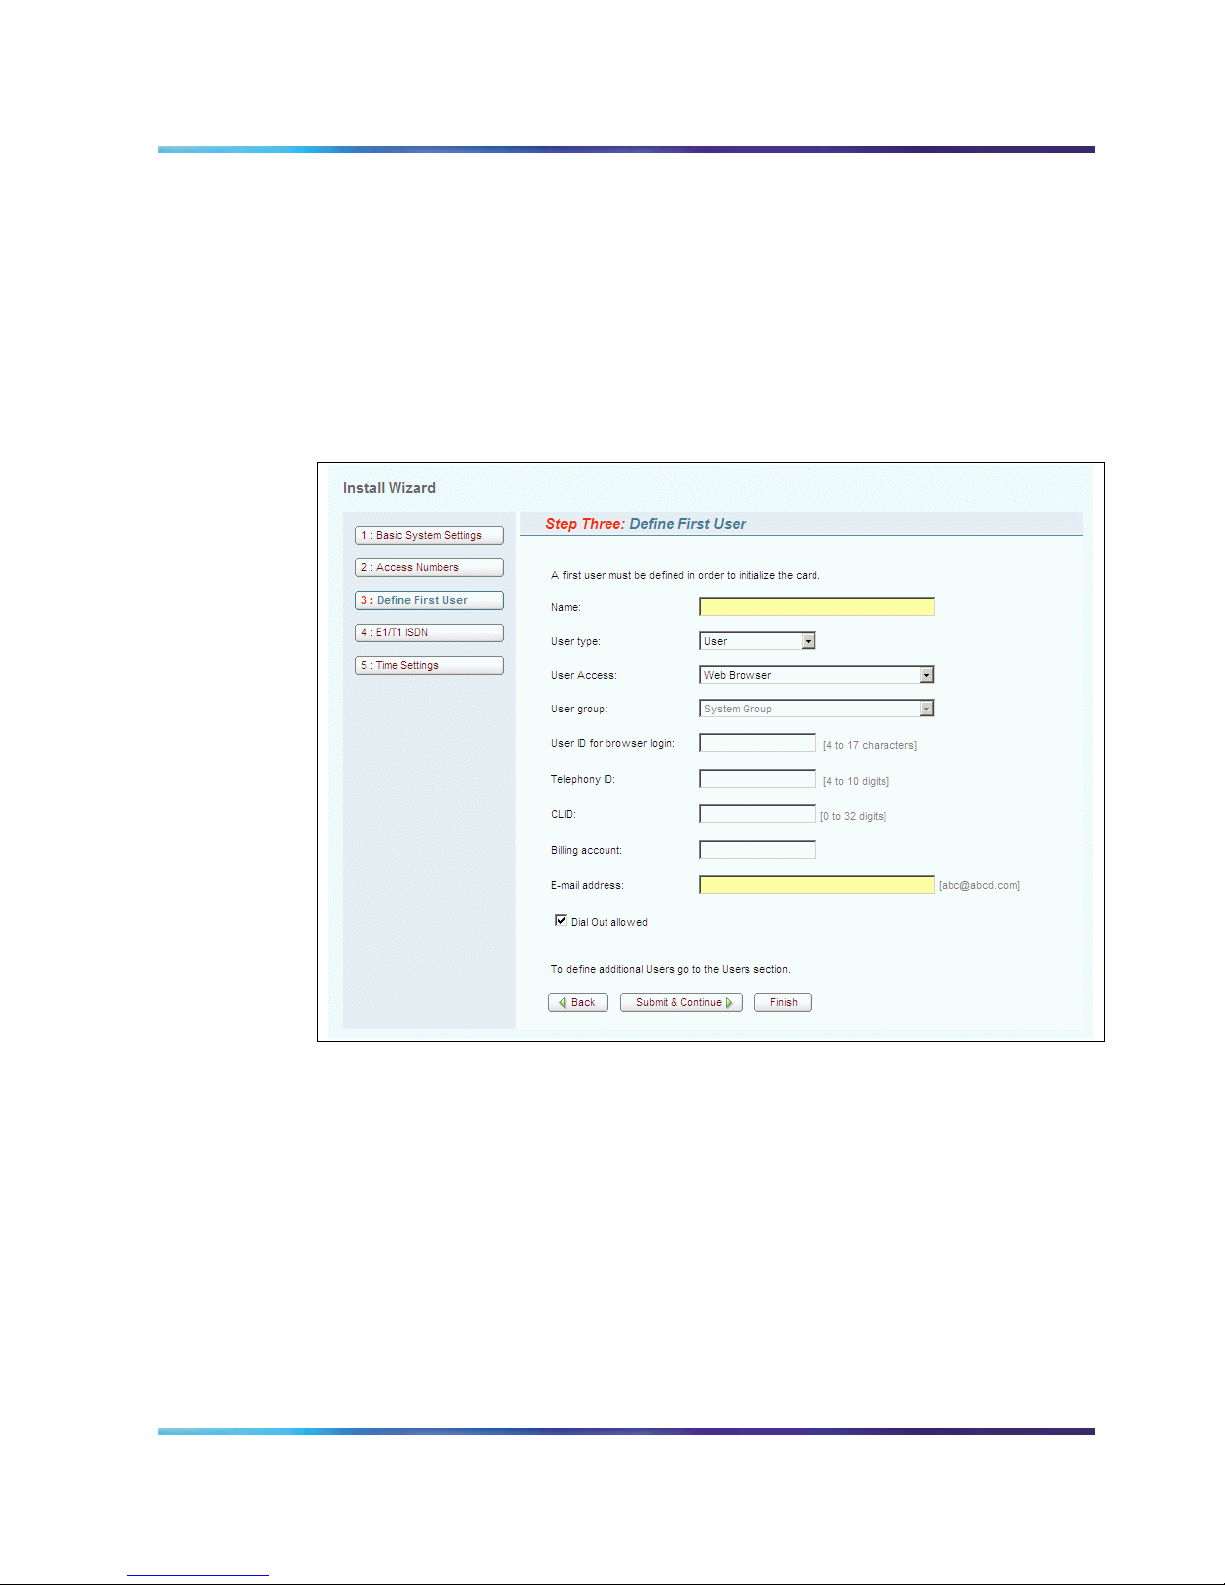
Defining the First User
This task is required only during initial installation and cannot be
performed after successful installation (the link is disabled). Perform
normal user administration from a separate window in the
Administration Web Browser. See Users Administration (page 44).
Steps
1 Log in to the Web Browser. See Accessing the Web Browser
(page 17).
2 Click Install Wizard on the Console.
Nortel Integrated Conference Bridge Professional Administrator Guide
26 Browser User Interface
The ICB Professional Install Wizard window opens to the Basic
system Settings panel, see figure in Configuring Basic System
Settings (page 22).
3 Click Define First User on the left-hand side of the ICB
Professional Install Wizard window.
The Define First User panel opens, as shown in following figure.
Figure 9: Install Wizard
Define First User panel
4 Define at least one user to perform sanity tests, such as scheduling
conferences and placing calls. Define a user that can be deleted or
modified from the regular User Administration window. This step
eliminates the need to open a separate window to define a user and
perform basic testing after the Wizard is finished.
5 Do one of the following:
a Click Submit & Continue to save the changes and return to the
Console, or continue to the next step.
b Click Back to return to the previous step without saving the
changes.
Standard 01.01 June 2007
Browser User Interface 27
c Click Finish to save the changes and return to the Console.
d Click Console in the title frame to return to the Console without
saving the changes.
E1/T1 ISDN Trunk Configuration
This section defines process to configure E1/T1 trunks parameters.
1 Log in to the Web Browser. See Accessing the Web Browser
(page
17).
2 Click Install Wizard on the Console.
The ICB Professional Install Wizard window opens to the Basic
system Settings panel, see figure in Configuring Basic System
Settings (page
22).
3 Click E1/T1 ISDN on the left-hand side of the ICB Professional
Install Wizard window.
The E1/T1 ISDN panel opens, as shown in following figure.
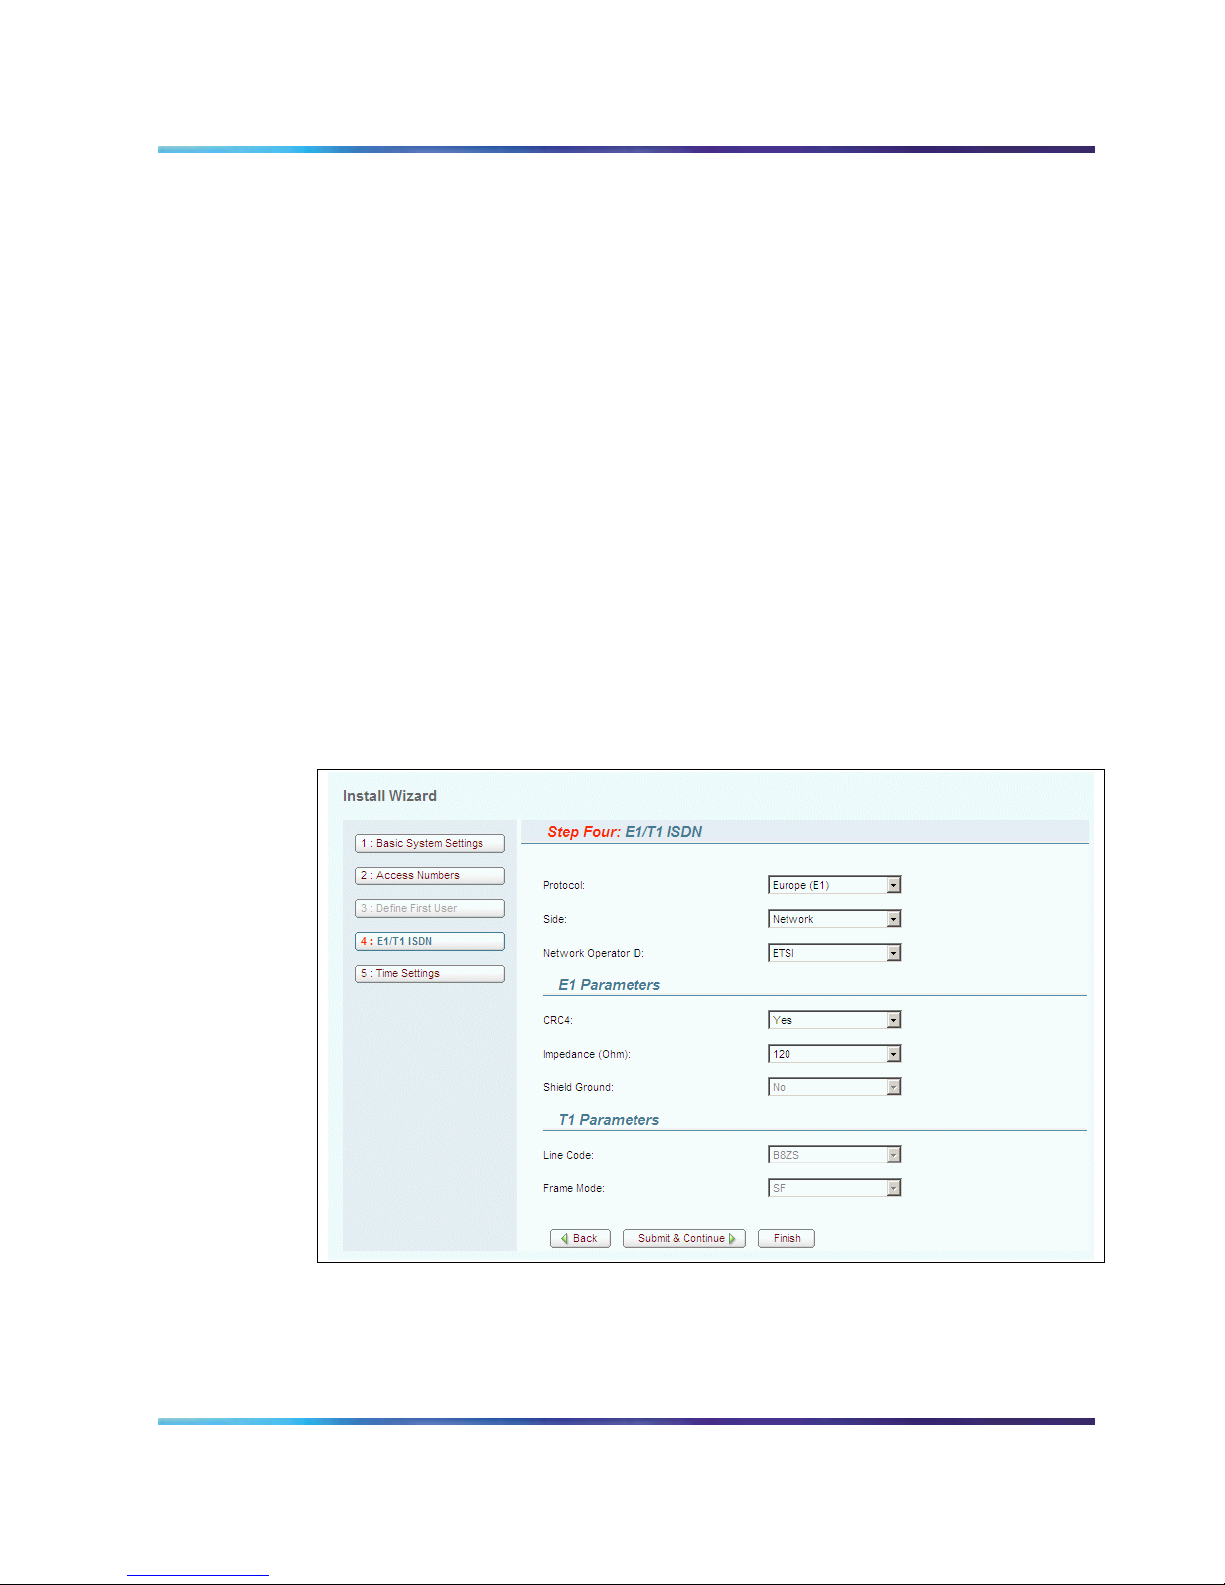
Figure 10: Install Wizard
E1/T1 ISDN panel
4 In the Protocol field, select the ISDN PRA protocol type - Europe
(E1) or North America (T1).
5 In the Side field, select the Network side.
Nortel Integrated Conference Bridge Professional Administrator Guide

28 Browser User Interface
6 In the Network Operator ID field, select the ISDN operator ID:
⎯ Europe E1: ETSI
⎯ North America T1: National ISDN 1or 2, AT&T 4ESS, AT&T
5ESS or DMS100
7 In the E1 Parameters - CRC4 field, select Yes or No.
8 In the E1 Parameters - Impedance (Ohm) field, select
120(RJ45)or 75 (BNC) to imply the physical trunk connection
used.
9 In the E1 Parameters - Shield Ground field, for 75Ω shield ground
option may also be specified.
10 In the T1 Parameters - Line Code field, select AMI or B8ZS.
11 In the T1 Parameters - Frame Mode field, select SF or ESF.
12 Do one of the following:
a Click Submit & Continue to save the changes and return to the
Console, or continue to the next step.
b Click Back to return to the previous step without saving the
changes.
c Click Finish to save the changes and return to the Console.
d Click Console in the title frame to return to the Console without
saving the changes.
Note 1: Parameter similar to Nortel Switch
Note 2: Modification of the parameter will cause Restart to ICB
Professional system
Configuring Time Settings parameters
This task is for adjustment of date & time, time zone and Daylight
saving Time.
Steps
1 Log in to the Web Browser.
2 Click Install Wizard on the Console.
The ICB Professional Install Wizard window opens to the Basic
system Settings panel, as shown in figure in Configuring Basic
System Settings (page
22).
3 Click Time Settings on the left-hand side of the ICB Professional
Install Wizard window.
Standard 01.01 June 2007
 Loading...