

Page 1

DiVitas Client
User Guide for Nokia E and N Series
Version 2.7
Part Number: DOC-CLIENT-UG-207
Page 2

Copyright and Confidentiality Notice
Copyright 2009 DiVitas Networks, Inc. All rights reserved. DiVitas Networks, DiVitas
Server, DiVitas Client and the DiVitas logo are trademarks of DiVitas Networks, Inc. All
other trademarks are properties of their respective owners.
The designs, features, documentation, software, data and firmware described herein are
confidential and proprietary to DiVitas Networks, Inc. and its suppliers. None of these
items, regardless of the forms in which they exist, may be used or disclosed to others for
any purpose except as specifically authorized in writing by DiVitas Networks, Inc. In
accepting this document or utilizing this software, the recipient agrees that neither this
document nor the information or designs disclosed therein nor the software nor any part
thereof shall be reproduced or transferred to other documents nor used or disclosed for
any purpose except as specifically authorized in writing by DiVitas Networks, Inc.
Disclaimer
DiVitas Networks, Inc. makes no representation or warranties, expressed or implied, as to
the truth or accuracy of any information contained herein. This publication may include
typographical errors and technical inaccuracies. The content is provided “as is” and all
expressed or implied conditions, representations and warranties, including any implied
warranty of merchantability, fitness for a particular purpose, or non-infringement, are
disclaimed, except to the extent that such disclaimers are held to be legally invalid.
2
Page 3
This book is for users of the DiVitas Client on certain Nokia E Series and N Series
handset models. Although this book contains some general E Series usage information,
the book’s focus is on the DiVitas Client itself. The book is not intended to be an
exhaustive guide on all E Series and N Series features.
For information about non-DiVitas features on your Nokia handset, see the Nokia User
Guide for your handset model. The Nokia web site is also a worthy source of information
about your handset.
DiVitas Product Documentation
Table 1 lists the user documents for the DiVitas Server and the DiVitas Client.
Table 1. DiVitas User Documentation
About This Book
Solution
Component
DiVitas Server DiVitas Server Administration Guide
DiVitas Client DiVitas Client User Guide for Nokia E and N Series (this document)
Title and Description
Describes how to install and configure the DiVitas Server and how to manage user
accounts and features.
Describes the DiVitas Client for E Series and N Series handsets and how to configure
and use the client.
DiVitas Client Quick User Guide
Shoret guide that provides basic information about the DiVitas Client.
DiVitas Client User Guide for Nokia E and N Series Phones, v2.7
3
Page 4
Typographical Conventio ns
About This Book
Typographical Conventions
Table 2 lists the conventions used in this guide to highlight information.
Table 2. Typographical Conventions
Text
Appearance
Blue Blue text indicates a command. To use a command, use the left or right selection key to
Italics Italics are used to indicate a value you must supply. Bold is used to indicate text that
Bold Generally, bold is used to show characters you must enter exactly as they are shown in
Blue underline Blue, underlined text indicates a URL link. You can click on the link to access the web
Meaning
select it.
For example, to place an active call on hold, press the left selection key and select Hold.
Some commands, such as Options, display a list of subcommands. The text indicates
this with a bracket, as follows:
To end a call, select Options > End.
must be entered exactly as shown.
Italics also are occasionally used to indicate emphasis, such as when a new term is
being introduced or when special attention should be given to a specific word or phrase.
Italics also are used to highlight the titles of other documents referred to in this
document.
the text. Bold is also used sparingly to highlight important text.
page.
CAUTION! This icon and the bold text next to it call attention to the potential for data loss
or service interruption.
Note. This icon and the text next to it call attention to important supplementary details.
Terminology
This guide uses the term cellular to refer to mobile voice service. Generally, the term is
synonymous with GSM. Similarly, this guide uses the term CellData, which is
synonymous with packet data.
Technical Support
Should you have any questions concerning this product, or if you desire to contact DiV itas
Networks for any reason, please contact DiVitas Service and Support at:
(650) 625-1900 or support@divitas.com
.
4
DiVitas Client User Guide for Nokia E and N Series Phones, v2.7
Page 5

Contents
About This Book . . . . . . . . . . . . . . . . . . . . . . . . . . . . . . . . . . . . . . . . . . . . . . . . .3
DiVitas Product Documentation . . . . . . . . . . . . . . . . . . . . . . . . . . . . . . . . . . . . . . . . . . . . . . . 3
Typographical Conventions . . . . . . . . . . . . . . . . . . . . . . . . . . . . . . . . . . . . . . . . . . . . . . . . . . 4
Terminology . . . . . . . . . . . . . . . . . . . . . . . . . . . . . . . . . . . . . . . . . . . . . . . . . . . . . . . . . . . . . . 4
Technical Support . . . . . . . . . . . . . . . . . . . . . . . . . . . . . . . . . . . . . . . . . . . . . . . . . . . . . . . . . . 4
Getting Started . . . . . . . . . . . . . . . . . . . . . . . . . . . . . . . . . . . . . . . . . . . . . . . . . .9
Installing the DiVitas Client – Overview . . . . . . . . . . . . . . . . . . . . . . . . . . . . . . . . . . . . . . . . 10
Logging Into the DiVitas Client . . . . . . . . . . . . . . . . . . . . . . . . . . . . . . . . . . . . . . . . . . . . . . . 12
Changing Your DiVitas Client Password . . . . . . . . . . . . . . . . . . . . . . . . . . . . . . . . . . . . . . . . 13
DiVitas Home Screen . . . . . . . . . . . . . . . . . . . . . . . . . . . . . . . . . . . . . . . . . . . . . . . . . . . . . . 14
Accessing Help or Version Information . . . . . . . . . . . . . . . . . . . . . . . . . . . . . . . . . . . . . . . . 17
Locking the Keypad When the DiVitas Client Is Active . . . . . . . . . . . . . . . . . . . . . . . . . . . . 18
Minimizing the DiVitas Client . . . . . . . . . . . . . . . . . . . . . . . . . . . . . . . . . . . . . . . . . . . . . . . . 18
Exiting the DiVitas Client . . . . . . . . . . . . . . . . . . . . . . . . . . . . . . . . . . . . . . . . . . . . . . . . . . . 19
Presence . . . . . . . . . . . . . . . . . . . . . . . . . . . . . . . . . . . . . . . . . . . . . . . . . . . . . . 21
Presence Indicators . . . . . . . . . . . . . . . . . . . . . . . . . . . . . . . . . . . . . . . . . . . . . . . . . . . . . . . 21
Changing Your Presence . . . . . . . . . . . . . . . . . . . . . . . . . . . . . . . . . . . . . . . . . . . . . . . . . . . 22
Changing Status Messages . . . . . . . . . . . . . . . . . . . . . . . . . . . . . . . . . . . . . . . . . . . . . . . . . 23
Using the DiVitas Dialer . . . . . . . . . . . . . . . . . . . . . . . . . . . . . . . . . . . . . . . . . .25
Accessing the DiVitas Dialer Screen . . . . . . . . . . . . . . . . . . . . . . . . . . . . . . . . . . . . . . . . . . 25
Making a Call . . . . . . . . . . . . . . . . . . . . . . . . . . . . . . . . . . . . . . . . . . . . . . . . . . . . . . . . . . . . 25
Answering a Call . . . . . . . . . . . . . . . . . . . . . . . . . . . . . . . . . . . . . . . . . . . . . . . . . . . . . . . . . . 28
Ending a Call . . . . . . . . . . . . . . . . . . . . . . . . . . . . . . . . . . . . . . . . . . . . . . . . . . . . . . . . . . . . 29
Placing a Call on Hold . . . . . . . . . . . . . . . . . . . . . . . . . . . . . . . . . . . . . . . . . . . . . . . . . . . . . 30
Transferring a Call . . . . . . . . . . . . . . . . . . . . . . . . . . . . . . . . . . . . . . . . . . . . . . . . . . . . . . . . . 30
Enabling the Loudspeaker . . . . . . . . . . . . . . . . . . . . . . . . . . . . . . . . . . . . . . . . . . . . . . . . . . 31
Muting the Microphone . . . . . . . . . . . . . . . . . . . . . . . . . . . . . . . . . . . . . . . . . . . . . . . . . . . . 31
Managing Multiple Calls . . . . . . . . . . . . . . . . . . . . . . . . . . . . . . . . . . . . . . . . . . . . . . . . . . . . 33
Toggling a Call Between the Handset and an IP Desk Phone . . . . . . . . . . . . . . . . . . . . . . . 35
Star Codes for Common Features . . . . . . . . . . . . . . . . . . . . . . . . . . . . . . . . . . . . . . . . . . . . 36
Conferencing . . . . . . . . . . . . . . . . . . . . . . . . . . . . . . . . . . . . . . . . . . . . . . . . . . .37
Setting Up a 3-Way Conference Call . . . . . . . . . . . . . . . . . . . . . . . . . . . . . . . . . . . . . . . . . . 37
DiVitas Client User Guide for Nokia E and N Series Phones, v2.7
5
Page 6

Participating In a Scheduled Conference Call . . . . . . . . . . . . . . . . . . . . . . . . . . . . . . . . . . . 41
Contacts . . . . . . . . . . . . . . . . . . . . . . . . . . . . . . . . . . . . . . . . . . . . . . . . . . . . . . 43
Displaying the DiVitas Contacts List . . . . . . . . . . . . . . . . . . . . . . . . . . . . . . . . . . . . . . . . . . 43
Searching the DiVitas Directory and Adding DiVitas Contacts . . . . . . . . . . . . . . . . . . . . . . 44
Locating a Contact via Quick Search . . . . . . . . . . . . . . . . . . . . . . . . . . . . . . . . . . . . . . . . . . 45
Filtering the Contacts List . . . . . . . . . . . . . . . . . . . . . . . . . . . . . . . . . . . . . . . . . . . . . . . . . . . 45
Calling or Sending a Message to a Contact . . . . . . . . . . . . . . . . . . . . . . . . . . . . . . . . . . . . . 46
Disabling the Presence Indicator for a Contact . . . . . . . . . . . . . . . . . . . . . . . . . . . . . . . . . . 47
Using the Call Log . . . . . . . . . . . . . . . . . . . . . . . . . . . . . . . . . . . . . . . . . . . . . .49
Accessing the Call Log Screens . . . . . . . . . . . . . . . . . . . . . . . . . . . . . . . . . . . . . . . . . . . . . . 50
Dialing a Logged Number . . . . . . . . . . . . . . . . . . . . . . . . . . . . . . . . . . . . . . . . . . . . . . . . . . . 50
Deleting a Call from the Call Log . . . . . . . . . . . . . . . . . . . . . . . . . . . . . . . . . . . . . . . . . . . . . 50
Where Calls Are Logged . . . . . . . . . . . . . . . . . . . . . . . . . . . . . . . . . . . . . . . . . . . . . . . . . . . . 51
Instant Messaging . . . . . . . . . . . . . . . . . . . . . . . . . . . . . . . . . . . . . . . . . . . . . .53
Adding a Network Contact . . . . . . . . . . . . . . . . . . . . . . . . . . . . . . . . . . . . . . . . . . . . . . . . . . 53
Sending a Message to a Network Contact . . . . . . . . . . . . . . . . . . . . . . . . . . . . . . . . . . . . . 54
Viewing and Replying to a Message . . . . . . . . . . . . . . . . . . . . . . . . . . . . . . . . . . . . . . . . . . 55
Managing Multiple Conversations . . . . . . . . . . . . . . . . . . . . . . . . . . . . . . . . . . . . . . . . . . . . 57
Deleting a Conversation . . . . . . . . . . . . . . . . . . . . . . . . . . . . . . . . . . . . . . . . . . . . . . . . . . . . 57
Accessing Voicemail . . . . . . . . . . . . . . . . . . . . . . . . . . . . . . . . . . . . . . . . . . . . 59
Voicemail Indicator . . . . . . . . . . . . . . . . . . . . . . . . . . . . . . . . . . . . . . . . . . . . . . . . . . . . . . . . 59
Playing Voicemail Messages . . . . . . . . . . . . . . . . . . . . . . . . . . . . . . . . . . . . . . . . . . . . . . . . 60
Saving a Message . . . . . . . . . . . . . . . . . . . . . . . . . . . . . . . . . . . . . . . . . . . . . . . . . . . . . . . . 61
Settings Options . . . . . . . . . . . . . . . . . . . . . . . . . . . . . . . . . . . . . . . . . . . . . . . . 63
Phone Settings . . . . . . . . . . . . . . . . . . . . . . . . . . . . . . . . . . . . . . . . . . . . . . . . . . . . . . . . . . . 63
Network Settings . . . . . . . . . . . . . . . . . . . . . . . . . . . . . . . . . . . . . . . . . . . . . . . . . . . . . . . . . 65
Upgrading the DiVitas Client . . . . . . . . . . . . . . . . . . . . . . . . . . . . . . . . . . . . . . 69
Verifying Proper Firmware Prior to Installing Client . . . . . . . . . . . . . . . . . . . . . . . . . . . . . . . 69
Alternative Client Installation Method . . . . . . . . . . . . . . . . . . . . . . . . . . . . . . . . . . . . . . . . . . 70
Upgrading the DiVitas Client . . . . . . . . . . . . . . . . . . . . . . . . . . . . . . . . . . . . . . . . . . . . . . . . 75
Adding a Shortcut to the DiVitas Client . . . . . . . . . . . . . . . . . . . . . . . . . . . . . . . . . . . . . . . . 76
Troubleshooting the DiVitas Client . . . . . . . . . . . . . . . . . . . . . . . . . . . . . . . . . . . . . . . . . . . . 79
Uninstalling the DiVitas Client . . . . . . . . . . . . . . . . . . . . . . . . . . . . . . . . . . . . . . . . . . . . . . . 80
Voice-Only Voicemail Access . . . . . . . . . . . . . . . . . . . . . . . . . . . . . . . . . . . . .81
Signing In to the DiVitas Server Voicemail System . . . . . . . . . . . . . . . . . . . . . . . . . . . . . . . 81
Voicemail Options . . . . . . . . . . . . . . . . . . . . . . . . . . . . . . . . . . . . . . . . . . . . . . . . . . . . . . . . . 82
6
DiVitas Client User Guide for Nokia E and N Series Phones, v2.7
Page 7

Setting Up Your Mailbox . . . . . . . . . . . . . . . . . . . . . . . . . . . . . . . . . . . . . . . . . . . . . . . . . . . . 85
Checking Your Voicemail . . . . . . . . . . . . . . . . . . . . . . . . . . . . . . . . . . . . . . . . . . . . . . . . . . . 87
DiVitas Client User Guide for Nokia E and N Series Phones, v2.7
7
Page 8

8
DiVitas Client User Guide for Nokia E and N Series Phones, v2.7
Page 9
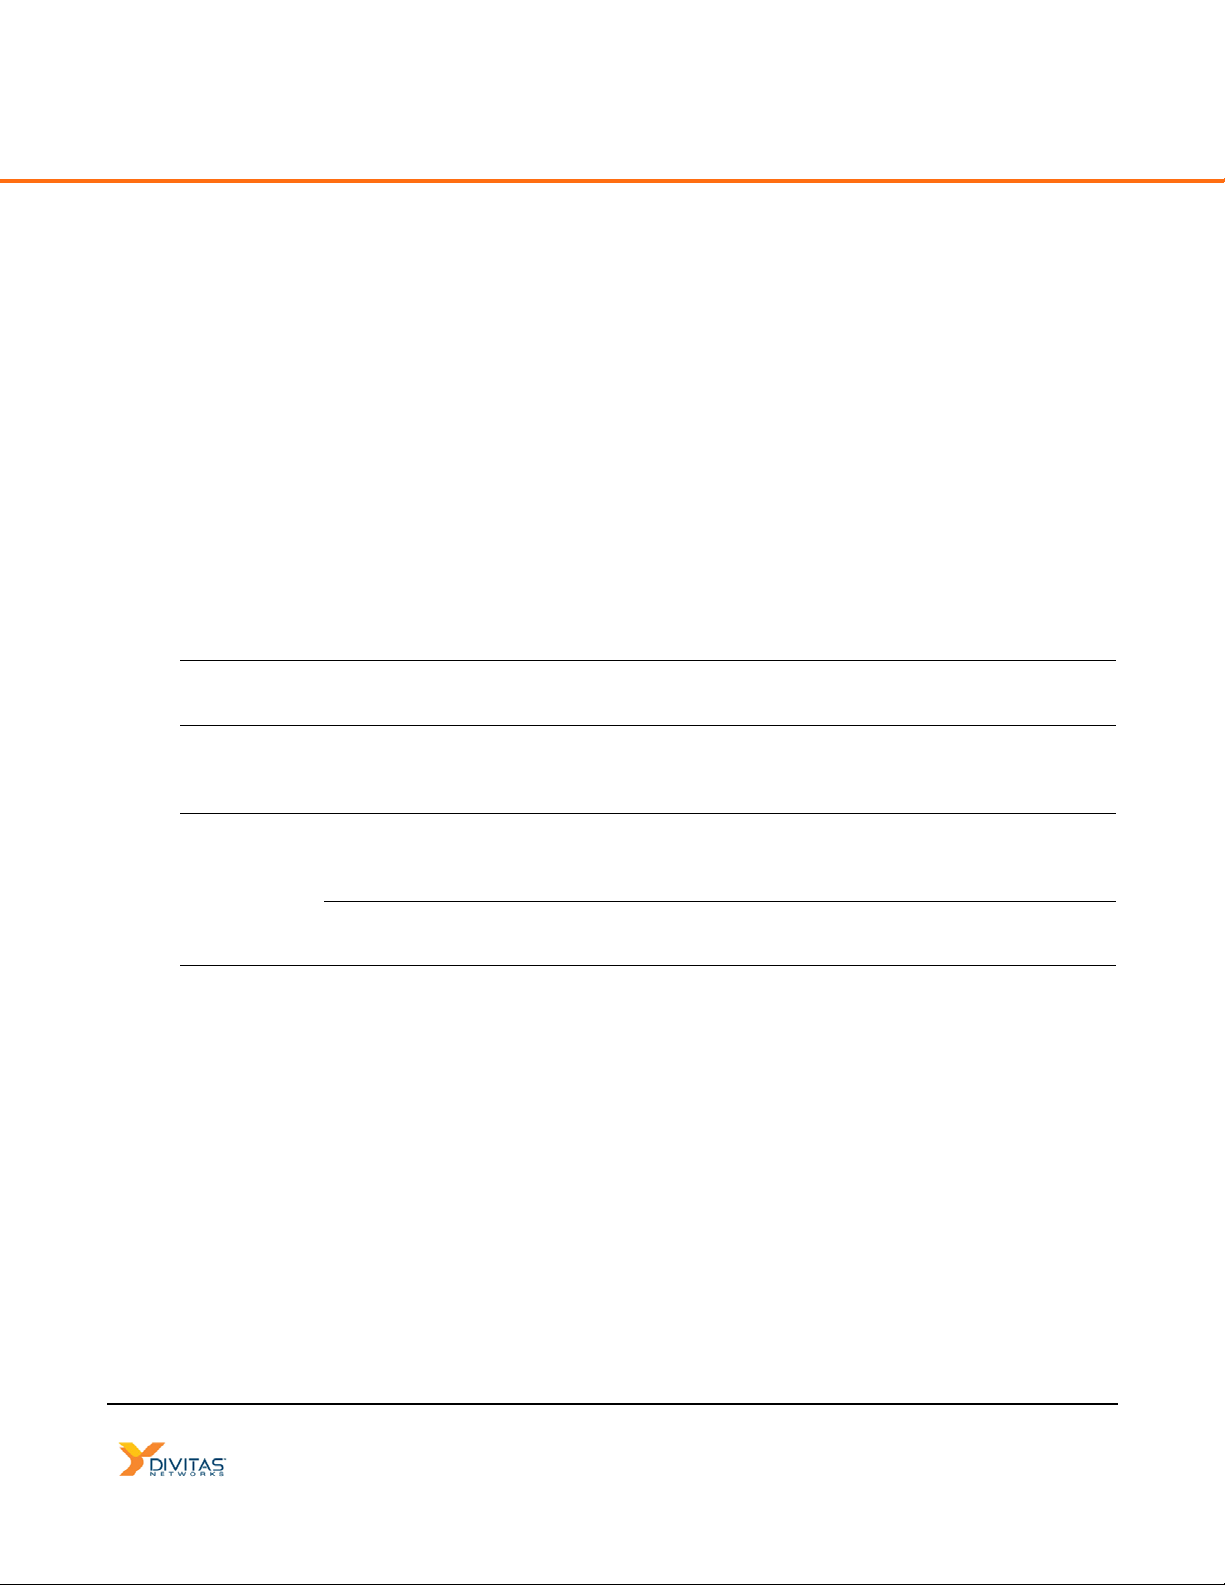
Getting Started
Battery status
Your presence
Call medium
Feature access
Recent calls
(WiFi or Cell)
status
GSM status
icons can be
highlighted to
display a tool tip
Installing the DiVitas Client – Overview . . . . . . . . . . . . . . . . . . . . . . . . . . . . . . . . . . . . . 10
Logging Into the DiVitas Client . . . . . . . . . . . . . . . . . . . . . . . . . . . . . . . . . . . . . . . . . . . 12
Changing Your DiVitas Client Password . . . . . . . . . . . . . . . . . . . . . . . . . . . . . . . . . . . . 13
DiVitas Home Screen . . . . . . . . . . . . . . . . . . . . . . . . . . . . . . . . . . . . . . . . . . . . . . . . . . 14
Accessing Help or Version Information . . . . . . . . . . . . . . . . . . . . . . . . . . . . . . . . . . . . . 17
Locking the Keypad When the DiVitas Client Is Active . . . . . . . . . . . . . . . . . . . . . . . . . 18
Minimizing the DiVitas Client . . . . . . . . . . . . . . . . . . . . . . . . . . . . . . . . . . . . . . . . . . . . . 18
Exiting the DiVitas Client . . . . . . . . . . . . . . . . . . . . . . . . . . . . . . . . . . . . . . . . . . . . . . . . 19
The DiVitas Client extends your corporate PBX to your handset and reduces cellular
costs. The DiVitas Client provides continuous connectivity by automatically detect ing and
selecting the optimal network (WiFi or cellular) over which to route calls.
Figure 1. DiVitas Client Home Screen
Most screen examples in this guide show the Nokia E61i. On some other
supported Nokia E Series handset models, the DiVitas Client dialer and other
DiVitas Client screens appear narrower. On any model, the background color or
skin might be different. However, the DiVitas Client features work as described in
this guide.
DiVitas Client User Guide for Nokia E and N Series Phones, v2.7
9
Page 10

Installing the DiVitas Client – Overview
Getting Started
Installing the DiVitas Client – Overview
Generally, your system administrator will install and configure the DiVitas Client for you.
You can verify whether the DiVitas Client has been installed by trying to launch the client.
■ If the DiVit as Home screen, privacy and billable events notices, or the Enter p assword
dialog appears when you launch the DiVitas Client, this means your account is
already set up, and you can proceed to “Changing Your DiVitas Client Password” on
page 13.
■ If the Nokia disclaimer appears or a screen of DiVitas Client configuration settings
appears (extension number , password, server IP, and mobile number), this means the
application has been installed, but you will need to enter values for these settings
before you can sign in. (See “Entering DiVitas Client Configuration Settings” on
page 73 for more information.)
■ If neither of the above scenarios applies, you may need to install the application on
your handset. The section below offers the simplest method for installing the DiVitas
application. An alternative method appears later in this document.
Installing the DiVitas Client onto the Handset
For a list of supported handset models, please refer to the following URL:
http://www.divitas.com/Product-sup-devices.html
Before installing the DiVitas Client, make sure the Nokia device is running the
correct firware version. (See “Verifying Proper Firmware Prior to Installing Client”
on page 69 for more information.)
Download of a DiVitas Client image during installation or upgrade over a CellData
(packet data) connection can take a long time. If possible, use a WiFi connection
instead. If you do use CellData, leave the handset stationary if possible. Moving
the handset during the download can cause the download to fail, in which case
you will need to start the installation or upgrade process again.
To install and set up the DiVitas Client:
1 On the handset, open the email or SMS message sent by the DiVitas Server.
Contact your system administrator if you do not receive this message.
2 Two links appear within the SMS message – one link connects to the internal IP
address (or FQDN) of the file server, while the other link connects to the external IP
address (or FQDN) of this same server.
10
● If you are inside the firewall, click on the internal link.
DiVitas Client User Guide for Nokia E and N Series Phones, v2.7
Page 11

Installing the DiVitas Client – Overview
Getting Started
● If you are outside the firewall (CellData), click on the external link.
Talk to your system administrator if you are not certain which of the two links you
should select.
3 Follow the instructions on the screen.
Details:
■ If the above installation method is unsuccessful, please refer to “Alternative Client
Installation Method” on page 70.
■ If the handset does not already have “access points” configured (connections for
CellData and WiFi), they will need to be added before you can fully use the DiVitas
Client. See the Nokia guide that came with your handset or refer to the Nokia web site
for information on adding “access points.”
DiVitas Client User Guide for Nokia E and N Series Phones, v2.7
11
Page 12
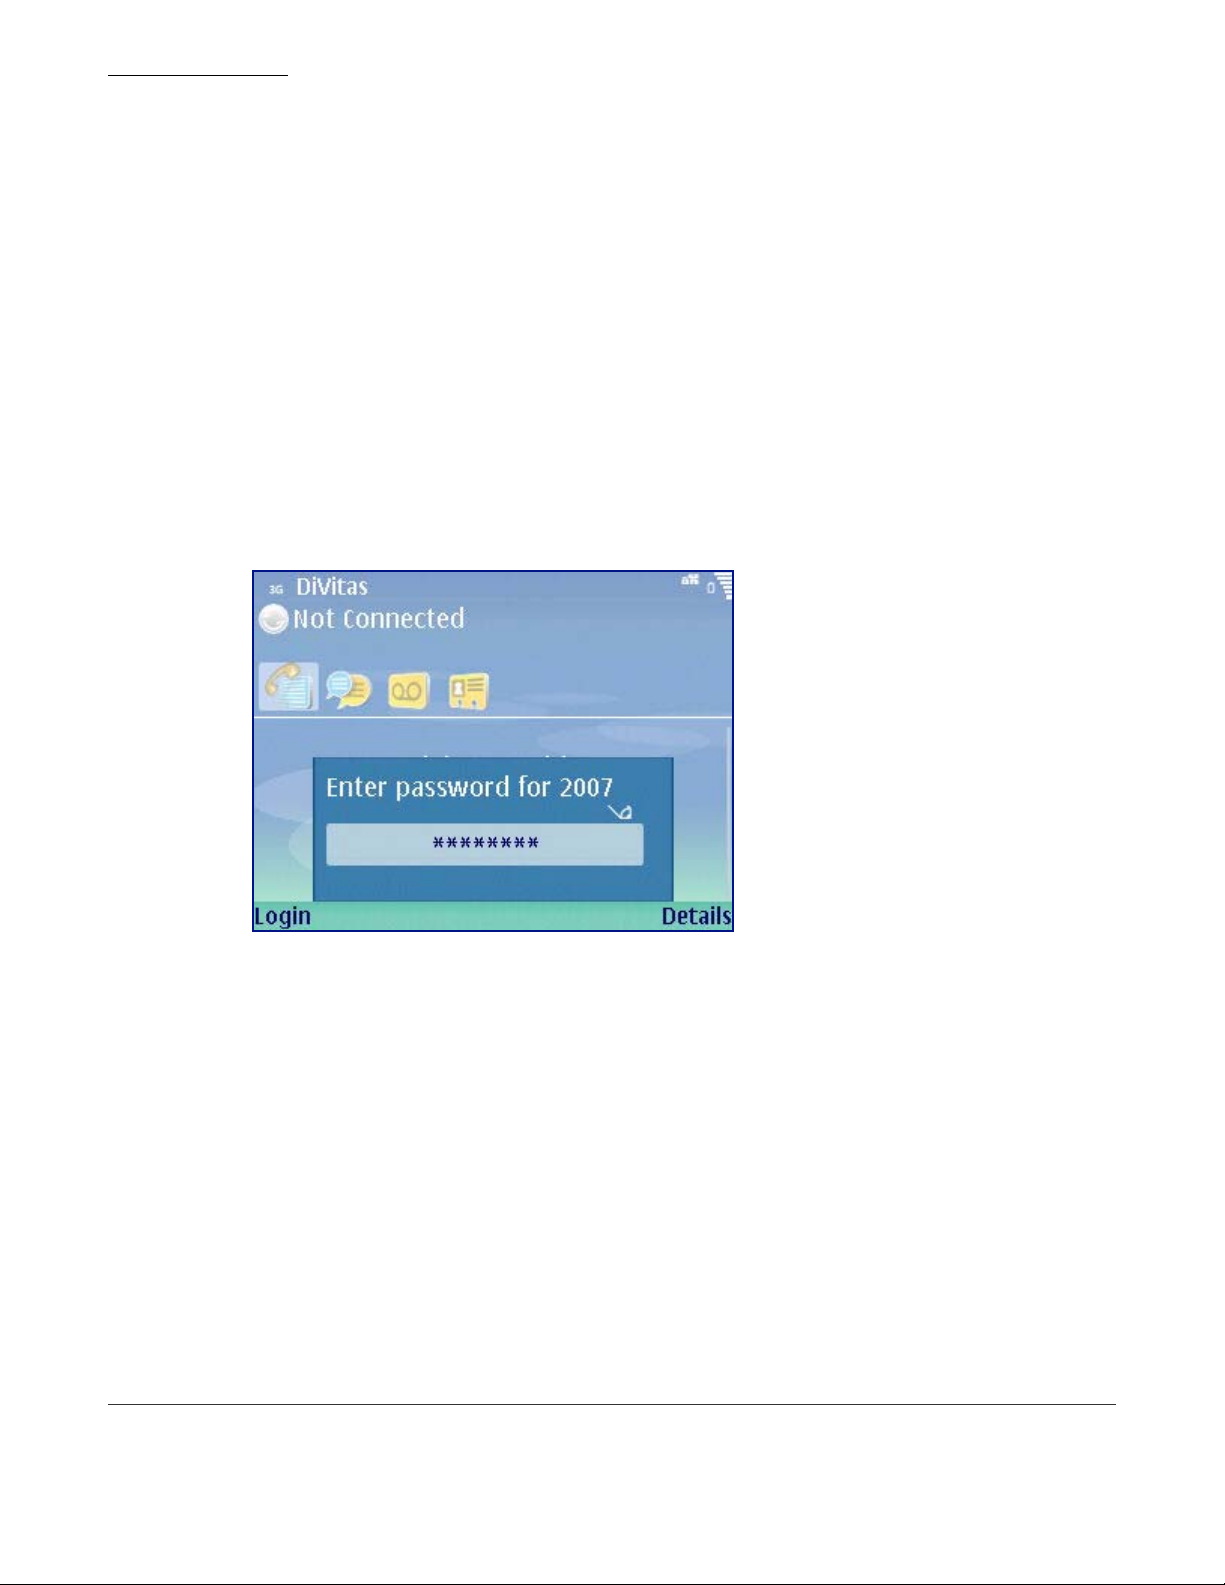
Logging Into the DiVitas Client
Getting Started
Logging Into the DiVitas Client
By default, after it is installed, the DiVitas Client automatically starts when you power on
or reboot your handset.
If you or the server administrator have already configured your client settings and left the
Save password option enabled, you do not need to enter any information to log in. You
are automatically logged into the server after the client starts.
If the Enter password prompt appears:
1 Type your DiVitas password.
2 Press the left selection key to select Login.
Figure 2. DiVitas Sign-in
If some notices appear before the Enter password prompt appears, select OK after
reading each notice. If prompted to select whether to re-display a notice the next time yo u
start the client, select Yes or No. (Press the selection key directly under an option to
select that option.)
Starting the DiVitas Client if it Does Not Automatically Start
If the DiVitas Client does not start automatically:
1 Press the Menu key.
2 Scroll to the Office folder. (For some phone models, the DiVitas Client may be
installed in a second Office folder installed.)
3 Press the Navi™ scroll key to open the folder.
(You also can press the left selection key to select Options, then select Open.)
12
DiVitas Client User Guide for Nokia E and N Series Phones, v2.7
Page 13
4 Scroll to the DiVitas icon:
5 Press the Navi scroll key or select Options > Open to start the DiVitas Client.
The DiVitas Client contacts the DiVitas Server to verify your device and user account
information.
If the Nokia disclaimer or a screen of fields for DiVitas Client settings (extension
number, password, server IP address, and mobile number) appears instead of the
Enter password dialog, you will need to enter these settings before you can log in.
See “Entering DiVitas Client Configuration Settings” on page 73
Changing Your DiVitas Client Password
Your DiVitas Server administrator assigns your DiVitas password when configuring your
DiVitas account. You can change this password.
Changing Your DiVitas Client Password
Getting Started
.
If you change the password during an active call, the call will be dropped.
To change your DiVitas password:
1 While on the DiV it as Home screen, press the lef t selection key to select Options, then
select Change password.
A screen with blank password fields appears.
2 In the Current Password field, enter your current password.
3 In the New Password and Confirm New Password fields, enter your new password.
The password can be an alphanumeric string (4 - 8 characters), with no blanks.
4 Press the left selection key to select Change.
A message informs you that your password was changed successfully. Then, the
Enter password dialog appears, prompting you to log in with the new password.
5 Enter your new password and press the left selection key to select Login.
DiVitas Client User Guide for Nokia E and N Series Phones, v2.7
13
Page 14
DiVitas Home Screen
Getting Started
DiVitas Home Screen
The DiVitas Client’s Home Screen is displayed after you log into the DiVitas Server.
Refer to Figure 1 on page 9 for the locations of the following areas on the Home screen.
GSM / Battery Status
The top row of the DiVitas Home Screen shows the following information:
■ GSM signal availability
■ Connection status
■ Battery power level
Presence Status
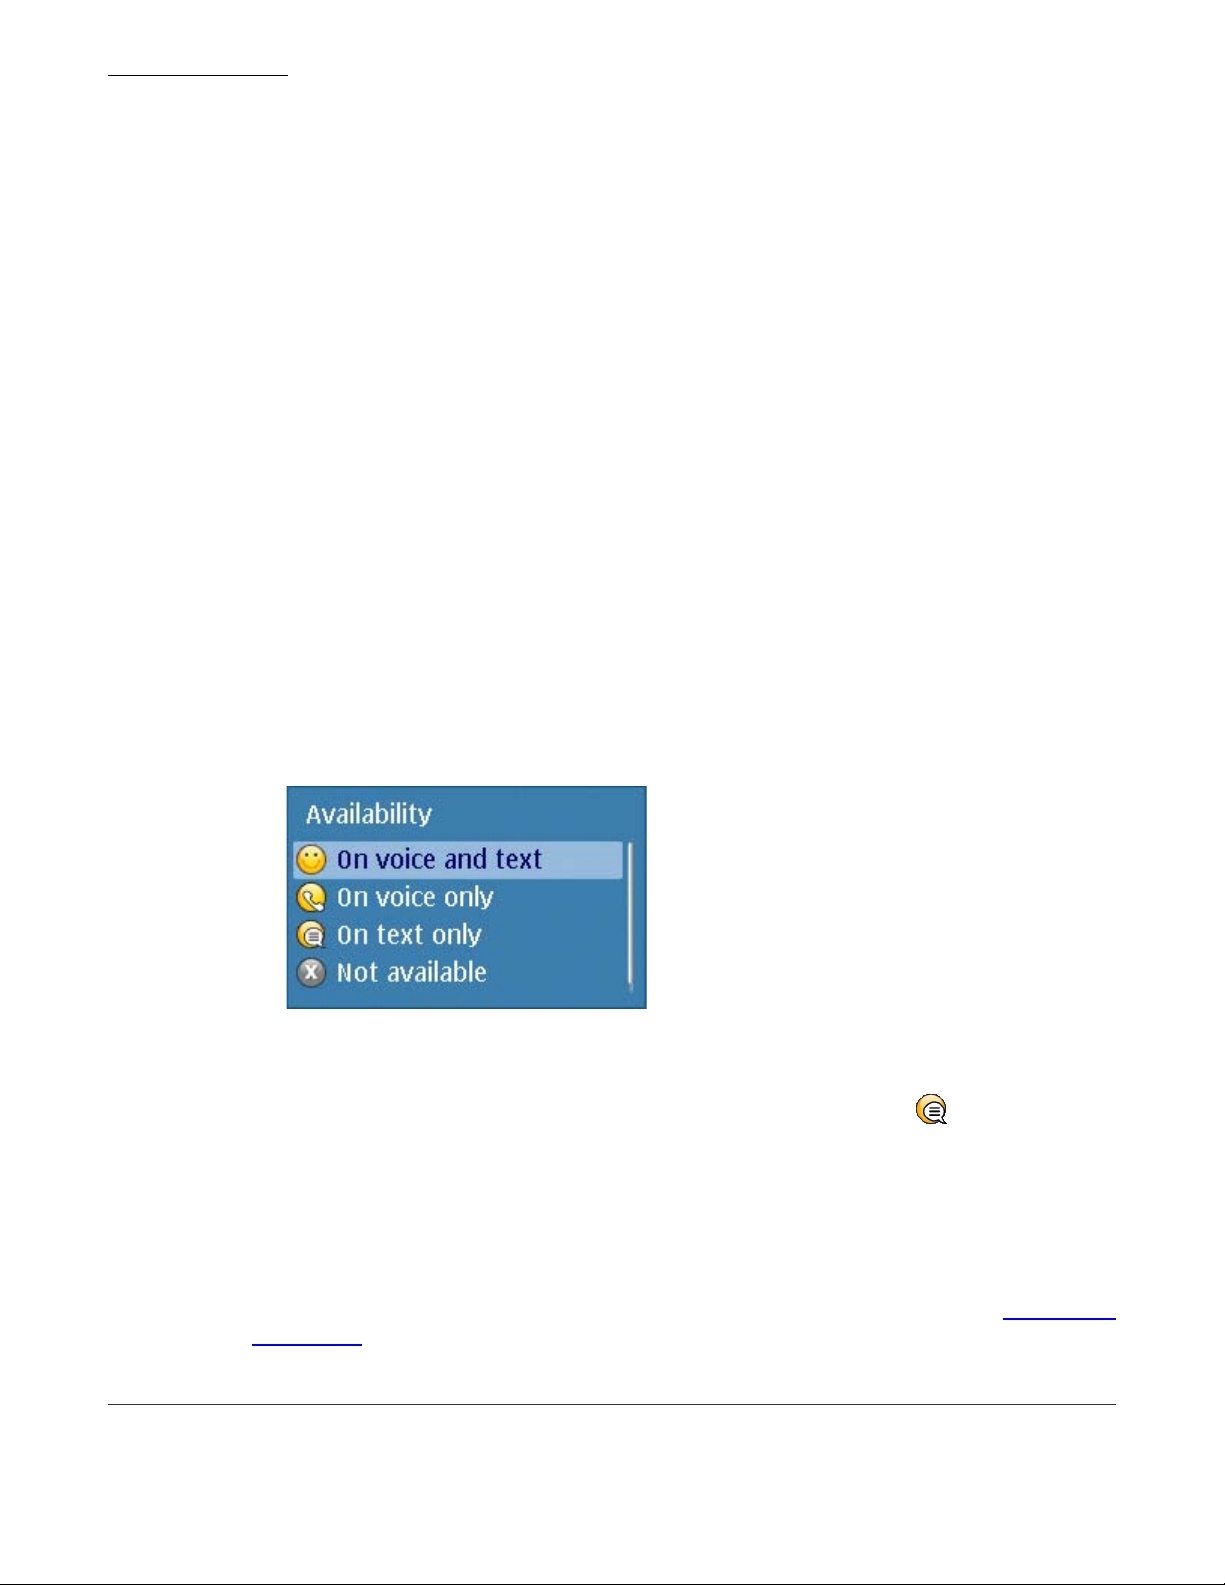
The presence status section of the DiVita s Home screen shows the following information:
■ Your presence (voice and text availability) – The following icons indicate your selected
reachability by voice or text messaging:
Figure 3. Presence Options
The presence icon appears next to your name, both on your handset and on the
handsets of other DiVitas users. For example, if you are unavailable for voice but
available for text, the following icon appears next to your name:
■ Your extension number and name – This is the DiVitas extension with which you
logged in, and the user name that is associated with your extension on the DiVitas
Server.
■ Your status message – The same message appears under your name both on your
handset and on the handsets of other DiVitas users.
14
For more information about your DiVitas presence and status messages, see “Presence”
on page 21.
DiVitas Client User Guide for Nokia E and N Series Phones, v2.7
Page 15
Call Medium
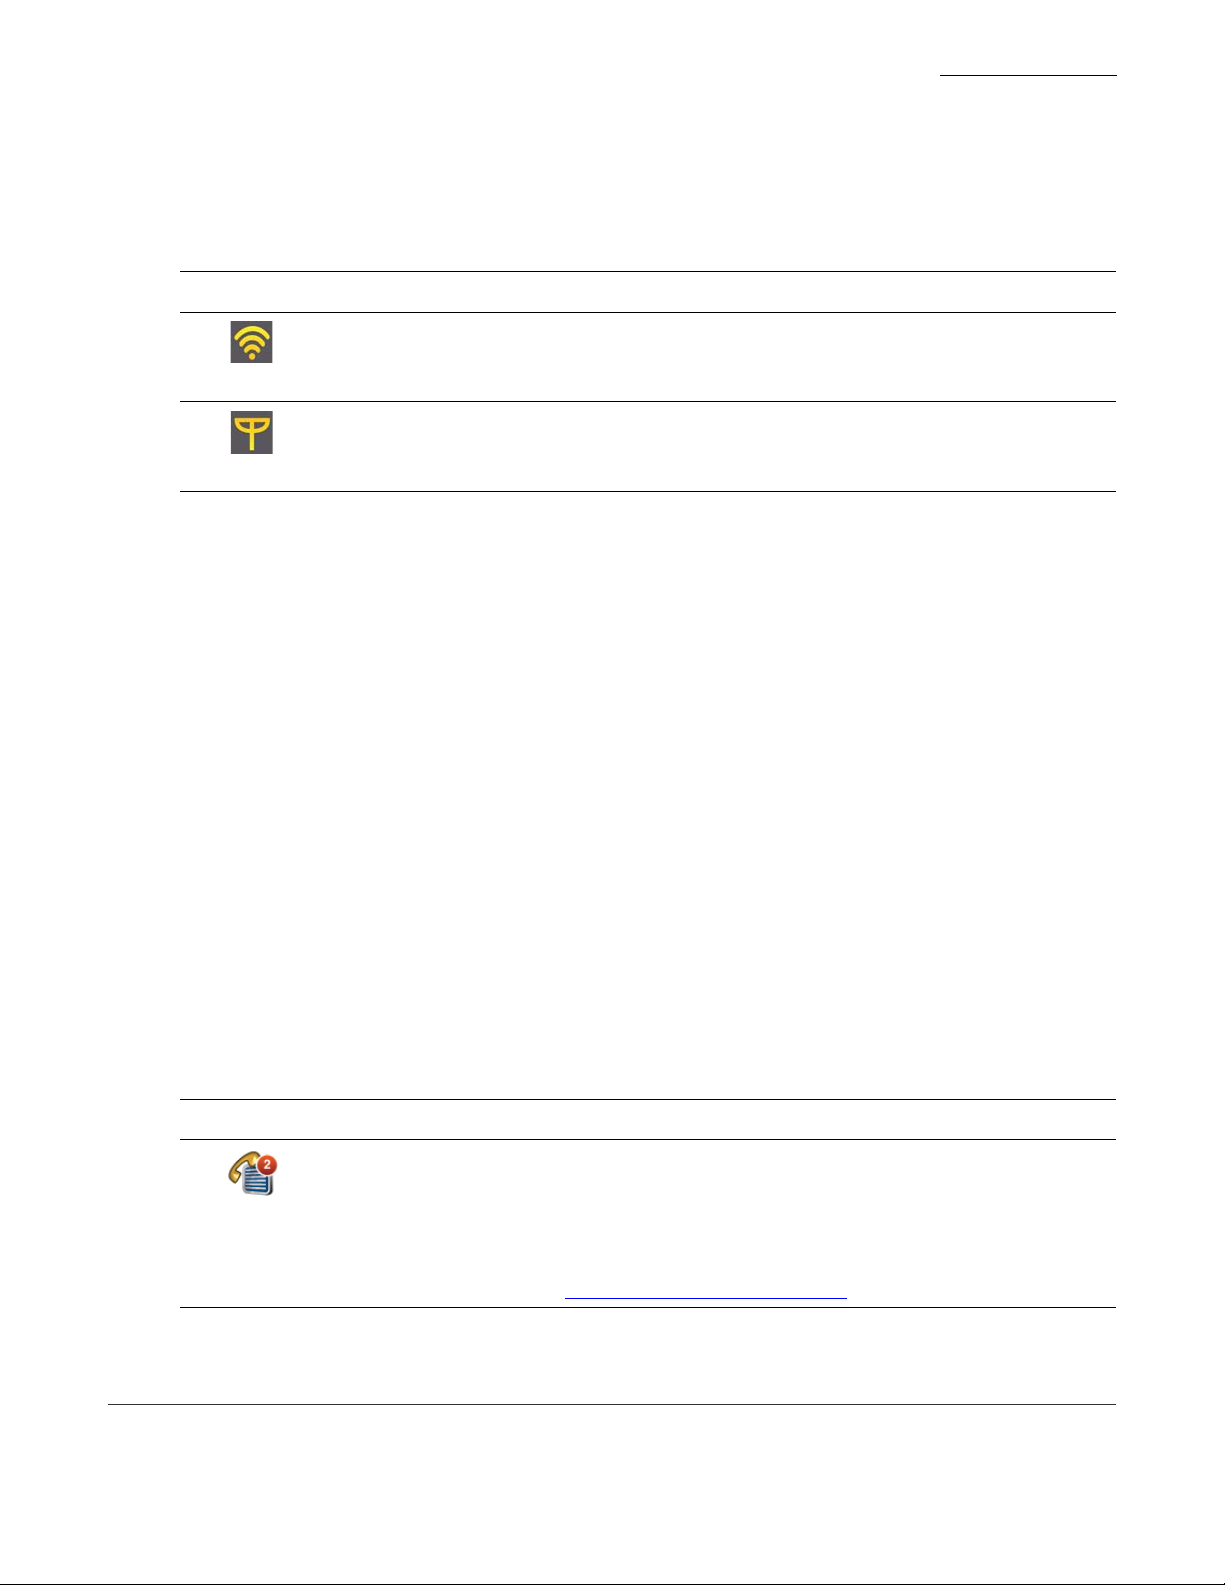
The call medium icon indicates the medium (WiFI or cell) available for new calls.
Table 1. Call Medium
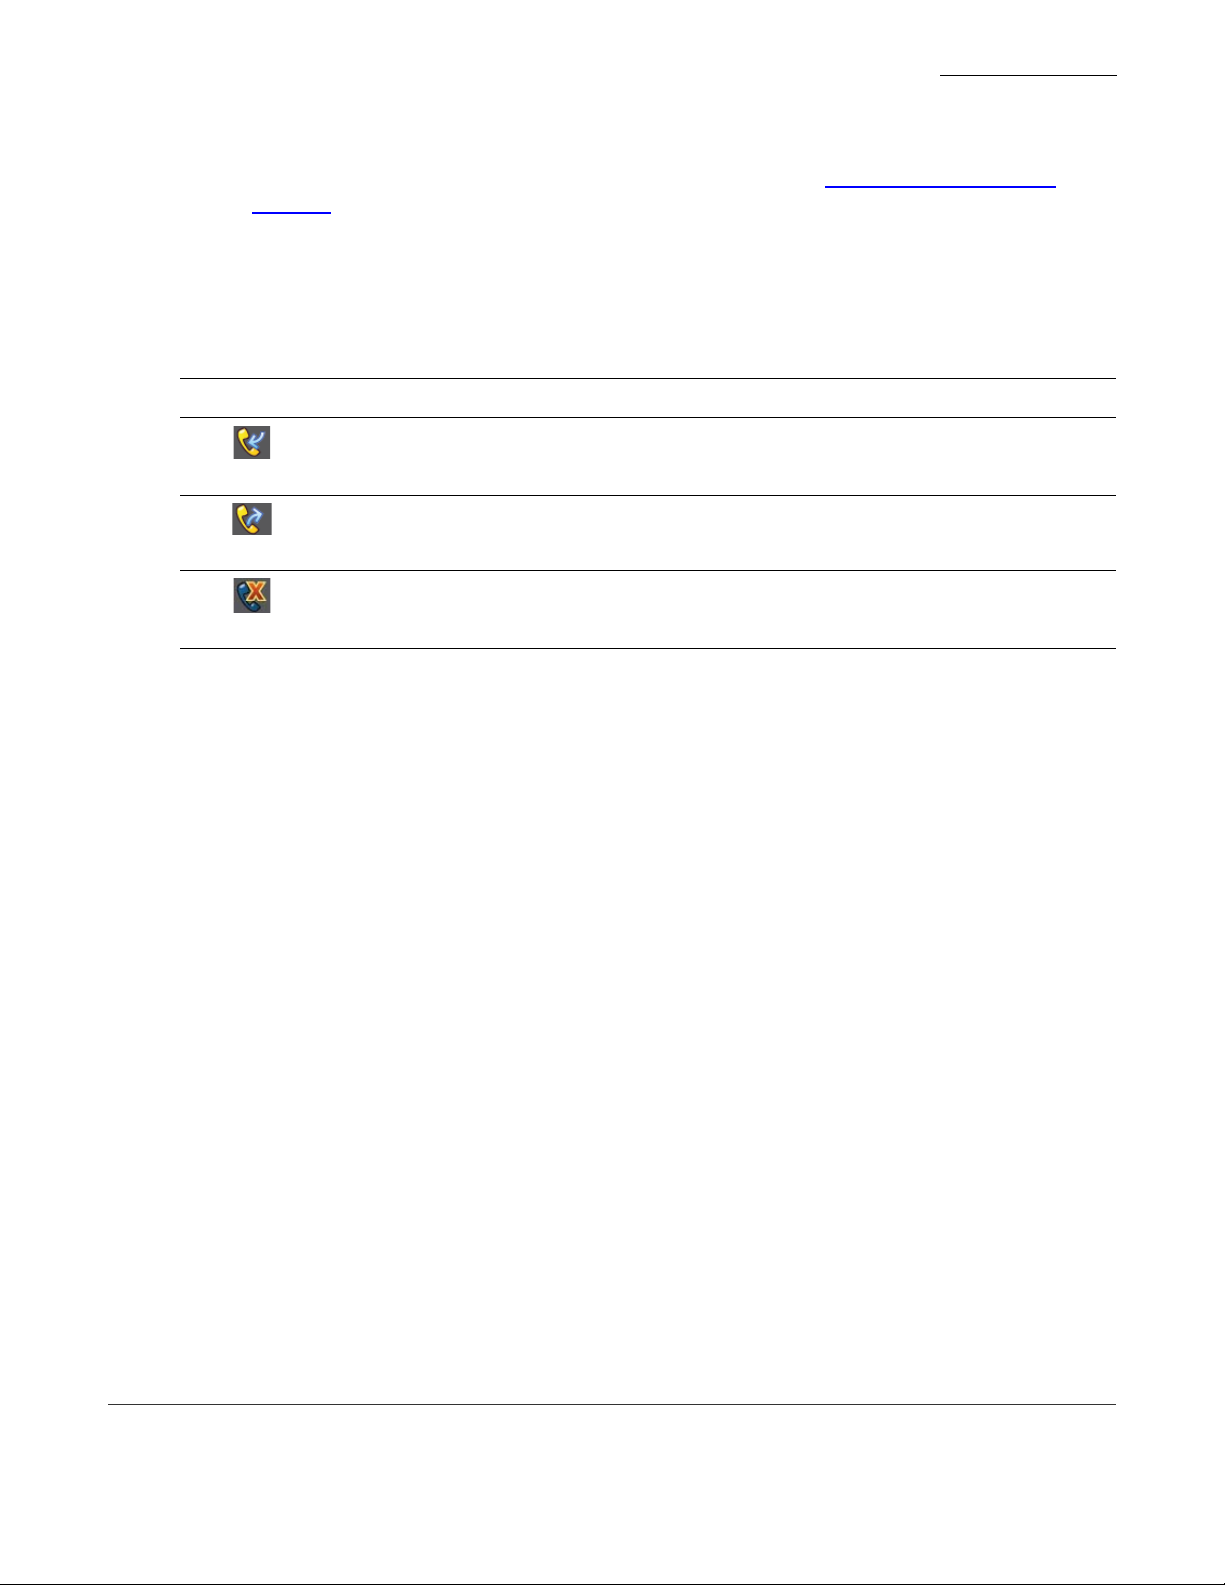
Indicator Description
New calls you place through the DiVitas dialer will go over WiFi.
New calls you place through the DiVitas dialer will go over cellular voice (GSM).
Locking Calls to a Specific Network
A key benefit of the DiVitas Client is that it will automatically locate the strongest network
(i.e. WiFi or cellular) and route calls over that network. However, in some environments,
(such as an area that has spotty WiFi and poor cellular coverage), users may want to lock
calls to one network or the other . Simply select Options > Lock calls to, and then select
either WiFi or Cell. (Note that the default setting is Auto.)
DiVitas Home Screen
Getting Started
When this feature is enabled, it will prevent calls from roaming to the stronger network.
Instead of roaming to cellular when the user walks out of WiFi range during an active call,
the user will hear RTP-loss music, and if the user has not returned to an area with
adequate WiFi coverage within two minutes, the call will be dropped. If, however , the user
locks calls to cell and comes within range of WiFi, calls will stay connected on cell.
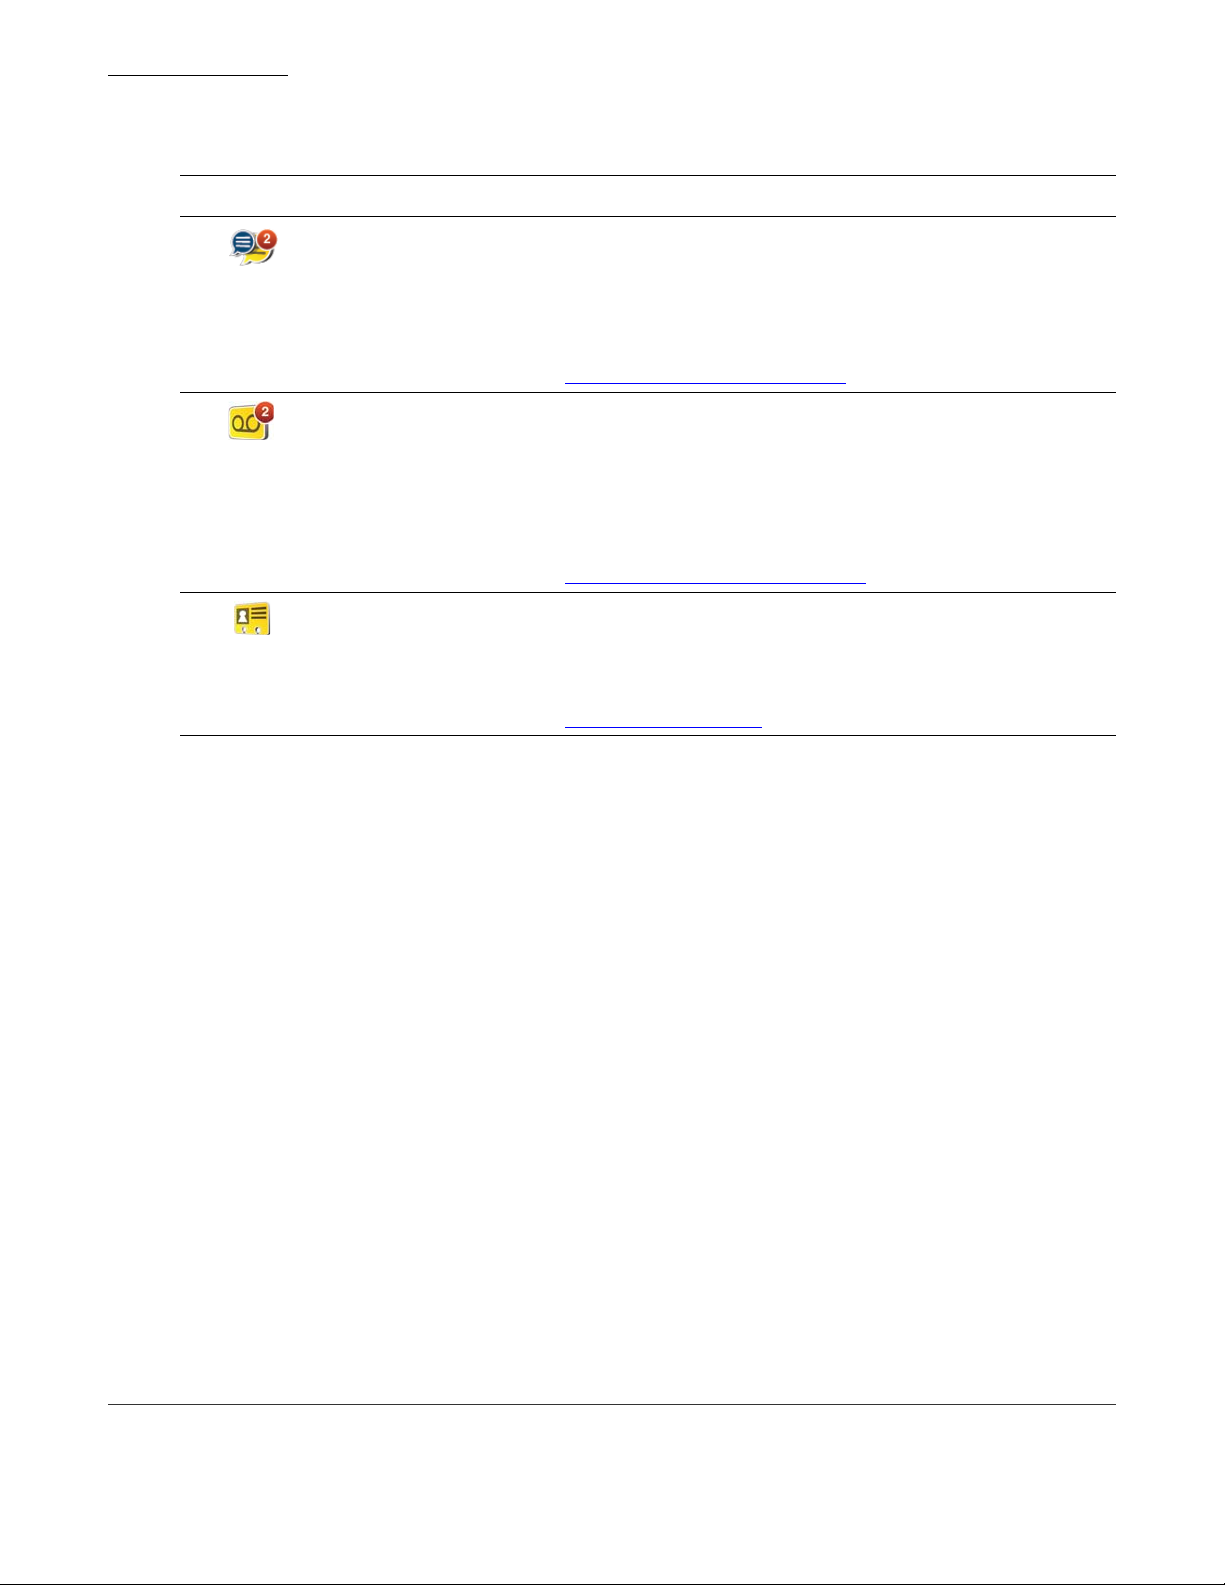
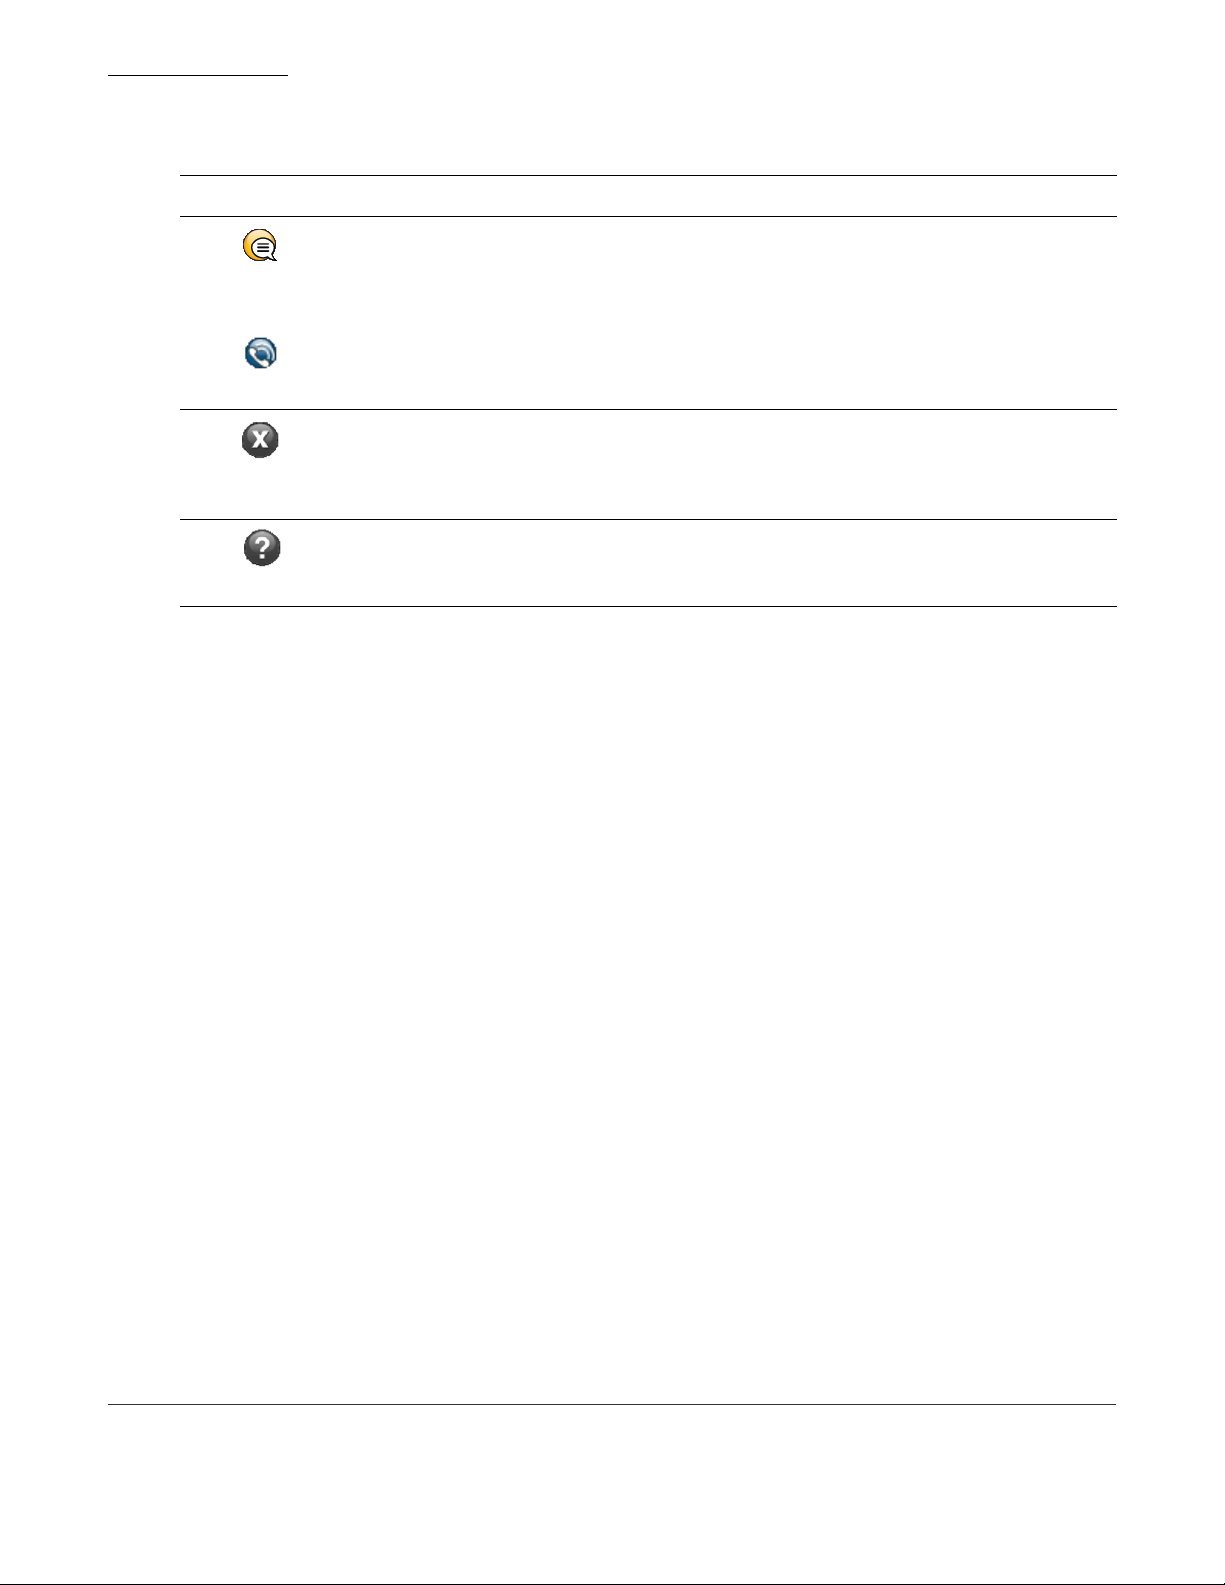
Feature Access Icons
Table 2 lists the feature access icons. By selecting the icon from the DiVit as home screen,
a tool tip appears.
Table 2. Feature Access Icons
Icon Description
Provides access to the DiVitas Call Log screens. Separate screens are provided for
missed calls, outgoing calls, and incoming (or received) calls.
The number displayed at the upper right corner of the icon indicates the number of new
missed calls. If the number of missed calls exceeds 10, the number will be replaced with
a “+” sign. If no number is displayed, you do not have any new missed calls.
(For more information, see “Using the Call Log” on page 49
.)
DiVitas Client User Guide for Nokia E and N Series Phones, v2.7
15
Page 16
DiVitas Home Screen
Getting Started
Table 2. Feature Access Icons (continued)
Icon Description
Provides access to the DiVitas Messaging screen.
From the Messaging screen, you can have text conversations with other DiVitas users.
The number displayed at the upper right corn er of the icon indicates new text me ssages.
If the number of new text messages exceeds 10, the number will be replaced with a “+”
sign. If no number is displayed, you do not have any new text messages.
(For more information, see “Instant Messaging” on pag e53
.)
Provides access to your DiVitas voicemail box.
From the Voicemail screen, you can download and play voicemails, as well as return
calls.
The number displayed at the upper right corner of the icon indicates new voicemails. If
the number of new voicemails exceeds 10, the number will be replaced with a “+” sign. If
no number is displayed, you do not have any new voicemails.
(For more information, see “Accessing Voicemail” on page 59
.)
Provides access to the DiVitas Client view of your Contacts list.
From the DiVitas Contacts screen, you can view presence availability for other DiVitas
users. Y ou can also send text messages to other DiVitas users and place calls to DiV it as
users and non-DiVitas contacts.
(For more information, see “Contacts” on page 43
.)
To navigate to a feature:
1 Scroll to the feature icon to select it.
2 Do one of the following:
Recent Calls
This section of the DiVitas Home screen lists the most recent call activity. All call types
(dialed, received, and missed) are included.
The caller ID and the time of the most recent call also are shown, and for call log entries
from other DiVitas users, the caller’s voice and text availability is shown.
● Press the Navi scroll key.
● With the feature access icon selected (highlighted), select the menu option to
display the screen:
◆ Options > Missed call log
◆ Options > Message list
◆ Options > Voice mail list
◆ Options > Contacts
16
DiVitas Client User Guide for Nokia E and N Series Phones, v2.7
Page 17
For multiple calls to or from the same number, only the most recent call is shown. To see
the individual calls, navigate to the Call Log Screens. (See “Using the Call Log” on
page 49.)
Icons appear next to the call entry to indicate whether the most recent call was received,
sent, or missed. These icons are shown in Table 3 below.
Table 3. Call Log Icons
Indicator Description
Indicates a received call. The call was answered in the DiVitas Client on the handset.
Indicates an outgoing call. The call was initiated from your DiVitas Client extension on
the handset.
Indicates a missed call. The call either was not answered or was answered by your
voicemail.
Accessing Help or Version Information
Getting Started
You can return a call by selecting the call log entry, then either pressing the Call key or
selecting Options > Call.
If the caller is another DiVitas user, you also can send a text message by selecting the
call log entry, then selecting Options > Send message.
Accessing Help or Version Information
The DiVitas Client has online help, which you can access when the client is active. To
access the help:
1 From almost any of the DiVitas screens, press the left selection key to display the
Options menu.
2 Select Help.
To display information about the DiVitas Client version that is running on the handset:
1 From the DiVitas Home screen, press the left selection key to display the Options
menu.
2 Select About.
DiVitas Client User Guide for Nokia E and N Series Phones, v2.7
17
Page 18
Locking the Keypad When the DiVitas Client Is Active
Getting Started
Locking the Keypad When the DiVitas Client Is Active
If you need to lock the handset’s keypad but you want the DiVitas Client to be able to
receive calls while the keypad is locked, you can do so from within the client.
You can answer calls even when the keypad is locked. In this case, the keypad is
automatically re-locked after the call is ended.
Non-slider Models
To lock the keypad on Nokia models that do not have a sliding face (e.g. E71, E90) while
the DiVitas Client is active by doing the following:
1 From almost any DiVitas screen except the Contact screen and the Settings screen,
select Options > Lock keypad.
To unlock the keypad:
1 Press the left selection key (Unlock).
2 Press the function key.
Slider Models
Some models have a sliding face (e.g. E66, N95). These models do not have a Lock
keypad menu option. Instead, to lock the keypad, simply close the slider and select the
Yes soft key to confirm
If you are on a call when you close the keypad, the call is ended. This is true for
calls on the DiVitas Client dialer and for calls on the handset’s native dialer.
To unlock the keypad, open the slider and then select the OK soft key to confirm.
1
.
Minimizing the DiVitas Client
To minimize the DiVitas Client, press the End key when you are not on a call.
Caution! When you are on a call, the function of the End key is to hang up
the call.
1. This confirmation message does not appear on the E66 handset.
18
DiVitas Client User Guide for Nokia E and N Series Phones, v2.7
Page 19

To re-display the DiVitas Client again:
1 Press and hold the Menu key to display the list of applications that are running on the
handset.
2 Select the DiVitas icon
1
3 Press the Navi scroll key.
Exiting the DiVitas Client
To exit the DiVitas Client:
1 From the DiVitas Home screen, select Options > Exit.
A confirmation message is displayed.
2 Confirm or cancel the exit:
Exiting the DiVitas Client
Getting Started
.
● To exit, press the left selection key to select Yes.
● To cancel the exit, press the right selection key to select No.
It might take a few seconds for the exit to be completed. You will still be able to place calls
through the mobile number, but you will no longer be able to place or receive calls
through the DiVitas Client without re-launching the application.
1. If you need to minimize the DiVitas Client during an active call, follow this same procedure but select the Standby icon.
DiVitas Client User Guide for Nokia E and N Series Phones, v2.7
19
Page 20

Exiting the DiVitas Client
Getting Started
20
DiVitas Client User Guide for Nokia E and N Series Phones, v2.7
Page 21
Presence
Presence Indicators . . . . . . . . . . . . . . . . . . . . . . . . . . . . . . . . . . . . . . . . . . . . . . . . . . . 21
Changing Your Presence . . . . . . . . . . . . . . . . . . . . . . . . . . . . . . . . . . . . . . . . . . . . . . . 22
Changing Status Messages . . . . . . . . . . . . . . . . . . . . . . . . . . . . . . . . . . . . . . . . . . . . . 23
Your availability to be contacted through the DiVitas Client is managed by your presence.
Every DiVitas user has the following types of presence:
■ Voice availability – Controls whether calls to your extension ring your handset or go
directly to voicemail
■ Text availability – Controls whether new instant messages (IMs) appear briefly in a
popup window in the client when they are sent
The first time you sign in to the DiVitas Server, both types of presence are enabled by
default. You can individually disable or re-enable each type of presence.
Presence Indicators
Presence information is indicated in the DiVitas Client with icons and with your status
message. Presence information enables DiVitas users to assess the availability of one
another, as well as preferred communication mode (i.e. voice or text).
Presence icons are shown below in Table 4. These icons (and status messages) appear
on your handset in the status area at the uppe r left of the DiVitas Client, near your name.
They also appear on the handsets of other DiVitas users in the recent call list, contacts
list, and next to conversations in the Messaging screen.
Table 4. DiVitas Client Availability Icons
Presence Icon Description
Available for voice calls and text messages.
Available for voice calls only.
New text messages will not appear in pop-up windows but will instead be queued and
accessible from the Messaging screen.
DiVitas Client User Guide for Nokia E and N Series Phones, v2.7
21
Page 22
Changing Your Presence
Presence
Table 4. DiVitas Client Availability Icons (continued)
Presence Icon Description
Available for text messages only.
New text messages will briefly appear in a pop-up windows along with an auditory
notification. Calls to your extension will be fowarded to your DiVitas voicemail box.
Note that the Missed call icon does not get updated when calls are missed.
On a call.
Not available for voice calls or text messages.
into the DiVitas Server.
Calls to your extension will be sent to voicemail and text messages will not appear in
pop-up windows.
Operation request is still pending at the server.
Changing Your Presence
By default, the first time you sign into the DiVitas Server, you are available for both voice
and text.
To change your presence:
1 Display the Home screen, if not already disp layed. (From most other screens, you can
select Home.)
2 Display the presence options by doing either of the following:
This icon appears when you are not logged
22
● Scroll to the status area. This is the area that shows your extension and user
name. Press the Navi scroll key.
● Scroll to the status area and select Options > Change presence.
The following menu is displayed.
DiVitas Client User Guide for Nokia E and N Series Phones, v2.7
Page 23
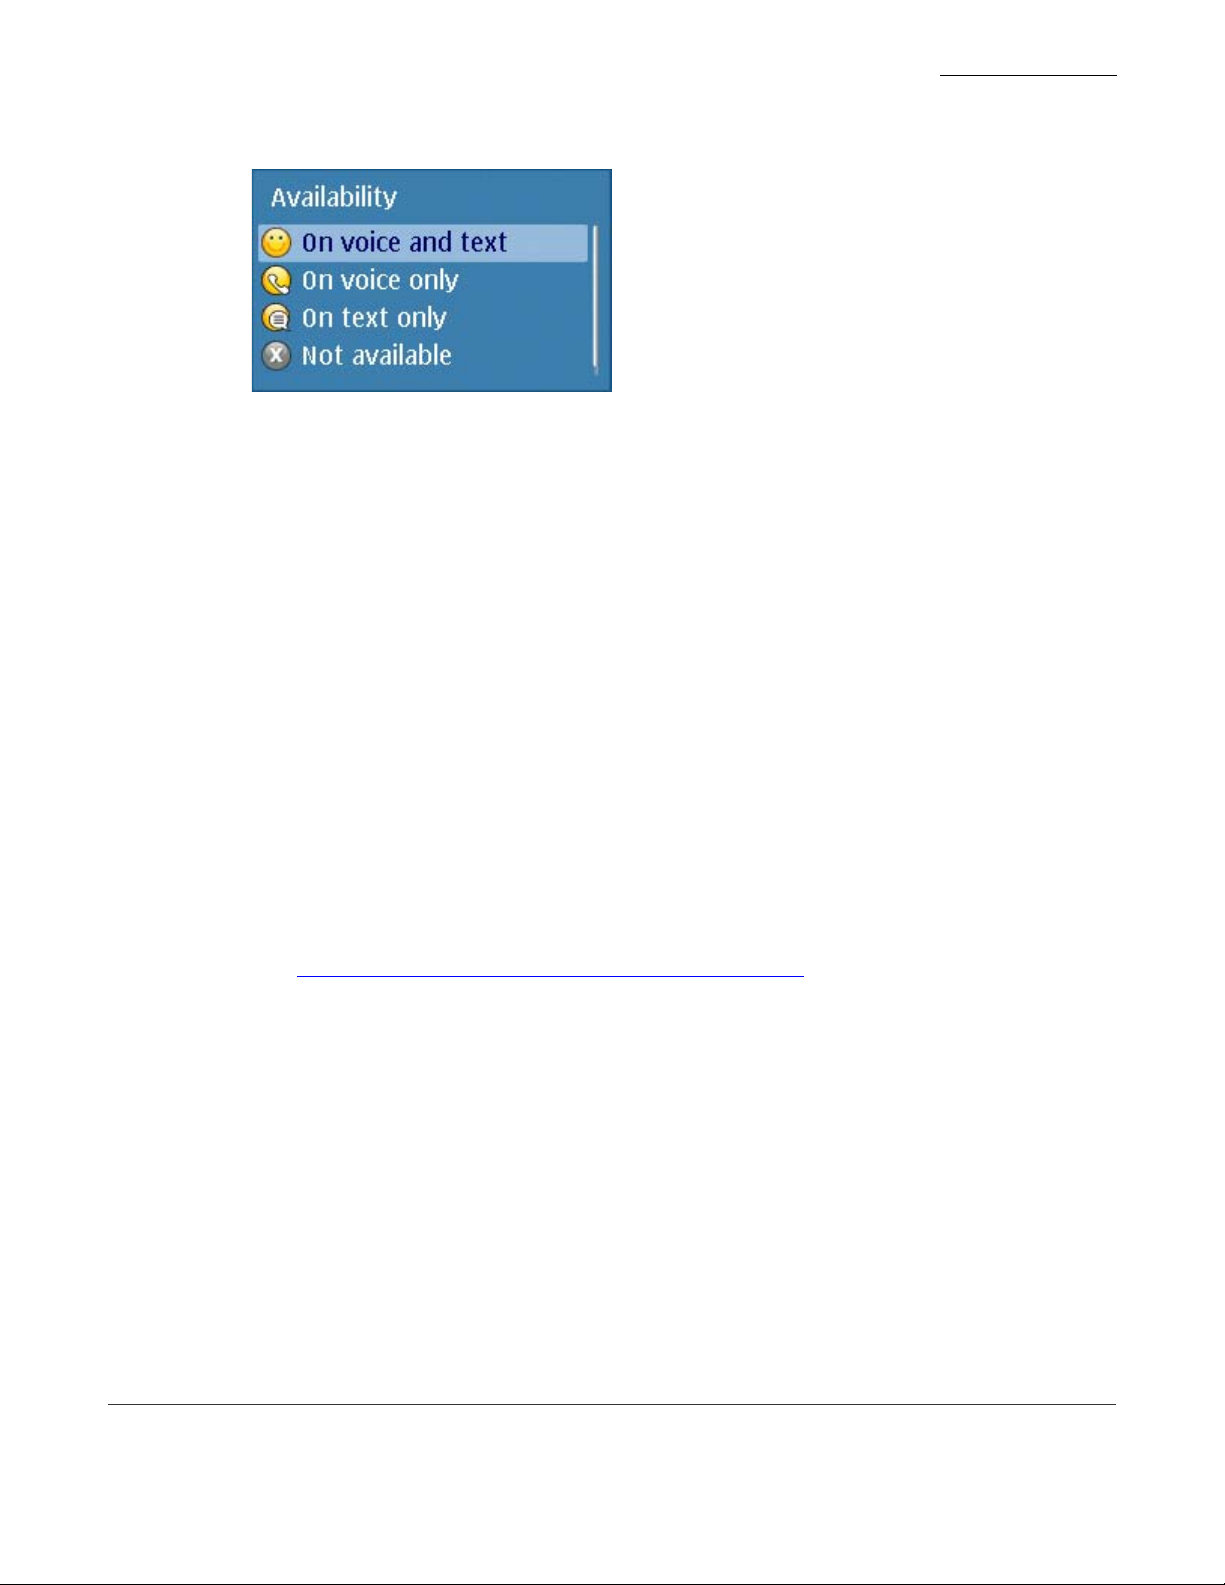
Figure 4. Presence Menu
3 Select an option.
4 Press the Navi scroll key or select OK.
Changing Status Messages
Your status message (personal message) is displayed on your handset in the status area
of the Home screen, and under your user name on other DiVitas users’ handsets.
Changing Status Messages
Presence
The DiVitas Client comes with the following status messages by default:
■ In the office
■ In a meeting
■ Out of the office
■ On vacation
The “In the office” message is displayed by default.
See “Changing the Text of a St atus Message” on page 24
customized status message.
Selecting Another Status Message
To select a different message:
1 On the DiVitas Home screen, scroll to the user status area. (See Figure 1 on page 9.)
2 Select Options > Personal message > Select message.
The status messages are displayed.
for details on creating your own
3 Scroll to the message you want to display and select OK.
DiVitas Client User Guide for Nokia E and N Series Phones, v2.7
23
Page 24

Changing Status Messages
Presence
Changing the Text of a Status Message
You can change the text of the currently-selected status message to create your own
customized message. However, the DiVitas Client supports only four messages, so in
order to create a customized message, you must overwrite an existing one. To do so:
1 On the DiVitas Home screen, scroll to the user status area. (See Figure 1 on page 9.)
2 Select Options > Personal message > Edit message.
An edit window appears, with the message highlighted for editing.
3 Edit the desired message text.
4 Select OK to save the changes or Cancel to cancel them.
The status message is changed.
24
DiVitas Client User Guide for Nokia E and N Series Phones, v2.7
Page 25
Using the DiVitas Dialer
Accessing the DiVitas Dialer Screen . . . . . . . . . . . . . . . . . . . . . . . . . . . . . . . . . . . . . . . 25
Making a Call . . . . . . . . . . . . . . . . . . . . . . . . . . . . . . . . . . . . . . . . . . . . . . . . . . . . . . . . 25
Answering a Call . . . . . . . . . . . . . . . . . . . . . . . . . . . . . . . . . . . . . . . . . . . . . . . . . . . . . . 28
Ending a Call . . . . . . . . . . . . . . . . . . . . . . . . . . . . . . . . . . . . . . . . . . . . . . . . . . . . . . . . . 29
Placing a Call on Hold . . . . . . . . . . . . . . . . . . . . . . . . . . . . . . . . . . . . . . . . . . . . . . . . . . 30
Transferring a Call . . . . . . . . . . . . . . . . . . . . . . . . . . . . . . . . . . . . . . . . . . . . . . . . . . . . . 30
Enabling the Loudspeaker . . . . . . . . . . . . . . . . . . . . . . . . . . . . . . . . . . . . . . . . . . . . . . 31
Muting the Microphone . . . . . . . . . . . . . . . . . . . . . . . . . . . . . . . . . . . . . . . . . . . . . . . . . 31
Managing Multiple Calls . . . . . . . . . . . . . . . . . . . . . . . . . . . . . . . . . . . . . . . . . . . . . . . . 33
Toggling a Call Between the Handset and an IP Desk Phone . . . . . . . . . . . . . . . . . . . 35
Star Codes for Common Features . . . . . . . . . . . . . . . . . . . . . . . . . . . . . . . . . . . . . . . . 36
The DiVitas dialer enables you to make and answer calls. You can make and receive calls
to and from DiVitas extensions and non-DiVitas numbers.
Accessing the DiVitas Dialer Screen
The DiVitas Dialer screen is displayed automatically when you dial or answer a call. You
also can access the DiVitas Dialer screen from other feature screens (except the Home
screen) by scrolling to the following tab:
Making a Call
You can place a call from almost any screen that displays DiVitas contacts: Contacts
screen, Messaging screen, Voicemail screen, Call Log screen, or Recent Call List.
The call medium icon indicates the medium, or connection type, that the DiV itas Client will
use for the call (see Table 5 on page 26).
DiVitas Client User Guide for Nokia E and N Series Phones, v2.7
25
Page 26
Making a Call
Using the DiVitas Dialer
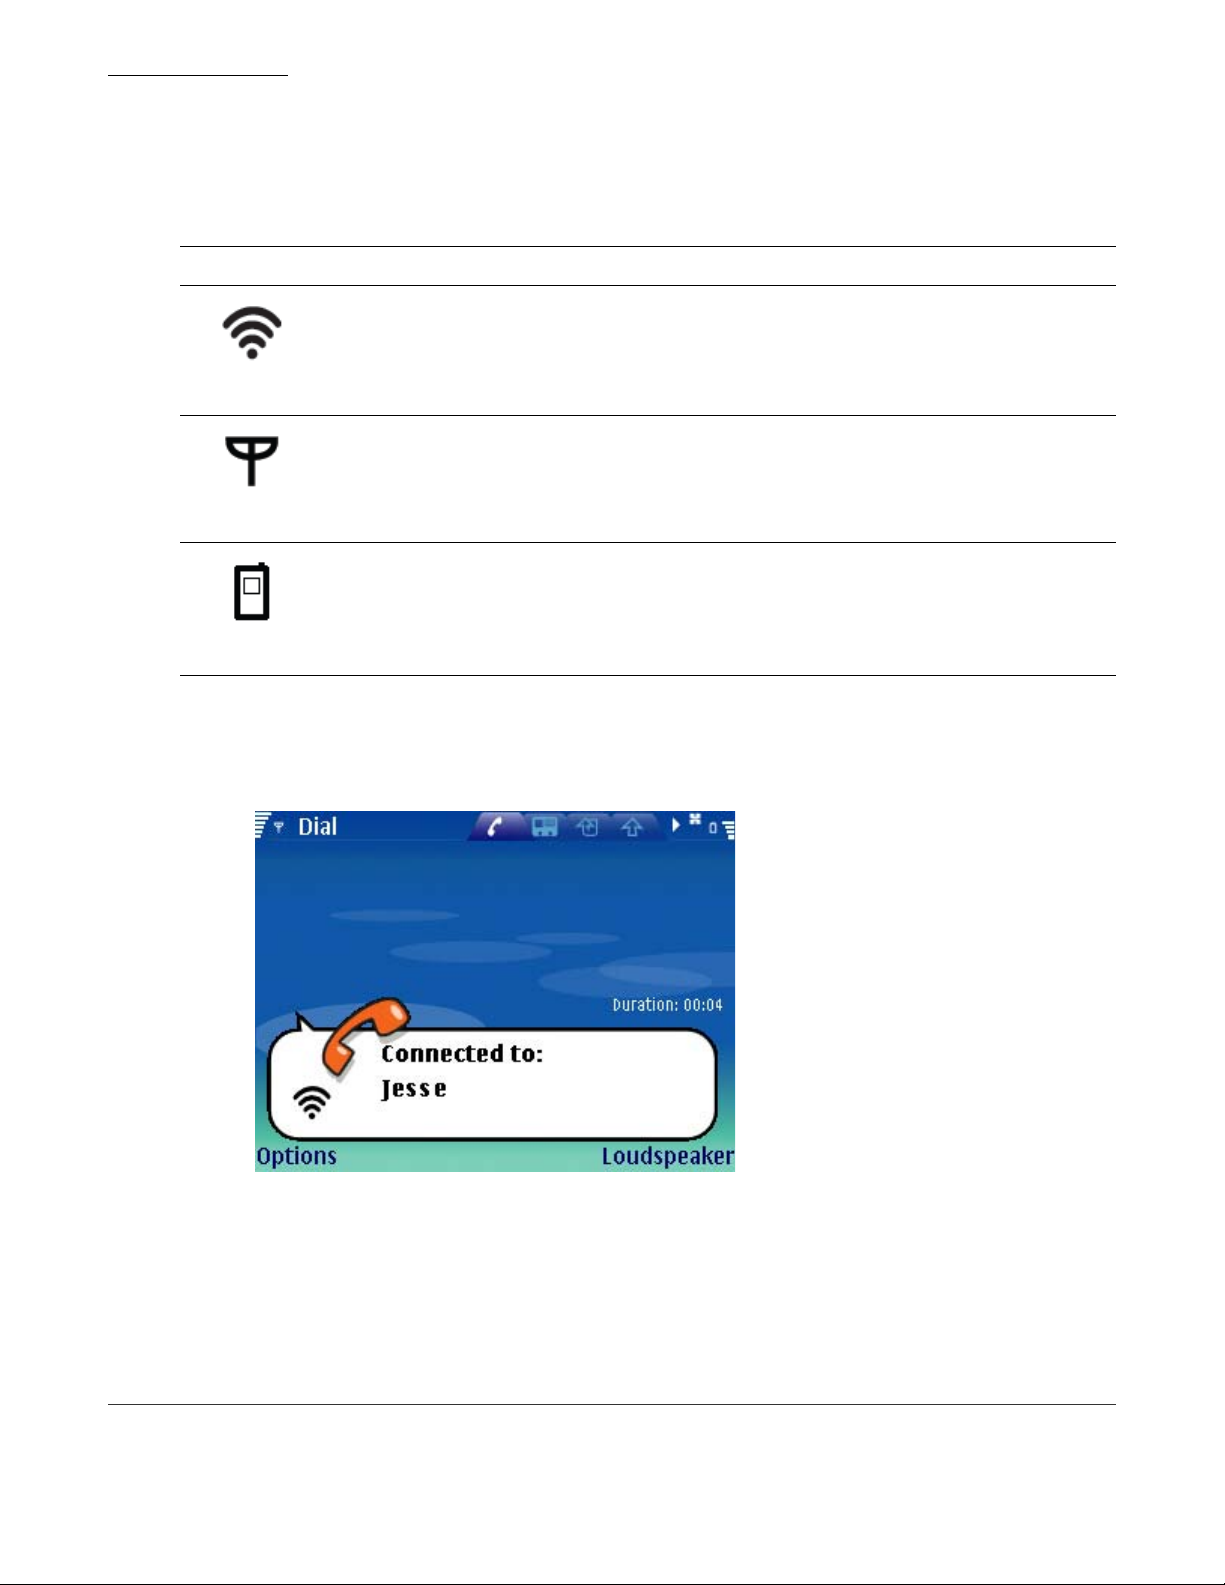
When a call is active, a call connection icon indicates the type of connection being used
for the call:
Table 5. Call Connection
Indicator Description
The call is on WiFi and is being managed by the DiVitas Server.
The call is on cellular and is being managed by the DiVitas Server.
The call is on cellular but is not being managed by the DiVitas Server.
In the following example, a call is on WiFi and is being managed by the DiVitas Server.
Figure 5. DiVitas Dialer screen with an Active Call on WiFi
26
DiVitas Client User Guide for Nokia E and N Series Phones, v2.7
Page 27

Dial by Typing the Phone Number
1 Go to the DiVitas Home screen or DiVitas Dialer screen.
2 Use the keypad to type the number.
3 Press the green Call key.
Alternatively, you press the left selection key to select Options > Call:
● From business number – This option places the call through the DiVitas Server.
● From mobile number – This option bypasses the server and places the call
directly through your mobile carrier.
If you use the Call > From mobile number option to dial another DiVitas user, you
must enter the complete phone number. Entering only the extension will not work
because you are dialing outside of the PBX.
Making a Call
Using the DiVitas Dialer
If you are already on a call when you dial the phone number for a new call, the
person with whom you are already on a call will hear the tones as you dial. To
avoid this, place the first call on hold before dialing the number for the second call.
Dial by Selecting a Contact
1 Access the DiVitas Contacts list. (See “Displaying the DiVitas Contacts List” on
page 43.)
2 Select the contact.
3 Select Options > Call > From business number OR From mobile number.
● If the contact has only one phone number, the DiVitas Client dials the number.
● If the contact has more than one number, the numbers are listed so that you can
choose one. Scroll to the number you want to call, then press the left selection key
to select OK.
Dial from the Messaging Screen
If you have a text conversation on the Messaging screen with the person you want to call:
DiVitas Client User Guide for Nokia E and N Series Phones, v2.7
27
Page 28

Answering a Call
Using the DiVitas Dialer
1 With the DiVitas Messaging screen displayed, select the conversation. (See “Instant
Messaging” on page 53.)
2 Select Options > Call.
Dial by Selecting a DiVitas Call Log Entry
1 Select the call entry on the Home screen or on a Call Log screen. (See “Using the Call
Log” on page 49.)
2 Press the Call key, or press the Navi scroll key and select Call. (You also can select
Options > Call.)
Redial the Last Number Dialed
To redial the extension or phone number that was most recently dialed:
1 Access the DiVitas Dialer screen.
2 Select Options > Redial.
Answering a Call
When you are available for voice, the DiVitas Client indicates an incoming call by ringing
the handset and by displaying an “Incoming call” message:
■ Incoming call: caller ID – If the caller ID is known, it is displayed in the message.
■ Incoming call: caller number – If the calle r ID is unkno wn, the caller’s phone numbe r
is displayed.
To answer a call:
● Press the green Call key.
● Press the Answer soft key.
● On models with a sliding face, open the slider to answer the call.
Selecting Ring Tones
In addition to the default DiVitas Client ring tone, you can also select one of the native
Nokia ring tones (models: E51, E63, E66, E71, E90, N73, N80, N81, N82, N85, N95,
N95-8GB, N96), and the Nokia ring tone will play for calls to the DiVitas Client. This
feature makes it easier for a group of users sitting close to one another to differentiate the
sound of their phones.
28
DiVitas Client User Guide for Nokia E and N Series Phones, v2.7
Page 29

This feature works best when the ring tone is in AAC file format. If other file formats are
used (e.g. MP3), the tones will only play when the device is in cell. If the device is in WiFi,
then the standard default DiVitas ringer will be played.
Converting Ring Tones to Supported Formats
Y ou can convert an unsup ported audio file (e.g. MP3 or W A V) to the AAC format using the
Nokia Multimedia Player (a utility found within PC Suite). To do so, simply open the audio
file and then click the ‘Convert and Save’ button .
Enter the location where you would like to save the file and click the ‘Save as Type’
drop-down menu and select ‘AAC Audio Files’. When the file has been converted, use a
USB cable to transfer the fing tone file to your device.
For more information, please search the PC Suite online help for “Nokia Multimedia
Player”, or contact your system administrator.
Enabling and Disabling Call Waiting
Ending a Call
Using the DiVitas Dialer
If you are already on a call when you receive a new call, the new call information is briefly
displayed on the screen and a call waiting tone plays on the speaker. If you answer the
new call, the DiVitas Client automatically places the first call on hold.
If desired, you can disable call waiting by pressing *71, followed by the green Talk key.
Any subsequent incoming calls are automatically sent to voicemail.
You can enable the feature by pressing *70, followed by the green Talk key.
Ending a Call
To end a call:
1 If you have two active calls and the call you want to end is the one at the top of the
dialer screen, swap the calls by selecting Options > Swap.
2 Do one of the following:
● Press the red End key.
● Select Options > End.
● On models with a sliding face, close the slider to end the call.
1
1. On models with a sliding face, close the slider.
DiVitas Client User Guide for Nokia E and N Series Phones, v2.7
29
Page 30

Placing a Call on Hold
Using the DiVitas Dialer
T o end the call by pressing the End key , press the key only briefly. If you press and
hold the key, the DiVitas Client will be minimized after the call is ended.
Placing a Call on Hold
To place a call on hold, select Options > Hold or press the green Call key.
To resume the call (take the call back off hold), press the right selection key (Resume) or
select Options > Resume, or press the green Call key.
Transferring a Call
The DiVitas Client supports the following transfer methods:
■ Attended transfer – An attended transf er allows you to speak with the person to whom
you plan to transfer a call, before actually transferring the call.
■ Blind transfer – A blind transfer allows you to transfer th e call immediately , witho ut first
speaking to the person to whom you transfer the call.
The procedures for each type of transfer are the same. The transfer is attended if you let
the party to which you are transferring the call answer the phone after you select Transfer.
The transfer is blind if you select Transfer when the other p arty’ s phone is still ringing and
they have not answered yet.
You can transfer a call to a contact or a number . If you h ave another call on hold, you also
can transfer the call to the caller on hold.
Transferring a Call by Selecting a Contact
1 Select Transfer > To contact.
The Contacts lists is displayed.
2 Select the contact.
3 Select Dial.
4 When you hear the ringer for the party to which you are transferring, do one of the
following:
● To speak with the other party before completing the transfer, wait for them to
answer the call. When you both are ready, select Transfer.
30
● To transfer immediately , you can select Transfer as soon as you hear the ringer for
the other party.
DiVitas Client User Guide for Nokia E and N Series Phones, v2.7
Page 31

Transferring a Call by Typing the Number
1 Select Transfer > To number.
A dialog for entering the number is displayed.
2 Type the number into the dialog.
3 Press the left selection key to select OK.
4 When you hear the ringer for the party to which you are transferring, do one of the
following:
● To speak with the other party before completing the transfer, wait for them to
answer the call. When you both are ready, select Transfer.
● To transfer immediately , you can select Transfer as soon as you hear the ringer for
the other party.
Enabling the Loudspeaker
Enabling the Loudspeaker
Using the DiVitas Dialer
Warning! Do not enable or use the loudspeaker while your ear is next to the
speaker. The volume is very loud.
By default, the loudspeaker is disabled. During an active call, you can enable the
loudspeaker. The loudspea ker remains on only until the end of the call. You also can turn
it off during the call.
To enable the loudspeaker during a call:
1 Move the speaker away from your ear.
2 Press the right selection key to select Loudspeaker.
To disable the loudspeaker during a call, press the right selection key to select Handset.
Muting the Microphone
You can mute the microphone during an active call. When the microphone is muted, you
are still able to hear the party at the other end of the call but they cannot hear you.
To mute the microphone, select Options > Mute, or press the Navi scroll key.
DiVitas Client User Guide for Nokia E and N Series Phones, v2.7
31
Page 32

Muting the Microphone
Using the DiVitas Dialer
To unmute, select Options > Unmute, or press the Navi scroll key.
Handset model E65 also has a Mute button (hard key).
32
DiVitas Client User Guide for Nokia E and N Series Phones, v2.7
Page 33

Managing Multiple Calls
The DiVitas Client supports up to two active calls at a time. An active call is any voice call
that currently is being managed by the DiVitas Server. Figure 6 shows an example of the
DiVitas dialer screen with two active calls.
Figure 6. DiVitas Dialer Screen with Two Active Calls
Managing Multiple Calls
Using the DiVitas Dialer
In this example, the call on hold is from a DiVitas extension.
Placing a Second Call
To place a second call when you already have a call active:
1 Select Options > New call.
2 Select one of the following:
● to numb er – This option places the current call on hold and displays a blank dial
window . Type the number to dial and press the Call key or select Options > Call >
From business number.
● to contact – This option places the current call on hold and displays the Contacts
list. Select the contact, then select Dial.
DiVitas Client User Guide for Nokia E and N Series Phones, v2.7
33
Page 34

Managing Multiple Calls
Using the DiVitas Dialer
Pressing the Call key routes the call through the DiVitas Server. To dial the call
directly , select Options > Call > From mobile number . The DiVitas Client places
the call as a voice call over GSM.
It is also possible to place a second call simply by dialing while the first call is
active (as opposed to placing the call on hold before dialing). However, the DTMF
tones will be audible on the active call. You will be dialing into someone’s ear.
In GPRS or non-3G modes, support to make or receive a second call is not
supported.
For information about setting up a 3-way conference call or joining a scheduled
conference call, see “Conferencing” on page 37
Call Audio
Only one call can have audio at any given time. The other call must be on hold. If you are
on a call and you answer a new call, the new call has audio and the other call is placed on
hold. For example, in Figure 6, when the call from DiVitas contact “Karen” is answered,
the caller on extension “8935” is automatically placed on hold.
Swapping Calls
To place the call that has audio on hold and resume audio with the other call, you can
swap the calls.
To swap between two active calls, select Options > Swap. The first call is placed on hold
while the audio on the second call becomes active. For example, Figure 7 shows “Karen”
being placed on hold when his called is swapped for the caller at extension “8935”.
.
34
DiVitas Client User Guide for Nokia E and N Series Phones, v2.7
Page 35

T oggling a Call Between the Handset and an IP Desk Phone
Figure 7. Swapped Calls
It is possible to talk with more than one other caller at a time, if you are on a
conference. See “Conferencing” on page 37.
Using the DiVitas Dialer
Toggling a Call Between the Handset and an IP Desk Phone
If you are signed onto multiple devices with the same DiVitas Client extension, you can
toggle active calls between the two devices.
To toggle a call:
1 Display the DiVitas Dialer screen, if not already displayed.
2 Select Options > Toggle call.
● If the call is on the handset when you select the option, the call is moved to the
desk phone.
● If the call is on the desk phone when you se lect the option, the call is moved to the
handset.
In either case, the call is moved by selecting the Toggle call option from the DiVitas
Client on the mobile handset. If you have two active calls, both calls are moved.
1
1. Note that this feature is not available when the user is on a cellular network.
DiVitas Client User Guide for Nokia E and N Series Phones, v2.7
35
Page 36

Star Codes for Common Features
Using the DiVitas Dialer
If you are moving calls from a desk phone to the handset, and the calls are part of
a 3-way conference, the conference is broken but the two calls are still moved to
the handset.
You cannot move calls that are part of a 3-way conference from a handset to a
desk phone.
Canceling a Toggle Request
To cancel a toggle request, select Options > Cancel toggle.
The Cancel toggle option is available only while the call is being moved between
devices. After the toggle is complete, you can move the call by selecting the
Toggle call option again.
Star Codes for Common Features
The following codes can be pressed from the DiVitas Client or from any desktop phone
that supports Asterisk open source telephony software.
Table 6. Asterisk feature shortcut star codes
Code Description
*70 Enable Call Waiting
*71 Disable Call Waiting
*72 Enable Call Forwarding
*73 Disable Call Forwarding
*77 IVR Recording
*78 Enable Do-Not-Disturb
*79 Disable Do-Not-Disturb
*90 Enable Call Forwarding on Busy Tone
*91 Disable Call Forwarding on Busy Tone
36
DiVitas Client User Guide for Nokia E and N Series Phones, v2.7
Page 37

Setting Up a 3-Way Conference Call . . . . . . . . . . . . . . . . . . . . . . . . . . . . . . . . . . . . . . 37
Participating In a Scheduled Conference Call . . . . . . . . . . . . . . . . . . . . . . . . . . . . . . . . 41
The DiVitas solution supports the following types of conference calls:
■ 3-way – A 3-way (“ad-hoc”) conference call can be initiated at any time by a DiVitas
user, with up to three callers (the DiVitas user and two other parties). The user who
initiates the conference is the moderator.
■ Scheduled – A scheduled conference can be set up by the system administrator and
can have up to twenty participants, including one moderator.
Setting Up a 3-Way Conference Call
Conferencing
You can set up a 3-way (“ad-hoc”) conference call with two other parties. You must
establish calls with both parties prior to beginning the conference.
During the conference, the following options are available to the conference moderator:
■ Mute / Unmute – Allows you to mute audio for all participants.
■ Break to – Allows you to speak confidentially with one participant without the other
participant being able to hear either of you.
■ Leave – Allows you to end your participation in the conference without breaking the
connection between the other two participants. The DiVitas Server directly connects
the other parties on a new call.
■ End conference – Ends the call for all three participants.
Caution! Make sure you understand the difference between Mute and
Break to before using either option. Moreover, when using the Break to
option, make sure you double-check that you are breaking to the correct
party. With either option, it can be quite embarrassing to accidentally say
something to the wrong party that was meant to be confidential.
DiVitas Client User Guide for Nokia E and N Series Phones, v2.7
37
Page 38

Setting Up a 3-Way Conference Call
Conferencing
Starting the Conference
To start a 3-way conference call:
1 Call the other parties, if you do not already have active calls with them.
● If you already have a call with one of the parties, place the call on hold, then call
the other party.
● If you do not have a call with either party, call one of them and place the call on
hold, then call the other party.
When you have one call on hold and a second active call, you are ready to start the
conference. Here is an example of one held call and a second active call.
Figure 8. Parties Ready To Conference
38
In this example, one of the other parties is on a non-DiVitas phone. From the
DiVitas Client, you can set up a conference with other DiVitas users, non-DiVitas
users, or a combination as in this example.
2 From the dialer screen, select Options > Conference.
On your dialer screen, the held and active calls are replaced with a single call named
“Conference”.
DiVitas Client User Guide for Nokia E and N Series Phones, v2.7
Page 39

Setting Up a 3-Way Conference Call
Conferencing
Figure 9. Live Conference
On the dialer screens of the other participant s, the conferen ce appears as a sing le active
call from you.
Muting a Conference
To mute a 3-way conference, select Options > Mute from the dialer screen, or simply
press the Navi scroll key.
The icon shown in the following example appears.
Figure 10. Muted Conference
To resume the conference, select Options > Unmute from the dialer screen, or press the
Navi scroll key.
DiVitas Client User Guide for Nokia E and N Series Phones, v2.7
39
Page 40

Setting Up a 3-Way Conference Call
Conferencing
The Mute option is different from the Break to option. The Mute option mutes
audio from the initiator, whereas the Break to option places one participant on
hold, while allowing you to speak confidentially with the other participant.
Breaking To a Single Conference Participant
To speak confidentially with one of the conference participants, you can “break to” that
participant. When you break to a conference p articip ant, the other p articipant is placed on
hold and can no longer hear either of you.
This option breaks the conference. When you are ready, you can re-establish the
conference by selecting Options > Conference.
Breaking to a Conference Participant
To break to an individual conference participant:
1 Select Options > Break to from the dialer screen.
A menu appears, listing both the other participants.
2 Select the participant with whom you want to speak confidentially.
Caution! Double-check that you are breaking to the correct party. It can be
quite embarrassing to accidentally say something that was meant to be
confidential to the wrong party.
The call status changes from “Conference” to again list the two separate calls. The party
you broke to is the active call. The other call is on hold.
Resuming the Conference
To resume the conference, select Options > Conference.
Leaving the Conference (without ending it)
To leave the conference without ending the call between the other two parties, select
Options > Leave.
The conference ends, and both the other parties are connected directly together on a new
call.
40
DiVitas Client User Guide for Nokia E and N Series Phones, v2.7
Page 41

Participating In a Scheduled Conference Call
If you are the initiator of the conference, after you leave the conference, you will
be unable to redial either of the other participants as long as they remain on the
call.
Ending the Conference
To end the conference, select Options > End conference, or press the red End key.
The call ends for all three participants.
Participating In a Scheduled Conference Call
This section describes how to join and leave a scheduled conference call and lists the
options available during the conference.
Participants do not need to wait for the moderator to join the conference. As soon as the
first two callers join the conference, they can talk.
Conferencing
Joining a Conference
1 Dial the conference number.
The DiVitas Server plays the following message: “Please enter the conference pin
number”.
2 If you are the moderator, enter the admin PIN. If you are not the moderator, enter the
user PIN.
The DiVitas Server plays one of the following messages:
● “You are currently the only person on the conference”. – This message is played if
there are no other callers on the conference. After playing this message, the
DiVitas Server plays the on-hold music until another caller joins the conference.
● “The re is currently one other person in the conference”. – This message is played
if you are the second caller.
● “The re are curre ntly number p eople in the conference”. – This message is played
if there is more than one person already in the conference. After this message is
played, you can hear the other participants and they can hear you.
● “The conference is full”. – The conference already has the maximum number of
callers. You will not be able to join the conference unless another caller leaves. T o
join in this case, hang up, then redial the conference number af ter th e othe r calle r
leaves.
DiVitas Client User Guide for Nokia E and N Series Phones, v2.7
41
Page 42

Participating In a Scheduled Conference Call
Conferencing
Leaving a Conference
To leave a conference, hang up the call.
If you are the last caller on the conference, the DiVitas Server plays the on-hold music
until you hang up.
Conference Options
Table 7 lists the options that are available to conference users and the conference
moderator.
Table 7. Conference Options
Option Description Available To...
*1 Mute/Unmute. Users and Moderator
*4 or *7 Decrease the speaker volume. Users and Moderator
*6 or *9 Increase the speaker volume. Users and Moderator
*2 Lock/Unlock the conference.
When the conference is locked, no new users can join .
Moderator only
42
DiVitas Client User Guide for Nokia E and N Series Phones, v2.7
Page 43

Contacts
Displaying the DiVitas Contacts List . . . . . . . . . . . . . . . . . . . . . . . . . . . . . . . . . . . . . . . 43
Searching the DiVitas Directory and Adding DiVitas Contacts . . . . . . . . . . . . . . . . . . . 44
Locating a Contact via Quick Search . . . . . . . . . . . . . . . . . . . . . . . . . . . . . . . . . . . . . . 45
Filtering the Contacts List . . . . . . . . . . . . . . . . . . . . . . . . . . . . . . . . . . . . . . . . . . . . . . . 45
Calling or Sending a Message to a Contact . . . . . . . . . . . . . . . . . . . . . . . . . . . . . . . . . 46
Disabling the Presence Indicator for a Contact . . . . . . . . . . . . . . . . . . . . . . . . . . . . . . . 47
The DiVitas Client integrates with the native contacts list on your handset. In addition to
displaying native contacts, the DiVitas Contacts list allows you to add DiVitas users and
view their presence information.
From within the DiVitas Client, you can:
■ View the voice and text availability of other DiVitas users.
■ Call any contact, whether or not the contact is another DiVitas user.
■ Send text messages to other DiVitas users.
If you add DiVitas users to your DiVitas Contacts list, the DiVitas Client
automatically adds them to the handset’s native contacts list as well. Likewise, if
you change or delete a contact from the handset’s native contacts list, the change
or deletion propagated to the DiVitas Contacts list.
Displaying the DiVitas Contacts List
To display the DiVitas Contacts list, do one of the following:
■ From the native Home screen, scroll to the Contacts icon
Press down on the Navi scroll key or select Options > Contacts.
■ From other DiVitas Client screens, scroll to the following icon:
DiVitas Client User Guide for Nokia E and N Series Phones, v2.7
43
Page 44

Searching the DiVitas Directory and Adding DiVitas Contacts
Contacts
Searching the DiVitas Directory and Adding DiVitas Contacts
You can search the DiVitas directory on the server for other DiVitas users, and add them
to your Contacts list.
To search the directory on the server for other DiVitas users:
1 From the Contacts screen, select Options > Search directory.
2 Select the By name or By extension.
3 Enter all or part of a name or extension number.
4 Press the Navi scroll key or select OK.
The DiVitas Client searches the server directory and displays all matching users in the
contacts list.
To add a DiVitas user to your Contacts list:
1 Select the contact.
2 Select Options > Add this contact.
The client adds the contact and sends a request to the server for the contact’s
presence status. If the user is not logged into the server, “Request pending” appears
beneath the contact name. As soon as the contact logs into the server, the “Request
pending” message is removed and the user’s presence and personal status message
is shown.
You can add a phone number to an existing contact by selecting an entry from a
recent call list, a call log, or an instant message and then selecting Options >
Add to contact > Update existing.
Adding an IVR Number to the Contacts List
If desired, users can enter an interactive voice response (IVR) number in their cont act list.
By entering the phone number for the IVR system, along with the pass code, and one or
more P’s in the dial string, users do not have to punch in the pass code every time they
dial into the IVR system.
For example, when a user dials into a conference bridge number 8881234567 with a pass
code of 9876, he can enter the dial string as ‘8881234567pp9876’. Each “p” in the dial
string would translates to a specific amount of delay (typically 2-seconds) such that when
the call is picked up at the remote end, a pause is introduced in between the sets of
44
DiVitas Client User Guide for Nokia E and N Series Phones, v2.7
Page 45

numbers. After the short delay, the digits following “p” are sent. In this example, the
conference bridge number 8881234567 will be dialed first, and then after the call is
picked up at the remote end, the pass code 9876 will be dialed after 4 seconds (2
seconds delay for each “p” in the dial string).
Note that one or more upper or lowercase P’s must be entered to create a pause that
matches the length of time it takes for the IVR system to say, “Please enter PIN.” This
may requiring some fine tuning by the user to make it work properly.
Locating a Contact via Quick Search
You can easily locate an entry in the DiVitas Contacts list by using the quick search field
at the bottom of the screen (i.e. the field with the magnifying glass). If your Contacts list
has many contacts, using the quick search field can make it much faster and easier to
locate a contact.
To locate a contact using the quick search field at the bottom of the screen:
Locating a Contact via Quick Search
Contacts
1 Type one or more characters of the contact name into the search field.
The DiVitas Client displays only the contacts that match the search string you
entered.
2 To narrow the search, enter more characters so that fewer contacts match the search
string.
3 Continue entering characters to reduce the number of matching results. If only one
contact appears, it will be highlighted by default. If multiple contacts are displayed,
you can select the desired contact by scrolling to it and then using the Options menu
to perform the desired action (e.g. call, send message, etc.).
Filtering the Contacts List
By default, the DiVitas Contacts screen lists both DiVitas and non-DiVitas contacts. You
can filter this list so that it only shows DiVitas users and/or contacts for whom presence
information is available.
To filter the DiVitas Contacts list:
1 From the Contacts screen, select Options > Filter.
2 Select one of the following:
● Show all – Displays all contacts, including non-DiVitas contacts.
● My network contacts – Display only other DiVitas users, regardless of presence.
DiVitas Client User Guide for Nokia E and N Series Phones, v2.7
45
Page 46

Calling or Sending a Message to a Contact
Contacts
● Show presence only – Displays only the other DiVitas users for whom the
presence indicator is enabled in the DiVitas Contacts list. (See “Disabling the
Presence Indicator for a Contact” on page 47.)
Notes:
■ While prior releases would only allow users to search the DiVitas contacts list based
on the currently-selected filter, the latest release decouples the quick search function
from filtering, so you can search for a contact even if the currently-selected filter is
causing the contact’s name to be hidden.
■ You also can select to hide or display the status messages (personal messages) of
other DiVitas users. The status messages are displayed by default. To hide them,
select Options > Hide personal messages.
Calling or Sending a Message to a Contact
You can call any DiVitas user or non-DiVitas contact. You can send a text message to any
DiVitas user whose handset supports text messaging.
To call a contact:
1 From the DiVitas Contacts screen, scroll to the name of the cont act to highlight it and
then do one of the following:
● Press the green Call key.
● Select Options > Call > From business number
1
OR From mobile number and
then press the left Select key to initiate the call or press the Navi scroll key.
If the contact has only one phone number, the DiVitas Client dials the number.
If the contact has more than one number, the numbers are listed so that you can choose
one. In this case, scroll to the number you want to call, then press the left se lection key to
select OK.
If desired, you can display the multiple phone numbers associated with a contact
prior to dialing by selecting Options > Vie w details.
1. Selecting “From business number” will send the call through the DiVitas Server. Selecting “From mobile number” sends it from
your cellular number, bypassing the DiVitas Server.
46
DiVitas Client User Guide for Nokia E and N Series Phones, v2.7
Page 47

Disabling the Presence Indicator for a Contact
To send a text message to another DiVitas user:
1 From the DiVitas Contacts screen, scroll to the name of the contact to highlight it.
2 Select Options > Send message.
3 In the chat screen that appears, begin typing your message in the field at the bottom.
4 Press the left Send soft key to transmit the message.
The Send message option is available only if the presence icon for a DiVitas user
indicates that he or she is available to receive text messages. (See Table 4 on
page 21 for a list of presence icons and their de finitions.)
Disabling the Presence Indicator for a Contact
Contacts
By default, a presence indicator is displayed next to each of the DiVitas users in the
DiVitas Contacts list, in the call log on the Home screen, and on the Messaging screen
next to any text conversations. If desired, you can disable display of the presence icon on
an individual contact basis.
To disable display of the presence indicator for a contact:
1 Select the contact.
2 Select Options > Presence > Don’t watch.
The presence icon next to the contact name disappears. This change also applies to the
other areas of the client where the user’s presence can be shown.
When display of the presence icon for a contact is disabled, the contact will not be
listed if you use the Filter > Show presence only option and the ‘Send Message’
option will disappear for this user.
To re-enable display of the presence indicator for a contact:
1 Select the contact.
2 Select Presence > Watch presence.
DiVitas Client User Guide for Nokia E and N Series Phones, v2.7
47
Page 48

Disabling the Presence Indicator for a Contact
Contacts
48
DiVitas Client User Guide for Nokia E and N Series Phones, v2.7
Page 49

Using the Call Log
Accessing the Call Log Screens . . . . . . . . . . . . . . . . . . . . . . . . . . . . . . . . . . . . . . . . . . 50
Dialing a Logged Number . . . . . . . . . . . . . . . . . . . . . . . . . . . . . . . . . . . . . . . . . . . . . . . 50
Deleting a Call from the Call Log . . . . . . . . . . . . . . . . . . . . . . . . . . . . . . . . . . . . . . . . . 50
Where Calls Are Logged . . . . . . . . . . . . . . . . . . . . . . . . . . . . . . . . . . . . . . . . . . . . . . . . 51
The DiVitas Client Call Log screens list the calls that were missed, dialed, or answered
using the DiVitas Client. Figure 11 shows an example of the Call Log screen that shows
missed calls.
Figure 11. Call Log—Answered Calls Screen
Calls to or from numbers in your Contacts list appear in the DiVitas Call Log by
contact name. Calls to or from people who are not in your contacts list will appear
in the DiVitas Call Log as phone number.
DiVitas Client User Guide for Nokia E and N Series Phones, v2.7
49
Page 50

Accessing the Call Log Screens
Using the Call Log
Accessing the Call Log Screens
To access the Call Log screens, press the Navi scroll key to the right to scroll to one of the
following tabs:
– Displays missed calls. These are calls that either were not answered or
were answered by your voicemail.
– Displays outgoing calls. These are calls that you initiated from your DiVitas
Client extension on the handset.
– Displays incoming calls. These are calls that you answered.
Dialing a Logged Number
To call the other party in a logged call, see “Dial by Selecting a DiVitas Call Log Entry” on
page 28.
Deleting a Call from the Call Log
To delete a call from the Call Log:
1 When the Call Log containing the call log entry is displayed, press the Navi scroll key
down or up to scroll through the list and select the call log entry.
2 Press the left selection key to select Options.
3 Select Delete.
A prompt appears, asking you to confirm whether to delete the call.
4 Select Yes to delete the call or No to cancel the request.
Deleting a call log in the missed, incoming, or outgoing call log screens will not
clear the entry from the recent call list displayed on the Home screen.
50
DiVitas Client User Guide for Nokia E and N Series Phones, v2.7
Page 51

Where Calls Are Logged
The DiVitas Client Call Log is separate from the call log for the handset’s native dialer.
Calls are logged in one or both logs, depending on the call direction, the medium (WiFi or
GSM), and whether the number on the handset is the DiVitas Client extension or the
handset’s mobile number. Table 8 lists where calls are logged.
Table 8. Where Calls Are Logged
Call Direction Native Dialer’s Call Log DiVitas Client Call Log
Where Calls Are Logged
Using the Call Log
Incoming To DiVitas Client
extension on GSM
To DiVitas Client
extension on WiFi
To mobile number on
GSM
Outgoing From DiVitas Client
extension on GSM
From DiVitas Client
extension on WiFi
From mobile number on
GSM
Handoff Handoff of DiVitas
Client call from WiFi to
GSM
Handoff of DiVitas
Client call from GSM to
WiFi
Logged as Incoming or Missed
call, depending on whether the
call was answered
Not logged Logged as Incoming or Missed
Logged as Incoming or Missed
call, depending on whether the
call was answered
Logged as Incoming Missed
call
Not logged Logged as Outgoing call
Logged as Outgoing call Not logged
Logged as Incoming call Not logged
Not logged Not logged
Logged as Incoming or Missed
call
call
Not logged
Logged as Outgoing call
DiVitas Client User Guide for Nokia E and N Series Phones, v2.7
51
Page 52

Where Calls Are Logged
Using the Call Log
52
DiVitas Client User Guide for Nokia E and N Series Phones, v2.7
Page 53

Instant Messaging
Adding a Network Contact . . . . . . . . . . . . . . . . . . . . . . . . . . . . . . . . . . . . . . . . . . . . . . . 53
Sending a Message to a Network Contact . . . . . . . . . . . . . . . . . . . . . . . . . . . . . . . . . . 54
Viewing and Replying to a Message . . . . . . . . . . . . . . . . . . . . . . . . . . . . . . . . . . . . . . . 55
Managing Multiple Conversations . . . . . . . . . . . . . . . . . . . . . . . . . . . . . . . . . . . . . . . . . 57
Deleting a Conversation . . . . . . . . . . . . . . . . . . . . . . . . . . . . . . . . . . . . . . . . . . . . . . . . 57
Instant Messaging (IM) enables you to have text conversations with other DiVitas users.
The Messaging window supports a maximum of 20 conversations. If the window
contains 20 conversations and a new one begins, the oldest o ne is automatically
deleted.
Adding a Network Contact
A network contact is any DiVitas user that you have explicitly added to your contact list.
Once this user has been added, you can monitor their presence st atus and send them a n
instant message.
You can add a network contact in one of the following ways:
■ If a user is already a native contact, his or her information is a utomatically carried over
to the DiVitas Contacts list and ‘Watch Presence’ will be enabled. Otherwise, select
the user from the Contacts list and then select Options > Presence > Watch presence
for this user.
■ Find the contact by searching the DiVitas server. Simply select Options > Search
Directory > By name/extension and then add the contact by selecting Options > Add
this contact. By default, 'Watch presence' will be enabled for this user, thus allowing
exchange of IMs.
DiVitas Client User Guide for Nokia E and N Series Phones, v2.7
53
Page 54

Sending a Message to a Network Contact
Instant Messaging
Sending a Message to a Network Contact
To send an IM to a network contact:
1 Select the user in the Recent Call List (from the Home screen) or in the DiVitas
Contacts list (from the Contacts screen).
2 Select Options > Send message.
3 A chat screen appears, as shown below:
Figure 12. Chat Window – Sending a New Message
4 Type your message in the field at the bottom.
5 Press the Navi scroll key or Select Send. The message is delivered as follows:
Notes:
● If you receive an incoming IM while you r presence setting is ‘On V oice and Text’ or
‘On Text Only’, a pop-up window appears for four seconds, providing you with the
option to select the View or Ignore soft keys. (See Figure 13 on page 55.)
The IM icon on the DiVitas Home screen is updated to indicate that a new
message has arrived, with the red circle indicating the number of new
messages:
● If the presence setting is ‘On V oice Only’ or ‘Not V oice or Text’, the pop-up window
does not appear, but the IM icon is still updated with the count of new messages.
● If your are logged out while an inco ming message arrives, the message is queued
by the server until you log in, at which time the message is delivered.
● An IM can be sent or received when you are on an active call, but it cannot be
sent when there is no data connection (e.g. Cellular Voice Channel mode).
54
DiVitas Client User Guide for Nokia E and N Series Phones, v2.7
Page 55

● If a loss of connectivity occurs while you are sending an IM, messages that have
not been successfully transmitted will appear in red italics until connectivity is
restored and the IM’s are automatically sent out by the client.
● Unread messages are preserved on your phone until they have been read. For
example, if the battery runs out, thus causing the device to shut down before the
user has had a chance to read a message, the message will be available upon
re-starting the application and connecting with server.
Viewing and Replying to a Message
When you receive a new message, the IM icon is updated:
The number in the red circle indicates the number of new messages that have been
received. If a plus “+” sign appears next to the number, that means the number exceeds 9
new messages.
If your presence setting is ‘On Voice and Text’ or ‘On Text Only’, the message also briefly
appears in a pop-up window that is displayed on the DiVitas Client.
Viewing and Replying to a Message
Instant Messaging
Figure 13. New Message Displayed in Pop-up Window
If you already have a chat window open for the conversation, the message appears in the
chat window. (See Figure 15 on page 57.)
To view an IM, do one of the following:
■ Click on the left View soft key.
■ Select the IM icon from the Home screen, and press the Navi scroll key, or select
Options > Message list.
DiVitas Client User Guide for Nokia E and N Series Phones, v2.7
55
Page 56

Viewing and Replying to a Message
Instant Messaging
Alternatively, you can press the right Ignore soft key to close the IM pop-up window.
The Messaging screen can manage multiple conversations. The latest message in each
conversation is displayed. In this example, there is only one conversation.
Figure 14. Messaging Screen
To reply to an IM:
1 On the message screen, select the conversation and press the Navi scroll key or
select Options > Send message.
A chat window opens, with a text entry field located at the bottom.
56
DiVitas Client User Guide for Nokia E and N Series Phones, v2.7
Page 57

Managing Multiple Conversations
Instant Messaging
2 Type your message and send. (See “Sending a Message to a Network Contact” on
page 54.)
Figure 15. New Message Displayed in Chat Window
Managing Multiple Conversations
The Messaging screen can have multiple conversations, one for each of the DiV itas users
with whom you are chatting. For each separate conversation, the most recent message is
displayed.
A conversation remains on the Messaging screen until you delete it, or until you already
have 20 conversations and a new one begins. In this case, the oldest conversation is
automatically deleted.
Deleting a Conversation
To delete a conversation:
1 Select the conversation on the Messaging screen.
2 Select Options > Delete conversation.
To clear all messages from a conversation without deleting the conversation itself, open
the conversation and select Options > Clear conversation.
DiVitas Client User Guide for Nokia E and N Series Phones, v2.7
57
Page 58

Deleting a Conversation
Instant Messaging
58
DiVitas Client User Guide for Nokia E and N Series Phones, v2.7
Page 59

Accessing Voicemail
Voicemail Indicator . . . . . . . . . . . . . . . . . . . . . . . . . . . . . . . . . . . . . . . . . . . . . . . . . . . . 59
Playing Voicemail Messages . . . . . . . . . . . . . . . . . . . . . . . . . . . . . . . . . . . . . . . . . . . . . 60
Saving a Message . . . . . . . . . . . . . . . . . . . . . . . . . . . . . . . . . . . . . . . . . . . . . . . . . . . . . 61
This chapter describes how to access voicemail and manage your DiVitas Server
voicemail account.
The DiVitas Client supports the following types of voicemail access:
■ Visual voicemail – You can scroll through your voicemails and listen to them in any
order. (Visual voicemail is described in this chapter.)
■ Vo ice-only voicemail – You can access voicemail by dialing the DiVitas Server.
(Voice-only voicemail is not described in this chapter. Instead, see “Voice-Only
Voicemail Access” on page 81.)
If your handset uses CellData (packet data) services or WiFi, you have visual voicemail.
Otherwise, you can use voice-only voicemail.
This chapter applies only to voicemail hosted on the DiVitas Server. If your
enterprise uses another voicemail system instead, this chapter is not applicable.
Contact your DiVitas Server administrator for information.
Voicemail Indicator
On the DiVitas Home screen, if the voicemail icon has a nu mber in the upper right corner,
you have new voicemail.
The number indicates the number of new voicemails you have. If your handset supports
Message Waiting Indicator (MWI), the indicator light flashes to indicate new voicemail.
DiVitas Client User Guide for Nokia E and N Series Phones, v2.7
59
Page 60

Playing Voicemail Messages
Accessing Voicemail
Playing Voicemail Messages
You can use the DiVitas Client to play new and saved voicemails.
To play a voicemail message:
1 Access the voicemail page using one of the following methods:
● On the DiVitas Home screen, scroll to the voicemail icon:
Press the Navi scroll key or select Options > Voice mail list.
● From other DiVitas screens, scroll to the voicemail tab:
2 Scroll to the voicemail.
3 Press the Navi scroll key, or select Options > Download and play.
If you are replaying a message you’ve listened to previously, select Options > Play.
Figure 16. Voicemail Screen
Voicemail Message Options
The following voicemail management options area available when a voicemail message
is selected:
■ Options > Download and play
■ Options > Play (this will appear if the message has already been downloaded)
■ Options > Call
■ Options > Delete
■ Options > Delete All
60
DiVitas Client User Guide for Nokia E and N Series Phones, v2.7
Page 61

■ Options > Call voice mail
■ Options > Add to contact
■ Options > Settings
■ Options > Help
Playback Options
The following playback option is available during playback of a message:
■ Options > Pause / Resume
Notes:
■ If you are playing back a voicemail message and an incoming call is received, the
voicemail stops playing and you will have to play it from the beginning.
■ If you are playing back a voicemail message and highlight a different message in the
visual voicemail screen, the audio is paused. You can resume playback by
re-highlighting the original voicemail message and pressing the Navi scroll key.
Saving a Message
Accessing Voicemail
Saving a Message
Voicemails are automatically saved until you delete them. All your saved voicemails go
into the same folder on the server. To replay a voicemail, just highlight and select
Options > Play.
DiVitas Client User Guide for Nokia E and N Series Phones, v2.7
61
Page 62

Saving a Message
Accessing Voicemail
62
DiVitas Client User Guide for Nokia E and N Series Phones, v2.7
Page 63

Phone Settings . . . . . . . . . . . . . . . . . . . . . . . . . . . . . . . . . . . . . . . . . . . . . . . . . . . . . . . 63
Network Settings . . . . . . . . . . . . . . . . . . . . . . . . . . . . . . . . . . . . . . . . . . . . . . . . . . . . . . 65
The Settings menu allows you to configure DiV it as Client options and display informat ion
about the network. This chapter describes the Settings options.
Phone Settings
The Phone settings menu has the following options.
Force calls via DiVitas
The Force calls via DiVitas option makes the DiVitas Client the default dialer, placing all
outbound calls through the DiVitas Server instead of through the handset’s native dialer.
Calls initiated by typing a number, selecting a contact, call log, or web link will use the
DiVitas Client dialer instead of the native dialer.
Settings Options
1
This option is enabled by default.
To disable the option, select Options > Settings > Phone settings > Force calls via
DiVitas. The state changes from Enabled to Disabled. To re-enable it, use the same
procedure to change the state to Enabled.
To use this option, you must leave the DiVitas Client running. If you exit the
DiVitas Client, the handset’s native dialer will be used to place outbound calls.
Auto-start DiVitas Client
The Auto-start DiVitas Client option configures the DiVitas Client to start automatically
each time the handset is powered on or rebooted.
This option is enabled by default.
1. When enabled, the caller ID for all outbound calls will be the caller ID that is associated with your DiVitas Client extension.
Likewise, all outbound calls will appear in the DiVitas Client call log.
DiVitas Client User Guide for Nokia E and N Series Phones, v2.7
63
Page 64

Phone Settings
Settings Options
To disable the option, select Options > Settings > Phone settings > Auto-start DiVitas
Client. The state changes from Enabled to Disabled. To re-enable it, use the same
procedure to change the state to Enabled.
Privacy statement
This option enables or disables re-display of the privacy statement each time the DiVitas
Client is started.
When the privacy notice is displayed as the DiVitas Client is starting up, the client
displays a prompt asking whether you want to display it again in the future. If you select
the option to prohibit future display of the message, this change is applied to the Phone
settings menu. The state of this option is changed to Disabled.
Billable events notice
This option enables or disables re-display of the billable events notice each time the
DiVitas Client is started.
When the billable events notice is displayed as the DiVitas Client is starting up, the client
displays a prompt asking whether you want to display it again in the future. If you select
the option to prohibit future display of the message, this change is applied to the Phone
settings menu. The state of this option is changed to Disabled.
Save password
This option enables or disables memory of your password by the client. When this option
is enabled, you do not need to enter your password the next time you log into the client.
Your password is automatically sent to the server.
This option is enabled by default.
To disable the option, select Options > Settings > Phone settings > Save password. The
state changes from Enabled to Disabled. To re-enable it, use the same procedure to
change the state to Enabled.
64
DiVitas Client User Guide for Nokia E and N Series Phones, v2.7
Page 65

Network Settings
The Network settings menu has the following options.
Global data roaming
By default, the DiVitas Client avoids international dat a roamin g charges for both Ce llDat a
(packet data) and voice. If the client detects that the handset is attempting to roam onto
the network of a country other than the home country (i.e. the country associated with the
SIM card), the client automatically disables CellData usage to prevent the client from
incurring roaming charges. Note that if a call is active when an international roam is
attempted, the active call will be ended.
Global data roaming is disabled by default.
To enable global data roaming, select Options > Settings > Network Settings > Global
data roaming. The state changes from Disabled to Enabled.
Network Settings
Settings Options
The Global data roaming option does not affect roaming from one carrier network
to another within the same home country, nor does it affect roaming onto WiFi.
Presence data
The Presence data option specifies the network conditions under which the messaging
and presence features are enabled in your client. You can select one of the following:
■ Always On – Text messaging and presence data are enabled on WiFi and CellData.
■ Only on WiFi – Text messaging and presence data are enabled only on WiFi. If you
■ Disable while Roaming – Text messaging and presence data are enabled on WiFi and
■ Disable Presence – Text messaging and presence data are disabled under all
leave WiFi coverage, the features are temporarily disabled until you are back on WiFi.
CellData, except when the client detects that the handset is attempting to roam onto
the network of a country other than the home country of the handset’s SIM. In this
case, to save roaming costs, the client disables text messaging and presence data
until the handset roams back into the SIM’s home country.
network conditions.
The default is Always On. To change the setting, select one of the other options listed
above.
DiVitas Client User Guide for Nokia E and N Series Phones, v2.7
65
Page 66

Network Settings
Settings Options
Connection status
This option displays a screen of information about the status of the currently active
connection in use by the DiVitas Client.
The connection status screen shows the following information:
■ Handset IP Address – IP address of your handset.
■ Server Internal Address – Internal IP address or FQDN of the DiVitas Server. This is
the address where the server can be reached on the private network, from inside the
firewall.
■ Server External Address – External IP address or FQDN of the DiVi tas Server. This is
the address where the server can be reached from the Internet.
■ Interface – Type of IP connection:
● WiFi – Wireless LAN (WLAN) network.
● Cell – Packet cell data services through a cellular carrier (GPRS, UMTS, and so
on).
■ SSID – Network name of the WLAN network. If the active wireless IP connection is a
CellData connection instead of a WLAN connection, this field displays “No WiFi.”
■ RSSI Value – Received Signal Strength Indicator. This is the strength of the WiFi
signal, in -dBm. A higher number represents a weaker signal than a lower number:
● 0 dBm is the best theoretically possible RSSI value. The WiFi signal is very
strong.
● If the connection is a CellData connection rather than a WiFi connection, the RSSI
value is shown as -200.
■ RSSI Threshold – The minimum RSSI allowed for calls over WiFi. If the RSSI falls
below this threshold for more than a short while, the DiVitas Client hands off the call to
cellular.
Access point preferences
This option allows you to prohibit the DiVitas Client from using specific access points
(APs).
The DiVitas Client follows the Nokia convention of using the term “AP” to refer to a
Wireless LAN (WLAN) connection or a CellData (packet data) connection.
66
DiVitas Client User Guide for Nokia E and N Series Phones, v2.7
Page 67

Network Settings
Settings Options
By default, when the handset has an active WLAN connection, the DiVitas Client will try to
use the connection to reach the DiVitas Server. If the DiVitas Server cannot be reached
on the active WLAN connection, the DiVitas Client then uses the active packet data
connection.
Y ou might want to prevent the DiVit as Client from using certain connection s. For example,
if you have a packet data connection that is only for multimedia messaging, the DiVitas
Client might not work properly over the connection. Multimedia messaging connections
also can be more expensive than packet data connections used for web browsing.
Likewise, if you have WLAN connections that cannot reach the DiVit a s Server, you might
want to prevent the DiVitas Client from attempting to use those connections.
To prohibit the DiVitas Client from trying to use a specific connection:
1 Select Options > Settings > Network settings > Access point preferences.
2 Select the desired connection to disable.
3 Select Options > Disable access point, or press the Navi scroll key.
The icon next to the disabled connection changes to an “x” in a gray circle.
To re-enable a connection, select it, then select Options > Enable access point, or press
the Navi scroll key. The icon next to the re-enabled connection changes back to green.
Disabling or re-enabling a connection applies only to DiVitas Client use of the
connection, and does not affect the connection’s status outside the client. For
example, if a connection is enabled on the handset, and you disable the
connection in the client, then select Menu > Tools > Settings > Connection >
Access points, you can observe that the connection is still enabled.
DiVitas Client User Guide for Nokia E and N Series Phones, v2.7
67
Page 68

Network Settings
Settings Options
68
DiVitas Client User Guide for Nokia E and N Series Phones, v2.7
Page 69

Upgrading the DiVitas Client
Verifying Proper Firmware Prior to Installing Client . . . . . . . . . . . . . . . . . . . . . . . . . . . . 69
Alternative Client Installation Method . . . . . . . . . . . . . . . . . . . . . . . . . . . . . . . . . . . . . . 70
Upgrading the DiVitas Client . . . . . . . . . . . . . . . . . . . . . . . . . . . . . . . . . . . . . . . . . . . . . 75
Adding a Shortcut to the DiVitas Client . . . . . . . . . . . . . . . . . . . . . . . . . . . . . . . . . . . . . 76
Troubleshooting the DiVitas Client . . . . . . . . . . . . . . . . . . . . . . . . . . . . . . . . . . . . . . . . 79
Uninstalling the DiVitas Client . . . . . . . . . . . . . . . . . . . . . . . . . . . . . . . . . . . . . . . . . . . . 80
Verifying Proper Firmware Prior to Installing Client
Prior to installing the DiVitas Client software on the Nokia handset, you must first verify
that the handset is running the correct firmware version, and must t ake corrective action if
it is not. DiVitas recommends running the following versions of Nokia firmware:
■ E51 - run version 100.34 or higher
■ E61i – run version 2.06x or higher
■ E63 – run version 100.21.110 or higher
■ E65 – run version 2.06x or higher
■ E66 – run version 100.07.78 or higher
■ E71 – run version 100.07 or higher
■ E71x – run version 3.27 or higher
■ E90 – run version 07.40.x
■ N73 – run version 3.0705.1.0.31
■ N80 – run version 5.0719.0.2
■ N81 – run version 11.0.045
■ N82 – run version 30.0.019
■ N85 – run version 11.047
■ N95 – run version 20.0 or higher
■ N96 – run version 12.043 or higher
DiVitas Client User Guide for Nokia E and N Series Phones, v2.7
69
Page 70

Alternative Client Installation Method
Upgrading the DiVitas Client
To determine which version is running on a handset, dial *#0000# from the native dialer,
(not from the DiVitas Client dialer.) If necessary, upgrade the firmware using the Nokia
Software Updater (at nokia.com/softwareupdate) and PC Suite.
Note: A factory reset is done during firmware upgrade, which will remove all your data.
Before upgrading the firmware, make sure to save all your contacts and other data
onto a PC or flash card. Also, make sure your phone battery is fully charged.
Alternative Client Installation Method
If the handset is not provisioned to receive email or SMS messages, you can use the
following steps instead. You will need to know the IP address or FQDN of the server. If
you are outside the network firewall, the firewall also might need to be configured to allow
your handset to reach the server. Ask your DiVitas Server administrator for the DiVitas
Server IP address or FQDN to use.
1 On the handset, open a web browser.
2 Navigate to the following URL:
https://<server-ipaddr-or-FQDN>/hs_img
where server-ipaddr-or-FQDN is an IP address or fully qualified domain name
provided by the system administrator.
3 If the browser is configured to prompt you to select a connection, select one to
continue.
The DiVitas Server must be reachable on the connection you select.
A message appears, stating that the DiVitas Server has a certificate that is not trusted
by the handset.
4 Press the left selection key to select Options, then select Continue.
The User name dialog appears.
70
DiVitas Client User Guide for Nokia E and N Series Phones, v2.7
Page 71

Alternative Client Installation Method
Upgrading the DiVitas Client
Figure 17. User Name Dialog
5 Enter your DiV itas Client extension number. Press the left selection key to select OK.
The Password dialog appears.
6 Enter your DiVitas Client user password. Press the left selection key to select OK.
A message appears, stating that authentication information will be sent as plain text.
7 Press the left selection key to select OK.
A list of DiVitas Client image files appears.
8 Use the Navi scroll key to move the pointer over the image file until it is highlighted,
then press the Navi scroll key.
Information about the image file is displayed.
9 Press the left selection key to select OK.
10 The image is downloaded. If a prompt appears, asking whether you want to open the
downloaded image, press the left selection key to select Open.
The Install DiVitasPhone? message appears.
DiVitas Client User Guide for Nokia E and N Series Phones, v2.7
71
Page 72

Alternative Client Installation Method
Upgrading the DiVitas Client
Figure 18. Install DiVitasPhone? Message
11 Press the left selection key to select Yes.
Details about the application file are displayed.
12 Press the left selection key to select Continue.
A security warning is displayed and asks whether you want to continue the
installation.
13 Press the left selection key to select Yes.
If you are upgrading by installing over a previous DiVitas Client image, a message
asks you whether you want to replace the older version. Press the lef t selection key to
select OK.
14 You may be prompted to select the installation location (phone memory or flash
memory). Select phone memory and press the left Selection key to continue.
Details about the Nokia APS Server application are displayed.
15 Press the left selection key to select Continue.
A message about the save location for log files appears.
16 Read the message, then press the left selection key to select OK.
The Nokia disclaimer appears.
17 Read the disclaimer, then press the left selection key to select OK.
The handset installs the application. When installation is complete, a blank browser
page is displayed.
72
18 Press the left selection key to select Options, then select Exit to close the browser.
DiVitas Client User Guide for Nokia E and N Series Phones, v2.7
Page 73

19 If a prompt appears asking you whether to clear the cache, press the lef t selection key
to select Yes or the right selection key to select No, depending on your preference.
20 If this is a new installation of the DiVitas Client, you will need to enter the DiVitas
Client configuration settings. Go to “Entering DiVitas Client Configuration Settings”. If
you are upgrading, you do not need to reconfigure the settings.
Entering DiVitas Client Configuration Settings
Before you can sign in to the DiVitas Server for the first time, you must configure user
settings. You will need to enter the following information. Ask your DiVitas Server
administrator for the values to enter . You also can ask your GSM service provider for your
mobile number.
■ User Extension – Your DiVitas Client extension.
■ User Password – Your DiVitas Client password.
■ Server Address – IP address or FQDN of the DiVitas Server.
■ Phone number – Mobile (cellular) number of the handset.
Alternative Client Installation Method
Upgrading the DiVitas Client
It is invalid to specify a DiVitas Client extension as the mobile number.
To enter the user settings:
1 Start the DiVitas Client, if not already started.
2 Access the user settings screen:
If you are starting the DiVitas Client for the first time, the DiVitas Client configuration
settings screen is displayed automatically after you finish with the disclaimer and
notifications.
Otherwise, when the Enter password dialog is displayed, press the right selection key
to select Details.
DiVitas Client User Guide for Nokia E and N Series Phones, v2.7
73
Page 74

Alternative Client Installation Method
Upgrading the DiVitas Client
Figure 19. DiVitas Client Configuration Settings Page
3 Enter the following information into the fields on the screen:
● User Extension
● User Password
● Server Address
● Phon e number (Enter the number tha t will be required by the DiV it as Server’ s dial
plan. For example, if the DiVitas Server is not configured to add the prefix, then
you must include it here. Ask your system administrator for more information.)
On models that do not have a QWERTY keyboard (e.g. E65 or E66), dots in the IP
address can be entered by pressing # or *.
4 Press the left selection key to select Login.
The DiVitas Client dialer appears and the DiVitas Client signs you into the DiVitas
Server.
If the DiVitas Client does not respond, make sure all the fields are filled in. The
DiVitas Client will not respond to the Login option unless all the DiVitas Client
configuration fields are filled in.
The next time you start the DiVitas Client application, you only need to enter your
password. The DiVitas Client remembers the other values.
74
DiVitas Client User Guide for Nokia E and N Series Phones, v2.7
Page 75

Upgrading the DiVitas Client
When a new version of the DiVitas Client software is available on the DiVitas Server, a
message such as the one shown in Figure 20 automatically appears when you start the
DiVitas Client.
Figure 20. DiVitas Client upgrade prompt
Select Yes to begin the upgrade.
Upgrading the DiVitas Client
Upgrading the DiVitas Client
If the you select No to refuse the upgrade, the DiVitas Client terminates. Y ou must
complete the upgrade in order to continue to use the DiVitas Client.
From this point, the upgrade procedure is the same as the installation procedure,
beginning with step 10 on page 71.
DiVitas Client User Guide for Nokia E and N Series Phones, v2.7
75
Page 76

Adding a Shortcut to the DiVit as C lient
Upgrading the DiVitas Client
Adding a Shortcut to the DiVitas Client
You can add a shortcut to the DiVitas Client from the Active-S t andby screen, by replacing
one of the feature icons already on the screen. On handset models that have an Own key,
you also can program this key to start the DiVitas Client.
Adding a Shortcut to the Active-Standby Screen
1 Select Menu > Tools > Settings > Phone > Standy mode > Active standy apps.
2 Scroll to the shortcut you want to replace. Shortcut 1 programs the first icon on the lef t
of the icon row on the Active-Standby screen, Shortcut 2 programs the second icon
from the left, and so on.
3 Press the Navi scroll key to display a list of applications. (See Figure 21.)
4 Scroll to “DiVitas” and select it, or select OK.
5 Select Back > Back > Back > Exit.
6 Verify that the DiVitas Client icon is present on the Active-Standby screen. (See the
example in Figure 22.)
Figure 21. Active-Standby Shortcut Selection
76
DiVitas Client User Guide for Nokia E and N Series Phones, v2.7
Page 77

Figure 22. Active-Standby Screen
Programming the Own Key
Adding a Shortcut to the DiVitas Client
Upgrading the DiVitas Client
Some devices have an ‘Own key’, which is a button with the following icon that can be
programmed to launch an application of your choosing. If your device has an ‘Own key’
you can configure it by doing the following:
1 Press and hold the Own key, or select Menu > Tools > Own key. The Own key screen
appears, where you can program the key. (See Figure 23.)
2 Press the Navi scroll key to display a list of applications.
3 Scroll to “DiVitas” and press the Navi scroll key to select it, or select OK.
4 Select Exit.
DiVitas Client User Guide for Nokia E and N Series Phones, v2.7
77
Page 78

Adding a Shortcut to the DiVit as C lient
Upgrading the DiVitas Client
Figure 23. Menu > Tools > Own key
78
DiVitas Client User Guide for Nokia E and N Series Phones, v2.7
Page 79

Troubleshooting the DiVitas Client
The DiVitas Client offers several tools to assist the system administrator in
troubleshooting the software. If the user notices any unusual behavior, the upload log
utility allows the client to upload logs from the client to the server. Similarly, the archive
log utility allows the user to save log files on the client for later analysis, so log files can be
saved even during a loss of connectivity.
Uploading Logs from the DiVitas Client
The Upload Log feature allows users to upload a dynamic set of log files to the DiVitas
Server for later review by a system administrator. To upload the client log files to the
DiVitas Server, simply select Options > Upload Log from the home screen.
Up to 300 logs can be stored on the phone, uploaded to the server , and accessed through
the DiVitas Server GUI. Once this 300-log threshold has been reached, successive log
files (on the phone) will overwrite the oldest log files. In other words, the 301st log will
overwrite the 1st log file.
Troubleshooting the DiVitas Client
Upgrading the DiVitas Client
Archiving Logs on the Phone’s Memory Card
The DiVitas Client supports the ability to archive a set of lo g file s on the ph one's memory
card. This feature lets DiVitas users take a snapshot of the current logs and preserve
them in the phone’s memory card, thus preventing them from being overwritten by newer
and continuously-generated log files. This tool can prove invaluable when the Upload
Logs feature cannot function – perhaps due to a loss of connectivity. To use the archive
log utility, simply select Options > Archive log.
Archived files are named according to timestamp and should be accessed by th e system
administrator by pressing the Nokia menu button and navigating to the following folder:
Office > File Mgr. > select the Memory Card icon (see below) > scroll down to DVLogs >
DVLogArchives.
DiVitas Client User Guide for Nokia E and N Series Phones, v2.7
79
Page 80

Uninstalling the DiVitas Client
Upgrading the DiVitas Client
Figure 24. Accessing client logs files from the memory card
Notes:
■ Up to five sets of logs can be saved on the phone using the Archive Log fea ture, af ter
which older sets of archived files must be deleted to make room for the new ones.
Uninstalling the DiVitas Client
If you should ever choose to uninstall the DiVitas Client, DiVitas recommends that you
use the following procedure:
1 Press the Menu key.
2 Select the Office folder.
3 Select the DiVitas icon.
4 Select Options > Remove.
5 Select Yes at the prompt.
80
DiVitas Client User Guide for Nokia E and N Series Phones, v2.7
Page 81

Voice-Only Voicemail Access
Signing In to the DiVitas Server Voicemail System . . . . . . . . . . . . . . . . . . . . . . . . . . . . 81
Voicemail Options . . . . . . . . . . . . . . . . . . . . . . . . . . . . . . . . . . . . . . . . . . . . . . . . . . . . . 82
Setting Up Your Mailbox . . . . . . . . . . . . . . . . . . . . . . . . . . . . . . . . . . . . . . . . . . . . . . . . 85
Checking Your Voicemail . . . . . . . . . . . . . . . . . . . . . . . . . . . . . . . . . . . . . . . . . . . . . . . . 87
This chapter describes how to manage your DiVitas Server voicemail account by dialing
the DiVitas Server. These procedures are not performed using the Voicemail screen.
Signing In to the DiVitas Server Voicemail System
To sign into your DiVitas Server voicemail account, use one of the following methods.
Signing In from Your Extension
Method 1
1 Access the DiVitas Dialer screen. (See “Accessing the DiVitas Dialer Screen” on
page 25.)
2 Select Options > Call voicemail.
3 When prompted to enter your password, enter your DiVitas voicemail password.
Method 2
1 Dial *97.
2 When prompted to enter your password, enter your DiVitas voicemail password.
Signing In from Another Device
To sign into your voicemail from another device:
1 Dial *98.
2 When prompted to enter your use r name, en ter your DiVitas Client extension number.
3 When prompted to enter your password, enter your DiVitas Server voicemail
password.
DiVitas Client User Guide for Nokia E and N Series Phones, v2.7
81
Page 82

Voicemail Options
Voice-Only Voicemail Access
Voicemail Options
After you sign in, the voicemail system will play a menu of options. This is the main menu.
■ 1 – Play messages
■ 2 – Change folders
■ 3 – Advanced options
■ 0 – Mailbox options
■ * – Help
■ # – Exit
Options 1, 2, and 0 lead to further options. Option 3 has an option to return to the main
menu but is otherwise not used. Figure 25 on page 83 and Figure 26 on page 84 show
the voicemail options available on the DiVitas Server. (Option 3 in the main menu is not
shown, since it is not used.)
82
DiVitas Client User Guide for Nokia E and N Series Phones, v2.7
Page 83

Figure 25. Voicemail Options
Voicemail Options
Voice-Only Voicemail Access
DiVitas Client User Guide for Nokia E and N Series Phones, v2.7
83
Page 84

Voicemail Options
Voice-Only Voicemail Access
Figure 26. Voicemail Options (cont.)
84
DiVitas Client User Guide for Nokia E and N Series Phones, v2.7
Page 85

Setting Up Your Mailbox
If DiVitas Server voicemail service has been enabled for your DiVitas Client extension,
the mailbox is already set up with a default password and a default set of greetings. You
can customize your mailbox by changing these settings.
Ask your DiVitas Server administrator for your default voicemail password. The
DiVitas Server administrator sets the password when adding your DiVitas Client
user account to the DiVitas Server.
Table 9 describes the voicemail greetings you can customize.
Table 9. Configurable Voicemail Greetings
Greeting Type Description Default Greeting Customized Greeting
Setting Up Your Mailbox
Voice-Only Voicemail Access
Unavailable The Unavailable greeting is played in
the following cases:
• Someone calls your extension when
you are not signed into the DiVitas
Server.
• Someone calls your extension when
you are signed into the DiVitas
Server but you do not answer the
call.
• Someone calls your extension when
you are not available for voice.
Busy The Busy greeting is played for callers
who call your DiVitas Client extension
when you are already on a call.
Temporary When configured, the Temporary
greeting is played instead of the
Unavailable or Busy greeting, in all of
the cases where these two greetings
normally are played.
For example, if you are going on
vacation, you can record a Temporary
greeting to inform callers of the dates
you will be away.
“The person at
extension
extension-number is
unavailable. Please
leave a message after
the tone. When
finished, hang up or
press the # key.“
“The person at
extension
extension-number is
unavailable. Please
leave a message after
the tone. When
finished, hang up or
press the # key.“
By default, there is no
Temporary greeting.
Your new Unavailable
greeting replaces the
first sentence of the
default greeting.
Your new Busy
greeting replaces the
first sentence of the
default greeting.
Your Temporary
greeting replaces the
first sentence of the
Unavailable and Busy
greetings.
DiVitas Client User Guide for Nokia E and N Series Phones, v2.7
85
Page 86

Setting Up Your Mailbox
Voice-Only Voicemail Access
You also can record your name. By default, the greetings listed in Table 9 say “The person
at extension extension-number is unavailable/busy”
say your name instead of “
The person at extension extension-number”.
To return a greeting to its default value, you can erase it.
Changing Your Voicemail Password
1 Sign in to the voicemail system. (See “Signing In to the DiVitas Server Voicemail
System” on page 81.)
2 Press 0 to access voicemail options.
3 Press 5.
The voicemail system prompts you to enter your new password.
4 Enter the new password.
The voicemail system prompts you to enter your new password again, to ensure you
typed the numbers you intended to type.
. If you record your name, the greetings
5 Enter the new password again.
6 When you are finished, press End.
7 Dial into the DiVitas Server voicemail system again and test the new password.
Changing Your Name
1 Sign in to the voicemail system. (See “Signing In to the DiVitas Server Voicemail
System” on page 81.)
2 Press 0 to access voicemail options.
3 Press 3.
4 After the tone, say your name.
5 Press #.
6 Press 2 to listen to your recording.
7 Press 1 to save the recording or press 3 to rerecord it.
8 Hang up, or select another option. (See Figure 26 on page 84.)
86
DiVitas Client User Guide for Nokia E and N Series Phones, v2.7
Page 87

Customizing Your Voicemail Greetings
You can customize the greetings described in Table 9 on page 85.
1 Sign in to the voicemail system. (See “Signing In to the DiVitas Server Voicemail
System” on page 81.)
2 Press 0 to access voicemail options.
3 Press one of the following numbers:
● 1 – To record your Unavailable greeting
● 2 – To record your Busy greeting
● 4 – To record your Temporary greeting
4 After the tone, speak your new greeting.
5 Press #.
6 Press 2 to listen to your new greeting.
Checking Yo ur Voicemail
Voice-Only Voicemail Access
7 Press 1 to save the greeting or press 3 to re-record it.
8 Hang up or select another option. (See Figure 26 on page 84.)
Checking Your Voicemail
Your voicemail is stored in folders. The DiVitas Server voicemail system provides the
following folders:
■ New
■ Old
■ Work
■ Family
■ Friends
All voicemail messages that you have not listened to are stored in the New folder. After
you listen to a voicemail, the message is moved from the New folder to one of the other
folders. By default, messages are moved to the Old folder. However, after you listen to a
message, the voicemail system allows you to specify the folder in which to save the
message. You can save a message into any of the folders.
DiVitas Client User Guide for Nokia E and N Series Phones, v2.7
87
Page 88

Checking Your Voicemail
Voice-Only Voicemail Access
To access your voicemail:
1 Sign in to the voicemail system. (See “Signing In to the DiVitas Server Voicemail
System” on page 81.)
2 Select a message folder. The prompt from the voicemail system differs depending on
whether you have new messages, old messages, or both.
● If you have new messages, the following options are available:
● If you have saved messages but no new messages, the following options are
◆ 1 – Listen to new messages. The voicemail system begins playing the first
new message.
◆ 2 – Change folders.
available:
◆ 1 – Listen to old messages. The voicemail system begins playing the first old
message.
◆ 2 – Change folders.
3 If you selected 2 to change folders, press a number to select a voicemail folder:
● 0 – New messages
● 1 – Old messages
● 2 – Work messages
● 3 – Family messages
● 4 – Friends’ messages
Press 1 to play the messages that are contained in the selected folder.
4 When you are finished, hang up or select ano ther option. (Se e Figure 26 on page 84.)
Rewinding or Fast Forwarding
While you are playing a message, you can rewind or fast forward:
■ * – Rewind
■ # – Fast forward
Saving a Message
88
After you listen to a message, the voicemail system allows you to save the message. In
fact, the message is saved by default to the Old folder, unless you delete the me ssage or
save it to another folder instead.
DiVitas Client User Guide for Nokia E and N Series Phones, v2.7
Page 89

To save a message in a specific folder:
1 After the message is played, press 9.
2 Press a number to select the folder:
● 0 – New messages
● 1 – Old messages
● 2 – Work messages
● 3 – Family messages
● 4 – Friends’ messages
Forwarding a Message
After you listen to a message, one of the options presented by the voicemail system is to
forward the message to another extension. You can prepend a message of your own to
the forwarded message or forward it as-is, without a prepended message.
Checking Yo ur Voicemail
Voice-Only Voicemail Access
To forward a message:
1 After the message is played, press 8.
2 Press a number to prepend the message or forward as-is:
● 1 – Prepend a message before forwarding
● 2 – Forward as-is
These options along with the other message options are shown in Figure 25 on page 83.
DiVitas Client User Guide for Nokia E and N Series Phones, v2.7
89
Page 90

Checking Your Voicemail
Voice-Only Voicemail Access
90
DiVitas Client User Guide for Nokia E and N Series Phones, v2.7
 Loading...