

Page 1

NOKIA
SERIES 60 UI STYLE GUIDE
1
Copyright © Nokia Corporation | ver. 1.4
Page 2

Editorial notes
A style guide should give an overview and provide enough guidelines for designing
good applications, but not all the information to write the software. This is intended
to be a compact and easy to read guide, which means skipping many details that can
be found in other documents. There's no general discussion about good usability;
instead this document tries to clarify how the style elements of the Nokia Series 60
user interface are meant to be used in practice.
The content is also intended to be independent of product-specific hardware, so that
the guidelines would apply to any product that implements the UI style. Sometimes
this means dropping out things that would be appropriate for one product but maybe
not for another one.
A few example images in this version are not final.
Seppo Helle, 31.10.2001
2
Page 3

Contents
ABOUT THIS DOCUMENT................................................................................................................................................ 7
PURPOSE .......................................................................................................................................................................7
AUDIENCE..................................................................................................................................................................... 7
1. WHERE NOKIA SERIES 60 UI BELONGS................................................................................................................ 8
2. HARDWARE REQUIREMENTS...................................................................................................................................9
DISPLAY .............................................................................................................................................................................. 9
KEYS ..............................................................................................................................................................................10
EXTRA KEYS................................................................................................................................................................10
3. GRAPHICAL COMPONENTS.....................................................................................................................................11
WINDOWS AND PANES................................................................................................................................................11
STANDARD PANES IN APPLICATION WINDOWS....................................................................................................12
MAIN PANE.................................................................................................................................................................12
STATUS PANE.............................................................................................................................................................13
TITLE PANE..................................................................................................................................................................13
CONTEXT PANE..........................................................................................................................................................14
NAVI PANE..................................................................................................................................................................14
SIGNAL PANE.............................................................................................................................................................15
BATTERY PANE / UNIVERSAL INDICATOR PANE................................................................................................15
CONTROL PANE .........................................................................................................................................................16
POP-UP WINDOWS........................................................................................................................................................16
PRESENTATION OF TEXT................................................................................................................................................18
JUSTIFICATION...........................................................................................................................................................18
TRUNCATION..............................................................................................................................................................18
4. INTERACTION STYLE.................................................................................................................................................18
KEYPAD FUNCTIONS......................................................................................................................................................18
KEY PRESSES..............................................................................................................................................................18
KEYPAD TONE.............................................................................................................................................................19
TYPICAL FUNCTIONS OF THE STANDARD KEYS.................................................................................................19
NAVIGATION....................................................................................................................................................................22
NAVIGATING IN APPLICATIONS.............................................................................................................................22
NAVIGATION USING TABS ......................................................................................................................................23
FOLDER HIERARCHIES.............................................................................................................................................24
3
Page 4

NAVIGATION USING LINKS.....................................................................................................................................25
5. UI COMPONENTS......................................................................................................................................................25
LISTS AND GRIDS............................................................................................................................................................25
HIGHLIGHTING...........................................................................................................................................................25
EMPTY LISTS AND GRIDS........................................................................................................................................26
LIST BROWSING.........................................................................................................................................................26
SCROLLING INDICATOR FOR LISTS.......................................................................................................................27
ORDER OF ITEMS AND BROWSING IN GRIDS....................................................................................................28
SCROLLING INDICATOR FOR GRIDS.....................................................................................................................30
LIST TYPES........................................................................................................................................................................30
MENU LIST..................................................................................................................................................................30
SELECTION LIST..........................................................................................................................................................31
MARKABLE LIST.........................................................................................................................................................34
MULTISELECTION LIST..............................................................................................................................................36
SETTING LISTS............................................................................................................................................................37
FORMS.........................................................................................................................................................................40
LIST LAYOUTS..................................................................................................................................................................43
COLUMN STRUCTURE OF LISTS.............................................................................................................................44
LIST ITEM TYPES........................................................................................................................................................45
NUMBERED ITEMS....................................................................................................................................................48
ITEM TYPE COMBINATIONS....................................................................................................................................48
GRID TYPES......................................................................................................................................................................49
FIND PANE........................................................................................................................................................................49
OPTIONS MENU..............................................................................................................................................................50
SUBMENUS.................................................................................................................................................................51
UNAVAILABLE ITEMS................................................................................................................................................52
OTHER OPTION MENUS...........................................................................................................................................52
OPTIONS TEMPLATE..................................................................................................................................................53
NOTES ..............................................................................................................................................................................56
SOFT NOTIFICATIONS.....................................................................................................................................................58
DISCARDING SOFT NOTIFICATIONS......................................................................................................................59
MANY SIMULTANEOUS SOFT NOTIFICATIONS...................................................................................................59
QUERIES............................................................................................................................................................................60
4
Page 5

CONFIRMATION QUERY...........................................................................................................................................60
LIST QUERY.................................................................................................................................................................61
MULTISELECTION LIST QUERY ...............................................................................................................................62
DATA QUERY ..............................................................................................................................................................63
INDICATORS.....................................................................................................................................................................64
SIGNAL AND BATTERY INDICATORS.....................................................................................................................64
STATUS INDICATORS................................................................................................................................................65
INDICATORS IN NAVI PANE....................................................................................................................................65
EDITING INDICATORS IN POP-UP WINDOWS....................................................................................................66
SOFT INDICATORS.....................................................................................................................................................66
OPERATOR INDICATOR ............................................................................................................................................67
SCROLLING INDICATORS.........................................................................................................................................67
APPLICATION-SPECIFIC INDICATORS...................................................................................................................67
6. APPLICATIONS AND DESIGN EXAMPLES.............................................................................................................67
IDLE ..............................................................................................................................................................................67
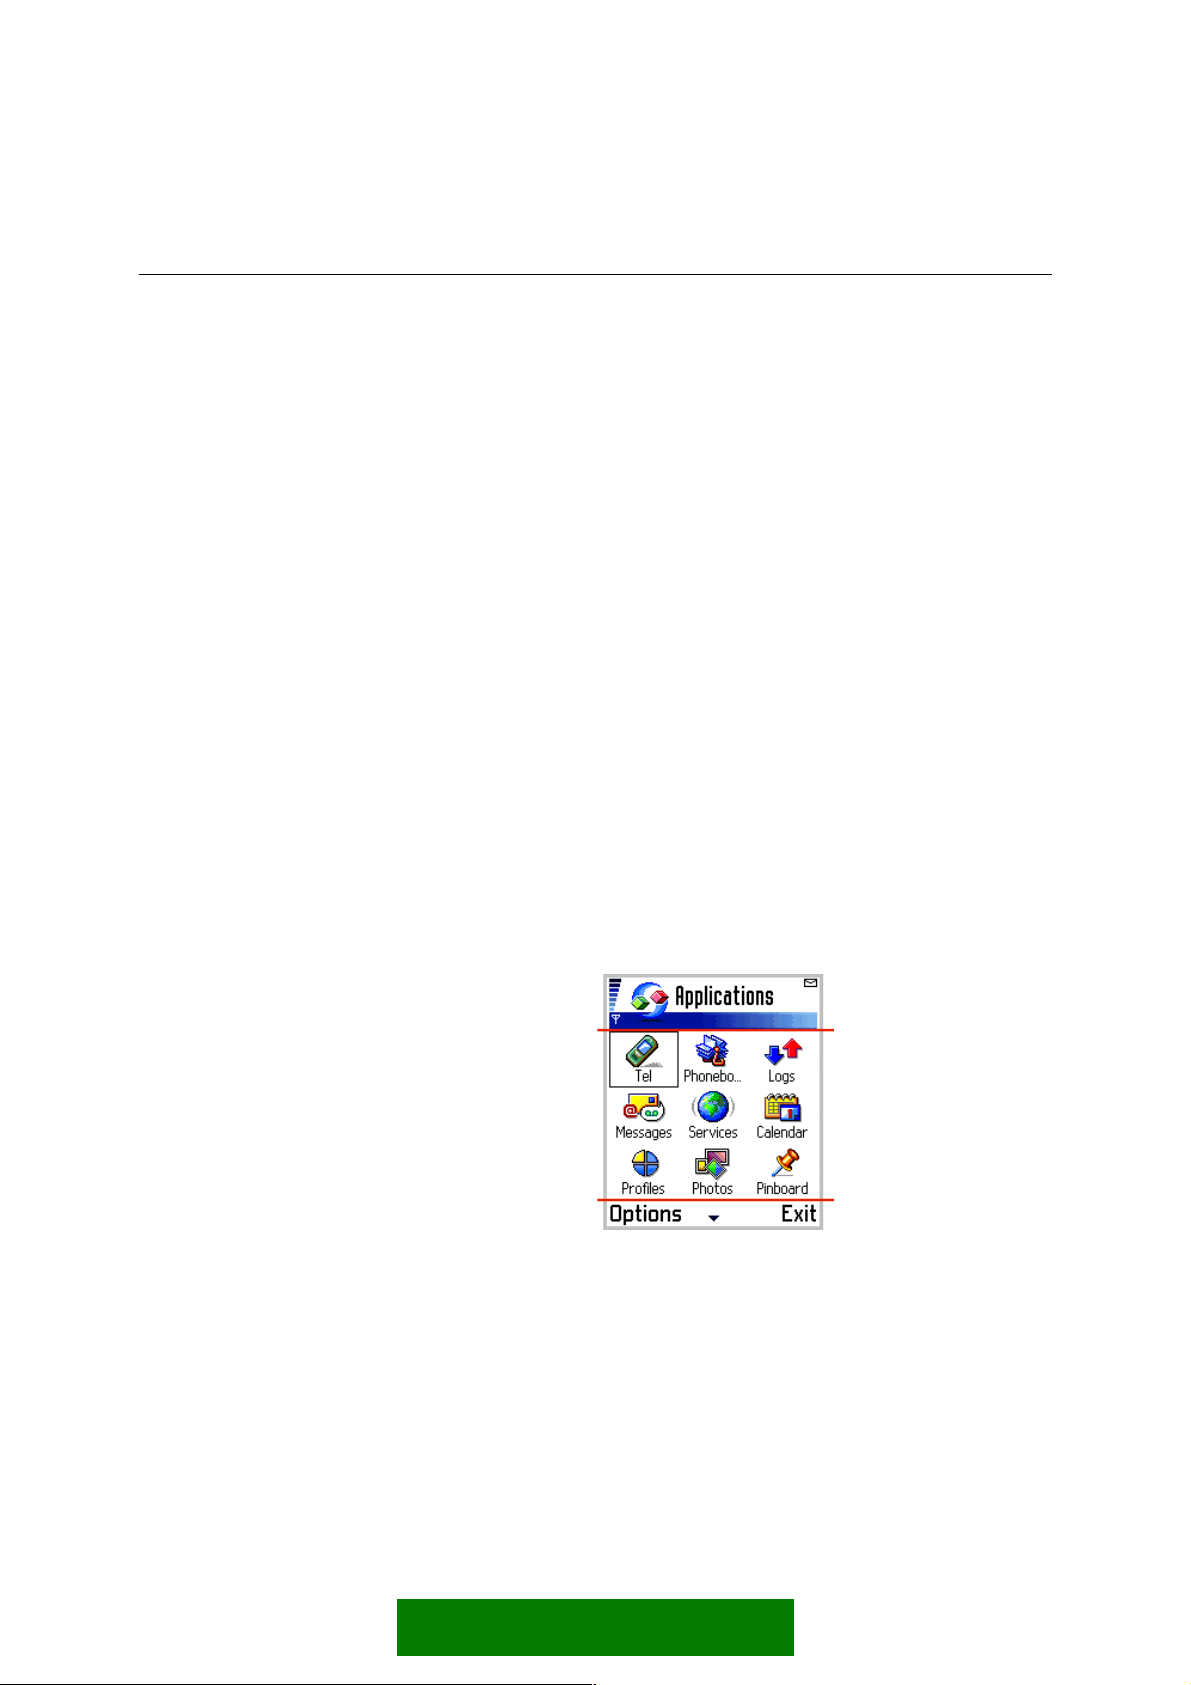
APPLICATION SHELL.......................................................................................................................................................68
SHORTCUTS ................................................................................................................................................................69
CUSTOMIZING THE APPLICATION SHELL............................................................................................................69
FAST APPLICATION SWAPPING..............................................................................................................................69
APPLICATION HANDLING .............................................................................................................................................69
OPENING AND CLOSING APPLICATIONS.............................................................................................................70
MULTITASKING..........................................................................................................................................................70
APPLICATION INTERACTIONS.................................................................................................................................71
PHONE ..............................................................................................................................................................................72
CALL HANDLING........................................................................................................................................................74
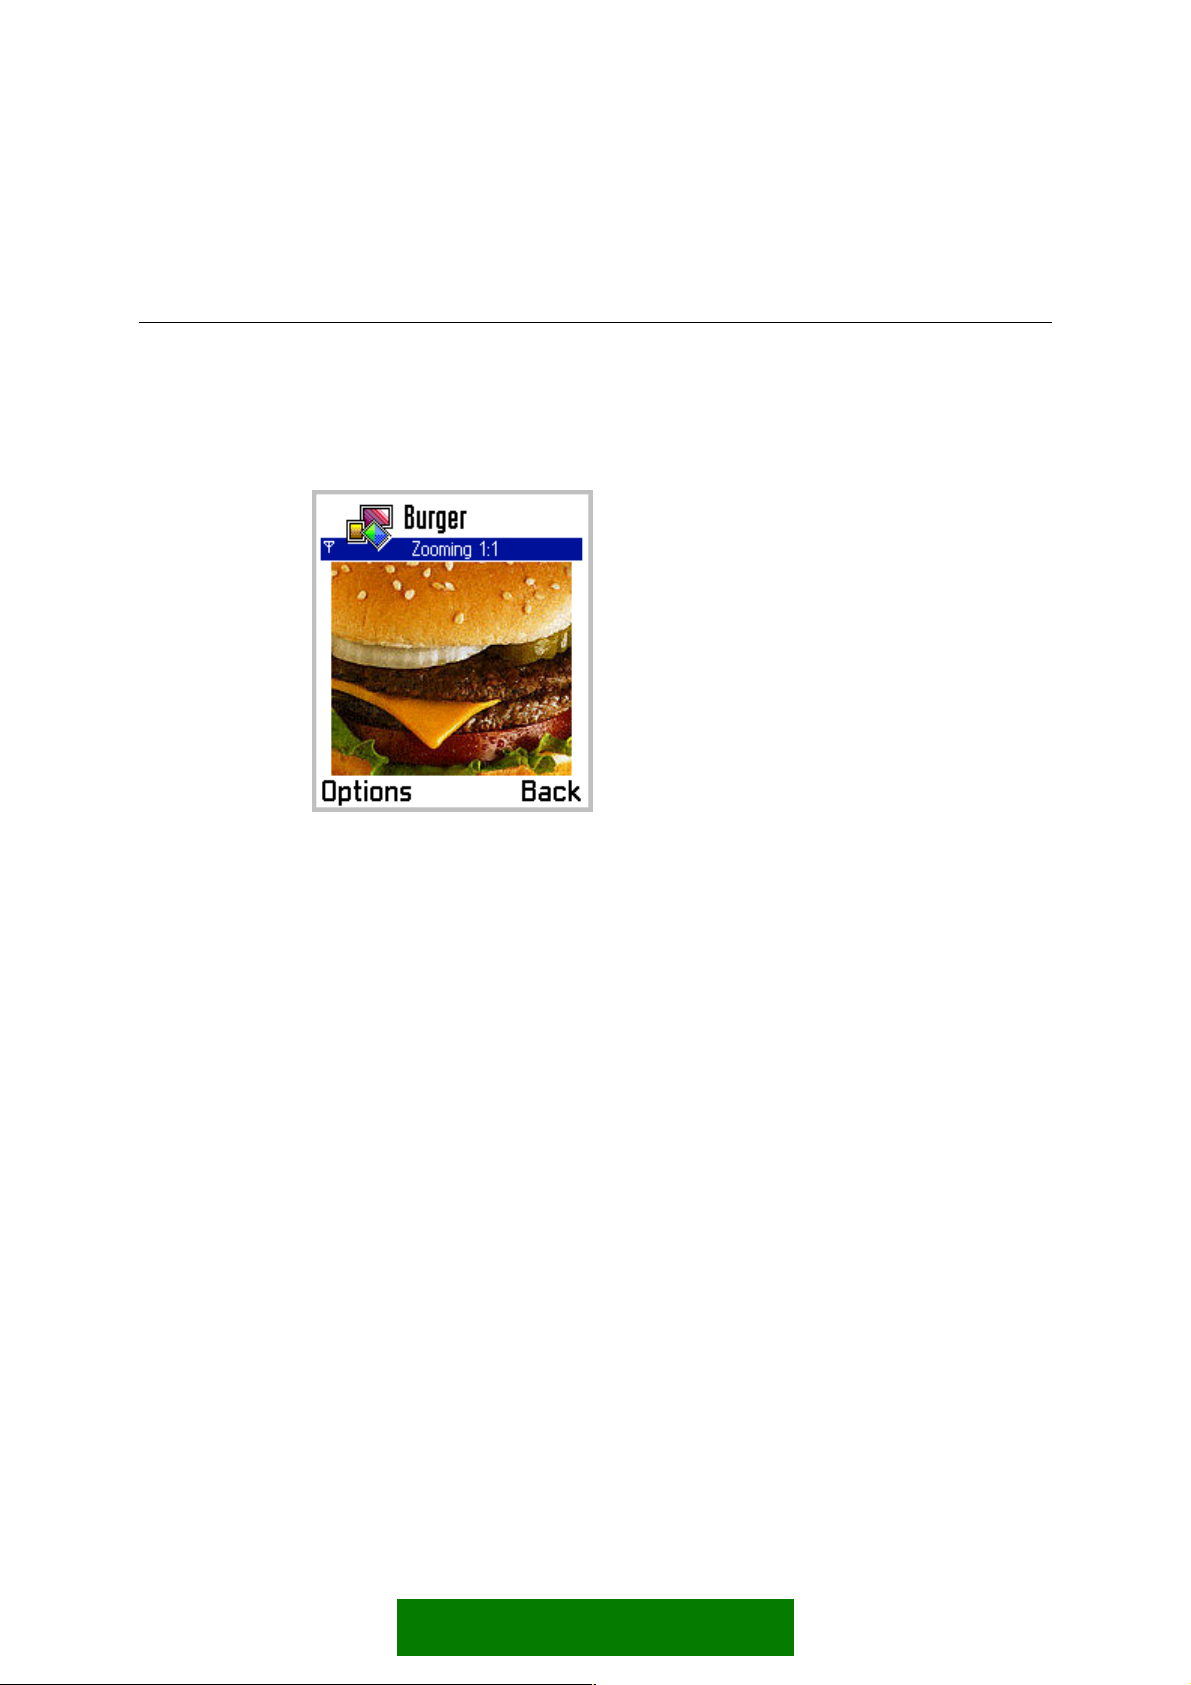
VIEWERS AND PLAYERS................................................................................................................................................75
TEXT VIEWERS............................................................................................................................................................75
IMAGE VIEWERS........................................................................................................................................................75
MULTIMEDIA VIEWERS............................................................................................................................................76
AUDIO AND VIDEO PLAYERS..................................................................................................................................76
TEXT EDITING...................................................................................................................................................................77
EDIT MENU .................................................................................................................................................................78
EDITING INDICATORS...............................................................................................................................................79
5
Page 6

SELECTING TEXT ........................................................................................................................................................80
DOCUMENT HANDLING................................................................................................................................................80
CREATING NEW DOCUMENTS ...............................................................................................................................80
SAVING EDITED DATA..............................................................................................................................................81
FOLDERS......................................................................................................................................................................82
GROUPS.......................................................................................................................................................................82
FETCHING DATA.........................................................................................................................................................83
SETTINGS..........................................................................................................................................................................83
6
Page 7

About this document
Purpose
The Nokia Series 60 UI Style Guide gives an overview of the Series 60 user interface
and describes the essential parts of it, giving examples of how to use the interface
elements.
The Nokia Series 60 UI Style Guide can be used as an introduction to the style or as
reference material. It can provide background material to help UI designers make
decisions about their product.
Audience
This document is intended, in the first place, for people who work with application
design for devices using the Series 60 UI.
It will also help persons like product managers to get a general view of the Series 60
UI, what it is and how it is intended to be used.
7
Page 8

1. WHERE NOKIA SERIES 60 UI BELONGS
Nokia Series 60 UI is intended for use in higher end mobile phones featuring personal
information management (PIM) and multimedia applications such as:
Calendars ·
·
Text and multimedia messaging
·
E-mail
·
WAP or other browsers
·
Imaging
The screen is suitable for viewing short messages and can also display colour or
grayscale images.
The data entry interface is optimised for a numeric ITU-T type keypad. Other input
devices are not considered in this document although it would be possible to support,
for example, an external keyboard.
One hand operation is a key rule: the user is able to do almost all tasks with just one
hand, pressing the keys with the thumb. A few exceptions exist in functions that are
targeted to power users and require pressing two keys simultaneously.
Nokia Series 60 UI is not an optimal user interface for very basic phones. All basic
phone functions can be done with it, but the capabilities of Series 60 UI would not
be fully utilised. There are other interface styles that are better than Series 60 UI for
the very basic phones.
Series 60 UI is also not designed for car based or wearable products, or for other
product categories significantly different from advanced hand-held mobile phones.
8
Page 9
2. HARDWARE REQUIREMENTS
Nokia Series 60 UI has certain requirements concerning the hardware. This section
lists the assumed hardware for the first implementation; it is possible to extend and
modify the hardware to some extent for subsequent product generations.
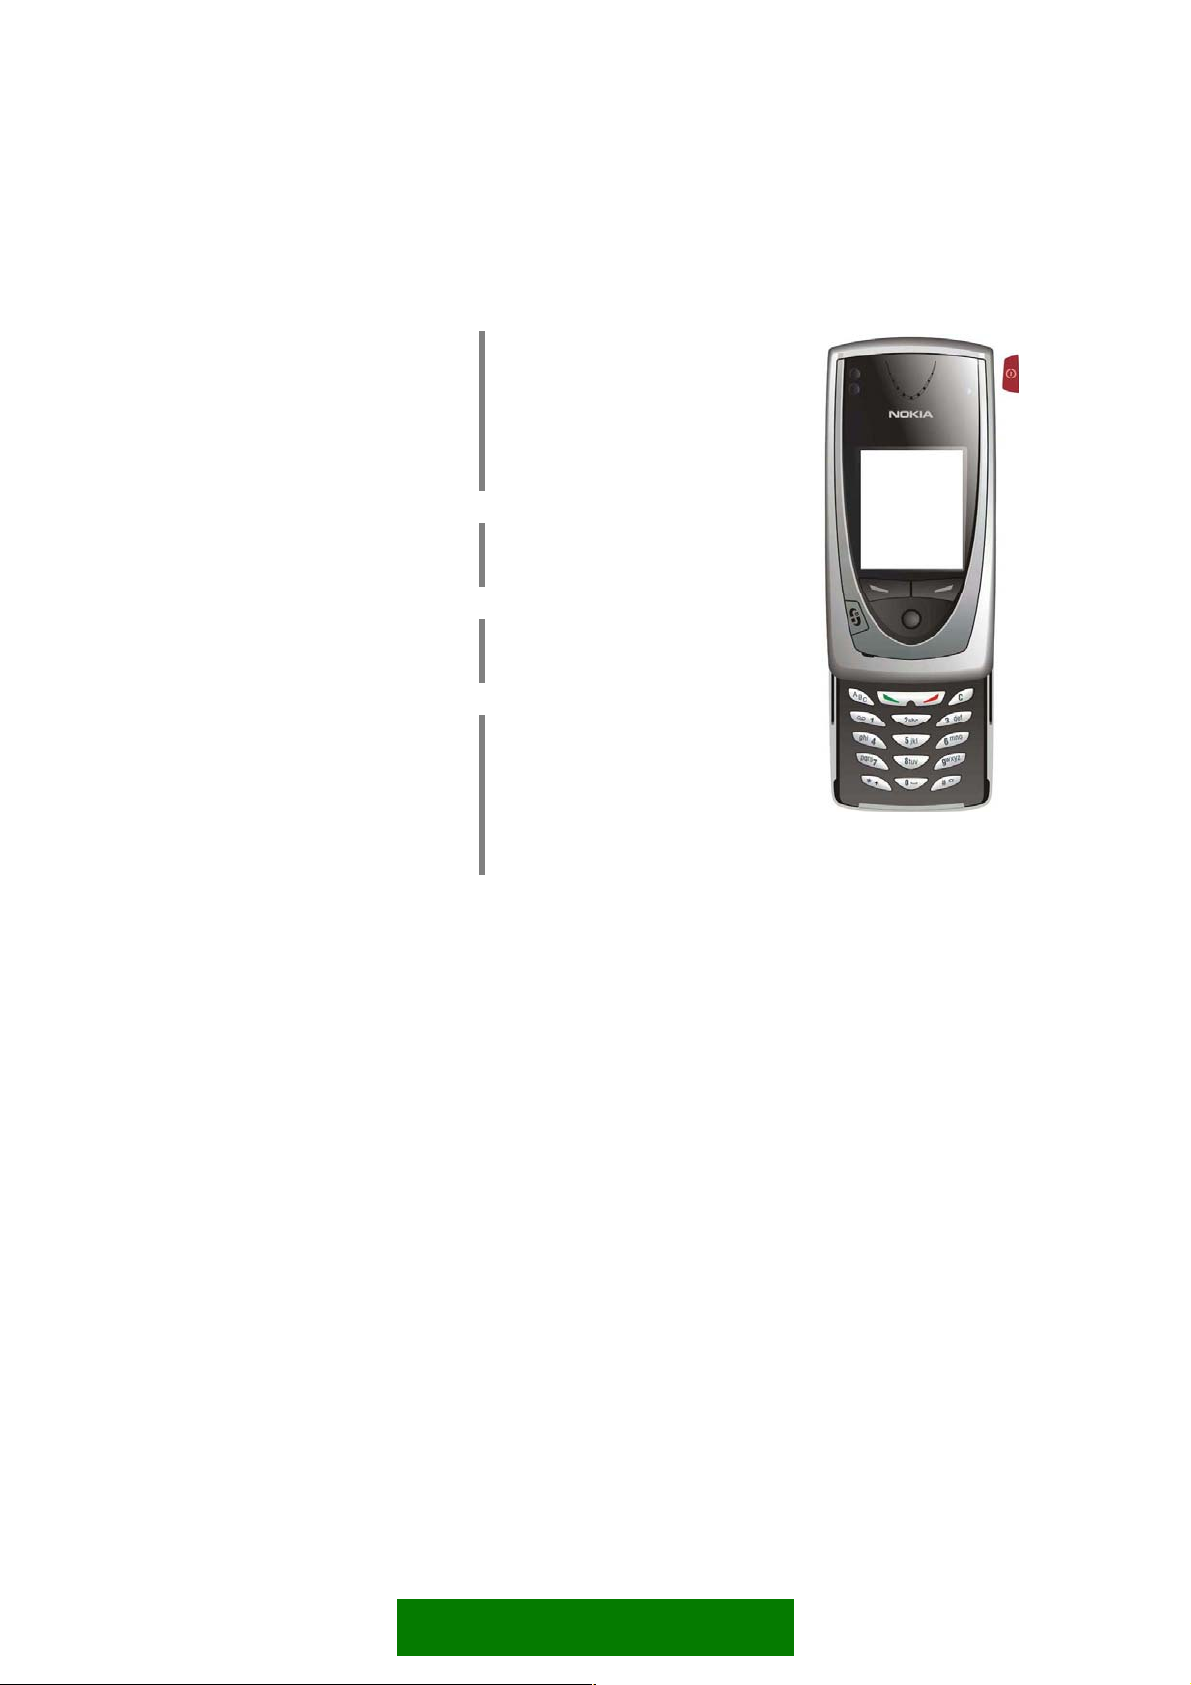
Display
Figure 2-1. Series 60 display.
The Series 60 UI display specifications are as follows:
Resolution: 176 pixels (width) by 208 pixels (height). ·
It should be possible to modify the vertical resolution for future generations.
The first implementation, however, assumes these resolutions.
·
Square pixels.
·
Physical size: about 35 mm (width) by 41 mm (height). Corresponds to
approximately 0.2 mm pixel pitch.
Significantly smaller pixel pitch risks making some fonts too small to be
readable. Larger pitch is possible, considering usability issues.
·
Colour capability (4096 or more colours preferred).
9
Page 10
Keys
The following keys are required for Series 60 UI:
navigation keys
Scroll up
Scroll down
Scroll left
Scroll right
Select key
softkeys
Left softkey
Right softkey
call handling
Send key
End key
other
Applications key
ITU-T numeric keypad (0-9, *, #)
Clear key
Edit key
Power key
The navigation keys can be ordinary buttons, or they can be implemented using
·
different control devices, for example a roller which can be rotated and pressed
so that up, down and select functions would be mapped to it.
·
Hardware solution may have some effect on the navigation functionality: for
example a long key press event can't be accomplished with a rotating device.
·
Each softkey has a corresponding textual label on the bottom of the screen.
·
The Edit key is the only key that can be used simultaneously with another key
press, for example, the combinations where any of the navigation keys are
pressed while the Edit key is held down.
See section Keypad functions in chapter Interaction style for more information
about the usage of keys.
Extra keys
Other specific keys can be added to a product to emphasize or facilitate some
functions. These extra keys could be used to control applications or hardware such as
spoken commands, sound recording, and audio volume control.
10
Page 11
3. GRAPHICAL COMPONENTS
Windows and panes
The display layouts are hierarchically organised. The layouts are built using
components called windows and panes.
screen Screen is the topmost display component,
window Window is a component that has no parent except
Each application runs in a window of it's own.
pane Pane means a sub-component of a window (sub-
corresponding to the entire pixel area of the
physical screen.
the screen. Typically a window fills up the entire
screen, but there are also smaller (temporary)
windows that take up only a part of the screen,
leaving other parts of the screen visible around
themselves.
Applications can also use other temporary windows.
window).
A window may contain many panes, and each pane
may contain further sub-panes and so on. A bottom
level component that cannot have a subcomponent, can be called an element.
Figure 3-1. Panes
application window An application window is a principal window filling
up the entire screen. It is usually not used directly
for display, but just as a parent for the various
panes.
A typical application window is divided into the
following panes:
Status pane
Main pane
Control pane
11
Page 12

- status pane
- main pane
- softkey pane
See the dedicated sections for more detailed
descriptions on each of these panes.
pop-up window A pop-up window does not fill the entire screen; the
pop-up window has a frame, and typically the
underlying application is partly visible around the
pop-up window.
Pop-up windows are typically used in temporary
states. Back stepping does not usually lead to a
pop-up window.
Detailed information on various pop-up windows
can be found in section Pop-up windows.
Standard panes in application windows
Main pane
Main pane is the principal area of the screen where an application can display its
data.
There are a number of standard components for applications to use in the main pane:
a list There are several standard list types to choose from.
(See section Lists and grids for a detailed
description of list types.)
a grid There are also several different grid types to choose
from.
find pane Find pane is used together with a list, and it allows
the user to search list items alphabetically. (See
section Lists and grids for more information about
the find pane.)
status indicators The status indicator pane only exists in idle state,
immediately below navi pane, and displays status
indicators. A few of the indicators appear also in the
universal indicator pane (at other times than in
idle), others exist only in the status indicator pane.
soft indicators Soft indicators only exist in idle state. See section
Indicators for more information on status indicators
and soft indicators.
12
Page 13

Applications can also use the main pane area to freely draw whatever is needed. In
that case, however, the responsibility of the look and feel is entirely on the
application's designer. General guidelines for designing application specific main
pane layouts can be found elsewhere in this document.
Status pane
Status pane displays status information of the current application and state as well
as general information about the device status – for example the signal strength and
battery charging. It occupies the top part of the screen.
Status pane may be non-existent in a few applications or situations.
Status pane contains the following sub-panes:
Title pane ·
·
Context pane
·
Navi pane
·
Signal pane
·
Battery pane / Universal indicator pane
Title pane
Signal
pane
Context
pane
Figure 3-2. Status pane areas.
Navi pane
Batteery pane
(Universal
indicator pane)
See the following sections for detailed descriptions about each of these.
Title pane
Title pane displays a context - dependent application title or state name.
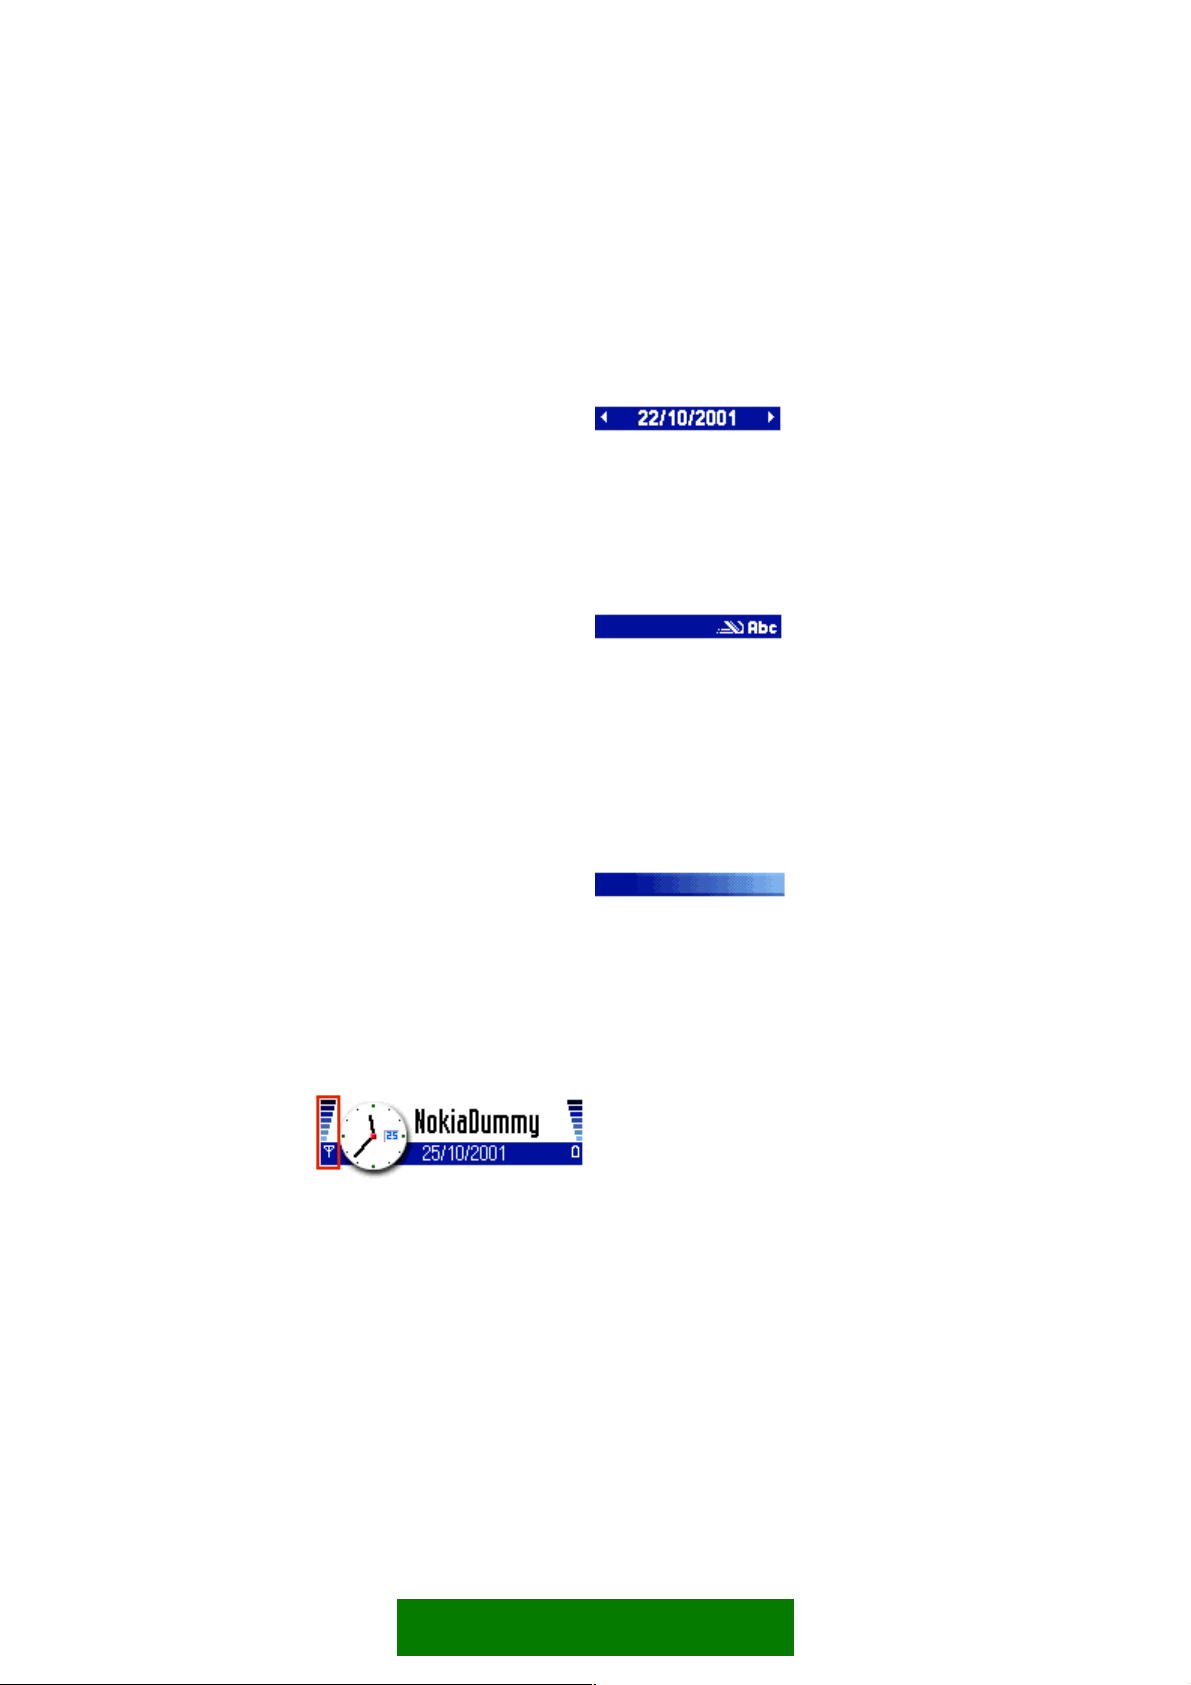
Figure 3-3. Title pane
Typically, the title text is the descriptive name of the current main pane view. ·
· In application idle, the title text is typically the application's name.
13
Page 14
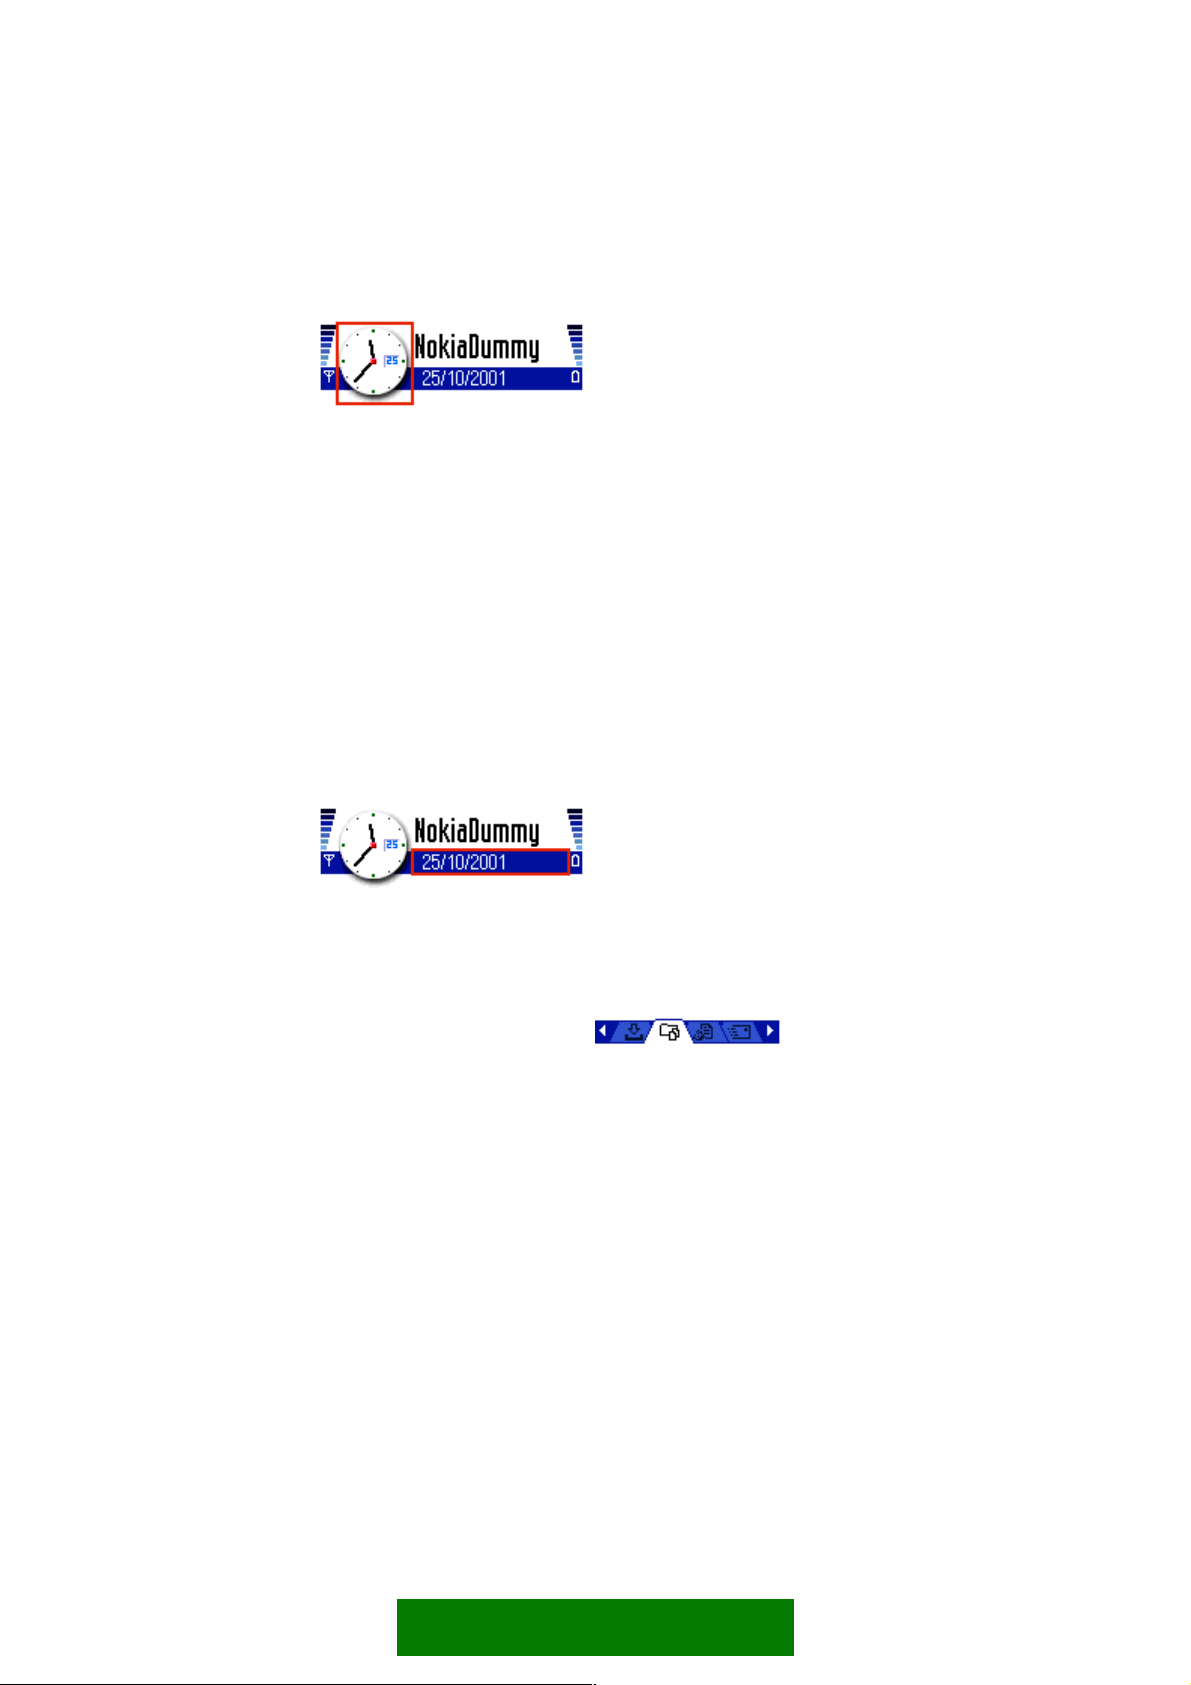
Context pane
Context pane displays the current application's icon.
Figure 3-4. Context pane.
The user can recognize the application by the context pane whenever the title
·
pane contains a context - specific text.
· The context pane graphic may contain some dynamic element (for example
animation) to inform the user about the application's state. Some applications
(e.g. Contacts) may even use the pane in a fully dynamic way to display some
data relevant to the application.
Navi pane
The principal use of the navi pane is to display information about the current state
and view, and to help the user navigate in the application.
Figure 3-5. Navi pane.
Depending on the context, the navi pane can alternatively contain:
Tabs
Figure 3-6. Tabs.
Used when there are a few different data views that
can be viewed alternatively. There are arrow
indicators in both ends of the widget (shown only
when there are further tabs hidden in the
corresponding direction). Each tab has either a
graphic or a text (or both) as a label.
The following tab layouts can be used:
- two tabs
- three tabs
- four tabs
- three long tabs (stacked, so that only one is fully
visible at a time)
The currently active tab is highlighted.
More than four tabs can exist simultaneously; the
tabs can be scrolled horizontally. However, as a
14
Page 15
design guideline, the number of tabs should be kept
low (max 6 recommended), and the number should
not be dynamic.
(See Tabs in section Interaction style for a
description of their effect on navigation within an
application.)
Navigation text
Figure 3-7. Navigation text.
Navigation text is displayed in the navi pane when
there are similar items to be browsed by scrolling
horizontally, e.g. dates in a calendar. Arrow
indicators in both ends of the pane indicate the
possibility to scroll.
Indicators
Figure 3-8. Indicators in the navi pane.
In editors the navi pane contains editing indicators.
(See the section Indicators for a more detailed
description of navi pane indicators.)
Application-specific content When none of the above content types is suitable,
the navi pane content can be designed specifically
for an application.
Empty pane
Figure 3-9. Empty navi pane.
The navi pane can be empty. A graphic is provided
for this.
Signal pane
Displays the cellular signal strength indicator.
Figure 3-10. Signal pane (left).
The indicator may also contain information about GPRS connection status.
Battery pane / Universal indicator pane
This area of the status pane is used in two different ways.
15
Page 16
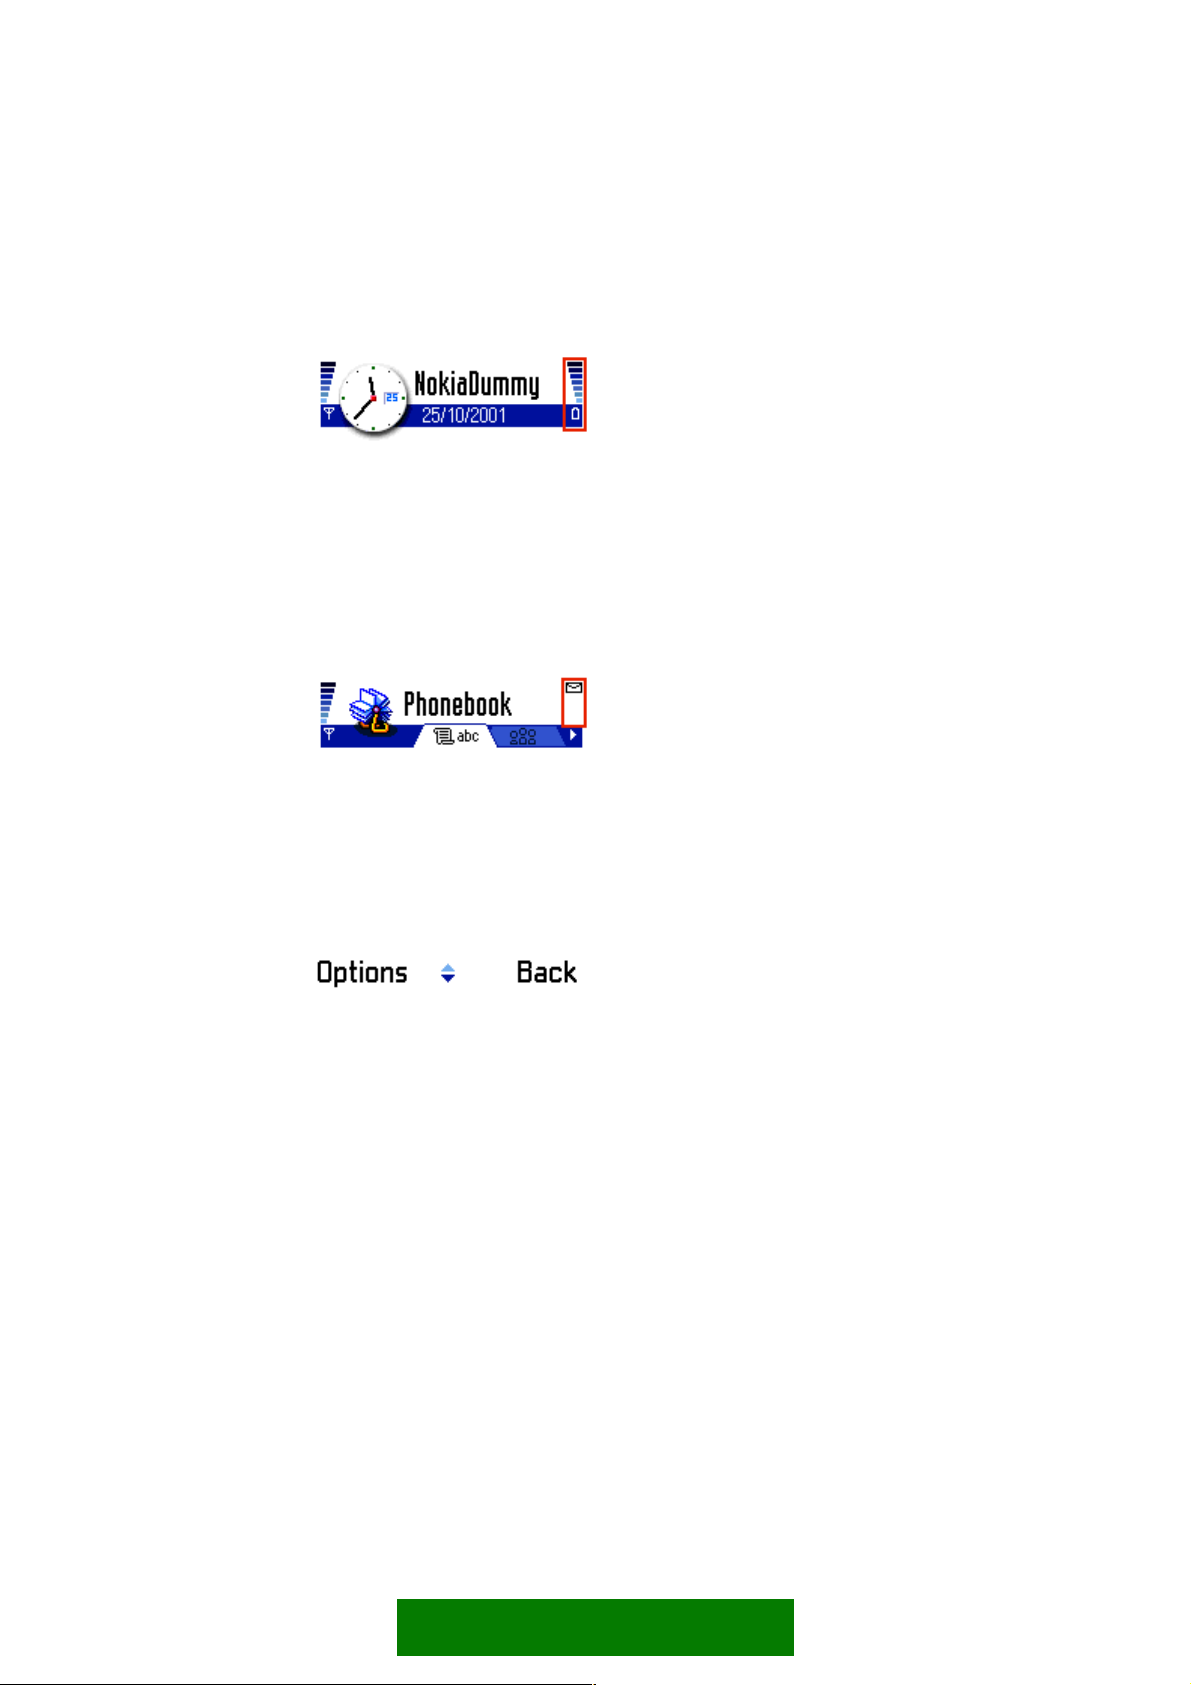
Battery pane Battery indicator is only visible in the idle state. It
displays the remaining energy level of the battery,
using a graphical indicator. It also acts as a
charging indicator.
Figure 3-11. Battery pane (right).
Universal indicator pane Used for displaying universal status indicators: the
status indicators that need to be visible regardless
of the current application. The maximum number of
items at a time is 3; items are prioritized according
to their importance.
Figure 3-12. Universal indicator pane replaces the battery pane (right).
Control pane
Control pane occupies the bottom part of the screen and displays the labels
associated with the two softkeys.
Figure 3-13. Control pane.
When there is a list that can be scrolled, the scrolling indicator arrows appear
between the softkey labels. See section Lists and Grids for a detailed description of
the indicators.
Control pane is also active during options menus, queries and other states using popup windows, although it does not reside itself in the pop-up window.
The actual softkeys should be positioned directly beneath the screen so that the
association between the keys and their respective labels is evident.
Pop-up windows
Certain UI components are displayed within pop-up windows. A common
characteristic for all these components is that they are temporary states, which
means that they do not remain open if the application for some reason is left in
background processing when some other application takes control. Also,
16
Page 17

backstepping from one state to the previous state never leads into a temporary state;
they are skipped.
More information on these components can be found in section UI components.
Options menu The commands and options that are available in the
current context can be accessed via the options
menu. It is displayed as a list in a pop-up window.
Query A query is a component where the software waits
for user input. All query components are displayed
in pop-up windows. They consist of a prompt
(possibly containing a graphical element) and some
kind of input component. Various types of queries
exist:
- confirmation query: has either one or two possible
input values, given using the softkeys.
- list query: has a limited number of possible input
values, the user selects one from a list.
- multiselection list query: has a limited number of
possible input values, the user can select zero, one
or more of them in one pass.
- data query: contains an input field for a numeric
or alphanumeric value that the user can edit.
Note A note is a feedback component that informs the
user about the current situation. Notes do not
require user input. They contain a text and possibly
a graphical element, the layout is similar to a
confirmation query, however the softkey labels are
typically non-existent.
Soft notification Soft notifications are reminders which inform the
user of events that have typically occurred during
the user's absence. Soft notifications can only be
seen in the idle state, and the user can acknowledge
them. There are two types of soft notifications; the
layouts resemble those of confirmation queries and
list queries:
- single soft notification: contains one notification.
- grouped soft notification: contains a number of
information items presented as a list, and a title
text common to all of the items.
Call window Incoming calls and outgoing calls are presented in
pop-up windows. See the section Call handling for
more detailed information on call windows.
17
Page 18

Presentation of text
Justification
Default text justification is left. There are only a few exceptions to this, in specific
cases, for example:
Soft indicators in idle state. These are right justified. ·
It must also be noted that when the display text language is Arabic or some other
language following right to left writing direction, many elements are right justified.
(See [some specific document] for more information on layout changes for right-toleft languages.)
Truncation
When a text does not fit into the view where it is displayed, it must be truncated. By
default, texts are truncated from the end, and three periods (…) are displayed in the
end of the truncated text as an indication. Exceptions to the main rule:
·
Phone numbers are truncated from the beginning, because the first digits of a
phone number are usually considered less important than the rest.
4. INTERACTION STYLE
Keypad functions
This section describes the typical functions for each key. Some application-specific
functions may exist in addition to the ones mentioned here.
Key presses
A key press is a press and release of a key (down and up).
Typically, the primary action of the key is performed when the key is pressed down,
already before the key is released. (There may be exceptions to this rule; see the Edit
key section for an example.)
Some functions depend on the length of the key press:
In a short key press the key is held down for less than 0.8 seconds. ·
·
If the key is held down for 0.8 seconds or more, the result is a long key press.
·
Normally, if the pressed key (in the given context) has functions for both a short
and long key press, the short key press action is performed first at the moment
when the key is pressed down, and if the key press turns out to be long, then the
long key press action is performed. In a few cases - the Applications key and the
18
Page 19

Edit key - the interaction is different, causing the action on the key release
event.
Certain keys, possibly in certain contexts only, may perform key repeat. Key
·
repeat starts after long key press timeout when the key is continuously being
held down, and the associated function is performed according to the key repeat
frequency, for example 3 times/second. (The repeat frequency may be user
adjustable.) Moving the cursor in an editor is a typical case where key repeat can
be used.
·
Long key press action and key repeat actions are not defined at the same time;
only one of those can occur in the given context.
·
The primary key press action should not be conflicting with the long key press
action or key repeat action.
With some input hardware, long key presses and key repeat may not be possible.
The roller is an example of such an input device. The long key press actions and
key repeat actions should be designed so that this does not cause harm: the
long key press must never be the only way to do a function.
Keypad tone
A tone can be generated whenever a key event occurs. The tones for short key press
(actually a key down event) and long key press are different; a key repeat event uses
the long key press tone.
Keypad tone can be adjusted or turned off by the user.
Typical functions of the standard keys
Scroll up / Scroll down - Move focus one item up/down in lists and grids.
- Move cursor one line up/down in editors.
- Scroll view one page up/down in viewers.
Scroll left / Scroll right - Move focus one item left/right in grids.
- Move cursor one character left/right in editors.
- Move to previous/next view in tabbed views.
- Move to previous/next folder view in hierarchical
folder structures.
- Move to previous/next document or view in
certain document viewers.
- Adjust sound volume during calls and sound
playback.
- Changes the value in pop-up field immediately.
Select - Open the focused item (e.g. document or folder) in
selection lists and grids.
- Select an option in menus and lists.
- Open a context - specific options menu when
19
Page 20

there is no item to open and no option to select (see
section Selection list).
The Select key must not directly activate any such
function the user would not expect in the given
situation. Therefore, the context specific options
menu is offered in states where no selectable items
exist.
The open/select function should not be mixed with
the options menu function within the same state;
only one or the other should be used.
Left softkey - Typically labeled Options. Opens the options
menu.
Other labels and functions:
- Select. Used in menu lists and grids where further
options are not available. Selects the focused item;
same as Select key function.
- OK, Yes and other positive replies; used in
confirmation queries.
- In idle, a shortcut to a specific application.
Configurable by the user, labeled according to the
application.
Right softkey - Typically labeled Back. Returns to the previous
state. (See section Application handling for a more
detailed description.)
Other labels and functions:
- Exit in application main states. Exits the
application and returns to idle.
- Cancel, interrupts a procedure and returns to the
preceding state; used in queries and other
temporary states.
- No and other negative replies; used in
confirmation queries.
- In idle, a shortcut to a specific application.
Configurable by the user, labeled according to the
application.
Send - Answers the incoming call when the phone rings.
- Creates an outgoing call when in Contacts and
other states where the focus is in a field containing
a phone number or name associated with a phone
number.
- Sends a message; used when in a message editor
and To-field contains a valid address.
20
Page 21

During calls:
- Puts an active call on hold; makes a held call
active; swaps active and held calls if both exist.
- Answer a waiting call (if only one call exists
already).
(See section Call handling for more detailed
descriptions.)
In idle:
- Brings up Last dialed calls list for redialing.
End - Rejects the arriving call.
- When an active call exists: ends the active call.
- When only a held call exists: ends the held call.
- When both active and held calls exist: ends the
active call, makes the held call active.
- When no calls exist and an application is active:
returns to idle (application is not terminated).
- Long press: closes down all connections (for
example GPRS, data call); however this has no effect
on IR and Bluetooth.
(See sections Call handling and Application
handling for more detailed descriptions.)
Applications key - Brings up the Application shell, allowing
application launching and swapping.
- When within the Application shell, returns to idle.
- Long press of Applications key brings up the quick
application swapping window, allowing switching
between running applications.
(See section Application handling for a more
detailed description.)
Numeric keypad (0-9, *, #) - Numeric and alphanumeric character entry.
- Application-specific shortcuts and other functions.
Clear - Clears characters when editing text or numbers.
- Clears documents or other entities in lists. (These
functions always require a confirmation from the
user.)
Clear is not used for back stepping or exiting; it is
only used for deletion.
Edit - Opens an editing-specific Options menu in editors;
the menu contains functions for input mode
changing and other editing functions. Refer to Text
editing section for contents of the menu.
- In editors, can be used together with the
21
Page 22

The Edit key is handled in a special way: the primary
Power - Turns power on and off. This requires a long key
Navigation
navigation keys to select (highlight) text, which
then enables the copy and cut functions.
- In markable lists, using Edit key together with
navigation keys allows the user to mark several
items of the list, then a function can be executed on
all the marked items as one operation.
action (editing options menu) is opened from the
key release event, not the key down event as it
would usually be. This is to enable the mark/select
function where the key is being held down as a
modifier key.
(See sections Editing and Lists and Grids for more
detailed descriptions on the select and mark
functions.)
press.
- Opens the Profiles menu for switching active
profile.
The model of navigation is based on states arranged as hierarchical trees, familiar
from existing UI concepts. A few added features bring in new flexibility:
Tabs ·
·
Applications key and the Application shell
·
Direct navigation between sibling folders
·
Links to applications and documents; Pinboard
These features are described in the following sections.
Navigating in applications
The traditional hierarchical tree structure forms the basis for navigation. The user can
move forward from one node (state) by opening an available item or selecting an
option from a menu. Back function (available in the right softkey Back) returns to
the previous level in the hierarchy. In the initial state of an application (number 1 in
the figure below) the Exit function replaces Back in the right softkey; it closes the
application.
22
Page 23
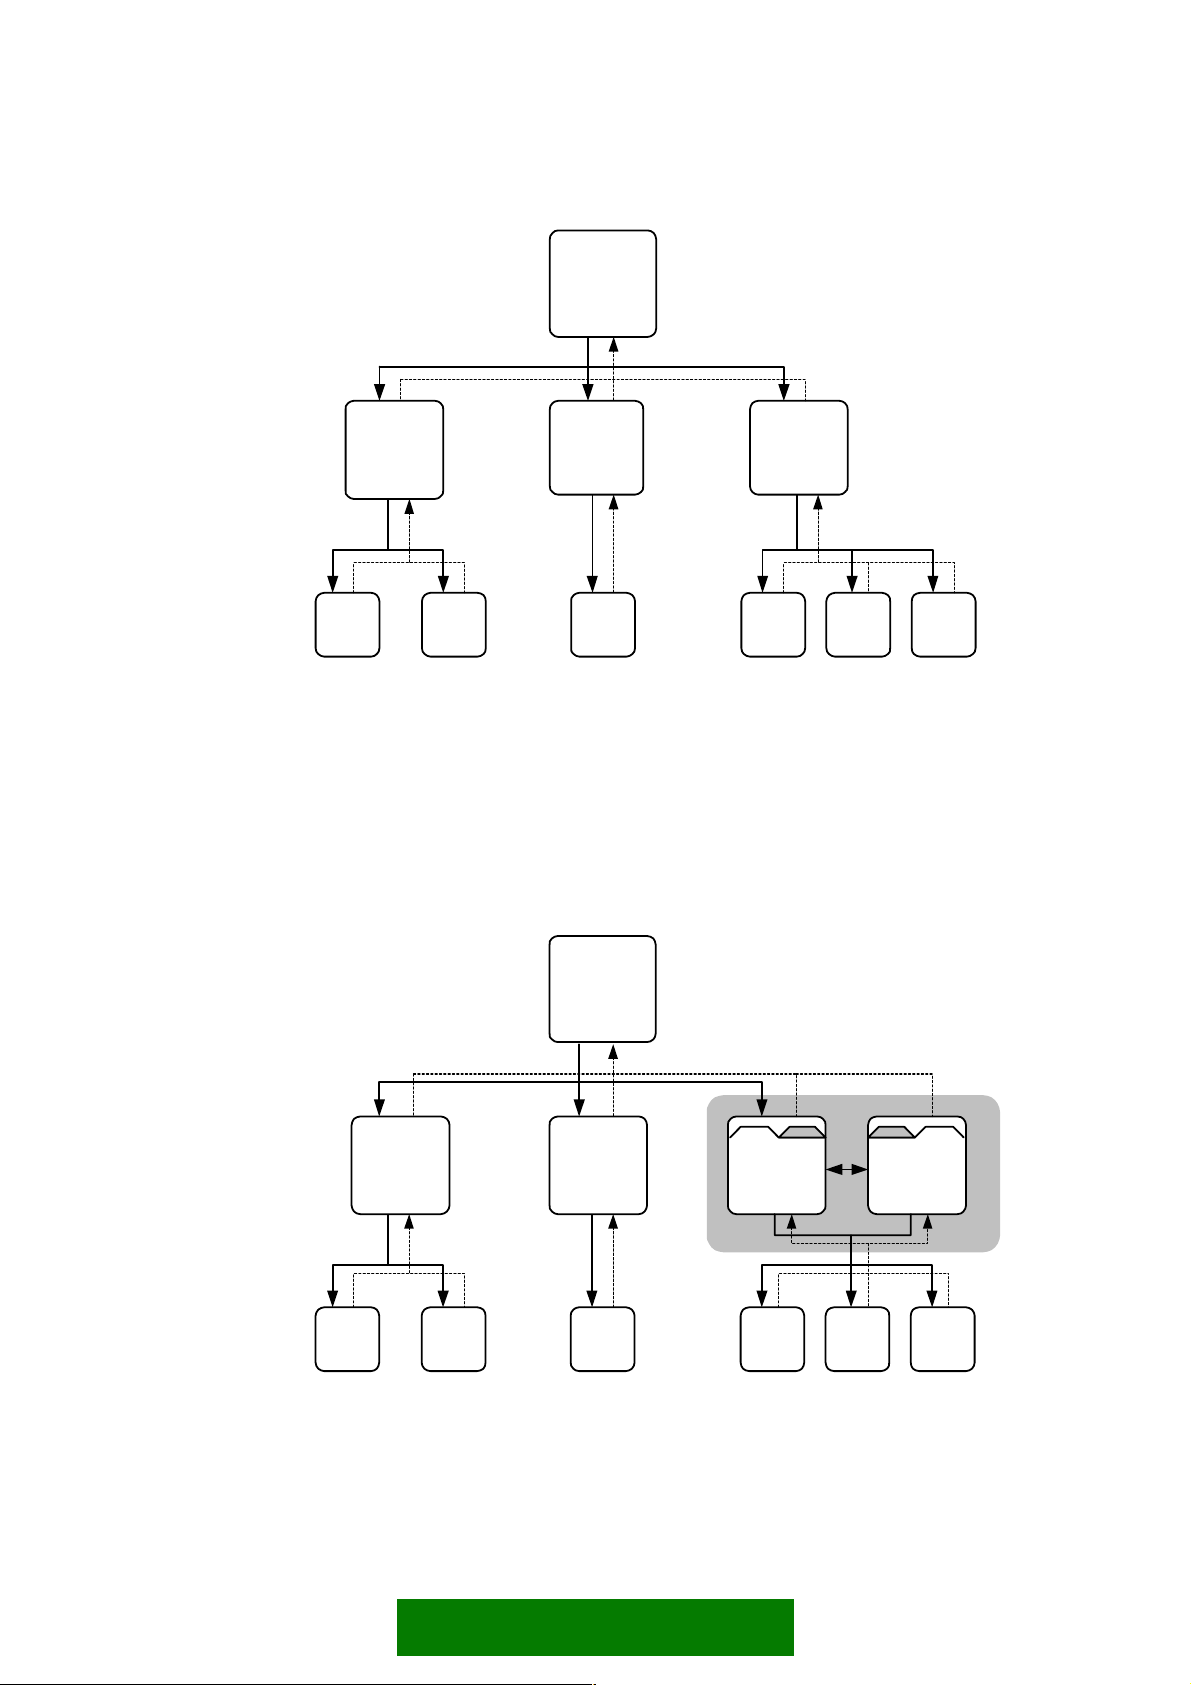
1
1-1
1-1-1 1-1-2 1-2-1 1-3-1 1-3-2 1-3-3
1-2 1-3
Figure 4-1. An example of a basic state hierarchy in an application. Solid lines indicate
moving forward from a state into a sub-state. Dotted lines are backward
moves to the previous level.
Navigation using Tabs
Nokia Series 60 UI uses the tab metaphor that allows combining several pages of
related information into a single state when all of it would not fit onto a single
screen or list. The user can switch the tabs using the left and right scroll keys, as
indicated in Navi pane.
1
1-21-1
1-1-1 1-1-2 1-2-1 1-3-1 1-3-2 1-3-3
1-3b1-3a
Figure 4-2. In this example, state 1-3 uses two tabs to present its information. The user
moves between views 1-3a and 1-3b using the left and right scroll keys.
Note that there’s no Back function moving between the tab views; Back
from both of them leads to state 1.
23
Page 24
Tab-controlled views apply the following rules:
Moving from one tab view to another has no effect on the function of the Back
·
softkey in these views: from all of them the back function leads to the same
place – the previous level in the application. The tabbed views are in this respect
interpreted as one state in the application.
·
When a state has tabbed views, one of them is the default view that is opened
when the user enters the state from the previous level.
·
When the user has proceeded from a tabbed view into a deeper hierarchy level,
the Back function returns to the same tabbed view where the user came from
(which is not necessarily the default view described in the previous bullet).
·
The possibilities to go forward from tab views may differ from one view to
another (although typically they are similar). This means that one tab view may
have other functions available to the user than another tab view in the same
state.
Folder hierarchies
When browsing within a folder hierarchy, Series 60 UI offers a direct access from one
folder to another (“sibling”) folder in the same level. The left and right scroll keys are
used to accomplish this. The Navi pane displays the folder number versus the total
number of folders in the parent list.
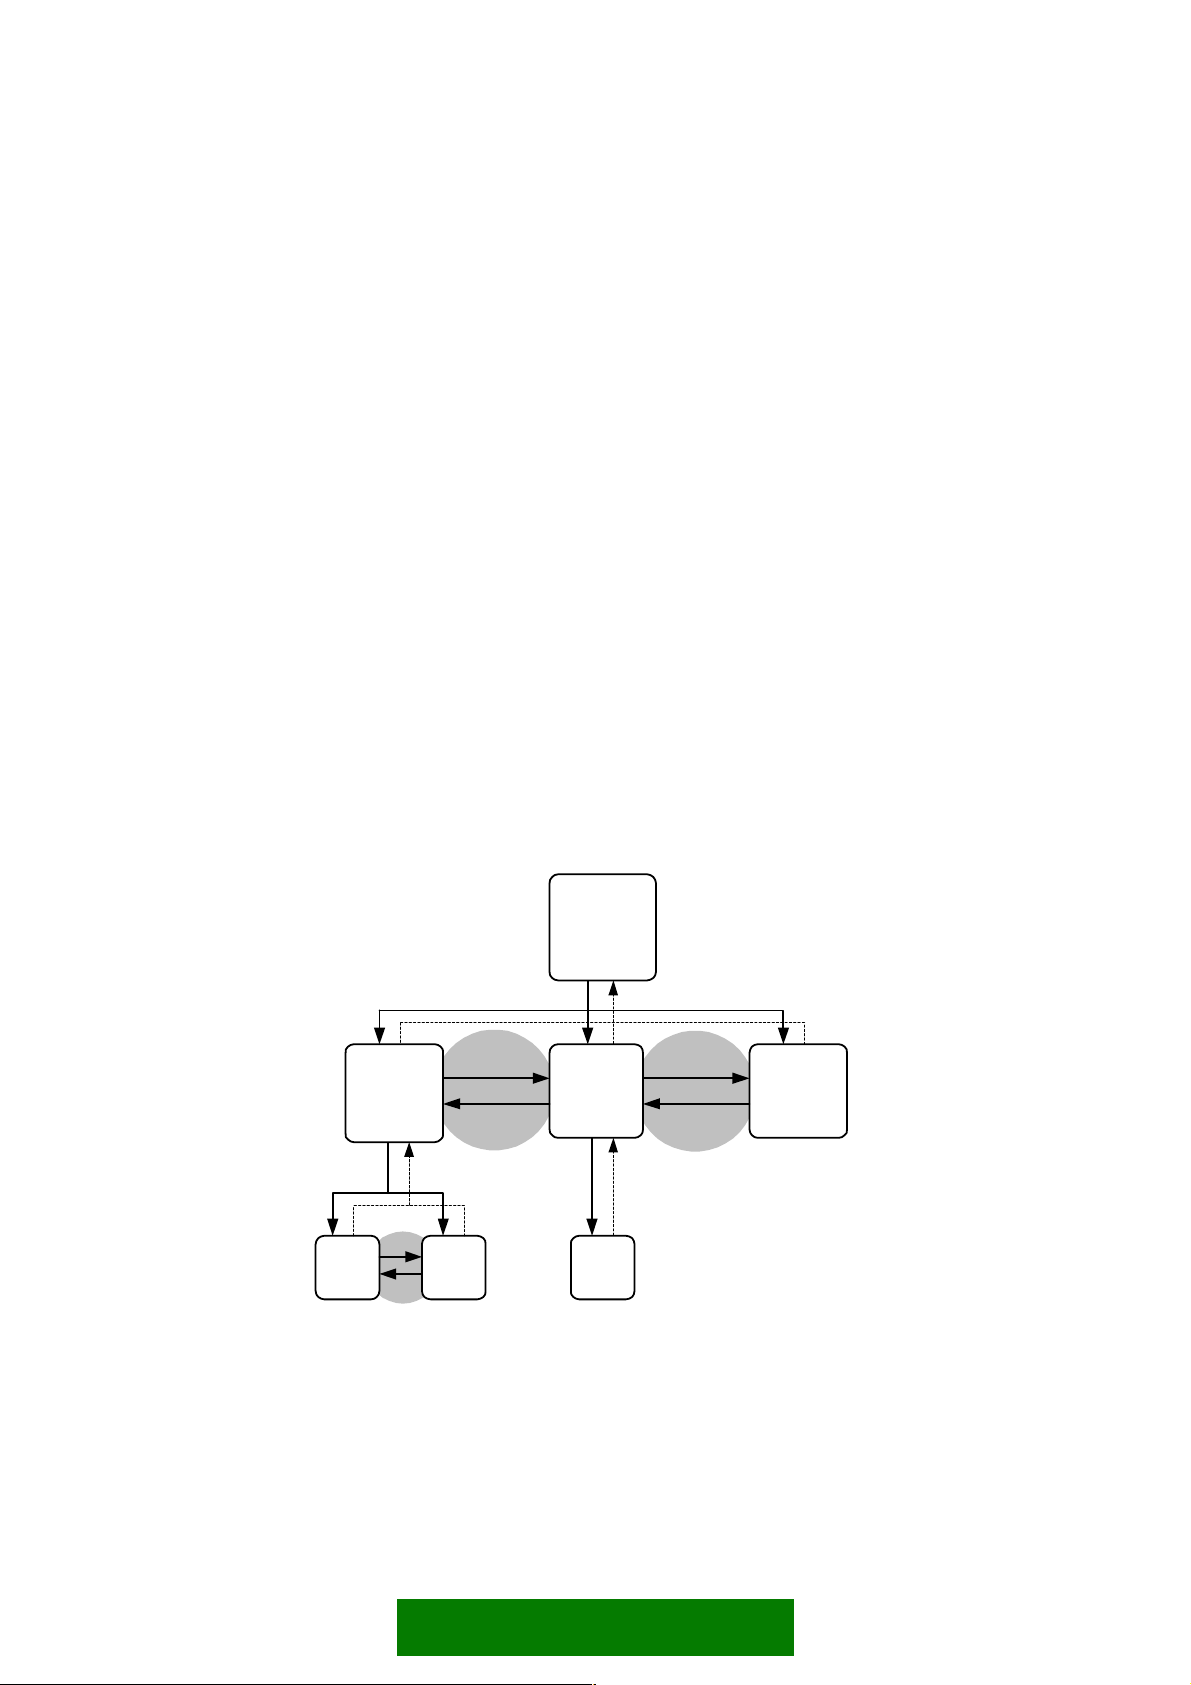
1
1-1
1-1-1 1-1-2 1-2-1
1-2 1-3
Figure 4-3. In this example, each displayed state is a folder containing a list of items.
State one contains three folders (1-1, 1-2, 1-3). When the user has opened
one of these, there is a possibility to move directly into the other two
folders without first going back to state 1. Folder 1-1 contains two subfolders and folder 1-2 contains one. There can be individual items in each
folder in addition to the folders; those are not visible in the state diagram.
24
Page 25

This additional navigation feature can be interpreted as a shortcut between sibling
folders. For folder navigation, the basic navigation rules are applied, noticing the
following:
Moving from one folder to another has no effect on the function of the Back
·
softkey in these views: from all of them the back function leads to the previous
hierarchy level.
· The navigation shortcuts can only be applied when there is no other use for the
left and right scroll keys in the state.
Navigation using Links
Links leading from one application (or idle) to another application may exist. Links
are one-way shortcuts: there is no direct path back to the state where the link was
started; instead, the navigation inside the linked application functions as if the user
had manually activated the other application and navigated to the target state.
For more information on links, see the Application handling section.
5. UI COMPONENTS
Lists and grids
Vertical lists are used extensively in most applications. Two dimensional grids are less
frequently used, but have obvious advantages in some situations. In lists and grids,
the user can move the focus from one item to another using the navigation keys. This
is called browsing or scrolling.
Vertical browsing is preferred over horizontal browsing in general; the keypad
·
solutions should take this into account.
Highlighting
When a list or grid is in use, one item on it is always in focus. The item in focus is
indicated by a graphical means called highlighting; the item is said to be highlighted.
The appearance of highlighting on a list item is a coloured (or gray) bar which
completely occupies the item in focus. The item text and graphics are displayed on
the bar.
Grid item highlighting is a frame over the item in focus.
25
Page 26

a. b.
Figure 5-1 List highlighting (a) and grid highlighting (b).
Empty lists and grids
If there are no items to be displayed in a list or grid, the pane contains a text
informing the user about the empty list.
Figure 5-2. Empty list.
Depending on the case, it may be justified to prompt the user to create the first item
for an empty list.
List browsing
In a list, browsing is possible in two directions: pressing scroll up key moves the
focus one step up (backward), and pressing scroll down moves the focus one step
down (forward).
When browsing, the item in focus must always be visible. The detailed rules of
moving the focus are as follows:
If the choice item that is becoming focused is already fully visible, all the items
·
stay in their current positions, and highlight is moved from the old item to the
new item.
26
Page 27

If the new choice item is not visible, all items are moved in the view to the
·
appropriate direction so that the new item becomes fully visible. For example, if
focus is moving down and the new item is currently below the bottom edge of
the view, the items are moved up.
· When moving the choice items in the view, they are only moved the minimum
amount necessary. For example, when moving items up to get the next one under
the bottom edge visible, the item moves to the lowest allowed position in the
view.
By default, a list is a queue. This means that it is not allowed to browse forward from
the last item or browse backward from the first item. If the user attempts this the list
does not react; there is no feedback except the normal keypad tone.
It is also possible to specify the list to be a loop, which means that it is possible to
browse forward from the last choice item – this step leads to the first item in the list
– and vice versa.
The display of a looping list jumps from the last item to the first item in a noncontinuous way, so that the first item is shown on top of the view, just as it
would appear if scrolling backward through the whole list. (This is due to EPOC
implementation and is different from traditional Nokia style where the loops
appear continuous, with no jump in the looping point.)
The scrolling as specified here is ‘traditional style’ where the highlight moves
until the lower or upper edge of the list requires the content to scroll. Other,
potentially better methods could replace this without consequences to other
features.
Scrolling indicator for lists
Lists have no scroll bar. There is, however, a scrolling indicator component which
indicates the relative position of the item in focus within the list.
The scrolling indicator is only displayed when all items in the list can’t fit on the
display simultaneously.
Figure 5-3. Scrolling indicator in the control pane. The downward arrow is dimmed
because the focus is near the end of the list.
27
Page 28

The indicator is situated in the control pane, and it consists of two arrow images, one
pointing up and the other one down. The colours of the arrows depend on the
position of the focus, so that towards the list’s beginning, the upward arrow image
becomes less noticeable and eventually (when on the first item) disappears, and vice
versa. So clearly visible arrows always point in the direction which has the larger
number of items in the list.
The scrolling indicator is displayed with all list types, with main pane lists as well as
pop-up window lists.
The scrolling indicator functions as specified above also when the list is a loop –
there is a distinctive change in the indicator at the moment the list loops.
Order of items and browsing in grids
In a grid the available items are in a rectangular arrangement of cells and browsing
is possible in four directions. In addition to up and down functions, the user can
press scroll right to move the focus one step right, or press scroll left to move the
focus one step left.
The number of items can be larger than what fits in the view so the grid items may
scroll in the view when browsing.
The preferred scrolling dimension is vertical; this means that when more items
·
are added, the number of items in a grid grows downward line by line, but not
outside the window to the left or right.
·
A grid should not be scrollable in both dimensions; it is acceptable only in cases
where the grid has a natural geometry that can’t be changed. A calendar’s month
view is an example of this kind of geometry (but even in that case it is better to
fit the whole month on screen rather than make it scrollable in both dimensions).
·
The default filling order of choice items in a grid is first left–to–right, then topto-bottom.
1 2 3
4 5 6
7 8 9
Figure 5-4. Default grid filling order.
It may happen that a grid is not filled completely. Depending on the application, the
grid can be auto-filling (cells moved within the grid so that empty cells in the middle
get filled), in which case there can only be empty cells on the rightmost part of the
last line. Other applications may allow empty cells anywhere, so that the grid can be
sparse.
28
Page 29

The browsing in grids that scroll vertically resembles traditional scrolling in text
editors, based on the idea that the user can always move to the correct row first and
then move within the row to the correct item. The following rules are applied:
Empty cells are skipped: the focus is never on an empty cell. ·
An exception to this occurs when the user is moving items around in a grid; in
that situation all cells are accessible.
·
When browsing down or up, the focus is moved to the adjacent cell directly
below or above the current cell, if that cell is filled. In case it is empty, the
nearest cell on the same row gets the focus. If all cells on the row are empty, the
search continues on the next row in the same direction, and so on until a filled
cell is found.
·
When browsing right, the focus moves to the following filled cell on the same
row. If there are no filled cells in that direction on the row, the search continues
from the beginning of the next row, and so on until a filled cell is found.
·
Browsing left moves the focus to the previous filled cell on the same row, or
continues searching from the end of the previous row. Using only the right or left
scroll key, the user can thus go through every item in the grid, regardless of the
distribution of items in it.
·
The grid is scrolled (moved within the view) only when the item that is becoming
focused is not fully visible already.
·
By default, grids do not loop vertically from the end to the beginning or vice
versa.
a. b.
Figure 5-5. Examples of moving the focus in a grid, starting from top right:
a. Only Scroll down commands used.
b. Only Scroll right commands used.
29
Page 30

Horizontally scrolling grids may be used when the application design requires it. For
them, the browsing rules are applied by exchanging the horizontal and vertical
browsing rules. The example figures presented above are correct if turned 90 degrees
counter-clockwise.
Scrolling indicator for grids
The same scrolling indicator as with lists is applied to vertically scrolling grids. The
indicator refers to the row where the focus is located; left-right movement within
the row has no effect on the indicator.
For horizontally scrolling grids, the indicator appears as rotated 90 degrees, and
refers to the current column.
List types
Based on the functionality, the following list categories can be identified:
·
·
Menu list ·
Selection list
Markable list
·
Multi-selection list
·
Setting list
·
Form
Lists belonging to one category may have different graphical appearances. See
section List layouts for information about different-looking list items.
Menu list
Menu lists are used to select one item from a list and do nothing else; the Options
command is not available when a menu list is being browsed. (Options menu itself is
a menu list.)
If a high-priority event like an incoming call happens when a menu list is open, the
list is cancelled and the new event takes control. These lists are often displayed
inside a pop-up window.
Default keypad functions during a menu list:
Scroll up / down move focus the list
Scroll left / right ignored (unless there is a submenu; see section
Options menu)
Select key select the item, do associated function
30
Page 31

Left softkey (Select) select the item, do associated function
Right softkey (Cancel) dismiss the menu; return to the state preceding the
opening of menu
Send key, Edit key ignored
numeric keypad ignored
other keys dismiss the menu and do the default action of the
key
Examples of components using menu lists are options menu and list query.
Figure 5-6. Menu lists: Options menu (left) and list query.
Selection list
A selection list is a common means of displaying and accessing data in applications.
When there is a selection list displayed the application is typically in a permanent
state, which means the user can leave the application, open another application and
later return to the same state. Selection lists are displayed in the main pane.
Typically, the user can open items on a selection list, leading into another, more
detailed view of the item within the application. In addition to browsing and
selecting items, other functions are available in the options menu (see section
Options menu).
Usage of the Select key in selection lists deserves special attention. Depending on
the case, it can do the following actions:
Select the item in focus. This should happen whenever it is assumed that the user
·
is clear about what happens. Selecting can mean:
- opening an item like a folder, or a date in a calendar, leading to a detailed view
- executing a command when the focused item is a command
31
Page 32

Open a context-specific options menu. This should only happen when the user
·
cannot be assumed to know what happens if the Select key is pressed. The menu
should contain only high-priority options associated with the item in focus, not
general items like Settings or Help.
The two types of Select key actions should not be mixed within one list; one or the
other should happen for every item in the list.
Select4
Figure 5-7. Select action opens a view.
Select4
Figure 5-8. Select action does a command.
32
Page 33

Select4
Figure 5-9. Context-specific Options menu opened from Select key.
Keypad functions for selection lists:
Scroll up / down move focus in the list
Scroll left / right may be ignored, or may have navigation functions
associated with them (see section Navigation)
Select key select the item; see discussion above
Left softkey (Options) open the options menu (see section Options menu)
Right softkey (Back; Exit) back stepping (see section Navigation)
Clear deletes the item if it can be deleted (confirmation
from the user required); otherwise ignored
Edit ignored, or marking function if the list is markable
(see section Markable list)
numeric keypad may be ignored, or may have specific functions
within the state
other keys do the default action of the key
33
Page 34

Figure 5-10. Selection lists.
Markable list
A markable list is a selection list with the added marking feature. The user can mark
any number of items on the list while browsing it, and then execute a single
command, which is applied to all the marked items. This is analogous to the
multiple-item highlight feature used in computer GUIs.
The marking feature will typically be applied to lists the user manages, containing a
large number of items that may be for example sent, moved or deleted. By marking
items first and then selecting a command the user can do some operations more
quickly and with less key presses than doing the command separately for each of the
items.
Marked items are indicated graphically.
The exact style of mark indication is a graphical design issue. This version of the
Style guide uses check marks.
Figure 5-11. A markable list. Marked items are indicated graphically on the list.
34
Page 35

The mark and unmark functions are available in the Options menu of the markable
list. Alternatively, or as a shortcut, the user can keep the Edit key pressed while using
the navigation and Select keys in the following way:
Pressing the Select key while holding Edit marks the current item. This is a
·
toggling function, so pressing Edit-Select on a marked item unmarks the item.
·
Pressing a scroll key (up or down) while holding Edit marks both the current item
and the one onto which the focus moves. If the user keeps holding the Edit and
scrolls further in the same direction, all the scrolled items become marked; to
unmark the items in reverse order the user can scroll into the opposite direction
while keeping Edit down.
·
Items can be unmarked by Edit-scrolling: if the user starts holding Edit when on
a marked item, and then scrolls, all scrolled items become unmarked.
·
Several marking actions can be done subsequently. The user can mark an item,
then release Edit, browse and move the focus onto some other item on the list,
and then mark that item. The first item remains marked, and the ones between
the two do not become marked.
·
All items become unmarked when the user exits the list, for example by back
stepping. Items remain marked if the user opens and cancels the options menu,
or swaps applications.
·
Pressing and releasing the Edit key alone does not cause any action.
·
If the user presses the Select key (without Edit) when there are marked items on
the list, then the context-specific options menu is opened, containing only the
functions that apply to multiple items.
A markable list functions exactly like a normal selection list, except for the marking
feature.
The user may access the options menu to do functions on all marked items at once.
Only the functions that are applicable to multiple items simultaneously appear in the
options. Appropriate error handling must be designed for functions that don't apply
to some or all of the marked items.
·
When executing a function, if any of the items are marked, all the marked items
are affected by the function. If the focus is on an item that is not marked, the
function does not affect that item.
·
After the selected function is successfully done, all items are unmarked. In an
error case, when the function cannot be applied, the marks should remain in
place.
The options menu includes marking and unmarking functions in a submenu so that
any user can find the feature. The submenu has also Mark all and Unmark all
options.
35
Page 36

For other keypad actions than the ones described above, refer to the Selection list
section.
Multiselection list
Multiselection list is used when we want to emphasize that it is possible to select
several items from a list at the same time. Typically, there is an operation going on
that expects one or more items as input. An example of this is when the user is
creating a group, and a list of names is offered as a multiselection list.
In a multiselection list, the user can browse the items and check and uncheck any
number of them. The state of each item is indicated in a checkbox adjacent to the
item. When the user accepts the list, information about the marked items is passed
to the application.
Items are checked and unchecked using the Select key, and the list is accepted with
the left softkey Done. Note that unlike in a markable list, the Options softkey is not
available – one can only check and uncheck items, and then accept or cancel the list.
Figure 5-12. Multiselection lists: in main pane (left) and in a setting editor.
Keypad functions for multiselection lists:
Scroll up / down move focus in the list
Scroll left / right ignored (can be used to control tabs)
Select key check / uncheck the current item; toggle
Left softkey (Done) accept the list, pass the selections to the application
Right softkey (Cancel) cancel the list, return to previous state
Clear, Edit, Send ignored
numeric keypad ignored
36
Page 37

other keys cancel the list, and then do the default action of the
key
Setting lists
Setting list is a specific kind of selection list containing setting items which the user
can adjust. Setting lists are displayed in the main pane.
Figure 5-13. A setting list.
A setting item can be adjusted by selecting it in the same way as selection list items
are selected in general, by pressing the Select key, or choosing the Change command
in the options menu. The main pane then displays the setting item editor where the
value can be changed.
There are several setting item types available. They look the same in the setting list:
each item displays an attribute text (title of the setting) on one line and the current
value on another line within the item. The adjusting and editing functions differ
between setting item types.
pop-up setting Pop–up setting allows the user to choose one value
from a pre–defined list. The setting editor displays
the available values in a menu list.
Figure 5-14. Pop-up setting.
When opening a pop-up setting, the currently
selected option is highlighted, and it must be visible.
A pop-up setting may also allow the user to enter a
new textual value in addition to the pre-defined
37
Page 38

values. Then the last option is named Other, and
selecting it opens a data query for entering the new
value.
multiselection list setting Multiselection list setting allows the user to choose
several simultaneous values from a pre–defined list.
The setting editor displays the available values as a
multi-selection list. The setting item displays the
number of selected items versus all items in the
value field; for example: 3/8.
Figure 5-15. Multiselection setting.
text setting The value of a text setting item is an alphanumeric
or numeric string. The editor can be of some specific
type, like date/time editor.
Figure 5-16. Text setting.
slider setting With slider the user can 'adjust the value of' by
sliding a marker. The value of a slider is adjusted
using the Scroll left and Scroll right keys.
Figure 5-17. Slider setting.
38
Page 39

During a setting editor state, the keypad functions are:
Scroll up / down pop-up, multiselection: browse the list
text: move cursor
slider: ignored
Scroll left / right pop-up: ignored
multiselection: ignored
text: move cursor
slider: adjust (key repeat event may move the slider
by several steps)
Select key all except multiselection: accept the value, return to
setting list
multiselection: toggle check/uncheck
Left softkey (OK) accept the current item or value, return
Right softkey (Cancel) cancel the setting editor, return
Clear pop-up, multiselection: ignored
text: delete characters
slider: ignored
Edit pop-up, multiselection: ignored
text: editing mode menu
slider: ignored
numeric keypad pop-up, multiselection : ignored
text: input functions
slider: ignored; if the value is numeric it may be
adjustable using the numeric keys.
other keys cancel the setting editor, then do the default action
of the key
During the setting editor state, the navi pane is empty, or in case of the text editor,
contains editing indicators.
Further guidelines:
Typically, the access to a setting list is via the Options menu. (See section
·
Options menu.)
·
Setting lists can only contain setting items, not other types of items mixed with
them. (In case the settings are arranged in a hierarchical structure, both setting
items and 'setting folders' may exist in one list. See section Settings in the
Guidelines chapter.)
·
All the setting item types can co-exist in the same setting list.
39
Page 40

If pop-up setting has only two available values (like On and Off) and no special
·
procedure is needed when switching from one value to the other, then the
setting editor (list) need not be displayed when the user presses the Select key;
the item's value is changed immediately. However, if the user opens the setting
item via the options menu, or if an additional procedure is required (for example
a password) before the item’s value can be changed, the menu list is opened
normally. Note that scroll left and scroll right can also be used to change the
value without opening the list.
Forms
Form is a specific kind of selection list, where all items (fields) have some editable
content.
A form can be in view state or edit state. The item layouts and functionality are
different in these states:
·
In view state, the items are not editable. The form functions and looks just like a
similar selection list. Items can be selected to perform an application-specific
function.
·
In edit state, the user can edit all the fields. Forms can contain text fields
(alphanumeric or numeric content), pop-up fields and sliders.
The user can switch from view state to edit states using the Edit command in the
Options menu.
In edit state, the contents of the form can be accepted using the right softkey,
labeled as Done. The form returns then into view state.
Always-editable forms
In case a view state is not useful, the form can be specified as edit-state only. Then
the user can edit the fields right away when entering the form, and accepting the
form returns into a state outside the form instead of the view state.
Figure 5-18. A form in edit state.
40
Page 41

Forms without the Options softkey
In case the form does not need any context-specific functions in the Options menu,
the softkey interface can be the same as in queries: left softkey is Done and the right
softkey is Cancel. Done accepts the contents and returns, wherea the Cancel function
discards all changes in the form and returns.
Form items
Empty items (that contain no data) can be hidden in the form’s view state. However,
this is not a requirement; forms can be designed either way, whichever is better for
the given application.
Unlike ordinary list items, the form items may have different sizes in the layout but
in edit state only. A long data field may occupy more than one line in edit state, but
in view state it is truncated to the first line.
The user may be able to add and remove form items. This is done with commands in
options menu.
Form items always have a label. The label has a text part, or a text and a graphical
part; however all items in one form must have the same column layout. (See section
List layouts for detailed information about layouts.)
The following item types can be used in a form:
Text field (alphanumeric or numeric content) ·
·
Pop-up field
·
Slider
Any combination of these types is possible within one form.
When the form is in edit state, the user can move the focus up and down like in a
list. The highlight in edit state is different from the highlight in view state, acting as
a visual cue. A cursor blinks in a text field that is in focus. There is no need to save
each field separately; the user can browse and modify the fields in any order and
then accept all modifications. During browsing a form in edit state, the keypad
functions are as follows:
Scroll up / down Move focus between form items (when in a text
field move the cursor within an item line by line).
Scroll left / right on a pop-up field: change value without opening list
on a text field: move cursor character by character
on a slider: adjust slider value
Select key on a pop-up field: open list
on a text field: move to next field
on a slider: move to next field
41
Page 42

Left softkey (Options) Options menu.
(In a form without options menu, left softkey is
Done.)
Right softkey (Done) Accept the contents and return to previous state.
(In a form without options menu, right softkey is
Cancel.)
Clear pop-up: ignored
text: delete characters
slider: ignored
Edit pop-up: ignored
text: editing mode menu; select text
slider: ignored
numeric keypad pop-up: ignored
text: input
slider: ignored
other keys default action of the key
The field types are described in the following paragraphs:
text field Text field contains some type of numeric or
alphanumeric data. It can be edited directly, using
the usual editing functions, when the form is in
editing state. The text field can expand to more
than one line if necessary.
In view state a text field looks identical to a
corresponding list item.
Figure 5-19. Text field.
pop-up field Pop–up field offers a possibility to choose one value
from a pre–defined list.
In view state a pop–up field looks identical to a list
item; the text is the current value of the field.
In edit state it has a distinct look that identifies the
field as a pop–up list.
To edit the item in edit state, the user can press the
Select key; it opens into a menu list that contains
the available values. The highlight is on the current
value. When the list is open, the softkeys are OK and
Cancel, as usual with a menu list. Both softkeys
return to the edit state in the form.
42
Page 43

Figure 5-20. Pop-up field.
A pop-up field may also allow the user to enter a
textual value in addition to the pre-defined values.
Then the last option is named for example Other,
and selecting it opens a data query.
slider With slider the user can adjust a numeric value
(although it is not necessary to present the actual
value to the user as a number).
In view state, the item is presented as a textual
item.
In edit state, the value of a slider is immediately
adjustable using the Scroll left and right keys.
Figure 5-21. Slider field.
List layouts
List items can in general be more complex (contain more elements) than grid items.
Certain layout rules apply to all lists:
All items in a list have equal height on screen. (Forms do not follow this rule in
·
edit state; see section Forms.)
· The column structure of all items in a list must be similar. It is not possible to
combine e.g. single-column items to a three-column item list. (But it is possible
to use some different item types having the same general appearance.) See the
following section about columns.
43
Page 44

Partial items are not visible: when the list/grid pane area does not exactly
·
correspond to an integer number of items, the remaining area outside the last
fully visible item appears empty, displaying the background of the particular
pane.
Column structure of lists
For visual consistency, the standard list layouts are built around a structure of three
virtual columns. The column borders are aligned with the sides of the context pane.
The width of list items can be divided in three sections (columns A, B and C), starting
from left. All three columns need not be used separately in a list layout:
combinations AB, BC or ABC are possible. However, all items within a list must use
the same column layout. Additional indicator icons can be displayed in the right edge
of column C, as seen in the example b) below. The area for these indicators is not
really a column in the same sense as the other three, as it can be used dynamically,
item by item.
a) b)
c) d)
Figure 5-22. Different column arrangements:
a) All columns used for text item.
b) Column A contains icon, columns B&C combined for text.
c) Columns A&B combined for large icon, column C contains text.
d) Column A: icon; column B: label; column C: text.
44
Page 45

Standard elements in list items, associated with columns, are:
column A - small graphic (icon)
- item number (see section Numbered items)
column B - heading (title or attribute of the item)
column AB - heading (title or attribute of the item)
- large graphic (e.g. icon or image thumbnail)
column C/BC/ABC - main text of the item
List item types
The appearance of list items can be chosen from the following types. The examples
are from lists displayed in main pane; for most item types a similar component for
use in pop-up windows do exist.
single-line item
single-line item with heading
single-line item with graphic
Figure 5-23.
main text only (columns ABC)
usage:
- menu lists
- selection lists, markable lists
There is a corresponding component for pop-up
windows, without the line on the left side.
Figure 5-24.
heading text (AB), main text (C)
usage:
- menu lists
- selection lists, markable lists
There is a corresponding component for pop-up
windows.
Figure 5-25.
small graphic (A), main text (BC)
usage:
- menu lists
- selection lists, markable lists
- multiselection lists
There is a corresponding component for pop-up
windows.
45
Page 46

single-line item with graphic
and heading Figure 5-26.
small graphic (A), heading text (B), main text (C)
usage:
- menu lists
- selection lists, markable lists
- multiselection lists
There is a corresponding component for pop-up
windows.
single-line item with
large graphic
two-line item
double item
Figure 5-27.
large graphic (AB), main text (C)
usage:
- menu lists
- selection lists, markable lists
Figure 5-28.
main text (ABC)
usage:
- menu lists
- selection lists
This layout has one text item that can extend to two
lines.
Figure 5-29.
primary text, secondary text (ABC)
usage:
- menu lists
- selection lists
This layout has two text lines (primary text on top,
secondary text below). The second line may be
empty.
There is a corresponding component for pop-up
windows.
double item with graphic
Figure 5-30.
46
Page 47

primary text, secondary text (ABC)
usage:
- menu lists
- selection lists
double item
with large graphic
double item style 2
Figure 5-31.
large graphic (AB), primary text, secondary text (C)
usage:
- menu lists
- selection lists
Like a double item, but with the graphic added on
the left side. Second line may be empty.
There is a corresponding component for pop-up
windows.
Figure 5-32.
heading text (ABC), main text (BC)
usage:
- forms
- menu lists
- selection lists
This layout has emphasis on the lower line, as
opposed to the other double item style where the
upper line is emphasized.
double item style 2
with graphic
Figure 5-33.
graphic (A)
heading text, main text (BC)
usage:
- menu lists
- selection lists
Similar to the previous layout, graphic added.
47
Page 48

setting item
Figure 5-34.
attribute text (ABC), value text (C)
usage:
- setting lists
A two-line layout: attribute text is on top line, value
text (or graphic) on bottom line in a box. The value
box may be omitted in order to create a regular
selection item within a setting list.
Numbered items
Instead of small graphic, the A column (where used separately) may contain a
number. This can be used to indicate item numbers in lists where necessary.
Figure 5-35. A numbered list.
Numbered items should be used only in lists where numbers are meaningful and
·
give some added value. There is no specific functionality (such as shortcuts) that
all numbered lists would have.
Item type combinations
A list can only be composed of items of the same type. However, it is possible to use
some item types for different purposes. An example is a setting list that contains an
item for accessing a sub-list of settings. In this item, the value box is omitted so that
the item looks like a regular selection item, and selecting it will open another list.
Similar techniques are possible with other double item types, too.
48
Page 49

Figure 5-36. A setting list containing a non-setting item (Call waiting) to access another
Grid types
Grids are in many ways analogous to lists. However, there are some things worth
noticing:
·
· Grid layouts are not standardized as much as lists are, the layouts must be
The following grid types can be used, and they are analogous to corresponding list
types:
menu grid for selecting one item; no options menu
view.
In grids, the Scroll left and Scroll right keys are always used for moving the
focus; they can't be used in any other way that may be possible with lists.
designed case by case for the applications. Typically, grid items occupy less
screen space than list items. This results in grid items having fewer elements
than list items. A grid item may in general have one text, or one graphic, or a
text and a graphic.
selection grid permanent state; can be left pending, options menu
is available
markable grid a selection grid with the marking function
There are no grid types corresponding to a multiselection list, a setting list or a form.
Find pane
Find pane is a component intended to help find items in a list. The find pane is
situated in the bottom part of the main pane.
49
Page 50

Figure 5-37. A find pane within a selection list of names in Phonebook.
The standard functionality is as follows:
Characters typed from the numeric keypad appear in the end of the string in the
·
find pane.
·
There is no cursor, so the user can only add and remove characters in the end.
·
The find pane may be hidden until the user types in a character.
·
Whenever the find string changes, the list in the main pane is filtered, and only
the items matching the string are displayed. The user can browse the list
normally using Scroll up and Scroll down keys.
Options menu
The Options menu is a tool that offers the user a set of possible functions in the
current context. The options menu is opened by pressing the left softkey labeled
Options.
Figure 5-38. Options menu.
50
Page 51

The options menu is a menu list displayed in a pop-up window. Selecting an item is
done pressing either the left softkey (OK) or the Select key. The user must either
select an item from the list or cancel the menu; it can't be left pending during
another action. (See section Menu list.)
The pop-up window is located above the control pane, and its height is dynamic;
maximum size is approximately the size of the standard main pane. The content on
screen outside the menu pop-up is dimmed.
Items in the options menu use the single item layout, that is, they are text-only. The
number of items in a menu is not limited; the list scrolls as necessary. Options menu
does not loop.
Only the functions that are available in the current context are listed in the menu;
unavailable ones are removed. (See section Hidden items in the Guidelines chapter.)
Submenus
An item in the options menu can be a submenu title, leading to additional choices
that are displayed in another pop-up window (on top of the options menu pop-up
window) as a submenu.
Figure 5-39. Submenu in the options menu.
The submenu is opened by pressing either the Left softkey (Select), Select key or
Scroll right.
The user can close the submenu window by pressing either the Right softkey (Cancel)
or Scroll left. The main menu window stays open, with the focus on the submenu
title.
When an item in a submenu is selected, both the submenu and main menu windows
are closed.
The following rules apply to submenus:
51
Page 52

The number of items should be low, so that the user does not need to scroll in
·
order to see all of them.
·
Functions should not sometimes occur in main level and at other times in a
submenu. Items that are in a submenu should always be found in the same
submenu.
·
Only one submenu level is allowed, that is, a submenu can't contain another
submenu.
Unavailable items
Situations often occur where a certain function cannot be used. In these cases, the
corresponding items in the options menu must either be hidden, or there must be an
error message given when the user tries to access a function that can’t be
accomplished. Series 60 UI does not use dimming of menu items.
This is a trade-off issue: removing unnecessary options makes the option lists shorter
– an often desired result – but at the same time it changes the menu from situation
to situation, preventing users from learning the function locations. It may even cause
frustration if the users expect some function to be found in the menu, but it is
sometimes not there.
·
In case the user has no reason to search for a certain function in the given
situation, it should be hidden. As an extreme example, the Delete option is not
needed when there are no items to be deleted.
·
If the user searches for a function, even though it cannot be used in the current
situation, it is often better to display the option and give an appropriate message
if the user tries to access that function.
Other option menus
Some option menus are accessed in other ways than by using the Options softkey.
The usage of these menus is similar to the usual options menu. Examples of other
such menus are:
OK options menu The Select key opens this option menu when there’s
no single intuitive function (like opening the item in
focus) for it. The OK options menu only lists
functions that:
- affect the item in focus only
- could be regarded as potentially intuitive
- are competing for the topmost place of the menu.
Other functions can be accessed through the
Options softkey. The number of items in the OK
options list is usually two or three, it should never
be more than four. As an example, in a message
editor the functions in OK options could be Send
and Add recipient.
52
Page 53

Delete operation should not be listed in the OK
options menu. (The Clear key is a shortcut to that
function.)
In case there are marked items in a list, the OK
options menu should include the mark/unmark
functions. When a list is empty, it may make sense
to offer a Create new type of option in the OK
options – but only when it would be an appropriate
function in the context.
Edit options menu Opened by pressing the Edit key in a text editor.
Contains only editing commands. See section Text
editing.
Options template
The order of items in an options menu should follow the template presented below.
(In specific cases, when there are strong arguments against the order in the
template, the order can be changed.)
The option names listed here are generic names, not the actual texts used in the
products. The texts may even vary between applications even though the logical item
is the same.
Items that should appear in every full options menu opened from the Left softkey
·
are labeled mandatory. However, these items are not required in OK Options
menus.
·
For other than the mandatory items, only the items needed in each context shall
appear in the options menu.
·
Items specific to the context can be added among the common items, in the
places where they best fit, considering the importance and probable usage
frequency. The places where context-specific items may appear are represented
as +++ in the list.
·
Submenu titles are indicated with 4 and are followed by submenu items.
mandatory when the Select key does an open/select function.
Open / Select /Change
Call now
Send now
‘Change’ is used in setting lists.
Same as the Select key function.
+ + +
For immediate calling when a phone number is available
(typically highlighted). For example in Phonebook, the phone
number is in focus.
- Immediate sending in message editor, when an address exists.
- Open a message editor when there is an address available.
53
Page 54

Write 4
Submenu for message writing
SMS
MMS
email
Create new
Send via (1)4
SMS
MMS
Email
Bluetooth
IR
Save
Start writing a new short message.
Start writing a new multimedia message.
Start writing a new email.
Initiate creation of a new item. When more than one type of
item can be created, a submenu may be used to select the type.
Submenu for initiating the sending of items using one of the
available connections. (Not the same as “Send now”.)
In this location in applications where sending data is a primary
function.
Save the current document. (In most applications this is not a
necessary function as saving is automatic.)
Edit item
Delete item
View info (1)
Move
Move to folder
New folder
Edit list 4
+ + +
Enables editing of the current item, for example a form, or an
individual item on a list.
- Deletes the item(s) in focus (or marked) on a list.
- Deletes the current item being viewed.
+ + +
View detailed info about the current item. In this location in
applications where this is a high-priority function.
+ + +
Move an item to a different location within the list or grid.
Move item(s) into a folder
Create a new folder
+ + +
Submenu for functions used in markable lists.
54
Page 55

Mark / Unmark
Mark or unmark the current item, depending on the current
state.
Mark all
Unmark all
Rename
Add to contacts 4
Create new
Update existing
Find in text 4
Phone number
email address
URL
Rename the item in focus.
+ + +
Submenu for functions used to add contact information into
the Phonebook.
Creates a new contact item.
Adds new field(s) in an existing contact item.
Submenu for functions used to extract contact information
from text in viewers and browsers.
+ + +
Send via (2) 4
SMS
MMS
email
Bluetooth
IR
View info (2)
Print
Add to Pinboard
Settings
Exit
Submenu for initiating the sending of items using one of the
available connections. In this location in applications where
sending data is a secondary function.
View detailed info about the current item. In this location in
applications where this is a low-priority function.
Print the current item.
Add a link to the current application or document into the
Pinboard.
Access to application settings or context-dependent settings.
mandatory
Exit the application.
55
Page 56

Notes
A note is a feedback component that informs the user about the current
·
situation. A note contains a text and possibly a graphical element. The softkey
labels are typically empty (a wait note is an exception to this.)
Figure 5-40. An information note.
Notes do not require user input, although a user can dismiss most notes by
·
pressing any key.
The following note types are in use:
confirmation note Informs the user about a successfully completed
operation. Short duration, subtle tone. (This should
not be used after every kind of successful action;
see the guidelines below.)
information note Gives information about an unexpected situation
during usage of the device. Longer duration and
more noticeable tone than in a confirmation note.
Errors that are not too serious should cause an
information note.
warning note Used when the user must be notified about
something that may require action. Fairly long
duration, and a sound that can be heard (and
distinguished) even when not concentrating on the
phone. An example: battery low warning.
error note This is a red light. It should only be used when the
user has tried to do something that may cause a
considerable problem. See the guidelines below.
permanent note A note that must remain on screen for an indefinite
time. The user can't dismiss it. Example: insert SIM
card.
wait note A note containing a progress or wait graphic. (Wait
graphic is an animation of indefinite duration,
whereas progress graphic is a growing bar that can
be used when it is possible to estimate the duration
of the operation.) Used during operations that take
a long time. The user should be able to stop the
56
Page 57

operation. For this a softkey labeled, for example,
“Cancel’ is provided.
Figure 5-41. A wait note with a Cancel function in the right softkey.
Some guidelines concerning note usage:
Use a confirmation note when:
The effect of the operation can't be seen directly by some other means.
·
Example: Message sent.
·
There is some relevant information to be communicated by it.
Example: Last call duration.
Confirmation notes should not be used after every completed operation, this would
easily start to annoy users. Confirmation notes should not be used when:
- There is already another dialogue in the procedure, for example "Do you want to
remove this message? Y/N"
- A progress indication is visible during the procedure.
- The user can see the result of the operation when it is done. Example: adding or
removing objects in a list.
- A setting has been changed. The new value of the setting is visible in the setting
item.
- The operation can be considered minor or so frequent that a note would be
annoying. Example: copy-paste actions.
Use an error note when:
·
The user does something that may cause considerable harm immediately or later.
Example: the user gave a wrong PIN code. Repeating this a couple of times
would block the SIM card.
To keep the error notes effective, they should be used very sparingly. In most
"ordinary" error cases, an information note should be used instead of an error note.
It has less aggressive sound and graphics.
·
It should also be noted that if the information to be given is such that the user
must see and acknowledge it, a confirmation query is a better component to
use than a note. Then the user must press a key to dismiss the information, and
there is time to read and think about the notification.
57
Page 58

Soft notifications
Soft Notifications are reminders that inform the user of events that have occurred in
the user’s absence, or while the user was busy with some application. Text, and also
graphics, can be used to communicate the message to the user. Soft notifications are
displayed in pop-up windows.
The user can respond to the soft notification by using the softkeys. The left softkey is
used for activating a function, for example opening a message that has arrived. The
right softkey is used to discard the notification without taking any further action.
Figure 5-42. A soft notification indicating the arrival of voice messages.
Soft notifications are displayed only in idle state. If an event that causes a soft
notification (for example a missed call) occurs when an application is active, it may
cause other kinds of UI events to notify the user, but if the user does not react to
these, the soft notification appears only after the phone is put in idle state – if the
event still requires it.
The application that launched a soft notification can control it and also discard it. It
is possible to use the Applications key during a soft notification; in that case the soft
notification disappears, but reappears when the user returns to idle state, unless the
application responsible for it has discarded it.
Soft notifications can be displayed for the user in two different appearances:
Ungrouped soft notification
·
These notifications contain one piece of information each. The appearance of the
notification window is the same as a note’s. The example in the previous figure is
an ungrouped soft notification.
· Grouped soft notification
Many different items of information can be combined into one soft notification
where the items are displayed as a list. The user can pick up one of the items at a
time and react to it. The appearance of this soft notification type is the same as
a list query (see section Queries).
58
Page 59

Figure 5-43: A grouped soft notification. The height of the window is dynamic and
depends on the number of lines in the list.
Discarding soft notifications
The application that launched a soft notification can discard it without user
intervention when the notification becomes obsolete. A soft notification should
remain pending until the user has responded to it, or started using the corresponding
application so that in effect the notification becomes obsolete. In that case the
application can discard the notification even though the user may not have actually
seen it.
When the user reacts to a soft notification by pressing the right softkey (for example
Read), or selects one item of a grouped soft notification, the item becomes
interpreted as obsolete, and will not reappear. If a soft notification contained more
than one item, the other ones remain pending and reappear when the user returns to
idle.
The user can dismiss the notification by pressing the right softkey, labeled Exit. After
this, the notification does not reappear until new events cause a new notification to
be created. In case of a grouped soft notification, all items it contains are discarded.
Many simultaneous soft notifications
Soft notifications are stacked in case there is more than one pending at a time: after
the topmost one is discarded, the one following it will be displayed. Each notification
has a priority value that determines the order of the notifications.
59
Page 60

Queries
Figure 5-44. Several stacked soft notifications. Note the graphic indicating multiple
windows.
A query is a state where the software waits for user input. Queries are used in
situations with more than one way to proceed, when the application needs data from
the user, or when it is necessary to make sure the user knows what is happening. A
query must exit before the application can proceed.
Queries are displayed in pop-up windows. The following query types can be used:
Confirmation query
·
A question or notice with one or two possible responses.
·
List query
A question with a selection of more than two possible (predefined) responses.
·
Multiselection list query
Presents a list of items; the user can select any number of them.
·
Data query
Used for numeric or textual input.
Confirmation query
A confirmation query requests the user to confirm an operation, or asks a yes-notype of question. It can be used for instance to make sure the user does not
accidentally delete important information or start an operation which cannot be
taken back.
The layout for a confirmation query is the same as note layout, with an optional
graphic item.
One or two softkey labels can be used. In case the query can cause two different
consequences, the positive choice (‘Yes’) is placed on the left softkey, and the
negative one (‘No’) on the right softkey. In pure confirmations, only one way to
60
Page 61

proceed is possible, and the response text (for example ‘OK’) is placed on the left
softkey.
The Selection key always causes the same action as the left softkey.
Figure 5-45. A confirmation query.
Guidelines for designing confirmation queries:
When designing the prompt text, make sure the ‘positive’ answer is also the safe
·
one. Users tend to proceed pressing the left softkey or Selection key without
thinking too much.
·
Use descriptive softkey labels whenever possible. For a query about deleting
something, it is better to label the softkeys as ‘Delete’ and ‘Keep’ than use
generic terms like ‘OK’ and ‘Cancel’ that are more complex to interpret.
·
Redundant confirmation queries should be avoided. Do not add a confirmation
query if there already are other forms of feedback, unless it is crucial that the
user gets a certain piece of information.
List query
A list query offers a list of predefined choices for the user. It can be used when more
than two options must be offered to the user. There is a prompt text (optional) on
top of the window, and a list of options to choose from.
The list in a list query is a menu list: the user can select an item or dismiss the query;
the Options menu is not available. The default softkey labels are OK on the left and
Cancel on the right - actual texts can be specific to the context. The Selection key
causes the same action as the left softkey.
Any list item layout suitable for menu lists can be used; see section List layouts.
61
Page 62

Figure 5-46. A list query.
The number of items in the list should be kept low, so that all items can be seen
without scrolling.
Instead of a list, a grid can be used in a query. The grid query function is otherwise
identical to a list query.
Figure 5-47. A grid in a query.
Multiselection list query
A multiselection list query is used when the user needs to be able to select several
items from a list at the same time. See section Multiselection list for a description of
multiselection list.
The left softkey (‘OK’) is used for accepting the query, and the right softkey is Cancel.
62
Page 63

Figure 5-48. Multiselection list query.
Data query
A data query requests the user to type in some alphanumeric or numeric information,
like a name or a phone number.
The query contains a prompt text and a user input field. The input field can have any
type of editor, depending on context, so that the input may be restricted to for
example numeric data, date or time only. Both the prompt and input fields can be
longer than one line when necessary.
The softkeys of the data query are OK on the left, for accepting the input, and Cancel
on the right softkey, for discarding the query. The Selection key accepts the input just
as the left softkey.
Clear key is used for deleting characters, and for that purpose only.
Figure 5-49. Data query. The input field may extend automatically to more than one
line’s height, and also prompt text may take two lines.
Password query
A specific case of data query is password query, used for confidential information like
passwords or PINs. It uses the password editor, which functions very much like any
other editor, except that instead of the actual data, a dummy character (asterisk)
represents each input character. In case of a numeric-only password, the asterisks
appear as soon as characters are entered. In case of alphanumeric input, to support
typing characters by repeated presses of the same numeric key, the character is
displayed normally for a short time, and then changed to an asterisk.
63
Page 64

Figure 5-50. A password query window.
Data queries with multiple fields
It is possible to have two input fields in a data query. An example of this is a user
name and password query: one field is then a normal alphanumeric editor and the
other a password editor. In this case, a press of the Selection key moves the insertion
point from the first field to the next; in the second field it accepts the query. The left
softkey always accepts the query. The user can also move from one field to the other
using scroll up and scroll down.
Figure 5-51. A data query window with two input fields.
Indicators
Indicators are graphical or textual objects on screen that provide information about
the status of the system. They cannot be used for input, and there is no focus on an
indicator: the user cannot point at an indicator to do actions.
The various indicator types in use are described in the following subsections.
Signal and battery indicators
The top-left area of the screen is used for the cellular signal strength indicator, and
the corresponding top-right area for the battery level indicator.
Figure 5-52. Signal and battery indicators on the sides of the status pane. Other status
indicators are visible below the navi pane.
64
Page 65

The signal indicator is part of the status pane, and it is displayed in all states where
the status pane exists. The indicator consists of an antenna icon and a bar graph that
indicates the current signal level. The antenna icon may be replaced by another icon
indicating the GPRS connection status.
The battery indicator is displayed only in idle state and in Phone application. In other
applications, the area is used for universal status indicators. The indicator consists of
a battery icon and a bar graph.
Status indicators
Status indicators are small graphical icons. They inform the user about such issues as
unread messages, waiting voice mail, selected phone line, IR and Bluetooth
connection status, set alarm clock, home zone, and locked keypad. Each status
indicator has a priority number, which determines which icons are displayed in case
there are more of them than fit on the screen simultaneously.
In idle state, and in Phone application, the status indicators are displayed in the
status indicator area below the status pane. (See figure 5-50.)
Within applications other than Phone, status indicators appear in the Universal
status indicator pane, which is the same area as the battery pane. Due to the small
size of this area, and also to avoid displaying unimportant things in general, only the
most important status indicators are displayed there. This is true even in cases where
an indicator could fit into the pane: only the most important ones do appear at all as
universal status indicators, others are only seen in idle.
Figure 5-53. Universal status indicators are displayed in the top-right corner.
Indicators in Navi pane
The navi pane can contain several kinds of indicators, depending on which way the
pane is used in the particular context:
Left-right arrows When sideways navigation between different main
pane views is used, the navi pane displays the
navigation information (tabs or text may be used).
65
Page 66

Arrow icons on the left and right ends of navi pane
indicate the possibility to move in the corresponding
directions. (With tabs, the arrows are only displayed
when all tabs are not visible.)
Figure 5-54. Arrows in navi pane.
Editing indicators When an editor is in use in the main pane, the
indicators related to editing parameters are
displayed in the navi pane. They indicate things such
as the editing mode (numeric/alphanumeric),
character case, predictive text status, and available
space.
Figure 5-55. Editing indicators in navi pane.
Audio volume indicator Used in applications where audio volume
adjustment is necessary, as in Phone.
Figure 5-56. Volume indicator in navi pane.
Editing indicators in pop-up windows
When a pop-up window contains an editor that needs editing indicators, it is not
feasible to use the navi pane for the indicators. For this purpose, a specific area in
the pop-up window, above the editing field, can be used for displaying the editing
indicators. (See the Text editing section for an example.)
Soft indicators
Soft indicators are textual indicators displayed in the main pane of the idle state.
Examples of cases where a soft indicator can be used are call charges indication and
MCN (Micro-Cellular Network) area indication.
Figure 5-57. Soft indicators in the main pane.
66
Page 67

Operator indicator
In idle, the title pane contains the operator indicator. It is either a text or a graphical
image.
Figure 5-58. A graphical operator indicator in the title pane.
Scrolling indicators
Arrowhead-shaped icons that indicate the scrolling status in lists are situated
between softkey labels in the softkey pane. Refer to section Lists and grids for
detailed description of the indicator functionality.
Application-specific indicators
Applications may need indicators specific to their own purposes. Such indicators can
be placed into the navi pane, if it is available, or into some part of the main pane.
However, using the main pane this way may require the use of a specific main pane
layout. Notice also that the icons present in many list item layouts can be utilised as
indicators.
6. APPLICATIONS AND DESIGN EXAMPLES
Idle
The Idle state is the basic state of the device. It displays information about the
current state of the device, including connection status, battery level, and network
operator. Refer to the UI Components section for detailed information about the
indicators.
Figure 6-1. Idle screen.
Functions of the keys in idle are as follows:
67
Page 68

The softkeys can be configured by the user to access various applications. ·
·
Scroll up, scroll down: open the Phonebook.
·
Scroll left, scroll right: unassigned by default, may be assigned by the user.
·
Select key: ignored.
·
Numeric keys can be used to dial a phone number manually; a press of a numeric
key opens a number entry window. A long key press in idle is used for one-key
calling to the number assigned to the key.
·
A short key press of the Power key opens a list of Profiles for switching the active
profile.
·
Applications key enters the Application shell, as usual.
The user may have a possibility to set any image as background ‘wallpaper’ in idle.
It is also possible to have a ‘screen saver’ application that may use the whole screen
while the device is not used. It should be noticed, however, that soft notifications
and other indications on screen would not be visible during this kind of application.
Application shell
The Application shell is the menu used for accessing all applications. Pressing the
Application key opens the Application shell, where the user may browse and select an
application. Applications are presented as a grid of items by default; the user can
also choose to use a list presentation. Pressing the Select key opens an application
and closes the Application shell. Refer to the Application handling section for
detailed information about opening and closing applications.
Figure 6-2. Application shell.
68
Page 69

Shortcuts
When the Application shell has been opened and no navigation has taken place, the
numeric keys 1-9 can be used as shortcuts to selecting an application. The keys are
mapped directly to the 9 icons in the shell’s initial view, so that key 1 corresponds to
the top-left application and key 9 to the bottom-right one.
When the user starts scrolling, the shortcuts are not available. Notice also that
numeric shortcuts do not exist inside applications in general.
Customizing the Application shell
The user can adjust the order of applications, as well as create folders and move
applications into folders within the Application shell. These managing functions are
available through the Options softkey on the left.
Fast application swapping
There is a shortcut to swapping between applications that are currently running. A
long press of the Applications key opens the fast swapping pop-up window that
contains the icons of the currently running applications. The user can browse and
select one of these in the same way as in the full Application shell.
Figure 6-3. Fast application swapping window.
Application handling
This section describes the handling of applications, and interactions between
applications, in the Series 60 UI environment.
Some basic assumptions:
There can be only one instance of each application at a time. This means that
·
when the user selects an application in the Application shell, there is never a
confusion about which process it refers to: either there is one running instance
of the application, in which case it will be displayed, or there is none, in which
case a new process will be created.
69
Page 70

However, software modules that several applications can use (such as editors)
·
may run simultaneously in more than one application. The user may thus see the
same feature being run in several different applications at the same time.
Opening and closing applications
Applications are typically opened using the Application shell, the menu containing all
installed applications.
There may be other ways to open an application, such as:
·
Assigning a shortcut to an application into a softkey, to be used in Idle state.
·
Using a link in Pinboard (see section Pinboard).
·
Using a specific shortcut built in to another application.
When there is no instance of the opened application already running, a new process
for the application is created. If the application is already running, opening the
application means bringing the existing application process on top. In case of a link
that points to a specific state in an application, the existing application is
interrupted and forced into the target state. See section Multitasking for more
information on this.
The user can close applications in the following ways:
·
Using the right softkey, which goes backwards in the application hierarchy
(Back) and finally exits the application (Exit).
·
Using the Exit function in the Options menu.
Closing an application means that the processes associated with it in the working
memory are terminated.
Application processes can also be terminated by the system, for example when the
user powers down the device.
Multitasking
The Series 60 UI style allows multitasking, that is, working with more than one
application simultaneously. To accomplish this, an application can be left running
when switching to another application, and it is possible to swap between running
applications and interact with them.
To open another application without terminating the current one, the user can press
the Applications key to go directly into the Application shell, and select the other
application from there. The first application process then remains running in the
background while the user is interacting with the second application.
It is possible to swap between two or more running applications by using the
Application shell.
70
Page 71

It is also possible to go to Idle state of the phone and leave an application running.
This can be done by pressing the End key, or by selecting the Phone application from
the Application shell. (The Phone application and Idle state are mutually exclusive
states in the phone: when there is a voice call going on, there is no Idle state.) During
a phone calls, however, the End key is used for terminating the call and cannot be
used as a shortcut to Idle.
The number of simultaneously running (different) applications is limited only by the
available memory in the device. When a new application process can’t be created
because of limited memory, the system can automatically shut down applications to
gain more memory space.
Application interactions
There are two different models of interaction between applications:
1) Use of modules (services) that can be called and run within several
different applications. In this model, a service or library function is running
within the application the user was originally working with. The
applications do not conflict with each other when this model is used.
It should be noted that from the user’s point of view, each item in the
Application shell is seen as an application. A specific service can be run in
any number of these applications at the same time, so the user may see a
similar screen in many applications running simultaneously. But the user
cannot launch a new instance of any of the applications in the Application
shell before terminating the existing one first: selecting a running
application will simply revert to the existing one.
The Back function works normally in this model: the user can step back
from an embedded module to the calling application; the modules may
even be nested.
Application
process
call call
return return
Service A
sub-process
Service B
sub-process
Figure 6-4: Nested services running within an application process. The Back function
leads to the parent process.
2) Actually switching from one application to another to accomplish a task.
In this model, the other application may need to be interrupted if it is
already running. This model is needed when links from one application to
another are used.
Whenever an application needs to be interrupted, the system takes care of
all pending data. If there’s information that needs to be saved, the system
71
Page 72

saves it automatically into a default place, and if there’s a pending dialog
it will be canceled. The user is not asked questions; all the operations
needed to bring the application to the target state are done automatically.
After switching applications in this way, the Back function does not lead
to the previous state. Instead, it functions as if the user had manually
entered the second application and navigated to the target state: it leads
to the previous state in the second application’s internal structure even
though the user did not actually navigate through it.
Phone
Application A
State 1
backback
State 2
State 3
switch
Application B
State 1
backback
State 2
State 3
Figure 6-5: Switching between applications, interrupting application B. The Back
function works inside application B, it does not lead back to application A.
Phone is the application for handling voice calls. It is a central application in the
device. The idle state, described, earlier, can be thought of as a part of the Phone
application: calls can be created by dialing from the idle state, and whenever there
are one or more voice calls going on, the Phone application takes the place of idle;
both can’t exist simultaneously.
In Application shell, the first application is Phone. If there are no calls when the user
selects it, the device will go to idle state.
72
Page 73

In simple one-call cases, the Phone application looks like this:
a. b.
Figure 6-6. Phone application examples: a. Creating an outgoing call; b. Active call
going on.
More complex cases, where more than one call is involved, may also happen. The
locations and sizes of individual call windows change according to the situation:
a. b.
c.
Figure 6-7. Phone application, multi-call cases: a. One call active, another on hold; b.
One active, one held, one waiting call; c. User is entering a number while
another call is active.
When there are ongoing calls, but some other application than Phone is on top, the
call windows are reduced into a small pop-up window in the top-right corner.
73
Page 74

Figure 6-8. Call status window, used when Phone application does not reside on screen.
Call handling
Calls are handled using the Send and End keys as follows:
Send - Answers the incoming call when the phone rings
or there is a waiting call.
- Creates an outgoing call when there is a number
entry window active.
- Puts active call on hold; unholds a held call; swaps
held and active calls.
End - Rejects the incoming call.
- When an active call exists: ends the active call.
- When only a held call exists: ends the held call.
- When both active and held calls exist: ends the
active call, makes the held call active.
A basic rule is that Call handling keys accomplish the same functions whether the
Phone application is on screen or not, so the user need not swap applications for
these operations when using another application. (However, some applications may
override the Send key and use it on a local function: for example, in Messaging, Send
can be used to send a message.)
Volume control
In case the hardware has no dedicated volume keys, the sound volume is adjusted
using the scroll left and scroll right keys. The volume indicator is in the Navi pane.
It is worth noticing that the user must be in the Phone application (or another audio
application) to be able to adjust sound volume if dedicated volume keys do not exist.
The same volume adjustment method is used in other audio applications.
74
Page 75

Figure 6-9. Volume indicator in the Navi pane.
Viewers and players
Viewers are used for displaying read-only data. Examples of viewers are SMS, e-mail,
and image viewers.
To edit or create new data, the user starts an editor; the viewer may offer an option
for starting an editor.
When a piece of read-only data is presented, no focus is needed, as the user does not
need to access any individual object within the data – it is only necessary to be able
to go through the data. We can imagine the data projected onto a virtual strip of
paper that the user can move within the viewing window. There is no need to point
at a specific part within the data, but a viewer may be able to zoom in and out.
Text viewers
Text viewers should in general follow these guidelines:
Text is wrapped according to the width of the viewing pane. There should be no
·
need to scroll sideways while reading the text.
· Up and down scrolling should proceed page by page. A press of scroll down key
displays the next screenful of text. (Note that in editors, text is scrolled line by
line.)
Image viewers
A still image viewer is a tool optimized for viewing photographs or other images. A
dedicated image viewer may offer features like zooming and scrolling, full screen
viewing, and adjustments of image parameters like brightness and contrast.
By default, the image should initially be scaled so that it fills the available screen
area.
Viewing functions are available in the viewer’s menu of options. However, the
numeric keypad may also be used to control some of the functions – this allows
quick access to frequently used functions, such as zooming.
75
Page 76

Multimedia viewers
For viewers that support several forms of data, the capabilities should be extended,
while still keeping the core functions consistent with text viewers. For example, the
viewed data may contain graphical still images that are displayed among text. The
following additions to the earlier rules are applied:
When necessary an embedded image shall be scaled down so that it can fit the
·
display as a whole. If the scaling capabilities are limited, a moderate amount of
oversize can be allowed.
·
When scrolling the data, the user should be able to see each image completely.
This means that at least one scrolling step should let the user view the full
image. (If scrolling would occur strictly one screenful at a time, an image could
be split into two parts, each one in a separate screen.)
·
The user should able to view an embedded image better by opening it into an
image viewer. (Note that a focus may exist in order to select the desired image,
although application designs without focus are also possible.)
·
After viewing an image in a separate image viewer, the user shall be able to
come directly back to the multimedia viewer, in the position the user started
from.
Audio and video players
Audio and video are time-based data. The players for such data need at least the
following functions:
·
Play
·
Pause
Stops the player, but leaves the pointer in the current location so that playing
can be continued later.
These commands can be mapped to the same key, as only one of them is needed at
all times. These functions shall be accessible by a single key press. The positive action
softkey is preferred for this purpose.
Additional functions may include:
·
Stop
Ends playing the clip and positions the pointer in the beginning of the current
piece or section (audio or video clip).
·
Next piece
Moves to the beginning of the next piece.
·
Previous piece
Moves to the beginning of the previous piece.
76
Page 77

Forward / Rewind
·
Fast playing of the piece, using short audio clips, forward or reverse.
· Faster / Slower
Changes the speed of playing the audio, without changing the pitch. Can be
useful with voice memos, for example.
Playing functions shall be available in the player’s menu of options. However, the
numeric keypad may also be used to control some of the functions.
Text editing
This section describes the common principles of text editing, focusing on Latin based
scripts. Requirements of other writing systems and input methods, such as those
used for Chinese or Arabic, are not covered in detail.
Character input is accomplished using the numeric keys. The ITU-T standard for
numeric keypads specifies the mapping of Latin (English) characters to the keys,
assigning three or four letters to each number key from 2 to 9. The input of a specific
character can happen either by repeated key presses within a time-out, or using
some language-specific algorithm (such as T9 by Tegic) that tries to find correct
characters according to the produced key sequence.
Other keys have specific functions assigned to them during text editing:
1 key Punctuation.
Most used punctuation characters are available
using repeated key presses within a time-out.
* key In alpha mode, offers the next match in T9 input.
In alpha mode, a long press opens a special
character grid, where the complete set of
punctuation and other characters are displayed. One
character can be picked at a time.
In number mode, produces the * character, repeated
presses produce other characters allowed within
phone numbers: +, p, w
# key In alpha mode, changes the character case
(uppercase, lower case, text case).
In number mode, produces the # character.
C key Clears the previous character from cursor. In case
more characters are selected, clears all selected
characters.
Edit key Press and release: opens an edit menu (see
description below).
77
Page 78

Selects characters when pressed simultaneously
with navigation keys (see section Selecting text
below).
Edit menu
Editing-specific functions can be accessed using the Edit menu. It is opened by
pressing the Edit key when in text editor. The Edit menu looks and works just like the
Options menu, but it contains only text-editing functions whereas other available
options remain accessible in the Options menu. The content of the Edit menu is as
follows (note that items that do not apply to the editor in use do not appear in the
menu):
Predictive text options 4
T9 on/off
Matches
Insert word
Edit word
Alpha mode
Numeric mode
(other input modes)
Cut
Copy
Paste
Undo
Submenu for predictive text options
Temporary setting of predictive input.
Switch to alpha input mode.
Switch to number input mode.
Other available input modes are listed as individual items in the
menu. The other modes may be language-specific.
+ + +
The clipboard functions allow importing and exporting chunks
of text.
Undoes the latest editing actions.
Insert number
Insert symbol
Opens a data query where the user can enter a number, and
inserts the number into text.
Opens the special character window. The same action as a long
press of the * key.
78
Page 79

Figure 6-10. Special character window.
Editing indicators
The status of the editor is displayed using graphic indicators. They inform the user
about things such as:
Editing mode (numeric/alphanumeric, language-specific modes) ·
·
Character case
·
Predictive text status
·
Available space
When the editor is in the main pane, the indicators are located in the navi pane. A
data query that resides in a pop-up window has its indicators within the window.
a. b.
Figure 6-11. Editing indicators in navi pane (a) and above the editor field in a pop-up (b).
79
Page 80

Selecting text
A chunk of text can be selected in an editor by keeping the Edit key pressed and
using the navigation keys (scroll left/right/up/down). The selected text is shown using
a highlight. The Cut and Copy functions are available when text is selected.
Figure 6-12. Text selection in an editor.
If the user presses any scroll key alone when there is a text selection, the selection
disappears and the cursor reappears in the respective position.
Document handling
Creating new documents
The user must be able to start typing (or otherwise creating) a new document
without first being asked for a file name. In many cases, documents don’t even have
a name that would be seen by the user: short messages and notes, for example, are
listed and managed by the beginning of the content.
Some document types have a file name the user can choose. Even then, the system
may give a default name for the document, and the user is not forced to name it.
When it is important that the user knows the document name, the following
methods can be used:
The system asks the user to confirm the name, using a query with the default
·
name in place. This can happen at the moment the user is about to exit the
editor, or when the user has selected the Save option.
· In some applications it makes sense that the user can give a default name in
advance, and the system creates unique names from it by adding for example a
number after the common name. This way it is possible to have meaningful
document names without typing them for each file.
80
Page 81

Saving edited data
Various kinds of documents may have different requirements concerning the behavior
of keeping or discarding the edited data. Typically one enters data, or modifies it, in
an editor, and then closes the editor accepting the new data. But sometimes there
may be a need to do something else, like cancel the edit, or save an intermediate
version of the data.
Simple queries and setting items offer the user one input element (an editor or a
list), presented in a temporary window. The softkeys are OK and Cancel. Select key is
assigned the same action as the left softkey: they Select both accept the input and
close the query. Cancel softkey discards all changes and returns. There is no need to
ask for a confirmation from the user. The actions are clear, and the accepting option
can always be seen in the softkey.
A form is a view with more than one input element. Form element types are text
(and numeric) fields, pop-up lists and sliders. A form may have separate view and
edit states; to go from view to edit one has to select Edit in the Options. Most forms
do not appear in the view state at all; the items are then always editable. In the edit
state, the user can move from one element to another and do changes.
Forms are somewhat different from queries and setting items, as individual fields do
not require an explicit accept action – one can move freely between fields and edit
at free will. The user can accept the whole form in one command.
In case there are no context-specific functions (other than acceptance and
canellation of the form), the interaction can be made similar to that of queries: the
left softkey is Done and the right one Cancel. This arrangement is easy to understand.
However, often there are functions that must be accessible while editing the form,
for example adding new items to the form. In that case, an Options softkey is needed,
and the form can’t be accepted simply by using the left softkey. The solution to this
problem is to assign the Done function to the right softkey. Pressing it accepts the
data in the form and returns to the appropriate place. In case we need to offer the
cancel function too, it can be added into the Options, using a descriptive name like
Discard changes.
Document editors (such as a message editor) usually need the Options softkey. There
may be message sending commands, preferences, help and other functions that need
to be placed in the options menu. In this case, too, the right softkey will save the
data and return to the appropriate place; it is labeled as Close. A note telling where
the data was saved should be given in case it is not obvious within the context.
In some applications there may be a need for discarding all changes, or saving
intermediate versions of the document. These functions can be placed in the options
menu as required. It is worth noticing though that sometimes technical restrictions –
memory limitations etc. - may prevent for example discarding all changes to the
document.
81
Page 82

Folders
When there are a lot of data items to be managed, it makes sense to divide them into
smaller sets. A folder is a place where a set of items can be collected. A folder can be
present among single items in a directory, but it can be opened in order to view its
contents. Users are able to create folders and delete them, move items into folders
and out of folders, and rename folders and change other properties of folders
(depending on application).
In Series 60 UI, hierarchical folder structures are not allowed. In other words, a folder
cannot reside inside another folder.
The normal methods for managing folder are as follows:
To create a new folder, the user selects the New folder option while in a data
·
items list.
·
To add items into an existing folder, the user selects the Move to folder option
while the focus is on the item to be moved. A list of existing folders is offered,
and the user can select the target folder. (To add more than one item at a time, it
is possible to mark items using the marking feature.)
·
The functions for folder managing (Move to folder, New folder) are available in a
submenu called Organize.
Groups
Groups are another means of managing data in a container. But unlike folders,
groups do not contain actual data – there are only links to data that exist elsewhere.
This makes it possible to access the same data from many places. A typical
application for groups is a distribution list: one can collect a set of addresses into
one group, to send messages to all the addresses by just referring to the group, and
the same addresses can be present in any number of different groups.
Groups can be managed in much the same way as folders. There are some
differences, however:
·
Groups are presented in a separate group view, not within the actual data items
list. The group view can be a tab view within the application.
·
To create a new group, one goes to the group view and selects the option New
group.
·
To add items to a group, one must be within the target group view, and select
the Add items to group option there. A list of items is then presented, typically
as a multiselection list, for the user to choose from.
82
Page 83

Fetching data
Often it is necessary to be able to pick up a piece of data from an application, such
as a phone number or address from the Phonebook. This is called fetching. It is a
read-only operation: the user cannot edit the data, only browsing and selecting are
possible.
Browsing data during a fetch operation should resemble the application’s normal
use: the data should be arranged the same way so that it is easy to find. Only the
available functions are different: the data can’t be edited.
The left softkey during a fetch operation is labeled Select, and it activates the same
function as the Select key: it selects the data currently in focus. The right softkey is
Cancel, and returns to the previous state without bringing back any data.
Sometimes it is feasible to use a multiselection list for fetching data. This should be
done when it is probable that the user wants to select more than one item for
fetching. An example of this is creating a group in the Phonebook to be used as a
distribution list: a list of names is offered to the user, and since the probable
intention is to have more than one name in the group, a multiselection list is a good
tool to use. (See section Multiselection list in the UI components chapter.)
Settings
Global settings – the ones that affect several applications or general issues within
the device, are collected into the General Settings application.
Application-specific settings are handled within the application UI. They should be
collected into a settings view that can be accessed via the Options menu. The
Settings option exists at least in the application’s initial or basic state, and possibly
also in other states where it would be beneficial to have easy access to settings –
especially to some context-dependent settings. The settings view is a list of setting
items (see the list item type description in the List types section).
Sometimes a general setting may be duplicated as an application-specific setting.
The order of priorities for duplicate settings must be specified case by case. For
example, a general predictive text setting could be overridden by an applicationspecific setting, but a general ‘silent mode’ setting within a profile should be
effective regardless of any other tone settings.
If the number of setting items (within an application) is large, it may be necessary to
divide them into groups. The grouping can be done in the following ways:
Use tabs to access different setting groups ·
· Design a hierarchical setting tree, use 'setting folders' in the top level (there may
be individual settings and folders in one list; this is an exception to the rule that
only setting items should exist in one list).
83
Page 84

84
 Loading...