

Page 1
Nokia Secure Access System
Getting Started Guide
Version 3.0
Part No. N450867004 Rev A
Published November 2004
Page 2

2 Nokia Secure Access System Getting Started Guide
COPYRIGHT
©2004 Nokia. All rights reserved.
Rights reserved under the copyright laws of the United States.
RESTRICTED RIGHTS LEGEND
Use, duplication, or disclosure by the United States Government is subject to restrictions as set forth in subparagraph
(c)(1)(ii) of the Rights in Technical Data and Computer Software clause at DFARS 252.227-7013.
Notwithstanding any other license agreement that may pertain to, or accompany the delivery of, this computer software,
the rights of the United States Government regarding its use, reproduction, and disclosure are as set forth in the
Commercial Computer Software-Restricted Rights clause at FAR 52.227-19.
IMPORTANT NOTE TO USERS
This software and hardware is provided by Nokia Inc. as is and any express or implied warranties, including, but not
limited to, implied warranties of merchantability and fitness for a particular purpose are disclaimed. In no event shall
Nokia, or its affiliates, subsidiaries or suppliers be liable for any direct, indirect, incidental, special, exemplary, or
consequential damages (including, but not limited to, procurement of substitute goods or services; loss of use, data, or
profits; or business interruption) however caused and on any theory of liability, whether in contract, strict liability, or tort
(including negligence or otherwise) arising in any way out of the use of this software, even if advised of the possibility of
such damage.
Nokia reserves the right to make changes without further notice to any products herein.
TRADEMARKS
Nokia is a registered trademark of Nokia Corporation. Other products mentioned in this document are trademarks or
registered trademarks of their respective holders.
030114
Page 3

Nokia Secure Access System Getting Started Guide 3
Nokia Contact Information
Corporate Headquarters
Regional Contact Information
Nokia Customer Support
Web Site http://www.nokia.com
Telephone 1-888-477-4566 or
1-650-625-2000
Fax 1-650-691-2170
Mail
Address
Nokia Inc.
313 Fairchild Drive
Mountain View, California
94043-2215 USA
Americas Nokia Inc.
313 Fairchild Drive
Mountain View, CA 94043-2215
USA
Tel: 1-877-997-9199
Outside USA and Canada: +1 512-437-7089
email: ipsecurity.na@nokia.com
Europe,
Middle East,
and Africa
Nokia House, Summit Avenue
Southwood, Farnborough
Hampshire GU14 ONG UK
Tel: UK: +44 161 601 8908
Tel: France: +33 170 708 166
email: ipsecurity.emea@nokia.com
Asia-Pacific 438B Alexandra Road
#07-00 Alexandra Technopark
Singapore 119968
Tel: +65 6588 3364
email: ipsecurity.apac@nokia.com
Web Site: https://support.nokia.com
Email: tac.support@nokia.com
Americas Europe
Voice: 1-888-361-5030 or
1-613-271-6721
Voice: +44 (0) 125-286-8900
Fax: 1-613-271-8782 Fax: +44 (0) 125-286-5666
Asia-Pacific
Voice: +65-67232999
Fax: +65-67232897
031014
Page 4

4 Nokia Secure Access System Getting Started Guide
Page 5

Nokia Secure Access System Getting Started Guide 5
Contents
About This Guide . . . . . . . . . . . . . . . . . . . . . . . . . . . . . . . . . . . . . . . . . . . . . . . . . . 7
Conventions This Guide Uses . . . . . . . . . . . . . . . . . . . . . . . . . . . . . . . . . . . . . . . . . . 7
Notices . . . . . . . . . . . . . . . . . . . . . . . . . . . . . . . . . . . . . . . . . . . . . . . . . . . . . . . . . . 7
Web User Interface Conventions . . . . . . . . . . . . . . . . . . . . . . . . . . . . . . . . . . . . . . 7
Related Documentation . . . . . . . . . . . . . . . . . . . . . . . . . . . . . . . . . . . . . . . . . . . . . . . 8
1 Installing the Nokia Secure Access System Gateway . . . . . . . . . . . . . . . . . . . . . 9
Nokia Secure Access System Requirements. . . . . . . . . . . . . . . . . . . . . . . . . . . . . . . 9
Server Requirements . . . . . . . . . . . . . . . . . . . . . . . . . . . . . . . . . . . . . . . . . . . . . . . 9
Security Platforms . . . . . . . . . . . . . . . . . . . . . . . . . . . . . . . . . . . . . . . . . . . . . . . 10
Operating System. . . . . . . . . . . . . . . . . . . . . . . . . . . . . . . . . . . . . . . . . . . . . . . . 10
Client Operating Systems. . . . . . . . . . . . . . . . . . . . . . . . . . . . . . . . . . . . . . . . . . 10
Web Browser Requirements . . . . . . . . . . . . . . . . . . . . . . . . . . . . . . . . . . . . . . . . . 11
Email Client Systems . . . . . . . . . . . . . . . . . . . . . . . . . . . . . . . . . . . . . . . . . . . . . . 11
Installation Tasks Overview . . . . . . . . . . . . . . . . . . . . . . . . . . . . . . . . . . . . . . . . . . . 11
Installing the Hardware. . . . . . . . . . . . . . . . . . . . . . . . . . . . . . . . . . . . . . . . . . . . . . . 13
Initial Configuration. . . . . . . . . . . . . . . . . . . . . . . . . . . . . . . . . . . . . . . . . . . . . . . . . . 13
About the Nokia IPSO Operating System . . . . . . . . . . . . . . . . . . . . . . . . . . . . . . . 13
Performing Initial Configuration. . . . . . . . . . . . . . . . . . . . . . . . . . . . . . . . . . . . . . . 13
Configuring Nokia Network Voyager Settings. . . . . . . . . . . . . . . . . . . . . . . . . . . . 14
Enabling Nokia Network Voyager Web Access with SSL . . . . . . . . . . . . . . . . . 15
Installing the No k ia S e cu re Access Packa g e. . . . . . . . . . . . . . . . . . . . . . . . . . . . . . 15
Determining If the Package Is Preinstalled. . . . . . . . . . . . . . . . . . . . . . . . . . . . . . 16
Initializing When the Package Is Preinstalled . . . . . . . . . . . . . . . . . . . . . . . . . . . . 17
Installing the Package with Nokia Network Voyager. . . . . . . . . . . . . . . . . . . . . . . 17
Before you Start . . . . . . . . . . . . . . . . . . . . . . . . . . . . . . . . . . . . . . . . . . . . . . . . . 17
Obtaining the Package . . . . . . . . . . . . . . . . . . . . . . . . . . . . . . . . . . . . . . . . . . . . 17
Transferring the Package with FTP . . . . . . . . . . . . . . . . . . . . . . . . . . . . . . . . . . 17
Installing or Upgrading the Package with Nokia Network Voyager . . . . . . . . . . 18
Activating the Package with Nokia Network Voyager. . . . . . . . . . . . . . . . . . . . . 22
Installing the Package From the Command-Line Interface. . . . . . . . . . . . . . . . . . 25
newpkg Options . . . . . . . . . . . . . . . . . . . . . . . . . . . . . . . . . . . . . . . . . . . . . . . . . 26
Signing On to the G a te w a y as th e Ad ministrator . . . . . . . . . . . . . . . . . . . . . . . . . . . 27
Overview of the Configuration Menu . . . . . . . . . . . . . . . . . . . . . . . . . . . . . . . . . . . . 31
Configuring Nokia Secure Access System. . . . . . . . . . . . . . . . . . . . . . . . . . . . . . . . 32
Authenticating the admin User . . . . . . . . . . . . . . . . . . . . . . . . . . . . . . . . . . . . . . . 32
Page 6

6 Nokia Secure Access System Getting Started Guide
Installing the License . . . . . . . . . . . . . . . . . . . . . . . . . . . . . . . . . . . . . . . . . . . . . . 33
Configuring a User . . . . . . . . . . . . . . . . . . . . . . . . . . . . . . . . . . . . . . . . . . . . . . . . 37
Configuring a Group. . . . . . . . . . . . . . . . . . . . . . . . . . . . . . . . . . . . . . . . . . . . . . . 39
Adding a User to a Group . . . . . . . . . . . . . . . . . . . . . . . . . . . . . . . . . . . . . . . . . . 40
Configuring a Web Resource. . . . . . . . . . . . . . . . . . . . . . . . . . . . . . . . . . . . . . . . 41
Configuring Access Control Lists for a Web Resource . . . . . . . . . . . . . . . . . . . 44
Specifying User Portal Settings . . . . . . . . . . . . . . . . . . . . . . . . . . . . . . . . . . . . . . 45
Page 7
Nokia Secure Access System Getting Started Guide 7
About This Guide
Welcome to Nokia Secure Access System. This guide is intended for the system administrator
who installs and configures Nokia Secure Access System. This guide describes how to install
Nokia Secure Access System software and get started with some example configuration
procedures.
For detailed gateway and configuration information, see the Nokia Secure Acces s System
Configuration Guide v3.0.
For an overview of the technologies that the Nokia Secure Access System uses, see the Nokia
Secure Access System Technology Overview.
Conventions This Guide Uses
This document uses the following conventions.
Notices
Note
Notes provide information of special interest or recommendations.
Web User Interface Conventions
Throughout this guide, a greater than sign (>), with spaces before and after the sign, is used to
indicate navigatio n throu ghou t the Web user i nterf ace menu b y clic king menu option s an d links.
For example, to configure a new user group, choose Users > User Configuration > New User
Group.
Note
The globe icon indicates that the adjacent field (in yellow) supports Unicode encoding.
Page 8

8 Nokia Secure Access System Getting Started Guide
Note
When you provide information in the Nokia Secure Access System configuration fields, click
Save Settings before you select tabs or buttons to ensure that your changes are saved
before you go to a new configuration page.
Related Documentation
For supporting documentati on, che ck the Nokia Secure Access System v3. 0 CD-ROM for the
following documents:
Nokia Secure Access System Release Notes v3.0
Nokia Secure Access System Technology Overview v3.0
Nokia Secure Access System Configuration Guide v3.0
Nokia Secure Access System User’s Guide v3.0
Page 9
Nokia Secure Access System Getting Started Guide 9
1 Installing the Nokia Secure Access
System Gateway
This section describes how to install the Nokia Secure Access gateway, including:
Nokia Secure Access System Requirements
Installation Tasks Overview
Installing the Hardware
Initial Configuration
Install i ng the Nokia S ecure Access Package
Signing On to the Gateway as the Administrator
Overview of the Configuration Menu
Configuring Nokia Secure Access System
Note
Your Nokia appliance ships with the Nokia Secure Access System package installed. If the
package is not installed, you can install it by using Nokia Network Voyager. For more
information, see “Installing the Package with Nokia Network Voyager” on page 17.
Nokia Secure Access System Requirements
This section describes the hardware and software required to run Nokia Secure Access System,
including security platforms, client operating systems, Web browsers and email client systems.
Server Requirements
This section describes the security platform and operating system requirements for the Nokia
Secure Access System server.
Page 10
Installing the Nokia Secure Acce ss System Gate way
10 Nokia Secure Access System Getting Started Guide
Security Platforms
The following Nokia IP security appliances support Nokia Secure Access System v3.0:
Nokia IP130
Nokia IP350
Nokia IP380
Nokia IP1260
Note
To run Nokia Secure Access System, the appliance must have at least 256 MB of RAM
installed. For optimum performance, Nokia recommends that at least 512 MB be installed.
Operating System
The following versions of Nokia IPSO-SB support Nokia Secure Access System v3.0:
v3.7 Build 34, 39, 41
v3.7.1 Build 7, 10, 12, 16
v3.8 Build 31, 34, 39
Client Operating Systems
The following client operating systems are supported:
Micro soft Windows operating systems:
98 SE
ME and ME Pocket PC
NTv4, 2000 with SP4
XP Home and Professional, with SP1 and SP2
CE
Red Hat versions 7.3, 8.0, and 9.0
MAC OS X
Note
All operating systems must have the most current version of service packs applied to be
supported.
Page 11
Installation Task s Ove rvie w
Nokia Secure Access System Getting Started Guide 11
Web Browser Requirements
Most SSL-capable Web browsers are compatible with Nokia Secure Access System, including
the followin g:
Microsoft Internet Explorer v5.5 and later
Netscape v6.2 and later
Mozilla v1.6 and later
Firefox v0.8 and later
Mac OS X Safari
Email Client Systems
The following is a list of supported email client systems for the Nokia Secure Access System:
Microsoft Outlook 98, 2000, 2002, 2003
Outlook Express
Lotus Notes client 5.0, 6.5, 6.0.2
Eudora
Netscape
Mozilla v1.6 and later
Installation Tasks Overview
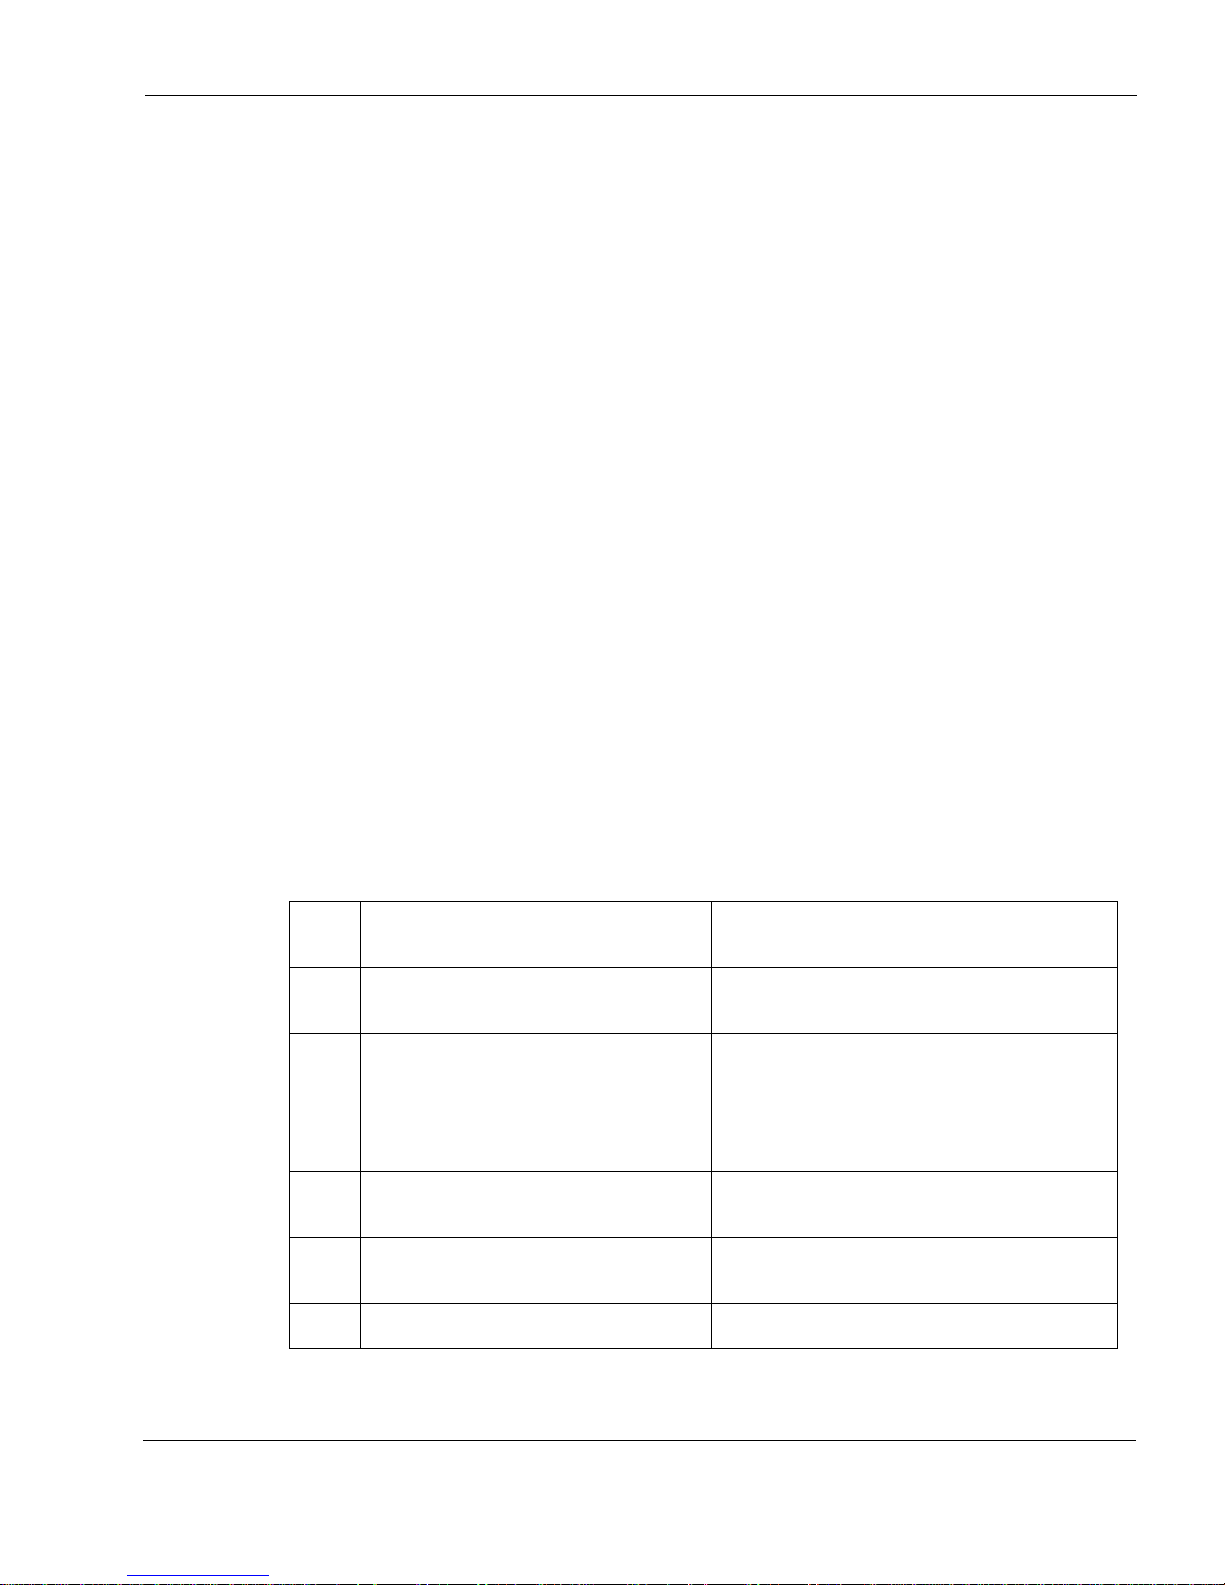
Table 1 list the common tasks and steps for instal ling the Nokia Secure Access System.
Table 1 Nokia Secure Access System Task Overview
Check
box Task overview Where to find information
Install and connect the hardware “Installing the Hardware” on page 13 of this
guide.
Configure the appliance
• Configure Nokia IPSO
• Perform the initial configuration
• Configure Nokia Network Voyager
settings
“Initial Configuration” on page 13 of this guide.
Install the Nokia Secure Access System
package
“Installing th e Noki a S ecure Ac cess Pack age” on
page 15 of this guide.
Sign on to the gateway as an
administrator
“Signing On to the Gateway as th e Administrator”
on page 27 of this guide.
Install the license “Installing the License” on page 33 of this guide.
Page 12

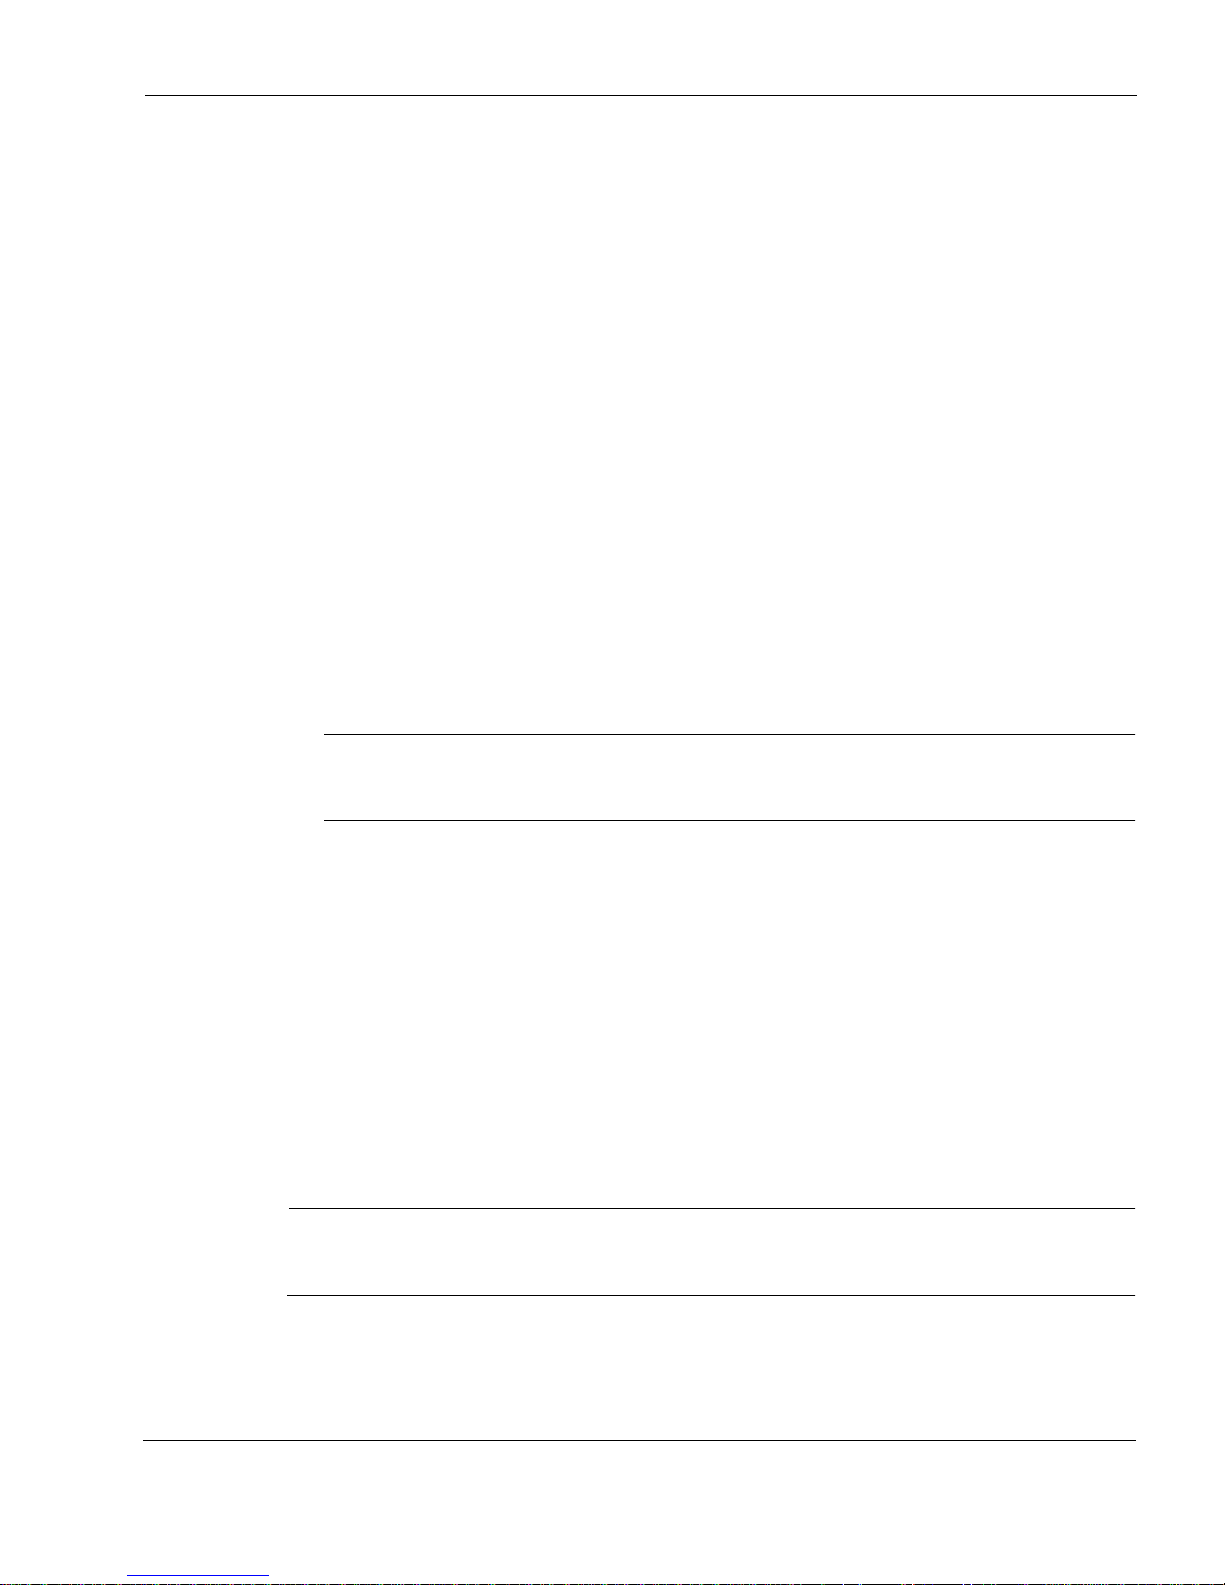
Installing the Nokia Secure Acce ss System Gate way
12 Nokia Secure Access System Getting Started Guide
Configure the server certificat e Nokia Secure Ac cess System Configuration
Guide v3.0
Configure network settings
(Listen on specific interfaces, encryption
levels, and so on.)
Nokia Secure Ac cess System Configuration
Guide v3.0
Configure logging
(Syslog, SNMP)
Nokia Secure Ac cess System Configuration
Guide v3.0
Specify user portal settings “Specifying User Portal Settings” on page 45 of
this guide.
Configure users “Configuring a User” on page 37 of this guide.
Configure groups “Configuring a Group” on page 39 of this guide.
Add a user to a group “Adding a User to a Group” on page 40 of this
guide.
Configure Web resources “Configuring a Web Resource” on page 41 of this
guide.
Configuring file resources Nokia Secure Access System Configuration
Guide v3.0
Configuring email resources Nokia Secure Ac cess System Configuration
Guide v3.0
Configuring authentication methods:
• Authenticating users at sign on
• Authenticating with external serv ers
Nokia Secure Ac cess System Configuration
Guide v3.0
Configure client integrity scanning Nokia Secure Access Syst em Configuration
Guide v3.0
Configure advanced access control Nokia Secure Ac cess System Configuration
Guide v3.0
Table 1 Nokia Secure Access System Task Overview (continued)
Check
box Task overview Where to find information
Page 13

Installing the Hardware
Nokia Secure Access System Getting Started Guide 13
Installing the Hardware
For information about how to install the hardware and ho w to phys ically connect your device to
the network, see t h e do cumen tation for your speci fi c device. For example , if you are installing a
Nokia IP350 security platform, see the installation guide included with your appliance.
Initial Confi guration
This section describes how to perform initial configuration of the Nokia IP security appliance,
and configuring Nokia Voyager settings.
Note
If your appliance was preconfigured, skip the following sections and proceed to “Signing On
to the Gateway as the Administrator” on page 27.
About the Nokia IPSO Operating System
Nokia IP security platforms are based on the Nokia IPSO operating system. The Nokia Secure
Access System software is installed as a package on the Nokia IPSO appliance. Configure your
appliance before you install the Nokia Secure Access System package.
For more information about configuring IPSO, see the Nokia Voyager Reference Guide.
Performing Initial Configuration
This section describes how to perform initial configuration of the Nokia IP security platform.
The first time you supply power to your Nokia appliance, the initial configuration process
begins. This process enables you to configure the network settings and provides access to the
admin account.
You can perform the initial configuration in two ways:
You can configure a DHCP server to provide the initial configuration information the first
time the appliance is started.
You can perform the initial configuration manually by using a console connection. Connect
the supplied null-mode m cable ( consol e cabl e) to t he DB9 por t labe led Cons ole and con nect
the other end of the cable to a system running a terminal-emulation program.
Specify the following information:
Hostname of the appliance.
Use a fully qualified domain name, such as gateway.example.com.
In itial password for the administrator ac count.
Username is admin.
Page 14

Installing the Nokia Secure Acce ss System Gate way
14 Nokia Secure Access System Getting Started Guide
IP address and netmask bit length for at least one network interface.
Set the netmask b it -l engt h inp ut to the number of bi t s i n the network mask. For example,
for a network mask of 255.255.255.0, enter 24.
Default route address.
Note
For information about how to configure the initial settings, see the IP series installation guide
that is included with your appliance.
Configuring Nokia Network Voyager Settings
After you complete the initial configuration, you can access the Nokia Network Voyager
configuration menu by using your Web browser.
Nokia Network Voyager is an SSL-ca pable, Web-bas ed element managemen t interf ace to Nokia
IP security platforms . Network Voyager is preinst alled on you r applianc e and is enabled t hrough
the Nokia IPSO operating system. With Network Voyager, you can manage, monitor, and
configure the appliance from any authorized location within the network by using a Web
browser.
To access Nokia Network Voyager
1. Enter the URL of the appliance into your Web browser, by using either the appliance IP
address or hostname (for example, http://gateway.example.com).
2. When prompted, authenticate to Network Voyager with the username admin and the
password you specified during the initial configuration.
3. Configure the following appliance settings in Network Voyager:
a. Click the Local Time Setup link in the System Configu rati on secti on to set the loc al time
so that time stamps on logging messages are accurate.
b. Set the default domain suffix, such as example.com.
c. Click the DNS link in the System Configuration section.
d. Specify a valid DNS server so that the gateway can resolve hostnames. The gateway
Network Information System (NIS) client requires that DNS be configured to operate.
Click the DNS link in the System Configuration section.
Page 15
Installing the Nokia Secure Access Package
Nokia Secure Access System Getting Started Guide 15
Enabling Nokia Network Voyager Web Access with SSL
Secure Socket Layer (SSL) provides a secure way to connect to network appliances by using
Nokia IPSO. Before you install Nokia Secure Access System, enable SSL Web access by using
Network Voyager.
To enable SSL Web access with Network Network Voyager
1. From the Nokia Network Voyager main page, select Security and Access Configuration.
2. From the Voyager Configuration page, select Voyager Web Access.
3. In Voyager Access, check that Allow Voyager Web access is set to Yes.
By default, this is set to Yes.
4. Enter the number of the port to activate in the Voyager SSL port number text box.
The default is 443.
5. Click the encryption level appropriate for your security needs.
For example, 128-bit key or stronger. The default is none, which disables SSL.
When you enter the encry pti on level, you are enterin g the minimum level of encrypt ion y ou
require. Encryption is stronger by default if your Web browser supports it.
6. Click Apply.
Note
Replace http:// with https:// in your browser window before you click Save because you
are enabling a secured connection.
7. Click Save.
IPSO includes a default sample certificate and private key for testing purposes only and do not
provide a secure SSL connectio n. You must generate a certificat e, and the priv ate key associ ated
with the certificate, to create a secure connection by using SSL. For more information, see the
Nokia Network Voyager Reference Guide.
Installing the Nokia Secure Access Package
This section describes how to install the Nokia Secure Access System package on your
appliance, includ ing how t o determine whether the pac kage has been preinstal l ed, how to install
the package from the command line, and performing initialization for both cases.
Note
If your system is preconfigured for use with Nokia Secure Access System, skip this section
and continue to “Signing On to the Gateway as the Administrator” on page 27.
Page 16

Installing the Nokia Secure Acce ss System Gate way
16 Nokia Secure Access System Getting Started Guide
If you know that an earlier version of Nokia Secure Access System is installed on your
appliance, see “To install or upgrade the package with Nokia Network Voyager” on page 19.
Determining If the Package Is Preinstalled
From Nokia Network Voyager, you can determine if the package is preinstalled on your
appliance . If it is preinstalled it stil l needs to be activated.
To determine if the package is preinstalled
1. From the Nokia Network Voyager main page, select System Configuration.
2. From the Voyager Configuration page, select Manage Installed Packages.
The Manage Packages page opens.
If the list of the installed packages includes a package named Nokia Secure Access
System, activate the package. See “Activating the Pa ckage with Nokia Network
Voyager” on page 22.
If the list of installed packages does not include a package named Nokia Secure Access
System, install the package. See “Installing or Upgrading the Package with Nokia
Network Voyager” on page 18.
Page 17

Installing the Nokia Secure Access Package
Nokia Secure Access System Getting Started Guide 17
Initializing When the Package Is Preinstalled
If the Nokia Secure Access System package is already installed on the appliance, it must be
activated (turned on) and enabled before you sign on to the Nokia Secure Access System
gateway.
See “Activating the Package with Nokia Network Voyager” on page 22.
Installing the Package with Nokia Network Voyager
This section describes how to install the Nokia Secure Access System package by using Nokia
Network Voyager, includ ing wh at you ne ed t o know before you start the i nst allation, using FTP
to transfer the packing and installing and upgrading tasks.
Before you Start
Before you install the package with Nokia Network Voyager, do the following:
Disable any other packages, including firewall and VPN packages before you install the
Nokia Secure Access System package.
Verify that Nokia IPSO v3.7, v3.7.1, or v3.8 is installed on your appliance.
If your appliance is running an earlier version of Nokia IPSO, you can upgrade to a newer
version by obtaining the Nokia IPSO installation file from http://support.nokia.com
First, you should check for compatibility between Nokia IPSO and Nokia Secure Access
System versions at https://support.nokia.com/register/productsSupported.jsp#ems. Then,
you can install this file by using Nokia Network Voyager.
Obtaining the Package
If the Nokia Secure Access System software package is not on your appliance, you can obtain
the package from the Nokia support site at https://support.nokia.com. After you download the
package, you can transfer the file to the opt/packages directory on the Nokia Secure Access
System gateway.
Transferring the Package with FTP
After you download the nsas_3_0_0_<timestamp>.tgz package file, you can transfer the
package to the appliance by using FTP, then install the package.
To download the package with Nokia Network Voyager
1. Download the nsas_3_0_0_<timestamp>.tgz package file from the Nokia support site at
https://support.nokia.com.
2. If the workstation on which you stored the package file does not allow FTP access, transfer
the package file to a computer that you can access with FTP.
3. From the Nokia Network Voyager main page, select System Configuration.
Page 18

Installing the Nokia Secure Acce ss System Gate way
18 Nokia Secure Access System Getting Started Guide
4. From the Voyager Configuration page, select Manage Installed Packages.
The Manage Packages page opens.
5. From the Manage Packages page, select FTP and Install Packages.
The FTP Packages page opens.
6. In the text boxes, provide the hostname or IP address of the FTP server and the directory
path on that server (optional).
Also, provide the username and the password for your account on the FTP server.
7. Click Apply.
The FTP Packages page refreshes. A list of packages (.tgz files) found on the FTP server
appears in the Site Listing panel.
8. Select the nsas_3_0_0_<timestamp>.tgz file.
9. Click Apply.
The package is downloaded to the appliance.
10. Continue installing the Nokia Secure Access System package beginning with step 4 of “To
install or upgrade the package with Nokia Network Voyager.”
Installing or Upgrading the Package with Nokia Network
Voyager
This section describes how to install the package by using Nokia Network Voyager. Table 2
shows, by version number, which directory the package installs to on the appliance. These are
some of the previous Nokia Secure Access System versions and their corresponding directory
locations.
During the package upgrade, the new version of Nokia Secure Access System automatically
imports the configuration from the previous package version. Once the package upgrade
completes, the previous version of the package is deactivated (but not deleted), and the new
package is activated
.
When you upgrade the package, the old package configuration is maintained.
Table 2 Package Version and Directory
Version Directory
3.0 /opt/nsas-3.0.0
2.1 /opt/nsas-2.1.0
2.0 /opt/nsas-2.0.0
1.2 /opt/nsas-1.2.0
1.1 /opt/nsas-1.1.0
Page 19

Installing the Nokia Secure Access Package
Nokia Secure Access System Getting Started Guide 19
To install or upgrade the package with Nokia Network Voyager
1. From the Nokia Network Voyager main page, select System Configuration.
2. From the Voyager Configuration page, select Manage Installed Packages.
The Manage Packages page opens.
3. From the Manage Packages page, select FTP and Install Packages.
The FTP Packages page opens.
Page 20

Installing the Nokia Secure Acce ss System Gate way
20 Nokia Secure Access System Getting Started Guide
4. Select opt/packages/ns as_3_ 0_0_<timestamp>.tgz.
If this option is not prese nt in the list, see “To download the package with Nokia Network
Voyager” on page 17.
5. Click Apply to unpack the package.
Note
The package is first unpacked to the /opt/tmp directory.
This operation can take several seconds to complete. When the package is successfully
unpacked, the Package Installation and Upgrade page refreshes and displays the package
name, class, version, and description.
On some platforms, you might see the message “Timeout waiting for response from
database server” when co mpleting this step. If this occ urs, click Up to return to the Manage
Packages page, then select FTP and Install Packages. The link to install and upgrade the
package will be visible on the FTP Packages page.
6. To install the unpacked package, click the following link, located at the bottom left side of
the screen.
The Package Installation and Upgrade page opens.
To inst all the package:
a. Click Yes on the Install option.
b. Ensure that the Upgrade option is set to No.
Page 21

Installing the Nokia Secure Access Package
Nokia Secure Access System Getting Started Guide 21
To upgrade the package:
a. Click Yes on the Upgrade option.
b. Ensure that the Install option is set to No.
c. Select the Nokia Secure Access System version to upgrade.
7. Click Apply.
The screen refreshes and indicates that the operation was successful.
8. To enable the package, click the following link located in the bottom left corner of the
window:
Click here to finish the initial configuration.
If you are installing a package, the Nokia Secure Access page opens and begins to
generate the random number seed.
If you are upgrading the package, the Nokia Secure Access page opens.
Note
The Nokia Secure Access System page shows that the system is creating the random
number seed. The page refreshes itself when the operation is complete. If the random
number was already seeded, you do not see this page.
The screen refreshes and shows package status.
Page 22

Installing the Nokia Secure Acce ss System Gate way
22 Nokia Secure Access System Getting Started Guide
If the package is enabled, select Click here to sign on to the Nokia Secure Access System.
Continue to “To authenticate at the Sign-on page” on page 29. This link points to the
gateway configuration system. You are taken directly to the gateway configuration system
after you sign on to the gateway.
If the package is disabled, continue to “Activating the Package with Nokia Network
Voyager” on page 22.
Activating the Package with Nokia Network Voyager
Disable any other packages , including firewal l and VPN packages, befo re you activate the Nokia
Secure Access System package. This section describes how to activate the package with Nokia
Network Voyager.
To activate the Nokia Secure Access System package
1. From the Nokia Network Voyager main page, select System Configuration.
The Voyager Configuration page opens.
2. From the Configuration page, select Manage Installed Packages.
The Manage Packages page opens.
Page 23

Installing the Nokia Secure Access Package
Nokia Secure Access System Getting Started Guide 23
3. In the Applications group, check that the Nokia Secure Access System package is set to On.
4. Click Apply.
5. Click Save. You do not need to reboot your system.
The Nokia Secure Access System package is installed, activated, and enabled.
Note
During the installation, Nokia Network Voyager is moved off of port 80 (or 443), so that
Nokia Secure Access System can use those ports.
If you are not already on the Nokia Secure Access page (by following the link after you
install the package), access this page from the Nokia Network Voyager main page by
selecting Security and Access Configuration. The Voyager Configuration page opens and
from there you can select Nokia Secure Access System.
The Nokia Secure Access System page opens.
Page 24

Installing the Nokia Secure Acce ss System Gate way
24 Nokia Secure Access System Getting Started Guide
If the status is enabled, click the Click here to sign onto NSAS link and continue to “To
authenticate at the Sign-on page” on page 29.
If the status on this page shows as disabled, click:
Click here to initialize the Nokia Secure Access Sys tem
The resulting page advances you to the Nokia Network Voyager Web server on the new
port, which is either 8080 or 8443.
6. If necessary, log on to Network Voyager again by using the username admin and the same
administrator password as before.
Note
When cookie-based sessi on man agem ent is enabl ed in N etwo rk Voyager, yo u can
select Acquire Exclusive Configuration Lock when you log on to Network Voyager. If you
acquire this lock before you install and enable the Nokia Secure Access System
package, the lock does not clear when the Network Voyager Web server port switches
from port 80 to 8080, or from port 443 to 8443. When you log on to Network Voyager
after the port change, the error message “Could not acquire exclusive configuration
lock” appears. If this occurs override the lock by clicking Log In with Advanced Options
and select Yes for Override Locks Acquired by Other Users.
The Nokia Secure Access System page now shows that the status is enabled. You can now
sign on to the Nokia Secure Access System gateway. Continue to “Signing On to the
Gateway as the Administrator” on page 27.
Page 25

Installing the Nokia Secure Access Package
Nokia Secure Access System Getting Started Guide 25
Installing the Package From the Command-Line Interface
Disable any other packages, including firewall and VPN packages before you install the Nokia
Secure Access System package. This section de scribes how t o install and enable the Nokia
Secure Access System package from the Command-Line Interface (CLI).
You can install the package from the CLI by using the newpkg command. The newpkg
command automatically extracts the package files into the /opt directory and activates the
package. When you enter newpkg, the script guides you through the installation process. You
can also specify command options, which are listed in Table 3 on page 26.
Note
Installing or upgrading the package by using the Nokia IPSO clish command is not
supported.
To access the CLI
1. Log on to the appliance by usin g a c ommand-li ne conn ectio n (SSH, consol e, or Tel net) over
a TCP/IP network.
For example:
telnet 10.5.189.21
2. Sign on by using the username admin, and use the admin password.
To install the package from the CLI
1. From the command line, enter:
newpkg -n/opt/packages/nsas_3_0_0_<timestamp>.tgz
The following options appear:
Load new package from:
1. Install from CD-ROM.
2. Install from anonymous FTP server.
3. Install from FTP server with username and password.
4. Install from local filesystem.
5. Exit new package installation.
2. Enter 4.
The following response appears:
End of new package installation
cleaning up ..done
If the Network Voyager ports listed are different from 80 or 443, the Nokia Secure
Access System package is installed, activated, and enabled. See “Signing On to the
Gateway as the Administrator” on page 27.
If you use the -i argument with the newpkg command, you must activate the package.
See “Activating the Package with Nokia Network Voyager” on page 22.
Page 26

Installing the Nokia Secure Acce ss System Gate way
26 Nokia Secure Access System Getting Started Guide
newpkg Options
Table 3 describes the options you can use with the newpkg command.
The syntax of newpkg is:
newpkg [-o
path
] [-m
media_type
] [-l
user_name
]
[-s
server_ipaddrs
] [-p
password
] [-n
path
]
To upgrade the package from the CLI
1. From the command line, enter one of the following commands:
newpkg -o /opt/nsas-<old-version> -n /opt/packages/
nsas_3_0_0_<timestamp>.tgz
For example:
newpkg -o /opt/nsas-1.3.0 -n/opt/packages/nsas_3_0_0_2004040514.tgz
newpkg -o /opt/nsas-<old-version> -m ftp -l username -s
ip.addr.of.ftp.server -p password -n /directory/location/
nsas_3_0_0_<timestamp>.tgz
For example:
newpkg -o /opt/nsas-1.3.0 -m ftp -l jsmith -s 10.10.22.23 -p password -n
/eng/newbuilds/nsas_3_0_0_2004040514.tgz
Table 3 newpkg Options
Option Description
-d
Print debug messages to the screen.
-h
Display help lines for command-line parameters.
-i
Install only (do not activate).
-l user_name
User name for FTP.
-m media_type
Media type. For example, FTP/CD-ROM/LOCAL or
CDROM/AFTP/FTP/LOCAL.
-n path
Full path to new package. For example, /pub/current/xxx.tgz.
-o path
Full path to old package for upgrade. For example, /opt/xxx.
-p password
Password for FTP.
-s server_ipaddr
Server IP address if media type is FT P/AFTP.
-v
Verbose FTP.
Page 27

Signing On to the Gateway as the Administrator
Nokia Secure Access System Getting Started Guide 27
The -o option indicates the location, such as directory, of the old installed version to
upgrade.
The -n option indicates the location of the new file to install from and is an actual
filename.
2. The following options appear:
Load new package from:
1. Install from CD-ROM.
2. Install from anonymous FTP server.
3. Install from FTP server with username and password.
4. Install from local filesystem.
5. Exit new package installation.
3. Enter 4 or your applicable path.
The following response appears:
Do you want to upgrade from nsas-3.0.0 to nsas3.0.0?
[ y/n]
4. Enter y.
The following response appears:
End of new package installation
cleaning up ..done
Signing On to the Gateway as the Administrator
After you install, acti vate, and enable the No kia Secure Acc ess System pac kage, you can si gn on
to the gateway as the Administrator from the Sign-on page. To access the Sign-on page, either:
Enter the gateway URL into your Web browser.
or
Click the link on the Nokia Secure Access System page in Nokia Network Voyager.
To use Nokia Network Voyager to access the sign-on page
1. From the Network Voyager main page, click Security and Access Configuration.
The Configuration page opens.
Page 28

Installing the Nokia Secure Acce ss System Gate way
28 Nokia Secure Access System Getting Started Guide
Note
If Nokia Secure Access System does not appear in the links under the Security and
Access Configuration heading, the package is not installed or activated. See “Installing
the Nokia Secure Access Package” on page 15.
2. Click Nokia Secure Access System.
The Nokia Secure Access System page opens.
3. Click the following link:
Click here to sign on to the Nokia Secure Access System.
Page 29

Signing On to the Gateway as the Administrator
Nokia Secure Access System Getting Started Guide 29
This link points to the gateway configuration system. You are taken directly to the gateway
configuration s ystem af ter you si gn on t o the g ateway, in stead of see ing t he p ortal page after
you sign on.
To authenticate at the Sign-on page
1. Enter username admin in the Username text box.
At the gateway Sign-on page, authenticate to the gateway as the administrator.
2. Enter the administrator password in the Password text box.
As an administrator, sign on by using the username admin and the same password you used
to access Nokia Network Voyager or the Nokia IPSO CLI.
Note
The Sign-On page shows the currently enabled language for the user interface. By
default, English is enabled. Nokia Secure Access System supports language packs that
allow users to view the system in multiple languages. For more information, see the
Nokia Secure Access System Configuration Guide v3.0.
3. Click Sign On.
Note
You can sign on by using a certificate only after you configure the gateway for certificate
authentication. For details, see the Nokia Secure Access System Configuration
Guide v3.0.
Page 30

Installing the Nokia Secure Acce ss System Gate way
30 Nokia Secure Access System Getting Started Guide
The Nokia Secure Access System configuration page opens.
From the Nokia Secure Access System configuration pages, the administrator can manage
and configure the Nokia Secure Access System gateway.
Page 31

Overview of the Configuration Menu
Nokia Secure Access System Getting Started Guide 31
Overview of the Configuration Menu
After you install the Nokia Sec ure Access Syst em on your app li anc e and sign on to the gateway
as an Administrator, the main window opens. This section describes the Nokia Secure Access
System user interface configuration menu.
The left side of the main window displays a menu with the settings that you can configure, as
described in Table 4.
Table 4 Nokia Secure Access System Configuration Menu
Menu Item Description
General Configure general gateway settings, including gateway
logging, exporting and importing the gateway configuration
file, entering and up dating a ne w serve r license . You can al so
view a summary of the gateway status, and enable
configuration sharing.
Global Properties Configure access control, network settings, the appearance
of the user interface, e nable la nguage pa cks, co nfigure N okia
Secure Workspace, config ure N o ki a Sec ure Conn ec tor c li ent
settings, SNMP, variables, client integrity scanning, and
determine the method for downloading the JRE plugin..
Certificates Configure gateway server certificates and backend trusted
CA certificates, including generating a new server certificate
and importing an existing certificate.
Page 32

Installing the Nokia Secure Acce ss System Gate way
32 Nokia Secure Access System Getting Started Guide
Configuring Nokia Secure Access System
This section covers all the configuration steps that you need to perform to successfully use the
Nokia Secure Access System.
Authenticating the admin User
You can configure the gateway to authenticate the Nokia Secure Access System administrator
either by us ing the same authentication scheme that the Nokia IPSO operating system for the
appliance uses, o r by usin g the gateway ’s con figured aut henticat ion methods of the gat eway. For
instance, the administrator can sign on to the gateway by using a client certificate, or by using a
password recognized by a RADIUS or NIS server.
You can specify which scheme to use to authenticate the gateway administrator by setting the
General properties on the admin user accou nt.
To configure the admin authentication scheme
1. From the configuration menu, choose User Configuration > Users.
The Manage Users page opens.
2. Click the username of the admin user.
The General Properties for the admin user page opens.
3. Choose one of the options for Admin User Authentication:
Authenticate admin user by using the standard Nokia IPSO authentication.
Authenticate admin user by using the general authentication methods. For information
about general authen tication methods , see the Nokia Secure Access System Configuration
Guide v3.0.
User Configuration Configure users, user groups, and authentication.
Resources Configure the resources available to the user through the
gateway. Resources are divided into four types:
•Web—HTTP and HTTPS servers.
•File—FTP, Windows, and NFS file servers.
•Email—POP, IMAP, and SMTP servers.
• Port-forwarding—tunnel TCP and U DP traffic through the
gateway, including support for Microsoft Exchange and
other mail and groupware services.
System Nokia Network Voyager returns to the main Network Voya ger
page.
Table 4 Nokia Secure Access System Configuration Menu (continued)
Menu Item Description
Page 33

Configuring Nokia Secure Acce ss System
Nokia Secure Access System Getting Started Guide 33
Installing the License
This section describes how to install and configure the gateway license.You can use the
Configure License page to install the license, upload a new license or view the current license.
Upon initial installation of the Nokia Secure Access System, no license file is present on the
gateway. If you do not have a license file, contact your Nokia sales representative or visit the
Nokia License Center either at https://support.nokia.com/license or choose a link from the
Configure License page.
The License Center needs the following information:
License Authentication Code (LAC)
Host Identifier number—appears as t he Host I denti fier on the Con figur e Licens e page and
matches the serial number located on the Nokia Secure Access gateway.
Use the LAC and Host Identifier number to generate the license from the Nokia License Center.
When you submit a purchase order to Nokia or your reseller for Nokia Secure Access System,
the hardware is shipped from the factory. A License Authentication Code (LAC) is ema iled to
the email address on the purchase order and is usually received before the hardware.
To generate the license from the Nokia License Center
1. From the configuration menu, choose General > License.
From the Configure License page, cop y the host i dent if ie r numbe r to a cl ip boar d , or wri t e it
down, because you need it in this procedure.
Note
The license generated with the LAC applies only to that hardware serial number and the
license generated can only be used on that appliance.
2. From the Configure License page, click the License Center link https://support.nokia.com/
license.
The Nokia License Center page opens.
Page 34

Installing the Nokia Secure Acce ss System Gate way
34 Nokia Secure Access System Getting Started Guide
3. Log in to the License Center:
Enter your login name and password.
or
Click Register if you are a first time visitor.
If you are a first time visitor, your username and password is emailed to you after you
complete the new user registration process.
4. Enter the LAC in the dialog box.
Access this dialog bo x afte r y ou are logged in to t he Lic ense Cen ter wi th y our use rname an d
password.
Page 35

Configuring Nokia Secure Acce ss System
Nokia Secure Access System Getting Started Guide 35
5. Click Generate Licenses.
6. Cut and paste the host identifier into the Nokia IPSO serial number field.
You can obtain this number from the Nokia Secure Access System Configure License page.
7. Click Generate.
The license is generated.
8. Enter the com pany name and user email a ddress that t he license is to be sent to.
9. Click Confirm.
10. To save the file, do one of the following:
Click Save for File.
or
Copy and paste the information between Begin License and End License.
The license is emailed to you. You might want to add the .lic extension when you name the
license.
Note
Nokia recommends that you save your License Authentication Code (LAC). You might need
it for emergency recovery.
Page 36

Installing the Nokia Secure Acce ss System Gate way
36 Nokia Secure Access System Getting Started Guide
To import the gateway license
1. From the configuration menu, choose General > License.
The Configure License page opens.
The current license information appea rs, including the host identifier, license f i le n am e, a nd
features of the license. Upon initial installation of Nokia Secure Access System, no license
file is prese nt on the gateway.
2. To upload a new license, in the File Name text box enter the file name of the license file
stored on your computer, or click Browse to locate the file.
3. Click Upload New License.
The license is uploaded to the gateway and the Configure License page refreshes. The
license feature det ails s how the numbe r of simult aneous u sers t hat the gateway suppo rts, t he
expiration time of the li cense, an d the license status. The licens e status is aut henticat ed when
the license is valid for th e appliance, as identified by the Host Identifier.
Page 37

Configuring Nokia Secure Acce ss System
Nokia Secure Access System Getting Started Guide 37
Configuring a User
Use the User Configuration pages to add a new user to the gateway and to configure user
properties. The following procedure is to add a locally defined user. A locally defined user is
identified by the specified username, with all of the user’s settings stored locally in the gateway
configuration. However, a locally-defined user can be authenticated by using an authorization
method that communicates with external authorization servers.
To configure a user that authenticates to an external server, see the Nokia Secure Access Syst em
Configuration Guide v3.0.
To add a new user
1. From the configuration menu, choose User Configuration > Users.
The Manage Users page opens.
2. Click New User.
The General Properties for User page opens.
3. Click Locally Defined and enter the Username.
For example: jsmith
Usernames can contain ASCII text, except:
| : + “ ‘ <space>
Alphanumeric characters, as well as the hyphen (-) and underscore (_) characters are
allowed. Unicode characters are not supported.
For information about how to create an externally defined user and select an authentication
method, see the Nokia Secure Acce ss System Configuration Guide v3.0.
Page 38

Installing the Nokia Secure Acce ss System Gate way
38 Nokia Secure Access System Getting Started Guide
4. Enter the full name of the use r.
For example: John Smith
5. Click Save Settings.
The new user is added to the gateway users and appears in the list on the Manage Users
page. The General Properties for User page opens.
6. Under Password-Based Authe nticati on Methods, make sure that the Allo w checkbox next to
Local Passw ord is checked (default).
7. Under Identification, click Set Local Password.
The Local Password page opens.
8. Enter and confirm the password for the new user.
The password must contain at least eight characters.The default is eight characters but this
number is configurable. The password cannot contain spaces, colons, or control characters.
For information about how to change the password, see the Nokia Secure Access System
Configuration Guide v3.0.
9. Click Save Settings.
The user is now configured to access the gateway.
Page 39

Configuring Nokia Secure Acce ss System
Nokia Secure Access System Getting Started Guide 39
Configuring a Group
Use the General Properties for User Group page to add a new user group to the gateway and
associate members with that particular group. The administrator can define user groups and
configure how users are assigned to those groups. Group memberships can be used to help
manage access control and also determine which resource links are seen on a user’s portal page.
To add a new user group
1. From the configuration menu, choose User Configuration > User Groups.
The Manage User Groups page opens.
2. Click New User Group.
The General Properties for User Group page opens.
3. Enter the Group Name and Description for the new group.
For example: Finance in the Group Name text box and Finance Department in the
Description text box.
Group names can contain ASCII text, except:
‘ \ “ { } [ ] : < > & # +
The yellow fields allow UTF-8 Unicode. UTF-8 Unicode is used for usernames,
descriptions, port al link text, an d portal messages. For more informati on about Unicode, see
the Nokia Secure Access System Configuration Guide v3.0.
4. Click Save Settings.
Page 40

Installing the Nokia Secure Acce ss System Gate way
40 Nokia Secure Access System Getting Started Guide
Adding a User to a Group
Use the User Group pages to add a new user group to the gateway and associate users with that
group.
To add a user to a group
1. From the configuration menu, choose User Configuration > Users.
The Manage Users page opens.
2. Click the name of the user from the Username list box.
For example: jsmith.
The General Properties for User page opens.
3. Click Edit List in User Group Memberships.
The Edit User Groups page opens.
4. Select the groups to add, then click Add.
For example: Finance.
5. Click Save Settings.
The new group is added to the Users General Properties page.
Note
You can also assign users to groups from the General page for that group by editing the
member list.
Page 41

Configuring Nokia Secure Acce ss System
Nokia Secure Access System Getting Started Guide 41
Configuring a Web Resource
Use the Manage Web Resources page to add a Web Resource to the user or user group portal
page. By configuring Web resources and access control lists, the administrator can define
exactly what Web servers a user can access.
To add a Web resource to the user portal page
1. From the configuration menu, choose Resources > Web.
The Manage Web Resources page opens.
2. Click New Resource.
The Properties for Web Resource page opens.
3. Enter the Identification information, including Resource Name, Description, Portal Link
Text, and check the check box to specify that pass-through link credentials should be used.
For example, Nokia in the Resource Name text box and Nokia Web site in the Description
text box. Resource names can contain ASCII text, with the following exceptions:
‘ \ “ { } [ ] : < > & # +
The Portal Link Text is the text for the hyperlink to the Web Resource as seen on the user
portal. For example, you can configure the link text for the resource named Nokia as Go to
the Nokia Web site.
Page 42

Installing the Nokia Secure Acce ss System Gate way
42 Nokia Secure Access System Getting Started Guide
Page 43

Configuring Nokia Secure Acce ss System
Nokia Secure Access System Getting Started Guide 43
4. Enter the base URL.
The base URL specifies the backend Web server (or directory) that corresponds to the Web
resource. The base URL must begin with either http:// or https ://. The base URL specifies
where the level of access starts. Include the trailing slash, as the following example shows:
http://www.nokia.com/
5. Enter the por tal link URL.
The portal URL must be more specific than the base URL and provide s t he exact link that is
displayed when the user clicks the portal link text.
For example:, if the base URL provides access to http://www.nokia.com/, the portal URL
can direct them to http://www.nokia.com/welcome.html/ and display the welcome page.
6. Specify Citrix Nfuse settings:
a. If the base URL is for a Citrix Nfuse Classic Web se rve r, c heck the check box to specify
that the Web re source is a Citr ix Web server.
b. Specify the access control settings:
Do not perform access control on connections to MetaFrame servers (default).
Use the Global Rules to perform access control on connections to MetaFrame servers.
7. Specify the proxy settings.
You can configure Web resources to use:
No proxy—the gateway communicates directly with the Web server. No proxy is the
default setting.
The default HTTP proxy—you can define the default HTTP or HTTPS proxy settings
from the Resources > Web > Proxies page.
A specific HTTP or HTTPS proxy—if you select this option, enter the IP address and
port number of the proxy server.
8. Check the check box to allow pass-through credentials for this Web Resource.
This means that the user d oes not have to authenticate a second time to this reso urce if their
authentication method ha s pass -t hrough c redent ials enabl ed, and t his r esourc e uses th e same
authentication cre dentials.
Page 44

Installing the Nokia Secure Acce ss System Gate way
44 Nokia Secure Access System Getting Started Guide
9. Specify Client-side cookie handling.
Default setting is do not allow cookie information from this resource to be sent to the
browser.
10. Specify logging.
Check the check box to:
Enable debug logging for this resource.
Enable auditi ng messages for this resou rce. (defau lt).
11. Click Save Settings.
Additional tabs for Access Control appear. Use the Simple Access Control tab to apply rules
to the new r esource.
Configuring Access Control Lists for a Web Resource
Use the Simple Access Control pages to configure access control lists (ACLs) and select which
user groups are allowed or denied access to the Web resource.
To configure ACLs for a Web resource
1. From the General Properties Web Resource page, click the Access Control—Simple tab.
The Simple Access Control page for the resource opens.
2. Specify the user groups that are allowed access to the reso urce by selecting the groups fr om
the All Users Group list, then click Add to move those groups to the Allow Users Group list.
For example: Finance.
3. Select the default action.
The defaul t setting of the default action is DENY.
Page 45

Configuring Nokia Secure Acce ss System
Nokia Secure Access System Getting Started Guide 45
4. To add a resource link to the portal, check Add portal link to this resource for each allowed
group.
5. Click Save Settings.
The ACL is s aved with rules that reflect the allowed user groups for this resource .
For information about advanced access control lists, see the Nokia Secure Access System
Configuration Guide v3.0.
Specifying User Portal Settings
Access the user portal pages to specify user portal properties for the Web resource. These
settings determine the list of resources on the Main Page of the user portal. For instance, if you
configure a Web resource in th e port al set ti ngs , the use r sees a link to the defined resourc e fr om
the user portal page.
Note
You can also put the users in a group and configure the group portal.
To configure user portal settings
1. From the configuration menu, choose User Configuration > Users.
The Manage Users page opens.
2. Click the username.
For example: jsmith.
The General Properties for User page opens.
3. Click the Portal tab.
The Portal Properties for User page opens.
Page 46

Installing the Nokia Secure Acce ss System Gate way
46 Nokia Secure Access System Getting Started Guide
4. Check the Use combined settings of User Groups check box (default).
The user’s portal sett ings no w inc lude th e porta l sett ings of all us er g roups t o which th e user
belongs. For more information about user and group settings, see the Nokia Secure Access
System Configuration Guide v3.0.
5. Specify the Resource settings.
a. To add a Web resource, click Edit List for Web Resources.
b. Select the resource to add, then click Add.
For example: Nokia.
c. Click Save Settings.
d. Click Return to Po rtal Properties.
Page 47

Configuring Nokia Secure Acce ss System
Nokia Secure Access System Getting Started Guide 47
6. Check the En able text box for typing destination URLs (default).
This action places a check box on the user portal that allows the user to enter the URL.
7. Click Save Settings.
The Web Resource is added to the user portal.
You can access the gateway Web resources by clicking the Web resource links from the
Resources page in the user portal.
An example of the user portal page follows.
For information about how to configure file, email, or port-forwarding resources, see the
Nokia Secure Access System Configurati on Guide v3.0.
Note
When the administrator is viewing the Nokia Secure Access System configuration page,
they can access their own portal page by clicking the Home link in the upper tool bar on
the Nokia Secure Access System configuration page. In a user portal, this link is titled
Main.
Page 48

Installing the Nokia Secure Acce ss System Gate way
48 Nokia Secure Access System Getting Started Guide
 Loading...