

Page 1

Nokia Customer Care
2366i (RM-155)
Mobile Terminals
Service Software Instructions
Issue 2 - February 2007 Company Confidential
Page 2

2366i (RM-155)
Service Software Instructions Nokia Customer Care
Contents Page
Introduction ..................................................................................................................................................... 3
Hardware and Operating System Requirements—Test Computer .................................................3
Phoenix Service Software............................................................................................................................. 4
Before You Begin .........................................................................................................................................4
Creating a Phoenix Connection ...............................................................................................................4
Scanning for a Product ..............................................................................................................................6
Using Components ......................................................................................................................................6
Using Profiles ................................................................................................................................................6
Uninstalling Service Software..................................................................................................................... 7
Page 2 Company Confidential Issue 2 - February 2007
Page 3
2366i (RM-155)
Nokia Customer Care Service Software Instructions
Introduction
You must obtain software support bundles (SSBs) to load software upgrade files to
customer-specific mobile terminal models. The SSBs are InstallShield executable
packages. Double-click on the package, and the software installs automatically. No
rebooting of the computer is required.
These bundles are created by Nokia Customer Care and made available by Nokia After
Market Services (AMS) on the Partners Web Page for your applicable region:
• Americas = https://americas.partners.nokia.com
•APAC = https://apac.partners.nokia.com
• China = https://china.partners.nokia.com
•EMEA = https://trade.online.nokia.com or https://europe.partners.nokia.com
The Web pages are password controlled. If you have not registered as a user, contact
Nokia Central Service.
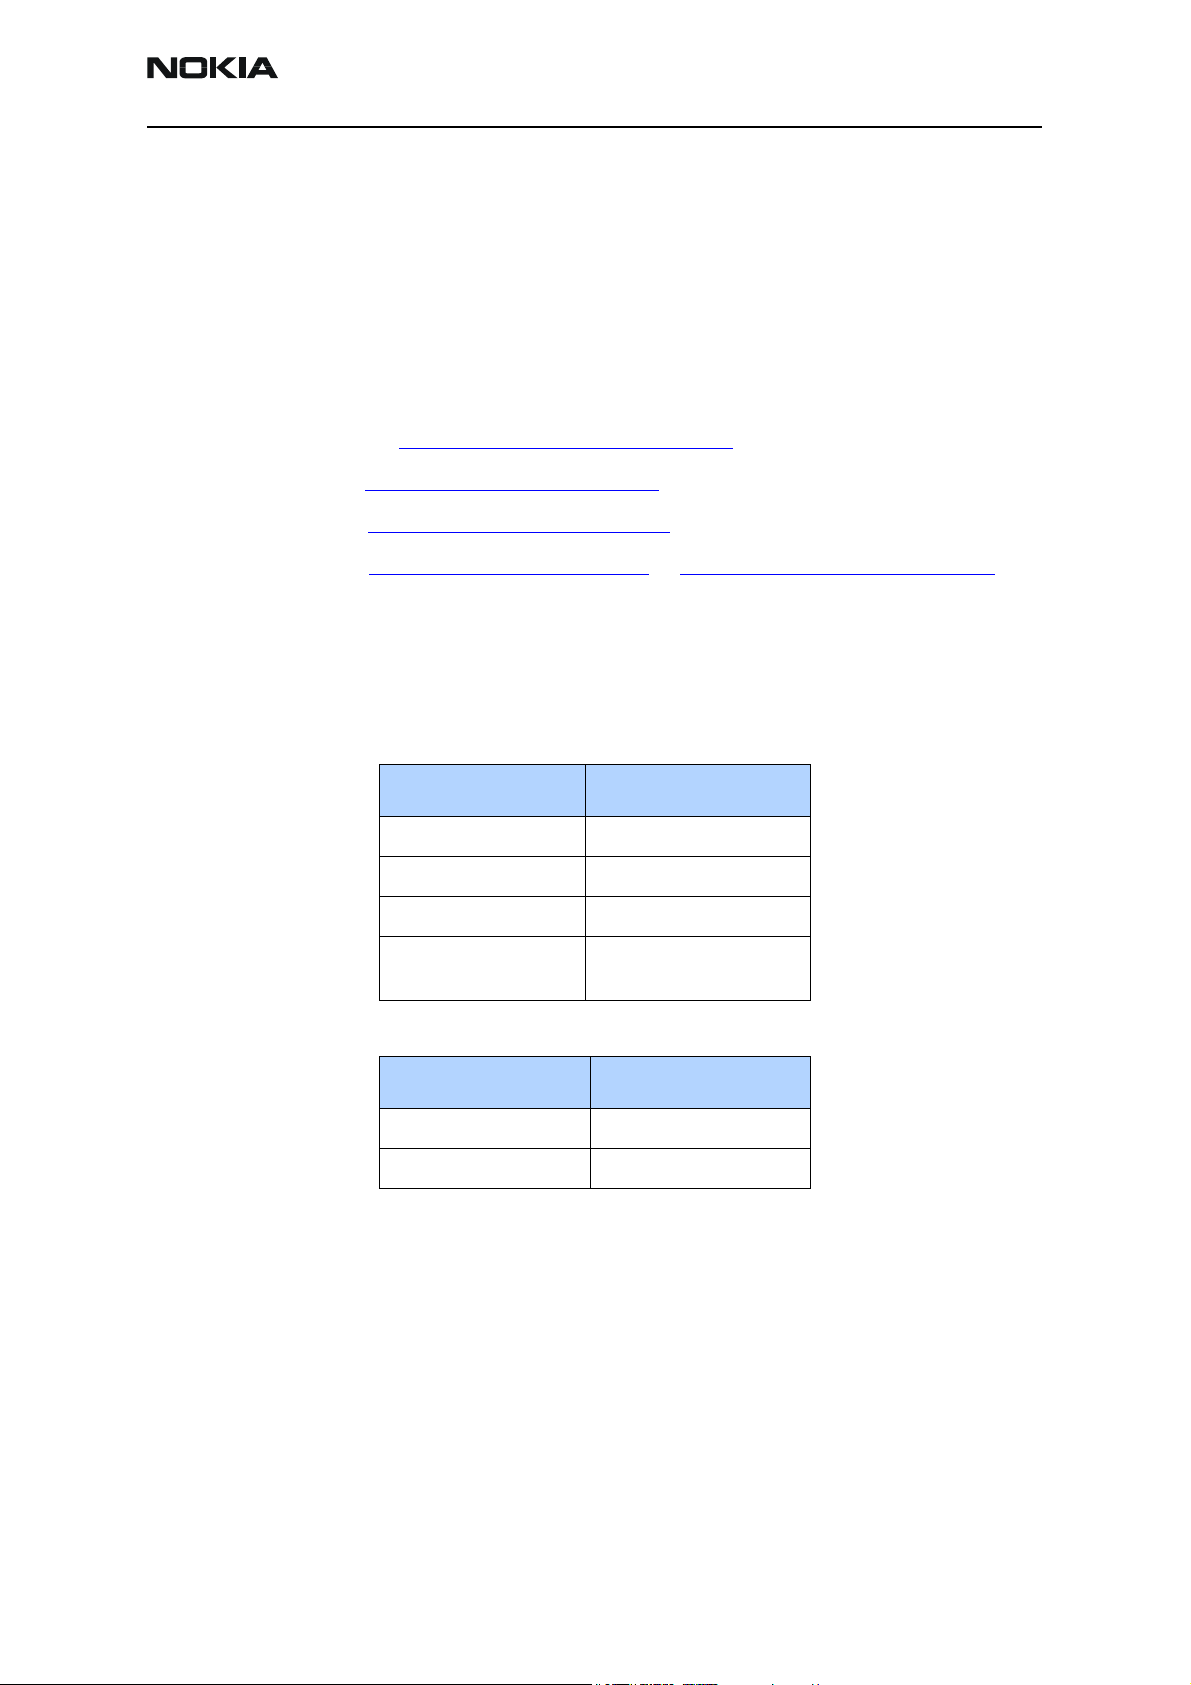
Hardware and Operating System Requirements—Test Computer
Table 1: Minimum Hardware Requirements
Hardware Minimum Value
Processor 700 MHz
RAM 256 MB
Disk space needed 100-200 MB
Interface ports Parallel or USB (dongle-
dependent)
Table 2: Supported Operating System Requirements
Operating System Notes
Windows 2000 Professional version
Windows XP
Issue 2 - February 2007 Company Confidential Page 3
Page 4

2366i (RM-155)
Service Software Instructions Nokia Customer Care
Phoenix Service Software
Before You Begin
Phoenix is the Windows software used to test Nokia phones. Before installing Phoenix,
ensure the following items are implemented:
• Uninstall any previous versions of Phoenix that exist on the machine. See
"Uninstalling Service Software" on page 7.
• If the computer supports administrator rights, ensure that access is enabled for
the user performing the Phoenix installation.
• Phoenix requires the complete Phoenix installation package, which is around
30 MB.
• You MUST have a Nokia hardware key, or dongle, installed on the computer prior
to beginning the software installation. The dongle is attached to the parallel port
for PKD dongles, or, in the case of an FLS-4S dongle, to either the parallel port or
the Universal Serial Bus (USB) port (if the computer supports USB).
• Custom installation is only recommended for experienced users.
• After installation, reboot the computer before using Phoenix.
Creating a Phoenix Connection
Use the following steps to create a connection the first time you use Phoenix.
1. Open the File menu, and select Manage Connections.
Figure 1: File Menu with the Manage Connections option
Page 4 Company Confidential Issue 2 - February 2007
Page 5

2366i (RM-155)
Nokia Customer Care Service Software Instructions
2. Click Add to create a new connection.
Figure 2: Manage Connection dialog box
3. Choose either Wizard or Manual on the Select mode dialog box.
• Wizard allows Phoenix to auto-detect your connection configuration.
• Manual allows you to manually select options to create the connection.
Figure 3: Select Mode dialog box
4. Click Next.
5. After a connection is defined, make sure that the connection you want to use
appears at the top of the list. If necessary, use the up and down arrows on the
Manage Connection dialog box to move the connection to the top, and click
Apply.
6. Click Close when you are finished.
7. Proceed with the normal initiation of a session by scanning for or selecting a
product.
Issue 2 - February 2007 Company Confidential Page 5
Page 6

2366i (RM-155)
Service Software Instructions Nokia Customer Care
Scanning for a Product
Many Phoenix features are product specific. At the beginning of a session, you must
configure Phoenix for the product on which you are working by first connecting the
phone product to the test arrangement, then opening the File menu and selecting Scan
Product. Phoenix automatically scans for the product and selects the necessary
configurations. The status bar at the bottom indicates the product type. If No product is
displayed, check the cable connections, and ensure that the Phoenix connection has
been properly created. If these are correct, the phone may have a malfunction that
prevents a connection.
Using Components
Phoenix tasks are managed by specific software components. Use the main menu to
select the component you want to perform. When the new component window is
opened, Phoenix also opens an associated toolbar and adds component-specific menu
items to the window menu.
Using Profiles
Phoenix’s profile feature stores product, connection, and open components into
permanent storage by creating a file with an.nmp file extension. Saved profiles allow you
to configure Phoenix to open with specified components.
Opening and saving profiles is done via the Open Profile and Save Profile options in the
File menu. Phoenix stores profiles with user-defined names. As a result, there can be
multiple profiles for different repeated tasks or user preferences.
Page 6 Company Confidential Issue 2 - February 2007
Page 7

2366i (RM-155)
Nokia Customer Care Service Software Instructions
Uninstalling Service Software
Failure to remove the program properly causes misconfiguration of the computer’s
registry. Use the following steps to uninstall Diego or Phoenix service software.
1. Navigate to the computer's Control Panel, which is accessible from the Start
button or by double-clicking the My Computer desktop icon.
2. Double-click the Add/Remove Programs icon.
3. Select the software version that you want to remove, and click Add/Remove.
4. Click OK to begin the removal process.
5. Follow the on-screen instructions.
6. When the removal is complete, reboot the computer.
Issue 2 - February 2007 Company Confidential Page 7
Page 8

2366i (RM-155)
Service Software Instructions Nokia Customer Care
This page intentionally left blank.
Page 8 Company Confidential Issue 2 - February 2007
 Loading...