

Nokia 002G6Q3, N96 - Smartphone 16 GB, N96 User Manual

Nokia N96 User Guide
DECLARATION OF CONFORMITY
Hereby, NOKIA CORPORATION declares th
provisions of Directive 1999/5/EC. A copy of the
declaration_of_conformity/.
© 2008 Nokia. All rights reserved.
Nokia, Nokia Connecting People, Nokia Origin
of Nokia Corporation. Nokia tune is a soun
their respective owners.
Reproduction, transfer, distribution, or st
orage of part or all of
at this RM-247 product is in
al Enhancements logos, Nseries, N96, N-Ga
d mark of Nokia Corp
oration. Other product and company names m
the contents in this document in any form wi
Declaration of Conformity can be found at h
ge, Navi, Visual Radio, and Nokia Care are
compliance with the essential requirements and
entioned herein may be
thout the prior
ttp://www.nokia.com/phones/
trademarks or r
trademarks or tradenames of
other relevant
egistered trademarks
written permission of Nokia is prohibited.
This product includes software licensed f
US Patent No 5818437 and other pending pa
Java and all Java-based marks are trademarks
Portions of the Nokia Maps software are ©19
This product is licensed under the MPEG-4
encoded in compliance with the MPEGvideo provided by a licensed video provider
internal, and commercial uses, may be ob
Nokia operates a policy of ongoing devel
without prior notice.
TO THE MAXIMUM EXTENT PERMITTED BY A
INCOME OR ANY SPECIAL, INCIDENTAL, CONSEQU
THE CONTENTS OF THIS DOCUMENT ARE PROVID
BUT NOT LIMITED TO, THE IMPLIED WARR
CONTENTS OF THIS DOCUMENT. NOKIA R
For the most current product informatio
Visual Patent Portfolio License (i) for person
4 Visual Standard by a cons
tained from MPEG LA, LLC. See http://www.
opment. Nokia reserves the right to make cha
PPLICABLE LAW, UNDER NO CI
ANTIES OF MERCHANTABILITY AND FITNESS FO
ESERVES THE RIGHT TO REVISE THIS DOCUMENT
n, please refer to
rom Symbian Software Ltd ©1998-2008. Symb
tents. T9 text input software Copyright ©
1997-2008. Tegic Communications, Inc. All ri
or registered trademarks of Sun Microsys
96-2008 The FreeType Project. All rights res
umer engaged in a personal and no
. No license is granted or shall be implied for any
ENTIAL OR INDIRECT DAMAGES HOWSOEVER CAU
ED "AS IS". EXCEPT AS RE
www.nokia.com.hk.
RCUMSTANCES SHALL NOKIA OR ANY OF ITS L
QUI RED BY A PPLIC ABLE LA W, NO W ARRANT IE
erved.
al and noncommercial use in connection
mpegla.com
nges and improvements to any of the product
R A PARTICULAR PURPOSE, ARE MADE IN RELATI
OR WITHDRAW IT AT ANY TIME WITHOUT PRIO
ian and Symbian OS are trademarks of Symb
tems, Inc.
ncommercial activity and (ii) f
other use. Additional informatio
SED.
ICENSORS BE RESPONSIBLE FO
S OF ANY KIN D, EIT HER EXP
ian Ltd.
ghts reserved.
with information which has been
or use in connection with MPEG-4
n, including that related to promotional,
s described in this document
R ANY LOSS OF DATA OR
RESS OR IMPLIED, INCLUDING,
ACCURACY, RELIABILITY OR
ON TO THE
R NOTICE.

Reverse engineering of any software in the No
Nokia's representations, warranties, d
licensors.
The availability of particular products an
of language options.
Export controls
This device may contain commodities, techn
prohibited.
FCC/INDUSTRY CANADA NOTICE
Your device may cause TV or radio interf
you to stop using your telephone if su
15 of the FCC rules. Operation is subject to the fo
interference received, including interfer
authority to operate this equipment.
amages and liabilities, such limitations shall l
d applications and services for these products may var
ology or software subject to export laws and regu
erence (for example, when using a telephone in clo
ch interference cannot be
ence that may cause und
kia device is prohibited to the extent permitt
llowing two conditions: (1) This device
eliminated. If you require assistance,
esired operation. Any changes or
ikewise limit any representations, warran
may not cause harmful interference, and (2) this
ed by applicable law. Insofar as thi
y by region. Please check with
lations from the US and other countr
se proximity to receiving equipment).
contact your local service facility. This device complies
modifications not expressly ap
s user guide contains any limitations on
ties, damages and liabilities of Nokia's
your Nokia dealer for details, and availability
The FCC or Industry Canada can require
proved by Nokia co
ies. Diversion contrary to law is
device must accept any
with part
uld void the user's

Contents
Safety...................................................................6
About your device..................................................................
Network services....................................................................
....6
...7
Find help...............................................................8
Instructions inside - In-device help.................................
Get started..............................................................................
Extended user guide..........................................................
Additional applications.............................................................9
........8
....8
........9
Your device.........................................................10
Transfer content................................................................
Multimedia menu....................................................................11
Mobile search..........................................................................
N-Gage™ .................................................................................
Offline profile...........................................................................12
......10
.11
.11
Personalise your device.....................................13
Set tones in Profiles............................................................
Modify the standby mode.......................................................13
Modify the main menu...................................................
.....13
.........14
TV and video.......................................................15
Nokia Video Centre................................................................
View and download video clips..........................................
Video feeds............................................................................16
My videos...............................................................................17
..15
15
Transfer videos from your PC.............................................
Video centre settings..........................................................
Live TV.......................................................................................1
About Live TV....................................................................
First start-up..........................................................................1
View programmes..........................................................
Live TV Settings....................................................................
..17
..17
.....18
......19
.19
Music folder........................................................20
Music player.........................................................................
Play a song or a podcast episode........................................2
Podcasts.................................................................................
Transfer music to your device.............................................21
Transfer music from PC....................................................
Transfer with Windows Media Player..............................2
Nokia Music Store....................................................................2
Radio applications...................................................................22
FM radio ................................................................................2
Listen to the radio..............................................................23
Nokia Internet Radio............................................................2
Listen to internet radio stations......................................24
.....20
21
..22
Camera...............................................................25
About the camera....................................................................
Activate the camera................................................................2
Image capture..........................................................................
Still image camera indicators..............................................25
Active toolbar.......................................................................
25
25
.26
8
8
0
2
2
3
4
5

Capture images...................................................................
Location information............................................................27
Video recording.......................................................................28
Video capture indicators......................................................28
Record videos........................................................................28
..27
Photos................................................................30
About Photos........................................................................
View images and videos....................................................
Active toolbar........................................................................
....30
.....30
...31
Home network...................................................32
About home network..............................................................32
Important security information..........................................
...32
Empty the cache...................................................................
End the connection.............................................................
Connection security.................................................................44
....44
.....44
Connections........................................................46
Wireless LAN..........................................................................
About WLAN...........................................................................46
WLAN wizard.........................................................................
Bluetooth connectivity............................................................47
About Bluetooth connectivity...........................................
Settings.................................................................................
Security tips................................................................
Send data using Bluetooth connectivity...........................
Pair devices...................................................................
...46
47
...47
.48
...........48
.49
.........49
Positioning (GPS)................................................34
About GPS.................................................................................34
Assisted GPS (A-GPS)................................................................34
Hold your device correctly...................................................
Tips on creating a GPS connection........................................
...35
.35
Maps...................................................................37
About Maps...........................................................................
Browse maps..........................................................................
Download maps.......................................................................39
Extra services for Maps............................................................40
....37
..38
Web browser......................................................42
Browse the web.......................................................................42
Web feeds and blogs...............................................................43
Widgets.................................................................................
....44
Write and send messages..................................50
Make calls...........................................................52
Voice calls ................................................................................
Make a video call......................................................................52
52
Nokia original enhancements............................54
Enhancements......................................................................
Battery......................................................................................54
Battery................................................................
Battery and charger information.....................................
Nokia battery authentication guidelines............................
Authenticate ho
What if your battery is not authentic?............................
lo
gram
..
..
....................................................5
....54
55
......55
..56
...57
7

Care and maintenance.......................................58
Additional safety information...........................60
Small children....................................................................
Operating environment..................................................
Medical devices..................................................................
Implanted medical devices..................................................
Hearing aids.......................................................................
Vehicles.....................................................................................61
Potentially explosive environments..........................
Emergency calls....................................................................
CERTIFICATION INFORMATION (SAR)................................
......60
........60
......60
60
...61
............62
...62
........63
Index..................................................................64
Safety
Read these simple guidelines. Not following them may be
dangerous or illegal. Read the complete user guide for
further information.
SWITCH ON SAFELY
Do not switch the device on when wireless phone
use is prohibited or when it may cause interference
or danger.
ROAD SAFETY COMES FIRST
Obey all local laws. Always keep your hands free to
operate the vehicle while driving. Your first
consideration while driving should be road safety.
INTERFERENCE
All wireless devices may be susceptible to
interference, which could affect performance.
SWITCH OFF IN RESTRICTED AREAS
Follow any restrictions. Switch the device off in
aircraft, near medical equipment, fuel, chemicals,
or blasting areas.
QUALIFIED SERVICE
Only qualified personnel may install or repair this
product.
ENHANCEMENTS AND BATTERIES
Use only approved enhancements and batteries.
Do not connect incompatible products.
WATER-RESISTANCE
Your device is not water-resistant. Keep it dry.
About your device
The wireless device described in this guide is approved for
use on the (E)GSM 850, 900, 1800, 1900, and UMTS 900 and
2100 MHz networks. Contact your service provider for more
information about networks.
When using the features in this device, obey all laws and
respect local customs, privacy and legitimate rights of others,
including copyrights.
Copyright protection may prevent some images, music, and
other content from being copied, modified, or transferred.
Your device supports several methods of connectivity. Like
computers, your device may be exposed to viruses and other
harmful content. Exercise caution with messages,
connectivity requests, browsing, and downloads. Only install
© 2008 Nokia. All rights reserved.6

and use services and other software from trustworthy
sources that offer adequate security and protection against
harmful software, such as applications that are Symbian
Signed or have passed the Java Verified™ testing. Consider
installing antivirus and other security software on your
device and any connected computer.
Your device may have preinstalled bookmarks and links for
third-party internet sites. You may also access other thirdparty sites through your device. Third-party sites are not
affiliated with Nokia, and Nokia does not endorse or assume
liability for them. If you choose to access such sites, you
should take precautions for security or content.
Warning: To use any features in this device, other
than the alarm clock, the device must be switched on. Do not
switch the device on when wireless device use may cause
interference or danger.
The office applications support common features of Microsoft
Word, PowerPoint, and Excel (Microsoft Office 2000, XP, and
2003). Not all file formats can be viewed or modified.
Remember to make back-up copies or keep a written record
of all important information stored in your device.
When connecting to any other device, read its user guide for
detailed safety instructions. Do not connect incompatible
products.
The images in this guide may differ from your device display.
Network services
To use the device you must have service from a wireless
service provider. Many of the features require special network
features. These features are not available on all networks;
other networks may require that you make specific
arrangements with your service provider before you can use
the network services. Using network services involves
transmission of data. Check with your service provider for
details about fees in your home network and when roaming
on other networks. Your service provider can give you
instructions and explain what charges will apply. Some
networks may have limitations that affect how you can use
network services. For instance, some networks may not
support all language-dependent characters and services.
Your service provider may have requested that certain
features be disabled or not activated in your device. If so,
these features will not appear on your device menu. Your
device may also have a special configuration such as changes
in menu names, menu order, and icons. Contact your service
provider for more information.
This device supports WAP 2.0 protocols (HTTP and SSL) that
run on TCP/IP protocols. Some features of this device, such as
MMS, browsing, and e-mail, require network support for
these technologies.
© 2008 Nokia. All rights reserved. 7
Find help
For more information on acce
power, and freeing memory, see the extended user guide
on the product support pages of the Nokia website.
Instructions in
ss codes, settings, battery
side - In-device
help
Your device contains instructions to help you use it.
When an application
the current view, select
from the main menu, select
and the relevant application.
8
is open, to access the help text for
Options
Tools >
> Help
. To open help
Utilities >
Help,
You can find links to related topics at the end of the help
text. To make the instructions easier to read, you can
change the size of the text. If you click on an underlined
word, a short explanation is displayed. Help uses the
following indicators:
topic.
When you are reading the inst
help and the application that is open in the background,
press and hold
shows a link to the application being discussed.
shows a link to a related help
ructions, to switch between
, or select the ap
plication link (
).
Get started
See the get started guide for
instructions for setting up
essential information.
keys and parts information,
the device and for other
© 2008 Nokia. All rights reserved.

Extended user guide
An extended version of this user guide is available on the
product support pages of the Nokia website. Some
applications or functions are explained only in the
extended user guide. This is explained in the relevant
sections. The extended user guide also contains a
troubleshooting section.
The applications and functions located in the following
folders of your device are explained only in the extended
user guide:
● Tools — Information on file management,
synchronisation, and settings
● Office — Information on text processing applications
and converter
● Applications — Information on time management,
calculation, and application management
● Media — Information on media players, recording,
and digital rights management
Additional applications
There are various applications provided by Nokia and
different third-party software developers that help you
do more with your device. These applications are
explained in the guides that are available on the product
support pages of the Nokia website.
© 2008 Nokia. All rights reserved. 9

Your device
Model number: N96-1.
Hereinafter referred to as N96.
For more information on your device, such as the antenna
location, essential display indicators, and shortcuts, see
the extended user guide on the product support pages of
the Nokia website.
Transfer content
You can use the Switch application to copy content such
as phone numbers, addresses, calendar items, and
images from your previous Nokia device to your Nokia
N96 using Bluetooth connectivity.
The type of content that can be transferred depends on
the model of the device from which you want to transfer
content. If that device supports synchronisation, you can
also synchronise data between the devices. Your Nokia
N96 notifies you if the other device is not compatible.
If the other device cannot be switched on without a SIM
card, you can insert your SIM card in it. When your Nokia
N96 is switched on without a SIM card, the offline profile
is automatically activated, and transfer can be done.
Transfer content for the first time
1. To retrieve data from the other device for the first
time, on your Nokia N96, select Switch in the Welcome
application, or press
Utilities > Switch.
2. Select the connection type you want to use to transfer
the data. Both devices must support the selected
connection type.
3. If you select Bluetooth, connect the two devices. To
have your device search for devices with Bluetooth
connectivity, select Continue. Select the device from
which you want to transfer content. You are asked to
enter a code on your Nokia N96. Enter a code (1-16
digits), and select OK. Enter the same code on the
other device, and select OK. The devices are now
paired.
See "Pair devices", p. 49.
Some earlier Nokia devices may not have the Switch
application. In this case, the Switch application is sent
to the other device as a message. To install the Switch
application on the other device, open the message,
and follow the instructions on the display.
4. From your Nokia N96, select the content you want to
transfer from the other device.
, and select Tools >
© 2008 Nokia. All rights reserved.10
When the transfer has started, you can cancel it and
continue later.
Content is transferred from the memory of the other
device to the corresponding location in your Nokia N96.
The transfer time depends on the amount of data to be
transferred.
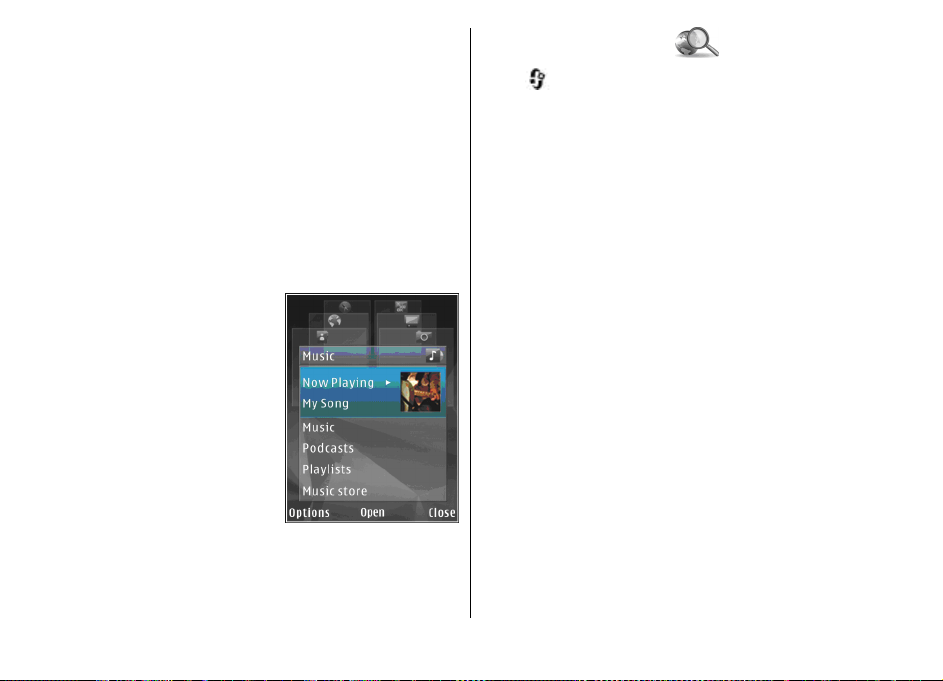
Multimedia menu
With the multimedia menu, you can access your most
frequently used multimedia content. The selected
content is shown in the appropriate application.
1. To open or close the
multimedia menu, press the
multimedia key.
2. To browse the tiles, scroll left
or right.
3. To scroll up or down in a tile,
press the scroll key up or
down. To select items, press
the scroll key.
To change the order of the tiles,
select Options > Arrange
tiles.
To return to the multimedia menu from an open
application, press the multimedia key.
Mobile search
Press , and select Search.
Use Mobile Search to access internet search engines and
to find and connect to local services, websites, images,
and mobile content. You can also search content in your
device, such as calendar entries, e-mail, and other
messages.
For more information, see the extended user guide on the
product support pages of the Nokia website.
N-Gage™
For more information on the N-Gage application, see the
extended user guide on the product support pages of the
Nokia website.
You can play high-quality, multiplayer N-Gage games with
your device. N-Gage is a mobile gaming platform
available for a range of compatible Nokia mobile devices.
To access N-Gage games, players, and content, select the
N-Gage application in the main menu.
For the full N-Gage experience, you need internet access
on your device, either through the cellular network or
wireless LAN. Contact your service provider for more
information on data services.
For more information, visit www.n-gage.com.
© 2008 Nokia. All rights reserved. 11

Offline profile
To activate the offline profile, press the power key briefly,
and select Offline.
The offline profile lets you use the device without
connecting to the wireless network. When you activate
the offline profile, the connection to the wireless network
is turned off, as indicated by
indicator area. All wireless RF signals to and from the
device are prevented. If you try to send messages, they
are placed in the outbox to be sent later.
When the offline profile is active, you can use your device
without a SIM card.
Important: In the offline profile you cannot make
or receive any calls, or use other features that require
cellular network coverage. Calls may still be possible to
the official emergency number programmed into your
device. To make calls, you must first activate the phone
function by changing profiles. If the device has been
locked, enter the lock code.
To leave the offline profile, press the power key briefly,
and select another profile. The device re-enables wireless
transmissions (providing there is sufficient signal
strength).
in the signal strength
© 2008 Nokia. All rights reserved.12
Personalise your device
You can personalise your device by changing the standby
mode, main menu, tones, themes, or font size. Most of the
personalisation options, such as changing the font size,
can be accessed through the device settings.
For information on Themes and 3-D tones, see the
extended user guide on the product support pages of the
Nokia website.
Set tones in Profiles
Press , and select Tools > Profiles.
You can use profiles to set and customise the ringing
tones, message alert tones, and other tones for different
events, environments, or caller groups.
To change the profile, select a profile, and Options >
Activate, or press the power key in the standby mode.
Scroll to the profile you want to activate, and select OK.
Tip: To switch between the general and silent
profiles in the standby mode, press and hold #.
To modify a profile, scroll to the profile, and select
Options > Personalise.
© 2008 Nokia. All rights reserved. 13
If you want to set a profile to be active a certain time,
select Options > Timed. When the set time expires, the
profile changes back to the previously active one. When
a profile is timed,
The Offline profile cannot be timed.
If you want the caller’s name to be spoken when your
device rings, select Options > Personalise > Say
caller's name > On. The caller’s name must be found in
Contacts.
To create a new profile, select Options > Create new.
is displayed in the standby mode.
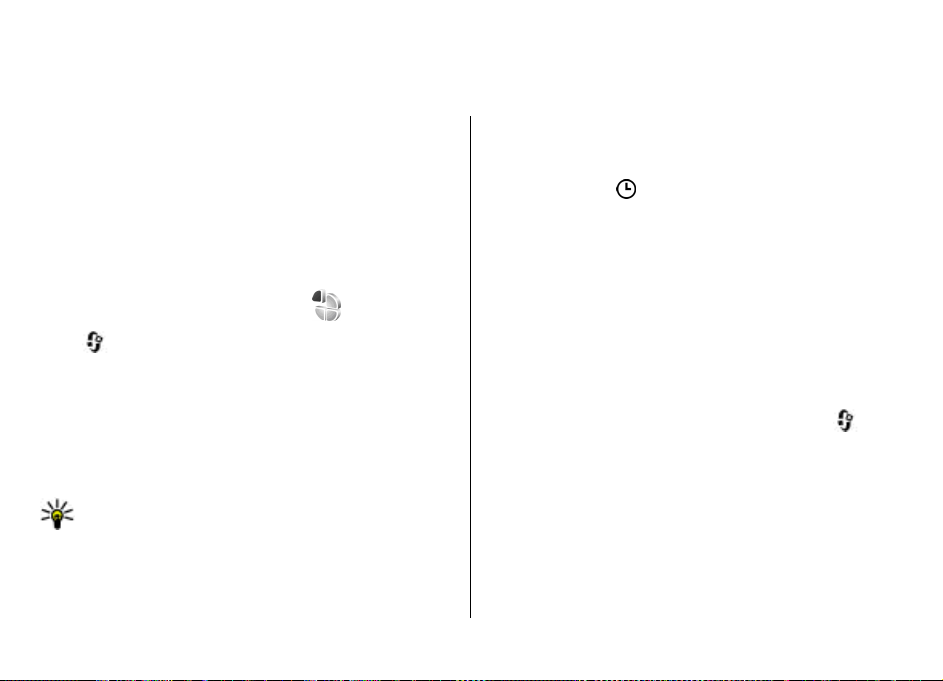
Modify the standby mode
To change the look of the standby mode, press , and
select Tools > Settings > General >
Personalisation > Standby mode > Standby theme.
The active standby display shows application shortcuts,
and events from applications
such as calendar and player.
To change the selection key
shortcuts or the default shortcut
icons in the active standby
mode, select Tools >
Settings > General >
Personalisation > Standby
mode > Shortcuts. Some
shortcuts may be fixed, and you
cannot change them.
To change the clock shown in the
standby mode, press
Clock > Options > Settings > Clock type.
You can also change the standby mode background image
or what is shown in the power saver in the device settings.
Tip: To check whether there are applications
running in the background, press and hold
close the applications you do not use, scroll to an
application in the list, and press C. Leaving
applications running in the background increases
the demand on battery power.
, and select Applications >
. To
Modify the main menu
To change the main menu view, in the main menu, press
and select Tools > Settings > General >
Personalisation > Themes > Menu view. You can
change the main menu to be shown as Grid, List,
Horseshoe, or V-shaped.
To rearrange the main menu, in the main menu, select
Options > Move, Move to folder, or New folder. You
can move applications used less frequently into folders
and place applications that you use more often into the
main menu.
© 2008 Nokia. All rights reserved.14

TV and video
For more information on Video Centre, live TV, and TV-out
mode, see the extended user guide on the product
support pages of the Nokia website.
Nokia Video Centre
With Nokia Video Centre (network service), you can
download and stream video clips over the air from
compatible internet video services using packet data or
WLAN. You can also transfer video clips from a compatible
PC to your device and view them in Video Centre.
Using packet data access points to download videos may
involve the transmission of large amounts of data
through your service provider's network. Contact your
service provider for information about data transmission
charges.
Your device may have predefined services.
Service providers may provide free content or charge a
fee. Check the pricing in the service or from the service
provider.
© 2008 Nokia. All rights reserved. 15
View and download video clips
Connect to video services
1. Press , and select Video centre.
2. To connect to a service, select
Video directory and the
desired video service from
the service catalogue.
Tip: You can access the
video services on the TV &
video tile in the
multimedia menu.
View a video clip
To browse the content of
installed video services, select
Video feeds.
To select a video clip, use the scroll key. The content of
some video services is divided into categories; to browse
video clips, select a category. To search for a video clip in
the service, select Video search. Search may not be
available in all services.

To view information about the selected video clip, select
Options > Video details.
Some video clips can be streamed over the air, but others
must be first downloaded to your device. To download a
video clip, select Options > Download. Downloads
continue in the background if you exit the application.
The downloaded video clips are saved in My videos. To
stream a video clip or view a downloaded one, select
Options > Play. When the video clip is playing, to control
the video player, use the media keys. To adjust the
volume, press the volume key.
Schedule downloads
Setting the application to download video clips
automatically may involve the transmission of large
amounts of data through your service provider's network.
Contact your service provider for information about data
transmission charges. To schedule an automatic
download for video clips in a service, select a category and
Options > Schedule downloads. Video centre
automatically downloads new video clips daily at the time
you define.
To cancel scheduled downloads for a category, select
Manual download as the download method.
Video feeds
The content of the installed video services is distributed
using RSS feeds. You can view and manage your feeds in
Video feeds.
To check your current feed subscriptions, select
Options > Feed subscriptions.
To refresh the content of all feeds, select Options >
Refresh feeds.
To subscribe to new feeds, select Options > Add feed.
Select Via Video directory to select a feed from the
services in the video directory, or Add manually to add
a video feed address.
To view the videos available in a feed, scroll to it, and
press the scroll key.
To view information about a video, select Options >
Feed details.
To update the contents of the current feed, select
Options > Refresh list.
To manage your account options for a given feed, if
available, select Options > Manage account.
To remove a feed from your subscriptions, select
Options > Remo ve feed. You may not be able to remove
some preinstalled feeds.
© 2008 Nokia. All rights reserved.16

My videos
My videos is a storage place for all videos in the Video
centre application. You can list downloaded videos, TV
recordings, and video clips recorded with the device
camera in separate views. To open My videos, press
and select Video centre > My videos.
To open folders and view video clips, use the scroll key.
To control the video player when the video clip is playing,
use the media keys. To adjust the volume, press the
volume key.
To play a downloaded video clip in the home network,
select Options > Show via home network. Home
network must be configured first.
network", p. 32.
To copy or move video clips to the mass memory or a
compatible memory card, select Options > Move and
copy > Copy or Move and the desired memory.
See "About home
Transfer videos from your PC
Transfer your own video clips to Video centre from
compatible devices using a compatible USB data cable.
Video centre will display only the video clips which are in
a format supported by your device.
1. To view your device on a PC as a mass memory device
where you can transfer any data files, make the
connection with a USB data cable.
2. Select Mass storage as the connection mode.
3. Select the video clips you want to copy from your PC.
4. Transfer the video clips to E:\My Videos in the mass
memory of your device, or to F:\My Videos in a
compatible memory card, if available.
,
The transferred video clips appear in the My videos
folder in Video centre. Video files in other folders of
your device are not displayed.
Video centre settings
In the Video centre main view, select Options >
Settings and from the following:
● Video service selection — Select the video services
you want to appear in Video centre. You can also view
the details of a video service.
● Default access points — Select Always ask or User-
defined to choose the access points used for the data
connection. Using packet data access points to
download files may involve the transmission of large
amounts of data through your service provider's
network. Contact your service provider for information
about data transmission charges.
● Parental control — Activate the parental lock for
video services, if the service provider has set age limits
for videos.
● Preferred memory — Select whether downloaded
videos are saved in the mass memory or on a
© 2008 Nokia. All rights reserved. 17

compatible memory card. If the selected memory
becomes full, the device saves the content in the other
memory.
● Thumbnails — Select whether to download and view
thumbnail images in video feeds.
Live TV
For more information on Live TV, see the extended user
guide on the product support pages of the Nokia website.
About Live TV
Your device has an integrated Digital Video Broadcast Handheld (DVB-H) receiver, which enables it to receive
digital TV broadcasts. With Live TV, you can access mobile
television and radio services (network service) and watch
and listen to digital TV programmes.
If you do not have access to a Live TV service, the operators
in your area may not support Live TV services.
Live TV services may only be available upon subscription.
For the Live TV network coverage, availability and pricing
of Live TV services, and instructions on accessing the
services, contact your service provider.
In some countries, owners of a television receiver are
required to pay a television licence fee. Contact your local
authorities for more information.
You cannot watch Live TV without a SIM card or when the
Offline profile is activated.
If you need to change your device or your SIM card, contact
your service provider for the availability of the service.
You may have to resubscribe to the service.
The TV programme content provider or the Live TV service
provider may limit the use of external devices with
Bluetooth wireless technology when Live TV is used;
audio reception may be stopped if you are using a headset
with Bluetooth wireless technology.
If you answer a call while watching Live TV, audio
reception is muted, but resumes after you finish the call.
First start-up
1. To open Live TV, press the multimedia key, and select
TV & video > Live TV. The system shows the
programme guides available in your location. In the
first start-up, this may take a few minutes.
2. To select a programme guide, scroll to it, and press the
scroll key. The system arranges the available channels.
This may take some time. You can change the
programme guide later in the settings.
The last selected programme guide and the last watched
TV channel are shown the next time you open Live TV.
© 2008 Nokia. All rights reserved.18

I f t h e d e vi c e c a nn o t f i nd a ny p ro g ra m me g ui d es w he n yo u
open Live TV, select
available programme guides.
Live TV uses a large amount
the programme guide. The device attempts to update
programme guide periodically ev
there is not enough memory for the update, the device
notifies you that device memory is low.
Options
> Rescan
Select one of the guides.
of device memory to store
to search for the
the
en if Live TV is not on. If
View programmes
You may have to subscribe to a channel or a programme
before you can view it.
To view a channel, scroll to
wait for the channel to load
number keys to enter the channel number. Press
enter two-digit channel numbers.
To change the channel,
To switch between the land
switch the mode of the 2-way slide.
To adjust the volume, use the volume key. To mute and
unmute the sound, select
it, press the scroll key, and
. Alternatively, press the
scroll left or right.
scape and portrait views,
Options >
Mute or Unmute
# to
loudspeaker is in use, because the volume may be
extremely loud.
Live TV Settings
Options > Settings
Select
● System status
TV and the signal strength. To update the signal
strength indicator, close this
● Channel order
To mark the items you want to move, select
Mark. To move the items, select
scroll to the new lo
Parental control
●
The required password is the same as the device lock
code. You must enter the lock code to view any TV
programme with a higher age limit.
● Reminder alarm
reminded of a programme start.
● Programme guide
guides, and change the current programme guide.
.
— View the general status of the Live
— Change the default channel order.
, and define the following:
dialog, and open it again.
Options
cation, and select OK
— Set an age limit for programmes.
— Define how early you want to be
— View the available programme
Options >
> Move,
.
Warning:
Continuous exposure to h
hearing. Do not hold the device near your ear when the
© 2008 Nokia. All rights reserved.
Listen to music at a moderate level.
igh volume may damage your
19
 Loading...