


© 2008 Nokia. All rights reserved.
Nokia, Nokia Connecting People, Nseries, N96, Navi, and Nokia Care are trademarks or registered trademarks of Nokia Corporation. Other product and
company names mentioned herein may be trademarks or tradenames of their respective owners.
Reproduction, transfer, distribution, or storage of part or all of the contents in this document in any form without the prior written permission of Nokia
is prohibited.
9206463/Issue 1
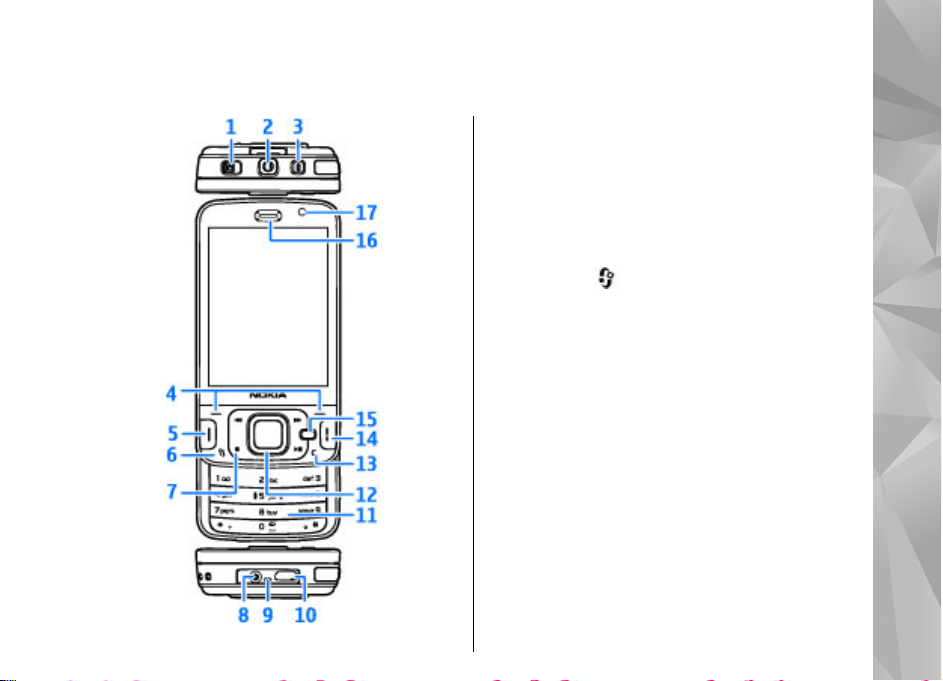
Keys and parts (front)
1 — Lock switch
2 — Nokia AV Connector (3.5 mm) for compatible
headsets and headphones
3 — Power key
4 — Selection keys
5 — Call key
6 — Menu key
7 — Media keys
8 — Charger connector
9 — Microphone
10 — Micro USB connector to connect to a
compatible PC
11 — Numeric keypad
12 — Scroll key
13 — Clear key C
14 — End key
15 — Multimedia key
16 — Earpiece
17 — Secondary camera
Keys and parts (front)
3
Keys and parts (back and sides)
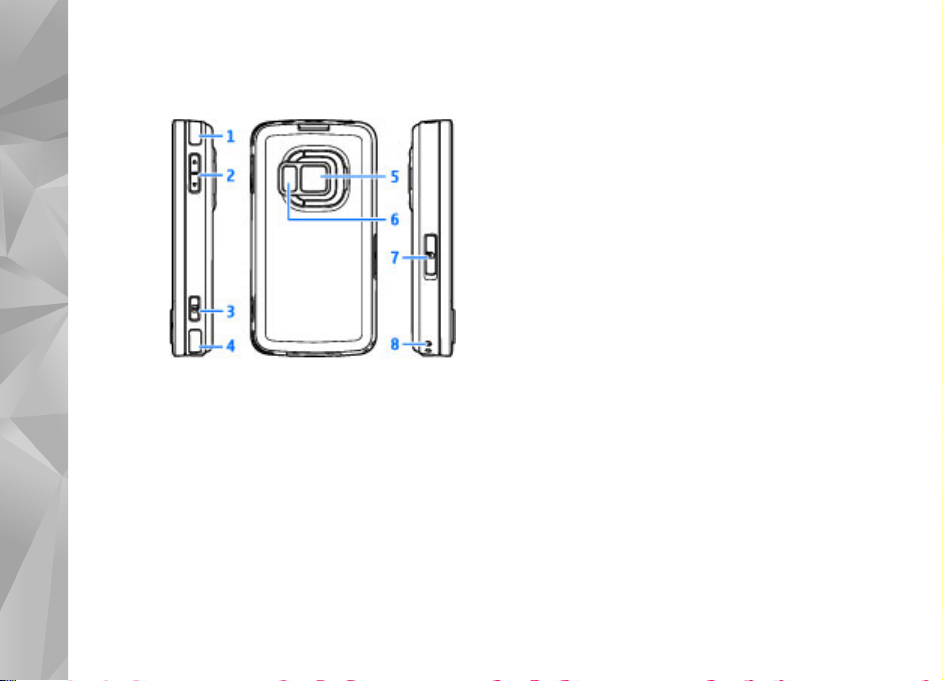
Keys and parts (back and sides)
1 and 4 — Stereo speakers with 3-D sound effect
2 — Zoom/Volume key
3 — 2-stage capture key for auto-focus, still image
capture, and video recording
5 — Main camera for high resolution (up to 5
megapixels) image capture and video recording
6 — Flash and video light
7 — Memory card slot for a compatible microSD card
8 — Hole for a wrist strap
4
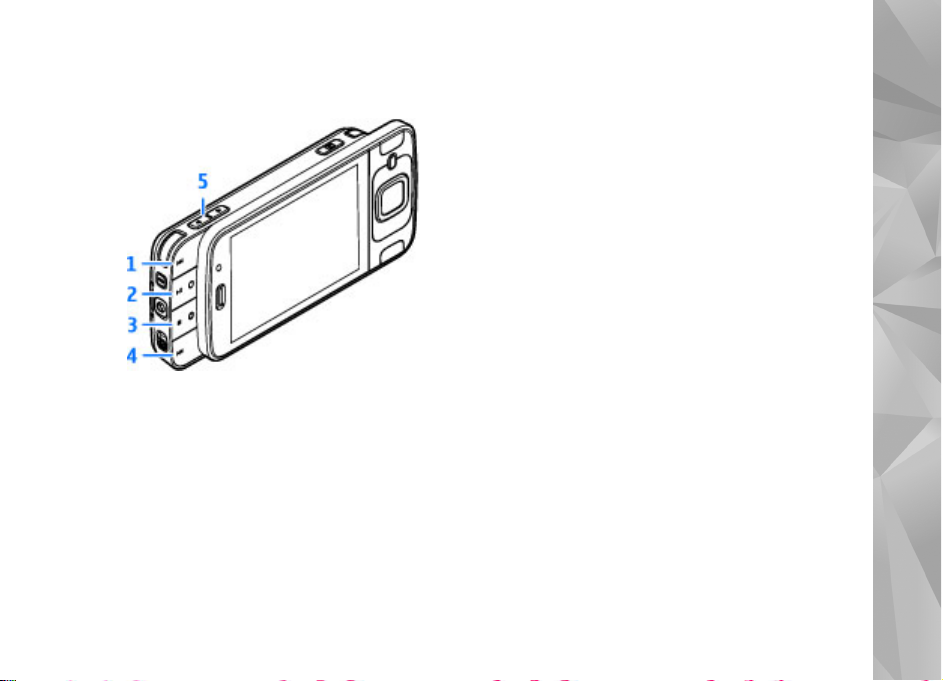
Keys and parts (media)
1 — Forward
2 — Play/Pause; can also be used for playing games
3 — Stop; can also be used for playing games
4 — Rewind
5 — Zoom/Volume key
Keys and parts (media)
5
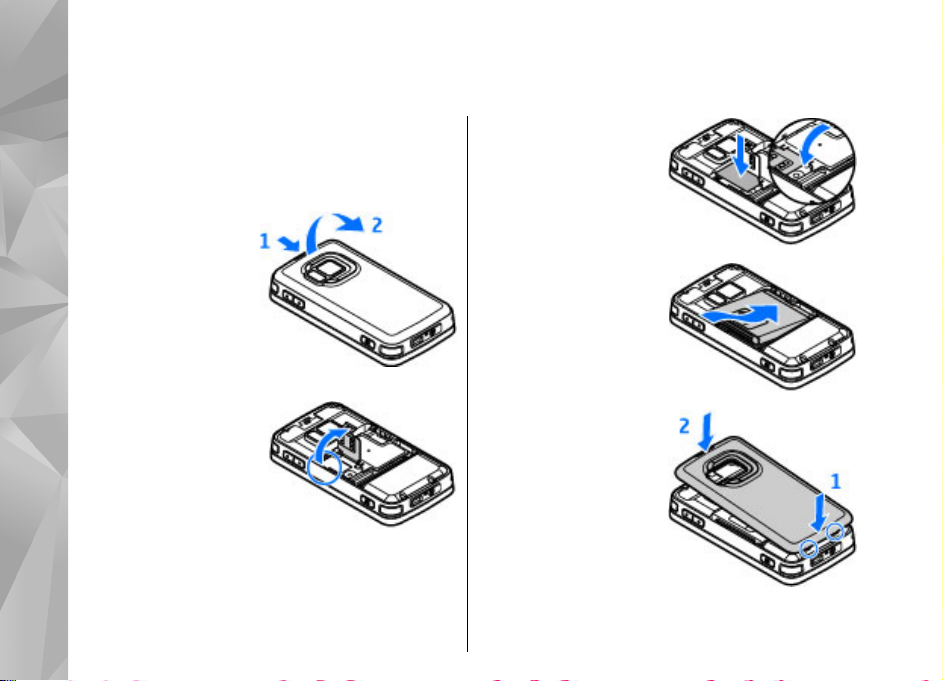
Insert SIM card and battery
A USIM card is an enhanced version of the SIM card
and is supported by UMTS mobile phones.
Always switch the device off and disconnect the
charger before removing the battery.
1. With the back of the
device facing you,
press and hold the
release button, and
lift up the cover.
Insert SIM card and battery
2. To release the SIM
card holder, lift the
holder up using the
handle.
3. Insert the SIM card
into the card holder.
Ensure that the
bevelled corner on
the card is facing
toward the slot, and
that the contact area
on the card is facing down.
6
4. Close the holder, and
lock it into place.
5. Insert the battery.
6. To replace the cover,
direct the bottom
locking catches
toward their slots,
and press until the
cover locks into
place.
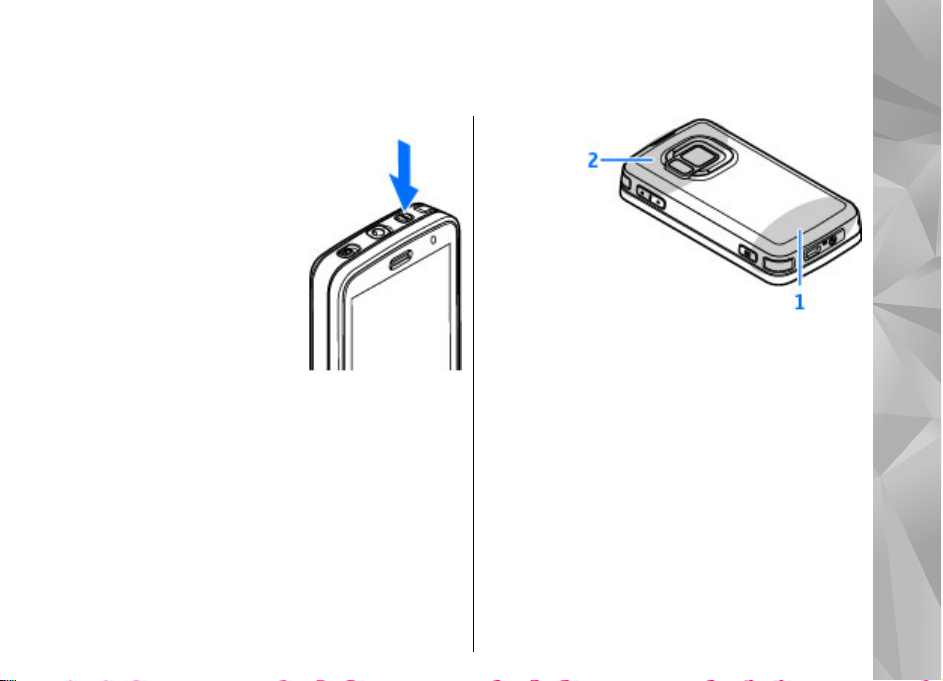
Switch the device on
1. Press and hold the power key.
2. If the device asks for a PIN
code or lock code, enter it,
and press the left
selection key. The factory
setting for the lock code is
12345.
Your device may have
internal and external
antennas. As with any radio
transmitting device, avoid
touching the antenna area
unnecessarily while the
antenna is transmitting or receiving. Contact with
such an antenna affects the communication quality
and may cause the device to operate at a higher
power level than otherwise needed and may reduce
the battery life.
Switch the device on
1 — Cellular antenna
2 — Antenna for Bluetooth technology, wireless
LAN, and DVB-H; GPS receiver
Note that the Bluetooth, WLAN, GPS, and DVB-H
antennas are located in the back cover of your
device. If you change the back cover, check that the
new cover includes these antennas, otherwise
these connections stop working.
7
 Loading...