

Page 1

Get started
Nokia N92-1
Page 2

Get Started
Modes
Model number: Nokia N92-1.
Hereinafter referred to as Nokia N92.
Your device has four modes: Fold closed mode (1), View mode (2), Fold open mode (3), and
Imaging mode (4). For more information, see ‘Modes’ in the user guide.
In the Fold closed mode, you can continue listening to the radio, TV, or music player, and adjust
the volume. You can change the profile or switch the device off with the power key. If the TV is
switched on, you can view the Mobile TV channel and program information, program schedule,
and recording status on the cover display. If the TV is off, you can view the message status and
check the time.
Page 3

If you lift the side of the swing axis display when the fold is closed, the View mode is activated.
Besides using other applications, you can use the View mode to watch TV programs and videos,
view your images, browse the Web, and make hands-free calls.
In the Fold open mode, you can navigate in the main menu with the scroll key, select and open
applications and files, and use all the basic phone functions. The secondary camera above the
top left corner of the display is available for video calls. The fold opens about 160 degrees, as
shown in the picture. Do not force the fold to open more.
Use the Imaging mode to record videos and take pictures quickly and easily. To activate the
Imaging mode, open the fold up to 90 degrees, hold the device sideways, and turn the fold up
so that the main display faces you. The main camera is activated, and you see the view to be
captured.
Page 4
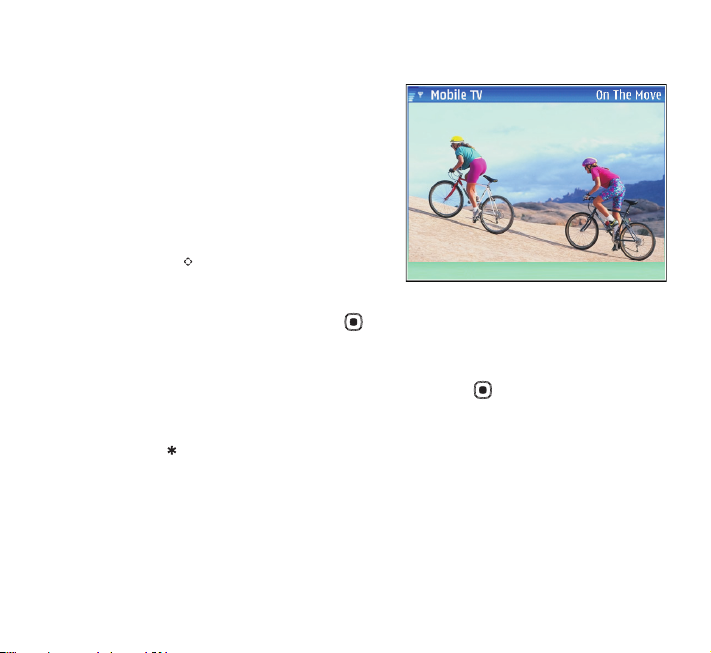
Mobile TV
With Mobile TV, you can watch, listen to, and record
digital TV programs and access interactive mobile
television and radio services (network service).
Check the Mobile TV network coverage and the
availability of and instructions on accessing
datacast services and pricing with your service
provider.
To open the Mobile TV application, press and hold
the multimedia key . The system shows the
program guides that are available in your location. In
the first start-up, this may take a few minutes. To
select a program guide, scroll to it, and press . The system arranges the available channels
according to the program guide. This may take some time. You can change the program guide
later in the settings.
To view a list of available channels, scroll up or down, and press to select a channel. To
change the channel, you can also use the media keys on both sides of the scroll key. You can
also press the number keys to change the channel. To switch between full screen and normal
screen size, press on the keypad.
In some countries, owners of a television receiver are required to pay a television licence fee.
Contact you local authorities for more information.
For more information, see ‘Mobile TV’ in the user guide.
Options
Exit
Page 5

Keys and parts—Fold closed mode
•Main camera unit and lens (1).
•LED flash (2)
•Memory card slot for a miniSD
card (3)
•Pop-Port™ interface system
connector for compatible
enhancements (4)
•Charger connector (5)
•Infrared port (6)
•Stereo loudspeakers (7)
• Volume key to adjust volume and
zoom in and out when you use the
camera (8)
•Capture key to take pictures and
record videos (9)
• Power key (10)
Page 6

Keys and parts—Fold open mode
• Secondary camera for video calls (1)
• Selection keys to select the commands and items in the
View mode (2)
• Selection keys to select the commands and items in the
Imaging and Fold open mode. Press and hold to use
voice commands. (3)
• Call key (4)
• Menu key (5)
• Press and hold as a shortcut to a web connection. (6)
• Multimedia key (7)
•Clear key (8)
• Two-way number keypad (9)
• End key (10)
TM
•Navi
• Media keys to control the Mobile TV, video player,
scroll key (hereinafter referred to as the scroll
key) to move left, right, up, or down in menus. Press the
key in the middle ( ) to select, accept, or activate.
(11)
music player, and radio. (12)
Page 7

Insert the (U)SIM card and battery
The USIM card is an enhanced version of the SIM card and is supported by UMTS mobile devices.
For availability and information on using SIM card services, contact your SIM card vendor. This
may be the service provider or other vendor.
1 With the back of the device facing you, slide the back cover downwards
(1) and lift it up (2).
Always switch the device off, and disconnect the charger before
removing the battery.
2 To release the (U)SIM card holder, slide the holder, and lift the holder
up (3).
3 Insert the (U)SIM card into the holder (4). Ensure that the beveled
corner on the card is facing upward from the holder, and that the
contact area on the card is facing the connectors on the device.
4 Close the holder, and slide it to lock it into place (5).
5 Insert the battery (6). Ensure that the contacts on the top of the battery
are facing the connectors on the device.
6 To replace the back cover, slide it upwards starting from the bottom,
until it clicks into place.
Page 8

Charge the battery
1 Connect a compatible charger to a wall outlet.
2 Connect the power cord to the device. If the battery is
completely discharged, it may take a while before the
charging indicator starts scrolling. The device can be used
while charging.
3 When the battery is fully charged, the bar stops scrolling.
Disconnect the charger from the device, then from the wall
outlet.
You can also use the Nokia Charger Adapter (CA-44) to charge
the battery with previous compatible Nokia charger models.
For enhancements, batteries, and chargers, see the user guide
‘Enhancements, batteries, and chargers’, p. 9.
Page 9

Switch the device on
1 Press and hold the power key on top of the device.
2 If the device asks for a (U)PIN code or lock code, enter it, and press . The factory setting
for the lock code is 12345.
3 The tutorial starts.
Your device has internal antennas.
Note: As with any radio transmitting device, avoid touching
an antenna unnecessarily when the antenna is in use. For
example, avoid touching the cellular antenna during a
phone call. Contact with a transmitting or receiving
antenna affects the quality of the radio communication,
may cause the device to operate at a higher power level
than otherwise needed, and may reduce the battery life.
1 DVB-H antenna for receiving Mobile TV broadcasts
2 Bluetooth and Wireless LAN technology
3 Cellular antennas
When you switch on the device for the first time, it may ask you to set the following
information: Select current city:, Time:, and Date:. Use the scroll keys and the number keys. To
find the city, enter the first letters of the city name. The city you select also defines the time
zone for the clock in your device.
Your service provider may have requested that certain features be disabled or not activated in
your device. If so, these features will not appear on your device menu. Your device may also have
a special configuration such as changes in menu names, menu order, and icons. Contact your
service provider for more information.
Page 10

Headset
Connect the compatible headset to the Pop-Port interface system
connector of your device.
Warning: When you use the headset, your ability to hear
outside sounds may be affected. Do not use the headset where it can
endanger your safety.
Insert the memory card
You can use a compatible miniSD card as extra storage space to save the memory on your device.
You can also back up information from your device to the memory card.
Use only compatible miniSD cards approved by Nokia for use with this device. Nokia uses
approved industry standards for memory cards, but some brands may not be fully compatible
with this device. Incompatible cards may damage the card and the device and corrupt data
stored on the card.
Page 11

To insert the memory card:
1 Open the door (11) of the memory card slot on top of the device.
2 Insert the memory card in the slot (12). Ensure that the contact area on
the card is facing down, and the beveled corner is facing towards the slot.
3 Push the card in (13). You hear a click when the card locks into place.
Eject the memory card
1 Before you eject the card, press , and select Remove mem. card. All applications are
closed.
2 When Remove memory card and press 'OK' is displayed, open the
memory card slot door.
3 Press the memory card to release it from the slot (14).
4 Remove the memory card, and if required by the device, select OK to
confirm.
Important: Do not remove the memory card in the middle of an
operation when the card is being accessed. Removing the card in the middle
of an operation may damage the memory card as well as the device, and data
stored on the card may be corrupted.
Page 12

Settings
Your device normally has MMS, GPRS, streaming, and mobile internet settings automatically
configured in the device, based upon your network service provider information.
For more information, see ‘Connectivity’ in the user guide.
Displays
Remove any protective plastic film covering the displays and the camera lens.
A small number of missing, discolored, or bright dots may appear on the screen. This is a
characteristic of this type of display. Some displays may contain pixels or dots that remain on
or off. This is normal, not a fault.
Transfer content from another device
To use the transfer application, see the user guide, ‘Transfer content from another device’, p. 14.
To use the Nokia Content Copier in Nokia PC Suite to copy content from a compatible Nokia
see the CD-ROM supplied with your device. Nokia Content Copier supports several Nokia
device
device models. For more information on the devices supported by each Nokia PC Suite, refer to
the www.nokia.com/pcsuite pages.
Page 13

Support
Help
The help function provides instructions for using the device. To access it from an application,
select Options > Help.
Tutorial
The tutorial gives you information about some of the features of your device. The tutorial starts
automatically at first start-up. To access it in the menu, press , and select My own > Tutorial.
User guide
Refer to the user guide for other important information about your device.
Online
Check http://www.nokia.com/support or your local Nokia Web site for the latest version of this
guide, additional information, downloads, and services related to your Nokia product
Copyright © 2007 Nokia. All rights reserved.
Nokia, Nokia Connecting People, Nseries, N92, Navi, and Pop-Port are trademarks or registered
trademarks of Nokia Corporation. Other product and company names mentioned herein may be
trademarks or tradenames of their respective owners.
Reproduction, transfer, distribution or storage of part or all of the contents in this document in
any form without the prior written permission of Nokia is prohibited.
Issue 2 EN, 9246541
 Loading...