

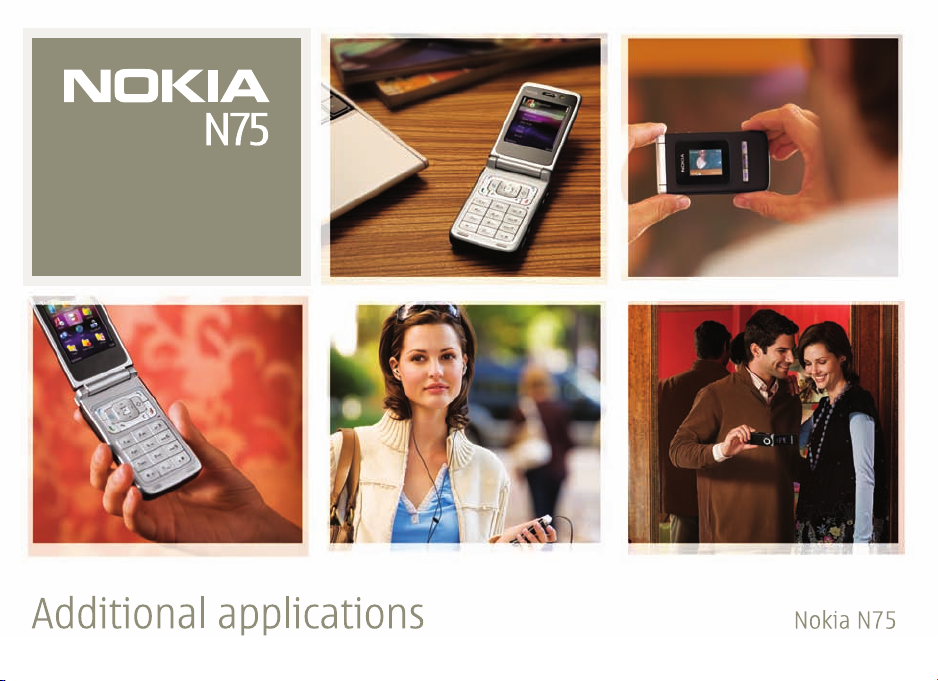
Page 1
Page 2

ABOUT ADD-ON APPLICATIONS FOR YOUR NOKIA N75
In the memory of your device and on the CD-ROM supplied with the device you will
find additional applications from Nokia and third-party developers. The content and
the availability of applications and services may vary by country, retailer and/or
network operator. The applications and further information about the use of the
applications at www.nokia.com/support are available in selected languages only.
Some operations and features are SIM card and/or network dependent, MMS
dependent, or dependent on the compatibility of devices and the content formats
supported. Some services are subject to a separate charge.
NO WARRANTY
The third party applications provided in the memory of your device and on the CD-ROM
supplied with the device, and discussed in this guide have been created and are
owned by persons or entities that are not affiliated with or related to Nokia. Nokia
does not own the copyrights and/or intellectual property rights to these third party
applications. As such, Nokia does not take responsibility for any end user support
or the functionality of these third party applications, nor the information presented
in the applications or these materials. Nokia does not provide any warranty for
these applications.
YOU ACKNOWLEDGE THE SOFTWARE AND/OR APPLICATIONS (COLLECTIVELY, THE
"SOFTWARE") ARE PROVIDED AS IS WITHOUT WARRANTY OF ANY KIND EXPRESS
OR IMPLIED AND TO THE MAXIMUM EXTENT PERMITTED BY APPLICABLE LAW.
NEITHER NOKIA NOR ITS AFFILIATES MAKE ANY REPRESENTATIONS OR WARRANTIES,
EXPRESS OR IMPLIED, INCLUDING BUT NOT LIMITED TO WARRANTIES OF TITLE,
MERCHANTABILITY OR FITNESS FOR A PARTICULAR PURPOSE OR THAT THE
SOFTWARE WILL NOT INFRINGE ANY THIRD PARTY PATENTS, COPYRIGHTS,
TRADEMARKS, OR OTHER RIGHTS. THERE IS NO WARRANTY BY NOKIA OR BY ITS
AFFILIATES THAT ANY ASPECT OF THE SOFTWARE WILL MEET YOUR REQUIREMENTS O R
THAT THE OPERATION OF THE SOFTWARE WILL BE UNINTERRUPTED OR ERRORFREE. YOU ASSUME ALL RESPONSIBILITY AND RISK FOR THE SELECTION OF THE
SOFTWARE TO ACHIEVE YOUR INTENDED RESULTS AND FOR THE INSTALLATION,
USE AND RESULTS OBTAINED FROM IT. TO THE MAXIMUM EXTENT PERMITTED BY
APPLICABLE LAW, IN NO EVENT SHALL NOKIA, ITS EMPLOYEES OR AFFILIATES BE
LIABLE FOR ANY LOST PROFITS, REVENUE, SALES, DATA, INFORMATION OR COSTS
OF PROCUREMENT OF SUBSTITUTE GOODS OR SERVICES, PROPERTY DAMAGE,
PERSONAL INJURY, INTERRUPTION OF BUSINESS, OR FOR ANY DIRECT, INDIRECT,
INCIDENTAL, ECONOMIC, COVER, PUNITIVE, SPECIAL OR CONSEQUENTIAL DAMAGES,
HOWEVER CAUSED AND WHETHER A RISING UNDER CONTRACT, TORT, NEGLIGENCE,
OR OTHER THEORY OF LIABILITY ARISING OUT OF THE INSTALLATION OR USE OF OR
INABILITY TO USE THE SOFTWARE, EVEN IF NOKIA OR ITS AFFILIATES ARE ADVISED
OF THE POSSIBILITY OF SUCH DAMAGES. BECAUSE SOME COUNTRIES/STATES/
JURISDICTIONS DO NOT ALLOW THE ABOVE EXCLUSION OR LIMITATION OF
LIABILITY, BUT MAY ALLOW LIABILITY TO BE LIMITED, IN SUCH CASES, NOKIA, ITS
EMPLOYEES' OR AFFILIATES' LIABILITY SHALL BE LIMITED TO 50 EURO. NOTHING
CONTAINED IN THIS DISCLAIMER SHALL PREJUDICE THE STATUTORY RIGHTS OF
ANY PARTY DEALING AS A CONSUMER.
Copyright © 2007 Nokia. All rights reserved. Nokia and Nokia Connecting People are
registered trademarks of Nokia Corporation.
Other product and company names mentioned herein may be trademarks or trade
names of their respective owners.
Changes and improvements to the products described in this document are possible
without prior notice. Availability may vary by country and region.
NOKIA CORPORATION
NOKIA MULTIMEDIA MARKETING
WWW.NOKIA.COM
ISSUE 1 EN, 9252456
Page 3

Contents
Introduction............................................... 4
Quickoffice ................................................ 5
Adobe Reader ............................................ 7
Lifeblog ...................................................... 9
Nokia PC Suite ........................................ 12
Download!................................................ 13
Settings wizard........................................ 14
Zip manager............................................. 16
Adobe Photoshop Album
Starter Edition ........................................ 17
Page 4

Introduction
Model number: Nokia N75
Your Nokia N75 is a powerful, intelligent multimedia device.
There are various applications provided by Nokia and
Introduction
different third-party software developers to help you do
more with your Nokia N75.
Some of the applications may be provided in the device
memory, on the CD-ROM (if supplied with the device), or
on the internet.
Availability of the applications may vary according to your
country or sales area.
To use some applications, you must accept the applicable
license terms. Some of the applications my allow use
during a free trial period before requiring payment.
Throughout this document, icons indicate if the application
is available in the device software ( ), or on the
CD-ROM ( ).
Note: You must install the applications on the
CD-ROM to a compatible PC before using them.
4
Network services
To use the phone you must have service from a wireless
service provider. Many of the features in this device depend
on features in the wireless network to function. These
network services may not be available on all networks or
you may have to make specific arrangements with your
service provider before you can utilize network services.
Your service provider may need to give you additional
instructions for their use and explain what charges will
apply. Some networks may have limitations that affect
how you can use network services. For instance, some
networks may not support all language-dependent
characters and services.
Support
Applications provided by third-party software developers
are supported by these developers. If you experience
problems with an application, obtain support from the
relevant Web site. See the Web links at the end of each
application in this guide.
Page 5
Quickoffice
Quickoffice
To use the Quickoffice applications, press , and select
Office > Quickoffice. A list of files in the .doc, .xls, .ppt,
and .txt file formats saved in the device opens.
To open a file in its respective application, press . To sort
files, select Options > Sort files.
To open Quickword, Quicksheet, or Quickpoint, press
to reach the desired view.
Quickword
With Quickword, you can view native Microsoft Word
documents on the display of your device. Quickword
supports colors, bold, italics, and underline.
Quickword supports the viewing of documents saved in
.doc format in Microsoft Word 97, 2000, and XP, and Palm
eBooks in .doc format. Not all variations or features of the
mentioned file formats are supported.
View Word documents
To move in the document, use the scroll key.
To search the document for text, select Options > Search.
You can also select Options and from the following:
Go to—to move to the start, end, or selected position
within the document
Zoom—to zoom in or out
Start Autoscroll—to start automatic scrolling through the
document. To stop scrolling, press .
Quicksheet
With Quicksheet, you can read Microsoft Excel files on the
display of your device.
Quicksheet supports the viewing of spreadsheet files
saved in .xls format in Microsoft Excel 97, 2000, 2003,
and XP. Not all variations or features of the mentioned
file formats are supported.
Quickoffice
5
Page 6

View spreadsheets
To move around in the spreadsheet, use the scroll key.
To switch between worksheets, select Options > Pan.
To search the speadsheet for a text within a value or
Quickoffice
formula, select Options > Search.
To change how the spreadsheet is displayed, select
Options and from the following:
Zoom—to zoom in or out
Freeze panes—to keep the highlighted row, column, or
both visible while you move in the spreadsheet
Resize—to adjust the size of columns or rows
Quickpoint
With Quickpoint, you can view Microsoft PowerPoint
presentations on the display of your device.
Quickpoint supports the viewing of presentations created
in .ppt format in Microsoft PowerPoint 97, 2000, and XP.
Not all variations or features of the mentioned file formats
are supported.
View presentations
To move between the slide, outline, and the notes view,
press or .
To move to the next or previous slide in the presentation,
press or .
To view the presentation in full screen, select Options >
Full screen.
To expand items in the presentation outline in the outline
view, select Options > Expand entry.
More information
If you experience problems with Quickword, Quicksheet,
or Quickpoint, visit www.quickoffice.com
information. Support is also available by sending an e-mail
to supportS60@quickoffice.com.
for more
6
Page 7
Adobe Reader
Adobe reader
With Adobe Reader you can read PDF documents on the
display of your device.
This application has been optimized for PDF document
content on handsets and other mobile devices, and provides
only a limited set of features compared with PC versions.
Note: This application is only available in a limited
number of languages.
To access and open documents:
•Press , and select Office > Adobe PDF. Select
Options > Browse for file to browse and open
documents stored in the device memory and on a
compatible memory card.
• Open an e-mail attachment from received e-mail
messages (network service).
• Send a document using Bluetooth connectivity to your
Inbox in Messag..
•Use File mgr. to browse and open documents stored in
the device memory and on the memory card.
• Browse Web pages. Ensure your device is set up with
an Internet access point before browsing. For more
information on access points, see the user guide for
your device.
Manage PDF files
To browse and manage PDF files, press , and select
Tools > Adobe PDF. Your recent files are listed in the file
view. To open a document, scroll to it, and press .
You can also select Options and from the following:
Browse for file—to browse for PDF files in the device
memory or on a compatible memory card.
Settings—to modify default zoom level and viewing mode
of PDF documents.
View PDF files
When a PDF file is open, select Options and one of
the following:
Zoom—to zoom in, out, or to a selected percentage.
You can also resize the document to the screen width,
or fit the whole PDF page to the screen.
Find—to search the document for a text.
Adobe Reader
7
Page 8

View—to view the document in full screen. You can also
rotate the PDF document by 90 degrees in either direction.
Go to—to move to a selected page, next page, previous
page, first page, or last page.
Save—to save the file to device memory or a compatible
memory card.
Adobe Reader
Settings—to modify default zoom level and default
viewing mode.
Details—to display the properties of the PDF document.
More information
For more information, visit www.adobe.com.
To share questions, suggestions, and information about the
application, visit the Adobe Reader for Symbian OS user
forum at www.adobe.com/support/forums
.
8
Page 9

Lifeblog
Lifeblog
Nokia Lifeblog is a combination of software for mobile phone
and PC that keeps a multimedia diary of the items that you
collect with your device. Nokia Lifeblog automatically
organizes your photos, videos, sounds, text messages,
multimedia messages, and weblog posts into a chronology
that you can browse, search, share, publish, and back up.
Both Nokia Lifeblog for PC and Nokia Lifeblog for mobile
phone let you send or blog your items for others to see.
Nokia Lifeblog for mobile phone automatically keeps track
of your multimedia item s. Us e Noki a Lifeblog on your de vice
to browse your items, send them to others, or publish them
on the Web. Connect your device to a compatible PC using
a USB data cable or Bluetooth connectivity to transfer and
synchronize the items on the device with your compatible PC.
Nokia Lifeblog for PC provides easy browsing and searching of
the items that you collected with your device. With one-button
transfer using a USB data cable or Bluetooth connectivity,
your favorite photos, videos, text, and multimedia messages
are transferred back to your device.
For safekeeping, you can back up your Nokia Lifeblog
database using your hard disk, CDs, DVDs, removable
drive, or network drive. Additionally, you can post items to
your weblog (blog).
Note: This application is only available in a limited
number of language
To start Lifeblog on your device, press , and select
Applications > Lifeblog > Options > Open.
Installation on your PC
Before you install Nokia Lifeblog on a compatible PC, you
need the following:
• 1 GHz Intel Pentium or equivalent, 128 MB RAM
• 400 MB of available hard disk space (if Microsoft
DirectX and Nokia PC Suite must be installed)
• Graphics capability of 1024x768 and 24-bit color
• 32 MB graphics card
• Microsoft Windows 2000 or Windows XP
To install Nokia Lifeblog on your PC:
1 Insert the DVD-ROM supplied with your device.
2 Install Nokia PC Suite (includes Nokia Connectivity
Cable Drivers for USB connection).
3 Install Nokia Lifeblog for PC.
Lifeblog
9
Page 10

If Microsoft DirectX 9.0 is not already installed on your PC,
it is installed at the same time with Nokia Lifeblog for PC.
Connect your device and your PC
Lifeblog
To connect your device and a compatible PC using the USB
data cable supplied with your device:
1 Ensure that you have installed Nokia PC Suite.
2 Connect the USB data cable to the device and the PC.
When you connect your device to the PC for the first
time after you have installed PC Suite, the PC installs
the specific driver for your device. This may take a while.
3 Start the Nokia Lifeblog PC application.
To connect your device and a compatible PC using
Bluetooth wireless technology:
1 Ensure that you have installed Nokia PC Suite on your PC.
2 Ensure that you have paired your device and the
PC through Bluetooth wireless technology with
Get Connected in Nokia PC Suite. See "Nokia PC
Suite", p. 12, and the user guide for your device.
3 Activate Bluetooth connectivity on your device and on
your PC. For details, see the user guide for your device
and the documentation for your PC.
Copy items
When you have connected your device to a compatible PC
using a USB data cable or Bluetooth connectivity, you can
copy your items between your device and your PC.
To copy new or edited items from your device to your PC,
and copy the selected items from your PC to your device:
1 Start the Nokia Lifeblog application on your PC.
2 In the Nokia Lifeblog PC application, select File >
Copy from phone and to Phone.
The new items from your device are copied to your PC.
The items on the To phone view on your PC are copied
to your device.
Post to the Web
To share your b est Nokia Lifeblog items, send them to your
weblog on the Internet for others to see.
You must first create an account with a weblog service,
create one or more weblogs that you use as the destination
of your posts, and add the weblog account to Nokia Lifeblog.
The recommended weblog service for Nokia Lifeblog is
TypePad from Six Apart, www.typepad.com.
On your device, add the weblog account in Nokia Lifeblog
in the weblog settings. On your PC, edit accounts in the
Edit log accounts window.
To post items to the Web from your device:
1 In Timeline or Favourites, select the items that you
want to post to the Web.
2 Select Options > Post to Web.
10
Page 11

3 If you use the feature for the first time, Nokia Lifeblog
retrieves a weblog list from the weblog server.
4 The weblog post dialog opens. Select the weblog you
want to use from the Post to: list. If you have created
new weblogs, to update the weblog list, select Options >
Refresh blog list.
5 Enter a title and a caption for the post. You can also
write a longer story or description in the body text field.
6 When everything is ready, select Options > Send.
To post items to the Web from your PC:
1 In Timeline or Favourites, select the items (a maximum
of 50) that you want to post to the Web.
2 Select File > Post to the Web.... The Post to the Web
window opens.
3 Enter a title and a caption for the post. You can also
write a longer story or description in the body text field.
4 Select the weblog that you want to use from the
Post to: list.
5 When everything is ready, click the Send button.
To import images or videos from a compatible PC to Nokia
Lifeblog for PC:
1 In Timeline or Favourites, select File > Import from
PC.... The Import window opens.
2 Browse the list to find the image or video file, or sound
or text file from the list, or navigate to other folders to
find the file that you want to import. Use the Look in
list to browse other drives or appliances.
3 Select a folder, file, or several files. You can view their
content in the Preview: pane.
4 Click Open to import the folder (including subfolders)
or selected files.
Browse Timeline and Favorites
When you start Nokia Lifeblog on your PC, you have several
ways to move around in the Timeline and Favourites
views. The fastest way is to grab the slider handle and
move it forward or backward, fast or slow. Alternatively,
click the time bar to select a date, use the Go to date...
feature, or use the arrow keys.
Lifeblog
Import items from other sources
In addition to the .jpeg images of your imaging device, you
can also import .jpeg images and .3gp and .mp4 video clips,
.amr sound files, and .txt text files from other sources (such
as a CD, DVD, or folders on your hard disk) into Nokia Lifeblog.
More information
For more information on weblog services and their
compatibility with Nokia Lifeblog, visit
www.nokia.com/lifeblog
PC application to open Nokia Lifeblog Help.
, or press F1 in the Nokia Lifeblog
11
Page 12

Nokia PC Suite
Nokia PC Suite is a set of PC applications developed for use
Nokia PC Suite
with your Nokia N75.
To install and use Nokia PC Suite, you need a PC that runs
on Microsoft Windows 2000 or XP and is compatible with
the provided USB cable, or with Bluetooth connectivity.
Before using Nokia PC Suite, you need to install it on
your PC. See the CD–ROM supplied with your device for
more information.
A full user guide for Nokia PC Suite is available in electronic
format on the CD-ROM. For further information, and to
download the most recent version of Nokia PC Suite, visit
www.nokia.com/pcsuite
Some useful applications in Nokia PC Suite are:
Get Connected—to connect your device to a compatible
PC for the first time
12
Nokia PC Suite
.
PC Sync—to synchronize contacts, calendar, to-do, and note
items between your device and a compatible PC personal
information manager (PIM)
Content Copier—to back up data from your device or
restore saved data from the compatible PC to the device
Image Store—to store images and videos from your device
to a compatible PC
Phone Browser—to manage the contents of your device
folders through Windows Explorer
Music Manager—to create and organize digital music files
on a compatible PC and transfer them to a compatible device
One Touch Access—to establish a network connection
using your device as a modem
More information
For further information, and to download the most recent
version of Nokia PC Suite, visit www.nokia.com/pcsuite
.
Page 13

Download!
Download!
With Download! (network service) you can discover, preview,
buy, download, and upgrade conten t, services, and applications
that work with your Nokia N75. Games, ringing tones,
wallpapers, applications, and much more are right at hand.
The items are categorized under catalogs and folders
provided by different service providers. The available
content depends on your service provider.
Press , and select Download!.
Download! uses your network services to access the most
updated content. For information on additional ite ms available
through Download!, contact your network operator, service
provider, or the supplier or manufacturer of the item.
Download! receives ongoing updates, bringing you the
latest content your network operator or service provider
offers for your device. To update the content in Download!
manually, select Options > Refresh list.
To hide a folder or a catalog from the list, for example, to
view only the items you use frequently, select Options >
Hide. To make all the hidden items visible again, select
Options > Show all.
To buy the selected item in the main view or in a folder or
catalog, select Options > Buy. A submenu opens, where you
can select the version of the item and view price information.
The available options depend on the service provider.
To download an item that is free of charge, select
Options > Get.
Settings for Download!
The application updates your device with the most recent
content available from your network operator or service
provider and other available channels. To change the
settings, select Options > Settings >
Access point—Select which access point is used to connect
to the service provider’s server, and whether to have the
device to ask for the access point every time you use.
Automatic open—Select Yes if you want the content or
application to be opened automatically after downloading.
Preview confirmation—Select No if you want to
automatically download a preview of the content or
application. Select Yes if you want to be asked
separately each time before downloading a preview.
Buy confirmation—Select Yes if you want to be asked for
confirmation before buying content or an application. If you
select No the buying process starts immediately after you
select the option Buy.
After you complete the settings, select Back.
Download!
13
Page 14

Settings wizard
Settings wizard configures your device for operator (MMS,
GPRS, and mobile Internet), e-mail, push-to-talk (network
Settings wizard
service), and video sharing (network service) settings based
on your wireless service provider information.
To use these services, you may have to contact your
network operator or service provider to activate a data
connection or other services.
Press , and select Tools > Sett. wiz..
Select the item from the menu that you want to configure
your device for, and press .
E-mail
1 When you choose to configure your e-mail settings,
Settings wizard detects your available network
operator, and asks you to confirm it. Select OK, or scroll
to another network operator, and select OK.
2 Select your e-mail service provider from the list.
3 Select the outgoing mail server. Use the default server
if you are not sure.
14
Settings wizard
4 Settings wizard prompts you to enter the details of your
e-mail address, user name, and password. Select each
in turn, and select Options > Change. Enter the details,
and select OK.
5 Select Options > OK when you are finished.
6 Select OK to confirm that you want to set up the
mailbox for the specified operator.
7 Select OK.
Push to talk
1 When you choose to configure your push-to-talk (Push
to talk) (network service) settings, Settings wizard
detects your available network operator, and asks you
to confirm it. Select OK, or scroll to another network
operator, and select OK.
2 Some operators require a user name, password, and
nickname. Select each in turn, and select Options >
Change. Enter the details, and select OK.
3 Select Options > OK when you are finished.
4 Select OK to confirm that you want to set up Push to
talk for the specified operator.
Page 15

Operator
1 When you choose to configure your operator settings,
Settings wizard detects your available network operator
and asks you to confirm it. Select OK, or scroll to another
network operator, and select OK.
2 Select OK to confirm that you want to set up your
device for the specified operator.
More information
If you experience any problems with Settings wizard,
visit the Nokia phone settings Web site at
www.nokia.com/phonesettings
.
Settings wizard
15
Page 16

Zip manager
16
Zip manager
Zip manager
Use the Zip manager application to compress files.
Compressed files use less memory and are more
convenient to e-mail.
To open Zip manager, press , and select Office > Zip.
Select Options and from the following:
New archive—Create a new archive file to store
compressed ZIP formatted files
Add to archive—Add single or multiplecompressed files or
directories to an existing archive.
Delete—Delete files or directories from an existing archive.
Password—Set, clear, or change the archive password for
protected archives.
Settings—Change the following settings: Compession level
and Include subfolders.
You can store archive files on the device or on the
memory card.
Page 17

Adobe Photoshop Album Starter Edition
Adobe Photoshop Album
Starter Edition
Adobe Photoshop Album Starter Edition 3.0 helps you to
find, fix, and easily share your photos using a compatible
PC. With this version of Starter Edition you can:
• Use tags to organize your photos so that they are easy
to find.
• Use a calendar view to view all of your digital photos in
one place.
• Fix common photo flaws in a single click.
• Share photos in many ways: send through e-mail, print
at home, or send them to compatible mobile devices.
Note: This application is only available in a limited
number of languages.
Installation
Install the Starter Edition application to your compatible PC
from the CD-ROM provided with your device. Starter Edition
requires the Microsoft Windows 2000 (Service Pack 4 or
above), or XP operating system (Service Pack 2 or above),
Nokia PC Suite 6.5 or later for connectivity between your
device and PC, and Apple QuickTime 6.5.1. or later to view
and edit video clips.
Nokia PC Suite can be found on the CD-ROM supplied
with your device. If your system does not have Apple
QuickTime installed, you can install it from
www.apple.com/quicktime/download
on-screen installation instructions.
. Follow the
Transfer photos and video clips from
Nokia N75 to PC
There are two ways to transfer your photos from your
device to Starter Edition.
To transfer photos and video clips to a compatible
PC automatically:
1 Connect your device to a compatible PC with the USB
data cable provided with your device. On the PC, the
Adobe Photo Downloader dialog box opens, and the
new image and video files captured since the last
transfer are automatically selected.
2 To start the transfer, click Get Photos. All selected files
are imported to Starter Edition. Any albums you created
in the My Stuff of your device will be automatically
transferred into Starter Edition and identified as tags.
3 You can select to delete files from your device after
they have been transferred to Starter Edition.
Adobe Photoshop Album Starter Edition
17
Page 18

To enable or disable the automatic Adobe Photo Downloader
dialog box, right-click the icon on the task bar.
To transfer photos to a compatible PC manually:
1 Connect your device to a compatible PC with the USB
data cable or using Bluetooth connectivity.
2 Start the Starter Edition application.
3 In the shortcuts bar, click Get photos > From Camera,
Mobile Phone or Card Reader. The Adobe Photo
Downloader dialog box opens.
4 Click Get Photos to start the transfer. All selected files
are imported to Starter Edition. Any albums you created
in the My Stuff of your device will be automatically
transferred into Starter Edition and identified as tags.
5 You can delete files from your device after they have
been transferred to the Starter Edition.
Transfer photos and video clips from
Adobe Photoshop Album Starter Edition
PC to Nokia N75
To transfer edited photos and video clips back to your device:
1 Connect your device to a compatible PC with the USB
data cable or using Bluetooth connectivity.
2 Start the Starter Edition application.
3 Select the photos and videos you want to transfer to
your device.
4 Click Share in the shortcuts bar, and select Send to
Mobile Phone.
5 Click OK.
Organize and find photos by date
Starter Edition automatically organizes your photos by
date so that they are easy to find. There are two ways to
find photos by date: photo well and calendar view.
To find photos using the photo well:
1 Select Photo Well in the shortcuts bar.
2 In the timeline below the shortcuts bar, select the month
of the photos you want to view. Photos from that month
are shown in the photo well.
To find photos using the calendar view:
1 Select Calendar View in the shortcuts bar.
2 In the calendar view, select a day with a photo to view
all the photos taken that day.
3 Scroll from month to month with the arrow buttons at
the top of the calendar.
Organize and find photos using tags
Find photos by using keyword tags based on the people,
place, event, and other characteristics of the photo. When
you tag your photos, you do not have to remember the file
name, date, or folder for each photo.Click Organize in the
shortcuts bar to open the Tag pane.
18
Page 19

To create your own tag:
1 Click New in the Tag pane, and select New Tag.
2 In the Create Tag dialog box, use the Category menu to
choose which subcategory you want to list the tag under.
3 In the Name text box, enter the name you want to give
the tag.
4 In the Note text box, enter any information you want
to add about the tag.
5 Click OK.
The tag appears in the Tag pane under the category or
subcategory you selected.To attach a tag to a photo, drag
the tag from the Tag pane onto the photo in the photo well.
To find your photos, double-click a tag in the Tag pane; the
search finds all photos that have that particular tag attached.
To narrow the range of photos and jump to a particular
month, click the bar in the timeline.
If you create a new album on the device, add photos in it,
and transfer the photos to Starter Edition, the album
information shows as a new tag under Imported tags.
Fix your photos
To fix the most common photo problems:
1 Select a photo in the photo well.
2 Click Fix photo in the shortcuts bar. Starter Edition
makes a copy of the original photo file for editing.
To fix the photo automatically, select Auto Smart Fix.
To fix the photo manually, select Fix Photo Window...,
and from the following:
General—Selects auto correction for color, levels,
contrast, or sharpening.
Crop—Crops a photo to improve the composition or add
emphasis to an image.
Red Eye—Corrects the red-eye effect caused by a
camera flash.
Play and edit your videos
To play your videos, double-click the video file, and click
Play under the video window.
To edit, rearrange, and delete scenes in your mobile movies:
1 Right-click a movie file, and select Edit Mobile Movie.
You see the first frame of your video in the video
window. The blue marker in the timeline below the
video window indicates the frame you are viewing.
2 To play, pause, stop, go to the beginning, or go to the
end, use the control buttons below the video window.
To move through the video, drag the blue marker in
the timeline.
Adobe Photoshop Album Starter Edition
19
Page 20

3 To select a section of the video to edit, rearrange, or
delete, do one of the following:
• Drag the selection handles that are located at the
beginning and end of the timeline.
• To mark the start time of the selection, press and
hold Shift, and click in the timeline. To mark the end
time, press and hold Ctrl, and click in the timeline.
After you have selected a section, you can drag the
selection bar in the timeline.
4 To delete the selected section of the video, click the
Delete button in the toolbar.
To crop the selection and delete the parts outside it,
click the Crop button in the toolbar.
Adobe Photoshop Album Starter Edition
To copy the selection and paste it to another point in
time, click the Copy button in the toolbar. Drag the
blue marker in the timeline to the desired point, and
click the Paste button.
More information
For additional help on the program functions, select Help >
Adobe Photoshop Album Help in the main menu.
For more information on Starter Edition, visit
www.adobe.com/products/photoshopalbum/starter.html
.
20
Page 21

Notes22Notes
21
Page 22

Page 23

Notes24Notes
23
Page 24

 Loading...