

Page 1

Nokia Mobile Internet Toolkit
Version 4.1
User’s Guide
May 2004
Page 2

Copyright © Nokia 1999-2004. All rights reserved.
This document is for use with the Nokia Mobile Internet Toolkit. Reproduction, transfer, distribution or
storage of part or all of the contents in this document in any form without the prior written permission
of Nokia is prohibited.
, Nokia Mobile Internet Toolkit, and the Nokia Connecting People logo are trademarks or registered
Nokia
trademarks of Nokia Corporation. Other product and company names mentioned herein may be trademarks or
trade names of their respective owners.
Java and all Java-based trademarks and logos are trademarks or registered trademarks of Sun
Microsystems, Inc
.
Nokia operates a policy of on-going development. Nokia reserves the right to make changes and
improvements to any of the products described in this document without prior notice.
UNDER NO CIRCUMSTANCES SHALL NOKIA BE RESPONSIBLE FOR ANY LOSS OF DATA OR
INCOME OR ANY SPECIAL, INCIDENTAL, CONSEQUENTIAL OR INDIRECT DAMAGES
HOWSOEVER CAUSED.
THE CONTENTS OF THIS DOCUMENT ARE PROVIDED "AS IS". EXCEPT AS REQUIRED BY
APPLICABLE LAW, NO WARRANTIES OF ANY KIND, EITHER EXPRESS OR IMPLIED,
INCLUDING, BUT NOT LIMITED TO, THE IMPLIED WARRANTIES OF MERCHANTABILITY
AND FITNESS FOR A PARTICULAR PURPOSE, ARE MADE IN RELATION TO THE ACCURACY,
RELIABILITY OR CONTENTS OF THIS DOCUMENT. NOKIA RESERVES THE RIGHT TO
REVISE THIS DOCUMENT OR WITHDRAW IT AT ANY TIME WITHOUT PRIOR NOTICE.
The availability of particular phone products may vary by region. Please check with the Nokia dealer
nearest to you.
Visit Forum Nokia (http://www.forum.nokia.com)
, the site designed for developers using technologies
supported by Nokia.
Page 3

Contents
Introduction ........................................................................................................................................ 5
Audience........................................................................................................................................ 5
Standards Support ......................................................................................................................... 5
Typographical Conventions ...........................................................................................................5
Related Documents........................................................................................................................ 6
Getting Started................................................................................................................................... 7
Features.........................................................................................................................................8
Launching NMIT ........................................................................................................................ 11
Launching NMIT From the Windows Start Menu...................................................................... 11
Launching NMIT From a Command Line.................................................................................. 11
Menus ......................................................................................................................................... 12
File Menu.................................................................................................................................. 13
Edit Menu ................................................................................................................................. 14
Windows Menu......................................................................................................................... 14
Tools Menu .............................................................................................................................. 15
Preferences ............................................................................................................................. 16
Help Menu................................................................................................................................ 20
Navigate Using Keyboard Shortcuts ............................................................................................. 20
Sending comments to Nokia Corporation..................................................................................... 22
Browsing Editors...............................................................................................................................23
Browsing Editors for Validatable Content .................................................................................... 24
Editing Features For Validatable Text Content .......................................................................... 25
Editor Window Layout........................................................................................................... 25
Initial Content of the Document Editing Region...................................................................... 26
Color Coding ......................................................................................................................... 26
Mouse Operations.................................................................................................................. 26
XML Element and Attribute Insertion Features....................................................................... 27
Active Buttons........................................................................................................................ 30
Revalidate ........................................................................................................................... 30
Show................................................................................................................................... 32
Options............................................................................................................................... 32
Document Summary Bar......................................................................................................... 34
Message Region ..................................................................................................................... 34
Validating the Same Content Against Different DTDs............................................................. 35
Displaying a Non-UTF-Encoded Document on Phone SDKs ................................................... 35
XHTML-MP............................................................................................................................. 36
XHTML-MP+CHTML ............................................................................................................ 37
WML 1.3 Deck.......................................................................................................................... 38
Nokia Mobile Internet Toolkit User’s Guide 1
Page 4

CSS ........................................................................................................................................... 38
Inserting CSS Property Values................................................................................................. 40
CSS Style Sheet Design and Syntax.......................................................................................... 42
Other Browsing Editors ............................................................................................................... 43
WML Script ............................................................................................................................. 43
Executing a WMLScript Function........................................................................................... 44
Debugging With the tk_result Reserved Variable .................................................................... 44
WML Script Editor Controls .................................................................................................. 45
WBMP Image ........................................................................................................................... 45
WBMP Editor Toolbar Buttons .............................................................................................. 46
WBMP Editor Draw Modal Control....................................................................................... 48
WBMP Editor Rescale Image Modal Control.......................................................................... 48
WBMP Editor Resize Canvas Modal Control.......................................................................... 49
Import and Convert JPG and GIF Images to WBMP Format ................................................... 50
Push Editors.......................................................................................................................................51
Overview of Push Messages ......................................................................................................... 52
Encoding and Header Handling in Push Messages...................................................................... 53
Saving Push Messages................................................................................................................ 53
SI, SL, and CO Editors ................................................................................................................. 54
Common Features ..................................................................................................................... 54
Headers.................................................................................................................................. 54
Active Buttons........................................................................................................................ 56
Service Indication (SI) Editor ..................................................................................................... 57
Service Loading (SL) Editor ....................................................................................................... 59
Cache Operation (CO) Editor.................................................................................................... 60
Multipart Message Editor ............................................................................................................ 61
Quickly Creating a Multipart Message....................................................................................... 62
Multipart Message Processing....................................................................................................63
Editing Multipart Headers......................................................................................................... 64
Including Parts .......................................................................................................................... 65
Editing Part Headers.................................................................................................................. 66
Part Properties With Content..................................................................................................... 66
Multipart Button Controls......................................................................................................... 67
Saving Multipart Messages ........................................................................................................ 67
Messaging Editors.............................................................................................................................69
Quickly Creating a Multimedia (MMS) Message.......................................................................... 70
Overview of MMS Messages........................................................................................................70
Structure of an MMS Message ................................................................................................... 72
Relationship Between MMS Media Parts ................................................................................... 73
Saving MMS Messages .............................................................................................................. 74
MMS Wizard............................................................................................................................... 74
MMS Message Editor .................................................................................................................. 79
MMS Message Headers .............................................................................................................80
Parts List................................................................................................................................... 82
Part Properties........................................................................................................................... 83
Button Controls......................................................................................................................... 84
SMIL Editor................................................................................................................................. 84
Generating an MMS Message From a SMIL File ........................................................................ 86
2 Nokia Mobile Internet Toolkit User’s Guide
Page 5

Generating an MMS Message From Media Parts........................................................................ 86
Modifying an Existing MMS Message........................................................................................ 87
Modifying Non-SMIL Parts in an Existing MMS Message ...................................................... 87
Modifying a SMIL Part in an Existing MMS Message ............................................................. 88
DRM Editors ......................................................................................................................................89
Accessing the DRM Editors.......................................................................................................... 90
Creating a DRM Message ............................................................................................................ 91
Creating a Forward Lock Message............................................................................................. 92
Creating a Combined Delivery Message..................................................................................... 93
Creating a Separate Delivery Message........................................................................................ 95
Working With Digital Rights ....................................................................................................... 96
How SDKs and Phones Apply Digital Rights.............................................................................. 97
How Contents and Rights Are Matched..................................................................................... 97
Opening a .dcf File Without an Associated .dr File.................................................................. 99
Opening a .dr File Without a .dcf File ..................................................................................... 99
Setting Digital Rights in the DRM Window ............................................................................... 99
Enabling a Permission ............................................................................................................ 99
Applying Constraints to a Permission ....................................................................................100
Exporting Digital Rights........................................................................................................101
Working With Digital Rights in the Digital Rights Editor ............................................................102
Creating a New Digital Rights File............................................................................................102
Opening an Existing Digital Rights File.....................................................................................102
Setting Options .....................................................................................................................103
Processing the Rights in XML................................................................................................103
Creating Re-usable Rights...........................................................................................................103
Copying Digital Rights................................................................................................................104
Creating Multiple Rights Files for a Single Content File...............................................................104
Creating Multiple Rights Files in the DRM Editor.....................................................................104
Creating Multiple Rights Files in the Digital Rights Editor ........................................................104
Saving a Template for the DRM Editor .......................................................................................105
Download Descriptor Editor.......................................................................................................... 107
About Download Descriptors......................................................................................................107
Creating a Download Descriptor.................................................................................................108
Testing a Download Descriptor ..................................................................................................109
Working With SDKs ...................................................................................................................... 111
Discovery of Running Phone SDKs..............................................................................................112
Launching and Closing Phone SDKs............................................................................................113
Displaying Editor Content on Phone SDKs..................................................................................114
Browsing Mobile Internet and File Content .................................................................................115
Browsing File Content ..............................................................................................................115
Browsing Mobile Internet Content............................................................................................115
Using Bookmarks .....................................................................................................................116
Adding Bookmarks................................................................................................................116
Editing and Deleting Bookmarks ...........................................................................................117
DTD Manager ................................................................................................................................. 121
DTD Manager Interface..............................................................................................................122
Nokia Mobile Internet Toolkit User’s Guide 3
Page 6

DTD Manager Available DTDs Region ....................................................................................122
DTD Manager DTD Properties Region.....................................................................................123
DTD Manager Button Controls................................................................................................125
DTD Manager Task Descriptions ...............................................................................................125
Registering a New DTD ...........................................................................................................126
Collecting Required Registration Data...................................................................................126
Registering a DTD ................................................................................................................127
Testing Document Content Validity Against Multiple DTDs.....................................................128
Adding a Module to a DTD......................................................................................................129
Upgrading a Registered DTD to a Newer Version.....................................................................130
WAP Gateway ................................................................................................................................ 131
Appendix: HTTP File Response Format ........................................................................................ 133
Glossary........................................................................................................................................... 135
4 Nokia Mobile Internet Toolkit User’s Guide
Page 7
Introduction
This guide describes how to use the Nokia Mobile Internet Toolkit 4.1.
Audience
Read this guide if you are a developer of Push, MMS, and DRM messages or of web content for
cell phones.
Standards Support
Nokia Mobile Internet Toolkit 4.1, supports WAP and other standards maintained by the Open
Mobile Alliance (OMA), as well as other standards maintained by other organizations.
Typographical Conventions
The following typographical conventions are used in this guide:
Notation Explanation
Courier
Italic
Bold Names of Windows menus, commands, buttons, and icons
URL link
Nokia Mobile Internet Toolkit User’s Guide 5
Text that you enter (as opposed to system prompts and responses)
•File paths
• Commands
• Program code
• Names of books, documents, and new terminology
Active link
Page 8

Related Documents
Specifications, that are created and maintained by the Open Mobile Alliance and are freely
available at http://openmobilealliance.org.
Assorted documents aboutmessaging technologies are freely available from http://
www.forum.nokia.com/.
Numerous specifications of interest to mobile content developers, notably those relating to
XHTML Mobile Profile and CSS, are published by the World Wide Web Consortium (W3C). You
may access these at http://www.w3.org/
Introduction
6 Nokia Mobile Internet Toolkit User’s Guide
Page 9
Getting Started
Nokia Mobile Internet Toolkit (NMIT) consists of a set of editors that you can use to learn how
tto create various types of mobile Internet content. NMIT lets you display this content on
multiple phone SDKs.
Phone SDKs are installed separately. NMIT detects installed, supported phone SDKs at startup
and lists these in its
phone SDK by simply clicking a
Many NMIT editors are used for creating XML-based content types defined by Document Type
Defintions (DTDs). These editors employ content validation to check content against a DTD, and
they provide features for easily selecting elements and attributions for insertion based on current
cursor position. In addition, NMIT provides a DTD Manager through which you can import new
DTDs for use by NMIT editors.
This chapter discusses the following topics:
Features
Launching NMIT
SDK Control Panel
. You can display content you author on any supported
Show
button within an editor.
Menus
Navigate Using Keyboard Shortcuts
Nokia Mobile Internet Toolkit User’s Guide 7
Page 10
Getting Started
Features
Major features of NMIT include:
• A set of editors for creating and editing mobile Internet content. These are all
accessible using the File>New or File>Open command. Most editors enable the
immediate processing and display of content on a phone SDK by pressing a button
(Show or Push) within the editor. The following table briefly describes these editors.
NMIT Editors
Browsing Editors Description
WML 1.3 Deck
WML Script
WBMP Image
XHTML-MP
XHTML-MP+CHTML
CSS
Select DTD From List Create a document based on a selected system DTD, that is,
Create a Wireless Markup Language (WML) document.
Supports the WML 1.3 DTD, which conforms to the June
2000 WAP specification. Creation of WML 1.2 and 1.1
documents is also supported.
Create WMLScript content. WMLScript is a derivative of
ECMA Script and is used to add programmatic logic to a
WML deck, for example, calculations.
Create a Wireless Bitmap (WBMP) image. Similar to most
image editors, the WBMP editor enables the creation and
editing of WBMP images, as well as conversion of existing
images from GIF and JPEG formats to WBMP format.
Create an XHTML document based on the XHTML Mobile
Profile DTD.
Create an XHTML document based on the XHTML Mobile
Profile DTD with additional element and attributes taken
from Compact HTML.
Create a Cascading Style Sheet (CSS). The CSS contains
formatting style definitions that will be applied to the
elements specified in an XHTML document.
a DTD from a built-in list or one you created yourself.
Push Content Editors Description
Service Indication (SI)
Editor
Service Loading (SL)
Editor
Cache Operation (CO)
Editor
8 Nokia Mobile Internet Toolkit User’s Guide
Create a Service Indication Push message, which is sent to
notify a user of the availability of new content.
Cre ate a Serv ice Lo ading Push m essag e, whi ch is sen t to force
a user agent running on the client device to download new
content (without notifying the user).
Create a Cache Operation Push message, which is sent to
invalidate specific content in the user agent cache (thus
forcing a reload of content the next time the user requests
that content).
Page 11
NMIT Editors
Features
Multipart Message
Editor
Messaging Editors Description
MMS Wizard
MMS Message Editor
SMIL Editor
Deployment Editors Description
DRM Editors
Rights Editor
Create a multipart message, which is a kind of Push message
consisting of more than one part, each of which is separately
processed by the user agent. The editor enables the
incorporation and ordering of already existing parts (files)
into a single multipart message.
Create a Multimedia Messaging file consisting of one or
more parts, each part consisting of text, image, or audio
content.
Create or edit an MMS Message. Major features enable you
to add, delete, or rearrange media parts; edit MMS headers
and individual Part headers; and push the message to
selected phone SDKs.
Create a Synchronized Multimedia Integration Language file
(SMIL and SMIL 3GPP), for specifying the presentational
options of an MMS message.
Create a DRM message with content and rights to it.
Edit DRM rights in an XML editor.
Download Descriptor
Editor
Create a Download Descriptor, which describes the content
so a phone user can determine whether the content can be
loaded on the phone.
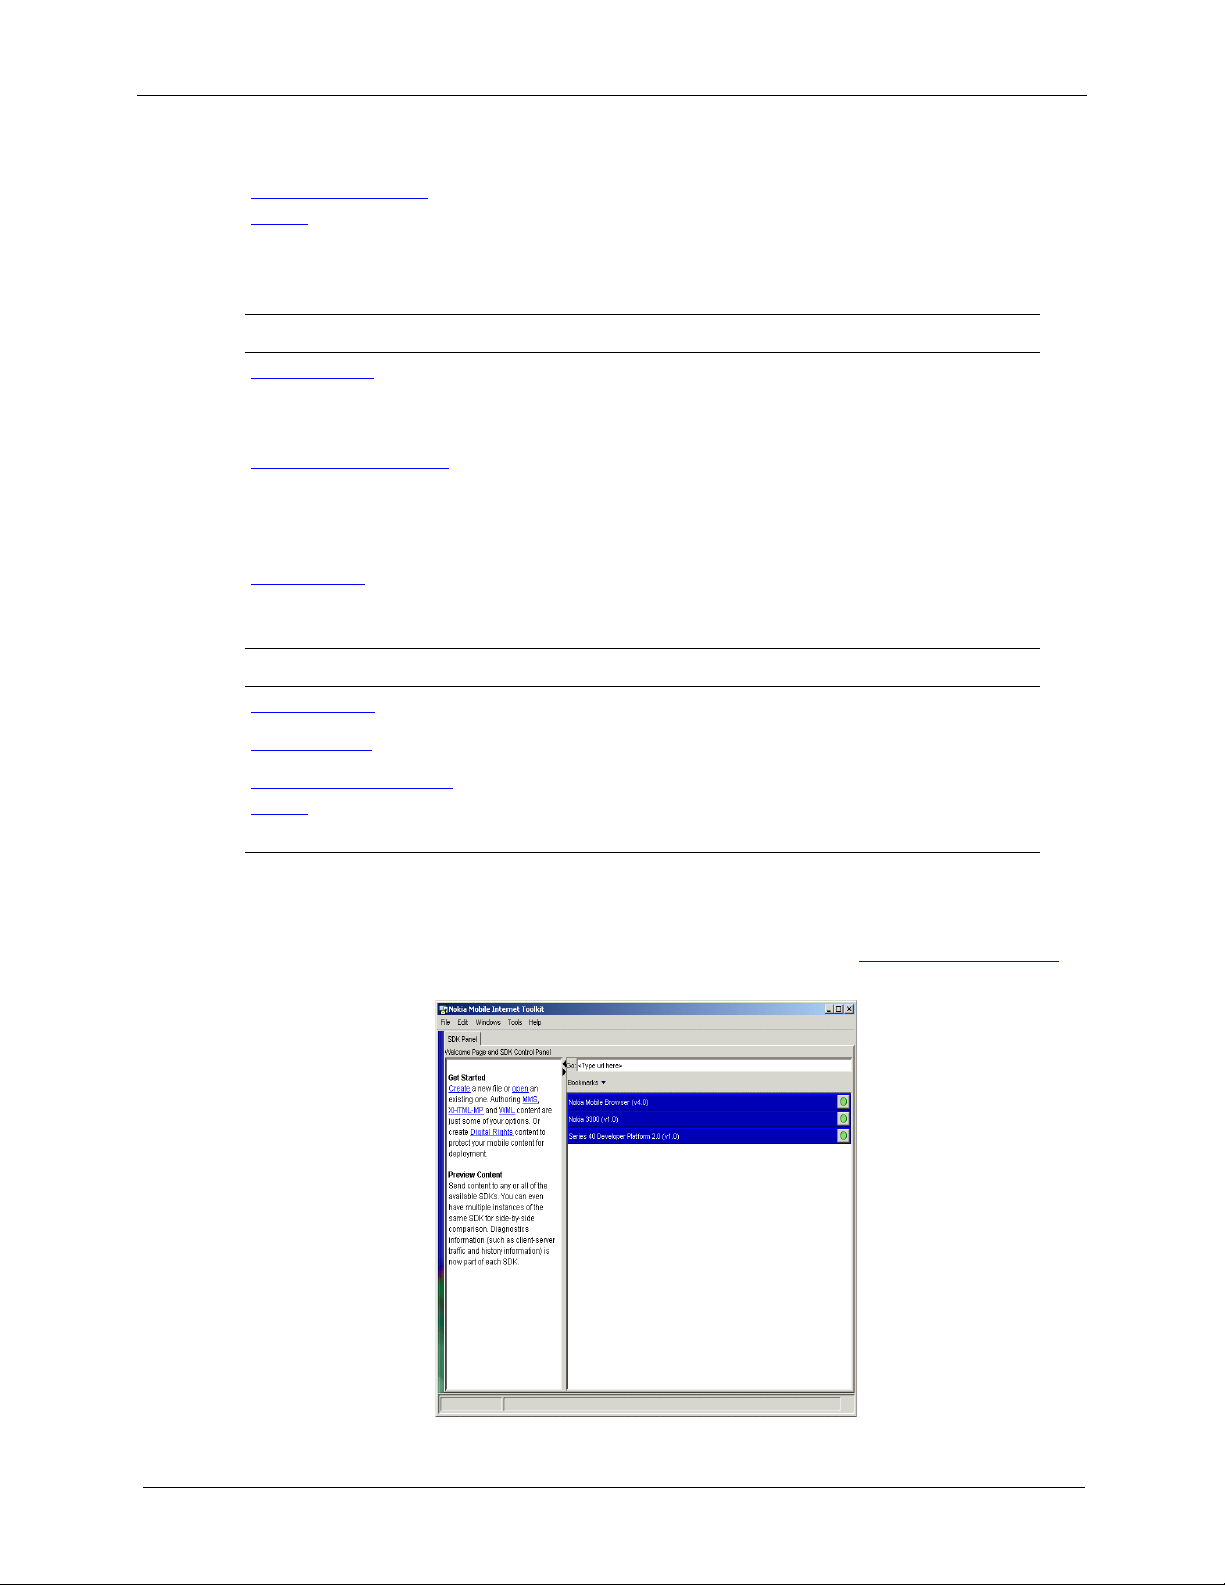
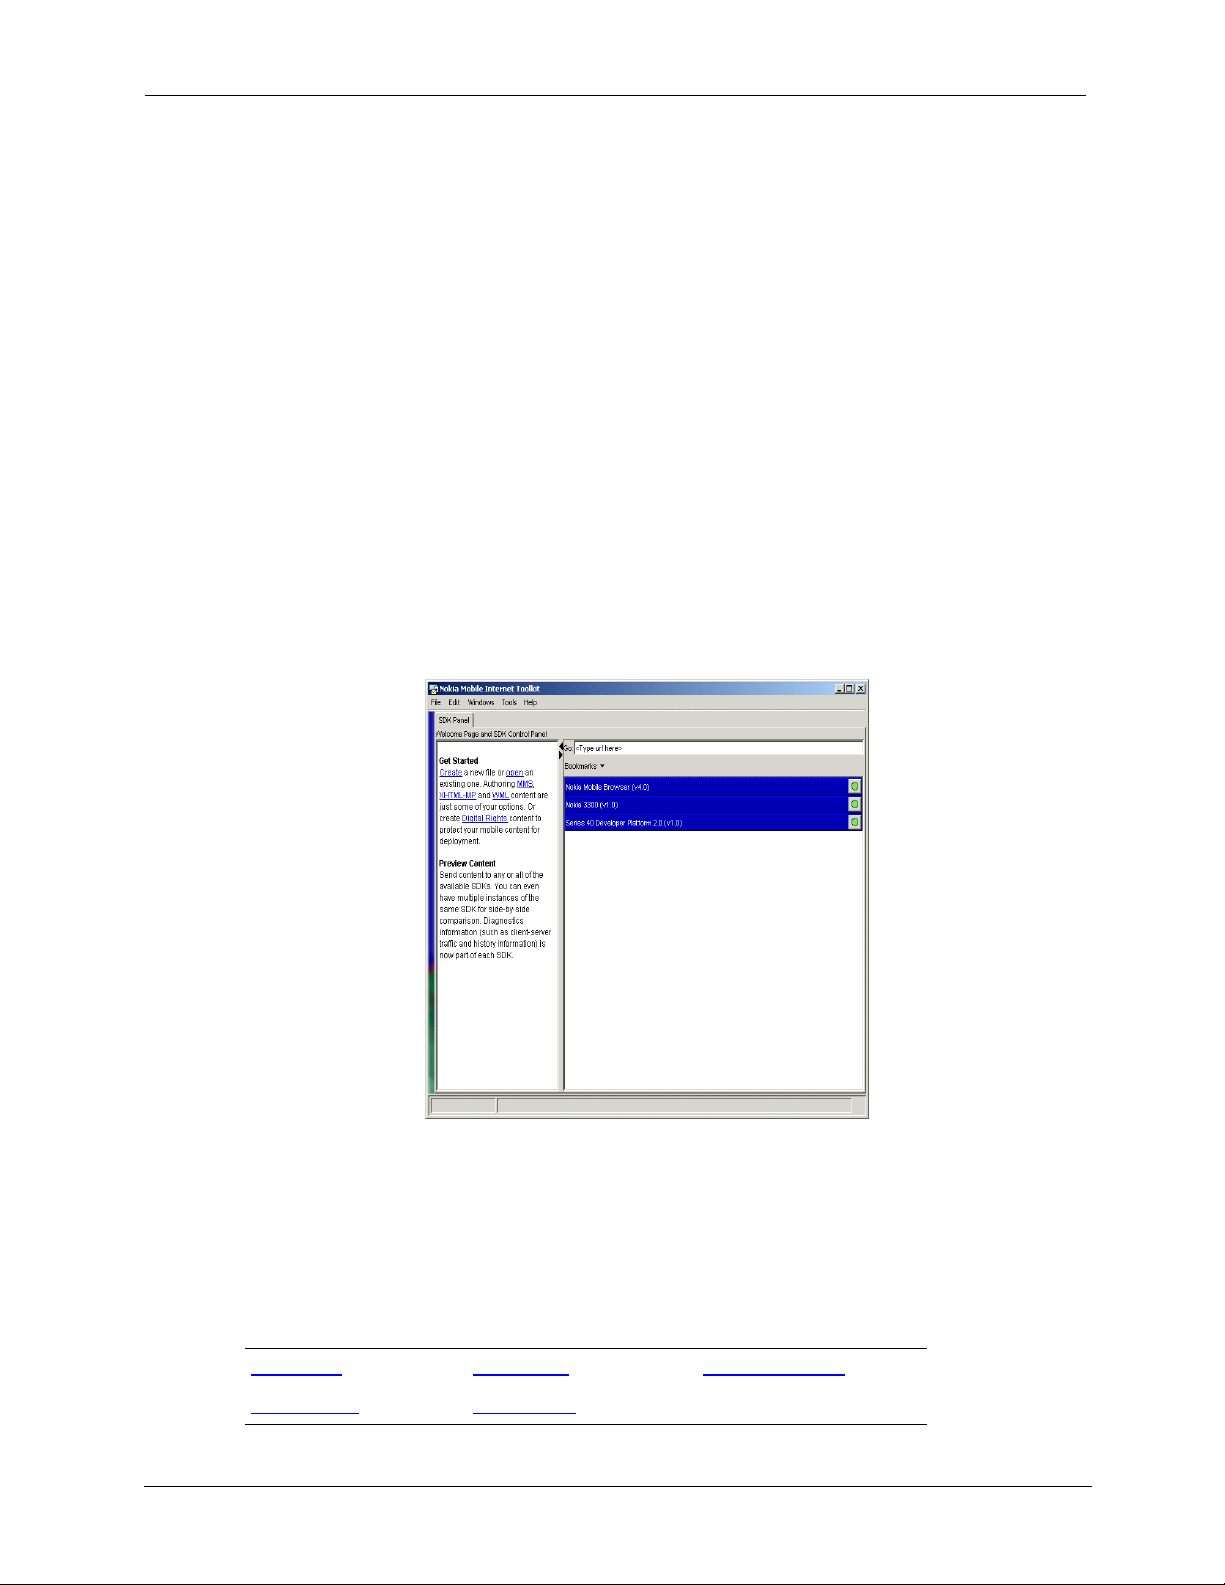
•An SDK Control Panel from which you can select one or more installed phone SDKs
upon which to display content from an editor or from the Internet. The panel is a tab
in the main window and is shown below. See the chapter titled Working With SDKs
for a complete description.
Nokia Mobile Internet Toolkit User’s Guide 9
Page 12

Getting Started
• Several sample applications you can use as aids in developing your own content.
These include the content types WML, XHTML, Push, and MMS and are readily
available through the File>Open menu, through the Bookmarks button (see above
figure), or in the directory:
• Ease of Use Features, described in the table below:
Ease of Use Feature Description
Pop-Up Menus Many NMIT commands and functions are accessible by clicking
<NMIT-installation-directory>\samples
the right mouse button.
Right-clicking within a window area but not on an individual
item will generally display a popup menu of window-level
commands, such as Close or Tear of f .
Right-clicking on an individual item displays commands relevant
to that item. For example, right-clicking on an XHTML
document displays commands for revalidating the document and
for showing the document on phone SDKs. If there are no
commands particularly relevant to an individual item, NMIT
usually displays window-level commands in the popup menu.
.
Tool Tips Tool tips are pop-up text describing the function of an active
control. Throughout the NMIT interface, resting the cursor on
an active control such as a button or drop-down lists displays a
tool tip.
Documentation The User’s Guide (this manual) is provided in PDF format for
viewing using Adobe Acrobat.
Keyboard Shortcuts NMIT makes navigation and selection functions available
through keyboard and keypad presses for those who prefer the
keyboard to the mouse. These are described in the section titled
Navigate Using Keyboard Shortcuts
Independent Windows You can keep multiple documents open and visible
simultaneously by "tearing off" a document, that is, detaching it
from the main NMIT window so it is an independent window. As
an independent window it can be sized, moved, and minimized
independently.
To tear off a document, right-click in the document window and
choose the Tea r O ff pop-up menu option.
To put a torn off document back into the NMIT main window as
a tab page, right-click in the document window and choose the
Put Back pop-up menu option.
.
Editor Preferences Before using an NMIT editor, you may wish to set the available
editor preferences such as line numbering, auto-validation, and
show warnings.
10 Nokia Mobile Internet Toolkit User’s Guide
Page 13

Launching NMIT
Launching NMIT
You can launch NMIT from the Windows
Start
menu or from the command line.
Launching NMIT From the Windows Start Menu
To launch NMIT from the Windows
Start>Programs>Nokia Developer Tools>Nokia Mobile Internet Toolkit>NMIT4.1
Start
menu, choose:
Launching NMIT From a Command Line
You can launch NMIT by directly executing a
is useful if you wish to launch NMIT programmatically, for example, from within another
application.
Launching from the command line is also useful for specifying that one or more files be opened
upon launch. These files will be opened in the appropriate NMIT editor, based on file type.
Additionally, for all text files listed on the command line, you can specify that they be opened
using any of the supported character encodings. In this case, the files will be read using the
specified encoding, unless encoding information specified in the content itself (XML-based
content only) overrides the encoding you specify.
If you have accepted the NMIT default installation location, the location of the NMIT executable
is:
C:\Nokia\Tools\Nokia_Mobile_Internet_Toolkit\bin\Toolkit.exe
syntax statement, substitute the full path name, such as the above default path, for
Toolkit.exe [-argname argvalue ...] [file ...]
.exe
or
.jar
file. Launching from a command line
.
In the following
Toolkit.exe
.
An argument is identified by a required hyphen (-) preceding the argument name. For arguments
that accept a value, the value follows the name and is separated by a space. If multiple arguments
are specified, a space ( ) is required between each, and between an argument and any specified file
parameters. The following are the permitted arguments:
-enc
This argument specifies that any text files listed on the command line be
imported into the appropriate NMIT editor (based on file type) using the
specified character encoding.
This argument must be specified on the command line prior to any files. For
example, the following command launches NMIT, opens
WML editor and
the
utf-16
Toolkit.exe -enc utf-16 file1.wml file2.xhtml
Character encodings supported by NMIT are listed in the Default Input
Text Encoding list box within the Toolkit Preferences dialog
(Edit>Preferences). You may enter any of these encodings as a command
line argument.
character encoding:
file2
in the XHTML editor, and reads both files using
file1
in the
When you use character encoding as an argument value, the following rules apply:
Nokia Mobile Internet Toolkit User’s Guide 11
Page 14
Getting Started
• The encoding in the file takes precedence over the encoding in Preferences or the
command line.
• If the file does not specify a character encoding, the encoding in the command line
argument takes precedence over the encoding specified in Preferences.
• If no encoding is specified in the file or on the command line, the Default Input
encoding value in Preferences is used.
You can also launch NMIT from a command line by executing its
.jar
file. Assuming you
accepted the default NMIT installation directory, do the following:
1Navigate to
C:\Nokia\Nokia_Mobile_Internet_Toolkit
2 Enter the following MSDOS command:
PATH=C:\Nokia\Nokia_Mobile_Internet_Toolkit\bin;%PATH%
3 Enter the following MSDOS command:
java -jar lib\toolkit.jar
If NMIT is not currently running, it will be started. If it is already running, the content is
displayed in the running NMIT rather than in another instance of NMIT.
Upon launch, the NMIT
Wel co me
tab is displayed along with the
SDK Control Panel
:
Wel co me
The
Welc om e
tab provides an overview of NMIT functions. You can drag the bar so that the
section does not display.
Menus
This chapter describes the following six NMIT main menu commands and their submenus.
File Menu Edit Menu Windows Menu
Tools Menu Help Menu
12 Nokia Mobile Internet Toolkit User’s Guide
Page 15

File Menu
The
File
menu provides these options:
File Menu Options
New Displays the Availa ble Co nte nt Type s dialog from which you can choose
a content type for the file you wish to create.
After you select the content type and choose OK, NMIT opens the
appropriate editor, displaying a default template for the content type.
Open Displays the Open file for editing dialog from which you can navigate to
an existing file that you wish to edit.
NMIT opens the appropriate editor for the selected file based on the file
type.
Close Closes the current document and displays the next open document in the
NMIT tab order (if there are other open documents).
Save In an NMIT Editor window, saves an already named file. If the file is
untitled, you are prompted for a file name.
Menus
Save As In an NMIT Editor window, opens the Save as dialog into which you can
type a file name for the file you wish to save. By default, NMIT supplies a
file extension for the file based on the content type.
Save as Template... In an NMIT Editor window, lets you save the current content so that the
editor is initialized with that content when you next create a new file of
the same Content Type.
To restore a default template, quit NMIT and then delete the template
you saved from:
C:\Nokia\Tools\Nokia_Mobile_Internet_Toolkit\Templates
Template names are the icon label prepended by
the Content Type.
When you restart NMIT and create new content with the editor, the
editor then opens with the default template.
Print (Text editors only) Opens the Print dialog from which you can print the
current document.
Print to HTML... Opens the Save As dialog which enables you to save the current document
in publishable HTML format (text editor only). When such a document
is subsequently opened in a browser, it is displayed as it is displayed within
an NMIT editor, showing elements and attributes, proper syntax, and
color coding.
This format is useful for publishing code for review by other content
developers or for creating online documentation for programming code.
New
and appended with
.
<various file
names>
Exit Closes NMIT and all the SDKs started from NMIT
Nokia Mobile Internet Toolkit User’s Guide 13
Re-opens any of these most recently opened file names. Up to four files are
listed.
Page 16
Getting Started
Edit Menu
Edit commands are selectively available or unavailable depending on the context.
Copy
, and
Paste
are generally available in Editor windows. Others, such as
Undo
Find, Cut,
and
unavailable if you have as yet taken no action. Unavailable commands are grayed out.
Edit Menu Options
Undo Undo the previous action.
Note that NMIT dynamically renames this menu item to reflect what its action
will be. For example, if you have performed a paste operation, the menu item is
renamed Undo addition. This item is grayed out if there is no previous action.
Redo Do the action that had previously been undone; that is, undo the last undo.
Note that NMIT dynamically renames this menu item to reflect what its action
will be. This item is grayed out if there is no previous action.
Cut Delete the selected text and copy it to the Clipboard.
Copy Copy the selected text to the Clipboard.
Paste Paste the contents of the Clipboard at the cursor insertion point.
Find Opens the Find/Replace Text dialog in which you can specify text to find (and
optionally replace) in the current editor window.
Windows Menu
Redo
are
The
Windows
menu enables you to view all open documents and provides options for selecting
which window is the active window and for tearing off or putting back the active window.
Windows Menu Options
<open
documents>
Tea r O ff
<current>
Displays a list of all open documents. Select an open document to bring that
document to the foreground for editing.
Tears off the active document from the NMIT main window, creating an
independent window (with a complete menu bar) that can be sized, moved,
and minimized independently. This function enables you to view multiple
documents simultaneously.
To put a torn off document back into the main NMIT window, choose the
Windows>Put Back menu item from the torn off window’s menu bar.
Both the tearing off and the putting back of document windows can also be
accomplished by right-clicking the mouse in a document window and then
choosing the desired option from the popup menu.
14 Nokia Mobile Internet Toolkit User’s Guide
Page 17

Tools Menu
The
Tools
menu provides these options:
Tools Menu Options
SDK Control Panel Opens the SDK Control Panel tab from which you can choose among
available phone SDKs to which you wish to send a document for display.
The use of this control panel is described in the chapter titled Wo rk in g
With SDKs.
DTD Manager Opens the DTD Manager, an NMIT component that enables you to
register additional DTDs for use with NMIT content editors (see DTD
Manager).
WAP Gat eway Launches Nokia WAP Gateway Simulator (NWGS) if installed on your
computer. NWGS is a single-user WAP Gateway based on the multiuser Nokia Activ Server.
In order to browse the Internet using a phone SDK, the phone SDK
must be configured to use NWGS or an external WAP gateway. If the
former, NWGS must be running. This menu option is provided for
convenience in launching NWGS.
Menus
Preferences Opens the Preferences
dialog, described below.
Nokia Mobile Internet Toolkit User’s Guide 15
Page 18
Getting Started
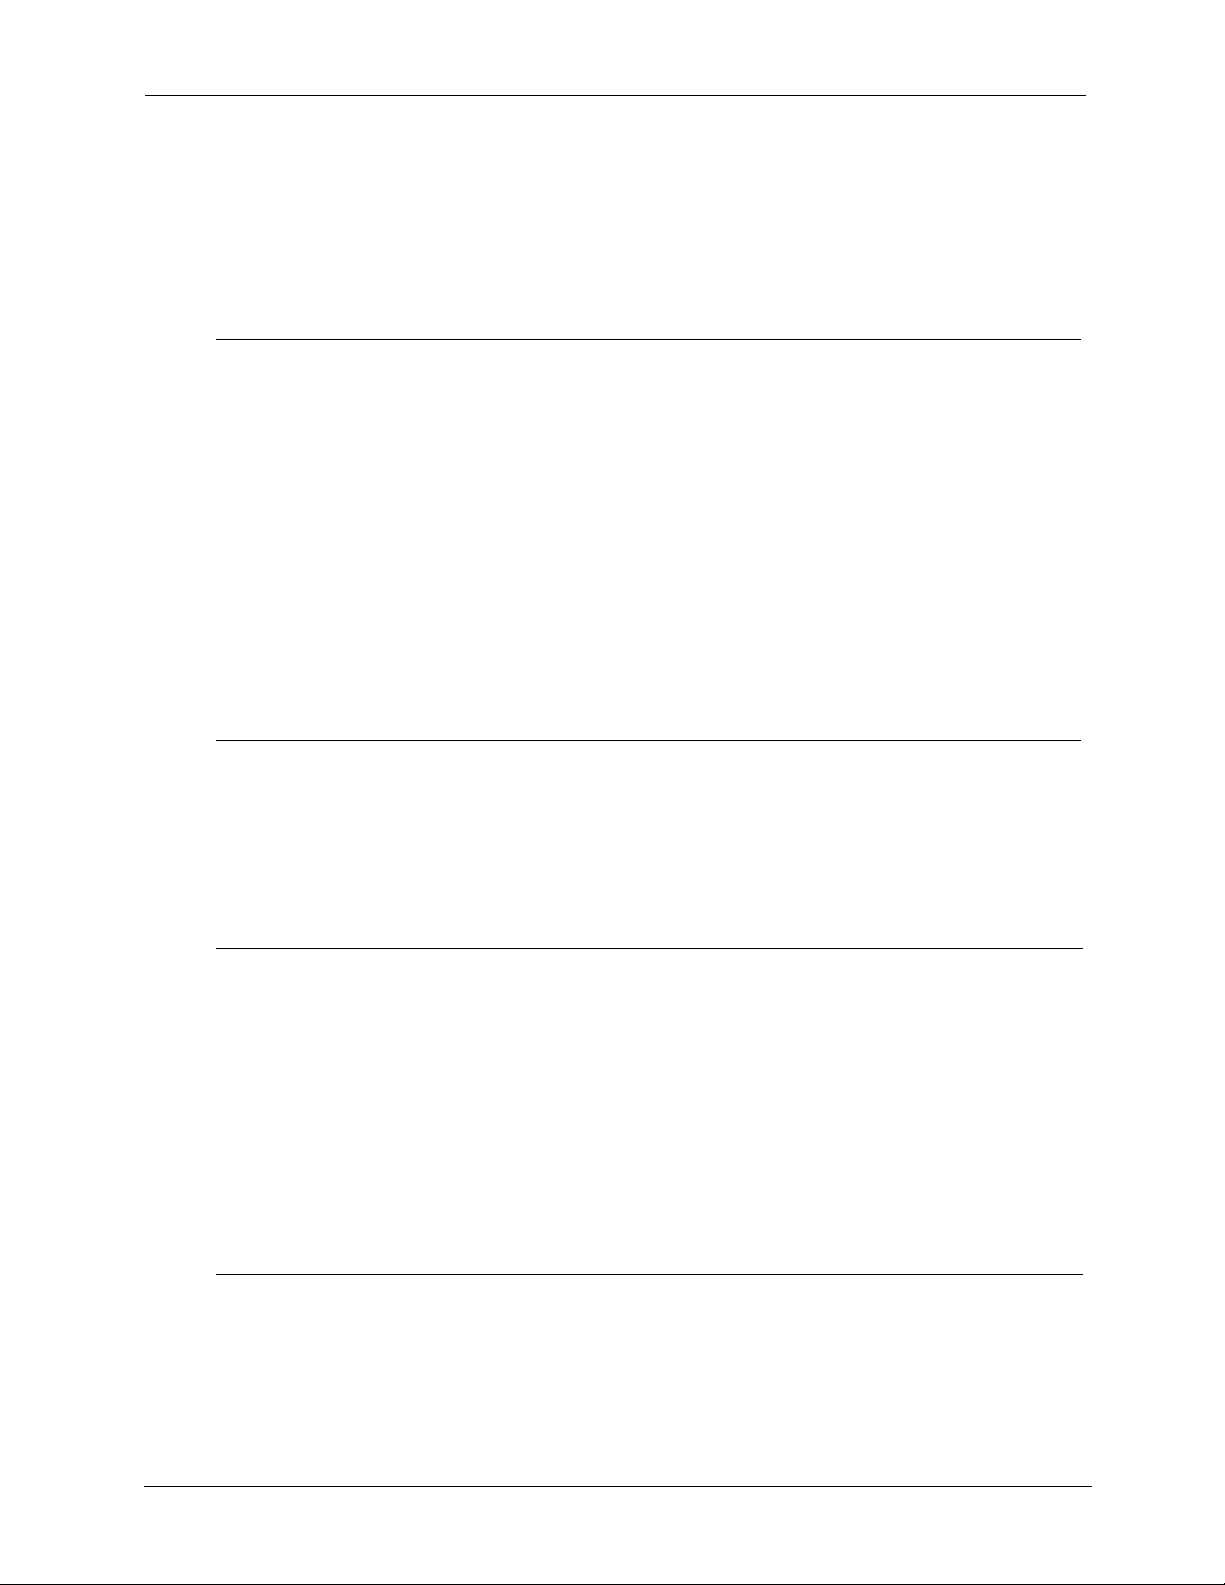
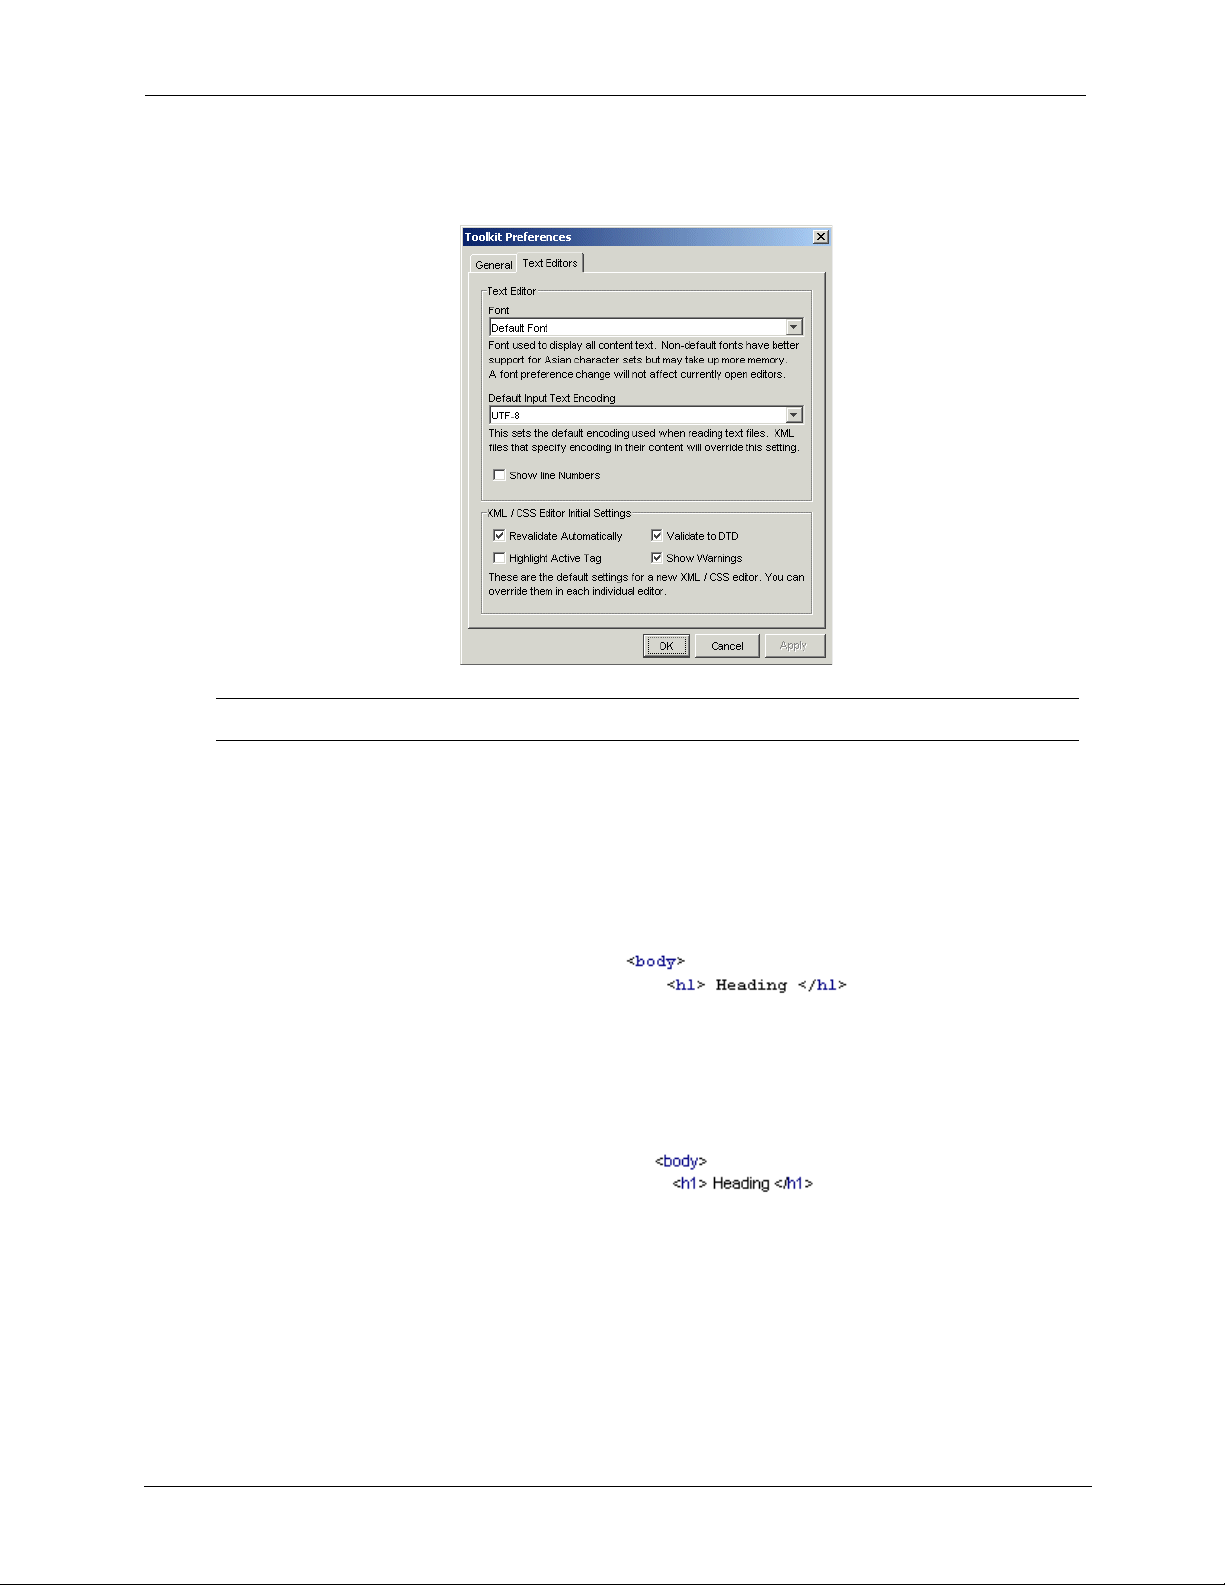
Preferences
Choose
pages
The
Tools>Preferences
General
General
Placement
to open the Toolkit Preferences dialog, which contains the two tab
and
Text Editors
.
tab provides settings arranged in the three regions:
, as shown below.
Startup, War ning s
, and
Ta b
General Tab Options
Startup
On Startup, re-open files that were open
on previous exit
On Startup, start previously running
SDKs
On Startup, /Start Nokia WAP Gateway
Server
Warnings
When checked, NMIT reopens files that were open
when you last exited from NMIT.
When checked, NMIT starts all the SDKs that were
running when you last exited from MIT.
When checked, NMIT starts the Nokia WAP
Gateway Simulator every time you start NMIT.
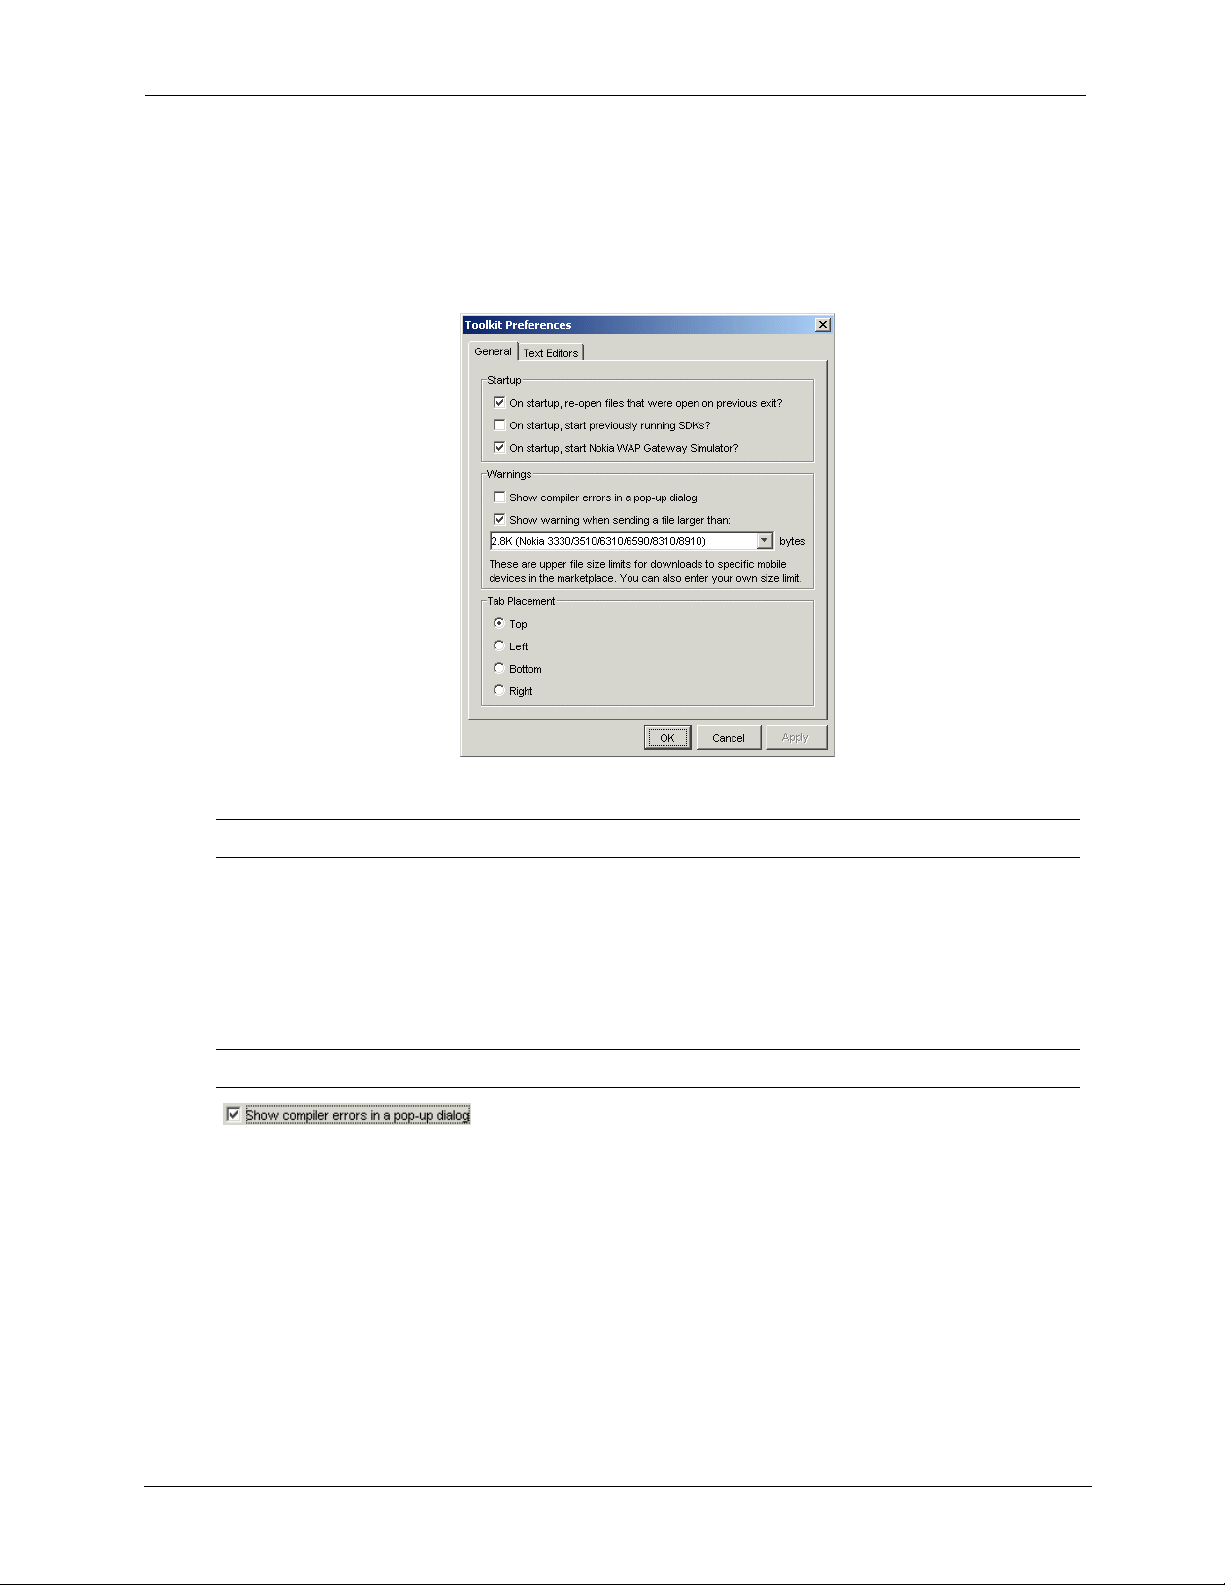
If checked, NMIT displays compilation errors in a
pop-up dialog box, as well as in the message area
below the editing window.
Unchecking this box disables pop-up display of
compilation error messages.
16 Nokia Mobile Internet Toolkit User’s Guide
Page 19
General Tab Options
Menus
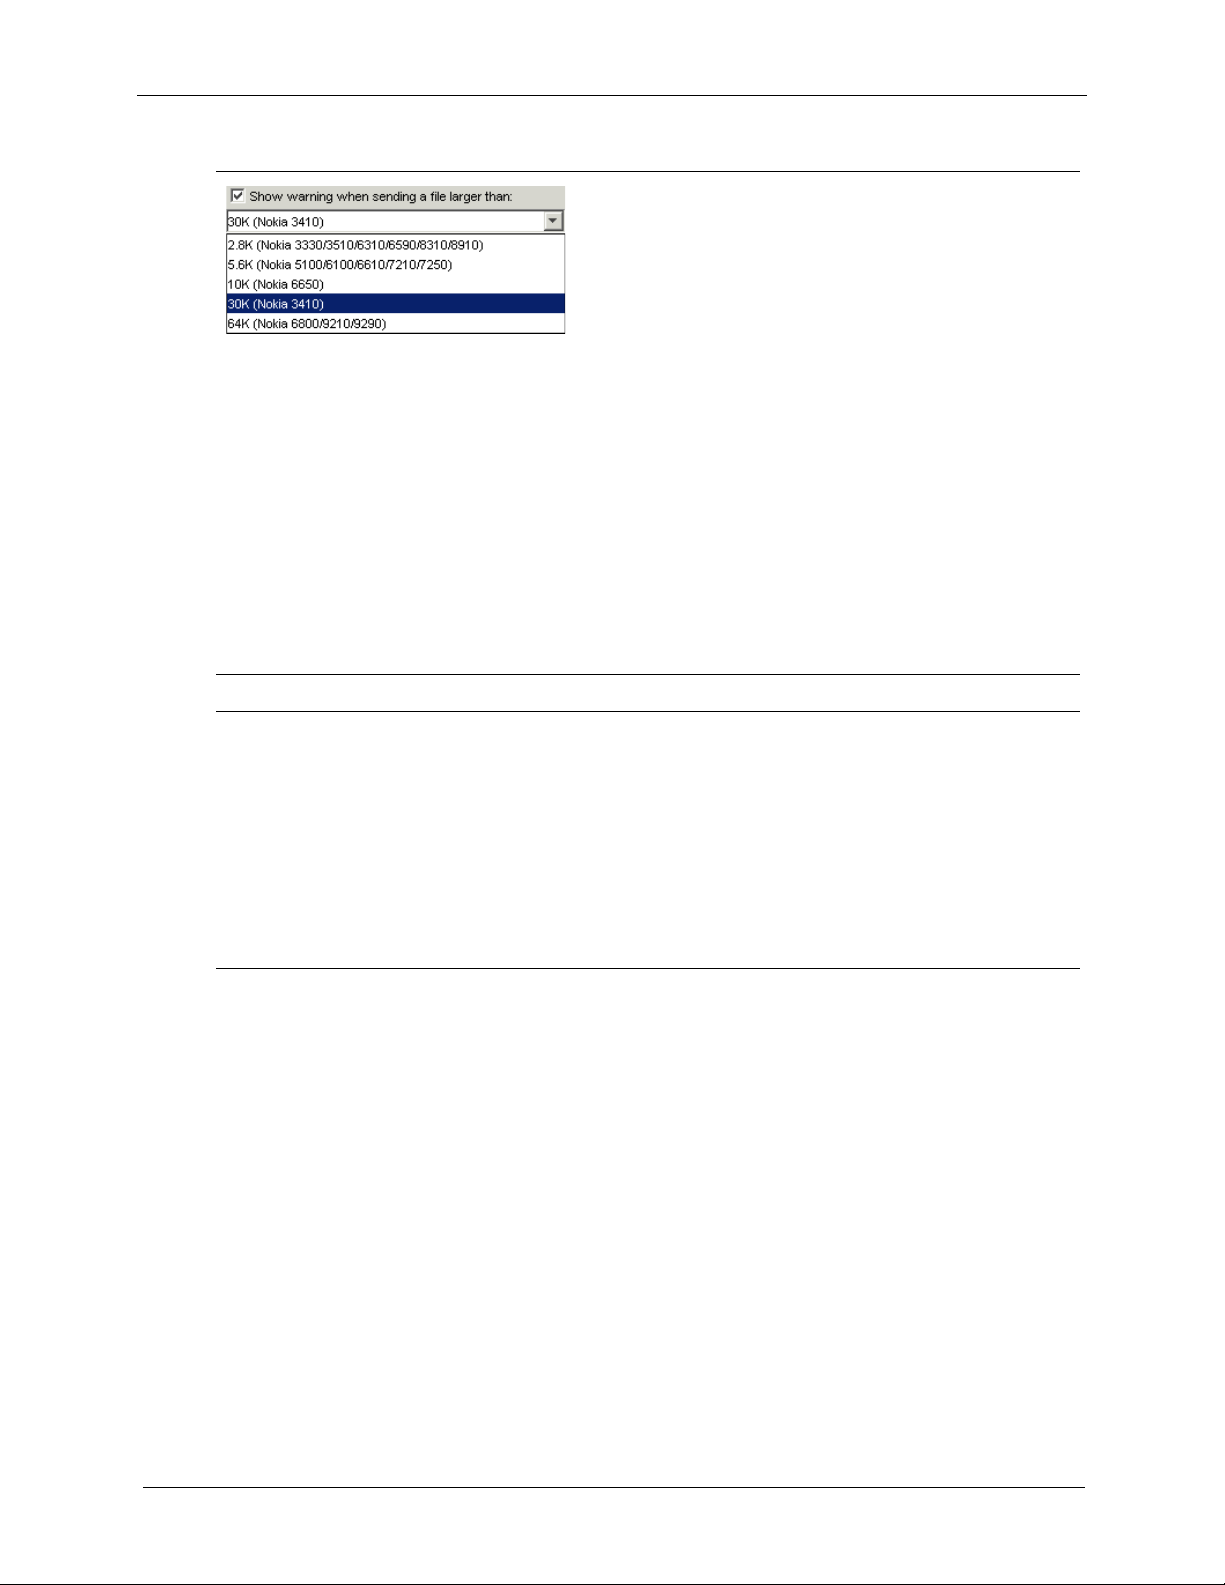
If checked, NMIT displays a warning under these
conditions:
• The current WML or XHTML document you
show on a phone SDK exceeds the size you
specified in the bytes text entry field.
• The size of the compiled content of a WML file
saved in binary format exceeds the size you
specified in the bytes text entry field.
If unchecked, NMIT displays no warnings.
This field uses a drop-down list box displaying
several existing mobile devices and the size of largest
file that can be downloaded to the device.
You can choose from the list, or you can enter your
own value by selecting the existing value and then
typing in a new value.
MMS ignores this setting and uses size limits defined
for each SDK.
Tab Placement
To p Positions document tabs along the top of the display
window.
Right Positions document tabs to the right of the display
window.
Bottom Positions document tabs along the bottom of the
display window.
Left Positions document tabs to the left of the display
window.
Nokia Mobile Internet Toolkit User’s Guide 17
Page 20
Getting Started
The
and encoding to be used in the display of documents open in a text editor, and initial settings for
XML/CSS editors:
Tex t Ed it o r
tab provides settings that apply to all text editors in NMIT, including the font
Text Editor
Font Sets the font to be used in the display of text within the content editing
region of all text editors. NMIT offers the two font options Default Font
and Arial Unicode MS, though the latter is offered only if this font is already
installed on your computer. Some differences between these are given below;
however, you should choose whichever you prefer.
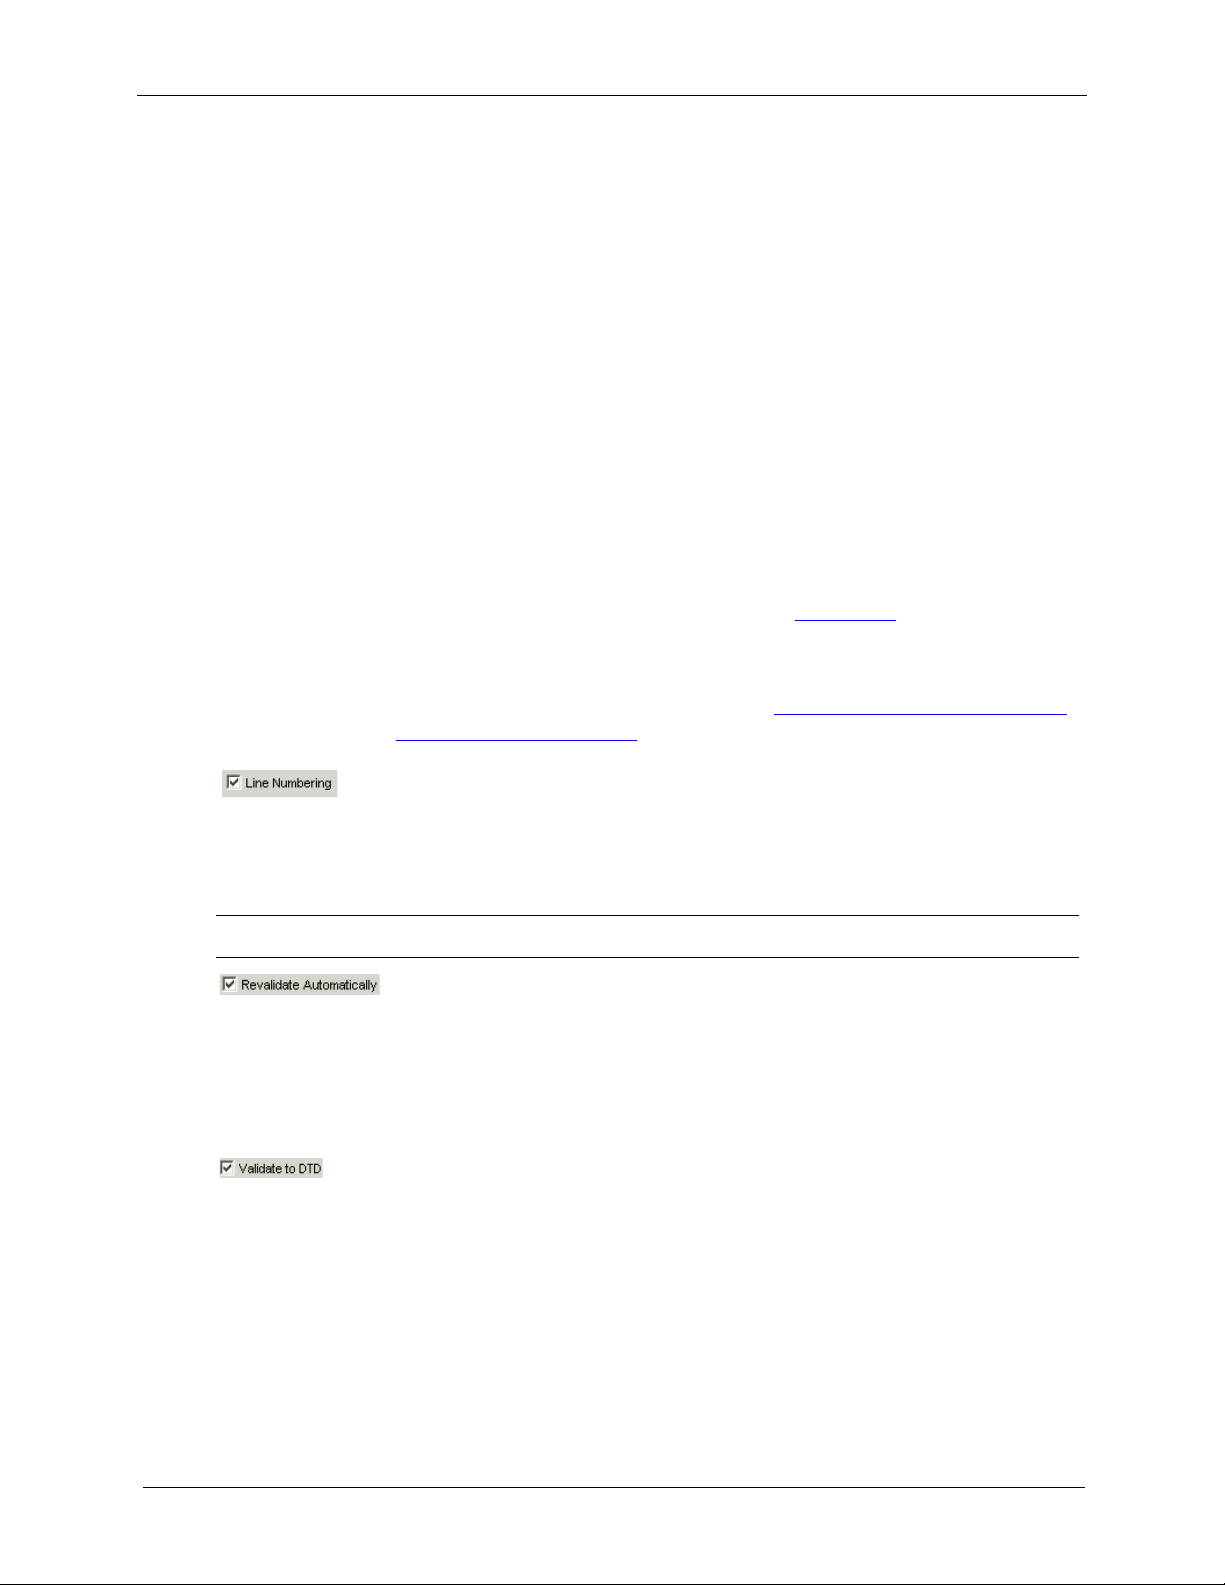
The Default Font is a monospaced font: each character is of the same fixed
width. This is the NMIT default font, a sample of which is shown below:
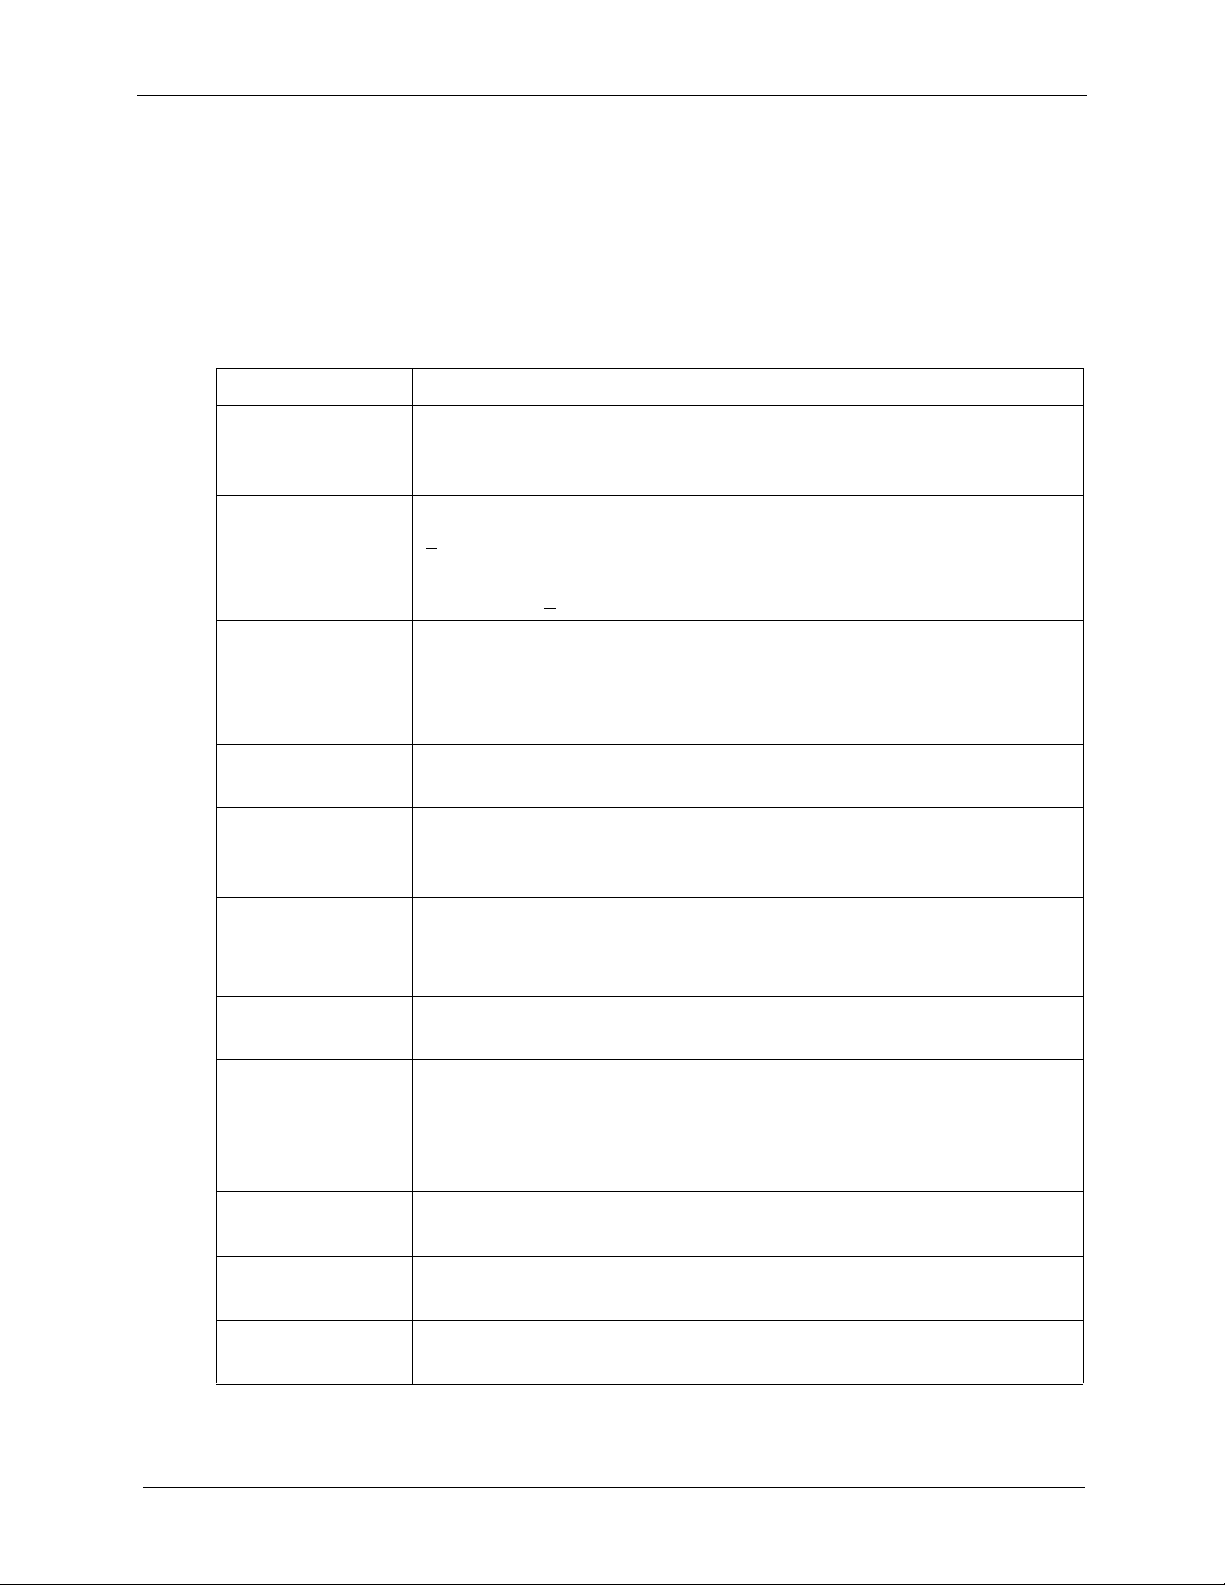
The Arial Unicode MS font is a “richer” font than the NMIT default font
and contains support for many languages; however, it is not a monospace
font. It is recommended to choose this font if your content contains
characters from any Asian language. The following code snippet uses the
Arial Unicode MS font:
When you change a font, the change is seen in documents you open
thereafter; documents already open are unchanged.
18 Nokia Mobile Internet Toolkit User’s Guide
Page 21
Menus
Default Input
Text Encoding
Use this drop-down list to choose a text encoding that an NMIT text editor
will use as the default encoding when reading in a document that you have
chosen to open. Note the following:
• Whenever an XML-based document contains a statement specifying its
own encoding (the
charset
attribute in the XML prologue on the first
line), NMIT reads in the document using that encoding rather than the
encoding specified in the Default Input Text Encoding list.
• Some encodings have an identifying signature in the first few bytes. In
this case, NMIT may detect that the document uses a different
encoding and will then use the encoding it discovers rather than the one
you specified in the list.
• If the document was specified as a command line argument with the
enc
encoding, NMIT uses that encoding.
-
• If the Default Input Text Encoding does not match the encoding used at
the time the document was created, the document may appear garbled
or unreadable. In this case, close the document and re-open it using a
different input encoding. (See the section Preferences
for details on how
to do this.
• NMIT uses the UTF-8 encoding by default.
For additional information, see the section Displaying a Non-UTF-Encoded
Document on Phone SDKs.
XML/CSS Editors
If checked, line numbers are displayed along the left border in the text
editing areas of all the text-based editors.
If unchecked, no line numbers are displayed.
Line numbers in compile error reporting will be displayed even if this box is
unchecked.
If checked, NMIT’s text-based editors revalidate document content
automatically at five-second intervals after editing activity stops. This saves
you from having to revalidate manually using the Revalidate button in the
editor window. This is the default setting. Open files are automatically
revalidated, even if this box is unchecked.
If unchecked, automatic revalidation is disabled.
If checked, NMIT’s text-based editors validate the document content
against the DTD specified in the
DOCTYPE
declaration found within the
document content. In this case, the parser checks that all elements and
attributes are used in accordance with the rules specified in the DTD as well
as in accordance with the XML rules for creating “well formed’ content.
This is the default setting.
If unchecked, NMIT’s validating parser checks only for “well-formed”
XML-based content.
Nokia Mobile Internet Toolkit User’s Guide 19
Page 22

Getting Started
Help Menu
The
Help Menu Options
If checked, the element in which the cursor is currently positioned is
highlighted in a light background color.
If unchecked, no highlighting is used to identify current cursor position.
This is the default setting.
If checked, non-fatal parser warnings are displayed whenever NMIT’s
parser revalidates the document.
If unchecked (the default), no warnings are shown.
Errors are always shown no matter what the setting.
Help
menu provides options for accessing NMIT user guide information and release notes:
User’s Guide
(PDF)
Nokia Update
Manager
Release Notes Displays the release notes accompanying this version of NMIT. These notes
About Mobile
Internet Toolkit
Feedback Lets you send any comments you have about this product to Nokia
Opens the
in Adobe Acrobat Reader.
Launches Nokia Update Manager, a small application that enables you to
easily download and install Forum Nokia software. An Internet connection
is required to use Update Manager.
include version information, changed features, and unresolved issues.
Opens the About Mobile Internet Toolkit dialog, which provides NMIT
version information.
Corporation if you have an active Internet connection.
Nokia Mobile Internet Toolkit 4.1 User’s Guide (this manual)
Navigate Using Keyboard Shortcuts
NMIT provides keyboard shortcuts you can use to navigate and perform operations. These are key
combinations that can be used in place of normal mouse operations and are particularly useful if
you prefer using the keyboard to using the mouse.
• NMIT Windows shortcuts. Use the Windows shortcut ALT+TAB to move input
focus from one window to another, for example, to move from the NMIT main
window to a “torn off” NMIT editor window. Within the Multipart Editor, use TAB
to move input focus from one header field to another. Use CTRL+TAB moves the
input focus between window elements such as controls or buttons that you may wish
to select.
• You can tell that buttons have the input focus by noting an indented rectangular
border; text-entry fields are highlighted.
20 Nokia Mobile Internet Toolkit User’s Guide
Page 23
Navigate Using Keyboard Shortcuts
• Menu item shortcuts. To choose a menu item, press the ALT key while
simultaneously pressing the letter that is underlined in the menu item name. Once a
menu is opened, you can select another item within that menu by pressing the ALT
key in combination with the UP or DOWN arrows and then choosing ENTER.
A key combination is executed by holding down the key preceding the plus sign (+) and then
pressing the key following the plus sign. In effect, pressing two keys simultaneously.
Keyboard Shortcuts for NMIT Windows
Key Combination Description
ALT+TAB On Windows operating systems, moves focus from one Windows process
to another. In NMIT, moves focus from the main NMIT window to a
phone SDK or to a torn-off NMIT window.
ALT+x On the menu bar, opens the menu whose name contains an underlined x
(x
).
Within a menu, chooses the menu item whose name contains an
underlined x (x
TAB Within a window, navigates forward from one control or field to the next,
eventually looping back to the starting point. The current position (or
“focus”) is indicated by a dotted rectangle.
In an editing area, inserts a tab character.
).
CTRL+TAB Within a window, moves focus from inside an editor window to the control
buttons and fields on that window but outside the editing area.
SHIFT+TAB Within a window, navigates backward from one control or field to the
next, eventually looping back to the starting point. The current position
(or “focus”) is indicated by a dotted rectangle.
ENTER On a button, executes either the default button function or the function
having the active focus.
In an editing area, enters a carriage return character.
ALT+ENTER Within a window, displays the application menu allowing you to move,
size, resize, minimize, maximize, or close the window.
<space bar> On a button, executes the button function.
On a check box, pressing <space bar> checks the button if it is currently
unchecked or unchecks it if it is currently checked.
When focus is in an editing area, enters a space character.
<Left arrow> When a main menu item is open, moves the focus to the main menu item
to the left.
<Right arrow> When a main menu item is open, moves the focus to the main menu item
to the right.
<Up arrow> On a menu or one of its menu items, moves the focus to the previous item
on that menu.
Nokia Mobile Internet Toolkit User’s Guide 21
Page 24
Getting Started
Keyboard Shortcuts for NMIT Windows
Key Combination Description
<Down arrow> On a menu or one of its menu items, moves the focus to the next item menu
on that menu.
PgUp In an editor window, scrolls one page up.
PgDn In an editor window, scrolls one page down.
Sending comments to Nokia Corporation
You can send any comments you have about this product to Nokia Corporation if you have an
active Internet connection by selecting Help>Feedback. Selecting this option automatically opens
http://www.forum.nokia.com/feedback where you can enter your comme
nts.
22 Nokia Mobile Internet Toolkit User’s Guide
Page 25
Browsing Editors
This manual defines a
browsing
editor as an editor used to create content for display by the
browser application of a phone SDK. Note that phone SDKs also have inbox-type applications for
handling Push messages and MMS messages. You do not “browse” the Push and MMS content
types; these are delivered to you.
Browsers on many phone SDKs can display both WML and XHTML text documents, as well as
other content types that are referenced by or invoked within these documents, such as WBMP or
GIF images, or, in the case of WML documents, WML Scripts. All of these content types, then,
are destined for display or handling by the browser application of a phone SDK, and this manual
groups the editors for these content types together under the category “browsing editors.”
Within the category of browsing editors may be found a set of editors that employ a validating
parser to check that text content is valid. These
validating editor
s are designed for content that
(1) is XML-based and uses a DTD or (2) employs hierarchical text elements that can be validated
for syntax (such as CSS). The two NMIT browsing editors that are not validating editors are the
WML Script and WBMP Image editors. The following table summarizes these distinctions among
NMIT’s browsing editors.
Validating Editor Validatable Content Uses DTD
WML 1.3 Deck
XHTML-MP
XHTML-MP+CHTML
Ye s Ye s
Ye s Ye s
Ye s Ye s
Select DTD From List... Yes Yes
CSS
WML Script
WBMP Image
Nokia Mobile Internet Toolkit User’s Guide 23
Ye s N o
Ye s N o
No No
Page 26
Browsing Editors
You can use any of the following methods to open a validating editor, once you have in mind the
content type you wish to create:
• Choose File>New and then select one of the following icons in the Available Content
Ty pe s dialog.
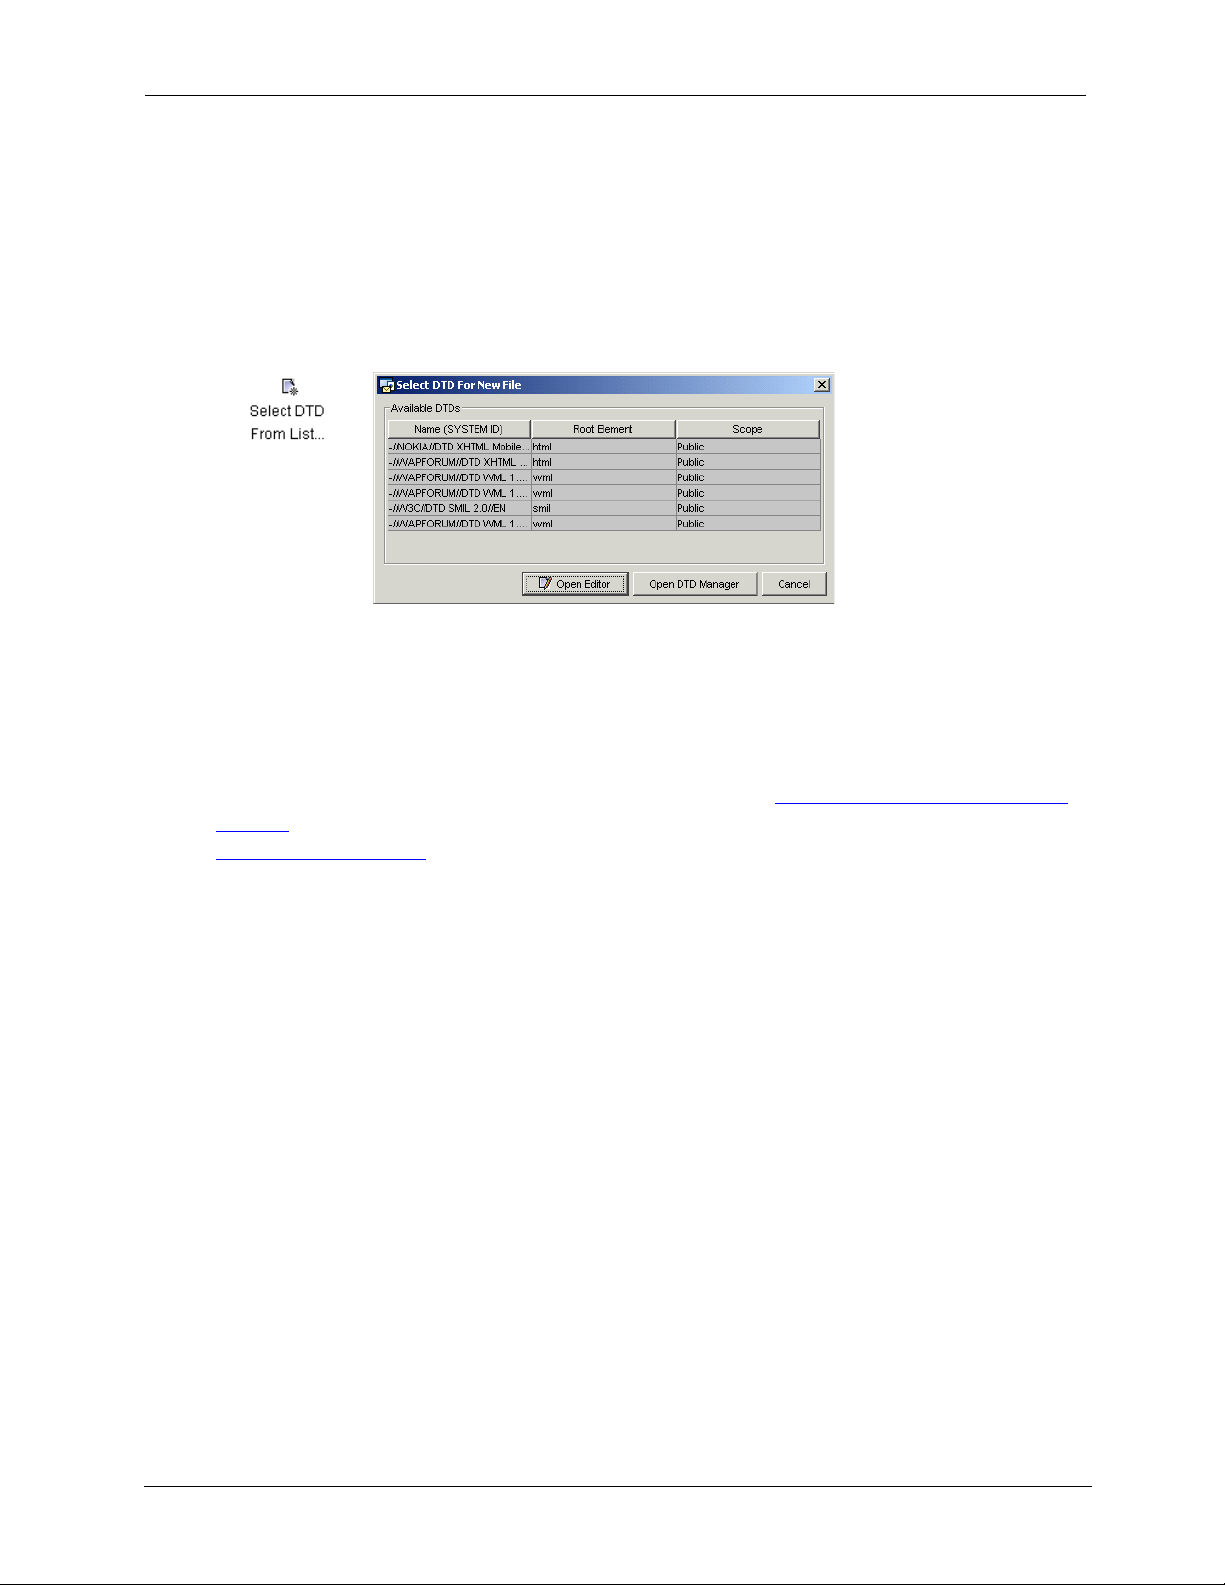
• Choose File>New, choose the Select DTD From List icon (in the left column below),
select the desired DTD from the list showing all currently installed DTDs, and then
choose the Open Editor button:
• Choose Tools>DTD Manager, select a DTD from the list (same list as in (2) above) in
the Available DTDs region, and choose Open Editor.
• Choose File>Open and then choose an existing file with one of the following types:
wml, wmls, xhtml, html,wbmp,gif,
or
css
.
Editors for structured content types are functionally similar in the editing facilities they provide.
For this reason, they are described together in the section titled Browsing Editors for Validatable
Content. The WBMP Image and WML Script Editors are described separately in the section titled
Other Browsing Editors.
Browsing Editors for Validatable Content
Recall that a distinction is made between validatable content that is based on a Document Type
Definition (DTD) and validatable content which is not. (CSS is the single content type that does
not use a DTD.)
This section discusses first the editing features common to all validating editors; secondly, those
features used only when editing DTD-based content types; and then concludes with separate
discussions of each validating editor.
24 Nokia Mobile Internet Toolkit User’s Guide
Page 27
Browsing Editors for Validatable Content
Validating editors are editors that operate on any of the following structured content types:
• WML 1.3 Deck
• XHTML-MP
• XHTML-MP+CHTML
• CSS
• SMIL Editor (The SMIL content type is DTD-based, and SMIL editor features are
identical to those of the browsing editors for text content except for the lack of a
Show button to display content on a phone SDK. It is discussed in the Messaging
Editors chapter instead of here because it is not used to create browsable content.)
• Any content type opened using the Select DTD From List menu option (File>New
and then the Browsing tab).
Editing Features For Validatable Text Content
This section describes editing features for validating editor.
Editor Window Layout
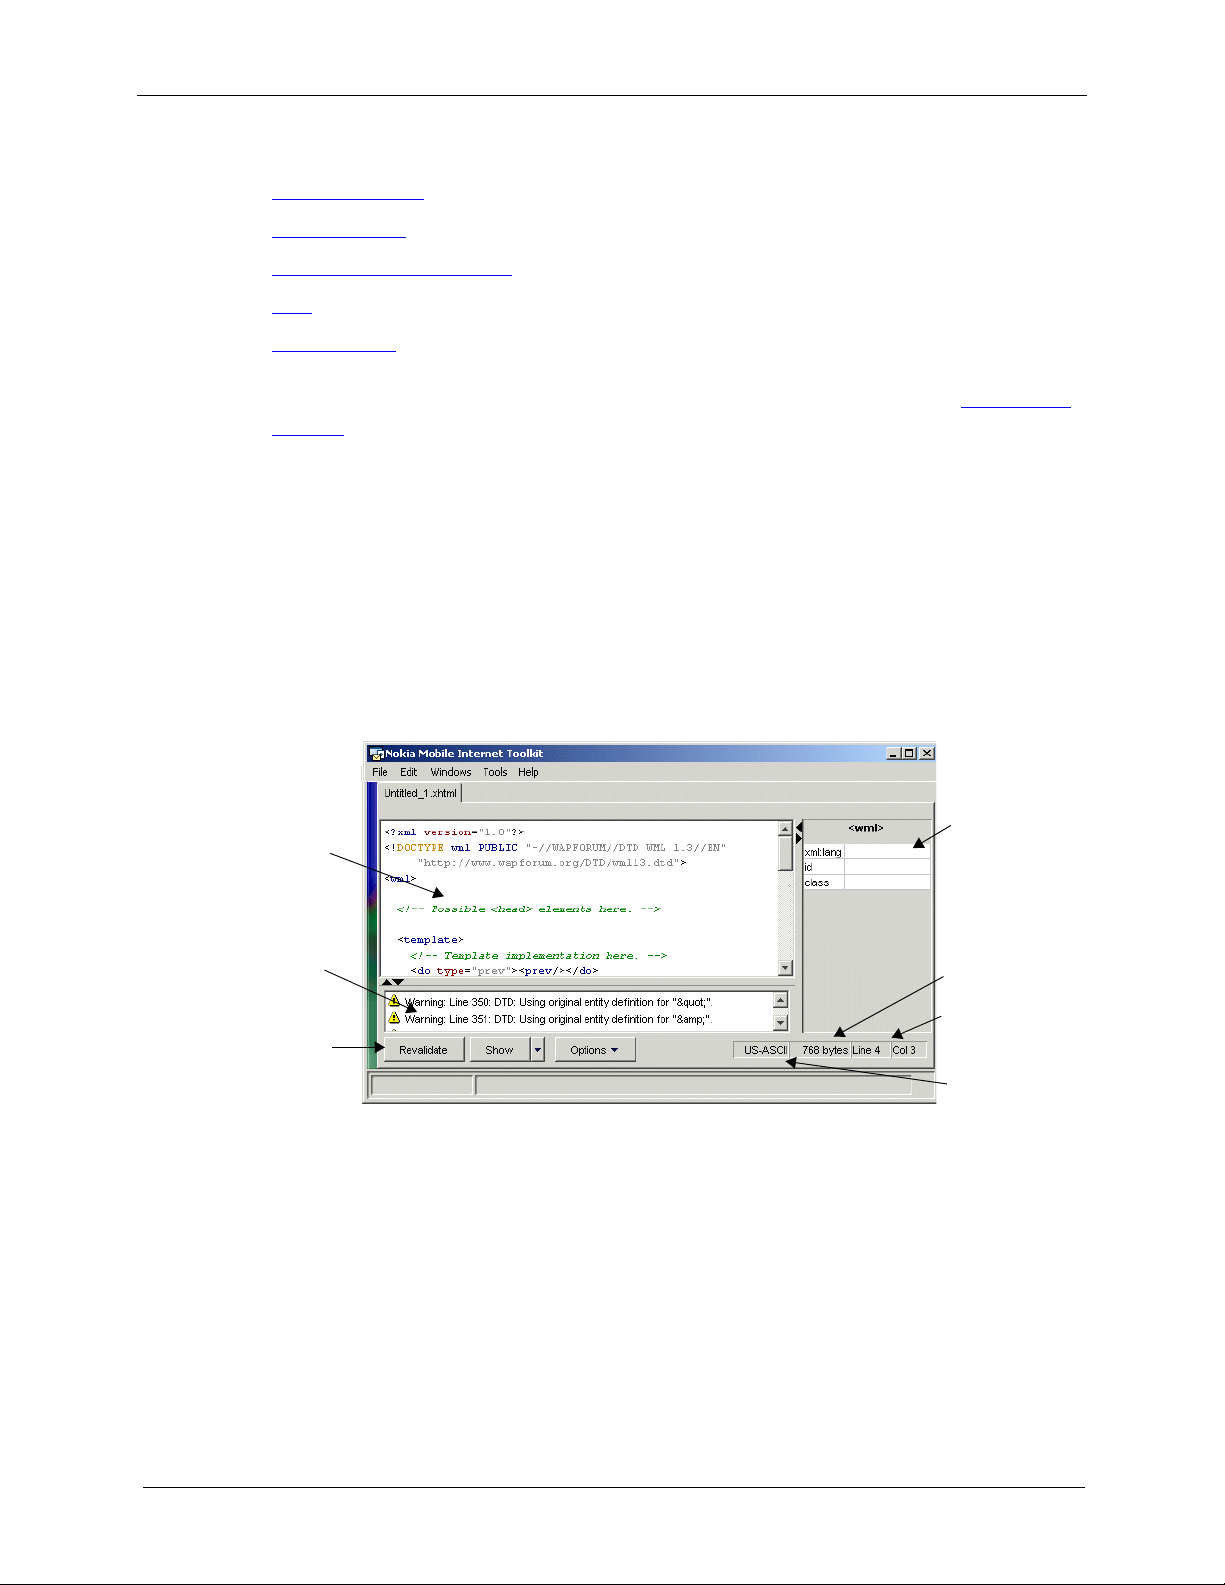
The following figure shows the major regions in a validating editor:
Text Editing
Region
Message
Region
Active
Buttons
Note the following with respect to the above figure:
• Enter text in the text editing region. The NMIT editor displays a template for the
content type you have chosen when you create a new file.
• Use the side panel to insert valid attributes for the element highlighted by the cursor
in the text editing region and to modify attribute values.
Side Panel
Document
Size
Cursor
Position
Document
Encoding
• The message region displays validation messages when you save, Show, or Va li d a te a
document.
• Use the active buttons to validate content, show the document on phone SDKs, or set
editing options.
Nokia Mobile Internet Toolkit User’s Guide 25
Page 28

Browsing Editors
• The document summary displays details about the current document.
Initial Content of the Document Editing Region
Each of NMIT’s supported XML-based content types has an associated template. Therefore,
when you open an XML-based content type, the editor is initialized with the associated document
template. It is within this template that you begin entering your content. All required elements are
already inserted in the editor display, and comments suggest where you might wish to add various
new elements.
For an NMIT editor to open an XML-based content type, a unique template for that content type
must be installed. NMIT does provide a template file for the pre-installed DTD-based content
types. If you wish to install your own DTD, you must provide an associated template file or have
NMIT auto-generate a template file. These operations are performed using NMIT’s DTD
Manager.
Note that when you open the CSS text editor, which is not XML-based, the text editing region of
the editor window displays a sample CSS style sheet. This is helpful in that it shows proper syntax
and it may already include tags that you had planned to use.
Color Coding
A validating editor automatically differentiates among recognized data entered. For example,
element names are displayed in blue; attribute names, in red; attribute values, in gray; and so on.
This makes it easy to visually “parse” the displayed content. Note that colors might vary
depending on the configuration of your monitor.
Mouse Operations
The following table describes the possible mouse operations on text in the text editing region:
Single click • Sets the insertion point.
• Upon an element name, displays permissible attributes in the side
panel.
• Upon an attribute name, highlights that attribute in the side panel.
Double click • Selects a word, where a word consists of the characters bounded by
space or special characters such as the “<“ and “>”.
• Upon element or attribute names, also highlights these in the side
panel.
Triple click Selects an entire line.
26 Nokia Mobile Internet Toolkit User’s Guide
Page 29

Browsing Editors for Validatable Content
Right click Displays a pop-up menu, whose options vary depending upon whether the
document content type is XML-based or CSS. For example:
RIGHT-CLICK ON DTD-BASED CONTENT
XML Displays permissible attributes that can be inserted at the cursor position.
See the next section titled XML Element and Attribute Insertion Features
Undo Undoes the previous text editing operation.
Redo Performs again the last text editing operation.
Cut Cuts the selected text to the Clipboard.
Right-Click on CSS Content
.
Copy Copies the selected text to the Clipboard.
Paste Pastes the contents of the Clipboard at the insertion point.
Show on
Phone SDKs
Revalidate For an XML-based document, checks that the document is well-formed
Close Closes the document. You will be prompted to save as yet unsaved
Tea r O ff Removes the document from the NMIT main window and places it in a
For XML-based documents only, displays the current document on the
currently running phone SDKs. Only phone SDKs you have launched
using the SDK Control Panel will receive the document content.
Because CSS documents cannot be independently displayed, this option is
unavailable for CSS documents.
(correct syntax) and strictly conforming to the DTD.
For a CSS document, checks that the document is well-formed (correct
syntax).
documents.
separate, independent window.
XML Element and Attribute Insertion Features
When editing an XML-based document, you need to know which elements, if any, are valid child
elements of any given element. As well, you need to know which are the valid attributes that may
be inserted within an element. Then, once you have determined which element or attribute you
would like to insert, it is helpful to have these inserted for you automatically, using correct syntax
and spacing. NMIT provides the following features in support of this:
• XML popup menu option
• CRL+K key combination
Nokia Mobile Internet Toolkit User’s Guide 27
Page 30
Browsing Editors
• Side panel
All of these features are available for XML-based documents; however, the XML popup menu is
not available for CSS documents. XML-based documents must be valid, however, because menu
options displayed are derived from the rules inherent in the DTD. You must successfully revalidate
your document before using these automatic insertion features because revalidation maps the
cursor text position (where the item gets inserted) to the XML logical structure of the document.
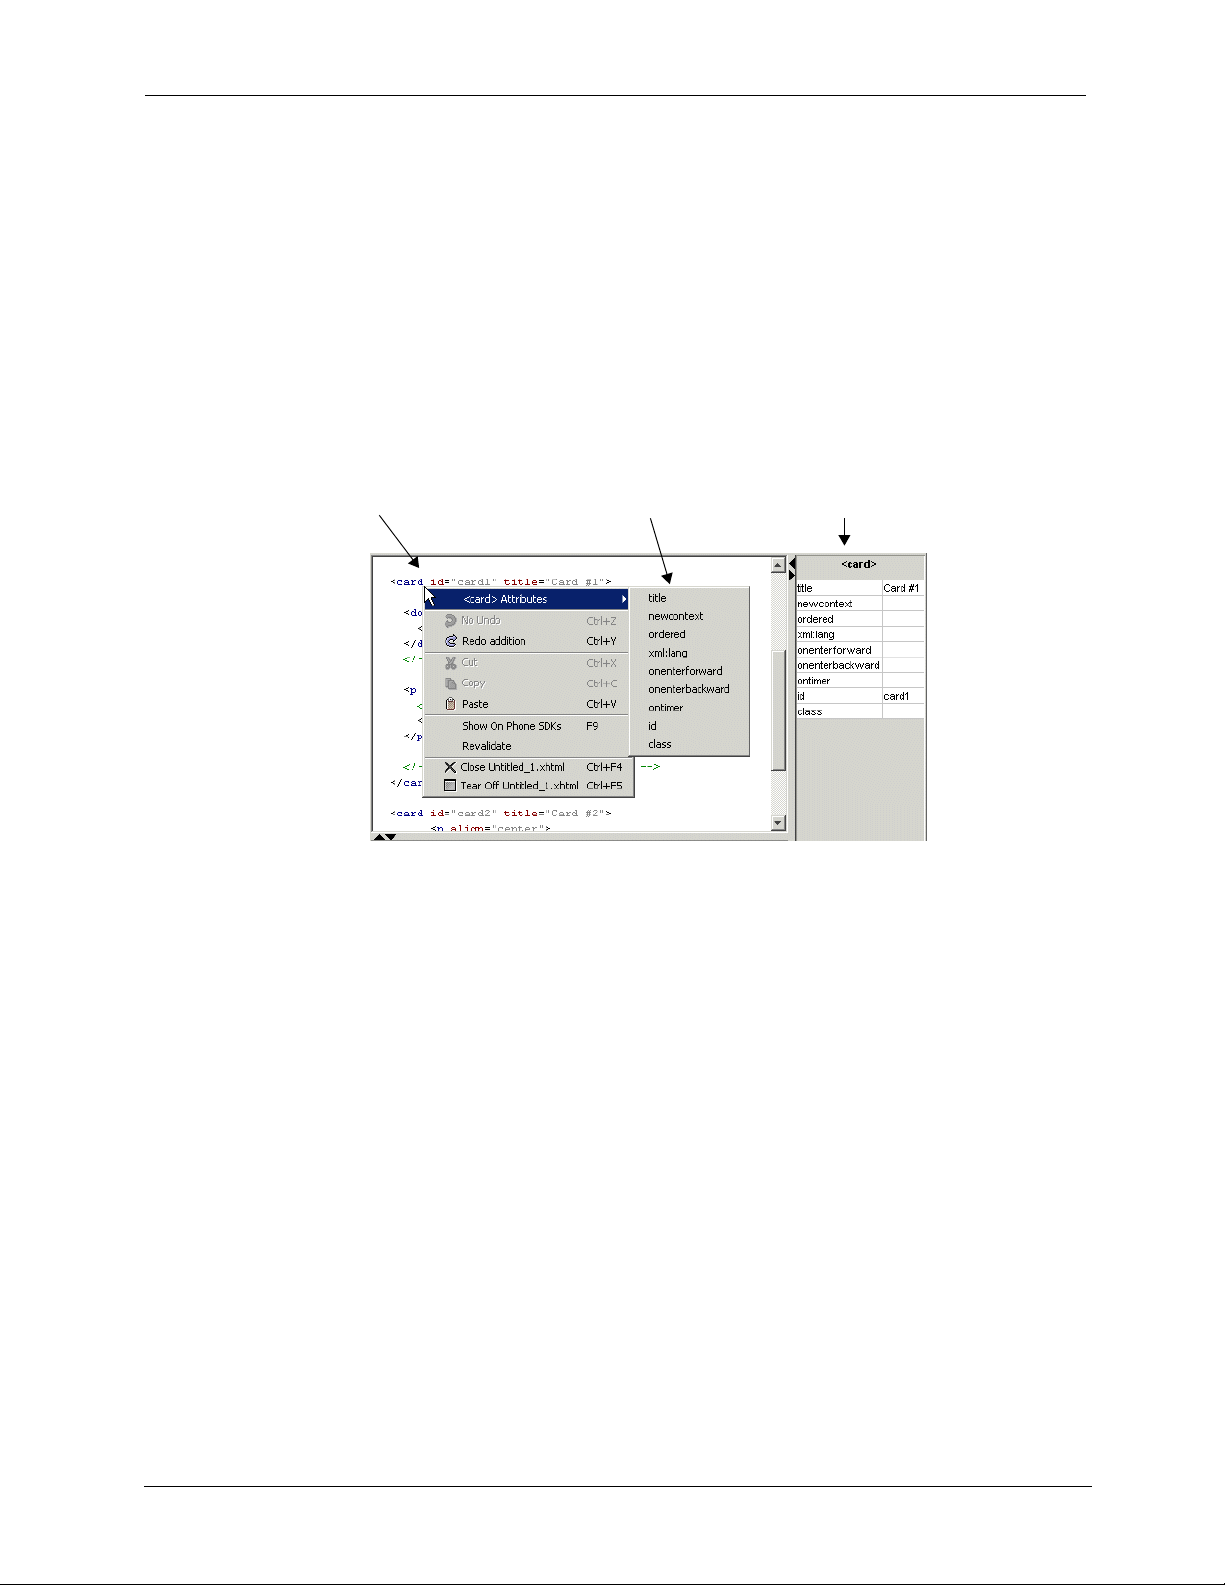
To use any of the above features, first position the cursor by clicking within the current document.
For example, in the following figure, right-clicking on the
displays a popup menu within which the top
when selected. At the same time, legal attributes of the
submenu and in the side panel at the far right:
Right-Click on <card>
element or press CTRL+K
<card>
XML
menu option changes to
<card>
<card> attributes displayed
in sub-menu
element in the document
<card> Attributes
element are displayed both in a
<card> attributes displayed in
side panel
Note that pressing
right-clicking and choosing the
CTRL+K
within the
XML
submenu option.
<card>
element results in the same popup menu as does
To insert an attribute: (1) simply choose it from the submenu using the mouse or (2) use the Up
and Down arrow navigation keys to highlight it and then choose
class
in the figure above, choosing the
occurs within the opening and closing brackets of the
attribute inserts the string
<card>
Enter
class=“ ”
element.
. So, in the example shown
and the insertion
Both the XML menu and CTRL+K functions operate with sensitivity to cursor position. In the
following example, the
below the line containing the
position is outside of the opening and closing brackets of the
would be appropriate) but is inside of the opening
XML
menu option is selected with the cursor position on the blank line
<card>
element shown in the earlier figure. In this case, the cursor
<card>
<card>
and closing
element (where attributes
</card>
tags where child
28 Nokia Mobile Internet Toolkit User’s Guide
Page 31

Browsing Editors for Validatable Content
elements would be appropriate. Consequently, valid child elements rather than attributes are
displayed in the submenu:
Note that in the above figure, the side panel to the right is blank, as no attributes may be validly
inserted at the insertion point.
The following are guidelines for determining whether attributes or elements are displayed in a
popup menu, as well as whether the side panel is active:
• Elements are displayed if the cursor is positioned anywhere between the opening and
closing tags of an element which has valid child elements (between the
</card>
tags, for example).
<card>
and
• Attributes are displayed if the cursor is positioned within the delimiters of an opening
element, whether or not that element has valid child elements (for example, within
the
<p>
or
<head>
tags. (but not within the brackets of the closing
</p>
tag).
For XML-based documents, the side panel is displayed whenever the cursor is positioned such that
attributes, and not elements, can be validly inserted (see the list of rules above). When attributes
cannot be legally inserted at the cursor position, the side panel is blank. For CSS documents, the
side panel is always available and displays the list of valid CSS properties available for mobile
devices.
Attributes and attribute values are displayed in the side panel in hierarchical fashion. Attributes
are listed in eight categories, each of which when expanded displays the attribute names within
that category. When an attribute name is expanded, its valid attribute values are displayed. The
following figures depict this hierarchical structure:
Nokia Mobile Internet Toolkit User’s Guide 29
Page 32

Browsing Editors
When the side panel is active, the element name of the current element (the element in which the
cursor is positioned) is displayed at the top. For example, the
element in the figure displayed below:
The side panel is displayed as a two-column table where the first column displays valid attribute
names and the second column displays the values currently assigned to the attributes. An empty
cell in the right column indicates that no value is currently assigned to that attribute, that is, that
the attribute is absent from the document.
If you click in a cell in the second column, it becomes an active text-entry box into which you can
enter a value for the attribute in the adjacent column. For example, clicking in the column adjacent
to the
xml:lang
<html>
element is the current
allows us to enter the value “en” as displayed in the figure below.
To insert into the document the attribute with the newly entered value, choose
Enter
or click
anywhere in the first column. This is shown in the figure below:
You can navigate up or down the list of entries in the side panel by using the Up and Down arrow
keys.
If you change your mind and do not wish to insert any attributes, click anywhere in the text editing
region to clear the side panel.
Active Buttons
This section describes the active buttons along the bottom of the text editing window. Which
buttons are displayed depends upon the content type of the current document. For example, when
Show
a CSS document is the current document, the
possible to show this document on a phone SDK. Subsequent sections describe each button.
button is not displayed because it is not
Revalidate
Choose the button to validate the current document. Validation is done by NMIT’s
validating parser. Using the
Validate to DTD
check box menu option in the
Options
button,
you can set the parser to validate against a DTD or not. The following is a brief discussion of
validation, what it involves, and how it can be applied to documents of various content types.
30 Nokia Mobile Internet Toolkit User’s Guide
Page 33

Browsing Editors for Validatable Content
A
well-formed
can be processed unambiguously by the software, whether or not the document contains a DTD
document is a document that conforms to certain syntactical rules and therefore
.
Both CSS and some HTML documents can be validated for well-formedness, though neither has a
DTD. Likewise, documents that do contain DTDs, such as the WML, XHTML, and SMIL
content types, can also be tested only for well-formedness. You could, for example, create a brand
new element, insert it into a WML document, and, so long as it was specified with correct syntax,
validate it successfully for well-formedness despite the fact that it was not defined within a DTD.
A
strictly conforming
document is one that is (1) well-formed (as described above), (2) contains
only elements, attributes, and attribute values as specified in the DTD, and (3) contains these only
in the correct locations within the document. The parser may fail a document in a test for validity
against the strictly conforming standard if, for example, text was entered at an improper location,
an attribute name not specified in the DTD was used, or a child element was specified outside of
its parent element. To test that a document is strictly conforming, ensure that the
DTD
check box is checked, and then choose the
Revalidate
button.
Validate to
To test a document for well-formedness, ensure that the
button) is unchecked, then choose the
Revalidate
Validate to DTD
check box (
Options
button. Testing for well-formedness is
important for CSS documents and for HTML documents that you might wish to convert to
XHTML. When converting to XHTML, for example, the first step might be to ensure that the
document is well-formed, and after that to begin making it strictly conforming by replacing
nonstandard elements and attributes with conforming XHTML elements and attributes.
Nokia Mobile Internet Toolkit User’s Guide 31
Page 34

Browsing Editors
Show
Options
Causes the current document to be displayed on the phone SDKs
currently checked in the SDK Control Panel. Note that you must
first launch a phone SDK before sending a document to it.
Also note that, for WML documents, the Show button has no
drop-down arrow because it cannot be displayed in a browser (as
can XHTML documents) but rather only in a phone SDK.
Clicking the narrow rectangle to the right of the Show button
displays a drop-down target selector offering two choices:
• Show on Phone SDKs. Sends an XHTML document to all
selected phone SDKs; this is the same as simply choosing the
Show button.
• Show in Browser. Sends an XHTML document to the
default web browser for your computer.
Choosing the Options button displays the default settings in
effect for all XML-based and CSS editors (WML, XHTML,
SMIL, CSS).
These default options are specified in the Editor Preferences tab
(Edit>Preferences).
The purpose of the Options button is to enable you to override
these default options for the current document. Individual
options are described below.
32 Nokia Mobile Internet Toolkit User’s Guide
Page 35

Browsing Editors for Validatable Content
Output Encoding Choose the character encoding to be used the next time that
NMIT saves the current document to disk. A document is saved
to disk whenever you explicitly save it or when you choose Show
to display the document on a phone SDK.
You must be sure that a character encoding that you choose here
is identical to the character encoding specified within the
document itself, if one is specified in the document. Within an
XHTML document, for example, character encoding may be
specified as the value of the
charset
attribute within the XML
prologue on the first line.
Typically, the document character set for XML and WML is the
Universal Character Set of ISO/IEC-10646. This character set is
usually identical to Unicode 2.0. However, any character
encoding ("charset") that contains a proper subset of the logical
characters in Unicode may be used. The list of NMIT-supported
encodings is shown in the radio button list (see left).
By default, NMIT editors save the document in the same
encoding used to read in the document (if you opened the
document) or in UTF-8 if you created a new document and you
make no selection in this radio button list.
For additional information, see the section Displaying a Non-
UTF-Encoded Document on Phone SDKs.
Highlight Active Tag Check this box if you prefer the editor to highlight the element
in which the cursor is positioned; the highlight is a light
background color.
Revalidate Automatically Check this box if you wish the current document to be checked
for validity automatically, roughly at intervals of five seconds
after text entry has stopped. If checked, you do not need to
regularly use the Revalidate button to validate the document you
are editing.
If unchecked, no automatic validation occurs. Note that
highlighting of document content depends on validation.
Validate to DTD If checked, the document is validated against the DTD that it
references.
If unchecked, the document is validated for well-formedness
only, and not against the DTD.
The section describing the Revalidate
button provides a full
discussion of validation.
Show Warnings If checked, all three categories of messages (informational,
warning, and error) are displayed in the message region.
If unchecked, only error messages are displayed.
See the section Message Region
Nokia Mobile Internet Toolkit User’s Guide 33
for additional details.
Page 36

Browsing Editors
Document Summary Bar
The document summary bar to the right of the active buttons along the bottom of the editing
window displays summary details about the current document, as shown below:
The summary details provided for the current document are as follows:
• The character encoding, UTF-8 in the above figure.
• The size of the document in bytes. For encoded content types, such as WML, the
encoded content size is given. For unengaged content types, such as XHTML and
CSS, the size is given for the text length.
• The line and column number in which the cursor is presently positioned.
Message Region
The message region is an adjustable screen region below the text editing region wherein messages
relating to the validation and compilation of the document are displayed. Messages are displayed
whenever you choose the
Revalidate
or
Show
buttons or whenever automatic validation occurs.
In the following figure, a portion of a WML document is displayed, the
Show
button has been
chosen, and three messages relating to the compilation of the document are displayed:
Messages may have any of the following three severity levels:
• Informational. These can be turned off using the Options button.
• Warning. These can be turned off using the Options button.
• Error. These are always displayed regardless of the options settings.
Double-click an error message to bring the cursor to the line within the document where the error
was encountered; the line will also be highlighted, whether or not you have selected the
Active Tag
option in the
Options
menu.
Highlight
Note that messages relating to an error within the document always indicate the line number on
which the offending item was encountered. (The second error message in the figure above refers to
34 Nokia Mobile Internet Toolkit User’s Guide
Page 37

Browsing Editors for Validatable Content
line 12.) Because of this, you may wish to specify that the document itself display line numbers
(
Edit>Preferences
).
Validating the Same Content Against Different DTDs
You can validate a document against other DTDs that are based on the same root element. For
example, a
the root element to be
Assume you are working on a WML document that references the WML 1.3 DTD. To check
whether the document is also valid against a WML 1.2 DTD, follow this procedure:
wml
file may be checked for validity against any of the three installed DTDs that specify
<wml>
.
1 Place the cursor anywhere within the
DOCTYPE
declaration of the current document. In
the side panel, the DTD drop-down list is displayed.
2 Select the desired DTD from the DTD drop-down list. That DTD is substituted for
the existing one within the document.
3 Choose the Revalidate button. If there are no errors, the document is valid for the
substituted DTD.
The following figure shows a WML document with the DTD drop-down list:
Note that nothing in the document is modified except the
DOCTYPE
declaration. Also, you should
revalidate the document whenever switching from one DTD to another.
Displaying a Non-UTF-Encoded Document on Phone SDKs
The following procedure describes how to open and display an XML-based document that is
encoded in a format other than UTF-8 or UTF-16.
1 Within NMIT, choose Edit>Preferences to display the General tab in the Preferences
dialog. In the Default Input Text Encoding list, select the encoding that corresponds
to that used in the document you wish to open and display.
2 Choose File>Open to open the document in an NMIT editor.
3 Choose the Options button and then choose the UTF-8 radio button as the value for
the Output Encoding.
4 Edit the XML prologue in the document (the first line), if necessary, so that the
encoding
<?xml version=”1.0” encoding=”utf-8”?>
attribute specifies a value of
UTF-8
; for example:
5 Press the Show button to display the document on the selected phone SDKs. NMIT
converts the encoding when it saves the document prior to its display on the phone
SDKs.
Nokia Mobile Internet Toolkit User’s Guide 35
Page 38

Browsing Editors
XHTML-MP
XHTML-MP
The XHTML-MP content type references the XHTML Mobile Profile 1.0 DTD. This DTD is the
generally recognized standard DTD for XHTML content for mobile devices. Nokia recommends
using this content type when creating XHTML-based content. The required elements of this DTD
are described below.
The first XML statement
second
<!DOCTYPE>
The third element is
<?xml version=”1.0”?>
is required by all XML documents. The
statement specifies the DTD Public ID and the URL of its Internet location.
<html>
, and the fourth is
<head>
. The last required element is the
<body>
element within which you enter the bulk of your document content.
Editing features available while editing XHTML-MP content are described in the section titled
Editing Features For Validatable Text Content.
36 Nokia Mobile Internet Toolkit User’s Guide
Page 39

XHTML-MP+CHTML
XHTML-MP+CHTML
The
XHTML-MP+CHTML
plus the following additional ones:
Browsing Editors for Validatable Content
content type contains all XHTML Mobile Profile DTD elements
<center> <dir> <marquee> <font>
<menu> <plaintext> <blink>
The
XHTML-MP+CHTML
content type contains all XHTML Mobile Profile DTD attributes
plus the following ones:
href=”tel:<phone-number>”
accesskey
In the
<a>
element, the
scheme. When the link is selected, the number
specified in
phone book, as the user chooses.
In the
an access key shortcut.
tel:
<a>, <textarea>
href
attribute accepts the
can be directly dialed or stored in the
, and
<input>
elements, creates
Editing features available while editing XHTML-MP+CHTML content are described in the
section titled Editing Features For Validatable Text Content
.
tel:
Nokia Mobile Internet Toolkit User’s Guide 37
Page 40

Browsing Editors
WML 1.3 Deck
WML Content Editor
By default, the NMIT WML editor references the WML 1.3 DTD. This DTD is the generally
recognized standard DTD for XHTML content. The required elements of this DTD are described
below.
The first XML statement
second
<!DOCTYPE>
The third required element is
<?xml version=”1.0”?>
is required by all XML documents. The
specifies the DTD Public ID and the URL of its Internet location.
<wml>
. Within the
<wml>
element, the
<head>
and
<template>
elements are optional.
DTDs for WML versions 1.1 and 1.2 are also registered for use in NMIT editors, and you can
change the WML 1.3 DTD to 1.1 or 1.2 by placing the cursor in the
<!DOCTYPE>
declaration and
selecting either of these from the DTD drop-down selector in the side panel, as described in the
section titled Validating the Same Content Against Different DTDs.
Editing features available while editing WML content are described in the section titled Editing
Features For Validatable Text Content.
Note: The WML compiler does not support the following encodings: Windows-1252, ISO-8859-
4, ISO-8859-8, GBK, BIG5 or Shift-JIS. So, if any of these are used in your WML
document, choosing Save Binary causes a failure with compilation errors.
CSS
Wireless CSS is a style sheet language designed specifically for mobile devices; it is a subset of
Cascading Style Sheets Level 2
to use style sheets to apply formatting to XHTML documents.
You use the CSS Editor to create an external style sheet (a CSS file) that contains formatting rules
to be applied to an XHTML document. You then reference the CSS file within the XHTML
document using the
created the CSS file
<link>
style.css
(CSS2). Many browsers in mobile handsets have the capability
element within the
<head>
element. For example, assuming you have
, your XHTML document might contain the following code:
38 Nokia Mobile Internet Toolkit User’s Guide
Page 41

Browsing Editors for Validatable Content
<head>
<link rel=”stylesheet” href=”style.css” > </head>
Because the rules in a CSS style sheet apply to elements or a group of elements within the XHTML
document, modifying a style sheet is an easy way to change the appearance of that document. The
separation of content from formatting makes it possible to display a single XHTML document on
multiple phone handsets or SDKs, no matter how different their display sizes or other
characteristics may be. This is done by simply creating a separate CSS file for each output handset
or SDK. In fact, using CSS, one could change the look and feel of an entire mobile portal simply by
modifying its CSS file, leaving the content itself unchanged.
The CSS editor is shown in the following figure
Note the following with respect to the text editing region in the above figure:
• The following color coding is used in the text editing region:
Green Comment The sample style sheet contains a comment showing the
proper syntax for comments. It also contains information
about CSS syntax.
Blue Selector A selector is either (1) an XHTML element name or (2) a class
attribute name. Class attribute names are preceded by a
period (.)
The selector specifies the entity to which the CSS property
should be applied.
Red Property CSS property name.
Tan Property value CSS property value.
Nokia Mobile Internet Toolkit User’s Guide 39
Page 42

Browsing Editors
• The following color coding is used in the CSS Property Palette region:
Black Property
category
Red Property CSS property name.
Blue Property value CSS property value.
<Gray> Property value Property value defined by the CSS specification. Some
Name of a property category. These names are not part of the
CSS specification but are used as a way to organize the many
property names to make them easier to locate.
property values are not CSS keywords but rather text or
number values that you must enter. For example, you enter
the name of a font family in the
<family-name>
the CSS Property Palette region, any value within angle
brackets (“<“ and “>”) is a value that you type in rather than
select.
value for the
font-family
property name. In
• A sample style sheet is displayed in the text editing region. This style sheet is included
simply to give an idea of the correct syntax for entering rules (see the section below
titled CSS Style Sheet Design and Syntax). You could, therefore, safely delete the
sample style sheet and start from scratch; or, only keep those XHTML elements you
intend to modify, deleting the rest.
• Right-click popup menus, the message region, active buttons, and document
summary areas of the editor are described in the section Editing Features For
Vali da ta bl e Te xt Co n te nt .
Inserting CSS Property Values
The first step in formatting a particular element is to type the selector name, followed by the
required braces. Then, once this syntactical structure is in place, you can enter formatting
properties for that element in the three ways described below.
1 Direct text entry. Within the braces, you can type in a property name, a colon (:), and
then the property value. This is the manual method and enables maximum control. It
may be helpful to use the CSS Property Palette to view the list of property values you
can select for the property you wish to specify.
2 CTRL-K Combination. Within the document editing window, with your cursor
positioned anywhere on a line containing a selector and within the required braces,
press CTRL+K to display a popup menu list of property categories.
From within the desired property category, navigate to the desired property and
property value by using the arrow keys or the mouse, and then press ENTER or click
the left mouse button. The selected item is inserted properly within the braces on the
line containing the desired selector.
40 Nokia Mobile Internet Toolkit User’s Guide
Page 43

Browsing Editors for Validatable Content
For example, in the following figure, the cursor is positioned in the document
window on line 5 (h1) when CTRL+K is pressed. Navigation to the
italic
value in
the popup menu is shown.
After releasing the mouse button, the CSS editor inserts the selected property and
property value within the braces on the line where the h1 selector is specified, as
shown below:
3 Property Palette.Within the document editing window, with your cursor positioned
anywhere on a line containing a selector and the required braces, explore the CSS
Property Palette region along the right of the CSS editor window.
• Click one of the property categories to display the available properties within a
property category.
• Expand the view of a property to view its available property values.
• Double-click a property value (or press Enter) to insert the property name and
value into the document at the cursor location.
For example, in the following figure, the cursor is positioned in the document
window on line 6 (on the line with selector
navigation to
the property/value pair
text
, then
color
color:purple
, then
purple
within the braces for selector
nav
). In the CSS Property Palette pane,
is shown. Double-clicking
purple
nav
.
inserts
Since the CSS language is not based on a DTD, there is no concept of a strictly conforming style
sheet. Therefore, the
Options
menu does not offer the
Validate to DTD
or
Show Warnings
options. Revalidation is done only to validate CSS syntax.
Nokia Mobile Internet Toolkit User’s Guide 41
Page 44

Browsing Editors
Any style can theoretically be applied to any document; however, mobile handsets or phone SDKs
may ignore unsupported styles.
CSS Style Sheet Design and Syntax
To create a usable style sheet for your XHTML document, you must first decide upon the
XHTML elements whose format you wish to control. This depends, naturally, upon which
XHTML elements you have used in your XHTML document. Then, you create a rule for this
selector using the following syntax:
selector { property: value; }
selector
property
value
In the simplest case, a selector is the name of an XHTML element (or group
of elements) to which the rule applies. Use a comma (,) to separate multiple
elements.
However, a selector can also be the value of an
id
or
class
attribute or other
more complex expression. In this case, a period precedes the selector name
as shown in the following line:
.p {font: courier new}
A property is a formatting element for which you can choose a value. For
example,
bolder
and
font-weight
. The following rule specifies that all
is a property, some of whose values are
<h1>
elements are to be
normal, bold
,
formatted using a bold font weight:
h1 {font-weight: bold}
You can specify multiple properties for a selector; to do so, use a semicolon
(;) to separate each property/value pair. For example, we can add a
h1
property value to the
h1 {font-weight: bold; font-size: large}
selector as follows:
font-size
All property/value pairs assigned to a given selector are enclosed within a
single set of braces.
You may assign one or more values to a property, though it is usually only
one. Use a comma to separate multiple values. When multiple values are
specified in a rule, the browser will use the first value that it can implement,
evaluating the rule from left to right. So, for example, a browser processing
the following rule will attempt to reduce the font size to 30% of the original;
if this is not possible, it will apply the
h1 {font-weight: bold; font-size: 30%,smaller}
smaller
value.
In CSS, subsequent rules override previous ones (assuming they apply to the same element); this is
the meaning of
document; then applies those in an external style sheet (referenced using a
the
<head>
cascading
in cascading style sheet. A browser applies its default style sheet to a
<link>
element); then applies styles on an element by element basis for each
element within
<style>
element
specified within the document body. So the processing order is (1) default browser style sheet, (2)
external style sheet, and (3) individual
42 Nokia Mobile Internet Toolkit User’s Guide
<style>
elements, in order of increasing precedence.
Page 45

CSS language rules can be complex. It is recommended to read the CSS specification for a
complete language description, as well as Nokia’s XHTML Guidelines, which provides guidelines
for the effective use of CSS styles. The latter document can be downloaded from Forum Nokia.
Other Browsing Editors
NMIT provides the following two editors for creating content that is used in support of WML and
XHTML content:
A WML Script editor for creating or modifying WML Script content, which is used to provide
scripting capability from within a WML document.
A WBMP Image editor for creating and editing WBMP images, and for converting images in GIF
and JPG format to WBMP format.
WML Script
The WMLScript Editor is opened whenever you take any of the following actions:
Other Browsing Editors
• Choose File>New>WMLScript.
• Choose File>Open and then choose a
wmls
file.
When creating a new document, the WMLScript Editor opens displaying a blank document as
shown below.
After coding your function, you compile the code by choosing the
After choosing
Compile
, a message region is opened beneath the editing window. Within this
Compile
button.
region, compile-time errors and status messages are displayed. You can hide these messages in
order to restore the full text editing window by choosing the
that, view the messages again by choosing the
View Messages
Hide Messages
button, and after
button, thus toggling between the
two views.
Nokia Mobile Internet Toolkit User’s Guide 43
Page 46

Browsing Editors
Executing a WMLScript Function
When your compilation is successful, you can test your function in the following ways:
• Open the WML document that calls the function defined in your WMLS document
and then display the WML document on the phone SDK by choosing Show.
All Nokia phone SDKs have a Diagnostics panel containing a Current view. Most
phone SDKs also support the viewing of variables within the Current view. Using this
view, you can view and modify variables used in your WML Script document and
then reload the content again.
Showing the WML document on the phone SDK enables you to see the results of both
your WML and WMLScript content on the phone SDK display itself, as well as to
observe the interaction between the two files in a browser context.
• Choose the Call button in the WMLScript editor. Choosing Call opens the Calling
Script dialog into which you enter a call to one of the functions defined in the
WMLScript currently displayed in the editor. Alternatively, you can type the call in
the text box to the right of the Call button and then press Enter.
Debugging With the tk_result Reserved Variable
The WML Script editor reserves the variable name
this useful (1) if the phone SDK to which you display content does not have a Diagnostics view
within which you can inspect variables or (2) you wish to test the value of a variable whose value
may change during the course of script execution, almost as you would test using a breakpoint.
You set the
tk_result
variable at the desired location within your WML Script document. Then
when you call the function, its value is displayed in the phone SDK.
The following example shows the use of the
mortgage.wmls
1 Open the
variable we wish to examine is the
var tmp = Float.pow((1 + mi), num_payments);
payment= principal * (mi * tmp / (tmp - 1));
2Enter a new
WMLScript sample file (available in the NMIT sample folder).
mortgage.wmls
WMLBrowser.setVar
document in the WML Script editor. The intermediate
tmp
statement just below the line containing the
variable we are interested in, as shown below. This statement will load the value of
tmp
at that point into the reserved
var tmp = Float.pow((1 + mi), num_payments);
WMLBrowser.setVar(‘tk_result’,tmp);
payment= principal * (mi * tmp / (tmp - 1));
tk_result
tk_result
tk_result
for your use in testing. You may find
reserved variable within the
variable, which is used as follows:
variable.
tmp
3 Call the
mortgage.wmls
payment
function, which is the name of the function defined in the
document, by entering the following in the Call text box and then
pressing Enter:
payment(‘tk_result’,200000,6,240)
44 Nokia Mobile Internet Toolkit User’s Guide
Page 47

Other Browsing Editors
4 The value of the
tk_result
variable is displayed in the phone SDK, as shown below.
We now know the value of the
Script document.
WML Script Editor Controls
Compiles the WMLScript source file (file extension
executable WMLScript file (extension
compiled file is removed when NMIT is closed.
After choosing Compile, compilation messages are displayed by default.
Choose Hide Messages to restore the full text editing window and View
Messages to open the message display again. These buttons allow you to
toggle between viewing and hiding messages.
tmp
variable at that point in the execution of the WML
wmls
) into an
wmlsc
) in the same directory. The
Choosing the Call button displays the Calling Script dialog. Enter the
name of the function to call, as well as any required arguments, using the
proper function call syntax, and choose OK to execute the call. NMIT
calls the function with the arguments you specified by generating a
dummy WML page and displaying it on the selected SDK.
Alternatively, enter the function call into the text box to the right of the
Call button and press Enter to execute the function.
The above two methods of entering a function to call are equivalent.
Display showing the current location of the cursor within the code
editing area. The location is given as a line and column number.
WBMP Image
The WBMP Image Editor is displayed whenever you take any of the following actions:
• Choose File>New>WBMP Image.
• Choose File>Open and choose a file of any of the supported file types: WBMP, GIF,
JPG. Note that, if you choose a file of type GIF or JPG, NMIT converts it to WBMP
format before displaying it.
Nokia Mobile Internet Toolkit User’s Guide 45
Page 48

Browsing Editors
NMIT always displays the
New Dimensions
dialog whenever you choose to create a new WBMP
image, as shown below:
A reasonably sized image for display on a phone SDK is 32 pixels by 32 pixels. Entering this value
and then choosing OK displays the WBMP Image Editor main window, shown below:
The WBMP Image editor opens with a highlighted drawing region, sized according to the
dimensions you entered in the
small, so you may wish to enlarge it by using the
New Dimensions
dialog. A 32 x 32 pixel drawing region is rather
Zoom
drop-down list box at the bottom. You
can choose to enlarge the drawing region as much as 5,000%.
The WBMP Image editor uses the following modal controls. Switch from one control to another
by selecting a Toolbar button.
WBMP Editor Toolbar Buttons
WBMP Editor Draw Modal Control
WBMP Editor Rescale Image Modal Control
WBMP Editor Resize Canvas Modal Control
WBMP Editor Toolbar Buttons
The Toolbar buttons are displayed horizontally along the top of the WBMP editor window. They
are divided functionally by space between each functional grouping. That is, there are the first pair
(
Undo
and
Redo
), a space, the next group (
Cut, Copy, Paste
), a space, the next (Select region), a
46 Nokia Mobile Internet Toolkit User’s Guide
Page 49

Other Browsing Editors
space, the next group (pixel, line, rectangle, ellipse), a space, and finally the two modal control
switch buttons.
Undo the previous action. You can undo the previous action, the action before
that, the one before that, and so on, by choosing Undo multiple times.
Undo the previous undo action; that is, Redo. You can perform multiple Redo’s.
For example, you can restore the state of your drawing after choosing multiple
Undo’s by performing the same number of Redo’s.
Cut the selected region and put it on the Clipboard. Use the tool to select the
region.
Copy the selected region to the Clipboard. Use the tool to select the region.
Paste the contents of the Clipboard into an active select region. Use the tool
to select the region into which to paste the content.
Selects a rectangular region.
To use the tool, click the left mouse button at one corner of the desired region,
drag the pointer to the opposite corner, and then release the mouse button. A red
rectangle indicates the region you selected. Choose Undo if you wish to try
again. To redraw a select region, click once to remove it and draw it again.
The Select tool is very useful:
You can remove anything in a select region by choosing Cut; so, for example, if
the select region bisected a circle, choosing Cut would create a semicircle.
You can paste the contents of the Clipboard into a select area.
Draws a free-form line or inserts a single pixel.
To draw a free-form line: click at the start point, drag, then release at the end
point.
To insert a pixel: position the cursor, then click and release.
Draws a straight line.
To draw a straight line: click at the start point and drag, then release at the end
point.
Draws a rectangle.
To draw a rectangle: click at one corner and drag, then release at the opposite
corner.
Draws a circle or ellipse.
To draw a circle or ellipse: click, drag in any direction to change shape or size,
then release.
Displays the WBMP Editor Rescale Image Modal Control
the window.
Displays the WBMP Editor Resize Canvas Modal Control
the window.
, at the right side of
, at the right side of
Nokia Mobile Internet Toolkit User’s Guide 47
Page 50

Browsing Editors
WBMP Editor Draw Modal Control
The Draw Modal control region, to the right of the WBMP Editor window, is the default modal
control. It is displayed when you first open the editor.
The Draw Modal control specifies settings for line weight and for fill color. These settings affect
the behavior of each of the four drawing tools: , , , and . If the Draw Modal control is
not displayed, choose one of the above drawing tools to display it.
Draw Modal Control Options
Sets the line weight and color.
To set the line weight: increase the line weight by clicking the up arrow,
thereby increasing the displayed numerical value; decrease line weight
using the down arrow. If you set a line weight of 0, the line appears
invisible but still exists.
To set the line color: choose black or white from the drop-down list
box.
Sets the fill pattern to be used when drawing a rectangle or ellipse.
To set the fill pattern: choose one of the five settings by choosing from
the drop-down list.
Choose a line weight and fill options before drawing a line or shape. The editor does not permit
the changing of options after a line or shape has been created. So, for example, if you want a
rectangle with a fill pattern, choose the fill pattern before creating the rectangle. You cannot use
the selector tool to set a fill pattern for an already existing shape.
WBMP Editor Rescale Image Modal Control
The Rescale Image control region, to the right of the WBMP Editor window, is displayed by
selecting the Toolbar button.
48 Nokia Mobile Internet Toolkit User’s Guide
Page 51

Other Browsing Editors
Rescaling an image is akin to stretching or shrinking a canvas upon which a figure is already
drawn. The figure stretches or shrinks along with the canvas, distorting the original figure in the
process.
Rescale Image Modal Control Options
To rescale an image: adjust the height and width values (in pixels) of
the existing image up or down, thus stretching or shrinking the image.
When you are satisfied with the result, choose Accept. If not, choose
Start Over.
Accept has the effect of storing (but not to disk) the currently adjusted
state of the canvas, establishing in effect a new starting point for further
adjustment.
Start Over returns the canvas to its state at the time you last chose
Accept. But you can only return to that point, never prior to it. The
Start Over control is active only if you have made a change since you
last chose Accept.
Remember to choose File>Save when you are done.
WBMP Editor Resize Canvas Modal Control
The Resize Canvas control region, to the right of the WBMP Editor window, is displayed by
selecting the Toolbar button.
The canvas is the image area you specified at the time of creation in the
Imagine the upper left corner of the canvas at position (0,0) on the (x,y) axes. The lower right
corner is at position (width, height), where these values are given in the modal control display.
Resizing an image differs from rescaling in that it does not distort the image (by stretching or
shrinking); instead, it involves adding or subtracting pixels to the edges of the canvas, thus
changing the size.
Resizing an image is useful in repositioning a drawn figure on the canvas or cropping the figure,
that is, removing a part of it. For example, you can reposition an image that is centered on the
New Dimensions
dialog.
Nokia Mobile Internet Toolkit User’s Guide 49
Page 52

Browsing Editors
canvas by increasing the canvas size on any edge. You can crop an image by decreasing the canvas
size on one edge (sort of like rolling up a window shade upon which an image is drawn).
Resize Canvas Modal Control Options
The Resize Canvas control uses controls (arrows) to increase or
decrease the image along an edge, as follows:
Decrease image width from the left or right edge.
Increase image width from the left or right edge.
Decrease image height from the top or bottom edge.
Increase image height from the top or bottom edge.
When you are satisfied with the result, choose Accept. If not, choose
Start Over.
Accept has the effect of storing (but not to disk) the currently adjusted
state of the canvas, establishing in effect a new starting point for further
adjustment.
Start Over returns the canvas to its state at the time you last chose
Accept. But you can only return to that point, never prior to it. The
Start Over control is active only if you have made a change since you
last chose Accept.
Remember to choose File>Save when you are done
Import and Convert JPG and GIF Images to WBMP Format
The NMIT WBMP editor can import and convert a JPG or GIF image to WBMP format. Since the
WBMP format does not use color, any color in the JPG or GIF image is converted to black and
white. A process called “dithering” is used to translate colors into different densities of black dots
on a white background, thus producing different shades of gray.
1 Choose File>Open to open the desired JPG or GIF image. The image is opened in the
WBMP image editor.
2 Choose Save or Save As from within the WBMP editor to save the file in WBMP
format. Note that NMIT converts the image upon import; so you can modify the
image within the editor before saving it.
50 Nokia Mobile Internet Toolkit User’s Guide
Page 53

Push Editors
A Push Content Editor is opened in the NMIT editors window whenever you take any of the
following actions:
• Choose File>New, choose the Push tab in the Available Contents Type dialog, select
a Push content type, and then choose OK.
• Choose File>Open and then choose an existing Push content file. You can open both
source files (of file types si, sl, and co) and encoded files (of file types
coc
).
NMIT provides a separate editor for creating each of the three standard WAP Push content types
si, sl
(
Nokia Mobile Internet Toolkit User’s Guide 51
, and co) and a fourth for the special type
multipart
. These editors differ from NMIT
sic, slc
, and
Page 54

Push Editors
Browsing editors in that they are designed as Windows “wizards” in order to facilitate the entering
of headers, and in the case of multipart, the inclusion of file parts.
Push Content Editors
Service Indication (SI)
Editor
Service Loading (SL)
Editor
Cache Operation (CO)
Editor
Multipart Message
Editor
Creates a message intended to be delivered to the phone SDK
Push Inbox, not to the phone browser. The message serves as a
notification to the user that new content is available for
downloading. The user can then select the supplied URL to
download the content.
Creates a message intended to be used to force a user agent
running on the client device to download new content without
notifying the user.
Creates a message intended to be used to invalidate particular
entries in the user agent cache, thus forcing a reload of content
the next time the user requests content identified by those
entries.
Creates a message consisting of one or more separate parts,
with each part consisting of a header section and content body.
The editor enables you to assemble a number of related pieces
of content parts that can be pushed as a group in order to reduce
network latency.
Overview of Push Messages
A Push message is an unsolicited message sent by a server to a client. In the network environment,
a server application called a Push Initiator initiates the sending of a Push message. It sends this
message via the Push Access Protocol (PAP) to a Push Proxy Gateway (PPG), which extracts the
relevant client-bound content and encodes it, prepends the required content type header and any
other included headers (all unencoded), and sends it using the WAP protocol over a wireless
network to the destination mobile handset. The mobile handset decodes the message and,
recognizing the content type as Push-related, dispatches it to the content handlers; for example,
Service Indication (SI) content is dispatched to the handset Service Inbox. The user of the handset
then views the message in the service Inbox and can retrieve the content by selecting the included
URL.
In the NMIT environment, there is no Push Initiator and therefore no use of PAP or PPG; nor do
messages traverse a wireless network. There is instead a Nokia-internal protocol whereby
messages you create using NMIT Push editors can be delivered to phone SDKs running on the
same local machine as NMIT. The aim is to enable you, working within NMIT, to construct Push
messages just as a Push Initiator does, encoded and with appropriate headers, and to deliver these
to phone SDKS in the same manner as a Push Initiator delivers Push messages to mobile handsets
in the network environment. The delivered messages therefore are structurally identical to those
received over the network.
NMIT provides Push message editors in order to enable you to observe on a phone SDK how Push
messages you create would appear if deployed over the network to mobile handsets. This is
52 Nokia Mobile Internet Toolkit User’s Guide
Page 55

Overview of Push Messages
possible because phone SDKs are usually designed to behave as their namesake mobile handsets.
Not all SDKs or phones support Push. Check the documentation.
In addition, supported Nokia phone SDKs employ a Diagnostics Panel through which you can
view Push content details such as headers which would have been present had the message been
transmitted over the network through a WAP gateway. The ability to view headers received by the
phone SDK facilitates your design of custom headers which you might, for example, use in
designing a new Push service.
Encoding and Header Handling in Push Messages
Phone SDKs expect to receive only WAP-encoded Push message content. Therefore, messages that
you push to phone SDKs are always encoded by NMIT.
When you store a Push message in binary format (
Store Binary
button), NMIT encodes the
message content only (as do WAP gateways). You can see this by opening such a message in a
binary editor (such as
hexedit
) and checking the content against the WAP SI specification. Also
note that the binary file format does not include any Push message headers.
However, when NMIT saves Push messages as source (
Store Source
button), the headers are
included as standard HTTP headers. For this reason, you should save Push messages that you may
wish to edit again in source format.
According to Push specifications, headers received from a Push Initiator are passed through to the
receiving mobile handset unencoded, but they are not required to be available for user viewing. So,
for example, if a Push Initiator generates a message and includes the
X-Wap-Application-ID
header (to specify a handset application that is to process it), the WAP gateway will pass this
along, unencoded. The handset software processes the message, using header information as
necessary (for example, the
X-Wap-Application-ID
), decodes the encoded message content, and
dispatches it to the handset’s Service Inbox. When the user views the message, he views only the
message content; headers received by the handset and using in processing have been discarded and
are not available to the user.
However, in the NMIT environment, which is a developer environment and not a user
environment, all headers must be preserved and accessible after the message has been received in
the Service Inbox, including user-defined headers. To accomplish this, NMIT packages these
headers separate from the message content so that a user of a phone SDK may view these using the
SDK’s Diagnostics Panel.
Saving Push Messages
Like other types of WAP content, a Push message has both an encoded (binary) and a text (source)
form. In any of the three Push editors, you can choose to store the message as text by choosing
Store Source
and edit the message within a Push editor. Note, however, that NMIT stores Push message headers
only when you store the message in source format.
You might choose to store as text (
template or model for a message that you intend your Push Initiator to generate programmatically.
Nokia Mobile Internet Toolkit User’s Guide 53
or as binary by choosing
Store Source
Store Binary
) when you are creating a message to use as a
. In either case, you will be able to later open
Page 56

Push Editors
You might choose to store as encoded (Store Binary) when you are ready to have your Push
Initiator (perhaps implemented as a servlet inside a WAP Push Gateway) read the encoded
content, generate the required headers dynamically, and then send it to a client directly.
SI, SL, and CO Editors
SI, SL, and CO messages are structurally similar: each consists of HTTP header information and a
single XML-based content body. They differ principally in their intended uses within an
application; they each use a different DTD and different XML elements.
The editor for each opens with the selected content type already entered for you in the required
HTTP header field. You must enter data in the required fields, which are highlighted within the
editor. You may also add optional headers and content, but these optional fields are hidden from
view until you choose to display them using a control button.
The following sections describe the SI, SL, and CO editors:
Common Features
Service Indication (SI) Editor
Service Loading (SL) Editor
Cache Operation (CO) Editor
Common Features
Headers
All three Push message editors display a region titled
included with the message content.
The appropriate value for the
Content-Type
header is automatically inserted within each editor
and cannot be modified. (Note that all non-editable fields are colored the same as the window
background color.) The value displayed is based on the editor chosen:
vnd.wap.sic
vnd.wap.coc
for SI messages,
for CO messages.
application/vnd.wap.slc
Headers
which displays the headers to be
for SL messages, and
application/
application/
54 Nokia Mobile Internet Toolkit User’s Guide
Page 57

SI, SL, and CO Editors
You may specify optional push headers by clicking the button adjacent to the label
Push Headers
X-Wap-Application-Id
X-Wap-Content-URI
X-Wap-Initiator-URI
. Some standard WAP Push headers are then displayed as shown below:
Destination application ID. An identifier agreed upon by a
server application and a client device which instructs the
device browser to pass the content to a client-side application
for processing.
Virtual URI of the message. Messages in the cache with this
header will generate cache hits when other requests specify a
matching URI.
URI of the Push Initiator Application, which is the
application that generated the Push message.
Optional
To ent er a va l u e fo r a
Header Name
:
• Click in the adjacent Header Value field and type the desired value.
To add a new line on which you can enter an additional header name and value:
• Click anywhere on the last line until a new line is displayed.
To delete a header line:
• Click in the left column of the line (to select it) and then press the Delete key.
To specify that NMIT send the header:
• Click in the Send/Save column to place a check mark on the header line.
To specify that NMIT not send the header or to save the header when you save the message:
• Click in the Send/Save column to remove the check mark on the header line. This
feature eliminates the need to delete and then re-enter values for individual test
cases.
Note that, when you save a Push message in source format, NMIT includes only those headers for
which there is a check mark in the adjacent Send column. (No headers are stored if you save in
binary format, regardless of check marks.)
Nokia Mobile Internet Toolkit User’s Guide 55
Page 58

Push Editors
Active Buttons
The SI, SL, and CO Editors all display the following three active buttons along the bottom of the
editor window.
Pushes the current message to the phone SDK you have launched from
the SDK Control Panel.
How the phone SDK responds to the reception of a Push message
depends on the SDK software, as well as on the nature of the message.
Processing requirements are described in the various WAP
specifications for Push Content. SI messages, for example, are displayed
in the phone SDK; CO messages may delete expired messages from the
local cache; SL messages may cause the loading and execution of a
specified service.
Opens the Save As dialog in which you can name and save the newly
created message, excluding headers, in encoded format. The default file
extension is
sic, slc
, or
coc
, which are all encoded file types.
Note that if you open an encoded file in a Push editor, headers are not
displayed because encoded files are not intended for further editing in
NMIT. They may, however, be examined in another editor to view the
encoding.
By default, NMIT editors save files in the
\samples
directory, though
you can change the directory from within the Save dialog.
56 Nokia Mobile Internet Toolkit User’s Guide
Page 59

SI, SL, and CO Editors
Service Indication (SI) Editor
The SI Editor consists of two window regions (Headers and Content) and a set of active buttons
along the bottom of the window.
Nokia Mobile Internet Toolkit User’s Guide 57
Page 60

Push Editors
The
Content Fields in an SI Message
Text Message Text to be displayed on the phone SDK. For example, in a mail
href URL to be fetched when the user chooses to process this message. For
action Drop-down list box displaying five possible actions to be taken by the user
Service Indication Content
application, the text message “You have new mail” might be displayed on
the user’s phone, typically providing the user a means for fetching the mail
via the URL specified in the
example, in a mail application, the URL specified by
the location from which the user’s mail may be downloaded.
agent at the time this SI message is received on the terminal device. The
WAP specifications describe the precise behavior required or suggested by
any of the following values: (1) signal-high, (2) signal-medium, (3) signallow, (4) signal-none, (5) delete. Generally, these values specify the level of
priority or urgency to be adopted by the user agent in processing the
message, where signal-high is most urgent.
region of the SI Editor dialog contains the following fields.
href
field.
href
might specify
Optional Content Fields in an SI Message
si-id Unique ID of this SI message.
This is used by the phone SDK to eliminate duplicate messages.
si-expires Expiration date of this SI message.
The date-time format is YYYY-MM-DDThh:mm:ssZ where the “T” and
the “Z” are required literal characters. See the WAP Service Indication
Specification for details.
created Creation date of this SI message.
The date-time format is the same as for the
Info Section The
<info>
element provides a way to specify additional information not
provided by the attributes of the
contains one or more
information. Each
<item>
<item>
elements that specify the additional
element contains a
what information the content of the
client uses this information is implementation dependent, and a client may
Class 1
discard the
SI <info>
Class attribute describing the nature of the content specified in Item 1
(below). For example:
<info>
sections.
element. Currently, Nokia SDKs do not use or support
DogType
in the example above.
si-expires
<indication>
class
<item>
element contains. How a
field (see above).
element. The element
attribute describing
Item 1 Content identified by the Class attribute (above).
Class 2 (same as Class 1 above).
Item 2 (same as Item 1 above).
58 Nokia Mobile Internet Toolkit User’s Guide
Page 61

SI, SL, and CO Editors
Service Loading (SL) Editor
The SL Editor consists of two window regions (Headers and Content) and a set of active buttons
along the bottom of the window. The Headers window region is described in the section titled
Common Features, and the active buttons in the section titled Active Buttons.
The
Service Loading Content
Content Fields in an SL Message
action Drop-down list box displaying three possible actions to be taken by the user
agent at the time this SL message is received on the terminal device. The WAP
specifications describe the precise behavior required or suggested by any of the
following values: (1)
values specify the level of priority or urgency to be adopted by the user agent in
processing the message, while the third specifies that the fetched message should
be placed immediately in the local cache. If a value is not specified,
is used.
href (Required) URL of the service to be loaded and processed by the user agent. For
example, a service provider might use an SL message to load a WML deck that
notified the user that his balance had not been paid.
region of the SL Editor dialog contains the following fields:
execute-high
, (2)
execute-low
, (3)
cache
. The first two
execute-low
Because SL messages can be used n denial-of-service attacks, some devices block this content type.
Nokia Mobile Internet Toolkit User’s Guide 59
Page 62
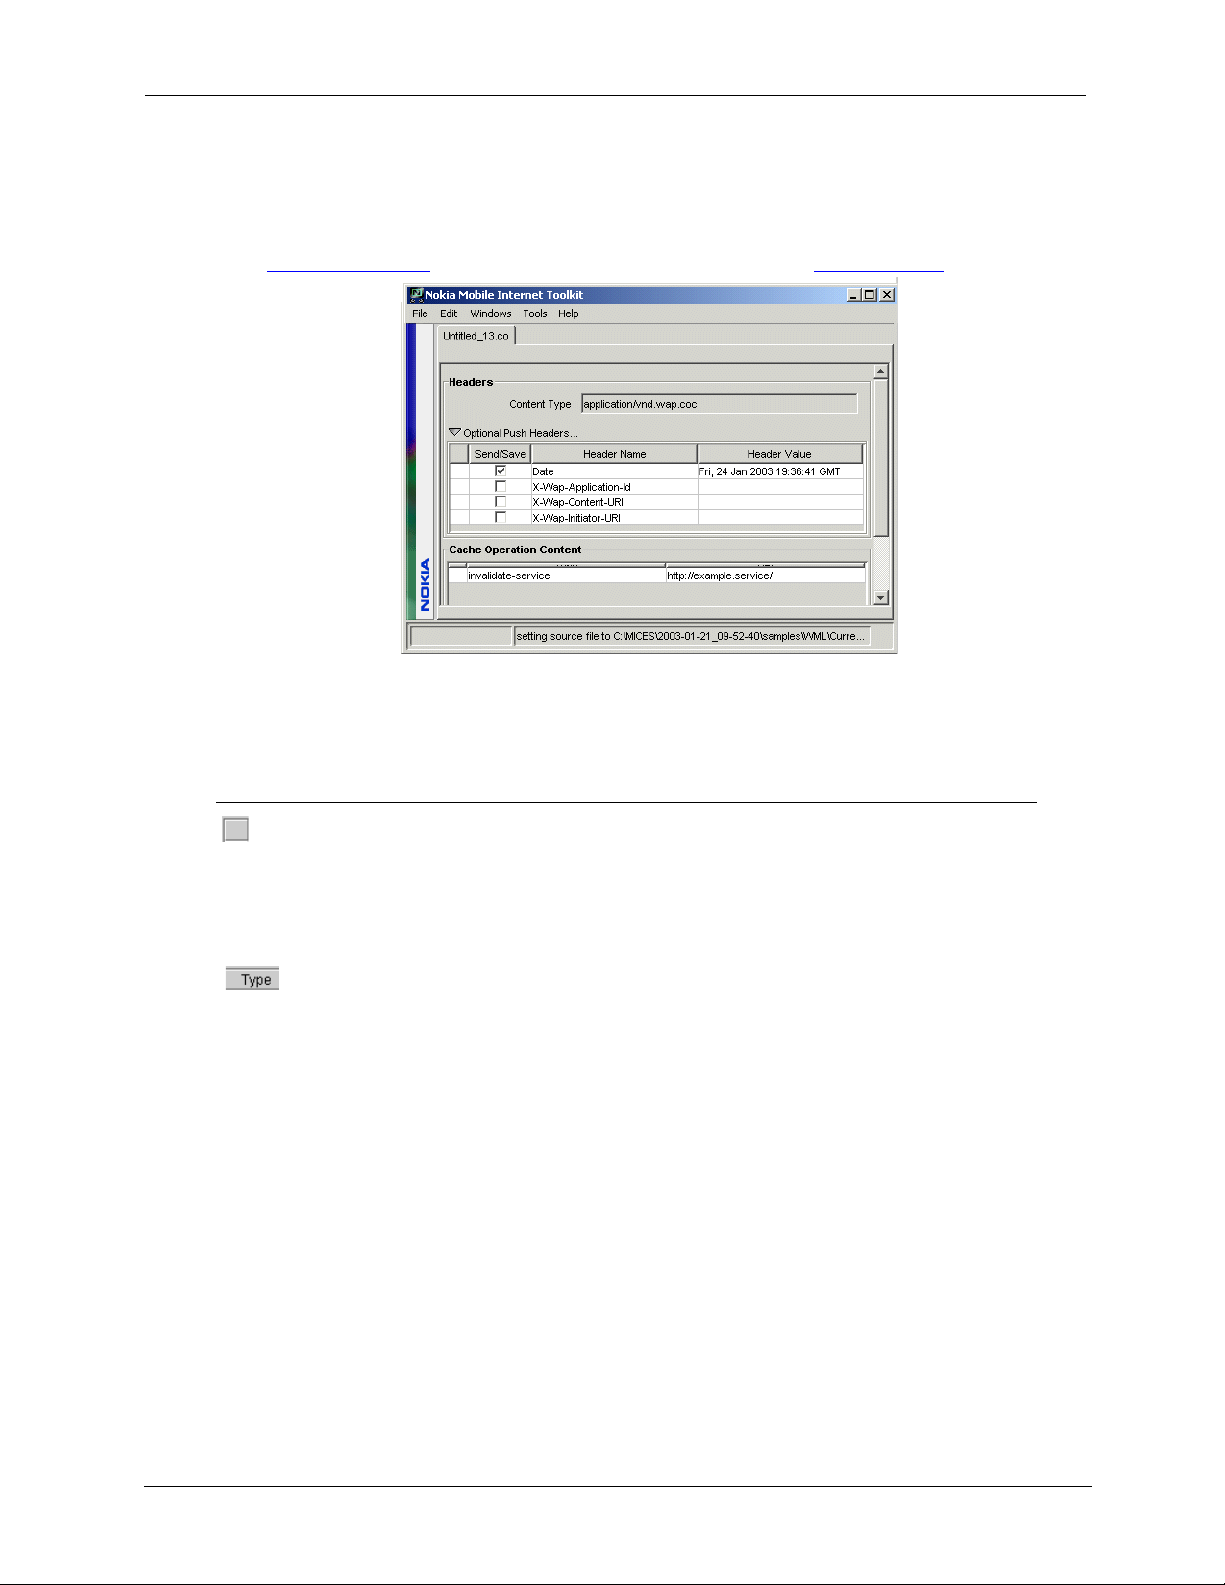
Push Editors
Cache Operation (CO) Editor
The CO Editor consists of two window regions (
buttons along the bottom of the window. The
Headers
Headers
and
Content
) and a set of active
window region is described in the section
titled Common Features, and the active buttons in the section titled Active Buttons.
The
Cache Operation Content
region of the CO Editor displays a table with three columns (the
first is quite narrow) and a single data entry beneath. Use this region to specify one or more
invalidation directives. There must be at least one such directive in a cache operation message.
Cache Operation Content Fields
Clicking in this empty area (not the column heading) in this left-most column
selects the entire line. After it is selected, you can press the Delete key to
delete the entire line.
Note that you cannot delete all the lines because a CO message must have at
least one invalidate directive.
Clicking in the Typ e column (not the column heading) displays a popup
selection box that enables you to toggle between the two CO directive types,
invalidate-service or invalidate-object, thus changing the entered directive.
When a CO message containing an invalidate-object URI is processed by the
user agent, any object in the local cache whose URL exactly matches the URI
of the invalidate-object item is deleted from the cache.
When a CO message containing an invalidate-service URI is processed by the
user agent, any object in the local cache whose URL matches the URI prefix
of the invalidate-service item is deleted from the cache. This item is useful
therefore for removing multiple objects from the cache, all of which may have
originated from the same service.
See the WAP specification for Cache Operation for detailed information
regarding the purpose and use of these items.
60 Nokia Mobile Internet Toolkit User’s Guide
Page 63

Cache Operation Content Fields
Clicking in the URI column (not the column heading) causes that item to
become editable. You can add a URI to an empty entry, modify an existing
entry, or use select, copy, and paste to change the entry to the desired value.
Note that typing into the URI column of the last row adds an empty row
below so that you can enter as many directives as required.
The following figure shows a Cache Operation Content dialog in which an additional directive has
already been added, resulting in a new row below. Lines with blank URI fields are not included
when the message is sent or saved.
Multipart Message Editor
Multipart Message Editor
A multipart message is a single message composed of an ordered list of messages (or parts), each
of which has a set of HTTP headers and a content body. The parts may be of any content type.
In WAP environments, the multipart format is used to enable the delivery of a set of related
content parts to a device all at once in order to avoid multiple network requests, thereby reducing
latency and thus the user’s perception of the application response time. A phone SDK that receives
a Push multipart message loads the first part and stores the remaining parts in cache. Multipart
messages would, in real world applications, typically be dynamically generated on a content server
either in response to a request or as server-initiated pushed content.
When you use the Multipart Editor to create a multipart message, you are actually assembling
already existing content (in separate files) into an ordered package of parts and then specifying
headers for both the entire package and for the individual parts.
This section describes how to quickly create a multipart message; the format, processing, and
saving of multipart messages; and finally the use of the editor’s display regions and button
controls:
Quickly Creating a Multipart Message
Multipart Message Processing
Editing Multipart Headers at the top of the window.
Including Parts
region to the left.
Part Properties With Content to the right.
Multipart Button Controls
Nokia Mobile Internet Toolkit User’s Guide 61
along the bottom to the left.
Page 64

Push Editors
This is the Multipart Message Editor:
Quickly Creating a Multipart Message
The section titled Multipart Message Processing describes the nature and purpose of multipart
messages. The task summary described here gives the steps used to create and display a multipart
message containing two parts: a Service Indication (SI) push message and the WML file referenced
by the SI message. The purpose of the multipart message is to enable the user, who has just read
the SI message, to immediately view the accompanying WML message without experiencing
network latency. This is possible because the WML file is as part of the Push message and is stored
in cache.
1 Create a Service Indication Message. Choose File>New, then the Push tab, then
Service Indication, and then OK to open the Service Indication editor. In the Te x t
Message field, enter the text:
href field, enter the text
button. Name the file
in the
/samples/Push
Weather-Alert.sic
directory.
A weather update is available. View it now?
http://weather.com/today.wmlc
. Choose the Store Binary
(be sure the file extension is
In the
sic
) and store it
2 Create a WML deck. Choose File>New, then WML 1.3 Deck, then OK to open the
WML Deck editor. Choose File>Save As and save the file to the same
directory with the name
today.wml
. Enter (or cut and paste) the following text into
/samples/Push
the newly created file:
<wml>
<card title=”Weather Update”>
<p>Today’s weather is cloudy, with a 70% chance of showers.</p>
</card>
</wml>
Choose Revalidate and fix any parsing errors. Then choose Show to compile the file
and display it on a phone SDK. NMIT encodes the WML file and stores it in the same
directory with the file extension
wmlc
.
3 Create the Multipart file. Choose File>New, then the Push tab, then
Multipart Message, and then OK to open the Multipart Message editor. Include the
62 Nokia Mobile Internet Toolkit User’s Guide
Page 65

Multipart Message Editor
encoded versions of the two files you just created by choosing the Add Part button;
navigate to the directory in which the files are located, select them both, and choose
Open.
4 Ensure that both files are displayed in the Parts List region in the following order:
from top to bottom, first
Weather-Alert.sic
and then
today.wmlc
. If they are not so
ordered, correct the order by selecting a file and using the up and down arrows
(adjacent to the Parts List label) to position it.
5 Select the file
region so its value is the URL
today.wmlc
. Edit its X-Wap-Content-URI header in the Part Properties
http://weather.com/today.wmlc
. (Note that some
phone SDKs require that you specify this value in the Content-Location header.)
Ensure the Date header has the value of today’s date in standard HTTP format; for
example, “Mon, 06 May 2002 11:00:45 GMT,” without the quotes and in the required
GMT time zone. Finally, add a Cache-Control header with the value
max-age=36000
this ensures the file will remain cacheable for the next 10 hours.
6In the Multipart Headers region at the top of the editor window, ensure the value of
the Content-Type header is
application/vnd.wap.multipart.mixed
.
7 Choose the button to push the multipart message to a running phone SDK. In
the phone SDK, you should see the text you specified in the
update is available. View it now?
” Then, when you choose to retrieve the content
sic
file: “
A weather
(and the way you do this may vary from SDK to SDK), you should see the content of
the
wml
file you created, that is, the text “
Today’s weather is cloudy...
”
Multipart Message Processing
When the phone SDK receives a multipart message, it identifies the message type as a multipart
message by the
out its constituent parts.
Content Type
header and then proceeds to disassemble the message, separating
;
After disassembling the message, the phone SDK processes the first part immediately and puts any
remaining parts into cache according to its cache management rules. After you push a multipart
message, you can use the Diagnostics Cache view in the phone SDK to examine the contents of the
phone SDK cache to verify that the parts are there.
The content type of the first part will determine whether or not anything is displayed on the phone
SDK: if the first part is an SI content type, a notification is displayed; if a CO or SL content type,
nothing is displayed; if a WML content type, nothing may be displayed, as the display of this
content type is browser-dependent and not defined in the WAP Push specifications. For these
reasons, the first part in most multipart messages will be of content type SI.
In normal WAP browsing, you request a URL and receive a response to that request. The browser
places the response in cache and uses the request URL as the cache key for future requests to that
URL. Now, a Multipart Push message is essentially a response without an associated request.
WAP Push applications use the value of the header
X-Wap-Content-URI
as a virtual request URL
in managing cache entries for the messages that have been pushed.
Any references in the content of the first part of a multipart message that cause a browser load
request will also causes the browser to check its cache first. Such a reference might be an
Nokia Mobile Internet Toolkit User’s Guide 63
href
Page 66

Push Editors
attribute specifying a URL an SI message. If the reference matches a cache entry (keyed with the
Wap-Content-URI
header value), then the resource is loaded from the cache and a network access
is avoided. This mechanism is used by the browser to fetch and display the cached parts of a
multipart message.
Editing Multipart Headers
Multipart headers are distinct and unrelated to any of the constituent parts within the multipart
message. Multipart headers serve a function much like the name on a file folder, describing the
container rather than any specific part. Inside the folder, continuing the analogy, are the separate
parts, each of which has its own headers.
Multipart is a MIME format which was initially created to enable the inclusion of various binary
content types within a mail message which could be sent over the Internet. The MIME
specification defines several multipart message types, three of which have been adopted by the
Open Mobile Alliance and adapted for use in the WAP environment. You can create a message
using any of the following MIME or WAP content types:
MIME Format WAP Format Description
multipart/
mixed
application/
vnd.wap.multi
part.mixed
This format is used typically for including various content
types without specifying any relation between the parts.
This is usually the default multipart message type used in
WAP applications.
X-
multipart/
alternative
multipart/
related
application/
vnd.wap.multi
part.alternat
ive
application/
vnd.wap.multi
part.related
This format is used typically for including two or more
content types which are different representations of the same
content: for example, content in both text and RTF formats.
This format is used typically for including various content
types which are related in some way.
In the Multipart Headers region at the top of the editor window, you specify headers that apply to
the entire multipart message. In this region, there are two columns titled
Header Value
The first header name is the required
.
Content-Type
, whose value you choose from the drop-down
Header Name
and
list box in the adjacent Header Value column. These values are shown below:
64 Nokia Mobile Internet Toolkit User’s Guide
Page 67

Multipart Message Editor
• Choose one of the first three (encoded) types if you are assembling a multipart
message targeted for display directly to a phone SDK. (Parts must be WAP-encoded
first before being added to the message; NMIT does not perform any encoding.)
After inserting headers, this message is ready to be used by any application capable of
pushing content (such as NMIT or any kind of Push Initiator).
• Choose one of the last three (unencoded) types if you are assembling a multipart
message that you wish to be readable by MIME tools, displayed in readable format in
a text editor, or emailed. Include unencoded parts only.
Refer to the section titled Saving Multipart Messages for additional information regarding how
your choice of the
Content-Type
header value influences NMIT’s saving operations.
After you have selected a content type for the multipart message from the drop-down list in the
Header Value
row beneath the
can enter a header name. Click the adjacent empty table cell in the
column, you may enter other optional headers and values by clicking in the empty
Header Name
column. The table cell becomes editable when you click it so you
Header Value
column to enter
a value for the header name you entered.
If you place a check mark in the
Send/Save
column adjacent to a particular header, NMIT sends
that header, and when you save the file, writes it out as part of the message; otherwise, it does not.
This feature eliminates the need to delete and then re-enter values for individual test cases.
Including Parts
In the Multipart Parts region to the left in the Multipart Message editor, you assemble the
multipart entries that are to be included in the message; that is, you insert the desired part files
(use CTRL with mouse clicks to select multiple files) and then place them in the desired order.
If you have specified one of the three WAP
automatically encode the component parts when it pushes the multipart files to the SDKs, you
must insert only encoded content parts, whereas if you have specified a MIME
header, you should insert only the source format of the content parts.
You cannot create a part within the Multipart Message editor. You must have already created,
debugged, and saved each entry you wish to include. Also, note that nested multipart parts are
prohibited by WAP Push specifications; NMIT cannot recursively unpack the parts.
Multipart Parts Controls
After you have selected a part in the Parts List display region, click this
button to move that part up one position. The topmost entry in the region
is the first multipart entry and will be processed first; the bottom entry is
processed last.
Content-Type
headers and expect the SDK to
Content-Type
After you have selected a part in the Parts List display region, click this
button to move that part down one position. The topmost entry in the
region is the first multipart entry and will be processed first; the bottom
entry is processed last.
Nokia Mobile Internet Toolkit User’s Guide 65
Page 68

Push Editors
Multipart Parts Controls
Drag and Drop You can use the Windows drag and drop feature to add files to a multipart
Double Click When you double click the icon for an included part file, NMIT opens the
Editing Part Headers
Removes the selected part or parts from the Parts List region.
(If you mistakenly remove a part, you can easily replace it by choosing
Edit>Undo.)
Displays the Open dialog in which you can select one or more files to be
included in this multipart message. The selected files are then inserted
into the Parts List file display region.
message. In Windows Explorer, left click the file, holding down the mouse
button; then drag it to the Parts List region and release the mouse button.
part in an appropriate editor if it recognizes the content type. If NMIT
does not support the content type, it will use the system’s default editor
for that content type.
The section Multipart Message Processing described how phone SDKs managed Push messages in
their cache. Assuming you have included all part files in the multipart message, you must now edit
the Part headers in the Part Properties region to ensure the cache behavior will be what you intend.
Each part that you wish to be cached must specify the
alternatively, the
Content-Location
header. The value for this header for a given part must match
X-Wap-Content-URI
header, or
any references to that part in the content of other messages. So, for example, to enable an SI
message (the first part) with an
this (a succeeding part) from the cache, the
needs to match the string
href
attribute whose value is
X-Wap-Content-URI
http://myhost/page.wml
http://myhost/page.wml
to fetch
header of the succeeding part
. So, you must edit the header fields of each
part to coordinate with any references made in other parts.
If neither the
X-Wap-Content-URI
nor
Content-Location
header is present for a given part, the
phone SDK will discard the part.
The
Date
header specifies the creation date, which, for multipart messages is the date and time
when the part is included in the multipart message. NMIT includes the value of this header
automatically.
NMIT’s Multipart editor initializes the value of the
Content-Location
header with the file name
used when you insert the part into the multipart message. NMIT uses this header to name the part
when NMIT opens up an existing multipart file.
Part Properties With Content
The Multipart Part Properties region to the bottom right of the Multipart Message editor is used
to display information about a part which has been selected in the Parts List region.
66 Nokia Mobile Internet Toolkit User’s Guide
Page 69

Multipart Message Editor
The following figure shows the Part Properties region in which a
sic
file is displayed.
As described in Editing Multipart Headers, you can modify any header value by clicking on it. You
can also delete any header and its corresponding value by selecting the entire row and pressing
Delete
. However, you cannot delete the first (required) header
Content-Type
, though you can
change its value.
The content of the multipart entry is displayed in an area just below the
Header Value
region. In the example shown, the content is encoded. Any non-ASCII content
Header Name
and
type (such as encoded content) is displayed as a hexadecimal byte stream. The text equivalent of
this byte stream is displayed, line by line, to the right.
Note the dotted split-pane divider along the left edge of the
cursor on this region, the cursor changes, allowing you to resize the
Parts List
regions.
Part Properties
Part Properties
region. If you rest the
and adjacent
Multipart Button Controls
The Multipart Message editor contains the following button controls.
Multipart Message Controls
Add Part Opens a navigation dialog that enables you to locate a part file to be included
in the multipart message.
Push Pushes the multipart message to the phone SDK.
Clear Contents Removes all multipart entries from the current Multipart editing window, thus
allowing you to easily start over.
Saving Multipart Messages
You can save a multipart message to a file in either an unencoded
by choosing
File>Save As
.
To save in unencoded (standard MIME) format, you must have selected one of the following
MIME header values for the
multipart/mixed
multipart/alternative
multipart/related
Content-Type
header in the
Multipart Headers
.mp
or an encoded
region:
.mpc
format
Nokia Mobile Internet Toolkit User’s Guide 67
Page 70

Push Editors
To save in WAP-encoded format, you must have selected one of the following WAP header values
for the
The saved file includes (1) multipart headers, (2) headers of all parts, and (3) contents of all parts.
If you separately modify a part that is included in an already saved multipart message, the
multipart message is not updated with the changed part. To update a multipart message with an
updated part, you must reopen the multipart message, delete the part which has been modified,
and then reinsert the updated part.
You might wish to open an unencoded MIME multipart file in a common text editor such as
Windows Notepad to see how NMIT has constructed the multipart file. Encoded multipart files,
on the other hand, are ready to be deployed by Push applications such as a Push Initiator program
or by the NMIT Push editor (to a phone SDK).
Because NMIT does not inspect or process the content section of any of the parts within a
multipart message, it is possible that a multipart message saved in encoded format may contain
unencoded data. This would occur, for example, if you included an unencoded part when you
constructed the multipart message. It is your responsibility to ensure that the multipart message
parts you include are consistent with the multipart format in which you wish to save the multipart
message.
Content-Type
application/vnd.wap.multipart.mixed
application/vnd.wap.multipart.alternative
application/vnd.wap.multipart.related
header in the
Multipart Headers
region:
Encoded multipart files are ready to be used by Push applications such as a Push Initiator program
or by the NMIT Push application, as this is the format in which the multipart message is pushed
over the network.
68 Nokia Mobile Internet Toolkit User’s Guide
Page 71

Messaging Editors
A Multimedia Messaging Service (MMS) message is a specially formatted message containing
rich media content: one or more of text, image, or audio files, with an optional SMIL
(Synchronized Multimedia Integration Language) file for specifying how the included media files
should be displayed.
NMIT provides the following three messaging editors:
MMS Wizard The MMS wizard presents a series of dialogs in which you enter
addressing information and specify media parts for inclusion in an
MMS message. It finishes by opening the MMS Message Editor
and populating this editor with the information you entered.
It is recommended to use the wizard if you are including a SMIL file
as one of the media parts, as in this case, the wizard also
automatically inserts header values that enable sequential
processing of the parts in accordance with the SMIL file.
The MMS wizard is opened whenever you choose
File>New>MMS Wizard
.
MMS Message Editor
Nokia Mobile Internet Toolkit User’s Guide 69
This editor displays all MMS message headers, all media parts and
media part headers, and provides functions for adding and deleting
parts, modifying headers, creating an encoded MMS message from
the parts and headers, pushing the message to a phone SDK, and
saving the message to a file.
The MMS Message editor is opened whenever you (1) choose
File>New>MMS Message, (2) choose Finish in the MMS Wizard,
(3) open an already existing MMS message, or (4) press the
Generate MMS button in the SMIL editor.
Page 72

Messaging Editors
SMIL Editor Creates a SMIL file that can be included in an MMS message as a
media part. The SMIL part identifies the media parts and specifies
how these should be presented in the phone SDK.
The SMIL editor is opened whenever you (1) choose
File>New>SMIL or (2) choose To o l s> D T D M a n a g e r, select a
SMIL content type, and choose Open Editor.
This chapter contains the following sections:
Quickly Creating a Multimedia (MMS) Message
Overview of MMS Messages
MMS Wizard
MMS Message Editor
SMIL Editor
Quickly Creating a Multimedia (MMS) Message
The task summary described here gives the steps used to quickly create and display an MMS
message.
1 Choose File>New in the NMIT main window or in the NMIT editors window.
2 Choose the Messaging tab in the Available Contents dialog, select MMS Wizard, and
choose OK.
NMIT opens the MMS Wizard, which guides you through the process of entering
essential information such as the recipients, the media file content, and the use (or
not) of a SMIL presentation script.
After completing the wizard dialogs, NMIT opens the MMS Message Editor, which
displays the MMS data you entered so far. Here you have the opportunity to (1) edit
header values, (2) add or delete headers, (3) choose to send or not send certain
headers, (4) reorder the sequence of included media files, (5) add or delete files, and
(6) edit header values or add or delete headers for included media files.
3 Choose the Push button in the MMS Message Editor to display the message on the
current phone SDK. The User’s Guide for the phone SDK describes how the received
MMS message is handled within the phone SDK. You must ensure that the phone
SDK you are using is capable of receiving MMS messages, as not all are.
Overview of MMS Messages
MMS is a WAP-based, store-and-forward, rich-content messaging system. It uses the WAP WSP
protocol stack for communication between a client device and a WAP gateway, and it uses a
Multimedia Messaging Service Center (MMSC), which is a kind of combination MMS ProxyRelay and MMS Server, as the store-and-forward center (similar to regular email).
70 Nokia Mobile Internet Toolkit User’s Guide
Page 73

Overview of MMS Messages
The following steps summarize MMS messaging in the network environment:
1 You create an MMS message on a mobile handset and send it to the addressee. (The
value of the
X-Mms-Message-Type
header is
m-send-req
.) The mobile handset initiates
a WAP connection and sends the entire message with all part content as a WSP Post.
2 The MMSC receives the MMS message and responds to the originating handset over
the same WAP connection “Message sent.”
3 The MMSC sends an MMS message to the addressee (receiving handset) containing
the URL for retrieving the MMS message. (The value of the
header is
m-notification-ind
.)
X-Mms-Message-Type
4 The receiving handset initiates a WAP connection and retrieves the message using a
WSP Get.
5 The MMSC sends the MMS message to the receiving handset over the same WAP
connection using a WSP Get Response. (The value of the
is
m-retrieve-conf
.) The receiving handset displays “Message received.”
X-Mms-Message-Type
header
6 The receiving handset displays “Message received” and sends to the MMSC over the
same WAP connection using a WSP Post an MMS message (type
m-acknowledge-ind
indicating the message has been received.
)
7 If requested by the sender, the MMSC sends an MMS message to the message sender
(originating handset) “Message delivered.”
Note that in only steps 1 and 5 is the entire message transmitted. Within NMIT, the MMS message
you create will correspond to that sent in either step 1 or 5 depending upon the value you choose
for the
X-Mms-Message-Type
header. The MMS message is encoded and sent directly to the phone
SDK, through a private interface, not through the WSP protocol stack. It does not pass through a
WAP gateway or through an MMSC.
Therefore, to summarize, within NMIT, the sending of an MMS message having the message type
m-send-req
(originating application), whereas sending an MMS message of type
to a phone SDK enables you to see what an MMSC would receive from the sender
m-send-conf
enables you to
see what a recipient receives from the MMSC.
The following additional topics are discussed in this section:
Structure of an MMS Message
Relationship Between MMS Media Parts
Saving MMS Messages
Nokia Mobile Internet Toolkit User’s Guide 71
Page 74

Messaging Editors
Structure of an MMS Message
The following figure depicts an MMS message as it is constructed to be sent over the network
within both NMIT and the network environment.
MMS Message Structure
At the outermost (WSP) level, an MMS message
consists of a WSP Header section and a WSP Content
section.
Content-Type
The
Header section must be
message
.
header specified within the WSP
application/vnd.wap.mms-
The WSP Content section itself consists of a
multipart message in WSP-encoded format consisting
of an MMS Header section and an MMS Message
Body.
The MMS Header section must specify a
Type
header of
application/vnd.wap.multipart.related
(1)
there is a SMIL file included or (2)
vnd.wap.multipart.mixed
if there is no included
Content-
if
application/
SMIL file.
The
start
parameter specifies a value that is used to
determine which part in the Message Body is to be
processed first: specifically, that part whose
ID
header specifies that same value. When a SMIL
part is included, its
this value and the
start
a
parameter that matches the
Content-Type
Content-ID
header must specify
header must include
Content-ID
Content-
.
The Message Body section consists of each included
part, where each part consists of a Part Header
section and Part Content section.
The Part Header section consists of a number of
headers particular to the part.
The Part Content section contains the actual part
content.
When you create an MMS message using the NMIT MMS Message editor, you are creating a
message that conforms to the structure shown above. When you push the message to a phone SDK,
NMIT inserts the WSP Header value
application/vnd.wap.mms-message
automatically,
encodes the message, and pushes it to the phone SDK through a private interface.
72 Nokia Mobile Internet Toolkit User’s Guide
Page 75

Overview of MMS Messages
Relationship Between MMS Media Parts
MMS devices expect the content part (the body) of an MMS message to be formatted as either a
multipart/mixed
If
multipart/mixed
included parts. In this case, the media files are presented to the device display in the order in which
they appear in the message.
If
multipart/related
devices expect to find (in the Multipart Header section of the MMS content) a
the
Content-Type
SMIL part must be processed first.
The following figure shows an MMS message containing a SMIL file. The green dotted line shows
how headers are used to identify the SMIL part. and the way in which header values are used by
the MMS device to parse the content in order to determine the order in which individual media
files are to be processed.
or as a
multipart/related
WSP-encoded message.
, MMS devices infer that no presentation (SMIL) file is present as one of the
, MMS devices infer that a presentation file is present. In this case, MMS
start
parameter to
header, which it uses to locate the SMIL file within the content body, as this
Use of Headers in MMS
First, the phone SDK locates the part whose
the
start
parameter to the multipart/related content type header. This part, the SMIL
multipart/related
Content-ID
Messages
presentation file, may be considered the "root" of the
header value matches the value given in
multipart/related
structure.
The phone SDK retrieves the required
start
identified by the
parameter; this allows the phone SDK to determine whether it can handle
the message before unpacking it. The value of this
Content-Type
header of the SMIL file part (if it does not, behavior of the phone SDK is
type
parameter, which specifies the content type of the part
type
parameter should match the value of the
unpredictable).
Next, in processing the SMIL part, the device learns the number of included media parts and the
order in which they should be processed. It locates these parts by matching string values given in
Nokia Mobile Internet Toolkit User’s Guide 73
Page 76

Messaging Editors
the SMIL file to the values of headers in the individual parts. Specifically, it seeks to find the part
whose
href
Content-Location
attribute in the SMIL file. Or, if the value of an
with the
meaningful identifying string) equals the value specified by the characters immediately following
the characters
then uses that part as the referenced media object. The following shows an example of this
mapping:
SMIL File Referencing of Included Media Parts
header value (typically, the original filename) equals the value of an
cid:
scheme, it seeks the part whose
cid:
and enclosed within brackets (< and >). When a match is found, the device
href
Content-ID
attribute in the SMIL file is prefixed
header value (typically, some
Attribute Values in SMIL
File
href=”longtime.txt” Content-Location: longtime.txt
href=”cid:longtimePic” Content-ID: <longtimePic>
Saving MMS Messages
When you save an MMS message, NMIT writes the entire package to a file; the package includes
(1) MMS message headers, (2) headers of all parts, and (3) contents of all parts.
Note that if you separately modify a part that is included in an already saved MMS message, the
MMS message is not updated with the changed part. To update an MMS message with an
updated part, you must reopen the MMS message, delete the part which has been modified, and
then reinsert it.
When you reopen an MMS message, the MMS Wizard is not invoked. Instead, the message is
opened in the MMS Messaging editor within which you can view the headers and content of each
part, as well as rearrange the sequence of the parts.
MMS Wizard
matches Header Values in Part Files
Use the MMS Message Setup Wizard to begin creating an MMS message. The MMS Message
Setup Wizard prompts you for required information such as headers and parts to be included in
the message, autogenerates a SMIL file if you wish to include one, and then assembles these
components and presents them to you in the MMS Message Multipart editor. From within the
multipart editor, you will then have the opportunity to add, delete, or rearrange parts, modify
header values, and so on, prior to the generation of the final encoded MMS message.
It is recommended to use the MMS Wizard if you are creating a new MMS message and are
including a SMIL file. This is because header references must be used to coordinate the
presentation of parts, as shown in the table titled SMIL File Referencing of Included Media Parts.
The following are the MMS Wizard dialogs described in sequential order:
74 Nokia Mobile Internet Toolkit User’s Guide
Page 77

MMS Wizard
1 Select MMS Message Type
This dialog requests that you choose the message type. The selection you make results
in a header value being inserted for the
X-Mms-Message-Type
header.
• Choose the
m-send-req
radio button to create an MMS message that replicates an
MMS message as it would be received by an MMSC from an originating
application (sender) in the network environment.
• Choose the
m-retrieve-conf
radio button to create an MMS message that
replicates an MMS message as it would be received by a terminating application
(receiver) from an MMSC in the network environment.
See the section titled Overview of MMS Messages for a more detailed description of
how these differing message types are deployed in the MMS messaging environment.
Note that some headers differ for these two message types. Headers for the message
type you choose will be displayed within the MMS Message editor after you choose
Finish in the MMS Wizard.
Nokia Mobile Internet Toolkit User’s Guide 75
Page 78

Messaging Editors
2 Choose Recipient Addresses
This dialog requests that you enter information about the recipients for the MMS message. You
must specify a value for at least one of the following fields:
To, Cc
, or
Bcc
.
MMS Message Addressing
From The From header is required, but NMIT automatically inserts the value
mms-editor@toolkit
. Later, you can change this value within the MMS
Message Editor.
To Address of the MMS recipient terminal. The address format may be either
an email or device-address. These are precisely defined in the WAP MMS
Encapsulation specification.
Specify an email address with the “<“and “>” delimiters; for example:
<MyFriend@isp.com>.
Specify a device-address as a global phone number or internet host followed
by
/Type
where the
address an internet server, specify the IP address followed by
mobile phone, the phone number followed by
Type
specifies the type of the device. For example, to
Type=PLMN
.
Type=IPV4
; if a
Cc Address of individuals or devices to which a carbon copy of the message is
to be sent. The address formats are as described as in the To field.
Bcc Address of individuals or devices to which a blind carbon copy of the
message is to be sent. (These addresses are not included in the messages sent
to addresses specified in the To or Cc fields. The address formats are as
described as in the To field.
Subject (Optional). Subject of the MMS message.
76 Nokia Mobile Internet Toolkit User’s Guide
Page 79

MMS Wizard
3 Include Media Files
The wizard dialog requests that you specify the location of the media files that you wish to include
in the MMS message.
Add file... Opens the Select media file dialog from which you can select the media files to
be included. Use the CTRL and the Shift keys when using the mouse in order
to select multiple files. Then choose Open to add these files to the media file
list.
Note that media files can be added in any order, as you will have an
opportunity later to rearrange them; however, the files must exist in order to be
added to the list.
Filename Full path to the media file to be added to the MMS message. You can enter the
path directly into the text box or press the Add file... button to navigate to it.
Delete Deletes the file or files currently selected in the Media File List. Files are deleted
from the list only, not from disk.
Nokia Mobile Internet Toolkit User’s Guide 77
Page 80

Messaging Editors
4 Include SMIL Presentation Script
This dialog requests that you specify whether you wish to include a SMIL presentation script with
the MMS message. If you do, you must either specify the location of an existing SMIL file or
specify that you wish to have one generated for you.
Auto-generate SMIL
file
Choose this button if you wish NMIT to generate a SMIL file for
this MMS message.
In generating the SMIL file, NMIT uses default values for the
presentation layout, that is, the areas of the display to be occupied
by text and image media files.
NMIT also adds the file locations of all media files you specified
for the MMS message, and, based on the file types of these files,
identifies the files as either “text” or “image” and uses these values
for the
region
attribute.
NMIT generates a SMIL file capable of presenting the media files
to the display in a default configuration. You can modify the SMIL
file later using the SMIL editor.
After you choose Finish, NMIT saves the SMIL file using the file
default.smil
name
and inserts
default.smil
into the new MMS
message as the first part.
Include a SMIL file Choose this button if you wish NMIT to include an existing SMIL
file for this MMS message. (See the section titled SMIL Editor
for
information about creating your own SMIL file.)
After choosing this button, the SMIL filename text entry box
becomes active. Enter the path to the file directly into the text box
or choose the Browse button to open the Select media file dialog
within which you can navigate the local disk directory structure to
find the file to be included.
Finally, choose Finish to include the SMIL file.
78 Nokia Mobile Internet Toolkit User’s Guide
Page 81

MMS Message Editor
No SMIL file Choose this button if you do not wish to add a SMIL file to the
MMS message.
SMIL Transition Lets you insert a transition mode and length of time between each
media file in a sequence. Typ e controls the style of the transition
and Sec controls the length of time in seconds.
After you have made your selection, choose the
MMS Message Editor opens, displaying the information you entered.
MMS Message Editor
You use NMIT’s MMS Message Multipart editor to assemble existing files (parts) into a single
multipart message, to specify headers for the individual parts and for the entire MMS message,
and then finally to push the MMS message to one or more phone SDKs.
The MMS Message Editor is displayed when you perform any of the following actions:
• Choose File>New and then choose MMS Message on the Messaging tab.
• You complete the dialogs of the MMS Message Setup Wizard, choosing Finish in the
last dialog.
• You open an existing MMS message.
Finish
button. The MMS Wizard closes and the
Nokia Mobile Internet Toolkit User’s Guide 79
Page 82

Messaging Editors
The following figure shows the MMS Message editor:
Note the following with respect to the contents shown above:
The
MMS Message Type
can change the type to
drop-down list at the top shows the type to be
m-send-req
and then back at any time and header values will be retained.
m-retrieve-conf
The MMS Message Headers section is expanded to show all headers available for the content type.
These vary slightly for
The Parts List
region at the lower left shows five files. The first file in the list is a SMIL file; because
m-retrieve-conf
and
m-send-req
.
it is selected, its headers and content are displayed in the adjacent Part Properties region.
Button Controls at the bottom of the window enable operations on the current message,
specifically, pushing the message to phone SDKS and adding and clearing contents.
MMS Message Headers
MMS Message headers are distinct and unrelated to any of the constituent parts within the
multipart message. Multipart headers serve a function much like the postal instructions on a mail
envelope, indicating the nature of the items within the container.
The WAP MMS specifications define precisely the multipart header names and the sequence in
which some of them must appear. Therefore, within NMIT’s MMS Message Editor, you cannot
delete these specified headers or reorder them, though you can choose that optional headers not be
sent or saved to a file (using the
can be added to the end of the displayed MMS Message headers.
Send/Save
check box). Any additional headers you wish to add
. You
80 Nokia Mobile Internet Toolkit User’s Guide
Page 83

MMS Message Editor
The Multipart Headers region at the top of the MMS Message editor window contains a fourcolumn table in which you perform operations on headers.
To enter a value for a header name:
• Click in the adjacent Header Value field and type the desired value. Values for
some MMS headers are fixed and cannot be changed. Values for others are
constrained within a list of values.
To add a new line on which you can enter an additional header name and value:
• Click anywhere on the last line and enter text until a new line is displayed.
To delete a header line:
• Click in the left column of the line and press the Delete key. Note that you cannot
delete standard MMS headers, only additional headers you have added.
To specify that NMIT send the header when pushing the MMS message to a phone SDK
or saving the message to a file:
• Click in the Send/Save column to place a check mark on the header line.
To specify that NMIT not send the header and not save it to a file:
• Click in the Send/Save column to remove the check mark on the header line. This
feature eliminates the need to delete and then re-enter values for individual test
cases. Note that you cannot remove the check mark adjacent to a required header,
as required headers must always be sent.
The following table describes each header and its possible values. In this region, there are two
columns titled
MMS Message Headers
Header Name Header Value
X-Mms-Message-Type
X-Mms-Transaction-ID
X-Mms-MMS-Version
Header Name
and
Header Value
(Required) The value is either
send-req
The section titled Overview of MMS Messages
the difference between these two message types.
(Optional) Identifies either (1) the transaction started by
the MMSC in sending an
recipient terminal and without that terminal sending an
NotifyResp
delivery was requested by the terminal.
(Required) The MMS version number 1.0 is fixed and
cannot be changed.
, selectable from the drop-down list.
.
m-retrieve-conf
M-Notification
or (2) a new transaction where deferred
or
describes
to the MMS
m-
M-
Message-ID
Nokia Mobile Internet Toolkit User’s Guide 81
(Optional) Unique ID assigned to the message. It is
required whenever the MMS originating terminal requests
a read reply.
Page 84

Messaging Editors
MMS Message Headers
Header Name Header Value
Date
From
To
Cc
Bcc
Subject
X-Mms-Message-Class
X-Mms-Priority
X-Mms-Delivery-Report
X-Mms-Read-Reply
(Required) Date and time that the message is sent (from the
MMSC to the MMS recipient terminal). NMIT’s MMS
Message Setup Wizard creates this date, but you can change
it.
(Optional) See the table titled MMS Message Addressing.
(Optional) See the table titled MMS Message Addressing.
(Optional) See the table titled MMS Message Addressing.
(Optional) See the table titled MMS Message Addressing.
(Optional) See the table titled MMS Message Addressing.
(Optional) One of four message classes:
Advertisement, Informational, Auto
default is
Personal
.
(Optional) One of three priorities:
specified, the default is
Normal
.
Personal
,
. If not specified, the
Low, Normal, High
. If not
(Optional) Specifies whether the sender wishes to receive a
Yes
delivery report from each recipient. Values are
or No
(the default). This is not supported by NMIT.
(Optional) Specifies whether the sender wishes to receive a
Yes
read report from each recipient. Values are
or No (the
default). This is not supported by NMIT.
Content-Type
(Required) Enter the value
application/vnd.wap.multipart.mixed
if the MMS
message contains no SMIL file.
If the MMS message does contain a SMIL file, enter the
value
application/vnd.wap.multipart.related
the
start
and
type
parameters. See the section titled
Relationship Between MMS Media Parts
, followed by
for a description
of these parameters.
See the table titled Editing Multipart Headers
for more
information regarding the differences between the
multipart/mixed
and
multipart/related
content types.
Parts List
In the Parts List region to the left in the MMS Message editor, you assemble the parts that are to
be included in the message; that is, you insert each part (file) and then place the files in the desired
order.
82 Nokia Mobile Internet Toolkit User’s Guide
Page 85

MMS Message Editor
You cannot create a part within the MMS Message editor. You must have already created,
debugged, and saved to persistent each part you wish to include. Also, note that nested parts are
prohibited.
The following figure shows the Parts List region containing five parts.
Parts List Region Controls
After you have selected a part in the Parts List display region, click this
button to move that part up one position. The topmost entry in the region
is the first multipart entry and will be processed first; the bottom entry is
processed last.
After you have selected a part in the Parts List display region, click this
button to move that part down one position. The topmost entry in the
region is the first multipart entry and will be processed first; the bottom
entry is processed last.
Removes a selected part from the Parts List region. Note that if you
mistakenly remove a part, you can replace it by choosing Edit>Undo.
Displays the Open dialog in which you can select a file to be included in the
multipart message.
Drag and
Drop
Double Click When you double click the icon for an included part file, NMIT opens the
You can use the Windows drag and drop feature to add files to the Parts
List. In Windows Explorer, left click the part file, holding down the mouse
button; then drag it to the Parts List region and release the mouse button.
file in an appropriate editor if it recognizes the content type. If NMIT does
not support the content type, it attempts to open the file in the system’s
default editor for that content type.
Part Properties
The Part Properties region of the MMS Message editor is used to display information about a part
which has been selected in the Parts List region. It provides an opportunity for you to modify the
values of the default headers, as well as to add additional headers (and values).
Nokia Mobile Internet Toolkit User’s Guide 83
Page 86

Messaging Editors
The following figure shows the Part Properties region in which a
gif
image part is displayed.
As described in the section MMS Message Headers, you can modify any header value by clicking
on it. You can also delete any header and its corresponding value by selecting the entire row and
pressing
Delete
.
The empty row below the displayed headers and values can be used to add a new header and its
value: click in the row to enter the desired content.
The content of the part is displayed below the header section.
Note the dotted split-pane divider along the left edge of the
cursor on this region, the cursor changes, allowing you to resize the
Parts List
regions.
Part Properties
Part Properties
region. If you rest the
and adjacent
Button Controls
The MMS Message editor contains the following button controls.
MMS Message Controls
SMIL Editor
The Synchronized Multimedia Integration Language (SMIL) is an XML-based language that Lets
you write interactive multimedia presentations. SMIL makes it possible to control both the timing
and layout of these objects as they are displayed on a screen.
NMIT’s SMIL editor supports two version of the SMIL spec:
• SMIL 2.0, authored by the W3C standards organization. The editor supports all 2.0
language features (element and attributes) and validates SMIL documents against the
SMIL 2.0 DTD.
Pushes the MMS message currently displayed to the phone SDK.
Removes parts from the current editing window, thus allowing you to easily start
over.
84 Nokia Mobile Internet Toolkit User’s Guide
Page 87

SMIL Editor
• SMIL 3GPP, which consists of the modules required by SMIL Basic Profile (and SMIL
2.0 Host Language Conformance) and additional MediaAccessibility,
MediaDescription, MediaClipping, MetaInformation, PrefetchControl, EventTiming
and BasicTransitions modules. The editor validates SMIL3GPP against the SMIL
3GPP DTD.
You use NMIT’s SMIL editor to specify layout, presentation, and timing properties to be used by
the phone SDK when displaying the parts of an MMS message. Specifically, you can specify:
• Layout properties for the size of the screen upon which the MMS part contents will
be displayed.
• Screen regions, identified by ID values, wherein MMS parts having that ID will be
displayed.
• URIs where the media parts to be displayed are located.
• Timing values (in seconds) that indicate how long each part is to be displayed.
• The transition type and length of transition between parts.
Finally, having specified the information listed above, you can generate an MMS message based on
the SMIL file.
Some Nokia phone SDKs currently ignore SMIL part within an MMS message. Check the
documentation for information about support for SMIL parts.
The following figure shows the SMIL Message editor:
SMIL features currently supported in existing devices are far fewer than those defined in the
specification. For this reason, several corporations, including Nokia, have agreed to support a
limited subset of SMIL elements in order to achieve the minimal presentation capabilities required
by the first phase in MMS message implementation. An
MMS Conformance Document
, which
describes the minimum requirements needed for end-to-end interoperability of MMS handsets and
MMS servers, is available at
http://openmobilealliance.org/.
Nokia Mobile Internet Toolkit User’s Guide 85
Page 88

Messaging Editors
Since SMIL is an XML-based content type, NMIT’s SMIL editor has all of the features of a
structured editor as described in the section titled Editing Features For Validatable Text Content.
Refer to this section for a detailed description of the editor features.
The SMIL editor is unique in that it provides the following additional active button:
Opens the MMS Message editor and within this editor (1) includes the
current SMIL document and all part files referenced by the SMIL file
and (2) inserts header values related to the included parts. By default,
the MMS message type header is set to
can change this (in the MMS Message editor) to
The SMIL document must be valid in order to generate an MMS
message, and the part files it references must be in the same directory.
Generating an MMS Message From a SMIL File
To generate an MMS message starting only from a SMIL document.
1 Create a new SMIL document or open an existing SMIL document containing all
standard, required elements; add the desired information, including that for all parts;
then choose Revalidate to validate the SMIL document and fix any errors. Finally,
save the SMIL document using the desired file name in the same folder as the message
parts.
m-retrieve-conf
m-send-req
, though you
if desired.
2 If you are testing the message on the Series 60 Content Authoring SDK for Symbian
1.0x OS, Nokia Edition: In the SMIL document, delete the following lines at the top
of the document and save the document using the same file name:
<?xml version=”1.0"?>
<!DOCTYPE smil PUBLIC "-//W3C//DTD SMIL 2.0//EN"
"http://www.w3.org/2001/SMIL20/SMIL20.dtd">
This deletion is required in the Series 60 Content Authoring SDK for Symbian 1.0x
OS, Nokia Edition, and is not required for later phone SDKs that support SMIL. The
Series 60 Content Authoring SDK for Symbian 1.0x OS, Nokia Edition, cannot
process a standard SMIL document, which begins with the
requires that the SMIL document begin with the
<smil>
<xml>
element.
element, but instead
3 Choose Generate MMS to generate the MMS message. The message is opened in the
MMS Message Editor.
4 In the MMS Message editor, edit the Part headers if desired. Then choose Push to
display it on the phone SDK. The parts should be displayed in accordance with the
order in which they were specified in the SMIL document.
Generating an MMS Message From Media Parts
This section describes how to generate an MMS message when you have the media parts to be
included.
86 Nokia Mobile Internet Toolkit User’s Guide
Page 89

SMIL Editor
1 Launch the MMS Wizard and include all your media parts. See the section titled
MMS Wizard for instructions.
2 Choose either the No SMIL file radio button or the Auto-Generate SMIL file radio
button in the dialog, titled Include SMIL Presentation Script, of the MMS Wizard and
then press Finish. The MMS Message editor is automatically opened. See the section
titled MMS Message Editor for details regarding how to use this editor.
3 If there is no SMIL file, you may wish to order the parts within the Parts list, from top
to bottom, in the order in which you wish these parts to be presented in the phone
SDK, from first to last. If there is a SMIL part, the SMIL part dictates the order.
4 Modify any MMS or Part headers, as desired.
5 In the MMS Message editor, choose Push. The MMS message is displayed in the
selected phone SDKs.
Modifying an Existing MMS Message
If you have an existing MMS message, you may wish to open it in the MMS Message editor in
order to display it on a phone SDK or to modify it and then display it. To display your MMS
message:.
1 Choose File>Open to open the MMS message. The message is displayed in the MMS
Message editor.
2 In the MMS Message editor, choose Push. If there are no errors, the message is
displayed in the currently selected phone SDKs. If there are errors, you must correct
these.
The following sections describe modifying parts.
Modifying Non-SMIL Parts in an Existing MMS Message
This section describes modifying parts within an existing MMS message which does not include a
SMIL part. If the MMS message does include a SMIL part, see the section titled Modifying a
SMIL Part in an Existing MMS Message.
Modifying a part in an MMS message may mean one of the following:
• Deleting a part. To delete a part, select the part and choose the trash can icon at the
top of the Parts list. You can then choose the Push button to display the MMS
message on selected phone SDKs.
• Adding a part. To add a part, choose the Add Part button. A dialog is displayed in
which you can locate the part to be included. After choosing Open, the part is
displayed in the Parts list. Ensure that it is positioned in the list in the order in which
you wish it to be displayed, as when no SMIL file is used, parts are displayed
sequentially from top to bottom as they appear in the list.
Nokia Mobile Internet Toolkit User’s Guide 87
Page 90

Messaging Editors
• Editing a part. To edit an existing part, in the MMS Message editor, double-click the
part in the Parts list. The part is opened in its default editor (based on file type). Edit
the part as desired and then save it (File>Save). The MMS Message editor detects the
part has changed and uses the new part. (Click on another part to verify the part has
been refreshed.)
If the part is not refreshed, delete the part and then add the one you just saved. In this
case, custom part headers for the deleted part are removed and will need to be added
again.
Modifying a SMIL Part in an Existing MMS Message
To modify a SMIL part within an existing MMS message: In the MMS Message editor, doubleclick the SMIL part in the Parts list. The part is opened in the NMIT SMIL editor. Edit the SMIL
part as desired and then save it (
The MMS Message editor detects the part has changed and uses the new part. (Click on another
part to verify the part has been refreshed.)
File>Save
).
If you do choose the
Generate MMS
button in the SMIL editor, a new message having a different
file name is opened in the MMS Message editor. This message is different from the one you started
from. So, if you have edited any MMS or part headers in the original MMS message, you will
generally not wish to create a new MMS message because this header information will not be
present in the new message. You could, however, copy the header information from the old
message to the new one using Cut and Paste, field by field.
See the section titled Relationship Between MMS Media Parts for a description of the use of
headers within an MMS message that includes a SMIL part. These headers will need to be
reinserted in order for the MMS message to be properly displayed.
88 Nokia Mobile Internet Toolkit User’s Guide
Page 91

DRM Editors
Digital Rights Management (DRM) is a system of content types and cell phone behavior that
allows a content provider to control how a phone user uses and re-distributes media content (such
as a song or a game). This control is achieved by pairing the media content with rights that
control how often and for how long a phone user can use the content on the cell phone. For
example, a content provider can permit an phone user to receive and play a song once as a
preview. Or the content provider can allow the phone user to purchase the rights to play the song
indefinitely.
DRM provides three message types that protect content with varying levels of security:
DRM Message Type Description
Forward lock A single message that lets a phone user use the content without limits on
Combined Delivery A single message that lets a phone user use the content with some
that device (cell phone), but prohibits the phone user from forwarding the
content to another device.
limitations on that device, but prohibits the phone user from forwarding
the content to another device.
Separate Delivery A pair of messages (one with content, one with the rights to the content)
that let a phone user use the content with some limitations on that device
if the user has received the rights to use the content. The phone user can
forward the contents to another phone user but not the rights.
Information about obtaining rights is embedded in the content file so a
new receiver of the content can obtain the rights to use the content.
The DRM Message Editor lets you:
• Select and prepare the media content to wrap in a digital rights message. The DRM
message works with a copy of the original content so that the original content file is
never altered.
Nokia Mobile Internet Toolkit User’s Guide 89
Page 92

DRM Editors
• Create and prepare the rights that allows the phone user to use content.
• Push the message on an SDK that is capable of implementing DRM messages.
How the content provider chooses to deliver the content and its rights depends on several factors,
including whether the content has more than one set of rights available and how the content will
be distributed. No content can be used without its associated rights.
Accessing the DRM Editors
To access the DRM editors:
1 Open the SDK on which you want to display the DRM message.
2 Select File>New. The Available Content Type window appears:
3Click the Deployment tab to access the DRM editors:
90 Nokia Mobile Internet Toolkit User’s Guide
Page 93

Creating a DRM Message
From this window, you can select the DRM component you want to work with:
To Click And see
Work with content and rights
together
Work with rights in an XML
editor
Creating a DRM Message
To create a Forward Lock, Combined Delivery, or Separate Delivery message:
1From the Deployment panel, click the DRM Message icon, and click OK. The DRM
Message Editor window appears:
DRM Message Creating a DRM Message
DRM Rights Working With Digital Rights in the
Digital Rights Editor
The content of the DRM window varies, depending on the type of message you select. The image
above shows DRM window when
Nokia Mobile Internet Toolkit User’s Guide 91
Forward Lock
is selected.
Page 94

DRM Editors
When you select
appears:
This side lets you specify
the content (for all
message types)
Combined Delivery
or
Separate Delivery
This side lets you specify the rights
to the content (Combined Delivery or
Separate Delivery only)
, the digital rights side of the window
Drag the bar between the content and rights sides to adjust the area of the content and digital
rights.
From this window, you can create a DRM message in four basic steps. The complexity of each step
depends on what type of DRM message you are creating. Some fields that apply to one type of
message do not apply to others. The basic steps are:
1 Select the type of message. (Forward Lock, Combined Delivery, Separate Delivery)
2 Select the content. (Browse to the location of the file that contains the content to
which you are going to assign rights.)
3 Confirm the required headers and edit the optional headers, if necessary.
4 Specify the rights. (Not applicable to Forward Lock messages).
After you create the message, you can display the message on an SDK to test how the message
works.
Creating a Forward Lock Message
A Forward Lock message contains content that:
• Can be used without limitations on the device that receives it
• Cannot be forwarded to any other device
92 Nokia Mobile Internet Toolkit User’s Guide
Page 95

Creating a DRM Message
When you prepare a Forward Lock message, you select the content and save the message in a file
that has a
.dm
extension. A
.dm
file uses a standard multipart format with the media content as
its only part. The content of a Forward Lock message is always unencrypted.
To prepare a Forward Lock message:
1Under Select Lock Type, select Forward Lock.
The Specify Rights section on the right of the DRM Message window remains grayed
out because a Forward Lock message does not have a rights object. A Forward Lock
message has implied unlimited rights associated with its content.
2Under Select Media Content, click Load Content to browse to the content file you
want to wrap in the message. After you select the file:
• A thumbnail representing the content appears.
•The Content-Type header under Edit Headers reflects the contents type of the file.
Content-ID is not applicable to this type of message.
3Under Content-Transfer-Encoding, select one of the following:
• Binary - Leaves the content unencoded. Recommended for most content.
• Base64 - Encodes content by converting it from binary to 7-bit (ASCII) using a
Base64 encoding scheme. (Recommended for use with mail programs that do not
handle binary message content.)
4Under Edit Headers, check that the headers listed under the Required tab are correct:
•The Content -Type value reflects the content type of the file. If this entry is
incorrect, you can edit the header. The entry might be incorrect if the original
content file did not have the correct suffix for its type.
•The Content-Transfer-Encoding value matches the value you selected in step 3.
No headers are listed under Optional.
5 Do one of the following:
• Click Show Message to display the message on the SDK you’ve chosen.
.dm
•Select File>Save or File>Save As to save the message as a
file.
•Select File>Save As Template to save the message lock type and its associated
information as the initial content for this editor. For more information, see Saving
a Template for the DRM Editor.
Creating a Combined Delivery Message
A Combined Delivery message delivers in a single file:
•Content
• Rights to use the content on the receiving device
For example, an phone user who receives a song in a Combined Delivery message can play the
song in accordance to the rights that are in the file - say, five times over one month. The phone user
Nokia Mobile Internet Toolkit User’s Guide 93
Page 96

DRM Editors
cannot forward the message to another phone user because a Combined Delivery message
contains rights and an phone user cannot forward rights.
When you prepare a Combined Delivery message, you select the content and set the rights to the
content. You can then push the file to the SDKs that are currently active in NMIT or save the
message in a file that has a
content is always unencrypted.
Generally, you use a Combined Delivery message when you have a content that you always ship
with a specific set of rights, and when you do not require the content to be encrypted for security.
To create a Combined Delivery message:
1Under Select Message Type, select Combined Delivery.
2Under Select Media Content, click Load Content to browse to the content’s file you
3Under Content-ID, enter an identifier for the content. This identifier must be unique
.dm extension. A
.dm
file uses a standard multipart format. The
The Specify Rights section of the DRM Message window becomes active. You will
later specify the rights to the content in this section of the window.
want to wrap in the message. A thumbnail representing the content appears after you
select the file.
to the media object because it links the object to the rights.
The Content-ID you enter is reflected identically in these places:
• Under Edit Headers> Required tab>Content-ID header.
• Under UID in the Specify rights section of the DRM window.
4Under Content-Transfer-Encoding, select one of the following:
• Binary - Leaves the content unencoded. Recommended for most content.
• Base64 - Encodes content by converting it from binary to 7-bit (ASCII) using a
Base64 encoding scheme. (Recommended for use with mail programs that do not
have binary conversion schemes.)
5Under Edit Headers, check that the headers listed under the Required tab:
•The Content -Type value reflects the content type of the file. If this entry is
incorrect, you can edit the header. The entry might be incorrect if the content file
does not have a suffix.
•The Content-ID value matches the value you entered under Content-ID.
•The Content-Transfer-Encoding value matches the value you selected for Content-
Transfer_Encoding.
No headers are listed under Optional. Combined Delivery messages do not have
optional headers.
6Under Specify Rights, enter the rights you want to associate with the content. See
Working With Digital Rights
94 Nokia Mobile Internet Toolkit User’s Guide
.
Page 97

Creating a DRM Message
7 Do one of the following:
• Click Show Message to display the message on the SDK you’ve chosen.
•Select File>Save or File>Save As to save the message as a
.dm
file.
•Select File>Save As Template to save the message lock type and its associated
information. For more information, see Saving a Template for the DRM Editor.
Creating a Separate Delivery Message
A Separate Delivery message is composed of two discrete files that work together to form one
DRM message:
• One file contains the encrypted content.
• One file contains a key to unencrypt the content and the rights to use it.
The phone user can use the content on that device only when he or she acquires the rights to that
content.
The separation of content and rights permits the phone user to forward the content to another
phone user who can then acquire (purchase) the rights from the content provider to use the
content. The phone user cannot forward the rights. Each subsequent receiver of the content must
acquire new rights from the content provider to use the content.
When you prepare a Separate Delivery message, you select the content and set the rights to the
content, as you would in a Combined Delivery message. Then, when you save the message:
• The content is encrypted and saved in a file with a suffix of
.dcf
.
• The rights to the content and the encryption key are automatically saved in another
file that has the same prefix as the content file but with an extension of
For example, if you save the content
make up the message are
nifty_tune.dcf
nifty_tune
(content) and
in a Separate Delivery message, the two files that
nifty_tune.dr
(rights).
.dr
.
Naming the files with the same prefix is one of the ways the DRM Message Editor matches rights
with content. For more information, see How Contents and Rights Are Matched
The Separate Delivery message has only one file type for the content (
.dcf
.
). But you can save
rights in a Separate Delivery message rights in two formats:
• Unencoded (
message. You can open, read, and edit a
.dr
) - Unencoded
.dr
is the default format you get whenever you save a
.dr
file in a DRM Rights editor. Use this
format if you plan to re-use the rights with multiple contents.
• Encoded (
.drc
) - This format encodes the rights with WBWML, a binary format that
NMIT cannot open, read, or edit. Use this format when you know you will be dealing
with a gateway that uses a binary format. For more information about
Working With Digital Rights
.
.drc
files, see
If you plan to have more than one set of rights for one content, see Creating Multiple Rights Files
for a Single Content File.
Nokia Mobile Internet Toolkit User’s Guide 95
Page 98

DRM Editors
To create a Separate Delivery message:
1Under Select Message Type, select Separate Delivery.
2Under Select Media Content, click Load Content and browse to the file that contains
3Under Content-ID, enter an identifier for the content. This identifier must be unique
4Under Edit Headers, check the headers listed under the Required tab, to ensure that
The Specify Rights section on the right of the DRM Message window becomes active.
You will later specify the rights to the content in this section of the window.
the content you want. A thumbnail representing the content appears.
to the content because it links the object to the rights.
The Content-ID you enter is reflected identically in these places:
•In the Content-ID field where you enter the unique identifier.
• Under UID in the Specify rights section of the DRM window.
Content-Transfer-Encoding is not used in Separate Delivery messages.
the Content -Type value reflects the content type of the file. If this entry is incorrect,
you can edit the header. The entry might be incorrect if the content file does not have
a suffix.
Separate Delivery messages stores the information under Content-ID as part of its
format but not as a header.
5Under Edit Headers, edit the headers listed under the Optional tab. Only Separate
Delivery messages have Optional headers that you can edit.
6Under Specify Rights, enter the rights you want to associate with the content. See
Working With Digital Rights.
7 Do one of the following:
• Click Show Message to display the content on the SDK you’ve chosen.
•Select File>Save or File>Save As to save the content in a
.dm
file. Both files will have the same prefix.
•Select File>Save As Template to save the message lock type and its associated
information. For more information, see Saving a Template for the DRM Editor
Working With Digital Rights
You specify digital rights when you create a Combined Delivery or Separate Delivery message. A
Forward Lock message has implied unlimited rights associated with its content, so you do not
need to specify rights.
.dcf
file and the rights in a
.
You can create and edit rights in the:
• DRM Message window, which presents digital rights in a graphical user interface and
can associate the rights with whatever content you have selected by automatically
generating a UID and an Encryption key.
96 Nokia Mobile Internet Toolkit User’s Guide
Page 99

Working With Digital Rights
• DRM Rights editor, which presents the digital rights in XML format.
Digital rights have these parts:
• Permissions - general rights that fall into these categories: Play, Execute, Print, and
Display.
• Constraints - limitations applied to a permission. For example, you can constraint the
Play permission to a single execution of the content for ten minutes. Unless you set
constraints, a permission is unlimited.
How SDKs and Phones Apply Digital Rights
When an SDK or phone receives the rights to a content, the SDK or phone applies only
permissions that are applicable to the content. In other words, if the content is music in an
file, an SDK applies only Play permissions, regardless of what other rights are enabled. An SDK
determines what rights it applies to a content based on its content-type header, which, in turn,
NMIT generates from the extension of content’s file.
The SDK and phone also control what it does when rights conflict. For example, if the rights end
date is a week from now, but the rights interval constraint is one month, the specific DRM
implementation of the SDK determine which right prevails. Typically, the more limited constraint
prevails.
.mp3
The SDK and phone must also have a mechanism to ensure that rights cannot be forwarded. A
phone user cannot forward rights from a cell phone. A phone user cannot forward a Forward Lock
or a Combined Delivery message because they contain rights. In a Separate Delivery message, the
phone user can forward the content but not its rights.
How Contents and Rights Are Matched
Content and its rights are linked internally with these identifiers:
Identifier Definition Used in
Content-ID A unique ID that pertains only to one content file in
NMIT. You assign this ID to the content’s file.
UID A unique ID that pertains only to one content file in
NMIT. The UID is taken from the Content-ID you
assigned to a content’s file.
Content-ID
header
Encryption key A unique key that unlocks its associated content for
A required header that reflects the unique ID you
assigned to a content’s file in the Content-ID field
when you selected the content’s file.
use. This key is automatically generated by the DRM
Message Editor and is linked to the UID of a file.
Combined Delivery
Separate Delivery
Combined Delivery
Separate Delivery
Combined Delivery
Separate Delivery
Nokia Mobile Internet Toolkit User’s Guide 97
Page 100

DRM Editors
The locations of these identifiers on the DRM window are shown below:
Separate Delivery
Combined Deliver
Type in a Content-ID.
Separate Delivery
Combined Deliver
NMIT generates one UID
based on the Content-ID.
Separate Delivery only
NMIT generates one
encryption key for each edit
session.
Combined Delivery
NMIT generates one Content-ID
header for the Content-ID you enter.
When a device receives several DRM messages, each with contents and rights, the rights must be
correctly linked with specific content for which it is meant. Preserving this association is especially
important in Separate Delivery messages where the content and its rights are sent separately.
NMIT associates the content/rights pair by giving the content and rights file the same prefix with
a different suffix. For example,
nifty_tune.dcf
and
nifty_tune.dr
. are part of the same
message. The DRM Message Editor automatically provides the name symmetry whenever you
save a Separate Delivery message. When the UID in the Rights file does not match the Content-ID
in the content file, NMIT displays an error message.
For the DRM Message Editor to find the pair of files, the
.dcf
and the
.dr
files:
• Must have the same prefix
• Must be located in the same directory
98 Nokia Mobile Internet Toolkit User’s Guide
 Loading...